0005-2000 res. manual
0005-2000 res. manual
0005-2000 res. manual

You also want an ePaper? Increase the reach of your titles
YUMPU automatically turns print PDFs into web optimized ePapers that Google loves.
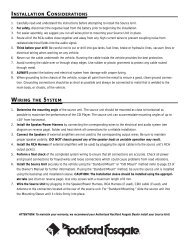
(Mounting Instructions, continued)<br />
TWEETER MOUNTING<br />
The best location for the tweeter is usually high up on the door and as far forward as is<br />
possible without interference from the dashboard.<br />
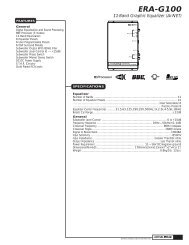
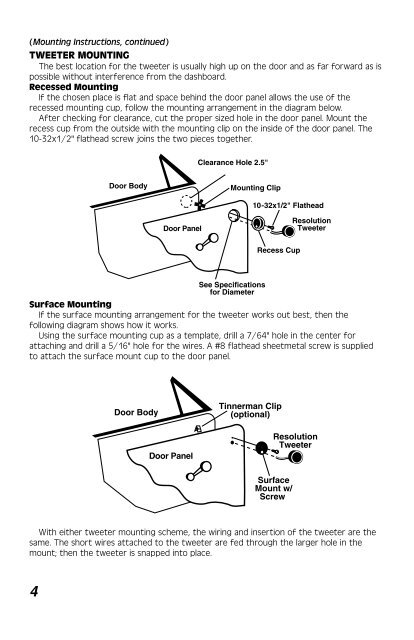
Recessed Mounting<br />
If the chosen place is flat and space behind the door panel allows the use of the<br />
recessed mounting cup, follow the mounting arrangement in the diagram below.<br />
After checking for clearance, cut the proper sized hole in the door panel. Mount the<br />
recess cup from the outside with the mounting clip on the inside of the door panel. The<br />
10-32x1/2" flathead screw joins the two pieces together.<br />
Clearance Hole 2.5"<br />
Door Body<br />
Mounting Clip<br />
10-32x1/2" Flathead<br />
Door Panel<br />
Resolution<br />
Tweeter<br />
Recess Cup<br />
See Specifications<br />
for Diameter<br />
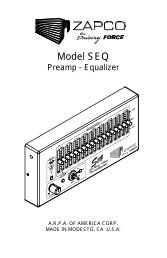
Surface Mounting<br />
If the surface mounting arrangement for the tweeter works out best, then the<br />
following diagram shows how it works.<br />
Using the surface mounting cup as a template, drill a 7/64" hole in the center for<br />
attaching and drill a 5/16" hole for the wi<strong>res</strong>. A #8 flathead sheetmetal screw is supplied<br />
to attach the surface mount cup to the door panel.<br />
Door Body<br />
Tinnerman Clip<br />
(optional)<br />
Door Panel<br />
Resolution<br />
Tweeter<br />
Surface<br />
Mount w/<br />
Screw<br />
With either tweeter mounting scheme, the wiring and insertion of the tweeter are the<br />
same. The short wi<strong>res</strong> attached to the tweeter are fed through the larger hole in the<br />
mount; then the tweeter is snapped into place.<br />
4