0005-2000 res. manual
0005-2000 res. manual
0005-2000 res. manual

You also want an ePaper? Increase the reach of your titles
YUMPU automatically turns print PDFs into web optimized ePapers that Google loves.
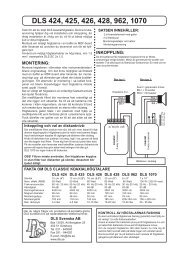
(Mounting Instructions, continued)<br />
If any of the drivers are mounted in the<br />
door, it is necessary to run the supplied<br />
wire through the door jamb. This wire<br />
must be kept away from sharp edges and<br />
the possibility of being pinched. An existing<br />
boot in the door jamb is the ideal place to<br />
run the wi<strong>res</strong>, but sometimes this does not<br />
exist or is inaccessible. Drilling holes to run<br />
wi<strong>res</strong> through is very tricky, and caution<br />
must be exercised not to drill into other<br />
wiring or mechanisms. Any time a wire is<br />
run through a bare hole, it is necessary to<br />
insert a rubber grommet first.<br />
The supplied crossovers should not be<br />
mounted in the doors or any other location<br />
that is subject to moisture. Inside the<br />
kickpanels or under the dash are ideal locations<br />
for the crossovers in most vehicles.<br />
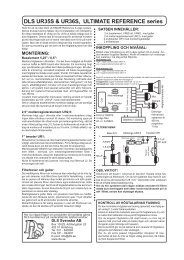
Coaxial Mounting<br />
The third option is to mount the tweeter to the center of the midrange. This will effectively<br />
form a high quality coaxial speaker. To do this, unscrew the bullet shaped phase plug<br />
from the center of the midrange and remove the magnet boot.<br />
Using the included tweeter pole mount, feed the tweeter wi<strong>res</strong> through the hole in the<br />
center and snap the tweeter into the swivel mount.<br />
5