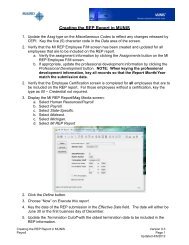
Aesop/MUNIS Payroll Report
Aesop/MUNIS Payroll Report
Aesop/MUNIS Payroll Report

Create successful ePaper yourself
Turn your PDF publications into a flip-book with our unique Google optimized e-Paper software.
<strong>Aesop</strong>/<strong>MUNIS</strong> <strong>Payroll</strong> <strong>Report</strong><br />
To create the report in <strong>Aesop</strong> that you will need to coordinate absences with your<br />
payroll in <strong>MUNIS</strong>, please see the following steps. Note: This only needs to be done<br />
once.<br />
1. Go into <strong>Aesop</strong><br />
2. Click on <strong>Report</strong>s.<br />
3. Click on <strong>Report</strong> Writer.<br />
4. Click Create New.<br />
Located about 2” down the page after ABSENCE DATA (Create New)<br />
5. Assign a name for the report.<br />
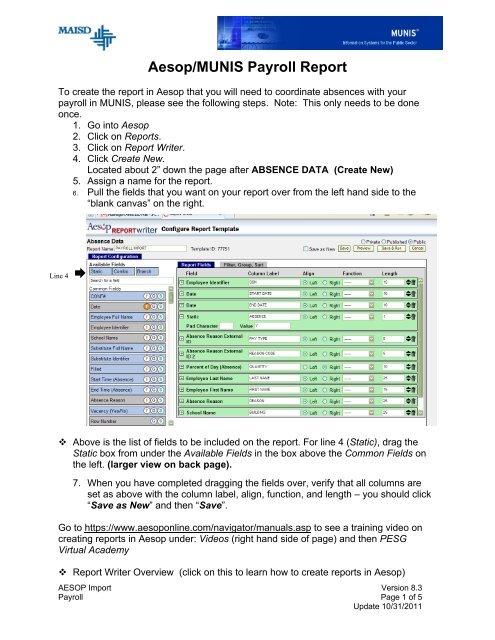
6. Pull the fields that you want on your report over from the left hand side to the<br />
“blank canvas” on the right.<br />
Line 4 <br />
Above is the list of fields to be included on the report. For line 4 (Static), drag the<br />
Static box from under the Available Fields in the box above the Common Fields on<br />
the left. (larger view on back page).<br />
7. When you have completed dragging the fields over, verify that all columns are<br />
set as above with the column label, align, function, and length – you should click<br />
“Save as New” and then “Save”.<br />
Go to https://www.aesoponline.com/navigator/manuals.asp to see a training video on<br />
creating reports in <strong>Aesop</strong> under: Videos (right hand side of page) and then PESG<br />
Virtual Academy<br />
<strong>Report</strong> Writer Overview (click on this to learn how to create reports in <strong>Aesop</strong>)<br />
AESOP Import Version 8.3<br />
<strong>Payroll</strong> Page 1 of 5<br />
Update 10/31/2011
Create the data import form in <strong>MUNIS</strong>. Note: This only needs to be done once.<br />
1. Sign on to <strong>MUNIS</strong><br />
2. Display the Forms Definition screen.<br />
System Administration → Printer/Device Administration<br />
3. Locate the forms definition for the process prtimatt.<br />
4. Click Copy.<br />
5. Enter AESOP in the Name field.<br />
6. Enter an appropriate description.<br />
7. Click the Accept button or press Enter.<br />
8. Click the Update button or press Ctrl-U.<br />
9. Update the Forms Definition to match the specifications below. This must match<br />
exactly.<br />
AESOP Import Version 8.3<br />
<strong>Payroll</strong> Page 2 of 5<br />
Update 10/31/2011
Instructions to Run the <strong>Aesop</strong> <strong>Report</strong> for <strong>Payroll</strong><br />
1. Sign on to AESOP.<br />
2. Click <strong>Report</strong>s<br />
3. Click <strong>Report</strong> Writer<br />
4. Go to your new report and click “run with new filters” to the right of the report<br />
5. Under the “Filter Tab” enter pay period – change to “fixed” (goes from Sunday to<br />
Saturday) and click Run<br />
6. Uncheck HTML and check Excel Compatible (csv) – click Run<br />
7. Download as Excel Compatible (CSV)<br />
8. Select Open<br />
9. Highlight entire document and auto size the columns<br />
10. Sort by “reason” and delete rows that should not be imported such as:<br />
* Vacancies * Conference Days *Field Trips<br />
* Prof. Development (any days that we would be covering the employees pay<br />
from their usual salary – not through a sick day, personal day, vacation day etc.)<br />
11. Please note: If the complete Social Security Number is not shown in column A,<br />
go back into <strong>Aesop</strong> and make sure that you add the employee’s SS# in the<br />
“identifier” space. YOU MUST RUN THIS REPORT OVER if you have had to go<br />
back and add a SS#.<br />
12. Change “Quantity” column to “text”<br />
13. Delete header row<br />
14. Save as .csv to a folder and file name of your choice<br />
15. Close – (click “yes” to message about formatting)<br />
16. Click No to save<br />
17. Exit AESOP<br />
AESOP Import Version 8.3<br />
<strong>Payroll</strong> Page 3 of 5<br />
Update 10/31/2011
18. Go into Excel and open your report to verify the information.<br />
19. Log in to <strong>MUNIS</strong>.<br />
20. Display the Time Entry Screen.<br />
Human Resouce/ <strong>Payroll</strong> → <strong>Payroll</strong> → <strong>Payroll</strong>/Processing<br />
21. Verify that the pay period matches the dates selected in AESOP.<br />
22. Select Import.<br />
23. Click the Browse button in the File field.<br />
24. Select Form AESOP – AESOP<br />
25. Verify that the Delimiter is a comma.<br />
26. Click Accept.<br />
If errors occur, run report, delete the batch that was created, resolve and repeat the<br />
process. Once the batch is in <strong>MUNIS</strong>, move the approved batch into payroll and<br />
process as normal.<br />
AESOP Import Version 8.3<br />
<strong>Payroll</strong> Page 4 of 5<br />
Update 10/31/2011
AESOP Import Version 8.3<br />
<strong>Payroll</strong> Page 5 of 5<br />
Update 10/31/2011