43-06937 INSERT-EPIC 430 OEM INTEGRATION MANUAL - TransAct
43-06937 INSERT-EPIC 430 OEM INTEGRATION MANUAL - TransAct
43-06937 INSERT-EPIC 430 OEM INTEGRATION MANUAL - TransAct

Create successful ePaper yourself
Turn your PDF publications into a flip-book with our unique Google optimized e-Paper software.
<strong>OEM</strong> Integration Manual<br />
PN <strong>43</strong>-06938 Rev L, Jan. 2009
This page intentionally left blank
Change History<br />
Rev A Initial version July 2006<br />
Rev B Added command documentation for [ENQ]<br />
Modified the environmental specification<br />
Updated a number of printer images.<br />
Described more clearly how to enter self test and other test modes.<br />
Added color support.<br />
Rev C. Minor Format changes<br />
Removed references to Pens<br />
Added documentation to additional Error counters<br />
Removed refinances to the PJ1000<br />
Added a foot note indicating the Vbus on the USB link is used to<br />
disable the Serial link.<br />
Added a few page breaks.<br />
Changes to mounting instructions<br />
Rev D Clarified the Macro Save command overview. August 2006<br />
Added a grounding section.<br />
Rev E<br />
Added the [ESC] + J and [ESC] + j commands. (Available on Rev 1.04 of the firmware)<br />
Corrected the parameter order in the [ESC][RS]O file open command.<br />
Corrected the Return directory command.<br />
Added return file free space commands.<br />
Added Close all files command<br />
Added Set/Clear File attributes command.<br />
Removed Warranty information from this manual.<br />
Updated the Technical support phone numbers.<br />
Added a return firmware Checksum command.<br />
Rev F November 2006<br />
Added a File operation status command.<br />
Added documentation for Field Configuration Option<br />
Added the power connection pin-out.<br />
Added hot plug warning when interconnecting the electronics module with the print module.<br />
Added a Firmware Identification command. (Page 156)<br />
Added a Firmware Check Sum verification to the [ESC][RS]V command. (Page 220)<br />
Added module interconnect and bezel connections.<br />
Corrected the Page Mode set page size command<br />
Added several Page Mode commands.<br />
Rev G Jan 18, 2007<br />
Fixed the ENQ 15, and 22 Hex listing<br />
Fixed the description of the print graphic mode and reassign graphic mode commands.<br />
Modified the Jam Detection description and improved the paper loading instructions.<br />
Added a section on clearing paper jams.<br />
The ESC RS E command has been removed and replaced with ESC RS X. ESC RS E<br />
deleted all files and should not.<br />
User defined macros must have a .mac extension.<br />
Removed display pass through<br />
Removed multi-drop.<br />
Removed the reference to the ESC RS T command in the ESC RS I command description.<br />
Removed the ESC w command. It is not in this product.<br />
Updated product images.<br />
Added a section on selecting the correct driver.<br />
Rev H June 2007<br />
Added support for Bitmap fonts.<br />
Added USB Configurability<br />
Added command to allow user control of the Bezel lamp.<br />
Added feature to disable the extended features on the FEED button.<br />
Added feature to allow Bezel to flash on error.<br />
Added Periodic Status back<br />
Fixed description of strike through. Was described as over score.<br />
Rev J Sept 2007<br />
Modified the Periodic status back [ESC][EM]p command.<br />
Rev K June 2008<br />
Modified the Remote down load command.<br />
Rev L Jan 2009<br />
Clarified the power requirements<br />
<strong>43</strong>-06938 Rev L Page i
This page intentionally left blank<br />
Page ii<br />
<strong>43</strong>-06938 Rev L
Federal Communications Commission Radio<br />
Frequency Interference Statement<br />
The Epic <strong>43</strong>0 TM Printer complies with the limits for a Class A computing device<br />
in accordance with the specifications in Part 15 of FCC rules. These<br />
regulations are designed to minimize radio frequency interference during<br />
installation; however, there is no guarantee that radio or television interference<br />
will not occur during any particular installation. Interference can be<br />
determined by turning the equipment off and on while the radio or television is<br />
on. If the printer causes interference to radio or television reception, try to<br />
correct the interference by one or more of the following measures:<br />
1. Reorient the radio or television receiving antenna<br />
2. Relocate the printer with respect to the receiver<br />
3. Plug the printer and receiver into different circuits<br />
If necessary, the user should consult their dealer or an experienced<br />
radio/television technician for additional suggestions. The user may find the<br />
following booklet prepared by the Federal Communications Commission<br />
helpful: How to Identify and Resolve Radio/TV Interference Problems. This<br />
booklet is available from the US Government Printing Office, Washington, DC<br />
20402. Ask for stock number 004-000-00345-4.<br />
Canadian Department of Communications Radio<br />
Interference Statement<br />
The Epic <strong>43</strong>0 TM Printer does not exceed Class A limits for radio noise<br />
emissions from digital apparatus set out in the Radio Interference Regulations<br />
of the Canadian Department of Communications.<br />
Regulatory Compliance<br />
EN60950-1<br />
EN55022<br />
EN55024<br />
CE Mark<br />
RoHS<br />
<strong>43</strong>-06938 Rev L Page iii
Disclaimer<br />
NOTICE TO ALL PERSONS RECEIVING THIS DOCUMENT:<br />
The information in this document is subject to change without notice. No part<br />
of this document may be reproduced, stored or transmitted in any form or by<br />
any means, electronic or mechanical, for any purpose, without the express<br />
written permission of <strong>TransAct</strong> Technologies, Inc. ("<strong>TransAct</strong>"). This<br />
document is the property of and contains information that is both confidential<br />
and proprietary to <strong>TransAct</strong>. Recipient shall not disclose any portion of this<br />
document to any third party.<br />
TRANSACT DOES NOT ASSUME ANY LIABILITY FOR DAMAGES<br />
INCURRED, DIRECTLY OR INDIRECTLY, FROM ANY ERRORS,<br />
OMISSIONS OR DISCREPANCIES IN THE INFORMATION CONTAINED IN<br />
THIS DOCUMENT.<br />
<strong>TransAct</strong> cannot guarantee that changes in software and equipment made by<br />
other manufacturers, and referred to in this publication, do not affect the<br />
applicability of information in this publication.<br />
Copyright<br />
© 2007-2009 <strong>TransAct</strong> Technologies, Inc. All rights reserved.<br />
Revision Level L<br />
January 2009<br />
Printed in USA<br />
Trademarks<br />
Some of the product names mentioned herein are used for identification<br />
purposes only and may be trademarks and/or registered trademarks of their<br />
respective companies.<br />
BANKjet, 50Plus, Insta-Load, Ithaca, “Made to Order. Built to Last”, Magnetec,<br />
PcOS, POSjet, PowerPocket and <strong>TransAct</strong> are registered trademarks and<br />
Epic <strong>43</strong>0 TM , Flex-Zone, _mport, ithaColor, iTherm, KITCHENjet, Momentum,<br />
QDT and TicketBurst are trademarks of <strong>TransAct</strong> Technologies, Inc.<br />
Page iv<br />
<strong>43</strong>-06938 Rev L
Table of Contents<br />
Change History ................................................................................................ i<br />
Federal Communications Commission Radio Frequency Interference<br />
Statement .......................................................................................................iii<br />
Canadian Department of Communications Radio Interference Statement .......iii<br />
Regulatory Compliance ...................................................................................iii<br />
Disclaimer ...................................................................................................... iv<br />
Copyright ....................................................................................................... iv<br />
Trademarks.................................................................................................... iv<br />
Table of Contents............................................................................................ v<br />
Figures........................................................................................................... xi<br />
Tables ............................................................................................................ xi<br />
Introducing your Epic <strong>43</strong>0 TM Printer ........ 1<br />
About your <strong>TransAct</strong> ® Epic <strong>43</strong>0 TM Printer ........................................................ 3<br />
Who Should Read This Guide? ....................................................................... 4<br />
What Is Included in This Guide? ..................................................................... 4<br />
Technical and Sales Support .......................................................................... 5<br />
On-line Technical Support .......................................................................... 5<br />
Telephone Technical Support ..................................................................... 5<br />
Return Materials Authorization and Return Policies .................................... 6<br />
Service Programs ....................................................................................... 6<br />
Sales Support............................................................................................. 6<br />
Contact Information .................................................................................... 7<br />
Epic <strong>43</strong>0 TM Specifications and<br />
Requirements ......................................... 9<br />
Epic <strong>43</strong>0 TM Specifications and Requirements ................................................ 11<br />
Standard Features ........................................................................................ 11<br />
Optional Features ......................................................................................... 12<br />
General Specifications .................................................................................. 13<br />
Printer Dimensions ................................................................................... 13<br />
Weight ...................................................................................................... 13<br />
Interface Type .......................................................................................... 13<br />
Printer Type.............................................................................................. 14<br />
Printer Environmental Conditions ............................................................. 14<br />
Reliability.................................................................................................. 14<br />
AC Power Requirements .......................................................................... 14<br />
DC Power Requirements .......................................................................... 15<br />
Test Standards ......................................................................................... 16<br />
Accoustic Noise: ....................................................................................... 17<br />
Printing Specifications................................................................................... 18<br />
Paper Roll Specifications .............................................................................. 18<br />
Paper Out ..................................................................................................... 18<br />
Auto Cutter Position ...................................................................................... 18<br />
Communications Interface ............................................................................ 19<br />
RS-232 Serial Interface ............................................................................ 19<br />
Serial Port Features .......................................................................... 19<br />
Signal Voltage and Current levels...................................................... 19<br />
USB Interface ........................................................................................... 20<br />
USB Configuration............................................................................. 20<br />
<strong>43</strong>-06938 Rev L Page v
Operational Procedures ........................ 21<br />
How to Operate the Epic <strong>43</strong>0 TM Printer .......................................................... 23<br />
Indicator Lights (LED) ................................................................................... 23<br />
The FEED button .......................................................................................... 23<br />
The TEST button........................................................................................... 24<br />
Using Self-Test ......................................................................................... 25<br />
Testing the printer ............................................................................. 25<br />
Factory Test ...................................................................................... 26<br />
Level 0 Diagnostics .................................................................................. 27<br />
Power On .......................................................................................... 27<br />
Boot Loader Mode .................................................................................... 27<br />
Printer Status LED’s ................................................................................. 29<br />
<strong>TransAct</strong> Boot Load Mode ................................................................. 29<br />
Self Test Mode .................................................................................. 29<br />
Normal Operation .............................................................................. 29<br />
Soft Errors ......................................................................................... 29<br />
Hard Errors ........................................................................................ 30<br />
Auto Error Recovery ................................................................................. 30<br />
Flash Format Errors .......................................................................... 30<br />
Input Power Fault .............................................................................. 30<br />
Head Temperature Fault ................................................................... 30<br />
Configuration Faults Recovery .......................................................... 30<br />
Loading Paper .............................................................................................. 31<br />
Clearing Paper Jams .................................................................................... 32<br />
Cleaning the Print Head ................................................................................ 33<br />
Configuring Your Epic <strong>43</strong>0 TM Printer ...... 35<br />
Configuration Mode Overview ....................................................................... 37<br />
Selecting the Communications interface ................................................... 37<br />
Most Frequent Configuration Incompatibilities .......................................... 37<br />
How to Change Configuration Settings ......................................................... 38<br />
Entering into Configuration Mode ............................................................. 38<br />
Setting up for Color Paper ............................................................................. 39<br />
Custom Color ........................................................................................... 39<br />
Remote Configuration ................................................................................... 39<br />
Remote Boot Load ........................................................................................ 39<br />
Field Configuration Feature ........................................................................... 40<br />
Using Field Configuration .................................................................. 40<br />
Mounting Requirements ........................ <strong>43</strong><br />
Electronics Base Assembly to Final Product ............................................. 45<br />
Optional Remote Base Cover ................................................................... 46<br />
Epic <strong>43</strong>0 TM grounding .................................................................................... 47<br />
Custom Bezel Specifications and Recommendations ............................... 48<br />
Custom Bezel to Printer Mechanism mounting points ........................ 48<br />
Printer Sensors ..................................... 49<br />
Printer Sensors ............................................................................................. 51<br />
Paper Out Sensor..................................................................................... 51<br />
Cover-Open Switch .................................................................................. 52<br />
Top-of-Form ............................................................................................. 52<br />
Paper Low Sensor (Option) ...................................................................... 52<br />
Page vi<br />
<strong>43</strong>-06938 Rev L
Jam Detection Sensor .............................................................................. 52<br />
Transport Ticket Taken Sensor ................................................................ 52<br />
Electrical Connections ........................... 53<br />
Communications Interface ............................................................................ 55<br />
Power Connection......................................................................................... 55<br />
Remote Base Interconnect ............................................................................ 56<br />
Bezel Interconnect ........................................................................................ 58<br />
Printer Block Diagram ................................................................................... 59<br />
Control Codes ........................................ 61<br />
Control Codes Overview ............................................................................... 63<br />
Nomenclature ............................................................................................... 63<br />
Standard Emulation .................................................................................. 64<br />
IPCL Codes .............................................................................................. 64<br />
Other Emulations ..................................................................................... 64<br />
Application Development .............................................................................. 64<br />
<strong>TransAct</strong> Control Codes and Commands ...................................................... 64<br />
PcOS Printer Control Codes ..................................................................... 64<br />
Quick PcOS Reference Chart ................................................................... 66<br />
Low Level Paper Motion Control ............................................................... 72<br />
Print/Paper Motion ............................................................................. 72<br />
Horizontal Motion Control ......................................................................... 73<br />
Vertical Motion Control ............................................................................. 75<br />
Feed to Black Dot ..................................................................................... 82<br />
Character Pitch ........................................................................................ 84<br />
Character Font ......................................................................................... 89<br />
Character Sets and Code Pages .............................................................. 90<br />
Codepage description files ................................................................ 90<br />
Code page selection ................................................................................. 92<br />
Character Attributes .......................................................................... 96<br />
Page Mode ............................................................................................. 102<br />
How to use page mode .................................................................... 102<br />
Page Definition ................................................................................ 102<br />
Auto-cutter and page mode ............................................................. 103<br />
Mechanism commands in page mode ............................................. 103<br />
Stopping page mode definition ........................................................ 103<br />
Printing the page ............................................................................. 103<br />
Graphic Mode......................................................................................... 111<br />
Standard APA Graphics .................................................................. 111<br />
Extended APA Graphics .................................................................. 112<br />
Horizontal Color Graphics ............................................................... 114<br />
Graphics Compression ........................................................................... 116<br />
Simple Raster Graphics ......................................................................... 117<br />
User Store (Graphic Save and Macros) .................................................. 118<br />
Programming Considerations .......................................................... 118<br />
Defining Macros .............................................................................. 118<br />
User Store Commands .................................................................... 120<br />
Legacy User Macros .............................................................................. 125<br />
Bar Codes .............................................................................................. 127<br />
Interleaved 2 of 5 ............................................................................. 128<br />
Code 39 .......................................................................................... 128<br />
<strong>43</strong>-06938 Rev L Page vii
Code 128......................................................................................... 129<br />
UPC A ............................................................................................. 132<br />
UPC E ............................................................................................. 132<br />
EAN-13 ........................................................................................... 132<br />
EAN-8 ............................................................................................. 132<br />
EAN-14 ........................................................................................... 132<br />
Code 93 .......................................................................................... 132<br />
Codabar .......................................................................................... 133<br />
PDF 417 .......................................................................................... 133<br />
Electronic Journal ................................................................................... 136<br />
Configuring the Electronic Journal ................................................... 136<br />
Electronic Journal Security .............................................................. 136<br />
Initializing the Electronic Journal ..................................................... 137<br />
Electronic Journal Configuration and Reporting Commands ............ 137<br />
Printing/Reporting and Resetting the Electronic Journal .................. 141<br />
Journal Entries and using Journal Print Mode .................................. 141<br />
Journal Print Mode Options ............................................................. 142<br />
Electronic Journal Entries ................................................................ 1<strong>43</strong><br />
Journal mode .................................................................................. 145<br />
Carbon Copy Journal Mode ............................................................. 146<br />
Transport Control ................................................................................... 147<br />
Miscellaneous Control ............................................................................ 148<br />
Remote Power Control ........................................................................... 154<br />
Documented Extended Control commands ............................................ 155<br />
Printer Status ......................................................................................... 157<br />
Status Inquire .................................................................................. 157<br />
Serial and USB Mode Inquire .......................................................... 157<br />
IEEE 1284 Mode Inquire ................................................................. 158<br />
Inquire Commands ................................................................................. 158<br />
Double Level Loader ................................................................................... 169<br />
Entering Field Boot Load Mode. ............................................................. 169<br />
Epic <strong>43</strong>0 TM Color Graphics ................... 171<br />
Printing Graphics ........................................................................................ 173<br />
Character Graphics ................................................................................ 173<br />
APA Graphics......................................................................................... 174<br />
Procedure for APA graphics: ........................................................... 174<br />
Epic <strong>43</strong>0 TM Universal Color Graphics .......................................................... 175<br />
Print File Graphics .................................................................................. 176<br />
To generate a print file. .................................................................... 176<br />
Store Graphics in the printer: .................................................................. 176<br />
To Store a graphic in the printer ...................................................... 176<br />
Print a stored graphic. ..................................................................... 177<br />
Generate a file to store color graphics into a printer ......................... 177<br />
How universal color graphics is done ..................................................... 177<br />
How to use IPCL commands in text strings............................................. 178<br />
Load and store named graphic image.............................................. 178<br />
Recall and print stored named graphic image .................................. 178<br />
Cautions ................................................................................................. 178<br />
Universal Graphics Command Descriptions ........................................... 180<br />
Bitmapped File Graphic Support ................................................................. 182<br />
Epic <strong>43</strong>0 TM Coupon-Cut-Logo Feature ........................................................ 183<br />
Page viii<br />
<strong>43</strong>-06938 Rev L
Unicode and Fonts .............................. 185<br />
Fonts .......................................................................................................... 187<br />
Character Generation ............................................................................. 187<br />
Outline characters ........................................................................... 187<br />
Stroke-based characters ................................................................. 188<br />
Character Size ................................................................................ 188<br />
Selecting Character Size ................................................................. 188<br />
Legacy or Classic Method ............................................................... 188<br />
Line spacing .................................................................................... 190<br />
Selecting character size by points. .................................................. 190<br />
Internal Fonts ......................................................................................... 190<br />
Custom Fonts ......................................................................................... 190<br />
Stacked or Linked fonts .......................................................................... 191<br />
Font Storage .......................................................................................... 191<br />
Bitmap Fonts .......................................................................................... 193<br />
Unicode ...................................................................................................... 196<br />
Unicode Encoding .................................................................................. 196<br />
File system and the POR.INI file ................................................................. 198<br />
Font Size and Spacing ................................................................................ 204<br />
Font Size and Spacing command interactions ........................................ 205<br />
Legacy Printer Features that Have Changed............................................... 211<br />
User defined characters ......................................................................... 211<br />
Dynamic code page definition ................................................................ 211<br />
File System ......................................... 213<br />
File System Interface .................................................................................. 215<br />
File System commands .......................................................................... 215<br />
Epic <strong>43</strong>0 TM Extended Printer Control ... 221<br />
Remote Printer Reset ................................................................................. 226<br />
Reset in Serial Mode .............................................................................. 226<br />
Miscellaneous Communication Features ..................................................... 227<br />
Power-cycle Recovery ............................................................................ 227<br />
Off-line Control ....................................................................................... 227<br />
Remote Boot Load Mode ........................................................................ 228<br />
Recovery from Mechanical Errors ............................................................... 229<br />
Epic <strong>43</strong>0 TM Programmers Notes ........... 230<br />
General Notes ............................................................................................. 232<br />
What Drivers do I need ............................................................................... 233<br />
Definitions .............................................................................................. 233<br />
Do you want to use USB and simulate a Communication Port ................ 234<br />
Are you using OPOS (UnifiedPOS/UPOS)? ........................................... 234<br />
Do you want to print from a Windows Application? ................................. 234<br />
Windows Printer Driver ........................................................................... 235<br />
When to use a windows printer driver: ............................................. 235<br />
When not to use a windows printer driver: ....................................... 235<br />
PC Hardware .............................................................................................. 235<br />
GDI ............................................................................................................. 235<br />
OPOS driver ........................................................................................... 236<br />
When to use an OPOS driver: ......................................................... 236<br />
When not to use an OPOS driver: ................................................... 236<br />
<strong>43</strong>-06938 Rev L Page ix
PC Hardware .............................................................................................. 236<br />
USB driver: ............................................................................................. 237<br />
When to use the USB driver: ........................................................... 237<br />
When not to use the USB driver: ..................................................... 237<br />
POSPrinter Activex Control (POSPrinter OCX):...................................... 238<br />
When to use the POSPrinter OCX: .................................................. 238<br />
When not to use the POSPrinter OCX: ............................................ 238<br />
PC Hardware .............................................................................................. 238<br />
Appendix A: Unicode Character Addresses<br />
........................................................... 239<br />
Appendix B: WGL4.0 Character Addresses<br />
........................................................... 241<br />
Appendix C: Internal Code Page<br />
Definitions .......................................... 247<br />
Appendix D - ASCII Code Table ........... 249<br />
Appendix E: Ordering Supplies ............ 250<br />
Index .................................................... 251<br />
Page x<br />
<strong>43</strong>-06938 Rev L
Figures<br />
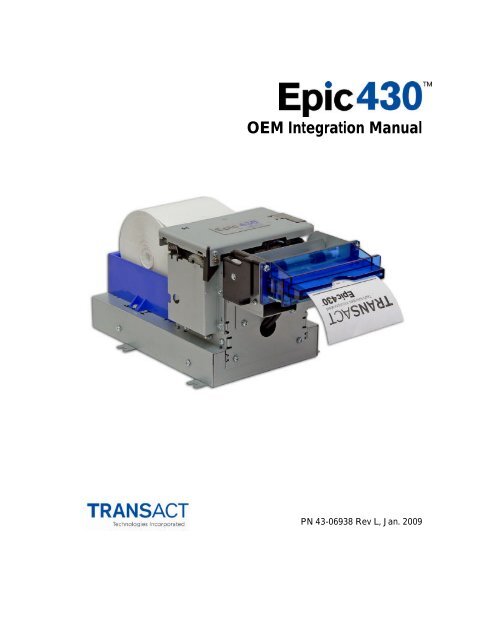
Figure 1. Epic <strong>43</strong>0 TM Printer. ......................................................................... 11<br />
Figure 2. Epic <strong>43</strong>0 TM Dimensions. ................................................................. 13<br />
Figure 3. Temperature and Humidity Ranges. ............................................... 14<br />
Figure 4. Location of TEST Button Inside Electronics Base. .......................... 24<br />
Figure 5. Loading a Paper Roll. ..................................................................... 31<br />
Figure 6. Startup message in Field Configuration mode. ............................... 40<br />
Figure 7. Sample pre-loaded configuration.................................................... 41<br />
Figure 8. Electronics Base Assembly to Final Product .................................. 45<br />
Figure 9. Optional Remote Base Cover ......................................................... 46<br />
Figure 10. Remote Base Mounted to Printer Mechanism .............................. 47<br />
Figure 11. Custom Bezel Mounting and Hardware Requirements ................. 48<br />
Figure 12. Sensor Breakdown and Locations. ............................................... 51<br />
Figure 13. Communication Location and Connector Info. ............................. 55<br />
Figure 14. Remote Base with cable cover removed ...................................... 56<br />
Figure 15. Remote Base with cable cover in place ........................................ 56<br />
Figure 16. Remote cable to Printer Mechanism connection........................... 57<br />
Figure 17. Bezel illumination drive ................................................................ 58<br />
Figure 18 Page Mode Entry Orientations .................................................... 103<br />
Figure 19 Page mode set printable area ..................................................... 106<br />
Figure 20 Default Page mode printed area .................................................. 106<br />
Figure 21 Defined Page mode printed area ................................................. 107<br />
Figure 22 Code 39 Full 128 Character Encoding ......................................... 129<br />
Figure 23 Expanded Function Coding ......................................................... 130<br />
Figure 24 Code 128 Encoding Values ......................................................... 131<br />
Figure 25 Example of Character Graphics .................................................. 173<br />
Figure 26 Windows Driver ........................................................................... 235<br />
Figure 27 OPOS (UPOS) Driveer ................................................................ 236<br />
Figure 28 USB Driver .................................................................................. 237<br />
Figure 29 POSPrinter OCX ......................................................................... 238<br />
Tables<br />
Table 1 Serial Interface Pin-outs ................................................................... 19<br />
Table 2 Character Pitch ................................................................................ 87<br />
Table 3 Inter-character Spacing .................................................................... 88<br />
Table 4 Language Table ID’s ........................................................................ 93<br />
Table 5 Euro Character Substitution Matrix ................................................... 94<br />
Table 6 Paper Sensor Commands .............................................................. 150<br />
Table 7 Paper Sensor Commands .............................................................. 151<br />
Table 8 Possible Character Pitches ............................................................ 189<br />
Table 9 Requested CPI and Resulting CPI ................................................. 190<br />
Table 10 Character Pitch ............................................................................ 211<br />
<strong>43</strong>-06938 Rev L Page xi
Chapter 1<br />
Introducing your Epic <strong>43</strong>0 TM Printer<br />
<strong>43</strong>-06938 Rev L Page 1
This page intentionally left blank<br />
Page 2<br />
<strong>43</strong>-06938 Rev L
About Your Epic <strong>43</strong>0 TM Printer<br />
About your <strong>TransAct</strong> ® Epic <strong>43</strong>0 TM Printer<br />
The <strong>TransAct</strong> ® Epic <strong>43</strong>0 TM printer represents the very latest technology for use<br />
for thermal receipt printing, specifically designed for the needs of gaming and<br />
kiosk applications. It builds upon the architecture of <strong>TransAct</strong>’s proven thermal<br />
printers, together with a host of features specifically designed to improve the<br />
performance of your receipt printing applications, including:<br />
• Modular printer design, with an electronics base that can be mounted up to<br />
2 feet maximum from the main unit.<br />
• Paper roll bracket/spindle allowing paper roll to be mounted behind or<br />
below printer mechanism<br />
• High-speed (6 inches per second) thermal receipt printing<br />
• Barcode printing capabilities.<br />
• Up to four (4) inch (100 mm) diameter paper roll<br />
• Long-life ticket cutter<br />
• Optional variable length presenter capable of handling from 63.5 to 254<br />
mm. (2.5 -10 inches) length tickets<br />
• Stroke-based fonts capable of supporting Asian and Latin characters<br />
These features and more let you quickly and easily integrate reliable ticket<br />
printing in your gaming and kiosk applications, while giving you the quality,<br />
durability and uptime you have come to expect from <strong>TransAct</strong> ® printers.<br />
<strong>43</strong>-06938 Rev L Page 3
About Your Epic <strong>43</strong>0 TM Printer<br />
Who Should Read This Guide?<br />
This document provides information useful to original equipment<br />
manufacturers (<strong>OEM</strong>) who will integrate the Epic <strong>43</strong>0 TM printer into their<br />
products.<br />
What Is Included in This Guide?<br />
This Integration Manual includes information on the mechanical, electrical and<br />
command language requirements of the Epic <strong>43</strong>0 TM printer. It provides the<br />
following information to support your integration efforts:<br />
• Warranty and technical support information.<br />
• Specifications and functionality description.<br />
• Mounting requirements and mounting locations.<br />
• Power and interface connections.<br />
• Operational procedures.<br />
• Programming information, including documentation of low-level and highlevel<br />
command interfaces, as well as sample scripts to guide your own<br />
implementation efforts.<br />
We want you to have a trouble-free implementation with your <strong>TransAct</strong> ®<br />
printer. For any issues not covered in this guide, quality technical support is<br />
available on-line at www.transact-tech.com, or by telephone or fax – consult<br />
the following pages for more details about our support services.<br />
Page 4<br />
<strong>43</strong>-06938 Rev L
About Your Epic <strong>43</strong>0 TM Printer<br />
Technical and Sales Support<br />
Your printer is backed by the resources of <strong>TransAct</strong> Technologies, a global<br />
technology firm with dedicated technical support and sales assistance. Here is<br />
how we can help you:<br />
On-line Technical Support<br />
Our web site at www.transact-tech.com is your on-line portal to obtaining<br />
technical assistance with your <strong>TransAct</strong> ® printer. Click on Ithaca link and then<br />
the Technical Support link to find support information for your Epic <strong>43</strong>0 TM<br />
printer. Our on-line support site also includes a convenient e-mail assistance<br />
request form, where you can submit support requests 24 hours a day, and<br />
receive a return contact from a <strong>TransAct</strong> support technician during regular<br />
business hours.<br />
Telephone Technical Support<br />
Live telephone support is available Monday through Friday from 8 AM to 5 PM<br />
local time, excluding holidays. We can provide general information about<br />
programming for your Epic <strong>43</strong>0 TM printer, technical support, documentation, or<br />
assistance in sending a printer for service. To obtain telephone support,<br />
contact the number below for your region and ask for Technical Support.<br />
Eastern United States: 1.877.7ITHACA (1.877.748.4222), Fax: 607.257.3911<br />
United Kingdom: 011-44-170-977-2500, Fax: 011-44-170-977-2505<br />
To help us serve you faster, please have the following information ready when<br />
you call:<br />
• The Model Number and Serial Number of the printer.<br />
• A list of any other peripheral devices attached to the same port as the<br />
printer.<br />
• What application software, operating system, and network (if any) you are<br />
using.<br />
• What happened and what you were doing when the problem occurred.<br />
• How you tried to solve the problem.<br />
<strong>43</strong>-06938 Rev L Page 5
About Your Epic <strong>43</strong>0 TM Printer<br />
Return Materials Authorization and Return Policies<br />
If a support technician determines that the printer should be serviced at a<br />
<strong>TransAct</strong> facility, and you want to return the printer for repair, we will issue you<br />
the Returned Materials Authorization (RMA) number that is required before<br />
returning the printer. Repairs are warranted for 90 days from the date of repair<br />
or for the balance of the original warranty period, whichever is greater. Please<br />
prepare the printer being returned for repair as follows:<br />
• Pack the printer to be returned in the original packing material.<br />
• Packing material may be purchased from <strong>TransAct</strong>’s Ithaca Facility.<br />
• Do not return any accessories unless asked to do so by a support<br />
technician.<br />
• Write the RMA number clearly on the outside of the box.<br />
Service Programs<br />
<strong>TransAct</strong> Technologies Incorporated has a full service organization to meet<br />
your printer service and repair requirements. If your printer needs service,<br />
please contact your service provider first. If any problems still persist, you can<br />
directly contact the Technical Support department at the numbers listed above<br />
for a return authorization. Customers outside the United States and United<br />
Kingdom should contact your distributor for services. <strong>TransAct</strong> offers the<br />
following service programs to meet your needs.<br />
• Extended Warranty.<br />
• Depot Repair.<br />
• Maintenance Contract.<br />
• Internet Support.<br />
Sales Support<br />
To order supplies, receive information about other Ithaca products, or obtain<br />
information about your warranty, contact our Sales Department at the contact<br />
telephone or fax numbers listed below. To receive information on International<br />
distribution, visit our web site at www.transact-tech.com.<br />
Page 6<br />
<strong>43</strong>-06938 Rev L
About Your Epic <strong>43</strong>0 TM Printer<br />
Contact Information<br />
<strong>TransAct</strong> Technologies Incorporated<br />
Ithaca Facility<br />
20 Bomax Drive<br />
Ithaca, NY 14850 USA<br />
<strong>TransAct</strong> Technologies<br />
World Gaming Headquarters<br />
& Western Regional Repair Center<br />
6700 Paradise Road<br />
Suite D<br />
Las Vegas, NV 89119 USA<br />
Telephone 877.7ithaca or 607.257.8901<br />
Main fax 607.257.8922<br />
Sales fax 607.257.3868<br />
Technical Support fax 607.257.3911<br />
Web site<br />
www.transact-tech.com<br />
Western United States: 877.822.8923, Fax: 702.254.7796<br />
United Kingdom: 011-44-170-977-2500, Fax: 011-44-170-977-2505<br />
<strong>43</strong>-06938 Rev L Page 7
Chapter 2<br />
Epic <strong>43</strong>0 TM Specifications and Requirements<br />
<strong>43</strong>-06938 Rev L Page 9
This page intentionally left blank<br />
Page 10<br />
<strong>43</strong>-06938 Rev L
Specifications and Requirements<br />
Epic <strong>43</strong>0 TM Specifications and Requirements<br />
Standard Features<br />
Figure 1. Epic <strong>43</strong>0 TM Printer.<br />
The following features are standard for Epic <strong>43</strong>0 TM printers:<br />
• Modular design, with electronics base assembly capable of being mounted<br />
remotely up to two feet from the printer mechanism.<br />
• Full-cut auto-cutter module as part of printer mechanism<br />
• Minimum 150 mm (6.0”)/second print speed (monochrome black text).<br />
• 203 dpi print resolution (8 dots/mm.)<br />
• Special print scalable to 8x with reverse, underscore, italic, and bold print<br />
• 44/57 characters per line for 80 mm paper width<br />
• Face-up print orientation<br />
• ASCII and Unicode character encoding:<br />
• Ladder and fence barcode printing supporting UPC-A, UPC-E, EAN13,<br />
EAN8, Code39, ITF, CODABAR, Code93, Code 128, Code31, and<br />
Interleaved 2 of 5<br />
• Serial RS232C and USB interfaces built into Main Controller PCB.<br />
• Selectable baud rates<br />
• Drivers for Windows XP and Xpe<br />
<strong>43</strong>-06938 Rev L Page 11
Specifications and Requirements<br />
• 4 MB minimum flash memory and 8 MB RAM<br />
• Ithaca command set emulation<br />
• Power: 24 VDC (See power requirements section for details)<br />
• Power Connector: 4 pin Molex<br />
• Paper Out, Paper Cover-Open, Top-Of-Form, Jam Detection, Transport<br />
Ticket Taken and Head Temperature sensors<br />
• ON/OFF Switch located in rear of electronics base.<br />
• Recessed cable access with easy to use cable strain reliefs.<br />
• Power and error LED(s)<br />
• Paper feed button<br />
• Easy paper loading<br />
• Portrait or landscape printing under Windows<br />
• Internal counters to track number of hours on, cuts completed, lines fed,<br />
and error conditions<br />
• Capable of handling a 100 mm. (4.0 inch) diameter, 60 or 80mm. wide<br />
paper roll<br />
• Compliant with RoHS (Restriction on Hazardous Substances)<br />
Optional Features<br />
The following options are available:<br />
• Variable length presenter, capable of handling from 63.5 to 254 mm. (2.5 -<br />
10 inches) length tickets<br />
• Paper Low sensor<br />
• Additional or custom fonts or character sets.<br />
• Custom emulations (Epson, Custom)<br />
• Universal power supply (100-240 VAC, 47-63 Hz)<br />
• Bezel assembly, with LEDs (translucent blue)<br />
• Remote printer mounting kit<br />
Page 12<br />
<strong>43</strong>-06938 Rev L
Specifications and Requirements<br />
General Specifications<br />
5.75” (146mm)<br />
11.76” (299mm)<br />
5.23” (133mm)<br />
Figure 2. Epic <strong>43</strong>0 TM Dimensions.<br />
Printer Dimensions<br />
Max Dimensions<br />
W D H<br />
Dimensions in<br />
inches<br />
5.23 11.76 5.75<br />
Dimensions in 133 299 146<br />
millimeters<br />
(fully assembled as single unit)<br />
Weight<br />
Approximate weight<br />
4.7 lb<br />
Interface Type<br />
Bi-directional serial RS-232 or USB<br />
<strong>43</strong>-06938 Rev L Page 13
Specifications and Requirements<br />
Printer Type<br />
Fixed 80 mm linear thermal head.<br />
Figure 3. Temperature and Humidity Ranges.<br />
Printer Environmental Conditions<br />
Operating Temperature Range: 5º - 50ºC (41ºF – 122ºF)<br />
Shipping/Storage Temperature Range: –10º - 50ºC (14ºF – 122ºF)<br />
Operating Humidity Range:<br />
10% - 90% non-condensing<br />
Shipping/Storage Humidity Range: 10% - 90% non-condensing<br />
(excluding paper)<br />
Reliability<br />
Printer Life:<br />
Print Head Life:<br />
Cutter Life:<br />
10,000,000 print lines<br />
75Km. min.<br />
1,000,000 cuts (POS Grade)<br />
AC Power Requirements<br />
90-265 VAC at 47-63 Hz. (With optional external supply)<br />
Page 14<br />
<strong>43</strong>-06938 Rev L
Specifications and Requirements<br />
DC Power Requirements<br />
Thermal printers require high peak currents based on how many print<br />
elements are being used and how often. High density printing requires much<br />
more current than low density printing. High density printing in the horizontal<br />
axis will put extreme peak loads on the power supply. These high peak<br />
currents can cause power supplies to sag, roll back or even shut down. A<br />
power supply with an average rating sufficient to meet the average printer<br />
requirements many not be sufficient to meet the peak requirements. The<br />
power supply selection is critical to proper printer operation.<br />
Typical power supplies are designed to provide a continuous well regulated<br />
voltage at an average current that does not fluctuate too much and will<br />
typically have a wattage rating based on that average current. A power supply<br />
suitable for the Epic <strong>43</strong>0 could have a wattage rating of 48 watts but unless it<br />
can provide peak currents of 8 amps (192 watts) and maintain 24VDC output,<br />
it will not function properly.<br />
Some power supplies are designed to provide multiple voltages. These power<br />
supplies typically provide a logic supply voltage that requires close regulation.<br />
The other voltages are not as well regulated or have post regulation. In this<br />
case when the 24 volt output is required to provide high peak currents, the<br />
circuitry within the power supply must maintain the logic voltage and the 24<br />
volt supply will sag. In some cased the high peak load will actually shut down<br />
the complete supply.<br />
Thermal printing has specific power requirements to develop the thermal<br />
paper. The <strong>EPIC</strong> <strong>43</strong>0 printer monitors the incoming voltage and will increase<br />
its current requirements if the voltage is low. The printer will adjust the print<br />
element burn time and that will resulting in increased average current<br />
requirements. Input voltage ranges from about 20 to 27 volts can be<br />
accommodated by the <strong>EPIC</strong> <strong>43</strong>0. If the input voltage is outside the acceptable<br />
range, the printer will issue a fault and will not function.<br />
A suitable power supply for a thermal printer will provide a constant voltage<br />
over a wide range of loads with a rather low average current requirement.<br />
Consider the following when selecting or designing a power supply for the<br />
Epic 880.<br />
1) It must be able to provide quick response to step loads.<br />
2) The current will range widely with peaks at least 4 times the average<br />
3) Specify the load requirements for the power supply as shown in the table<br />
below.<br />
4) Consider a dedicated power supply for the printer.<br />
5) If the printer is expected to print dense graphics, increase the average and<br />
continuous current requirements by at least 25%.<br />
6) Use power cables that are as short as possible and use adequate wire size<br />
based on the cable length. Typically AWG 18 is the minimum wire size<br />
provided the length is less than 3 ft (1 m).<br />
7) Make sure the power supply uses a low ESR capacitor of at least 2200uF and<br />
preferably larger in the output circuit.<br />
<strong>43</strong>-06938 Rev L Page 15
Specifications and Requirements<br />
8) When the printer prepares to print, it will activate the print head power and<br />
charge a bulk capacitor attached to the print head. This current spike can be<br />
up to 15 amps for up to 200uS depending on the charge state of the<br />
capacitor.<br />
9) Make sure the power supply specification includes any bezel current<br />
requirements.<br />
10) Consider that the Frame ground and the 24V return are connected together in<br />
the printer.<br />
11) Use connectors in the power interconnect that are rated for the maximum<br />
average current.<br />
Output Voltage<br />
Under all line, load and environmental conditions<br />
Load Current<br />
Max. Ripple<br />
Over voltage Protection<br />
Over current Protection<br />
24VDC ±8.5%<br />
0A min<br />
1.87A continuous<br />
3.5A continuous - 1 minute maximum.<br />
8A peak load 23.38% duty cycle 2ms period<br />
.1A/us slew rate 200 ms maximum<br />
240mv p-p<br />
< 30V<br />
Output equipped with auto restart short circuit<br />
protection < 7amps when tshort >10ms<br />
Test Standards<br />
CE MARK (1998)<br />
FCC CLASS B<br />
EN60950-1<br />
Page 16<br />
<strong>43</strong>-06938 Rev L
Specifications and Requirements<br />
IEC 60950 (1991) Second Edition with Amendments 1,2,3,4<br />
ROHH/WEEE<br />
Accoustic Noise:<br />
58 dBA<br />
<strong>43</strong>-06938 Rev L Page 17
Specifications and Requirements<br />
Printing Specifications<br />
Printing method:<br />
Vertical/Horizontal dot pitch:<br />
Resolution:<br />
Line feed pitch:<br />
Print zone (typical)<br />
Print speed (monochrome):<br />
Number of print elements:<br />
Thermal Sensitive Line Dot System<br />
0.125 mm.<br />
8 dots per mm (203 DPI)<br />
3.2 mm. (.125 inches)<br />
72 mm (2.81 inches)<br />
6 inches per second<br />
640 dots in-line (576 are typically used)<br />
Paper Roll Specifications<br />
Paper Type:<br />
One ply thermal paper<br />
Paper Width:<br />
79.5 +/- .05 mm (3.13 +/- .02 inches)<br />
or 59.5 +/- 0.5 mm. (2.34 +/- .02 inches)<br />
Paper Thickness 0.076 mm to 0.09 mm (.0022 to .0035 in.) thick<br />
Roll Diameter:<br />
101.6 mm (4.0 in.)<br />
Roll Core Inside Diameter: .445 to .635 inches<br />
Roll Core Outside Diameter: .730 to .860 inches<br />
Paper Grades : POS and Lottery grades<br />
Paper Usage Precautions:<br />
Use only specified thermal paper. If other paper is used, print quality, head<br />
life, and cutter life may deteriorate.<br />
Paper Out<br />
A receipt paper out sensor is provided as a standard feature, which senses<br />
when approximately .5 inches length of paper is left on the paper roll.<br />
Auto Cutter Position<br />
A full cut auto-cutter is a standard feature with all <strong>TransAct</strong> ® Epic <strong>43</strong>0 TM<br />
printers.<br />
Cutter type Guillotine<br />
Media width 79.5 mm: 80.0 +/- 0.5 mm. (3.13 +/- 0.01 inches)<br />
Media thickness range 0.0022 to 0.0035 inch<br />
Cut to line of print 0.70 inch<br />
Cutter life<br />
1,000,000 cuts (POS grade)<br />
750,000 cuts (Lottery grade)<br />
Cut time:<br />
Less than 350 milliseconds<br />
Page 18<br />
<strong>43</strong>-06938 Rev L
Specifications and Requirements<br />
Communications Interface<br />
RS-232 Serial Interface<br />
Serial Port Features<br />
The serial port features are as follows:<br />
Baud Rates 300, 600, 1200, 2400, 4800, 9600, 19.2K, 38.4K, and 57.6K<br />
Bit Patterns<br />
8-bit no parity; 8-bit odd; 8-bit even; 7-bit no parity; 7-bit odd;<br />
7-bit even<br />
Flow Control<br />
DTR and XON/XOFF<br />
9-pin 25-pin Signal Description<br />
Pin 1 Pin 8 Not Connected<br />
Pin 2 Pin 3 RX Receive Data<br />
Pin 3 Pin 2 TX Transmit Data<br />
Pin 4 Pin 20 DTR Data Terminal Ready<br />
Pin 5 Pin 7 GND Signal Ground<br />
Pin 6 Pin 6 DSR Data Set Ready<br />
Pin 7 Pin 4 RTS Request to Send<br />
Pin 8 Pin 5 CTS Clear to Send<br />
Pin 9 Pin 11 Not Connected<br />
Table 1 Serial Interface Pin-outs<br />
Signal Voltage and Current levels<br />
The serial interface meets EIA RS232 interface specifications:<br />
Voltage Levels Max +-15 Volts<br />
Min +- 3 Volts<br />
Mark = Off = -3 to –15 Volts<br />
Space = On = +3 to +15 Volts<br />
Because both the host and printer are DTE’s (Data Terminal Equipment), they<br />
use the same serial port pin-outs. If the cable that is used to connect the host<br />
to the printer is a pin-to-pin inter-connect, it will not work. Therefore, a null<br />
modem or turn-around cable must be used to interconnect the host and the<br />
printer.<br />
<strong>43</strong>-06938 Rev L Page 19
Specifications and Requirements<br />
USB Interface<br />
The USB interface is a Version 1.1 interface that is Version 2.0 compliant.<br />
The standard USB interface is implemented through a Standard Series “B”<br />
Receptacle as defined in the USB Specification. The printer is self-powered<br />
and does not draw power from the standard type B USB interface cable.<br />
The Standard USB Type B connector has the following pin functions:<br />
Pin Signal<br />
1 Vbus (+5 V dc 1 ) (This is used to select between Interfaces)<br />
2 Minus data<br />
3 Plus data<br />
4 Ground<br />
Note: The standard USB interface does not have enough power to run the<br />
printer. It is not possible to power the printer with the USB cable alone.<br />
USB Configuration<br />
To allow the application to use a virtual serial port or a USB printer port to<br />
interact with the printer, the <strong>EPIC</strong> <strong>43</strong>0 supports both. Whether it supports a<br />
virtual com port or a USB Printer device is configurable. The USB section of<br />
the configuration allows the USB Mode, the USB Enumeration, the disconnect<br />
when not ready, and if the printer will perform a normal Windows plug and play<br />
operation to be configured. The default is both USB virtual com, and printer<br />
port, use description, do not disconnect when not ready with Windows PnP on.<br />
You should configure these options based on how you want the printer to<br />
perform in USB mode at USB enumeration. Typically only Virtual COM or<br />
USB printer is required. If you want to load the Transact Virtual com port<br />
driver, disable the USB printer port. Typically you can use the description as<br />
the enumeration ID. The enumeration ID is how the printer is uniquely<br />
identified to the host. If you select description, all Epic <strong>43</strong>0’s will be the same.<br />
That way you can interchange printers without affecting the port location. The<br />
drawback is that you can’t have more than one Epic <strong>43</strong>0 connected to the<br />
same host. If that is a requirement, select ID by serial number or allow the ID<br />
number to be assigned by windows based on the connection. Generally<br />
disconnect when not ready is not desirable. However, in some cases with<br />
USB printer connections, this may be the only way to determine if the printer is<br />
ready.<br />
You can also disable the Windows PnP sequence. This will prevent the<br />
windows system from receiving the printer driver selection sequence. This will<br />
allow you to manual assign a driver to the USB printer connection and not<br />
have Windows keep asking for a printer driver.<br />
1 The Vbus signal is used to disable the serial port. If the USB is connected the<br />
RS232 serial port is not active.<br />
Page 20<br />
<strong>43</strong>-06938 Rev L
Chapter 3<br />
Operational Procedures<br />
<strong>43</strong>-06938 Rev L Page 21
This page intentionally left blank<br />
Page 22<br />
<strong>43</strong>-06938 Rev L
Operational Procedures<br />
How to Operate the Epic <strong>43</strong>0 TM Printer<br />
Your Epic <strong>43</strong>0 TM printer contains two buttons and four (LED) indicator lights.<br />
Indicator Lights (LED)<br />
The four Epic <strong>43</strong>0 TM indicator lights are:<br />
• Ready LED Indicates printer activity and non-recoverable errors<br />
• Open LED Indicates the cover is open<br />
• Paper LED Indicates paper status (paper low or out)<br />
• Error LED Indicates problems and probability of recovery<br />
The FEED button<br />
The FEED button will provide various functions, depending upon how long it is<br />
pressed.<br />
Pressing this button will provide one of three functions. The function is timedependent,<br />
and the display indicators will change to indicate the next mode,<br />
as follows:<br />
• The feed button is a multifunction button. By pressing and releasing the<br />
Feed button, the printer will feed about 5 inches of paper while printing the<br />
printer firmware version. This is intended to clear the printer and align the<br />
next ticket for print.<br />
• By pressing and holding the feed button for a longer time, two additional<br />
features may be activated. Pressing and holding the button for about two<br />
seconds will enter journal maintenance mode.<br />
• Holding the button for about 4 seconds will enter configuration mode.<br />
To aid in selecting the correct mode, the Error LED will illuminate as soon as<br />
the button is pressed and indicates that FEED is selected. After about 2<br />
seconds the Error LED will go out and the PAPER indicator will illuminate.<br />
This indicates that Journal mode is selected. After about 4 seconds, the<br />
Cover LED will illuminate indicating configuration mode is selected<br />
<strong>43</strong>-06938 Rev L Page 23
Operational Procedures<br />
The TEST button<br />
The printer has a hidden TEST button on the right side of the Electronics<br />
Base.<br />
TEST Button<br />
(inside hole)<br />
Figure 4. Location of TEST Button Inside Electronics Base.<br />
The TEST button is a multifunction button. By pressing and releasing the<br />
TEST button, the printer will enter self test mode. This is intended to verify the<br />
printer’s operation.<br />
By pressing and holding the TEST button for a longer time, two additional<br />
features may be activated. Pressing and holding the button for about two<br />
seconds will enter hex dump mode. Holding the button for about 4 seconds will<br />
enter configuration mode.<br />
To aid in selecting the correct mode, the Error LED will illuminate as soon as<br />
the button is pressed and indicates that self test is selected. After about 2<br />
seconds the Error LED will go out and the PAPER indicator will illuminate.<br />
This indicates that hex-dump mode is selected. After about 4 seconds, the<br />
Cover LED will illuminate indicating configuration mode is selected<br />
Page 24<br />
<strong>43</strong>-06938 Rev L
Operational Procedures<br />
Using Self-Test<br />
Self-Test Mode allows you to perform a series of tests to show if the printer is<br />
functioning correctly.<br />
To enter self test, momentarily press 2 the diagnostics button recessed behind<br />
the hole on the printer.<br />
The Epic <strong>43</strong>0 TM has several Self-Test options. Some are designed to be useful<br />
when performing on-site print evaluations. Others are designed for factory<br />
setup by <strong>TransAct</strong>.<br />
Once in test mode, the FEED button is used to select the test to be run.<br />
Testing the printer<br />
Use the first three TEST options when verifying basic printer operation. The<br />
last three options are for factory test.<br />
Operation –Ticket Print<br />
The receipt test is the primary test option to use when determining if the printer<br />
is functioning correctly.<br />
The ticket test is mostly used during the early stages of troubleshooting, to<br />
eliminate the possibility that the problem is occurring with the printer. If the<br />
printer experiences a failure, and the error indicator light is activated, call<br />
<strong>TransAct</strong>’s Technical Support department.<br />
Operation – Head Test<br />
This test performs a test pattern that will print all the head print elements and<br />
verify that the drive roll is free from defects or debris. The print head has two<br />
heating elements per dot position. A print element is not considered bad<br />
unless both elements are missing. If the head test shows that there is an<br />
inconsistency in the print there may be debris on the drive roll. If debris is<br />
indicated, cleaning the drive roll should correct the problem. If this does not<br />
correct the problem, contact <strong>TransAct</strong>’s Technical Support department.<br />
Operation – Marker Calibration<br />
The printer is equipped with several sensors in the paper path, which are<br />
adjustable and will handle a wide range of paper under normal operation.<br />
However, if there appear to be problems associated with any sensor’s<br />
operation, the Marker Calibration test will attempt to adjust the sensors for<br />
optional operation with the paper installed. The Top-of-Form, Paper Out and<br />
2 The test button is a multifunction button. By pressing and releasing the test button,<br />
the printer will enter self test. By pressing and holding the test button for a longer<br />
time, two additional features may be activated: pressing and holding the button for<br />
about two seconds will enter hex dump mode, and holding the button for about 4<br />
seconds will enter configuration mode. To aid in selecting the correct mode, the Error<br />
LED will illuminate as soon as the button is pressed and indicate that self test is<br />
selected. After about 2 seconds the Error LED will go out and the PAPER indicator<br />
will illuminate, indicating that hex dump is selected. After about 4 seconds, the Cover<br />
LED will illuminate, indicating that configuration mode is selected.<br />
<strong>43</strong>-06938 Rev L Page 25
Operational Procedures<br />
Jam sensors will be recalibrated. To run this test, simply select it. The printer<br />
will automatically position the paper and adjust the sensors. If the paper<br />
installed does not have black dot markings, the Top-of-Form sensor will be<br />
adjusted based on the white level of the paper only.<br />
Factory Test<br />
The printer is equipped with several factory test modes. These test options are<br />
only used for factory burn-in and testing.<br />
Operation – Continuous<br />
Operation – Burn-in<br />
Operation – Rolling ASCII<br />
Page 26<br />
<strong>43</strong>-06938 Rev L
Operational Procedures<br />
Level 0 Diagnostics<br />
Level 0 diagnostics are only run at power up, e.g. when power is first applied.<br />
These diagnostics perform the following tasks:<br />
Power On<br />
1. Basic System Integrity<br />
2. Vector Integrity<br />
3. RAM Test<br />
4. Flash Boot Loader Integrity<br />
5. Flash Firmware Integrity (NOTE: If the firmware is corrupted, the printer will remain in boot load.)<br />
6. USB Controller Diagnostics and verify.<br />
7. Start Normal Firmware<br />
8. Verify Configuration Integrity<br />
9. Interface Configuration<br />
10. File System Integrity<br />
11. Start Kernel, Verify Multitasking, Start Tasks<br />
Once the kernel is running, the following tests must pass to allow operation. However, if any<br />
test fails (except the knife home test), the remaining tests will generate recoverable faults and<br />
normal operation will start as soon as the fault is cleared. These tests are also run when<br />
operation is resumed from OFF.<br />
12. Cover Closed Check<br />
13. Knife Home<br />
14. Paper Present<br />
15. Clear Paper Path.<br />
16. Place Printer On-line, Start Normal Operation<br />
The first phase of testing consists of step 1-5, and determines that the boot<br />
loader is accurate and the printer firmware is correct. Tests 1 through 4<br />
produce non-recoverable errors if they fail, in which case the power must be<br />
removed from the printer and the printer returned for service. If the boot loader<br />
is intact, but the main firmware is corrupted, the printer automatically enters<br />
boot loader mode, where the firmware can then be reloaded into the printer.<br />
Boot Loader Mode<br />
The boot loader may be entered during normal operation through special<br />
commands. Normal boot load operation is by manually starting boot load<br />
mode. Boot loader mode can be entered in one of three ways: (1) when Level<br />
0 Diagnostics finds that the firmware check (also known as a cyclical<br />
redundancy check, or CRC) is bad, (2) manually, or (3) through the use of a<br />
special boot load command.<br />
To manually enter the boot loader, hold the Diagnostics button in the side of<br />
the printer while the power is applied. The ERROR Indicator comes on, and<br />
the READY indicator blinks. At this time, the firmware boot program is<br />
operating and the boot load file may be sent to the printer. When the printer<br />
receives the boot load file, the printer will automatically restart if the firmware<br />
load was successful. If the load fails, the printer will remain in boot load mode.<br />
If the load fails, reset the printer by removing the power and restarting it. Then<br />
try again.<br />
<strong>43</strong>-06938 Rev L Page 27
Operational Procedures<br />
Note: In this download mode, the printer will only accept data on the RS232<br />
serial port. A second level loader, described in more detail in the command<br />
section of the Epic <strong>43</strong>0 <strong>OEM</strong> Integration Manual, supports the USB interface.<br />
Note: In rare cases, it may be required to load the firmware twice. The Epic<br />
<strong>43</strong>0 TM contains a flash file system. The complete flash image is sometimes<br />
distributed as part of a firmware update. If the file system image is not<br />
compatible with the previous firmware configuration, the new firmware may<br />
need to reformat the file system. If this occurs, the firmware will have to be<br />
reloaded after the flash is reformatted. The indications that this is happening<br />
will be excessively long startup after a firmware update after which the printer<br />
will not print: tickets are presented, however only graphics are printed, and<br />
fonts will be missing. In this case it is important that the reformat be allowed to<br />
complete, as it can take up to 30 seconds to reformat the entire flash system.<br />
Page 28<br />
<strong>43</strong>-06938 Rev L
Operational Procedures<br />
Printer Status LED’s<br />
The Epic <strong>43</strong>0 TM printer has four indicator lights to indicate various operating<br />
states of the printer. In general these are Fault, Cover Open, Paper Status,<br />
and Ready.<br />
The printer may be in normal operation, self test or in one of two boot load<br />
modes. The Ready and Fault indicators will indicate which mode by a unique<br />
blink pattern:<br />
<strong>TransAct</strong> Boot Load Mode<br />
In <strong>TransAct</strong> Boot Load Mode, the power LED will blink slowly with a 50% duty<br />
cycle. It will repeat this cycle about every 2 seconds (1 Sec on, 1 Sec off).<br />
There will be a red indication on the Error LED indicator until the down load is<br />
started.<br />
Self Test Mode<br />
When the printer is in Self Test Mode, the power indicator will blink slowly with<br />
a 50% duty cycle at a 2 second rate. This is very similar to <strong>TransAct</strong> Boot<br />
Load Mode, however, the red error indicator will not be present.<br />
Normal Operation<br />
During Normal operation, the Power LED will remain on unless an error is<br />
being indicated. There are two classes of errors, soft errors and hard errors.<br />
Soft errors are recoverable without power cycling the printer; conversely,<br />
recovering from hard errors requires removing the power from the printer,<br />
correcting the problem, and then reapplying power.<br />
Status<br />
Power On, Printer Ready<br />
Paper Low<br />
LED response<br />
Power LED on (Not Blinking)<br />
Paper LED Blinking<br />
Soft Errors<br />
Soft errors may be recovered by the host, or by opening and closing the<br />
printer cover. Each of these errors is indicated by a 5 second repeating blink<br />
pattern on the Power LED with the red Error LED continuously on.<br />
Out of Paper 2 Blinks Paper LED will also be on.<br />
Cover Open 3<br />
4 Blinks<br />
Jam Detected<br />
5 Blinks<br />
Missed Top of Form 6 Blinks Paper LED will blink fast.<br />
Illegal or Bad Command 7 Blinks Paper LED will blink fast.<br />
Printer Over Temp 8 Blinks Error LED will blink slow.<br />
Bad Power 8 Blinks Error LED will blink fast.<br />
3 The printer may be configured to beep if the cover is open.<br />
<strong>43</strong>-06938 Rev L Page 29
Operational Procedures<br />
Hard Errors<br />
Hard errors have a similar blink pattern to soft errors, except that they are<br />
slower and repeat every 10 seconds. In general, these errors occur during<br />
level 0 diagnostics and are not recoverable. In these cases, the Error and<br />
Power LEDs will blink at the same time.<br />
EEPROM read fault<br />
EEPROM write fault<br />
Error Vector Taken<br />
Knife Error<br />
User Store Format Error<br />
User Data Store Error<br />
Flash Read/Write Error<br />
Memory Error<br />
Com Adapter<br />
Kernel Fault<br />
2 Blinks<br />
3 Blinks<br />
4 Blinks<br />
5 Blinks<br />
7 Blinks<br />
8 Blinks<br />
9 Blinks<br />
12 Blinks<br />
14 Blinks<br />
15 Blinks<br />
Auto Error Recovery<br />
The Epic <strong>43</strong>0 TM printer has the ability to auto recover from some internal<br />
errors.<br />
Flash Format Errors<br />
The internal flash that is used to store graphic images is formatted to assure<br />
data integrity. If this format is corrupted, the printer will automatically delete<br />
and reformat the flash. The host can then reload the images.<br />
Input Power Fault<br />
The printer monitors the power input to the printer. If it is found to be greater<br />
than 26 volts or less than 20, the printer will stop and wait for the power to<br />
return to specification.<br />
Head Temperature Fault<br />
The printer monitors the head temperature. If the head temperature is greater<br />
than 60º C, the printer will start to slow down. If the head exceeds 65º C, the<br />
printer will stop. The printer will heat the head to maintain a head temperature<br />
of 25º C. If the printer can not maintain a head temperature of 0º C, the printer<br />
will stop. In all cases, the printer will automatically recover when the head<br />
temperature is within range.<br />
Configuration Faults Recovery<br />
The printer maintains an operating configuration in EEPROM. Information<br />
such as the printer’s serial number, operating configuration, and running totals<br />
are stored in this memory. Each section of this memory maintains a check<br />
character to signal that the data is valid. If this memory is found to be<br />
corrupted, the printer will restore it based on a backup copy saved in flash.<br />
This flash copy is generated when the printer was electronically configured<br />
using the <strong>TransAct</strong> ® configuration tool. Any configuration parameters altered<br />
during normal operation, will not be saved in the flash copy. The EEPROM will<br />
be restored to the value set by the configuration program.<br />
Page 30<br />
<strong>43</strong>-06938 Rev L
Operational Procedures<br />
Loading Paper<br />
The Epic <strong>43</strong>0 printer uses a continuous roll of POS or Lottery grade thermal<br />
paper, with specifications outlined in the chapter Epic <strong>43</strong>0TM Specifications<br />
and Requirements.<br />
Knife assembly<br />
opening<br />
Paper direction<br />
Figure 5. Loading a Paper Roll.<br />
Instructions for loading the paper are as follows:<br />
1. Open the top cover of the printer by pressing the cover open button.<br />
2. Make sure the paper path is clear and there are no obstructions through the<br />
knife or transport.<br />
<strong>43</strong>-06938 Rev L Page 31
Operational Procedures<br />
3. Place a roll of new paper in the paper holder, with the end of the paper<br />
unloading from the back to the front of the printer, as shown in the figure.<br />
4. Prepare the end of the paper with a clean square cut end with no folds or<br />
distortions to the paper<br />
5. Thread the free end of the paper through the knife assembly opening as<br />
shown.<br />
6. Push the end of the paper towards the transport rollers. Place the end of the<br />
paper as close to the transport rollers as possible. Make sure the paper is<br />
aligned with the paper guides and not skewed.<br />
7. Close the cover by rotating it back into position until it securely clicks into<br />
place. Paper will feed automatically, and then print and eject a test ticket.<br />
Clearing Paper Jams<br />
In the unlikely event of a paper jam, it is important to completely clear the jam<br />
before restarting the printer. In general it is not required to power cycle the<br />
printer to clear a paper jam, however, there are cases where the printer must<br />
be power cycled to properly home the cutter blade. (See below)<br />
1. Expose the paper path by pressing the cover open button.<br />
2. Make sure the paper path is clear and there are no obstructions through the<br />
knife or transport.<br />
3. Clear Printer jams by removing any paper from within the printer.<br />
a. CAUTION: If the paper is wrapped around the platen, the printer<br />
power MUST be turned off to allow the paper to be removed. Failure<br />
to turn the power off will result in the paper getting stuck behind the<br />
platen and being more difficult to clear.<br />
b. If the paper is jammed in the knife, carefully remove the paper from<br />
the knife assembly. If the knife cutter is in the paper path, turn the<br />
power off, close the cover, and turn the power back on to allow the<br />
printer to re-home the cutter blade.<br />
4. Clear Transport jams by carefully removing any obstructions.<br />
a. CAUTION. Do not force objects into the transport from the front. This<br />
can damage the ticket taken sensor. Due to variations in bezel<br />
designs; it may be difficult to clear a jam between the transport and<br />
the bezel. If the jam is not accessible, it may be required to remove<br />
the bezel to properly clear the jam.<br />
5. Prepare the end of the paper with a clean square cut end with no folds or<br />
distortions to the paper.<br />
6. Thread the free end of the paper through the knife assembly opening as<br />
shown. If the paper will not freely go through the knife, the knife is still<br />
jammed. Go back to step 3.<br />
7. Push the end of the paper towards the transport rollers. Place the end of the<br />
paper as close to the transport rollers as possible. Make sure the paper is<br />
aligned with the paper guides and not skewed.<br />
8. Close the cover by rotating it back into position until it securely clicks into<br />
place. Paper will feed automatically, and then print and eject a test ticket.<br />
9. If the paper path was not completely cleared the printer will re-enter the jam<br />
state. Do not simply open and close the cover to clear a jam. The paper path<br />
Page 32<br />
<strong>43</strong>-06938 Rev L
Operational Procedures<br />
including the transport and bezel must be clear before proper operation can<br />
be restored.<br />
Cleaning the Print Head<br />
Once the unit is opened, the paper path is accessible for cleaning or clearing<br />
paper. Use a soft brush to clean the paper dust from inside the printer. The<br />
paper dust should also be removed from the sensor optics. If streaking on the<br />
printed ticket is evident, the thermal print head may need to be cleaned. This<br />
can be with a cotton swab moistened with an alcohol solvent (ethanol,<br />
methanol, IPA).<br />
Warning: After printing, the print head can be very hot.<br />
Be careful not to touch it and let it cool down before you<br />
clean it. Do not damage the print head by touching it<br />
with your fingers or any hard object.<br />
<strong>43</strong>-06938 Rev L Page 33
Chapter 4<br />
Configuring Your Epic <strong>43</strong>0 TM Printer<br />
<strong>43</strong>-06938 Rev L Page 35
This page intentionally left blank<br />
Page 36<br />
<strong>43</strong>-06938 Rev L
Configuring Your Epic <strong>43</strong>0 TM Printer<br />
Configuration Mode Overview<br />
There are two ways to configure the Epic <strong>43</strong>0 TM printer: the first is to use the<br />
manual configuration sequence by using the TEST and FEED key, and the<br />
second is to use <strong>TransAct</strong>’s remote configuration software. <strong>TransAct</strong><br />
Technologies offers the use of a remote CONFIG program as a fast, easy way<br />
for system integrators to configure or reconfigure your Epic <strong>43</strong>0 TM printer. To<br />
obtain more information, or the latest version of the CONFIG program, call<br />
<strong>TransAct</strong>’s Sales Department or contact Technical Support.<br />
Selecting the Communications interface<br />
The USB and RS232 interfaces are not active concurrently. Only one at a<br />
time is supported. The USB link has priority. If the USB link is active (Vbus is<br />
present) the RS-232 link is inactive.<br />
Most Frequent Configuration Incompatibilities<br />
• Emulation<br />
• RS-232 Serial Interface (baud rate)<br />
<strong>43</strong>-06938 Rev L Page 37
Configuring Your Epic <strong>43</strong>0 TM Printer<br />
How to Change Configuration Settings<br />
Entering into Configuration Mode<br />
1) Press the TEST 4 button for approximately 4 seconds.<br />
2) Select configuration mode.<br />
3) Follow the printed instructions.<br />
• Press and hold the FEED button for the next option.<br />
• Press and Release the FEED button to change the option.<br />
• Power cycle to exit without changing.<br />
• Press TEST to save and Exit<br />
After you enter Configuration Mode, the printer will print the current<br />
configuration, the current totals and the error logs, if any. Save this printout as<br />
a guide to changing the configuration. It’s also useful in case you wish to<br />
return the printer to the previous configuration.<br />
Each emulation may have different configurable features. If you are changing<br />
the emulation, note that the printout that was printed at the beginning of the<br />
configuration process may be incorrect for the new emulation, and the<br />
configurable features may be different. If you are using this printout as a<br />
configuration guide, and you are changing the emulation, you may wish to<br />
save the new emulation and then re-enter Configuration Mode to change other<br />
options. This will print all the available features for the new emulation.<br />
4 The Test button is a multifunction button. By pressing and releasing the test button,<br />
the printer will enter self test. By pressing and holding the test button for a longer<br />
time, two additional features may be activated: pressing and holding the button for<br />
about two seconds will enter hex dump mode, and holding the button for about 4<br />
seconds will enter configuration mode. To aid in selecting the correct mode, the Error<br />
LED will illuminate as soon as the button is pressed and indicate that self test is<br />
selected. After about 2 seconds the Error LED will go out and the PAPER indicator<br />
will illuminate, indicating that hex dump is selected. After about 4 seconds, the Cover<br />
LED will illuminate, indicating that configuration mode is selected.<br />
Page 38<br />
<strong>43</strong>-06938 Rev L
Configuring Your Epic <strong>43</strong>0 TM Printer<br />
Setting up for Color Paper<br />
The Epic <strong>43</strong>0 TM may be configured to print two color thermal paper. For good<br />
print quality, the printer should be configured to print the paper being used. If<br />
the paper you are using is included in the list of papers displayed during<br />
printer configuration, that configuration should be used. If not, the printer<br />
should be set to Generic Color. If this does not produce acceptable print<br />
quality, you may select Custom Color.<br />
Custom Color<br />
When using Custom Color, start with a read setting of about 0.12 mJ/sq.mm<br />
and a black energy of 0.24 mJ/sq.mm. First, adjust the black level to produce<br />
acceptable black print.<br />
Remote Configuration<br />
DO NOT EXCEED 0.40 mJ/sq.mm, or the paper may<br />
start to stick to the print head and cause paper jams.<br />
Setting the Black energy too high will also slow the<br />
printer down. All color papers tested by <strong>TransAct</strong> will<br />
operate with black levels less than 0.35 mJ/sq.mm.<br />
When the Black energy is set, adjust the Color value.<br />
NEVER exceed the Black energy with the Color energy.<br />
The color level can be very critical. Do not attempt to<br />
make the color darker by increasing the energy to the<br />
point where black starts to appear, the print quality will<br />
not be consistent.<br />
Remote configuration is provided for all printers, and is accessed through a<br />
series of extended diagnostic and configuration commands. The <strong>TransAct</strong> ®<br />
universal configuration program will allow the configuration to be read, edited,<br />
and written back to the printer. It will also allow the configuration of one printer<br />
to be recorded and replicated over a number of printers. The program is<br />
available from <strong>TransAct</strong> Technical Support or by downloading it from the<br />
Internet – consult the section On-line Technical Support for further details.<br />
Remote Boot Load<br />
The Epic <strong>43</strong>0 TM printer is equipped with a special boot loader feature that will<br />
allow field updates of the printer’s firmware. This loader is started by<br />
command and then a <strong>TransAct</strong> ® firmware load image is sent to the printer.<br />
When the load image is successfully received by the remote boot loader, the<br />
printer will automatically reset and operate with the updated code. If the<br />
firmware update fails for any reason, the printer will remain in Remote Boot<br />
load mode until a successful load is accomplished.<br />
<strong>43</strong>-06938 Rev L Page 39
Configuring Your Epic <strong>43</strong>0 TM Printer<br />
Field Configuration Feature<br />
A field configuration feature allows easy setup and configuration of your Epic<br />
<strong>43</strong>0 printer. This feature provides a one-time prompt, on initial power-up, that<br />
lets you select from a number of configurations that are pre-loaded for you at<br />
the factory.<br />
This feature is an option, and must be set up and activated by <strong>TransAct</strong>. It<br />
stores a specified number of complete, commonly-used configurations in the<br />
printer, together with a text description and configuration summary.<br />
Using Field Configuration<br />
When the FEED button is pressed for over 6 seconds, the printer will either<br />
enter field configuration mode or comprehensive configuration mode<br />
depending on whether the field configuration feature is present.<br />
The initial print out will be as shown in Figure 6:<br />
There are x<br />
stored configurations<br />
to select from.<br />
Press and release FEED<br />
to move between options.<br />
Press and hold the<br />
FEED button to select<br />
an option.<br />
Press DIAG Button<br />
Or Cycle Power<br />
To Exit<br />
Figure 6. Startup message in Field Configuration mode.<br />
Note: The “x” value shown in this figure will be the actual<br />
number of loaded configurations, and can range from 2<br />
to 20.<br />
The first option presented is an option to print all the stored configurations in<br />
summary form. Press and hold the FEED button after this option is displayed<br />
to select it. This summary includes the configuration name, a text description<br />
and a brief list of features for each pre-loaded configuration.<br />
Page 40<br />
<strong>43</strong>-06938 Rev L
Configuring Your Epic <strong>43</strong>0 TM Printer<br />
After the “Print all option”, each configuration is sequentially presented by<br />
name with its description. Press the FEED button once to move to the next<br />
configuration in the list, or press and hold the FEED button to select the<br />
displayed configuration. A sample configuration is shown in Figure 7.<br />
ID: xxxxxxx<br />
Configuration description:<br />
Ithaca normal with transport<br />
Configuration Summary:<br />
Emulation<br />
Emulation mode -Ithaca PcOS<br />
Paper Selection<br />
Print Energy Control:<br />
Paper -Generic Black<br />
RS232 Serial Interface<br />
Baud Rate : 19200 BPS<br />
Mode : 8 Bit No Parity 1 Stop Bit<br />
Handshaking : Ready/Busy<br />
Receive Error : Prints ‘?’<br />
DTR/RTS Signal : RTS and DTR<br />
CTS/DSR Signal : None<br />
General Options<br />
Code Page : <strong>43</strong>7<br />
CPI : 17<br />
Carriage Return : Normal<br />
Off-Line Option : Normal<br />
Line Spacing : 8.1 LPI<br />
Input Buffer : 8192 Char.<br />
And so on<br />
Figure 7. Sample pre-loaded configuration.<br />
Once a selection is made, a summary will be printed, and the user will be<br />
asked to confirm the selection by pressing the FEED button. If not confirmed,<br />
the printer resets and the process starts over. The printer will not exit this<br />
mode until one of the predefined configurations is selected and accepted.<br />
If confirmed, the selected configuration is recorded in the printer and made<br />
active, after which the printer then resets. Once a selected configuration is<br />
activated, the configuration will remain active until changed.<br />
Note: It is possible to require that a configuration be<br />
activated before the printer can be used. In this case the<br />
printer will request a configuration be selected every<br />
time it is turned on until a valid configuration is actually<br />
selected. At that time the printer will operate normaly.<br />
<strong>43</strong>-06938 Rev L Page 41
Chapter 5<br />
Mounting Requirements<br />
<strong>43</strong>-06938 Rev L Page <strong>43</strong>
This page intentionally left blank<br />
Page 44<br />
<strong>43</strong>-06938 Rev L
Mounting Requirements<br />
Electronics Base Assembly to Final Product<br />
The following shows dimensions and locations for mounting a standard Epic<br />
<strong>43</strong>0 TM printer, with attachment points shown on the Electronic Base Assembly.<br />
Bottom:<br />
4x M4x 0.7 screws.<br />
4x ?.176” thru holes.<br />
Bucket mounting<br />
holes<br />
Cover plate<br />
holes<br />
Figure 8. Electronics Base Assembly to Final Product<br />
<strong>43</strong>-06938 Rev L Page 45
Mounting Requirements<br />
Optional Remote Base Cover<br />
The Epic <strong>43</strong>0 TM printer can optionally be configured for the printer mechanism<br />
to be mounted remotely from the electronics base. In such a case, a remote<br />
base cover is attached to the base of the printer mechanism. The diagram<br />
shows mounting holes and dimensions for this base cover, while the<br />
subsequent image shows this base cover attached to the printer mechanism.<br />
Top:<br />
2x M4x 0.7 screws.<br />
2x ?.200” thru holes.<br />
Screw holes<br />
Figure 9. Optional Remote Base Cover<br />
Page 46<br />
<strong>43</strong>-06938 Rev L
Mounting Requirements<br />
Remote Base<br />
Epic <strong>43</strong>0 TM grounding<br />
Figure 10. Remote Base Mounted to Printer Mechanism<br />
Due to the modular capability of the Epic <strong>43</strong>0 TM printer, special considerations<br />
should be taken to ensure the modules are commonly grounded for immunity<br />
to external electrical faults such as ESD, magnetic transients, and radio<br />
frequency interference. Mounting tabs are provided on the electronic module<br />
and printer mechanism to make frame ground connections during installation.<br />
In addition, when the electronic module and print mechanism are separated,<br />
such as the electronic module mounted on a chassis and the printer<br />
mechanism mounted on a door, the interconnecting cables may pass across<br />
potentially un-bonded boundaries. In this case it is important that chassis and<br />
door are conductively bonded by metal hinges or braid to maintain a common<br />
frame ground connection between modules. Optimum installations provide a<br />
continuous grounded surface all along the interconnecting cables between<br />
modules.<br />
Remote cabling is not design for "hot-plugging". Ensure that power is off to the<br />
electronics module when connecting the print mechanism."<br />
<strong>43</strong>-06938 Rev L Page 47
Mounting Requirements<br />
Custom Bezel Specifications and Recommendations<br />
Custom Bezel to Printer Mechanism mounting points<br />
Epic <strong>43</strong>0 TM printers are designed to accommodate an optional bezel assembly<br />
that is mounted following the hardware and mounting dimensions as listed.<br />
(Bezel assemblies are available from <strong>TransAct</strong> as an option with your printer.)<br />
The following drawing shows the positioning and dimensions of the Epic <strong>43</strong>0 TM<br />
printer’s mounting points.<br />
Front:<br />
2x M3x 0.5 screws and interface with custom bezel.<br />
4.060<br />
M3 THREAD-2PL<br />
.702<br />
REF<br />
1.100<br />
.100-2PL<br />
5.014<br />
REF<br />
Printer view<br />
4.458<br />
TICKET<br />
EXIT<br />
MOUNTING SLOT<br />
M3 MOUNTING<br />
SCREW - 2PL<br />
1.100<br />
4.060<br />
.090 MOUNTING<br />
BOSS - 2PL<br />
Bezel view<br />
Figure 11. Custom Bezel Mounting and Hardware Requirements<br />
Page 48<br />
<strong>43</strong>-06938 Rev L
Chapter 6<br />
Printer Sensors<br />
<strong>43</strong>-06938 Rev L Page 49
This page intentionally left blank<br />
Page 50<br />
<strong>43</strong>-06938 Rev L
Printer Sensors<br />
Printer Sensors<br />
The Epic <strong>43</strong>0 TM printer uses several sensors to provide feedback to the host<br />
system, as pictured in Figure 12.<br />
Transport Ticket Taken Sensor<br />
Top-of-Form Sensor<br />
Paper Out Sensor<br />
Jam Detection<br />
Sensor<br />
Paper Low Sensor<br />
(Optional)<br />
Cover-Open Switch<br />
(located on inner<br />
frame)<br />
Figure 12. Sensor Breakdown and Locations.<br />
Paper Out Sensor<br />
A Paper Out Sensor, mounted to the Lower Paper Guide, optically senses a<br />
Paper Out flag located in the ticket path. When the sensor detects the flag, it<br />
indicates that the ticket roll is depleted.<br />
<strong>43</strong>-06938 Rev L Page 51
Printer Sensors<br />
Cover-Open Switch<br />
A Cover-Open Switch, mounted to the inner right side plate, is activated when<br />
the Top Cover is closed and the latch depresses the switch arm. When the<br />
Top Cover is opened, the Cover Open switch trips, and the printer goes offline.<br />
Top-of-Form<br />
A Top-of-Form Sensor is mounted in the Lower Paper Path, and senses a preprinted<br />
black dot (if present) on the ticket stock. This black mark is used to<br />
position the paper for printing on a preprinted form. Typically the ticket is prepositioned<br />
to the Top-of-Form and when the ticket is complete, the paper is<br />
fed to the Top-of-Form and then cut.<br />
Paper Low Sensor (Option)<br />
The Epic <strong>43</strong>0 TM has an optional interruptive Paper Low Sensor. This sensor is<br />
mounted to the Paper Bucket and will provide an indication that the paper is<br />
getting low. The length of paper remaining when paper low is sensed is<br />
dependent on the paper roll core diameter.<br />
Jam Detection Sensor<br />
A jam sensor is mounted to the knife frame, and senses the presence of a<br />
ticket immediately before and after a knife cut. Under normal conditions, the<br />
ticket should be present at the detector before a knife cut, and not present<br />
after the cut and delivery of the ticket. If a ticket is not processed properly the<br />
jam detection sensor detects the improper ticket progress, stops the printer<br />
and enters a jammed state. The jam must be manually cleared before<br />
additional tickets can be printed.<br />
Transport Ticket Taken Sensor<br />
A Ticket Taken Sensor, mounted in the Ticket Transport, is used to detect the<br />
lead edge of the ticket as well as determine when customers have actually<br />
taken the printed ticket.<br />
Page 52<br />
<strong>43</strong>-06938 Rev L
Chapter 7<br />
Electrical Connections<br />
<strong>43</strong>-06938 Rev L Page 53
This page intentionally left blank<br />
Page 54<br />
<strong>43</strong>-06938 Rev L
Electrical Connections<br />
Communications Interface<br />
USB and RS-232 communications are supplied through interface connections<br />
at the rear of the printer, as illustrated in the figure. The Serial RS-232<br />
interface connector is a 9-pin DB connector and the USB interface is a<br />
standard USB B connector.<br />
Power Connection<br />
Serial RS-232 port<br />
USB port<br />
Figure 13. Communication Location and Connector Info.<br />
Power Connection<br />
<strong>43</strong>-06938 Rev L Page 55
Electrical Connections<br />
Remote Base Interconnect<br />
The Remote Base and the Print Mechnisem are inter connected by a cable<br />
assembly. This assemply is connected as shown.<br />
Figure 14. Remote Base with cable cover removed<br />
Figure 15. Remote Base with cable cover in place<br />
Page 56<br />
<strong>43</strong>-06938 Rev L
Electrical Connections<br />
Figure 16. Remote cable to Printer Mechanism connection<br />
CAUTION: Remote cabling is not design for "hot-plugging". Ensure that power<br />
is off to the electronics module when connecting the print mechanism."<br />
Interconnect cables are keyed to prevent misconnection. Care should be<br />
taken to assure that all three connections are correct and fully seated.<br />
Due to the modular capability of the Epic <strong>43</strong>0 TM printer, special considerations<br />
should be taken to ensure the modules are commonly grounded for immunity<br />
to external electrical faults such as ESD, magnetic transients, and radio<br />
frequency interference. Mounting tabs are provided on the electronic module<br />
and printer mechanism to make frame ground connections during installation.<br />
In addition, when the electronic module and print mechanism are separated,<br />
such as the electronic module mounted on a chassis and the printer<br />
mechanism mounted on a door, the interconnecting cables may pass across<br />
potentially un-bonded boundaries. In this case it is important that chassis and<br />
door are conductively bonded by metal hinges or braid to maintain a common<br />
frame ground connection between modules. Optimum installations provide a<br />
continuous grounded surface all along the interconnecting cables between<br />
modules.<br />
<strong>43</strong>-06938 Rev L Page 57
Electrical Connections<br />
Bezel Interconnect<br />
The bezel drive is a switched +24 volt drive capable of 1 amp. It is protected<br />
by a self resetting poly-fuse. Note this current is not included in the normal<br />
operating current specifications.<br />
Figure 17. Bezel illumination drive<br />
Page 58<br />
<strong>43</strong>-06938 Rev L
Electrical Connections<br />
Printer Block Diagram<br />
<strong>43</strong>-06938 Rev L Page 59
Chapter 8<br />
Control Codes<br />
<strong>43</strong>-06938 Rev L Page 61
This page intentionally left blank<br />
Page 62<br />
<strong>43</strong>-06938 Rev L
Control Codes<br />
Control Codes Overview<br />
This <strong>OEM</strong> Integration Manual is designed to help users of the Epic <strong>43</strong>0 TM<br />
printer develop applications. Epic <strong>43</strong>0 TM Printers are specialized point-of-sale<br />
printers that have several features not normally found on general-purpose<br />
printers. Because of these special features, Epic <strong>43</strong>0 TM Printers have unique<br />
control codes. This <strong>OEM</strong> Integration Manual documents the control codes that<br />
are unique to the Epic <strong>43</strong>0 TM Printer.<br />
Nomenclature<br />
When describing control codes, confusion often occurs as to whether the<br />
description is decimal, hexadecimal, or ASCII. To minimize the problem, this<br />
<strong>OEM</strong> Integration Manual uses the following nomenclature when describing<br />
control code sequences.<br />
[ ] Encloses a control character. [ ] represents a single, 8-bit<br />
value as defined in the standard ASCII tables. The ASCII Code<br />
Table in Appendix B lists the control codes. An example would<br />
be [ESC], which would represent a 1BH or 27 decimal.<br />
< > Encloses an 8-bit value in decimal format. The value is from<br />
zero to 255. An example is , which represents 02H or 2<br />
decimal.<br />
<br />
Indicates a variable parameter. The variable parameter, ,<br />
can have a value from zero to 255. The meaning of is<br />
described and defined in the description of the command.<br />
Indicates that there are two parameters, and , where<br />
both can have values from zero to 255.<br />
Is an <strong>TransAct</strong> ® Printer Control Language (IPCL) parameter<br />
consisting of two digits where and are ASCII<br />
characters from zero to nine. The parameter is combined to<br />
form a value from zero to 99. If is included, the parameter<br />
is combined to be from zero to 999. If two values are specified,<br />
there must be two bytes added to the IPCL code. That is, if the<br />
command specifies and the desired value is five, it<br />
must be specified as 05.<br />
X<br />
All other characters in control strings represent ASCII<br />
characters. For example, [ESC] 1 represents 1BH followed by<br />
31H.<br />
In many cases, applications require that control sequences be specified in<br />
hexadecimal or decimal codes. In most cases, commands are specified in<br />
ASCII, hexadecimal, and decimal. The ASCII Code Table in Appendix D (page<br />
249) lists ASCII, hexadecimal, and decimal equivalents.<br />
<strong>43</strong>-06938 Rev L Page 63
Control Codes<br />
Standard Emulation<br />
The standard control codes for the Epic <strong>43</strong>0 TM Printer are extensions and<br />
subsets of the PcOS emulation provided on other <strong>TransAct</strong> ® products.<br />
The Epic <strong>43</strong>0 TM printer also supports an emulation of the Epson ESC/POS<br />
control language, as well as a Custom VKP80 emulation capability. For details<br />
about these emulations, contact <strong>TransAct</strong> Technical Support.<br />
IPCL Codes<br />
<strong>TransAct</strong> ® Printer Control Language (IPCL) codes are part of PcOS and<br />
designed to control a printer without using control characters (i.e. characters<br />
less than 20H). Only the standard PcOS emulation supports IPCL.<br />
In rare cases, an IPCL code will interfere with the text that is to be printed. The<br />
IPCL translator can be disabled with an [ESC] y command.<br />
Other Emulations<br />
The Epic <strong>43</strong>0 TM Printer supports a basic Epson emulation.<br />
Note: Specific EPSON compatibility features, such as its Automated Status<br />
Back (ASB) feature, are available as an option from <strong>TransAct</strong><br />
Technologies. Command codes pertaining to these features are<br />
documented as “licensed” within the command description.<br />
It is intended that the standard <strong>TransAct</strong> ® PcOS emulation be used for new<br />
applications. Not all features of Epic <strong>43</strong>0 TM Printers are supported by other<br />
emulations.<br />
Application Development<br />
To aid application development, several chapters in this manual are designed<br />
to help the programmer understand the Epic <strong>43</strong>0 TM Printer. The next chapter<br />
provides a detailed description of each of the commands. Subsequent<br />
chapters provide explanations of how the printer works, including a description<br />
of the internal print buffer, communications link, and interaction between the<br />
host computer and printer.<br />
<strong>TransAct</strong> Control Codes and Commands<br />
Throughout this <strong>OEM</strong> Integration Manual, charts and tables list commands<br />
and features. In most cases, the charts cross-reference the page that<br />
describes the command. Code summary charts, arranged by code and<br />
function, are provided to help quickly find commands.<br />
PcOS Printer Control Codes<br />
The following section defines the Epic <strong>43</strong>0 TM <strong>TransAct</strong> ® PcOS emulation. The<br />
native, <strong>TransAct</strong> ® PcOS emulation provides the most flexibility and control<br />
over the printer. It is consistent with most previous <strong>TransAct</strong> ® PcOS products,<br />
and should be used when the printer is placed in a new application.<br />
Alternatively, an emulation is offered for the Epson ESC/POS language, as<br />
Page 64<br />
<strong>43</strong>-06938 Rev L
Control Codes<br />
well as a customer emulation; contact <strong>TransAct</strong> Technical Support for further<br />
information on these options.<br />
<strong>TransAct</strong> does not recommend that you generate drivers for emulations other<br />
than PcOS. In addition, <strong>TransAct</strong> has created several tools that can be used<br />
to generate and maintain graphic images and files for print on the Epic <strong>43</strong>0 TM .<br />
Information about drivers and tools are available on the <strong>TransAct</strong> web site and<br />
on a <strong>TransAct</strong> ® Software Developer’s Toolkit. For more information about<br />
either of these options, contact <strong>TransAct</strong> Technical Support.<br />
<strong>43</strong>-06938 Rev L Page 65
Control Codes<br />
Quick PcOS Reference Chart<br />
Description ASCII Hex IPCL Page<br />
equivalent<br />
code<br />
Low Level paper Motion<br />
Line feed. [LF] 0AH &%LF 72<br />
Carriage return. [CR] 0DH &%CR 72<br />
Horizontal Motion<br />
Back space. [BS] 08H &%BS 73<br />
Horizontal tab. [HT] 09H &%HT 73<br />
Set horizontal tab stops. [ESC] D 1BH 44H none 73<br />
... <br />
Set horizontal position. [ESC] n 1BH 6EH &%HP 74<br />
Set justification.<br />
n=0 Left<br />
n=1 Center<br />
n=2 Right<br />
n=8 Left (No line feed)<br />
n=9 Center (No line feed)<br />
n=10 Right (No line feed)<br />
Reset horizontal and vertical tab<br />
stops.<br />
Set left/right print margins.<br />
n 1 = Left margin, n 2 = Right margin<br />
Select minimum character height<br />
and width in points<br />
Select minimum character height<br />
<br />
[ESC] a 1BH 61H &%JR {n=2}<br />
&%JC {n=1}<br />
&%JL {n=0}<br />
[ESC] R 1BH 52H &%HV 74<br />
[ESC] X 1BH 58H none 148<br />
[ESC] + P 1BH 50H none 209<br />
[ESC] + p 1BH 70H none 210<br />
and width in ¼ points<br />
Vertical Motion<br />
Perform a fine line feed. [ESC] J 1BH 4AH &%FM <br />
<br />
Set 1/8-inch line spacing. [ESC] 0 1BH 30H &%ST 75<br />
Set 7/72-inch line spacing. [ESC] 1 1BH 31H &%SG 76<br />
Begin variable line spacing. [ESC] 2 1BH 32H none 76<br />
(Enable [ESC] A ).<br />
Set variable line spacing to n/216 [ESC] 3 1BH 33H &%SV 75<br />
inch.<br />
<br />
Set variable line spacing to n/72 [ESC] A 1BH 41H none 76<br />
inch.<br />
Set Line spacing in points [ESC]+V 1BH 2BH 56H None 209<br />
Set Line spacing in ¼ points [ESC]+v 1BH 2BH 76H None 210<br />
Select minimum character height [ESC] + P 1BH 50H none 209<br />
and width in points<br />
Select minimum character height [ESC] + p 1BH 70H none 210<br />
and width in ¼ points<br />
Feed lines at current spacing. [ESC] d 1BH 64H &%FL 78<br />
<br />
Set vertical tab stops. [ESC] B 1BH 42H none 79<br />
... 0<br />
Vertical tab. [VT] 0BH &%VT 78<br />
Form feed. [FF] 0CH &%FF 79<br />
Feed to black dot [ESC][VT] 1BH 0BH None 82<br />
74<br />
75<br />
Page 66<br />
<strong>43</strong>-06938 Rev L
Control Codes<br />
Description ASCII Hex IPCL Page<br />
equivalent<br />
code<br />
Set top of form. [ESC] 4 1BH 34H &%TF 80<br />
Set form length in lines. [ESC] C 1BH <strong>43</strong>H &%SL 80<br />
<br />
Begin auto line feed. (n=0, end n=1) [ESC] 5 1BH 35H &%CA {n=0} 81<br />
&%MA {n=1}<br />
Set form length in inches. [ESC] C [NUL] 1BH <strong>43</strong>H &%SI 80<br />
<br />
Transport Control<br />
Set Transport Mode [ESC]i 1BH 69H None 147<br />
Feed Transport [ESC]j 1BH 6AH None 147<br />
Deliver ticket from transport [ESC]k 1BH 6BH None 147<br />
Character Pitch<br />
Set character spacing in points [ESC]+I 1BH 2BH 49H None 207<br />
Set character spacing in ¼ points [ESC]+i 1BH 2BH 69H None 208<br />
Set character spacing in points with [ESC]+J 1BH 2BH 4AH None 208<br />
adjustment<br />
Set character spacing in ¼ points [ESC]+j 1BH 2BH 6AH None 209<br />
with adjustment<br />
Begin 10 CPI character pitch. [DC2] 12H &%F3 86<br />
Begin 12 CPI character pitch. [ESC] : 1BH 3AH &%F2 86<br />
Begin 17 CPI character pitch. [SI] 0FH &%F1 86<br />
Set character pitch. [ESC] [ P 1BH 5BH 50H &%F 87<br />
Set inter-character spacing. [ESC] V 1BH 56H none 88<br />
Begin 24 CPI character pitch [ESC][SI] 1BH 0FH &%F4 86<br />
Select Minimum character Height [ESC] + P 1BH 50H none 209<br />
and Width in points<br />
Select Minimum character Height [ESC] + p 1BH 70H none 210<br />
and Width in ¼ points<br />
Character Font<br />
Select font [ESC] + 3 1BH 2BH 31H none 200<br />
Select font by name<br />
[ESC] + N<br />
1BH 2BH 4EH none 200<br />
Filename<br />
Define Stacked Font [ESC] + S 1BH 2BH 53H none 200<br />
…<br />
Set stroke font Brush Size [ESC] + B 1BH 2BH 42H none 210<br />
Select Minimum character Height [ESC] + P 1BH 50H none 209<br />
and Width in points<br />
Select Minimum character Height<br />
and Width in ¼ points<br />
[ESC] + p 1BH 70H none 210<br />
Begin 12 x 12 draft print. [ESC] # 1BH 23H 00H &%QT 89<br />
Set print size (legacy mode).<br />
n=0 Draft (12 x 12)<br />
[ESC] I 1BH 49H &%QT {n=0}<br />
&%QU {n=1}<br />
89<br />
n=1 Large draft (12 x 14)<br />
&%QL {n=2}<br />
n=2 NLQ (24 x 16)<br />
&%QS {n=3}<br />
n=3 NLQ (24 x 16)<br />
n=4-7 Repeats 0-3<br />
Select character code page. ASCII<br />
Mode only.<br />
[ESC] [ T 1BH 5BH 54H &%CP <br />
<br />
<br />
Select Codepage by name. ASCII [ESC] + C 1BH 2BH <strong>43</strong>H None 94<br />
Mode only<br />
Insert Euro character. [ESC] [ C 1BH,5BH, <strong>43</strong>H &%EU 94<br />
93<br />
<strong>43</strong>-06938 Rev L Page 67
Control Codes<br />
Description ASCII Hex IPCL Page<br />
equivalent<br />
code<br />
Print control character. [ESC] ^ 1BH,5EH &%CC 95<br />
<br />
Print Unicode character [ESC] “ 1BH,22H &%PU 95<br />
<br />
<br />
Character Attributes<br />
Select color. [ESC] c 1BH,63H &%CL 96<br />
Begin one-line double-wide print. [SO] 0EH &%MW 96<br />
Cancel one-line double-wide print. [DC4] 14H &%MN 96<br />
Multi-line double-wide double-high [ESC] W 1BH,57H &%FS {n=0} 97<br />
mode.<br />
&%FD {n=1}<br />
n=0 Standard mode<br />
&%FH {n=3}<br />
n=1 Double-wide<br />
n=2 Double-high<br />
3 = Both<br />
Enable/disable Strike through.<br />
n=0 End<br />
n=1 Begin<br />
Begin underline mode.<br />
n = 0 End<br />
n = 1 Begin<br />
[ESC] _ 1BH,5FH &%CO {n=0}<br />
&%MO {n=1}<br />
[ESC] - 1BH,2DH &%CU {n=0}<br />
&%MU<br />
{n=1}<br />
Begin enhanced print. [ESC] G 1BH,47H &%ME 99<br />
End enhanced print. [ESC] H 1BH,48H &%CE 99<br />
Begin emphasized print. [ESC] E 1BH,45H &%MM 100<br />
End emphasized print. [ESC] F 1BH,46H &%CM 100<br />
Set print style. (See command [ESC] [ @ ... 1BH,5BH, &%DH 98<br />
description.)<br />
40H… &%SH<br />
Select superscript. [ESC] S 1BH,53H, 00H &%SP 100<br />
Select subscript. [ESC] S 1BH,53H, 01H &%SB 100<br />
End superscript or subscript. [ESC] T 1BH,54H &%SE 101<br />
Begin italics. [ESC] % G 1BH,25H, 47H &%MI 101<br />
End italics. [ESC] % H 1BH,25H, 48H &%CI 101<br />
Page Mode<br />
Select page mode [ESC] t 1BH,74H &%PM 103<br />
Set page mode page size [ESC] u … 1BH,75H &%PS 108<br />
Set page mode page position [ESC] o … 1BH,6FH none 110<br />
Set Page Mode Size Enhanced [ESC][SUB]S 1BH, 1AH 53H none 105<br />
Set Page Mode Printed Area [ESC][SUB]W 1BH, 1AH 57H none 107<br />
Set Page Position Enhanced [ESC][SUB]A 1BH, 1AH 41H &%PY 110<br />
Set Page Position Relative [ESC][SUB]R 1BH, 1AH 41H none 110<br />
Exit page mode [FF] 0CH &%FF 110<br />
APA Graphics<br />
Print single-density graphics.<br />
=0...255<br />
=0…3<br />
len= + 256 * <br />
[ESC] K 1BH,4BH none 111<br />
Print half-speed double-density [ESC] L 1BH,4CH none 111<br />
graphics.<br />
Print full-speed double-density [ESC] Y 1BH,59H none 112<br />
graphics.<br />
Print quad-density graphics. [ESC] Z 1BH,5AH none 112<br />
97<br />
99<br />
Page 68<br />
<strong>43</strong>-06938 Rev L
Control Codes<br />
Description ASCII Hex IPCL<br />
equivalent<br />
code<br />
Select bidirectional or unidirectional<br />
print. n=0 Bidirectional<br />
n=1 Unidirectional<br />
[ESC] U 1BH,55H &%GU {n=1}<br />
&%GB {n=0}<br />
Page<br />
Print graphics in mode . [ESC] * 1BH,2AH none 112<br />
<br />
Reassign graphic mode. [ESC] ? 1BH,3FH none 112<br />
Horizontal Graphics<br />
Process horizontal graphics data.<br />
1BH,68H none 114<br />
[ESC] h <br />
<br />
<br />
Set horizontal graphic mode. [ESC] * <br />
<br />
Bitmap Graphic File Support<br />
Print Bitmap graphics from file. [ESC] [FS] P <br />
FileName<br />
[ESC] [FS] p<br />
<br />
113<br />
1BH,2AH none 115<br />
1BH,1CH,<br />
50H<br />
1BH,1CH,<br />
50H<br />
none 182<br />
Print Bitmap graphics from bitmap<br />
data<br />
none 182<br />
User Store<br />
Begin named macro record. [ESC] [US] b 1BH,1FH, 62H &%UB 121<br />
<br />
<br />
Save macro data in user store. [ESC] [US] m 1BH,1FH, &%UM 121<br />
<br />
6DH<br />
End named macro record.<br />
[ESC] [US] e 1BH,1FH, 65H &%UG 121<br />
<br />
<br />
Load item from user store.<br />
[ESC] [US] l 1BH,1FH, &%UL 122<br />
<br />
6CH<br />
Run macro data from user store. [ESC] [US] r 1BH,1FH, 72H &%UR 122<br />
<br />
<br />
Flag item as a start-up macro. [ESC] [US] s 1BH,1FH, &%US 122<br />
<br />
6DH<br />
Delete item from user store. [ESC] [US] d 1BH,1FH, 64H &%UD 123<br />
<br />
<br />
Flush information from user store. [ESC] [US] f ALL 1BH,1FH, &%UF 123<br />
<br />
66H,00H<br />
Report on user store.<br />
[ESC] [US] q 1BH,1FH, 72H &%UQ 123<br />
<br />
<br />
Return a report on user store [ESC] [US] ? 1BH,1FH, 72H &%UQ 123<br />
<br />
<br />
Process user macro. [ESC] g 1BH,67H, 00H &%GP 125<br />
Start macro record. [ESC] g 1BH,67H, 01H &%GS 125<br />
Stop macro record. [ESC] g 1BH,67H, 02H &%GE 126<br />
Stop macro record and save [ESC] g 1BH, 67H,<br />
03H<br />
Bar Codes<br />
&%GW 126<br />
<strong>43</strong>-06938 Rev L Page 69
Control Codes<br />
Description ASCII Hex IPCL<br />
equivalent<br />
code<br />
Print bar code.<br />
n=0 Interleave 2 of 5<br />
n=1 Code 39<br />
n=2 Code 128<br />
n=3 UPC A<br />
n=4 EAN-13<br />
n=5 UPC E<br />
n=6 EAN-8<br />
n= 7 Code 93<br />
n = 8 Codabar<br />
PDF 417 bar code control<br />
Set bar code height.<br />
n=0 Restore defaults<br />
n=1 – 9 Number of passes<br />
(0.11 inch per pass)<br />
[ESC] b ...<br />
[ETX]<br />
1BH,62H<br />
&%25 {n=0}<br />
&%39 {n=1}<br />
&%12 {n=2}<br />
&%UP {n=3}<br />
&%EA {n=4}<br />
&%UE {n=5}<br />
&%E8 {n=6}<br />
&%93 {n=7}<br />
Page<br />
127<br />
[ESC] [EM] E <br />
<br />
1BH 19H 45H none 133<br />
[ESC] [EM] B 1BH,19H, 42H &%BH 134<br />
<br />
Set bar code width [ESC] [EM] W 1BH 19H 57H &%BW 135<br />
Set bar code justification, HRI print [ESC] [EM] J 1BH,19H, 4AH &%BJ 134<br />
mode, and print direction.<br />
<br />
Electronic Journal<br />
Electronic journal initialize and set<br />
password<br />
[ESC][GS]I<br />
<br />
1BH 1DH 49H %&EI 137<br />
Electronic journal erase the [ESC][GS]E 1BH 1DH 45H &%EC 137<br />
electronic journal<br />
<br />
Print the electronic journal [ESC][GS]P< S l > 1BH 1DH 50H &%EP 138<br />
< L l > <br />
Report the electronic journal [ESC][GS]R< S l > < 1BH 1DH 52H &%EQ 138<br />
S h >< L l > <br />
Electronic journal begin entry ESC]l 1BH 6CH %&EB 145<br />
Electronic journal suspend entry [ESC]l 1BH 6CH &%ES 146<br />
Electronic journal resume entry [ESC]l 1BH 6CH &%ER 146<br />
Electronic journal end entry [ESC]l 1BH 6CH &%EE 146<br />
Electronic journal mode begin<br />
(journal station)<br />
Unicode<br />
Initiate Unicode UTF-16BE<br />
encoding<br />
Initiate Unicode UTF-16LE<br />
encoding<br />
Initiate Unicode UTF-8 encoding<br />
(MBCS)<br />
Initiate Unicode UTF-8 Text only<br />
encoding (MBCS)<br />
Initiate normal 8-bit ASCII character<br />
encoding<br />
[ESC]{ 1BH 7BH None 145<br />
[ESC] + H 1BH 2BH 48H none 201<br />
[ESC] + L 1BH 2BH 4CH none 201<br />
[ESC] + M 1BH 2BH 4DH none 202<br />
[ESC] + T 1BH 2BH 54H none 202<br />
[ESC] + A 1BH 2BH 41H none 203<br />
File System Commands<br />
Open File<br />
[ESC][RS] O 1BH 1EH 4FH none 215<br />
FileName<br />
Return Free Space for Open File [ESC][RS] S 1BH 1EH 53H none 216<br />
Return Free Space for Partition [ESC][RS] s 1BH 1EH 73H none 216<br />
Page 70<br />
<strong>43</strong>-06938 Rev L
Control Codes<br />
Description ASCII Hex IPCL Page<br />
equivalent<br />
code<br />
Return Last File Command Status [ESC][RS] ? 1BH 1EH 3FH none 218<br />
Close File [ESC][RS] C 1BH 1EH <strong>43</strong>H none 217<br />
Close All Files [ESC][RS] K 1BH 1EH 4BH none 217<br />
Open File<br />
[ESC][RS] O 1BH 1EH 4FH none 215<br />
FileName<br />
Set/Clear File Attributes<br />
[ESC][RS] A 1BH 1EH 41H none 217<br />
FileName<br />
Write File Data [ESC][RS] W 1BH 1EH 57H none 218<br />
<br />
Read File Data [ESC][RS] R 1BH 1EH 52H none 219<br />
<br />
File Directory File [ESC][RS] I 1BH 1EH 49H none 219<br />
Delete all Files in partition [ESC][RS] E 1BH 1EH 45H none 219<br />
De-fragment File system [ESC][RS] F 1BH 1EH 46H none 219<br />
Verify File System [ESC][RS] V 1BH 1EH 56H none 220<br />
Miscellaneous Commands<br />
Set left/right margins.<br />
[ESC] X 1BH 58H none 148<br />
N 1 = Left margin<br />
n 2 = Right margin<br />
Clear print buffer. [CAN] 18H &%RP 148<br />
Query marker. [ESC] q 1BH 71H none 149<br />
Perform Auto Cut [ESC] v 1BH 76H &%FC 149<br />
Initialize printer. [ESC] @ 1BH 40H none 149<br />
Inquire status. (Refer to command<br />
descriptions.)<br />
[ENQ] 05H none 158<br />
Activate Periodic Status back [ESC] [EM] P 1BH 19H 50H none 167<br />
Control Periodic Status back [ESC] [EM] p 1BH 19H 70H none 167<br />
User control of Bezel lamp [ESC]~z 1BH, 7EH,<br />
7AH<br />
&%BF 151<br />
Extended Diagnostics<br />
Set control feature commands. [ESC] y 1BH,79H &%Y0 – 9 or<br />
&%YX<br />
152<br />
(for<br />
numbers >9)<br />
Extended diagnostics. [ESC] ~ 1BH,7EH none 153<br />
Return Firmware Checksum [ESC]~ Z 1BH,7EH,5AH none 155<br />
Return Firmware ID [ESC]~ F 1BH,7EH,46H none 156<br />
Verify File System and Firmware [ESC][RS] V 1BH 1EH 56H none 220<br />
Enter Remote Down load [ESC] ~ % 1BH,7EH,<br />
0EH,25H<br />
none 228<br />
<strong>43</strong>-06938 Rev L Page 71
Control Codes<br />
Low Level Paper Motion Control<br />
Print/Paper Motion<br />
[CR]<br />
Carriage return<br />
ASCII<br />
[CR]<br />
Hexadecimal 0DH<br />
Decimal <br />
IPCL<br />
&%CR<br />
EPOS<br />
0DH<br />
Description The [CR] command prints the contents of the print buffer (if any)<br />
and resets the next character print position to the left margin. A line feed is<br />
not performed unless auto-feed is active. The print rotation direction and the<br />
left margin command define the left margin.<br />
[LF]<br />
Line feed<br />
ASCII<br />
[LF]<br />
Hexadecimal 0AH<br />
Decimal <br />
IPCL<br />
&%LF<br />
EPOS<br />
0AH<br />
Description The [LF] command prints the contents of the buffer (if any) and<br />
advances paper one line at the current default line spacing. The next<br />
character print position is not reset to the left margin unless auto-CR is active.<br />
Page 72<br />
<strong>43</strong>-06938 Rev L
Control Codes<br />
Horizontal Motion Control<br />
Several commands can be used to control the horizontal position of<br />
characters. Many applications use space control to position fields. However,<br />
the Epic <strong>43</strong>0 TM Printer has the ability to control character position with<br />
horizontal tab stops. This is done using the horizontal tab [HT] to move to<br />
those tab stops.<br />
[HT]<br />
Horizontal tab<br />
ASCII<br />
[HT]<br />
Hexadecimal 09H<br />
Decimal <br />
IPCL<br />
&%HT<br />
EPOS<br />
[HT]<br />
Description The [HT] command inserts spaces in the print buffer up to the next<br />
tab stop. The default tab locations are every eight spaces.<br />
[BS]<br />
Back space<br />
ASCII<br />
[BS]<br />
Hexadecimal 08H<br />
Decimal <br />
IPCL<br />
&%BS<br />
EPOS<br />
[BS]<br />
Description The [BS] command moves the print buffer one character width to<br />
the left. The pointer position cannot be moved to the left of the left margin.<br />
[BS] does not cause the buffer to be printed; rather, the following data is<br />
OR’ed with the previous data.<br />
[ESC] D<br />
Set horizontal tab stops<br />
ASCII [ESC] D ... 0<br />
Hexadecimal 1BH 44H ... 00H<br />
Decimal ... <br />
IPCL<br />
none<br />
EPOS [ESC] D ... 0<br />
Description The [ESC] D ... 0 command sets tab stops at<br />
the character columns specified by . The end of the settings is specified<br />
by a . All previously set tabs will be cleared. Column sizes are in<br />
accordance with the current character pitch. Setting tabs that are beyond the<br />
station width is possible. A [CR] is inserted when the tab is used. Printing<br />
begins at the home position. The power up default is every eight spaces, i.e.,<br />
9, 17, 25, and so on; use the restore-default procedure [ESC] R to set these<br />
default tabs rather than re-specify the tabs.<br />
<strong>43</strong>-06938 Rev L Page 73
Control Codes<br />
[ESC] R<br />
Reset horizontal and vertical tab stops<br />
ASCII<br />
[ESC] R<br />
Hexadecimal 1BH 52H<br />
Decimal <br />
IPCL<br />
&%HV<br />
EPOS<br />
none<br />
Description The [ESC] R command resets horizontal and vertical tab stops to<br />
the power up configuration. The power up horizontal default is every eight<br />
spaces, i.e., 9, 17, 25, and so on. The vertical default is every line.<br />
[ESC] a<br />
Set Justification<br />
ASCII<br />
Hexadecimal<br />
Decimal<br />
IPCL<br />
EPOS<br />
[ESC] a <br />
1BH 61H <br />
<br />
&%JL, &%JC, &%JR<br />
[ESC] a <br />
Description The [ESC] a command sets the horizontal justification.<br />
Where 0 = Left justified<br />
&%JL<br />
1 = Center justified &%JC<br />
2 = Right justified &%JR<br />
8 = Left justified (no line feed) None<br />
9 = Center justified (no line feed) None<br />
10 = Right justified (no line feed) None<br />
The print format of the printer can be right, center, or left justified. The<br />
value of specifies the justification. The power on default is left justified.<br />
Note: The justify commands also affect graphics.<br />
[ESC] n<br />
Set horizontal position<br />
ASCII [ESC] n <br />
Hexadecimal 1BH 6EH <br />
Decimal <br />
IPCL &%HP <br />
EPOS [ESC]$ <br />
Description The [ESC] command sets the print position to <br />
+ * 256 in 1/196 inches.<br />
Page 74<br />
<strong>43</strong>-06938 Rev L
Control Codes<br />
Vertical Motion Control<br />
[ESC] j<br />
Perform a fine line feed<br />
ASCII<br />
[ESC] J <br />
Hexadecimal 1BH 4AH <br />
Decimal <br />
IPCL &%FM <br />
EPOS<br />
[ESC] J <br />
Description The [ESC] J command prints the contents of the buffer and<br />
performs a line feed of n/216 inch. The default line spacing value is not<br />
changed. The next character print position is reset to the left margin if the<br />
Auto-CR mode is set.<br />
Notes:<br />
• In EPOS mode, the command performs feeds in n/144-inch<br />
increments.<br />
• Immediately after APA graphics, the command is adjusted for the<br />
difference between 72 dpi graphics and 96 dpi print.<br />
[ESC] 3<br />
ASCII<br />
Hexadecimal<br />
Decimal<br />
IPCL<br />
EPOS<br />
Set variable line spacing to n/216 inch<br />
[ESC] 3 <br />
1BH 33H <br />
<br />
&%SV <br />
[ESC] 3 <br />
Description The [ESC] 3 command sets the default line spacing to n/216<br />
inch, where n = 1 to 255. The line feed spacing used by [LF] is set to values<br />
other than 1/8 or 7/72 inch. The command takes effect immediately.<br />
Note: In EPOS mode, the command performs line feeds in n/144-inch<br />
increments.<br />
[ESC] 0<br />
Set line spacing to 1/8 inch<br />
ASCII [ESC] 0<br />
Hexadecimal 1BH 30H<br />
Decimal <br />
IPCL<br />
&%ST<br />
EPOS [ESC] 2<br />
Description The [ESC] 0 command sets the default line spacing to 1/8 inch<br />
(27/216 inch), which is the standard eight lines per inch line spacing at initial<br />
power-up.<br />
Note: In EPOS mode, the command sets 1/6-inch spacing or six lines per inch.<br />
<strong>43</strong>-06938 Rev L Page 75
Control Codes<br />
[ESC] 1<br />
Set line spacing to 21/216 inch or 7/72 inch<br />
ASCII [ESC] 1<br />
Hexadecimal 1BH 31H<br />
Decimal <br />
IPCL<br />
&%SG<br />
EPOS<br />
none<br />
Description The [ESC] 1 command sets the default line spacing to 21/216<br />
inch. Use 21/216-inch line spacing for all-points-addressable (APA) graphics<br />
printing.<br />
[ESC] A<br />
Set variable line spacing to n/72 inch<br />
ASCII<br />
Hexadecimal<br />
Decimal<br />
IPCL<br />
EPOS<br />
[ESC] A <br />
1BH 41H <br />
<br />
none<br />
none<br />
Description The [ESC] A command sets the default line spacing to n/72,<br />
where n = 1 to 85. Variable line spacing does not take effect until enabled by<br />
the [ESC] 2 command. The command is provided to maintain backward<br />
compatibility with the <strong>TransAct</strong> ® Series 50, OKIDATA, IBM, and other printers.<br />
It can also be used to print on preprinted forms.<br />
[ESC] 2<br />
Enable [ESC] A variable line spacing<br />
ASCII [ESC] 2<br />
Hexadecimal 1BH 32H<br />
Decimal <br />
IPCL<br />
none<br />
EPOS<br />
none<br />
Description The [ESC] 2 command is a companion to the [ESC] A <br />
command and puts the specified line spacing into effect. It remains in effect<br />
until another line spacing command is issued.<br />
Page 76<br />
<strong>43</strong>-06938 Rev L
Control Codes<br />
Function Set minimum Line Spacing in Points All<br />
ASCII<br />
[ESC] + V <br />
Hexadecimal 1BH 2BH 56H<br />
Decimal <br />
Range d = 0, 4 – 72<br />
The [ESC] + V command will set the line spacing in points, where one point is<br />
defined as 1/72 nd of an inch.<br />
If d = 0 variable spacing is selected.<br />
NOTE: This is the minimum spacing. If the character<br />
height setting requires a larger spacing, the character<br />
height will override this setting.<br />
Function Set minimum Line Spacing in ¼ Points All<br />
ASCII<br />
[ESC] + v <br />
Hexadecimal 1BH 2BH 76H<br />
Decimal <br />
Range d = 0, 16 – 255<br />
The [ESC] + v command will set the line spacing in ¼ points, where ¼ point is<br />
defined as 1/288 th of an inch.<br />
ASCII<br />
[ESC] + v <br />
Hexadecimal<br />
1BH 2BH 76H<br />
Decimal <br />
Range d = 0, 16 – 255<br />
If d = 0 variable spacing is selected.<br />
NOTE: This is the minimum spacing. If the character<br />
height setting requires a larger spacing, the character<br />
height will override this setting.<br />
<strong>43</strong>-06938 Rev L Page 77
Control Codes<br />
[ESC] d<br />
ASCII<br />
Hexadecimal<br />
Decimal<br />
IPCL<br />
EPOS<br />
Feed lines at the current spacing<br />
[ESC] d <br />
1BH 64H <br />
<br />
&%FL <br />
[ESC] d<br />
Description The [ESC] d command prints the contents of the buffer (if any)<br />
and performs line feeds at the current line spacing. The command does<br />
not change the default line spacing value. The next character print position is<br />
reset to the left margin.<br />
Note: The IPCL command prints from 00 to 99 lines. For example, if you wish<br />
to feed 12 lines, the IPCL command would be as follows: &%FL12.<br />
Function<br />
Reverse feed lines at the current spacing<br />
ASCII<br />
[ESC] e <br />
Hexadecimal 1BH 65H <br />
Decimal <br />
IPCL<br />
&%FB <br />
EPOS<br />
[ESC] e<br />
Description The [ESC] e command prints the contents of the buffer (if any)<br />
and performs reverse line feeds at the current line spacing. The<br />
command does not change the default line spacing value. The next character<br />
print position is reset to the left margin.<br />
Note: The reverse feed is limited to 2 lines. Do NOT attempt to reverse feed<br />
more than 2 lines or the paper could jam.<br />
Note: The IPCL command prints from 00 to 99 lines. For example, if you wish<br />
to feed 12 lines, the IPCL command would be as follows: &%FL12.<br />
[VT]<br />
Vertical tab<br />
ASCII<br />
[VT]<br />
Hexadecimal 0BH<br />
Decimal <br />
IPCL<br />
&%VT<br />
EPOS<br />
(VT)<br />
Description The printer sets a line counter to the top of the form at reset and<br />
when a set top of form command is issued. By setting vertical tab stops,<br />
various form positions can be reached with a [VT] operation.<br />
Page 78<br />
<strong>43</strong>-06938 Rev L
Control Codes<br />
[ESC] B<br />
Set vertical tab stops<br />
ASCII [ESC] B ... 0<br />
Hexadecimal 1BH 42H ... 00H<br />
Decimal ... <br />
IPCL<br />
none<br />
EPOS [ESC] B ... 0<br />
Description The [ESC] B ... 0 command sets tab stops at<br />
line positions specified by . The end of the setting is specified by a .<br />
All previously set tabs will be cleared. If n n is less than n n-1 , then the command<br />
is in error, and all of the following information is printed. In other words, tab<br />
stops must be entered sequentially in order to be accepted. A total of 64 tab<br />
stops can be specified. (The power on default is a vertical tab on every line).<br />
[ESC] R<br />
Reset horizontal and vertical tab stops<br />
ASCII<br />
[ESC] R<br />
Hexadecimal 1BH 52H<br />
Decimal <br />
IPCL<br />
&%HV<br />
EPOS<br />
none<br />
Description The [ESC] R command resets horizontal and vertical tab stops to<br />
power up configuration. The power up horizontal default is every eight<br />
spaces, i.e., 9, 17, 25, etc. The vertical default is every line.<br />
[FF]<br />
Form feed<br />
ASCII<br />
[FF]<br />
Hexadecimal 0CH<br />
Decimal <br />
IPCL<br />
&%FF<br />
EPOS<br />
none<br />
Description The [FF] command performs a form feed to the top of the form.<br />
Note: The form feed command can be disabled by setting the form length to<br />
zero.<br />
Note: In page mode this command ends page mode. It does not position the<br />
paper to top of form.<br />
<strong>43</strong>-06938 Rev L Page 79
Control Codes<br />
[ESC] 4<br />
Set top of form<br />
ASCII [ESC] 4<br />
Hexadecimal 1BH 34H<br />
Decimal <br />
IPCL<br />
&%TF<br />
EPOS<br />
[ESC] L<br />
Description The [ESC] 4 command sets the top of form to the current position.<br />
Note: This command does not operate in or affect page mode.<br />
[ESC] C<br />
Set form length in lines<br />
ASCII<br />
[ESC] C <br />
Hexadecimal 1BH <strong>43</strong>H <br />
Decimal <br />
IPCL &%SL <br />
EPOS<br />
[ESC] C <br />
Description The [ESC] C command sets the form length to lines at the<br />
current line spacing. If the current page position is greater than the new page<br />
length, the command also sets the current position as the top of form.<br />
Note: This command does not set the page size in page mode.<br />
[ESC] C [NUL] Set form length in inches<br />
ASCII<br />
[ESC] C [NUL] <br />
Hexadecimal 1BH <strong>43</strong>H <br />
Decimal <br />
IPCL &%SI <br />
EPOS<br />
none<br />
Description The [ESC] C [NUL] command sets the form length to <br />
inches. If the current page position is greater than the new page length, the<br />
command also sets the current position as the top of form. If zero inches are<br />
specified, the form feed and vertical tab commands are ignored.<br />
Note: This command does not set the page size in page mode.<br />
Page 80<br />
<strong>43</strong>-06938 Rev L
Control Codes<br />
[ESC] 5<br />
Begin auto line feed<br />
ASCII<br />
[ESC] 5 <br />
Hexadecimal 1BH 35H <br />
Decimal <br />
IPCL<br />
&%MA (Begin)<br />
IPCL &%CA (End)<br />
EPOS<br />
none<br />
Description The [ESC] 5 command sets auto line feed mode. [ESC] 5 <br />
command ends auto line feed mode.<br />
Note: The begin and end auto line feed command overrides the configuration<br />
setting.<br />
<strong>43</strong>-06938 Rev L Page 81
Control Codes<br />
Feed to Black Dot<br />
Epic <strong>43</strong>0 TM printers are available with an optional black dot sensor, supported<br />
by a feed to black dot command as well as an additional function to adjust the<br />
width and offset of the black dot.<br />
Note: This is a special order option, and requires an additional sensor and<br />
modified firmware. It is not possible to field retrofit a standard Epic <strong>43</strong>0 TM with<br />
a black dot sensor.<br />
Function<br />
ASCII<br />
Hexadecimal<br />
Decimal<br />
IPCL<br />
EPOS<br />
Feed to Black Dot<br />
[ESC][VT]<br />
1BH, 0BH,<br />
<br />
None<br />
[GS][VT]<br />
Where n is the number of inches to feed while looking for the<br />
black marker.<br />
Description The [ESC][VT] command performs feeds the paper until the black<br />
dot is positioned as configured.<br />
This command keeps track of the location of the black dot and will feed<br />
paper until the black dot is positioned as configured.<br />
There are three configurable Black Dot parameters. The Dot Width, and<br />
the Offset may be adjusted to operate with a specific paper. The Calibration is<br />
preset and should not be changed.<br />
Function<br />
Adjusting the width and offset of the Black Dot<br />
ASCII<br />
Hexadecimal<br />
Decimal<br />
ESC ~ W nl nh m<br />
1B 7E 57 nl nh m<br />
27 126 87 nl nh m<br />
Where n = The offset adjustment of the Black dot in n/203 inches<br />
where n = nl + 256*nh. Default is 304 or 1.5 inches. Values greater than 368<br />
will set n to 368.<br />
M = The Width of the black dot in m/203 inches. The default is 76 or<br />
0.375 inches. Values less than 51 will be ignored.<br />
The offset adjustment is the position of the black dot in relation to the cut point.<br />
If n = 0 the cut point will be in the center of the black dot. If the value of n =<br />
304, the cut point will be 1.5 inches above the black dot.<br />
Note: This command may be issued as part of an application. If the values in<br />
the configuration match the requested values, no operation occurs.<br />
Page 82<br />
<strong>43</strong>-06938 Rev L
Control Codes<br />
0.8 (.20) to first line of print<br />
n/203 (n/8)<br />
Cut to Center of black dot<br />
m/203 (m/8) Dot Width<br />
Back of Ticket<br />
Dimensions in Inches (mm)<br />
Note: This command interacts with the Feed to Black Dot command. If the<br />
Black Dot paper option is set, the black dot position specified by this command<br />
will be used for the Cover Close operation.<br />
<strong>43</strong>-06938 Rev L Page 83
Control Codes<br />
Character Pitch<br />
Function Set Character spacing in points. All<br />
ASCII<br />
[ESC] + I <br />
Hexadecimal 1BH 2BH 49H<br />
Decimal <br />
Range d = 0, 4 – 72<br />
The [ESC] + I command will set the character spacing in points, where one<br />
point is defined as 1/72 nd of an inch. This command will force mono-space<br />
printing. It will override any character spacing set by the set character height<br />
and width commands defined above. This spacing will be enforced until<br />
deactivated by setting the value to 0 or if the set character height and width<br />
commands use a 0 for the width indicating proportional spacing should be<br />
used. This command differs from the [ESC] + J command in that all<br />
characters are centered on the fixed cell size. It the character is too big for the<br />
cell, it may overlap the previous and next character. The character size is not<br />
adjusted to fit the cell.<br />
If d = 0 variable spacing is selected.<br />
NOTE: If the current character size is too large for the<br />
selected spacing, the characters will overlap. Variable<br />
spacing is recommended.<br />
Function Set Character spacing in ¼ points. All<br />
ASCII<br />
[ESC] + i <br />
Hexadecimal 1BH 2BH 69H<br />
Decimal <br />
Range d = 0, 16 – 255<br />
The [ESC] + i command will set the character spacing in points, where ¼ point<br />
is defined as 1/288 th of an inch. This command will force mono-space printing.<br />
It will override any character spacing set by the set character height and width<br />
commands defined above. This spacing will be enforced until deactivated by<br />
setting the value to 0 or if the set character height and width commands use a<br />
0 for the width indicating proportional spacing should be used. This command<br />
differs from the [ESC] + j command in that all characters are centered on the<br />
fixed cell size. It the character is too big for the cell, it may overlap the<br />
previous and next character. The character size is not adjusted to fit the cell.<br />
If d = 0 variable spacing is selected.<br />
NOTE: If the current character size is too large for the<br />
selected spacing, the characters will overlap. Variable<br />
spacing is recommended.<br />
Page 84<br />
<strong>43</strong>-06938 Rev L
Control Codes<br />
Function Set Character spacing in points with adjustment. All<br />
ASCII<br />
[ESC] + J <br />
Hexadecimal 1BH 2BH 4AH<br />
Decimal <br />
Range d = 0, 4 – 72<br />
The [ESC] + J command will set the character spacing in points, where one<br />
point is defined as 1/72 nd of an inch. This command will force mono-space<br />
printing. It will override any character spacing set by the set character height<br />
and width commands defined above. This spacing will be enforced until<br />
deactivated by setting the value to 0 or if the set character height and width<br />
commands use a 0 for the width indicating proportional spacing should be<br />
used. This command differs from the [ESC] + I command in that if the<br />
character is too large for the cell, the cell will be expanded in multiples of <br />
until the character fits.<br />
If d = 0 variable spacing is selected. However, note that the cell adjustment<br />
flag will remain set and if legacy commands are used they will allow the cell to<br />
be expanded.<br />
NOTE: If the current character size is too large for the<br />
selected spacing, the cell size will be expanded<br />
Function Set Character spacing in points with adjustment. All<br />
ASCII<br />
[ESC] + j <br />
Hexadecimal 1BH 2BH 6AH<br />
Decimal <br />
Range d = 0, 16 – 255<br />
The [ESC] + j command will set the character spacing in points, where ¼ point<br />
is defined as 1/288 th of an inch. This command will force mono-space printing.<br />
It will override any character spacing set by the set character height and width<br />
commands defined above. This spacing will be enforced until deactivated by<br />
setting the value to 0 or if the set character height and width commands use a<br />
0 for the width indicating proportional spacing should be used. This command<br />
differs from the [ESC] + i command in that if the character is too large for the<br />
cell, the cell will be expanded in multiples of until the character fits.<br />
If d = 0 variable spacing is selected. However, note that the cell adjustment<br />
flag will remain set and if legacy commands are used they will allow the cell to<br />
be expanded.<br />
NOTE: If the current character size is too large for the<br />
selected spacing, the characters will overlap. Variable<br />
spacing is recommended.<br />
<strong>43</strong>-06938 Rev L Page 85
Control Codes<br />
[DC2]<br />
Begin 10 cpi character pitch (Legacy Command)<br />
ASCII<br />
[DC2]<br />
Hexadecimal 12H<br />
Decimal <br />
IPCL<br />
&%F3<br />
EPOS<br />
[ESC][SP] <br />
Description The [DC2] command sets 9.905 characters per inch print pitch.<br />
[ESC] :<br />
Begin 12 cpi character pitch (Legacy Command)<br />
ASCII [ESC] :<br />
Hexadecimal 1BH 3AH<br />
Decimal <br />
IPCL<br />
&%F2<br />
EPOS<br />
[ESC] [SP] <br />
Description The [ESC] : command sets 12.235 characters per inch print pitch.<br />
[SI]<br />
Begin 17 cpi character pitch (Legacy Command)<br />
ASCII<br />
[SI]<br />
Hexadecimal 0FH<br />
Decimal <br />
IPCL<br />
&%F1<br />
EPOS<br />
[ESC] [SP] <br />
Description The [SI] command sets 17.333 characters per inch print pitch.<br />
[ESC] [SI]<br />
Begin 24 cpi character pitch (Legacy Command)<br />
ASCII<br />
[ESC] [SI]<br />
Hexadecimal 1BH 0FH<br />
Decimal <br />
IPCL<br />
&%F4<br />
EPOS<br />
[ESC] [SP] <br />
Description The [ESC] [SP] command sets 23.111 characters per inch print<br />
pitch.<br />
Page 86<br />
<strong>43</strong>-06938 Rev L
Control Codes<br />
[ESC] [ P<br />
ASCII<br />
Hexadecimal<br />
Decimal<br />
IPCL<br />
EPOS<br />
Set character pitch<br />
[ESC] [ P <br />
1BH 5BH 50H <br />
<br />
&%F1, &%F2, &%F3, &%F4, &%F5, &%F6, &%F7<br />
[ESC] [SP] <br />
Description The [ESC] [ P command sets character per inch print pitch to<br />
. The printer resolution limits the exact print pitch. The following table lists<br />
the exact pitch for various values on .<br />
<br />
Resulting<br />
Characters<br />
IPCL<br />
per Inch<br />
1 1.00<br />
2 2.00<br />
3 3.01<br />
4 4.00<br />
5 4.95<br />
6 5.94<br />
7 6.93<br />
8 8.00 &%F7<br />
9 9.04<br />
10 9.90 &%F3<br />
11 10.95<br />
12 12.23 &%F2<br />
13 13.00<br />
14 13.87<br />
15 14.86 &%F6<br />
Shaded selections are not recommended.<br />
<br />
Table 2 Character Pitch<br />
Resulting<br />
Characters<br />
IPCL<br />
per Inch<br />
16 16.00<br />
17 17.33 &%F1<br />
18 17.33<br />
19 18.91<br />
20 20.8 &%F5<br />
21 20.8<br />
22 23.11<br />
23 23.11<br />
24 23.11 &%F4<br />
25 23.11<br />
26 26<br />
27 26<br />
28 26<br />
29 29.71<br />
30 29.71<br />
This command disables any right-side spacing set by the [ESC] V command.<br />
In addition, when font changes are made, the character pitch is maintained.<br />
<strong>43</strong>-06938 Rev L Page 87
Control Codes<br />
[ESC] V<br />
Mode<br />
ASCII<br />
Hexadecimal<br />
Decimal<br />
IPCL<br />
EPOS<br />
Set inter-character spacing (Legacy Command)<br />
Global<br />
[ESC] V <br />
1BH 56H <br />
<br />
none<br />
[ESC] [SP] <br />
Description The [ESC] V command sets inter-character spacing by adding<br />
white space between characters. The value of sets the spacing in 216ths<br />
of an inch. The printer can only set the spacing in 208ths of an inch and<br />
converts 216ths to the nearest 208 th of an inch. Each font has a basic size,<br />
and the inter-character spacing value is added to the basic size. Therefore,<br />
the affect of this command on characters per inch (cpi) will depend on the font<br />
selected.<br />
Note 1: The [ESC] V command disables any pitch settings established<br />
by pitch set commands that establish a cpi (like [ESC] [ P ). After a set<br />
right-side spacing command is issued, the pitch will vary with font selection.<br />
Font selections use the current, active, right-side spacing.<br />
Note 2: With the inter-character spacing command, the pitch cannot be<br />
set less than the font size. Therefore, it is not as effective as the pitch<br />
command, [ESC] [ P . The following table lists the cpi equivalent for<br />
several values of .<br />
The following table lists the cpi equivalent for several values of .<br />
Small Draft (cpi) Large Draft (cpi) NLQ (cpi)<br />
0 17.33 14.86 13<br />
1 16 13.9 12.24<br />
2 14.86 13 11.6<br />
3 13.9 12.24 10.9<br />
4 13 11.6 10.4<br />
5 12.24 10.9 9.90<br />
Table 3 Inter-character Spacing<br />
Page 88<br />
<strong>43</strong>-06938 Rev L
Control Codes<br />
Character Font<br />
[ESC] #<br />
Begin 12 x 12 print mode (Legacy Command)<br />
ASCII [ESC] # <br />
Hexadecimal 1BH 23H 00H<br />
Decimal <br />
IPCL<br />
&%QT<br />
EPOS<br />
[ESC] ! <br />
Description The [ESC] # command begins 12 x 12 draft like print mode.<br />
Draft print is provided to maintain compatibility with other <strong>TransAct</strong> ® products.<br />
[ESC] I<br />
Set print size mode (Legacy Command)<br />
ASCII<br />
[ESC] I <br />
Hexadecimal 1BH 49H <br />
Decimal <br />
IPCL &%QT 12 x 12 draft mode<br />
&%QU 12 x 14 large draft mode<br />
&%QL 24 x 16 near letter quality (NLQ) mode<br />
&%QS 24 x 16 near letter quality (NLQ) mode<br />
EPOS<br />
[GS] ! and/or [ESC] ! <br />
Description The [ESC] I (e.g. capital “i”) command begins draft, large draft<br />
or near letter quality print mode.<br />
Where n<br />
0 = 12 x 12 like draft<br />
1 = 12 x 14 like large draft<br />
2 = 24 x 16 like near letter quality (NLQ)<br />
3 = 24 x 16 like near letter quality (NLQ)<br />
4 – 7 repeats 0 – 3<br />
Note 1: The all characters printed by the <strong>EPIC</strong> <strong>43</strong>0 are generated from<br />
scaleable fonts. All these mode selections configure the font rendering<br />
code to generate fonts that are approximately equivalent to the matrix sizes<br />
indicated.<br />
<strong>43</strong>-06938 Rev L Page 89
Control Codes<br />
Character Sets and Code Pages<br />
The Epic <strong>43</strong>0 TM Printer is primarily intended to be used in Unicode based<br />
systems. However to provide legacy support, the printer supports 8 bit and<br />
double byte ASCII encoding with code pages.<br />
When not using Unicode or double byte encoding, the printer is restricted to<br />
the 8 bit ASCII character set. To support international languages, the<br />
characters that are assigned to each of the 256 possible locations can be<br />
remapped to any character in the Unicode standard. Typically, the first 32<br />
characters are reserved for control characters. The next 72 are typically fixed<br />
to alpha numeric and punctuation. The upper 128 characters are typically<br />
redefined to characters that support the specific language or country. These<br />
mappings are generally referred to as codepages.<br />
The Epic <strong>43</strong>0 TM provides several legacy commands to select a country code or<br />
codepage maps. However, they all simply select an ASCII to Unicode<br />
translation map. Several predefined mappings to provide legacy support are<br />
internal to the printer, but the majority of the maps are placed in the printer’s<br />
file system. This allows any preexisting codepage mapping to be defined as<br />
well as the ability to define custom mappings unique to your application.<br />
Codepage description files<br />
The format of the codepage description file is somewhat flexible. The basic<br />
format is that each line will specify an ASCII character ID and the Unicode<br />
character that is to appear in that ASCII ID location.<br />
The file format is one character per line with the first value being the ASCII ID<br />
and the second value being the Unicode address. The file should be<br />
something like this:<br />
0x00 0x0000 # NULL<br />
0x01 0x0001 # START OF HEADING<br />
0x02 0x0002 # START OF TEXT<br />
0x03 0x0003 # END OF TEXT<br />
...<br />
or<br />
\Language = USA<br />
\Code Page = <strong>43</strong>7<br />
0x00 0x0000 ; 0 NULL<br />
0x01 0x263A ; 9786 WHITE SMILE<br />
0x02 0x263B ; 9787 BLACK SMILE<br />
0x03 0x2665 ; 9829 BLACK HEART SUIT<br />
0x04 0x2666 ; 9830 BLACK DIAMOND SUIT<br />
0x05 0x2663 ; 9827 BLACK CLUB SUIT<br />
...<br />
or<br />
0 0 ; NULL<br />
1 9786 ; WHITE SMILE<br />
2 9787 ; BLACK SMILE<br />
3 9829 ; BLACK HEART SUIT<br />
Page 90<br />
<strong>43</strong>-06938 Rev L
Control Codes<br />
4 9830 ; BLACK DIAMOND SUIT<br />
5 9827 ; BLACK CLUB SUIT<br />
...<br />
or<br />
SYMBOL SET = WE<br />
/name = Windows 3.1 Latin 2<br />
/pcl char = E<br />
...<br />
/symbols =<br />
32 0x0020 ; Space Code, Prntabl Thin Space<br />
33 0x0021 ; Exclamation<br />
34 0x0022 ; Neutral Double Quote<br />
5 0x0023 ; Number<br />
36 0x0024 ; Dollar<br />
...<br />
or<br />
\Language = USA<br />
\Code Page = <strong>43</strong>7<br />
0x00 - 0x0000 ; 0 NULL<br />
0x01 - 0x263A ; 9786 WHITE SMILE<br />
0x02 - 0x263B ; 9787 BLACK SMILE<br />
0x03 - 0x2665 ; 9829 BLACK HART SUIT<br />
0x04 - 0x2666 ; 9830 BLACK DIAMOND SUIT<br />
0x05 - 0x2663 ; 9827 BLACK CLUB SUIT<br />
...<br />
or<br />
\Language = USA<br />
\Code Page = <strong>43</strong>7<br />
0x00 = 0x0000 ; 0 NULL<br />
0x01 = 0x263A ; 9786 WHITE SMILE<br />
0x02 = 0x263B ; 9787 BLACK SMILE<br />
0x03 = 0x2665 ; 9829 BLACK HART SUIT<br />
0x04 = 0x2666 ; 9830 BLACK DIAMOND SUIT<br />
0x05 = 0x2663 ; 9827 BLACK CLUB SUIT<br />
Numbers beginning with 0x… are treated as hexadecimal, all other as decimal.<br />
Any line beginning with a non-numeric value is ignored. Any information after<br />
the Unicode value is ignored. Not all of the ASCII ID’s need to be present,<br />
however, only ID’s present will be affected.<br />
There are two ways to select a codepage file. The first is by using the<br />
standard code page select command. If this command is used, the file name<br />
is critical; it must follow the format of Cpxyz.CPM. The xyz is the code page<br />
number that is being selected in the command. For example CP850.CPM<br />
would be referred to as 850. If the legacy commands are to be used to select<br />
file based code page mapping, the selection mode must be selected in the<br />
printer’s configuration.<br />
The second form is by name. This command is free form and will select any<br />
file present which will then be to use it as a code page definition. If the file is<br />
not a code page file, you will get unexpected results. If the file does not exist,<br />
the command is ignored. Any extension may be used for a codepage map,<br />
<strong>43</strong>-06938 Rev L Page 91
Control Codes<br />
however, it is best to use the .CPM extension, with a descriptive filename<br />
recommended. For example ISO8859-1.CPM would be a good choice for the<br />
ISO8859-1 code page.<br />
Code page selection<br />
In ASCII mode the Epic <strong>43</strong>0 TM Printer supports 65 different international<br />
character sets. In IBM and EPOS printers, there are two ways of selecting a<br />
character set.<br />
One way substitute’s international characters in the upper 128 characters of a<br />
standard character set. The substitution technique supports a few different<br />
countries. However, as more and more countries were added, too many<br />
characters were being replaced, and it became a problem for the application<br />
to match the characters displayed and printed.<br />
To solve this problem, a second method of selecting a character set was<br />
developed – code pages. The printer and display use the same code page,<br />
and the application displays and prints the same characters. IBM and EPOS<br />
defined new commands to select code pages, and left the old commands in<br />
effect.<br />
The Epic <strong>43</strong>0 TM Printer supports international character sets as well as code<br />
pages. To allow the most flexibility for the application programmer, both<br />
methods are extended in the Epic <strong>43</strong>0 TM Printer. In IBM mode, there are 19<br />
character sets and 60 code pages. In EPOS mode, there are 57 character sets<br />
and five code pages. 5<br />
The Epic <strong>43</strong>0 TM Printer allows the IBM code page selection command to<br />
choose character sets as well as normal IBM code pages. The EPOS<br />
character set select command has been extended to allow additional<br />
character sets over and above the 11 defined by EPOS. The EPOS code page<br />
select command has not been extended because there is no EPOS definition<br />
beyond the first six ID’s.<br />
All characters in code pages as well as character sets are addressed as zero<br />
through 255. (Characters below 32 must be addressed with the [ESC] ^ <br />
command.) Code pages may be changed at any time and are active for all<br />
features including rotated print. To allow other code pages to be created by<br />
an application, a redefine character set command is provided.<br />
As discussed above, there are two commands for language selection in IBM<br />
mode. The first is [ESC] !, which selects one of 19 international character sets.<br />
The [ESC] ! command does not allow all of the possible character sets to be<br />
selected, it is provided for compatibility with older programs only. The second<br />
is [ESC] [ T, which selects any of the 58 code pages. In EPOS mode, the<br />
[ESC] R command has been expanded to select any of the 59 international<br />
character sets or code pages.<br />
5 Epson provides limited code page support through ID to code page translation.<br />
Only six translations are defined.<br />
Page 92<br />
<strong>43</strong>-06938 Rev L
Control Codes<br />
[ESC] !<br />
ASCII<br />
Hexadecimal<br />
Decimal<br />
IPCL<br />
EPOS<br />
Select international character set (Legacy Command)<br />
[ESC] ! <br />
1BH 21H <br />
<br />
&%CS <br />
[ESC] R <br />
Description The [ESC] ! command selects international character set .<br />
In standard mode, the value of is as follows.<br />
Note: This command is supported in ASCII mode only.<br />
Language Language<br />
64-‘@’ ASCII (slashed zero) 73-‘I’ Italian<br />
65-‘A’ ASCII (unslashed zero) 74-‘J’ French Canadian<br />
66-‘B’ British 75-‘K’ Spanish<br />
67-‘C’ German 76-‘L’ Swedish II<br />
68-‘D’ French 77 –‘M’ Swedish III<br />
69-‘E’ Swedish 78-‘N’ Swedish IV<br />
70-‘F’ Danish 79-‘O’ Turkish<br />
71-‘G’ Norwegian 80-‘P’ Swiss I<br />
72-‘H’ Dutch 81-‘Q’ Swiss II<br />
Table 4 Language Table ID’s<br />
[ESC] [ T Select character code page<br />
ASCII [ESC] [ T <br />
Hexadecimal 1BH 5BH 54H <br />
Decimal <br />
IPCL &%CP <br />
EPOS<br />
[ESC] t <br />
Description The [ESC] [ T command selects character code page<br />
. The Epic <strong>43</strong>0 TM Printer supports many code pages. The following<br />
code pages are supported.<br />
Note: This command is supported in ASCII mode only.<br />
Note: See Appendix C: Internal Code Page Definitions for the internally<br />
defined code pages. Additional code pages may be defined and loaded as<br />
Codepage definition files.<br />
Note: The code page field is a 16-bit field that is a function of the code page<br />
numbers and , e.g. ( * 256) +. For example, 1 * 256 + 181<br />
= <strong>43</strong>7. For the IPCL command, the page is specified in ASCII as a 4-byte<br />
field.<br />
Note: If the requested code page is not found in the internal maps, the file<br />
system is searched for the definition.<br />
<strong>43</strong>-06938 Rev L Page 93
Control Codes<br />
Function Select character code page by name. All<br />
ASCII [ESC] + C Codepage.CPM <br />
Hexadecimal 1BH 2BH <strong>43</strong>H<br />
Decimal <br />
CodePage File name from 5 to 30 characters.<br />
Description The [ESC] + C command will select and read a code page<br />
encoding file. If the file does not exist, the current code page will be selected.<br />
If the code page definition is not complete, only the character locations defined<br />
by the file will be effected.<br />
Note: Code page translations only occur in ASCII mode. This command has<br />
no effect in Unicode mode.<br />
[ESC] [ C Insert Euro character PcOS<br />
ASCII<br />
ESC] [ C <br />
Hexadecimal 1BH 5BH <strong>43</strong>H <br />
Decimal <br />
IPCL<br />
&%EU<br />
Description The [ESC] [ C command allows an application to replace any<br />
character in the currently active code page with the Euro character. The<br />
character to be replaced is defined by . For example, if the currently active<br />
character set is CP 850 (multi-lingual) and 0D5H character is to be the Euro<br />
character, “1BH 5BH <strong>43</strong>H 0D5H” replaces the character at 0D5H with the Euro<br />
symbol. This command is only valid in ASCII mode when code pages are<br />
active.<br />
Note: This command is effective only in ASCII mode.<br />
Typical Euro Character Substitution Locations<br />
Name Epson IBM Code Page Insertion Point (hex)<br />
850 26 850 0xD5<br />
Turkey 857 57 857 0XD5<br />
Win Cyrillic 52 1022 0X88<br />
Win Turkish 51 1021 0X80<br />
Win Greek 50 1020 0X80<br />
Win Hebrew 62 1032 0X80<br />
Win Baltic 68 1034 0X80<br />
Table 5 Euro Character Substitution Matrix<br />
Page 94<br />
<strong>43</strong>-06938 Rev L
Control Codes<br />
[ESC] ^<br />
ASCII<br />
Hexadecimal<br />
Decimal<br />
IPCL<br />
EPOS<br />
Print control character<br />
[ESC] ^ <br />
1BH 5EH <br />
<br />
&%CC <br />
[ESC] ^ <br />
Description The [ESC] ^ command allows characters from zero to 31<br />
codes to be printed. During normal operation, characters from zero to 31 are<br />
control characters. The command turns off control code translation for the<br />
following character. can range in value from zero to 255.<br />
[ESC] “<br />
Print Unicode character<br />
ASCII [ESC] “ <br />
Hexadecimal 1BH 22H <br />
Decimal <br />
IPCL<br />
&%PU <br />
EPOS [ESC] “ <br />
Description The [ESC] “command allows any Unicode character to<br />
be directly addressed and inserted into the print data. can range in<br />
value from zero to 65535.<br />
<strong>43</strong>-06938 Rev L Page 95
Control Codes<br />
Character Attributes<br />
[ESC] c<br />
Select color<br />
ASCII<br />
[ESC] c <br />
Hexadecimal 1BH 63H <br />
Decimal <br />
IPCL &%CL <br />
EPOS<br />
none<br />
Description The [ESC] c command selects the print color.<br />
Where 0 = Black<br />
1 = Red<br />
2 = Green<br />
3 = Blue<br />
[SO]<br />
ASCII<br />
[SO]<br />
Hexadecimal 0EH<br />
Decimal <br />
IPCL<br />
&%MW<br />
EPOS<br />
none<br />
Begin one-line double-wide print<br />
Description The [SO] command causes subsequent characters to be printed at<br />
twice the currently selected character width. For example, ten cpi becomes<br />
five cpi, 17 cpi becomes 8.5 cpi, etc. The [SO] command remains in effect<br />
until a valid line terminator is received ([CR], [LF], or [ESC] J (fine line<br />
feed)); the command is canceled; or the maximum number of characters per<br />
line is reached and the printer performs an auto-print.<br />
[DC4]<br />
ASCII<br />
[DC4]<br />
Hexadecimal 14H<br />
Decimal <br />
IPCL<br />
&%MN<br />
EPOS<br />
none<br />
Cancel one-line double-wide print<br />
Description The [DC4] command cancels one-line double-wide mode set by<br />
the [SO] command and allows single- and double-wide characters to be<br />
printed on the same line.<br />
Page 96<br />
<strong>43</strong>-06938 Rev L
Control Codes<br />
[ESC] _<br />
ASCII<br />
Hexadecimal<br />
Decimal<br />
IPCL<br />
IPCL<br />
EPOS<br />
Enable/Disable Strike Through<br />
[ESC] _ <br />
1BH 5FH 01H<br />
<br />
&%MO (Begin)<br />
&%CO (End)<br />
[ESC] ! <br />
Description The [ESC] _ command begins over-score print mode. All<br />
subsequent text, leading spaces, and trailing spaces are over-scored. [ESC] _<br />
ends the mode.<br />
Note: In EPOS mode, [ESC] ! performs a similar function; however, near<br />
letter quality (NLQ) is not available.<br />
[ESC] W<br />
Multi-line double-wide and double-high mode<br />
ASCII<br />
[ESC] W <br />
Hexadecimal 1BH 57H <br />
Decimal <br />
IPCL &%FD {n = 1}<br />
&%FS {n = 0}<br />
&%FHA {n = 3}<br />
(Note: Single-wide, double-high mode is not available in IPCL mode.)<br />
EPOS<br />
[ESC] ! <br />
Description The [ESC] W command controls multi-line double-wide or<br />
double-high mode, where n specifies the mode:<br />
n = 0 is standard single-wide and single-high;<br />
n = 1 begins double-wide;<br />
n = 2 begins double-high; and<br />
n = 3 begins double-wide double-high.<br />
Where n Bits 765<strong>43</strong>210 Function<br />
1------- Underline<br />
--1----- Double-wide<br />
---1---- Double-high<br />
-------X Font: 0 = draft; 1 = large draft<br />
Note: The [ESC] W command does not affect line spacing.<br />
Note: In EPOS mode, [ESC] ! performs a similar function; however, near<br />
letter quality (NLQ) is not available.<br />
<strong>43</strong>-06938 Rev L Page 97
Control Codes<br />
[ESC] [ @<br />
Set print style: double-wide, double-high, italic control<br />
ASCII<br />
[ESC] [ @ [EOT] [NUL] [NUL] <br />
Hexadecimal 1BH 5BH 40H 04H 00H 00H <br />
Decimal <br />
IPCL &%DH Double-high, double-wide, and double-space<br />
&%SH Single-high, single-wide, and single-space<br />
Also, see [ESC] W above.<br />
Description The [ESC] [ @ [EOT] [NUL] [NUL] command sets<br />
double-wide, double-high, and italic print mode.<br />
Where k bits k 765<strong>43</strong>210<br />
----xxxx Italic control<br />
0 ----0000 No change<br />
1 ----0001 Italics On<br />
2 ----0010 Italics Off<br />
Where n bits n 765<strong>43</strong>210<br />
----0nnn Height multiplier (Maximum 4)<br />
0 ----0000 No change<br />
xxxx---- Line spacing<br />
0 0000---- No change<br />
Where m bits m 765<strong>43</strong>210<br />
----0nnn Width multiplier (Maximum 4)<br />
0 ----0000 No change<br />
Note: The maximum height and width multiplier is four.<br />
Page 98<br />
<strong>43</strong>-06938 Rev L
Control Codes<br />
[ESC] -<br />
ASCII<br />
Hexadecimal<br />
Decimal<br />
IPCL<br />
IPCL<br />
EPOS<br />
Begin underline<br />
[ESC] - <br />
1BH 2DH 01H<br />
<br />
&%MU (Begin)<br />
&%CU (End)<br />
[ESC] ! <br />
Description The [ESC] - command begins underline print mode. All<br />
subsequent text, leading spaces, and trailing spaces are underlined. [ESC] -<br />
ends the mode.<br />
Note: In EPOS mode, [ESC] ! performs a similar function; however, near<br />
letter quality (NLQ) is not available.<br />
[ESC] G<br />
Begin enhanced print<br />
ASCII<br />
[ESC] G<br />
Hexadecimal 1BH 47H<br />
Decimal <br />
IPCL<br />
&%ME<br />
EPOS [ESC] G <br />
Description All subsequent text is printed in enhanced print mode (two passes<br />
with a vertical offset). Enhanced printing provides a deeper resolution of each<br />
character and may enhance multiple part forms printing.<br />
[ESC] H<br />
End enhanced print mode<br />
ASCII<br />
[ESC] H<br />
Hexadecimal 1BH 48H<br />
Decimal <br />
IPCL<br />
&%CE<br />
EPOS [ESC] G <br />
Description The [ESC] H command cancels enhanced print mode and returns<br />
to the currently selected font.<br />
<strong>43</strong>-06938 Rev L Page 99
Control Codes<br />
[ESC] E<br />
Begin emphasized print mode<br />
ASCII<br />
[ESC] E<br />
Hexadecimal 1BH 45H<br />
Decimal <br />
IPCL<br />
&%MM<br />
EPOS [ESC] E <br />
Description The [ESC] E command begins emphasized print mode (one pass<br />
with horizontal offset). Emphasized print is bolder than normal print.<br />
[ESC] F<br />
End emphasized print mode<br />
ASCII<br />
[ESC] F<br />
Hexadecimal 1BH 46H<br />
Decimal <br />
IPCL<br />
&%CM<br />
EPOS [ESC] E <br />
Description The [ESC] F command cancels emphasized print mode.<br />
[ESC] S Select superscript<br />
ASCII [ESC] S <br />
Hexadecimal 1BH 53H 00H<br />
Decimal <br />
IPCL<br />
&%SP<br />
EPOS<br />
none<br />
Description The [ESC] S command selects superscript. The following<br />
characters are printed half size on the upper side of the print line.<br />
Note: Superscript is not available in all print modes.<br />
[ESC] S Select subscript<br />
ASCII [ESC] S <br />
Hexadecimal 1BH 53H 01H<br />
Decimal <br />
IPCL<br />
&%SB<br />
EPOS<br />
none<br />
Description The [ESC] S command selects subscript. The following<br />
characters are printed half size on the bottom side of the print line.<br />
Note: Superscript is not available in all print modes.<br />
Page 100<br />
<strong>43</strong>-06938 Rev L
Control Codes<br />
[ESC] T<br />
End superscript or subscript<br />
ASCII<br />
[ESC] T<br />
Hexadecimal 1BH 54H<br />
Decimal <br />
IPCL<br />
&%SE<br />
EPOS<br />
none<br />
Description The [ESC] T command ends superscript or subscript.<br />
[ESC] % G<br />
Begin italics<br />
ASCII<br />
[ESC] % G<br />
Hexadecimal 1BH 25H 47H<br />
Decimal <br />
IPCL<br />
&%MI<br />
EPOS [ESC] 4<br />
Description The [ESC] % G command begins italic print mode.<br />
Note: Italics are not available in all print modes.<br />
[ESC] % H<br />
End italics<br />
ASCII<br />
[ESC] % H<br />
Hexadecimal 1BH 25H 48H<br />
Decimal <br />
IPCL<br />
&%CI<br />
EPOS [ESC] 5<br />
Description The [ESC] % H command ends italic print mode.<br />
<strong>43</strong>-06938 Rev L Page 101
Control Codes<br />
Page Mode<br />
The Epic <strong>43</strong>0 TM supports two operational modes, standard and page mode. In<br />
standard mode, as a line of text is received it is buffered and printed when the<br />
line feed is received. In page mode the printer waits for a complete “page” (a<br />
number of lines) to be received before printing the complete page. The<br />
advantage of page mode is that text and/or graphics can be placed anywhere<br />
on the page, in any order, and in any of 4 orientations.<br />
How to use page mode<br />
Page mode requires two phases to operate correctly.<br />
1. Page definition<br />
a. Define the master page size either just before or just after<br />
entering page mode.<br />
b. Optionally define a sub page.<br />
The master page defines the maximum page size, all sub<br />
pages must be smaller and contained within the master<br />
page. Master and sub page definitions are always done<br />
base on the 0 degree orientation not the current rotation.<br />
c. Optionally set an orientation. This may be 0, 90, 180 or 270<br />
degrees.<br />
d. Optionally set the entry position. This is based on the current<br />
sub page and the current rotation.<br />
e. Enter text or graphics.<br />
f. Go to step b to define additional sub pages or step c to change<br />
the orientation.<br />
2. Print the page.<br />
Page Definition<br />
The [ESC]t command will start page definition and define the initial orientation.<br />
An [ESC]t command during page definition will change the orientation and<br />
reset the entry location back to the top left corner of that orientation.<br />
Receipt or<br />
Inserted Form<br />
Initial entry<br />
location<br />
A > > > > ><br />
D > > > > ><br />
B > > > > ><br />
C > > > > ><br />
Page 102<br />
<strong>43</strong>-06938 Rev L
Control Codes<br />
Figure 18 Page Mode Entry Orientations<br />
The [ESC] u command wet the maximum page dimensions. Note that these<br />
dimensions are always based on 0 degree rotation.<br />
Enter text and/or graphics as required.<br />
Auto-cutter and page mode<br />
You may embed an auto-cutter command with in a page definition. The autocut<br />
command may be placed anywhere in the page definition, however, it will<br />
be processed after the page is printed. To prevent the cut from occurring in the<br />
page, it will be preceded with a feed that will place the end of the page about<br />
0.125 inches above the auto-cut position.<br />
Mechanism commands in page mode<br />
In general, mechanism commands received during page mode will be<br />
processed if the result will not affect the printed result.<br />
Stopping page mode definition<br />
The following operations will stop a page mode definition:<br />
1) [ESC]@ Printer initialize command.<br />
2) Real time reset request [ENQ]<br />
3) Turning the printer off.<br />
Printing the page<br />
The [FF] command starts the printing process.<br />
Printing starts at the current paper position. The complete page definition is<br />
printed excluding any blank information at the bottom of the page.<br />
If the [FF] command is used to print the page, the memory used to store the<br />
page image is not maintained and is released to be used by other functions.<br />
Function Select page mode<br />
ASCII [ESC] t or [ESC] [SUB] t<br />
Hexadecimal 1BH 74H or 1BH 1AH 74H<br />
Decimal or <br />
IPCL &%PM<br />
EPOS<br />
[ESC] L<br />
Description This command activates page mode and sets the orientation.<br />
This command may also be issued during page definition. When issued in<br />
page mode it resets the orientation and entry position, but does not cause the<br />
currently defined image to be erased or printed.<br />
Where<br />
x = 0 for standard orientation (Direction A).<br />
x = 1 for 270° Rotation (Direction B)<br />
x = 2 for 180° Rotation (Direction C)<br />
x = 3 for 90° Rotation (Direction D)<br />
<strong>43</strong>-06938 Rev L Page 103
Control Codes<br />
Receipt or<br />
Inserted Form<br />
Initial entry<br />
location<br />
A > > > > ><br />
D > > > > ><br />
B > > > > ><br />
C > > > > ><br />
Note 1: This command saves the current right and left margin and sets them<br />
to the maximum values for the orientation currently defined.<br />
Note 2: During page mode definition almost all printer commands are active.<br />
The following table lists the exceptions.<br />
Command Active Action<br />
Cash drawer Yes<br />
Immediate action<br />
commands<br />
Bell command Yes Immediate action<br />
Auto cut commands Delayed The printer will perform a feed to cut and then operate the auto<br />
cutter after the page is printed. The cut command may be<br />
anywhere in the definition. If the page is printed twice, the Auto<br />
cut command must be reissued after the first print to generate<br />
additional cuts.<br />
Electronic journal<br />
station select<br />
No<br />
This command is like a station select and is not active. You<br />
cannot store page mode images in the electronic journal. A page<br />
mode command in journal station mode will exit journal mode.<br />
Electronic journal<br />
entries<br />
Yes<br />
You can make journal entries as part of a page description. They<br />
are saved as text and not part of the page.<br />
Status requests Yes The status is returned during definition.<br />
Printer initialize<br />
command<br />
Yes<br />
Cancels page mode definition and returns the printer to standard<br />
mode.<br />
Set top of form No You must set the top of form outside of page mode. The form<br />
position is maintained after the page is printed.<br />
Vertical tab No The definition of a vertical tab is ambiguous in page mode and is<br />
ignored.<br />
Macro definitions No You can not define or delete a macro while in page mode. You<br />
can, however, invoke a macro or stored graphic. You can not<br />
enter page mode while in a macro definition.<br />
Note 3: Unless specified by a page mode set page size command, the default<br />
page size is the full paper width for about 14 inches. Printing starts at the<br />
Page 104<br />
<strong>43</strong>-06938 Rev L
Control Codes<br />
current paper position. The complete page definition is printed excluding any<br />
blank information at the bottom of the page.<br />
Function Set Print Area in Page Mode Enhanced<br />
ASCII [ESC] [SUB] S <br />
Hexadecimal 1BH 1AH 53H <br />
Decimal <br />
IPCL<br />
None<br />
EPOS<br />
[ESC] W<br />
Description This command Sets the position and size of the initial area in<br />
page mode and sub pages.<br />
Where:<br />
the x direction offset Min 0<br />
the y direction offset Min 0<br />
the width in dots Max 576<br />
< H L > the height in dots Max 3000<br />
This command should always be sent before or immediately after page mode<br />
is entered to define the initial page size.<br />
Once in page mode (after the [ESC]t command) the command can be sent<br />
multiple times so that several different print areas, aligned in different print<br />
directions, can be developed in the printer’s page buffer before being printed<br />
using the Print Page Mode commands<br />
(FF or ESC FF).<br />
The starting position of the print area is the upper left of the area to be printed.<br />
The Yoffset is in the y direction and is YO dots and the Xoffset is in the x<br />
direction and is XO dots in. The length of the area to be printed in the y<br />
direction is set to H dots. The length of the area to be printed in the x direction<br />
is set to W dots.<br />
The set print area command may be invoked multiple times while in page<br />
mode. The first invocation specifies the initial master page size. Following<br />
invocations will define smaller windows within the initially defined page. If the<br />
Set page size command is not used, the page size will default to the maximum<br />
size.<br />
The orientation of the set print area command is always based on 0 degrees<br />
regardless of the current orientation setting. This includes if the command is<br />
sent before the start page mode command, after the start page mode<br />
command, or as a sub-page.<br />
Note: The maximum printable area in the x direction is<br />
576/203 or 3.15 inches.<br />
Note: The maximum printable area in the y direction is<br />
2999/203 or 14.78 inches.<br />
Note: Only the used portion of the page is printed. That is<br />
the page length will only include what actually has print<br />
data. See illustration below.<br />
<strong>43</strong>-06938 Rev L Page 105
Control Codes<br />
YOffset <br />
Height < H L ><br />
Width < W L ><br />
XOffset <br />
Figure 19 Page mode set printable area<br />
Cut to print offset<br />
0.7 in or 18mm<br />
Previous cut<br />
edge<br />
Start of page<br />
definition<br />
Max width is 576 dots<br />
Cut point is after<br />
bottom most print<br />
data.<br />
Bottom most print data<br />
Unused page area<br />
is not printed<br />
End of page<br />
definition<br />
Figure 20 Default Page mode printed area<br />
Page 106<br />
<strong>43</strong>-06938 Rev L
Control Codes<br />
Function Set Printed Area in Page Mode Enhanced<br />
ASCII [ESC] [SUB] W <br />
Hexadecimal 1BH 1AH 57H <br />
Decimal <br />
IPCL<br />
None<br />
EPOS<br />
[ESC] W<br />
Description This command is similar Set Print Area in Page Mode command<br />
above, however it will force the complete page to be printer rather than only<br />
what is used. It will define sub pages, however is intended to set the initial<br />
page size.<br />
Where:<br />
the x direction offset Min 0<br />
the y direction offset Min 0<br />
the width in dots Max(576)<br />
< H L > the height in dots Max(3000)<br />
This command should always be sent before or immediately after select page<br />
mode command and will define the initial page size. This command differs<br />
from the Set Print Area in Page Mode command in that it does not allow the<br />
page to be shortened. The complete page is printed even if it is not used.<br />
Cut to print offset<br />
0.7 in or 18mm<br />
Previous cut<br />
edge<br />
Start of page<br />
definition<br />
Max width is 576 dots<br />
End of page<br />
definition<br />
Bottom most print data<br />
Unused page area<br />
is not printed<br />
Cut point after<br />
bottom of page<br />
definition<br />
Figure 21 Defined Page mode printed area<br />
<strong>43</strong>-06938 Rev L Page 107
Control Codes<br />
Function Set Print Area in Page Mode Legacy Support Command<br />
ASCII [ESC] u < H L ><br />
Hexadecimal 1BH 75H < H L ><br />
Decimal < H L ><br />
IPCL<br />
&%PS<br />
EPOS<br />
[ESC] W<br />
Description This command Sets the position and size of the printing initial<br />
area in page mode and sub pages.<br />
Where:<br />
the y direction offset Default(0)<br />
the width in dots Default(576)<br />
< H L > the height in dots Default(3000)<br />
This command should always be sent before or immediately after page mode<br />
is entered to define the initial page size.<br />
Once in page mode (after the [ESC]t command) the command can be sent<br />
multiple times so that several different print areas, aligned in different print<br />
directions, can be developed in the printer’s page buffer before being printed<br />
using the Print Page Mode commands<br />
(FF or ESC FF).<br />
The starting position of the print area is the upper left of the area to be printed.<br />
The offset is in the x direction and is O dots. The length of the area to be<br />
printed in the y direction is set to H dots. The length of the area to be printed in<br />
the x direction is set to W dots. (Note that the Y offset is always 0)<br />
The set print area command may be invoked multiple times while in page<br />
mode. The first invocation specifies the final page height. Following<br />
invocations will define smaller windows within the initially defined page. If the<br />
Set page size command is not used, the page size will default to the maximum<br />
size.<br />
The orientation of the set print area command is always based on 0 degrees<br />
regardless of the current orientation setting. This includes if the command is<br />
sent before the start page mode command, after the start page mode<br />
command, or as a sub-page.<br />
Note: The maximum printable area in the x direction is<br />
576/203 or 3.15 inches.<br />
Note: The maximum printable area in the y direction is<br />
2999/203 or 14.78 inches.<br />
Note: The printed page length will only include what<br />
actually has print data.<br />
Page 108<br />
<strong>43</strong>-06938 Rev L
Control Codes<br />
Function Set Page Mode Entry Position<br />
ASCII [ESC] [SUB] A <br />
Hexadecimal 1BH 1AH 41H<br />
Decimal <br />
IPCL<br />
&%PY<br />
EPOS<br />
[ESC] W<br />
Description This command sets the horizontal and vertical entry position to<br />
anywhere on the page. It is only valid in page mode. If the value specified is<br />
beyond the page boundary, the command is ignored. (X and Y refers to the<br />
current active orientation specified by the [ESC]t command, and is not same<br />
as the page definition of X and Y.)<br />
The X and Y positions are in dots.<br />
Y = Y h * 256 + Y l dots from the top<br />
X = X h * 256 + X l dots from the left<br />
Note: You can also use the [ESC]J, [ESC]M. [ESC]d and [ESC]e<br />
commands to position the print on the page.<br />
Function Set Page Mode Entry Position Relative<br />
ASCII [ESC] [SUB] R <br />
Hexadecimal 1BH 1AH 52H <br />
Decimal <br />
IPCL<br />
None<br />
EPOS<br />
[ESC] W<br />
Description This command sets the horizontal and vertical entry position to<br />
anywhere on the page. It is only valid in page mode. If the value specified is<br />
beyond the page boundary, the command is ignored. (X and Y refers to the<br />
current active orientation specified by the [ESC]t command, and is not same<br />
as the page definition of X and Y.)<br />
The X and Y positions are in dots.<br />
Y = Y h * 256 + Y l dots from the current Y<br />
X = X h * 256 + X l dots from the current X<br />
Note: You can also use the [ESC]J, [ESC]M. [ESC]d and [ESC]e<br />
commands to position the print on the page.<br />
<strong>43</strong>-06938 Rev L Page 109
Control Codes<br />
Function Set Page Mode Entry Position Legacy Support<br />
ASCII<br />
[ESC] o <br />
Hexadecimal 1BH 6FH <br />
Decimal <br />
IPCL<br />
None<br />
EPOS<br />
[ESC] W<br />
Description This command sets the horizontal and vertical entry position to<br />
anywhere on the page. It is only valid in page mode. If the value specified is<br />
beyond the page boundary, the command is ignored. (X and Y refers to the<br />
current active orientation specified by the [ESC]t command, and is not same<br />
as the page definition of X and Y.)<br />
The X and Y positions are in dots.<br />
Y = Y h * 256 + Y l dots from the top<br />
X = X h * 256 + X l dots from the left<br />
The F parameter is a flag that specifies if this command is an absolute<br />
position command or relative to the current position. If its value is the<br />
command is processed as a relative position command, and if its value is <br />
the command is interpreted as an absolute position command.<br />
Note: You can also use the [ESC]J, [ESC]M. [ESC]d and [ESC]e<br />
commands to position the print on the page.<br />
Function Exit Page Mode<br />
ASCII [FF] or [ESC][SUB] P<br />
Hexadecimal 0CH or 1BH 1AH 50H<br />
Decimal or <br />
IPCL<br />
&%FF<br />
EPOS<br />
[FF]<br />
Description This command exits page mode definition and starts the print<br />
process. If the printer is not in page mode, this command is treated as a<br />
normal form feed command.<br />
Note: When page mode finishes printing, the left and right margins are<br />
restored to the values before the select page mode command. All other<br />
format changes are preserved.<br />
Page 110<br />
<strong>43</strong>-06938 Rev L
Control Codes<br />
Graphic Mode<br />
The Epic <strong>43</strong>0 TM Printer conforms to the basic definition of IBM all-pointsaddressable<br />
(APA) graphic commands. It is not designed to print large<br />
quantities of graphical data. The printer only prints graphics that are 2.5<br />
inches wide. At this time, there is no graphics mode for Epson emulation.<br />
The Epic <strong>43</strong>0 TM Printer always prints in one of the native resolutions of 203 x<br />
203 dpi. To provide compatibility with the standard IBM APA resolutions, the<br />
printer internally modifies the graphics to print as expected. The printer<br />
converts the vertical resolution by altering the [ESC] J command (which is<br />
typically used for vertical spacing) and adjusting it so that horizontal passes<br />
touch as expected. The requested horizontal resolution is converted by data<br />
scaling. Because the vertical dpi of the printer is always greater, the resulting<br />
APA graphics printed on the Epic <strong>43</strong>0 TM Printer may be slightly smaller or<br />
larger than the same graphic printed on an impact printer. All of this is done<br />
transparently to the application; however, loss of resolution may result in some<br />
modes. If desired the [ESC] * command can be used to select the native<br />
resolution.<br />
Note 1: If the Epic <strong>43</strong>0 TM Printer is used with programs that convert text to<br />
graphics, the printer is slower than if the printer is sent ASCII text. The Epic<br />
<strong>43</strong>0 TM Printer is supported by a Windows’ print driver that allows applications<br />
to select internal supported fonts.<br />
Note 2: Generally, the horizontal graphic commands provide faster print<br />
than the APA graphic commands.<br />
Standard APA Graphics<br />
[ESC] K<br />
Print single-density graphics (60h x 72v dpi)<br />
ASCII [ESC] K <br />
Hexadecimal 1BH 4BH <br />
Decimal <br />
IPCL<br />
none<br />
Description The [ESC] K command prints + 256 * bytes<br />
of single-density graphics (60 dpi).<br />
[ESC] L<br />
Print half-speed double-density graphics (120h x 72v dpi)<br />
ASCII [ESC] L <br />
Hexadecimal 1BH 4CH <br />
Decimal <br />
IPCL<br />
none<br />
Description The [ESC] L command prints + 256 * bytes of<br />
double-density graphics (120 dpi) at half speed, allowing full and half dots to<br />
be printed.<br />
<strong>43</strong>-06938 Rev L Page 111
Control Codes<br />
[ESC] Y<br />
Print full-speed double-density graphics (120h x 72v dpi)<br />
ASCII [ESC] Y <br />
Hexadecimal 1BH 59H <br />
Decimal <br />
IPCL<br />
none<br />
Description The [ESC] Y command prints + 256 * bytes<br />
of double-density graphics (120 dpi) at full speed with no consecutive dots.<br />
(The mode is generally used to print 120h by 144v dpi resolutions in two<br />
passes).<br />
[ESC] Z<br />
Print quad-density graphics (240h x 72v dpi)<br />
ASCII [ESC] Z <br />
Hexadecimal 1BH 5AH <br />
Decimal <br />
IPCL<br />
none<br />
Description The [ESC] Z command prints + 256 * bytes of<br />
quad-density graphics (240 dpi) at half speed with no consecutive dots. (The<br />
mode is generally used to print 240h by 144v dpi resolutions in two passes).<br />
Extended APA Graphics<br />
[ESC] *<br />
Print graphics in mode (60h/ 120h/ 240h x 72v dpi)<br />
ASCII [ESC] * <br />
Hexadecimal 1BH 2AH <br />
Decimal <br />
IPCL<br />
none<br />
Description The [ESC] * command selects the graphic<br />
resolution graphic modes as specified by .<br />
Where <br />
Mode Resolution<br />
0 60 dpi<br />
1 120 dpi<br />
2 120 dpi<br />
3 240 dpi<br />
4 80 dpi<br />
5 72 dpi<br />
6 90 dpi<br />
Mode Resolution<br />
7 144 dpi<br />
8,9 Not supported<br />
10 102 x 102 dpi<br />
11 203 x 102 dpi<br />
12 102 x 203 dpi<br />
13 203 x 203 dpi<br />
15,16 Not supported<br />
[ESC] ?<br />
ASCII<br />
Hexadecimal<br />
Decimal<br />
IPCL<br />
Reassign graphic mode<br />
[ESC] ? <br />
1BH 3FH <br />
<br />
none<br />
Page 112<br />
<strong>43</strong>-06938 Rev L
Control Codes<br />
Description The [ESC] ? command reassigns graphic resolution <br />
to resolution . Possible values for are K, L, Y, or Z referent to the<br />
[ESC] K, [ESC] L, [ESC] Y, and [ESC] Z APA graphics commands.<br />
Resolutions, , are zero to sixteen as follows:<br />
Where <br />
Mode Resolution<br />
0 60 dpi<br />
1 120 dpi<br />
2 120 dpi<br />
3 240 dpi<br />
4 80 dpi<br />
5 72 dpi<br />
6 90 dpi<br />
Mode Resolution<br />
7 144 dpi<br />
8,9 Not supported<br />
10 102 x 102 dpi<br />
11 203 x 102 dpi<br />
12 102 x 203 dpi<br />
13 203 x 203 dpi<br />
15,16 Not supported<br />
Note: Modes 11 through 13 are designed to support horizontal graphics and<br />
are not intended for APA graphics.<br />
[ESC] U Select unidirectional print<br />
ASCII [ESC] U <br />
Hexadecimal 1BH 55H 01H<br />
Decimal <br />
IPCL<br />
&%GU<br />
EPOS ESC] U <br />
Description The [ESC] U is a legacy command used in impact printers to<br />
provide better graphics. It forces the printer to print all data in unidirectional<br />
print mode to improve line to line registration for graphical data. This<br />
command has no effect in this printer.<br />
[ESC] U Select bidirectional print<br />
ASCII [ESC] U <br />
Hexadecimal 1BH 55H 00H<br />
Decimal <br />
IPCL<br />
&%GB<br />
EPOS [ESC] U <br />
Description The [ESC] U command prints all data in bi-directional, logicseeking<br />
print mode. This command has no effect in this printer.<br />
<strong>43</strong>-06938 Rev L Page 113
Control Codes<br />
Horizontal Color Graphics<br />
The Epic <strong>43</strong>0 TM Printer supports monochrome and color graphics sent as<br />
horizontal scan lines. Individual scan lines of graphic data are sent to the<br />
printer one line at a time. The Epic <strong>43</strong>0 TM Printer supports only two color<br />
printing, however, the horizontal graphic command interface gives full color<br />
support for printer graphics. Full color support is provided to establish a full<br />
color standard for future printers. Color data is sent in one of three color<br />
planes. Typically, a red plane or scan line is sent, then green and blue. The<br />
sequence of lines defines one row of dots that is printed on the paper.<br />
The horizontal graphic commands do not include resolution information.<br />
Therefore, atleast once before sending graphics data, set the graphics<br />
resolution by sending the [ESC] * command with a zero length (no data). The<br />
graphic resolution sets the internal graphic mode of the printer. The printer<br />
stays in graphic mode until it is changed by another command. Note that the<br />
bar code generation and other graphic commands change graphics mode.<br />
The format of the horizontal graphic command follows.<br />
[ESC] h<br />
Process horizontal graphics data<br />
ASCII<br />
[ESC] h <br />
Hexadecimal 1BH 68H<br />
Decimal <br />
IPCL<br />
None<br />
EPOS<br />
None<br />
Description The [ESC] h command<br />
processes horizontal graphic data, where is a byte that specifies the<br />
color of the data being sent.<br />
= 0 Use Previously Selected Color<br />
1 Red<br />
2 Green<br />
4 Blue<br />
= byte specifying the length of the data including the format byte,<br />
ranging from 0 to 254 (255 is reserved for future use.)<br />
= byte specifying the format of the graphics data.<br />
0 for raw data<br />
1 for bit wise RLE compression<br />
8 for byte wise RLE compression<br />
254 for difference compression<br />
255 for same as previous scan line data<br />
=<br />
the data bytes that define the graphics to be printed.<br />
Page 114<br />
<strong>43</strong>-06938 Rev L
Control Codes<br />
Note 1: Red, green, and blue pixels set to one at the same location result in a<br />
white dot, while red, green, and blue pixels set to zero form a black dot. For<br />
black print, one represents a black dot and zero represents a white dot.<br />
Note 2: More than one color may be set at a time – for example, setting the<br />
color to six would set green and blue simultaneously.<br />
[ESC] *<br />
Set horizontal graphic mode<br />
ASCII [ESC] * <br />
Hexadecimal 1BH 2AH <br />
Decimal <br />
IPCL<br />
none<br />
Description The [ESC] * command selects one of the three<br />
graphic modes specified by . The two bytes after the mode must be zero.<br />
Where 0,2,3,4,5,6,7 Standard Graphic Modes<br />
(See ESC * command documentation in previous section.)<br />
Mode Resolution<br />
0,2,3,4,5,6,7 Standard Graphic Modes (See ESC *<br />
command documentation in previous section.)<br />
8,9 Not supported<br />
10 102 x 102 dpi<br />
11 203 x 102 dpi<br />
12 102 x 203 dpi<br />
13 203 x 203 dpi<br />
15,16 Not supported<br />
Note 1: Only modes 10 thorough 13 should be selected for horizontal<br />
graphics.<br />
Example Command Comment<br />
[ESC] * <br />
Set resolution to 102x102 dpi.<br />
[ESC] h Send 8-bytes red pixels.<br />
[ESC] h Send 8-bytes green pixels.<br />
[ESC] h Send 8-bytes blue pixels.<br />
LF Send line feed to force print of any buffered data not yet printed.<br />
<strong>43</strong>-06938 Rev L Page 115
Control Codes<br />
Graphics Compression<br />
Although the printer compression algorithms are documented, it is<br />
recommended that our Windows printer driver be used to generate a graphic<br />
image. Our Windows’ printer driver selects the best compression method to<br />
use on a scan line by scan line basis. The print driver can be directed to print<br />
to file, creating a .prn file. When creating a .prn file, it is recommended that the<br />
Start/End Doc settings be cleared in the Start/End Doc tab of the printer<br />
properties page. After the .prn file is created, it can be read and sent to the<br />
printer by the host application.<br />
Bit wise RLE. In bit wise RLE compression, the Most Significant Bit (MSB)<br />
compression of each data byte denotes if the compressed data represents one<br />
or zero bits. Bits zero through six indicate how many bits are represented as a<br />
one or zero. A 34 Hex (34H) represents 34H bits set to zero. A 97H<br />
represents 17H bits set to one.<br />
[ESC] h <br />
Byte wise RLE. In byte wise RLE compression, data is represented in byte<br />
Compression pairs. The first byte is a count, and the second is the graphics<br />
data. The graphics data byte is repeated the number of times represented by<br />
the count byte.<br />
[ESC] h <br />
Where means repeat ffH nine times and means<br />
repeat 55H two times.<br />
Difference Compression. In difference compression, data is represented in<br />
byte pairs. In compression, the first byte is an index into the byte stream, as it<br />
would exist if sent in an uncompressed format, while the second byte is the<br />
data that is different in the new scan line data; in other words, “The scan line is<br />
the same as the previous except for the byte at a specific position.”<br />
[ESC] h <br />
Where means use the previously transmitted scan line data but<br />
change byte 3 to a d5H and change byte 11 (0bH) to a 51H.<br />
Same-as-previous Compression. In same-as-previous compression, the<br />
command does not contain any graphics data. The command specifies that<br />
the printer is to use the previous scan line data for the current scan line.<br />
[ESC] h .<br />
Page 116<br />
<strong>43</strong>-06938 Rev L
Control Codes<br />
Simple Raster Graphics<br />
Simple Raster Graphics prints an horizontal raster of graphics data one or<br />
multiple times. Horizontal offset and number of data bytes are variable and<br />
specified by parameters. This is a legacy support command and intended to<br />
be replaced by horizontal graphics commands. This command does not<br />
support compression or color graphics.<br />
[ESC] .<br />
Simple raster graphic mode<br />
ASCII [ESC] . m n rL rH d1...dn * <br />
Hexadecimal 1BH 2EH m n rL rH d1…dn<br />
Decimal m n rL rH d1…dn<br />
IPCL<br />
none<br />
Description The [ESC]. command is a simple method of printing raster<br />
graphics, however the format does not support compression or color.<br />
Where:<br />
m: horizontal offset from left margin = 8 x m dots<br />
n: number of data bytes that compose the raster<br />
r : number of times the raster is to be printed = 256x rH + rL<br />
d1…dn: data bytes<br />
Range: 0
Control Codes<br />
User Store (Graphic Save and Macros)<br />
The Epic <strong>43</strong>0 TM Printer maintains about 2.5 Megabytes of flash memory to<br />
save user information. The information can be either macros or graphic<br />
images.<br />
To allow the host application to maintain these groups of data, a series of user<br />
store maintenance commands are available. As referenced earlier in this<br />
manual, the user can define a limited number of custom characters and define<br />
a macro. These character/macro definitions can also be saved in user store.<br />
However, only one character definition and one macro can be active at any<br />
time. One macro definition can be flagged to load and run at startup. If a flag is<br />
set, the printer will automatically process the macro at initialization.<br />
Programming Considerations<br />
The flash (nonvolatile) memory has a limited number of write cycle operations.<br />
Consequently, the number of saves should be limited. The buffer should not<br />
be saved on a transaction by transaction basis, but rather a maximum of once<br />
per day.<br />
The buffer is initially about 16K 6 bytes long. All commands 7 and print data are<br />
placed in the buffer and must be included in the size limits. The printer does<br />
not indicate when the buffer is full. The application must make sure that the<br />
buffer is not overfilled. The printer simply stops saving information when it is<br />
full. As the buffer fills, the input data is printed normally. The effect of the<br />
macro start command is to clear the buffer and to start to save the input data.<br />
The macro stop command stops saving data and initializes internal pointers<br />
for the next print. To store the data in the nonvolatile flash, it must be named<br />
and saved by one of the user-store save commands.<br />
When the macro buffer is inserted into the data stream, configuration<br />
commands (like font or pitch changes) remain in effect after the macro is<br />
processed. Illegal commands are placed in the buffer and take up space.<br />
Horizontal graphics should be sent to the printer compressed. If the data is not<br />
compressed, it is saved in the macro buffer. If the buffer is saved into the userstore<br />
nonvolatile flash, there must be enough room in the user store for all of<br />
the data. As user-store space is used, the macro buffer will be larger than the<br />
available space in user store. Only the used space is saved, but it is possible<br />
to define a macro that does not fit in the remaining user-store space.<br />
Defining Macros<br />
Macros can be defined two ways. The first is by using the begin and end<br />
named macro commands. These commands start the recording process and<br />
6 The actual buffer is smaller because of the overhead.<br />
7 IPCL commands are converted by the printer into an equivalent [ESC] code and then<br />
placed in the save buffer. The equivalent [ESC] code should be used to calculate the<br />
size of the save buffer data.<br />
Page 118<br />
<strong>43</strong>-06938 Rev L
Control Codes<br />
automatically save the macro when it is complete. The macro data is not<br />
processed, as it is sent to the printer.<br />
The second saves the received data to a RAM buffer and then saves the<br />
buffer by command. In this case data is actually processed as it is received.<br />
Begin/End Macro Without proceeding data<br />
Function Begin named macro record<br />
ASCII [ESC] [US] b <br />
Then send the data to be recorded. The printer does not process the data.<br />
The terminating may be replaced with an & or redefined. See [ESC]<br />
[EM]T or &%UT on page 125.<br />
Function End name macro record<br />
ASCII [ESC] [US] e <br />
Begin/End Macro While proceeding data<br />
The second way to define macros is to use [ESC] g commands to define the<br />
macro, and then the save macro data command to save the data. The<br />
terminating may be replaced with an & or redefined. See [ESC] [EM]T<br />
or &%UT on page 125.<br />
Function Start macro record<br />
ASCII<br />
[ESC] g Then send the data to be recorded. (The data<br />
is processed and printed).<br />
Function<br />
ASCII<br />
Stop macro record<br />
[ESC] g Then save the macro.<br />
Function Save macro data<br />
ASCII<br />
[ESC] [US] m <br />
Saving User-defined Characters. To save user-defined characters, first define<br />
the character set.<br />
<strong>43</strong>-06938 Rev L Page 119
Control Codes<br />
User Store Commands<br />
Function Load item from user store<br />
ASCII [ESC] [US] l <br />
If the item referenced is a user-defined character set, it is loaded into the<br />
current definition. If it is a macro, it is loaded into the macro buffer. It is not<br />
processed or printed.<br />
To help maintain the user-store area, the following commands can be used.<br />
The terminating may be replaced with an & or redefined. See [ESC]<br />
[EM]T or &%UT on page 125.<br />
Function Flag as a start-up macro<br />
ASCII [ESC] [US] s <br />
The [ESC] [US] s command flags the referenced item to be<br />
processed at startup. No more than one user character definition and user<br />
data item may be flagged.<br />
The terminating may be replaced with an & or redefined. See [ESC]<br />
[EM]T or &%UT on page 125.<br />
Function Remove item from user store<br />
ASCII [ESC] [US] e <br />
The [ESC] [US] e command removes an item from user store<br />
and frees up its space. The terminating may be replaced with an & or<br />
redefined. See [ESC] [EM]T or &%UT on page 125.<br />
Function Flush information from user store<br />
ASCII [ESC] [US] f ALL Base User Store<br />
or [ESC] [US] f EXT Extended User Store.<br />
Description The [ESC] [US] f ALL command clears all of the information to<br />
the user store and frees the data space. The [ESC] [US] f EXT command<br />
clears all of the information in the extended the user store.<br />
The terminating may be replaced with an & or redefined. See [ESC]<br />
[EM]T or &%UT on page 125.<br />
Function Report on user store<br />
ASCII ESC] [US] q <br />
Description The [ESC] [US] q prints or returns information about the<br />
contents of and available space in user store.<br />
The terminating may be replaced with an & or redefined. See [ESC]<br />
[EM]T or &%UT on page 125.<br />
Note: A configuration option is available that locks the user store data. The<br />
configuration option prevents the occurrence of new user store data<br />
operation until the lock is manually reset and accidental deletion of the saved<br />
information. The user-defined character buffer and/or user data buffer may<br />
be redefined and used but cannot be stored.<br />
Page 120<br />
<strong>43</strong>-06938 Rev L
Control Codes<br />
Function Begin named macro record<br />
ASCII [ESC] [US] b <br />
Hexadecimal 1BH 1FH 62H<br />
Decimal <br />
IPCL &%UB <br />
EPOS<br />
none<br />
Description The [ESC] [US] b command erases the current<br />
macro, initializes the macro buffer structure, and redirects the following data to<br />
the macro buffer. It uses the field as a reference. If the name<br />
already exists in the flash user store, the command is ignored. The command<br />
must be followed by the “End name macro record” command with the same<br />
name. If the data that follows is larger than the macro buffer (about 16K), the<br />
macro definition is terminated without saving any data.<br />
The terminating may be replaced with an & or redefined. See [ESC]<br />
[EM]T or &%UT on page 125.<br />
NOTE: User defined macros must use a .mac extension.<br />
Function End named macro record<br />
ASCII [ESC] [US] e <br />
Hexadecimal 1BH 1FH 65H<br />
Decimal <br />
IPCL &%UG <br />
EPOS<br />
none<br />
Description The [ESC] [US] e command ends the macro record<br />
operation and saves the macro to flash. It uses the field to verify<br />
the command end and must match the “Begin named macro record”<br />
command. If the name already exists in the flash user store or the macro<br />
memory is exceeded, the command is valid, and the field prints. If<br />
there is not enough room in the flash user store for the macro, the save is not<br />
performed, but the macro buffer is valid.<br />
The terminating may be replaced with an & or redefined. See [ESC]<br />
[EM]T or &%UT on page 125.<br />
NOTE: User defined macros must use a .mac extension.<br />
Function Save macro data in user store<br />
ASCII [ESC] [US] m <br />
Hexadecimal 1BH 1FH 6DH<br />
Decimal <br />
IPCL &%UM <br />
EPOS<br />
[GS] -… is from one to 15 characters and<br />
must be null terminated.<br />
Description The [ESC] [US] m command saves the current<br />
macro buffer structure into the flash user-store area. It uses the <br />
<strong>43</strong>-06938 Rev L Page 121
Control Codes<br />
field as a reference name. If the name already exists in the flash user store,<br />
the command does not store the data.<br />
The terminating may be replaced with an & or redefined. See [ESC]<br />
[EM]T or &%UT on page 125.<br />
NOTE: User defined macros must use a .mac extension.<br />
Function Load item from user store<br />
ASCII [ESC] [US] l <br />
Hexadecimal 1BH 1FH 6CH<br />
Decimal <br />
IPCL &%UL <br />
EPOS<br />
[GS] 0 is from one to 15 characters and must<br />
be null terminated.<br />
Description The [ESC] [US] l command loads the referenced<br />
item into the appropriate structure. If the item referenced is a user-defined<br />
character set, it is loaded into the current user-character definition, which does<br />
not affect the active state of user-defined characters. If it is a macro, it is<br />
loaded into the macro buffer, but it is not inserted into the data stream. [ESC]<br />
g inserts the macro buffer into the data stream. If the named item does<br />
not exist, the command does nothing.<br />
The terminating may be replaced with an & or redefined. See [ESC]<br />
[EM]T or &%UT>n> on page 125.<br />
NOTE: User defined macros must use a .mac extension.<br />
Function Run macro data from user store<br />
ASCII [ESC] [US] r <br />
Hexadecimal 1BH 1FH 72H<br />
Decimal <br />
IPCL &%UR <br />
EPOS<br />
[GS] 0 is from one to 15 characters and must<br />
be null terminated.<br />
Description The [ESC] [US] r command loads the referenced<br />
macro into the macro buffer. The macro buffer is then inserted into the data<br />
stream. If the named item does not exist or is not a macro, nothing happens.<br />
The terminating may be replaced with an & or redefined. See [ESC]<br />
[EM]T or &%UT on page 125.<br />
NOTE: User defined macros must use a .mac extension.<br />
Function Flag item as a start-up macro<br />
ASCII [ESC] [US] s <br />
Hexadecimal 1BH 1FH 73H<br />
Decimal <br />
IPCL &%US <br />
Page 122<br />
<strong>43</strong>-06938 Rev L
Control Codes<br />
EPOS<br />
[GS] 0 is from one to 15 characters and must<br />
be null terminated.<br />
Description The [ESC] [US] s command flags the referenced<br />
item to be processed at startup. Only one user character definition and one<br />
macro may be flagged to run at startup.<br />
The terminating may be replaced with an & or redefined. See [ESC]<br />
[EM]T or &%UT on page125<br />
Note: If a character definition is loaded at startup, it is automatically made<br />
active.<br />
NOTE: User defined macros must use a .mac extension.<br />
Function Delete item from user store<br />
ASCII [ESC] [US] d <br />
Hexadecimal 1BH 1FH 64H<br />
Decimal <br />
IPCL &%UD <br />
EPOS<br />
[GS] 1 is from one to 15 characters and<br />
must be null terminated.<br />
Description The [ESC] [US] d command removes an item from<br />
user store and frees up space. If the item does not exist, the command does<br />
nothing.<br />
The terminating may be replaced with an & or redefined. See [ESC]<br />
[EM]T or &%UT>n> on page 125.<br />
NOTE: User defined macros must use a .mac extension.<br />
Function Flush information from user store<br />
ASCII [ESC] [US] f ALL User Store.<br />
Hexadecimal 1BH 1FH 66H 00H<br />
Decimal <br />
IPCL<br />
&%UF<br />
EPOS [GS] 5<br />
Description The [ESC] [US] f ALL command clears all entries in user store<br />
and frees the data space. It must have the name, “ALL” (in uppercase)<br />
attached.<br />
The terminating may be replaced with an & or redefined. See [ESC]<br />
[EM]T or &%UT>n> on page 125.<br />
Function Report on user store<br />
ASCII [ESC] [US] q Print a user store report<br />
Or [ESC] [US] ? Return a formatted user store<br />
report<br />
Hexadecimal 1BH 1FH 71H<br />
Decimal <br />
IPCL &%UQ <br />
<strong>43</strong>-06938 Rev L Page 123
Control Codes<br />
EPOS [GS] 3<br />
Description The [ESC] [US] q command prints a status report.<br />
The file name is ignored and may be omitted. The NUL must be present. The<br />
intention of the command is to aid in macro development.<br />
The terminating may be replaced with an & or redefined. See [ESC]<br />
[EM]T or &%UT on page 125.<br />
Note: The report is also printed as part of the configuration report.<br />
Page 124<br />
<strong>43</strong>-06938 Rev L
Control Codes<br />
Function Redefine User Store Termination Character<br />
ASCII<br />
[ESC] [EM] T <br />
Hexadecimal 1BH 19H 54H <br />
Decimal <br />
IPCL<br />
&%UT <br />
EPOS<br />
None<br />
Description This command allows the terminator used to signal the end of the<br />
name field in User Store commands to be modified. The value of is used<br />
(in addition to the ) for the terminator. The value of n may be from 0 to<br />
255.<br />
The default value for the second terminator is &. If this command redefines<br />
the terminator to something other than &, the & will no longer function.<br />
Example If &%UT% were sent to the printer, the user store command to run<br />
macro “Demo” would be &%URDemo%.<br />
Legacy User Macros<br />
The following commands are provided for legacy support. They are not<br />
intended for new applications.<br />
[ESC] g <br />
Process user macro<br />
ASCII [ESC] g <br />
Hexadecimal 1BH 67H 00H<br />
Decimal <br />
IPCL<br />
&%GP<br />
EPOS [ESC] g <br />
Description The [ESC] g command prints the user-store data buffer.<br />
[ESC] g <br />
Start macro record<br />
ASCII [ESC] g <br />
Hexadecimal 1BH 67H 01H<br />
Decimal <br />
IPCL<br />
&%GS<br />
EPOS ESC] g <br />
Description The [ESC] g command clears the user-store data buffer and<br />
begins recording data. The next 2000 bytes (including characters and<br />
commands) are recorded.<br />
<strong>43</strong>-06938 Rev L Page 125
Control Codes<br />
[ESC] g <br />
Stop macro record<br />
ASCII [ESC] g <br />
Hexadecimal 1BH 67H 02H<br />
Decimal <br />
IPCL<br />
&%GE<br />
EPOS [ESC] g <br />
Description The [ESC] g command stops recording user-store data<br />
information. The buffer is not saved into the nonvolatile memory.<br />
[ESC] g <br />
Stop macro record and save<br />
ASCII [ESC] g <br />
Hexadecimal 1BH 67H 03H<br />
Decimal <br />
IPCL<br />
&%GW<br />
EPOS [ESC] g <br />
Description The [ESC] g command stops recording graphic save<br />
information. The buffer is saved into the user-store nonvolatile memory under<br />
the name, “ESCg3_Save”<br />
Note: The [ESC] g command is supplied for compatibility with the Series<br />
80PLUS and 90PLUS printers.<br />
Page 126<br />
<strong>43</strong>-06938 Rev L
Control Codes<br />
Bar Codes<br />
The Epic <strong>43</strong>0 TM Printer supports the ability to print bar codes. The printer offers a<br />
number of formats as defined below. The host does not need to form the graphic<br />
image for these bar codes. The host need only send the printer the information to be<br />
bar coded and a graphic is generated by the printer. In some cases, a check<br />
character is required by the format. In most cases, the printer generates the check<br />
character and inserts it correctly in the format. The printer uses internal graphic<br />
modes to form bar code images, and the images are adjusted for ink bleed. In<br />
general, the bar codes generated by sending graphic data to the printer are not as<br />
readable as the bar codes the printer generates. Bar codes are printed at a 203 x 203<br />
resolution.<br />
Barcodes may be printed horizontally or vertically. When printed vertically the length<br />
of the barcode can be greater (i.e. more characters can be printed). You can not print<br />
human readable interpretation (HRI) characters in vertical mode. It is generally better<br />
to print vertical barcodes by printing horizontal barcodes in page mode rotated 90° or<br />
270°. You can then mix HRI and other text with the barcodes.<br />
Function Print bar code<br />
ASCII<br />
[ESC] b {information} [ETX]<br />
Hexadecimal 1BH 62H ... 03H<br />
Decimal ... <br />
IPCL &%25 ... [CR] Interleaved 2 of 5<br />
&%39 ... [CR] Code 39<br />
&%12 ... [CR] Code 128<br />
&%28 . Code 128 (allows a two character<br />
length, preceding the information)<br />
&%UP ... [CR]<br />
UPC A<br />
&%UE ... [CR]<br />
UPC E<br />
&%EA .. [CR]<br />
EAN-13<br />
&%E8 ... [CR]<br />
EAN-8<br />
&%93 .. [CR] Code 93<br />
&%CB .. [CR]<br />
Codabar<br />
EPOS<br />
[ESC] b or [GS] k <br />
Description The [ESC] b {information} [ETX] command prints information as a bar<br />
code. The bar code is centered on the print zone.<br />
Where n =<br />
0 Interleaved 2 of 5 Numeric (0-9) only; must be even number of digits<br />
1 Code 39 26 uppercase letters (A-Z); 10 digits (0-9)<br />
(See description for full 128 character set support)<br />
2 Code 128 (See description for character set selection)<br />
3 UPC A Numeric (0-9) only; 11 digits<br />
4 EAN-13 Numeric (0-9) only; 12 digits<br />
5 UPC E Numeric (0-9) only; 11 digits<br />
6 EAN-8 Numeric (0-9) only; 7 digits<br />
7 Code 93 26 letters; 10 digits (0-9); and 7 special characters<br />
8 Codabar 10 digits (0-9); 4 start/stop characters,<br />
A, B, C, and D; and 6 special characters.<br />
9 PDF-417 2D alpha Numeric (See notes below)<br />
12 EAN-14 Numeric (0-9) only 14 digits<br />
<strong>43</strong>-06938 Rev L Page 127
Control Codes<br />
Note: You may print barcodes in page mode. If you rotate these barcodes 90° or<br />
180° you can get significantly longer barcodes.<br />
Interleaved 2 of 5<br />
Interleaved 2 of 5 is a high-density, self-checking, continuous, numeric bar code. It is<br />
mainly used where fixed-length numeric fields are required. The data field must be an<br />
even number of characters. If an odd data field is sent to the Epic <strong>43</strong>0 TM printer, it will<br />
be zero padded. Due to space limitations, only 16 characters can be printed.<br />
Code 39<br />
Code 39 is an alphanumeric bar code. It is a discrete, self-checking, variable-length<br />
code. The printer prints the complete data field. The number of characters that can be<br />
printed depends on the bar width scaling. If the bar code scale is set to 2, 17<br />
characters may be printed per line. There are two modes of operation for the Code 39<br />
barcodes. The first is in a variable length format. In this mode all characters sent to<br />
the printer will be printed up to the termination character. Only 0-9, A-Z -, period, and<br />
space may be printed. $, %, +, and / Characters may be used as escape characters<br />
for full 128 character support. If illegal characters are passed to the printer, they are<br />
converted to legal codes. (For example, a would be converted to A).<br />
In full 128 character mode, the printer will encode the full 128 character set. In this<br />
mode, the first character received must be the length. IE. [ESC]k… where n<br />
specifies the number of characters to follow. The characters following n characters<br />
may be from 0 to 127. Values greater than 127 are converted to printable characters<br />
by removing the 8 th bit.<br />
Page 128<br />
<strong>43</strong>-06938 Rev L
Control Codes<br />
The following table specifies the Code 39 character set.<br />
ASCII Code<br />
NUL %U<br />
SOH $A<br />
STX $B<br />
ETH $C<br />
EOT $D<br />
ENQ $E<br />
ACK $F<br />
BEL $G<br />
BS $H<br />
HT $I<br />
LF $J<br />
VT $K<br />
FF $L<br />
CR $M<br />
SO $N<br />
SI $O<br />
DLE $P<br />
DC1 $Q<br />
DC2 $R<br />
DC3 $S<br />
DC4 $T<br />
NAK $U<br />
SYN $V<br />
ETB $W<br />
CAN $X<br />
EM $Y<br />
SUB $Z<br />
ESC %A<br />
FS %B<br />
GS %C<br />
RS %D<br />
US %E<br />
ASCII Code<br />
SP Space<br />
! /A<br />
“ /B<br />
# /C<br />
$ /D<br />
% /E<br />
& /F<br />
‘ /G<br />
( /H<br />
) /I<br />
* /J<br />
+ /K<br />
, /L<br />
- -<br />
. .<br />
/ /O<br />
0 0<br />
1 1<br />
2 2<br />
3 3<br />
4 4<br />
5 5<br />
6 6<br />
7 7<br />
8 8<br />
9 9<br />
: /Z<br />
; %F<br />
< %G<br />
= %H<br />
> %I<br />
? %J<br />
ASCII Code<br />
@ %V<br />
A A<br />
B B<br />
C C<br />
D D<br />
E E<br />
F F<br />
G G<br />
H H<br />
I I<br />
J J<br />
K K<br />
L L<br />
M M<br />
N N<br />
O O<br />
P P<br />
Q Q<br />
R R<br />
S S<br />
T T<br />
U U<br />
V V<br />
W W<br />
X X<br />
Y Y<br />
Z Z<br />
[ %K<br />
\ %L<br />
] %M<br />
^ %N<br />
_ %O<br />
ASCII Code<br />
` %W<br />
a +A<br />
b +B<br />
c +C<br />
d +D<br />
e +E<br />
f +F<br />
g +G<br />
h +H<br />
i +I<br />
j +J<br />
k +K<br />
l +L<br />
m +M<br />
n +N<br />
o +O<br />
p +P<br />
q +Q<br />
r +R<br />
s +S<br />
t +T<br />
u +U<br />
v +V<br />
w +W<br />
x +X<br />
y +Y<br />
z +Z<br />
{ %P<br />
| %Q<br />
} %R<br />
~ %S<br />
DEL %T<br />
Figure 22 Code 39 Full 128 Character Encoding<br />
Code 128<br />
Code 128 is an alphanumeric bar code. It is a high-density, variable-length,<br />
continuous code, which employs multiple element widths. Code 128 has three<br />
possible start codes. The start code defines the code set, Code A, B, or C that will be<br />
used to generate the barcode. The Epic <strong>43</strong>0 TM allows the code set to be specified, or<br />
it can be select by the printer based on the information in the data field.<br />
To specify code set:<br />
[ESC] b {information} [ETX]<br />
If the first character in the data field is a start code as shown in Figure 23<br />
below, the printer will print the complete data field from the selected set. Due to space<br />
limitations, only ten characters can be printed. The check digit is generated and<br />
printed by the printer. Characters are also specified as shown in Figure 23.<br />
To have the printer selected code set and automatically generate an optimal barcode,<br />
the value of Code should be the length.<br />
[ESC] b {information}<br />
<strong>43</strong>-06938 Rev L Page 129
Control Codes<br />
If the first character is from 1 to 31, the printer will automatically select Code<br />
A, B, or C depending on the data present. If the data is all numeric, the data can be<br />
printed as pairs. This effectively doubles the amount of data that can be printed. The<br />
check digit is generated and printed by the printer.<br />
Note: If the first character is greater than and not through , the<br />
printer will discard the first character and print the data as defined in Code A..<br />
Space is defined as a , which makes programming difficult and causes control<br />
character conflicts for the printer. To solve the problem, the Epic <strong>43</strong>0 TM Printer<br />
subtracts 32 from all characters that are to be included in the bar code. In the Code<br />
128 definition, an ‘A’ is ; however, the printer converts an ASCII ‘A’ () to a<br />
internally. This sets Code 128C and the start codes off by 32.<br />
Barcode 128 consists of 107 unique symbols. 101 of the symbols take on different<br />
meanings based on the start code or an embedded shift code sequence. Code stick A<br />
consists of alphanumeric characters and ASCII control codes (see the table below).<br />
Code stick B consists of Alpha numeric with lower case alpha, Code stick C consists<br />
of numeric pairs.<br />
In automatic mode, any ASCII data from 0 to 127 could be entered. Values less than<br />
32 will be encoded as Code stick A NUL- US, values from 96 through 127 will be<br />
encoded from Code stick B. Where ever possible numeric pairs will be encoded from<br />
Code stick C.<br />
In the past, FNC1, FNC2, FNC3, and FNC4 have not been accessible to the<br />
programmer. The EAN 128 barcode requires that FNC1 be made available. To<br />
provide EAN 128 compatibility, the acceptable character range has been expanded<br />
by 10 to include the ability to specify FNC1, FNC2, FNC3 and FNC4. In automatic<br />
mode, values of 130-132 will be accepted, however, the resulting barcode may be<br />
unreadable.<br />
128 Code Value in Decimal Value in Hex<br />
FNC3 128 80<br />
FNC2 129 81<br />
Not Valid 130 82<br />
131 83<br />
132 84<br />
FNC4 133 85<br />
FNC1 134 86<br />
Start A 135 87<br />
Start B 136 88<br />
Start C 137 89<br />
Figure 23 Expanded Function Coding<br />
Note: In automatic mode, FNC4 is always specified as 133 regardless of what code<br />
stick is currently active.<br />
In most cases, the <strong>TransAct</strong> ® supreme will generate the most compact barcode for<br />
you. However, if it is desirable to have complete control, the programmer should use<br />
manual mode.<br />
Page 130<br />
<strong>43</strong>-06938 Rev L
Control Codes<br />
Code 128 Encoding<br />
<strong>TransAct</strong> Manual<br />
Encoding<br />
Code Stick<br />
Code Decimal Hex<br />
Code<br />
A<br />
Code<br />
B<br />
Code<br />
C<br />
128<br />
Value<br />
Value Value<br />
Space Space 00 00 32 20<br />
! ! 01 01 33 21<br />
“ “ 02 02 34 22<br />
# # 03 03 35 23<br />
$ $ 04 04 36 24<br />
% % 05 05 37 25<br />
& & 06 06 38 26<br />
‘ ‘ 07 07 39 27<br />
( ( 08 08 40 28<br />
) ) 09 09 41 29<br />
* * 10 10 42 2A<br />
+ + 11 11 <strong>43</strong> 2B<br />
, , 12 12 44 2C<br />
- - 13 13 45 2D<br />
. . 14 14 46 2E<br />
/ / 15 15 47 2F<br />
0 0 16 16 48 30<br />
1 1 17 17 49 31<br />
2 2 18 18 50 32<br />
3 3 19 19 51 33<br />
4 4 20 20 52 34<br />
5 5 21 21 53 35<br />
6 6 22 22 54 36<br />
7 7 23 23 55 37<br />
8 8 24 24 56 38<br />
9 9 25 25 57 39<br />
: : 26 26 58 3A<br />
; ; 27 27 59 3B<br />
< < 28 28 60 3C<br />
= = 29 29 61 3D<br />
> > 30 30 62 3E<br />
? ? 31 31 63 3F<br />
@ @ 32 32 64 40<br />
A A 33 33 65 41<br />
B B 34 34 66 42<br />
C C 35 35 67 <strong>43</strong><br />
D D 36 36 68 44<br />
E E 37 37 69 45<br />
F F 38 38 70 46<br />
G G 39 39 71 47<br />
H H 40 40 72 48<br />
I I 41 41 73 49<br />
J J 42 42 74 4A<br />
K K <strong>43</strong> <strong>43</strong> 75 4B<br />
L L 44 44 76 4C<br />
M M 45 45 77 4D<br />
N N 46 46 78 4E<br />
O O 47 47 79 4F<br />
P P 48 48 80 50<br />
Q Q 49 49 81 51<br />
R R 50 50 82 52<br />
S S 51 51 83 53<br />
T T 52 52 84 54<br />
U U 53 53 85 55<br />
Code 128 Encoding<br />
<strong>TransAct</strong> Manual<br />
Encoding<br />
Code Stick<br />
Code Decimal Hex<br />
Code<br />
A<br />
Code<br />
B<br />
Code<br />
C<br />
128<br />
Value<br />
Value Value<br />
V V 54 54 86 56<br />
W W 55 55 87 57<br />
X X 56 56 88 58<br />
Y Y 57 57 89 59<br />
Z Z 58 58 90 5A<br />
[ [ 59 59 91 5B<br />
\ \ 60 60 92 5C<br />
] ] 61 61 93 5D<br />
^ ^ 62 62 94 5E<br />
_ _ 63 63 95 5F<br />
NUL ` 64 64 96 60<br />
SOH a 65 65 97 61<br />
STX b 66 66 98 62<br />
ETH c 67 67 99 63<br />
EOT d 68 68 100 64<br />
ENQ e 69 69 101 65<br />
ACK f 70 70 102 66<br />
BEL g 71 71 103 67<br />
BS h 72 72 104 68<br />
HT i 73 73 105 69<br />
LF j 74 74 106 6A<br />
VT k 75 75 107 6B<br />
FF l 76 76 108 6C<br />
CR m 77 77 109 6D<br />
SO n 78 78 110 6E<br />
SI o 79 79 111 6F<br />
DLE p 80 80 112 70<br />
DC1 q 81 81 113 71<br />
DC2 r 82 82 114 72<br />
DC3 s 83 83 115 73<br />
DC4 t 84 84 116 74<br />
NAK u 85 85 117 75<br />
SYN v 86 86 118 76<br />
ETB w 87 87 119 77<br />
CAN x 88 88 120 78<br />
EM y 89 89 121 79<br />
SUB z 90 90 122 7A<br />
ESC { 91 91 123 7B<br />
FS | 92 92 124 7C<br />
GS } 93 93 125 7D<br />
RS ~ 94 94 126 7E<br />
US DEL 95 95 127 7F<br />
FNC3 FNC3 96 96 128 80<br />
FNC2 FNC2 97 97 129 81<br />
Shift Shift 98 98 130 82<br />
Code Code 99 99 131 83<br />
C C<br />
Code FNC4 Code 100 132 84<br />
B<br />
B<br />
FNC4 Code Code 101 133 85<br />
A A<br />
FNC1 102 134 86<br />
Start Code A 103 135 87<br />
Start Code B 104 136 88<br />
Start Code C 105 137 89<br />
Stop - -<br />
Figure 24 Code 128 Encoding Values<br />
<strong>43</strong>-06938 Rev L Page 131
Control Codes<br />
UPC A<br />
UPC A is a fixed-length, numeric, continuous code that employs four element<br />
widths. The printer supports Universal Product Code Version A, E, EAN-8, and<br />
EAN-13. Version A encodes 11 digits. Typically, the UPC A format starts with<br />
a number system digit, five-digit manufacturer’s code, five-digit product code,<br />
and a check digit. The printer makes no assumptions about any of the codes<br />
except the check digit. The printer prints an UPC bar code with the 11 digits<br />
sent to it and generates the check digit. If fewer than 11 digits are sent, the<br />
remaining digits will be zeros. The printer prints an UPC that is about 130%<br />
the size of the UPC nominal standard, which provides optimal readability.<br />
UPC E<br />
UPC E is a zero suppression version of UPC. The printer requires that the first<br />
digit is zero for number system zero. If it is not zero, the bar code is not<br />
printed. The printer does the compression based on the compression rules for<br />
UPC E, prints an UPC bar code based on the 11 digits sent to it, and<br />
generates the check digit. If fewer than 11 digits are sent, the remaining digits<br />
will be zeros. The printer prints an UPC that is about 130% the size of the<br />
UPC nominal standard, which provides optimal readability.<br />
EAN-13<br />
EAN-13 is a fixed-length, numeric, continuous code that employs four element<br />
widths. The printer supports EAN-13, which is a superset of UPC that encodes<br />
12 digits. Typically, the format starts with a number set digit, which defines<br />
how the next six digits are encoded. The next five digits have fixed encoding.<br />
The last is a check digit. The printer prints an EAN-13 bar code with the 12<br />
digits sent to it and generates the check digit. If fewer than 12 digits are sent,<br />
the remaining digits will be zeros. The printer prints an EAN-13 bar code that<br />
is about 130% the size of the nominal standard, which provides optimal<br />
readability.<br />
EAN-8<br />
EAN-8 is a fixed-length, numeric, continuous code that employs four element<br />
widths. The printer supports EAN-8, which is a superset of UPC that encodes<br />
seven digits. The printer prints an EAN-8 bar code with the seven digits sent to<br />
it and generates the check digit. If fewer than seven digits are sent, the<br />
remaining digits will be zeros. The printer prints an EAN-8 bar code that is<br />
about 130% the size of the nominal standard, which provides optimal<br />
readability.<br />
EAN-14<br />
EAN-14 It is a high-density, fixed-length, numeric, continuous code, which<br />
employs multiple element widths. EAN-14, is a subset of Code 128 that<br />
encodes FNC1 and 14 digit pairs. If fewer than 14 digits are sent, leading<br />
zeros will be added to complete the code.<br />
Code 93<br />
Code 93 is a variable-length, alphanumeric bar code. The complete data field<br />
is printed by the printer. Due to space limitations, only 10 characters can be<br />
printed.<br />
Page 132<br />
<strong>43</strong>-06938 Rev L
Control Codes<br />
Codabar<br />
Codabar is a variable-length format, primarily used for numeric symbols. It<br />
offers 16 data characters, including the numeric digits zero through nine, and -<br />
, $, :, /, ., and +. Four unique start/stop characters, designated A, B, C, and D,<br />
are also available. Due to space limitations, only 12 characters can be printed.<br />
Note 1: A [CR] may also be used in place of the [ETX] to end the bar code<br />
data field.<br />
Note 2: Only information that is usable in a particular bar code will be printed.<br />
PDF 417<br />
PDF 417 is a two dimensional barcode that will encode the full ASCII<br />
character set. As it encodes the full set including control characters, the length<br />
of the following data must be provided to the printer. The form of the command<br />
is as follows:<br />
[ESC]b … <br />
Where the data length is (nH * 256) + nL. The length is limited to be from 1 to<br />
2048 characters.<br />
To control the formation of the barcode, the X and Y aspect ratios, rows and<br />
columns, and error correction levels can be altered.<br />
Function PDF 417 bar code control<br />
ASCII<br />
[ESC] [EM] E <br />
Hexadecimal 1BH 19H 45H <br />
Decimal <br />
IPCL<br />
None<br />
EPOS<br />
None<br />
Description This command alters the way PDF 417 barcodes are generated<br />
and printed.<br />
Where f = Feature to control and v = the value of the feature.<br />
f = C, <strong>43</strong>H, 67 Set encoding columns.<br />
v = 1-30, 0 sets to auto<br />
f = R, 52H, 82 Set encoding rows. v = 3-90, 0 sets to auto.<br />
f = X, 58H, 88 Set encoding X aspect. v = 2-6, 3 is default.<br />
f = Y, 59H, 89 Set encoding Y aspect. v = 2-32, 9 is default<br />
f = E, 45H, 69 Set error correction level.<br />
If v between 1 and 40 it is interpreted as a percentage of the data.<br />
If v is between 48 and 56 it is set to a specific level of 0 to 8.<br />
If v = 0, it will return it to the default setting of 10%.<br />
Typically the row and columns should be set to 0 so that auto encoding will be<br />
used. The X and Y aspect represent the number of dots horizontally and<br />
vertically to form the smallest image element. Values of 2 for each produce<br />
very small elements, and is probably too small unless good paper is used. The<br />
defaults are 3 by 9, which produce easily readable barcodes.<br />
<strong>43</strong>-06938 Rev L Page 133
Control Codes<br />
Error correcting levels are selected using one of two methods. The first is a<br />
fixed level.<br />
v Level Code Word<br />
48 Level 0 2<br />
49 Level 1 4<br />
50 Level 2 8<br />
51 Level 3 16<br />
52 Level 4 32<br />
53 Level 5 64<br />
54 Level 6 128<br />
55 Level 7 256<br />
56 Level 8 512<br />
The second way is to determine correction level based on the amount of data<br />
in the barcode. This is determined by calculating a correction ration based on<br />
the formula: Cf = (v * 0.1 * Len)<br />
Cf Level Code Word<br />
0-3 Level 1 4<br />
4-10 Level 2 8<br />
11-20 Level 3 16<br />
21-45 Level 4 32<br />
46-100 Level 5 64<br />
101-200 Level 6 128<br />
201-400 Level 7 256<br />
401 Up Level 8 512<br />
Function Set bar code height<br />
ASCII<br />
[ESC] [EM] B <br />
Hexadecimal 1BH 19H 42H <br />
Decimal <br />
IPCL<br />
&%BH <br />
EPOS<br />
[GS] h <br />
Description The [ESC] [EM] B command sets the bar code height where<br />
*24 is the number dots. The default is n = 4, and results in a barcode that<br />
is about 0.47 inches high.<br />
Page 134<br />
<strong>43</strong>-06938 Rev L
Control Codes<br />
Function Set bar code width<br />
ASCII<br />
[ESC] [EM] W <br />
Hexadecimal 1BH 19H 57H <br />
Decimal <br />
IPCL<br />
&%BW <br />
EPOS<br />
[GS] w <br />
Description The [ESC] [EM] w command sets the minimum bar width.<br />
The value may be between 1 and 8. The default is 3.<br />
Note: A value of 1 may result in barcodes that are unreadable with some<br />
readers.<br />
Function Set bar code justification, human readable interpretation (HRI)<br />
character print mode, and print direction<br />
ASCII<br />
[ESC] [EM] J <br />
Hexadecimal 1BH 19H 4AH <br />
Decimal <br />
IPCL &%BJ <br />
EPOS<br />
none<br />
The power on default is center justified with HRI characters not printed.<br />
Description The [ESC] [EM] J command selects the operation of the bar<br />
code justification, HRI characters, and print direction.<br />
Where n bits n IPCL 765<strong>43</strong>210<br />
------xx Justified<br />
0 00 ------00 Left<br />
1 01 ------01 Center<br />
2 02 ------10 Right<br />
--xx---- HRI characters<br />
0 00 --00---- Not printed<br />
16 16 --01---- Printed above the bar code<br />
32 32 --10---- Printed below the bar code<br />
48 48 --11---- Printed above and below the bar code<br />
-x------ Vertical print mode. (Page mode may<br />
work better)<br />
0 00 -0------ Bar code printed in horizontal<br />
direction (default)<br />
64 64 -100---- Bar code printed in vertical direction<br />
Note 1: The [ESC] [EM] J command only affects bar code printing.<br />
Note 2: HRI is not available in vertical print mode. You may print normal<br />
barcodes in page mode, which will provide for HRI and significantly longer<br />
barcodes.<br />
<strong>43</strong>-06938 Rev L Page 135
Control Codes<br />
Electronic Journal<br />
The Epic <strong>43</strong>0 TM has the capability to store electronic journal 8 data in flash<br />
memory. There are two ways entries can be made into the electronic journal.<br />
The first is by selecting the journal station. The second is by requesting that<br />
print data be placed into the electronic journal.<br />
Before the electronic journal can be used, it must be configured and initialized.<br />
Configuring the Electronic Journal<br />
The Epic <strong>43</strong>0 TM has about 9 1024K bytes of flash that can be assigned to the<br />
electronic journal or to extended user store. The 1024K is segmented in 64K<br />
segments, which may be assigned to either to electronic journal or extended<br />
user store. That is you can assign 2 segments or 128K to the electronic journal<br />
and the remaining segments will be assigned to extended user store.<br />
When electronic journal is in use, you cannot reconfigure the configuration of<br />
the extended flash memory. If you want to reconfigure the flash, the electronic<br />
journal must be erased. To erase the electronic journal you must know the<br />
password that was assigned when it was initialized. When printers are initially<br />
configured by <strong>TransAct</strong>, the extended flash is erased and partitioned but not<br />
initialized. Before you use the electronic journal you must initialize it.<br />
CAUTION: You can use the extended user store without<br />
initializing the electronic journal. If any data has been<br />
stored in the extended user store, it will be lost if the<br />
extended flash is repartitioned.<br />
CAUTION: The printer does not stop if the electronic<br />
journal runs out of memory. If the printer were to stop there<br />
would be no way for the host to print and clear the journal.<br />
The host system should monitor the Journal with the<br />
[ENQ] command. This command will return the<br />
electronic journal status and report how much memory is<br />
remaining (See page 140). When the free electronic<br />
journal space is less than a predetermined amount, the<br />
journal should be printed or retrieved and then reinitialized.<br />
Electronic Journal Security<br />
Electronic journal security is provided by applying a password to the erase<br />
feature of the electronic journal. Additionally, there is a factory set<br />
configuration that disables the ability for the operator to print the journal<br />
through the keypad.<br />
8 It must be noted that the <strong>TransAct</strong> ® Epic <strong>43</strong>0 TM does not maintain the current time<br />
or date. If a journal entry is to contain the time and/or date, the host system must<br />
transfer this as printable text.<br />
Page 136<br />
<strong>43</strong>-06938 Rev L
Control Codes<br />
It is possible to assign a blank password to the electronic journal. If this is<br />
done either through the keypad or by host control, the manual print mode will<br />
be allowed to erase and reinitialize the journal.<br />
It is up to the end user of the Epic <strong>43</strong>0 TM to implement and use the level of<br />
security that is required.<br />
CAUTION: If you have initialized the electronic journal and<br />
don’t know the password, there is no way to erase the<br />
electronic journal without returning the printer for service.<br />
The warranty does not cover this. All Epic <strong>43</strong>0 TM ’s are<br />
shipped with the electronic journal partitioned and erased<br />
but not initialized.<br />
Initializing the Electronic Journal<br />
Once the electronic journal is partitioned, it can be initialized. Initializing the<br />
electronic journal sets the password and formats the flash to accept journal<br />
entries. Each entry may be any length up to 8K, and entries greater than 8K<br />
are truncated. Entries will be added to the electronic journal until it is full. If the<br />
electronic journal is full, entries will be lost. The [ENQ] command can be<br />
used to query the state of the electronic journal.<br />
Electronic Journal Configuration and Reporting Commands<br />
Function Initialize and Set Password<br />
ASCII<br />
[ESC][GS]I<br />
Hexadecimal 1BH 1DH 49H <br />
Decimal <br />
IPCL<br />
&%EI&<br />
EPOS<br />
Description This command initializes the electronic journal and sets the<br />
password that allows the electronic journal to be erased. The password may<br />
be up to 14 characters and may contain any alphanumeric characters.<br />
Note: The electronic journal can not be deleted without this password.<br />
Function Erase the Electronic Journal<br />
ASCII [ESC][GS]E<br />
Hexadecimal 1BH 1DH 45H <br />
Decimal <br />
IPCL &%EC&<br />
EPOS<br />
Description This command erases all of the electronic journal. The password<br />
was set using the [ESC][GS]I command.<br />
Note: The electronic journal can not be deleted without this password.<br />
<strong>43</strong>-06938 Rev L Page 137
Control Codes<br />
Function Print the Electronic Journal<br />
ASCII [ESC][GS]P< S l >< S h >< L l >< L h ><br />
Hexadecimal 1BH 1DH 50H < S l >< S h >< L l >< L h ><br />
Decimal < S l >< S h >< L l >< L h ><br />
IPCL &%EP (L and S are 4 digits ie. 00100020 for 20<br />
records starting at 10)<br />
EPOS<br />
Description This command prints all or part of the electronic journal. *256<br />
+ specifies the first record to be printed and *256 + specifies<br />
the number of records to print. If *256 + are 0, records from the<br />
specified start to the last record are printed. Setting both start and end to 0<br />
will print the complete contents of the electronic journal.<br />
Note: The first record is identified as record 1.<br />
Function Report the Electronic Journal<br />
ASCII [ESC][GS]R< S l >< S h >< L l >< L h ><br />
Hexadecimal 1BH 1DH 52H < S l >< S h >< L l >< L h ><br />
Decimal < S l >< S h >< L l >< L h ><br />
IPCL &%EQ (L and S are 4 digits ie. 00100020 for 20<br />
records starting at 10)<br />
EPOS<br />
Description This command reports all or part of the electronic journal.<br />
*256 + specifies the first record to be printed and *256 + <br />
specifies the number of records to report. If *256 + are 0, all records<br />
from the specified start to the end are reported. Setting both start and end to 0<br />
will report the complete contents of the journal.<br />
Note: The first record is identified as record 1.<br />
The report format will be as follows:<br />
[STX] Record number [SOH] Record Text [ETX]<br />
…<br />
[EOT]<br />
Page 138<br />
<strong>43</strong>-06938 Rev L
Control Codes<br />
Function Set the Electronic Journal Record Header<br />
ASCII<br />
[ESC][GS]F<br />
Hexadecimal 1BH 1DH 46H<br />
Decimal <br />
IPCL<br />
None<br />
EPOS<br />
Description This command allows the record separator that is printed between<br />
records to be changed. The default format is:<br />
\r\nRecord %d\r\n<br />
Where: \r represents CR, \n represents LF, %d represents the position of<br />
the record number.<br />
Note: The %d must be present.<br />
Note: This follows standard “C” programming conventions. Most<br />
standard “C” formatting print parameters may be used.<br />
Note: The record header many be totally disabled by a configuration<br />
option.<br />
Function Print/Report an Electronic Journal Log<br />
ASCII [ESC][GS]L Print the report<br />
Or [ESC][GS]l Return the report<br />
Hexadecimal 1BH 1DH 4CH or 6CH<br />
Decimal or <br />
IPCL &%UL (No IPCL for returning the<br />
report)<br />
EPOS<br />
Description This command prints or returns a summary of the electronic<br />
journal. The format is as follows:<br />
Electronic journal is inactive. (The electronic journal is off, or not<br />
initialized)<br />
or Electronic journal has xxxx Records and is full.<br />
or Electronic journal has xxxx Records with yyyyyy bytes free.<br />
<strong>43</strong>-06938 Rev L Page 139
Control Codes<br />
Function Query the Electronic Journal<br />
ASCII<br />
[ENQ]<br />
Hexadecimal 05H 19H<br />
Decimal <br />
IPCL<br />
None<br />
EPOS<br />
Description This is a real time status request that returns the current state of<br />
the electronic journal.<br />
Return Format: [NAK]<br />
[NAK] EJ is not active. It is either off, not initialized or full. If n H *256 + n L is not<br />
zero, the EJ is available but not initialized and n H *256 + n L is the available<br />
space in K (1024) bytes.<br />
or [ACK]<br />
[ACK] the EJ is active an available and n H *256 + n L is the available space in K<br />
(1024) bytes.<br />
Page 140<br />
<strong>43</strong>-06938 Rev L
Control Codes<br />
Printing/Reporting and Resetting the Electronic Journal<br />
The electronic journal may be printed on the receipt or reported to the host.<br />
The printed report will print each journal entry with an entry separator defined<br />
by the user (or, if not defined, with a default). The journal can be erased and<br />
reinitialized at any time. It is up to the host application to assure the electronic<br />
journal is reported or printed before it is erased. To provide some level of<br />
security on the erase process, the erase function is password protected. The<br />
password is set by the previous initialize command. See the [ESC][GS]I and E<br />
commands for further details.<br />
There are two ways to print the electronic journal: one is under host control,<br />
and the second is by entering journal print mode and using the keypad to<br />
control the printout.<br />
Journal Entries and using Journal Print Mode<br />
Journal print mode can be used to initialize, print then erase the electronic<br />
journal. To provide a level of security for the journal, if the electronic journal is<br />
initialized under software control and a password is provided, the electronic<br />
journal can not be erased in journal print mode. There is also a factory<br />
configured mode that completely disables this feature.<br />
To enter Journal Print Mode:<br />
1. Press and hold the FEED 10 Button until the PAPER indicator illumintes<br />
(Approximately 2 seconds)<br />
2. Follow the directions printed on the receipt to select the desired option.<br />
The available options are:<br />
1. Initialize Journal. (If the electronic journal is not initialized)<br />
2. Print Complete Journal.<br />
3. Erase Complete Journal. (If the electronic journal is not password<br />
protected)<br />
4. Print Last 20 Records<br />
5. Print First Record.<br />
6. Skip 10 Records.<br />
7. Back 10 Records.<br />
8. Print remaining journal.<br />
9. Print last record.<br />
10 The feed button is a multifunction button. By pressing and releasing the<br />
Feed button, the printer will feed and cut a short thicket. This is intended to<br />
clear the printer after changing paper. By pressing and holding the feed<br />
button for a longer time, two additional featuers may be activated. Pressing<br />
and holding the button for about two seconds will enter journal maintance<br />
mode. Holding the button for about 4 seconds will enter configuration mode.<br />
To aid in selecting the correct mode, the Error LED will illuminate as soon as<br />
the button is pressed and indicates that FEED is selected. After about 2<br />
seconds the Error LED will go out and the PAPER indicator will illuminate.<br />
This indicates that Journal mode is selected. After about 4 seconds, the<br />
Cover LED will illuminate indicating configuration mode is selected.<br />
<strong>43</strong>-06938 Rev L Page 141
Control Codes<br />
When journal print is entered, the printer will print a short list of instructions,<br />
the available options, and a summery of the total number of records in the<br />
journal and the amount of space left.<br />
Journal Print Mode Options<br />
Initialize Journal<br />
If this option is offered, the journal has never been initialized. Selecting this<br />
option will initialize the journal with no password. Once initialized, the journal<br />
configuration can not be changed unless the journal is erased by command.<br />
Print Complete Journal.<br />
This option will print the complete journal log from record 1 to the end. The<br />
printer will use the default configuration and emulation to print the log. That is<br />
if the printer is configured for <strong>TransAct</strong> ® PcOS emulation and set to 6 lpi, large<br />
draft 16 cpi, the printer will print the log with these defaults. If a journal entry<br />
has been saved with print mode settings they will take effect for all following<br />
entries.<br />
Erase Complete Journal.<br />
If the electronic journal is not password protected, this option will erase the<br />
complete journal and reinitialize it.<br />
Printing part of the journal.<br />
• Print Last 20 Records<br />
• Print First Record.<br />
• Skip 10 Records.<br />
• Back 10 Records.<br />
• Print Remaining Journal.<br />
• Print Last Record.<br />
These commands will allow part of the journal to be printed. For example if the<br />
last 10 journal entries are to be printed, select print last record, then back 10<br />
and then print remaining journal.<br />
Security<br />
The security of the journal is up to the user. If the journal is host controlled, it<br />
should be password protected and if manual printing is not desirable, the<br />
printer should be configured so as to disable manual printing. The <strong>TransAct</strong> ®<br />
printer configuration utility will allow set and clear this feature. When Epic<br />
<strong>43</strong>0 TM printers leave the factory, the electronic journal is erased and is not<br />
initialized.<br />
Page 142<br />
<strong>43</strong>-06938 Rev L
Control Codes<br />
Electronic Journal Entries<br />
There are two ways to place information in the electronic journal. The first is by<br />
selecting journal mode. The second is by requesting that validation or receipt<br />
information is copied into the electronic journal.<br />
If you select journal mode, information sent to the printer is not printed, but<br />
stored in the flash memory. The information is stored as records in a linked<br />
list. Whenever a “journal mode begin” command is received, a new record is<br />
started. When journal mode is exited, the record is finished, closed and the<br />
link updated. This journal mode is intended to be printed at a later time. No<br />
printer control codes are allowed in the journal. Only [CR], [HT] and [LF]<br />
commands are allowed. Any other control character will end the journal<br />
record. Use [EOT] or [NUL] to provide the most graceful exit from journal<br />
mode.<br />
The other way to place information in the electronic journal is with carbon copy<br />
mode. In this mode select information sent to the validation or receipt station is<br />
carbon copied into the electronic journal. A record is started with the<br />
“Electronic Journal Begin” command and ended with the “Electronic Journal<br />
End” command. There is an “Electronic Journal Suspend” and “Electronic<br />
Journal Resume” which allows some information not to be saved.<br />
[esc][P
Control Codes<br />
The resulting journal entry would then only contain:<br />
---{Date:0} {Time:0:}--<br />
ST# 2000 OP# 00067 TE# 021 0035<br />
SUB TOTAL 8.68<br />
SALES TAX 1.50<br />
------<br />
TOTAL 10.18<br />
CASH TEND 20.00<br />
CHANGE DUE 9.82<br />
In carbon copy mode any printer control commands in the record data will be<br />
added to the journal record. As the records are printed, those commands will<br />
be used to format the print. Some care should be taken to assure that only<br />
format control command that you intend to be printed later get in the journal.<br />
Note: Information is gathered in packets or 16 bytes. If power is lost before<br />
the record is closed, up to 16 bytes of information may be lost. The link list<br />
will be repaired, with data loss, when power is next applied.<br />
Page 144<br />
<strong>43</strong>-06938 Rev L
Control Codes<br />
Journal mode<br />
Journal mode is a station select command. All data sent to the printer,<br />
following the journal mode select command, is stored in the EJ as a single<br />
record. Any control commands sent to the electronic journal will end the<br />
journal entry. An EOT, NUL or any printer command will end journal mode.<br />
Typically an EOT, CAN or station select will be used to end the journal mode.<br />
Function Electronic Journal Mode Begin<br />
ASCII<br />
[ESC]{<br />
Hexadecimal 1BH 7BH<br />
Decimal <br />
IPCL<br />
None<br />
EPOS<br />
Description The function enters journal mode. When in journal mode,<br />
commands are parsed and any command that is not appropriate is removed,<br />
causes journal mode to exit, or is saved.<br />
In general commands to involve printer operation are ignored, Commands that<br />
will cause a basic change in the printer like the [ESC]@ Initialize printer<br />
command stop the journal entry. Commands that return a response from the<br />
printer are not placed in the journal.<br />
All other commands are placed in the journal, and will be processed when the<br />
journal is printed.<br />
The [EOT] (4 or 4H) and CAN (24 or 14H) will cause the journal to stop and<br />
will not be processed again.<br />
In typical operation, a station select command should be used to exit journal<br />
mode. Note that any station select including another Journal select will close<br />
the journal entry. If a Journal select is processed in Journal mode, the current<br />
record will be closed, and a new record opened.<br />
<strong>43</strong>-06938 Rev L Page 145
Control Codes<br />
Carbon Copy Journal Mode<br />
Carbon copy mode allows information sent to the receipt or validation station<br />
to be copied into the electronic journal. An electronic journal entry is started<br />
with a “Start Carbon Copy” mode command and continues until a station<br />
select command is received or a “Stop Carbon Copy” command is received.<br />
The carbon copy operation may be suspended and restarted by a “Carbon<br />
Copy Suspend” and “Carbon Copy Resume” command. (Note: “Carbon Copy<br />
Suspend” and “Carbon Copy Resume” commands do not generate new<br />
electronic journal records.)<br />
Function Electronic Carbon Copy Begin<br />
ASCII [ESC]l <br />
Hexadecimal 1BH 6CH<br />
Decimal <br />
IPCL<br />
&%EB<br />
EPOS<br />
Description This command begins a carbon copy journal entry.<br />
Function Electronic Carbon Copy Suspend<br />
ASCII [ESC]l <br />
Hexadecimal 1BH 6CH<br />
Decimal <br />
IPCL<br />
&%ES<br />
EPOS<br />
Description This command temporarily suspends carbon copy journal entry.<br />
Function Electronic Carbon Copy Resume<br />
ASCII [ESC]l <br />
Hexadecimal 1BH 6CH<br />
Decimal <br />
IPCL<br />
&%ER<br />
EPOS<br />
Description This command resumes a temporarily suspended carbon copy<br />
journal entry.<br />
Function Electronic Carbon Copy End<br />
ASCII [ESC]l <br />
Hexadecimal 1BH 6CH<br />
Decimal <br />
IPCL<br />
&%EE<br />
EPOS<br />
Description This command ends a carbon copy journal entry.<br />
Page 146<br />
<strong>43</strong>-06938 Rev L
Control Codes<br />
Transport Control<br />
The Epic <strong>43</strong>0 TM is available with a transport that allows a printed ticket to be<br />
delivered only after the ticket is cut. To allow configuration and control of this<br />
feature several commands are provided. Note see [ENQ] below for Jam<br />
and Transport status.<br />
Function Set Transport Mode and Maximum ticket Loop<br />
ASCII<br />
[ESC] I <br />
Hexadecimal 1BH 69H <br />
Decimal <br />
Description This command configured the transport operation and sets the<br />
maximum ticket loop allowed to be captured by the transport. There are three<br />
features configured by this command. This first is if the transport will hold or<br />
drop the delivered ticket. The second is if the Cut command will automatically<br />
deliver the ticket through the transport. The third is how long of a ticket may<br />
be stored in the transport before it is cut.<br />
Where: f = Feature and v = setting<br />
if f = 1 then v sets the maximum ticket that can be stored in the transport.<br />
where v = 3 to 16 inches.<br />
if f = 2 then v sets the Drop of Hold setting.<br />
where v = 1 for drop and 0 for hold.<br />
if f = 3 then v sets the Cut and transport mode.<br />
where v = 0 the cut command will also transport the ticket. If v = 1 the cut will<br />
not transport the ticket. The ticket must be transported by command.<br />
Function Deliver Ticket<br />
ASCII<br />
[ESC] k<br />
Hexadecimal 1BH 6BH<br />
Decimal <br />
Description This command will deliver a previously cut ticket. This command<br />
requires that the Cut/Transport mode be set to cut only.<br />
Function Transport Feed<br />
ASCII<br />
[ESC] j <br />
Hexadecimal 1BH 6AH <br />
Decimal <br />
Description This command feeds the transport independently of the print paper<br />
feed. This command may be used to drop a previously held ticket or clear the<br />
transport on error. This feed is based on the current vertical motion unit,<br />
which is typically 203 steps per inch.<br />
<strong>43</strong>-06938 Rev L Page 147
Control Codes<br />
Miscellaneous Control<br />
[ESC] X<br />
Set left/right print margins<br />
ASCII [ESC] X <br />
Hexadecimal 1BH 58H <br />
Decimal <br />
IPCL<br />
none<br />
EPOS<br />
[ESC] Q<br />
Description The [ESC] X command sets left and right print margins<br />
in characters from the home position. Where n 1 = left margin and n 2 = right<br />
margin, the absolute position depends on the current print pitch. If the left and<br />
right margins are set to the right of the current horizontal position, the new<br />
margins become valid in the same line. If the left margin is set to the left of the<br />
current horizontal position and the right margin set to the right of the current<br />
horizontal position, the right margin setting becomes valid in the same line, but<br />
the left margin setting becomes valid in the next line. When the left and right<br />
margins are set to the left of the current horizontal position, both left and right<br />
margin settings appear to become valid in the next line because an auto-CR is<br />
performed by the subsequent data.<br />
[CAN]<br />
Clear print buffer<br />
ASCII<br />
[CAN]<br />
Hexadecimal 18H<br />
Decimal <br />
IPCL<br />
&%RP<br />
EPOS<br />
[CAN]<br />
Description The [CAN] command clears the print buffer and any unprinted<br />
information in the printer received before it. If the input buffer is not being<br />
processed because the printer is out of paper or a form is not inserted, the<br />
[CAN] command will not be processed until after the error is cleared. The<br />
[CAN] command does not restore default conditions; it only clears the print<br />
buffer.<br />
Page 148<br />
<strong>43</strong>-06938 Rev L
Control Codes<br />
[ESC] q<br />
ASCII<br />
Hexadecimal<br />
Decimal<br />
IPCL<br />
EPOS<br />
Query marker<br />
[ESC] q <br />
1BH 71H <br />
<br />
none<br />
none<br />
Description The [ESC] q command returns a status to the host when it is<br />
processed.<br />
Response [SOH] <br />
The [ESC] q command may be placed in the print data and, when<br />
processed by the printer, will return a progress status marker. The value of<br />
can be any 8-bit value. It is returned to the host unaltered. The intent is<br />
for it to be a sequence number. The command can be used to track the print<br />
progress of the printer or verify that data has been printed.<br />
Note: The [ESC] q command is a line terminator that causes the printer<br />
to print all previous data. If a normal line terminator like a [CR] is not<br />
supplied, right justify and auto-center do not function correctly. All data is left<br />
justified. [ESC] q does not perform a [CR] or [LF] function.<br />
[ESC] v<br />
Perform Auto Cut<br />
ASCII<br />
[ESC] v<br />
Hexadecimal 1BH 76H <br />
Decimal <br />
IPCL &%FC &%PC<br />
EPOS<br />
[ESC] i or [ESC] m<br />
Description The [ESC] v command operated the auto cutter.<br />
Note: The auto cutter is optional. If the auto cutter is not installed, this<br />
command will be ignored.<br />
[ESC] @<br />
Initialize the printer<br />
ASCII<br />
[ESC] @<br />
Hexadecimal 1BH 40H<br />
Decimal <br />
Description The [ESC] @ command initializes the printer. All settings,<br />
including character font and line spacing, are canceled.<br />
<strong>43</strong>-06938 Rev L Page 149
Control Codes<br />
[ESC] p 4<br />
Select paper sensor(s) to stop printing<br />
ASCII<br />
[ESC] p 4 <br />
Hexadecimal 1BH 70H 34H <br />
Decimal <br />
Range 0 ≤ n ≤ 255<br />
Description The [ESC] p 4 command selects which sensors tell the printer<br />
to stop printing. For the default setting, only the Paper Out sensor stops<br />
printing. When the paper roll near-end sensor is enabled and the sensor<br />
detects a near-end condition during printing, the printer completes the current<br />
line and then automatically goes off-line. Replacing a new paper roll restarts<br />
the printing. When the paper roll near-end sensor is disabled and a paper<br />
near-end condition is detected during printing, the paper out LED comes on,<br />
but the printer continues to print.<br />
Note: The Epic <strong>43</strong>0 TM printer does not allow the Paper Out sensor to be<br />
disabled. It is always on.<br />
is defined as follows:<br />
Bit On/Off Hexadecimal Decimal Function<br />
0,1 Off 00H Paper roll near-end sensor disabled<br />
On 01H,02H,03H ,, Paper roll near-end sensor enabled<br />
7 - 00H Undefined<br />
Table 6 Paper Sensor Commands<br />
[ESC] p 3<br />
Select paper sensor(s) to output paper-end signals<br />
ASCII<br />
[ESC] p 3 <br />
Hexadecimal 1BH 70H 33H <br />
Decimal <br />
Range 0 ≤ n ≤ 255<br />
Description The [ESC] p 3 command selects the paper sensor that<br />
outputs a paper-end signal to the parallel interface when a paper-end is<br />
detected. The default setting is when all sensors are enabled. ( = 15). It<br />
is possible to select multiple sensors to output signals. If any of the sensors<br />
detect a paper end, the paper end signal is output. The command is only<br />
available with a parallel interface. The paper-end sensor is an option. If the<br />
sensor is not equipped, the settings of bits 0 and 1 of the command are not<br />
effective.<br />
Page 150<br />
<strong>43</strong>-06938 Rev L
Control Codes<br />
Bit On/Off Hexadecimal Decimal Function<br />
0 Off 00H Paper roll near-end sensor disabled<br />
On 01H Paper roll near-end sensor enabled<br />
1 Off 00H Paper roll near-end sensor disabled<br />
On 02H Paper roll near-end sensor enabled<br />
2 Off 00H Paper roll end sensor disabled<br />
On 04H Paper roll end sensor enabled<br />
3 Off 00H Paper roll end sensor disabled<br />
On 08H Paper roll end sensor enabled<br />
4-7 - - - Undefined<br />
Table 7 Paper Sensor Commands<br />
[ESC] ~z<br />
ASCII<br />
Hexadecimal<br />
Decimal<br />
IPCL<br />
EPOS<br />
User Control of Bezel<br />
[ESC] ~ z <br />
1BH 7EH 7AH <br />
<br />
%&BF<br />
none<br />
Description The [ESC] ~z command sets a flash code into the bezel lamp<br />
control logic. This code will override any current flash code and will be<br />
overridden by any internally generated flash code.<br />
Flash codes :<br />
0 Return Bezel Light to normal state.<br />
1 Flash 1 time and pause<br />
2 Flash 2 times and pause<br />
…<br />
8 Flash 8 times and pause<br />
9 Fast steady blink<br />
10 Slow steady blink<br />
11 Active state<br />
NOTE: the bezel logic may be set to default on or off for the inactive state. If<br />
set to be on by default, the flash will blink off.<br />
<strong>43</strong>-06938 Rev L Page 151
Control Codes<br />
[ESC] y<br />
Set control feature commands<br />
ASCII<br />
[ESC] y <br />
Hexadecimal 1BH 79H <br />
Decimal <br />
IPCL &%Y0-9 or &%YX (for numbers > 9)<br />
EPOS<br />
[ESC] y <br />
Where n 0 Reinitializes the printer and forces TBD mode<br />
1 Reinitializes the printer and forces TBD mode<br />
2 Reinitializes the printer and forces Epic <strong>43</strong>0 TM mode<br />
3 Reinitializes the printer and forces extended EPOS mode<br />
4 Disables IPCL commands<br />
5 Enables IPCL commands<br />
6 Disables inquire processing (All command preprocessing is disabled.)<br />
7 Enables inquire processing<br />
8 Enables extended diagnostics<br />
9 Print Current Configuration<br />
10 Not used<br />
11 Reserved<br />
12 Reserved<br />
13 Not used<br />
14 Reserved<br />
15 Print Current totals<br />
16 Reserved<br />
17 Requests the printer to enter remote OFF.<br />
18 Requests the printer to exit remote OFF.<br />
20 Reserved<br />
Description The [ESC] y command enables and disables command set<br />
features.<br />
It is possible that the IPCL commands will interfere with print data. If this<br />
occurs, the IPCL can be disabled with an [ESC] y command.<br />
Note 1: Once IPCL commands are disabled, the Enable IPLC command will<br />
not be a valid IPCL code.<br />
Note 2: [ESC] y , , , and allow the printer to switch between<br />
emulation modes. When the switch takes place, the current print buffer is<br />
printed, and the printer reinitializes. These commands do not permanently<br />
change the configuration. A power on reset restores the mode that was<br />
configured in menu mode. A reset by command or from the INIT pin does not<br />
restore the mode.<br />
Note 3: [ESC] y and enable and disable the inquire process. These<br />
commands are not processed as they are received, but are buffered then<br />
processed. The buffering process allows inquire commands sent after a<br />
disable to be answered. In addition, inquires sent after an enable may not be<br />
answered. (See additional notes 3 and 4 on the next page).<br />
Note 4: In EPOS mode, the [ESC] y command is active.<br />
Page 152<br />
<strong>43</strong>-06938 Rev L
Control Codes<br />
[ESC] ~<br />
ASCII<br />
Hexadecimal<br />
Decimal<br />
IPCL<br />
EPOS<br />
Extended Configuration and Control<br />
[ESC] ~ <br />
1BH 7EH <br />
<br />
none<br />
[ESC] ~ <br />
Description The [ESC] ~ commands are extended diagnostics commands.<br />
They must all be preceded with an enabling command. These commands (in<br />
general) are not intended to be used by the end user.<br />
<strong>43</strong>-06938 Rev L Page 153
Control Codes<br />
Remote Power Control<br />
The Epic <strong>43</strong>0 TM Printer has a remote power control command that instructs it<br />
to enter OFF mode. When the command is issued, the printer performs print<br />
cartridge maintenance and enters OFF mode. Unlike manually turning the<br />
power off, remote power mode leaves the communications active. All<br />
commands except the exit power down command are ignored.<br />
[ESC] y<br />
Remote Power Control<br />
ASCII<br />
[ESC] y <br />
Hexadecimal 1BH 79H <br />
Decimal <br />
IPCL<br />
&%YX17 or &%YX18<br />
EPOS<br />
[ESC] y <br />
Where n 17 Requests the printer to enter remote OFF.<br />
18 Requests the printer to exit remote OFF<br />
Description Inquiry (ENQ) commands are accepted and answered in<br />
remote power down mode. The printer reactivates if a power up command is<br />
received or the power is cycled.<br />
Note 1: If power is lost after the power down command is issued, the printer<br />
will reenter normal operation when the power is restored.<br />
Note 2: This command is not available in all configurations mode.<br />
Page 154<br />
<strong>43</strong>-06938 Rev L
Control Codes<br />
Documented Extended Control commands<br />
The Epic <strong>43</strong>0 TM has a number of Extended Control commands designed to<br />
make operation and maintenance of the printer easier for the host application.<br />
For further details, refer to the <strong>TransAct</strong> ® Extended Control discussion in<br />
Chapter 8.<br />
[ESC] ~V<br />
Return Firmware Checksum<br />
ASCII<br />
[ESC] ~ Z<br />
Hexadecimal 1BH 7EH 5AH<br />
Decimal <br />
IPCL<br />
none<br />
EPOS<br />
[ESC] ~ Z<br />
Description The [ESC] ~ Z command is an extended diagnostics command<br />
that returns the Firmware checksum. It does not need to be proceeded with<br />
an enabling command. The return is 4 bytes formatted as follows:<br />
~Z<br />
<strong>43</strong>-06938 Rev L Page 155
Programming Codes Epic <strong>43</strong>0 TM <strong>OEM</strong> Integration Manual<br />
[ESC] ~F<br />
Return Firmware Identification<br />
ASCII<br />
[ESC] ~ F<br />
Hexadecimal 1BH 7EH 46H<br />
Decimal <br />
IPCL<br />
none<br />
EPOS<br />
[ESC] ~ F<br />
Description The [ESC] ~ F command is an extended diagnostics command<br />
that returns the Firmware Identification string. It does not need to be<br />
proceeded with an enabling command. The return is 14 byte null terminated<br />
string containing a 2 byte command ID and a 12 byte firmware ID and revision<br />
number. The format is as follows:<br />
~FPE<strong>43</strong>00-1.06<br />
Page 156<br />
<strong>43</strong>-06938 Rev L
Control Codes<br />
Printer Status<br />
Status Inquire<br />
The Epic <strong>43</strong>0 TM Printer is designed for use as part of an automated system<br />
where the host computer makes every attempt to correct problems with the<br />
printer. In addition, the host application requires that it be able to obtain more<br />
information from the printer than is typical of normal computer printers. For<br />
example, since a normal computer printer does not have cash drawers, such<br />
additional features require that the standard printer protocol be extended to<br />
deal with the added features of a point-of-sale (POS) printer.<br />
All inquire commands are processed as they are received (preprocessed or<br />
real time) and require a response from the printer. Consequently, parallel,<br />
IEEE 1284 bidirectional communications, USB or bidirectional serial operation<br />
is required.<br />
The Epic <strong>43</strong>0 TM Printer looks at and evaluates all commands as they are<br />
received, and does not respond to inquire commands that happen to be<br />
embedded in graphics or other commands. For more details, refer to the buffer<br />
and preprocessor descriptions in later sections.<br />
In all cases, inquire commands are responded to by an acknowledged (ACK)<br />
or a not acknowledged (NAK) and then the command ID, which allows the<br />
host application to make multiple requests and receive identifiable responses.<br />
If the printer is configured for serial or USB operation the status is<br />
automatically returned to the host. If the printer is configured for parallel, IEEE<br />
1284 operation, the HOST must initiate a reverse channel request to return the<br />
status.<br />
Serial and USB Mode Inquire<br />
All inquire (ENQ) commands require a response from the printer. During serial<br />
operation, all inquire commands are responded to by an acknowledged (ACK)<br />
or not acknowledged (NAK), the command ID, and in some cases status. Most<br />
status responses sequences contain a length field to help decode and<br />
separate responses.<br />
In general the printer should be configured for “Buffer Full Only” off-line<br />
operation if inquire commands are used. This prevents the printer from using<br />
flow control for anything but buffer full. The programmer must take on the<br />
responsibility for assuring that inquire commands are used to maintain status<br />
of the printer.<br />
The printer always accepts serial data even when it is off-line. The printer has<br />
reserve buffer space that allows additional information to be received even if<br />
the printer is signaling buffer full or off-line. Because inquire commands are<br />
processed before they go into the buffer, the printer responds even when it is<br />
busy printing.<br />
In serial mode, the response to an inquiry should be received by the host<br />
before another inquire command is issued to the printer. When the printer<br />
<strong>43</strong>-06938 Rev L Page 157
Control Codes<br />
receives an inquiry, it generates a response. If inquiries are sent to the printer<br />
too quickly, the printer spends all of its time responding and does not have<br />
time to print.<br />
IEEE 1284 Mode Inquire<br />
In parallel IEEE 1284 mode, status information can be returned to the host<br />
through the IEEE 1284 reverse channel. After the host makes an inquire<br />
request, it activates IEEE 1284 mode 0 reverse channel and waits for a<br />
response from the printer. The response to the inquire is identical to serial<br />
mode in format.<br />
The printer always accepts IEEE 1284 reverse-channel requests but does not<br />
accept inquire commands when off-line. It is possible to obtain status when<br />
off-line by placing the printer in dynamic response mode before the printer<br />
goes off-line. The IEEE 1284 reverse channel responds to status changes<br />
even when the printer is off-line.<br />
In general, the printer should be configured for “Buffer Full Only” off-line<br />
operation if inquire commands are used. This prevents the printer from using<br />
flow control for anything but buffer full. The programmer must take on the<br />
responsibility for assuring that inquire commands are used to maintain status<br />
of the printer.<br />
Inquire Commands<br />
[ENQ]<br />
Inquire printer status<br />
ASCII<br />
Hexadecimal<br />
Decimal<br />
IPCL<br />
EPOS<br />
[ENQ] <br />
05H <br />
<br />
none<br />
[GS] r or [DLE] [ENQ] or [DLE] [EOT]<br />
Description The [ENQ] command inquires about the printer’s status and<br />
returns a result.<br />
Note: When the printer is off-line, inquires may not be accepted.<br />
[ENQ] <br />
Inquire paper low status<br />
ASCII [ENQ] <br />
Hexadecimal 05H 03H<br />
Decimal <br />
Function Receipt paper low<br />
Response ACK (06H 03H) paper is present.<br />
NAK (15H 03H) paper is low.<br />
Page 158<br />
<strong>43</strong>-06938 Rev L
Control Codes<br />
[ENQ] <br />
Inquire receipt paper out status<br />
ASCII [ENQ] <br />
Hexadecimal 05H 04H<br />
Decimal <br />
Function Receipt paper exhausted<br />
Response ACK (06H 04H) Receipt paper is present<br />
NAK (15H 04H) Receipt paper is exhausted<br />
[ENQ] <br />
Inquire cover open status<br />
ASCII [ENQ] <br />
Hexadecimal 05H 08H<br />
Decimal <br />
Function Cover open/closed status<br />
Response ACK (06H 08H) The cover is closed<br />
NAK (15H 08H) The cover is open<br />
[ENQ] <br />
Is the buffer empty?<br />
ASCII [ENQ] <br />
Hexadecimal 05H 09H<br />
Decimal <br />
Function The [ENQ] command allows the host to know when the print<br />
buffer is empty. If IEEE 1284 is active, the command also clears the response<br />
buffer.<br />
Response ACK (06H 09H) The buffer is empty.<br />
NAK (15H 09H) The buffer is not empty.<br />
[ENQ] Request printer reset<br />
ASCII [ENQ] <br />
Hexadecimal 05H 0AH<br />
Decimal <br />
Function Reset printer<br />
Response Serial Parallel<br />
ACK (06H 0AH)<br />
No response<br />
The command was accepted.<br />
NAK (15H 0AH)<br />
The command was rejected.<br />
Description The ENQ , EPOS DLE ENQ commands and the INIT pin<br />
all have the same effect and are referred to as reset commands. To prevent<br />
data loss, the printer tries to finish printing the buffered data. When operator<br />
intervention with the printer is required for any reason, data loss results. The<br />
reset operation is saved until the printer goes idle.<br />
If the printer is idle and a reset command is received or pending, the printer<br />
resets, and the buffer clears. If the host resets an operator intervention<br />
operation, any remaining buffered data is cleared.<br />
<strong>43</strong>-06938 Rev L Page 159
Control Codes<br />
When the printer receives a reset command, the printer goes off-line<br />
and/or busy until the reset completes.<br />
If the host application continues to send information to the printer after a reset<br />
command, some of that information may be processed before the reset is<br />
processed.<br />
After the reset the transport is cleared. If it can not be cleared a jam status<br />
may be issued.<br />
Note: If reset inhibit is set in the configuration menu, this command is ignored.<br />
[ENQ] <br />
Inquire power cycle status<br />
ASCII [ENQ] <br />
Hexadecimal 05H 0BH<br />
Decimal <br />
Function Has the printer been power cycled since the last request?<br />
Response ACK (06H 0BH)<br />
Printer has been power cycled since the last [ENQ] <br />
NAK (15H 0BH)<br />
Printer has not power cycled since the last [ENQ] <br />
Description The first time after a reset, the command returns [ACK] , after<br />
that the command returns [NAK] . The command allows the application<br />
to determine if the printer has been power cycled and needs to be reinitialized.<br />
The [ENQ] command and the INIT signal on the parallel port both cause<br />
the printer to return power up status.<br />
[ENQ] <br />
Inquire Mechanical error status<br />
ASCII [ENQ] <br />
Hexadecimal 05H 0EH<br />
Decimal <br />
Function Error status<br />
Response ACK (06H 0EH) No mechanical errors<br />
NAK (15H 0FH) Mechanical error has occurred<br />
(Use [ENQ] to identify the error)<br />
Note: For this status request to function, the "Buffer Full Only" off-line option<br />
should be selected.<br />
Page 160<br />
<strong>43</strong>-06938 Rev L
Control Codes<br />
[ENQ] Inquire printer state<br />
ASCII [ENQ] <br />
Hexadecimal 05H 0FH<br />
Decimal <br />
Function The [ENQ] command returns the current printer state<br />
Note<br />
[ENQ] also returns the current printer state, but it<br />
should not be used as it conflicts with XON/XOFF flow control.<br />
Response [ACK] …<br />
Where:<br />
is the echo of the command ID.<br />
<br />
is the number of return bytes + 40 (28H)<br />
(to prevent confusion with XON/XOFF).<br />
: bit 0 = 1 always<br />
bit 1 = Cover is closed.<br />
bit 2 = Receipt paper is out.<br />
bit 3 = 0<br />
bit 4 = 1<br />
bit 5 = 0<br />
bit 6 = 1 always<br />
bit 7 = 0 always<br />
: bit 0 - 5 = 0 always<br />
bit 6 = 1 always<br />
bit 7 = 0 always<br />
Printer is waiting in an error mode.<br />
Use [ENQ] to identify the specific error<br />
and [ENQ] to recover<br />
Note: For this status request to function, the "Buffer Full Only" off-line option<br />
should be selected.<br />
[ENQ] <br />
Inquire all printer status<br />
ASCII [ENQ] <br />
Hexadecimal 05H 14H<br />
Decimal <br />
Function The [ENQ] command returns all status flags<br />
Response [ACK] …<br />
Where:<br />
is the echo of command ID.<br />
is the number of return bytes + 40<br />
(28H) (to prevent confusion with XON/XOFF).<br />
: bit 0 = 0<br />
bit 1 = 0<br />
bit 2 = Receipt paper is out.<br />
bit 3 = Ticket in transport<br />
bit 4 = Receipt paper error occurred. (low or out)<br />
bit 5 = 0<br />
<strong>43</strong>-06938 Rev L Page 161
Control Codes<br />
bit 6 = 1 always<br />
bit 7 = 0 always<br />
: bit 0 = 1 always<br />
bit 1 = Cover is closed.<br />
bit 2 = Buffer is empty.<br />
bit 3 = Printer has been power cycled,<br />
Reading this does not affect the state of the<br />
power-cycled flag. (Use [ENQ] to reset<br />
bit 4 =<br />
bit 5 = 0<br />
bit 6 = 1 always<br />
bit 7 = 0 always<br />
the power cycled bit.)<br />
Printer is waiting in an error mode.<br />
Use [ENQ] to identify the specific error<br />
and [ENQ] to recover<br />
: bit 0 = 0 always<br />
bit 1 = 1 always<br />
bit 2 = Jam detected<br />
bit 3 = 0 always<br />
bit 4 = 0 always<br />
bit 5 = Printer is blocking print<br />
(Cover is open or out of paper.)<br />
bit 6 = 1 always<br />
bit 7 = 0 always<br />
: bit 0 = 1 Printer supports single station print.<br />
bit 1 = 0.<br />
bit 2 = Printer supports multiple colors<br />
bit 3 = Printer supports cutter<br />
(Partial cut command is supported as full cut)<br />
bit 4 = Printer supports cutter.<br />
bit 5 = 0<br />
bit 6 = 1 always<br />
bit 7 = 0 always<br />
: 0<br />
: 0<br />
: 0<br />
Page 162<br />
<strong>43</strong>-06938 Rev L
Control Codes<br />
[ENQ] <br />
Inquire printer ID<br />
ASCII [ENQ] <br />
Hexadecimal 05H 15H<br />
Decimal <br />
Function The [ENQ] command returns the printer IEEE 1284<br />
ID string.<br />
Response [ACK] {ID string}<br />
Where: is the echo of the command ID and is the number of<br />
return bytes in the ID string {ID string} is the IEEE ID return string, which<br />
follows:<br />
MFG:<strong>TransAct</strong>.;<br />
CMD:M<strong>43</strong>0CL,IPCL;<br />
CLS:PRINTER;<br />
MDL:M<strong>43</strong>0 PcOS;<br />
DES:<strong>EPIC</strong> <strong>43</strong>0TM;<br />
REV:PE<strong>43</strong>00-01.00<br />
OPTS:$63xy<br />
Where x is a bit field defined as follows:<br />
bit 0 = 1 Red support<br />
bit 1 = 1 Green support<br />
bit 2 = 1 Blue support<br />
bit 3 = Always 0<br />
bit 4 = Always 1<br />
bit 5 = Always 1<br />
bit 6 = Always 0<br />
bit 7 = Always 0<br />
The y is a bit field defined as follows:<br />
bit 0 = 0<br />
bit 1 = Knife is installed.<br />
bit 2 = 0<br />
bit 3 = Always 0<br />
bit 4 = Always 1<br />
bit 5 = Always 1<br />
bit 6 = Always 0<br />
bit 7 = Always 0<br />
<strong>43</strong>-06938 Rev L Page 163
Control Codes<br />
[ENQ] <br />
Inquire error status<br />
ASCII [ENQ] <br />
Hexadecimal 05H 16H<br />
Decimal <br />
Function The [ENQ] command reports on the error status.<br />
Response [ACK] <br />
Where:<br />
is the echo of the command ID.<br />
<br />
is the number of return bytes + 40 (28H)<br />
(to prevent confusion with XON/XOFF).<br />
: Bit status as follows:<br />
bit 0 = Cover is open.<br />
bit 1 = Paper is Low<br />
bit 2 = Paper is out.<br />
bit 3 = 0<br />
bit 4 = Jam Detected.<br />
bit 5 = The Auto-Cutter has faulted.<br />
bit 6 = 1 always<br />
bit 7 = An serious error has occurred.<br />
Note 1: If bit 7 is set, a serious error has occurred. The printer is not able to<br />
recover from this type of error without operator intervention. If bit 7 is set<br />
without bit 5 (Auto-cutter fault) then the print carriage has faulted, which is<br />
probably caused by a paper jam or a component failure. The host system<br />
may issue an [ENQ] (Reset Request command) to attempt to recover.<br />
The Reset Request will reset the printer to an initial power up state. All data<br />
will be lost.<br />
Note 2: When a serious error occurs (bit 7 set) the printer enters a static<br />
state. Status responses will reflect the state of the printer when the error<br />
occurred.<br />
Note 3: For this status request to function during a serious error, the "Buffer<br />
Full Only" off line option should be selected.<br />
Page 164<br />
<strong>43</strong>-06938 Rev L
Control Codes<br />
[ENQ] <br />
Inquire user-store status<br />
ASCII [ENQ] <br />
Hexadecimal 05H 17H<br />
Decimal <br />
Function The [ENQ] command reports on the user-store<br />
status.<br />
Response [ACK] <br />
Where:<br />
is the echo of command ID. The report is a null terminated<br />
string with the following format:<br />
12345[CR][LF]<br />
(Free user store)<br />
12345 Type Name…[CR][LF] (First entry) etc.<br />
12345 Type Name…[CR][LF] (Last entry) <br />
Type The type field describes the type of information.<br />
M = macro<br />
C = character definition<br />
[ENQ] <br />
Inquire color status<br />
ASCII [ENQ] <br />
Hexadecimal 05H 18H<br />
Decimal <br />
Function The [ENQ] command reports Color Cartridge status.<br />
Response [ACK] <br />
Where<br />
Is the echo of command<br />
Secondary Color 0 = Not supported, 1 = Red, 2 = Green,<br />
4 = Blue<br />
Primary Color 16 = Black<br />
Color Status<br />
bit 0 = Not defined<br />
bit 1 = Not defined<br />
bit 2 = Secondary Color Not Supported<br />
bit 3 = 0 always<br />
bit 4 = 0 always<br />
bit 5 = 0 always<br />
bit 6 = 1 always<br />
bit 7 = 0 always<br />
<strong>43</strong>-06938 Rev L Page 165
Control Codes<br />
[ENQ] <br />
Inquire Jam/Transport Status<br />
ASCII [ENQ] <br />
Hexadecimal 05H 1DH<br />
Decimal <br />
Function The [ENQ] command reports Jam and Transport<br />
status.<br />
Response [ACK] <br />
Where<br />
Is the echo of command<br />
<br />
Status<br />
bit 0 = Paper Jammed before the cut<br />
bit 1 = Paper Jammed after the cut.<br />
bit 2 = 0 always<br />
bit 3 = Ticket in transport<br />
bit 4 = Jam Sensor<br />
bit 5 = 1 always<br />
bit 6 = 0 always<br />
bit 7 = 0 always<br />
[ENQ] <br />
Inquire Sensor Status<br />
ASCII [ENQ] <br />
Hexadecimal 05H 1EH<br />
Decimal <br />
Function The [ENQ] command reports sensor status.<br />
Response [ACK] <br />
Where<br />
Is the echo of command<br />
<br />
Status<br />
bit 0 = Cover<br />
bit 1 = Paper Out.<br />
bit 2 = Top Of Form<br />
bit 3 = Transport<br />
bit 4 = Jam Sensor<br />
bit 5 = 1 always<br />
bit 6 = Feed<br />
bit 7 = 0 always<br />
Page 166<br />
<strong>43</strong>-06938 Rev L
Control Codes<br />
[ENQ] <br />
Inquire Power Up Error Status<br />
ASCII [ENQ] <br />
Hexadecimal 05H 1FH<br />
Decimal <br />
Function The [ENQ] command reports Power up Error status.<br />
Response [ACK] <br />
Where<br />
Is the echo of command<br />
<br />
Status<br />
bit 0 = No Font file found<br />
bit 1 = Required files not found<br />
bit 2 = File system has faulted<br />
bit 3 = No POR.INI File (Default file has been generated)<br />
bit 4 = Codepage requested was not found<br />
bit 5 = Primary FAT was damaged, the alternate was used.<br />
bit 6 = 1 always<br />
bit 7 = 0 always<br />
[ESC] [EM]P<br />
Activate Periodic Status Back<br />
ASCII<br />
[ESC] [EM] P<br />
Hexadecimal 1BH 19H 50H <br />
Decimal <br />
IPCL<br />
None<br />
EPOS<br />
None<br />
Description This command activates the periodic status back feature. It will<br />
automatically return an [ENQ] status (See page 161) on a periodic bases.<br />
The value of n is the period in 100 MS intervals. This command is saved<br />
through power cycles. Once set it need not be set again, however you can set<br />
it the same value repeatedly as it is only saved if it is changed. In general it<br />
should not be changed on a regular bases.<br />
Where n = Interval in 100 MS increments. IE 20 = 2 Seconds. Setting the<br />
value to 0 disables the feature.<br />
Note: Periodic status back can also be activated with the [ESC][EM]p<br />
command, however it is not save during a power cycle.<br />
[ESC] [EM]p<br />
Activate Periodic Status Back<br />
ASCII<br />
[ESC] [EM] p<br />
Hexadecimal 1BH 19H 70H <br />
Decimal <br />
IPCL<br />
None<br />
EPOS<br />
None<br />
Description This command temporarily disables and enables the periodic<br />
status back feature if previously activated with the [ESC][EM]P command.<br />
<strong>43</strong>-06938 Rev L Page 167
Control Codes<br />
Where n = 0 disables PSB and n = (non zero) Enables PSB at the interval<br />
defined by the [ESC][EM]P command.<br />
If not previously activated with the [ESC][EM]P command, this command will<br />
activate it but not save the value through a power cycle.<br />
Where n = Interval in 100 MS increments. IE 20 = 2 Seconds. Setting the<br />
value to 0 disables the feature.<br />
Page 168<br />
<strong>43</strong>-06938 Rev L
Control Codes<br />
Double Level Loader<br />
It is desirable in some applications to allow the host application to enter boot<br />
load mode and update the firmware. Normally this is prevented by design,<br />
and it is not possible for the normal operating mode of the printer to enter the<br />
factory boot mode. A Watch Dog timer will reset the printer if abnormal<br />
conditions are detected; this timer protects the normal operating mode from<br />
being corrupted by an unexpected event. The factory boot loader does not<br />
support the Watch Dog timer. If for any reason, the normal operating mode<br />
enters the factory boot loader, the printer will reset in about 500 mS.<br />
To allow the application to update the operating firmware, an optional second<br />
loader is provided.<br />
Entering Field Boot Load Mode.<br />
To enter field Boot Load mode, the following command should be used:<br />
Function Enter Field Boot load mode<br />
ASCII<br />
[ESC] ~[SO]% or [ESC] ~[SO]# or [ESC] ~[SO]$<br />
Hexadecimal 1BH 7EH 0EH 25H<br />
Decimal <br />
Description This command waits for 200 Ms for the printer to be idle, turns off<br />
all active drivers and enters Field Boot load mode. No communications should<br />
be attempted for 2 seconds after this command is processed.<br />
When In Field boot load mode, the firmware image file provided by Transact<br />
should be sent to the printer. The communications will be the same as normal<br />
operating node.<br />
The [ESC] ~[SO]# and [ESC] ~[SO]$ commands also enter boot load only the<br />
way the USB enumerates may be altered. [ESC] ~[SO]# forces the boot load<br />
USB enumeration to use a different PID (Product Identification). This allows a<br />
different Windows driver to be evoked. [ESC] ~[SO]$ forces the boot load to<br />
use the same PID as normal operation. This will force Windows to envoke the<br />
same driver that is used for normal operation. The [ESC] ~[SO]% will use the<br />
current configuration.<br />
NOTE: [ESC] ~[SO]# and [ESC] ~[SO]$ alter the configuration.<br />
There are several commands available in field boot load mode that may be<br />
used by the host application to query the printer.<br />
Function Returns the boot loader ID<br />
ASCII<br />
[STX]B<br />
Hexadecimal 02H 42H<br />
Decimal <br />
Description Returns the Field Boot loader ID, e.g. PB<strong>43</strong>90-1.00[CR][LF]<br />
<strong>43</strong>-06938 Rev L Page 169
Control Codes<br />
Function Returns Flash Type ID<br />
ASCII<br />
[STX]E<br />
Hexadecimal 02H 45H<br />
Decimal <br />
Description Returns the Flash Type ID. IE. SGS 29F400B[CR][LF]<br />
Function Check and return the operating firmware ID<br />
ASCII<br />
[STX]K<br />
Hexadecimal 02H 4BH<br />
Decimal <br />
Description Checks the CRC and if valid returns the operating firmware ID. IE.<br />
PE<strong>43</strong>00-2.00[CR][LF]<br />
If the Firmware is not present or the CRC is incorrect, “None[CR][LF]” will<br />
be returned<br />
Function Checks and starts the operating firmware<br />
ASCII<br />
[STX]X<br />
Hexadecimal 02H58H<br />
Decimal <br />
Description Checks the CRC of the operating firmware and starts normal<br />
operation if correct. This command does not return any information.<br />
There are numerous other commands involved in performing the actual<br />
firmware update, whose details are beyond the scope of this document. To<br />
perform a flash update, simply send the file provided to you by Transact<br />
unaltered and the firmware will be updated.<br />
To allow easy access to the field loader, the power button may be used to<br />
switch between the factory loader and the field loader and from the field loader<br />
and normal operation. When this procedure is used with a serial adapter, the<br />
Baud rate will default to 19200 and the Protocol will be both XON/XOFF and<br />
Ready/Busy.<br />
Note 1: Do not attempt any other commands in field loader mode. You may<br />
experience unexpected and undesirable results.<br />
Note 2: If for any reason, the field loader is corrupt, the factory boot loader<br />
must be used to replace it.<br />
Page 170<br />
<strong>43</strong>-06938 Rev L
Epic <strong>43</strong>0 TM Graphics<br />
Chapter 9<br />
Epic <strong>43</strong>0 TM Color Graphics<br />
<strong>43</strong>-06938 Rev L Page 171
This page intentionally left blank<br />
Page 172<br />
<strong>43</strong>-06938 Rev L
Epic <strong>43</strong>0 TM Graphics<br />
Printing Graphics<br />
The Epic <strong>43</strong>0 TM Printer has bit-image graphic capability and a full PCcompatible<br />
character graphic set. The bit image format is similar to that used<br />
on other personal computer printers.<br />
Character Graphics<br />
Character graphics is the term for joining individual characters together to<br />
produce a mosaic of characters that form a graphic image. The simplest<br />
method uses an * (or any other character) to form an image. For example,<br />
<strong>TransAct</strong> ® ‘s printer brand of “Ithaca” might be formed as follows.<br />
*** *** * * ** *** **<br />
* * * * * * * * * *<br />
* * ***** **** * ****<br />
* * * * * * * * * *<br />
*** * * * * * *** * *<br />
Figure 25 Example of Character Graphics<br />
The extended character set of the printer supports line graphic characters that<br />
can be combined to form windows and other shapes. For the shapes to join<br />
from line to line, the spacing must be set properly.<br />
<strong>43</strong>-06938 Rev L Page 173
Epic <strong>43</strong>0 TM Graphics<br />
APA Graphics<br />
The printer is capable of all-points-addressable (APA) or horizontal graphics.<br />
This type of graphics is very popular in impact printers. To provide<br />
compatibility with legacy applications, The Epic <strong>43</strong>0 TM supports several APA<br />
graphics modes. Generating a graphic image by hand is time consuming and<br />
tedious. It is recommended that a graphic package be used to create a<br />
graphic image. The following procedure will help with the setup.<br />
Procedure for APA graphics:<br />
1. Generate the graphic image in the program of your choice. APA graphics<br />
only support monochrome images.<br />
2. Make sure the paper size chosen fits the printer (3 inches wide with 0.25-<br />
inch margins). If the paper size cannot be set, print a portion of the page.<br />
3. Print the graphic to a file using a generic, IBM, graphic, 9-pin driver. The<br />
standard IBM resolutions are 240 x 216 dpi, 120 x 72 dpi, and 60 x 72 dpi.<br />
The Epic <strong>43</strong>0 TM Printer supports all three resolutions by converting the<br />
input image to 203 x 203 dpi..<br />
4. Print the graphic image to a file.<br />
5. Edit the resulting file to remove any unwanted form control, and insert the<br />
Epic <strong>43</strong>0 TM form control.<br />
6. Make the resulting file available to your application, so it can be sent to the<br />
printer when required.<br />
Page 174<br />
<strong>43</strong>-06938 Rev L
Epic <strong>43</strong>0 TM Graphics<br />
Epic <strong>43</strong>0 TM Universal Color Graphics<br />
The Epic <strong>43</strong>0 TM Printer firmware supports the ability to print color graphics in<br />
all emulations.<br />
The intent of Universal Color Graphic support is to allow the Epic <strong>43</strong>0 TM<br />
graphics capability to be used in existing applications that do not support color<br />
graphics as well as all new applications.<br />
For new applications, the programmer may code the graphics generator into<br />
there printer driver. <strong>TransAct</strong> Technologies provides a Windows active X that<br />
will generate the graphics for you. In addition the source to the graphics<br />
generator is available upon request 11 .<br />
There are several ways to add color graphics to an existing application. The<br />
easiest for you will depend on how much control you have over your<br />
application. At a minimum, you should be able to change the name printed on<br />
the top of a receipt. With the PJColor 12 program you can store a named<br />
graphic into the printer an print it by changing the text name to match the<br />
stored graphic. For example, if your receipt has a name like "Joe's Market",<br />
you can save a graphic in the printer named "Joe's" and then change the<br />
"Joe's Market" to "&%URJoe's&" When the Epic <strong>43</strong>0 TM finds "&%URJoe's&", it<br />
is replaced with the stored graphic.<br />
Some applications allow a graphic file to be sent to the printer. In this case<br />
PJColor can generate the graphic file and then your application can send it to<br />
the printer.<br />
Note: PJColor was originally designed to support color inkjet printing. It has<br />
been enhanced and may be used to generate color graphics for the Epic<br />
<strong>43</strong>0 TM .<br />
PJColor also has a feature that will allow you to generate a file that will define<br />
the graphic to be stored into the printer. You can then use this file to setup any<br />
number of printers with the same graphic.<br />
If you are using a windows print driver (other than the <strong>TransAct</strong> ® Epic <strong>43</strong>0 TM<br />
driver) to support your printer, you will not be able to send color graphics to the<br />
printer through the print driver. The print driver will not support universal<br />
graphics. You can however, store the graphic in the printer and use IPCL<br />
commands to print the stored graphic. (You must select a printer resident font<br />
for this to work.)<br />
The following is a short summary and how to description of these features.<br />
11 You may be required to sign a nondisclosure agreement with <strong>TransAct</strong><br />
Technologies to obtain source code.<br />
12 The PJColor program has been enhanced to provide several ways to create Logos<br />
and Coupons and make them available to the Epic <strong>43</strong>0TM printer.<br />
<strong>43</strong>-06938 Rev L Page 175
Epic <strong>43</strong>0 TM Graphics<br />
Print File Graphics<br />
PJColor can generate a print file that may be sent to the printer in any<br />
emulation and print graphics.<br />
To generate a print file.<br />
1) Start PJColor<br />
2) Under Settings, select the Epic <strong>43</strong>0 TM printer. Then select the emulation<br />
that machines the printer.<br />
3) Select the resolution you would like to have the printer use to print the<br />
graphics. Low resolutions are faster, high resolutions produce better<br />
graphics.<br />
4) Load the graphics Image you wish to print.<br />
5) Select the communications port and configuration.<br />
6) Set the secondary color to NONE.<br />
7) Adjust the image to produce the effect you would like. The lower graphic<br />
window displays an approximation of the printed image.<br />
8) When you are satisfied with the graphic, press the "Print to a File" button.<br />
PJColor will ask what file you would like to receive the print data.<br />
9) This file can be sent to the printer and the graphic will be printed.<br />
Store Graphics in the printer:<br />
PJColor can store a graphic in the Epic <strong>43</strong>0 TM Printer or generate a file that will<br />
store a graphic in the printer.<br />
To Store a graphic in the printer<br />
1) Start PJColor<br />
2) Under Settings, Select the Epic <strong>43</strong>0 TM printer. Then select the emulation<br />
that you will be setting the printer to.<br />
3) Select the resolution you would like to have the printer use to print the<br />
graphics. Low resolutions are faster, high resolutions produce better<br />
graphics.<br />
4) Select the communications port and protocol that is to be used to<br />
communicate to the printer.<br />
5) Load the graphics Image you wish to print.<br />
6) Adjust the image to produce the effect you would like. The lower graphic<br />
window displays an approximation of the printed image.<br />
7) When you are satisfied with the graphic, press the "Store in Printer" button.<br />
PJColor will attempt to interrogate the printer and will display the graphics<br />
currently in the printer if any. (Note: If PJColor cannot communicate with<br />
the printer, only the "Save to File" option will be allowed.)<br />
8) Make sure there is enough room in the printer for the graphic.<br />
9) Insert a name in the "Macro Name" box. Keep it simple, this name will be<br />
used later to print the graphic.<br />
10) Record the graphic in the printer.<br />
Page 176<br />
<strong>43</strong>-06938 Rev L
Epic <strong>43</strong>0 TM Graphics<br />
Print a stored graphic.<br />
In the data stream to the printer enter "&%URName&" and the graphic will<br />
print in place of the "&%URName&" data. The "Name" must be identical to the<br />
name entered earlier.<br />
Generate a file to store color graphics into a printer<br />
To generate a file that will store a color graphic into a printer, follow the same<br />
procedure to store a graphic in a printer up through step 8. Then:<br />
1) Insert a name in the "Macro Name" box. This name should be kept simple,<br />
as it will be used later to print the graphic<br />
2) Press the "Save to File" button. This will allow you to select a file where<br />
the stored universal graphic information is saved.<br />
3) This file contains an "erase any previous graphic with the same name"<br />
command, "a save new graphic with this name" command and the<br />
graphics information.<br />
4) This file can then be sent to the printer and the graphic will be saved in the<br />
printer. Note that if the target printer does not have enough room for the<br />
graphic information to be stored, the graphic will not be stored.<br />
How universal color graphics is done<br />
The printer extends all the emulations to support two additional escape<br />
sequences and adds limited IPCL support.<br />
IPCL (<strong>TransAct</strong> Printer Control Language) is an ASCII method of sending<br />
printer commands to the printer. In <strong>TransAct</strong> PcOS emulation, IPCL command<br />
support is extensive. In other emulations, IPCL support is limited to the<br />
following commands.<br />
&%CR<br />
&%LF<br />
&%UAxxx<br />
&%CLx<br />
&%UBName&<br />
&%UGName&<br />
&%URName&<br />
&%UDName&<br />
&%USName&<br />
&%UFALL&<br />
&%UQ&<br />
&%UTx<br />
Insert a [CR]<br />
Insert a [LF]<br />
Feed xxx paper steps and cycle auto-cutter<br />
Select Color where x = 0 for Black or 1,2,3 for Color<br />
Begin defining universal graphic "Name"<br />
End the definition of "Name"<br />
Run (print) universal graphic "Name"<br />
Remove universal graphic "Name" from nonvolatile<br />
memory<br />
Flag universal graphic "Name" to be run when the<br />
printer is turned on<br />
Erase all stored universal graphics. (Erases all<br />
User Store)<br />
Prints a directory of the universal graphics currently<br />
stored in the printer<br />
Changes the Name termination character from "&"<br />
<strong>43</strong>-06938 Rev L Page 177
Epic <strong>43</strong>0 TM Graphics<br />
to "x". "x" may range from 21H to 255H<br />
Note: The & used to flag the end of the Name string is not valid in PcOS<br />
<strong>TransAct</strong> emulation mode. You should use or define the terminator with<br />
the &%UTx command.<br />
The extended Escape sequences are [ESC][US]… and [ESC][FS]…<br />
The [ESC][US] commands are the same as the PcOS emulation. The<br />
[ESC][FS] commands are not intended to be used by the customer. They<br />
provide the universal graphics support. Because graphics would be very<br />
difficult to generate and are not supported by any graphics drives other than<br />
PJColor .<br />
How to use IPCL commands in text strings<br />
If your software allows you to pass text strings to the printer, you should be<br />
able to use the universal graphics commands. Most POS software allows user<br />
customization of the text message printed at the beginning and the end of the<br />
receipt.<br />
To use the Universal IPCL commands simply place them in a text string like<br />
the following example; note that your results may vary depending on the<br />
operation system, software and the ability to pass ASCII Characters.<br />
Load and store named graphic image<br />
• First you must create the graphic image using the PJColor Color Image<br />
Converter and save the image to a file. See the section “Generate a file to<br />
store graphics into a printer” above.<br />
• Send the following text strings to the printer using whatever means is<br />
available to you.<br />
&%UBLogo& Begin defining macro "Logo"<br />
&%UGLogo& End the Definition of "Logo"<br />
&%UMLogo& Save Macro "Logo" to nonvolatile memory<br />
• A graphic image named “Logo” should now be stored in the nonvolatile<br />
memory.<br />
• To verify the image is present, use the “&%UQ&” IPCL command or the<br />
PJColor Color Image Converter to print the name and size of the stored<br />
images.<br />
Recall and print stored named graphic image<br />
• Send the following text string to the printer using whatever means is<br />
available to you.<br />
&%URLogo& Run Macro "Logo" (Print the macro)<br />
Cautions<br />
Universal graphics information is stored in the same place as user defined<br />
characters and user defined macros. If you are using an emulation such as<br />
ESC/POS that supports macros and/or user defined characters, universal<br />
graphics will compete for space with these functions. In addition, the<br />
Page 178<br />
<strong>43</strong>-06938 Rev L
Epic <strong>43</strong>0 TM Graphics<br />
"&%UFALL&" (Erase universal graphics) will also erase any user defined<br />
graphics and macros.<br />
If you are using the <strong>TransAct</strong> PcOS emulation, these commands are identical<br />
with the User Store commands except for the terminator character. You may<br />
change the NUL terminator to "&" with "&%UT&" if you find the "&" easier.<br />
<strong>43</strong>-06938 Rev L Page 179
Epic <strong>43</strong>0 TM Graphics<br />
Universal Graphics Command Descriptions<br />
&%UB & Begin named universal graphic record<br />
IPCL<br />
&%UB &<br />
Description The &%UB & command initializes the universal graphic<br />
buffer structure, and redirects the following data to the universal graphic<br />
buffer. It uses the field as a reference. If the name already exists in<br />
the flash user store, the command is ignored. The command must be followed<br />
by the "End name universal graphic record" command with the same name. If<br />
the data that follows is larger than the universal graphic buffer (about 16K), the<br />
universal graphic definition is terminated without saving any data.<br />
&%UG & End named universal graphic record<br />
IPCL<br />
&%UG &<br />
Description The &%UG & command ends the universal graphic<br />
record operation and saves the universal graphic to flash. It uses the<br />
field to verify the command end and must match the "Begin named<br />
universal graphic record" command. If the name already exists in the flash<br />
user store or the universal graphic memory is exceeded, the command is<br />
invalid, and the field prints.<br />
&%UR & Run universal graphic data from user store<br />
IPCL<br />
&%UR &<br />
Description The &%UR & command loads the referenced universal<br />
graphic into the universal graphic buffer. The universal graphic buffer is then<br />
inserted into the data stream. If the named item does not exist or is not a<br />
universal graphic, the Epic <strong>43</strong>0 TM ignores the command.<br />
&%US & Flag item as a start-up universal graphic<br />
IPCL<br />
&%US &<br />
Description The &%US & command flags the referenced item to `be<br />
processed at startup. Only one user character definition and one universal<br />
graphic may be flagged to run at startup.<br />
&%UD & Delete item from user store<br />
IPCL<br />
&%UD &<br />
Description The &%UD &command removes an item from user store<br />
and frees up space. If the item does not exist, the Epic <strong>43</strong>0 TM ignores the<br />
command.<br />
Page 180<br />
<strong>43</strong>-06938 Rev L
Epic <strong>43</strong>0 TM Graphics<br />
&%UFALL& Flush information from user store<br />
IPCL<br />
&%UFALL&<br />
Description The &%UFALL& command clears all entries in user store and<br />
frees the data space. It must have the name, “ALL” (in uppercase) attached.<br />
&%UQ& Report on user store<br />
IPCL<br />
&%UQ&<br />
Description The &%UQ& command prints a status report. The intention of the<br />
command is to aid in universal graphic development.<br />
&%UT Redefine User Store Termination Character<br />
IPCL<br />
&%UT<br />
Description This command allows the terminator used to signal the end of the<br />
name field in User Store commands to be modified. The value of is used<br />
for the terminator. The value of n may be from 0 to 255.<br />
Example If &%UT% were sent to the printer the User Store command to run<br />
universal graphic "Demo" would be &%URDemo%.<br />
&%CL Set Print Color<br />
IPCL<br />
&%CL <br />
Description This command allows various colors to be selected on printer<br />
emulations that do not support color text.<br />
Where n: 0 Print in Black<br />
1, 2, 3 Print in Red, Blue, or Green<br />
&%UA Cycle Auto-Cutter<br />
IPCL &%UA <br />
Description This command feeds m/96 inches of paper and cycles the auto<br />
cutter.<br />
Where m: m = m 1 * 100 + m 2 *10 + m 3<br />
<strong>43</strong>-06938 Rev L Page 181
Epic <strong>43</strong>0 TM Graphics<br />
Bitmapped File Graphic Support<br />
It is possible to load a bitmap file into the printer and print it directly by<br />
command. The standard bitmap two color and 16 color bitmap file formats are<br />
supported.<br />
To use this feature, load a bitmap file into the printer using the file support<br />
commands or the Windows ® interface tool. These files can then be printed<br />
with the Print Bitmap File command. It is also possible to print a bitmap file<br />
passed from the host as data.<br />
Function Print Bitmap File command. All<br />
ASCII<br />
[ESC] [FS] P <br />
Hexadecimal 1BH 1CH 50H<br />
Decimal <br />
Scale<br />
0 = one to one, 1 = 2x high, 2 = 2x Wide, 3 = 2x High and<br />
2x Wide<br />
FileName File name from 1 to 30 characters including a three<br />
character extension, null terminated.<br />
Description The [ESC] [FS] P command will print at the current dot column a<br />
previously saved bitmap file image. If the file does not exist, this command<br />
will have no effect.<br />
Note: If the Scale is an uppercase ‘B’ this command will directly process a<br />
bitmap file. See the Print Bitmap Data command below.<br />
Function Print Bitmap Data command. All<br />
ASCII<br />
[ESC] [FS] P <br />
Hexadecimal 1BH 1CH 50H<br />
Decimal <br />
Description The [ESC] [FS] P command will print the bitmap file data that<br />
follows. Note that the first character in a bitmap file is an uppercase B. This<br />
differentiates this command from the Print Bitmap File command described<br />
above.<br />
Note: This command always prints the bitmap data at a scale of one to one.<br />
Page 182<br />
<strong>43</strong>-06938 Rev L
Epic <strong>43</strong>0 TM Graphics<br />
Epic <strong>43</strong>0 TM Coupon-Cut-Logo Feature<br />
The Epic <strong>43</strong>0 TM printer has a feature that will allow a coupon and or logo<br />
graphic to be printed as part of the existing auto cutter command.<br />
To activate this feature, it must first be configured. Configuration consists of<br />
specifying in what order the Coupon-Cut-Logo is processed and optionally,<br />
how much paper is to be feed after the new cut operation.<br />
Once configured, the Coupon and/or logo must be defined and loaded into the<br />
printer. The “Universal Graphics” feature should be used to define and load<br />
the graphic. The Coupon is named “Coupon”, and the Logo is named “Logo”.<br />
They may be saved in any resolution and of any size. They also need not be<br />
all graphics.<br />
The existing application cut command will be replaced by the Coupon-Cut-<br />
Logo operation. Configuration options are as follows:<br />
Cut Command Logo:<br />
Cut-Logo<br />
Coupon-Cut<br />
Logo-Cut<br />
Cut-Coupon<br />
Coupon-Cut-Logo<br />
Logo-Cut-Coupon<br />
Cut-Logo-Coupon<br />
Cut-Coupon-Logo<br />
Logo-Coupon-Cut<br />
Coupon-Logo-Cut<br />
Disabled<br />
Perform Feed to cut, then cut, and then print the Logo.<br />
Print the Coupon, Feed to Cut, and Cut.<br />
Print the Logo, Feed to Cut, and Cut.<br />
Perform Feed to cut, then cut, and then print the Coupon.<br />
Print the Coupon, Feed to cut, Cut, ad then print the Logo.<br />
Print the Logo, Feed to cut, Cut, ad then print the Coupon.<br />
Perform the Feed to cut, Print the Logo and then the Coupon.<br />
Perform the Feed to cut, Print the Coupon and then the Logo.<br />
Print the Logo, then the Coupon, feed to cut and Cut.<br />
Print the Coupon, then the Logo, feed to cut and Cut.<br />
Perform the Normal cut.<br />
Cut Command Logo Feed: 0 to 80 mm.<br />
<strong>43</strong>-06938 Rev L Page 183
Chapter 10<br />
Unicode and Fonts<br />
<strong>43</strong>-06938 Rev L Page 185
This page intentionally left blank<br />
Page 186<br />
<strong>43</strong>-06938 Rev L
Unicode and Fonts<br />
Fonts<br />
Your <strong>TransAct</strong> ® Epic <strong>43</strong>0 TM printer uses outline and/or stroke based scalable<br />
fonts. These fonts provide you wish additional font options as well as improved<br />
character appearance, while functioning transparently within legacy<br />
applications.<br />
Such fonts represent a substantial improvement to the so-called bitmap fonts<br />
that are traditionally used for thermal printers, which are based on a pixel by<br />
pixel definition of characters. With a fixed size and fixed character spacing,<br />
these bitmap fonts were limited to specific magnification factors from 2-8X,<br />
and required scaling and smoothing at larger font sizes. Moreover, such<br />
scaling and smoothing operations were often unsuitable for complex fonts<br />
such as Asian characters, where changes to pixel layout actually risk changing<br />
character meanings.<br />
To take full advantage of scalable fonts, the Epic <strong>43</strong>0 TM supports additional<br />
commands and features, including:<br />
1) Character size selection by points<br />
2) Character pitch selection by points<br />
3) Variable character spacing if desired<br />
4) Custom fonts<br />
5) Unicode support for international language support<br />
6) Enhanced code page support for ASCII based applications.<br />
Character Generation<br />
The font technology in the Epic <strong>43</strong>0 TM printer uses standard outline fonts<br />
(sometimes referred to as TrueType fonts) or stroke fonts. Both technologies<br />
are scalable, however each has unique advantages.<br />
Outline characters<br />
Outline characters use points along the edge of the character to<br />
describe the character. The character generator defines the edge and<br />
then fills in the enclosed space to define the character.<br />
This type of character generation produces very well formed characters<br />
and produces the best looking characters. However, it requires more<br />
storage than stroke fonts, and is best for non-Asian fonts.<br />
<strong>43</strong>-06938 Rev L Page 187
Unicode and Fonts<br />
Stroke-based characters<br />
With stroke based characters, the points stored are along the center<br />
line. Less than half the points are needed to render stroke based<br />
characters. This improves character-generation performance and uses<br />
less space.<br />
This type of character generation is fast and efficient, and is ideally<br />
suited for Asian fonts.<br />
Character Size<br />
The character generation engine used in the Epic <strong>43</strong>0 TM internally uses a<br />
standard point based system to specify the character size. One point is 1/72<br />
of an inch. Therefore a 72 point character would form a character suitable to<br />
generate one line per inch printing. The typical application might refer to a 12<br />
point character. This is the character height and not the width. The character<br />
width typically varies on character by character bases; for example, the lower<br />
case “i” is much narrower than the upper case “W”.<br />
Font selection commands for selecting character sizes in legacy applications<br />
are also supported. For printers such as the Epic <strong>43</strong>0 TM , two or three character<br />
sizes are generally predefined with a dot matrix size of 10x24 or 13x24 dots,<br />
and this fixed size may then be double or tripled to provide larger characters<br />
when needed. To supply legacy support, the Epic <strong>43</strong>0 TM will automatically<br />
select the appropriate character size to support the legacy font and character<br />
scaling commands.<br />
In the Epic <strong>43</strong>0 TM , the horizontal and vertical point size may be set<br />
independently. Typically this type of printer would print a tall, narrow, monospaced<br />
character. Tall narrow mono-spaced character provides a very<br />
readable print with easy column alignment while using less paper than<br />
standard type fonts. This type of font is sometimes referred to as a condensed<br />
font.<br />
Selecting Character Size<br />
The Epic <strong>43</strong>0 TM provides two ways to specify character size. The legacy or<br />
classic font selection method is based on dot matrix size. The second method<br />
is based on the standard type points system. The advantage of the type point<br />
system is that the print produced by the printer will match what is displayed by<br />
the host system, as both use the same system for describing the characters<br />
produced.<br />
Legacy or Classic Method<br />
With the classic method, the application selects a character size and then sets<br />
the character spacing by adding or removing dot spaces between the<br />
characters. Using the scaled font, the Epic <strong>43</strong>0 TM provides 3 basic predefined<br />
character sizes. The smallest is a 10x24 dot-like 13 font and is typically printed<br />
in pitches from 16 to 20 characters per inch (CPI). The next larger font is 13 x<br />
13 Characters are dot-like because they are not guaranteed to be exactly at an exact<br />
dot equivalent. They are spaced in a fixed character cell that provides equivalent<br />
spacing and alignment as a fixed character size, however the actual character size is<br />
defined by the font designer.<br />
Page 188<br />
<strong>43</strong>-06938 Rev L
Unicode and Fonts<br />
24 dot-like, and is typically printed in pitches from 14 to 16 CPI. The largest<br />
font is 14 x 24 dot-like font and is typically printed at pitches from 10 to 14 CPI.<br />
The Epic <strong>43</strong>0 TM always prints at 203 dots per inch (dpi) and always uses the<br />
scalable font to form characters. The resulting characters are not necessarily<br />
exactly the dot size indicated, but are always spaced in a fixed dot cell<br />
provided that the legacy commands are used. Adding or subtracting space<br />
between characters achieves different character pitches with a fixed character<br />
cell size. As each dot has a fixed size and position, only specific pitches are<br />
possible. The following table defines the fonts and pitches possible with each.<br />
Character Cell (H x W) 10x24 Font<br />
(W x H)<br />
13x24 Font<br />
(W x H)<br />
15x24 Font<br />
(W x H)<br />
Horizontal Width<br />
10 Dots<br />
0.0493 inches<br />
13 Dots<br />
0.0640 inches<br />
15 Dots<br />
0.0739 inches<br />
Vertical Height<br />
24 Dots<br />
0.118 Inches<br />
24 Dots<br />
0.118 Inches<br />
24 Dots<br />
0.118 Inches<br />
Character spacing in Characters per Inch (CPI)<br />
Pitch at native cell size 20.30 15.62 13.5<br />
5 dot Removed 40.60 25.38 20.30<br />
4 dot Removed 33.83 22.56 18.45<br />
3 dot Removed 29.00 20.30 16.92<br />
2 dot Removed 25.38 18.45 15.62<br />
1 dot Removed 22.56 16.92 14.50<br />
0 dot added 20.30 15.62 13.53<br />
1 dot added 18.45 14.50 12.69<br />
2 dots added 16.92 13.53 11.94<br />
3 dots added 15.62 12.69 11.28<br />
4 dots added 14.50 11.94 10.68<br />
5 dots added 13.53 11.28 10.15<br />
6 dots added 12.69 10.68 9.67<br />
NOTE: Combinations shown in shaded areas are not recommended.<br />
Table 8 Possible Character Pitches<br />
Character spacing may also be selected by requesting a print pitch based on<br />
characters pre inch. Once again, the results are not exact in this case. The<br />
following table lists the resulting spacing based on a given CPI request.<br />
Requested<br />
CPI<br />
Character<br />
Width<br />
Resulting CPI Requested CPI Character Width Resulting CPI<br />
0 variable variable 16 12 16.92<br />
1 203 1.00 17 12 18.45<br />
2 101 2.01 18 11 18.45<br />
3 67 3.03 19 10 20.30<br />
4 50 4.06 20 10 20.30<br />
5 40 5.08 21 9 22.56<br />
6 33 6.15 22 9 22.56<br />
7 29 7.00 23 8 25.38<br />
8 25 8.12 24 8 25.38<br />
9 22 9.23 25 8 25.38<br />
10 20 10.15 26 7 29.00<br />
11 18 11.28 27 7 29.00<br />
<strong>43</strong>-06938 Rev L Page 189
Unicode and Fonts<br />
12 16 12.69 28 7 29.00<br />
13 15 13.53 29 7 29.00<br />
14 14 14.50 30 6 33.83<br />
15 13 15.62<br />
NOTE: Combinations shown in shaded areas are not recommended.<br />
Table 9 Requested CPI and Resulting CPI<br />
If the requested spacing is zero, the character spacing will be defined by the<br />
character definition, and will result in variable spacing.<br />
Line spacing<br />
The legacy commands select line spacing as lines per inch. With scalable<br />
characters, the lines per inch is a minimum spacing. If a character is larger<br />
then the spacing between lines, the line spacing will be increased to allow<br />
enough room for the characters on that line.<br />
Selecting character size by points.<br />
In addition to the legacy or classic method of character size selection, the Epic<br />
<strong>43</strong>0 TM allows selection by point size. Point sizes from 4 to 72 points may be<br />
selected for both the horizontal and vertical axes. If a horizontal point size of<br />
zero (0) is selected for the horizontal spacing the characters are printed using<br />
variable spacing based on the character definition, using the vertical point size<br />
for the horizontal point size.<br />
To provide fine control over character size, two commands are available, one<br />
of which specifies the size in points, and the other of which specifies the size<br />
in ¼-point increments.<br />
If the font is a stroke font, the boldness of the characters is controlled through<br />
variations in individual stroke width.<br />
Internal Fonts<br />
The Epic <strong>43</strong>0 TM is provided by default with a standard WGL4 outline-based<br />
font, and optionally with an additional GB18030 stroke-based font. Additional<br />
user defined outline or stroke fonts may be used as required.<br />
The default font provided with the Epic <strong>43</strong>0 TM is called UTAH MT Condensed<br />
from Monotype. This is a condensed variable-pitch font that produces<br />
reasonable fixed-pitch results. In some cases, extra wide characters in this<br />
font may produce undesirable fixed-pitch results. If this is unacceptable, the<br />
<strong>TransAct</strong> Sub font may be loaded, containing slightly narrower characters in<br />
key locations. As another alternative, the printer may be ordered with a fixedpitch<br />
font, which will not allow variable-pitch printing.<br />
Custom Fonts<br />
The Epic <strong>43</strong>0 TM supports TrueType fonts. There are several companies that<br />
will provide custom character sets. The Epic <strong>43</strong>0 TM uses fonts provided by<br />
Monotype. You can contract Monotype through their website www.fonts.com,<br />
Page 190<br />
<strong>43</strong>-06938 Rev L
Unicode and Fonts<br />
or by phone in U.S. & Canada (toll-free 1-800-424-8973, directly at 1-781-970-<br />
6020), or the United Kingdom (Free Phone 0800 371242, direct +44 (0)1737<br />
765959.)<br />
Stacked or Linked fonts<br />
The Epic <strong>43</strong>0 TM also uses a font stacking technology where fonts are linked<br />
together. This means that as each character is looked up, the first font in the<br />
stack containing the character is then printed. For example, if a customer<br />
would like to replace several standard characters with custom characters, a<br />
user defined font can be provided that would, if first in the link, replace the<br />
characters n the standard font.<br />
It may also be desirable to stack fonts to provide a precedent for how<br />
individual characters are looked up. For example:<br />
• An application may wish to alter the appearance of several characters for<br />
security.<br />
• It might be necessary to define a group of special symbols for a specific<br />
application.<br />
• It might be necessary to supplement a font with special characters like<br />
OCR characters.<br />
To provide this flexibility, the Epic <strong>43</strong>0 TM has the ability to link up to 8 fonts<br />
together. When this is done, the first font in the link is searched first. If the<br />
character is not defined, the next font in the link is searched. This process is<br />
continued until the character is found or the last font is searched.<br />
There are two ways to define a linked font. This first is to define a default<br />
linked font in the POR.INI file. If it link font is defined in the POR.INI file, it will<br />
be selected as the default power on font. Selecting font 0 will select the linked<br />
font provided that a link font is defined.<br />
It is also possible to dynamically define a linked font. This requires that the<br />
fonts to be linked be aliased to a font id in the POR.INI file. Defining a linked<br />
font does not necessarily activate it. If the linked font was not already active, it<br />
must be selected by selecting font 0.<br />
Font Storage<br />
The Epic <strong>43</strong>0 TM supports a Flash file system used to store fonts, custom<br />
graphic and custom macros. A file system interface is provided for this<br />
system, where the host application may download files. In addition, <strong>TransAct</strong><br />
Technologies provides a file loading tool that runs on Windows ® based<br />
systems.<br />
To allow flexible and easy support for all kinds of fonts, fonts are stored in the<br />
Epic <strong>43</strong>0 TM printer as a standard font file. These files are typically not visible<br />
to the user, however; <strong>TransAct</strong> Technologies provides a support tool that will<br />
allow the user to load their own font directly from Windows and change the<br />
way fonts are printed. It is also possible for the host application to load fonts<br />
into the printer.<br />
<strong>43</strong>-06938 Rev L Page 191
Unicode and Fonts<br />
The printer can contain up to 99 unique and selectable fonts. Any font may be<br />
selected at any time. In addition up to 8 fonts may be linked or stacked<br />
together. Some standard character size and character pitch commands are<br />
supported as legacy commands. The appearance of the print using those<br />
commands has been optimized using the <strong>TransAct</strong> WGL4 font. If you elect to<br />
use your own font, or the GB18030 font, you may wish to use the scalable font<br />
control commands to select the character size and spacing rather than the<br />
legacy commands.<br />
<strong>TransAct</strong> Technologies provides a basic WGL4 font with the printer. This may<br />
be supplemented or replaced with a GB18030 Chinese font upon request.<br />
The printer will accept TrueType and compressed stroke fonts as defined by<br />
Monotype. If required, the customer may supplement the <strong>TransAct</strong> supplied<br />
fonts with their own custom fonts.<br />
WARNING: If you elect to load fonts into the printer you<br />
must have proper rights to that font. Do not download a<br />
font to the printer if you do not have the right to use the<br />
font as a downloaded printer font.<br />
Page 192<br />
<strong>43</strong>-06938 Rev L
Unicode and Fonts<br />
Bitmap Fonts<br />
It is possible to use bitmap fonts with the ITherm 280 Printer. Bitmap fonts are<br />
fixed pitch and are not scalable. They will only function as legacy fonts. The<br />
printer is optionally supplied with 4 legacy bitmap fonts. They are in a 10x24,<br />
12x24 draft font format and a 16x24 near letter quality format. They are<br />
defined as follows:<br />
BMFont0 = chr10x24.bft 10 x 24 draft font with typical spacing of 16 characters per inch<br />
BMFont1 = chr12x24.bft 12 x 24 draft font with typical spacing of 14 characters per inch<br />
BMFont2 = chr16x24.bft 16 x 24 NLQ font with typical spacing of 12 characters per inch<br />
BMFont4 = ocr16x24.bft 16 x 24 OCR font with typical spacing of 12 characters per inch<br />
It is possible to define a custom bitmap font. Transact supports a bitmap font<br />
compiler that will convert a bitmap font picture file into a compressed bitmap<br />
file that may be loaded into the printer as a bitmap (.bft) font file.<br />
The input to the program is a text file in a predefined format consisting of a<br />
font description and then character definitions consisting of the character ID<br />
and then the character definition. The format is as follows: (Note lines<br />
preceded with # characters are comments.<br />
# 11 by 24 font with a base line at 22<br />
# F=X is not used in Thermal Products<br />
W=11 H=24 B=22 F=0<br />
; N=0000 U=0000 NULL<br />
01 ...........<br />
02 ...........<br />
03 ...........<br />
04 ...........<br />
05 ...........<br />
06 ...........<br />
07 ...........<br />
08 ...........<br />
09 ...........<br />
10 ...........<br />
11 ...........<br />
12 ...........<br />
13 ...........<br />
14 ...........<br />
15 ...........<br />
16 ...........<br />
17 ...........<br />
18 ...........<br />
19 ...........<br />
20 ...........<br />
21 ...........<br />
22 ...........<br />
23 ...........<br />
24 ...........<br />
; N=0001 U=0020 SPACE<br />
<strong>43</strong>-06938 Rev L Page 193
Unicode and Fonts<br />
01 ...........<br />
02 ...........<br />
03 ...........<br />
04 ...........<br />
05 ...........<br />
06 ...........<br />
07 ...........<br />
08 ...........<br />
09 ...........<br />
10 ...........<br />
11 ...........<br />
12 ...........<br />
13 ...........<br />
14 ...........<br />
15 ...........<br />
16 ...........<br />
17 ...........<br />
18 ...........<br />
19 ...........<br />
20 ...........<br />
21 ...........<br />
22 ...........<br />
23 ...........<br />
24 ...........<br />
; N=0002 U=0021 EXCLAMINATION MARK<br />
01 ...........<br />
02 ...........<br />
03 ...00......<br />
04 ...00......<br />
05 ...00......<br />
06 ...00......<br />
07 ...00......<br />
08 ...00......<br />
09 ...00......<br />
10 ...00......<br />
11 ...00......<br />
12 ...00......<br />
13 ...00......<br />
14 ...00......<br />
15 ...00......<br />
16 ...00......<br />
17 ...........<br />
18 ...........<br />
19 ...........<br />
20 ..0000.....<br />
21 ..0000.....<br />
22 ..0000.....<br />
23 ...........<br />
24 ...........<br />
; N=0003 U=0022 QUOTATION MARK<br />
01 ...........<br />
02 ...........<br />
Page 194<br />
<strong>43</strong>-06938 Rev L
Unicode and Fonts<br />
03 .00..00....<br />
04 .00..00....<br />
05 .00..00....<br />
06 .00..00....<br />
07 .00..00....<br />
08 ...........<br />
09 ...........<br />
10 ...........<br />
11 ...........<br />
12 ...........<br />
13 ...........<br />
14 ...........<br />
15 ...........<br />
16 ...........<br />
17 ...........<br />
18 ...........<br />
19 ...........<br />
20 ...........<br />
21 ...........<br />
22 ...........<br />
23 ...........<br />
24 ...........<br />
; N=0004 U=0023 NUMBER SIGN<br />
01 ...........<br />
02 ...........<br />
03 ...........<br />
04 .....00....<br />
05 ..00.00....<br />
06 ..00.00....<br />
07 ..00.00....<br />
08 ..00.0000..<br />
09 ..0000000..<br />
10 0000000....<br />
11 0000.00....<br />
12 ..00.00....<br />
13 ..00.00....<br />
14 ..00.0000..<br />
15 ..0000000..<br />
16 0000000....<br />
17 0000.00....<br />
18 ..00.00....<br />
19 ..00.00....<br />
20 ..00.00....<br />
21 ..00.......<br />
22 ...........<br />
23 ...........<br />
24 ...........<br />
The characters must be in sequential order and must be assigned Unicode<br />
character codes. N=0001 is a sequence number in hex and is not used in<br />
controlling character generation or order. U=0021 is the Unicode address in<br />
hex and the characters must be in ascending Unicode address order.<br />
<strong>43</strong>-06938 Rev L Page 195
Unicode and Fonts<br />
Unicode<br />
As computer systems started to address more and more international<br />
environments, the classic ASCII standard with code pages became<br />
unworkable. Several competing systems were developed. however it was<br />
clear that a standard needed to be developed. In 1991 Version 1.0 of the<br />
Unicode standard was developed, to standardize how and where characters<br />
are to be addressed in an expanded addressing scheme. In 2000 Version 3.0<br />
of the Unicode standard was published and generally accepted. The Epic<br />
<strong>43</strong>0 TM follows this standard for character placement and encoding 14 .<br />
Note: If a custom font is used that is not in Unicode order, the order of the<br />
font will be used as if it were in Unicode order. Any subsequent character<br />
mappings will assume to be in Unicode order and may not produce the<br />
desired effects.<br />
Unicode Encoding<br />
The Epic <strong>43</strong>0 TM Printer supports Unicode character addressing using Unicode<br />
Transform Format or UTF as defined in the Version 3.0 Unicode Specification.<br />
There are several forms of UTF encoding.<br />
UTF-16 is the most straightforward way to access characters above 255. UTF-<br />
16 essentially sends two 8-bit bytes that form a 16-bit address to access the<br />
desired character. Basic UTF-16 does not define the byte order. If you wish<br />
to use UTF-16 and allow the printer to determine the byte order, you must<br />
send the byte order mark (0xFEFF) before you send any characters. To<br />
prevent loss of byte order synchronization, you should periodically send the<br />
byte order mark to resynchronize the printer with your application. If UTF-16 is<br />
selected, all data sent to the printer must be 16 bits. All commands and<br />
command parameters are also 16 bit, however only values between 0 and 255<br />
are valid. Note that 24 bit encoding is not supported.<br />
UTF-16BE uses the big-endian method of sending the two bytes. This method<br />
sends the high byte first and then the low byte. It is not required to send the<br />
byte order mark (0xFEFF) for the correct byte order to be initialized. However,<br />
to prevent loss of byte order synchronization, you should periodically send the<br />
byte order mark to resynchronize the printer with your application. If UTF-<br />
16BE is selected, all data sent to the printer must be 16 bits. All commands<br />
and command parameters are also 16 bit, however only values between 0 and<br />
255 are valid.<br />
UTF-16LE uses the little-endian method of sending the two bytes. This<br />
method sends the low byte first and then the high byte. It is not required to<br />
send the byte order mark (0xFEFF) for the correct byte order to be initialized.<br />
However, to prevent loss of byte order synchronization, you should<br />
periodically send the byte order mark to resynchronize the printer with your<br />
application. If UTF-16LE is selected all data sent to the printer must be 16 bits.<br />
14 The Version 3.0 Unicode standard defines a 24 bit addressing method that is not<br />
supported by the Epic <strong>43</strong>0 TM . The Epic <strong>43</strong>0 TM is limited to a 16-bit address value.<br />
Values greater than 65535 will be truncated to 16 bits.<br />
Page 196<br />
<strong>43</strong>-06938 Rev L
Unicode and Fonts<br />
All commands and command parameters are also 16 bit, however only values<br />
between 0 and 255 are valid.<br />
UTF-8 uses a Multiple Byte Character Sequence (MBCS) to identify the<br />
desired Unicode character. This encoding method is less straightforward but<br />
preserves some of the 8-bit character of ASCII encoding.. This method uses<br />
unique bit sequences at the MSBs of a byte to determine its location and<br />
meaning within the MBCS encoding. See the table below for more information.<br />
If UTF-8 is selected all data sent to the printer must be encoded. All command<br />
parameters over 127 must be encoded in UTF-8.<br />
UTF-8TXT uses a Multiple Byte Character Sequence (MBCS) to identify the<br />
desired Unicode character. This encoding method is identical to UTF-8 except<br />
command parameters over 127 are not UTF-8 encoded. They must be sent<br />
unmodified as 8-bit values.<br />
Note: Extended UTF encoding past 65534 is not supported in UTF-16 or<br />
UTF-8. Only Unicode addresses from 0 to 65534 are supported by the Epic<br />
<strong>43</strong>0 TM Printer.<br />
Scalar Value 1 st Byte 2nd Byte 3rd Byte<br />
000000000xxxxxxx 0xxxxxxx<br />
00000yyyyyxxxxxx 110yyyyy 10xxxxxx<br />
Zzzzyyyyyyxxxxxx 1110zzzz 10yyyyyy 10xxxxxx<br />
NOTE: 4 byte encoding is not supported.<br />
<strong>43</strong>-06938 Rev L Page 197
Unicode and Fonts<br />
File system and the POR.INI file<br />
The Epic <strong>43</strong>0 TM Printer supports a file system to support <strong>TransAct</strong><br />
Technologies fonts and allow the user to load and link custom fonts.<br />
The POSFile tool provides a Windows interface to the printer and will allow<br />
fonts and configuration files to be loaded into the printer. This tool can read<br />
and write the POR.INI file, however the <strong>TransAct</strong> supplied fonts can not be<br />
read or deleted from the printer.<br />
TrueType 15 and Compressed Stroke Fonts 16 are supported by the Epic <strong>43</strong>0 TM<br />
Printer. User-defined TrueType fonts many be defined and loaded into the<br />
printer, however, once in the printer they can not be extracted. (This protects<br />
the copyrights on the font.)<br />
The POR.INI file is used to control how fonts are named, identified and linked,<br />
as well as allowing how the font to be printed is controlled.<br />
The following is an example of the POR.INI file:<br />
; Default System Configuration.<br />
[encoding]<br />
mode = UTF8TXT<br />
;NOTE: A code page is only used in ASCII mode.<br />
;To specify a code page, use one of the following forms:<br />
CodePage = <strong>43</strong>7<br />
;CPFile = CP8959-1.cpm<br />
;To remap Unicode characters, define a UniRemap.cpm file.<br />
UniMapfile = UniRemap.cpm<br />
[font]<br />
;Optionally specify the Cache Partitions<br />
;Fontcache = 1024,512,256<br />
;True Type font hinting may be disabled by setting Nohint to 1<br />
;Nohint = 0<br />
;Specify Linked fonts starting with LinkFont1.<br />
;LinkFont1 will be searched first.<br />
;You may specify up to 8 linked fonts.<br />
;if Link Fonts are defined, they will be used as the default.<br />
LinkFont1 = TactMOD.ttf<br />
LinkFont2 = TactWGL_M.ttf<br />
LinkFont3 = TactGB18030.ccc<br />
;Up to 99 fonts may be defined<br />
Font1 = TactMOD.ttf<br />
Font2 = TactWGL_M.ttf<br />
Font3 = TactGB18030.ccc<br />
;The brush size effects only stroke fonts.<br />
Brush = 100<br />
[legacy]<br />
15 Some but not all features of Open Type fonts are supported. Open Type fonts are<br />
not recommended.<br />
16 Compressed Stroke fonts are supplied by MonoType Inc.<br />
Page 198<br />
<strong>43</strong>-06938 Rev L
Unicode and Fonts<br />
;EmulationMode = Font,Horizontal,Vertical,Width.<br />
; Where:<br />
; If Font = 0 Use Linkfont else 1-4 above.<br />
; If Font is 100 or greater use BMFont (Font - 100). BMFonts only used Width.<br />
; Horizontal and Vertical are in 8th points, Width in Dots.<br />
Custom1s = 0,56,72,10<br />
Custom1l = 0,64,72,14<br />
Custom2s = 0,64,72,14<br />
Custom2l = 0,64,72,18<br />
Epson1 = 0,56,72,10<br />
Epson2 = 0,64,72,14<br />
PcOS1 = 0,56,72,10<br />
PcOS2 = 0,64,72,14<br />
PcOS3 = 0,80,80,18<br />
PcOS4 = 0,80,80,20<br />
[bmfont]<br />
;There may be up to 8 bitmap fonts.<br />
;Bitmap fonts are fixed sizes and have no options<br />
BMFont0 = chr10x24.bft<br />
BMFont1 = chr13x24.bft<br />
BMFont2 = chr15x24.bft<br />
BMFont3 = chs15x24.bft<br />
Font1 through Font99 may be defined, and the font number is the alias used<br />
by the set font command, e.g. Font23 is selected by doing a select font 23<br />
command. Font 0 is reserved for selecting the linked font.<br />
The printer may contain one default linked font. A linked font is a method of<br />
allowing the user to replace characters in a standard font with custom<br />
characters, described in more detail in an earlier section. The POR.INI file is<br />
one way of defining a linked font. In the above POR.INI file link the link font<br />
consists of User, TactWGL, and the TactGB18030 fonts. When a character is<br />
to be printed, the user font will be searched followed by TactWGL and then the<br />
TactGB18030 font. The first font containing the character will define the<br />
character.<br />
Note: If a link font is defined in the POR.INI file, it will be selected as the<br />
default font. If no link font is defined, Font1 will be used at power-up. If the<br />
POR.INI file does not contain a linked font, and the Font1 selection is<br />
defective, the TactWGL font will be used. If no fonts are found, the printer<br />
will only print graphics.<br />
Bitmap fonts are not recommended, they should only be used if an exact<br />
bitmap is required. Bitmap fonts are not scalable like true type fonts, only the<br />
normal 2X, 3X and so on scaling is available. <strong>TransAct</strong> Technologies can<br />
upon request and signing an NDA provide tools to allow the customer to<br />
develop there own bitmap fonts. These fonts must be in Unicode order but<br />
only need support the specific characters needed in the font. NOTE: When<br />
loaded and made available the legacy select font commands should select<br />
the bitmap font by adding 100 to the font ID. For example to use BMFont0,<br />
select font 100 in the Legacy font definition. (Note: Only the font ID is used<br />
from the legacy font definition if a bitmap font is selected.)<br />
<strong>43</strong>-06938 Rev L Page 199
Unicode and Fonts<br />
Function Select Font All<br />
ASCII<br />
[ESC] + 3 <br />
Hexadecimal 1BH 2BH 31H<br />
Decimal <br />
Description The [ESC] + 3 command selects the font for printing. This<br />
command is used to select a previously loaded font based on its alias.<br />
Note: Selecting font 0 will select the linked font. If the selected font does not<br />
exist, the previous font will remain in effect.<br />
Function Define a Stacked or Linked Font All<br />
ASCII [ESC] + S … <br />
Hexadecimal 1BH 2BH 53H<br />
Decimal <br />
Description The [ESC] + S command defines but does not select a stacked or<br />
linked font set. This command will define a linked list of previously loaded and<br />
aliased fonts into a linked font stack. The font ID is the same ID as in the<br />
select font command. Up to 8 fonts may be linked. The last entry must be 0.<br />
If the font does not exist, it will not be made part of the link.<br />
Note: You must select font 0 to activate the linked font.<br />
Function Select Font by name All<br />
ASCII [ESC] + N <br />
Hexadecimal 1BH 2BH 31H<br />
Decimal <br />
Description The [ESC] + N command selects the font for printing by file name.<br />
This command is used to select a previously loaded font by its file name. If the<br />
selected font does not exist, the previous font will remain in effect.<br />
Note: This command may be undesirable because it embeds in the<br />
application a file name that you may wish to change in the future. By using<br />
the Alias ID the font name may change, but the application will remain<br />
constant.<br />
Page 200<br />
<strong>43</strong>-06938 Rev L
Unicode and Fonts<br />
Function Initiate Unicode UTF-16BE Encoding All<br />
ASCII<br />
[ESC] + H<br />
Hexadecimal 1BH 2BH 48H<br />
Decimal <br />
Description The [ESC] + H command will put the printer into UTF-16BE<br />
character encoding mode of operation. If you wish to access characters<br />
above 255, you must select a Unicode encoding such as UTF-16BE.<br />
You must select a downloaded font, as described in this section, before<br />
issuing this command.<br />
UTF-16 is the most straightforward way to access characters above 255,<br />
sending two 8-bit bytes that form a 16-bit address to access the desired<br />
character.<br />
UTF-16BE uses the big-endian method of sending the two bytes. This<br />
method sends the high byte first and then the low byte.<br />
Note: Once selected, all information sent to the printer must then use this<br />
encoding, even for non-print commands.<br />
Function Initiate Unicode UTF-16LE Encoding All<br />
ASCII<br />
[ESC] + L<br />
Hexadecimal 1BH 2BH 4CH<br />
Decimal <br />
Description The [ESC] + L command will put the printer into UTF-16LE<br />
character encoding mode of operation. If you wish to access characters<br />
above 255, You must select a Unicode encoding such as UTF-16LE.<br />
You must select a downloaded font, as described in this section, before<br />
issuing this command.<br />
UTF-16 is the most straightforward way to access characters above 255,<br />
sending two 8-bit bytes that form a 16-bit address to access the desired<br />
character.<br />
UTF-16LE uses the little-endian method of sending the two bytes. This<br />
method sends the low byte first and then the high byte.<br />
Note: Once selected, all information sent to the printer must then use this<br />
encoding, even for non-print commands.<br />
<strong>43</strong>-06938 Rev L Page 201
Unicode and Fonts<br />
Function Initiate Unicode UTF-8 Encoding (MBCS) All<br />
ASCII<br />
[ESC] + M<br />
Hexadecimal 1BH 2BH 4DH<br />
Decimal <br />
Description The [ESC] + M command will put the printer into UTF-8 character<br />
encoding mode of operation. If you wish to access characters above 255,<br />
You must select a Unicode encoding such as UTF-8.<br />
You must select a downloaded font, as described in this section, before<br />
issuing this command.<br />
UTF-8 uses a Multiple Byte Character Sequence (MBCS) to identify the<br />
desired Unicode character. This encoding method is less straightforward.<br />
This method uses unique bit sequences at the MSBs of a byte to determine its<br />
location and meaning within the MBCS encoding. See the table below for<br />
more information.<br />
Note: Once selected, all information sent to the printer must then use this<br />
encoding, even for non-print commands.<br />
Scalar Value 1 st Byte 2nd Byte 3rd Byte<br />
000000000xxxxxxx<br />
0xxxxxxx<br />
00000yyyyyxxxxxx 110yyyyy 10xxxxxx<br />
zzzzyyyyyyxxxxxx 1110zzzz 10yyyyyy 10xxxxxx<br />
Function Initiate Unicode UTF-8 Text only Encoding (MBCS) All<br />
ASCII<br />
[ESC] + T<br />
Hexadecimal 1BH 2BH 54H<br />
Decimal <br />
Description The [ESC] + T command will put the printer into UTF-8 Text only<br />
character encoding mode of operation. This mode is identical to the UTF-8<br />
mode described above, except commands and there parameters are not UTF<br />
encoded. For example the following command would be used to select<br />
underline on:<br />
[ESC] W 128.<br />
If true UTF-8 encoding were in effect, the 128 parameter would be UTF<br />
encoded to [ESC] W 194 128. With UTF-8 Text only mode this command is<br />
simply [ESC] W 128.<br />
Note: This command also applies to graphic data being sent to the printer.<br />
The graphic data is a command and not text. It is not UTF-8 encoded.<br />
Page 202<br />
<strong>43</strong>-06938 Rev L
Unicode and Fonts<br />
Function Initiate Normal 8-bit ASCII Character Encoding All<br />
ASCII<br />
[ESC] + A<br />
Hexadecimal 1BH 2BH 41H<br />
Decimal <br />
Description The [ESC] + A command will put the printer into normal character<br />
encoding mode of operation. One byte = one character. In this mode<br />
international characters must be selected by selecting the appropriate code<br />
page for translation.<br />
<strong>43</strong>-06938 Rev L Page 203
Unicode and Fonts<br />
Font Size and Spacing<br />
The font typically defines the character size and line spacing. The typical font<br />
is proportional spaced. That is the spacing between characters varies. This is<br />
not always the most desirable mode of operation. To give the programmer<br />
some additional control over character spacing and line height, the Accutherm<br />
Supreme provides a width and height override command.<br />
The following table converts dots to CPI (Characters Per Inch) points and ¼<br />
points and is useful in calculating point size settings.<br />
Dots<br />
1/203”<br />
Characters per Inch<br />
(CPI)<br />
Points<br />
1/72”<br />
¼ Points<br />
1/288”<br />
8 25.38 2.84 11.35<br />
9 22.56 3.19 12.77<br />
10 20.30 3.55 14.19<br />
11 18.45 3.90 15.61<br />
12 16.92 4.26 17.02<br />
13 15.62 4.61 18.44<br />
14 14.50 4.97 19.86<br />
15 13.53 5.32 21.28<br />
16 12.69 5.67 22.70<br />
17 11.94 6.03 24.12<br />
18 11.28 6.38 25.54<br />
19 10.68 6.74 26.96<br />
20 10.15 7.09 28.37<br />
21 9.67 7.45 29.79<br />
22 9.23 7.80 31.21<br />
23 8.83 8.16 32.63<br />
24 8.46 8.51 34.05<br />
25 8.12 8.87 35.47<br />
26 7.81 9.22 36.89<br />
27 7.52 9.58 38.31<br />
28 7.25 9.93 39.72<br />
29 7.00 10.29 41.14<br />
41 4.95 14.54 42.56<br />
48 4.23 17.02 68.10<br />
51 3.98 18.09 72.35<br />
68 2.99 24.12 96.47<br />
101 2.01 35.82 1<strong>43</strong>.29<br />
Page 204<br />
<strong>43</strong>-06938 Rev L
Unicode and Fonts<br />
Font Size and Spacing command interactions<br />
There are interactions between some of the following commands and some of<br />
the legacy font selection commands. These interactions need to be<br />
considered when developing a application for this printer.<br />
This printer uses a font rendering engine that relies on the font to provide<br />
character size and spacing information. Unfortunately, legacy applications<br />
assume all characters are the same and that the character size and spacing is<br />
fixed. To force the characters rendered by the font rendering engine to<br />
conform to legacy modes of operation, some post generation processing is<br />
performed to reposition the characters into a fixed size cell.<br />
The set minimum character height and width ([ESC] + P and [ESC] + p), the<br />
set character spacing ([ESC] + I, [ESC] + i, [ESC] + J and [ESC] + j), the set<br />
minimum line spacing ([ESC] + V and [ESC] + v), and the legacy font select<br />
and spacing commands all interact.<br />
The set minimum character height and width ([ESC] + P and [ESC] + p)<br />
commands set character size but in two different ways. In most systems a<br />
character point size refers only to the line spacing and indirectly to the<br />
character height. That is also true. The vertical character height referenced in<br />
these commands refer to the character height including the white space<br />
between lines. The horizontal character width is defined by the font. Normally<br />
only the character height would be specified and the width would be defined<br />
by the font and that’s how these commands work if the Width is defined as<br />
zero. If the width is defined as zero this is used as a flag to the printer to<br />
generate characters as defined by the font and use the character width<br />
returned by the font. In effect the vertical point size passed to the font<br />
rendering engine is the same as the horizontal value. The added effect of the<br />
width being passed as zero is that any enforced horizontal spacing is disables.<br />
IE the effect of the [ESC] + I, [ESC] + i, [ESC] + J and [ESC] + j commands are<br />
disabled. If the width is not zero, the [ESC] + I, [ESC] + i, [ESC] + J and [ESC]<br />
+ j remain in effect and only the resulting character size is changed, the<br />
horizontal spacing is not changed.<br />
The legacy [ESC] ! select the print mode effectively issues a set minimum<br />
character height and width command followed by a set character spacing<br />
command without effecting the pseudo fixed spacing flag.<br />
The pseudo fixed spacing flag is a further complication required for dealing<br />
with fonts that are not truly fixed pitch. In some cases a fixed pitch font will<br />
have more that one character size depending on what the character is used<br />
for. This generally only affects Asian fonts where the ideograms are generally<br />
twice as wide as Latin characters. In fixed spacing mode, the printer will put<br />
the rendered character at whatever spacing is requested even if they don’t fit.<br />
If the character is too big, it will overlap the previous and next character. To<br />
allow a fixed pitch operation that deals with small and large fixed pitch<br />
character, the printer has a pseudo-fixed pitch flag that will increase the<br />
spacing in multiples of the requested spacing until it fits.<br />
<strong>43</strong>-06938 Rev L Page 205
Unicode and Fonts<br />
The following table lists the commands and how they interact.<br />
Command Zero Character<br />
width<br />
[ESC] + P, Width 0 Same as<br />
[ESC] + p<br />
Height<br />
[ESC] + P, Width From<br />
[ESC] + p Not Zero Command<br />
[ESC] + I,<br />
[ESC] + i<br />
[ESC] + I,<br />
[ESC] + i<br />
[ESC] + J,<br />
[ESC] + j<br />
[ESC] + J,<br />
[ESC] + j<br />
[ESC]I <br />
Character<br />
height<br />
From<br />
command<br />
From<br />
command<br />
Cell Width<br />
From Font<br />
Based on<br />
set character<br />
spacing<br />
command<br />
Pseudo Fixed<br />
pitch flag<br />
No effect<br />
Will be used if<br />
previously set<br />
and character<br />
spacing is not<br />
being defined<br />
by the font<br />
Value 0 No effect No effect From Font Set Off but<br />
has no effect<br />
Value No effect No effect From Set Off<br />
Not zero<br />
Command<br />
Value 0 No effect No effect From Font Set On but<br />
has no effect<br />
Value<br />
Set On<br />
Not zero<br />
No effect No effect A multiple of<br />
the value<br />
defined by<br />
the command<br />
From<br />
POR.INI<br />
definition<br />
From<br />
POR.INI<br />
definition<br />
As defined by<br />
command<br />
Will be used if<br />
previously set.<br />
Page 206<br />
<strong>43</strong>-06938 Rev L
Unicode and Fonts<br />
Function Set minimum character height and width in points. All<br />
ASCII<br />
[ESC] + P <br />
Hexadecimal 1BH 2BH 50H<br />
Decimal <br />
Range w = 0, 4 – 72 h = 4 - 72<br />
The [ESC] + P command will set the minimum character width or height based<br />
on “w” for the width and “h” for height, where “w” and “h” are in points, defined<br />
as 1/72 nd of an inch increments.<br />
If the character width is set to zero, the height will be used for the width and<br />
proportional spacing will be used.<br />
NOTE: The set pitch command will take precedence<br />
unless this command selects 0 width.<br />
Function Set minimum character height and width in ¼ points. All<br />
ASCII<br />
[ESC] + p <br />
Hexadecimal 1BH 2BH 70H<br />
Decimal <br />
Range w = 0, 16 – 255h = 16 - 255<br />
The [ESC] + p command will set the minimum character width or height based<br />
on “w” for the width and “h” where “w” and “h” are in ¼ points or 1/288 th of an<br />
inch increments. This approximates setting characters by dot.<br />
If the character width is set to zero, the height will be used for the width and<br />
proportional spacing will be used.<br />
NOTE: The set pitch command will take precedence<br />
unless this command selects 0 width.<br />
Function Set Character spacing in points. All<br />
ASCII<br />
[ESC] + I <br />
Hexadecimal 1BH 2BH 49H<br />
Decimal <br />
Range d = 0, 4 – 72<br />
The [ESC] + I command will set the character spacing in points, where one<br />
point is defined as 1/72 nd of an inch. This command will force mono-space<br />
printing. It will override any character spacing set by the set character height<br />
and width commands defined above. This spacing will be enforced until<br />
deactivated by setting the value to 0 or if the set character height and width<br />
commands use a 0 for the width indicating proportional spacing should be<br />
<strong>43</strong>-06938 Rev L Page 207
Unicode and Fonts<br />
used. This command differs from the [ESC] + J command in that all<br />
characters are centered on the fixed cell size. It the character is too big for the<br />
cell, it may overlap the previous and next character. The character size is not<br />
adjusted to fit the cell.<br />
If d = 0 variable spacing is selected.<br />
NOTE: If the current character size is too large for the<br />
selected spacing, the characters will overlap. Variable<br />
spacing is recommended.<br />
Function Set Character spacing in ¼ points. All<br />
ASCII<br />
[ESC] + i <br />
Hexadecimal 1BH 2BH 69H<br />
Decimal <br />
Range d = 0, 16 – 255<br />
The [ESC] + i command will set the character spacing in points, where ¼ point<br />
is defined as 1/288 th of an inch. This command will force mono-space printing.<br />
It will override any character spacing set by the set character height and width<br />
commands defined above. This spacing will be enforced until deactivated by<br />
setting the value to 0 or if the set character height and width commands use a<br />
0 for the width indicating proportional spacing should be used. This command<br />
differs from the [ESC] + j command in that all characters are centered on the<br />
fixed cell size. It the character is too big for the cell, it may overlap the<br />
previous and next character. The character size is not adjusted to fit the cell.<br />
If d = 0 variable spacing is selected.<br />
NOTE: If the current character size is too large for the<br />
selected spacing, the characters will overlap. Variable<br />
spacing is recommended.<br />
Function Set Character spacing in points with adjustment. All<br />
ASCII<br />
[ESC] + J <br />
Hexadecimal 1BH 2BH 4AH<br />
Decimal <br />
Range d = 0, 4 – 72<br />
The [ESC] + J command will set the character spacing in points, where one<br />
point is defined as 1/72 nd of an inch. This command will force mono-space<br />
printing. It will override any character spacing set by the set character height<br />
and width commands defined above. This spacing will be enforced until<br />
deactivated by setting the value to 0 or if the set character height and width<br />
commands use a 0 for the width indicating proportional spacing should be<br />
used. This command differs from the [ESC] + I command in that if the<br />
character is too large for the cell, the cell will be expanded in multiples of <br />
until the character fits.<br />
Page 208<br />
<strong>43</strong>-06938 Rev L
Unicode and Fonts<br />
If d = 0 variable spacing is selected. However, note that the cell adjustment<br />
flag will remain set and if legacy commands are used they will allow the cell to<br />
be expanded.<br />
NOTE: If the current character size is too large for the<br />
selected spacing, the cell size will be expanded<br />
Function Set Character spacing in points with adjustment. All<br />
ASCII<br />
[ESC] + j <br />
Hexadecimal 1BH 2BH 6AH<br />
Decimal <br />
Range d = 0, 16 – 255<br />
The [ESC] + j command will set the character spacing in points, where ¼ point<br />
is defined as 1/288 th of an inch. This command will force mono-space printing.<br />
It will override any character spacing set by the set character height and width<br />
commands defined above. This spacing will be enforced until deactivated by<br />
setting the value to 0 or if the set character height and width commands use a<br />
0 for the width indicating proportional spacing should be used. This command<br />
differs from the [ESC] + i command in that if the character is too large for the<br />
cell, the cell will be expanded in multiples of until the character fits.<br />
If d = 0 variable spacing is selected. However, note that the cell adjustment<br />
flag will remain set and if legacy commands are used they will allow the cell to<br />
be expanded.<br />
NOTE: If the current character size is too large for the<br />
selected spacing, the characters will overlap. Variable<br />
spacing is recommended.<br />
Function Set minimum Line Spacing in Points All<br />
ASCII<br />
[ESC] + V <br />
Hexadecimal 1BH 2BH 56H<br />
Decimal <br />
Range d = 0, 4 – 72<br />
The [ESC] + V command will set the line spacing in points, where one point is<br />
defined as 1/72 nd of an inch.<br />
If d = 0 variable spacing is selected.<br />
NOTE: This is the minimum spacing. If the character<br />
height setting requires a larger spacing, the character<br />
height will override this setting.<br />
<strong>43</strong>-06938 Rev L Page 209
Unicode and Fonts<br />
Function Set minimum Line Spacing in ¼ Points All<br />
ASCII<br />
[ESC] + v <br />
Hexadecimal 1BH 2BH 76H<br />
Decimal <br />
Range d = 0, 16 – 255<br />
The [ESC] + v command will set the line spacing in ¼ points, where ¼ point is<br />
defined as 1/288 th of an inch.<br />
ASCII<br />
[ESC] + v <br />
Hexadecimal<br />
1BH 2BH 76H<br />
Decimal <br />
Range d = 0, 16 – 255<br />
If d = 0 variable spacing is selected.<br />
NOTE: This is the minimum spacing. If the character<br />
height setting requires a larger spacing, the character<br />
height will override this setting.<br />
Function Set stroke font brush size. All<br />
ASCII<br />
[ESC] + B <br />
Hexadecimal 1BH 2BH 42H<br />
Decimal <br />
Range w = 0, 6 – 200<br />
Description The [ESC] + B command will set brush stroke percentage for<br />
stroke fonts. If the brush size is set to zero the font design stroke width will be<br />
used.<br />
Values from 6 to 200 represent 0.4 to 12% of the em-width of the font. The<br />
default for most fonts is about 3%. The Epic <strong>43</strong>0 TM using the GB18030 font<br />
supplied by <strong>TransAct</strong> Technologies produces the best characters with a brush<br />
size of about 100.<br />
Note: The default value for the Brush stroke may be set in the POR.INI file.<br />
[ESC] [ P Set character pitch (Legacy mode command) PcOS<br />
ASCII<br />
Hexadecimal<br />
Decimal<br />
IPCL<br />
EPOS<br />
[ESC] [ P <br />
1BH 5BH 50H <br />
<br />
&%F1, &%F2, &%F3, &%F4, &%F5, &%F6, &%F7<br />
[ESC] [SP] <br />
Page 210<br />
<strong>43</strong>-06938 Rev L
Unicode and Fonts<br />
Description The [ESC] [ P command sets character per inch print pitch to<br />
. The printer resolution limits the exact print pitch. The following table lists<br />
the exact pitch for various values on .<br />
<br />
Resulting<br />
Characters<br />
IPCL<br />
per Inch<br />
1 1.00<br />
2 2.00<br />
3 3.01<br />
4 4.00<br />
5 4.95<br />
6 5.94<br />
7 6.93<br />
8 8.00 &%F7<br />
9 9.04<br />
10 9.90 &%F3<br />
11 10.95<br />
12 12.23 &%F2<br />
13 13.00<br />
14 13.87<br />
15 14.86 &%F6<br />
<br />
Resulting<br />
Characters<br />
IPCL<br />
per Inch<br />
16 16.00<br />
17 17.33 &%F1<br />
18 17.33<br />
19 18.91<br />
20 20.8 &%F5<br />
21 20.8<br />
22 23.11<br />
23 23.11<br />
24 23.11 &%F4<br />
25 23.11<br />
26 26<br />
27 26<br />
28 26<br />
29 29.71<br />
30 29.71<br />
Table 10 Character Pitch<br />
This command disables any right-side spacing set by the [ESC] V command.<br />
It enforces this spacing on the current font selection even if the character is<br />
too large for the spacing. In addition, when font changes are made, the<br />
character pitch is maintained.<br />
Legacy Printer Features that Have Changed<br />
Because this product employs outline and stroke font character generation,<br />
support for several legacy features are changed from previous versions.<br />
User defined characters<br />
User defined character were previously supported by a series of commands<br />
that would allow the user to define a new character bitmap. As characters are<br />
no longer bitmaps, these commands are not supported. If custom user<br />
defined characters are required, a custom font may be generated using any<br />
number of off-the-shelf font generation tools. The custom font may be loaded<br />
into the printer and then printed as any other character.<br />
Dynamic code page definition<br />
Dynamic code page definition is still supported when in ASCII mode, however<br />
Unicode is now used for the source character locations.<br />
<strong>43</strong>-06938 Rev L Page 211
Chapter 11<br />
File System<br />
<strong>43</strong>-06938 Rev L Page 213
This page intentionally left blank<br />
Page 214<br />
<strong>43</strong>-06938 Rev L
File System<br />
File System Interface<br />
The Epic <strong>43</strong>0 TM provides a file system to support fonts, configuration<br />
information, user graphics and macros.<br />
There are a number of commands that are provided to support the file system.<br />
In general, files need to be opened for read or write, read or written, and then<br />
closed. There is a command that will delete a file, and print or return a file<br />
directory.<br />
<strong>TransAct</strong> Technologies provides a Windows ® based tool that will interact with<br />
the Epic <strong>43</strong>0 TM and provide a drag and drop interface to the file system.<br />
The file system in the Epic <strong>43</strong>0 TM is partitioned into two sections, one for<br />
internal system use by the printer, and one for user information.<br />
The system partition is referred to as partition 0. It is reserved for fonts,<br />
configurations and code page files. This partition can not be deleted or<br />
completely erased. The second partition is for all other information. There is a<br />
command that will erase all the files in this partition. The partition where files<br />
are placed is determined by the three character extension.<br />
File System commands<br />
Function Open File command. All<br />
ASCII [ESC] [RS] O < Mode > < Filename ><br />
Hexadecimal 1BH 1EH 4FH<br />
Decimal <br />
Mode<br />
Mode of operation “r” for read or “w” for write.<br />
FileName File name from 1 to 30 characters including a three<br />
character extension.<br />
Description The [ESC] [RS]O command will select and open a file for the<br />
selected operation. If the file being opened for write exists, the existing file will<br />
be overwritten. Note that only one file may be open for external operations at<br />
any one time.<br />
The Mode and FileName take the following format and must be null<br />
terminated:<br />
r Filename.ext<br />
Valid Modes are:<br />
“r” Read.<br />
“w” Write<br />
“w+” Write Append (Future enhancement)<br />
“ram” open a RAM file for write.<br />
Note: RAM files capability is an option and not available on all products.<br />
<strong>43</strong>-06938 Rev L Page 215
File System<br />
File Extensions are any three characters. The following are predefined and<br />
reserved for internal use.<br />
Extension Partition Definition<br />
0= System<br />
1= User<br />
.udf 1 Undefined macro type<br />
.mac 1 Command Macro<br />
.img 1 Graphic image. (Internal format)<br />
.bgp 1 Bitmapped internal graphic<br />
.cfg 0 configuration.<br />
.ttf 0 true type font<br />
.ccc 0 compressed stroke font<br />
.cpm 0 code page map.<br />
.bmp 1 bitmap graphic file<br />
.gph 1 raster graphic file.<br />
.ini 0 System information file<br />
.sys 0 Load image<br />
.sy_ 0 Compressed load image.<br />
Note: All other file extensions will be placed in Partition 1 (user space)<br />
Function Return Free space for Open FIle. All<br />
ASCII<br />
[ESC] [RS] S<br />
Hexadecimal 1BH 1EH 53H<br />
Decimal <br />
Description The [ESC] [RS]S command will return an identifier byte and 4<br />
additional bytes representing a 32 bit value (LSB First) representing the<br />
amount of free space in the partition containing the open file.<br />
The format is as follows:<br />
S <br />
Function Return Free space for this partition. All<br />
ASCII<br />
[ESC] [RS] s<br />
Hexadecimal 1BH 1EH 73H<br />
Decimal <br />
Where<br />
n = The partition<br />
Description The [ESC] [RS]s command will return an identifier byte and 4<br />
additional bytes representing a 32 bit value (LSB First) representing the<br />
amount of free space in the partition.<br />
The format is as follows:<br />
S <br />
Page 216<br />
<strong>43</strong>-06938 Rev L
File System<br />
Function Close File command. All<br />
ASCII<br />
[ESC] [RS] C<br />
Hexadecimal 1BH 1EH <strong>43</strong>H<br />
Decimal <br />
Description The [ESC] [RS]C command will close the currently open file.<br />
Function Close All Files command. All<br />
ASCII<br />
[ESC] [RS] K<br />
Hexadecimal 1BH 1EH 4BH<br />
Decimal <br />
Description The [ESC] [RS]K command will close the font system and close all<br />
currently open files. Internal fonts will be reopened automatically if used.<br />
Function Delete File command. All<br />
ASCII<br />
[ESC] [RS] D <br />
Hexadecimal 1BH 1EH 44H<br />
Decimal <br />
FileName File name from 1 to 30 characters including a three<br />
character extension, null terminated.<br />
Description The [ESC] [RS]D command will select and delete a file.<br />
Note: Some of the system files are protected and can not be deleted.<br />
Function Set/Clear File Attributes command. All<br />
ASCII [ESC] [RS] A < Attbs > < Filename ><br />
Hexadecimal 1BH 1EH 41H<br />
Decimal <br />
Attbs<br />
File attributes to modify.<br />
FileName File name from 1 to 30 characters including a three<br />
character extension.<br />
Each file has several attributes associated to it. They include S, R, and H.<br />
Attribute Syntax Name Use<br />
S +S or -S System This is a system file.<br />
R +R or -R Read Only This file cannot be erased or modified.<br />
H +H or -H Hidden This file is hidden and not displayed in<br />
the directory listing.<br />
NOTE: Attributes can be combined, however, each needs to have the + or –<br />
as a prefix.<br />
To allow these attributes to be set and cleared, the [ESC][RS]A command can<br />
be used. The format is as follows:<br />
[ESC][RS]A-R-S FileName<br />
This command will remove the Read only and System attributes form File<br />
name.<br />
<strong>43</strong>-06938 Rev L Page 217
File System<br />
Function Return the last file command status. All<br />
ASCII [ESC] [RS] ?<br />
Hexadecimal 1BH 1EH 3FH<br />
Decimal <br />
The [ESC][RS]? Command requests the file system to return the status of the<br />
last file operation.<br />
This command, returns an identifier byte, followed by 2 bytes indicating the<br />
status results of the last file command. The format will be as follows:<br />
? or 3F, (47 or 42), <br />
Where:<br />
Status = ‘G’ for success and ‘B’ for Failure<br />
Detail = Detailed status as a binary byte with bit definitions as follows:<br />
Bit Hex Decimal Function<br />
0 01 1 File Open<br />
1 02 2 File in Write Mode<br />
2 04 4 The Read response is shorter than requested<br />
and EOF has been encountered.<br />
3 08 8 The file is already open.<br />
4 10 16 The file system has no space for the preceding<br />
operation. Could be out of Flash or out of Buffer<br />
space.<br />
5 20 32 A write operation has been attempted to a read<br />
only file.<br />
6 40 64 File requested was not found<br />
8 80 128 An error has occurred. Other bits may be set that<br />
give additional detail. (This bit determines the G<br />
or B status in the previous byte)<br />
Function Write File command. All<br />
ASCII [ESC] [RS] W <br />
Hexadecimal 1BH 1EH 57H<br />
Decimal <br />
Description The [ESC] [RS]W command sends data to the printer to be stored<br />
in the file. The parameters specify the length of data that will follow<br />
where the length is LH * 256 + LL. The data is treated as binary data with no<br />
translations.<br />
Page 218<br />
<strong>43</strong>-06938 Rev L
File System<br />
Function Read File command. All<br />
ASCII [ESC] [RS] R <br />
Hexadecimal 1BH 1EH 52H<br />
Decimal <br />
Description The [ESC] [RS]R command requests that data be read from the<br />
file and returned to the host.<br />
The parameters specify the length of data that should be returned<br />
where LH * 256 + LL specifies the number of returned bytes. The data is<br />
treated as binary data with no translations. If there is not enough data in the<br />
file to make up the requested length, only the available data is returned.<br />
Function Generate and return a file directory report. All<br />
ASCII<br />
[ESC] [RS] I<br />
Hexadecimal 1BH 1EH 49H<br />
Decimal <br />
Description The [ESC] [RS]I command requests that a formatted text directory<br />
be returned from the printer. Each line is null terminated.<br />
Function Erase all files in a partition All<br />
ASCII<br />
[ESC] [RS] X <br />
Hexadecimal 1BH 1EH 58H<br />
Decimal <br />
<br />
selects the partition. 0 = System, 1 = User.<br />
Description The [ESC] [RS]X command requests that the selected partition be<br />
reformatted. Reformatting the system partition is not recommended, as it<br />
will erase all fonts and render the printer unusable.<br />
Function De-fragment the file system. All<br />
ASCII<br />
[ESC] [RS] F<br />
Hexadecimal 1BH 1EH 46H<br />
Decimal <br />
Description The [ESC] [RS]F command forces the file system to go through<br />
the file system and clean up deleted file sectors. All sectors flagged for<br />
deletion are actually erased and consolidated when this command is issued.<br />
Note: File space is not necessarily freed up by a file delete. Sectors may be<br />
marked for deletion but still be present but inactive in the file system. These<br />
sectors take up flash space. Each cluster has a fixed number of sectors, and<br />
if the number of deleted sectors in a cluster exceed a predefined threshold,<br />
the cluster is de-fragmented automatically. This command forces all clusters<br />
to be de-fragmented.<br />
<strong>43</strong>-06938 Rev L Page 219
File System<br />
Function Verify files. All<br />
ASCII<br />
[ESC] [RS] V<br />
Hexadecimal 1BH 1EH 56H<br />
Decimal <br />
Description The [ESC] [RS]V opens and reads the VERIFY.CFG file. This file<br />
contains a list of all files that are to be validated in the printer and the expected<br />
CRC of the file. If all the files verify, this command will return VG followed by<br />
it’s 2 byte CRC. If any of the files do not verify, the command will return VB<br />
followed by it’s 2 byte CRC.<br />
For example the file might look like this:<br />
Por.ini 0x06FF<br />
Usb.sys 0xDEF9<br />
Only the Por.ini and Usb.sys files will be checked in this example.<br />
An additional and optional feature of this command is that it can verify the<br />
CRC of the operating firmware. By adding “Firmware” as a file name, this<br />
command will recalculate the Firmware CRC and compare it to the master<br />
value. If the recalculation does not match the master value, this command will<br />
return a failed response. The file would be as follows to add the Firmware<br />
check. By using the master value, this file need not be updated if the firmware<br />
is updated.<br />
Por.ini 0x06FF<br />
Usb.sys 0xDEF9<br />
Firmware<br />
By knowing the CRC of the Verify.cfg file, the host application can verify that<br />
all the other files are correct (and optionally the firmware) without knowing<br />
anything about the other files of firmware.<br />
Note: The default Verify.cfg file contains the as shipped POR.INI file, the<br />
USB.SYS file and any resident fonts. In addition it includes a Firmware Verify.<br />
If any of these files are modified, the Verify command must be updated to<br />
reflect any changes.<br />
Note: This command is not performed as a condition of normal operation. It is<br />
up to the host application to refuse to use the printer if this command returns a<br />
fail to verify status.<br />
Note: if the Verify.cfg file is not present, the verify command will return VB<br />
and a 0 CRC.<br />
Page 220<br />
<strong>43</strong>-06938 Rev L
Chapter 12<br />
Epic <strong>43</strong>0 TM Extended Printer Control<br />
<strong>43</strong>-06938 Rev L Page 221
This page intentionally left blank<br />
Page 222<br />
<strong>43</strong>-06938 Rev L
Epic <strong>43</strong>0 TM Extended Printer Control<br />
The Epic <strong>43</strong>0 TM printer has a number of Extended Control commands that allow an<br />
application to better track and maintain the printer. These commands are part of each<br />
supported emulation 17 .<br />
The printer maintains a log of printer activity. This activity may be returned to the host<br />
with the [ESC]~ T command. This command returns a ~T followed by four binary bits<br />
that make up a 32 bit unsigned integer. The description of the command below<br />
describes the format in full.<br />
The printer also contains a number of commands that will force the printer to perform<br />
specific functions to help maintain the printer or print information about the printer.<br />
The functions available are:<br />
1) Print Current Configuration<br />
2) Print current log totals<br />
Note: Each of these commands follow the ESC~ or ESCy format. Other functions<br />
are performed by these basic commands. Do not attempt to use any undocumented<br />
version of these commands. The extended diagnostics commands may affect the<br />
print quality and performance of the printer. In some cases, the commands may<br />
degrade the performance of the print cartridge or mechanism.<br />
Function Read and Return Totals<br />
ASCII<br />
[ESC] ~ T <br />
Hexadecimal 1BH 7EH 54H <br />
Decimal <br />
Description This command returns the current statistics for parameter n. The value<br />
returned will be ~T with the next 4 bytes being an unsigned integer. For example:<br />
[ESC]~T Request cover open count<br />
Returns: ~T or 256 + 100 or 356 cover opens<br />
Values of n Request:<br />
0 Black Dots<br />
1 Red Dots<br />
2 Not Used<br />
3 Cover Opens<br />
4 Paper Outs<br />
5 Line Feeds<br />
6 Characters Printed<br />
7 Not Used<br />
8 Not Used<br />
9 Standby Cycles<br />
17 The Star emulation does not allow the use of [ESC] y commands for extended diagnostics.<br />
The [ESC] y commands are not available.<br />
<strong>43</strong>-06938 Rev L Page 223
Epic <strong>43</strong>0 TM Extended Printer Control<br />
10 Power Up Resets<br />
11 Watchdog Resets<br />
12 Base Flash Erases<br />
13 Ext Flash Erases<br />
14 Auto Cutter Cycles<br />
15 Init Requests<br />
16 Error Vectors<br />
17 Auto Cutter Faults<br />
18 Power On Time (Min.)<br />
19 System Active Time (Min.)<br />
20 Over Temperature<br />
21 Cutter Re-Home<br />
22 Level 1 Jam Detections<br />
23 Level 2 Jam Detections<br />
24 Missed TOF<br />
25 Configuration Faults<br />
26 Not Used<br />
27 Flash File Faults<br />
Page 224<br />
<strong>43</strong>-06938 Rev L
Epic <strong>43</strong>0 TM Extended Printer Control<br />
Function Print Current Configuration and Totals<br />
ASCII [ESC] y or [ESC] ~ <br />
Hexadecimal 1BH 79H 09H<br />
Decimal <br />
Description This command forces the printer to print the current configuration.<br />
To function correctly it must be issued with the printer in the proper emulation<br />
mode. It is intended to be printed in the default <strong>TransAct</strong> ® configuration but<br />
will print in any configuration.<br />
Note: This command must be preceded with an ESC y .<br />
Function Print Current Totals<br />
ASCII [ESC] y <br />
Hexadecimal 1BH 79H 0FH<br />
Decimal <br />
Description This command forces the printer to print the current totals log.<br />
Note: This command must be preceded with an ESC y .<br />
Function Print Current Print Setup Values<br />
ASCII [ESC] y or [ESC] ~ <br />
Hexadecimal 1BH 79H 14H<br />
Decimal <br />
Description This command forces the printer to print the current setup values.<br />
Note: This command must be preceded with an ESC y .<br />
Function: Set Electronic Journal Print Configuration Control<br />
ASCII:<br />
[ESC] ~ j <br />
Hex:<br />
1BH 7EH 6AH<br />
Decimal: <br />
Description: This command reconfigures the electronic journal print<br />
mode record separator and manual printing modes<br />
Where n = 765<strong>43</strong>210 Bit values<br />
------X0<br />
Manual Electronic Journal Print mode is Enabled<br />
------X1<br />
Manual Electronic Journal Print mode is Disabled<br />
------0X<br />
A Record separation line is printed that may contain a<br />
record number.<br />
------1X<br />
No Record separation line is printed.<br />
Note: Both parameters must be set at the same time by this command.<br />
Note: The record separation configuration may be set in manual configuration<br />
mode. This command will reset the configuration to the value specified here.<br />
Note: This command performs a configuration update, and should not be done<br />
on a regular basis.<br />
Note: This command must be preceded with an ESC y to enable it.<br />
<strong>43</strong>-06938 Rev L Page 225
Epic <strong>43</strong>0 TM Extended Printer Control<br />
Remote Printer Reset<br />
Reset in Serial Mode<br />
It is possible to generate a software printer reset in serial mode. The [ENQ]<br />
command requests that the printer reset. (This is not a hardware reset).<br />
The reset completely initializes the hardware and software, but the printer<br />
does not recover from a loss of software control.<br />
Note: If the printer mode was changed by the [ESC] y or command,<br />
a soft reset will not return to the power on default.<br />
The command flow is as follows:<br />
• The [ENQ] is acknowledged. During cleanup and initialization, the<br />
printer is placed off-line. Before the printer initializes, it tries to clean up its<br />
input buffer and other internal processes.<br />
• The printer’s software is reinitialized.<br />
• The power-cycled flag is set.<br />
• The print head is homed and re-calibrated.<br />
• The printer goes back on-line.<br />
Page 226<br />
<strong>43</strong>-06938 Rev L
Epic <strong>43</strong>0 TM Extended Printer Control<br />
Miscellaneous Communication Features<br />
Power-cycle Recovery<br />
Sometimes the host needs to know if the printer was power cycled. An<br />
example would be after the receipt tape was changed. It is not necessary to<br />
turn off the printer to change the receipt. However, if the operator does, any<br />
information sent to the printer before the power cycle will be lost.<br />
The Epic <strong>43</strong>0 TM Printer has a flag that is set after a reset. The flag stays set<br />
until the host requests a reset. The [ENQ] command reads the flag. If<br />
the command returns power-cycled status, the power has been reset or power<br />
cycled since the last request. All unprinted information has been lost.<br />
If the print operation is critical, it is a good idea to check the power-cycle flag<br />
before and after all transactions. An alternate approach is to check the flag<br />
after every off-line to on-line transition.<br />
Note: If the printer mode was changed by the [ESC] y or command, a<br />
power-cycle reset will return to the initial configuration.<br />
Off-line Control<br />
A configuration flag that prevents the printer from going off-line (in most cases)<br />
is available. Off-line mode allows the application to query the printer for status<br />
rather than assume a status from the control signals. The feature allows the<br />
host application to query the printer at all times except when there is no power;<br />
a full input buffer; or a hard failure. For example, when the printer’s cover is<br />
open, the printer stops printing but still accepts data and inquiries. The inquire<br />
cover status command returns, “Cover open.”<br />
Hard failures result when there is no power or a printer fault occurs. If the<br />
printer is off-line, either the input buffer is full or a hard fault has occurred. The<br />
host application should not allow the input buffer to fill.<br />
<strong>43</strong>-06938 Rev L Page 227
Epic <strong>43</strong>0 TM Extended Printer Control<br />
Remote Boot Load Mode<br />
Remote boot load mode is entered by command. The boot image data format<br />
is preparatory to <strong>TransAct</strong> and is not documented here. There are however a<br />
few commands that are useful to determine if the printer is in the boot load<br />
mode and if a boot load has been successful.<br />
[ESC] ~ 14% Enter Remote Boot Load mode<br />
ASCII [ESC] ~ %<br />
Hexadecimal 1BH 7EH 0EH 25H<br />
Decimal <br />
IPCL<br />
none<br />
EPOS [ESC] ~ %<br />
Description The [ESC] ~ %command is an extended diagnostics<br />
command. It will transfer control of the printer to the Remote Boot loader.<br />
[STX] K<br />
Read and return application rev.<br />
ASCII<br />
[STX] K<br />
Hexadecimal 02H 4BH<br />
Decimal <br />
Description Boot loader command only. Read and return the Application<br />
firmware id and revision.<br />
[STX] B<br />
ASCII<br />
[STX] B<br />
Hexadecimal 02H 42H<br />
Decimal <br />
Read and return boot loader rev.<br />
Description Boot loader command only. Read and return the boot loader<br />
firmware id and revision.<br />
[STX] X<br />
ASCII<br />
[STX] X<br />
Hexadecimal 02H 58H<br />
Decimal <br />
Check and start normal operation<br />
Description Boot loader command only. Check the CRC and restart the printer<br />
if the firmware image is valid.<br />
Page 228<br />
<strong>43</strong>-06938 Rev L
Epic <strong>43</strong>0 TM Extended Printer Control<br />
Recovery from Mechanical Errors<br />
The <strong>TransAct</strong> Inquire commands and the Epson [DLE][ENQ] and [DLE][EOT]<br />
commands allow most printer error status to be read and in some cases<br />
recovery attempted. Paper jams and auto-cutter faults can be recovered,<br />
however, any data not previously printed will be lost.<br />
If the application is to support error recovery, the application should use the<br />
appropriate status request commands to query the printer periodically. If an<br />
error response is such that the fault is recoverable, the host application should<br />
interact with the operator and request that the fault be corrected. (for<br />
example, clear a paper jam) When the operator indicates that the problem<br />
has been corrected, the host can issue a reset request.<br />
If a serious error occurs, the printer will halt and enter fault error mode. If the<br />
fault is such that the printer can maintain communications with the host, the<br />
print status request and response system will remain active. The status of the<br />
system will however remain static, i.e. the status responses will reflect the<br />
state of the system when the fault occurred.<br />
There are errors that cannot be reported to the host system. These errors are<br />
such that the integrity of the printer do not allow continued operation. That is<br />
there is no way to report the error. These errors occur (for the most part)<br />
during power up diagnostics. They are as follows:<br />
EEPROM READ ERROR Power up only<br />
The Internal EEPROM is not readable or the check sum is bad.<br />
Pressing the Power Button will attempt to rewrite the configuration information.<br />
This may leave the printer configured incorrectly.<br />
EEPROM WRITE ERROR Power up/down and Configuration only<br />
The Internal EEPROM is defective. There is no recovery.<br />
SOFTWARE ERROR VECTOR Can occur at any time.<br />
These errors can occur during operation. They signal a serious problem with<br />
the system. In most cases this error will also generate a Watch Dog reset. A<br />
power cycle will generally recover normal printer operation. An ESD event or<br />
a firmware bug generally causes these errors. The printer maintains an error<br />
log, this log contains additional information about the fault and is printed<br />
during manual configuration. The information in this log should be reported to<br />
<strong>TransAct</strong> to identify the exact cause of the fault.<br />
USERSTORE FORMAT ERROR Power up or User Store Write Operations<br />
The User Store data in FLASH has an invalid format. Pressing the Power<br />
Button will erase the user store and reformat it. This can be caused by a<br />
firmware update.<br />
FLASH WRITE ERROR Power up or User Store Write Operation.<br />
The Program Flash has failed. There is no recovery from this error.<br />
COM ADAPTER ERROR Power up only<br />
The communications interface card is not supported by the firmware or is<br />
missing. There is no recovery.<br />
<strong>43</strong>-06938 Rev L Page 229
Chapter 13<br />
Epic <strong>43</strong>0 TM Programmers Notes<br />
Page 230<br />
<strong>43</strong>-06938 Rev L
This page intentionally left blank<br />
<strong>43</strong>-06938 Rev L Page 231
Epic <strong>43</strong>0 TM Programmers Notes<br />
General Notes<br />
When the serial port is used, it is important that the output lines from the<br />
printer not be shorted or back driven. If the signals are not to be used, they<br />
should be left open.<br />
Pins 3, 4, and 7 (of the 9 pin connector) are outputs from the printer. If any<br />
one of these signals is grounded or back driven, the other two outputs will be<br />
degraded.<br />
The best time to configure the printer from the host using remote configuration<br />
is during system setup or software update.<br />
Page 232<br />
<strong>43</strong>-06938 Rev L
Epic <strong>43</strong>0 TM What Drivers Do I Need<br />
What Drivers do I need<br />
Deciding what drivers I need can some times be confusing. This section is<br />
included to make that process easier.<br />
Definitions<br />
First a few definitions.<br />
OS - Operating System.<br />
Types of OS’s are: Windows (9x/Me/4.0/2000), Linux, Unix, OS2, ...<br />
Application - A software program that a person uses to do something (i.e. a<br />
POS application)<br />
Program - Program and Application are used interchangeably.<br />
Driver - software that makes hardware do something (i.e. something useful,<br />
we hope). A driver translates (or converts) a software command to a command<br />
that specific hardware can understand.<br />
Types of drivers: Printer driver, Port driver, OPOS driver, USB driver...<br />
OCX/ActiveX - a software component that utilizes Microsoft’s OLE (Object<br />
linking and embedding).<br />
API - Application Programming Interface. In the generic sense “The API”<br />
refers to the Windows Operating system API.<br />
Types of API’s: Windows API, Visual Basic API, Delphi API, MFC API<br />
<strong>43</strong>-06938 Rev L Page 233
Epic <strong>43</strong>0 TM What Drivers Do I need<br />
Do you want to use USB and simulate a Communication Port<br />
The <strong>TransAct</strong> Virtual Serial (TVS) USB Driver allows your application to think<br />
that it is communicating with a serial port, but is actually using the USB link to<br />
communicate with the printer.<br />
This should be downloaded and installed when requested as part of the<br />
Windows Plug and Play or may be preinstalled.<br />
The Epic <strong>43</strong>0 TM printer supports a composite USB interface. This interface<br />
allows a Windows print driver to be installed to a windows USB printer port as<br />
well as supporting a virtual serial port. The printer USB port is configurable<br />
and either the windows printer port or the virtual serial port may de disabled. If<br />
you will be using OPOS, you should disable the Windows printer interface. If<br />
you are going to use only the Windows printer API, you can but do not need to<br />
disable the virtual serial interface.<br />
Are you using OPOS (UnifiedPOS/UPOS)?<br />
If you are using an application that is written to interface with the OPOS "Ole<br />
Point of Sale" standard, then the <strong>TransAct</strong> Technologies OPOS Driver will<br />
allow you to communicate with most of <strong>TransAct</strong> Technologies Printers. The<br />
OPOS Driver provides the mechanisms to print in all of the print modes<br />
supported by the printer.<br />
Note: The <strong>TransAct</strong> Technologies OPOS driver only supports the Microsoft<br />
Windows Operating Systems.<br />
Note: If you are using a USB printer, you will also need to install the <strong>TransAct</strong><br />
Technologies Virtual Serial (TVS) driver.<br />
Note: If you are using an Ethernet printer, UPOS can be configured to interact<br />
directly with the printer. You do not need the VSerial Ethernet driver.<br />
Do you want to print from a Windows Application?<br />
Microsoft supports a Windows Printing API for Windows applications. This<br />
interface is intended to support typical Windows page printers and has<br />
features like begin document, end document and tray selection. Where this is<br />
not an ideal environment for a POS printer, however, there are cases where it<br />
is required.<br />
To support this environment <strong>TransAct</strong> Technologies provides a Windows print<br />
driver with extensions for POS.<br />
This may be down loaded and installed for most of <strong>TransAct</strong> Technologies<br />
printers.<br />
Please read the Ithaca Printer API documentation included with the driver. A<br />
POS printer is not the same as a typical consumer printer and requires unique<br />
consideration when using a Windows printer API interface.<br />
Page 234<br />
<strong>43</strong>-06938 Rev L
Epic <strong>43</strong>0 TM What Drivers Do I Need<br />
Windows Printer Driver<br />
A Windows printer driver is a Microsoft specific, Microsoft defined, type of<br />
driver that the OS uses to translate drawing commands by a Window’s<br />
application to a specific printer’s command set. A window’s printer driver is a<br />
graphics page mode driver. It is not a POS (Point of Sale) driver. (Have you<br />
ever had to open a cash drawer that was connected to your printer at home?)<br />
PC Hardware<br />
Window’s Operating System<br />
Windows Print<br />
Application<br />
GDI<br />
Graphics<br />
Device<br />
Interface<br />
Part of<br />
the<br />
Windows<br />
API<br />
Printer<br />
Driver<br />
Printer<br />
Driver<br />
Port Driver<br />
Serial<br />
OR<br />
Parallel<br />
OR<br />
USB<br />
OR<br />
Whatever<br />
Port<br />
Hardware<br />
Serial<br />
OR<br />
Parallel<br />
OR<br />
USB bus.<br />
OR<br />
Whatever.<br />
Figure 26 Windows Driver<br />
When to use a windows printer driver:<br />
Use a printer driver when writing a program that uses the Window’s API to<br />
send print information to the printer.<br />
When not to use a windows printer driver:<br />
When a program wants to send printer command codes to the printer or when<br />
a program wants to get information back from a printer.<br />
<strong>43</strong>-06938 Rev L Page 235
Epic <strong>43</strong>0 TM What Drivers Do I need<br />
OPOS driver<br />
An OPOS driver is an implementation of the UnifiedPOS (UPOS) specification.<br />
It provides an application interface for retail devices viz. POSPrinter, Scanner,<br />
Cash drawer, Pole Display, MICR, Scale etc.<br />
PC Hardware<br />
Window’s Operating System<br />
POS Application<br />
OPOS<br />
Port<br />
Driver<br />
Port<br />
Hardware<br />
OPOS<br />
Printer<br />
Control<br />
(ActiveX)<br />
Serial<br />
OR<br />
Parallel<br />
Serial<br />
OR<br />
Parallel<br />
OR<br />
USB<br />
OR<br />
USB bus.<br />
OR<br />
Whatever<br />
OR<br />
Whatever.<br />
Figure 27 OPOS (UPOS) Driveer<br />
When to use an OPOS driver:<br />
When an application is written that invokes the retail device functions based<br />
on the UPOS specification, in a vendor independent manner, OPOS can be<br />
used on the Microsoft Windows platform. It allows access to all the features of<br />
a retail device without having to deal with specific device commands. It also<br />
allows information to be retrieved from the retail device.<br />
When not to use an OPOS driver:<br />
When the application is written using windows print API and device specific<br />
commands are sent directly through the application, to the device.<br />
Page 236<br />
<strong>43</strong>-06938 Rev L
Epic <strong>43</strong>0 TM What Drivers Do I Need<br />
USB driver:<br />
A USB driver is a low level device driver, required for USB communication with<br />
the printers. It is a plug and play driver and needs to be installed for USB<br />
printers, when the printer is initially plugged into the system.<br />
Window’s Operating System<br />
OPOS<br />
Driver<br />
Windows<br />
Driver<br />
USB Interface<br />
USB Interface<br />
USB<br />
Driver<br />
USB<br />
PRINTER<br />
USB Interface<br />
Windows<br />
Print App.<br />
Figure 28 USB Driver<br />
When to use the USB driver:<br />
USB Driver is needed whenever data is to be sent/received from the printer<br />
using the USB interface. It is needed with both the Windows and the OPOS<br />
drivers, when these drivers use the USB interface as the underlying<br />
communication path. It is also needed if the application does not use either the<br />
OPOS or the Windows driver but needs to communicate directly with the<br />
printer using the USB interface.<br />
When not to use the USB driver:<br />
USB driver is not needed if the application uses any of the other forms of<br />
communication viz. serial, parallel or Ethernet, and does not use USB.<br />
<strong>43</strong>-06938 Rev L Page 237
Epic <strong>43</strong>0 TM What Drivers Do I need<br />
POSPrinter Activex Control (POSPrinter OCX):<br />
This is not a driver; it is a software component that provides a connection from<br />
an application to a port driver. This allows an application to communicate<br />
“directly” with a printer. This approach allows an application to send the<br />
commands, it wants to, to the printer. This approach is similar to the “old DOS<br />
days” of talking to a POS printer.<br />
PC Hardware<br />
Window’s Operating System<br />
Port<br />
Driver<br />
Port<br />
Hardware<br />
POS Application<br />
Printer<br />
Driver<br />
POSPrinter.ocx<br />
Serial<br />
OR<br />
Parallel<br />
OR<br />
USB<br />
OR<br />
Eternet<br />
Serial<br />
OR<br />
Parallel<br />
OR<br />
USB bus.<br />
OR<br />
Ethernet<br />
OR<br />
Whatever.<br />
OR<br />
Whatever.<br />
Figure 29 POSPrinter OCX<br />
When to use the POSPrinter OCX:<br />
When the application writer wants complete control of what is sent to the<br />
printer. The application must take the responsibility of sending the correct<br />
codes to the printer as well as detecting error conditions, and graceful<br />
recovery from error situations.<br />
When not to use the POSPrinter OCX:<br />
When you do not want to deal with the low-level commands sent to the printer.<br />
Page 238<br />
<strong>43</strong>-06938 Rev L
Appendix A: Code Page Definition Table<br />
Appendix A: Unicode Character Addresses<br />
Note: This information is based on the Unicode 3.0 Standard. For specific<br />
character locations see the Unicode standard.<br />
Note: The Epic <strong>43</strong>0 TM does not contain all possible Unicode characters. The<br />
default character sets are defined by the WGL4 standard.<br />
Unicode Range Use<br />
0x0000 0x007F C0 Controls and Basic Latin<br />
0x0000 0x001F C0 controls<br />
0x0020 0x007F ASCII<br />
0x0080 0x00FF C1 Controls and Latin-1 Supplement<br />
0x00A0 0x00FF Latin1<br />
0x0100 0x017F Latin Extended-A<br />
0x0180 0x024F Latin Extended-B<br />
0x0250 0x02AF IPA Extensions<br />
0x02B0 0x02FF Spacing Modifier Letters<br />
0x0300 0x036F Combining Diacritical Marks<br />
0x0370 0x03FF Greek<br />
0x0400 0x04FF Cyrillic<br />
0x0500 0x052F Unassigned zone 0500-052F<br />
0x0530 0x058F Armenian<br />
0x0590 0x05FF Hebrew<br />
0x0600 0x06FF Arabic<br />
0x0700 0x08FF Unassigned 0700-08FF<br />
0x0900 0x097F Devanagari. Based on ISCII 1988<br />
0x0980 0x09FF Bengali. Based on ISCII 1988<br />
0x0A00 0x0A7F Gurmukhi. Based on ISCII 1988<br />
0x0A80 0x0AFF Gujarati. Based on ISCII 1988<br />
0x0B00 0x0B7F Oriya. Based on ISCII 1988<br />
0x0B80 0x0BFF Tamil. Based on ISCII 1988<br />
0x0C00 0x0C7F Telugu. Based on ISCII 1988<br />
0x0C80 0x0CFF Kannada. Based on ISCII 1988<br />
0x0D00 0x0D7F Malayalam. Based on ISCII 1988<br />
0x0D80 0x0DFF Unassigned zone 0D80-0DFF<br />
0x0D80 0x0DFF Sinhala (Pre-Unicode 2.0)<br />
0x0E00 0x0E7F Thai. Based on TIS 620-2529<br />
0x0E80 0x0EFF Lao. Based on TIS 620-2529<br />
0x0F00 0x0F7F Burmese (Pre-Unicode 2.0)<br />
0x0F00 0x0FBF Tibetan<br />
0x0F80 0x0FFF Khmer (Pre-Unicode 2.0)<br />
0x1000 0x105F Tibetan (Pre-Unicode 2.0)<br />
0x1060 0x109F Mongolian (Pre-Unicode 2.0)<br />
0x10A0 0x10FF Georgian<br />
0x1100 0x11FF Hangul Jamo<br />
0x1100 0x11F9 Korean combining alphabet<br />
0x1200 0x137F Ethiopian (Post-Unicode 2.0)<br />
0x13A0 0x13FF Cherokee (Post-Unicode 2.0)<br />
0x1400 0x167F Canadian Syllabics (Post-Unicode 2.0)<br />
0x16A0 0x1DFF Unassigned zone 16A0-1DFF<br />
0x1E00 0x1EFF Latin Extended Additional<br />
0x1F00 0x1FFF Greek Extended<br />
<strong>43</strong>-06938 Rev L Page 239
Appendix A: Code Page Definition Table<br />
0x2000 0x206F General Punctuation<br />
0x2070 0x209F Superscripts and Subscripts<br />
0x20A0 0x20CF Currency Symbols<br />
0x20D0 0x20FF Combining Diacritical Marks for Symbols<br />
0x2100 0x214F Letter like Symbols<br />
0x2150 0x218F Number Forms<br />
0x2190 0x21FF Arrows<br />
0x2200 0x22FF Mathematical Operators<br />
0x2300 0x23FF Miscellaneous Technical<br />
0x2400 0x2<strong>43</strong>F Control Pictures<br />
0x2440 0x245F Optical Character Recognition<br />
0x2460 0x24FF Enclosed Alphanumerics<br />
0x2500 0x257F Box Drawing<br />
0x2580 0x259F Block Elements<br />
0x25A0 0x25FF Geometric Shapes<br />
0x2600 0x26FF Miscellaneous Symbols<br />
0x2700 0x27BF Dingbats<br />
0x27C0 0x27FF Unassigned zone 27C0-27FF<br />
0x2800 0x28FF Braille Pattern Symbols (Post-Unicode 2.0)<br />
0x2900 0x2FFF Unassigned zone 2900-2FFF<br />
0x3000 0x303F CJK Symbols and Punctuation<br />
0x3040 0x309F Hiragana<br />
0x30A0 0x30FF Katakana<br />
0x3100 0x312F Bopomofo<br />
0x3130 0x318F Hangul Compatibility Jamo. Based on KSC 5601<br />
0x3190 0x319F Kanbun<br />
0x31A0 0x31FF Unassigned zone 31A0-31FF<br />
0x3200 0x32FF Enclosed CJK Letters and Months<br />
0x3300 0x33FF CJK Compatibility<br />
0x3400 0x4DFF CJK Unified Ideograph Extension A (Post-Unicode<br />
2.0)<br />
0x4E00 0x9FA5 CJK Unified Ideographs<br />
0x9FA6 0xABFF Unassigned zone 9FA6-ABFF<br />
0xAC00 0xD7A3 Hangul Syllables<br />
0xD7A4 0xD7FF Unassigned zone D7A4-D7FF<br />
0xD800 0xDB7F High Surrogates<br />
0xDB80 0xDBFF Private Use High Surrogates<br />
0xDC00 0xDFFF Low Surrogates<br />
0xE000 0xF8FF Private Use Area<br />
0xF900 0xFAFF CJK Compatibility Ideographs<br />
0xFB00 0xFB4F Alphabetic Presentation Forms<br />
0xFB50 0xFDFF Arabic Presentation Forms-A<br />
0xFE20 0xFE2F Combining Half Marks<br />
0xFE30 0xFE4F CJK Compatibility Forms<br />
0xFE50 0xFE6F Small Form Variants<br />
0xFE70 0xFEFF Arabic Presentation Forms-B<br />
0xFEFF 0xFEFF Special<br />
0xFF00 0xFFEF Half width and Full width Forms<br />
0xFFF0 0xFFFF Specials<br />
0xFFF0 0xFFFD Specials<br />
0xFFFE 0xFFFF Not character codes<br />
Page 240<br />
<strong>43</strong>-06938 Rev L
Appendix B: WGL4.0 Character Addresses<br />
Appendix B: WGL4.0 Character Addresses<br />
Note: This information is based on the Microsoft's Typography web page.<br />
UNICODE CHARACTER<br />
0020 SPACE<br />
0021 EXCLAMATION MARK<br />
0022 QUOTATION MARK<br />
0023 NUMBER SIGN<br />
0024 DOLLAR SIGN<br />
0025 PERCENT SIGN<br />
0026 AMPERSAND<br />
0027 APOSTROPHE<br />
0028 LEFT PARENTHESIS<br />
0029 RIGHT PARENTHESIS<br />
002A ASTERISK<br />
002B PLUS SIGN<br />
002C COMMA<br />
002D HYPHEN-MINUS<br />
002E PERIOD<br />
002F SLASH<br />
0030 DIGIT ZERO<br />
0031 DIGIT ONE<br />
0032 DIGIT TWO<br />
0033 DIGIT THREE<br />
0034 DIGIT FOUR<br />
0035 DIGIT FIVE<br />
0036 DIGIT SIX<br />
0037 DIGIT SEVEN<br />
0038 DIGIT EIGHT<br />
0039 DIGIT NINE<br />
003A COLON<br />
003B SEMICOLON<br />
003C LESS-THAN SIGN<br />
003D EQUALS SIGN<br />
003E GREATER-THAN SIGN<br />
003F QUESTION MARK<br />
0040 COMMERCIAL AT<br />
0041 LATIN CAPITAL LETTER A<br />
0042 LATIN CAPITAL LETTER B<br />
00<strong>43</strong> LATIN CAPITAL LETTER C<br />
0044 LATIN CAPITAL LETTER D<br />
0045 LATIN CAPITAL LETTER E<br />
0046 LATIN CAPITAL LETTER F<br />
0047 LATIN CAPITAL LETTER G<br />
0048 LATIN CAPITAL LETTER H<br />
0049 LATIN CAPITAL LETTER I<br />
004A LATIN CAPITAL LETTER J<br />
004B LATIN CAPITAL LETTER K<br />
004C LATIN CAPITAL LETTER L<br />
004D LATIN CAPITAL LETTER M<br />
004E LATIN CAPITAL LETTER N<br />
004F LATIN CAPITAL LETTER O<br />
0050 LATIN CAPITAL LETTER P<br />
0051 LATIN CAPITAL LETTER Q<br />
0052 LATIN CAPITAL LETTER R<br />
0053 LATIN CAPITAL LETTER S<br />
0054 LATIN CAPITAL LETTER T<br />
0055 LATIN CAPITAL LETTER U<br />
0056 LATIN CAPITAL LETTER V<br />
0057 LATIN CAPITAL LETTER W<br />
0058 LATIN CAPITAL LETTER X<br />
0059 LATIN CAPITAL LETTER Y<br />
005A LATIN CAPITAL LETTER Z<br />
005B LEFT SQUARE BRACKET<br />
005C BACKSLASH<br />
005D RIGHT SQUARE BRACKET<br />
005E CIRCUMFLEX ACCENT<br />
005F UNDERLINE<br />
0060 GRAVE ACCENT<br />
0061 LATIN SMALL LETTER A<br />
0062 LATIN SMALL LETTER B<br />
0063 LATIN SMALL LETTER C<br />
0064 LATIN SMALL LETTER D<br />
0065 LATIN SMALL LETTER E<br />
0066 LATIN SMALL LETTER F<br />
0067 LATIN SMALL LETTER G<br />
0068 LATIN SMALL LETTER H<br />
0069 LATIN SMALL LETTER I<br />
006A LATIN SMALL LETTER J<br />
006B LATIN SMALL LETTER K<br />
006C LATIN SMALL LETTER L<br />
006D LATIN SMALL LETTER M<br />
006E LATIN SMALL LETTER N<br />
006F LATIN SMALL LETTER O<br />
0070 LATIN SMALL LETTER P<br />
0071 LATIN SMALL LETTER Q<br />
0072 LATIN SMALL LETTER R<br />
0073 LATIN SMALL LETTER S<br />
0074 LATIN SMALL LETTER T<br />
0075 LATIN SMALL LETTER U<br />
0076 LATIN SMALL LETTER V<br />
0077 LATIN SMALL LETTER W<br />
0078 LATIN SMALL LETTER X<br />
0079 LATIN SMALL LETTER Y<br />
007A LATIN SMALL LETTER Z<br />
007B LEFT CURLY BRACKET<br />
007C VERTICAL LINE<br />
007D RIGHT CURLY BRACKET<br />
007E TILDE<br />
00A0 NO-BREAK SPACE<br />
00A1 INVERTED EXCLAMATION MARK<br />
00A2 CENT SIGN<br />
00A3 POUND SIGN<br />
00A4 CURRENCY SIGN<br />
00A5 YEN SIGN<br />
00A6 BROKEN BAR<br />
00A7 SECTION SIGN<br />
00A8 DIAERESIS<br />
00A9 COPYRIGHT SIGN<br />
00AA FEMININE ORDINAL INDICATOR<br />
00AB LEFT GUILLEMET<br />
00AC NOT SIGN<br />
00AD SOFT HYPHEN<br />
00AE REGISTERED TRADE MARK SIGN<br />
00AF MACRON, OVERLINE<br />
00B0 DEGREE SIGN<br />
00B1 PLUS-MINUS SIGN<br />
00B2 SUPERSCRIPT TWO<br />
00B3 SUPERSCRIPT THREE<br />
00B4 ACUTE ACCENT<br />
00B5 MICRO SIGN<br />
00B6 PARAGRAPH SIGN<br />
00B7 MIDDLE DOT, KANA CONJOCTIVE<br />
00B8 CEDILLA<br />
00B9 SUPERSCRIPT ONE<br />
00BA MASCULINE ORDINAL INDICATOR<br />
00BB RIGHT GUILLEMET<br />
00BC VULGAR FRACTION ONE QUARTER<br />
00BD VULGAR FRACTION ONE HALF<br />
00BE VULGAR FRACTION THREE QUARTERS<br />
00BF INVERTED QUESTION MARK<br />
00C0<br />
LATIN CAPITAL LETTER A WITH GRAVE<br />
ACCENT<br />
00C1<br />
LATIN CAPITAL LETTER A WITH ACUTE<br />
ACCENT<br />
00C2<br />
LATIN CAPITAL LETTER A WITH CIRCUMFLEX<br />
ACCENT<br />
00C3 LATIN CAPITAL LETTER A WITH TILDE<br />
00C4 LATIN CAPITAL LETTER A WITH DIAERESIS<br />
<strong>43</strong>-06938 Rev L Page 241
Appendix B: WGL4.0 Character Addresses<br />
00C5<br />
00C6<br />
00C7<br />
00C8<br />
00C9<br />
00CA<br />
00CB<br />
00CC<br />
00CD<br />
00CE<br />
00CF<br />
00D0<br />
00D1<br />
00D2<br />
00D3<br />
00D4<br />
00D5<br />
00D6<br />
00D7<br />
00D8<br />
00D9<br />
00DA<br />
00DB<br />
00DC<br />
00DD<br />
00DE<br />
00DF<br />
00E0<br />
00E1<br />
00E2<br />
00E3<br />
00E4<br />
00E5<br />
00E6<br />
00E7<br />
00E8<br />
00E9<br />
00EA<br />
00EB<br />
00EC<br />
00ED<br />
00EE<br />
00EF<br />
00F0<br />
00F1<br />
00F2<br />
00F3<br />
00F4<br />
00F5<br />
00F6<br />
00F7<br />
00F8<br />
00F9<br />
LATIN CAPITAL LETTER A WITH RING ABOVE<br />
LATIN CAPITAL LETTER A WITH E<br />
LATIN CAPITAL LETTER C WITH CEDILLA<br />
LATIN CAPITAL LETTER E WITH GRAVE<br />
ACCENT<br />
LATIN CAPITAL LETTER E WITH ACUTE<br />
ACCENT<br />
LATIN CAPITAL LETTER E WITH CIRCUMFLEX<br />
ACCENT<br />
LATIN CAPITAL LETTER E WITH DIAERESIS<br />
LATIN CAPITAL LETTER I WITH GRAVE<br />
ACCENT<br />
LATIN CAPITAL LETTER I WITH ACUTE<br />
ACCENT<br />
LATIN CAPITAL LETTER I WITH CIRCUMFLEX<br />
ACCENT<br />
LATIN CAPITAL LETTER I WITH DIAERESIS<br />
LATIN CAPITAL LETTER ETH<br />
LATIN CAPITAL LETTER N WITH TILDE<br />
LATIN CAPITAL LETTER O WITH GRAVE<br />
ACCENT<br />
LATIN CAPITAL LETTER O WITH ACUTE<br />
ACCENT<br />
LATIN CAPITAL LETTER O WITH CIRCUMFLEX<br />
ACCENT<br />
LATIN CAPITAL LETTER O WITH TILDE<br />
LATIN CAPITAL LETTER O WITH DIAERESIS<br />
MULTIPLICATION SIGN<br />
LATIN CAPITAL LETTER O WITH OBLIQUE<br />
STROKE<br />
LATIN CAPITAL LETTER U WITH GRAVE<br />
ACCENT<br />
LATIN CAPITAL LETTER U WITH ACUTE<br />
ACCENT<br />
LATIN CAPITAL LETTER U WITH CIRCUMFLEX<br />
ACCENT<br />
LATIN CAPITAL LETTER U WITH DIAERESIS<br />
LATIN CAPITAL LETTER Y WITH ACUTE<br />
ACCENT<br />
LATIN CAPITAL LETTER THORN<br />
LATIN SMALL LETTER SHARP S<br />
LATIN SMALL LETTER A WITH GRAVE<br />
ACCENT<br />
LATIN SMALL LETTER A WITH ACUTE ACCENT<br />
LATIN SMALL LETTER A WITH CIRCUMFLEX<br />
ACCENT<br />
LATIN SMALL LETTER A WITH TILDE<br />
LATIN SMALL LETTER A WITH DIAERESIS<br />
LATIN SMALL LETTER A WITH RING ABOVE<br />
LATIN SMALL LETTER A WITH E<br />
LATIN SMALL LETTER C WITH CEDILLA<br />
LATIN SMALL LETTER E WITH GRAVE<br />
ACCENT<br />
LATIN SMALL LETTER E WITH ACUTE ACCENT<br />
LATIN SMALL LETTER E WITH CIRCUMFLEX<br />
ACCENT<br />
LATIN SMALL LETTER E WITH DIAERESIS<br />
LATIN SMALL LETTER I WITH GRAVE ACCENT<br />
LATIN SMALL LETTER I WITH ACUTE ACCENT<br />
LATIN SMALL LETTER I WITH CIRCUMFLEX<br />
ACCENT<br />
LATIN SMALL LETTER I WITH DIAERESIS<br />
LATIN SMALL LETTER ETH<br />
LATIN SMALL LETTER N WITH TILDE<br />
LATIN SMALL LETTER O WITH GRAVE<br />
ACCENT<br />
LATIN SMALL LETTER O WITH ACUTE<br />
ACCENT<br />
LATIN SMALL LETTER O WITH CIRCUMFLEX<br />
ACCENT<br />
LATIN SMALL LETTER O WITH TILDE<br />
LATIN SMALL LETTER O WITH DIAERESIS<br />
DIVISION SIGN<br />
LATIN SMALL LETTER O WITH OBLIQUE<br />
STROKE<br />
LATIN SMALL LETTER U WITH GRAVE<br />
ACCENT<br />
00FA LATIN SMALL LETTER U WITH ACUTE ACCENT<br />
00FB<br />
LATIN SMALL LETTER U WITH CIRCUMFLEX<br />
ACCENT<br />
00FC LATIN SMALL LETTER U WITH DIAERESIS<br />
00FD LATIN SMALL LETTER Y WITH ACUTE ACCENT<br />
00FE LATIN SMALL LETTER THORN<br />
00FF LATIN SMALL LETTER Y WITH DIAERESIS<br />
0100 LATIN CAPITAL LETTER A WITH MACRON<br />
0101 LATIN SMALL LETTER A WITH MACRON<br />
0102 LATIN CAPITAL LETTER A WITH BREVE<br />
0103 LATIN SMALL LETTER A WITH BREVE<br />
0104 LATIN CAPITAL LETTER A WITH OGONEK<br />
0105 LATIN SMALL LETTER A WITH OGONEK<br />
0106<br />
LATIN CAPITAL LETTER C WITH ACUTE<br />
ACCENT<br />
0107 LATIN SMALL LETTER C WITH ACUTE ACCENT<br />
0108 LATIN CAPITAL LETTER C WITH CIRCUMFLEX<br />
0109 LATIN SMALL LETTER C WITH CIRCUMFLEX<br />
010A LATIN CAPITAL LETTER C WITH DOT ABOVE<br />
010B LATIN SMALL LETTER C WITH DOT ABOVE<br />
010C LATIN CAPITAL LETTER C WITH CARON<br />
010D LATIN SMALL LETTER C WITH CARON<br />
010E LATIN CAPITAL LETTER D WITH HACEK<br />
010F LATIN SMALL LETTER D WITH HACEK<br />
0110 LATIN CAPITAL LETTER D WITH STROKE<br />
0111 LATIN SMALL LETTER D WITH STROKE<br />
0112 LATIN CAPITAL LETTER E WITH MACRON<br />
0113 LATIN SMALL LETTER E WITH MACRON<br />
0114 LATIN CAPITAL LETTER E WITH BREVE<br />
0115 LATIN SMALL LETTER E WITH BREVE<br />
0116 LATIN CAPITAL LETTER E WITH DOT ABOVE<br />
0117 LATIN SMALL LETTER E WITH DOT ABOVE<br />
0118 LATIN CAPITAL LETTER E WITH OGENEK<br />
0119 LATIN SMALL LETTER E WITH OGENEK<br />
011A LATIN CAPITAL LETTER E WITH HACEK<br />
011B LATIN SMALL LETTER E WITH HACEK<br />
011C LATIN CAPITAL LETTER G WITH CIRCUMFLEX<br />
011D LATIN SMALL LETTER G WITH CIRCUMFLEX<br />
011E LATIN CAPITAL LETTER G WITH BREVE<br />
011F LATIN SMALL LETTER G WITH BREVE<br />
0120 LATIN CAPITAL LETTER G WITH DOT ABOVE<br />
0121 LATIN SMALL LETTER G WITH DOT ABOVE<br />
0122 LATIN CAPITAL LETTER G WITH CEDILLA<br />
0123 LATIN SMALL LETTER G WITH CEDILLA<br />
0124 LATIN CAPITAL LETTER H WITH CIRCUMFLEX<br />
0125 LATIN SMALL LETTER H WITH CIRCUMFLEX<br />
0126 LATIN CAPITAL LETTER H WITH STROKE<br />
0127 LATIN SMALL LETTER H WITH STROKE<br />
0128 LATIN CAPITAL LETTER I WITH TILDE<br />
0129 LATIN SMALL LETTER I WITH TILDE<br />
012A LATIN CAPITAL LETTER I WITH MACRON<br />
012B LATIN SMALL LETTER I WITH MACRON<br />
012C LATIN CAPITAL LETTER I WITH BREVE<br />
012D LATIN SMALL LETTER I WITH BREVE<br />
012E LATIN CAPITAL LETTER I WITH OGONEK<br />
012F LATIN SMALL LETTER I WITH OGONEK<br />
0130 LATIN CAPITAL LETTER I WITH DOT ABOVE<br />
0131 LATIN SMALL LETTER I WITHOUT DOT ABOVE<br />
0132 LATIN CAPITAL LIGATURE IJ<br />
0133 LATIN SMALL LIGATURE IJ<br />
0134 LATIN CAPITAL LETTER J WITH CIRCUMFLEX<br />
0135 LATIN SMALL LETTER J WITH CIRCUMFLEX<br />
0136 LATIN CAPITAL LETTER K WITH CEDILLA<br />
0137 LATIN SMALL LETTER K WITH CEDILLA<br />
0138 LATIN SMALL LETTER KRA<br />
0139<br />
LATIN CAPITAL LETTER L WITH ACUTE<br />
ACCENT<br />
013A LATIN SMALL LETTER L WITH ACUTE ACCENT<br />
013B LATIN CAPITAL LETTER L WITH CEDILLA<br />
013C LATIN SMALL LETTER L WITH CEDILLA<br />
013D LATIN CAPITAL LETTER L WITH HACEK<br />
013E LATIN SMALL LETTER L WITH HACEK<br />
013F LATIN CAPITAL LETTER L WITH MIDDLE DOT<br />
0140 LATIN SMALL LETTER L WITH MIDDLE DOT<br />
0141 LATIN CAPITAL LETTER L WITH STROKE<br />
Page 242<br />
<strong>43</strong>-06938 Rev L
Appendix B: WGL4.0 Character Addresses<br />
0142 LATIN SMALL LETTER L WITH STROKE<br />
01<strong>43</strong><br />
LATIN CAPITAL LETTER N WITH ACUTE<br />
ACCENT<br />
0144 LATIN SMALL LETTER N WITH ACUTE ACCENT<br />
0145 LATIN CAPITAL LETTER N WITH CEDILLA<br />
0146 LATIN SMALL LETTER N WITH CEDILLA<br />
0147 LATIN CAPITAL LETTER N WITH HACEK<br />
0148 LATIN SMALL LETTER N WITH HACEK<br />
0149<br />
LATIN SMALL LETTER N PRECEDED BY<br />
APOSTROPHE<br />
014A LATIN CAPITAL LETTER ENG<br />
014B LATIN SMALL LETTER ENG<br />
014C LATIN CAPITAL LETTER O WITH MACRON<br />
014D LATIN SMALL LETTER O WITH MACRON<br />
014E LATIN CAPITAL LETTER O WITH BREVE<br />
014F LATIN SMALL LETTER O WITH BREVE<br />
0150<br />
LATIN CAPITAL LETTER O WITH DOUBLE<br />
ACUTE ACCENT<br />
0151<br />
LATIN SMALL LETTER O WITH DOUBLE<br />
ACUTE ACCENT<br />
0152 LATIN CAPITAL LIGATURE O WITH E<br />
0153 LATIN SMALL LIGATURE O WITH E<br />
0154<br />
LATIN CAPITAL LETTER R WITH ACUTE<br />
ACCENT<br />
0155 LATIN SMALL LETTER R WITH ACUTE ACCENT<br />
0156 LATIN CAPITAL LETTER R WITH CEDILLA<br />
0157 LATIN SMALL LETTER R WITH CEDILLA<br />
0158 LATIN CAPITAL LETTER R WITH HACEK<br />
0159 LATIN SMALL LETTER R WITH HACEK<br />
015A<br />
LATIN CAPITAL LETTER S WITH ACUTE<br />
ACCENT<br />
015B LATIN SMALL LETTER S WITH ACUTE ACCENT<br />
015C LATIN CAPITAL LETTER S WITH CIRCUMFLEX<br />
015D LATIN SMALL LETTER S WITH CIRCUMFLEX<br />
015E LATIN CAPITAL LETTER S WITH CEDILLA<br />
015F LATIN SMALL LETTER S WITH CEDILLA<br />
0160 LATIN CAPITAL LETTER S WITH HACEK<br />
0161 LATIN SMALL LETTER S WITH HACEK<br />
0162 LATIN CAPITAL LETTER T WITH CEDILLA<br />
0163 LATIN SMALL LETTER T WITH CEDILLA<br />
0164 LATIN CAPITAL LETTER T WITH HACEK<br />
0165 LATIN SMALL LETTER T WITH HACEK<br />
0166 LATIN CAPITAL LETTER T WITH STROKE<br />
0167 LATIN SMALL LETTER T WITH STROKE<br />
0168 LATIN CAPITAL LETTER U WITH TILDE<br />
0169 LATIN SMALL LETTER U WITH TILDE<br />
016A LATIN CAPITAL LETTER U WITH MACRON<br />
016B LATIN SMALL LETTER U WITH MACRON<br />
016C LATIN CAPITAL LETTER U WITH BREVE<br />
016D LATIN SMALL LETTER U WITH BREVE<br />
016E LATIN CAPITAL LETTER U WITH RING ABOVE<br />
016F LATIN SMALL LETTER U WITH RING ABOVE<br />
0170<br />
LATIN CAPITAL LETTER U WITH DOUBLE<br />
ACUTE ACCENT<br />
0171<br />
LATIN SMALL LETTER U WITH DOUBLE ACUTE<br />
ACCENT<br />
0172 LATIN CAPITAL LETTER U WITH OGONEK<br />
0173 LATIN SMALL LETTER U WITH OGONEK<br />
0174 LATIN CAPITAL LETTER W WITH CIRCUMFLEX<br />
0175 LATIN CMALL LETTER W WITH CIRCUMFLEX<br />
0176 LATIN CAPITAL LETTER Y WITH CIRCUMFLEX<br />
0177 LATIN SMALL LETTER Y WITH CIRCUMFLEX<br />
0178 LATIN CAPITAL LETTER Y WITH DIAERESIS<br />
0179<br />
LATIN CAPITAL LETTER Z WITH ACUTE<br />
ACCENT<br />
017A LATIN SMALL LETTER Z WITH ACUTE ACCENT<br />
017B LATIN CAPITAL LETTER Z WITH DOT ABOVE<br />
017C LATIN SMALL LETTER Z WITH DOT ABOVE<br />
017D LATIN CAPITAL LETTER Z WITH HACEK<br />
017E LATIN SMALL LETTER Z WITH HACEK<br />
017F LATIN SMALL LETTER LONG S<br />
0192 LATIN SMALL LETTER SCRIPT F,FLORIN SIGN<br />
01FA<br />
LATIN CAPITAL LETTER A WITH RING ABOVE<br />
AND ACUTE<br />
01FB<br />
LATIN SMALL LETTER A WITH RING ABOVE<br />
AND ACUTE<br />
01FC LATIN CAPITAL LIGATURE AE WITH ACUTE<br />
01FD LATIN SMALL LIGATURE AE WITH ACUTE<br />
01FE<br />
LATIN CAPITAL LETTER O WITH STROKE AND<br />
ACUTE<br />
01FF<br />
LATIN SMALL LETTER O WITH STROKE AND<br />
ACUTE<br />
02C6 NONSPACING CIRCUMFLEX ACCENT<br />
02C7 MODIFIER LETTER HACEK<br />
02C9 MODIFIER LETTER MACRON<br />
02D8 BREVE<br />
02D9 DOT ABOVE<br />
02DA RING ABOVE<br />
02DB OGONEK<br />
02DC NONSPACING TILDE<br />
02DD MODIFIER LETTER DOUBLE PRIME<br />
0384 GREEK TONOS<br />
0385 GREEK DIALYTIKA TONOS<br />
0386 GREEK CAPITAL LETTER ALPHA WITH TONOS<br />
0387 GREEK ANO TELEIA<br />
0388<br />
GREEK CAPITAL LETTER EPSILON WITH<br />
TONOS<br />
0389 GREEK CAPITAL LETTER ETA WITH TONOS<br />
038A GREEK CAPITAL LETTER IOTA WITH TONOS<br />
038C<br />
GREEK CAPITAL LETTER OMICRON WITH<br />
TONOS<br />
038E<br />
GREEK CAPITAL LETTER UPSILON WITH<br />
TONOS<br />
038F<br />
GREEK CAPITAL LETTER OMEGA WITH<br />
TONOS<br />
0390<br />
GREEK SMALL LETTER IOTA WITH DIALYTIKA<br />
AND TONOS<br />
0391 GREEK CAPITAL LETTER ALPHA<br />
0392 GREEK CAPITAL LETTER BETA<br />
0393 GREEK CAPITAL LETTER GAMMA<br />
0394 GREEK CAPITAL LETTER DELTA<br />
0395 GREEK CAPITAL LETTER EPSILON<br />
0396 GREEK CAPITAL LETTER ZETA<br />
0397 GREEK CAPITAL LETTER ETA<br />
0398 GREEK CAPITAL LETTER THETA<br />
0399 GREEK CAPITAL LETTER IOTA<br />
039A GREEK CAPITAL LETTER KAPPA<br />
039B GREEK CAPITAL LETTER LAMDA<br />
039C GREEK CAPITAL LETTER MU<br />
039D GREEK CAPITAL LETTER NU<br />
039E GREEK CAPITAL LETTER XI<br />
039F GREEK CAPITAL LETTER OMICRON<br />
03A0 GREEK CAPITAL LETTER PI<br />
03A1 GREEK CAPITAL LETTER RHO<br />
03A3 GREEK CAPITAL LETTER SIGMA<br />
03A4 GREEK CAPITAL LETTER TAU<br />
03A5 GREEK CAPITAL LETTER UPSILON<br />
03A6 GREEK CAPITAL LETTER PHI<br />
03A7 GREEK CAPITAL LETTER CHI<br />
03A8 GREEK CAPITAL LETTER PSI<br />
03A9 GREEK CAPITAL LETTER OMEGA<br />
03AA<br />
GREEK CAPITAL LETTER IOTA WITH<br />
DIALYTIKA<br />
03AB<br />
GREEK CAPITAL LETTER UPSILON WITH<br />
DIALYTIKA<br />
03AC GREEK SMALL LETTER ALPHA WITH TONOS<br />
03AD<br />
GREEK SMALL LETTER EPSILON WITH<br />
TONOS<br />
03AE GREEK SMALL LETTER ETA WITH TONOS<br />
03AF GREEK SMALL LETTER IOTA WITH TONOS<br />
03B0<br />
GREEK SMALL LETTER UPSILON WITH<br />
DIALYTIKA AND TONOS<br />
03B1 GREEK SMALL LETTER ALPHA<br />
03B2 GREEK SMALL LETTER BETA<br />
03B3 GREEK SMALL LETTER GAMMA<br />
03B4 GREEK SMALL LETTER DELTA<br />
03B5 GREEK SMALL LETTER EPSILON<br />
03B6 GREEK SMALL LETTER ZETA<br />
03B7 GREEK SMALL LETTER ETA<br />
03B8 GREEK SMALL LETTER THETA<br />
03B9 GREEK SMALL LETTER IOTA<br />
03BA GREEK SMALL LETTER KAPPA<br />
<strong>43</strong>-06938 Rev L Page 2<strong>43</strong>
Appendix B: WGL4.0 Character Addresses<br />
03BB GREEK SMALL LETTER LAMDA<br />
03BC GREEK SMALL LETTER MU<br />
03BD GREEK SMALL LETTER NU<br />
03BE GREEK SMALL LETTER XI<br />
03BF GREEK SMALL LETTER OMICRON<br />
03C0 GREEK SMALL LETTER PI<br />
03C1 GREEK SMALL LETTER RHO<br />
03C2 GREEK SMALL LETTER FINAL SIGMA<br />
03C3 GREEK SMALL LETTER SIGMA<br />
03C4 GREEK SMALL LETTER TAU<br />
03C5 GREEK SMALL LETTER UPSILON<br />
03C6 GREEK SMALL LETTER PHI<br />
03C7 GREEK SMALL LETTER CHI<br />
03C8 GREEK SMALL LETTER PSI<br />
03C9 GREEK SMALL LETTER OMEGA<br />
03CA GREEK SMALL LETTER IOTA WITH DIALYTIKA<br />
03CB<br />
GREEK SMALL LETTER UPSILON WITH<br />
DIALYTIKA<br />
03CC<br />
GREEK SMALL LETTER OMICRON WITH<br />
TONOS<br />
03CD<br />
GREEK SMALL LETTER UPSILON WITH<br />
TONOS<br />
03CE GREEK SMALL LETTER OMEGA WITH TONOS<br />
0401 CYRILLIC CAPITAL LETTER IO<br />
0402 CYRILLIC CAPITAL LETTER DJE<br />
0403 CYRILLIC CAPITAL LETTER GJE<br />
0404 CYRILLIC CAPITAL LETTER UKRAINIAN IE<br />
0405 CYRILLIC CAPITAL LETTER DZE<br />
0406<br />
CYRILLIC CAPITAL LETTER BYELORUSSIAN-<br />
UKRAINIAN I<br />
0407 CYRILLIC CAPITAL LETTER YI<br />
0408 CYRILLIC CAPITAL LETTER JE<br />
0409 CYRILLIC CAPITAL LETTER LJE<br />
040A CYRILLIC CAPITAL LETTER NJE<br />
040B CYRILLIC CAPITAL LETTER TSHE<br />
040C CYRILLIC CAPITAL LETTER KJE<br />
040E CYRILLIC CAPITAL LETTER SHORT U<br />
040F CYRILLIC CAPITAL LETTER DZHE<br />
0410 CYRILLIC CAPITAL LETTER A<br />
0411 CYRILLIC CAPITAL LETTER BE<br />
0412 CYRILLIC CAPITAL LETTER VE<br />
0413 CYRILLIC CAPITAL LETTER GHE<br />
0414 CYRILLIC CAPITAL LETTER DE<br />
0415 CYRILLIC CAPITAL LETTER IE<br />
0416 CYRILLIC CAPITAL LETTER ZHE<br />
0417 CYRILLIC CAPITAL LETTER ZE<br />
0418 CYRILLIC CAPITAL LETTER I<br />
0419 CYRILLIC CAPITAL LETTER SHORT I<br />
041A CYRILLIC CAPITAL LETTER KA<br />
041B CYRILLIC CAPITAL LETTER EL<br />
041C CYRILLIC CAPITAL LETTER EM<br />
041D CYRILLIC CAPITAL LETTER EN<br />
041E CYRILLIC CAPITAL LETTER O<br />
041F CYRILLIC CAPITAL LETTER PE<br />
0420 CYRILLIC CAPITAL LETTER ER<br />
0421 CYRILLIC CAPITAL LETTER ES<br />
0422 CYRILLIC CAPITAL LETTER TE<br />
0423 CYRILLIC CAPITAL LETTER U<br />
0424 CYRILLIC CAPITAL LETTER EF<br />
0425 CYRILLIC CAPITAL LETTER HA<br />
0426 CYRILLIC CAPITAL LETTER TSE<br />
0427 CYRILLIC CAPITAL LETTER CHE<br />
0428 CYRILLIC CAPITAL LETTER SHA<br />
0429 CYRILLIC CAPITAL LETTER SHCHA<br />
042A CYRILLIC CAPITAL LETTER HARD SIGN<br />
042B CYRILLIC CAPITAL LETTER YERU<br />
042C CYRILLIC CAPITAL LETTER SOFT SIGN<br />
042D CYRILLIC CAPITAL LETTER E<br />
042E CYRILLIC CAPITAL LETTER YU<br />
042F CYRILLIC CAPITAL LETTER YA<br />
0<strong>43</strong>0 CYRILLIC SMALL LETTER A<br />
0<strong>43</strong>1 CYRILLIC SMALL LETTER BE<br />
0<strong>43</strong>2 CYRILLIC SMALL LETTER VE<br />
0<strong>43</strong>3 CYRILLIC SMALL LETTER GHE<br />
0<strong>43</strong>4 CYRILLIC SMALL LETTER DE<br />
0<strong>43</strong>5 CYRILLIC SMALL LETTER IE<br />
0<strong>43</strong>6 CYRILLIC SMALL LETTER ZHE<br />
0<strong>43</strong>7 CYRILLIC SMALL LETTER ZE<br />
0<strong>43</strong>8 CYRILLIC SMALL LETTER I<br />
0<strong>43</strong>9 CYRILLIC SMALL LETTER SHORT I<br />
0<strong>43</strong>A CYRILLIC SMALL LETTER KA<br />
0<strong>43</strong>B CYRILLIC SMALL LETTER EL<br />
0<strong>43</strong>C CYRILLIC SMALL LETTER EM<br />
0<strong>43</strong>D CYRILLIC SMALL LETTER EN<br />
0<strong>43</strong>E CYRILLIC SMALL LETTER O<br />
0<strong>43</strong>F CYRILLIC SMALL LETTER PE<br />
0440 CYRILLIC SMALL LETTER ER<br />
0441 CYRILLIC SMALL LETTER ES<br />
0442 CYRILLIC SMALL LETTER TE<br />
04<strong>43</strong> CYRILLIC SMALL LETTER U<br />
0444 CYRILLIC SMALL LETTER EF<br />
0445 CYRILLIC SMALL LETTER HA<br />
0446 CYRILLIC SMALL LETTER TSE<br />
0447 CYRILLIC SMALL LETTER CHE<br />
0448 CYRILLIC SMALL LETTER SHA<br />
0449 CYRILLIC SMALL LETTER SHCHA<br />
044A CYRILLIC SMALL LETTER HARD SIGN<br />
044B CYRILLIC SMALL LETTER YERU<br />
044C CYRILLIC SMALL LETTER SOFT SIGN<br />
044D CYRILLIC SMALL LETTER E<br />
044E CYRILLIC SMALL LETTER YU<br />
044F CYRILLIC SMALL LETTER YA<br />
0451 CYRILLIC SMALL LETTER IO<br />
0452 CYRILLIC SMALL LETTER DJE<br />
0453 CYRILLIC SMALL LETTER GJE<br />
0454 CYRILLIC SMALL LETTER UKRAINIAN IE<br />
0455 CYRILLIC SMALL LETTER DZE<br />
0456<br />
CYRILLIC SMALL LETTER BYELORUSSIAN-<br />
UKRAINIAN I<br />
0457 CYRILLIC SMALL LETTER YI<br />
0458 CYRILLIC SMALL LETTER JE<br />
0459 CYRILLIC SMALL LETTER LJE<br />
045A CYRILLIC SMALL LETTER NJE<br />
045B CYRILLIC SMALL LETTER TSHE<br />
045C CYRILLIC SMALL LETTER KJE<br />
045E CYRILLIC SMALL LETTER SHORT U<br />
045F CYRILLIC SMALL LETTER DZHE<br />
0490<br />
CYRILLIC CAPITAL LETTER GHE WITH<br />
UPTURN<br />
0491 CYRILLIC SMALL LETTER GHE WITH UPTURN<br />
1E80 LATIN CAPITAL LETTER W WITH GRAVE<br />
1E81 LATIN SMALL LETTER W WITH GRAVE<br />
1E82 LATIN CAPITAL LETTER W WITH ACUTE<br />
1E83 LATIN SMALL LETTER W WITH ACUTE<br />
1E84 LATIN CAPITAL LETTER W WITH DIAERESIS<br />
1E85 LATIN SMALL LETTER W WITH DIAERESIS<br />
1EF2 LATIN CAPITAL LETTER Y WITH GRAVE<br />
1EF3 LATIN SMALL LETTER Y WITH GRAVE<br />
2013 EN DASH<br />
2014 EM DASH<br />
2015 HORIZONTAL BAR<br />
2017 DOUBLE LOW LINE<br />
2018 LEFT SINGLE QUOTATION MARK<br />
2019 RIGHT SINGLE QUOTATION MARK<br />
201A SINGLE LOW-9 QUOTATION MARK<br />
201B<br />
SINGLE HIGH-REVERSED-9 QUOTATION<br />
MARK<br />
201C LEFT DOUBLE QUOTATION MARK<br />
201D RIGHT DOUBLE QUOTATION MARK<br />
201E DOUBLE LOW-9 QUOTATION MARK<br />
2020 DAGGER<br />
2021 DOUBLE DAGGER<br />
2022 BULLET<br />
2026 HORIZONTAL ELLIPSIS<br />
2030 PER MILLE SIGN<br />
2032 PRIME<br />
2033 DOUBLE PRIME<br />
2039<br />
SINGLE LEFT-POINTING ANGLE QUOTATION<br />
MARK<br />
203A<br />
SINGLE RIGHT-POINTING ANGLE QUOTATION<br />
MARK<br />
Page 244<br />
<strong>43</strong>-06938 Rev L
Appendix B: WGL4.0 Character Addresses<br />
203C DOUBLE EXCLAMATION MARK<br />
203E OVERLINE<br />
2044 FRACTION SLASH<br />
207F SUPERSCRIPT LATIN SMALL LETTER N<br />
20A3 FRENCH FRANC SIGN<br />
20A4 LIRA SIGN<br />
20A7 PESETA SIGN<br />
20AC EURO CURRENCY SYMBOL<br />
2105 CARE OF<br />
2113 SCRIPT SMALL L<br />
2116 NUMERO SIGN<br />
2122 TRADEMARK SIGN<br />
2126 OHM SIGN<br />
212E ESTIMATED SYMBOL<br />
215B VULGAR FRACTION ONE EIGHTH<br />
215C VULGAR FRACTION THREE EIGHTHS<br />
215D VULGAR FRACTION FIVE EIGHTHS<br />
215E VULGAR FRACTION SEVEN EIGHTHS<br />
2190 LEFTWARDS ARROW<br />
2191 UPWARDS ARROW<br />
2192 RIGHTWARDS ARROW<br />
2193 DOWNWARDS ARROW<br />
2194 LEFT RIGHT ARROW<br />
2195 UP DOWN ARROW<br />
21A8 UP DOWN ARROW WITH BASE<br />
2202 PARTIAL DIFFERENTIAL<br />
2206 INCREMENT<br />
220F N-ARY PRODUCT<br />
2211 N-ARY SUMMATION<br />
2212 MINUS SIGN<br />
2215 DIVISION SLASH<br />
2219 BULLET OPERATOR<br />
221A SQUARE ROOT<br />
221E INFINITY<br />
221F RIGHT ANGLE<br />
2229 INTERSECTION<br />
222B INTEGRAL<br />
2248 ALMOST EQUAL TO<br />
2260 NOT EQUAL TO<br />
2261 IDENTICAL TO<br />
2264 LESS-THAN OR EQUAL TO<br />
2265 GREATER-THAN OR EQUAL TO<br />
2302 HOUSE<br />
2310 REVERSED NOT SIGN<br />
2320 TOP HALF INTEGRAL<br />
2321 BOTTOM HALF INTEGRAL<br />
2500 BOX DRAWINGS LIGHT HORIZONTAL<br />
2502 BOX DRAWINGS LIGHT VERTICAL<br />
250C BOX DRAWINGS LIGHT DOWN AND RIGHT<br />
2510 BOX DRAWINGS LIGHT DOWN AND LEFT<br />
2514 BOX DRAWINGS LIGHT UP AND RIGHT<br />
2518 BOX DRAWINGS LIGHT UP AND LEFT<br />
251C BOX DRAWINGS LIGHT VERTICAL AND RIGHT<br />
2524 BOX DRAWINGS LIGHT VERTICAL AND LEFT<br />
252C<br />
BOX DRAWINGS LIGHT DOWN AND<br />
HORIZONTAL<br />
2534 BOX DRAWINGS LIGHT UP AND HORIZONTAL<br />
253C<br />
BOX DRAWINGS LIGHT VERTICAL AND<br />
HORIZONTAL<br />
2550 BOX DRAWINGS DOUBLE HORIZONTAL<br />
2551 BOX DRAWINGS DOUBLE VERTICAL<br />
2552<br />
BOX DRAWINGS DOWN SINGLE AND RIGHT<br />
DOUBLE<br />
2553<br />
BOX DRAWINGS DOWN DOUBLE AND RIGHT<br />
SINGLE<br />
2554 BOX DRAWINGS DOUBLE DOWN AND RIGHT<br />
2555<br />
BOX DRAWINGS DOWN SINGLE AND LEFT<br />
DOUBLE<br />
2556<br />
BOX DRAWINGS DOWN DOUBLE AND LEFT<br />
SINGLE<br />
2557 BOX DRAWINGS DOUBLE DOWN AND LEFT<br />
2558<br />
BOX DRAWINGS UP SINGLE AND RIGHT<br />
DOUBLE<br />
2559<br />
BOX DRAWINGS UP DOUBLE AND RIGHT<br />
SINGLE<br />
255A BOX DRAWINGS DOUBLE UP AND RIGHT<br />
255B<br />
BOX DRAWINGS UP SINGLE AND LEFT<br />
DOUBLE<br />
255C<br />
BOX DRAWINGS UP DOUBLE AND LEFT<br />
SINGLE<br />
255D BOX DRAWINGS DOUBLE UP AND LEFT<br />
255E<br />
BOX DRAWINGS VERTICAL SINGLE AND<br />
RIGHT DOUBLE<br />
255F<br />
BOX DRAWINGS VERTICAL DOUBLE AND<br />
RIGHT SINGLE<br />
2560<br />
BOX DRAWINGS DOUBLE VERTICAL AND<br />
RIGHT<br />
2561<br />
BOX DRAWINGS VERTICAL SINGLE AND LEFT<br />
DOUBLE<br />
2562<br />
BOX DRAWINGS VERTICAL DOUBLE AND<br />
LEFT SINGLE<br />
2563<br />
BOX DRAWINGS DOUBLE VERTICAL AND<br />
LEFT<br />
2564<br />
BOX DRAWINGS DOWN SINGLE AND<br />
HORIZONTAL DOUBLE<br />
2565<br />
BOX DRAWINGS DOWN DOUBLE AND<br />
HORIZONTAL SINGLE<br />
2566<br />
BOX DRAWINGS DOUBLE DOWN AND<br />
HORIZONTAL<br />
2567<br />
BOX DRAWINGS UP SINGLE AND<br />
HORIZONTAL DOUBLE<br />
2568<br />
BOX DRAWINGS UP DOUBLE AND<br />
HORIZONTAL SINGLE<br />
2569<br />
BOX DRAWINGS DOUBLE UP AND<br />
HORIZONTAL<br />
256A<br />
BOX DRAWINGS VERTICAL SINGLE AND<br />
HORIZONTAL DOUBLE<br />
256B<br />
BOX DRAWINGS VERTICAL DOUBLE AND<br />
HORIZONTAL SINGLE<br />
256C<br />
BOX DRAWINGS DOUBLE VERTICAL AND<br />
HORIZONTAL<br />
2580 UPPER HALF BLOCK<br />
2584 LOWER HALF BLOCK<br />
2588 FULL BLOCK<br />
258C LEFT HALF BLOCK<br />
2590 RIGHT HALF BLOCK<br />
2591 LIGHT SHADE<br />
2592 MEDIUM SHADE<br />
2593 DARK SHADE<br />
25A0 BLACK SQUARE<br />
25A1 WHITE SQUARE<br />
25AA BLACK SMALL SQUARE<br />
25AB WHITE SMALL SQUARE<br />
25AC BLACK RECTANGLE<br />
25B2 BLACK UP-POINTING TRIANGLE<br />
25BA BLACK RIGHT-POINTING POINTER<br />
25BC BLACK DOWN-POINTING TRIANGLE<br />
25C4 BLACK LEFT-POINTING POINTER<br />
25CA LOZENGE<br />
25CB WHITE CIRCLE<br />
25CF BLACK CIRCLE<br />
25D8 INVERSE BULLET<br />
25D9 INVERSE WHITE CIRCLE<br />
25E6 WHITE BULLET<br />
263A WHITE SMILING FACE<br />
263B BLACK SMILING FACE<br />
263C WHITE SUN WITH RAYS<br />
2640 FEMALE SIGN<br />
2642 MALE SIGN<br />
2660 BLACK SPADE SUIT<br />
2663 BLACK CLUB SUIT<br />
2665 BLACK HEART SUIT<br />
2666 BLACK DIAMOND SUIT<br />
266A EIGHTH NOTE<br />
266B BEAMED EIGHTH NOTES<br />
F001 FI LIGATURE<br />
F002 FL LIGATURE<br />
FB01 FI LIGATURE<br />
FB02 FL LIGATURE<br />
<strong>43</strong>-06938 Rev L Page 245
Page 246<br />
<strong>43</strong>-06938 Rev L
Appendix C: Internal Code Page Definitions<br />
Appendix C: Internal Code Page<br />
Definitions<br />
Code<br />
Country Code/<br />
Decimal<br />
Page Language Set ID<br />
66 British 0,66 0H,042H 0,0,6,6 3<br />
67 German 0,67 0H,0<strong>43</strong>H 0,0,6,7 2<br />
68 French 0,68 0H,044H 0,0,6,8 NA<br />
69 Swedish I 0,69 0H,045H 0,0,6,9 5<br />
70 Danish 0,70 0H,046H 0,0,7,0 NA<br />
71 Norwegian 0,72 0H,047H 0,0,7,1 NA<br />
72 Dutch 0,72 0H,048H 0,0,7,2 14<br />
73 Italian 0,73 0H,049H 0,0,7,3 NA<br />
74 French Canadian 0,74 0H,04AH 0,0,7,4 13<br />
75 Spanish 0,75 0H,04bH 0,0,7,5 NA<br />
76 Swedish II 0,76 0H,04CH 0,0,7,6 15<br />
77 Swedish III 0,77 0H,04DH 0,0,7,7 16<br />
78 Swedish IV 0,78 0H,04EH 0,0,7,8 17<br />
79 Turkish 0,79 0H,04FH 0,0,7,9 18<br />
80 Swiss I 0,80 0H,050H 0,0,8,0 19<br />
81 Swiss II 0,81 0H,051H 0,0,8,1 20<br />
<strong>43</strong>7 USA 1,181 1H,0B5H 0,4,3,7 0<br />
737 Greek 2,225 2H,0E1H 0,7,3,7 37<br />
775 Baltic 75<br />
850 Multilingual 3,82 3H,052H 0,8,5,0 26<br />
852 East European 3,84 3H,054H 0,8,5,2 46<br />
Latin II<br />
855 Cyrillic 3,87 3H,057H 0,8,5,5 NA<br />
858 Turkey 3,90 3H,05AH 0,8,5,8 57<br />
1004 Windows 8859 3,236 3H,0ECH 1,0,0,4 NA<br />
1250 Windows default 4,226 4H,0E2H 1,2,5,0 NA<br />
1251 Windows Cyrillic 4,227 4H,0E3H 1,2,5,1 NA<br />
1252 Windows Latin 1 4,228 4H,0E4H 1,2,5,2 94<br />
1253 Windows Greek 4,229 4H,0E5H 1,2,5,3 NA<br />
1254 Windows Turkish 4,230 4H,0E6H 1,2,5,4 NA<br />
1257 Windows Baltic 4,233 4H,0E9H 1,2,5,7 NA<br />
NA French 1<br />
NA Danish I 4<br />
NA Italian 6<br />
NA Spanish I 7<br />
NA Japanese 8<br />
NA Norwegian 9<br />
NA Danish II 10<br />
NA Spanish II 11<br />
NA Latin American 12<br />
Hex<br />
ASCII <br />
Epson<br />
<strong>43</strong>-06938 Rev L Page 247
Appendix D: ASCII Code Table<br />
Appendix D - ASCII Code Table<br />
Hex Decimal ASCII<br />
00 0 NULL<br />
01 1 SOH<br />
02 2 STX<br />
03 3 ETX<br />
04 4 EOT<br />
05 5 ENQ<br />
06 6 ACK<br />
07 7 BEL<br />
08 8 BS<br />
09 9 HT<br />
0A 10 LF<br />
0B 11 VT<br />
0C 12 FF<br />
0D 13 CR<br />
0E 14 SO<br />
0F 15 SI<br />
10 16 DLE<br />
11 17 DC1<br />
12 18 DC2<br />
13 19 DC3<br />
14 20 DC4<br />
15 21 NAK<br />
16 22 SYN<br />
17 23 ETB<br />
18 24 CAN<br />
19 25 EM<br />
1A 26 SUB<br />
1B 27 ESC<br />
1C 28 FS<br />
1D 29 GS<br />
1E 30 RS<br />
1F 31 US<br />
Hex Decimal ASCII<br />
20 32 (SP)<br />
21 33 !<br />
22 34 "<br />
23 35 #<br />
24 36 $<br />
25 37 %<br />
26 38 &<br />
27 39 '<br />
28 40 (<br />
29 41 )<br />
2A 42 *<br />
2B <strong>43</strong> +<br />
2C 44 ,<br />
2D 45 -<br />
2E 46 .<br />
2F 47 /<br />
30 48 0<br />
31 49 1<br />
32 50 2<br />
33 51 3<br />
34 52 4<br />
35 53 5<br />
36 54 6<br />
37 55 7<br />
38 56 8<br />
39 57 9<br />
3A 58 :<br />
3B 59 ;<br />
3C 60 <<br />
3D 61 =<br />
3E 62 ><br />
3F 63 ?<br />
Hex Decimal ASCII<br />
40 64 @<br />
41 65 A<br />
42 66 B<br />
<strong>43</strong> 67 C<br />
44 68 D<br />
45 69 E<br />
46 70 F<br />
47 71 G<br />
48 72 H<br />
49 73 I<br />
4A 74 J<br />
4B 75 K<br />
4C 76 L<br />
4D 77 M<br />
4E 78 N<br />
4F 79 O<br />
50 80 P<br />
51 81 Q<br />
52 82 R<br />
53 83 S<br />
54 84 T<br />
55 85 U<br />
56 86 V<br />
57 87 W<br />
58 88 X<br />
59 89 Y<br />
5A 90 Z<br />
5B 91 [<br />
5C 92 \<br />
5D 93 ]<br />
5E 94 ^<br />
5F 95 _<br />
Hex Decimal ASCII<br />
60 96 `<br />
61 97 a<br />
62 98 b<br />
63 99 c<br />
64 100 d<br />
65 101 e<br />
66 102 f<br />
67 103 g<br />
68 104 h<br />
69 105 i<br />
6A 106 j<br />
6B 107 k<br />
6C 108 l<br />
6D 109 m<br />
6E 110 n<br />
6F 111 o<br />
70 112 p<br />
71 113 q<br />
72 114 r<br />
73 115 s<br />
74 116 t<br />
75 117 u<br />
76 118 v<br />
77 119 w<br />
78 120 x<br />
79 121 y<br />
7A 122 z<br />
7B 123 {<br />
7C 124 |<br />
7D 125 }<br />
7E 126 ~<br />
7F 127 (sp)<br />
<strong>43</strong>-06938 Rev L Page 249
t Appendix E: Ordering Supplies<br />
Appendix E: Ordering Supplies<br />
<strong>TransAct</strong> ® supplies, cables and drivers can be ordered easily direct from the<br />
<strong>TransAct</strong> website (www.transact-tech.com) or our telephone number within the<br />
US toll free: (877) 7<strong>TransAct</strong>. (other inquires: (607) 257-8901). When calling<br />
by phone, please ask for the Sales Department.<br />
Page 250<br />
<strong>43</strong>-06938 Rev L
Index<br />
Index<br />
[BEL] Audio alert, 149<br />
[BS] Insert back space, 73<br />
[CAN] Clear print buffer, 148<br />
[CR] Set carriage return, 72<br />
[DC2] Begin 10 cpi, 86<br />
[DC4] End one-line double-wide print,<br />
96<br />
[ENQ] Request printer reset, 159<br />
[ENQ] Request printer power<br />
cycle status, 160<br />
[ENQ] Inquire mechanical error<br />
status, 160<br />
[ENQ] Inquire printer state, 161<br />
[ENQ] Inquire all printer status,<br />
161<br />
[ENQ] Inquire printer ID, 163<br />
[ENQ] Inquire Error Status, 164<br />
[ENQ] Inquire user-store status,<br />
165, 166, 167<br />
[ENQ] Inquire receipt paper low<br />
status, 158<br />
[ENQ] Inquire receipt paper out<br />
status, 159<br />
[ENQ] Inquire cover open status,<br />
159<br />
[ENQ] Inquire buffer status, 159<br />
[ENQ] Inquire printer status, 158<br />
[ESC] - Begin underline, 97, 99<br />
[ESC] ! Select international<br />
character set, 77, 84, 85, 93, 94, 147,<br />
182, 200, 201, 202, 203, 207, 208,<br />
209, 210, 215, 216, 217, 218, 219,<br />
220<br />
[ESC] # Begin 12 x 12 draft print,<br />
89<br />
[ESC] % G Begin italics, 101<br />
[ESC] % H End italics, 101<br />
[ESC] * Set horizontal<br />
graphics mode, 115, 117<br />
[ESC] * Print graphics<br />
in mode , 112<br />
[ESC] ? Reassign graphic<br />
mode, 112<br />
[ESC] @ Initialize the printer, 149<br />
[ESC] [ @ ... Double-wide, double-high<br />
italics, 98<br />
[ESC] [ C Insert Euro character, 94<br />
[ESC] [ P Set character pitch, 87,<br />
210<br />
[ESC] [ T Select character<br />
code page, 93<br />
[ESC] [EM] B Set bar code height,<br />
134, 135<br />
[ESC] [EM] J Set bar code<br />
justification and HRI modes, 135<br />
[ESC] [SI] Begin 24 cpi, 86<br />
[ESC] [US] 1 Load item<br />
process, 120<br />
[ESC] [US] b Begin<br />
named macro record, 119, 121, 169,<br />
170<br />
[ESC] [US] d Delete<br />
item from user store, 123<br />
[ESC] [US] e End name<br />
macro record, 121<br />
[ESC] [US] e Remove<br />
item from user store, 120<br />
[ESC] [US] e Stop name<br />
macro record, 119<br />
[ESC] [US] f ALL Flush user store,<br />
120<br />
[ESC] [US] l Load<br />
macro/character, 122<br />
[ESC] [US] m Save<br />
macro data, 121<br />
[ESC] [US] m Save macro<br />
data, 119<br />
[ESC] [US] q Query user<br />
store, 123<br />
[ESC] [US] r Run macro<br />
data, 122<br />
[ESC] [US] s Flag as a<br />
start-up macro, 120<br />
[ESC] [US] s Flag startup<br />
macro, 122<br />
[ESC] ^ Print control character, 95<br />
[ESC] { Electronic Journal Begin, 145<br />
[ESC] Set horizontal<br />
position, 74<br />
[ESC] 0 Set line spacing to 27/216 inch,<br />
75<br />
[ESC] 1 Set line spacing to 7/72 inch, 76<br />
[ESC] 2 Enable variable line spacing, 76<br />
[ESC] 3 Set line spacing to n/216<br />
inch, 75<br />
[ESC] 4 Set top of form, 80<br />
[ESC] 5 Begin auto line feed, 81<br />
[ESC] a Set justification, 74<br />
[ESC] A Set variable line spacing<br />
to n/72 inch, 76<br />
[ESC] b ... Print bar code, 127, 133,<br />
167<br />
[ESC] B … 0 Set<br />
vertical tab stops, 79<br />
[ESC] Begin 12 cpi, 86<br />
[ESC] C [NUL] Set form length in<br />
inches, 80<br />
[ESC] c Select color, 96<br />
[ESC] C Set form length in lines,<br />
80<br />
[ESC] d Feed lines at current<br />
spacing, 78<br />
[ESC] D … 0 Set<br />
horizontal tab stops, 73<br />
[ESC] E Begin emphasized print, 100<br />
[ESC] F End emphasized print, 100<br />
<strong>43</strong>-06938 Rev L Page 251
Index<br />
[ESC] f Select receipt station, 103, 105,<br />
107, 108, 109, 110<br />
[ESC] g Process user macro, 125<br />
[ESC] g Start macro record, 119,<br />
125<br />
[ESC] g Stop macro record, 119,<br />
126<br />
[ESC] g Stop macro record and<br />
save, 126<br />
[ESC] G Begin enhanced print, 99<br />
[ESC] h <br />
Process color graphics, 114<br />
[ESC] h <br />
Process horizontal graphics,<br />
114<br />
[ESC] H End enhanced print, 99<br />
[ESC] I Set print quality mode, 89<br />
[ESC] J Fine line feed, 75<br />
[ESC] J Fine linefeed, 137, 138,<br />
139, 140<br />
[ESC] K Print single-density<br />
graphics, 111<br />
[ESC] L Print half-speed<br />
double-density graphics, 111<br />
[ESC] l Electronic Journal Carbon<br />
Copy, 146<br />
[ESC] p 3 Select paper sensor(s) to<br />
output paper-end signals, 150<br />
[ESC] p 4 Select paper sensor(s) to<br />
stop printing, 150<br />
[ESC] q Query marker, 149, 151<br />
[ESC] R Reset horizontal and vertical<br />
tab stops, 74, 79<br />
[ESC] S Select superscript, 100<br />
[ESC] S Select subscript, 100<br />
[ESC] T End superscript or subscript,<br />
101<br />
[ESC] U Begin bi-directional print,<br />
113<br />
[ESC] U Begin unidirectional print,<br />
113<br />
[ESC] V Set intercharacter spacing,<br />
88<br />
[ESC] W Double-wide, double-high<br />
mode, 97, 202<br />
[ESC] X Set left/right print<br />
margin, 148<br />
[ESC] y Set feature control, 152<br />
[ESC] Y Print full-speed<br />
double-density graphics, 112<br />
[ESC] Z Print quad-density<br />
graphics, 112<br />
[FF] Set form feed, 79, 82<br />
[HT] Set horizontal tab, 73<br />
[LF] Set line feed, 72<br />
[SI] Begin 17 cpi, 86<br />
[SO] Begin one-line double-wide print,<br />
96<br />
[VT] Set vertical tab, 78<br />
10 CPI Character Pitch, Beginning, 86<br />
12 CPI Character Pitch, Beginning, 86<br />
12 x 12 Draft Print Mode, Beginning, 89<br />
17 CPI Character Pitch, Beginning, 86<br />
24 CPI Character Pitch, Beginning, 86<br />
APA Graphics, Printing, 112<br />
Appendix A<br />
Ordering Supplies, 250<br />
Application Development, 64<br />
Assembly, 61<br />
Auto cut, Performing, 149<br />
Auto Error Recovery, 30<br />
Auto Line Feed, Beginning, 81<br />
Back Space, 73<br />
Bar Code, Print, 127, 133, 167<br />
Bar Code, Set height, 134, 135<br />
Bar Code, Set Justification, Print<br />
Direction, 135<br />
Bar Codes, 127<br />
Begin Italics, 101<br />
Bezel<br />
Mounting Points, 48<br />
Specifications and Recommendations,<br />
48<br />
Bi-directional Printing, Beginning, 113<br />
Boot Loader Mode, 27<br />
Carriage Return, 72<br />
Change User Store Terminator, 125<br />
Character attributes, 96<br />
Character Code Page, Setting, 93<br />
Character Pitch, Setting, 87, 210<br />
Code Page Definitions, 247<br />
Commands, User-store, 121, 170<br />
Communication<br />
Features, 227<br />
Communications Interface, 19<br />
Configuration<br />
Remote, 39<br />
Configuration Control, Extending, 153,<br />
155, 156, 228<br />
Configuration Mode<br />
Overview, 37<br />
Contact Information, 7<br />
Control Character, Printing, 95<br />
Control Codes<br />
Overview, 63<br />
Control Codes and Commands, 64<br />
Control Feature, Setting, 152<br />
Cover Open Status, Inquire, 159<br />
Disassembly, 61<br />
Double Density Graphics, Full-Speed<br />
Printing, 112<br />
Double Density Graphics, Half-Speed<br />
Printing, 111<br />
Emphasized Print Mode, Beginning, 100<br />
Emphasized Print Mode, Ending, 100<br />
End Italics, 101<br />
Enhanced Print Mode, Ending, 99<br />
Enhanced print, Beginning, 99<br />
Entering Configuration Mode, 38<br />
EPOS Emulation, 64<br />
Error Status, Inquire, 164<br />
Euro Character, Inserting, 94<br />
Extended APA Graphics, 112<br />
Form Feed, 79, 82<br />
Page 252<br />
<strong>43</strong>-06938 Rev L
Index<br />
Form Length, Setting Inches, 80<br />
Form Length, Setting Lines, 80<br />
Forming characters, 187<br />
Graphic<br />
Mode, 111<br />
Graphic Data, Processing, 114<br />
Graphic Mode, Reassigning, 112<br />
Graphic mode, Set Horizontal, 115, 117<br />
Graphic save, 118<br />
Graphics<br />
all-points-addressable (APA), 174<br />
Character, 173<br />
color, 114<br />
horizontal, 114<br />
Horizontal, 174<br />
printing, 173<br />
Horizontal Motion Control, 73<br />
Horizontal Position, Setting, 74<br />
Horizontal Tab, 73<br />
Horizontal tab Stops, Setting, 73<br />
IEEE 1284 buffer, Clearing, 159<br />
Indicator Lights, 23<br />
Initialize the Printer, 149<br />
Inquire Commands, 158<br />
Intercharacter Spacing, Setting, 88<br />
International Character Set, Selecting,<br />
77, 84, 85, 93, 94, 147, 182, 200, 201,<br />
202, 203, 207, 208, 209, 210, 215,<br />
216, 217, 218, 219, 220<br />
IPCL Codes, 64<br />
Justification, Setting, 74<br />
Level 0 diagnostics, 27<br />
Line feed, 72<br />
Line Feed, Performing, 75<br />
Line Spacing, Enabling, 76<br />
Line Spacing, Feeding Lines, 78<br />
Line Spacing, Set at 2 ½, 16-inch and<br />
7/72 inch, 76<br />
Line Spacing, Set-1/8 inch, 75<br />
Line Spacing, Set-n/216 inch, 75<br />
Line Spacing-Variable, Setting, 76<br />
Machanical Error Status, Inquire, 160<br />
Macro Data, Run from user Store, 122<br />
Macro Data, Saving, 119<br />
Macro Data, Saving in user Store, 121<br />
Macro Record, Beginning, 119<br />
Macro Record, Ending, 121<br />
Macro Record, Ending name, 119<br />
Macro Record, Start, 125<br />
Macro Record, Starting, 119, 121, 169,<br />
170<br />
Macro Record, Stop, 126<br />
Macro Record, Stop and Save, 126<br />
Macro Record, Stopping, 119<br />
Macro, Flag on Startup, 122<br />
Mounting<br />
Outer Chassis to Final Product, 45<br />
Multiline Mode, 97, 202<br />
Off-line active, 227<br />
One Line/Double Wide Print,<br />
Beginning, 96<br />
One Line/Double Wide Print, Canceling,<br />
96<br />
Output Paper end Signals, Selecting<br />
Paper Sensors, 150<br />
Overview, 3<br />
Paper Motion, 72<br />
Paper Out Status, Inquire, 159<br />
Paper Sensors, Selecting to Stop<br />
Printing, 150<br />
PcOS Control Codes, 64<br />
PcOS Quick Reference Chart, 66<br />
Power Control, Remote, 154<br />
Power Cycle Status, Inquire, 160<br />
Power-cycle recovery, 227<br />
Print buffer, control, 148<br />
Print Current Configuration, 225<br />
Print Current totals, 225<br />
Print margins, setting, 148<br />
Print Quality Mode, Setting, 89<br />
Print Style, Setting, 98<br />
Printer<br />
Bar Code Specifications, 18<br />
Printing Specifications, 18<br />
Printer Block Diagram, 59<br />
Printer Care, 23<br />
Printer ID, Inquire, 163<br />
Printer Reset, Requesting, 159<br />
Printer Sensors, 51<br />
Printer State, Inquire, 161<br />
Printer Status, 157<br />
Printer Status LED, 29<br />
Printer Status, Inquire, 158, 161<br />
Process User Macro, 125<br />
Programmer’s Notes, 232<br />
Programming Considerations, 118<br />
Quad Density Graphics, Printing, 112<br />
Query marker, 149, 151<br />
Read and return Totals, 223<br />
Recovery form Mechanical Errors, 229<br />
Regulatory Compliance, iii<br />
Remote Power Control, 154<br />
Remote Reset, 226<br />
Return Materials Authorization, 6<br />
Select Color, 96<br />
Select Subscript, 100<br />
Select Superscript, 100<br />
Self-Test<br />
Using, 25<br />
Sensors<br />
Jam Detection, 52<br />
Paper Low, 52<br />
Ticket Low, 51<br />
Ticket Taken, 52<br />
Top of Form, 52<br />
Top-of-Form, 52<br />
Serial Communications PCB, 55<br />
Serial Interface Communication, 19<br />
Single Density Graphics, Printing, 111<br />
Specifications, 18<br />
Bar Code, 18<br />
Power Requirements, 14<br />
Printing, 18<br />
<strong>43</strong>-06938 Rev L Page 253
Index<br />
Radiated Emissions, 16<br />
Reliability, 14<br />
Specifications and Requirements, 11<br />
Standard APA Graphics, 111<br />
Standard Emulation, 64<br />
Start up Macro, Flagging, 120<br />
Status Inquire, 157<br />
Status, Inquire Receipt Paper Low, 158<br />
Superscript and Subscript, 101<br />
Tab Stops, Resetting, 74, 79<br />
Technical Support, 5<br />
Testing the Printer, 26<br />
Top of Form, Setting, 80<br />
Underline, Beginning, 97, 99<br />
Unidirectional Printing, Beginning, 113<br />
User macros, 125<br />
User store, 118<br />
User Store Status, Inquire, 165, 166, 167<br />
User Store, Delete item, 123<br />
User Store, Flush Information, 120<br />
User Store, Load item, 122<br />
User Store, Loading item, 120<br />
User Store, Removing Item, 120<br />
User Store, Report, 123<br />
User Store, Reporting, 120<br />
Vertical Tab, 78<br />
Vertical Tab Stops, Setting, 79<br />
Page 254<br />
<strong>43</strong>-06938 Rev L