Celestron Off Axis Guider Instructions - First Light Optics
Celestron Off Axis Guider Instructions - First Light Optics
Celestron Off Axis Guider Instructions - First Light Optics

You also want an ePaper? Increase the reach of your titles
YUMPU automatically turns print PDFs into web optimized ePapers that Google loves.
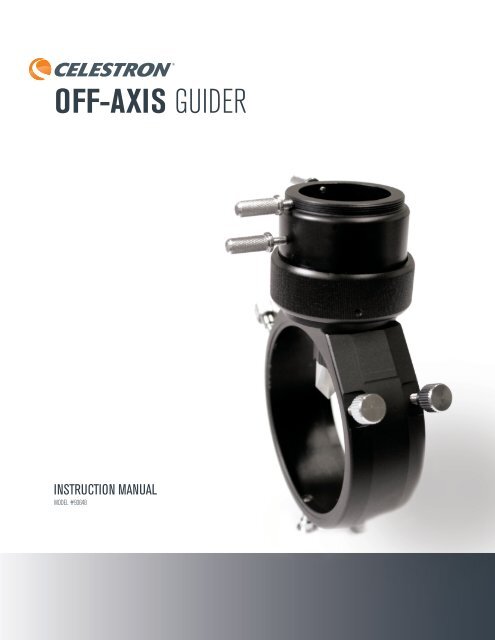
OFF-AXIS GUIDER<br />
INSTRUCTION MANUAL<br />
MODEL #93648<br />
TITLE I 1
INTRODUCTION<br />
Your <strong>Celestron</strong> <strong>Off</strong>-<strong>Axis</strong> <strong>Guider</strong> (OAG) allows you to take accurate, long exposure astroimages when used with an<br />
autoguider. Since the autoguider and imaging camera share the same telescope, you will achieve tracking accuracy<br />
greater than you would with a separate guide scope.<br />
PARTS LIST<br />
Male M48 Camera Adapter<br />
Male M42 T-thread Camera Adapter<br />
SCT Adapter<br />
Medium M48 Spacer Ring<br />
(11.55mm)<br />
<strong>Off</strong>-<strong>Axis</strong> <strong>Guider</strong><br />
Long T-thread<br />
Spacer Ring<br />
(24.25mm)<br />
Female M42<br />
T-thread Adapter<br />
Medium T-thread Spacer Ring<br />
(11.55mm)<br />
Short T-thread Spacer<br />
Ring (6mm)<br />
Female M48 Adapter<br />
Fig. 1<br />
2 I INTRODUCTION
SYSTEM REQUIREMENTS<br />
The <strong>Off</strong>-<strong>Axis</strong> <strong>Guider</strong> (OAG) requires a telescope, imaging camera, autoguider, and a mount tracking<br />
equatorially with autoguiding capability. You should already be familiar with these items before using<br />
the <strong>Off</strong>-<strong>Axis</strong> <strong>Guider</strong>.<br />
Refer to Figure 2 to familiarize yourself with the OAG.<br />
TELESCOPE<br />
To attach the front of the OAG to the telescope,<br />
the telescope must have M42 T-threads, M48<br />
threads, or 2” Schmidt-Cassegrain style threads.<br />
If your telescope has a 2” visual back, you will<br />
need to provide a camera adapter to attach the<br />
telescope to the <strong>Off</strong>-<strong>Axis</strong> <strong>Guider</strong>. Camera adapters<br />
are commonly available that adapt from 2” to M42<br />
T-thread (also called T2).<br />
Note that because the OAG consumes a significant<br />
amount of inward focus travel, some telescopes<br />
will not be able to reach focus with this accessory.<br />
Most Newtonian reflectors and some refractors<br />
do not have enough inward focus travel to<br />
accommodate the <strong>Off</strong>-<strong>Axis</strong> <strong>Guider</strong>. Refractors<br />
designed for astroimaging typically have plenty of<br />
focus travel, as do most catadioptric telescopes<br />
such as the Schmidt-Cassegrain or EdgeHD.<br />
1.25” Holder Thumbscrews<br />
Helical Focus<br />
Adjustment<br />
Pick-<strong>Off</strong> Prism<br />
Autoguider Camera<br />
Adapter T-threads<br />
Focus Lock<br />
Thumbscrew<br />
OAG BACKFOCUS<br />
You may need to configure the OAG to your<br />
particular telescope, camera, and autoguider<br />
combination. The measurements listed below<br />
refer to the actual length the part consumes when<br />
installed on the telescope.<br />
OAG Body: 29mm<br />
SCT Adaper:25.3mm<br />
Male M42 and M48 camera adapters: 12.5mm<br />
Female M42 and M48 telescope adapters: 4.5mm<br />
Short T-thread Spacer Ring: 6mm<br />
Medium T-thread Spacer Ring: 11.55mm<br />
Long T-thread Spacer Ring: 24.25mm<br />
Medium M48 Spacer Ring: 11.55mm<br />
Adapter Attachment &<br />
Rotation Thumbscrews<br />
Fig. 2<br />
IMAGING CAMERA<br />
A CCD camera or specialized astroimaging<br />
camera should have female T-threads or 48mm<br />
threads. It will attach to one of the two camera<br />
adapters included with the OAG.<br />
DSLR cameras require a T-ring specific to the make<br />
and model of the camera. Canon and Nikon T-rings<br />
are available from <strong>Celestron</strong>. Full frame DSLR cameras<br />
should use a wide T-ring with 48mm threads to fully<br />
illuminate the sensor’s field of view.<br />
SYSTEM REQUIREMENTS I 3
CONFIGURING THE<br />
OFF-AXIS GUIDER<br />
The included adapters allow you to use the <strong>Off</strong>-<strong>Axis</strong><br />
<strong>Guider</strong> with popular combinations of autoguiders,<br />
imaging cameras, and telescopes. Some telescopes,<br />
like the EdgeHD series, require a specific backfocus<br />
distance to the detector on the imaging camera.<br />
For this reason, the Spacer Rings must be used to<br />
achieve the correct distance.<br />
Pick-off Prism<br />
Flat Faces Telescope<br />
Always position the OAG so that the flat side of the<br />
pick-off prism faces the telescope (Figure 3).<br />
The imaging camera and autoguider must be parfocal<br />
to one another. That means the optical distance from<br />
the telescope to the autoguider sensor and camera<br />
sensor must be the same. To achieve this, a set of<br />
three T-thread Spacer Rings and one 48mm Spacer<br />
Ring (for full frame cameras) have been provided. In<br />
addition to the Spacer Rings, the <strong>Off</strong>-<strong>Axis</strong> <strong>Guider</strong> also<br />
features a helical focuser with 8mm of focus travel to<br />
allow the autoguider to reach focus.<br />
Telescope Side<br />
Camera Side<br />
Fig. 3<br />
Autoguider<br />
with T-threads<br />
OR<br />
Autoguider<br />
with1.25” Nosepiece<br />
Short 6mm<br />
T-thread Spacer<br />
Adapter Plate<br />
<strong>Off</strong>-<strong>Axis</strong><br />
<strong>Guider</strong><br />
Medium<br />
11.55mm<br />
T-thread<br />
Spacer<br />
DSLR<br />
T-Ring<br />
DSLR Camera<br />
OR<br />
SCT<br />
Adapter<br />
Male<br />
M42<br />
T-thread<br />
Fig. 4<br />
Nightscape<br />
Nosepiece<br />
Nightscape CCD Camera<br />
CONFIGURATION FOR SCHMIDT-CASSEGRAIN,<br />
OR EDGEHD 800 TELESCOPES WITH<br />
NIGHTSCAPE OR APS-C DSLR<br />
Refer to Figure 4 for the recommended adapter<br />
configuration. Your camera sensor should be 133mm<br />
away from the Rear Adapter Plate of the EdgeHD 800<br />
telescope. This configuration assumes a camera with<br />
55mm of backfocus to the sensor, which includes<br />
<strong>Celestron</strong> Nightscape CCD cameras and most<br />
DSLRs. If you are using a CCD camera with a<br />
different backfocus, you need to determine the<br />
distance needed from the OAG to camera to reach<br />
133mm total.<br />
4 I CONFIGURE YOUR OFF-AXIS GUIDER
CONFIGURATION FOR EDGEHD 925, 1100 AND<br />
1400 TELESCOPES WITH NIGHTSCAPE, DSLR,<br />
OR FULL FRAME DSLR OR CCD CAMERAS<br />
Refer to Figure 5.1 for APS-C sized camera sensors,<br />
such as <strong>Celestron</strong> Nightscape, Canon Rebels, or<br />
other CCD cameras. Refer to Figure 5.2 for full frame<br />
(35mm format) cameras such as the Canon 5D or<br />
large format CCD cameras.<br />
Your camera sensor should be 146mm away from<br />
the Baffle Lock Nut of the EdgeHD telescope. This<br />
configuration assumes a camera with 55mm of<br />
backfocus to the sensor, which includes <strong>Celestron</strong><br />
Nightscape CCD cameras and most DSLRs.<br />
If you are using a CCD camera with a different<br />
backfocus, you need to determine the spacing required<br />
to achieve a total distance of 146mm from the EdgeHD’s<br />
Baffle Lock Nut to your imaging camera sensor.<br />
Figure 6 shows a setup configured with the EdgeHD<br />
1100 with the Nightscape CCD camera as an imager<br />
and webcam style autoguider.<br />
Baffle Lock Nut<br />
Adapter Plate<br />
<strong>Off</strong>-<strong>Axis</strong> <strong>Guider</strong><br />
Autoguider<br />
with T-threads<br />
OR<br />
Short 6mm<br />
T-thread Spacer<br />
11.55mm<br />
Medium T-thread<br />
Spacer Ring<br />
Autoguider<br />
with1.25” Nosepiece<br />
DSLR<br />
T-Ring<br />
DSLR Camera<br />
OR<br />
SCT<br />
Adapter<br />
Male<br />
M42<br />
T-thread<br />
Fig. 5.1<br />
Nightscape<br />
Nosepiece<br />
Nightscape CCD Camera<br />
11.55mm<br />
Medium M48<br />
Spacer Ring<br />
DSLR<br />
T-Ring<br />
Male<br />
M42<br />
T-thread<br />
Nightscape<br />
Nosepiece<br />
Fig. 5.2 Fig. 6<br />
CONFIGURE YOUR OFF-AXIS GUIDER I 5
CONFIGURATION FOR OTHER TELESCOPES,<br />
USING A CAMERA ADAPTER<br />
Refer to Figure 7 as a possible configuration that<br />
uses a camera adapter. Any telescope with a camera<br />
adapter that uses T-threads or 48mm threads can<br />
attach to the OAG using the supplied female M42<br />
or M48 adapters. Note that you need to supply the<br />
camera adapter if your telescope does not already<br />
have threads build into the focuser.<br />
Autoguider<br />
Telescope Focuser with 2” Visual<br />
Back, 42mm T-threads or 48mm<br />
T-threads<br />
Female M42 T-thread<br />
or M48 T-thread<br />
Male M42 T-thread<br />
or M48 T-thread<br />
Camera Adapter<br />
(if needed)<br />
42mm T-threads or<br />
48mm T-threads<br />
<strong>Off</strong>-<strong>Axis</strong><br />
<strong>Guider</strong><br />
Fig. 7<br />
Imaging Camera<br />
ATTACHING THE AUTOGUIDER<br />
The OAG can attach to your autoguider using either the<br />
T-threads or the 1.25” holder. If the T-threads are used,<br />
remove the two 1.25” holder thumbscrews (Figure 2).<br />
Autoguiders like the Lodestar or ST-i fit into the 1.25”<br />
holder, and others like the StarShoot Auto<strong>Guider</strong> thread<br />
directly to the T-threads. Use caution when inserting<br />
an autoguider like the Lodestar. The pick-off prism<br />
holder can collide with the front optical window if the<br />
autoguider is pushed in all the way.<br />
Prism Height<br />
Adjustment Set Screw<br />
ADJUSTING THE PRISM HEIGHT<br />
The prism height can be adjusted to better illuminate<br />
the field of view of your autoguider. The smaller the<br />
imaging sensor size is for in your camera, the further<br />
“downward” the prism can be set without interfering<br />
with the sensor. This adjustment is normally not<br />
necessary unless the pick-off prism is obstructing<br />
your imaging camera’s sensor, or if you are using the<br />
smaller 42mm telescope adapter which will limit the<br />
illumination to the pick-off prism.<br />
Loosen the 2mm socket head screw using an Allen<br />
wrench (not included), and slide the prism housing up or<br />
down as needed before tightening the screw (Figure 8).<br />
Note: Use caution with this adjustment. Do not touch<br />
the prism. Note that when loosening the set screw, the<br />
prism housing is not captive and can slide off.<br />
Fig. 8<br />
6 I CONFIGURE YOUR OFF-AXIS GUIDER
FOCUSING<br />
Always start by focusing the imaging camera with your<br />
telescope. Then, proceed to focus the autoguider using<br />
the helical focus adjustment. The first time you use the<br />
OAG, you may need to locate a guide star visually with<br />
a 1.25” eyepiece. The Moon or a bright star cluster<br />
are good targets to start with so you can clearly see<br />
something on the camera side and guider side.<br />
If the imaging camera does not reach focus, determine<br />
if you need more inward or outward focus travel. The<br />
OAG consumes a significant amount of focus travel, so<br />
some telescopes may not be able to reach far enough<br />
inward focus travel (see System Requirements).<br />
If the autoguider does not reach focus, determine if<br />
you need to add a T-thread spacer ring to move the<br />
autoguider outward, or if you need more focus travel<br />
inward. If more inward travel is needed, additional<br />
spacing will need to be added between the imaging<br />
camera and OAG.<br />
Tighten the Focus Lock Thumbscrew (Figure 2) when<br />
the autoguider is focused.<br />
FINDING A GUIDE STAR<br />
AND ROTATING THE OAG<br />
Finding a guide star can be challenging, depending<br />
on the telescope used and the area of sky you are<br />
imaging in. Fortunately, you can rotate the OAG 360º<br />
to find a guide star. While carefully supporting the<br />
OAG and camera with your hand, carefully and slightly<br />
loosen the 3 thumbscrews that secure the front of the<br />
OAG to the telescope and rotate the OAG as needed<br />
to locate a guide star in your autoguider. Firmly tighten<br />
the 3 thumbscrews on the telescope side. If needed,<br />
make a similar adjustment to the camera side: loosen<br />
the 3 thumbscrews on the camera side and rotate your<br />
imaging camera to the desired orientation, then firmly<br />
tighten the screws again.<br />
WARRANTY<br />
Your <strong>Off</strong>-<strong>Axis</strong> <strong>Guider</strong> has a two year limited warranty.<br />
Please see the <strong>Celestron</strong> website for detailed warranty<br />
information at www.celestron.com.<br />
This product is designed and intended for use by<br />
those 14 years of age and older.<br />
FOCUSING I 7
2835 Columbia Street • Torrance, CA 90503 U.S.A.<br />
Telephone: 1(800) 421-9649 • Printed in China 2013<br />
©2013 <strong>Celestron</strong> • All rights reserved. • www.celestron.com