Barracuda Load Balancer - Quick Start Guide - Barracuda Networks
Barracuda Load Balancer - Quick Start Guide - Barracuda Networks
Barracuda Load Balancer - Quick Start Guide - Barracuda Networks

Create successful ePaper yourself
Turn your PDF publications into a flip-book with our unique Google optimized e-Paper software.
<strong>Barracuda</strong> <strong>Load</strong> <strong>Balancer</strong> - <strong>Quick</strong> <strong>Start</strong> <strong>Guide</strong><br />
The <strong>Barracuda</strong> <strong>Load</strong> <strong>Balancer</strong> is a Layer 4 load balancer with the added protection of<br />
Intrusion Prevention which can automatically protect your load balanced servers from any<br />
malicious activity that might happen to pass your other defenses.<br />
Getting <strong>Start</strong>ed<br />
This guide provides you with setup instructions for the <strong>Barracuda</strong> <strong>Load</strong> <strong>Balancer</strong>.<br />
We recommend reading these instructions fully before starting the setup. To<br />
begin setting up your <strong>Barracuda</strong> <strong>Load</strong> <strong>Balancer</strong>, you will need the following:<br />
• <strong>Barracuda</strong> <strong>Load</strong> <strong>Balancer</strong><br />
• AC Power Cord<br />
• Ethernet Cables<br />
• VGA Monitor (recommended)<br />
• PS2 Keyboard (recommended)<br />
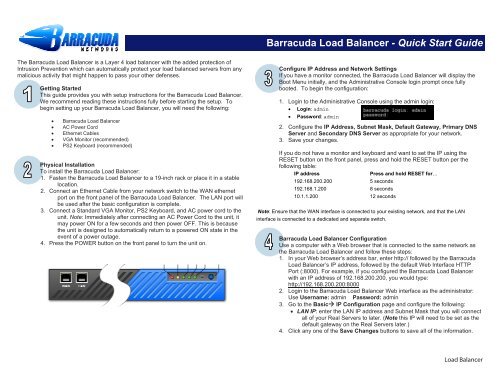
Physical Installation<br />
To install the <strong>Barracuda</strong> <strong>Load</strong> <strong>Balancer</strong>:<br />
1. Fasten the <strong>Barracuda</strong> <strong>Load</strong> <strong>Balancer</strong> to a 19-inch rack or place it in a stable<br />
location.<br />
2. Connect an Ethernet Cable from your network switch to the WAN ethernet<br />
port on the front panel of the <strong>Barracuda</strong> <strong>Load</strong> <strong>Balancer</strong>. The LAN port will<br />
be used after the basic configuration is complete.<br />
3. Connect a Standard VGA Monitor, PS2 Keyboard, and AC power cord to the<br />
unit. Note: Immediately after connecting an AC Power Cord to the unit, it<br />
may power ON for a few seconds and then power OFF. This is because<br />
the unit is designed to automatically return to a powered ON state in the<br />
event of a power outage.<br />
4. Press the POWER button on the front panel to turn the unit on.<br />
Configure IP Address and Network Settings<br />
If you have a monitor connected, the <strong>Barracuda</strong> <strong>Load</strong> <strong>Balancer</strong> will display the<br />
Boot Menu initially, and the Administrative Console login prompt once fully<br />
booted. To begin the configuration:<br />
1. Login to the Administrative Console using the admin login:<br />
• Login: admin<br />
• Password: admin<br />
2. Configure the IP Address, Subnet Mask, Default Gateway, Primary DNS<br />
Server and Secondary DNS Server as appropriate for your network.<br />
3. Save your changes.<br />
If you do not have a monitor and keyboard and want to set the IP using the<br />
RESET button on the front panel, press and hold the RESET button per the<br />
following table:<br />
IP address Press and hold RESET for…<br />
192.168.200.200 5 seconds<br />
192.168.1.200 8 seconds<br />
10.1.1.200 12 seconds<br />
Note: Ensure that the WAN interface is connected to your existing network, and that the LAN<br />
interface is connected to a dedicated and separate switch.<br />
<strong>Barracuda</strong> <strong>Load</strong> <strong>Balancer</strong> Configuration<br />
Use a computer with a Web browser that is connected to the same network as<br />
the <strong>Barracuda</strong> <strong>Load</strong> <strong>Balancer</strong> and follow these steps:<br />
1. In your Web browser’s address bar, enter http:// followed by the <strong>Barracuda</strong><br />
<strong>Load</strong> <strong>Balancer</strong>’s IP address, followed by the default Web Interface HTTP<br />
Port (:8000). For example, if you configured the <strong>Barracuda</strong> <strong>Load</strong> <strong>Balancer</strong><br />
with an IP address of 192.168.200.200, you would type:<br />
http://192.168.200.200:8000<br />
2. Login to the <strong>Barracuda</strong> <strong>Load</strong> <strong>Balancer</strong> Web interface as the administrator:<br />
Use Username: admin Password: admin<br />
3. Go to the Basic IP Configuration page and configure the following:<br />
• LAN IP: enter the LAN IP address and Subnet Mask that you will connect<br />
all of your Real Servers to later. (Note this IP will need to be set as the<br />
default gateway on the Real Servers later.)<br />
4. Click any one of the Save Changes buttons to save all of the information.<br />
<strong>Load</strong> <strong>Balancer</strong>
<strong>Barracuda</strong> <strong>Load</strong> <strong>Balancer</strong> - <strong>Quick</strong> <strong>Start</strong> <strong>Guide</strong><br />
Update the Firmware<br />
1. Go to AdvancedFirmware Update.<br />
2. Press Download Firmware. Click OK to acknowledge the download duration<br />
message. To avoid damaging the <strong>Barracuda</strong> <strong>Load</strong> <strong>Balancer</strong>, do not power<br />
OFF during an update or download. To view download progress, refresh<br />
your browser. You will be notified when the download is complete.<br />
3. On the AdvancedFirmware Update page, click the Apply Now button to<br />
apply the firmware. This will take a few minutes to complete.<br />
4. Click OK when prompted to reboot.<br />
5. After applying the firmware, <strong>Barracuda</strong> <strong>Networks</strong> recommends logging in to<br />
the Web interface again and reading the Release Notes to learn about<br />
enhancements and new features. It is also a good practice to verify settings,<br />
as new features may have been included with the firmware update.<br />
service. Also, define the port for the given service. If the service uses multiple ports,<br />
“ALL” can be used.<br />
4. In the final box, under “Real Servers,” type in the IP addresses for the servers which<br />
hold the application or content. In route-path, these servers must be on separate<br />
subnet than the Virtual IPs and have the <strong>Load</strong> <strong>Balancer</strong>’s LAN interface configured as<br />
their default gateway.<br />
Test Connectivity<br />
You should verify network connectivity by utilizing a machine in your existing<br />
network to access the service you just defined on the Virtual IP you chose<br />
earlier. You connect to the Virtual IP in the same way you used to go to the<br />
single server.<br />
Change the Administrator Password<br />
To avoid unauthorized use, we recommend you change the default administrator<br />
password to a more secure password. You can only change the administrator<br />
password for the Web interface. You cannot change the password for the<br />
Administrative Console, but this is only accessible via the keyboard which you<br />
can disconnect at any time.<br />
1. Go to BasicAdministration and enter your old and new passwords.<br />
2. Press Save Password.<br />
Product Activation<br />
Verify that the Energize Updates feature is activated on your <strong>Barracuda</strong> <strong>Load</strong><br />
<strong>Balancer</strong> by going to the BasicStatus page. Under Subscription Status, make<br />
sure the Energize Updates subscription is Current. If the Energize Updates is<br />
Not Activated, click the corresponding activation link to go to the <strong>Barracuda</strong><br />
<strong>Networks</strong> Product Activation page and complete activation of your subscriptions.<br />
Configure your first services<br />
The <strong>Barracuda</strong> <strong>Load</strong> <strong>Balancer</strong> is now ready for testing. For route-path<br />
deployment*, connect one or more servers you will wish to load balance to the<br />
switch plugged into the LAN interface. Ensure that their IP addresses are within<br />
the LAN IP and Netmask you defined earlier, and that they have the IP you<br />
entered in the LAN IP section as their default gateway.<br />
1. Go to Basic Services screen.<br />
2. In the top configuration line, enter a name for the service you wish to create. (This is a<br />
name you can use to identify the service in the future, but does not affect load<br />
balancing.)<br />
3. In the next input box over, enter a Virtual IP for the service. This IP will live on the<br />
WAN interface and become the cliently accessible IP used to reach the load balanced<br />
NOTE: Deployment methods and strategies are discussed in detail in the <strong>Barracuda</strong> <strong>Load</strong><br />
<strong>Balancer</strong> Administrator’s guide. This and other documentation is available at<br />
http://www.barracuda.com/documentation. Be sure to check out the <strong>Barracuda</strong><br />
<strong>Networks</strong> Support Forum at: http://forum.barracuda.com for Frequently Asked<br />
Questions (FAQs) and other helpful tips for setting up and using your <strong>Barracuda</strong> <strong>Load</strong><br />
<strong>Balancer</strong>.<br />
Contact and Copyright Information<br />
<strong>Barracuda</strong> <strong>Networks</strong>, Inc. 3175 S. Winchester Blvd., Campbell, CA 95008 USA • phone: 408.342.5400 • fax: 408.342.1061 • www.barracuda.com<br />
Copyright 2007 © <strong>Barracuda</strong> <strong>Networks</strong>, Inc. All rights reserved. Use of this product and this manual is subject to license. Information in this document is subject<br />
to change without notice. <strong>Barracuda</strong> Spam Firewall is a trademark of <strong>Barracuda</strong> <strong>Networks</strong>, Inc. All other brand and product names mentioned in this document are<br />
registered trademarks or trademarks of their respective holders. 070208-14v33-04-0614<br />
<strong>Load</strong> <strong>Balancer</strong>