DEPARTMENT OF THE ARMY TECHNICAL BULLETIN ...
DEPARTMENT OF THE ARMY TECHNICAL BULLETIN ...
DEPARTMENT OF THE ARMY TECHNICAL BULLETIN ...

You also want an ePaper? Increase the reach of your titles
YUMPU automatically turns print PDFs into web optimized ePapers that Google loves.
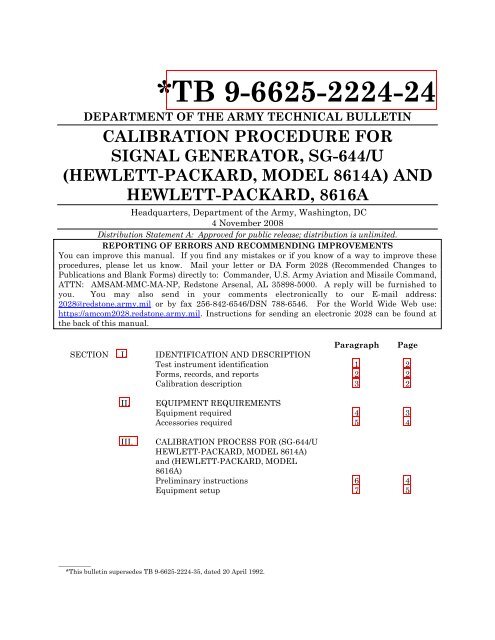
*TB 9-6625-2224-24<br />
<strong>DEPARTMENT</strong> <strong>OF</strong> <strong>THE</strong> <strong>ARMY</strong> <strong>TECHNICAL</strong> <strong>BULLETIN</strong><br />
CALIBRATION PROCEDURE FOR<br />
SIGNAL GENERATOR, SG-644/U<br />
(HEWLETT-PACKARD, MODEL 8614A) AND<br />
HEWLETT-PACKARD, 8616A<br />
Headquarters, Department of the Army, Washington, DC<br />
4 November 2008<br />
Distribution Statement A: Approved for public release; distribution is unlimited.<br />
REPORTING <strong>OF</strong> ERRORS AND RECOMMENDING IMPROVEMENTS<br />
You can improve this manual. If you find any mistakes or if you know of a way to improve these<br />
procedures, please let us know. Mail your letter or DA Form 2028 (Recommended Changes to<br />
Publications and Blank Forms) directly to: Commander, U.S. Army Aviation and Missile Command,<br />
ATTN: AMSAM-MMC-MA-NP, Redstone Arsenal, AL 35898-5000. A reply will be furnished to<br />
you. You may also send in your comments electronically to our E-mail address:<br />
2028@redstone.army.mil or by fax 256-842-6546/DSN 788-6546. For the World Wide Web use:<br />
https://amcom2028.redstone.army.mil. Instructions for sending an electronic 2028 can be found at<br />
the back of this manual.<br />
Paragraph Page<br />
SECTION I. IDENTIFICATION AND DESCRIPTION<br />
Test instrument identification 1 2<br />
Forms, records, and reports 2 2<br />
Calibration description 3 2<br />
II.<br />
III.<br />
EQUIPMENT REQUIREMENTS<br />
Equipment required 4 3<br />
Accessories required 5 4<br />
CALIBRATION PROCESS FOR (SG-644/U<br />
HEWLETT-PACKARD, MODEL 8614A)<br />
and (HEWLETT-PACKARD, MODEL<br />
8616A)<br />
Preliminary instructions 6 4<br />
Equipment setup 7 5<br />
__________<br />
*This bulletin supersedes TB 9-6625-2224-35, dated 20 April 1992.
TB 9-6625-2224-24<br />
Paragraph Page<br />
Frequency and stability 8 5<br />
Attenuator accuracy (SG-644/U (Hewlett-<br />
9 9<br />
Packard, Model 8614A))<br />
Attenuator accuracy (Hewlett-Packard, Model<br />
10 10<br />
8616A)) .......................................................................<br />
RF output power and leveled output (SG-644/A<br />
11 10<br />
(Hewlett-Packard, Model 8614A)) .............................<br />
RF output power and leveled output (Hewlett-<br />
12 11<br />
Packard, Model 8616A)) .............................................<br />
Internal square wave ................................................. 13 12<br />
Power supply .............................................................. 14 13<br />
Final procedure .......................................................... 15 13<br />
SECTION I<br />
IDENTIFICATION AND DESCRIPTION<br />
1. Test Instrument Identification. This bulletin provides instructions for the<br />
calibration of Signal Generator, SG-644/U (Hewlett-Packard, Model 8614A) and Hewlett-<br />
Packard, Model 8616A. The manufacturers’ manuals were used as the prime data sources<br />
in compiling these instructions. The equipment being calibrated will be referred to as the<br />
TI (test instrument) throughout this bulletin.<br />
a. Model Variations. Variations among models are described in text.<br />
b. Time and Technique. The time required for this calibration is approximately 4<br />
hours, using the microwave technique.<br />
2. Forms, Records, and Reports<br />
a. Forms, records, and reports required for calibration personnel at all levels are<br />
prescribed by TB 750-25.<br />
b. Adjustments to be reported are designated (R) at the end of the sentence in which<br />
they appear. When adjustments are in tables, the (R) follows the designated adjustment.<br />
Report only those adjustments made and designated with (R).<br />
3. Calibration Description. TI parameters and performance specifications which<br />
pertain to this calibration are listed in table 1.<br />
2
TB 9-6625-2224-24<br />
Table 1. Calibration Description<br />
Test instrument<br />
parameters<br />
Performance specifications<br />
Frequency SG-644/U (Hewlett-Packard, Model 8614A)<br />
Range: 800 to 2400 MHz<br />
Accuracy: ±5 MHz<br />
Line stability: ±0.003% for ±10% line voltage change<br />
Hewlett-Packard, Model 8616A<br />
Range: 1800 to 4500 MHz<br />
Accuracy: ±10 MHz<br />
Stability: ±0.003% for ±10% line voltage change<br />
RF output power SG-644/U (Hewlett-Packard, Model 8614A)<br />
Range: +10 to -127 dBm into 50 load<br />
Accuracy: ±0.75dB + attenuator accuracy (-10 to -127 dBm) 1<br />
(-15 to -127 dBm SN prefixed 501 and above) 2<br />
(0 to -127 dBm SN prefixed 851 and above) 1<br />
Hewlett-Packard, Model 8616A<br />
Range: +10 to -127 dBm (1800 to 3000 MHz) into 50 load<br />
+3 to - 127 dBm (3000 to 4500 MHz) into 50 load<br />
Accuracy: ±1.0 dB + attenuator accuracy (0 to -127 dBm) 1<br />
Attenuator SG-644/U (Hewlett-Packard, Model 8614A)<br />
Accuracy: +0, -3 dB (0 to -10 dBm) (0 to -15 dBm SN prefixed 501 and above)<br />
±.2 dB ±0.06 dB/10 dB (-10 to -127 dBm)<br />
(-15 to -127 dBm SN prefixed 501 and above)<br />
Hewlett-Packard, Model 8616A<br />
Accuracy: ±0.2 dB ±0.06 dB/10 dB (below -10 to -127 dBm)<br />
Leveled output SG-644/U (Hewlett-Packard, Model 8614A)<br />
Range: Attenuator setting below 0 dB<br />
Accuracy: ±.5 dB (±.75 dB SN prefixed 851 and above)<br />
Hewlett-Packard, Model 8616A<br />
Range: Attenuator setting below 0 dB<br />
Accuracy: ±1.0 dB<br />
Internal square wave Range: 950 to 1050 Hz<br />
(All models)<br />
1Verified at -10 dBm only.<br />
2Verified at -15 dBm only.<br />
SECTION II<br />
EQUIPMENT REQUIREMENTS<br />
4. Equipment Required. Table 2 identifies the specific equipment to be used in this<br />
calibration procedure. This equipment is issued with Secondary Transfer Calibration<br />
Standards Set AN/GSM-286, AN/GSM-287 or AN/GSM-705. Alternate items may be used<br />
by the calibrating activity. The items selected must be verified to perform satisfactorily<br />
prior to use and must bear evidence of current calibration. The equipment must meet or<br />
exceed the minimum use specifications listed in table 2. The accuracies listed in table 2<br />
provide a four-to-one ratio between the standard and TI. Where the four-to-one ratio<br />
cannot be met, actual accuracy of the equipment selected is shown in parenthesis.<br />
3
TB 9-6625-2224-24<br />
5. Accessories Required. The accessories required for this calibration are common<br />
usage accessories, issued as indicated in paragraph 4 above, and are not listed in this<br />
calibration procedure. The following peculiar accessory is also required for this calibration:<br />
Semiconductor device (crystal detector), 800 to 1800 MHz range, Hewlett-Packard, Model<br />
423AOPT03 (7923182-2).<br />
Table 2. Minimum Specifications of Equipment Required<br />
Manufacturer and model<br />
Common name<br />
Minimum use specifications<br />
(part number)<br />
ATTENUATOR (FIXED) Range: 20 dB<br />
Weinschel, Model 9918-20dB<br />
Frequency: 800 to 1800 MHz<br />
AUTOTRANSFORMER Range: 105 to 125 V ac Ridge, Model 9020A<br />
(9020A)<br />
MEASURING RECEIVER Dynamic range: 85 dB<br />
Accuracy: ±0.02dB/10 dB<br />
Frequency: 800 and 1800 MHz<br />
Measuring receiver system<br />
N5530S consisting of: Spectrum<br />
Analyzer, Agilent Model E4440A<br />
(E4440A), Power meter, Agilent<br />
Model E4419B (E4419B), and<br />
Sensor module, Agilent Model<br />
N5543A opt. 504 (504)<br />
MICROWAVE<br />
FREQUENCY COUNTER<br />
Range: 950 Hz to 4522.5 MHz<br />
Accuracy: ±0.00075%<br />
Anritsu, Model MF2414B003<br />
(MF2414B003)<br />
MULTIMETER<br />
Range: -402 to +21 V dc<br />
Accuracy: ±0.125%<br />
Hewlett-Packard, Model 3458A<br />
(3458A)<br />
POWER METER<br />
Range: -8.8 to -15.95 dBm<br />
Accuracy: ±1.25%<br />
Frequency: 800 to 4500 MHz<br />
Hewlett-Packard, Model 437B<br />
(13440045) w/power sensor<br />
Hewlett-Packard, Model 8481A or<br />
8482A (13440043)<br />
6. Preliminary Instructions<br />
SECTION III<br />
CALIBRATION PROCESS FOR<br />
HEWLETT-PACKARD, MODEL 8614A AND<br />
HEWLETT-PACKARD, MODEL 8616A<br />
a. The instructions outlined in paragraphs 6 and 7 are preparatory to the calibration<br />
process. Personnel should become familiar with the entire bulletin before beginning the<br />
calibration.<br />
b. Items of equipment used in this procedure are referenced within the text by common<br />
name as listed in table 2.<br />
c. Unless otherwise specified, verify the result of each test and, whenever the test<br />
requirement is not met, take corrective action before continuing with the calibration.<br />
Adjustments required to calibrate the TI are included in this procedure. Additional<br />
maintenance information is contained in the manufacturer's manual for this TI.<br />
d. When indications specified in paragraphs 8 through 13 are not within tolerance,<br />
perform the power supply check prior to making adjustments. After adjustments are made,<br />
4
TB 9-6625-2224-24<br />
repeat paragraphs 8 through 13. Do not perform power supply check if all other<br />
parameters are within tolerance.<br />
e. Unless otherwise specified, all controls and control settings refer to the TI.<br />
f. Unless otherwise specified, all control settings and indications in parenthesis refer<br />
to Hewlett-Packard, Model 8616A.<br />
7. Equipment Setup<br />
WARNING<br />
HIGH VOLTAGE is used or exposed during the performance of<br />
this calibration. DEATH ON CONTACT may result if<br />
personnel fail to observe safety precautions. REDUCE<br />
OUTPUT(S) to minimum after each step within the<br />
performance check where applicable.<br />
a. Remove TI protective cover as required for adjustment.<br />
b. Connect TI to autotransformer.<br />
c. Connect autotransformer to a 115 V ac source and adjust for 115 V output.<br />
d. Position controls as listed in (1) through (5) below:<br />
(1) LINE pushbutton pressed to in position.<br />
(2) All remaining pushbuttons released to out position.<br />
(3) F control centered.<br />
(4) FREQUENCY (MC) control to 0800 (1800).<br />
(5) ATTENUATION (DB) control to 000.<br />
e. Observe DBM meter pointer is on ZERO SET mark. If not, adjust ZERO SET.<br />
f. Allow at least 30 minutes for equipment to warm up and stabilize.<br />
8. Frequency and Stability<br />
a. Performance Check<br />
(1) Connect microwave frequency counter to RF POWER OUTPUTS CAL.<br />
NOTE<br />
Before INTERNAL ALC pushbutton is pressed to in position<br />
in (2) below, DBM meter should indicate approximately<br />
+1 dBm.<br />
(2) Press RF and INTERNAL ALC pushbuttons to in position and adjust ALC<br />
CAL OUTPUT control for a 0 indication on DBM meter. If microwave frequency counter<br />
does not indicate between 795 and 805 MHz (1790 and 1820 MHz), perform b below.<br />
Record microwave frequency counter indication.<br />
5
TB 9-6625-2224-24<br />
(3) Adjust autotransformer to 105 V. Microwave frequency counter will indicate<br />
within ±0.003 percent of indication recorded in (2) above.<br />
(4) Adjust autotransformer to 125 V. Microwave frequency counter will indicate<br />
within ±0.003 percent of indication recorded in (2) above.<br />
(5) Adjust autotransformer to 115 V.<br />
NOTE<br />
Always approach frequency setting in the same direction to<br />
eliminate backlash error.<br />
(6) Adjust FREQUENCY (MC) control to settings listed in table 3. If microwave<br />
frequency counter does not indicate within limits specified, perform b below.<br />
Table 3. Frequency and Stability<br />
Test instrument<br />
FREQUENCY (MC)<br />
Microwave frequency counter indications<br />
(MHz)<br />
settings<br />
Min<br />
Max<br />
800 (1800) 795 (1790) 805 (1810)<br />
1000 (2000) 995 (1990) 1005 (2010)<br />
1200 (2200) 1195 (2390) 1205 (2210)<br />
1400 (2400) 1395 (2390) 1405 (2410)<br />
1600 (2600) 1595 (2590) 1605 (2610)<br />
1800 (2800) 1795 (2790) 1805 (2810)<br />
2000 (3000) 1995 (2990) 2005 (3010)<br />
2200 (3200) 2195 (3190) 2205 (3210)<br />
2400 (3400) 2395 (3390) 2405 (3410)<br />
(3600) (3590) (3610)<br />
(3800) (3790) (3810)<br />
Test instrument<br />
FREQUENCY (MC)<br />
settings<br />
Table 3. Frequency and Stability - Continued<br />
Microwave frequency counter indications<br />
(MHz)<br />
Min<br />
Max<br />
(4000) (3990) (4010)<br />
(4200) (4190) (4210)<br />
(4400) (4390) (4410)<br />
(4500) (4490) (4510)<br />
b. Adjustments<br />
(1) Adjust FREQUENCY (MC) control to 1000 (1800). Record microwave<br />
frequency counter indication.<br />
(2) Adjust FREQUENCY (MC) control to 2400 (4000). Record microwave<br />
frequency counter indication.<br />
(3) Subtract indication recorded in b (1) above from indication recorded in b (2)<br />
above. If difference is not between 1397 and 1403 (2194 and 2206), refer to frequency dial<br />
correction chart (fig. 1) and determine correction value as in example below:<br />
6
TB 9-6625-2224-24<br />
EXAMPLE: If difference is 1354 MHz, the corrective dial setting in 990 MHz.<br />
Figure 1. Frequency dial correction chart.<br />
(4) Adjust FREQUENCY (MC) control to 1000 (1800). Loosen the two DIAL<br />
PLUNGER SET SCREWS (fig. 2), hold the DIAL PLUNGER (fig. 2) stationary, and set dial<br />
to correction value determined in b (3) above. Tighten DIAL PLUNGER SET SCREWS (R).<br />
(5) Repeat b (l) through (4) above as necessary.<br />
7
TB 9-6625-2224-24<br />
Figure 2. Test instrument top view.<br />
8
TB 9-6625-2224-24<br />
9. Attenuator Accuracy SG-644/U (Hewlett-Packard, Model 8614A)<br />
a. Performance Check<br />
NOTE<br />
Settings and indications in parenthesis are for SN prefixed 501<br />
and above.<br />
(1) Position controls as listed in (a) through (d) below:<br />
(a) RF pushbutton released to out position.<br />
(b) INTERNAL ALC pushbutton released to out position.<br />
(c) FREQUENCY (MC) control to 0800.<br />
(d) ATTENUATION (DB) control to 000.<br />
NOTE<br />
Verify that the proper CAL FACTORS are loaded for the<br />
measuring receiver power sensor module.<br />
(2) Zero and calibrate the measuring receiver power sensor module.<br />
(3) Set up measuring receiver to measure tuned level RF power in dB.<br />
(4) Connect measuring receiver power sensor module to RF POWER OUTPUTS CAL.<br />
(5) Press RF pushbutton and establish a 0 dB reference on the measuring receiver<br />
at 800 MHz.<br />
(6) Adjust ATTENUATION (DB) control to each setting in table 4. Measuring<br />
receiver will indicate within limits specified.<br />
Table 4. Attenuator Accuracy<br />
Test instrument<br />
ATTENUATION (DB)<br />
Measuring receiver indications<br />
(dB)<br />
dial indications<br />
Min<br />
Max<br />
010 (015) 10.0 (15.0) 13.0 (18.0)<br />
020 (025) 19.68 (24.68) 20.32 (25.32)<br />
030 (035) 29.62 (34.62) 30.38 (35.38)<br />
040 (045) 39.56 (44.56) 40.44 (45.44)<br />
050 (055) 49.50 (54.50) 50.50 (55.50)<br />
060 (065) 59.44 (64.44) 60.56 (65.56)<br />
070 (075) 69.38 (74.38) 70.62 (75.62)<br />
080 (085) 79.32 (84.32) 80.68 (85.68)<br />
090 (095) 89.26 (94.26) 90.74 (95.74)<br />
100 (105) 99.20 (104.20) 100.80 (105.80)<br />
110 (115) 109.14 (114.14) 110.86 (115.86)<br />
120 (125) 119.08 (124.08) 120.92 (125.92)<br />
b. Adjustments. No adjustments can be made.<br />
9
TB 9-6625-2224-24<br />
10. Attenuator Accuracy Hewlett-Packard, Model 8616A<br />
a. Performance Check<br />
(1) Position controls as listed in (a) through (c) below:<br />
(a) RF pushbutton released to out position.<br />
(b) FREQUENCY (MC) control to 1800.<br />
(c) ATTENUATION (DB) control to 010.<br />
NOTE<br />
Verify that the proper CAL FACTORS are loaded for the<br />
measuring receiver power sensor module.<br />
(2) Zero and calibrate the measuring receiver power sensor module.<br />
(3) Set up measuring receiver to measure tuned level RF power in dB.<br />
(4) Connect measuring receiver power sensor module to RF POWER OUTPUTS CAL.<br />
(5) Press RF pushbutton to in position and establish a 0 dB reference on the<br />
measuring receiver at 1800 MHz.<br />
(6) Adjust ATTENUATION (DB) control to each setting in table 5. Measuring<br />
receiver will indicate within limits specified.<br />
Table 5. Attenuator Accuracy<br />
Test instrument<br />
ATTENUATION (DB)<br />
Measuring receiver indications<br />
(dB)<br />
dial indications<br />
Min<br />
Max<br />
020 9.75 10.26<br />
030 19.68 20.32<br />
040 29.62 30.38<br />
050 39.56 40.44<br />
060 49.50 50.50<br />
070 59.44 60.56<br />
080 69.38 70.62<br />
090 79.32 80.68<br />
100 89.26 90.74<br />
110 99.20 100.80<br />
120 109.14 110.86<br />
b. Adjustments. No adjustments can be made.<br />
11. RF Output Power and Leveled Output SG-644/U (Hewlett-Packard, Model<br />
8614A)<br />
NOTE<br />
Settings and indications in parenthesis are for SN prefixed 501<br />
and above.<br />
(1) Press RF pushbutton to out position.<br />
10
TB 9-6625-2224-24<br />
(2) Connect power meter to RF POWER OUTPUTS CAL.<br />
(3) Position controls as listed in (a) through (d) below:<br />
(a) FREQUENCY (MC) control to 0800.<br />
(b) ATTENUATION (DB) control to 010 (015).<br />
(c) ALC CAL OUTPUT control fully ccw.<br />
(d) RF pushbutton pressed to in position.<br />
NOTE<br />
Before INTERNAL ALC pushbutton is pressed to in position<br />
in (4) below, DBM meter should indicate approximately +1 dBm.<br />
(4) Press INTERNAL ALC pushbutton to in position and adjust ALC CAL<br />
OUTPUT control for a 0 indication on DBM meter. Power meter will indicate<br />
between -9.05 and -10.95 dBm(-14.05 and -15.95 dBm). Record power meter indication.<br />
(5) Adjust FREQUENCY (MC) control from 0800 to 2400. If power meter<br />
indication does not remain within ±0.5 dB (±0.75 dB) of indication recorded in (4) above,<br />
perform b below.<br />
b. Adjustments. Adjust FREQUENCY (MC) control to settings listed in table 6 below<br />
and perform corresponding adjustment for a -10 dBm (-15 dBm) power meter indication.<br />
NOTE<br />
R614 and R621 interact as do R615 and R620. To simplify the<br />
adjustment, overcorrect when adjusting R614 or R615; then<br />
back off with interacting adjustment R621 or R620.<br />
Table 6. Leveled Output Adjustments<br />
Test instrument<br />
FREQUENCY (MC)<br />
dial settings<br />
Adjustments<br />
(fig. 2)<br />
0800 R614<br />
1600 below switch R621<br />
1600 above switch R615<br />
2400 R620<br />
12. RF Output Power and Leveled Output Hewlett-Packard, Model 8616A<br />
a. Performance Check<br />
(1) Press RF pushbutton to out position.<br />
(2) Connect power meter to RF POWER OUTPUTS CAL.<br />
(3) Position controls as listed in (a) through (d) below:<br />
(a) FREQUENCY (MC) control to 1800.<br />
(b) ATTENUATION (DB) control to 010.<br />
(c) ALC CAL OUTPUT control fully ccw.<br />
(d) RF pushbutton pressed to in position.<br />
11
TB 9-6625-2224-24<br />
NOTE<br />
Before INTERNAL ALC pushbutton is pressed to in position<br />
in (4) below, DBM meter should indicate approximately +1 dBm.<br />
(4) Press INTERNAL ALC pushbutton to in position and adjust ALC CAL<br />
OUTPUT control for a 0 indication on DBM meter. Power meter will indicate between -8.8<br />
and -11.2 dBm. Record power meter indication.<br />
(5) Adjust FREQUENCY (MC) control from 1800 to 4500. If power meter<br />
indication does not remain within ±1.0 dB of indication recorded in (4) above, perform b below.<br />
b. Adjustments. Adjust FREQUENCY (MC) control settings listed in table 7 below<br />
and perform corresponding adjustment for a -10 dBm power meter indication.<br />
NOTE<br />
R614 and R621 interact as do R615 and R620. To simplify the<br />
adjustment, overcorrect when adjusting R614 or R615, then<br />
back off with interacting adjustment R621 or R620.<br />
Table 7. Leveled Output Adjustments<br />
Test instrument<br />
FREQUENCY(MC)<br />
dial settings<br />
Adjustments<br />
(fig. 2)<br />
1800 R614<br />
3200 below switch R621<br />
3200 above switch R615<br />
4500 R620<br />
13. Internal Square Wave<br />
a. Performance Check<br />
(1) Position controls as listed in (a) through (d) below:<br />
(a) RF pushbutton released to out position.<br />
(b) INTERNAL ALC pushbutton released to out position.<br />
(c) FREQUENCY (MC) control to 0800 (1800).<br />
(d) ATTENUATION (DB) control to 000.<br />
(2) Connect microwave frequency counter to RF POWER OUTPUTS CAL, using<br />
crystal detector.<br />
(3) Press RF and INTERNAL SQ WAVE pushbuttons to in position. Adjust SQ<br />
WAVE control fully ccw. If microwave frequency counter does not indicate 950 Hz or less,<br />
perform b below.<br />
(4) Adjust SQ WAVE control fully cw. If microwave frequency counter does not<br />
indicate 1050 Hz or greater, perform b below.<br />
b. Adjustments. Adjust SQ WAVE control to center position. Adjust SQ WAVE<br />
SYM. ADJ. R410 (fig. 2) for 1000 Hz indication on microwave frequency counter (R).<br />
12
TB 9-6625-2224-24<br />
14. Power Supply<br />
a. Performance Check<br />
NOTE<br />
Do not perform power supply checks if all other parameters are<br />
within tolerance.<br />
NOTE<br />
C205 may either be chassis mounted or located on HIGH<br />
VOLTAGE (A100) board.<br />
(1) Connect multimeter negative to positive side of C205 (fig. 2) (white-violet wire),<br />
and multimeter positive to negative side of C205 (fig. 2) (violet wire). If multimeter does<br />
not indicate between -348 and -352 V dc (-398 and -402 V dc), perform b (l) below.<br />
(2) Connect multimeter negative to top of R4 (fig. 3) and multimeter positive to<br />
V203 PIN 5 TRACE (fig. 3). If multimeter does not indicate between -6.05 and -6.25 V dc,<br />
perform b (2) below.<br />
(3) Connect multimeter negative to chassis ground and multimeter positive to<br />
positive side of C53 (fig. 3). If multimeter does not indicate between +19 and +21 V dc,<br />
perform b (3) below.<br />
b. Adjustments<br />
(1) Adjust HV ADJ. R212 (fig. 2) for a -350 V dc (400 V dc) indication on multimeter (R).<br />
(2) Adjust DC FIL. ADJ. R5 (fig. 3) for a -6.15 V dc indication on multimeter (R).<br />
(3) Adjust R53 (fig. 2) for a +20 V dc indication on multimeter (R).<br />
Figure 3. High voltage board (A100) - partial view.<br />
15. Final Procedure<br />
a. Deenergize and disconnect all equipment.<br />
b. Annotate and affix DA label/form in accordance with TB 750-25.<br />
13/(14 Blank)
By Order of the Secretary of the Army:<br />
Official:<br />
GEORGE W. CASEY, JR.<br />
General, United States Army<br />
Chief of Staff<br />
JOYCE E. MORROW<br />
Administrative Assistant to the<br />
Secretary of the Army<br />
0719017<br />
Distribution:<br />
To be distributed in accordance with the initial distribution number (IDN) 343119<br />
requirements for calibration procedure TB 9-6625-2224-35.
Instructions for Submitting an Electronic 2028<br />
The following format must be used if submitting an electronic 2028. The subject line must be exactly<br />
the same and all fields must be included; however, only the following fields are mandatory: 1, 3, 4,<br />
5, 6, 7, 8, 9, 10, 13, 15, 16, 17, and 27.<br />
From: "Whomever" whomever@redstone.army.mil<br />
To:
PIN: 085080-000