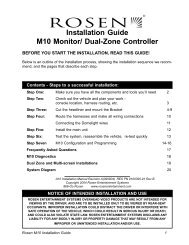
Roof Mount Color Monitor - Rosen Electronics
Roof Mount Color Monitor - Rosen Electronics
Roof Mount Color Monitor - Rosen Electronics

You also want an ePaper? Increase the reach of your titles
YUMPU automatically turns print PDFs into web optimized ePapers that Google loves.
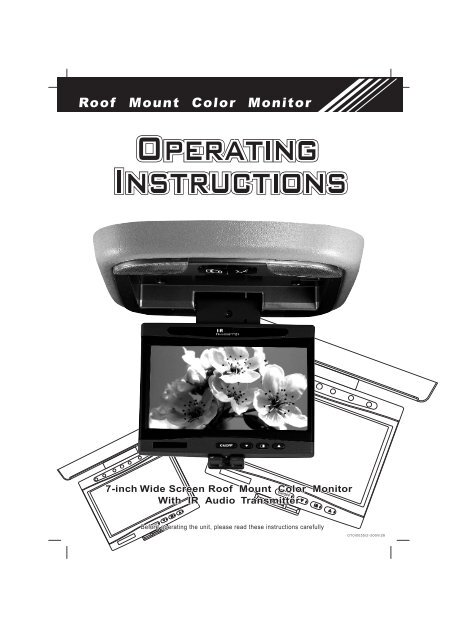
<strong>Roof</strong> <strong>Mount</strong> <strong>Color</strong> <strong>Monitor</strong><br />
IR<br />
TRANSMITTER<br />
IR<br />
TRANSMITTER<br />
7-inch Wide Screen <strong>Roof</strong> <strong>Mount</strong> <strong>Color</strong> <strong>Monitor</strong><br />
With IR Audio Transmitter<br />
ON/OFF<br />
Before operating the unit, please read these instructions carefully<br />
ON/OFF<br />
OT01003512-20011128
General Information<br />
TABLE OF CONTENTS<br />
General Information<br />
W elcome .............................................................................. 1<br />
Precautions ........................................................................ 1<br />
Important Notes ................................................................... 2<br />
Installation Guide<br />
Precautions .......................................................................... 3<br />
Electrical Connections ....................................................... 4<br />
Signal Connections .......................................................... 4<br />
T ypical Wiring Diagram .................................................. 5<br />
Main Unit<br />
Function K eys ........................................................... 6<br />
Remote Control Unit<br />
Frequently Used Buttons ................................................... 7<br />
Replacement of Battery ....................................................... 8<br />
Precautions ................................................................... 8<br />
Operating the <strong>Monitor</strong><br />
Eject / Open the Display <strong>Monitor</strong> .................................... 8<br />
K eeping the Display <strong>Monitor</strong> ........................................... 9<br />
Display F ormat .................................................................. 9<br />
Signal Source ON / OFF(MODE) ....................................... 9<br />
Function Mode (MENU) .................................................. 9<br />
Mute Function (Remote Control) ........................................ 10<br />
Door Light ON / OFF ......................................................... 10
General Information<br />
Courtesy Light ON / OFF .......................................... 10<br />
Accessories Supplied .................................................. 11<br />
Technical Specifications .................................................. 12<br />
System Configuration .......................................................... 13
WELCOME<br />
Thank you for the purchase of this <strong>Roof</strong> <strong>Mount</strong> <strong>Color</strong> <strong>Monitor</strong>. Before operating<br />
the unit, please read this manual thoroughly and retain it for future reference.<br />
PRECAUTIONS<br />
To prevent short-circuiting of the electrical system and cause serious damage to the<br />
unit or the vehicle, you are advised to follow the instructions carefully.<br />
* Should there be requirement to replace blown fuse, do remember to disconnect<br />
all power supply and switched off the unit before replacing it with a new one. Use<br />
only correct rating fuse to avoid damaging the unit.<br />
* During operation, if there is symptom of over-heating or system mal-function, do<br />
switch off the unit and consult your dealer immediately. Please do not attempt to<br />
open up the unit since there is no serviceable parts inside.<br />
To avoid damaging the LCD panel and cause serious injury to you or others, please<br />
observe the followings:<br />
* Do not drop the LCD display panel or subject it to direct impact.<br />
* Should the LCD panel is broken, do avoid all human contact to the broken glasses<br />
or fluid leaked out from the enclosure. If come into contact, do flush and clean<br />
affected areas with plenty of water. Seek medical attention immediately.<br />
This unit is designed using high quality electronic components and manufactured<br />
under stringent quality control system. The system unit will provide many hours of<br />
quality performance if use correctly. Do follow the maintenance procedure below:<br />
* The battery life of the remote control unit is about six months long. To ensure<br />
effective control, please replace the batteries regularly. Do not use new and used<br />
batteries at the same time to avoid damaging the good battery.<br />
* Do not use any chemical solvent, cleaning agent or corrosive detergent to clean<br />
away dirt on the surface of the screen. By so doing, you may cause irreversible<br />
damage to the surface of the TFT screen. To clean off dirt or fingerprints, we<br />
recommend the use of a soft damp lens cleaning cloth.<br />
* Do not drop the monitor or hit it with hard object. It may cause permanent<br />
damage to the LCD panel or the back light element.<br />
1
* When operating the display unit, do avoid touching or pressing the LCD glass<br />
panel. Excessive force may cause irreparable damage to the LCD screen.<br />
* Ensure no metal or foreign materials are dropped in between the display screen<br />
and enclosure. Obstacles may impeach smooth running of the tray and may cause<br />
electrical shorts.<br />
IMPORTANT NOTES:<br />
* When use in conjunction with Radio / TV tuner , please do note that these TV<br />
receivers are manufactured to receive television broadcast signals that are<br />
transmitted via terrestrial radio waves. Reception quality will change and vary<br />
according to geographical location and climatic condition.<br />
* To avoid accident, we strongly advise not to install the display screen at a position<br />
that will distract the attentiveness of the driver.<br />
* Do avoid installing the monitor screen at a position that is under direct sunlight<br />
and place monitor away from hot air vent. Please note that the normal working<br />
temperature of TFT screen is between 0¢XC to 60¢XC. If the internal temperature of<br />
the vehicle is extremely high, do allow a short cooling down period before operating<br />
the unit.<br />
* Installed unit at a dry location away from condensation.<br />
* Use only correct size of fasteners or connection cable during installation. Failure<br />
to comply with this requirement may damage the mechanical structure or create fire<br />
hazard.<br />
* Kindly refer to authorized dealers if in doubts.<br />
* To avoid electrical shock, do not open the enclosure. High voltage is present. No<br />
user serviceable parts inside the enclosure.<br />
* The picture quality of this display monitor is restricted by the LCD design. To<br />
achieve best picture quality, adjust the brightness control or viewing angle of the<br />
unit till optimum level.<br />
Before installing this display system, please check that you are in compliance<br />
with your local traffic rules and regulations<br />
2
INSTALLATION GUIDE<br />
Precautions:<br />
1. This unit should be install by qualified technician or service personnel.<br />
2. This product is designed to operate with a 12V DC, negative ground<br />
battery system.<br />
3. Disconnect the ground wire from the battery terminal before connecting<br />
this unit to the electrical system.<br />
4. The wiring from some other products or accessories might bear similar<br />
color code to this product but however they might of different function.<br />
It is always advisable to refer to the electrical connection diagrams of<br />
products or accessories before installation to avoid wrong connection.<br />
5. Use proper insulation and fastening materials to prevent electrical<br />
short-circuiting.<br />
6. Do not connect the yellow wire of this product directly to the battery<br />
terminal. Do remember to connect the red wire of this product to the<br />
ACC of the ignition key switch. Failure to do so may result in draining<br />
off the battery charge prematurely.<br />
7. Use only supplied accessories to avoid damaging the unit during<br />
installation.<br />
8. Do not install this product at a position that may cause injuries to the<br />
passenger(s) during an accident.<br />
9. However, due to different car specification, kindly ensure that the display<br />
monitor is suitably located such that it is not obstructing the rear view<br />
mirror or air-conditioning unit.<br />
10. Do not install this product at a declining angle exceeding 30.<br />
11.D o not install screws over plane surface which may affect monitor eject<br />
or retract function.<br />
3
ELECTRICAL CONNECTION:<br />
AD-6865<br />
<strong>Color</strong> Code<br />
Function<br />
Black<br />
Ground<br />
Red<br />
ACC<br />
Yellow +12V<br />
COURTESY LIGHTS<br />
<strong>Color</strong> Code<br />
Function<br />
Black<br />
Ground<br />
Red<br />
ACC<br />
Grey<br />
Door - Light Sensor<br />
Yellow +12V<br />
SIGNAL CONNECTION:<br />
AUDIO INPUT<br />
<strong>Color</strong> Code<br />
Red (RCA)<br />
White (RCA)<br />
Function<br />
Audio - Right<br />
Audio - Left (Mono)<br />
VIDEO INPUT (AD-6865)<br />
<strong>Color</strong> Code<br />
Function<br />
Yellow 1 (RCA) Video - In (V-IN 1)<br />
Yellow 2 (RCA) Video - In (V-IN 2)<br />
Yellow 3 (RCA) Video - Out (V - OUT 1)<br />
4
TYPICAL WIRING DIAGRAMS<br />
Audio in<br />
PUSH<br />
15 PIN<br />
TO MONITOR<br />
RED-ACC<br />
AD-6865<br />
YELLOW-BATTERY<br />
ADAPTORS<br />
BLUE-REMOTE OUT<br />
INPUT DC-13.2V BLACK-GND<br />
FUSE 2A<br />
SERIAL NO.<br />
55666657<br />
IN 1<br />
VIDEO<br />
IN 2<br />
OUT<br />
I R Headphone<br />
( Opt i onal )<br />
AV AV AV<br />
IN 1 IN 2 OUT<br />
AD-6865<br />
R<br />
E<br />
D<br />
A<br />
C<br />
C<br />
( )<br />
Y<br />
E<br />
L<br />
L<br />
O<br />
W<br />
( )<br />
B<br />
+<br />
B<br />
L<br />
A<br />
C<br />
K<br />
G<br />
N<br />
D<br />
( )<br />
YELLOW( B+)<br />
RED ( ACC)<br />
BLACK ( GND )<br />
GRAY ( Door - Li ght Sensor )<br />
Note : The unit will automatically power off when ACCis off. Be sure<br />
to connect Yellow to ACC power.<br />
5
MAIN UNIT FUNCTION KEYS<br />
5<br />
6<br />
7<br />
1<br />
4<br />
2<br />
3<br />
8<br />
1¡BLCD Display<br />
5¡BDoor Light ON / OFF Button( )<br />
2¡BON/ OFF Button (MODE) 6¡BCourtesy Light ( )<br />
3¡BUP/DOWN Button ( / )<br />
4¡BMENU Button ( )<br />
7¡BRemote Sensor<br />
8¡BOPEN Button<br />
6
REMOTE CONTROL UNIT<br />
Frequently used buttons:<br />
1<br />
CH/DISC/SET<br />
4<br />
POWER<br />
MODE<br />
2<br />
1 2 3 MENU<br />
3<br />
4<br />
5<br />
6<br />
MEMORY<br />
7<br />
8<br />
9<br />
0<br />
MUTE<br />
VOL<br />
5<br />
SCAN<br />
SAVE<br />
BAND<br />
DISP<br />
REP<br />
RC-1029A<br />
MOBILE AV REMOTE CONTROL<br />
1. CH / DISC / SET ( / ) buttons<br />
Use these buttons to search for TV channels or to select disc title or to select the desired settings under<br />
MENU screen.<br />
2. MODE button<br />
Press this button to select the required input video source. i.e. TV / AV1 / AV2.<br />
3. MENU button<br />
Press this button to display the menu screen.<br />
4. POWER button<br />
Press this button to OPEN (ON) or CLOSE (OFF) the monitor enclosure<br />
5.MUTE button<br />
7
Replacement of battery<br />
Remot e Cont r ol l er<br />
Bat t er y<br />
Bat t er y Hol der<br />
1. Use a small coin to ply open the battery holder from compartment.<br />
2. Remove old battery and put in a new one with positive sign " + " facing upward.<br />
3. Push battery holder into compartment until it is locked.<br />
Precautions<br />
1. Dispose off used battery properly.<br />
2. Do not misuse battery by shorting the positive " + " and negative " - " terminal or<br />
put it into fire. Overheating may cause battery to explode and a fire hazard.<br />
3. Remove used battery from compartment to prevent leakage from damaged battery.<br />
4. To avoid accident, do prevent children from playing with the battery.<br />
OPERATING THE MONITOR<br />
Note: Some function mode only can be activated when this monitor is connected as<br />
an integrated system with our range of peripherals. e.g. Radio & TV tuner,<br />
model, VCD/CD Changer , DVD player, or DVD changer.<br />
1. EJECT / OPEN THE DISPLAY MONITOR<br />
To eject / open the display monitor, push & pull the open button to the desired position.<br />
8
2. KEEPING THE DISPLAY MONITOR<br />
To keep the LCD display back into the enclosure, pull the monitor back to the tray.<br />
<strong>Monitor</strong> lock with a click.<br />
3. Display Format<br />
Press ( Menu ) to select Format<br />
Press or button to select desire screen size.<br />
The screen size switches in the following sequence each time the button is activated:<br />
ZOOM ¡÷ NORMAL ¡÷ FULL<br />
ZOOM: Picture stretched vertically and horizontally.<br />
NORMAL:When 4:3 picture is played on a wide screen, black bands appear on<br />
both side of the picture.<br />
FULL: 16:9 picture is fully displayed on screen.<br />
4. SIGNAL SOURCE ON/OFF (MODE)<br />
To select input signal AV1 or AV2 by activation of ON/OFF (MODE) button. Using<br />
either" " or " " key to toggle between NTSC or PAL display system.<br />
Note: The key function will change when this monitor is connected to our range of<br />
peripheral product. e.g. TV/Radio Tuner cum Amplifier . Please refer to the respective<br />
manual for details.<br />
5. FUNCTION MODE (MENU)<br />
Press MENU button to activate screen set up sequence as follow:<br />
COLOR ¡÷ BRIGHT ¡÷ TINT ¡÷ DIMMER ¡÷ FORMA T<br />
RESET<br />
COLOR: <strong>Color</strong> adjustment.<br />
BRIGHT : Brightness setting.<br />
TINT : Adjustment to color saturation.<br />
DIMMER: When this function is set to ON, brightness of screen will be adjusted<br />
to be dark.<br />
9
RESET: Reset COLOR, CONTRAST, BRIGHTNESS and TINT to factory preset level.<br />
Once the correct function is selected, press the cursor key i.e. ( or ( to the desired<br />
setting. If no key is depressed, this function mode will turn OFF in about 5 seconds.<br />
6. MUTE FUNCTION (Remote Control)<br />
This monitor is equipped with an infrared audio transmitter. The audio signal can be<br />
muted when MUTE button on the remote controller is activated.<br />
7. DOOR LIGHT ON / OFF ( )<br />
Engage this switch to have door sensor activated doom lights.<br />
Note: This function can be operational only when the Grey wire of the crystal doom<br />
light assembly is connected to the door sensor.<br />
8. COURTESY LIGHT ON / OFF ( )<br />
Activate this switch to ON /OFF the crystal doom lights.<br />
10
Accessories supplied<br />
Item<br />
1<br />
2<br />
3<br />
4<br />
5<br />
6<br />
7<br />
8<br />
9<br />
Item Description<br />
Metal plate<br />
Adaptor, AD6865<br />
Fastener screws, (Pan head 5 x 6)<br />
Fastener screws, (B5 x 8)<br />
Remote controller (RC-1029A)<br />
Operating manual<br />
Power supply cable assembly, 4P, 600mm #18<br />
Interconnecting cable assembly, doom light<br />
Source Cable MD 9 pin-15pin<br />
Quantity<br />
1<br />
1<br />
4<br />
2<br />
1<br />
1<br />
1<br />
1<br />
1<br />
11
TECHNICAL SPECIFICATIONS<br />
Type<br />
Display System<br />
Display Format<br />
Aspect Ratio<br />
Resolution<br />
Front Panel<br />
Active Area<br />
Back Light<br />
Mechanism<br />
Display Angle<br />
Source<br />
Wireless Audio<br />
Crystal Doom Light<br />
Operating Voltage<br />
Operating Current<br />
Operating Temperature<br />
Package Size<br />
Weight<br />
<strong>Roof</strong> <strong>Mount</strong> <strong>Color</strong> Display <strong>Monitor</strong><br />
7.0-inch (18cm) Active Matrix <strong>Color</strong> TFT LCD<br />
NTSC / PAL Selectable<br />
112,320 pixels<br />
16 : 9<br />
336,960 dots / 1,440 (W) x 234 (H) dots<br />
Anti-glare glass<br />
154.08 (W) x 86.58 (H) mm<br />
10,000 hours normal operation<br />
Manual Open / Close<br />
Adjustable<br />
Horizontal: Up/Down < 110¢X<br />
Composite video input x 2<br />
Composite video output x 1<br />
Audio L/R input x 1<br />
Infrared audio transmitter (Support IR receiver<br />
stereo head phone, L-channel: 2.3MHz /<br />
R-channel: 2.8MHz)<br />
Effective listening angle: 30¢X<br />
Effective range: 4 meter<br />
5W x 2 with door sensor connection<br />
DC 12V<br />
1.5A, Typical<br />
0¢XC to 60¢XC<br />
L295 x W240 x H34 mm<br />
820g<br />
All specifications are subjected to change without prior notification<br />
12
15 PIN<br />
TO MONITOR<br />
IN 1<br />
RED-ACC<br />
YELLOW-BATTERY<br />
BLUE-REMOTE OUT<br />
BLACK-GND<br />
VIDEO<br />
IN 2<br />
15 PIN<br />
TO MONITOR<br />
OUT<br />
IN 1<br />
RED-ACC<br />
YELLOW-BATTERY<br />
BLUE-REMOTE OUT<br />
BLACK-GND<br />
VIDEO<br />
IN 2<br />
OUT<br />
SYSEM CONFIGURATION<br />
OPTION 1<br />
<strong>Color</strong> <strong>Monitor</strong>/One Din DVD Player Digital Sound Processor Unit<br />
12V Supply<br />
Video Out<br />
Audio Out ( L)<br />
Audio Out (R)<br />
Optical Cable<br />
AD-6865<br />
AD-6865<br />
ADAPTORS<br />
INPUT DC-13.2V<br />
FUSE 2A<br />
SERIAL NO.<br />
55666657<br />
Audio In (L)<br />
Audio In (R)<br />
One din<br />
DVD Player<br />
DSP Unit: DTS Sound<br />
Processor<br />
Speakers<br />
IR Headphone<br />
(Optional)<br />
OPTION 2<br />
<strong>Color</strong> <strong>Monitor</strong>/TV/Radio Tuner cum Amplifier / One Din DVD Player<br />
12V Video Out<br />
Supply<br />
Audio Out(L)/(R)<br />
Proprietary DIN 9-Pin Cable<br />
Audio In (L)<br />
Audio In (R)<br />
9-Pin Connector<br />
Speakers /<br />
Power Supply<br />
One din<br />
DVD Player<br />
TV/Radio Tuner<br />
cum Amplifier<br />
Remote<br />
Control<br />
Antenna<br />
IR Headphone<br />
(Optional)<br />
OPTION 3<br />
<strong>Color</strong> <strong>Monitor</strong>/One Din DVD Player / Pre-Amp / Power Amplifier<br />
12V<br />
Supply<br />
Video Out<br />
Audio Out (L)<br />
Audio Out (R)<br />
Optical Cable<br />
Audio In (L)/(R)<br />
AD-6865<br />
AD-6865<br />
ADAPTORS<br />
INPUT DC-13.2V<br />
FUSE 2A<br />
SERIAL NO.<br />
55666657<br />
Audio In (L)<br />
Audio In (R)<br />
Pre-Amp<br />
One din<br />
DVD Player<br />
Supply<br />
to Pre-Amp<br />
Power Amplifier<br />
Speakers<br />
IR Headphone<br />
(Optional)<br />
13