Lawn Genie Richdel L71206p-9p Controller ... - Irrigation Direct
Lawn Genie Richdel L71206p-9p Controller ... - Irrigation Direct
Lawn Genie Richdel L71206p-9p Controller ... - Irrigation Direct

Create successful ePaper yourself
Turn your PDF publications into a flip-book with our unique Google optimized e-Paper software.
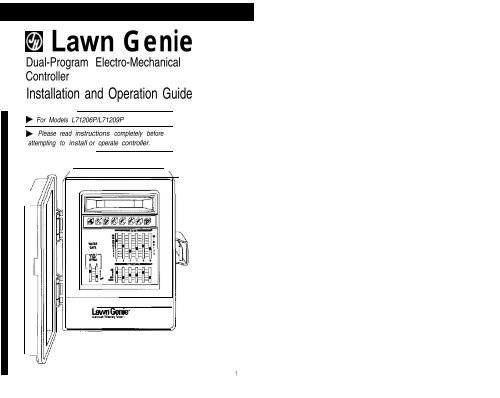
E!l <strong>Lawn</strong> <strong>Genie</strong><br />
Dual-Program Electro-Mechanical<br />
<strong>Controller</strong><br />
Installation and Operation Guide<br />
b For Models L71206P/L71209P<br />
b Please read instructions completely before<br />
attempting to install or operate controller.<br />
1
This manual explains<br />
how to install your<br />
<strong>Lawn</strong> <strong>Genie</strong> sprinkler<br />
controller and program<br />
it for the watering<br />
schedule that's right<br />
for your garden. The<br />
following sections are<br />
arranged to match the<br />
most efficient installation<br />
sequence.<br />
Refer to them in the<br />
order presented for<br />
best results.<br />
Introduction ,.,.,., ,.,., ~,~ .,,..,~ 3 Your <strong>Lawn</strong> <strong>Genie</strong> sprinkler<br />
Setting the current time ,.,,.,,., ,,.,,.,..,.,,.,..,.,,.,.,,., 9<br />
Selecting the right program ,,.,.,.,.,,.,.,.,.,.,,,,.,.,., ~,~,~,~,~,~ 10<br />
The <strong>Lawn</strong> <strong>Genie</strong> L71206P<br />
and L71209P controllers<br />
Setting the day schedules ,,,.,.,,.,.,,,,.,.,,,,.,., ,,.,.,., ... 11 give you four ways to<br />
Setting the start times ,,.,.,,.,.,,.,.,,.,.,,,,,,.,.,.,.,.,,, 12<br />
control how you distribute<br />
wate,to”ario”spartsof<br />
Setting the run times<br />
your yard. Here’s how<br />
they work.<br />
Zone Control<br />
<strong>Lawn</strong>s. shrubs, flower beds<br />
and other foliage all need<br />
different amounts of water.<br />
of your yard by assigning a<br />
different run time to one or<br />
more sprinkler heads<br />
controlled by a single valve.<br />
Each valve and the<br />
sprinklers it controls are<br />
called a Zone. The L71206P<br />
lets you divide your yard into<br />
as many as six Zones: the<br />
L71209P allows as many as<br />
nine.<br />
Programming options<br />
Certain parts of your yard<br />
may need water every day.<br />
Other parts may need water<br />
only twice a week. Dual<br />
programming lets you divide<br />
your Zones into two<br />
different groups, and assign<br />
each group a different<br />
interval between waterIng<br />
days. For example. Program<br />
A may water Zones 1,2.3.<br />
and 7-day select every third<br />
day, and Program B may<br />
water Zones 2 and 6 daily.<br />
It’s also possible to assign a<br />
Zone to both A and B<br />
Programs at once. For<br />
details, see ”Selecting the<br />
right Program’ on page 10.<br />
Start times<br />
Each Program lets you<br />
specify up to four different<br />
times to start watering the<br />
Zones it controls. For<br />
example. you might have<br />
Program A water all its<br />
Zones twice a day starting<br />
at 6AM and 4 PM, while<br />
Program B waters its Zones<br />
at 8 AM and 2 PM.<br />
Watering run times<br />
To deliver the correct<br />
amount of water to the<br />
foliage within each Zone.<br />
you can set each Zone to<br />
shutoff after a specified<br />
period of time -from 2 to 60<br />
minutes.<br />
2
q (1) Clock. Day Now key<br />
A dual function key that selects the time of day or day of the week.<br />
q<br />
q<br />
q<br />
q<br />
(2) Hours A key. key<br />
A dual function key for setting current hour and hours of start times or setting the<br />
day of the week.<br />
(3) Minutes. ON/OFF key<br />
A dual function key for setting current minute and minutes of start times or provide<br />
‘ON/OFF’ control of the days selected by ‘Days A.’ ‘Days B.’ keys.<br />
(4) Display<br />
Shows current time of day. Zones being watered and watering run time: also<br />
indicates programming errors and short circuit<br />
(5) Start keys<br />
For setting up to eight start limes per day (4 on Program A and 4 on Program B).<br />
Days keys<br />
In the 7 day select mode, enables you to program specific days of the week<br />
to be ‘ON’ or ‘OFF’ per program.<br />
q (6) Manual Cycle/Advance key<br />
A dual function key for initiating a semi-automatic watering cycle and advancing<br />
sequentially through the cycle to the next zone.<br />
q (7) Zone-Minute switches<br />
For setting separate watering run times or each Zone-from 2 to 60 minutes.<br />
q (8) Zone-Program switches<br />
For separately assigning each Zone to Program A, B, or both. Also for manually<br />
For assigning each Program a different interval between watering days. and<br />
‘Select 7-day keypad’ for 7 day specific programming or ‘OFF’ to prevent watering<br />
q (10) Terminal screws<br />
For connecting valve wire to controller.<br />
q (11) Battery connector<br />
For installing 9-volt battery for backup power in case of power failure.<br />
W Plug-in transformer<br />
5
Select the location<br />
A. Choose an indoor location near a standard<br />
120-volt dual electrical outlet. (250-volt outlet far 50 Hz<br />
international<br />
!<br />
units.)<br />
CAUTION: DO NOT place the controller where<br />
temperatures may exceed 130” Fahrenheit<br />
(W Centigrade), on a circuit controlled by a<br />
switch, or on the same circuit as a high power<br />
user (refrigerator air conditioner, garage door<br />
opener. etc.). Malfunctions may result.<br />
B. If controller must be mounted a greater distance from<br />
the outlet, replace the power cord attached to the<br />
transformer with a similar electrical cord (available from<br />
hardware and electrical supply stores).<br />
Wire the valves<br />
A. Run valve wiring underground wherever possible.<br />
For line runs less than 800 feet long. use 18-gauge,<br />
plastic jacketed thermostat control wire; over 800 feet<br />
use 14-gauge wire. Your dealer can provide this wire<br />
in 2.3.4.5.6.7 and 8-wire color-coded strands.<br />
B. Connect a single common wire to one of the wires<br />
from each valve.<br />
C. Solder or join all splices with wire nuts; then seal<br />
with vinyl or waterproof cement to assure a waterresistant<br />
connection.<br />
IMPORTANT: The power transformer is protected<br />
by an electronic circuit breaker Do not connect a<br />
combination of valves requiring an inrush current<br />
of more then 1 amp at 24 VAC,<br />
6<br />
A. Install a No. 8 screw at eye level in the wall, leaving<br />
1/8" of screw head projecting.<br />
B. Slip the keyhole opening on the back of the controller<br />
over the screw head.<br />
C. Open the controller case and install two s crews through<br />
the holes in the wiring compartment at the bottom of the<br />
controller.<br />
L71209P<br />
A. Mount the two hangers by attaching each to the upper<br />
back of the controller with a screw.<br />
B. Remove the controller's lower panel by removing two<br />
screws. then pulling out and down.<br />
C. Position controller at eye level on wall, then fasten<br />
using mounting hangers. Secure by installing screw<br />
through hole at center bottom of wiring cavity<br />
NOTE nstall either controller on a plaster or<br />
PI masonry :~ wall, “use plastic or lead anchor to<br />
secure screws.<br />
Connect the valve wires to controller<br />
A. Run all valve wires up through hole in bottom<br />
of controller.<br />
B. Connect the wire from valve number 1 to the terminal<br />
screw marked 1 on the controller: the wire from valve<br />
number 2 to the terminal 2. and so on This allows your<br />
controller to selectively water the Zone controlled by<br />
each valve,<br />
On the L71206P. terminal designations<br />
are marked on the inside of the wiring cover.<br />
page 16 for installation details.
Connect the transformer<br />
A. Run the power cable from the transformer up through<br />
the smaller of the two openings in the bottom of the<br />
controller.<br />
B. Connect one lead to each terminal screw marked 24V<br />
Make sure terminals at the end of the cable do not touch.<br />
C. Plug in the transformer.<br />
CAUTION: Use with supplied transformer ONLY!<br />
!<br />
Connect the battery<br />
A battery back-up system is built into your <strong>Lawn</strong> <strong>Genie</strong><br />
controller to maintain your programmed watering<br />
schedule in memory in case of temporary power failure,<br />
A, Connect a 9-volt alkaline battery (not supplied) to<br />
the battery connector in the wiring compartment of the<br />
controller case.<br />
B Place the battery in the wiring compartment<br />
C, Replace the wiring compartment cover.<br />
D, Replace the battery at least once a year. More often<br />
If<br />
!<br />
frequent power failures occur.<br />
CAUTION: Do not allow the battery connector to<br />
touch the controller's terminal strip (directly above<br />
the wiring compartment). Also, do not connect or<br />
disconnect valve wires while any Zones are in<br />
operation.<br />
In the controller's display. 1 2 P represents 12PM. or<br />
noon, and 1 2A represents 12AM. or midnight, When the<br />
power is first turned on. the controller always displays<br />
a time of 4 0 0 P (4:00 PM).<br />
Set the current time:<br />
Setting the current time is easy. Here’s how you’d<br />
do it if the time were now 10:03 AM.<br />
A. Press<br />
B. Press @and hold key down until display shows<br />
current hour and A (AM) or P(PM).<br />
C. Press @and hold key down until display shows<br />
current minute. To advance time quickly. hold down<br />
@or&? until desired time approaches. To advance<br />
time slowly, digit by digit, press @ or @ once for<br />
each hour or minute of advance.<br />
NOTE You must begin setting time within<br />
FI lO seconds : afterpressing @ Otherwise.<br />
you must press @ once again.<br />
Set the current day:<br />
A. Press @ key twice. (Display will show day-of-week).<br />
B, Press @key repeatedly until the correct day code number appears<br />
in the display. The correct day will be displayed as a number.<br />
please refer to the chart below far the correct day.<br />
8
WATER<br />
DAYS<br />
LAWNS SHRUBS<br />
Program A<br />
To accommodate the special watering needs of different<br />
parts of your yard. you can assign Zones to two separate<br />
watering Programs (A and B). Each Program activates the<br />
Zones assigned to it as a group with its own specific set<br />
of watering days and start times.<br />
Decide how frequently each Zone should be watered,<br />
If. for example, Zones covering lawn areas need water<br />
every third day, and Zones covering shrubs and ground<br />
cover need water every day. you might assign all lawn<br />
Zones to Program A and all shrub/ground cover Zones<br />
to Program B.<br />
Program B<br />
Select the interval between watering days<br />
for each program:<br />
A. Set the DAYS switch to the desired watering frequencies<br />
for Programs A and B. 3 every 3rd day. 2 every 2nd day, and<br />
1 every day. Set switch to OFF if Program is not in use.<br />
Zones programmed to water on a certain day will<br />
operate sequentially, skipping those Zones programmed<br />
to OFF. During watering. the Zone number will appear an<br />
the left of the display and its run time on the right. The<br />
display starts at one minute and counts up to the total<br />
run time before changing to the next Zone to be watered.<br />
NOTE The L71206P and the L71209P controllers<br />
RI have a : preset factory program which will keep<br />
your system operating in the event of a power failure<br />
and an inactive battery. This preset program<br />
will start a watering cycle by day interval as<br />
programmed by the DAYS switch. and beginning 10<br />
hours after the time that controller’s clock was<br />
first supplied with power<br />
WATER<br />
DAYS<br />
LAWNS SHRUBS<br />
Set a 7-day specific calendar:<br />
A. Refer to the ‘Day Chart' for day number information.<br />
Assign a Program to each Zone<br />
Now simply set the PROGRAM switch under each<br />
ZONE to desired A or B Program. Unused ZONES<br />
should be programmed in the OFF position. For newly<br />
seeded lawns or drip irrigation systems requiring<br />
multiple daily waterings, you can select a combination<br />
A B setting for up to eight start times per day. For use<br />
of the manual MAN setting, see page 17.<br />
B. Move the switch under ‘Water Days A’ to the ‘Select 7-day keypad’<br />
position.<br />
C. Press the @ key. (Display will show ‘1 ON.‘day 1 ON)<br />
D. Press the @ key to Program ‘OFF’ or press again to program<br />
‘ON.’<br />
E. Press the @ key again to advance to the next day (ie ‘2 ON, 2<br />
OFF’).<br />
F. Repeat procedure for all 7 days.<br />
G. If using Program B. repeat procedure for ‘Water Days B.’ ‘Days B.'
Setting the start times<br />
. 1 .~:<br />
Now that you’ve assigned each Zone to<br />
either Program A or B. you’re ready to select<br />
the times of day that each Program’s<br />
watering cycle will begin. You can set as<br />
many as four start times a day for each<br />
Program-watering all Zones under that<br />
program up to four a day. You’ll use the<br />
two keys under the display: @ and @<br />
Each key will set a time when a watering<br />
cycle will start for those Zones set to the<br />
corresponding A or B Program.<br />
not necessary to use a// start times<br />
available, Chart above is shown as an example of<br />
3-start times only.<br />
Here’s how you’d set Program A to start watering at<br />
7:30 PM,<br />
A, Press the Start key, (The display will show 2 00A)<br />
B. Press the key and hold until display shows the<br />
desired hour and A (AM) P (PM).<br />
C Press Min/on/off key and hold until display shows the<br />
desired minute.<br />
Once you’ve pressed a @ key you must<br />
press @or@ within lO seconds. Otherwise<br />
you must press @ once again before making<br />
changes. To simplify programming, write down<br />
your watering schedule first, using the reference<br />
chart on the back cover of this manual.<br />
D. Repeat procedure for all remaining start times.<br />
NOTE Enter start times in any order Start times<br />
are activated in chronological order regardless of<br />
programming sequence.<br />
E. If any start time IS not needed, be sure to set it to the<br />
OFF position. Hold the HRS key down until OFF appears in<br />
the display. This occurs just after 11 00P.<br />
Any Zone whose Program switch is in<br />
water at every start time<br />
programmed (up to 8).<br />
Since all Zones on a Program water in sequence.<br />
beginning with the lowest numbered Zone. make sure<br />
all Program start times are far enough apart to prevent<br />
watering cycles from overlapping. If overlap occurs. the<br />
controller will automatically delay the next start time to<br />
allow completion of the current watering cycle A<br />
watering cycle that runs past midnight will cancel any<br />
overlapping start times before midnight.<br />
Setting the watering run time-how long to water<br />
Your controller gives you a wide range of run times to<br />
provide precisely the right amount of water to each Zone.<br />
Settings may vary from 2 to 60 minutes.<br />
To program the watering run time for each Zone. simply<br />
move the corresponding MINUTES switch to the<br />
appropriate setting (2-60 minutes/. Make sure you<br />
position switches only on the minute marks, and not<br />
between them.<br />
12 13
Here’s how you might use your <strong>Lawn</strong> <strong>Genie</strong> controller to<br />
program a watering schedule for a typical lawn and<br />
garden. Please refer to instructions on the preceding<br />
pages far details an specific keystroke procedures.<br />
Set start times (up to four per day) for each Program:<br />
q (1) Push to set 6:00 AM start time for Program A. Watering cycle<br />
will start at 6:00 AM in Zone 1 and progress sequentially<br />
through Zones 2.3. and 4.<br />
Push again to set second start time for Program A. Watering cycle<br />
will start at 2:00 PM in Zone 1 and progress sequentially through<br />
Zones 2.3 and 4. Set additional start times to OFF.<br />
m Push to set 10:00 AM start time for Program B. Watering will<br />
start in Zone 5 only at 10:00 AM. Set additional start times to OFF.<br />
WATER<br />
DAYS<br />
/ r2iL-i<br />
I IA R - P R O G R A M -<br />
Set run times for each Zone:<br />
El Set Zones 1-4 to water lawn areas for 9 minutes<br />
q (4) Set Zone 5 to water shrubbery for 18 minutes<br />
Assign Zones to Program A. B, or OFF.<br />
q (5) Assign Zones 1-4 to Program A<br />
q (6) Assign Zone 5 to Program B<br />
q (7) Set Zone 6 to OFF<br />
Set watering day schedule:<br />
q (8) Set Program A to water every day<br />
q (9) Set Program B to water every third day<br />
14 15
Manual watering<br />
If your water doesn’t come from the pipes of a standard<br />
public water supply, you may be using an electrically<br />
operated master valve, or pump to draw directly from a<br />
well, pond, or similar source, In these cases. you’ll need<br />
to make the following wiring connections so your sprinkler<br />
controller can activate the valve or pump.<br />
A. Bring two wires up through the same hole in the<br />
controller cabinet used for the valve wiring.<br />
B. Connect one wire to the terminal marked PUMP<br />
C. Connect the second wire to the terminal marked<br />
COMM.<br />
D. For master valve installations. connect both wires to<br />
a master valve rated at 24 VAC and a current no greater<br />
than 9 VA,<br />
E. For pump start relay installations, connect the two<br />
wires to an auxiliary relay with a coil rated at 24 VAC<br />
and a current no greater than 3 VA. Then wire the relay’s<br />
contact to supply voltage to the pump’s contactor. A<br />
qualified electrician can make these connections for<br />
you. A <strong>Lawn</strong> <strong>Genie</strong> L3OOOOW Pump Starter can control a<br />
pump up to 2 HP at 240 volts.<br />
MOTE The controller's pump output will turn on<br />
RI whenever a Zone is watering manually or<br />
automatically.<br />
To water a single Zone at a time, move the PROGRAM<br />
switch for the Zone you wish to water to MAN. If more<br />
than one Zone’s Program switch is placed in the MAN<br />
position. only the lowest-numbered Zone will water, when<br />
that switch is moved off MAN, the next highest-numbered<br />
Zone will begin watering,<br />
The MAN setting overrides any automatic or semiautomatic<br />
watering cycle. including any cycle in progress<br />
1 2<br />
The manual setting will water continuously until the switch is moved,<br />
DO NOT LEAVE SWITCH IN THIS POSITION!<br />
Semi-automatic watering<br />
To start a complete watering cycle at times other<br />
than those you’ve programmed. press the @ Key.<br />
All Zones not set to OFF will water. To step through<br />
the zones during a semi-automatic cycle. press the<br />
@ key a second time. Each time the key is<br />
pressed. the controller will advance sequentially to<br />
rhe next zone with watering time.<br />
16
Turning off the system<br />
To prevent automatic watering (for example if rain is<br />
expected). move the DAY A and DAY B switches to OFF<br />
when no cycle is in progress. You may still water<br />
manually in this mode.<br />
Electronic circuit breaker operation<br />
If the controller detects a short circuit. it will automatically<br />
turn off power to the shorted Zone’s automatic<br />
valve. The display will flash FUS and the shorted<br />
Zone’s number and run time. The controller will continue<br />
to automatically water all other Zones under the<br />
programmed watering cycles, while the display continues<br />
flashing the Zone number with the short circuit.<br />
To return the controller and display to normal operating<br />
mode after repairing the short, press or any @<br />
key.<br />
Problem<br />
One or more valves<br />
do not wafer<br />
Possible Cause<br />
1. Faulty solenoid<br />
2. Poor wire connection<br />
3. Possible break in wire<br />
4. Valve flow stem screwed down too far<br />
FUS and a Zone number<br />
1. Faulty solenoid<br />
are flashing on display 2. Poor or shorted wire connection<br />
and no watering will<br />
occur<br />
Clock won’t keep correct time 1. <strong>Controller</strong> on circuit controlled by a switch<br />
2. <strong>Controller</strong> an same circuit as high power user<br />
(refrigerator, air conditioner, garage door<br />
opener, etc.)<br />
Zones turn on when they’re 1 Total combined run times have overlapped<br />
NOT programmed to start<br />
with another start time<br />
Clock has correct time and 1, One or more Zone switches are in the<br />
Zones appear to be functioning OFF position<br />
properly, but no valve will 2. The common wire is not connected<br />
turn on 3. Valve flow stem is screwed down too far<br />
One Zone won’t shut off<br />
electrically<br />
1. Zone switch is in MAN position<br />
2. Faulty valve<br />
3. Panicles of dirt or debris are stuck in valve<br />
For additional assistance call our Customer Service Hot-line (800) 231-5117.<br />
18<br />
19
If possible. schedule watering cycles in the early morning.<br />
when water pressure is at its highest. This allows ample<br />
time for water to soak in while evaporation and wind drift<br />
are low Evening watering can leave foliage damp for too<br />
long. leading to mildew under some circumstances.<br />
Ask your local nursery or garden center far a schedule<br />
suited to the special weather and soil conditions in<br />
your area.<br />
LIMITED WARRANTY<br />
<strong>Lawn</strong> <strong>Genie</strong> warrants to the purchaser of its products for<br />
a period of two (2) years from the date of original purchase<br />
that any defective product proved to be caused by faulty<br />
workmanship or faulty materials. when installed per<br />
instructions and used in a normal manner, will be repaired<br />
or replaced at <strong>Lawn</strong> <strong>Genie</strong>’s option at no charge. providing<br />
the product is received at the <strong>Lawn</strong> <strong>Genie</strong> factory or<br />
authorized factory service center. with all transportation<br />
charges prepaid within two years of the date of original<br />
purchase. This warranty does not apply to damages or<br />
malfunctions resulting from accidents. misuse or neglect.<br />
<strong>Lawn</strong> <strong>Genie</strong> will not pay labor or other costs of removal or<br />
reinstallation of any so-called defective products.<br />
NO IMPLIED WARRANTIES (INCLUDING BUT NOT<br />
LIMITED TO) FITNESS FOR A PARTICULAR PURPOSE.<br />
WHERE APPLICABLE, AND MERCHANTABILITY SHALL<br />
EXTEND BEYOND THE PERIOD OF THE EXPRESS WARRANTY<br />
DESCRIBED ABOVE. IN NO EVENT SHALL LAWN GENIE<br />
BE RESPONSIBLE FOR INCIDENTAL OR CONSEQUENTIAL<br />
DAMAGES TO PROPERTY WHICH MAY ARlSE FROM OR<br />
RELATE TO THE PURCHASE OF ANY LAWN GENIE PRODUCT.<br />
Some states do not allow limitations on how long<br />
an implied warranty lasts or the exclusion or limitation of<br />
incidental or consequential damages, so one or both of the<br />
above IimitatIons may not apply to you.<br />
This warranty gives you specific legal rights, and you<br />
may also have other rights which vary from state to state.<br />
To exercise your warranty, send unit. with photocopy<br />
of dated receipt, postage prepaid t o:<br />
20 21
station Watering Days Run Time Location<br />
6 ! I I<br />
7 I I I<br />
8 I I I<br />
3-A I<br />
24