THUNDER TIGER CAR ENGINES INSTRUCTIONS - RCPro.no
THUNDER TIGER CAR ENGINES INSTRUCTIONS - RCPro.no
THUNDER TIGER CAR ENGINES INSTRUCTIONS - RCPro.no

Create successful ePaper yourself
Turn your PDF publications into a flip-book with our unique Google optimized e-Paper software.
<strong>THUNDER</strong> <strong>TIGER</strong> <strong>CAR</strong> <strong>ENGINES</strong><br />
<strong>INSTRUCTIONS</strong><br />
LEARNING ABOUT YOUR ENGINE<br />
Before actually operate your engine, the following information is for the<br />
benefit of the newcomers with <strong>no</strong> previous experience of model engines.<br />
Please put the engine near you and read this instruction. The model<br />
engine is just like the engine of a motorcycle or a car that needs a key<br />
to start. You have to prepare some accessories and k<strong>no</strong>wledge. It is <strong>no</strong>t<br />
hard to operate your model engine by following the instructions properly.<br />
SHAFT STARTING SYSTEM<br />
The Thunder Tiger "K" type series engines feature a built-in hexagonal<br />
shaft starting system that can be operated to start the engine easily and<br />
quickly. Please refer to the instruction of your model vehicle for the<br />
compatibility of installing the "K" type series engine on your model vehicle.<br />
1) To use the Hex Starting shaft, either a cordless drill or 12V DC handy<br />
starter is required.<br />
2) Install the extended 6mm hex starting tool into the cordless drill or a<br />
12V DC starter.<br />
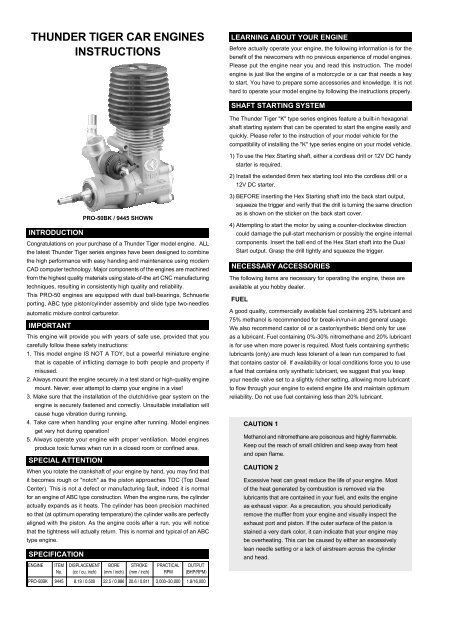
INTRODUCTION<br />
PRO-50BK / 9445 SHOWN<br />
Congratulations on your purchase of a Thunder Tiger model engine. ALL<br />
the latest Thunder Tiger series engines have been designed to combine<br />
the high performance with easy handing and maintenance using modern<br />
CAD computer tech<strong>no</strong>logy. Major components of the engines are machined<br />
from the highest quality materials using state-of-the art CNC manufacturing<br />
techniques, resulting in consistently high quality and reliability.<br />
This PRO-50 engines are equipped with dual ball-bearings, Schnuerle<br />
porting, ABC type piston/cylinder assembly and slide type two-needles<br />
automatic mixture control carburetor.<br />
IMPORTANT<br />
This engine will provide you with years of safe use, provided that you<br />
carefully follow these safety instructions:<br />
1. This model engine IS NOT A TOY, but a powerful miniature engine<br />
that is capable of inflicting damage to both people and property if<br />
misused.<br />
2. Always mount the engine securely in a test stand or high-quality engine<br />
mount. Never, ever attempt to clamp your engine in a vise!<br />
3. Make sure that the installation of the clutch/drive gear system on the<br />
engine is securely fastened and correctly. Unsuitable installation will<br />
cause huge vibration during running.<br />
4. Take care when handling your engine after running. Model engines<br />
get very hot during operation!<br />
5. Always operate your engine with proper ventilation. Model engines<br />
produce toxic fumes when run in a closed room or confined area.<br />
SPECIAL ATTENTION<br />
When you rotate the crankshaft of your engine by hand, you may find that<br />
it becomes rough or "<strong>no</strong>tch" as the piston approaches TDC (Top Dead<br />
Center). This is <strong>no</strong>t a defect or manufacturing fault, indeed it is <strong>no</strong>rmal<br />
for an engine of ABC type construction. When the engine runs, the cylinder<br />
actually expands as it heats. The cylinder has been precision machined<br />
so that (at optimum operating temperature) the cylinder walls are perfectly<br />
aligned with the piston. As the engine cools after a run, you will <strong>no</strong>tice<br />
that the tightness will actually return. This is <strong>no</strong>rmal and typical of an ABC<br />
type engine.<br />
SPECIFICATION<br />
ENGINE ITEM DISPLACEMENT BORE STROKE PRACTICAL OUTPUT<br />
No. (cc / cu. inch) (mm / inch) (mm / inch) RPM (BHP/RPM)<br />
PRO-50BK 9445 8.19 / 0.500 22.5 / 0.886 20.6 / 0.811 3,000~30,000 1.8/16,000<br />
3) BEFORE inserting the Hex Starting shaft into the back start output,<br />
squeeze the trigger and verify that the drill is turning the same direction<br />
as is shown on the sticker on the back start cover.<br />
4) Attempting to start the motor by using a counter-clockwise direction<br />
could damage the pull-start mechanism or possibly the engine internal<br />
components. Insert the ball end of the Hex Start shaft into the Dual<br />
Start output. Grasp the drill tightly and squeeze the trigger.<br />
NECESSARY ACCESSORIES<br />
The following items are necessary for operating the engine, these are<br />
available at you hobby dealer.<br />
FUEL<br />
A good quality, commercially available fuel containing 25% lubricant and<br />
75% metha<strong>no</strong>l is recommended for break-in/run-in and general usage.<br />
We also recommend castor oil or a castor/synthetic blend only for use<br />
as a lubricant. Fuel containing 0%-30% nitromethane and 20% lubricant<br />
is for use when more power is required. Most fuels containing synthetic<br />
lubricants (only) are much less tolerant of a lean run compared to fuel<br />
that contains castor oil. If availability or local conditions force you to use<br />
a fuel that contains only synthetic lubricant, we suggest that you keep<br />
your needle valve set to a slightly richer setting, allowing more lubricant<br />
to flow through your engine to extend engine life and maintain optimum<br />
reliability. Do <strong>no</strong>t use fuel containing less than 20% lubricant.<br />
CAUTION 1<br />
Metha<strong>no</strong>l and nitromethane are poiso<strong>no</strong>us and highly flammable.<br />
Keep out the reach of small children and keep away from heat<br />
and open flame.<br />
CAUTION 2<br />
Excessive heat can great reduce the life of your engine. Most<br />
of the heat generated by combustion is removed via the<br />
lubricants that are contained in your fuel, and exits the engine<br />
as exhaust vapor. As a precaution, you should periodically<br />
remove the muffler from your engine and visually inspect the<br />
exhaust port and piston. If the outer surface of the piston is<br />
stained a very dark color, it can indicate that your engine may<br />
be overheating. This can be caused by either an excessively<br />
lean needle setting or a lack of airstream across the cylinder<br />
and head.
GLOW PLUG<br />
The type and quality of glow plug used<br />
in your engine will have a maior impact<br />
on overall performance and reliability.<br />
All of the Thunder Tiger engines<br />
operate best with a R/C long-type plug<br />
such as Thunder Tiger, ENYA#3 or<br />
O.S. No.8. (while of excellent quality)<br />
have a colder heat range and may<br />
cause idle or throttle transition problems<br />
in smaller engines. Select the best one<br />
by practical tests.<br />
GLOW STARTER<br />
The electric power source for heating<br />
the glow plug.<br />
PLUG WRENCH<br />
Used for tighting or screwing off the<br />
glow plug. 4-way type (Thunder Tiger<br />
4-way wrench) is preferred.<br />
FUEL FILL BOTTLE OR FUEL<br />
PUMP<br />
Required to transfer fuel into the fuel<br />
tank in your model. A Thunder Tiger<br />
hand-crank pump or an electric pump<br />
are available at your hobby dealer.<br />
EXTENDED HEX STARTING<br />
TOOL<br />
To start the engine, you should have<br />
the 6mm extended hex starting tool to<br />
start the engine from the coupling on<br />
the backplate. A Thunder Tiger No.3801<br />
Extended Hex Stating Tool are available<br />
from your hobby dealer.<br />
INSTALLATION<br />
ENGINE<br />
Locate your engine onto the<br />
engine mount on the chassis.<br />
Make sure the gear mesh is<br />
smooth without excessive<br />
backlash. Set the clearance and<br />
secure the engine mounting<br />
screw. Both the top and bottom<br />
surfaces of the engine mount must<br />
be absolutely flat and parallel to<br />
avoid crankcase distortion, stress<br />
and power loss.<br />
NO.9281<br />
GLOW PLUG<br />
NO.2150/ 2151/ 2152<br />
GLOW STARTER<br />
NO.1102<br />
PLUG WRENCH<br />
NO.1645<br />
FUEL PUMP<br />
NO.2674<br />
STARTER<br />
NO.3801<br />
EXTENDED HEX STARTING TOOL<br />
A<br />
DIMENSIONS<br />
ITEM No. A B C D E F G H S<br />
MUFFLER/SILENCER<br />
After the engine is mounted onto your model, secure the muffler to the<br />
engine with two screws equipped with your engine. Be sure to tighten<br />
them firmly. The rear half of the muffler can be rotated to direct the exhaust<br />
residue away.<br />
(mm/inch) (mm/inch) (mm/inch) (mm/inch) (mm/inch) (mm/inch) (mm/inch) (mm/inch) (thread)<br />
9445 83.0/ 3.268 51.7/ 2.035 116.9/ 4.602 99.6/ 3.921 17.5/ 0.689 44.0/ 1.732 34.0/ 1.339 50.0/ 1.969 1/4-28<br />
GLOW PLUG<br />
Use 4-way wrench to screw the glow plug into your engine and do <strong>no</strong>t<br />
over tighten. Be sure to put the glow plug washer between the cylinder<br />
head and glow plug to eliminate gas leakage.<br />
AIR CLEANER<br />
It prevents damaging dust and dirt from being drawn into the engine<br />
through the carburetor. Even minute foreign particles can easily damage<br />
the engine and cause unreliable performance. It is necessary to check<br />
the filter element periodly and replace it as required.<br />
S<br />
B<br />
E<br />
PREPARATION FOR STARTING YOUR ENGINE<br />
PRE-ADJUST NEEDLE VALVE<br />
Turn the needle valve clockwise until you begin to feel resistance. This<br />
is the fully closed position. Do <strong>no</strong>t force the needle valve or you may<br />
damage your carburetor! It may be convenient to remember the position<br />
of the mark on the end of the needle valve. Now turn the needle valve<br />
counter-clockwise about 2 -2 1/2 turns. This will be a good place to start.<br />
(Turn the needle valve clockwise is to "close" for leaner mixture, while<br />
counter-clockwise is to "open" for richer mixture.)<br />
CHOKING/PRIMING YOUR ENGINE<br />
Turn on your control system and shift the throttle full to test. Press fuel<br />
pump in your fuel tank twice to prime your engine. The quantity of fuel<br />
drawn into the engine by priming is an important factor for starting your<br />
engine successfully. It needs more choke for the first starting and when<br />
the engine is cold.<br />
HEATING GLOW PLUG<br />
Fit the glo-starter or connect the 1.2 volt ignition battery onto the glow<br />
plug. The glow plug is made to keep the engine turning after removing<br />
the glow-starter or cutting off the ignition battery. The platinum alloy coil<br />
inside the glow plug is heated by the starter battery current, and remains<br />
hot to keep the engine running even after the electric power is cut off.<br />
STARTING<br />
1) Starter Box- Turn the flywheel by using an electric starter/ starter box<br />
to start the engine with the throttle opening slightly (approximately<br />
1m/m). The engine should fire after one or two tries.<br />
2) Hex Starter- Make sure that your drill/ starter is set to the clockwise<br />
or forward position. Fit the extension starting shaft to the drill/starter<br />
tight. Insert the shaft into the starting output on the engine and then<br />
power on the drill/starter. The engine should fire after one or two tries.<br />
If the engine becomes flooded: turn off your vehicle, and then the radio.<br />
Remove the glow plug using a glow wrench and then remove the air filter.<br />
Turn the vehicle over to allow any excess fuel in the engine to run out.<br />
Turn the vehicle right side up. Reinstall the air cleaner. Use the extended<br />
hex starting tool to start theenfine for seconds. Reinstall the glow plug<br />
with the glow plug wrench. And return to the <strong>no</strong>rmal starting procedure.<br />
CAUTION 1<br />
Do <strong>no</strong>t open the throttle beyond the setting position described<br />
above before starting. It can develop e<strong>no</strong>ugh power to injure<br />
people seriously and do substantial property damage.<br />
CAUTION 2<br />
Never operate your engine at high R.P.M without a "load", that<br />
is, with the wheels off the ground. Otherwise, your engine may<br />
be damaged in a few seconds!<br />
STOP YOUR ENGINE<br />
Cut off the fuel supply to the carburetor by pinching the fuel line closed<br />
or disconnect the fuel line at idle.<br />
BREAK-IN/RUN-IN PROCEDURES<br />
Because your Thunder Tiger engine has been precision-made from quality<br />
materials and is an ABC-type engine, a prolonged break-in period is <strong>no</strong>t<br />
necessary. In fact, your engine can be run in your car to break it in.<br />
1) We strongly recommended a fuel containing 20% caster oil or<br />
castor/synthetic blend with <strong>no</strong> more than 10% nitromethane be used<br />
for break-in. We strongly discourage using fuel containing only synthetic<br />
lubricants during the initial break-in period.<br />
2) Turn the needle valve clockwise to the fully closed position and back<br />
counter-clockwise about 3-3 1/2 turns. Start your engine as described<br />
above.
3) Use the throttle-stop screw to set the idle position (with the throttle<br />
opening approximately 1m/m) where the engine runs at a fast idle but<br />
without engaging the clutch. Then, disconnect the battery from the glow<br />
plug.<br />
4) Let the car run down the longest available straight, or at least, around<br />
a wide curve of sufficient radius to permit full-throttle driving and allow<br />
the engine to consume the entire tank of fuel at this needle setting. If<br />
it stops from being over-rich (i.e. dense smoke coming from the exhaust),<br />
close the needle valve 1/8 turn and re-start the engine.<br />
5) All adjustments during break-in will be made to the high speed needle<br />
valve. If your engine stops in the mid-range or does <strong>no</strong>t accelerate<br />
smoothly (when the throttle is opened from any setting above idle),<br />
please adjust the mixture metering screw as described in the<br />
<strong>CAR</strong>BURETOR ADJUSTMENT paragraph after break-in.<br />
6) After the first tank full, allow the engine to cool for a few minutes before<br />
re-filling the tank. Then close the needle valve 1/8 turn and restart.<br />
During the second tank of fuel, run the engine at alternate throttle<br />
settings (i.e.1/2 throttle for 30 seconds, then full throttle for 30 seconds,<br />
etc.) for about half the tank. Advance the throttle to full, and slowly lean<br />
the needle setting (about 1/8 turn at a time) until the highest speed is<br />
obtained (the smoke has thinned to a light gray).<br />
7) At this point, richen the needle setting about 1/8 turn (counter clockwise)<br />
and run a third tank of fuel at this needle setting. After 4-5 runs, your<br />
engine will be completely broken-in and ready for consistent performance.<br />
<strong>CAR</strong>BURETOR ADJUSTMENT<br />
These Thunder Tiger carburetors are specially designed for use with the<br />
high performance Thunder Tiger engines. They are able to provide a<br />
proper air-fuel mixture automatically at all throttle ranges from idle to full<br />
speed. The carburetor has been pre-adjusted at the factory, which should<br />
give excellent engine performance in most cases. Large adjustments of<br />
the carburetor should <strong>no</strong>t be required. However, different operation<br />
conditions (such as your choice of fuel, glow plug, gear ratio, clutch<br />
engagement point and climate) may make further adjustments necessary<br />
NEEDLE VALVE ADJUSTMENT<br />
This is used to adjust the high speed fuel mixture. Optimum setting is<br />
described in the BREAK-IN/RUN-IN PROCEDURES.<br />
MIXTURE METERING SCREW ADJUSTMENT<br />
This is used to obtain a smooth transition and stable idle.<br />
1) After the needle valve has been set, keep running at the highest speed<br />
for about 10 seconds then abruptly close the throttle to the lowest<br />
speed. Run at idle for about 5 seconds. Then quickly open the throttle.<br />
2) If the engine hesitates before picking up speed, and there is plenty of<br />
smoke and un-burned fuel coming out from the exhaust, the mixture<br />
is too rich. Screw in (clockwise) the mixture metering screw about 1/8<br />
turn.<br />
3) On the other hand, if it speeds up before quitting, the mixture is too<br />
lean. Screw it out about 1/8 turn.<br />
4) If this is difficult to observe, then allow the engine to idle slightly longer<br />
before opening the throttle. Repeat procedure 1) patiently for few times<br />
to ensure the best running is obtained.<br />
NOTE<br />
The mixture metering screw of your carburetor has been preadjusted<br />
at the factory. If it is screwed in or out too far, reset<br />
it as follow: This is the standard position.<br />
Carb. Body<br />
1.5 turns<br />
Mix. Metering Screw<br />
First rotate the Mixture metering screw<br />
until its slotted head is flush with the<br />
carburetor body.<br />
Then screw the screw out exactly 1.5 turns<br />
This is the standard position.<br />
THROTTLE-STOP SCREW ADJUSTMENT<br />
This is used to set the minimum idle speed. If the engine runs too fast at<br />
the lowest throttle opening, turn the throttle stop screw counter-clockwise<br />
to reduce the throttle opening.<br />
ENGINE <strong>CAR</strong>E<br />
Always keep the outside of your engine clean. Use clean, fresh fuel and<br />
keep your fuel can, pump, and fueling system free from dirt particles.<br />
Install a fresh fuel filter between the fuel tank and carburetor, and between<br />
your fuel pump and filling line to prevent any potential of dirt entering your<br />
engine.<br />
Model fuel contains alcohol, which is hydroscopic (meaning that it attracts<br />
moisture from the atmosphere). This can cause corrosion to the internal<br />
engine parts. After each running session, run all the fuel out from inside<br />
the engine and disconnect the fuel line from the carburetor. Put 4 or 5<br />
drops of after-run oil (Marvel Mystery Oil, Prather, Pacer, etc.) into the<br />
carburetor and turn the engine over by hand several times to protect the<br />
engine bearings and internal parts from corrosion.<br />
Never run your vehicle without the air filter .If the vehicle will be operated<br />
in an area with fine dust, use filter oil or caster oil on the air filter element.<br />
It is important that the foam is only moist to trap dirt and allow air passage.<br />
With the foam too wet, limited air can pass through; therefore, limiting<br />
engine performance. At the end of each operating session, drain the fuel<br />
from the fuel tamk.<br />
The use of after-run oil is also important during periods of prolonged<br />
storage (such as winter). We suggest removing the engine from the model,<br />
and liberally applying oil into the carburetor and glow plug hole, wrap your<br />
engine in a soft cloth and store in a sealed plastic bag.<br />
Do <strong>no</strong>t dismantle your engine unnecessarily, as this may upset precision<br />
fits such as piston/cylinder and crank pin/connecting rod assembly. If it<br />
is necessary to clean your engine completely, remove only the carb. (do<br />
<strong>no</strong> disassemble), muffler, backplate, and cylinder head. Flush the entire<br />
engine with fresh fuel and reassemble. Apply after-run oil to the engine<br />
and store or re-install into the model. Do <strong>no</strong>t disassemble your engine<br />
further than described above.<br />
CAUTION<br />
The rear crankshaft bearing of this engine uses a special plastic<br />
retainer. If the front housing needs to be heated to remove or<br />
replace the bearing, do <strong>no</strong>t allow the bearng to exceed 120˚C<br />
(248˚F), othewise it may be damaged and rendered<br />
unserviceable.<br />
SERVICE PROCEDURES<br />
Thunder Tiger strives to bring you the highest level of<br />
quality and service we can provide. We race and test<br />
our products around the world to bring you state-of-theart<br />
items. Thunder Tiger guarantees that you should<br />
enjoy many hours of trouble free use from our R/C<br />
products. Thunder Tiger products have been sold<br />
worldwide through the authorized distributors that are<br />
supported directly and rapidly from Thunder Tiger. You<br />
may find that Thunder Tiger is always pursuing to explore<br />
new items creatively with highest quality. To update the<br />
latest product information and to get the best technical<br />
support, please feel free to contact your local hobby<br />
shops or Thunder Tiger authorized distributor.
SPARE PARTS LIST<br />
Engine<br />
17<br />
11<br />
24<br />
12 12<br />
17<br />
12<br />
12<br />
20<br />
12<br />
22<br />
4<br />
15<br />
16a<br />
12<br />
9<br />
8<br />
5<br />
7<br />
13<br />
10<br />
16b<br />
NO. DESCRIPTION 9445<br />
PRO-50BK<br />
4 CRANKSHAFT AA0116<br />
5 CRANKCASE AN2111<br />
7 CONNECTING ROD AN0325<br />
8 WRIST PIN ASSEMBLY AA0337<br />
9 CIRCLIP AA0327<br />
10 CYLINDER & PISTON AN2112<br />
11 CYLINDER HEAD AA0119-R<br />
12 GASKET SET PN0243<br />
13 <strong>CAR</strong>B RETAINING BOLT AN0275<br />
15 <strong>CAR</strong>B ASSEMBLY 9750<br />
16a BALL BEARING, FRONT AMV1438L<br />
16b BALL BEARING, REAR AMV6902Y<br />
17 SCREW SET PN0116<br />
20 ONE WAY CLUTCH SET AN0118<br />
22 STARTING AXLE AA0109<br />
24 BACKPLATE AN0117<br />
Carburetor<br />
D<br />
B<br />
C<br />
NO. DESCRIPTION 9750<br />
A <strong>CAR</strong>BURETOR BODY PN1295<br />
A<br />
E<br />
B NEEDLLE VALVE ASSY. PN1047<br />
C NEEDLE VALVE ONLY PN1048<br />
D <strong>CAR</strong>B.SLIDE VALVE ASSY. PN1271<br />
F<br />
E MIXTURE METERING SCREW SET PN1050<br />
F O RING SET PN1051<br />
G BOLT& IDLE SCREW PN1272<br />
G<br />
H RECOVER SPRING AA1372<br />
H<br />
OPTIONAL PARTS<br />
9708W AIR FILTER .21 WHITE<br />
9708P AIR FILTER .21 PINK<br />
9708G AIR FILTER .21 GREEN<br />
9708B AIR FILTER .21 BLACK<br />
1165P FUEL FILTER<br />
PN1802 CLUTCH BELL, 31.5mm, 14T<br />
PN1803 CLUTCH BELL, 31.5mm, 16T<br />
PN1804 CLUTCH BELL, 31.5mm, 18T<br />
PN1805 CLUTCH BELL, 31.5mm, 20T<br />
PN1525 MUFFLER, MTA/ MGT-50<br />
9713 TUNED IPE, (L)<br />
9713-1 TUNED IPE, (L), w/MANIFOLD<br />
9714 TUNED IPE, (S)<br />
9714-1 TUNED IPE, (S), w/MANIFOLD<br />
PN1806 CLUTCH SHOES (4) PN1807 CLUTCH SPRING (4)<br />
PN1801 FLYWHEEL SET<br />
PN1526 MANIFLOD, MTA/ MGT-50 PN1527 MANIFLOD, 50B<br />
<strong>THUNDER</strong> <strong>TIGER</strong> CORP. http://www.thundertiger.com<br />
JA0476