

Installation Instruction - RealTruck.com
Installation Instruction - RealTruck.com
Installation Instruction - RealTruck.com

Create successful ePaper yourself
Turn your PDF publications into a flip-book with our unique Google optimized e-Paper software.
FORD F250-F450 - PART NO. 09231<br />
SUPER DUTY CREW CAB WITH 60/40 REAR SPLIT BENCH SEAT<br />
INSTALLATION INSTRUCTIONS<br />
Congratulations on your purchase of the Husky Gear Box. The Gear Box was designed to fit under or behind the rear seat<br />
of your truck or SUV. The Gear Box gives you a place to store loose items and clutter and ultimately help keep your vehicle<br />
organized. It’s designed to fit your vehicle with or without your Husky Liners in place and only takes a few minutes to install.<br />
NOTE: The Gear Box will not work in vehicles with the rear under-seat subwoofer.<br />
PACKAGE CONTENTS<br />
Gear Box – Part No: 09231 (1)<br />
Attachment Fastener and Washer (1)<br />
Dividers (2)<br />
<strong>Installation</strong> <strong>Instruction</strong>s (1)<br />
INSTRUCTIONS<br />
1) Open and remove the Gear Box from the shipping box and protective plastic bag.<br />
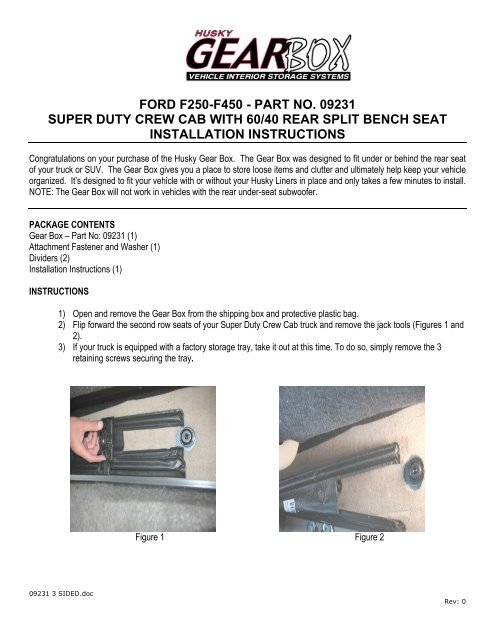
2) Flip forward the second row seats of your Super Duty Crew Cab truck and remove the jack tools (Figures 1 and<br />
2).<br />
3) If your truck is equipped with a factory storage tray, take it out at this time. To do so, simply remove the 3<br />
retaining screws securing the tray.<br />
Figure 1 Figure 2<br />
09231 3 SIDED.doc<br />
Rev: 0
4) Remove the jack and jack mounting bracket, then, reinstall the factory jack bracket fasteners. (Figures 3 and 4).<br />
Figure 3 Figure 4<br />
5) Look closely at your Gear Box, you will notice that there are 4 small indentions in the floor of it (Figure 5).<br />
These are attachment points. Determine which attachment method you are going to use. If you do not have a<br />
factory storage tray, drill a 3/8” hole at indention 3 (Figure 6) and install the Gear Box with the supplied bolt and<br />
washer (Figure 8). If you have a storage tray you can drill holes at indentions 1, 2, and 4 and attach the Gear<br />
Box with the existing fasteners. NOTE: When positioning the Gear Box for installation, tip the box on<br />
edge and lower it until it is below the level of the seat bottom, then rotate it so that the bottom rests on<br />
the cab floor (Figure 7).<br />
Figure 5 Figure 6<br />
09231 3 SIDED.doc<br />
Rev: 0
Figure 7 Figure 8<br />
Figure 9<br />
6) Once the Gear Box is secure, install the 2 dividers and you are ready to organize (Figure 9 above).<br />
If you are storing long items it may be necessary to remove the dividers. Also, small loose items can potentially roll<br />
around and be<strong>com</strong>e somewhat annoying. Simply place these items in a rag, towel, etc… roll them up and place in<br />
the Gear Box.<br />
If you have questions about your installation or any other Husky product, please call us at: 1-800-344-8759 M-F<br />
8:00 am to 5:00 pm Central Time.<br />
09231 3 SIDED.doc<br />
Rev: 0


