Create successful ePaper yourself
Turn your PDF publications into a flip-book with our unique Google optimized e-Paper software.
Keep Work<br />
Clean!<br />
Before soldering, remove rust or<br />
paint with a wire brush or emery<br />
paper. Remove dirt or grease<br />
with the right solvent Wipe work<br />
over with solvent after soldering,<br />
too. It helps prevent corrosion.<br />
Choose the Right<br />
Solder!<br />
40/60 is recommended for most<br />
work, but remember that aluminum,<br />
and some other metals,<br />
need special formulations.<br />
Make Sure<br />
the Tip is Tinned!<br />
Use the Right Flux!<br />
Never use acid flux for electrical work. Never dip the tip in a<br />
container of flux: apply flux to the work, not to the tool. This table<br />
will help you choose:<br />
Base Material or Rosin Acid<br />
Applied Finish Core Solder Core Solder<br />
Hot Tin Dip (tin cans) x x<br />
Hot Solder Dip x x<br />
Electro Tin 0.0005" x x<br />
Electro Tin 0.0002" x x<br />
Silver Plate x x<br />
Cadmium Plate x x<br />
Nickel Plate<br />
x<br />
Galvanized Steel<br />
x<br />
Copper x x<br />
Brass x x<br />
Be Extra<br />
Careful If<br />
You Use the<br />
Soldering<br />
Iron for Fine<br />
Work!<br />
Remember that high tip temperature!<br />
Use the lower temperature<br />
option and hold the<br />
work in pliers, so as to provide a<br />
heat sink.<br />
Helpful Hints When Soldering<br />
43<br />
Keep All<br />
Work Tips<br />
Clean!<br />
Wiping on a silicone sponge<br />
will prolong the working life of<br />
the tips. But, with use, deposits<br />
are bound to build up. As soon<br />
as any tip appears to be dirty,<br />
clean it by rubbing lightly with<br />
steel wool or fine emery cloth.<br />
Never use a file! After cleaning<br />
in this way, the tip will require<br />
re-tinning.<br />
Also, make sure the fastening<br />
screws, that hold the work tips in<br />
place, are kept tight at all times.<br />
They can loosen during use due<br />
to the alternate heating and<br />
cooling to which they are subjected.<br />
If the tool has not been<br />
used for some time, a film of<br />
oxide may form on the surfaces<br />
of these screws. If this happens,<br />
just loosen the screws a quarter<br />
turn and then retighten.<br />
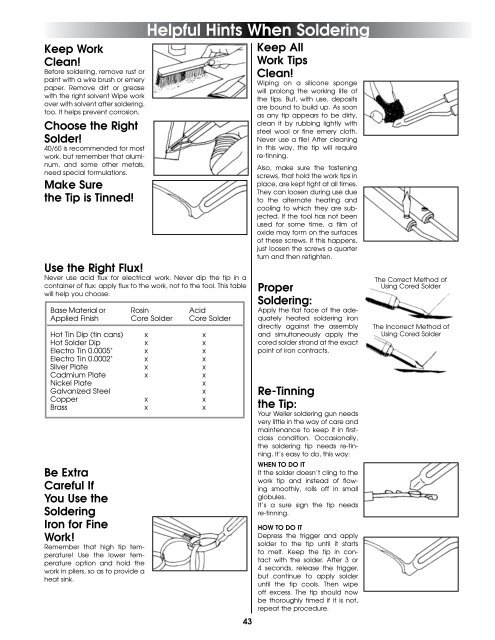
Proper<br />
Soldering:<br />
Apply the flat face of the adequately<br />
heated soldering iron<br />
directly against the assembly<br />
and simultaneously apply the<br />
cored solder strand at the exact<br />
point of iron contracts.<br />
Re-Tinning<br />
the Tip:<br />
Your Weller soldering gun needs<br />
very little in the way of care and<br />
maintenance to keep it in firstclass<br />
condition. Occasionally,<br />
the soldering tip needs re-tinning.<br />
It’s easy to do, this way:<br />
WHEN TO DO IT<br />
If the solder doesn’t cling to the<br />
work tip and instead of flowing<br />
smoothly, rolls off in small<br />
globules,<br />
It’s a sure sign the tip needs<br />
re-tinning.<br />
HOW TO DO IT<br />
Depress the trigger and apply<br />
solder to the tip until it starts<br />
to melt. Keep the tip in contact<br />
with the solder. After 3 or<br />
4 seconds, release the trigger,<br />
but continue to apply solder<br />
until the tip cools. Then wipe<br />
off excess. The tip should now<br />
be thoroughly timed if it is not,<br />
repeat the procedure.<br />
The Correct Method of<br />
Using Cored Solder<br />
The Incorrect Method of<br />
Using Cored Solder


