Mira Elite ST - Trading Depot Help
Mira Elite ST - Trading Depot Help
Mira Elite ST - Trading Depot Help

Create successful ePaper yourself
Turn your PDF publications into a flip-book with our unique Google optimized e-Paper software.
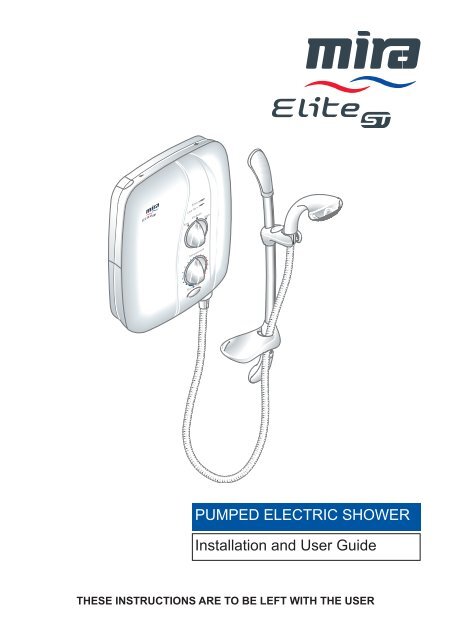
Pumped Electric Shower<br />
Installation and User Guide<br />
These instructions are to be left with the user
Contents<br />
Introduction................................................................................................3<br />
Important Safety Information......................................................................4<br />
Pack Contents Checklist............................................................................6<br />
1. <strong>Mira</strong> <strong>Elite</strong> <strong>ST</strong>.....................................................................................6<br />
2. Documentation..................................................................................6<br />
3. <strong>Mira</strong> Logic Electric Shower Fittings...................................................7<br />
Specifications.............................................................................................8<br />
1. Plumbing...........................................................................................8<br />
2. Electrical...........................................................................................8<br />
3. Standards and Approvals..................................................................8<br />
Installation Requirements..........................................................................9<br />
1. Plumbing...........................................................................................9<br />
2.1 Electrical.......................................................................................13<br />
2.2 Electrical (checklist in detail).........................................................14<br />
Installation................................................................................................15<br />
<strong>Mira</strong> <strong>Elite</strong> <strong>ST</strong>.......................................................................................15<br />
<strong>Mira</strong> Logic Electric Shower Fittings.....................................................17<br />
Commissioning........................................................................................19<br />
User Instructions......................................................................................21<br />
Using Your Shower.............................................................................22<br />
Fault Diagnosis........................................................................................24<br />
Maintenance............................................................................................27<br />
Handset - Cleaning.............................................................................27<br />
Filter - Cleaning/Renewing..................................................................27<br />
Dimensions..............................................................................................28<br />
Wiring Diagram........................................................................................29<br />
Spare Parts..............................................................................................30<br />
<strong>Mira</strong> <strong>Elite</strong> <strong>ST</strong> Spare Parts List.............................................................30<br />
<strong>Mira</strong> Logic Electric Shower Fittings Spare Parts List..........................32<br />
Optional Accessories...............................................................................33<br />
Notes........................................................................................................34<br />
Customer Service.......................................................................Back Page
Introduction<br />
Thank you for purchasing a quality <strong>Mira</strong> product. To exploit the full potential of your<br />
new product, please take time to read this guide thoroughly. Having done so, keep<br />
it handy for future reference.<br />
The <strong>Mira</strong> <strong>Elite</strong> <strong>ST</strong> is a tank-fed (cistern-fed) pumped electric shower for use where<br />
the mains water supply pressure is too low, unreliable or non existent, to operate a<br />
conventional electric shower.<br />
The <strong>Mira</strong> <strong>Elite</strong> <strong>ST</strong> features an internal pump unit which has been designed to provide<br />
all year round performance, even at the highest flow rates which are necessary<br />
during the summer months. The <strong>Elite</strong> <strong>ST</strong> has separate controls for power selection<br />
and temperature/flow adjustment. The <strong>Elite</strong> <strong>ST</strong> must have its own separate cold<br />
water supply from the cistern to ensure correct operation.<br />
The <strong>Mira</strong> <strong>Elite</strong> <strong>ST</strong> comes complete with a set of <strong>Mira</strong> Logic Electric Shower<br />
Fittings.<br />
Products Covered By This Guide:<br />
<strong>Mira</strong> <strong>Elite</strong> <strong>ST</strong> - A 9.8 kW @ 240 Volts AC (9.0 kW @ 230 Volts AC) heater. Available<br />
in white/chrome finish.<br />
<strong>Mira</strong> Logic Electric Shower Fittings<br />
An adjustable spray handset with four different spray actions (start, soothe, force<br />
and eco), supplied complete with flexible hose, clamp bracket assembly, slide bar,<br />
supports, soap dish/hose retaining ring. Available in white/chrome finish.<br />
If you experience any difficulty with the installation or operation of your new<br />
shower control, then please refer to "Fault Diagnosis", before contacting Kohler<br />
<strong>Mira</strong> Limited. Our telephone and fax numbers can be found on the back cover<br />
of this guide.
Important Safety Information<br />
1. Warning!<br />
1.1 Products manufactured by us are safe and without risk provided they are<br />
installed, used and maintained in good working order in accordance with our<br />
instructions and recommendations.<br />
1.2 This Appliance must be earthed. MAKE SURE SUPPLEMENTARY<br />
BONDING COMPLIES WITH THE "REQUIREMENTS FOR ELECTRICAL<br />
IN<strong>ST</strong>ALLATIONS".<br />
In accordance with the current edition of BS 7671 ‘The IEE Wiring Regulations'<br />
in force at the time of installation. This appliance is intended to be permanently<br />
connected to the fixed electrical wiring of the mains system with its own dedicated<br />
supply.<br />
1.3 DO NOT twist the individual cable cores of the live and neutral conductors, as<br />
this will prevent them from entering the terminal block.<br />
1.4 The shower unit must NOT be fitted where it may be exposed to freezing<br />
conditions. Make sure that any pipework that could become frozen is properly<br />
insulated.<br />
1.5 DO NOT operate this appliance if it appears to be frozen. Allow the appliance<br />
to thaw and then contact your installer before using again.<br />
1.6 There are no user serviceable components beneath the cover of this appliance.<br />
Only a competent tradesperson should remove the cover. If the cover is removed,<br />
the following warnings must be observed:<br />
1.6.1 Turn off the electrical and water supplies before removing the cover.<br />
1.6.2 Mains connections are exposed when the cover is removed.<br />
1.6.3 Refer to the wiring diagram before making any electrical connections<br />
(see section "Wiring Diagram").<br />
1.6.4 Make sure all electrical connections are tight, to prevent them<br />
overheating.<br />
1.7 If any of the following conditions occur, isolate the electricity and water supplies.<br />
Contact your installer or refer to “To contact us”, on the back page of this<br />
guide:<br />
1.7.1 If water is leaking from inside the product.<br />
1.7.2 If the case is damaged.<br />
1.7.3 If the appliance begins to make an odd noise, smell or smoke.<br />
1.7.4 If the appliance shows signs of a distinct change in performance,<br />
indicating a need for maintenance.<br />
1.7.5 If the cover is not correctly fitted.<br />
1.8 DO NOT fit any form of outlet flow control as the outlet acts as a vent for the<br />
tank body. Only <strong>Mira</strong> recommended outlet fittings should be used.
2. Caution!<br />
2.1 Read all of these instructions and retain this guide for later use.<br />
2.2 Pass on this guide in the event of change of ownership of the installation site.<br />
2.3 Follow all warnings, cautions and instructions contained in this guide, and on<br />
or inside the appliance.<br />
2.4 The electrical installation must comply with the “Requirements for Electrical<br />
Installations” (see section "Installation Requirements") commonly referred<br />
to as BS 7671 the IEE Wiring Regulations, or any particular regulations and<br />
practices, specified by the local electricity supply company in force at the time of<br />
installation. The installation should be carried out by an electrician or contractor<br />
who is registered, or is a member of, an association such as:<br />
2.4.1 National Inspection Council for Electrical Installation and Contracting<br />
(NICEIC), throughout the UK.<br />
2.4.2 The Electrical Contractors Association (ECA), England and Wales.<br />
2.4.3 The Electrical Contractors Association of Scotland (ECAS).<br />
2.5 The plumbing installation must comply with the requirements of UK Water<br />
Regulations/Bye-laws (Scotland), Building Regulations or any particular<br />
regulations and practices, specified by the local water company. The installation<br />
should be carried out by a plumber or contractor who is registered, or is a<br />
member of, an association such as:<br />
2.5.1 Institute of Plumbing (IOP), throughout the UK.<br />
2.5.2 National Association of Plumbing, Heating and Mechanical Services<br />
Contractors (NAPH & MSC), England and Wales.<br />
2.5.3 Scottish and Northern Ireland Plumbing Employers’ Federation (SNIPEF),<br />
Scotland and Northern Ireland.<br />
2.6 Anyone who may have difficulty understanding or operating the controls of any<br />
shower should be attended whilst showering. Particular consideration should<br />
be given to the young, the elderly, the infirm, or anyone inexperienced in the<br />
correct operation of the controls.<br />
2.7 When this appliance has reached the end of its serviceable life, it should be<br />
disposed of in a safe manner, in accordance with current local authority recycling,<br />
or waste disposal policy.
Pack Contents Checklist<br />
Tick the appropriate boxes to familiarize yourself with the part names and to<br />
confirm that the parts are included.<br />
1. <strong>Mira</strong> <strong>Elite</strong> <strong>ST</strong><br />
1 x Case Insert<br />
3 x Rubber Feet<br />
1 x Olive<br />
1 x Compression Nut<br />
3 x Fixing Screws<br />
3 x Wall Plugs<br />
1 x <strong>Mira</strong> <strong>Elite</strong> <strong>ST</strong>
2. <strong>Mira</strong> Logic Electric Shower Fittings<br />
2 x Wall Plugs<br />
2 x Fixing Screws<br />
2 x Slide Bar End Supports<br />
2 x Slide Bar End Caps<br />
1 x Applicator<br />
1 x Handset<br />
1 x Slide Bar<br />
2 x Hose Seals<br />
1 x 1.25 m Flexible Hose<br />
1 x Clamp Bracket Assembly<br />
1 x Soap Dish/Hose Retaining Ring<br />
1 x Soap Dish Collar<br />
3. Documentation<br />
1 x Installation and User Guide<br />
1 x Installer Checklist<br />
1 x Guarantee Card<br />
1 x Template (Use inner fitment)
1. Plumbing<br />
Specifications<br />
1.1 The 15 mm inlet compression connector incorporates an inlet filter. The inlet<br />
swivels to allow top, bottom or rear entry.<br />
1.2 The outlet terminates with a 1/2" BSP male thread for connection to a <strong>Mira</strong><br />
flexible shower hose.<br />
2. Electrical<br />
This is a high power unit, it is essential to contact your electricity supply company<br />
to make sure that the electricity supply is adequate for the purpose.<br />
2.1 The terminal block will not accept cable larger than 16 mm 2 .<br />
2.2 The motor is fitted with a self resetting thermal trip protection device, designed<br />
to operate if the ambient temperatures become too high. The maximum<br />
recommended ambient temperature for the <strong>Elite</strong> <strong>ST</strong> is 30°C.<br />
2.3 The following power ratings for the heater tanks are available with their respective<br />
voltages: <strong>Mira</strong> <strong>Elite</strong> <strong>ST</strong> 9.8 kW @ 240 V / 45 Amps (9.0 kW @ 230 V / 40<br />
Amps).<br />
2.4 The motor will absorb approximately 100 Watts maximum power under normal<br />
working conditions.<br />
3. Standards and Approvals<br />
3.1 The <strong>Mira</strong> <strong>Elite</strong> <strong>ST</strong> has been designed to comply with the requirements of the<br />
British Electrotechnical Approvals Board (BEAB) and the requirements of UK<br />
Water Regulations/Bye-laws (Scotland).<br />
3.2 This <strong>Mira</strong> <strong>Elite</strong> <strong>ST</strong> complies with all relevant directives for CE marking.
Installation Requirements<br />
1. Plumbing<br />
Read the section 'Important Safety Information' first.<br />
1.1 The <strong>Elite</strong> <strong>ST</strong> is designed to operate with water supply pressures from 0.8 kPa<br />
(0.008 bar / 80 millimetres head) to 100 kPa (1 bar / 10 metres head) (i.e. the<br />
vertical distance from the base of the cold cistern to the top of the <strong>Elite</strong> <strong>ST</strong>).<br />
However, the minimum head required will increase with pipe length and the<br />
guide given in paragraph 1.17 should be used to make sure that adequate head<br />
is available for any given installation.<br />
The <strong>Elite</strong> <strong>ST</strong> MU<strong>ST</strong> have its own separate supply from the cistern.<br />
25 Gallon/113 Ltr Cistern<br />
25 mm<br />
Correct Cistern Take Off<br />
Positioned away from the ball<br />
valve, with a 25 mm distance<br />
up from the base of the<br />
cistern. This connection will<br />
prevent air and debris entering<br />
the shower supply.<br />
Incorrect Cistern Take Off<br />
Debris from the bottom of the<br />
cistern and air generated when<br />
the cistern refills will enter the<br />
shower supply.<br />
1.2 The <strong>Elite</strong> <strong>ST</strong> is suitable for installation within the shower area and is fitted with<br />
a pressure relief valve. It must be positioned over a water catchment area with<br />
the controls at a convenient height. The shower fitting should be positioned so<br />
that it discharges down the centre line of the bath, or across the opening of a<br />
shower cubicle, and must be directed away from the shower unit.<br />
1.3 Use a minimum of 15 mm diameter supply pipework. It should be noted, however,<br />
that on long pipe runs this should be increased to 22 mm (refer to para 1.17 for<br />
guidance). When using flexible plastic pipe it is essential that the pipe is kept<br />
flat and not looped up at any point as this may lead to air build up which may<br />
impair performance of the shower.
1.4 A non restrictive (free flowing) isolating valve should be fitted into the supply<br />
from the cold water cistern, for maintenance purposes.<br />
1.5 The <strong>Elite</strong> <strong>ST</strong> must be fitted onto the finished wall surface i.e. on top of the<br />
tiles. Do not block the air ventilation gaps around the sides of the unit, either<br />
by tiling up to the sides of the unit or by using a sealant around the case.<br />
Important! This <strong>Elite</strong> <strong>ST</strong> is designed to be ventilated. Failure to do this may<br />
cause product failure.<br />
Note! The <strong>Mira</strong> <strong>Elite</strong> <strong>ST</strong> is fitted with a pump motor, and some mechanical<br />
noise can be expected in addition to the noise generated by the spray from<br />
the handset. The type of wall surface will affect the perceived sound levels.<br />
Stud partition and panel walls have a tendency to resonate, whilst solid walls<br />
provide the quietest operation. The tone of the pump motor may change when<br />
the temperature control knob is adjusted. This is quite normal.<br />
1.6 Inlet: 15 mm inlet compression connector is designed to accept plumbing supplies<br />
from the top, bottom or rear.<br />
1.7 Rear entry plumbing is accommodated without the need to recess the 15 mm<br />
inlet compression connector, enabling the wall’s surface to be completed and<br />
sealed to prevent water ingress, before final fitting.<br />
1.8 Swivel the inlet connector assembly to suit (not directly back into the wall). Avoid<br />
trapping the green earth bonding wire.<br />
1.9 Use only the 15 mm inlet compression connector supplied with the <strong>Elite</strong> <strong>ST</strong>, do<br />
not use any other types of fitting.<br />
1.10 Outlet: 1/2" BSP male, to accept <strong>Mira</strong> flexible hose.<br />
1.11 Refrain from applying excessive force when making connections.<br />
Note! Excessive force on the pump housing can impair pumping performance.<br />
Make sure that the supply pipe is trimmed and bent such that the 15 mm inlet<br />
connector sits (or can be lightly pressed) easily on the back of the clamp bracket<br />
prior to connection with the pump housing.<br />
1.12 To avoid damage to the case when soldered fittings are used, pre-solder the<br />
pipework and fittings before connecting them to the 15 mm inlet compression<br />
connector.<br />
1.13 Supply pipework MU<strong>ST</strong> be flushed to clear debris before connecting the<br />
<strong>Elite</strong> <strong>ST</strong>.<br />
10
1.14 A hose retaining ring is supplied to prevent the handset from dropping below<br />
the spillover level of the bath or shower, which could lead to contamination<br />
from back-siphonage (refer to illustration). The supplied hose retaining ring<br />
should meet the great majority of user requirements for shower installations<br />
with flexible outlet fittings. However, there will be occasions when the hose<br />
retaining ring will not provide a suitable solution. In these instances an outlet<br />
double checkvalve, e.g. the <strong>Mira</strong> DCV-H, must be fitted. The inclusion of the<br />
<strong>Mira</strong> DCV-H will increase the required supply pressure typically by 10 kPa (0.1<br />
bar).<br />
Double checkvalves, fitted in the inlet supply to the appliance, cause a<br />
pressure build-up, which could exceed the maximum static inlet pressure for<br />
the appliance.<br />
1.15 When installed in very hard water<br />
areas (above 200 ppm temporary<br />
hardness) your installer may advise<br />
the installation of a water treatment<br />
device, to reduce the effects of<br />
limescale formation. Your local water<br />
company will be able to advise the<br />
hardness of water in your area.<br />
Soap Dish/Hose<br />
Retaining Ring<br />
1.16 Avoid layouts where the hose will be<br />
sharply kinked. This may reduce the<br />
life of the hose.<br />
25 mm Minimum<br />
Spill-over<br />
Level<br />
1.17 Long pipe runs and excessive use of 90° elbows will significantly reduce the<br />
available head to supply the <strong>Elite</strong> <strong>ST</strong>. The pipework table should be completed<br />
to ensure that adequate head is available for any given application.<br />
11
Pipework<br />
The dimension (x) is calculated from the table below to give you a minimum<br />
effective head of 80 mm which is necessary to produce a satisfactory shower in all<br />
conditions.<br />
Plumbing Schematic Diagram<br />
A<br />
X<br />
B<br />
Example!<br />
The example below is based on the diagram above with 15 mm<br />
pipework, A = 1.5 m, B = 0.75 m.<br />
Size<br />
Quantity<br />
Head Loss (mm)<br />
15 mm Pipe<br />
22 mm Pipe<br />
(A) 1.5 + (B) 0.75 = 2.25 x 120 270<br />
(A) + (B) = x 20<br />
15 mm Elbow<br />
Number of Elbows<br />
1<br />
x 55<br />
55<br />
22 mm Elbow<br />
Number of Elbows<br />
x 15<br />
Minimum Effective Head<br />
(x) mm<br />
80<br />
405<br />
12
2.1 Electrical<br />
Read the section 'Important Safety Information' first.<br />
Checklist<br />
2.1.1 Electrical supply fuse and consumer unit are adequate for the product.<br />
2.1.2 Shower unit is earthed.<br />
2.1.3 The minimum required supply cable size must conform to BS 7671.<br />
2.1.4 Double pole isolating switch.<br />
2.1.5 Do not twist live or neutral cable cores.<br />
2.1.6 Electrical connections are tightly secured.<br />
Do not strain terminal block.<br />
2.1.7 Plumbing supply completed before electrical supply is turned on.<br />
Plumbing and Electrical Schematic Diagram<br />
Cold Water Storage<br />
Cistern (Tank)<br />
Warning Pipe<br />
Hot Water<br />
Cylinder Vent<br />
Pipe<br />
Independent Cold Water Supply<br />
to Shower<br />
Cold Water<br />
Mains Feed<br />
Cistern Fed<br />
Cold Supply<br />
to Other<br />
Outlets<br />
Hot Water<br />
Cylinder<br />
Feed<br />
Isolating<br />
Valve<br />
Soap Dish/<br />
Hose Retaining<br />
Ring<br />
Consumer Unit<br />
Double Pole<br />
Isolating Switch<br />
13
2.2 electrical (checklist in detail)<br />
2.2.1 In a domestic installation, the rating of the electricity supplier's fuse and<br />
the consumer unit must be adequate for the additional demand. The<br />
<strong>Mira</strong> <strong>Elite</strong> <strong>ST</strong> is a high power unit, therefore it is essential to contact<br />
your electricity supplier to ensure that the supply is adequate for the<br />
product. Voltage drop due to local heavy demand will reduce the shower's<br />
performance.<br />
2.2.2 The <strong>Mira</strong> <strong>Elite</strong> <strong>ST</strong> must be earthed by connecting the supply-cable<br />
earth conductor to the earth terminal.<br />
Supplementary bonding: Within the bathroom or shower room, all<br />
accessible conductive parts of electrical equipment and extraneous<br />
conductive parts (metal parts) that are likely to introduce earth<br />
potential, must be electrically bonded to earth using a minimum cable<br />
size of 4.0 mm 2 if the cable is not mechanically protected, (2.5 mm 2 if<br />
mechanically protected).<br />
2.2.3 Supply cable - refer to: 'Electrical Checklist'.<br />
2.2.4 As a guide only, and in accordance with BS 7671 we recommend close<br />
circuit protection:<br />
i.e. 9.8 kW @ 240 V = 45 Amp (9.0 kW @ 230 V = 40 Amp).<br />
It is strongly recommended that a 30 mA Residual Current Device (RCD)<br />
is included in the electrical circuit. This may be part of the consumer unit<br />
or a separate unit.<br />
A separate, permanently connected supply is taken from the consumer<br />
unit to the appliance through a double-pole switch, which has at least<br />
3 mm contact separation. The switch can be a ceiling mounted pullcord<br />
type within the shower room or a wall mounted switch in an adjacent<br />
room.<br />
2.2.5 DO NOT twist the individual cable cores of either the live or neutral<br />
conductors, as this will prevent them from entering the terminal block.<br />
2.2.6 DO NOT exert strain on the terminal block. Ensure that the electrical<br />
connections are tightly screwed down.<br />
2.2.7 DO NOT turn on the electrical supply until the plumbing has been<br />
completed.<br />
14
Low<br />
Medium<br />
High<br />
Installation<br />
<strong>Mira</strong> <strong>Elite</strong> <strong>ST</strong><br />
Read the section 'Important Safety Information' first.<br />
1. 2. ↓ 200 mm 3.<br />
↑<br />
Electrical supply is turned<br />
off at the mains.<br />
200 mm minimum gap<br />
from ceiling.<br />
4. 5. 6.<br />
Remove the four cover<br />
screws.<br />
Remove the cover and<br />
determine supply pipe<br />
position.<br />
For rear inlet, use<br />
soldered elbow.<br />
Do not trap green wire.<br />
7. 8. 9.<br />
CAUTION! Do not<br />
drill into buried cables<br />
or pipes.<br />
Drill and plug* the<br />
three holes using the<br />
template.<br />
Fit Rubber Feet and fix<br />
appliance to wall.<br />
* Alternative fixings for some wall structures are not supplied.<br />
15<br />
Flush a minimum<br />
of 10 litres through<br />
pipework.
10. 11.<br />
Connect supply pipe. Do not<br />
overtighten!<br />
Feed cable into Case. Fit Earth<br />
sleeve (not supplied) and strip<br />
insulation.<br />
Do not twist cable cores.<br />
12. 13.<br />
L = BROWN<br />
E = GREEN<br />
N = BLUE<br />
Firmly connect the conductors.<br />
Do not exert strain on the<br />
terminal block.<br />
Make sure wires are clear of all<br />
mounting holes.<br />
14. 15.<br />
Medium<br />
Low<br />
High<br />
Refit the Service Tunnel and<br />
Cover. Make sure they fit<br />
correctly.<br />
Do not overtighten screws.<br />
Do not use alternative screws<br />
to secure the Cover. This can<br />
cause internal damage to the<br />
appliance.<br />
Do not seal around the back of<br />
appliance.<br />
16
<strong>Mira</strong> Logic Electric Shower Fittings<br />
Read the section 'Important Safety Information' first.<br />
1. 2.<br />
Clamp Bracket<br />
Button<br />
Soap Dish/Retaining<br />
Ring<br />
Applicator<br />
25 mm Minimum<br />
Spill-over level<br />
Position as shown to prevent<br />
back siphonage.<br />
Slide Bar<br />
Depress button FULLY and<br />
assemble Clamp Bracket.<br />
Release button and remove<br />
Applicator.<br />
3. 4.<br />
Lock Features<br />
Slide the Soap Dish/Hose<br />
Retaining Ring and the Soap<br />
Dish Support collar onto the<br />
Slide Bar below the Clamp<br />
Bracket.<br />
Fit both the top and bottom<br />
Supports. Make sure the slots<br />
are aligned to fit fully home.<br />
17
5. 6.<br />
Mark the position of the middle<br />
slot on both top and bottom<br />
Supports.<br />
7. 8.<br />
CAUTION! Do not drill into<br />
buried cables or pipes.<br />
First fix the bottom Slide Bar<br />
Support and fully tighten the<br />
screw*. Then fix the top Slide<br />
Bar support whilst pressing<br />
it down, to keep the whole<br />
assembly together.<br />
Fit the End Caps to the Slide<br />
Bar supports.<br />
9.<br />
Fit the Hose to both the<br />
Handset and the Shower Outlet,<br />
remembering to pass it through<br />
the Soap Dish/Hose Retaining<br />
Ring. Do not overtighten the<br />
Hose connections.<br />
Hose Retaining<br />
Ring<br />
* Alternative fixings for some wall structures are not supplied.<br />
18
Low<br />
Power<br />
Low Flow<br />
Medium<br />
Temperatur e<br />
Start Stop<br />
High<br />
Low<br />
Power<br />
Low Flow<br />
Medium<br />
Temperatur e<br />
Start Stop<br />
High<br />
Commissioning<br />
If you are unsure how electric showers work, please read through the 'User<br />
Instructions' Section before continuing.<br />
1. 2. 3.<br />
Electrical supply is<br />
turned off at the mains.<br />
Turn BOTTOM control<br />
to full cold.<br />
4. 5. 6.<br />
Turn water supply fully on.<br />
Check for water leaks.<br />
Turn TOP control to<br />
LOW.<br />
Switch on electrical supply.<br />
7. 8. 9.<br />
COLD<br />
0-5 secs<br />
Push <strong>ST</strong>ART button. Water will be at full force Turn BOTTOM control<br />
and at a cool temperature. slowly. Temperature remains<br />
cool and flow is reduced.<br />
10. 11. 12.<br />
+<br />
0-5 secs<br />
_<br />
Turn BOTTOM control<br />
to full cold.<br />
Set the TOP control to<br />
MEDIUM.<br />
19<br />
The temperature will rise<br />
slightly.
13. 14.<br />
+<br />
_<br />
0-5 secs<br />
Set the TOP control to HIGH.<br />
15. 16.<br />
The temperature will rise further.<br />
Power<br />
Adjust temperature as required.<br />
Flow rate will adjust automatically.<br />
Press <strong>ST</strong>OP and isolate power.<br />
17. 18.<br />
0-5 secs<br />
The shower will purge water from<br />
its tank for a few seconds.<br />
Residual water may drain over<br />
a few minutes.<br />
20
User Instructions<br />
=<br />
=<br />
=<br />
COLD<br />
Medium<br />
Low<br />
High<br />
Stop Start<br />
-<br />
+<br />
-<br />
+<br />
Operation of the <strong>Mira</strong> <strong>Elite</strong> <strong>ST</strong><br />
21
Using Your Shower<br />
Read the section 'Important Safety Information' first.<br />
1. 2.<br />
Switch on electrical supply.<br />
Press <strong>ST</strong>ART button.<br />
3. 4.<br />
+<br />
_<br />
Set to desired position.<br />
Check water temperature before<br />
entering shower.<br />
5.<br />
+<br />
Allow 10-15 seconds for any temperature adjustments to reach the handset.<br />
_<br />
6. 7.<br />
Power<br />
Press <strong>ST</strong>OP button. Shower<br />
will continue to run for a few<br />
seconds before stopping.<br />
A small amount of water may<br />
continue to drain over a few<br />
minutes.<br />
22
Changing the Spray Setting<br />
The handset has four different spray settings (Eco, Start, Soothe and Force).<br />
1.<br />
2.<br />
Eco<br />
Turn the Spray Plate fully<br />
clockwise. A reduced flow of<br />
water will flow from the outer<br />
set of holes.<br />
Start<br />
T u r n t h e S p r a y P l a t e<br />
anticlockwise until it 'clicks'.<br />
Water will flow from the outer<br />
set of holes.<br />
3.<br />
4.<br />
Soothe<br />
T u r n t h e S p r a y P l a t e<br />
anticlockwise until it 'clicks'.<br />
Water will flow from the middle<br />
set of holes.<br />
Force<br />
T u r n t h e S p r a y P l a t e<br />
anticlockwise until it 'clicks'.<br />
Water will flow from the inner<br />
set of holes.<br />
Adjusting the Clamp Bracket<br />
1.<br />
Release Button<br />
2.<br />
Clamp Bracket<br />
Assembly<br />
Depress the release button<br />
and slide the Clamp Bracket<br />
assembly to the required<br />
position.<br />
23<br />
Move the handset to the required<br />
angle.
Fault Diagnosis<br />
The trouble shooting information below gives details on probable causes and remedies should difficulties<br />
be encountered whilst the shower is in operation.<br />
Warning! There are no user serviceable components beneath the cover of the appliance.<br />
ONLY A COMPETENT TRADESPERSON SHOULD REMOVE THE FRONT COVER!<br />
Symptom Power Low Heater Setting Probable Cause Possible Remedy<br />
Light Flow Low / Medium<br />
Light / High<br />
<strong>Elite</strong> <strong>ST</strong> fails<br />
to operate.<br />
OFF<br />
OFF<br />
Any<br />
Electrical supply isolated<br />
at double pole switch.<br />
Switch on electrical<br />
supply via pullcord or<br />
wall mounted switch.<br />
OFF<br />
OFF<br />
Any<br />
Fuse blown or MCB/RCD<br />
tripped indicating possible<br />
electrical fault.<br />
Renew the fuse or reset<br />
the MCB/RCD. If fault<br />
persists, contact your<br />
installer.<br />
No water<br />
or very low<br />
flow rate.<br />
ON<br />
ON<br />
ON<br />
ON<br />
Any<br />
Any<br />
H o s e o r h a n d s e t<br />
sprayplate blocked.<br />
Incoming water supply<br />
isolating valve turned<br />
down or off.<br />
Remove and clean.<br />
Turn isolating valve to<br />
fully on position.<br />
Shower<br />
cycles from<br />
hot to cold.<br />
ON<br />
OFF<br />
Medium / High<br />
Temperature knob or<br />
heater setting too high.<br />
Turn the TOP knob to<br />
MEDIUM setting and<br />
re‐adjust temperature<br />
k n o b u n t i l s u i t a b l e<br />
temperature is achieved.<br />
ON<br />
ON<br />
Medium / High<br />
Handset sprayplate<br />
blocked.<br />
Remove and clean.<br />
Unable to<br />
select a cool<br />
enough<br />
temperature.<br />
ON<br />
OFF<br />
High<br />
Due to a rise in the stored<br />
water temperature, the<br />
power rating may be too<br />
high.<br />
Turn the TOP knob to<br />
MEDIUM setting and<br />
re‐adjust temperature<br />
k n o b u n t i l s u i t a b l e<br />
temperature is achieved.<br />
24
Symptom Power Low Heater Setting Probable Cause Possible Remedy<br />
Light Flow Low / Medium<br />
Light / High<br />
ON<br />
ON<br />
Medium / High<br />
Handset sprayplate<br />
blocked.<br />
Remove Handset and<br />
clean.<br />
No water<br />
and motor<br />
tone<br />
increases.<br />
ON<br />
ON<br />
Any<br />
Cistern has run out of<br />
water.<br />
Turn off the <strong>Elite</strong> <strong>ST</strong><br />
immediately and resolve<br />
cistern storage difficulty.<br />
ON<br />
ON<br />
Any<br />
Internal pump unit faulty<br />
or thermal trip has<br />
operated.<br />
Wait for internal pump /<br />
shower to cool down. If<br />
still faulty contact your<br />
installer.<br />
ALL OF THE FOLLOWING REMEDIES MU<strong>ST</strong> ONLY BE PERFORMED BY A<br />
COMPETENT TRADESPERSON!<br />
Handset<br />
dripping.<br />
Low or no<br />
flow.<br />
OFF OFF Any Flow Valve faulty. Replace.<br />
ON ON Any Filter or water supply<br />
pipework restricted by<br />
a blockage or partial<br />
blockage.<br />
Flush supply pipe.<br />
Clean filter.<br />
ON ON Any Insufficient water supply<br />
p r e s s u r e / f l o w f o r<br />
operation.<br />
ON OFF Any H o s e o r h a n d s e t<br />
sprayplate blocked.<br />
ON OFF Any Flow Valve faulty. Replace.<br />
ON OFF Any Heater tank excessively<br />
scaled.<br />
Gravity fed system,<br />
minimum pressure 0.8<br />
kPa (0.008 Bar / 80<br />
mm).<br />
Remove and clean.<br />
Replace. In hard water<br />
areas consider the use<br />
of a water softener.<br />
25<br />
(Continued . . .)
Symptom Power Low Heater Setting Probable Cause Possible Remedy<br />
Light Flow Low / Medium<br />
Light / High<br />
ON OFF Any Service tunnel or cover<br />
not fitted correctly causing<br />
Start/Stop button not to<br />
operate.<br />
Check case inserts are<br />
cut and fitted correctly.<br />
C h e c k s e r v i c e s<br />
(electrical / plumbing)<br />
are not interfering with the<br />
location of service tunnel<br />
or cover.<br />
Operation of<br />
Temperature<br />
Control<br />
has little or<br />
no effect<br />
on water<br />
temperature.<br />
ON OFF Any Pump faulty. Replace.<br />
ON<br />
ON<br />
ON<br />
ON<br />
OFF<br />
OFF<br />
Medium / High<br />
Medium / High<br />
Medium / High<br />
Hose, handset or Filter<br />
blocked.<br />
Flow Valve faulty.<br />
Heater Tank failure.<br />
Remove and clean.<br />
Replace.<br />
Replace.<br />
ON<br />
OFF<br />
Medium / High<br />
Microswitch failure.<br />
Replace.<br />
No<br />
change in<br />
temperature<br />
between<br />
Low /<br />
Medium/<br />
High<br />
settings.<br />
ON<br />
OFF<br />
Any<br />
Possible Flow Valve,<br />
Microswitch or Heater<br />
Tank failure.<br />
Use a suitable continuity<br />
device to check the<br />
c o n t i n u i t y o f t h e<br />
Microswitch or Heater<br />
Tank and replace parts<br />
as required.<br />
Water will<br />
not turn off.<br />
ON<br />
OFF<br />
Medium / High<br />
Flow Valve, Solenoid or<br />
Start/Stop switch faulty.<br />
R e p l a c e p a r t s a s<br />
required.<br />
Appliance<br />
fails to<br />
produce<br />
hot water<br />
when set<br />
on Medium /<br />
High heater<br />
setting.<br />
ON<br />
OFF<br />
Medium / High<br />
Possible Microswitch or<br />
Thermal Switch failure.<br />
Use a suitable continuity<br />
device to check the<br />
c o n t i n u i t y o f t h e<br />
Microswitch or Heater<br />
Tank and replace parts<br />
as required.<br />
ON<br />
OFF<br />
Medium / High<br />
Possible Heater Tank<br />
failure.<br />
Replace.<br />
26
Low<br />
Power<br />
Low Flow<br />
Medium<br />
Temperatur e<br />
Start Stop<br />
High<br />
Maintenance<br />
Handset - Cleaning<br />
Clean with mild washing up detergent or<br />
soap solution. Wipe dry with soft cloth.<br />
CLEAR<br />
Filter - Cleaning/Renewing<br />
Poor shower performance can be<br />
avoided by descaling the spray head,<br />
which must be done regularly. Use<br />
thumb or soft cloth to wipe rubber<br />
nozzles.<br />
Read the section 'Important Safety Information' first.<br />
1. 2.<br />
3.<br />
Electrical supply is turned<br />
off at the mains.<br />
Turn water supply fully<br />
off.<br />
Remove the four screws<br />
and the Cover.<br />
4.<br />
Press down on the filter cover and turn<br />
anti-clockwise to release.<br />
Remove the filter cover and filter.<br />
Clean the filter and wipe the inside of the<br />
filter housing to remove any debris.<br />
Replace the filter ensuring it is located over<br />
the pins in the filter body.<br />
Refit in reverse order, making sure that the<br />
O-ring is correctly seated.<br />
27
Dimensions<br />
266 mm 95 mm<br />
Power<br />
Low Flow<br />
Low<br />
Medium<br />
High<br />
340 mm<br />
Temperatur e<br />
Start Stop<br />
344 mm<br />
659 mm<br />
28
Wiring Diagram<br />
PRESSURE / POWER<br />
SELECTOR SWITCH<br />
RED<br />
HIGH<br />
LOAD<br />
BROWN<br />
LOW<br />
RED<br />
BROWN<br />
LOW FLOW<br />
NEON<br />
BLUE<br />
ORANGE<br />
MOTOR<br />
BLUE<br />
BLACK<br />
THERMAL<br />
TRIP<br />
THERMAL<br />
CUTOUT<br />
DUAL DISC<br />
BROWN<br />
N<br />
C 0.1u<br />
L<br />
BLACK<br />
BLACK<br />
TANK CONNECTION<br />
INLET CONNECTOR<br />
POWER<br />
ON NEON<br />
BLUE<br />
BROWN<br />
<strong>ST</strong>OP/<strong>ST</strong>ART<br />
BROWN<br />
SOLENOID VALVE<br />
BLUE<br />
GREEN<br />
GREEN<br />
L N E<br />
29
<strong>Mira</strong> <strong>Elite</strong> <strong>ST</strong> Spare Parts List<br />
Spare Parts<br />
215 12 Thermal Trip Pack<br />
416 38 Clamp Bracket<br />
416 41 Thermal Switch<br />
416 43 Splash Guard<br />
416 48 Latching Switch<br />
416 51 Solenoid Coil Assembly<br />
428 56 Cover Seal (not shown)<br />
428 59 Service Tunnel<br />
428 61 Transfer/Inlet Tubes<br />
428 62 Motor/Pump Assembly<br />
428 64 Motor Dust Shield<br />
872 01 Microswitch N/O - 2 pin<br />
872 28 Microswitch C/O - 3 pin<br />
1563 516 Outlet Connector<br />
1563 504 Heater Tank 9.8 kW<br />
1563 507 Flow Valve Assembly<br />
1563 509 Switch Assembly<br />
1563 604 Cover Assembly<br />
1563 605 Component Pack - components identified 'A'<br />
1563 606 Terminal Block Assembly<br />
1563 607 Wire Harness Assembly<br />
1563 608 Screw Pack - components identified 'B'<br />
1563 679 Filter Assembly Spare<br />
1563 687 Filter Tube and Seal Pack - components identified 'C'<br />
1563 691 Filter<br />
Important note!<br />
Push-fit connectors must be assembled<br />
back to back onto the micro-switch<br />
terminals.<br />
A minimum air gap of 4 mm must be<br />
maintained between the connectors after<br />
assembly.<br />
4 mm minimum<br />
30
<strong>Mira</strong> <strong>Elite</strong> <strong>ST</strong> Spare Parts Diagram<br />
A<br />
B<br />
A<br />
B<br />
A<br />
416 41<br />
416 43<br />
1563 606<br />
A<br />
1563 607<br />
1563 509<br />
872 01<br />
1563 504<br />
B<br />
A<br />
428 59<br />
B<br />
416 38<br />
215 12<br />
428 62<br />
A<br />
B<br />
872 28<br />
B<br />
B<br />
1563 507<br />
B<br />
B<br />
1563 516<br />
C C<br />
C<br />
WARNING<br />
230 V<br />
DO NOT<br />
REMOVE<br />
SHIELD<br />
416 48<br />
416 51<br />
A<br />
C<br />
428 64<br />
1563.679<br />
1563.691<br />
1563 604<br />
31
<strong>Mira</strong> Logic Electric Shower Fittings Spare Parts List<br />
450.01 Hose 1.25 m - chrome<br />
450.03 Adjuster Ring<br />
450.06 Clamp Bracket Assembly - white<br />
450.08 Service Pack 'O' seals - components identified 'A'<br />
450.17 Slide Bar Wall Fixing Pack - components identified 'B'<br />
450.26 Slide Bar Support Assembly - white - components identified 'D'<br />
450.28 Slide Bar - chrome<br />
450.36 LC Spray Plate Pack - white<br />
632.73 Hose Washer<br />
1563.257 Adjustable Handset Assembly<br />
1563.552 Soap Dish/Hose Retaining Ring<br />
<strong>Mira</strong> Logic Electric Shower Fittings Spare Parts Diagram<br />
D<br />
B<br />
1563.257<br />
A<br />
450.28<br />
450.36<br />
632.73<br />
450.06<br />
450.03<br />
1563.552<br />
450.01<br />
D<br />
B<br />
32
Optional Accessories<br />
DCV-H: An outlet double check valve, designed to prevent the backflow or backsiphonage<br />
of potentially contaminated water, through shower controls which are<br />
fitted with a flexible hose as part of the outlet shower fitting. Available as an optional<br />
accessory from your Kohler <strong>Mira</strong> stockists.<br />
33
Notes<br />
34
Notes<br />
35
Customer Service<br />
UKAS<br />
1056830-W2-B © Kohler <strong>Mira</strong> Limited, July 2006<br />
36