View Architectural Guidelines PDF - Colorado Time Systems
View Architectural Guidelines PDF - Colorado Time Systems
View Architectural Guidelines PDF - Colorado Time Systems

You also want an ePaper? Increase the reach of your titles
YUMPU automatically turns print PDFs into web optimized ePapers that Google loves.
<strong>Architectural</strong> <strong>Guidelines</strong><br />
A Guide for Designing Competitive Aquatic Facilities
<strong>Colorado</strong> <strong>Time</strong> <strong>Systems</strong><br />
<strong>Architectural</strong> <strong>Guidelines</strong><br />
<strong>Colorado</strong> <strong>Time</strong> <strong>Systems</strong><br />
<strong>Architectural</strong> <strong>Guidelines</strong><br />
Table of Contents<br />
Timing System<br />
Start System<br />
Touchpads<br />
Relay Judging<br />
Scoreboards<br />
Scoreboards: Numeric LED<br />
Sample Scoreboard Configurations<br />
Deck Plates<br />
Wall Plates<br />
Pool Layout<br />
Aquatics Venue Site Worksheet<br />
Check List<br />
Table of Contents<br />
page 3<br />
page 4<br />
page 6<br />
page 8<br />
page 10<br />
page 11<br />
page 14<br />
page 15<br />
page 18<br />
page 19<br />
page 23<br />
page 35<br />
+1 (970) 667-1000<br />
page 2
Timing System<br />
Function & Placement in the<br />
Aquatic Timing/Scoring System<br />
The System 6 is the heart of an aquatic<br />
timing and scoring system. It is a portable<br />
console that needs to be physically plugged<br />
in to various timing and scoring<br />
components, either by connections to a wall<br />
plate, direct connection to cables in a cable<br />
harness, or wireless via wireless adapter.<br />
It coordinates information from the:<br />
l Start System<br />
l Touchpads<br />
l Relay Judging Platforms<br />
l Backup Buttons<br />
l Remote Judging Terminals (for diving)<br />
It sends information to<br />
l Scoreboards<br />
l Meet Management Software<br />
l Printer<br />
l Horns and Shot Clocks (for water polo)<br />
System 6 Timing Console<br />
Dimensions & Details<br />
Dimensions (H x W x D): Weight:<br />
9.75 x 18.375 x 11.5 inches 12.8 lbs (5.8kg)<br />
(21.6 x 46.7 x 31.4 cm)<br />
System 6 Carrying Case:<br />
10.125 x 21.25 x 17 inches 9.8 lbs (4.4kg)<br />
(25.7 x 54 x 43.2 cm)<br />
System 6 Features:<br />
Feature System 6<br />
Screen<br />
Color, 53 sq. in.<br />
Number of lanes Up to 12<br />
Lane shifting<br />
Yes<br />
Ability to store & post splits<br />
Yes<br />
Supports unlimited splits<br />
Yes<br />
Aquatic Sports:<br />
Swimming<br />
Yes<br />
Diving<br />
Yes<br />
Water Polo<br />
Optional<br />
Training Pace Clock<br />
Optional<br />
Pre-programmed event sequencing with customizing capabilities<br />
Yes<br />
Meet management interface port for PC download<br />
Yes<br />
USB functionality<br />
Yes<br />
A/C power with battery backup<br />
Yes<br />
Rechargeable battery<br />
Yes<br />
Hy-Tek Meet Management compatible<br />
Yes<br />
page 3<br />
www.coloradotime.com
Start System<br />
Function & Placement in the<br />
Aquatic Timing/Scoring System<br />
The Start System produces a start tone and<br />
visual signal to begin a swim race.<br />
Depending on the model, it can also<br />
perform other functions for competition and<br />
training. The start system is a portable unit<br />
that needs to be physically connected at<br />
one of three locations.<br />
Championship Start System<br />
Connection points:<br />
Infinity Start System<br />
l a deck plate at one side of the<br />
starting end, either at lane 1 or at the<br />
last lane (6, 8, 10, or 12)<br />
l the cable harness<br />
l a wall plate<br />
Dimensions & Details<br />
Dimensions (H x W x D): Weight: Power:<br />
Championship Start System<br />
Runs from normal wall power (110 - 240 VAC)<br />
with an included wall connector when away<br />
13.25 x 13 x 5.75 inches 17.4 lbs (7.9kg) from the pool deck. Alternately, it can be powered<br />
(33.7 x 33 x 14.6 cm) with two gel-cell batteries, which recharge when the<br />
unit is plugged into a wall outlet. It will operate<br />
while charging.<br />
Infinity Start System<br />
8.9 x 15 x 16.9 inches 12 lbs (5.4kg)<br />
(22.6 x 38.1 x 17.5 cm)<br />
Comparing Championship Start and Infinity<br />
Championship Start System Infinity Start System<br />
strobe 360 degrees 360 degrees<br />
horn auxiliary, but attachable built in<br />
PA capabilities yes yes<br />
auxiliary speakers 2 1<br />
block speakers up to 12 no<br />
mounting options tabletop tabletop<br />
tripod<br />
wall mount<br />
support for speedlights yes no<br />
support for deckside start yes<br />
no<br />
indicators<br />
tripod<br />
support for future enhancements yes no<br />
microphone options wired or wireless wired<br />
portability can be moved easily portable; has handle and weighs<br />
only 12 pounds<br />
power 110/240 VAC rechargeable battery only<br />
+1 (970) 667-1000<br />
page 4
Start System<br />
continued<br />
Accessories Available<br />
Championship Start System<br />
Infinity Start System<br />
Championship Start System<br />
Infinity Start System<br />
l<br />
l<br />
l<br />
l<br />
Speaker options: one speaker<br />
included. Additional speakers can be<br />
added<br />
- on the other side of the pool<br />
- for the backstroke pole<br />
- under each starting block<br />
- underwater, for underwater recall of<br />
false starts and for tremendous<br />
training opportunities<br />
Visual start signals: one strobe light<br />
included.<br />
- additional strobe lights can be<br />
added<br />
- Speedlights are LEDs along the<br />
front of a relay judging platform<br />
that flash simultaneously with the<br />
start tone and strobe light.<br />
- Deckside start indicator is an LED<br />
on the relay judging platform<br />
connector block that flashes<br />
simultaneously with the start<br />
system and speedlights for a<br />
visual cue to the backup timers<br />
Mounting options: tabletop, tripod, or<br />
wall mount<br />
Microphones: One wired microphone<br />
included.<br />
- an additional wired or wireless<br />
microphone can be added<br />
- Championship Start System has<br />
independent volume control for<br />
each microphone input, and the<br />
microphone volume is independent<br />
of the start tone volume.<br />
l<br />
l<br />
l<br />
l<br />
l<br />
Speaker options: one built-in speaker<br />
included<br />
- one additional speaker can be<br />
added<br />
Visual start signals: one built-in<br />
strobe light included.<br />
- one additional strobe light can be<br />
added<br />
Mounting options: tabletop or tripod<br />
Microphones: one wired microphone<br />
included<br />
Battery and charger: one internal<br />
battery that will recharge when the<br />
unit is plugged in and not operating is<br />
included<br />
- a secondary gel-cell battery and<br />
charger can be added<br />
www.coloradotime.com<br />
page 5
Touchpads<br />
AquaGrip Touchpad<br />
Function<br />
The main function of touchpads is to<br />
accurately record the swimmers’ finish times<br />
at the end of a race. The System 6 Timing<br />
Console electronically compares this time<br />
with the touches in other lanes to determine<br />
the order of finish. Touchpads and the<br />
timing console can be used to determine a<br />
swimmer’s official time in an event, and to<br />
record splits mid-race at the end of a length<br />
or lap.<br />
Touchpads are also used for electronic relay<br />
judging, in conjunction with relay judging<br />
platforms (RJPs). The touchpad records<br />
the incoming swimmer’s touch, and the RJP<br />
records the departure of the next swimmer<br />
in the relay. The timing console compares<br />
these times to assist officials in judging<br />
relay exchanges. Touchpads are also used<br />
in many training situations.<br />
<strong>Colorado</strong> <strong>Time</strong> <strong>Systems</strong>’ patented<br />
touchpads are the favorite in the industry<br />
because of their accuracy and consistency<br />
in recording touches, as well as their<br />
excellent surface texture. Touchpads are<br />
available with AquaGrip or standard surface.<br />
Dependable, internally sealed switches<br />
record even the lightest swimmers’ touch on<br />
the fully active face, giving an accurate<br />
finish every time with no dead spots.<br />
Placement in the Aquatic<br />
Timing/Scoring System<br />
Touchpads go in the pool at the finish/split<br />
end(s) of each lane. Consider touchpad<br />
placement when designing the pool and do<br />
not place pool features such as lights and<br />
water inlets on the pool wall where<br />
touchpads will hang during training or<br />
competition.<br />
The touchpads connect to the timing system<br />
through a deck plate near each starting<br />
block, a connection hub mounted<br />
underneath each block, or to a cable harness.<br />
<strong>Colorado</strong> <strong>Time</strong> <strong>Systems</strong>’ touchpads can be<br />
left in the water for the duration of a<br />
competition to avoid re-measuring the pool.<br />
Dimensions & Details<br />
Touchpad Dimensions (L x H x D)<br />
U.S. 60-inch 60 x 22 inches<br />
(152.4 x 55.8 cm)<br />
U.S. 78-inch 78 x 22 inches<br />
(198.1 x 55.8 cm)<br />
Custom custom width between 60<br />
and 96 inches<br />
FINA 195 cm 195 x 90 cm<br />
(76.8 x 35.5 inches)<br />
FINA 240 cm 240 x 90 cm<br />
(94.5 x 35.5 inches)<br />
All touchpads have a thickness of ~.76cm<br />
+/- (~.30” +/-)<br />
+1 (970) 667-1000<br />
When selecting touchpad sizes, consider<br />
the number of lane lines to be used<br />
between each lane, which reduces the width<br />
of usable lane. Each pad should run most<br />
of the width of the usable lane.<br />
page 6
Touchpads<br />
continued<br />
For Guttered Pools<br />
Polycarbonate and Velcro spacer brackets<br />
are placed between touchpads to prevent<br />
side-to-side movement and to attach the<br />
touchpads to the pool gutter. Spacer<br />
brackets are customized to each individual<br />
pool gutter design. Supply a drawing of the<br />
pool gutter profile with dimensions. A<br />
to-scale AutoCAD drawing is preferred.<br />
For Flat Wall Pools<br />
Stainless steel brackets are attached to<br />
each end of the touchpad and mounted to<br />
the pool deck with anchor bolts. Brackets<br />
are customized to the individual pool.<br />
Supply a drawing of the pool edge profile<br />
with dimensions, including the distance from<br />
deck level to water level. A to-scale<br />
AutoCAD drawing is preferred.<br />
NOTE: For many international style pools,<br />
a gutter hung FINA touchpad may be used<br />
in lieu of a flat wall type touchpad.<br />
Accessories Available<br />
Touchpad Caddy<br />
Touchpads are precision electronic<br />
instruments, and should be protected with a<br />
touchpad caddy that provides safe storage<br />
and a convenient means to transport<br />
touchpads to the pool deck.<br />
Touchpads must be stored away from direct<br />
sunlight when out of the water. Secure<br />
storage that meets this requirement should<br />
be designed.<br />
Dimensions (L x H x D): Weight:<br />
Caddy for standard pads:<br />
82 x 47 x 22 inches 105 lbs (47.6kg)<br />
(208.3 x 119.4 x 55.9 cm)<br />
Caddy for 96” pads:<br />
102 x 60 x 22 inches 150 lbs (68kg)<br />
(259 x 152.4 x 55.9 cm)<br />
Caddy for FINA pads:<br />
100.5 x 60 x 22 inches 129 lbs (58.5kg)<br />
(255.3 x 152.4 x 55.9 cm)<br />
Gutter Hung Touchpad Caddy<br />
Touchpad Test Meter<br />
Is used to check the sensitivity to touch<br />
within a touchpad. To make adjustments to<br />
a touchpad, a vacuum pump will also be<br />
needed. The test meter can also be used<br />
to test a cable harness, deck plate,<br />
under-block connection hub, or pushbutton.<br />
Vacuum Pump<br />
Is used to add or release air from a<br />
touchpad to adjust the sensitivity to touch.<br />
A test meter should be used in conjunction<br />
with the vacuum pump.<br />
page 7<br />
www.coloradotime.com
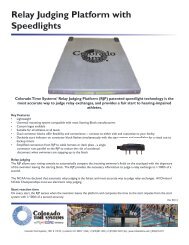
Relay Judging<br />
Function<br />
The primary function of relay judging<br />
platforms is to judge relay exchanges. They<br />
work in conjunction with the touchpads and<br />
System 6 Timing Console. The relay<br />
judging platform records the departure of<br />
the swimmer leaving the platform, and the<br />
timing console automatically compares this<br />
time with the incoming swimmer’s finish on<br />
the touchpad.<br />
Speedlights: LEDs across the front of<br />
RJPs flash simultaneously with the start<br />
tone and strobe light. All swimmers benefit<br />
from the visual signal, which they can easily<br />
see without altering their race-ready<br />
posture.<br />
<strong>Colorado</strong> <strong>Time</strong> <strong>Systems</strong>’ Relay Judging<br />
Platform (RJP) technology is the most<br />
accurate way to judge relay exchanges.<br />
The RJP will record the necessary<br />
information to judge a rely exchange to<br />
1/100th of a second.<br />
The NCAA has declared that automatic<br />
relay judging is the fairest and most<br />
accurate way to judge relay exchanges. All<br />
Division I NCAA Championships must use<br />
electronic relay judging. RJPs from<br />
<strong>Colorado</strong> <strong>Time</strong> <strong>Systems</strong> exceed NCAA<br />
standards.<br />
Deckside Start Indicator: An LED is<br />
integrated into the connector block on the<br />
deck side. The LED flashes simultaneously<br />
with the start signal and speedlights to give<br />
the deckside backup timers a visual cue,<br />
and increase the accuracy of backup times.<br />
Dual Connector Blocks: Connector blocks<br />
on both sides of the RJP offer flexibility and<br />
convenience - connect to either side and<br />
customize to your facility<br />
Simplified Connection: A single connector<br />
runs parallel to the RJP to reduce the risk of<br />
accidental disconnect when swimmers are<br />
stepping up to the block<br />
Accessories Available<br />
RJP Caddy: available for RJPs that are<br />
either 20” wide (up to 24” long) or 24” wide<br />
(up to 32” long)<br />
Championship Start System: needed to<br />
flash the speedlights and deckside start<br />
indicators on RJPs<br />
In addition to judging relay exchanges in<br />
competition, they also have many uses in<br />
training, including helping athletes improve<br />
their start reaction times.<br />
+1 (970) 667-1000<br />
page 8
Relay Judging<br />
continued<br />
Placement in the Aquatic<br />
Timing/Scoring System<br />
Relay Judging Platforms attach to, or are<br />
incorporated into, the starting blocks. They<br />
connect to the timing system through a deck<br />
plate near each starting block, a connection<br />
hub mounted underneath each block, or to a<br />
cable harness.<br />
Dimensions & Details<br />
Size (W x L):<br />
20 x 20 inches<br />
(50.8 x 50.8 cm)<br />
20 x 24 inches<br />
(50.8 x 60.9 cm)<br />
24 x 20 inches<br />
(60.9 x 50.8 cm)<br />
24 x 32 inches<br />
(60.9 x 81.3 cm)<br />
Weight:<br />
8.4 lbs<br />
(3.8kg)<br />
9.9 lbs<br />
(4.5kg)<br />
9.9 lbs<br />
(4.5kg)<br />
15.2 lbs<br />
(6.3kg)<br />
Custom sizes are also available. An RJP<br />
mounted on a starting block adds .3 inches<br />
(.76cm) to the height above the water.<br />
<strong>Colorado</strong> Block<br />
The <strong>Colorado</strong> Block is a special solution<br />
that includes CTS’ RJP. The <strong>Colorado</strong><br />
Block is a combination of Paragon Aquatics’<br />
Track Start Competitor starting block and<br />
<strong>Colorado</strong> <strong>Time</strong> <strong>Systems</strong>’ Relay Judging<br />
Platform with speedlights. The <strong>Colorado</strong><br />
Block incorporates a built-in connection hub<br />
and under-the-block start speaker in<br />
addition to the block and RJP.<br />
page 9<br />
www.coloradotime.com
Scoreboards<br />
Function<br />
Full Color Video Displays<br />
l affordable video boards in pixel densities ranging<br />
from 9mm to 50mm<br />
l display live action video and images from live<br />
camera feeds (underwater or above water),<br />
DVDs, TV feed, etc.<br />
<strong>Colorado</strong> <strong>Time</strong> <strong>Systems</strong> provides scoreboard displays<br />
to enhance the audience’s experience, highlight<br />
sponsors, display advertising, and showcase athletes.<br />
Our solutions include full-color video displays, single<br />
color LED matrix displays, and a variety of numeric<br />
scoreboards.<br />
Light Reflective Numeric Only<br />
l robust and proven<br />
l excellent for portable and outdoor scoreboards<br />
LED Numeric Only<br />
l available with red or amber LEDs<br />
l LED colors can be alternated for visibility and<br />
team designation<br />
l available for indoor or outdoor facilities<br />
Placement in the Aquatic<br />
Timing/Scoring System<br />
Single Color LED Matrix Displays<br />
l show scores, text, and animations<br />
Scoreboards connect to the timing system via a data<br />
junction box located at the scoreboard, which has<br />
in-wall or external cabling to the wall plate at the<br />
timing location. Most scoreboards can also connect<br />
via wireless scoreboard adapter.<br />
Dimensions & Details<br />
Specifications vary depending on the needs of the<br />
facility; contact a <strong>Colorado</strong> <strong>Time</strong> <strong>Systems</strong> sales<br />
representative for more information about options for<br />
a particular project.<br />
+1 (970) 667-1000<br />
page 10
Scoreboards: Numeric<br />
LED<br />
The scoreboards may be mounted on a flat wall in a<br />
variety of horizontal or vertical configurations using<br />
the flat wall mounting brackets pictured below.<br />
Placement in the Aquatic<br />
Timing/Scoring System<br />
Scoreboards connect to the timing system via a data<br />
junction box located at the scoreboard, which has<br />
in-wall or external cabling to the wall plate at the<br />
timing location. Scoreboards can also connect via<br />
wireless scoreboard adapter.<br />
Flat Wall Mounting Brackets<br />
Dimensions & Details<br />
Numeric LED Scoreboard Modules:<br />
Length: 97.675 inches (.m)<br />
Height: 14 inches (35.6cm)<br />
Depth: 4 inches (10.2cm)<br />
Weight: 45 lbs (20.4kg)<br />
Accessories Available<br />
l sign panels for facility/team name and/or<br />
sponsors<br />
l wireless scoreboard adapter<br />
Scoreboard Attachment to Corner Brackets<br />
and Unistrut<br />
Scoreboard Mounting<br />
LED numeric scoreboards are designed to be wall<br />
mounted. Mounting is simplified by the use of<br />
factory-provided wall mounting brackets and unistrut<br />
galvanized steel channel pre-cut to your installation<br />
requirements.<br />
The scoreboards may be corner mounted in a single<br />
scoreboard width vertical column using our standard<br />
corner mounting brackets. If the scoreboards must be<br />
mounted in a corner in a double width configuration, a<br />
special mounting framework will be required. Consult<br />
your sales representative for more information.<br />
Scoreboard Attachment to Flat Wall<br />
Bracket and Unistrut<br />
NOTE: Maximum 66 inch (167.6 cm) vertical spacing<br />
between brackets<br />
page 11<br />
www.coloradotime.com
Scoreboards: Numeric<br />
LED<br />
continued<br />
If your facility will not accommodate a wall-mounted<br />
scoreboard, the scoreboard can be mounted on a<br />
freestanding structure. The design of these structures<br />
is the responsibility of the architect. <strong>Colorado</strong> <strong>Time</strong><br />
<strong>Systems</strong> will provide information on the scoreboard<br />
module length, width, height, and weight. The<br />
architect is responsible for providing lightning<br />
protection for outdoor structures.<br />
Total wall to face of scoreboard dimension is about<br />
8.5 inches (21cm).<br />
NOTE: Scoreboards can be recessed into the wall so<br />
the face is flush with the wall around it. However,<br />
space must be available to remove the weather cover<br />
for servicing the digits or control board. Consult your<br />
sales representative when planning for a recessed<br />
scoreboard.<br />
All electrical wiring must be carried out in accordance<br />
with the applicable national, state, and local electrical<br />
codes. A qualified electrician should do all electrical<br />
wiring.<br />
Location of electrical outlets<br />
For every two lines of scoreboard, provide a duplex<br />
electrical outlet as indicated in the six-line example<br />
above. Following this recommendation makes for a<br />
clean wiring layout.<br />
Side <strong>View</strong> of Scoreboard Mounting Concept<br />
Mounting is accomplished in three steps:<br />
l wall brackets attached to wall using expansion<br />
bolts<br />
l unistrut attached to wall brackets using standard<br />
unistrut hardware<br />
l scoreboard modules attached directly to holes in<br />
unistrut face<br />
+1 (970) 667-1000<br />
page 12
Scoreboards: Numeric<br />
LED<br />
continued<br />
Mounting of electrical outlets<br />
Mount the duplex electrical outlets as shown below. If<br />
your pool is under construction or renovation, flush<br />
mounting with the wiring inside the walls is the<br />
recommended method. Otherwise, surface mounting<br />
of conduit and outlets is acceptable. Note the<br />
orientation of the outlet boxes if surface mounted as<br />
shown below.<br />
For outdoor scoreboards exposed to the weather, use<br />
wire receptacles mounted in accordance with National<br />
Electric Code or appropriate national and local codes<br />
for the country of installation.<br />
The scoreboard data connection box is a<br />
contractor-provided standard single gang box with<br />
blank cover. Data connectors and wiring are provided<br />
by <strong>Colorado</strong> <strong>Time</strong> <strong>Systems</strong>. A 1-inch (2.5cm) conduit<br />
must run between this box and the wall box at the<br />
timing location.<br />
NOTE: 220~240V scoreboards are available for<br />
international use.<br />
page 13<br />
www.coloradotime.com
Sample Numeric LED Scoreboard Configurations<br />
+1 (970) 667-1000<br />
page 14
Deck Plates<br />
Placement in the Aquatic<br />
Timing/Scoring System<br />
Deck plates are, as their name implies, mounted in<br />
the pool deck at each starting block. They serve as<br />
the connection point between the in-deck cabling and<br />
the equipment used in competition at the start and<br />
finish ends of the pool.<br />
Each deck plate comes completely wired with a<br />
maximum of 200 feet (61m) of cable; potted and<br />
ready to install. The potting collar fits inside a<br />
4 x 4 x 6 inch (10.2 x 10.2 x 15.2cm) PVC box. The<br />
deck plate is attached directly to the tile with stainless<br />
steel screws. It is critical that the tile or other finished<br />
floor is completed and level with the PVC box top<br />
edges (+/- .25 inch [.64cm]).<br />
QuickConnect Deck Plates<br />
The deck plate at each lane can accommodate a<br />
touchpad, backup buttons, relay judging platform and<br />
individual start tone speaker. QuickConnect deck<br />
plates accommodate RJP speedlights as well. The<br />
deck plates at the outside lanes are also wired for the<br />
start system to be connected.<br />
Pools that use on-deck cable harnesses do not need<br />
deck plates.<br />
Dimensions & Details<br />
<strong>Colorado</strong> <strong>Time</strong> <strong>Systems</strong> offers two styles of deck<br />
plates: QuickConnect and regular deck plates. Both<br />
offer a clean and uncluttered approach to timing<br />
system wiring, and are an improvement both in<br />
aesthetics and safety from on-deck cabling.<br />
The QuickConnect deck plate system consists of a<br />
connection hub mounted to the starting block, and an<br />
in-deck military-style connector. The connection hub<br />
mounted to the block replaces the standard deck<br />
plate as the place where all the electrical components<br />
plug in. A military connector with gold-plated<br />
connections is mounted in the pool deck. One short<br />
cable runs from the deck plate to the connection hub.<br />
This system provides greater convenience and less<br />
possibility of corrosion from pool chemicals and water.<br />
Deckplate with 4 x 4 x 6 PVC Box<br />
The QuickConnect deck plate system is required to<br />
accommodate speedlights on the front of RJPs.<br />
page 15<br />
www.coloradotime.com
Deck Plates<br />
continued<br />
Standard Deck Plates<br />
For Starting Blocks with Two Legs:<br />
Standard deck plates consist of a connection hub<br />
mounted to a Carlon PVC box in the pool deck. All<br />
the electrical components plug into this connection<br />
hub, or deck plate.<br />
Deck Plate Location and<br />
Installation<br />
Place the deck box at the intersection of lines<br />
centered between the legs of the starting block and<br />
centered between the pool edge and the legs of the<br />
block. Leave at least a 3-inch clearance perimeter<br />
around the entire deck box to accommodate the deck<br />
plate.<br />
For Starting Blocks with a Single Leg:<br />
Consider pool deck traffic when planning the location<br />
of deck boxes, to which the deck plates are mounted.<br />
Cables will be connected to the deck plate during the<br />
competition:<br />
l with the QuickConnect style, the cable between<br />
the connection hub and the deck plate will be<br />
connected<br />
l with the standard style, cables from the<br />
touchpads, backup buttons and RJPs will be<br />
connected<br />
For safety reasons, deck boxes should be placed<br />
beneath the starting platform, between the pool end<br />
wall and the starting block leg(s).<br />
Place the deck box in line with the starting block<br />
mounting plate and centered between the pool edge<br />
and the leg of the starting block. Leave at least a<br />
3-inch clearance perimeter around the entire deck box<br />
to accommodate the deck plate.<br />
+1 (970) 667-1000<br />
page 16
Deck Plates<br />
continued<br />
Once you have determined the preliminary location of<br />
your conduit runs, please send blueprints to <strong>Colorado</strong><br />
<strong>Time</strong> <strong>Systems</strong> for review and redlining by our Project<br />
Management team.<br />
Do not connect more than 12 deck boxes per run of<br />
2-inch (5.1cm) conduit.<br />
Do not connect more than four deck boxes per run of<br />
1-inch (2.5cm) conduit.<br />
Pull wires<br />
We require that all vacant conduits be supplied with<br />
pull wires.<br />
In-deck wiring<br />
All in-deck wiring should be located in PVC conduit,<br />
deck boxes and pull boxes. The in-deck wiring is<br />
limited to less than 5V and is grounded in the timing<br />
console.<br />
Bulkheads and deck plates<br />
If a bulkhead or bulkheads will be installed in the pool,<br />
it is essential that the consultant or architect ensure<br />
that the bulkhead manufacturer installs conduit runs<br />
and provisions for the installation of deck boxes and<br />
connection boxes. It is very difficult to add this to a<br />
bulkhead once it is under construction. Cable trays<br />
may be used in lieu of conduit and deck boxes, but<br />
the cable trays must be above the water level and an<br />
8 x 8 x 8 inch (20.3 x 20.3 x 20.3cm) connection box<br />
provided. Please contact your sales representative to<br />
discuss this critical item.<br />
page 17<br />
www.coloradotime.com
Wall Plates<br />
Function & Placement in the<br />
Aquatic Timing/Scoring System<br />
Wall plates are, as their name implies, mounted on<br />
the facility wall. They serve as the connection point<br />
between the cabling that runs in the conduit under the<br />
deck to the deck boxes, the scoreboard, timing<br />
console, start system, start speaker and microphone,<br />
and judging terminals.<br />
Dimensions & Details<br />
<strong>Colorado</strong> <strong>Time</strong> <strong>Systems</strong>’ wall plate is a standard<br />
15 x 15 x .25 inch (38.1 x 38.1 x .64cm) aluminum<br />
panel. It comes complete with all wiring and terminal<br />
connections required. It is designed to be used with a<br />
contractor-supplied 12 x 12 x 6 inch<br />
(30.5 x 30.5 x 15.2cm) wall junction box. When<br />
allowed by applicable national and local electrical<br />
codes, we prefer a PVC box rather than a steel unit<br />
for ease of installation.<br />
Wall plates should be mounted 18 to 36 inches<br />
(45.7 to 91.4cm) above finished floor level when<br />
installed on interior pool walls. Wall plates must be<br />
flush with the face or other mounting wall or recessed<br />
into it; they should not extend beyond the mounting<br />
wall surface.<br />
For outdoor pools, wall plates should be mounted 18<br />
to 36 inches (45.7 to 91.4cm) above the pool deck,<br />
mounted into a contractor-provided 12 x 12 x 6 inch<br />
(30.5 x 30.5 x 15.2cm) PVC box.<br />
Wall plate covers are available to protect wall plates<br />
from the elements & tampering.<br />
Wall plate cover is 16 x 16 x 2 inches (40.6 x 40.6 x<br />
5.1cm). Opening inside for wall plate is 13.5 x 11.5<br />
inches (34.3 x 29.2cm).<br />
+1 (970) 667-1000<br />
page 18
Pool Layout<br />
Typical 25 yd/25m Pool Layout for<br />
Swimming - Starting End Detail<br />
page 19<br />
www.coloradotime.com
Pool Layout<br />
Typical 25 yd/25m Pool Layout for<br />
Swimming - Starting End Detail<br />
+1 (970) 667-1000<br />
page 20
Pool Layout<br />
Typical 50m Setup - Wall Plates for<br />
Swimming and Diving<br />
page 21<br />
www.coloradotime.com
Pool Layout<br />
Typical 50m Setup with Diving Well -<br />
Wall Plates for Swimming and Diving<br />
+1 (970) 667-1000<br />
page 22
Aquatics Venue Site Worksheet<br />
Tools needed: Camera, tape measure, and screw driver<br />
Customer:<br />
Facility Name:<br />
Address:<br />
Contact Name/Title:<br />
Phone: Fax: Email:<br />
Facility Information<br />
Are blueprints available? YES NO<br />
Is this an indoor or outdoor facility: INDOOR OUTDOOR<br />
What competitions does this facility support?<br />
SWIMMING DIVING WATER POLO SYNCHRO<br />
OTHER (PROVIDE DETAILS)<br />
What level(s) of competitions does this facility host?<br />
CLUB LEVEL HIGH SCHOOL COLLEGE NATIONAL<br />
WORLD SPORTS<br />
OTHER:<br />
page 23<br />
www.coloradotime.com
Aquatics Venue Site Worksheet<br />
continued<br />
Pool Configuration<br />
What is the pool configuration? (Select the sample that best fits, or add the correct<br />
layout).<br />
Please indicate start end(s): A B C D E F G<br />
Start end: Top Bottom Left Right<br />
Short course:<br />
A<br />
B<br />
C<br />
Short course and long course:<br />
D<br />
E<br />
50 meter with single, moveable bulkhead:<br />
F<br />
50 meter with two moveable bulkheads:<br />
G<br />
+1 (970) 667-1000<br />
page 24
Aquatics Venue Site Worksheet<br />
continued<br />
How many lanes are used for competition?<br />
(Please note if different pool setups have different numbers of lanes)<br />
What are the lane widths?<br />
(Please note if different pool setups have different lane widths, and verify that all lines in<br />
a pool configuration have the same width lanes.)<br />
Are the gutter and pool wall flat and free of any obstructions such as lights, jets, lane<br />
lines, lane line attachments and/or protuding tiles or gutters?<br />
(If not, explain and illustrate)<br />
Gutter Profile<br />
(Select the diagram that best depicts your pool gutter) Measure, and document the<br />
requested dimensions and note the water level.<br />
Diagram# Measurements: X Y Z<br />
NOTE: If your gutter profile is not depicted above, include a sketch with dimensions,<br />
noting water level.<br />
page 25<br />
www.coloradotime.com
Aquatics Venue Site Worksheet<br />
continued<br />
Existing Timing Equipment<br />
(if there is no existing equipment, skip this section)<br />
Equipment Type of Info Details Qty Age<br />
Start System<br />
Model<br />
Timing Console Model<br />
Touchpads<br />
Manufacturer<br />
Size<br />
Mounted at end of pool or bulkhead?<br />
Notch-cut?<br />
Relay Judging<br />
Platforms<br />
Manufacturer and size<br />
Cabling<br />
In-deck? # of wall plates, deck plates,<br />
connections and functions for each<br />
On-deck? What cables? Lengths<br />
and functions of each<br />
Scoreboard<br />
Manufacturer<br />
Description, format (video, matrix, LED,<br />
light-reflective, etc), size<br />
+1 (970) 667-1000<br />
page 26
Aquatics Venue Site Worksheet<br />
continued<br />
Existing Timing Equipment<br />
(continued)<br />
Equipment Type of Info Details Qty Age<br />
Pace Clocks<br />
Manufacturer, format, size(s)<br />
Underwater<br />
Speaker<br />
Multifunction<br />
Training<br />
Manufacturer, what drives it<br />
Manufacturer, format, what functions<br />
i.e. Pace Clock<br />
Pro<br />
Misc./Other<br />
Bulkheads<br />
Are there bulkheads? YES NO If yes, how many?<br />
If so, are they moveable? YES NO<br />
Who is the bulkhead manufacturer?<br />
Will touchpads be mounted to a bulkhead? YES NO<br />
Size of space for touchpads, if on bulkhead:<br />
Will the bulkhead cabling be on-deck or in-deck?<br />
Are there any plans to buy new equipment in the next:YEAR<br />
2-YEARS 3-YEARS<br />
What meet management software is used? Hy-Tek Other None<br />
page 27<br />
www.coloradotime.com
Aquatics Venue Site Worksheet<br />
continued<br />
On-deck cabling requirement<br />
(if on-deck cabling will not be used, skip this section)<br />
Select the length of the extension from start system to timing console:<br />
25’ (7.6m) 50’ (15.2m) 164’ (50m) 200’ (60.9m)<br />
Are there lane speakers? YES NO<br />
If yes, select the length of cable to cover the distance from the start system to<br />
the first lane:<br />
10’ (3m) 25’ (7.6m) 50’ (15.2m) 125’ (38.1m) 200’ (60.9m)<br />
Is there a speaker mounted to the backstroke pole? YES NO<br />
If yes, select the length of cable to cover the distance from the start system to<br />
the backstroke speaker:<br />
10’ (3m) 25’ (7.6m) 50’ (15.2m) 125’ (38.1m) 200’ (60.9m)<br />
Select the touchpad size used at the near end:<br />
60” (152.4cm) 78” (198.12cm) 96” (245.84cm)<br />
188.5cm (74.12”) 240cm (94.48”) none<br />
Select the number of Pushbuttons required for each lane at the near end:<br />
1 2 3 none<br />
Is the distance from the timing console to the closest lane at the near end greater than<br />
40’ (12.1m)? YES NO<br />
If yes, select the extension length required:<br />
25’ (7.6m) 50’ (15.2m) 100’ (30.4m) 200’ (60.9m)<br />
+1 (970) 667-1000<br />
page 28
Aquatics Venue Site Worksheet<br />
continued<br />
On-deck cabling requirement<br />
(continued)<br />
Select the touchpad size used at the far end:<br />
60” (152.4cm) 78” (198.12cm) 96” (245.84cm)<br />
188.5cm (74.12”) 240cm (94.48”) none<br />
If touchpads or buttons are used at the far end, select the length of cable to cover the<br />
distance from the timing console to the closest lane at the far end:<br />
25’ (7.6m) 50’ (15.2m) 100’ (30.4m) 200’ (60.9m)<br />
Select the number of Pushbuttons required for each lane at the far end:<br />
1 2 3 none<br />
Miscellaneous items:<br />
Existing in-deck wiring<br />
(if in-deck wiring does not exist, skip this section)<br />
How old are the cabling and deck plates?<br />
How well is it working?<br />
If drawings are available, ensure they are up to date and include all of this information:<br />
l Wall plates: locations, size and function (include setup/sport configurations to be<br />
used at each box)<br />
l Deck plates: locations, manufacturers’ part number (ie. Carlon E989NNR-4” x 4” x<br />
6”, Carlon E987 4” x 4” x 4”, Scepter JB446 4” x 4” x 6”, or other)<br />
l Conduit runs and sizes<br />
If drawings are not available, make a sketch of the pool detailing all of the above<br />
information.<br />
page 29<br />
www.coloradotime.com
Aquatics Venue Site Worksheet<br />
continued<br />
New construction in-deck wiring<br />
(if there will not be in-deck wiring, skip this section)<br />
CTS experts are available to assist in creating drawings for bid proposal, equipment<br />
specification, and construction process.<br />
If drawings are available, ensure they are up to date and include all of this information:<br />
l Wall plates: locations, size and function (include setup/sport configurations to be<br />
used at each box)<br />
l Deck plates: locations, manufacturers’ part number (ie. Carlon E989NNR-4” x 4” x<br />
6”, Carlon E987 4” x 4” x 4”, Scepter JB446 4” x 4” x 6”, or other)<br />
l Conduit runs and sizes<br />
If drawings are not available, make a sketch of the pool detailing all of the above<br />
information.<br />
Pace Clocks<br />
Which of these functions will be used?<br />
Training Functions<br />
Display Functions<br />
Water Polo Swimming Diving<br />
Pacing Shot Clock Lane <strong>Time</strong> DD/position<br />
Splits Game Clock Event/Heat Current Round/Diver<br />
Start Reaction <strong>Time</strong>s <strong>Time</strong> Out Clock<br />
Relay Exchanges<br />
Team Scores<br />
Lap Counter<br />
How many permanently mounted clocks are required?<br />
Recessed or surface mounted: RECESSED SURFACE<br />
How many portable clocks are required?<br />
Are tripods needed for the portable clocks? YES NO<br />
+1 (970) 667-1000<br />
page 30
Aquatics Venue Site Worksheet<br />
continued<br />
Diving and/or Synchronized Swimming<br />
Will an additional timing console be used (separate from swimming)?<br />
YES<br />
NO<br />
Highest number of judges for a single event:<br />
Highest number of events to be run simultaneously:<br />
Do you need the ability to split a panel of judges across both sides of the pool?<br />
YES<br />
NO<br />
Wired or wireless? WIRED WIRELESS<br />
If wired, do you want the cabling to be in-deck or on-deck? IN-DECK ON-DECK<br />
Please include a sketch/sketches of the pool set up for a diving and/or synchronized<br />
swimming meet, including the following information:<br />
l Where do you place your scoring table?<br />
l How far from the scoring table to the judges?<br />
l If in-deck, where do you want your wall plate?<br />
Water Polo<br />
Does the facility need water polo shot clocks? YES NO<br />
If yes, how many? 2 4<br />
Is the cabling in-deck, on-deck, or wireless? IN ON WIRELESS<br />
Do you want the clocks to be portable, or permanently mounted?<br />
PORTABLE<br />
PERMANENT<br />
Please include a sketch of the pool set up for a water polo match.<br />
page 31<br />
www.coloradotime.com
Aquatics Venue Site Worksheet<br />
continued<br />
Numeric Scoreboards<br />
The electronics of all CTS displays are conformal coated to protect against the aquatic<br />
environment.<br />
How many lanes/places should show on the scoreboard at one time? (If the number of<br />
lines of scoreboard is fewer than the number of lanes in the pool, the results will cycle<br />
through the available lines.)<br />
1 2 3 4 5 6 7 8 9 10 11 12<br />
If this is a multi-line scoreboard, do you want it in a vertical format (all lanes stacked up<br />
on top of each other), or a horizontal format (the first half of the lanes on the left and<br />
the second half on the right)?<br />
VERTICAL<br />
HORIZONTAL<br />
Which of the following additional modules are needed? (please check all that apply)<br />
o<br />
o<br />
o<br />
o<br />
o<br />
Facility name panel<br />
Advertising panel(s) (if multiple, indicate quantity)<br />
Swimming<br />
o Home/guest score<br />
o Guest 2/Guest 3 score<br />
o Event/Heat<br />
o Lengths/Record<br />
Diving<br />
o Degree of difficulty/award<br />
o Degree of difficulty/round/award<br />
o Leader board<br />
Water Polo<br />
o Period/shot<br />
o Score/game time<br />
If you have a scoreboard layout plan, please provide a sketch.<br />
+1 (970) 667-1000<br />
page 32
Aquatics Venue Site Worksheet<br />
continued<br />
Matrix LED Display<br />
The electronics of all CTS displays are conformal coated to protect against the aquatic<br />
environment.<br />
Please select one:<br />
Single Color: 23mm 30mm 35mm<br />
Full Color: 18mm 23mm 30mm<br />
How many lines of information does it need to show? (recommend a minimum of the<br />
number of lanes in the pool plus two - one for the name of the event, and one for event<br />
number/heat/record time)<br />
8 10 12 14 other:<br />
How many characters are required per line? (recommend 32 minimum for split 2-pool<br />
operation)<br />
What will the board be mounted on? (wall material or structure material)<br />
Is there a space requirement that the display needs to fit within? YES<br />
If yes, please indicate requirement:<br />
NO<br />
What is the viewing distance? Maximum:<br />
Minimum:<br />
Will any kind of video feed go to the display? YES NO<br />
What is the available power for the scoreboard? # of circuits:<br />
Amperage:<br />
Is there a climate-controlled room that the controller will be placed in?<br />
YES<br />
NO<br />
Do you have conduit running to the display location?<br />
YES<br />
NO<br />
If you have a scoreboard layout plan, please provide a sketch.<br />
page 33<br />
www.coloradotime.com
Aquatics Venue Site Worksheet<br />
continued<br />
List of photos to take:<br />
In many cases, you may need to take several photos of an area to fully show the<br />
situation<br />
o Pool overview<br />
o Lane lines<br />
o Starting blocks & location(s)<br />
o Deck plates/deck plate locations (individual lanes, start locations, bulkhead<br />
connections, etc.)<br />
o Wall plates/wall plate locations<br />
o Location(s) for start system<br />
o Location(s) for timing console<br />
o Any existing timing equipment<br />
o Current connections for timing system or scoreboard, if applicable<br />
o Gutter<br />
o Bulkhead(s), including gutter, deck plates, areas for touchpads, etc.<br />
o Scoreboard location(s)<br />
o Diving well<br />
o Synchro area<br />
o Water polo field of play<br />
Please send the following (as applicable):<br />
o Copy of this completed document<br />
o Sketch and description of gutter/pool wall obstructions<br />
o Gutter profile drawing(s) with dimensions and angles<br />
o In-deck wiring drawing<br />
o Sketch(es) of your pool as set up for each sport<br />
o Scoreboard layout sketch<br />
o Photos, as described above<br />
Send via email: projects@coloradotime.com<br />
By regular mail:<br />
Project Management<br />
<strong>Colorado</strong> <strong>Time</strong> <strong>Systems</strong><br />
1551 E 11th Street<br />
Loveland, CO 80537<br />
+1 (970) 667-1000<br />
page 34
Checklist<br />
General<br />
o<br />
o<br />
o<br />
Review “Official Swimming Pool<br />
Design Compendium” for applicable<br />
rules and regulations for type of pool<br />
under construction<br />
Pool layout in CAD format sent to<br />
<strong>Colorado</strong> <strong>Time</strong> <strong>Systems</strong> for review and<br />
redlining<br />
Complete and submit Aquatics Venue<br />
Site Worksheet<br />
Touchpads<br />
o<br />
o<br />
o<br />
Lane width and lane line usage<br />
considered before selecting a touchpad<br />
width<br />
1:1 pool gutter diagram or end wall<br />
configuration forwarded to <strong>Colorado</strong><br />
<strong>Time</strong> <strong>Systems</strong> to determine touchpad<br />
bracket requirements<br />
If touchpads will be hung from<br />
bulkhead, bulkhead edge configuration<br />
forwarded to <strong>Colorado</strong> <strong>Time</strong> <strong>Systems</strong> to<br />
determine touchpad bracket<br />
requirements<br />
Individual deck box installation<br />
o<br />
o<br />
o<br />
Starting block manufacturer identified.<br />
Contact <strong>Colorado</strong> <strong>Time</strong> <strong>Systems</strong> for<br />
exact placement of deck boxes<br />
Conduit, deck boxes, pull box and wall<br />
box specifications given to contractor<br />
Deck box inside dimensions are<br />
critical (4 x 4 x 6 inches or 10.2 x 10.2 x<br />
15.2cm). Pull wires are required<br />
Electrical installation<br />
o<br />
o<br />
o<br />
page 35<br />
Electrical installation in compliance<br />
with National Electric Code<br />
Minimum of one 125VAC (GFI)<br />
fourplex outlet on its own circuit<br />
specified for the timing area<br />
Power requirements forwarded to the<br />
electrical contractor<br />
Scoreboard installation<br />
o<br />
o<br />
o<br />
Scoreboard positioned in view of timing<br />
operators. Horizontal and vertical<br />
viewing angles taken into consideration<br />
when placing scoreboard<br />
Vertical/horizontal dimensions<br />
confirmed with <strong>Colorado</strong> <strong>Time</strong> <strong>Systems</strong><br />
prior to finalizing plans<br />
Mounting method confirmed with<br />
<strong>Colorado</strong> <strong>Time</strong> <strong>Systems</strong> (type of<br />
brackets, load, indoor vs. outdoor, etc.)<br />
Timing area<br />
o<br />
o<br />
o<br />
Timing console location allows an<br />
unrestricted view of the scoreboard and<br />
starting blocks<br />
If planning a timing booth, include a<br />
door in a location that allows immediate<br />
access to the pool deck by the timing<br />
operators. A large window should be<br />
provided for good visibility<br />
Wall plate is located in immediate<br />
vicinity of timing area<br />
Bulkheads<br />
o<br />
o<br />
Bulkhead manufacturer is identified.<br />
Architect to specify location of conduit,<br />
deck boxes and connection boxes for<br />
installation by bulkhead manufacturer.<br />
Access must be provided to the<br />
connection boxes via a hinged lid or<br />
other method<br />
Bulkhead mechanical drawings,<br />
including access, provided to <strong>Colorado</strong><br />
<strong>Time</strong> <strong>Systems</strong><br />
www.coloradotime.com
www.coloradotime.com<br />
l info@coloradotime.com<br />
1551 E 11th Street, Loveland, CO 80537<br />
800-279-0111 l +1(970)667-1000 l +1(970)667-5876 (fax)<br />
All content © 2012 <strong>Colorado</strong> <strong>Time</strong> <strong>Systems</strong>