youngAmericababy⢠- BabyAge.com
youngAmericababy⢠- BabyAge.com
youngAmericababy⢠- BabyAge.com

Create successful ePaper yourself
Turn your PDF publications into a flip-book with our unique Google optimized e-Paper software.
youngAmericababy<br />
A trademark of Stanley Furniture Company, Inc.<br />
ASSEMBLY INSTRUCTIONS<br />
35314-215<br />
39494-215<br />
44914-215<br />
47214-215<br />
48394-215<br />
CRIB<br />
MODEL NUMBER<br />
35316-215<br />
39496-215<br />
44916-215<br />
47216-215<br />
48396-215<br />
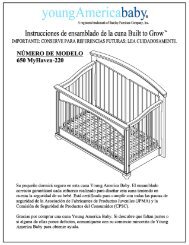
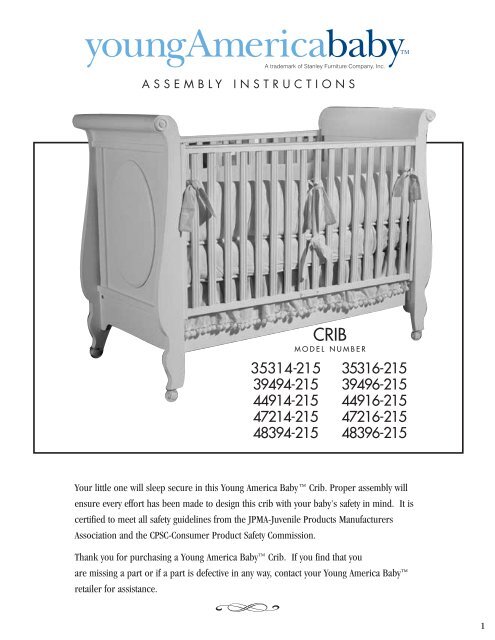
Your little one will sleep secure in this Young America Baby Crib. Proper assembly will<br />
ensure every effort has been made to design this crib with your baby's safety in mind. It is<br />
certified to meet all safety guidelines from the JPMA-Juvenile Products Manufacturers<br />
Association and the CPSC-Consumer Product Safety Commission.<br />
Thank you for purchasing a Young America Baby Crib. If you find that you<br />
are missing a part or if a part is defective in any way, contact your Young America Baby <br />
retailer for assistance.<br />
h<br />
1
WARNING: FAILURE TO FOLLOW THESE WARNINGS AND<br />
ASSEMBLY INSTRUCTIONS MAY RESULT IN SERIOUS INJURY OR DEATH.<br />
Read all instructions before assembling crib. KEEP INSTRUCTIONS FOR FUTURE USE.<br />
• Before each usage or assembly, inspect crib for damaged hardware, loose joints, missing parts or sharp<br />
edges. DO NOT use crib if any parts are missing or broken. Ask your dealer or write to Young America, P.O.<br />
Box 30, Stanleytown, VA 24168 for replacement parts and instructional literature if needed.<br />
• DO NOT substitute parts. Use only screws or parts supplied by manufacturer or parts of <strong>com</strong>parable<br />
quality and equal dimensions. Do not allow ends of screws or sharp edges to be exposed.<br />
• After raising side, make sure latches are secure.<br />
• When a child is able to climb out or reaches a height of 35 in. (90 cm), the crib should no longer<br />
be used.<br />
DO NOT place crib near window where cords from blinds or drapes may strangle a child.<br />
Strings can cause strangulation! DO NOT place items with a string, such as hood strings<br />
or pacifier cords, around a child’s neck. DO NOT suspend strings over crib or attach<br />
strings to toys.<br />
• If refinishing, use a non-toxic finish specified for children’s products<br />
• DO NOT leave child in crib with side lowered. Be sure side is in raised and locked position whenever<br />
child is in crib.<br />
• When child is able to pull to standing position, set mattress to lowest position and remove bumper pads,<br />
large toys, or other objects that could serve as steps for climbing out.<br />
• Never use plastic shipping bags or other plastic film as mattress covers because they can cause<br />
suffocation.<br />
• DO NOT use a water mattress with this crib.<br />
• The crib, including side rails, must be fully assembled prior to use.<br />
• Do not allow child to crawl or play underneath crib.<br />
• Replace teething rails if damaged, cracked or loose.<br />
• Use caution when a vaporizer is in use. Always aim vapor steam away from crib as well as away from any<br />
other wood furniture item.<br />
youngAmericababy<br />
A trademark of Stanley Furniture Company, Inc.<br />
2
IDENTIFYING THE PARTS<br />
LEFT CRIB END WITH<br />
DRAWER<br />
GUIDE<br />
RIGHT CRIB END<br />
WITH DRAWER GUIDE<br />
DROP SIDE<br />
STATIONARY SIDE<br />
STABILIZER RAILS (2)<br />
CRIB SPRING (1) WITH<br />
SCISSORS BRACKETS (4)<br />
LEFT & RIGHT CRIB DRAWER<br />
DRAWER BOTTOMS (2) SIDES WITH GUIDES (2)<br />
DRAWER DIVIDER (1)<br />
CRIB DRAWER BACK (1) CRIB DRAWER FRONT (1)<br />
youngAmericababy<br />
A trademark of Stanley Furniture Company, Inc.<br />
3
IDENTIFYING THE HARDWARE<br />
Identify the hardware included in the hardware bag using the illustrations below<br />
A. 4 Casters<br />
w/brakes<br />
B. 4 Decorative bolts<br />
2 3 /4" ( 1 /4" x 20 thread)<br />
C. 6 Decorative bolts<br />
1 3 /8" ( 1 /4" x 20 thread)<br />
D. 1 Allen wrench<br />
E. 4 Bolts, 8 washers &<br />
and 4 nylon locking nuts<br />
1 1 /4" (#10-32 thread)<br />
F. 4 Barrel Nuts G. 3 Capped Connecting Bolts<br />
H. 6 Connecting Cams I. 3 Threaded Connecting Bolts<br />
youngAmericababy<br />
A trademark of Stanley Furniture Company, Inc.<br />
4
ASSEMBLING AND OPERATING YOUR CRIB<br />
NOTE: Read all instructions before assembling crib. KEEP INSTRUCTIONS FOR FUTURE REFERENCE.<br />
There is a clear plastic bag attached to the flat spring that can be used to store instructions.<br />
This crib conforms to JPMA-Juvenile Products Manufacturers Association and the CPSC-Consumer Product Safety Commission. Please adhere to the following<br />
guidelines for assembly, operation and maintenance.<br />
PLIERS<br />
SCREWDRIVER<br />
(FLAT HEAD)<br />
SCREWDRIVER<br />
(PHILLIPS HEAD)<br />
TOOLS REQUIRED<br />
• Power tools are not re<strong>com</strong>mended for assembling your furniture.<br />
• Give yourself plenty of room to work.<br />
• Due to the size of this bed, it must be assembled within the space it will occupy.<br />
• The assembly will require at least two people to <strong>com</strong>plete.<br />
• Make sure all fasteners are tight.<br />
• Above all, take your time and read the instructions carefully.<br />
STEP 1.<br />
Attach wood stabilizer rails to the left and right crib ends.<br />
1. Insert barrel nuts into the holes on the inside of each end of the stabilizer rails as shown in SECTION “A”. Using a flathead<br />
screwdriver, align the slots in the barrel nuts with the center holes in the ends of the stabilizer rails. This will assure proper<br />
alignment with the bolts that will be inserted.<br />
2. Align the dowels in the ends of one of the stabilizer rails<br />
with the upper and lower holes that are bored in<br />
the panel near the bottom of the left crib end as<br />
shown in SECTION “A”. Make sure the<br />
notched edge of the stabilizer rail is turned up.<br />
3. Insert a 2 3 /4" x 1 /4"-20 bolt through the<br />
hole that is bored through the panel between<br />
the dowels. Using the allen wrench that is<br />
provided, tighten the bolt so that the dowels<br />
only go into the panel about half way.<br />
Do not tighten securely at this point,<br />
as this will interfere with assembly steps that follow.<br />
4. Repeat steps 2 and 3 to attach the stabilizer rail to the right crib end.<br />
5. Repeat steps 2-4 using the second stabilizer<br />
rail on the opposite side of the crib.<br />
youngAmericababy<br />
A trademark of Stanley Furniture Company, Inc.<br />
5
STEP 2.<br />
Attach stationary side to left and right crib ends.<br />
1. Position the stationary side so that the top rail with the plastic teething protector is on top.<br />
2. One of the posts of the left crib end has 3 threaded inserts in it. Bolt the stationary side to the left crib end by inserting<br />
3 of the 1 3 /8" (1/4" - 20 thread) decorative bolts through the 3 holes located in the end spindle of the stationary side.<br />
Line the holes in the end of the stationary side up with the threaded inserts on the inside of the post of the<br />
headboard and hand-tighten the 3 bolts. Do not tighten with allen wrench at this time.<br />
3. Repeat to attach the stationary side to the right crib end.<br />
youngAmericababy<br />
A trademark of Stanley Furniture Company, Inc.<br />
6
STEP 3.<br />
Install crib spring.<br />
1. The scissors brackets allow the crib spring to be installed at 3 different heights. The longer arm of the scissors bracket<br />
is attached to hole "A" for shipping purposes (see SECTION "C"). The bolts and nuts for the shorter arm are attached to<br />
the edge of the metal frame in holes "C" or "D". To achieve the lowest height, use the following <strong>com</strong>bination of holes:<br />
long arm attached to hole "A" – short arm attached to hole "D". The highest height is achieved by attaching the long arm<br />
to hole “C” -short arm to hole “D” (This is the preferred height for a newborn). The middle position is attained by attaching<br />
the long arm to hole “B” - short arm to hole “D”. Make sure to attach the scissors brackets to the inside of the metal frame with<br />
the head of the bolt going through from the outside of the frame. Attach all 4 scissors brackets using the same hole<br />
<strong>com</strong>binations. Tighten the bolts with a flat head screwdriver, using a pair of pliers or adjustable wrench to hold the<br />
nuts from the inside of the crib spring frame.<br />
2. Position the crib spring so that the flat side of the frame is up and the scissors brackets point downward.<br />
Carefully lower the crib spring into position so that the scissors brackets are on the outside of the stabilizer bars.<br />
Align the holes in the end of the long arm of the scissors bracket with the holes in the stabilizer rails. Put washers on<br />
the bolts from the inside of the stabilizer rails and attach using the nylon locking nuts that are provided, using a<br />
flat head screwdriver and a pair of pliers or adjustable wrench to hold the nylon locking nuts from inside the stabilizer rail.<br />
3. Tighten bolts securely.<br />
youngAmericababy<br />
A trademark of Stanley Furniture Company, Inc.<br />
7
STEP 4<br />
Attach drop side to left and right crib ends.<br />
1. Position the drop side so that the teething protector and the keyhole slot (see SECTION "D") is on top. There is a label<br />
on the bottom rail of the drop side that says “PUSH”. Make sure this label is turned to the outside of the crib so that<br />
the drop side will release and lock properly. Tilt the top edge of the drop side inward toward the crib. Align the upper<br />
glide buttons with the bottom of the slots for the upper tracks and guide them into the bottom of the slots. When both<br />
upper glide buttons are inside the upper tracks, carefully lower the drop side until the glide buttons reach the top of<br />
the upper tracks.<br />
2. Spread the bottom of the left and right crib ends apart slightly to allow the lower guide pin to clear the end spindle of<br />
the drop side. Engage the lower guide pin into the slot of the lower track.<br />
3. Repeat #2 to engage the other lower guide into the other end of the drop side.<br />
4. Once the upper glide buttons and lower guide pins are in place, raise the drop side until it locks into position.<br />
youngAmericababy<br />
A trademark of Stanley Furniture Company, Inc.<br />
8
STEP 5.<br />
Tighten stabilizer rails and the stationary side of crib.<br />
1. With the allen wrench provided, tighten the 4 decorative bolts that were used to attach the stabilizer rails.<br />
2. Also tighten the 6 bolts used to attach the stationary sides.<br />
STEP 6.<br />
Install casters.<br />
1. Insert a caster into caster bushing in the bottom of each leg.<br />
STEP 7.<br />
Drop-side operation.<br />
1. To lower the drop-side, lift up on the drop-side rail while pushing the bottom rail of the side toward the<br />
mattress support with your leg. The pressure applied with your leg will cause the guide pin to release and<br />
the side may be lowered.<br />
youngAmericababy<br />
A trademark of Stanley Furniture Company, Inc.<br />
9
STEP 8<br />
Assemble drawer divider and sides to drawer back.<br />
1. Lay the drawer back down so that the groove is facing up as shown in the diagram below.<br />
2. Insert a capped connector bolt through the center hole in the middle of the drawer back<br />
3. Align the wooden dowels in the end of the drawer divider that is marked “back” with the outer holes in the middle<br />
of the drawer back and the capped connector bolt that you installed<br />
4. Insert one of the connectiong cams into the hole on the side of the drawer divider. Use a Phillips screwdriver and turn<br />
the cam clokwise approximately 1/2 turn to lock the divider to the drawer back.<br />
5. Align the dowels in the ends of the drawer back with the outer holes that are near the ends of the left and right<br />
drawer sides.<br />
6. Insert capped connector bolts through the center holes at the back of the left and right drawer sides.<br />
7. Insert connecting cams into the holes near the ends of the drawer back and turn the cams clockwise approximately<br />
1/2 turn with a Phillips screwdriver to lock the sides to the drawer back.<br />
youngAmericababy<br />
A trademark of Stanley Furniture Company, Inc.<br />
10
STEP 9<br />
Install crib drawer bottoms.<br />
1. Orient one of the crib drawer bottoms so that the “NO STEP” warning label that is on the white side of the drawer<br />
bottom is facing the top and the front of the drawer assembly. Insert the drawer bottom into the grooves along the<br />
bottom edges of the drawer side and drawer divider. Slide the drawer bottom down into the groove that is in<br />
the drawer back.<br />
2. Repeat #1 to install the other drawer bottom.<br />
youngAmericababy<br />
A trademark of Stanley Furniture Company, Inc.<br />
11
STEP 10<br />
Attach draawer front to crib drawer.<br />
1. With the use of a flat head screwdriver, install threaded connecting bolts into the middle holes that are drilled on the<br />
back of the drawer front at each end and the center (refer to SECTION “A”). Use care not to over tighten these bolts to<br />
avoid damage to the drawer front.<br />
2. Align the holes, connnecting bolts, and the drawer bottom groove in the back of the drawer front with the holes in the<br />
ends of the drawer sides and drawer divider.<br />
3. Install connecting cams into the holes on the side of the drawer sides and drawer divider (refer to SECTION “B”).<br />
Using a Phillips screwdriver, turn the 3 connecting cams clockwise approximately 1/2 turn to lock the drawer front to<br />
the ends of the drawer sides and drawer divider<br />
4. The crib drawer is now fully assembled and ready to install.<br />
youngAmericababy<br />
A trademark of Stanley Furniture Company, Inc.<br />
12
STEP 11<br />
Installing the crib drawer.<br />
1. Extend the drawer guides outward that are mounted near the bottom of the left and right crib ends.<br />
2. With the help of another person, align the drawer guides that are mounted on the drawer sides with the guides that are<br />
mounted on the crib ends.<br />
3. Once both drawer guides are inserted into the guides on the crib ends, carefully push the drawer under the crib to the<br />
closed position.<br />
4. If you need to take the drawer <strong>com</strong>pletely out for any reason, pull the drawer open <strong>com</strong>pletely until it stops. Release<br />
the guide locks on both sides as shown in SECTION “A”. The drawer can then be pulled out until it releases from the<br />
guides mounted on the crib ends.<br />
STEP 12.<br />
Store instructions and install mattress.<br />
1. After <strong>com</strong>pleting assembly and after you have read the entire instructions booklet, store instructions in the plastic sleeve attached<br />
to the mattress spring foundation KEEP INSTRUCTIONS WITH THE CRIB. Install a crib mattress, which must be at least<br />
51-5/8” x 27-1/4” with a thickness not exceeding 6”.<br />
youngAmericababy<br />
A trademark of Stanley Furniture Company, Inc.<br />
13
CAUTION: Any mattress in this crib must be at least 27- 1 /4 " by 51- 5 /8 " with a<br />
thickness of no less than 5 inches and not exceeding 6 inches.<br />
MATTRESS<br />
5"MINIMUM THICKNESS<br />
6"MAXIMUM THICKNESS<br />
CRIB SPRING FRAME<br />
Operating Drop-Side<br />
1. Lift drop-side rail up.<br />
2. Using the side of your leg, apply pressure to the bottom rail<br />
of the drop-side gently toward the inside of the crib until you feel the locking mechanism release.<br />
3. Lower drop-side.<br />
4. To raise the drop-side, pull up on the drop-side rail. You will hear a click when it automatically locks into position.<br />
Maintaining Drop-Side<br />
1. Periodically check to make certain all screws are fastened securely..<br />
2. Check frequently that the crib spring brackets attached to the spring frame are securely attached to stabilizer rails.<br />
3. If you are missing a part or need a replacement part, do not use substitute parts. Ask your dealer for replacement parts or contact<br />
Customer Service at (276) 627-2100<br />
4. The spring adjustment bracket allows for the mattress to be lowered as your child grows. When your child reaches a height of 35 inches,<br />
or can climb out of the crib, you should place the child in a youth or regular bed.<br />
5. Save this instruction sheet in the event you disassemble the crib and need to reassemble it. This instruction sheet will also be useful<br />
in identifying replacement parts if needed at a future date.<br />
youngAmericababy<br />
A trademark of Stanley Furniture Company, Inc.<br />
14
CLEANING:<br />
Mix together a mild solution of gentle dishwashing liquid and water, apply to crib surface using a<br />
soft clean cloth lightly dampened in the solution. Rinse with clear water again using a soft clean<br />
cloth, then dry all surfaces thoroughly with a soft dry cloth. NO ABRASIVE CLEANERS, SCOURING<br />
PADS, STEEL WOOL, OR COARSE RAGS SHOULD BE USED TO CLEAN THIS FINE FURNITURE.<br />
STORAGE:<br />
A plastic pouch is attached to the crib spring for the storage of the assembly directions for future<br />
referral. After <strong>com</strong>pleting the assembly process, you are advised to read and be aware of all<br />
WARNINGS, CAUTIONS, CLEANING, STORAGE, USE AND MAINTENANCE notices contained in these<br />
instructions. We caution you not to place excess hardware in the plastic pouch as it could present<br />
danger to a child if retrieved and it could also puncture the crib mattress. When storing crib, use<br />
CAUTION as extreme temperature or humidity changes could be harmful.<br />
P.O. Box 30<br />
Stanleytown, VA 24168<br />
For parts, contact your Stanley dealer. For additional<br />
consumer information, call our Customer Services Department at<br />
1-(276) 627-2100. Mon. - Fri., 8-5 Eastern.<br />
youngAmericababy<br />
A trademark of Stanley Furniture Company, Inc.<br />
15