Built to Grow Crib Drawer Assembly Instructions ... - Stanley Furniture
Built to Grow Crib Drawer Assembly Instructions ... - Stanley Furniture
Built to Grow Crib Drawer Assembly Instructions ... - Stanley Furniture
Create successful ePaper yourself
Turn your PDF publications into a flip-book with our unique Google optimized e-Paper software.
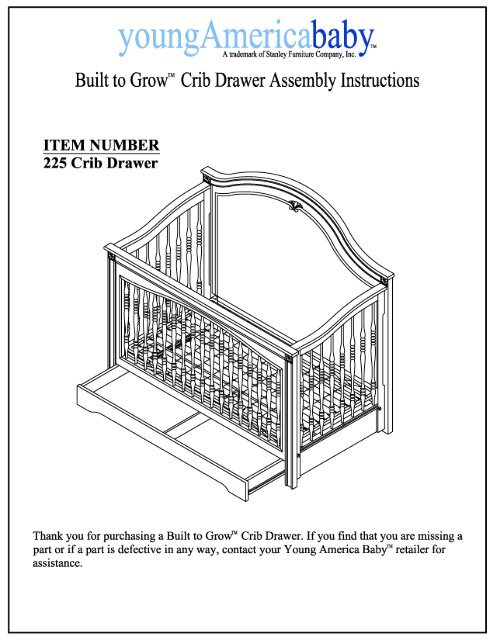
aby.A trademark of <strong>Stanley</strong> <strong>Furniture</strong> Company, Inc.<strong>Built</strong> <strong>to</strong> <strong>Grow</strong> <strong>Crib</strong> <strong>Drawer</strong> <strong>Assembly</strong> <strong>Instructions</strong>ITEM NUMBER225 <strong>Crib</strong> <strong>Drawer</strong>Thank you for purchasing a <strong>Built</strong> <strong>to</strong> <strong>Grow</strong> <strong>Crib</strong> <strong>Drawer</strong>. If you find that you are missing apart or if a part is defective in any way, contact your Young America Baby retailer forassistance.
2In July 1998, an EU (Spain and Portugal) stratified bot<strong>to</strong>m trawl survey have been made in Flemish Cap(Division 3M). A <strong>to</strong>tal of 119 valid hauls have been carried out <strong>to</strong> a depth of 709 meters. The results of this surveyincluding abundance indices of the main commercial species and age distributions for cod, the three species ofSebastes, american plaice, Greenland halibut and roughhead grenadier, are presented in the SCR 99/XX. Data onlength distributions of shrimp from this survey are presented in SCR Doc 98/81. Feeding studies on the mainspecies and collection of hydrography data and material for his<strong>to</strong>logical assessment of sexual maturity of cod,redfish, Greenland halibut and roughhead grenadier have also been carried out in this survey.ReferencesDel Río, J. L. (1998).- Northern shrimp (Pandalus borealis) on Flemish Cap in July-August 1998. NAFO SCRDoc. 98/81.Durán, P. , X. Paz and E. Cárdenas (1988).- Results from the 98 Spanish bot<strong>to</strong>m trawl survey in the NAFORegula<strong>to</strong>ry Area for Divisions 3NO. NAFO SCR Doc. 98/48.Vázquez, A. (1999).- Results from the bot<strong>to</strong>m trawl survey of Flemish Cap in 1998. NAFO SCR Doc. 98/XX.
Identifying the HardwareIdentify the hardware included in the hardware bag using the illustrations belowPage 33 Capped connecting boltsU-U-6 Connecting cams3 Threaded connecting bolts6 Wood screws#6 X 5/8" longTOOLS REQUIREDSCREWDRIVER(FLAT HEAD)SCREWDRIVER(PHILLIPS)——vouigA ri' icbaby.A trademark of <strong>Stanley</strong> <strong>Furniture</strong> Company, Inc.
Page 4Step 1: Assemble drawer divider and sides <strong>to</strong> drawer back1. Lay the drawer back down so that the groove is facing up as shown in the diagram below.2. Insert a capped connec<strong>to</strong>r bolt from the back of the drawer back through the center hole in the middle of the drawer back.3. Align the wooden dowels in the end of the drawer divider that is marked "back" with the holes in the center of the drawerback and the capped connec<strong>to</strong>r bolt that you installed.4. Insert one of the connecting cams in<strong>to</strong> the hole on the side of the drawer divider. Use a Phillips screwdriver and turn thecam clockwise approximately 1/2 turn <strong>to</strong> lock the divider <strong>to</strong> the drawer back.5. Position the right drawer side so that the grooved edge is aligned with the grooved edge of the drawer back (Refer <strong>to</strong>SECTION "A"). Align the dowels in the end of the drawer back with the outer holes that are located on the inside near the endof the right drawer side.6. Insert a capped connec<strong>to</strong>r bolt through the center hole at the back of the right drawer side.7. Insert a connecting cam in<strong>to</strong> the hole near the end of the drawer back and turn the cams clockwise approximately 1/2 turnwith a Phillips screwdriver <strong>to</strong> lock the side <strong>to</strong> the drawer back.8. Repeat steps 5, 6, and 7 <strong>to</strong> attach the left drawer side <strong>to</strong> the drawer back.BRAVER DIV1CONNECTORBOLTCONNECTINGDOWELbabyA frademark of <strong>Stanley</strong> Faraitare Company, Inc.
Page 6Step 3: Attach drawer front <strong>to</strong> crib drawer1. With the use of a flat head screwdriver, install threaded connecting bolts in<strong>to</strong> the middle holes on the back of the drawerfront at each end and the center (refer <strong>to</strong> SECTION "A"). Use care not <strong>to</strong> over tighten these bolts <strong>to</strong> avoid damage <strong>to</strong> thedrawer front.2. Align the dowels, connecting bolts, and the drawer bot<strong>to</strong>m groove with the holes in the ends of the drawer assembly.3. Install connecting cams in<strong>to</strong> the holes on the side of the drawer sides and drawer divider (refer <strong>to</strong> SECTION "B"). Using aphillips screwdriver, turn each connecting cam clockwise approximately 1/2 turn <strong>to</strong> lock the drawer front <strong>to</strong> the ends of thedrawer sides and drawer divider.4. The crib drawer is now fully assembled and ready <strong>to</strong> install.THREADED CONNECTING BOLTLAT HEADCAMPHILLIPSbabyA frademark of <strong>Stanley</strong> Faraitare Company, Inc.
Page 7Step 4: Attach drawer guides <strong>to</strong> left and right crib endsNOTE: If your <strong>Built</strong> <strong>to</strong> <strong>Grow</strong>tm <strong>Crib</strong> is already assembled, it is not necessary <strong>to</strong> disassemble it <strong>to</strong> attach thedrawer guides. With the help of another person, carefully lay the crib on the back of the headboard <strong>to</strong> accessthe pre-drilled holes on the inside of the crib ends in order <strong>to</strong> attach the drawer guides.1. The crib ends are pre-drilled for screws in order <strong>to</strong> properly locate the drawer guides. Locate the drawer guide that isstamped with "CL" (this stamp indentifies left hand guide) and align the hole in the guide that is pointed out with the REDarrow with the pre-drilled hole that is closest <strong>to</strong> the front of the left crib end.2. Using a phillips screwdriver, install a #6 X 5/8" long wood screw through the guide and in<strong>to</strong> the pre-drilled hole. Do nottighten the screw completely at this time.3. Install 2 additional #6 X 5/8" long wood screws in<strong>to</strong> the holes in the drawer guide that align with the other pre-drilledholes in the crib end. Tighten all 3 screws so that the heads of the screws are flush with the inside surface of the drawerguide. This will insure that the drawer will operate smoothly when installed.4. Locate the drawer guide that is stamped with "CR" (this stamp indentifies right hand guide) and repeat the above steps<strong>to</strong> attach the guide <strong>to</strong> the right crib end.5. If your crib is not fully assembled refer back <strong>to</strong> Page 6 of the <strong>Built</strong> <strong>to</strong> <strong>Grow</strong>TM <strong>Crib</strong> <strong>Assembly</strong> <strong>Instructions</strong> at this point. Ifthe crib is assembled, proceed <strong>to</strong> the next page of these instructions.FRONT OFCRIBWITH 'CL' STAMPGUIDEGOES ON LEFT CRIB ENDWITH WHEEL TO FRONT'RE—BORED HOLES ON INSIDEOF CRIB END INDICATE WHERETO LOCATE SCREWSOW INDICATES PROPERFOR FRONT SCREW#6 X 5/8' WOOD SCRE'PHILLIPS SCREWDRIVEIbabyA trademark of <strong>Stanley</strong> Furaitare Company, Inc.
Page 9CLEANING:Mix <strong>to</strong>gether a mild solution of gentle dishwashing liquid and water, apply <strong>to</strong> <strong>to</strong>ddler bed surface using a softclean cloth lightly dampened in the solution. Rinse with clear water again using a soft clean cloth, then dry allsurfaces thoroughly with a soft dry cloth. NO ABRASIVE CLEANERS, SCOURING PADS, STEEL WOOL, ORCOARSE RAGS SHOULD BE USED TO CLEAN THIS FINE FURNITURE.STORAGE:A plastic sleeve is attached <strong>to</strong> the crib spring for the s<strong>to</strong>rage of the assembly directions for future referral. Aftercompleting the assembly process, you are advised <strong>to</strong> read and be aware of all WARNINGS, CAUTIONS,CLEANING, STORAGE, USE AND MAINTENANCE notices contained in these instructions. We caution younot <strong>to</strong> place excess hardware in the plastic sleeve as it could present danger <strong>to</strong> a child if retrieved and it couldalso puncture the crib mattress. When s<strong>to</strong>ring <strong>to</strong>ddler bed, use CAUTION as extreme temperature or humiditychanges could be harmful.PERIODIC MAINTAINANCE:1. Periodically check <strong>to</strong> make certain all connec<strong>to</strong>rs are fastened securely.2. If you are missing a part or need a replacement part, do not use substitute parts. Ask your dealer for replacementparts or contact Cus<strong>to</strong>mer Service at (276) 627-2100.3. Save this instruction sheet in the event you disassemble the drawer and need <strong>to</strong> reassemble it. This instruction sheetwill also be useful in identifying replacement parts if needed at a future date.<strong>Stanley</strong>FURHTUREP.O. Box 30<strong>Stanley</strong><strong>to</strong>wn, VA 24168For parts, contact your <strong>Stanley</strong> dealer. For additionalconsumer information, call our Cus<strong>to</strong>mer Services Department at1-(276).627-2100 Mon. - Fri., 8-5 EasternbabyA trademark of <strong>Stanley</strong> <strong>Furniture</strong> Company, Inc.


