Robin Z5xx Heatspreader - Toradex
Robin Z5xx Heatspreader - Toradex
Robin Z5xx Heatspreader - Toradex

You also want an ePaper? Increase the reach of your titles
YUMPU automatically turns print PDFs into web optimized ePapers that Google loves.
high performance low power computing<br />
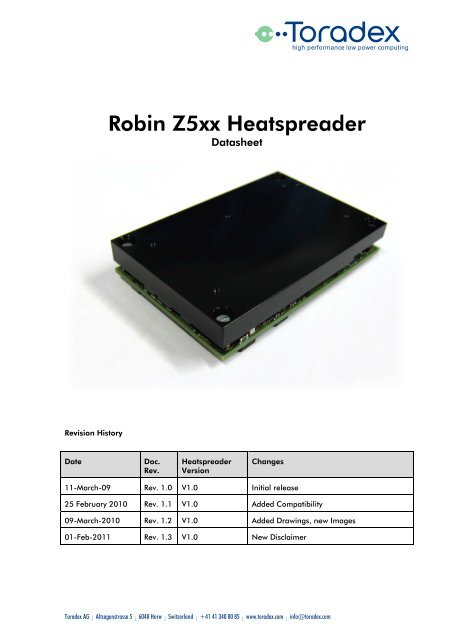
<strong>Robin</strong> <strong>Z5xx</strong> <strong>Heatspreader</strong><br />
Datasheet<br />
Revision History<br />
Date<br />
Doc.<br />
Rev.<br />
<strong>Heatspreader</strong><br />
Version<br />
Changes<br />
11-March-09 Rev. 1.0 V1.0 Initial release<br />
25 February 2010 Rev. 1.1 V1.0 Added Compatibility<br />
09-March-2010 Rev. 1.2 V1.0 Added Drawings, new Images<br />
01-Feb-2011 Rev. 1.3 V1.0 New Disclaimer<br />
<strong>Toradex</strong> AG l Altsagenstrasse 5 l 6048 Horw l Switzerland l +41 41 340 80 85 l www.toradex.com l info@toradex.com
Datasheet <strong>Heatspreader</strong> <strong>Robin</strong> <strong>Z5xx</strong><br />
Content<br />
1. Introduction 3<br />
2. Technical specifications 3<br />
3. Compatibility 3<br />
4. <strong>Heatspreader</strong> dimensions 4<br />
5. Assembly 5<br />
5.1. Assembly procedure 5<br />
<strong>Toradex</strong> AG l Altsagenstrasse 5 l 6048 Horw l Switzerland l +41 41 340 80 85 l www.toradex.com l info@toradex.com l 2/7
Datasheet <strong>Heatspreader</strong> <strong>Robin</strong> <strong>Z5xx</strong><br />
1. Introduction<br />
The heatspreader is an interface between the <strong>Robin</strong> and its components surfaces and a heat sink.<br />
Attaching a heatspreader to the <strong>Robin</strong> module is not a complete thermal solution. The<br />
heatspreader is mounted to the <strong>Robin</strong> by means of 4 screws of a M2.5 thread. The screws can be<br />
mounted from the top or from the bottom. There are additional threaded holes for attaching the<br />
heatspreader to a heat sink or a thermal management solution.<br />
2. Technical specifications<br />
The following table shows the technical specifications of the heatspreader.<br />
Material aluminum alloy 6061<br />
Coating<br />
black anodized<br />
Thermal conductivity<br />
180 W/(mK)<br />
Weight<br />
100 gr.<br />
TIM* thermal conductivity<br />
5.5 W/(mK)<br />
TIM = thermal interface material<br />
3. Compatibility<br />
Version<br />
V1.0 A<br />
(23021000)<br />
V1.0 B<br />
(23021001)<br />
Content<br />
<strong>Heatspreader</strong><br />
11.4mm height<br />
TIM<br />
bubblefoil packaging<br />
<strong>Heatspreader</strong><br />
11.4mm height<br />
TIM<br />
M2.5x12mm screws<br />
nuts<br />
Blister packaging<br />
Comments<br />
<strong>Robin</strong> <strong>Z5xx</strong> V1.0: Full compatible<br />
<strong>Robin</strong> <strong>Z5xx</strong> V2.0: Full compatible, but overall nominal<br />
height differ by 0.4mm (tolerance of specification is +/-<br />
0.65mm) *1<br />
Daisy V1.0 and V1.1: compatible, but screws needed<br />
Daisy V1.0 and V1.1: compatible, but screws needed<br />
Lily V1.0 and V1.1: compatible, but screws needed<br />
Lily V2.0 and V2.1: compatible, but screws needed<br />
<strong>Robin</strong> <strong>Z5xx</strong> V1.0: Full compatible<br />
<strong>Robin</strong> <strong>Z5xx</strong> V2.0: Full compatible, but overall nominal<br />
height differ by 0.4mm (tolerance of specification is +/-<br />
0.65mm) *1<br />
Daisy V1.0 and V1.1: Full compatible<br />
Lily V1.0 and V1.1: Full compatible<br />
Lily V2.0: compatible, but longer screws needed *2<br />
Lily V2.1: Full compatible<br />
*1: COM Express COM.0 specifications required the module together with the heatspreader to<br />
have a total height of 13.00mm +/- 0.65mm.<br />
<strong>Robin</strong> <strong>Z5xx</strong> V1.0 PCB thickness: 1.6mm -> overall nominal thickness with heatspreader: 13.00mm<br />
<strong>Robin</strong> <strong>Z5xx</strong> V2.0 PCB thickness: 2.0mm -> overall nominal thickness with heatspreader: 13.40mm<br />
*2: Standoffs on Lily V2.0 are M3 threaded, longer screws are needed to mount the <strong>Heatspreader</strong><br />
on Lily V2.0 carrier board.<br />
<strong>Toradex</strong> AG l Altsagenstrasse 5 l 6048 Horw l Switzerland l +41 41 340 80 85 l www.toradex.com l info@toradex.com l 3/7
Datasheet <strong>Heatspreader</strong> <strong>Robin</strong> <strong>Z5xx</strong><br />
4. <strong>Heatspreader</strong> dimensions<br />
The following drawings illustrate the mechanical dimensions of the heatspreader. All<br />
measurements are in millimeter.<br />
<strong>Toradex</strong> AG l Altsagenstrasse 5 l 6048 Horw l Switzerland l +41 41 340 80 85 l www.toradex.com l info@toradex.com l 4/7
Datasheet <strong>Heatspreader</strong> <strong>Robin</strong> <strong>Z5xx</strong><br />
5. Assembly<br />
Assembly must be done very carefully since putting the heatspreader in a wrong way will damage<br />
the Woodpecker module or may prevent the system to work properly. The screws to useddepend<br />
on the solution, one possible solution is illustrated below.<br />
5.1. Assembly procedure<br />
The following procedure shows how to attach the thermal interface material (TIM) and the<br />
heatspreader on the example of assembling a complete heatsink solution to the <strong>Robin</strong> module.<br />
Please read the procedure very carefully in order not to damage the module.<br />
1. The yellow rectangle shows where the TIM must be placed. That is on the left, the System<br />
Controller Hub (=SCH=Poulsbo=US15W) and on the right the Atom (=CPU=Silverthrone)<br />
processor.<br />
2. Remove the plastic foils on the TIM (on both sides) and attach the TIM as shown over the<br />
SCH and CPU.<br />
<strong>Toradex</strong> AG l Altsagenstrasse 5 l 6048 Horw l Switzerland l +41 41 340 80 85 l www.toradex.com l info@toradex.com l 5/7
Datasheet <strong>Heatspreader</strong> <strong>Robin</strong> <strong>Z5xx</strong><br />
3. Make sure the TIM covers completely the Silicone of the SCH and CPU (yellow) and is not<br />
placed on the capacitor on the right side (green).<br />
4. On attaching the heatsink, make sure the yellow marked corner is on the right side. (Very<br />
important for <strong>Robin</strong> since she position of the screws don’t assure that it is mounted<br />
correctly).<br />
5. Mount the heatsink in a way that the position of the holes is right from the beginning<br />
(moving it may not be possible since the TIM sticks the aluminium and print together).<br />
6. Use M2.5 screws to fix the heatsink together with module.<br />
7. Done.<br />
<strong>Toradex</strong> AG l Altsagenstrasse 5 l 6048 Horw l Switzerland l +41 41 340 80 85 l www.toradex.com l info@toradex.com l 6/7
Datasheet <strong>Heatspreader</strong> <strong>Robin</strong> <strong>Z5xx</strong><br />
Disclaimer:<br />
Copyright © <strong>Toradex</strong> AG. All rights reserved. All data is for information purposes only and not<br />
guaranteed for legal purposes. Information has been carefully checked and is believed to be<br />
accurate; however, no responsibility is assumed for inaccuracies. Brand and product names are<br />
trademarks or registered trademarks of their respective owners. Specifications are subject to<br />
change without notice.<br />
Trademark Acknowledgement:<br />
Brand and product names are trademarks or registered trademarks of their respective owners.<br />
<strong>Toradex</strong> AG l Altsagenstrasse 5 l 6048 Horw l Switzerland l +41 41 340 80 85 l www.toradex.com l info@toradex.com l 7/7