Apalis Carrier Board Design Guide - Toradex
Apalis Carrier Board Design Guide - Toradex
Apalis Carrier Board Design Guide - Toradex
- No tags were found...

Create successful ePaper yourself
Turn your PDF publications into a flip-book with our unique Google optimized e-Paper software.
<strong>Apalis</strong> Computer Module<strong>Carrier</strong> <strong>Board</strong> <strong>Design</strong> <strong>Guide</strong>
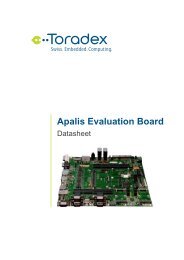
<strong>Apalis</strong> <strong>Carrier</strong> <strong>Board</strong> <strong>Design</strong> <strong>Guide</strong>Issued by: <strong>Toradex</strong> Document Type: <strong>Carrier</strong> <strong>Board</strong> <strong>Design</strong> <strong>Guide</strong>Purpose:This document is a guideline for developing a carrier board that conforms to the specificationsfor the <strong>Apalis</strong> ® Computer ModuleDocumentVersion:1.3Revision HistoryDateVersionRemarks8 April 2013 V1.0 Initial Release: Preliminary Version27 August 2013 V1.1 Correction in section 4.326 November 2013 V1.2 Correction in Figure 23Correction in Table 10, Table 11, Table 12, and Table 13: signalsUSBH_OC# and USBH_EN pin numbersCorrection in Table 16: Description of the pins 282-30213 April 2015 V1.3 Remove layout guide section (available in a separate document), adddescriptions of low-speed interfaces, minor correctionsCorrection of mSATA schematics (Figure 15)<strong>Toradex</strong> AG l Altsagenstrasse 5 l 6048 Horw l Switzerland l +41 41 500 48 00 l www.toradex.com l info@toradex.com Page | 2
<strong>Apalis</strong> <strong>Carrier</strong> <strong>Board</strong> <strong>Design</strong> <strong>Guide</strong>1 Introduction ....................................................................................................................... 61.1 Overview ............................................................................................................................. 61.2 Additional Documents .......................................................................................................... 61.2.1 Layout <strong>Design</strong> <strong>Guide</strong> ................................................................................................. 61.2.2 <strong>Apalis</strong> Module Datasheets ......................................................................................... 61.2.3 <strong>Apalis</strong> Module Definition ............................................................................................ 61.2.4 <strong>Toradex</strong> Developer Centre ......................................................................................... 61.2.5 <strong>Apalis</strong> Evaluation <strong>Board</strong> Schematics ........................................................................... 71.2.6 Pinout <strong>Design</strong>er ........................................................................................................ 71.3 Abbreviations ....................................................................................................................... 72 Interfaces ......................................................................................................................... 102.1 Architecture ....................................................................................................................... 102.1.1 Standard Interfaces ................................................................................................. 112.1.2 Type-specific Interfaces ........................................................................................... 112.1.3 Pin Numbering ........................................................................................................ 122.2 PCI Express ...................................................................................................................... 132.2.1 PCIe Signals ........................................................................................................... 132.2.2 Reference Schematics ............................................................................................. 132.2.3 Unused PCIe Signals Termination ............................................................................ 182.3 SATA ................................................................................................................................ 192.3.1 SATA Signals .......................................................................................................... 192.3.2 Reference Schematics ............................................................................................. 192.3.3 Unused SATA Signals Termination ........................................................................... 212.4 Ethernet ............................................................................................................................ 222.4.1 Ethernet Signals ...................................................................................................... 222.4.2 Reference Schematics ............................................................................................. 222.4.3 Unused Ethernet Signals Termination ....................................................................... 252.5 USB .................................................................................................................................. 252.5.1 USB Signals ........................................................................................................... 252.5.2 Reference Schematics ............................................................................................. 262.5.3 Unused USB Signal Termination .............................................................................. 322.6 Parallel RGB LCD Interface ................................................................................................ 332.6.1 Parallel RGB LCD Signals ....................................................................................... 332.6.2 Color Mapping......................................................................................................... 332.6.3 Reference Schematics ............................................................................................. 352.6.4 Unused Parallel RGB Interface Signal Termination .................................................... 372.7 LVDS LCD Interface ........................................................................................................... 372.7.1 LVDS Signals .......................................................................................................... 382.7.2 Compatibility between LVDS Configurations.............................................................. 382.7.3 Reference Schematics ............................................................................................. 412.7.4 Unused LVDS Interface Signal Termination .............................................................. 412.8 HDMI/DVI .......................................................................................................................... 412.8.1 HDMI/DVI Signals ................................................................................................... 422.8.2 Reference Schematics ............................................................................................. 422.8.3 Unused HDMI/DVI Signal Termination ...................................................................... 442.9 Analogue VGA ................................................................................................................... 442.9.1 VGA Signals ........................................................................................................... 442.9.2 Reference Schematics ............................................................................................. 452.9.3 Unused VGA Interface Signal Termination ................................................................ 452.10 Parallel Camera Interface ................................................................................................... 452.10.1 Parallel Camera Signals ....................................................................................... 462.10.2 Unused Parallel Camera Interface Signal Termination ............................................ 462.11 SD/MMC/SDIO .................................................................................................................. 462.11.1 SD/MMC/SDIO Signals ........................................................................................ 472.11.2 Reference Schematics ......................................................................................... 472.11.3 Unused SD/MMC/SDIO Interface Signal Termination ............................................. 48<strong>Toradex</strong> AG l Altsagenstrasse 5 l 6048 Horw l Switzerland l +41 41 500 48 00 l www.toradex.com l info@toradex.com Page | 3
<strong>Apalis</strong> <strong>Carrier</strong> <strong>Board</strong> <strong>Design</strong> <strong>Guide</strong>4.2 Fixation of the Module ........................................................................................................ 694.3 Thermal Solution ................................................................................................................ 704.4 Module Size ...................................................................................................................... 724.5 Connector and MXM SnapLock Land Pattern Requirements ................................................. 724.6 <strong>Carrier</strong> <strong>Board</strong> Space Requirements ..................................................................................... 735 Appendix A – Physical Pin Definition and Location ............................................................... 76<strong>Toradex</strong> AG l Altsagenstrasse 5 l 6048 Horw l Switzerland l +41 41 500 48 00 l www.toradex.com l info@toradex.com Page | 5
<strong>Apalis</strong> <strong>Carrier</strong> <strong>Board</strong> <strong>Design</strong> <strong>Guide</strong>1 Introduction1.1 OverviewThis document is designed to guide users through the development of a customized carrier boardfor the <strong>Apalis</strong> Computer module. It describes the different interfaces and contains referenceschematics. This document reflects only the standardized primary function of the <strong>Apalis</strong> modules.The type-specific interfaces and secondary functions are not guaranteed to be compatible betweendifferent <strong>Apalis</strong> modules. These interfaces are described in the datasheet of each computermodule. Some <strong>Apalis</strong> modules do not feature the full set of standard interfaces. Therefore, it isstrongly recommended to read the datasheets of the modules that are intended to be used withthe carrier board.The <strong>Apalis</strong> Computer module features new high-speed interfaces such as PCI Express, SATA, HDMIand LVDS which require special layout considerations regarding trace impedance and lengthmatching. Please read carefully the <strong>Toradex</strong> Layout <strong>Design</strong> <strong>Guide</strong> for additional information to therouting of these interfaces.1.2 Additional Documents1.2.1 Layout <strong>Design</strong> <strong>Guide</strong>This document contains layout requirement specifications for the high-speed signals and helps toavoid problems related with the layout.http://developer.toradex.com/hardware-resources/arm-family/carrier-board-design1.2.2 <strong>Apalis</strong> Module DatasheetsFor every <strong>Apalis</strong> Module, there is a datasheet available. Among other things, this documentdescribes the type-specific interfaces and the secondary function of the pins. Before starting thedevelopment of a customized carrier board, please check in this document whether the requiredinterfaces are really available on the selected modules.https://www.toradex.com/products/apalis-arm-computer-modules1.2.3 <strong>Apalis</strong> Module DefinitionThis document describes the <strong>Apalis</strong> Module standard. It provides additional information about theinterfaces.http://docs.toradex.com/100240-apalis-module-specification.pdf1.2.4 <strong>Toradex</strong> Developer CentreYou can find a lot of additional information in the <strong>Toradex</strong> Developer Centre, which is updatedwith the latest product support information on a regular basis.Please note that the Developer Centre is common for all <strong>Toradex</strong> products. You should alwayscheck to ensure if information is valid or relevant for the <strong>Apalis</strong> modules.http://www.developer.toradex.com<strong>Toradex</strong> AG l Altsagenstrasse 5 l 6048 Horw l Switzerland l +41 41 500 48 00 l www.toradex.com l info@toradex.com Page | 6
<strong>Apalis</strong> <strong>Carrier</strong> <strong>Board</strong> <strong>Design</strong> <strong>Guide</strong>1.2.5 <strong>Apalis</strong> Evaluation <strong>Board</strong> SchematicsWe provide the completed schematics plus the Altium project file for the <strong>Apalis</strong> Evaluation <strong>Board</strong>for free. This is a great help when designing your own <strong>Carrier</strong> <strong>Board</strong>.http://developer.toradex.com/hardware-resources/arm-family/carrier-board-design1.2.6 Pinout <strong>Design</strong>erThis is an interactive and useful tool for configuring the pin muxing of the Colibri and <strong>Apalis</strong>modules. It can be really helpful in custom carrier board development on <strong>Toradex</strong> modules andchecking compatibility of existing carrier boards with our modules.http://developer.toradex.com/knowledge-base/pinout-designer1.3 AbbreviationsAbbreviationADCAGNDAuto-MDIXCADCANCDMACECCPUCSIDACDDCDRCDSIDVIDVI-ADVI-DDVI-IEDAEDIDEMIeMMCESDFPD-LinkGBEGNDGPIOGSMHDAHDCPHDMII 2 CExplanationAnalogue to Digital ConverterAnalogue Ground, separate ground for analogue signalsAutomatically Medium Dependent Interface Crossing, a PHY with Auto-MDIX f is able to detect whetherRX and TX need to be crossed (MDI or MDIX)Computer-Aided <strong>Design</strong>, in this document is referred to PCB Layout toolsController Area Network, a bus that is manly used in automotive and industrial environmentCode Division Multiplex Access, abbreviation often used for a mobile phone standard for datacommunicationConsumer Electronic Control, HDMI feature that allows to control CEC compatible devicesCentral Processor UnitCamera Serial InterfaceDigital to Analogue ConverterDisplay Data Channel, interface for reading out the capability of a monitor, in this document DDC2B(based on I 2 C) is always meant<strong>Design</strong> Rule Check, a tool for checking whether all design rules are satisfied in a CAD toolDisplay Serial InterfaceDigital Visual Interface, digital signals are electrical compatible with HDMIDigital Visual Interface Analogue only, signals are compatible with VGADigital Visual Interface Digital only, signals are electrical compatible with HDMIDigital Visual Interface Integrated, combines digital and analogue video signals in one connectorElectronic <strong>Design</strong> Automation, software for schematic capture and PCB layout (CAD or ECAD)Extended Display Identification Data, timing setting information provided by the display in a PROMElectromagnetic Interference, high frequency disturbancesEmbedded Multi Media Card, flash memory combined with MMC interface controller in a BGA package,used as internal flash memoryElectrostatic Discharge, high voltage spike or spark that can damage electrostatic- sensitive devicesFlat Panel Display Link, high-speed serial interface for liquid crystal displays. In this document also calledLVDS interface.Gigabit Ethernet, Ethernet interface with a maximum data rate of 1000Mbit/sGroundGeneral Purpose Input/Output, pin that can be configured being an input or outputGlobal System for Mobile CommunicationsHigh Definition Audio (HD Audio), digital audio interface between CPU and audio codecHigh-Bandwidth Digital content Protection, copy protection system that is used by HDMI beside othersHigh-Definition Multimedia Interface, combines audio and video signal for connecting monitors, TV sets orProjectors, electrical compatible with DVI-DInter-Integrated Circuit, two wire interface for connecting low-speed peripherals<strong>Toradex</strong> AG l Altsagenstrasse 5 l 6048 Horw l Switzerland l +41 41 500 48 00 l www.toradex.com l info@toradex.com Page | 7
<strong>Apalis</strong> <strong>Carrier</strong> <strong>Board</strong> <strong>Design</strong> <strong>Guide</strong>AbbreviationI 2 SIrDAJTAGLCDLSBLVDSMIPIMDIMDIXmini PCIeMMCMSBmSATAMXM3N/AN/CODOTGOWRPCBPCIPCIePCMPDPHYPMICPUPWMRGBRJ45RS232RS422RS485R-UIMS/PDIFSATASDSDIOSIMSMBusSoCSPITIMTMDSTVS DiodeExplanationIntegrated Interchip Sound, serial bus for connecting PCM audio data between two devicesInfrared Data Association, infrared interface for connecting peripheralsJoint Test Action Group, widely used debug interfaceLiquid Crystal DisplayLeast Significant BitLow-Voltage Differential Signaling, electrical interface standard that can transport very high-speed signalsover twisted-pair cables. Many interfaces like PCIe or SATA use this interface. Since the first successfulapplication was the Flat Panel Display Link, LVDS became a synonymous for this interface. In thisdocument, the term LVDS is used for the FPD-Link interface.Mobile Industry Processor Interface AllianceMedium Dependent Interface, physical interface between Ethernet PHY and cable connectorMedium Dependent Interface Crossed, an MDI interface with crossed RX and TX interfacesPCI Express Mini Card, card form factor for internal peripherals. The interface features PCIe and USB 2.0connectivityMultiMediaCard, flash memory cardMost Significant BitMini-SATA, a standardized form factor for small solid state drive, similar dimensions as mini PCIeMobile PCI Express Module (second generation), graphic card standard for mobile device, the <strong>Apalis</strong> formfactor uses the physical connector but not the pin-out and the PCB dimensions of the MXM3 standard.Not AvailableNot ConnectedOpen DrainUSB On-The-Go, a USB host interface that can also act as USB client when connected to another hostinterfaceOne Wire (1-Wire), low-speed interface which needs just one data wire plus groundPrinted Circuit <strong>Board</strong>Peripheral Component Interconnect, parallel computer expansion bus for connecting peripheralsPCI Express, high-speed serial computer expansion bus, replaces the PCI busPulse-Code Modulation, digitally representation of analogue signals, standard interface for digital audioPull-Down ResistorPhysical Layer of the OSI modelPower Management IC, integrated circuit that manages amongst others the power sequence of a systemPull-up ResistorPulse-Width ModulationRed Green Blue, color channels in common display interfacesRegistered Jack, common name for the 8P8C modular connector that is used for Ethernet wiringSingle ended serial port interfaceDifferential signaling serial port interface, full duplexDifferential signaling serial port interface, half duplex, multi drop configuration possibleRemovable User Identity Module, identifications card for CDMA phones and networks, an extension of theGSM SIM cardSony/Philips Digital Interconnect Format, optical or coaxial interface for audio signalsSerial ATA, high-speed differential signaling interface for hard drives and SSDSecure Digital, flash memory cardSecure Digital Input Output, an external bus for peripherals that uses the SD interfaceSubscriber Identification Module, identification card for GSM phonesSystem Management Bus (SMB), two wire bus based on the I 2 C specifications, used specially in x86design for system management.System on a Chip, IC which integrates the main component of a computer on a single chipSerial Peripheral Interface Bus, synchronous four wire full duplex bus for peripheralsThermal Interface Material, thermal conductive material between CPU and heat spreader or heat sinkTransition-Minimized Differential Signaling, serial high-speed transmitting technology that is used by DVIand HDMITransient-Voltage-Suppression Diode, diode that is used to protect interfaces against voltage spikes<strong>Toradex</strong> AG l Altsagenstrasse 5 l 6048 Horw l Switzerland l +41 41 500 48 00 l www.toradex.com l info@toradex.com Page | 8
<strong>Apalis</strong> <strong>Carrier</strong> <strong>Board</strong> <strong>Design</strong> <strong>Guide</strong>AbbreviationUARTUSBVCCVGAExplanationUniversal Asynchronous Receiver/Transmitter, serial interface, in combination with a transceiver a RS232,RS422, RS485, IrDA or similar interface can be achievedUniversal Serial Bus, serial interface for internal and external peripheralsPositive supply voltageVideo Graphics Array, analogue video interface for monitorsTable 1: Abbreviations<strong>Toradex</strong> AG l Altsagenstrasse 5 l 6048 Horw l Switzerland l +41 41 500 48 00 l www.toradex.com l info@toradex.com Page | 9
<strong>Apalis</strong> <strong>Carrier</strong> <strong>Board</strong> <strong>Design</strong> <strong>Guide</strong>2 Interfaces2.1 ArchitectureThe block diagram in Figure 1 shows the basic architecture of the <strong>Apalis</strong> module, depicting thestandard interfaces and some examples of type-specific interfaces.Standard interfaces are interfaces that are compatible between different <strong>Apalis</strong> modules. The pinsare reserved for this specific function and are not used for other purpose. This guarantees electricalcompatibility between carrier board designs which only uses the standard interfaces. This helps toensure longevity of carrier board designs and provides support for future modules. Some modulesmay not feature all the standard interfaces. In this case, for the GPIO compatible interfaces, GPIOfunctionality is provided. Other interfaces on the module might be left disconnected.Type-specific interfaces are interfaces which are not guaranteed to be functionally or electricallycompatible between modules. If a carrier board design uses such interfaces, then it is possible thatother modules in the <strong>Apalis</strong> module family do not provide these interfaces and instead provideanother interface on the associated pins. These interfaces might be electrically incompatible. In thiscase, the carrier board will be restricted for use only with certain <strong>Apalis</strong> modules.SATA (x1)PCI Express (x4)PWM (x4)I2C (x3)Parallel CameraAnalogue and ResistiveTouchPCI Express (x1)Camera Serial Interface(CSI)Display Serial Interface(DSI)SPI (x2)Digital Audio24 Bit Parallel LCD<strong>Apalis</strong> ModuleDual Channel LVDSVGASPDIFMMC (8 bit)SDIO (4 bit)CAN (x2)HDMI/DVIUART (x4)GPIO (x8)(dedicated, many moreavailable)USB(2 x USB3.0)(2 x USB2.0)(1x USB client shared)Gigabit EthernetAnalogue AudioFunction is standard: Reserved on every module (however, not necessarilyimplemented on every module). Will only be used for this purpose or GPIO.Figure 1: <strong>Apalis</strong> Module ArchitectureFunction is type specific: May only be present on specific modules and isnot guaranteed to be electrically or functionality compatible on differentmodules; the pins may be used for as yet undefined interfaces<strong>Toradex</strong> AG l Altsagenstrasse 5 l 6048 Horw l Switzerland l +41 41 500 48 00 l www.toradex.com l info@toradex.com Page | 10
<strong>Apalis</strong> <strong>Carrier</strong> <strong>Board</strong> <strong>Design</strong> <strong>Guide</strong>2.1.1 Standard InterfacesThe standard interfaces on the <strong>Apalis</strong> module family guarantees electrical and functionalcompatibility between the module family members. The table below shows an overview of thestandard interfaces that are provided by an <strong>Apalis</strong> module. The “GPIO Capable” column indicateswhether the assigned pins can be used as GPIOs. “Yes” and “No” are self-Explanatory. “Optional”indicates that it may be possible for some modules, but not all.The “Standard” column indicates the number of interfaces that the specification allows for in thestandard pin-out. Customers should consult the datasheet for specific <strong>Apalis</strong> module variants tocheck which interfaces are available for that module. If a module does not feature the completenumber of interfaces that is specified by the <strong>Apalis</strong> standard, the provided interfaces are filled inthe ascending order from low to high. For example, the <strong>Apalis</strong> standard features 4 USB ports (port1 to port 4). If a module only provides 3 USB interfaces, they are provided at port 1, 2 and 3 of themodule edge connector. Port 4 will be left unconnected in this case. If a custom carrier board onlyuses 2 USB interfaces, port 1 and 2 should be used. This guarantees better compatibility with<strong>Apalis</strong> modules that do not feature all USB ports.Description Standard Note4/5 Wire Resistive Touch 1 Touch wiper shared with analogue input 4 NoAnalogue Inputs 4 Minimum 8-bit resolution, 0-3.3V nominal range NoAnalogue Audio 1 Line in L&R, Microphone in, Headphone out L&R NoGPIOCapableCAN 2 OptionalDigital Audio 1 HDA YesDual Channel LVDS Display 1 1x or 2x single channel or 1x dual channel mode NoGigabit Ethernet 1 NoGPIO 8 YesHDMI (TDMS) 1 NoI2C 3 Including DDC YesParallel Camera 1 8-bit YUV OptionalParallel LCD 1 24-bit resolution OptionalPCI-Express (lane count) 1 Single lane and clock NoPWM 4 YesSATA 1 NoSDIO 1 4-bit YesSDMMC 1 8-bit YesS/PDIF 1 1 input, 1 output OptionalSPI 2 YesUART 4 1 Full Function, 1 CTS/RTS, 2 RXD/TXD only YesUSB 4 2 x USB 3.0, 2 x USB 2.0, 1 x shared host/client USB 2.0 NoVGA 1 NoTable 2: Standard Interfaces2.1.2 Type-specific InterfacesType-specific interfaces allow for the possibility of including interfaces which may not exist yet orare yet to be widely adopted, or interfaces which may be specific to a particular device or groups ofdevices. They also offer a mechanism for extending features which are present on the standardinterfaces, such as providing additional PCI-Express lanes. This provides the <strong>Apalis</strong> module with theflexibility of being able to reconfigure a subset of pins for different uses between different modules.<strong>Toradex</strong> AG l Altsagenstrasse 5 l 6048 Horw l Switzerland l +41 41 500 48 00 l www.toradex.com l info@toradex.com Page | 11
<strong>Apalis</strong> <strong>Carrier</strong> <strong>Board</strong> <strong>Design</strong> <strong>Guide</strong>It should be noted that wherever possible, type-specific interfaces will be kept common acrossmodules that share such interfaces. For example, if both module A and module B have threeadditional PCI-Express lanes which are available in the same configurations as a type-specificinterface, then they shall be assigned to the same pins in the type-specific area of the connector.Hence, both module A and module B shall share compatibility between these parts of the typespecificinterface.The signal routing and need for external components for the type-specific interfaces are notreflected in this document. Please consult the applicable <strong>Apalis</strong> module datasheet for moreinformation on these interfaces.2.1.3 Pin NumberingThe diagrams below show the pin numbering schema on both sides of the module. The schemadeviates from the unrelated MXM3 standard pin numbering schema.Pins on the top side of the module have even numbering and pins on the bottom side have oddnumbering.The pin number increases linearly as a multiple of the pitch – that is, pins which are not assembledin the connector (between pins 18 and 23) are also accounted for in the numbering (pins 19through 22 do not exist). Similarly, pins which do not exist due to the connector notch are alsoaccounted for (pins 166 through 172).Pin320Pin174Top SidePin164Pin18Pin24Pin2Pin40.50 1.251.501.25Figure 2: Pin numbering schema on the top side of the moduleBottom SideFigure 3: Pin numbering schema on the bottom side of the module<strong>Toradex</strong> AG l Altsagenstrasse 5 l 6048 Horw l Switzerland l +41 41 500 48 00 l www.toradex.com l info@toradex.com Page | 12
<strong>Apalis</strong> <strong>Carrier</strong> <strong>Board</strong> <strong>Design</strong> <strong>Guide</strong>Pin321Module Insertion EdgePin173Pin165Pin23Pin17 Pin1Pin320Pin174 Pin164Figure 4: Pin numbering schema on the module connector land patternPin24Pin18 Pin22.2 PCI ExpressThe <strong>Apalis</strong> module form factor only features one PCIe lane as standard interface. Depending onthe module, there may be additional lanes available in the type-specific area.2.2.1 PCIe Signals<strong>Apalis</strong>Pin<strong>Apalis</strong>Signal NameI/OTypePowerRailDescription55 PCIE1_CLK+ O PCIe PCIe 100MHz reference clock output positive53 PCIE1_CLK- O PCIe PCIe 100MHz reference clock output negative49 PCIE1_TX+ O PCIe PCIe transmit data positive47 PCIE1_TX- O PCIe PCIe transmit data negative43 PCIE1_RX+ I PCIe PCIe receive data positive41 PCIE1_RX- I PCIe PCIe receive data negative37 WAKE1_MICO I CMOS 3.3V General purpose wake signal26 RESET_MOCI# O CMOS 3.3V General reset output of the module209 I2C1_SDA I/O OD 3.3V211 I2C1_SCL O OD 3.3VI2C interface data, some PICe device need SMB interface for specialconfigurationI2C interface clock, some PICe device need SMB interface for specialconfigurationTable 3: PCIe signalsThe PCIe interface supports polarity inversion. This means that the positive and negative signal pinscan be inverted in order to simplify the layout by avoiding crossing of the signals. Some PCIedevices support additional lane reversal for multi-lane interfaces. As the standard interfaces on<strong>Apalis</strong> provide only a single lane PCIe interface, the lane reversal feature is not relevant to the<strong>Apalis</strong> specification. Some <strong>Apalis</strong> modules provide additional multi-lane PCIe interfaces as typespecificinterfaces. Please consult the datasheets of such modules to determine if lane reversal isapplicable and supported.2.2.2 Reference SchematicsThe PCIe schematic differs depending on whether the PCIe device is soldered directly to the carrierboard (device-down) or is located on a PCIe card. Special care needs to be taken to determine asto whether or not AC coupling capacitors are required. The maximum trace length of the lanesdepends on whether the design is for an external card or a device-down.Every PCIe lane consists of a pair of transmitting (TX) and receiving (RX) traces. Unfortunately, thenames RX and TX can be confusing as the host transmitter needs to be connected to the receiver ofthe device and vice versa. Normally, the signals are named from the host’s perspective until theyreach the pins of the PCIe device. Therefore, the transmitting pins of the <strong>Apalis</strong> modules should becalled TX at the carrier board while the receiving pins of the module should be called RX. Pleaseread carefully the datasheet of the PCIe device in order to make sure that RX and TX are notinadvertently swapped.<strong>Toradex</strong> AG l Altsagenstrasse 5 l 6048 Horw l Switzerland l +41 41 500 48 00 l www.toradex.com l info@toradex.com Page | 13
<strong>Apalis</strong> <strong>Carrier</strong> <strong>Board</strong> <strong>Design</strong> <strong>Guide</strong>Every PCIe device needs a 100MHz reference clock. It is not permitted to connect a reference clockto two device loads. The <strong>Apalis</strong> module provides one reference clock output as a standardinterface. There may be additional PCIe reference clocks outputs in the type-specific area. If thereare not enough PCIe reference clocks available (e.g. if a PCIe switch is used or the PCIe interfacesin the type-specific area do not provide additional clock outputs), a zero-delay PCIe clock buffer isrequired on the baseboard. Some PCIe switches features an internal PCIe clock buffer, which canavoid the necessity of a dedicated clock buffer.X1RPCIE1_RX-PCIE1_RX+PCIE1_TX-PCIE1_TX+PCIE1_CLK-PCIE1_CLK+<strong>Apalis</strong> - PCI-Express18 of 25MM70-314-310B1X1GI2C1_SCLI2C1_SDA<strong>Apalis</strong> - I2C7 of 25MM70-314-310B14143474953 PCIE1_CLK_N55 PCIE1_CLK_P211 I2C1_SCL209 I2C1_SDAPCIE1[0..1]IC1PCIE1_CLK_P 2SRC_INPCIE1_CLK_N 3SRC_IN#16GND SRC_STOPOptionalI2C1_SCL R2 0R PCIE1_SCL 13SCLKI2C1_SDA 0R PCIE1_SDA 14SDATAR4I2C1[0..1]12BYPASS#/PLLR91K17HIGH_BW13PDGND1VDD15VDD211VDD318VDD43.3V_PCIE_CLK_BUF 24VDD5C1 C2 C3 C4 C52.2uF 100nF 100nF 100nF 100nF4GNDGND ICS9DB401CGLFOE_INVOE6#OE1#DIF_1DIF_1#DIF_2DIF_2#DIF_5DIF_5#DIF_6DIF_6#IREFVDDAGNDA252186791020192322R1 33R33RR3R5 33R33RR6R7 33RR826 R1628475R1%C6100nF27GND3.3V_PCIE_CLK_BUF3.3V_PCIE_CLK_BUF3.3V_PCIE_CLK_BUF33RR10R11R12R13R14R153.3V_PCIE_CLK_BUF_APCIE1A_CLK_PPCIE1A_CLK_NPCIE1B_CLK_PPCIE1B_CLK_NPCIE1C_CLK_PPCIE1C_CLK_N6X49.9RGNDPCIE1A-C_CLK[0..5]PCIE1A-C_CLK[0..5]3.3V3.3V_PCIE_CLK_BUFL13A120R@100MHz3.3V_PCIE_CLK_BUF 3.3V_PCIE_CLK_BUF_AL23A120R@100MHzFigure 5: PCIe reference clock buffer example2.2.2.1 PCIe x1 Slot Schematic ExampleThe PCIe card slot design defines that the decoupling capacitors for the TX lanes should be placedon the module and the RX lanes on the card. Therefore, no additional decoupling capacitors arepermitted to be placed on the carrier board in the RX, TX and reference clock lines.PCIE1_TX+PCIE1_TX+HSOp(0)TXPCIE1_TX-PCIE1_TX-HSOn(0)RXPCIeHost2x 100nFPCIE1_RX+ModuleConnectorPCIE1_RX+HSIp(0)PCIe SlotConnectorPCIeDeviceRXPCIE1_RX-PCIE1_RX-HSIn(0)TX2x 100nF<strong>Apalis</strong> Module <strong>Carrier</strong> <strong>Board</strong> PCIe CardFigure 6: PCIe x1 Slot Block DiagramThe <strong>Apalis</strong> module standard does not feature a dedicated PCIe reset output as it does not providethe PCIe hot-plug functionality. Therefore, the PCIe reset input (PERST#, pin A11) of the slot shouldbe served by the general module reset output (RESET_MOCI#). Some <strong>Apalis</strong> modules may providethe additional hot-plug signals such as reset and hot-plug detect as secondary functions or as typespecificinterfaces. Nevertheless, as the compatibility between different <strong>Apalis</strong> modules cannot beguaranteed using these hot-plug signals, it is recommended that the RESET_MOCI# signal is usedas reset.<strong>Toradex</strong> AG l Altsagenstrasse 5 l 6048 Horw l Switzerland l +41 41 500 48 00 l www.toradex.com l info@toradex.com Page | 14
<strong>Apalis</strong> <strong>Carrier</strong> <strong>Board</strong> <strong>Design</strong> <strong>Guide</strong>The PCIe x1 slot uses two card present signals (PRSNT1#, pin A1 and PRSNT2#, pin B18) which areshorted to the ground by the card (if it is inserted). Again, as the <strong>Apalis</strong> module standard does notfeature the PCIe hot-plug feature, these pins can be left unconnected.The wake output of the PCIe slot (WAKE#, pin B11) can be connected to the general wake input ofthe <strong>Apalis</strong> module (WAKE1_MICO#). Wake-up-capable PCIe cards such as Ethernet cards can usethis signal to wake up the module from its suspend state.The JTAG interface on the PCIe slot can be left unconnected. This interface is only used fordebugging purposes. No termination on the carrier board is needed.The PCIe slot pin-out features an SMB interface for additional power management control. As theSMB and I2C buses are compatible, it is recommended that the I2C1 interface on the <strong>Apalis</strong>module is used if the SMB interface is needed. Most PCIe cards do not make use of the SMBinterface. Therefore, these pins can be left unconnected for most applications.In addition to the 3.3V input, the PCIe slot features an additional +3.3V aux (pin B10) and +12V(pin A2, A3, B1 and B2). The +3.3V aux is a standby rail for cards that feature the wake upfunctionality. If the card does not need to be powered in standby, it is recommended that this pin isconnected to the normal +3.3V supply. Do not leave this pin unconnected.Not all PCIe cards need the +12V supply. For a battery powered system or a carrier board with awide voltage input range, it might be difficult to generate a regulated 12V rail. In this case, werecommend checking with the PCIe card(s) manufacturer to determine if the +12V supply isrequired.PCIE1[0..5]X1RPCIE1_RX-PCIE1_RX+PCIE1_TX-PCIE1_TX+PCIE1_CLK-PCIE1_CLK+<strong>Apalis</strong> - PCI-Express414347495355PCIE1_RX_NPCIE1_RX_PPCIE1_TX_NPCIE1_TX_PPCIE1_CLK_NPCIE1_CLK_PGNDPCIE1_RX_NPCIE1_RX_PGNDPCIE1_CLK_NPCIE1_CLK_PGNDA18A17A16A15A14A13A12X2GNDPER0-PER0+GNDREFCLK-REFCLK+GNDGNDPRSNT2#GNDPET0-PET0+GNDRSVDB18B17B16B15B14B13B12GNDPCIE1_PRSNT2#GNDPCIE1_TX_NGNDPCIE1_TX_P3.3VR14.7KTP118 of 25MM70-314-310B1X1G<strong>Apalis</strong> - I2C7 of 25MM70-314-310B1I2C1_SCLI2C1_SDA211209I2C1_SCLI2C1_SDAI2C1[0..1]RESET_MOCI#3.3V3.3VGND12V12VGNDA11A10A9A8A7A6A5A4A3A2A1PERST#+3.3V+3.3VTMSTDOTDITCKGND+12V+12VPRSNT1#WAKE#+3.3VAuxTRST#+3.3VGNDSMDATSMCLKGNDRSVD+12V+12VB11 WAKE1_MICO#B10B93.3V_STBB83.3VOptionalB7GNDB6 PCIE1_SMDAT R2 0R I2C1_SDAB5 PCIE1_SMCLK R3 0R I2C1_SCLB4B3GND12V 3.3VB212VB112V C2 22uF C1 22uF16V 10V+GND+GNDX1DPOWER_ENABLE_MOCIRESET_MOCI#RESET_MICO#WAKE1_MICO#<strong>Apalis</strong> - System Control4 of 25MM70-314-310B1SYSTEM_CTRL[0..1]2426 RESET_MOCI#2837 WAKE1_MICO#Figure 7: PCIe x1 slot reference schematic2.2.2.2 Mini PCIe Card Schematic ExampleThe Mini PCIe Card (also called PCI Express Mini Card, Mini PCI Express or Mini PCIe) also featuresa USB 2.0 high-speed interface. In order to be compliant, the carrier board needs to provide bothinterfaces, the PCIe and USB. As most of the Mini PCIe Cards use only one of its interfaces for anembedded carrier board which is developed for a restricted set of compatible cards, it might besufficient to implement only the required interface. Check with the Mini PCIe Card vendor whetherthe USB, PCIe or both interfaces are used by the card.<strong>Toradex</strong> AG l Altsagenstrasse 5 l 6048 Horw l Switzerland l +41 41 500 48 00 l www.toradex.com l info@toradex.com Page | 15
<strong>Apalis</strong> <strong>Carrier</strong> <strong>Board</strong> <strong>Design</strong> <strong>Guide</strong>The Mini PCIe Card features the decoupling capacitors for the RX lines on the card. Therefore, noadditional decoupling capacitors should to be placed on the carrier board in either the RX, TX orreference clock lines.USBHostUSBHn_D+USBHn_D+USB_D+USBHn_D-USBHn_D-USB_D-USBDeviceTXPCIeHostPCIE1_TX+PCIE1_TX-2x 100nFModuleConnectorPCIE1_TX+PCIE1_TX-PET0+PET0-PCIe Mini CardConnectorRXPCIeDevicePCIE1_RX+PCIE1_RX+PER0+RXPCIE1_RX-PCIE1_RX-PER0-TX2x 100nF<strong>Apalis</strong> Module <strong>Carrier</strong> <strong>Board</strong> PCIe Mini CardFigure 8: Mini PCIe Card Block DiagramThe <strong>Apalis</strong> module standard does not feature a dedicated PCIe reset output as it does not providethe PCIe hot-plug functionality. Therefore, the PCIe reset input (PERST#, pin 22) of the card shouldbe served by the general module reset output (RESET_MOCI#). Some <strong>Apalis</strong> modules mightprovide the additional hot-plug signals such as reset and hot-plug detect as secondary functions oras type-specific interfaces. Nevertheless, as compatibility between different <strong>Apalis</strong> modules couldnot be guaranteed by using these hot-plug signals, it is recommended that the RESET_MOCI#signal is used as reset.The clock request output of the card (CLKREQ#, Pin 7) can be left unconnected. It might also beconnected to a free GPIO on the <strong>Apalis</strong> module. In this case, the clock request functionality needsto be implemented in software.The wake output of the Mini PCIe Card (WAKE#, pin 1) can be connected to the general wakeinput of the <strong>Apalis</strong> module (WAKE1_MICO#). Wake-up-capable Mini PCIe Cards such as Wi-Ficards can use this signal to wake up the module from its suspend state.The R-UIM interface of the Mini PCIe Card (UIM, pin 8, 10, 12, 14 and 16) are only needed formobile broadband modem cards such as 3G cards. If the card interface needs to support suchmodems, an additional SIM card holder needs to be attached to this interface.The Mini PCIe Card pin-out features an SMB interface for additional power management control.As the SMB and I2C buses are compatible, it is recommended that the I2C1 interface on the <strong>Apalis</strong>module is used if the SMB interface is needed. Most PCIe cards do not make use of the SMBinterface. Therefore, these pins can be left unconnected for most applications.<strong>Toradex</strong> AG l Altsagenstrasse 5 l 6048 Horw l Switzerland l +41 41 500 48 00 l www.toradex.com l info@toradex.com Page | 16
<strong>Apalis</strong> <strong>Carrier</strong> <strong>Board</strong> <strong>Design</strong> <strong>Guide</strong>X2W_DISABLE# UIM_PWRUIM_RESETSMB_CLK UIM_CLOCKSMB_DAT UIM_VPPUIM_DATAWAKE# SIM_C8/RSVDPERST# SIM_C4/RSVDCLKREQ#LED_WWAN#LED_WLAN#REF_CLK- LED_WPAN#REF_CLK+1V5PCIe_RX-1V5PCIe_RX+ 1V5PCIe_TX- 3V3_AUXPCIe_TX+ 3V33V3USB_D-GNDUSB_D+GNDGNDGNDCOEX1GNDCOEX2GNDGNDGNDRSVDGNDRSVDGNDRSVDGNDRSVDGNDRSVDGNDRSVDGND67910-5700X1GI2C1_SCLI2C1_SDA<strong>Apalis</strong> - I2C7 of 25MM70-314-310B1X1DPOWER_ENABLE_MOCIRESET_MOCI#RESET_MICO#WAKE1_MICO#<strong>Apalis</strong> - System Control4 of 25MM70-314-310B1X1RPCIE1_RX-PCIE1_RX+PCIE1_TX-PCIE1_TX+PCIE1_CLK-PCIE1_CLK+<strong>Apalis</strong> - PCI-Express18 of 25MM70-314-310B1X1CUSBO1_D-USBO1_D+USBO1_SSTX-USBO1_SSTX+USBO1_SSRX-USBO1_SSRX+USBO1_VBUSUSBO1_IDUSBO1_OC#USBO1_EN211 I2C1_SCL209 I2C1_SDA2426 RESET_MOCI#2837 WAKE1_MICO#41 PCIE1_RX_N43 PCIE1_RX_P47 PCIE1_TX_N49 PCIE1_TX_P53 PCIE1_CLK_N55 PCIE1_CLK_P7674706864626072262274I2C1[0..1]SYSTEM_CTRL[0..1]PCIE[0..5]USBH[0..1]JP1GNDI2C1_SCLI2C1_SDA3.3V_PCIER147KPCIE1_WDISABLE# 20OptionalR2 0R PCIE1_SMCLK 30R3 0R PCIE1_SMDAT 32WAKE1_MICO#PCIE1_CLK_NPCIE1_CLK_PPCIE1_RX_NPCIE1_RX_PPCIE1_TX_NPCIE1_TX_PRESET_MOCI#USBH_D_NUSBH_D_P3.3V_PCIE3.3V_PCIE12271113232531333638353941454749518141216101719424446628482425249151821262729343537404350X3PCIE1_UIM_PWR 1VCCPCIE1_UIM_RESET 2RESETPCIE1_UIM_CLK 3CLOCKPCIE1_UIM_VPP 6VPPPCIE1_UIM_DATA 7I/O1.5V1.5V1.5VGNDGNDPCIE1_WWLAN#PCIE1_WLAN#PCIE1_WPAN#3.3V_STB3.3V_PCIE3.3V_PCIE5GND7111S2015X02LFLED1LED2LED33.3V_PCIER6150RR7150RR8150RUSBH_OC#USBH_EN9684Mini PCIe LatchMECH1USBH2_D-USBH2_D+8280USBH_D_NUSBH_D_PUSBH3_D-USBH3_D+8886USBH4_D-USBH4_D+USBH4_SSTX-USBH4_SSTX+USBH4_SSRX-USBH4_SSRX+<strong>Apalis</strong> - USB3 of 25MM70-314-310B11009810410692943.3VGNDC410uF10VPower3.3V_PCIE 3.3V1.5VIC136L1V_IN V_OUT23AR9EN740.2KC133R@100MHzPCIE_FBC5C2FBC3110uFR10100nF10uFNC10uF10V 4820K16V10VNCGND10V59NC GND_PADSC4215AFigure 9: Mini PCIe card reference schematicGNDGNDGND2.2.2.3 PCIe x1 Device-Down Schematic ExampleDevice-Down means that the PCIe device is soldered directly to the carrier board. The decouplingcapacitors for the RX lanes (TX from the device) need to be placed on the carrier board. As thecapacitors for the TX lanes are located on the <strong>Apalis</strong> module, no additional capacitors should beplace on the TX lines. The reference clock lines do not need decoupling capacitors.PCIE1_TX+PCIE1_TX+PCIE_RX+TXPCIE1_TX-PCIE1_TX-PCIE_RX-RXPCIeHost2x 100nFPCIE1_RX+ModuleConnectorPCIE1_RX+PCIE_TX+PCIeDevice(down)RXPCIE1_RX-PCIE1_RX-PCIE_TX-TX2x 100nF<strong>Apalis</strong> Module<strong>Carrier</strong> <strong>Board</strong>Figure 10: PCIe Device-Down block diagram<strong>Toradex</strong> AG l Altsagenstrasse 5 l 6048 Horw l Switzerland l +41 41 500 48 00 l www.toradex.com l info@toradex.com Page | 17
<strong>Apalis</strong> <strong>Carrier</strong> <strong>Board</strong> <strong>Design</strong> <strong>Guide</strong>The schematic diagram shown below is an example of a device-down design of a gigabit Ethernetcontroller. Please be aware that the TX lane from the module needs to be connected to the RXinput of the controller. The RX lane from the module needs to be connected to the TX output of thecontroller. Check your device carefully to determine whether it needs this crossing or not.X1RPCIE1_RX-PCIE1_RX+PCIE1_TX-PCIE1_TX+PCIE1_CLK-PCIE1_CLK+<strong>Apalis</strong> - PCI-Express18 of 25MM70-314-310B1X1DPOWER_ENABLE_MOCIRESET_MOCI#RESET_MICO#WAKE1_MICO#<strong>Apalis</strong> - System Control4 of 25MM70-314-310B1X1GI2C1_SCLI2C1_SDA<strong>Apalis</strong> - I2C7 of 25MM70-314-310B141434749535524262837211209I2C1_SCLI2C1_SDAPCIE1_RX_NPCIE1_RX_PPCIE1_TX_NPCIE1_TX_PPCIE1_CLK_NPCIE1_CLK_PRESET_MOCI#WAKE1_MICO#PCIE1[0..5]I2C1[0..1]PCIE1_RX_PPCIE1_RX_NSYSTEM_CTRL[0..1]3.3VC547uFC3C1100nFC2100nFI2C1_SCLI2C1_SDAOptionalR3 0RR43.3VGND25.0000 MHz - 22pF -50ESR1 2GNDC610uF1.5V_LANC1310uF0.9V_LANC1810uF33pF25VOSC1 33pFC7100nFC14100nFC19100nFC825VC4GND100nFC15100nFC20100nF3.3V3.3VPCIE1_RX_S_P 21PCIE1_RX_S_N 20PCIE1_TX_PPCIE1_TX_NRESET_MOCI#WAKE1_MICO#C9IC1APCIE1_CLK_P 26PE_CLK_PPCIE1_CLK_N 25PE_CLK_N0R100nFC16100nFC21100nFR1R2ETH1_SCLETH1_SDAR5R7R14C10GND100nFC17GND100nFC22GND100nFNA2423171610K 28110K34363510K63616210K 6018192944610R 45IC1B10VDD3P3_127VDD3P3_241VDD3P3_351VDD3P3_464VDD3P3_5C2447561132425922100nFPE_TX_PPE_TX_NPE_RX_PPE_RX_NPE_RST#PE_WAKE#DEV_OFF#LAN_PWR_GOODSMB_CLKSMB_DATASDP0SDP1/PCIE_DISSDP2SDP3JTAG_TMSJTAG_TCKJTAG_TDIJTAG_TDOXTAL_1XTAL_2I210VDD1P5_1VDD1P5_2VDD0P9_1VDD0P9_2VDD0P9_3VDD0P9_4I210SMB_ALERT#RSVD_22_NCMDI_0_PMDI_0_NMDI_1_PMDI_1_NMDI_2_PMDI_2_NMDI_3_PMDI_3_NNVM_CS#NVM_SKNVM_SINVM_SOLED0LED1LED2NC_SI_TXD0NC_SI_TXD1NC_SI_RXD0NC_SI_RXD1NC_SI_ARB_INNC_SI_ARB_OUTNC_SI_CLK_INNC_SI_CRS_DVNC_SI_TX_ENRSETVDD1P5_OUTVDD0P9_OUTCTOPCBOTGND58 ETH1_MDI0_P57 ETH1_MDI0_N55 ETH1_MDI1_P54 ETH1_MDI1_N53 ETH1_MDI2_P52 ETH1_MDI2_N50 ETH1_MDI3_P49 ETH1_MDI3_N151312143130 ETH1_ACT33 ETH1_LINK9 R68 R86 R95 R1043442 R113 R127 R1348R15 4.99K39404037HSC233.3V10K10K10K10K10K10K10KGND1.5V_LANC11C12GND10uFGND 0.9V_LAN10uF39nF25VETH1[0..9]ETH1[0..9]Figure 11: PCIe Device-Down example schematicGNDGND2.2.3 Unused PCIe Signals Termination<strong>Apalis</strong>Pin<strong>Apalis</strong>Signal NameRecommended Termination55 PCIE1_CLK+ Leave NC if not used53 PCIE1_CLK- Leave NC if not used49 PCIE1_TX+ Leave NC if not used47 PCIE1_TX- Leave NC if not used43 PCIE1_RX+ Preferable connect to GND if not used or leave NC41 PCIE1_RX- Preferable connect to GND if not used or leave NC37 WAKE1_MICO Add pull-up resistor or disable the wake function in software26 RESET_MOCI# Leave NC if not used209 I2C1_SDA Add pull-up resistor or disable the I 2 C function in software211 I2C1_SCL Add pull-up resistor or disable the I 2 C function in softwareTable 4: Unused PCIe Signals Termination<strong>Toradex</strong> AG l Altsagenstrasse 5 l 6048 Horw l Switzerland l +41 41 500 48 00 l www.toradex.com l info@toradex.com Page | 18
<strong>Apalis</strong> <strong>Carrier</strong> <strong>Board</strong> <strong>Design</strong> <strong>Guide</strong>2.3 SATAThe <strong>Apalis</strong> module form factor features one SATA interface as standard interface. Depending onthe module, there are maybe additional interfaces type-specific SATA interfaces available.2.3.1 SATA Signals<strong>Apalis</strong>Pin<strong>Apalis</strong>Signal NameI/OTypePowerRailDescription33 SATA1_TX+ O SATA SATA transmit data positive31 SATA1_TX- O SATA SATA transmit data negative25 SATA1_RX+ I SATA SATA receive data positive27 SATA1_RX- I SATA SATA receive data negative35 SATA1_ACT# O OD 3.3V Activity indication LED output, active lowTable 5: SATA SignalsThe SATA interface does not support polarity inversion. This means the positive and negative signalpins cannot be swapped for layout simplification.2.3.2 Reference SchematicsEvery SATA interface consists of a pair of transmitting (TX) and receiving (RX) traces. Unfortunately,the names RX and TX can be confusing, as at the end, the transmitter of the host needs to beconnected to the receiver of the device and vice versa. Normally, the signals are named after thehost until they reach the pins of the SATA device. Therefore, the transmitting pins of the <strong>Apalis</strong>modules should be called TX on the carrier board while the receiving input pins of the <strong>Apalis</strong>module should be called RX.2.3.2.1 SATA Connector Schematic ExampleThe AC coupling capacitors for the RX and TX lines are placed on the <strong>Apalis</strong> module. Therefore, noadditional serial capacitors are needed nor permitted on the carrier board.SATA1_TX+SATA1_TX+A+ (TX+)TXSATA1_TX-SATA1_TX-A- (TX-)RXSATAHost2x 10nFSATA1_RX+ModuleConnectorSATA1_RX+B+ (RX+)SATAConnectorSATAConnectorSATADeviceRXSATA1_RX-SATA1_RX-B- (RX-)TX2x 10nF<strong>Apalis</strong> Module <strong>Carrier</strong> <strong>Board</strong> SATA CableSATA DriveFigure 12: SATA connector block diagramAdditionally to the RX and TX pairs, the SATA interface on the <strong>Apalis</strong> module features a LED outputsignal for signaling activity at the SATA interface (SATA1_ACT#). This information is provided bythe host driver. The signal type is open drain. Therefore a pull-up resistor is required on the carrierboard. As the signal is used as signal reference for the SATA1_TX+ signal in the MXM3 connector,a strapping capacitor of 1nF should be placed from SATA1_ACT# to GND close to the MXM3connector.<strong>Toradex</strong> AG l Altsagenstrasse 5 l 6048 Horw l Switzerland l +41 41 500 48 00 l www.toradex.com l info@toradex.com Page | 19
<strong>Apalis</strong> <strong>Carrier</strong> <strong>Board</strong> <strong>Design</strong> <strong>Guide</strong>X1SSATA1_RX-SATA1_RX+SATA1_TX-SATA1_TX+SATA1_ACT#<strong>Apalis</strong> - SATA19 of 25MM70-314-310B12725313335SATA1_RX_NSATA1_RX_PSATA1_TX_NSATA1_TX_PMXM3_35_MGNDC11nF50VSATA1[0..3]GNDSATA1_RX_PSATA1_RX_NGNDSATA1_TX_NSATA1_TX_PR1GND22R3.3V_SW3.3V_SWR4100KSATA1_ACT 53R3470KSATA1_ACT# 2T1BSI-1024-XX27GND6B+ (RX+)5B- (RX-)4GND3A- (TX-)2A+ (TX+)1GND04708040053.3V_SWR2120RLED1GREEN1 6GNDT1ASI-1024-X4Figure 13: SATA connector reference schematic2.3.2.2 mSATA Card Schematic ExampleMini-SATA is a standard for solid state drive cards that uses the Mini PCIe Card connector and clip.Please do not confuse mSATA with Mini PCIe Cards solid state drives. These cards feature an onmodule flash controller with PCIe interface. The pin-out is electrical compatible, but Mini PCIe Carduses the PCIe interface while the mSATA uses the SATA interface instead.Even though the pin-out of the mSATA seems to be similar to the Mini PCIe Card, there is animportant pitfall to remark. Officially, the Mini PCIe Card features the RX+ signal on pin 25 andRX- on pin 23. The mSATA interface specifies the RX+ signal on pin 23 and RX- signal on 25. ThePCIe interface supports polarity reversal, but not the SATA interface. This means that additionalcare needs to be taken to connect the SATA signals correctly to the mSATA card.Since the AC coupling capacitors for both RX and TX lines are placed on the <strong>Apalis</strong> Module, noextra serial capacitors are required on the carrier board.GNDSATA1_TX+SATA1_TX+HSOp(0)TXSATAHostRXModuleConnectorSATA1_TX-2x 10nFSATA1_RX+SATA1_RX-SATA1_TX-SATA1_RX+SATA1_RX-HSOn(0)HSIp(0)HSIn(0)mSATA SlotConnector (Mini PCIe Card)RXSATADeviceTX2x 10nF<strong>Apalis</strong> Module <strong>Carrier</strong> <strong>Board</strong> mSATA ModuleFigure 14: mSATA block diagramThe mSATA pin-out features an activity indication output (pin49). This output indicates the activityof the SATA device controller similar to the SATA1_ACT# output of the <strong>Apalis</strong> module. Both signalsare designed to drive an indication LED. As the output of the mSATA card is not mandatory, it isrecommended that the SATA1_ACT# output of the <strong>Apalis</strong> module is used instead.Pin 51 of the mSATA connector can be used to detect whether an mSATA card is present. Thissignal could be used for switching the SATA/PCIe signal in mSATA/Mini PCIe Card dual design.The mSATA does not make use of the SMB interface. Therefore, the I2C1 interface does not needsto be connected to the mSATA connector.<strong>Toradex</strong> AG l Altsagenstrasse 5 l 6048 Horw l Switzerland l +41 41 500 48 00 l www.toradex.com l info@toradex.com Page | 20
<strong>Apalis</strong> <strong>Carrier</strong> <strong>Board</strong> <strong>Design</strong> <strong>Guide</strong>X1SMM70-314-310B1<strong>Apalis</strong> - SATA19 of 25SATA1_ACT#2725313335SI-1024-X3.3V1 6R3120RT1AGNDLED1GREEN2SATA1_RX_NSATA1_RX_PSATA1_TX_NSATA1_TX_P3.3V34R4GND470KT1B5SI-1024-X3.3VR5100KSATA1_mSATA_ACT#SATA1_RX_PSATA1_RX_N3.3V_mSATA3.3V_mSATASATA1_mSATA_PREDET#2030321227111323253133363835394145474951SATA1_RX-SATA1_RX+SATA1_TX-SATA1_TX+X2W_DISABLE# UIM_PWRUIM_RESETSMB_CLK UIM_CLOCKSMB_DAT UIM_VPPUIM_DATAWAKE# SIM_C8/RSVDPERST# SIM_C4/RSVDCLKREQ#LED_WWAN#LED_WLAN#REF_CLK- LED_WPAN#REF_CLK+1V5PCIe_RX-1V5PCIe_RX+ 1V5PCIe_TX- 3V3_AUXPCIe_TX+ 3V33V3USB_D-GNDUSB_D+GNDGNDGNDCOEX1GNDCOEX2GNDGNDGNDRSVDGNDRSVDGNDRSVDGNDRSVDGNDRSVDGNDRSVDGND67910-570081412161017194244466284824252491518212627293435374043501.5V1.5V1.5V3.3V_mSATA3.3V_mSATA3.3V_mSATAGNDMini PCIe LatchTP1MECH13.3VC410uF10VGND3.3V_mSATAL13A33R@100MHzC510uF10VGND3.3VC210uF10VGNDPowerIC13V_IN2EN1NC4NC5NCSC4215AV_OUTFBGNDGND_PAD67 mSATA1_FB89R640.2KR720KC310uF10V1.5VC1GND100nF16V2.3.3 Unused SATA Signals Termination<strong>Apalis</strong>Pin<strong>Apalis</strong>Signal NameFigure 15: mSATA reference schematicRecommended Termination33 SATA1_TX+ Leave NC if not used31 SATA1_TX- Leave NC if not used25 SATA1_RX+ Preferable connect to GND if not used or leave NC27 SATA1_RX- Preferable connect to GND if not used or leave NC35 SATA1_ACT# Leave NC if not usedTable 6: Unused SATA signal termination<strong>Toradex</strong> AG l Altsagenstrasse 5 l 6048 Horw l Switzerland l +41 41 500 48 00 l www.toradex.com l info@toradex.com Page | 21
<strong>Apalis</strong> <strong>Carrier</strong> <strong>Board</strong> <strong>Design</strong> <strong>Guide</strong>2.4 EthernetThe <strong>Apalis</strong> module standard features a single Gigabit Ethernet (1000Base-T) interface port. Theinterface is backward compatible with the 10/100Mbit Ethernet (10/100Base-TX) standard. Some<strong>Apalis</strong> modules may feature only 10/100Base-TX instead of 1000Base-T. Please consult therelevant datasheet of the module for more information about the interface speed.2.4.1 Ethernet Signals<strong>Apalis</strong>Pin<strong>Apalis</strong>Signal NameI/OType50 ETH1_MDI0+ I/O Analogue48 ETH1_MDI0- I/O Analogue56 ETH1_MDI1+ I/O Analogue54 ETH1_MDI1- I/O Analogue32 ETH1_MDI2+ I/O Analogue34 ETH1_MDI2- I/O Analogue38 ETH1_MDI3+ I/O Analogue40 ETH1_MDI3- I/O AnaloguePowerRailDescription1000Base-T: DA+10/100Base-TX: Transmit +1000Base-T: DA-10/100Base -TX: Transmit -1000Base-T: DB+10/100Base -TX: Receive +1000Base-T: DB-10/100Base -TX: Receive -1000Base-T: DC+10/100Base -TX: Unused1000Base-T: DC-10/100Base -TX: Unused1000Base-T: DD+10/100Base -TX: Unused1000Base-T: DD-10/100Base -TX: Unused46 ETH+_CTREF O Analogue Centre tap supply42 ETH1_ACT O CMOS 3.3V LED indication output for activity on the Ethernet port44 ETH1_LINK O CMOS 3.3V LED indication output for established Ethernet link2.4.2 Reference SchematicsTable 7: Ethernet signalsEthernet connectors with integrated magnetics are preferable. If a design with external magneticsis chosen, additional care has to be taken to route the signals between the magnetics and Ethernetconnector. If only a fast Ethernet (100Mbit/s) is required, some design costs may be saved by usingonly 10/100Base-TX magnetics.The LED output signals ETH1_ACT and ETH1_LINK can be connected directly to the LED of theEthernet jack with suitable serial resistors. There is no need for additional buffering if the currentdrawn does not exceeds 10mA. The ETH1_ACT signal is used as reference for the ETH1_MDI3-signal in the MXM3 connector, a strapping capacitor of 1nF should be placed to GND close to theMXM3 connector.2.4.2.1 Gigabit Ethernet Schematic Example (Integrated Magnetics)The need for center tap voltage depends on the Ethernet PHY used on the <strong>Apalis</strong> module. In orderto keep the carrier board compatible with all <strong>Apalis</strong> modules, the center tap pins of the magneticsshould all be connected to the center tap voltage source pin of the module connector(ETH1_CTREF). Please add capacitors and a ferrite bead according to the reference schematic.<strong>Toradex</strong> AG l Altsagenstrasse 5 l 6048 Horw l Switzerland l +41 41 500 48 00 l www.toradex.com l info@toradex.com Page | 22
<strong>Apalis</strong> <strong>Carrier</strong> <strong>Board</strong> <strong>Design</strong> <strong>Guide</strong>5048565432343840424446ETH1_MDI0_PETH1_MDI0_NETH1_MDI1_PETH1_MDI1_NETH1_MDI2_PETH1_MDI2_NETH1_MDI3_PETH1_MDI3_NETH1_ACTETH1_LINKETH1_CTREFETH1[0..10]ETH1_ACTETH1_MDI0_NETH1_MDI1_PETH1_MDI1_NETH1_MDI2_PETH1_MDI2_NC11nF50VGNDETH1_MDI0_PR1150RETH1_ACT_C3.3V_SWETH1_CTREF_0ETH1_CTREF_1ETH1_CTREF_21314111210465312X1BETH1_MDI0+ETH1_MDI0-ETH1_MDI1+ETH1_MDI1-ETH1_MDI2+ETH1_MDI2-ETH1_MDI3+ETH1_MDI3-ETH1_ACTETH1_LINKETH1_CTREF<strong>Apalis</strong> - Gigabit Ethernet2 of 25MM70-314-310B1X2CAD0+CT0D0-D1+CT1D1-D2+CT2D2-yellow123645ETH1_MDI3_PETH1_MDI3_NETH1_CTREF_3879D3+CT3D3-78ETH1_LINKR2150RR3150RNA163.3V_SWETH1_LINK_C 17ETH1_LINK_GB 15ACCL829-1J1T-43greenorangeS2SS1S4 X 75R1000pF 2kVR40RSHIELDC2 ETH1_CTREF_0100nF16VETH1_CTREFL12A220R@100MHz+C447uF6.3VC5100nF16VR5 0RETH1_CTREF_ALLR6 0RGNDGNDC3100nF16VC6100nF16VETH1_CTREF_1ETH1_CTREF_2GNDGNDR70RGNDC7100nF16VETH1_CTREF_3Figure 16: Gigabit Ethernet with integrated magnetics reference schematic2.4.2.2 Gigabit Ethernet Schematic Example (Discrete Magnetics)If discrete magnetics are used instead of a RJ-45 Ethernet jack with integrated magnetics, specialcare has to be taken to route the signals between the magnetics and the jack. These signals arerequired to be high-voltage isolated from the other signals. It is therefore necessary to place adedicated ground plane under these signals which has a minimum separation of 2mm from everyother signal and plane. Additionally, a separate shield ground for the LAN device is needed. Try toplace the magnetics as close as possible to the Ethernet jack. This reduces the length of the signaltraces between the magnetics and jack.GND>2mmACT LEDDMI Signals from<strong>Apalis</strong> ModuleMagneticsEthernetJack(RJ-45)Magnetics GNDDigital GNDLINK LEDShield GNDFigure 17: Separation of magnetics ground<strong>Toradex</strong> AG l Altsagenstrasse 5 l 6048 Horw l Switzerland l +41 41 500 48 00 l www.toradex.com l info@toradex.com Page | 23
<strong>Apalis</strong> <strong>Carrier</strong> <strong>Board</strong> <strong>Design</strong> <strong>Guide</strong>5048565432343840424446ETH1_MDI0_PETH1_MDI0_NETH1_MDI1_PETH1_MDI1_NETH1_MDI2_PETH1_MDI2_NETH1_MDI3_PETH1_MDI3_NETH1_ACTETH1_LINKETH1_CTREFETH1[0..10]ETH1_MDI0_PETH1_CTREF_0ETH1_MDI0_NETH1_MDI1_PETH1_CTREF_1ETH1_MDI1_NETH1_MDI2_PETH1_CTREF_2ETH1_MDI2_NETH1_MDI3_PETH1_CTREF_3ETH1_MDI3_N213546879111012232422202119171816141513R175R R275RC11nF2000VR375R R475R12364578X1BETH1_MDI0+ETH1_MDI0-ETH1_MDI1+ETH1_MDI1-ETH1_MDI2+ETH1_MDI2-ETH1_MDI3+ETH1_MDI3-ETH1_ACTETH1_LINKETH1_CTREF<strong>Apalis</strong> - Gigabit Ethernet2 of 25MM70-314-310B1IC1TD1+TCT1TD1-TD2+TCT2TD2-TD3+TCT3TD3-TD4+TCT4TD4-H5019NLMX1+MCT1MX1-MX2+MCT2MX2-MX3+MCT3MX3-MX4+MCT4MX4-X2TRD1+TRD1-TRD2+TRD2-TRD3+TRD3-TRD4+TRD4-ETH1_ACTC21nF50VR5150RETH1_ACT_CSHIELD3.3V_SW109LED_R_ALED_R_CGNDETH1_LINKETH1_CTREFR6150RL12A220R@100MHzETH1_LINK_C+C347uF6.3VC4100nF16VETH1_CTREF_ALLR70R123.3V_SW LED_L_A11LED_L_CRJHSE-5384-NDC5 ETH1_CTREF_0100nF16VSSS2S1SHIELDGNDGNDR80RGNDC6100nF16VETH1_CTREF_1R90RGNDC7100nF16VETH1_CTREF_2R100RGNDC8100nF16VETH1_CTREF_3Figure 18: Gigabit Ethernet with discrete magnetics reference schematic2.4.2.3 10/100Mbit Ethernet Schematic Example (Integrated Magnetics)The Fast Ethernet interface uses the MDI0 as transmitting lanes and the MDI1 as receiving lane. Asmost Ethernet PHYs feature Auto-MDIX, the signal direction RX and TX could be swapped. It isstrongly recommend that RX and TX lanes are not swapped in order to ensure compatibilitybetween all <strong>Apalis</strong> modules.The MDI2 and MDI3 lanes are not used for the 10/100Base-TX interface. These signals can be leftunconnected. Most of the Fast Ethernet PHYs do not need a center tap voltage. Even so, it isrecommended that the center tap pins of the magnetics are connected to the center tap source pinof the <strong>Apalis</strong> module connector.GNDETH1[0..6]RD-X1BETH1_MDI0+ETH1_MDI0-ETH1_MDI1+ETH1_MDI1-ETH1_MDI2+ETH1_MDI2-ETH1_MDI3+ETH1_MDI3-ETH1_ACTETH1_LINKETH1_CTREF<strong>Apalis</strong> - Gigabit Ethernet2 of 25MM70-314-310B15048565432343840424446ETH1_TX0_PETH1_TX0_NETH1_RXI_PETH1_RXI_NETH1_LINK_ACTETH1_SPEEDETH1_CTREFETH1_TX0_PETH1_TX0_NETH1_RXI_PETH_RXI_NETH1_LINK_ACTETH1_SPEEDETH1_CTREFETH1_CTREF_TXDETH1_CTREF_RXDR13.3V150RR2 3.3V150RL12A220R@100MHz+1423569101211X2TD+CT_TXDRD+CT_RXDTD-LED_Left_ALED_Left_CLED_Right_ALED_Right_CJ00-0065NLETH1_CTREF_ALLC1 C247uF 100nF6.3V 16VR30RC3100nF16VNCCHS GNDSHIELDSHIELD78S1S2SHIELD2ETH1_CTREF_TXDGNDGNDR40RGNDC4100nF16VETH1_CTREF_RXDFigure 19: Fast Ethernet with integrated magnetics reference schematicGND<strong>Toradex</strong> AG l Altsagenstrasse 5 l 6048 Horw l Switzerland l +41 41 500 48 00 l www.toradex.com l info@toradex.com Page | 24
<strong>Apalis</strong> <strong>Carrier</strong> <strong>Board</strong> <strong>Design</strong> <strong>Guide</strong>2.4.3 Unused Ethernet Signals TerminationAll unused Ethernet signals can be left unconnected.2.5 USB2.5.1 USB SignalsThe <strong>Apalis</strong> standard features four USB interfaces. Two of them support the additional signalsrequired for USB 3.0 SuperSpeed. One of the USB interfaces features the additional signals thatare needed for OTG. The following table shows the possible features for each USB interface in the<strong>Apalis</strong> module standard. Please note that not every <strong>Apalis</strong> module will feature all the four USBinterfaces or every USB feature. Please check the datasheet of the respective <strong>Apalis</strong> modules inorder to determine which features are supported.<strong>Apalis</strong> Port1.5Mbit/sLow Speed(1.1)12 Mbit/sFull Speed(1.1)480Mbit/sHigh Speed(2.0)5Gbit/sSuperSpeed(3.0)USBO1 USBH2 USBH3 USBH4 OTGTable 8: Maximum possible supported features for the USB portsThe USBO1 is a SuperSpeed OTG capable interface. As most <strong>Apalis</strong> modules will use this USB portfor debugging and flash memory recovery, it is recommended that this interface is accessible evenfor carrier board designs which do not need any USB interface. This USB port does not share anysignal with other ports and has its own power enable and overcurrent signals.The additional data links for USB 3.0 SuperSpeed run at 5 Gbit/s and are fully compliant with thePCI Express Base Specification, Revision 2.0. SuperSpeed signals support polarity inversion. Thismeans the positive and negative signal pins can be inverted in order to simplify the layout byavoiding crossover of the signals. It is not permitted to swap the receiving signals with thetransmitting ones. The USB 2.0 data signals do not support polarity inversion; D+ and D- cannotbe swapped.<strong>Apalis</strong>Pin<strong>Apalis</strong>Signal NameI/OTypePowerRailDescription74 USBO1_D+ I/O USB 3.3V Positive differential USB signal, OTG capable76 USBO1_D- I/O USB 3.3V Negative differential USB signal, OTG capable62 USBO1_SSRX+ I USB Positive differential receiving signal for USB3.0, OTG capable64 USBO1_SSRX- I USB Negative differential receiving signal for USB3.0, OTG capable68 USBO1_SSTX+ O USB Positive differential transmission signal for USB3.0, OTG capable70 USBO1_SSTX- O USB Negative differential transmission signal for USB3.0, OTG capable72 USBO1_ID I CMOS 3.3V Cable identification pin for the OTG60 USBO1_VBUS I CMOS274 USBO1_EN O CMOS 3.3V3.3V/5V tolerantBus voltage detection in the OTG client modeEnable signal for the bus voltage output in host mode for theUSBO1 interface262 USBO1_OC# I OD 3.3V Overcurrent input signal for the USBO1 interfaceTable 9: USBO1 signalsUSBH2 and USBH3 ports do not provide the additional data signals for SuperSpeed USB3.0. Thepower enable and overcurrent signals are shared also with the USBH4 port.<strong>Toradex</strong> AG l Altsagenstrasse 5 l 6048 Horw l Switzerland l +41 41 500 48 00 l www.toradex.com l info@toradex.com Page | 25
<strong>Apalis</strong> <strong>Carrier</strong> <strong>Board</strong> <strong>Design</strong> <strong>Guide</strong><strong>Apalis</strong>Pin<strong>Apalis</strong>Signal NameI/OTypePowerRailDescription80 USBH2_D+ I/O USB 3.3V Positive differential USB host signal82 USBH2_D- I/O USB 3.3V Negative differential USB host signal84 USBH_EN O CMOS 3.3VEnable signal for the bus voltage output, shared with all USB hostports96 USBH_OC# I OD 3.3V Over current input signal, shared with all USB host portsTable 10: USBH2 signals<strong>Apalis</strong>Pin<strong>Apalis</strong>Signal NameI/OTypePowerRailDescription86 USBH3_D+ I/O USB 3.3V Positive differential USB host signal88 USBH3_D- I/O USB 3.3V Negative differential USB host signal84 USBH_EN O CMOS 3.3VEnable signal for the bus voltage output, shared with all USB hostports96 USBH_OC# I OD 3.3V Overcurrent input signal, shared with all USB host portsTable 11: USBH3 signals<strong>Apalis</strong>Pin<strong>Apalis</strong>Signal NameI/OTypePowerRailDescription98 USBH4_D+ I/O USB 3.3V Positive differential USB host signal100 USBH4_D- I/O USB 3.3V Negative differential USB host signal94 USB H4_SSRX+ I USB Positive differential receiving host signal for USB3.092 USB H4_SSRX- I USB Negative differential receiving host signal for USB3.0106 USBH4_SSTX+ O USB Positive differential transmission host signal for USB3.0104 USB H4_SSTX- O USB Negative differential transmission host signal for USB3.084 USBH_EN O CMOS 3.3VEnable signal for the bus voltage output, shared with all USB hostports96 USBH_OC# I OD 3.3V Overcurrent input signal, shared with all USB host ports2.5.2 Reference SchematicsTable 12: USBH4 signalsAs the additional SuperSpeed USB 3.0 data signals are PCIe Gen2 signals at the physical layer, theschematic requirements are similar to those for PCIe. This means AC coupling capacitors arerequired. The placement of the capacitors depends on whether the USB 3.0 device is populated onthe carrier board (device-down) or is connected over a cable. The USB 2.0 data signals do notneed any coupling capacitors.The SuperSpeed interface consists of a pair of transmitting (TX) and receiving (RX) traces.Unfortunately, the names RX and TX can be confusing as the host transmitter needs to beconnected to the receiver of the device and vice versa. Normally, the signals are named after thehost until they reach the pins of the USB device. Therefore, the transmitting pins on the <strong>Apalis</strong>module should be called TX on the carrier board while the receiving pins should be called RX.Please read carefully the datasheet of the USB device (device-down) in order to ensure RX and TXare not confused.2.5.2.1 USB 3.0 OTG Schematic ExampleThe AC coupling capacitors for the SuperSpeed TX signals are located on the <strong>Apalis</strong> module whilethe capacitors for the RX signals are located on the USB device. No additional series capacitors arerequired nor permitted on the <strong>Carrier</strong> board. The USB 2.0 data signals do not need any seriescapacitors at all.<strong>Toradex</strong> AG l Altsagenstrasse 5 l 6048 Horw l Switzerland l +41 41 500 48 00 l www.toradex.com l info@toradex.com Page | 26
<strong>Apalis</strong> <strong>Carrier</strong> <strong>Board</strong> <strong>Design</strong> <strong>Guide</strong>If the USB signals are externally available, ESD protection diodes need to be placed on all of theUSB signals. Make sure that the protection diodes are USB 3.0 compliant. The USB 2.0 signalsadditionally require a common mode choke for passing EMI testing. Use common mode chokesthat are specified for High-speed USB 2.0.RX/TXUSB 2.0/1.1USBO1_D+USBO1_D+USBO1_D-USBO1_D-TVSDiodeD+D-RX/TXUSB 2.0/1.1USB 3.0 OTG ControllerTXSuperSpeedRXModuleConnectorTVSDiodeTVSDiodeUSBO1_SSTX+USBO1_SSTX-2x 100nFUSBO1_SSRX+USBO1_SSRX-USBO1_SSTX+USBO1_SSTX-USBO1_SSRX+USBO1_SSRX-SSTX+SSTX-SSRX+SSRX-USB 3.0 OTG ConnectorUSB 3.0 ConnectorRXSuperSpeedTXUSB 3.0 Device2x 100nF<strong>Apalis</strong> Module<strong>Carrier</strong> <strong>Board</strong>USB CableFigure 20: USB 3.0 OTG Block DiagramUSB DriveThe USBO1_ID signal is used to detect which type of USB connector is plugged into the OTG jack(Micro-AB jack). When a Micro-A connector is inserted, the ID pin is connected to signal ground,causing the OTG port to be configured as a host. If a Micro-B USB connector is inserted, the ID pinis left unbiased and the OTG port will be configured as a slave device. For the USBO1_ID signal apull-up resistor to 3.3V is needed.The USBO1_VBUS input signal is only used if the OTG port is in client mode (Micro-B USBconnector plugged in or by software configured as slave only). The signal is used to detect whethera host is connected on the other end of the USB cable. This signal is 5V tolerant and can beconnected directly to the power supply pin of the USB jack. ESD protection diodes should be usedfor this signal.The USBO1_EN and USBO1_OC# signals are only used when the OTG port is operating in hostmode (Micro-A USB connector is plugged in or the port is configured by software as host only). TheUSBO1_EN signal is used to enable the USB bus power supply if it needs to be switchable. A USBcompliant design needs to detect overcurrent on the USB bus power supply and switch the poweroff should an over-current condition occur. The USBO1_OC# signal is used to signal to the hostcontroller that an over-current condition has occurred. This signal is active-low and requires a pullupresistor on the baseboard.<strong>Toradex</strong> AG l Altsagenstrasse 5 l 6048 Horw l Switzerland l +41 41 500 48 00 l www.toradex.com l info@toradex.com Page | 27
<strong>Apalis</strong> <strong>Carrier</strong> <strong>Board</strong> <strong>Design</strong> <strong>Guide</strong>TPD2EUSB30DRTRTPD2EUSB30DRTR2D-1D+2D-1D+X1CUSBO1_D-USBO1_D+USBO1_SSTX-USBO1_SSTX+USBO1_SSRX-USBO1_SSRX+USBO1_VBUSUSBO1_IDUSBO1_OC#USBO1_ENUSBH_OC#USBH_EN76 USBO1_D_N74 USBO1_D_P70 USBO1_SSTX_N68 USBO1_SSTX_P64 USBO1_SSRX_N62 USBO1_SSRX_P60 USBO1_VBUS72 USBO1_ID262 USBO1_OC#274 USBO1_EN9684USBO1[0..5]USB_CTRL[0..3]D13USBO1_SSRX_PGNDUSBO1_SSRX_NUSBO1_SSTX_PUSBO1_SSTX_NL190R@100MHzUSBO1_D_N 2 3USBO1_D_P 143.3VR3 100KSHIELDUSBO1_IDD23X2GND10SSRX+9SSRX-8GND_USBO1 GND DRAIN7SSTX+6SSTX-VCC_USBO11VCCUSBO1_D_CON_N2D-USBO1_D_CON_P3D+USBO1_ID4ID5GND1003-005-23100L2D32A220R@100MHz3 45V_ESD 5V GND_USBO1GNDL3254AC139R@100MHz16 100nFSHIELDSHIELDS1S2SHIELDUSBH2_D-USBH2_D+8280RCLAMP0504SSHIELDUSBH3_D-USBH3_D+USBH4_D-USBH4_D+USBH4_SSTX-USBH4_SSTX+USBH4_SSRX-USBH4_SSRX+<strong>Apalis</strong> - USB3 of 25MM70-314-310B18886100981041069294USBO1_EN5V IC1A3.3V R52V_IN OUT_1100K 3R4EN_18100KOC_1#GNDUSBO1_OC#TPS2052BDUSBO1_VBUS R2 0RIC1B4GND EN_2 OUT_25OC_2#1GND GNDTPS2052BDVCC_USBO1220R@100MHz72AC2 C3C4100nF 100uF L4 1nF16V 10V50VGND GNDGND_USBO16Figure 21: USB 3.0 OTG reference schematic+OptionalVCC_USBO1R1330RLED1GREENGND2.5.2.2 USB 2.0 Client Schematic ExampleIf the USBO1 port is used only as high-speed client interface (e.g. if only used as debugginginterface), a simplified schematic diagram is necessary.RX/TXUSB 2.0/1.1USBO1_D+USBO1_D+USBO1_D-USBO1_D-TVSDiodeD+D-USB 2.0ConnectorUSB 2.0ConnectorRX/TXUSB 2.0/1.1USB 2.0 HostUSB 3.0 OTG ControllerTXSuperSpeedUSBO1_SSTX+USBO1_SSTX-2x 100nFUSBO1_SSRX+ModuleConnectorRXUSBO1_SSRX-<strong>Apalis</strong> Module<strong>Carrier</strong> <strong>Board</strong>USB CableFigure 22: USB 2.0 client block diagramUSB DriveUSBO1_EN, USBO1_OC# and USBO1_ID pins are not used in this configuration. The USBO1_ENpin can be left unconnected. The USBO1_OC# should be pulled up to 3.3V or disabled in thesoftware. The USBO1_ID pin needs to be pulled up to 3.3V or the OTG port needs to beconfigured by the software to be the client only.The USBO1_VBUS pin can be connected directly to the USB bus power supply of the USB Type Bconnector. This signal is needed to indicate to the system that a host is connected at the other endof the USB cable.<strong>Toradex</strong> AG l Altsagenstrasse 5 l 6048 Horw l Switzerland l +41 41 500 48 00 l www.toradex.com l info@toradex.com Page | 28
<strong>Apalis</strong> <strong>Carrier</strong> <strong>Board</strong> <strong>Design</strong> <strong>Guide</strong>X1CUSBO1_D-USBO1_D+USBO1_SSTX-USBO1_SSTX+USBO1_SSRX-USBO1_SSRX+USBO1_VBUSUSBO1_IDUSBO1_OC#USBO1_ENUSBH_OC#USBH_EN76747068646260722622749684L2USBO1_D_N 2 3USBO1_D_P 1490R@100MHz3.3V3.3VR1100K R2USBO1_VBUS100KUSBO1_IDUSBO1_OC#SHIELD21USBO1_D_CON_NUSBO1_D_CON_PD13 4RCLAMP0504S565V_ESD 5VL34AC139R@100MHz100nFSHIELDX22D-3D+VCC_USBO11VCC4GND61729-0010BLFGND_USBO1L12A220R@100MHzOptionalVCC_USBO1R3330RGNDS1S2SHIELDUSBH2_D-USBH2_D+8280LED1GNDGREENUSBH3_D-USBH3_D+8886USBH4_D-USBH4_D+USBH4_SSTX-USBH4_SSTX+USBH4_SSRX-USBH4_SSRX+<strong>Apalis</strong> - USB3 of 25MM70-314-310B1100981041069294Figure 23: USB 2.0 client reference schematic2.5.2.3 USB 3.0 Host Connector Schematic ExampleThe following schematic example shows how to use the USBH4 port as a USB 3.0 host interface. AsUSB 3.0 is backward compatible, this port could also be used as a USB 2.0 host interface.RX/TXUSB 2.0/1.1USBH4_D+USBH4_D+USBH4_D-USBH4_D-TVSDiodeD+D-RX/TXUSB 2.0/1.1USB 3.0 HostTXSuperSpeedRXModuleConnectorTVSDiodeTVSDiodeUSBH4_SSTX+USBH4_SSTX-2x 100nFUSBH4_SSRX+USBH4_SSRX-USBH4_SSTX+USBH4_SSTX-USBH4_SSRX+USBH4_SSRX-SSTX+SSTX-SSRX+SSRX-USB 3.0 ConnectorUSB 3.0 ConnectorRXSuperSpeedTXUSB 3.0 Device2x 100nF<strong>Apalis</strong> Module<strong>Carrier</strong> <strong>Board</strong>USB CableFigure 24: USB 3.0 host block diagramUSB DriveThe power enable signal USBH_EN is shared with the other two host interfaces USBH2 and USBH3.If the USB bus power supply needs to be switched individually for each port, any free pin withGPIO functionality could be used. In this case the USB driver needs to be modified to support suchan implementation.The USBH_OC# signal is shared between all the USB host ports of the <strong>Apalis</strong>. Since the signal isopen drain type, it can be connected directly to the all overcurrent output ports. The signal requiresa pull-up resistor on the carrier board.<strong>Toradex</strong> AG l Altsagenstrasse 5 l 6048 Horw l Switzerland l +41 41 500 48 00 l www.toradex.com l info@toradex.com Page | 29
<strong>Apalis</strong> <strong>Carrier</strong> <strong>Board</strong> <strong>Design</strong> <strong>Guide</strong>X1CUSBO1_D-USBO1_D+USBO1_SSTX-USBO1_SSTX+USBO1_SSRX-USBO1_SSRX+USBO1_VBUSUSBO1_IDUSBO1_OC#USBO1_ENUSBH_OC#USBH_ENUSBH2_D-USBH2_D+USBH3_D-USBH3_D+USBH4_D-USBH4_D+USBH4_SSTX-USBH4_SSTX+USBH4_SSRX-USBH4_SSRX+<strong>Apalis</strong> - USB3 of 25MM70-314-310B17674706864626072262274 3.3VR2USB_CTRL[0..1]100K96 USBH_OC#84 USBH_ENR3100K8280GNDUSBH4[0..5]8886100USBH4_D_N98 USBH4_D_P104USBH4_SSTX_N106USBH4_SSTX_P92 USBH4_SSRX_N94 USBH4_SSRX_PIC1B46GND EN_2 OUT_25OC_2#1GND GNDTPS2052BD5V IC1AVCC_USBH4220R@100MHz27V_IN OUT_12AUSBH_EN 3C1 C2C3EN_1100nF 100uF L3 1nFOptionalUSBH_OC# 8OC_1#16V 10V50VVCC_USBH4TPS2052BDGND GNDGND_USBH4R1TPD2EUSB30DRTR330RLED121GREEND-D+GNDD1X2USBH4_SSRX_NGND5SSRX-USBH4_SSRX_P6SSRX+7GND_USBH4 GND-DRAINUSBH4_SSTX_N8SSTX-USBH4_SSTX_P9SSTX+VCC_USBH41L1VCCUSBH4_D_N 2 3USBH4_D_CON_N2D-USBH4_D_P 14USBH4_D_CON_P3D+90R@100MHzD2D34GND21 211932258-1L2D-D+ D-D+2A220R@100MHzFigure 25: USB 3.0 host reference schematic+GND_USBH4GNDGNDGNDTPD2EUSB30DRTR TPD2EUSB30DRTRS1S2SHIELD2.5.2.4 USB 3.0 Device Down Schematic ExampleDevice-Down means that the USB device is soldered to the carrier board. The AC couplingcapacitors for the SuperSpeed RX lane (TX from the device) need to be placed on the carrier board.As the capacitors for the TX lane are located on the <strong>Apalis</strong> module, no additional capacitors arerequired nor permitted on the TX lines.No series capacitors should be placed in the USB 2.0 data signal lines. Instead of placing acommon mode choke to the USB 2.0 data signals, series resistors can be added for reducing theslew rate, which will help minimize EMC problems. The value of the series resistor is a trade-offbetween reducing electromagnetic radiation and signal quality. A good starting value is 22Ω.ESD protection diodes and common mode chokes are usually not needed for device-downimplementations.USBH4_D+USBH4_D+D+RX/TXUSB 2.0/1.1USBH4_D-USBH4_D-2x 22?D-RX/TXUSB 2.0/1.1USB 3.0 HostTXUSBH4_SSTX+USBH4_SSTX-ModuleConnectorUSBH4_SSTX+USBH4_SSTX-SSRX+SSRX-RXUSB 3.0 DeviceSuperSpeed2x 100nFUSBH4_SSRX+USBH4_SSRX+SSTX+SuperSpeedRXUSBH4_SSRX-USBH4_SSRX-SSTX-TX2x 100nF<strong>Apalis</strong> Module<strong>Carrier</strong> <strong>Board</strong>Figure 26: USB 3.0 device down block diagram<strong>Toradex</strong> AG l Altsagenstrasse 5 l 6048 Horw l Switzerland l +41 41 500 48 00 l www.toradex.com l info@toradex.com Page | 30
<strong>Apalis</strong> <strong>Carrier</strong> <strong>Board</strong> <strong>Design</strong> <strong>Guide</strong>X1C765VUSBO1_D-R174USBO1_D+R2 90.9K 1%7010KUSBO1_SSTX-1%68SATA1[0..3]X2USBO1_SSTX+USBH4[0..5]GNDIC1A7GND GND6450SATA1_RX_NSATA1_RX_P6USBO1_SSRX-SATA_RXM 59C1 100nFUSB_VBUSB+ (RX+)62USBH4_D_N R3 22R 3560 SATA1_RX_PSATA1_RX_N 100nF 5USBO1_SSRX+USB_DMSATA_RXPB- (RX-)USBH4_D_P36C24USB_DPGND GND60R4 22RSATA1_TX_NSATA1_TX_N3USBO1_VBUSSATA_TXM 56C3 100nFC4A- (TX-)72PCIE1_RX_N100nF 4257 SATA1_TX_PSATA1_TX_P 100nF 2USBO1_IDUSB_SSTXM SATA_TXPA+ (TX+)262PCIE1_RX_P100nF 43C51USBO1_OC#USB_SSTXPGND274USBO1_ENC6IC23.3VUSBH4_SSTX_P4621 SPI_CE#18GND 0470804005USB_SSRXPSPI_CS0CS# VCCUSBH4_SSTX_N4518 SPI_SO57 4.7KUSB_SSRXM SPI_DATA_OUTSI HOLD#17 SPI_SCK63 R5C7SPI_SCLKSCK WP#100nF963820 SPI_SI SPI_SO_J 24 R6 4.7KUSBH_OC#R7 USB_R1SPI_DATA_INSO GND8422USBH_EN10KSPI_CS1/GPIO103923Pm25LV512A1%GNDUSB_R1RTN SPI_CS2/GPIO11R8 4.7KSPI Enable30OSC1 3.3V3.3V_DFREQSEL0823152 JP131USBH2_D-3.3V_DFREQSEL1XIOUT OE80USBH2_D+R9 4.7KRESET_MOCI#45424GRSTzXOGND VCC826OSC 40.0 MHz C8GPIO0JTAG_TDI1uF88927USBH3_D-GPIO1JTAG_TDO861025GNDGNDUSBH3_D+GPIO2JTAG_TCK1128GPIO3JTAG_TMS13GPIO41429GPIO5JTAG_TRSTz100USBH4_D_N152USBH4_D-GPIO6PWM098 USBH4_D_P163USBH4_D+GPIO7PWM1564GPIO8/UART_RXNC104USBH4_SSTX_N637USBH4_SSTX-GPIO9/UART_TXNC106USBH4_SSTX_PUSBH4_SSTX+TUSB926192 USBH4_SSRX_NUSBH4_SSRX-94 USBH4_SSRX_P3.3V_ANIC1B1.1V_DUSBH4_SSRX+341VDDA33 VDD<strong>Apalis</strong> - USBC20 C21 4012 C22 C18 C10 C11 C12 C13 C14 C15 C16 C17 C9 C19VDDA33 VDD22uF 100nF 4819 10nF 10nF 100nF 100nF 100nF 100nF 100nF 100nF 100nF 100nF 1uF 22uFVDDA33 VDD3 of 256232MM70-314-310B1VDDA33 VDDGND33GNDVDDX1D41VDDPower2447POWER_ENABLE_MOCIVDDL12649RESET_MOCI#VDD3.3V 2A 3.3V_AN2855RESET_MICO#VDD220R@100MHz3761WAKE1_MICO#VDDL25363VSSOSC VDD3.3V 2A 3.3V_D<strong>Apalis</strong> - System Control3.3V_D220R@100MHz4451VSS VDD334 of 255824 C25 C26 C27 C23 C24L3MM70-314-310B1VSS VDD331.1V 2A 1.1V_D657100nF 100nF 100nF 1uF 22uFVSS VDD33220R@100MHzGND TUSB9261GNDFigure 27: USB 3.0 device down reference schematic (USB3.0 to SATA Bridge)2.5.2.5 USB 2.0 Host Connector Schematic ExampleUSB 2.0 HostRX/TXUSB 2.0/1.1USBHn_D+ModuleConnectorUSBHn_D+USBHn_D-USBHn_D-TVSDiodeD+D-USB 2.0ConnectorUSB 2.0ConnectorRX/TXUSB 2.0/1.1USB 2.0 Device<strong>Apalis</strong> Module<strong>Carrier</strong> <strong>Board</strong>USB CableFigure 28: USB 2.0 host block diagramUSB DriveThe power enable signal USBH_EN is shared with the all three other host interfaces USBH2,USBH3 and USBH4. If USB bus power supply needs to be switched individually for each port, anyfree pin with GPIO functionality could be used to control the USB power rails individually. In thiscase the USB driver needs to support such an implementation.The USBH_OC# signal is shared between all the USB host ports of the <strong>Apalis</strong>. Since the signal isopen drain type, it can be connected directly to the all overcurrent output ports. The signal requiresa pull-up resistor on the carrier board.<strong>Toradex</strong> AG l Altsagenstrasse 5 l 6048 Horw l Switzerland l +41 41 500 48 00 l www.toradex.com l info@toradex.com Page | 31
<strong>Apalis</strong> <strong>Carrier</strong> <strong>Board</strong> <strong>Design</strong> <strong>Guide</strong>X1CUSBO1_D-USBO1_D+USBO1_SSTX-USBO1_SSTX+USBO1_SSRX-USBO1_SSRX+USBO1_VBUSUSBO1_IDUSBO1_OC#USBO1_ENUSBH_OC#USBH_EN7674706864626072262274 3.3VR2USB_CTRL[0..1]100K96 USBH_OC#84 USBH_ENR3GND100K4GND51GND5V2USBH_EN 3USBH_OC# 8IC1BEN_2OC_2#GNDTPS2052BDIC1AV_INEN_1OC_1#TPS2052BDOUT_2OUT_167C1100nF16V+GND GNDVCC_USBH2220R@100MHzC2100uF10V2AC3L3 1nF50VGND_USBH2X2OptionalVCC_USBH2R1330RLED1GREENGNDUSBH2_D-USBH2_D+USBH3_D-USBH3_D+USBH4_D-USBH4_D+USBH4_SSTX-USBH4_SSTX+USBH4_SSRX-USBH4_SSRX+<strong>Apalis</strong> - USB3 of 25MM70-314-310B11L1VCC82 USBH2_D_N 2 3USBH2_D_CON_N2D-80 USBH2_D_P 14USBH2_D_CON_P3D+D2490R@100MHzGND21D-D+L2882A86220R@100MHzGND_USBH2GNDGNDTPD2EUSB30DRTR100981041069294Figure 29: USB 2.0 host reference schematic292303-1S1S2S3S4SHIELD2.5.3 Unused USB Signal Termination<strong>Apalis</strong>Pin<strong>Apalis</strong>Signal NameRecommended Termination74 USBO1_D+ Leave NC if not used76 USBO1_D- Leave NC if not used62 USBO1_SSRX+ Leave NC if not used64 USBO1_SSRX- Leave NC if not used68 USBO1_SSTX+ Leave NC if not used70 USBO1_SSTX- Leave NC if not used80 USBH2_D+ Leave NC if not used82 USBH2_D- Leave NC if not used86 USBH3_D+ Leave NC if not used88 USBH3_D- Leave NC if not used98 USBH4_D+ Leave NC if not used100 USBH4_D- Leave NC if not used94 USB H4_SSRX+ Leave NC if not used92 USB H4_SSRX- Leave NC if not used106 USBH4_SSTX+ Leave NC if not used104 USB H4_SSTX- Leave NC if not used72 USBO1_ID60 USBO1_VBUS Leave NC if not used274 USBO1_EN Leave NC if not usedLeave NC and set the USB port direction in software to host or client OR ground the pin if port isused permanently as host OR add pull-up resistor if port is used as slave.262 USBO1_OC# Add pull-up resistor or disable the overcurrent function in software84 USBH_EN Leave NC if not used96 USBH_OC# Add pull-up resistor OR disable the overcurrent function in softwareTable 13: Unused USB signal termination<strong>Toradex</strong> AG l Altsagenstrasse 5 l 6048 Horw l Switzerland l +41 41 500 48 00 l www.toradex.com l info@toradex.com Page | 32
<strong>Apalis</strong> <strong>Carrier</strong> <strong>Board</strong> <strong>Design</strong> <strong>Guide</strong>2.6 Parallel RGB LCD Interface2.6.1 Parallel RGB LCD Signals<strong>Apalis</strong>Pin<strong>Apalis</strong>Signal NameI/OTypePowerRail251 LCD1_R0 O CMOS 3.3V253 LCD1_R1 O CMOS 3.3V255 LCD1_R2 O CMOS 3.3V257 LCD1_R3 O CMOS 3.3V259 LCD1_R4 O CMOS 3.3V261 LCD1_R5 O CMOS 3.3V263 LCD1_R6 O CMOS 3.3V265 LCD1_R7 O CMOS 3.3V269 LCD1_G0 O CMOS 3.3V271 LCD1_G1 O CMOS 3.3V273 LCD1_G2 O CMOS 3.3V275 LCD1_G3 O CMOS 3.3V277 LCD1_G4 O CMOS 3.3V279 LCD1_G5 O CMOS 3.3V281 LCD1_G6 O CMOS 3.3V283 LCD1_G7 O CMOS 3.3V287 LCD1_B0 O CMOS 3.3V289 LCD1_B1 O CMOS 3.3V291 LCD1_B2 O CMOS 3.3V293 LCD1_B3 O CMOS 3.3V295 LCD1_B4 O CMOS 3.3V297 LCD1_B5 O CMOS 3.3V299 LCD1_B6 O CMOS 3.3V301 LCD1_B7 O CMOS 3.3VDescriptionRed LCD data signals (LSB: 0, MSB: 7)Green LCD data signals (LSB: 0, MSB: 7)Blue LCD data signals (LSB: 0, MSB: 7)249 LCD1_DE O CMOS 3.3V Data Enable (other names: Output Enable)243 LCD1_PCLK O CMOS 3.3V Pixel Clock (other names: Dot Clock, L_PCLK_WR)247 LCD1_HSYNC O CMOS 3.3V Horizontal Sync (other names: Line Clock, L_LCKL_A0)245 LCD1_VSYNC O CMOS 3.3V Vertical Sync (other names: Frame Clock, L_FCLK)239 BKL1_PWM O CMOS 3.3V286 BKL1_ON O CMOS 3.3V Backlight enable signalBacklight PWM, can be used to control the brightness of the LCDbacklight205 I2C2_SDA I/O OD 3.3V I 2 C interface that might be used for the extended display identificationdata (EDID) or as DDC if a converter to VGA or DVI is added. This207 I2C2_SCL O OD 3.3V interface is shared with the other display interfaces.2.6.2 Color MappingTable 14: Parallel RGB LCD signalsThe 24-bit color mapping is guaranteed to be compatible with other <strong>Apalis</strong> modules. R7, G7 andB7 are the most significant bits (MSBs) and R0, G0 and B0 are the least significant bits (LSBs) forthe respective colors. To use displays which require fewer bits (e.g. 18 or 16-bit displays), simply donot connect the bottom n LSBs for each color, where n is the number of signals that are notrequired for a specific color. For instance, to connect an 18-bit display, R0, R1, G0, G1 B0, and B1will remain unused, and R2, G2, and B2 will become the LSBs for this configuration.Some <strong>Apalis</strong> Modules might feature additional color mappings for 18 or 16-bit displays. Thesemappings might be incompatible with the 24-bit mapping of the <strong>Apalis</strong> standard. In order to keep<strong>Toradex</strong> AG l Altsagenstrasse 5 l 6048 Horw l Switzerland l +41 41 500 48 00 l www.toradex.com l info@toradex.com Page | 33
<strong>Apalis</strong> <strong>Carrier</strong> <strong>Board</strong> <strong>Design</strong> <strong>Guide</strong>the design compatible, it is recommended to attach 18 or 16-bit displays to the 24-bit mappedinterface as the following table shows.<strong>Apalis</strong>Pin<strong>Apalis</strong>Signal Name24 bitRGB251 LCD1_R0 R0253 LCD1_R1 R118 bitRGB255 LCD1_R2 R2 R016 bitRGB257 LCD1_R3 R3 R1 R0259 LCD1_R4 R4 R2 R1261 LCD1_R5 R5 R3 R2263 LCD1_R6 R6 R4 R3265 LCD1_R7 R7 R5 R4269 LCD1_G0 G0271 LCD1_G1 G1273 LCD1_G2 G2 G0 G0275 LCD1_G3 G3 G1 G1277 LCD1_G4 G4 G2 G2279 LCD1_G5 G5 G3 G3281 LCD1_G6 G6 G4 G4283 LCD1_G7 G7 G5 G5287 LCD1_B0 B0289 LCD1_B1 B1291 LCD1_B2 B2 B0293 LCD1_B3 B3 B1 B0295 LCD1_B4 B4 B2 B1297 LCD1_B5 B5 B3 B2299 LCD1_B6 B6 B4 B3301 LCD1_B7 B7 B5 B4Table 15: Parallel RGB LCD signals<strong>Toradex</strong> AG l Altsagenstrasse 5 l 6048 Horw l Switzerland l +41 41 500 48 00 l www.toradex.com l info@toradex.com Page | 34
<strong>Apalis</strong> <strong>Carrier</strong> <strong>Board</strong> <strong>Design</strong> <strong>Guide</strong>2.6.3 Reference Schematics2.6.3.1 24-bit Display Schematic ExampleThe parallel RGB interface can cause problems with EMC compliance when used with a high pixelclock frequency. This can be made worse if a display is connected over flat flex cables. Therefore,the flat flex cables should be kept as short as possible. Series resistors in the data lines reduce theslew rate of the signals which instead reduces the radiation problem but can also introduce signalquality and timing related problems. The serial resistor value is a trade-off between reduction ofelectromagnetic radiation and signal quality. A good starting value is 22Ω.Some displays feature an I 2 C interface for reading out the EDID PROM or additional controls suchas contrast and hue. If the carrier board provides no other display interface with DDC, it isrecommended that the I2C2 on the <strong>Apalis</strong> module be used for the DDC. If the DDC is used, makesure that I 2 C device(s) on the RGB display do not interfere with the DDC address 50h. Otherwise,use a different I 2 C interface on the <strong>Apalis</strong> module. The I 2 C interfaces on the <strong>Apalis</strong> module have a3.3V logic level. If the display requires a 5V interface, add an I 2 C logic level shifter.X1LMXM3_239BKL1_PWM 239243 MXM3_243LCD1_PCLK245 MXM3_245LCD1_VSYNC247 MXM3_247LCD1_HSYNC249 MXM3_249LCD1_DE286 MXM3_286BKL1_ON251 MXM3_251LCD1_R0253 MXM3_253LCD1_R1255 MXM3_255LCD1_R2257 MXM3_257LCD1_R3259 MXM3_259LCD1_R4261 MXM3_261LCD1_R5263 MXM3_263LCD1_R6265 MXM3_265LCD1_R7269 MXM3_269LCD1_G0271 MXM3_271LCD1_G1273 MXM3_273LCD1_G2275 MXM3_275LCD1_G3277 MXM3_277LCD1_G4279 MXM3_279LCD1_G5281 MXM3_281LCD1_G6283 MXM3_283LCD1_G7287 MXM3_287LCD1_B0289 MXM3_289LCD1_B1291 MXM3_291LCD1_B2293 MXM3_293LCD1_B3295 MXM3_295LCD1_B4297 MXM3_297LCD1_B5299 MXM3_299LCD1_B6301 MXM3_301LCD1_B7<strong>Apalis</strong> - Digital RGB12 of 25MM70-314-310B1X1Y205 MXM3_205I2C2_SDA207 MXM3_207I2C2_SCL<strong>Apalis</strong> - Display DDC25 of 25MM70-314-310B1X1D24POWER_ENABLE_MOCI26RESET_MOCI#28RESET_MICO#37WAKE1_MICO#<strong>Apalis</strong> - System Control4 of 25MM70-314-310B1LCD[0..29]R1 22R PWM_BKL1R2 22R LCD1_PCLKR3 22R LCD1_VSYNCR4 22R LCD1_HSYNCR5 22R LCD1_DER6 22R BKL1_ONR7 22R LCD1_R0R8 22R LCD1_R1R9 22R LCD1_R2R10 22R LCD1_R3R11 22R LCD1_R4R12 22R LCD1_R5R13 22R LCD1_R6R14 22R LCD1_R7R15 22R LCD1_G0R16 22R LCD1_G1R17 22R LCD1_G2R18 22R LCD1_G3R19 22R LCD1_G4R20 22R LCD1_G5R21 22R LCD1_G6R22 22R LCD1_G7R23 22R LCD1_B0R24 22R LCD1_B1R25 22R LCD1_B2R26 22R LCD1_B3R27 22R LCD1_B4R28 22R LCD1_B5R29 22R LCD1_B6R30 22RR37 22R I2C2_SDA22R I2C2_SCLR39LCD1_B7JP133.3V2V_DDC15V3.3VV_DDC V_DDCIC1100K R3127C1 VREF1 VREF2R32 R33100nF16V 18 1.8K 1.8KR35 R34 GND EN1.8K 1.8K100nF C2I2C2_DDC[0..1]16VGNDGNDI2C2_SCL36R36SCL1 SCL222RI2C2_SDA45R38SDA1 SDA222RPCA9306DCTTL1500mA220R@100MHzL2500mA220R@100MHzC3 C44.7pF 4.7pFGNDFigure 30: 24-bit parallel RGB display reference schematicDisplay ConnectorX21GND25V33.3V43.3VLCD1_B75LCD1_B66LCD1_B57LCD1_B48LCD1_B39LCD1_B2 10LCD1_B1 11LCD1_B0 1213GNDLCD1_G7 14LCD1_G6 15LCD1_G5 16LCD1_G4 17LCD1_G3 18LCD1_G2 19LCD1_G1 20LCD1_G0 2122GNDLCD1_R7 23LCD1_R6 24LCD1_R5 25LCD1_R4 26LCD1_R3 27LCD1_R2 28LCD1_R1 29LCD1_R0 3031GNDLCD1_PCLK 32LCD1_HSYNC 33LCD1_VSYNC 34LCD1_DE 35BKL1_ON 36PWM_BKL1 37I2C2_DDC_SCL_C 38I2C2_DDC_SDA_C 39RESET_MOCI# 40FH12-40S-0.5SV(55)<strong>Toradex</strong> AG l Altsagenstrasse 5 l 6048 Horw l Switzerland l +41 41 500 48 00 l www.toradex.com l info@toradex.com Page | 35
12+<strong>Apalis</strong> <strong>Carrier</strong> <strong>Board</strong> <strong>Design</strong> <strong>Guide</strong>2.6.3.2 VGA DAC Schematic ExampleThe <strong>Apalis</strong> standard features a dedicated VGA interface. Nevertheless, it is possible to add aparallel RGB to VGA converter if an additional VGA interface is needed or a specific <strong>Apalis</strong> moduledoes not feature VGA output at the VGA pins. For additional information about the availability of adedicated VGA interface and whether it is independent from the parallel RGB interface, pleaseconsult the applicable <strong>Apalis</strong> module datasheet.3.3V5VV_DISPR61.8KI2C2_DDC[0..1]X1YI2C2_SCL205 MXM3_205 R1 22R I2C2_SDAI2C2_SDA207 MXM3_207 22R I2C2_SCLI2C2_SDAI2C2_SCLR2<strong>Apalis</strong> - Display DDC25 of 25MM70-314-310B1X1LLCD[0..28]BKL1_PWM 239243 MXM3_243 R10 22R LCD1_PCLKLCD1_R7LCD1_PCLK245 MXM3_245 R11 22R LCD1_VSYNCLCD1_R6LCD1_VSYNC247 MXM3_247 R12 22R LCD1_HSYNCLCD1_R5LCD1_HSYNC249 MXM3_249 R13 22R LCD1_DELCD1_R4LCD1_DE286 MXM3_286 R14 22R BKL1_ONLCD1_R3BKL1_ONLCD1_R2251 MXM3_251 R16 22R LCD1_R0LCD1_R1LCD1_R0253 MXM3_253 R17 22R LCD1_R1LCD1_R0LCD1_R1255 MXM3_255 R18 22R LCD1_R2LCD1_R2257 MXM3_257 R19 22R LCD1_R3LCD1_G7LCD1_R3259 MXM3_259 R20 22R LCD1_R4LCD1_G6LCD1_R4261 MXM3_261 R22 22R LCD1_R5LCD1_G5LCD1_R5263 MXM3_263 R23 22R LCD1_R6LCD1_G4LCD1_R6265 MXM3_265 R24 22R LCD1_R7LCD1_G3LCD1_R7269 MXM3_269 R25 22R LCD1_G0LCD1_G2LCD1_G0271 MXM3_271 R26 22R LCD1_G1LCD1_G1LCD1_G1273 MXM3_273 R27 22R LCD1_G2LCD1_G0LCD1_G2275 MXM3_275 R29 22R LCD1_G3LCD1_G3277 MXM3_277 R30 22R LCD1_G4LCD1_B7LCD1_G4279 MXM3_279 R31 22R LCD1_G5LCD1_B6LCD1_G5281 MXM3_281 R32 22R LCD1_G6LCD1_B5LCD1_G6283 MXM3_283 R33 22R LCD1_G7LCD1_B4LCD1_G7287 MXM3_287 R34 22R LCD1_B0LCD1_B3LCD1_B0289 MXM3_289 R35 22R LCD1_B1LCD1_B2LCD1_B1291 MXM3_291 R36 22R LCD1_B2LCD1_B1LCD1_B2293 MXM3_293 R37 22R LCD1_B3LCD1_B0LCD1_B3295 MXM3_295 R38 22R LCD1_B4LCD1_B4297 MXM3_297 R39 22R LCD1_B5LCD1_PCLKLCD1_B5299 MXM3_299 R40 22R LCD1_B6LCD1_B6GND301 MXM3_301 R41 22R LCD1_B7LCD1_DELCD1_B7BKL1_ON<strong>Apalis</strong> - Digital RGB12 of 25MM70-314-310B1LCD1_HSYNCR71.8K48474645444342411098765432322212019181716241211385VGNDGND2C1100nF16V 1IC2R7R6R5R4R3R2R1R0G7G6G5G4G3G2G1G0B7B6B5B4B3B2B1B034IC1CLOCKSYNC#BLANK#PSAVE#C5100nF16VADV7125KSTZ14025C21100nF16V3VREF1GNDSCL1SDA1PCA9306DCTT3.3V36AVREF35COMPC6100nF16VGNDGNDGNDGNDGNDGNDGNDGNDGNDIC3VCCGNDVREF2SN74LVC1G17141525263940YNCENSCL2SDA241100K78100nF65IOR+IOG+IOB+IOR-IOG-IOB-VAAVAAVAARSETR4433RR3C216VGNDR41.8K34333231282713293037R5GND1.8KGNDGNDVGA_GREENGNDGNDVGA_BLUEGNDR42560RL6500mAR822RR922RR1575RR2175RR2875RVGA_REDC1410nF25V220R@100MHzL1500mA220R@100MHzL2500mA220R@100MHzGNDGNDC15100nF16VC2047pF50VC34.7pFC710pF50VC910pF50VGNDL3600mA40R@100MHzC1610nF25VC44.7pFC17100nF16VC810pF50VGNDL4600mA40R@100MHzC1010pF50VL5600mA40R@100MHzC1110pF50VGNDGNDLCD1_HSYNC_CI2C2_DDC_SCL_CI2C2_DDC_SDA_CC1210pF50VC1810nF25VC19100nF16VPLACE D1, D2 NEAR THE VGA CONNECTORSHIELD2RCLAMP0504SVGA_RED_CVGA_GREEN_CVGA_BLUE_C3.3VGNDC1322uF10VD1I2C2_DDC_C[0 .1]D2SHIELD2V_DISPGNDRCLAMP0504S31JP15VVGA_RED_CVGA_GREEN_CI2C2_DDC_SDA_CVGA_BLUE_CLCD1_HSYNC_CLCD1_VSYNC_CI2C2_DDC_SCL_C2D3BAT54R43120RPIN9V_DISPGNDGNDGNDPIN9GNDGNDX24A16 611 11 12 7712 12 23 88 13 3134 99 14 414 10510 15 515HDR15SN-HX24B HDR15SN-HSHIELDSHIELD2 SHIELD2IC4L7LCD1_VSYNC24 R45LCD1_VSYNC_CA Y500mA33R 220R@100MHz C2255V47pFC23 VCC100nF50V16V31GNDGND NCGNDSN74LVC1G17Figure 31: VGA DAC reference schematic<strong>Toradex</strong> AG l Altsagenstrasse 5 l 6048 Horw l Switzerland l +41 41 500 48 00 l www.toradex.com l info@toradex.com Page | 36
<strong>Apalis</strong> <strong>Carrier</strong> <strong>Board</strong> <strong>Design</strong> <strong>Guide</strong>2.6.3.3 LVDS Transmitter Schematic ExampleAs EMC compliance, if using the parallel RGB interface becomes problematic, it is recommended toattach liquid crystal displays with high resolutions using a LVDS interface. LVDS also reducesproblems with long cables. The <strong>Apalis</strong> standard features a dedicated LVDS LCD interface. If theprovided LVDS interface is incompatible with the display or an additional interface is needed, aparallel RGB to LVDS transmitter can be placed on the carrier board. Please consult the <strong>Apalis</strong>module to determine whether the dedicated LVDS interface is independent from the parallel RGBinterface.As there are different LVDS color mappings available, check with your display vendor on how theRGB signals need to be connected to the transmitter.X1LMXM3_239BKL1_PWM 239243 MXM3_243LCD1_PCLK245 MXM3_245LCD1_VSYNC247 MXM3_247LCD1_HSYNC249 MXM3_249LCD1_DE286 MXM3_286BKL1_ON251 MXM3_251LCD1_R0253 MXM3_253LCD1_R1255 MXM3_255LCD1_R2257 MXM3_257LCD1_R3259 MXM3_259LCD1_R4261 MXM3_261LCD1_R5263LCD1_R6265LCD1_R7269 MXM3_269LCD1_G0271 MXM3_271LCD1_G1273 MXM3_273LCD1_G2275 MXM3_275LCD1_G3277 MXM3_277LCD1_G4279 MXM3_279LCD1_G5281LCD1_G6283LCD1_G7287 MXM3_287LCD1_B0289 MXM3_289LCD1_B1291 MXM3_291LCD1_B2293 MXM3_293LCD1_B3295 MXM3_295LCD1_B4297 MXM3_297LCD1_B5299LCD1_B6301LCD1_B7<strong>Apalis</strong> - Digital RGBR1R2R3R4R5R6R7R8R9R10R11R12R15R16R17R18R19R20R23R24R25R26R27R2822R PWM_BKL122R LCD1_PCLK22R LCD1_VSYNC22R LCD1_HSYNC22R LCD1_DE22R BKL1_ON22R LCD1_R022R LCD1_R122R LCD1_R222R LCD1_R322R LCD1_R422R LCD1_R522R LCD1_G022R LCD1_G122R LCD1_G222R LCD1_G322R LCD1_G422R LCD1_G522R LCD1_B022R LCD1_B122R LCD1_B222R LCD1_B322R LCD1_B422R LCD1_B5LCD[0..29]IC4ALCD1_R0 44TxIN0/RED0LCD1_R1 45TxIN1/RED1LCD1_R2 47TxIN2/RED2LCD1_R3 48TxIN3/RED3LCD1_R4 1TxIN4/RED4LCD1_R5 3TxIN5/RED5LCD1_G0 4TxIN6/GREEN0LCD1_G1 6TxIN7/GREEN1LCD1_G2 7TxIN8/GREEN2LCD1_G3 9TxIN9/GREEN3LCD1_G4 10TxIN10/GREEN4LCD1_G5 12TxIN11/GREEN5LCD1_B0 13TxIN12/BLUE0LCD1_B1 15TxIN13/BLUE1LCD1_B2 16TxIN14/BLUE2LCD1_B3 18TxIN15/BLUE3LCD1_B4 19TxIN16/BLUE4LCD1_B5 20TxIN17/BLUE5LCD1_HSYNC 22TxIN18/HSYNKLCD1_VSYNC 23TxIN19/VSYINKLCD1_DE 25TxIN20/DELCD1_PCLK 26TxCLKIN1 of 2DS90C363BMTPWM_BKL1BKL1_ON40 LVDS1_OUT0_P41 LVDS1_OUT0_N38 LVDS1_OUT1_P39 LVDS1_OUT1_N34 LVDS1_OUT2_P35 LVDS1_OUT2_N32 LVDS1_CLK_P33 LVDS1_CLK_NLVDS1[0..7]5V_LVDS13.3V_LVDS1LVDS1_OUT0_NLVDS1_OUT0_PLVDS1_OUT1_NLVDS1_OUT1_PLVDS1_OUT2_NLVDS1_OUT2_PLVDS1_CLK_NLVDS1_CLK_PPWM_BKL1BKL1_ONJP113.3V_LVDS1235V_LVDS1R3100KGNDJP213.3V_LVDS1235V_LVDS1R4100KTxOUT0+TxOUT0-TxOUT1+TxOUT1-TxOUT2+TxOUT2-TxCLKOUT+TxCLKOUT-X181VCC_5V2VCC_LVDS5LVDS_OUT0-7LVDS_OUT0+8LVDS_OUT1-10LVDS_OUT1+11LVDS_OUT2-13LVDS_OUT2+14LVDS_CLK-16LVDS_CLK+4BL CTRL17BL ON19SEL120SEL2DF13A-20DP-1.25v(56)369121518GNDMM70-314-310B112 of 253.3VL16L17C5210nF25V3.3VGNDBKL1_ON220R@100MHzC5310nF25V220R@100MHzVCC_PLL2AVCC_LVDS2AC5510nF25VC5410nF25VC5610nF25VGND_LVDSGND_PLLR270RR281KGND28211427293743IC4BVCC1VCC2VCC4R_FBPWRDWN#VCC-PLLVCC-LVDSNCDS90C363BMTFigure 32: LVDS transmitter reference schematic2 of 2GND1GND2GND3GND4GND5GND-PLL1GND-PLL2GND-LVDS1GND-LVDS2GND-LVDS35111724463028423631GNDL14GND_PLLL15GND_LVDS220R@100MHz2A220R@100MHz2AGNDGND3.3V5VPowerL132A3.3V_LVDS1220R@100MHzC51100nF16VGNDL122A5V_LVDS1220R@100MHzC50100nF16VGND2.6.4 Unused Parallel RGB Interface Signal TerminationAll unused parallel RGB interface signals can be left unconnected. Some <strong>Apalis</strong> modules might usethe parallel RGB interface internally for providing an LVDS or VGA interface via a transmitter orDAC. If such a video interface is used, the unused parallel RGB interface cannot be configured foralternative functions (e.g. GPIO). Please check the <strong>Apalis</strong> module datasheet for more informationabout GPIO capability and any usage restrictions for the parallel RGB interface.2.7 LVDS LCD InterfaceThe <strong>Apalis</strong> module standard provides a LVDS interface with up to two channel and 24-bit fordisplays. The interface is officially called FPD-Link or FlatLink. Please carefully study the datasheetsof individual <strong>Apalis</strong> modules for information regarding dual or single channel, 18 or 24-bit colordepth and color mapping support.<strong>Toradex</strong> AG l Altsagenstrasse 5 l 6048 Horw l Switzerland l +41 41 500 48 00 l www.toradex.com l info@toradex.com Page | 37
<strong>Apalis</strong> <strong>Carrier</strong> <strong>Board</strong> <strong>Design</strong> <strong>Guide</strong>2.7.1 LVDS Signals<strong>Apalis</strong>Pin<strong>Apalis</strong>Signal NameI/OTypePowerRailDescription246 LVDS1_A_CLK- O LVDS LVDS Clock out for channel A248 LVDS1_A_CLK+ O LVDS(odd pixels/single channel)252 LVDS1_A_TX0- O LVDS LVDS data lane 0 for channel A254 LVDS1_A_TX0+ O LVDS(odd pixels/single channel)258 LVDS1_A_TX1- O LVDS LVDS data lane 1 for channel A260 LVDS1_A_TX1+ O LVDS(odd pixels/single channel)264 LVDS1_A_TX2- O LVDS LVDS data lane 2 for channel A266 LVDS1_A_TX2+ O LVDS(odd pixels/single channel)270 LVDS1_A_TX3- O LVDS LVDS data lane 3 for channel A272 LVDS1_A_TX3+ O LVDS(odd pixels/single channel; unused for 18-bit)276 LVDS1_B_CLK- O LVDS LVDS Clock out for channel B278 LVDS1_B_CLK+ O LVDS(even pixels/unused for single channel)282 LVDS1_B_TX0- O LVDS LVDS data lane 0 for channel B284 LVDS1_B_TX0+ O LVDS(odd pixels/unused for single channel)288 LVDS1_B_TX1- O LVDS LVDS data lane 1 for channel B290 LVDS1_B_TX1+ O LVDS(odd pixels/unused for single channel)294 LVDS1_B_TX2- O LVDS LVDS data lane 2 for channel B296 LVDS1_B_TX2+ O LVDS(odd pixels/unused for single channel)300 LVDS1_B_TX3- O LVDS LVDS data lane 3 for channel B302 LVDS1_B_TX3+ O LVDS(odd pixels/unused for single channel; unused for 18-bit)239 BKL1_PWM O CMOS 3.3V286 BKL1_ON O CMOS 3.3V Backlight enable signalBacklight PWM, can be used to control the brightness of the LCDbacklight205 I2C2_SDA I/O OD 3.3V I 2 C interface that might be used for the extended display identificationdata (EDID) or as DDC if a converter to VGA or DVI is added. This207 I2C2_SCL O OD 3.3V interface is shared with the other display interfaces.Table 16: LVDS LCD signals2.7.2 Compatibility between LVDS ConfigurationsA single channel LVDS interface can provide resolutions up to 1280x1024 pixels (depending onavailable displays). Displays with higher resolutions require a second LVDS channel. In this case,the odd bits are transmitted in the first channel and the even bits are transmitted in the secondchannel. Depending on the <strong>Apalis</strong> module, the LVDS transmitter will provide either single or dualchannel signals. Some modules may be more flexible in their ability to configure the output modeof the transmitter. Please consult the applicable <strong>Apalis</strong> module datasheet for information aboutsupported channel modes. As the following figure shows, it is not possible to connect a singlechannel display to a dual channel output and vice versa.<strong>Toradex</strong> AG l Altsagenstrasse 5 l 6048 Horw l Switzerland l +41 41 500 48 00 l www.toradex.com l info@toradex.com Page | 38
<strong>Apalis</strong> <strong>Carrier</strong> <strong>Board</strong> <strong>Design</strong> <strong>Guide</strong>CLKCLKCLKCLKSingle Channel TransmitterTX0TX1TX2TX3RX0RX1RX2RX3Single Channel DisplaySingle Channel TransmitterTX0TX1TX2TX3RX0RX1RX2RX3CLKRX0RX1Dual Channel DisplayRX2RX3CLKCLKCLKCLKTransmitter in Dual Channel ModeTX0TX1TX2TX3CLKTX0TX1TX2TX3RX0RX1RX2RX3Single Channel DisplayTransmitter in Dual Channel ModeTX0TX1TX2TX3CLKTX0TX1TX2TX3RX0RX1RX2RX3CLKRX0RX1RX2RX3Dual Channel DisplayFigure 33: Compatibility between Single and Dual Channel LVDSFor the 24-bit LVDS interface, there are two different color mappings available; VESA and JEIDA.The following figure shows the compatibility between the 18-bit LVDS interface and these colormappings. When selecting a display, ensure that the <strong>Apalis</strong> module LVDS interface can beconfigured to a compatible color mapping as some modules may not support all color mappings.18bit Display24bit JEIDA Display24bit VESA Display18bit Transmitter18bit TransmitterCLKTX0TX1TX2CLKRX0RX1RX218bit Display18bit TransmitterCLKTX0TX1TX2CLKRX0RX1RX2RX324bit JEIDA Display18bit TransmitterCLKTX0TX1TX2CLKRX0RX1RX2RX324bit VESA Display24bit JEIDA Transmitter24bit JEIDA TransmitterCLKTX0TX1TX2TX3CLKRX0RX1RX218bit Display24bit JEIDA TransmitterCLKTX0TX1TX2TX3CLKRX0RX1RX2RX324bit JEIDA Display24bit JEIDA TransmitterCLKTX0TX1TX2TX3CLKRX0RX1RX2RX324bit VESA Display24bit VESA Transmitter24bit VESA TransmitterCLKTX0TX1TX2TX3CLKRX0RX1RX218bit Display24bit VESA TransmitterCLKTX0TX1TX2TX3CLKRX0RX1RX2RX324bit JEIDA Display24bit VESA TransmitterCLKTX0TX1TX2TX3CLKRX0RX1RX2RX324bit VESA DisplayFigure 34: Compatibility between LVDS color mapping<strong>Toradex</strong> AG l Altsagenstrasse 5 l 6048 Horw l Switzerland l +41 41 500 48 00 l www.toradex.com l info@toradex.com Page | 39
<strong>Apalis</strong> <strong>Carrier</strong> <strong>Board</strong> <strong>Design</strong> <strong>Guide</strong>2.7.2.1 18-bit Color MappingThe color mapping for the 18-bit LVDS interface is standardized and is shown in the followingpicture:LVDS1_A_CLK+LVDS1_B_CLK+G0 R5 R4 R3 R2 R1 R0B1 B0 G5 G4 G3 G2 G1DE VSYNC HSYNC B5 B4 B3 B2Previous Cycle Current Cycle Next Cycle2.7.2.2 24-bit JEIDA Color MappingFigure 35: 18-bit LVDS Color MappingThe JEIDA color mapping is compatible with the 18-bit LVDS interface. Therefore, the mapping issometimes also called “24-bit / 18-bit Compatible Color Mapping”. The signal names of the colorbits are renamed (e.g. the 18-bit R5 is renamed to 24-bit R7) but the position of the MSB is kept asthe same. The additional least significant bits R0, R1, G0, G1, B0, and B1 are transmitted in theadditional fourth LVDS data pair.LVDS1_A_CLK+LVDS1_B_CLK+G2 R7 R6 R5 R4 R3 R2B3 B2 G7 G6 G5 G4 G3DE VSYNC HSYNC B7 B6 B5 B4N/A B1 B0 G1 G0 R1 R0Previous Cycle Current Cycle Next CycleFigure 36: 24-bit JEIDA LVDS color mapping2.7.2.3 24-bit VESA Color MappingMost of the 24-bit LVDS displays follow the VESA Color mapping. The VESA color mapping doesnot rename the signal bits. This means that the position of the MSB is different as they areavailable in the additional data pair. Hence, the VESA color mapping is not compatible with the18-bit interface.LVDS1_A_CLK+LVDS1_B_CLK+LVDS1_A_TX0+/-LVDS1_B_TX0+/-LVDS1_A_TX1+/-LVDS1_B_TX1+/-LVDS1_A_TX2+/-LVDS1_B_TX2+/-LVDS1_A_TX0+/-LVDS1_B_TX0+/-LVDS1_A_TX1+/-LVDS1_B_TX1+/-LVDS1_A_TX2+/-LVDS1_B_TX2+/-LVDS1_A_TX3+/-LVDS1_B_TX3+/-LVDS1_A_TX0+/-LVDS1_B_TX0+/-LVDS1_A_TX1+/-LVDS1_B_TX1+/-LVDS1_A_TX2+/-LVDS1_B_TX2+/-LVDS1_A_TX3+/-LVDS1_B_TX3+/-G0 R5 R4 R3 R2 R1 R0B1 B0 G5 G4 G3 G2 G1DE VSYNC HSYNC B5 B4 B3 B2N/A B7 B6 G7 G6 R7 R6Previous Cycle Current Cycle Next CycleFigure 37: 24-bit VESA LVDS color mapping<strong>Toradex</strong> AG l Altsagenstrasse 5 l 6048 Horw l Switzerland l +41 41 500 48 00 l www.toradex.com l info@toradex.com Page | 40
<strong>Apalis</strong> <strong>Carrier</strong> <strong>Board</strong> <strong>Design</strong> <strong>Guide</strong>2.7.3 Reference SchematicsSome displays feature an I 2 C interface for reading out the EDID PROM or additional controls suchas contrast and hue. If the carrier board provides no other display interface with DDC, the I2C2interface should be used. If the DDC is used, make sure that I 2 C device(s) on the LVDS display doesnot interfere with the DDC address 50h. Otherwise, a different I 2 C interface should be used. TheI 2 C interfaces on the <strong>Apalis</strong> module are 3.3V logic level. If the display requires a 5V interface, addan I 2 C logic level shifter.X1O246 LVDS1_A_CLK_NLVDS1_A_CLK-248 LVDS1_A_CLK_PLVDS1_A_CLK+252 LVDS1_A_TX0_NLVDS1_A_TX0-254 LVDS1_A_TX0_PLVDS1_A_TX0+258 LVDS1_A_TX1_NLVDS1_A_TX1-260 LVDS1_A_TX1_PLVDS1_A_TX1+264 LVDS1_A_TX2_NLVDS1_A_TX2-266 LVDS1_A_TX2_PLVDS1_A_TX2+270 LVDS1_A_TX3_NLVDS1_A_TX3-272 LVDS1_A_TX3_PLVDS1_A_TX3+276 LVDS1_B_CLK_NLVDS1_B_CLK-278 LVDS1_B_CLK_PLVDS1_B_CLK+282 LVDS1_B_TX0_NLVDS1_B_TX0-284 LVDS1_B_TX0_PLVDS1_B_TX0+288 LVDS1_B_TX1_NLVDS1_B_TX1-290 LVDS1_B_TX1_PLVDS1_B_TX1+294 LVDS1_B_TX2_NLVDS1_B_TX2-296 LVDS1_B_TX2_PLVDS1_B_TX2+300 LVDS1_B_TX3_NLVDS1_B_TX3-302 LVDS1_B_TX3_PLVDS1_B_TX3+<strong>Apalis</strong> - Dual Channel LVDS15 of 25MM70-314-310B1X1LMXM3_239BKL1_PWM 239R1243LCD1_PCLK245LCD1_VSYNC247LCD1_HSYNC249LCD1_DE286 MXM3_286 R2BKL1_ON251LCD1_R0253LCD1_R1255LCD1_R2257LCD1_R3259LCD1_R4261LCD1_R5263LCD1_R6265LCD1_R7269LCD1_G0271LCD1_G1273LCD1_G2275LCD1_G3277LCD1_G4279LCD1_G5281LCD1_G6283LCD1_G7287LCD1_B0289LCD1_B1291LCD1_B2293LCD1_B3295LCD1_B4297LCD1_B5299LCD1_B6301LCD1_B7<strong>Apalis</strong> - Digital RGB12 of 25MM70-314-310B122R22RPWM_BKL1BKL1_ON3.3V3.3V2C1100nF16V 1R8 R91.8K 1.8KGNDI2C2_SCL3I2C2_SDA4I2C2_DDC[0..1]5VIC1100KR57VREF1 VREF2R68 1.8KGND ENC216V100nFGND6SCL1 SCL25SDA1 SDA2PCA9306DCTTLCD[0..1]3.3V_LVDS15V_LVDS1JP33.3V_LVDS132V_DDC5V_LVDS115V V_DDCJP1123R3100KGNDJP2123R4100KGNDR71.8K220R@100MHzR10 L2I2C2_DDC_SCL_C500mA22RR11 L4I2C2_DDC_SDA_C500mA22R 220R@100MHzC5 C64.7pF 4.7pFGNDLVDS1[0..19]X2LVDS1_A_TX3_P 1LVDS1_A_TX3+LVDS1_A_TX3_N 3LVDS1_A_TX3-LVDS1_A_TX2_P 7LVDS1_A_TX2+LVDS1_A_TX2_N 9LVDS1_A_TX2-LVDS1_A_TX1_P 13LVDS1_A_TX1+LVDS1_A_TX1_N 15LVDS1_A_TX1-LVDS1_A_TX0_P 19LVDS1_A_TX0+LVDS1_A_TX0_N 21LVDS1_A_TX0-LVDS1_A_CLK_P 25LVDS1_A_CLK+LVDS1_A_CLK_N 27LVDS1_A_CLK-LVDS1_B_CLK_N 4LVDS1_B_CLK-LVDS1_B_CLK_P 6LVDS1_B_CLK+LVDS1_B_TX0_N 10LVDS1_B_TX0-LVDS1_B_TX0_P 12LVDS1_B_TX0+LVDS1_B_TX1_N 16LVDS1_B_TX1-LVDS1_B_TX1_P 18LVDS1_B_TX1+LVDS1_B_TX2_N 22LVDS1_B_TX2-LVDS1_B_TX2_P 24LVDS1_B_TX2+LVDS1_B_TX3_N 28LVDS1_B_TX3-LVDS1_B_TX3_P 30LVDS1_B_TX3+PWM_BKL1 35BL CRTLBKL1_ON 37BL ONLVDS1_SEL_1 31SEL 1 (3.3V - 5V)LVDS1_SEL_2 33SEL2 (GND - 3.3V)I2C2_DDC_SDA_C 36SDAI2C2_DDC_SCL_C 38SCL323.3V_LVDS1 3.3V LVDS345V_LVDS1 5V LVDS3912V_LVDS1 12V LVDS4012V_LVDS1 12V LVDSDF13A-40DP-1.25v(55)1.25mm pitch Connector2GND5GND8GND11GND14GND17GND20GND23GND26GND29GNDI2C2_DDC_C[0..1]GNDPowerL13.3V 2A3.3V_LVDS1220R@100MHzC3100nF16VGNDL35V 2A5V_LVDS1220R@100MHzC4100nF16VGNDL512V 2A12V_LVDS1220R@100MHzC7100nF16VX1Y<strong>Apalis</strong> - Display DDCI2C2_SDAI2C2_SCL205 MXM3_205 R12 22R I2C2_SDA207 MXM3_207 22R I2C2_SCLR13GNDMM70-314-310B125 of 25Figure 38: 24-bit Dual channel LVDS display reference schematic2.7.4 Unused LVDS Interface Signal TerminationAll unused LVDS interface signals can be left unconnected.2.8 HDMI/DVIThe HDMI and DVI interface uses a TMDS compatible physical link to transfer video and optionalaudio data. Electrically, HDMI and DVI are equal, but there can be some differences in theprotocol. HDMI is the successor of DVI and specifies the additional transport for audio data andcontent protection (HDCP). HDMI devices (monitor, television set etc.) can be driven with the DVIinterface as HDMI is backward compatible. Compatibility is not guaranteed when attempting todrive a DVI device with an HDMI interface. Not all DVI displays accept the HDMI protocol or areHDCP compatible. Please read the datasheet of the <strong>Apalis</strong> module for more information about thesupported HDMI and DVI protocols.<strong>Toradex</strong> AG l Altsagenstrasse 5 l 6048 Horw l Switzerland l +41 41 500 48 00 l www.toradex.com l info@toradex.com Page | 41
<strong>Apalis</strong> <strong>Carrier</strong> <strong>Board</strong> <strong>Design</strong> <strong>Guide</strong>The HDMI and DVI interfaces define different connectors. There are passive adapters available inboth directions. Please be aware that HDMI and HDCP have licensing restrictions in place.2.8.1 HDMI/DVI Signals<strong>Apalis</strong>Pin<strong>Apalis</strong>Signal NameI/OTypePowerRailDescription240 HDMI1_TXC+ O TDMS HDMI/DVI differential clock positive242 HDMI1_TXC- O TDMS HDMI/DVI differential clock negative234 HDMI1_TXD0+ O TDMS HDMI/DVI differential data lane 0 positive236 HDMI1_TXD0- O TDMS HDMI/DVI differential data lane 0 negative228 HDMI1_TXD1+ O TDMS HDMI/DVI differential data lane 1 positive230 HDMI1_TXD1- O TDMS HDMI/DVI differential data lane 1 negative222 HDMI1_TXD2+ O TDMS HDMI/DVI differential data lane 2 positive224 HDMI1_TXD2- O TDMS HDMI/DVI differential data lane 2 negative220 HDMI1_CEC I/O OD 3.3V HDMI consumer electronic control232 HDMI1_HPD I CMOS 3.3V Hot-plug detect205 I2C2_SDA I/O OD 3.3V I 2 C interface for reading the extended display identification data (EDID)207 I2C2_SCL O OD 3.3V over DDC. This interface is shared with other display interfaces2.8.2 Reference Schematics2.8.2.1 DVI Schematic ExampleTable 17: HDMI/DVI signalsThere are different DVI connector configurations available. The DVI-D (digital) supports only thenative DVI signals. The DVI-A (analogue) provides only analogue VGA signals. The DVI-I(integrated) combines the digital DVI signals and the analogue VGA signals. For the DVI-A andDVI-I, there are passive adapters to the D-SUB VGA connector available. There is only one DDCchannel available on the DVI-I interface. Therefore, the connector is not designed to use both links(DVI and VGA) simultaneously. Nevertheless, there are Y-cables available which provide a DVI andVGA output. Such cables are not standardized normally. They provide the DDC on either the DVIor VGA output. Please be aware of this when using a similar Y-cable.The following schematic example shows a DVI-I implementation. It can be used as an example fora DVI-D design if you simply remove the analogue VGA signals. The sync signals for the VGAsignals need to be level shifted from 3.3V to 5V. The same is necessary for the DDC signals. TheTDMS signals need to be ESD protected using diodes. The schematic example shows a discretesolution for the level shifting and protection. There are integrated solutions also available.<strong>Toradex</strong> AG l Altsagenstrasse 5 l 6048 Horw l Switzerland l +41 41 500 48 00 l www.toradex.com l info@toradex.com Page | 42
<strong>Apalis</strong> <strong>Carrier</strong> <strong>Board</strong> <strong>Design</strong> <strong>Guide</strong>3.3V5VV_DISPX1YI2C2_SDAI2C2_SCL<strong>Apalis</strong> - Display DDC25 of 25MM70-314-310B1R41.8KI2C2_DDC[0..1]205 MXM3_205 R6 22R I2C2_SDA207 MXM3_207 22R I2C2_SCLI2C2_SCLR8I2C2_SDAIC1100KR127C1 VREF1 VREF2R2100nF16V 18 1.8KR5 GND EN1.8KC216V100nFGNDGND36SCL1 SCL245SDA1 SDA2PCA9306DCTTR31.8KRCLAMP0504S220R@100MHzR7 L1I2C2_DDC_SCL_C500mA22RR9 L2I2C2_DDC_SDA_C500mA22R 220R@100MHzC3 C44.7pFI2C2_DDC_C[0..1] D14.7pFX1XHDMI1_CECHDMI1_HPDHDMI1_TXC-HDMI1_TXC+HDMI1_TXD0-HDMI1_TXD0+HDMI1_TXD1-HDMI1_TXD1+HDMI1_TXD2-HDMI1_TXD2+<strong>Apalis</strong> - HDMI24 of 25MM70-314-310B1220232242240236234230228224222RCLAMP0504SHDMI1_HPD_MXM3 R10 10KHDMI1_HPDC5C6GND 50V 220pF GND50V 1nFHDMI1_TXC_NHDMI1_TXC_PHDMI1_TXD0_NHDMI1_TXD0_PHDMI1_TXD1_NHDMI1_TXD1_PHDMI1_TXD2_NHDMI1_TXD2_PD2D3RCLAMP0504SSHIELDSHIELDPLACE D1, D2, D3, D4 NEAR THE DVI-I CONNECTORD4RCLAMP0504SSHIELDHDMI1[0..8]GNDVGA[0..4]SHIELDHDMI1_TXD2_NHDMI1_TXD2_PGNDI2C2_DDC_SCL_CI2C2_DDC_SDA_CVGA1_VSYNC_CHDMI1_TXD1_NHDMI1_TXD1_PGNDV_DISPGNDHDMI1_HPDHDMI1_TXD0_NHDMI1_TXD0_PGNDGNDHDMI1_TXC_PHDMI1_TXC_N123456789101112131415161718192021222324X2X1WVGA1_RVGA1_GVGA1_BVGA1_HSYNCVGA1_VSYNC<strong>Apalis</strong> - VGA208 VGA1_R210 VGA1_G212 VGA1_B214 VGA1_HSYNC216 VGA1_VSYNCR11150RGNDR12150RGNDR13150RGNDGNDGNDGNDC710pF50VC910pF50VC1110pF50VL3600mA40R@100MHzL4600mA40R@100MHzL5600mA40R@100MHzGNDGNDGNDC810pF50VC1010pF50VC1210pF50VVGA1_R_CVGA1_G_CVGA1_B_CVGA1_HSYNC_CVGA1_VSYNC_CVGA1_R_CVGA1_G_CVGA1_B_CVGA1_HSYNC_CGNDC1C2C3C4C55VX1SHIELDX2SHIELD74320-1004SHIELDD5V_DISPBAT54MM70-314-310B123 of 255VGND25C14100nF16V3IC2AVCCGNDYNC41SN74LVC1G17DCKRR1433RL6500mA220R@100MHzGNDC1347pF50V5VGNDIC3L724 R15A Y500mA33R 220R@100MHz C15547pFC16 VCC100nF50V16V31GND NCGNDSN74LVC1G17DCKRFigure 39: DVI-I reference schematic2.8.2.2 HDMI Schematic ExampleThe HDMI connector does not feature an Analogue VGA interface, but there is an optionalConsumer Electronics Control (CEC) interface available. This single-wire interface is used to controlconsumer audio and video devices such as televisions or AV receivers. There are many differenttrade names for CEC (VIERA Link, Anynet+, EasyLink, Aquos Link, BRAVIA Link, etc.) The CEC is a3.3V interface. Nevertheless, it is recommended that a level shifter is added. This eliminatesproblems with displays that may pull-up the signals to other voltage levels.The I 2 C signals for the DDC and the hot-plug detection (HPD) need to be shifted to/from the 5Vlogic level of the HDMI interface to the <strong>Apalis</strong> module signal level of 3.3V. The DDC requiresexternal pull-up resistors on the module. The HPD has a 100kΩ pull-down resistor already on thebaseboard. Since the HPD and CEC signals are used as references for the TDMS signals on themodule connector, it is recommended that 1nF stitching capacitors are added to the HPD and100pF stitching capacitors to the CEC signal, close to the module connector.<strong>Toradex</strong> AG l Altsagenstrasse 5 l 6048 Horw l Switzerland l +41 41 500 48 00 l www.toradex.com l info@toradex.com Page | 43
<strong>Apalis</strong> <strong>Carrier</strong> <strong>Board</strong> <strong>Design</strong> <strong>Guide</strong>X1XHDMI1_CECHDMI1_HPDHDMI1_TXC-HDMI1_TXC+HDMI1_TXD0-HDMI1_TXD0+HDMI1_TXD1-HDMI1_TXD1+HDMI1_TXD2-HDMI1_TXD2+<strong>Apalis</strong> - HDMI24 of 25MM70-314-310B1X1YI2C2_SDAI2C2_SCL<strong>Apalis</strong> - Display DDC25 of 25MM70-314-310B13.3VR132.4K 1%T1R2162KD1HDMI1[0..8]1%BAT54HDMI1_CECD2HDMI1_CEC_C220BAT54HDMI1_TXD2_P232HDMI1_HPD_MXM3 R3 10KHDMI1_HPDGNDC1C2HDMI1_TXD2_NGNDGND50V 1nF220pF 50V242HDMI1_TXC_NHDMI1_TXD1_P240HDMI1_TXC_PGNDHDMI1_TXD1_N236HDMI1_TXD0_N234HDMI1_TXD0_PHDMI1_TXD0_PGND230HDMI1_TXD1_NHDMI1_TXD0_N228HDMI1_TXD1_PHDMI1_TXC_P224HDMI1_TXD2_NGND222HDMI1_TXD2_PHDMI1_TXC_ND3D4HDMI1_CEC_CRCLAMP0504SRCLAMP0504SI2C2_DDC_SCL_CI2C2_DDC_SDA_CGNDSHIELDSHIELD5V V_DISPPLACE D1, D2, D3 NEAR THE DVI-I CONNECTOR 3.3VV_DISPIC1100KHDMI1_HPDR427I2C2_DDC_C[0..1]C3 VREF1 VREF2R5 R6100nF16V 18 1.8K 1.8KR7 R8 GND EN1.8K 1.8KC4I2C2_DDC[0..1]16V100nFD5205 MXM3_205 R9 22R I2C2_SDAGNDGND220R@100MHz207 MXM3_207 22R I2C2_SCLI2C2_SCL36R10 L1I2C2_DDC_SCL_CSCL1 SCL2500mAR1122RI2C2_SDA45R12 L2I2C2_DDC_SDA_CSDA1 SDA2500mA22R 220R@100MHzPCA9306DCTTC5 C64.7pFSHIELD4.7pFRCLAMP0504SGNDFigure 40: HDMI reference schematicX21TDMS_D2P2TDMS_D2_Shield3TDMS_D2N4TDMS_D1P5TDMS_D1_Shield6TDMS_D1N7TDMS_D0P8TDMS_D0_Shield9TDMS_D0N10TDMS_CLKP11TDMS_CLK_Shield12TDMS_CLKN13CEC14HEC15DDC_SCL16DDC_SDA17SH1GNDSH1SH2SH218SH3PWR_5V_50mA SH319SH4HotPlug_HECDP S4HHDMI1747981-1SHIELDD65VV_DISPBAT542.8.3 Unused HDMI/DVI Signal TerminationAll unused HDMI/DVI signals can be left unconnected. The HPD has a 100kΩ pull-down resistor onthe module.<strong>Apalis</strong>Pin<strong>Apalis</strong>Signal NameRecommended Termination240 HDMI1_TXC+ Leave NC if not used242 HDMI1_TXC- Leave NC if not used234 HDMI1_TXD0+ Leave NC if not used236 HDMI1_TXD0- Leave NC if not used228 HDMI1_TXD1+ Leave NC if not used230 HDMI1_TXD1- Leave NC if not used222 HDMI1_TXD2+ Leave NC if not used224 HDMI1_TXD2- Leave NC if not used220 HDMI1_CEC Add pull-up resistor or disable the CEC function in software232 HDMI1_HPD Leave NC if not used, 100kΩ resistor on <strong>Apalis</strong> module205 I2C2_SDA Add pull-up resistor or disable the I 2 C function in software207 I2C2_SCL Add pull-up resistor or disable the I 2 C function in softwareTable 18: Unused HDMI/DVI signal termination2.9 Analogue VGA2.9.1 VGA Signals<strong>Apalis</strong>Pin<strong>Apalis</strong>Signal NameI/OTypePowerRailDescription208 VGA1_R O Analogue Analogue red video (0 to 0.7V)210 VGA1_G O Analogue Analogue green video (0 to 0.7V)212 VGA1_B O Analogue Analogue blue video (0 to 0.7V)214 VGA1_HSYNC O CMOS 3.3V Horizontal sync216 VGA1_VSYNC O CMOS 3.3V Vertical sync205 I2C2_SDA I/O OD 3.3V I 2 C interface for reading the extended display identification data(EDID) over DDC. This interface is shared with other display207 I2C2_SCL O OD 3.3V interfacesTable 19: VGA signals<strong>Toradex</strong> AG l Altsagenstrasse 5 l 6048 Horw l Switzerland l +41 41 500 48 00 l www.toradex.com l info@toradex.com Page | 44
<strong>Apalis</strong> <strong>Carrier</strong> <strong>Board</strong> <strong>Design</strong> <strong>Guide</strong>2.9.2 Reference SchematicsThe horizontal and vertical sync signals need to be level shifted on the baseboard. The same is truefor the DDC I 2 C signals. In the VGA connector standard, the carrier board needs to provide 5Vpower supply for the EDID memory on the DDC. This allows the system to read out the EDIDinformation of an attached display even if it is not powered. Unfortunately, some displays sourcethe 5V internally and also provide internal pull-up resistors to the I 2 C lines. This can cause backfeedingproblems. Therefore, we recommend connecting the display and pull-up resistor 5V supplyover a diode to the module supply.It is mandatory to place a 150Ω resistor to ground on every analogue RGB signal. Place thisresistor as close to the VGA connector as possible. Before this resistor, the signal trace can berouted with 50Ω impedance. After the resistor, the signal should be routed with 75Ω impedance.Depending on the layer stack up, 75Ω traces cannot be reached due to the width becoming toosmall. In this case, lower traces impedance (e.g. 50Ω) can be used but the trace length should bekept short.All signals on the VGA D-SUB connector need to be ESD protected. TSR diodes can be used. It isrecommended that a PI-filter is added to the analogue RGB signals. The values for the capacitorsand inductors depend on the maximum display resolution required. The PI-filter reduces EMIproblems, but also limits the maximum bandwidth of the VGA signal.3.3V5VV_DISPX1YI2C2_SDAI2C2_SCL<strong>Apalis</strong> - Display DDC25 of 25MM70-314-310B1X1WVGA1_RVGA1_GVGA1_BVGA1_HSYNCVGA1_VSYNC<strong>Apalis</strong> - VGA205207208210212214216MXM3_205MXM3_207VGA1_RVGA1_GVGA1_BVGA1_HSYNCVGA1_VSYNCR7R922R22RGNDGNDGNDI2C2_SDAI2C2_SCLR10150RR11150RR12150RI2C2_DDC[0..1]I2C2_SCLI2C2_SDAGNDGNDGNDC510pF50VC710pF50VC910pF50VR41.8KR51.8KGND2C1100nF16V 1L3600mA40R@100MHzL4600mA40R@100MHzL534IC1600mA40R@100MHzVREF1GNDSCL1SDA1PCA9306DCTTVREF2ENSCL2SDA2GNDGNDGNDC610pF50VC810pF50VC1010pF50V100K78C216V100nFGND65R1R21.8KR31.8KR6R822R22RRCLAMP0504SD1L1220R@100MHzI2C2_DDC_SCL_C500mAL2I2C2_DDC_SDA_C500mA220R@100MHzC3SHIELDD2C44.7pF 4.7pFGNDI2C2_DDC_C[0..1]VGA1_R_CVGA1_G_CVGA1_B_CGNDGNDI2C2_DDC_SDA_CVGA1_HSYNC_CVGA1_VSYNC_CGNDPIN9GNDGNDI2C2_DDC_SCL_C1611271238134914510151112131415X24A61728394105MM70-314-310B123 of 255VGND5VGNDIC2L624 R13A Y500mA33R 220R@100MHzC11SHIELD547pFC12 VCC100nF50V16V31GND NCGNDSN74LVC1G17DCKRRCLAMP0504SPLACE D1, D2 NEAR THE DVI-I CONNECTORIC3L724 R15A Y500mA33R 220R@100MHzC135VCC47pFC14100nF50V16V31GND NCGNDSN74LVC1G17DCKRFigure 41: VGA reference schematic3V_DISP1GNDJP1HDR15SN-H2 R14PIN9120RX24BSHIELDHDR15SN-HSHIELD SHIELD2.9.3 Unused VGA Interface Signal TerminationAll unused VGA interface signals can be left unconnected.2.10 Parallel Camera InterfaceThe <strong>Apalis</strong> module standard features an 8-bit parallel camera interface as a standard interface.Depending on the module, there are maybe additional bits available in the type-specific area.Only the 8-bit YUV and ITU-R BT.656 format mode is intent to keep compatible between <strong>Apalis</strong>modules. Consult the <strong>Apalis</strong> datasheets for more information regarding the additional availableinput modes (e. g. Bayer, RGB etc.).<strong>Toradex</strong> AG l Altsagenstrasse 5 l 6048 Horw l Switzerland l +41 41 500 48 00 l www.toradex.com l info@toradex.com Page | 45
<strong>Apalis</strong> <strong>Carrier</strong> <strong>Board</strong> <strong>Design</strong> <strong>Guide</strong>2.10.1 Parallel Camera Signals<strong>Apalis</strong>Pin<strong>Apalis</strong>Signal NameI/OTypePowerRail187 CAM1_D0 I CMOS 3.3V185 CAM1_D1 I CMOS 3.3V183 CAM1_D2 I CMOS 3.3V181 CAM1_D3 I CMOS 3.3V179 CAM1_D4 I CMOS 3.3V177 CAM1_D5 I CMOS 3.3V175 CAM1_D6 I CMOS 3.3V173 CAM1_D7 I CMOS 3.3VDescriptionVideo input pixel data191 CAM1_PCLK I CMOS 3.3V Video input pixel clock195 CAM1_VSYNC I CMOS 3.3V Video input vertical sync197 CAM1_HSYNC I CMOS 3.3V Video input horizontal sync193 CAM1_MCLK O CMOS 3.3V201 I2C3_SDA I/O OD 3.3V203 I2C3_SCL O OD 3.3VMaster clock output for the camera. Some cameras might not need thisclock since they already use other clock sourcesCamera I 2 C interface - might be needed in the autofocus unitTable 20: Parallel Camera Signals2.10.2 Unused Parallel Camera Interface Signal TerminationAll unused parallel camera input signals can be left unconnected if the interface is disabled insoftware. These signals may be able to be used as GPIOs when they are not used as camerainterface. Please consult the applicable <strong>Apalis</strong> module datasheet.2.11 SD/MMC/SDIOThe <strong>Apalis</strong> module form factor features two SDIO interfaces as standard interfaces. One of theseinterfaces can provide up to 8 data bit which can be used for interfacing MMCplus cards andeMMC memory chips. The 8-bit interface is backward compatible with the 4bit data bus and canbe used for SD, SDIO and MMC devices. The SD and SDIO interface can only make use of the 4-bit wide data bus, as there is no 8-bit SD interface defined.The SD cards know different bus speed modes. The required signal voltage depends on the busspeed mode. For example the SDR104 mode requires 1.8V signaling. In the <strong>Apalis</strong> moduledefinition, all GPIO capable interfaces including the SD/MMC/SDIO are defined for 3.3V. Some<strong>Apalis</strong> modules might be capable to switch the voltages of the SD card interface pins to a 1.8V, butit is not mandatory. Read the relevant datasheet of the <strong>Apalis</strong> module.Even if the bus speed mode requires the signaling voltage of 1.8V, the supply of the card itself isstill 3.3V. Pay attention to the SD card signal pull-up resistors on the carrier board. If the 1.8Vmode is supported by the carrier board, the voltage for the pull-up resistors also needs to beswitchable. Few <strong>Apalis</strong> modules may allow removing the pull-up resistors on the carrier board andusing the internal ones only. In this case, it is the preferred solution. Even if the external pull-upresistors are not mandatory, we recommend adding unassembled pull-up resistors to the 3.3V railin order for it to be compatible with the future modules.<strong>Toradex</strong> AG l Altsagenstrasse 5 l 6048 Horw l Switzerland l +41 41 500 48 00 l www.toradex.com l info@toradex.com Page | 46
<strong>Apalis</strong> <strong>Carrier</strong> <strong>Board</strong> <strong>Design</strong> <strong>Guide</strong>Bus Speed Mode Max. Clock Frequency Max. Bus Speed Signal VoltageDefault Speed 25 MHz 12.5 MB/s 3.3VHigh Speed 50 MHz 25 MB/s 3.3VSDR12 25 MHz 12.5 MB/s 1.8VSDR25 50 MHz 25 MB/s 1.8VDDR50 50 MHz 50 MB/s 1.8VSDR50 100 MHz 50 MB/s 1.8VSDR104 208 MHz 104 MB/s 1.8VTable 21: SD Card Bus Speed Modes2.11.1 SD/MMC/SDIO Signals<strong>Apalis</strong>Pin<strong>Apalis</strong>Signal NameI/OTypePowerRail160 MMC1_D0 I/O CMOS 3.3V162 MMC1_D1 I/O CMOS 3.3V144 MMC1_D2 I/O CMOS 3.3V146 MMC1_D3 I/O CMOS 3.3V148 MMC1_D4 I/O CMOS 3.3V152 MMC1_D5 I/O CMOS 3.3V156 MMC1_D6 I/O CMOS 3.3V158 MMC1_D7 I/O CMOS 3.3VDescriptionData signals [3:0] - used for SD, MMC and SDIO interfaces; addexternal pull-up resistorsData signals [7:0] - only needed for 8-bit MMC interface; add externalpull-up resistors; for 4bit MMC, SD and SDIO - leave this pinsunconnected150 MMC1_CMD I/O CMOS 3.3V Command signal - add external pull-up resistor154 MMC1_CLK O CMOS 3.3V Clock output164 MMC1_CD# I CMOS 3.3V Card detect, add pull-up resistor if card detect is usedTable 22: 8bit SD/MMC/SDIO signals<strong>Apalis</strong>Pin<strong>Apalis</strong>Signal NameI/OTypePowerRail186 SD1_D0 I/O CMOS 3.3V188 SD1_D1 I/O CMOS 3.3V176 SD1_D2 I/O CMOS 3.3V178 SD1_D3 I/O CMOS 3.3VDescriptionData signals [3:0] - used for SD, MMC and SDIO interfaces; addexternal pull-up resistors180 SD1_CMD I/O CMOS 3.3V Command signal - add external pull-up resistor184 SD1_CLK O CMOS 3.3V Clock output190 SD1_CD# I CMOS 3.3V Card detect -add pull-up resistor if card detect is used2.11.2 Reference SchematicsTable 23: 4bit SD/MMC/SDIO signalsEven if the selected module does not require pull-up resistors on the data and command lines, it isrecommended to place such resistors in the customer design and not just assemble them. Thisensures that the module is compatible with other <strong>Apalis</strong> modules. There is no dedicated writeprotectionsignal available on the standard <strong>Apalis</strong> pin-out. Any free GPIO capable signal can beused if the write-protection function is required.<strong>Toradex</strong> AG l Altsagenstrasse 5 l 6048 Horw l Switzerland l +41 41 500 48 00 l www.toradex.com l info@toradex.com Page | 47
<strong>Apalis</strong> <strong>Carrier</strong> <strong>Board</strong> <strong>Design</strong> <strong>Guide</strong>2.11.2.1 SD Card Slot Reference SchematicsBoth interfaces, the SD1 and the MMC1, can be used as SD Card slot interface.3.3V_SWR29 R30 R31 R32 R3933K 68K 68K 68K 68KX19AX1F<strong>Apalis</strong> - SDIO6 of 25MM70-314-310B1SD1_CMDSD1_CLKSD1_CD#SD1_D0SD1_D1SD1_D2SD1_D3SD1_D01807MXM3_180_M RA22D 22R SD1_CMDDAT_0SD1_D11848MXM3_184_M RA24A 22R SD1_CLKDAT_1SD1_D21909MXM3_190_M RA24D 22R SD1_CD#DAT_2SD1_D31DAT_3186 MXM3_186_M RA24B 22R SD1_D0188 MXM3_188_M RA24C 22R SD1_D1176 MXM3_176_M RA22B 22R SD1_D2178 MXM3_178_M RA22C 22R SD1_D3RA22A 22RVCCSD1_CMD2CMDSD1_CLK5CLKSD1_CD#10CDGND11WPGND3.3V_SWTP13M90-03011-03YDR45X19B10KS1GNDS2GNDS3C37GNDSHIELDS410nFGND25VM90-03011-03YDGNDFigure 42: 4bit SD Card Slot Reference SchematicSD/MMC Holder4363.3V_SDC3610uF6.3VGNDC35100nF16VL102A220R@100MHz3.3V_SW2.11.2.2 MMC Card Slot (8bit) Reference SchematicsPlease note the different pin numbering of the MMC card in the following schematic. Even thoughthe selected 8-bit MMC card slot is compatible with SD cards, the pin numbering is different formthe normal SD cards.3.3V_SWR46 R47 R48 R49 R50 R51 R52 R53 R54X1KMMC1_CMDMMC1_CLKMMC1_CD#MMC1_D0MMC1_D1MMC1_D2MMC1_D3MMC1_D4MMC1_D5MMC1_D6MMC1_D7<strong>Apalis</strong> - MMC11 of 25MM70-314-310B1150154164160162144146148152156158MXM3_150_MMXM3_154_MMXM3_164_MMXM3_160_MMXM3_162_MMXM3_144_MMXM3_146_MMXM3_148_MMXM3_152_MMXM3_156_MMXM3_158_MRA16DRA18BRA20CRA20ARA20BRA16ARA16BRA16CRA18ARA18CRA18DRA20D22R22R22R22R22R22R22R22R22R22R22R22RMMC1_CMDMMC1_CLKMMC1_CD#MMC1_D0MMC1_D1MMC1_D2MMC1_D3MMC1_D4MMC1_D5MMC1_D6MMC1_D7MMC1_D0MMC1_D1MMC1_D2MMC1_D3MMC1_D4MMC1_D5MMC1_D6MMC1_D7MMC1_CMDMMC1_CLKMMC1_CD#101-00565-64Figure 43: 8-bit MMC/SD Card Slot Reference SchematicGND33K3.3V_SWR5510KC4010nF25V68K68K68K68K68K68K68K68KTP1443151413117512821X18ADAT0DAT1DAT2DAT3DAT4DAT5DAT6DAT7CMDCLKC/DWPGNDGNDGNDGNDS1S2S3S4MMC8bitX18BSHIELD101-00565-64VDDGNDGNDSD/MMC 8bit Holder3.3V_MMC3.3V_SWL1192A220R@100MHzC39 C3810uF 100nF66.3V 16V10GND2.11.3 Unused SD/MMC/SDIO Interface Signal TerminationAll unused SD interface signals can be left unconnected. If a complete SD/MMC/SDIO ports isunused, the signal can be used as GPIO. Unused signals of a used port (for example the upperfour data bits of the 8-bit interface when used only in 4-bit mode), may be able to be used asGPIO. Check the relevant <strong>Apalis</strong> module datasheet for more information.2.12 I 2 CThe <strong>Apalis</strong> module standard features three I 2 C interfaces. The interface I2C1 is a general purposeI 2 C while I2C2 is intended to be used with the DDC interface and I2C3 is intended to be used withthe camera interfaces. All I 2 C interfaces can also be used for general purpose.The I 2 C as well as the DDC interfaces do not feature any pull-up resistors on the module. It isrequired to add pull-up resistors to the data and clock lines on the carrier board. The pull-upresistor value is typically between 1Ω and 10kΩ. A small pull-up resistor increases the powerconsumption while a large resistor could lead to problems in the signal quality. The optimum sizeof the resistor depends on the capacitive load on the I 2 C lines and the required bus speed.<strong>Toradex</strong> AG l Altsagenstrasse 5 l 6048 Horw l Switzerland l +41 41 500 48 00 l www.toradex.com l info@toradex.com Page | 48
-<strong>Apalis</strong> <strong>Carrier</strong> <strong>Board</strong> <strong>Design</strong> <strong>Guide</strong>2.12.1 I 2 C Signals<strong>Apalis</strong>Pin<strong>Apalis</strong>Signal NameI/OTypePowerRail209 I2C1_SDA I/O OD 3.3V211 I2C1_SCL O OD 3.3V205 I2C2_SDA I/O OD 3.3V207 I2C2_SCL O OD 3.3V201 I2C3_SDA I/O OD 3.3V203 I2C3_SCL O OD 3.3VDescriptionGeneral purpose I 2 C data signal,pull-up resistor required on carrier boardGeneral purpose I 2 C clock signal,pull-up resistor required on carrier boardDisplay Data Channel I 2 C data signal,pull-up resistor required on carrier boardDisplay Data Channel I 2 C clock signal,pull-up resistor required on carrier boardCamera interface I 2 C data signal,pull-up resistor required on carrier boardCamera interface I 2 C clock signal,pull-up resistor required on carrier boardTable 24: I 2 C signals2.12.2 Real-Team Clock (RTC) recommendationThe RTC on the module is not designed for ultra-low power consumption. Therefore, a standardlithium coin cell battery can drain faster than allowed for certain designs. If a rechargeable RTCbattery is not a solution, it is recommended to use an external ultra-low power RTC IC on thecarrier board instead. In this case, add the external RTC to the I2C1 interface of the module andleave the VCC_BACKUP pin unconnected.3.3V3.3V_SWR173470RX1G<strong>Apalis</strong> - I2C7 of 25MM70-314-310B1I2C1_SCLI2C1_SDA211209R296R29722R22RR1751.8KR1761.8KR177100K IC217OUTI2C1_SCL 6I2C1_SDA 5SCLSDAM41T0M627pF50VC15427pF50VC155C157100nF16VFigure 44: External RTC Reference SchematicOSCIOSCOVCCVSSNF132.768KHz2843OSC21 2NANAGNDGNDC15622uF25VBackup during Battery change: about 0.6 sec/uFD4BAT54D5BAT541+2R17410RGNDBAT1HU2032-LF2.12.3 Unused I 2 C Signal TerminationAll unused I 2 C can be left unconnected if the according I 2 C port is switched off in software.Otherwise, it is recommended to keep the pull-up resistors available. Unused I 2 C signals can beconfigured to be GPIO.2.13 UARTThe <strong>Apalis</strong> module form factor features up to four UART interfaces. Even though, the UART1 isspecified as a full-featured UART. Some modules might not provide all the control signals. Pleaseread the relevant datasheet of the modules carefully. The UART1 is the standard console outputinterface for the Linux and Windows Embedded Compact operating system. It is desirable to keepat least the RX and TX signals of this port accessible for system debugging.UART2 features RTS and CTS signals for hardware flow control while UART3 and UART4 do notfeature any flow control signals. Some modules might provide additional flow control signals onnon-standard pins.<strong>Toradex</strong> AG l Altsagenstrasse 5 l 6048 Horw l Switzerland l +41 41 500 48 00 l www.toradex.com l info@toradex.com Page | 49
<strong>Apalis</strong> <strong>Carrier</strong> <strong>Board</strong> <strong>Design</strong> <strong>Guide</strong>2.13.1 UART Signals<strong>Apalis</strong>Pin<strong>Apalis</strong>Signal NameI/OTypePowerRailDescription118 UART1_RXD I CMOS 3.3V Received Data112 UART1_TXD O CMOS 3.3V Transmitted Data114 UART1_RTS O CMOS 3.3V Request to Send116 UART1_CTS I CMOS 3.3V Clear to Send110 UART1_DTR O CMOS 3.3V Data Terminal Ready120 UART1_DSR I CMOS 3.3V Data Set Ready122 UART1_RI I CMOS 3.3V Ring Indicator124 UART1_DCD I CMOS 3.3V Data <strong>Carrier</strong> Detect132 UART2_RXD I CMOS 3.3V Received Data126 UART2_TXD O CMOS 3.3V Transmitted Data128 UART2_RTS O CMOS 3.3V Request to Send130 UART2_CTS I CMOS 3.3V Clear to Send136 UART3_RXD I CMOS 3.3V Received Data134 UART3_TXD O CMOS 3.3V Transmitted Data140 UART4_RXD I CMOS 3.3V Received Data138 UART4_TXD O CMOS 3.3V Transmitted Data2.13.2 Reference SchematicsTable 25: UART Signals2.13.2.1 Full-Featured RS232 Reference SchematicsThe RS232 interface can be classified as Data Terminal Equipment (DTE) or Data CommunicationEquipment (DCE). This classification is inherited from the usage of the interface for modems. Thesignal direction of these modes is different. Some <strong>Apalis</strong> modules might allow changing the modeand therefore also the data direction, but this is not a mandatory requirement. According to the<strong>Apalis</strong> specifications, the interface is intent to be used in the DTE configuration.Signal Name UsageDTE Direction(<strong>Apalis</strong> standard)UART1_RXD Received Data Data from DCE to DTE Input OutputUART1_TXD Transmitted Data Data from DTE to DCE Output InputUART1_RTSRequest to SendDTE request to DCE to be prepared toreceive dataOutputUART1_CTS Clear to Send DCE indicates ready to accept data Input OutputUART1_DTR Data Terminal Ready DTE indicates presence to DCE Output InputUART1_DSR Data Set Ready DCE is ready to receive commands or data Input OutputUART1_RIUART1_DCDRing IndicatorData <strong>Carrier</strong> DetectDCE announce to have detected an incomingring signal on the telephone lineDCE announce to be connected to thetelephone lineTable 26: RS232 Signal ModesInputInputDCE DirectionInputOutputOutput<strong>Toradex</strong> AG l Altsagenstrasse 5 l 6048 Horw l Switzerland l +41 41 500 48 00 l www.toradex.com l info@toradex.com Page | 50
<strong>Apalis</strong> <strong>Carrier</strong> <strong>Board</strong> <strong>Design</strong> <strong>Guide</strong>X1JUART1_RXDUART1_TXDUART1_RTSUART1_CTSUART1_DCDUART1_DSRUART1_DTRUART1_RIUART2_RXDUART2_TXDUART2_RTSUART2_CTSUART3_RXDUART3_TXDUART4_RXDUART4_TXD<strong>Apalis</strong> - UART10 of 25MM70-314-310B1118112114116124120110122132126128130136134140138MXM3_118_MMXM3_112_MMXM3_114_MMXM3_116_MMXM3_124_MMXM3_120_MMXM3_110_MMXM3_122_MRA10ARA8BRA8CRA8DRA10DRA10BRA8ARA10C22R22R22R22R22R22R22R22R3.3V_SWIC7B26C44VCC100nF 100nF16V C48 16V 27V+GND C51100nF16VUART1_RXDUART1_TXDUART1_RTSUART1_CTSUART1_DCDUART1_DSRUART1_DTRUART1_RI2824C1+GNDV-C2+C1-C2-SN65C3243DBR25312UART1_RTSUART1_TXDUART1_DTRUART1_DCDUART1_RIUART1_DSRUART1_RXDUART1_CTSC45100nF16VGNDC49100nF16V3.3V_SW3.3V_SWIC7A14T1IN13T2IN12T3INR2OUTBR1OUTR2OUTR3OUTR4OUTR5OUTSN65C3243DBRFigure 45: RS232 Reference Schematic201918171615222321FORCEOFF#FORCEONINVALID#T1OUTT2OUTT3OUTR1INR2INR3INR4INR5IN9 UART1_RS232_L_RTS10 UART1_RS232_L_TXD11 UART1_RS232_L_DTR4 UART1_RS232_L_DCD5 UART1_RS232_L_RI6 UART1_RS232_L_DSR7 UART1_RS232_L_RXD8 UART1_RS232_L_CTSX28BUART1_RS232_L_DCDL1UART1_RS232_L_DSRL6UART1_RS232_L_RXDL2UART1_RS232_L_RTSL7UART1_RS232_L_TXDL3UART1_RS232_L_CTSL8UART1_RS232_L_DTRL4UART1_RS232_L_RIL9L5GND178-009-613R5712.13.2.2 RS422 Reference SchematicsThe RS422 is a full-duplex serial interface with differential pair signals. This allows higher datarates over longer distances as with the RS232. Since the RS422 has separate RX and TX signalpairs, no additional control signals are required for changing the signal direction. This means, theRS422 requires only the RX and TX signals of the UART interface. Therefore, it is possible to use anyof the four standard UART interfaces of the <strong>Apalis</strong> standard.The RS422 specification does not contain a connector. Therefore, there is no standard connectorfor this interface available. The reference schematic below uses the 9-pin D-sub connector (DE-9).Peripherals might have a different pin-out even if they use as well a DE-9 connector.X1JUART1_RXDUART1_TXDUART1_RTSUART1_CTSUART1_DCDUART1_DSRUART1_DTRUART1_RIUART2_RXDUART2_TXDUART2_RTSUART2_CTSUART3_RXDUART3_TXDUART4_RXDUART4_TXD<strong>Apalis</strong> - UART10 of 25MM70-314-310B1118112114116124120110122132126128130136134140138MXM3_136_MMXM3_134_MRA14BRA14A22R22R3.3V_SWC41100nF16VGNDGND3.3V_SWUART3_RXDUART3_TXD131418RE# 3DEGND42567IC4VCCVCCNCNCnREDERODIGNDGNDADM3491ARZRx+Tx+1211910R57120RUART2_RS422_RXD+UART2_RS422_TXD+GNDUART2_RS422_TXD+UART2_RS422_RXD+UART2_RS422_TXD-UART2_RS422_RXD-UART2_RS422_RXD-UART2_RS422_TXD-Rx-Tx-X55A1627384951734351-1Figure 46: RS422 Reference Schematic2.13.2.3 RS485 Reference SchematicsThe RS485 interface is a half-duplex serial interface with differential pair signals. Instead of twodifferential pair wires (RS422), only one pair is used for transmitting and receiving the data. Thebus allows Multi-Point connections. Since the transceiver needs to be set either in the transmittingor receiving mode, an additional control signal is required. It is recommended to use the RTS signalof the corresponding UART interface. The RTS signal is only available on the UART1 and UART2 as<strong>Apalis</strong> standard interface. The schematic shown below inverts the RTS signal for the data enableinput of the transceiver. Some modules allow inverting the signal in software, but it isrecommended to keep the inverter circuit in in the RTS signal in order to maintain compatibilitywith different modules and drivers provided by <strong>Toradex</strong>. For some applications, it is desirable thatthe UART controller does not see the TX message on its RX pins (echo of the sent message). In thiscase, the receive enable pin (RE#) can be driven as well with the RTS signal. This turns off the RXoutput buffer during sending a message.Like the RS422, the RS485 specification does not describe a standard connector. The referenceschematic shown below uses a DE-9 connector which may have a different pin-out compared tosome peripheral devices.<strong>Toradex</strong> AG l Altsagenstrasse 5 l 6048 Horw l Switzerland l +41 41 500 48 00 l www.toradex.com l info@toradex.com Page | 51
<strong>Apalis</strong> <strong>Carrier</strong> <strong>Board</strong> <strong>Design</strong> <strong>Guide</strong>X1JUART1_RXDUART1_TXDUART1_RTSUART1_CTSUART1_DCDUART1_DSRUART1_DTRUART1_RIUART2_RXDUART2_TXDUART2_RTSUART2_CTSUART3_RXDUART3_TXDUART4_RXDUART4_TXD<strong>Apalis</strong> - UART10 of 25MM70-314-310B1118112114116124120110122132126128130136134140138R10 22RR11 22RR12 22R3.3V_SWGND253IC2A Y4VCCGND NC1SN74LVC1G04DCKR3.3V_SWNA GNDR58680RUART2_RS485_D+R57120RUART2_RS485_D-R60680RNAGND3.3V_SWIC413VCC14VCCC41Rx+100nF 1NC16V 8NCGNDRE# 3nRE Rx-DE 4DE Tx+UART2_RXD 2ROUART2_TXD 5DITx-6GND7NAGNDR20GND ADM3491ARZ0RR21 Assemble R20 and remove R21:100K ECHO disabled (the sender doesnot get an echo of the sent message)GND1211910X55A1627384951734351-1Figure 47: RS485 Reference Schematic2.13.2.4 IrDA Reference SchematicsIrDA is an optical wireless communication interface. There are different physical layer modulationschemes available. Make sure that you check which modes are supported by a specific <strong>Apalis</strong>module and the peripheral devices.X1JMM70-314-310B1<strong>Apalis</strong> - UART10 of 25UART1_RXDUART1_TXDUART1_RTSUART1_CTSUART1_DCDUART1_DSRUART1_DTRUART1_RIUART2_RXDUART2_TXDUART2_RTSUART2_CTSUART3_RXDUART3_TXDUART4_RXDUART4_TXD118112114116124120110122132126128130136134140138R10R1122R22RGNDFigure 48: IrDA Reference SchematicR69100KR663.3V_SW3.3V_SWR684.7R22RR670RGNDUART4_IRDA_SDUART4_TXDUART4_RXDUART4_IRDA_LED 127UART4_IRDA_VCC 6C57 C62100nF 4.7uF16V 10V 85+X303TXD4RXDLED_ALED_KNCVCCGNDSDTFDU4101IrDA Transceiver2.13.3 Unused UART Signal TerminationUnused UART interface signals can be left unconnected. For debugging purpose, it isrecommended to have at least the UART1_RXD and UART1_TXD signals available.2.14 SPIThe serial peripheral interface (SPI) bus is a synchronous, full duplex interface. The <strong>Apalis</strong> moduleform factor features two independent SPI interfaces. Each of these interfaces has one chip selectsignal as compatible standard. Some modules may feature an additional chip select signal oradditional SPI interfaces as secondary function of other pins.The clock polarity and phase of the SPI bus is not standardized. Some peripherals latch the data atthe positive edge of the clock while others latch it at the negative edge. The SPI modes describethese different behaviors. Make sure that the relevant <strong>Apalis</strong> module and the peripheral devicesare set to the same SPI mode.<strong>Toradex</strong> AG l Altsagenstrasse 5 l 6048 Horw l Switzerland l +41 41 500 48 00 l www.toradex.com l info@toradex.com Page | 52
<strong>Apalis</strong> <strong>Carrier</strong> <strong>Board</strong> <strong>Design</strong> <strong>Guide</strong>SPI ModeClockPolarityClockPhaseDescription0 0 0 Clock has positive polarity and the data is latched at the positive edge of SCK1 0 1 Clock has positive polarity and the data is latched at the negative edge of SCK2 1 0 Clock has negative polarity and the data is latched at the positive edge of SCK4 1 1 Clock has negative polarity and the data is latched at the negative edge of SCKTable 27: SPI Modes2.14.1 SPI SignalsA SPI bus consists of one master and one or many slaves. In the <strong>Apalis</strong> standard, the module is theSPI master. Some modules may also allow themselves to be used as SPI slaves. Some modules mayprovide this function on different, non-standard pins.<strong>Apalis</strong>Pin<strong>Apalis</strong>Signal NameI/OTypePowerRailDescription225 SPI1_MOSI O CMOS 3.3V Master Output, Slave Input223 SPI1_MISO I CMOS 3.3V Master Input, Slave Output227 SPI1_CS O CMOS 3.3V Slave Select221 SPI1_CLK O CMOS 3.3V Serial Clock231 SPI2_MOSI O CMOS 3.3V Master Output, Slave Input229 SPI2_MISO I CMOS 3.3V Master Input, Slave Output233 SPI2_CS O CMOS 3.3V Slave Select235 SPI2_CLK O CMOS 3.3V Serial ClockTable 28: SPI Signals2.14.2 Unused SPI Signal TerminationUnused SPI signals can be left unconnected.2.15 CANThe controller area network (CAN) bus is a multi-master serial bus standard. It was first introducedfor the automotive sector and soon became widely adopted in the industrial sector. Differentversions of CAN specifications are available. Make sure that the corresponding <strong>Apalis</strong> modulecomplies with the required version.2.15.1 CAN Signals<strong>Apalis</strong>Pin<strong>Apalis</strong>Signal NameI/OTypePowerRailDescription14 CAN1_TX O CMOS 3.3V CAN port 1 transmit pin12 CAN1_RX I CMOS 3.3V CAN port 1 receive pin18 CAN2_TX O CMOS 3.3V CAN port 2 transmit pin16 CAN2_RX I CMOS 3.3V CAN port 2 receive pinTable 29: CAN Signals<strong>Toradex</strong> AG l Altsagenstrasse 5 l 6048 Horw l Switzerland l +41 41 500 48 00 l www.toradex.com l info@toradex.com Page | 53
<strong>Apalis</strong> <strong>Carrier</strong> <strong>Board</strong> <strong>Design</strong> <strong>Guide</strong>2.15.2 Reference SchematicsThe CAN interface requires a transceiver on the carrier board. Normally, the CAN interface needsto be galvanically isolated from the <strong>Apalis</strong> computer module. There are transceivers with integratedsignal isolation coupler and isolated DC/DC converters available (for example the Analog DevicesADM3053). The other solution is to use separate components for the transceiver, signal couplerand DC/DC converter. There are different type of connectors used for the CAN interface. Thereference schematic below uses a DE-9 connector. Since this is not an official standard, somedevices might have a different pin-out.5V_SWIC10CAN1_5V_ISO3.3V_SWGNDC10410uF10V8C105100nF16V 9VCCGND1_3VISOOUTGND2_21211C106100nF16VC10710uF10VCAN1_GND_ISOX32AX1Q<strong>Apalis</strong> - CAN17 of 25MM70-314-310B1CAN1_RXCAN1_TXCAN2_RXCAN2_TX12141618RA4DRA4C22R22RR10510K3.3V_SWGNDCAN1_TXCAN1_RXC109100nF16V6C108 VIO10nF25V 3GND1_21GND1_17GND1_410GND1_55TXD4RXD2NCADM3053BRWZVISOINGND2_1GND2_4GND2_3CANLCANCANHVREFRS1920131615171418 R106C11010nF25VCAN1_5V_ISO0RC111100nF16VCAN1_GND_ISOCAN1_GND_ISOCAN1_5V_ISONAU1R100 CAN1_PGND U60R CAN1_LU2CAN1_HU7R99U3100RU8U4R101 CAN1_PWU90RNAU5CAN1_GND_ISO178-009-613R571CAN ConnectorR107 R10856R 56R47nFC11216VFigure 49: CAN Reference SchematicCAN1_GND_ISO2.15.3 Unused CAN Interface Signal TerminationAccording to the <strong>Apalis</strong> standard, the CAN interface signals do not need to be GPIO capable. Itdepends on the module whether the CAN interface signal pins can be used for other purposes ifthe CAN interface is not in use. Some <strong>Apalis</strong> modules provide the CAN interface by using adedicated controller. It is recommended to tie the CAN RX signals to ground or 3.3V if the interfaceis not used. This can help in reducing the power consumption of modules with stand-alone CANcontroller.2.16 PWMThe <strong>Apalis</strong> module form factor defines five pulse width modulator (PWM) outputs - four generalpurpose outputs and one dedicated for the backlight of the display. Since not all SoCs provide upto five PWM channels, there might be some shared channels which cannot be used concurrently.Please read the relevant datasheet of the module carefully. The maximum output frequency andthe available duty cycle steps can also vary between the different <strong>Apalis</strong> modules.2.16.1 PWM Signals<strong>Apalis</strong>Pin<strong>Apalis</strong>Signal NameI/OTypePowerRailDescription2 PWM1 O CMOS 3.3V General purpose PWM output4 PWM2 O CMOS 3.3V General purpose PWM output6 PWM3 O CMOS 3.3V General purpose PWM output8 PWM4 O CMOS 3.3V General purpose PWM output239 BKL1_PWM O CMOS 3.3V Dedicated PWM output for the LCD display backlightTable 30: PWM Signals<strong>Toradex</strong> AG l Altsagenstrasse 5 l 6048 Horw l Switzerland l +41 41 500 48 00 l www.toradex.com l info@toradex.com Page | 54
<strong>Apalis</strong> <strong>Carrier</strong> <strong>Board</strong> <strong>Design</strong> <strong>Guide</strong>2.16.2 Reference SchematicsThe PWM output signals can be used to drive motors, LEDs, robotic servos, fans, etc. It is possibleto get an analogue signal with a simple low pass filter.X1E<strong>Apalis</strong> - PWM and AnalogMM70-314-310B15 of 25AN1_ADC0AN1_ADC1AN1_ADC2AN1_TSWIP_ADC3PWM1PWM2PWM3PWM43053073093112468R92R9310K10K330nFC118330nF16VGNDC11916VGNDPWM3PWM4GNDX17321826936-3PWM1PWM2GNDR116100KAnalogue OutputFigure 50: PWM Example Schematic23.3V_SW1 6GNDR113120RLED1GREENT5ASI-1024-XGND5R117100K3.3V_SW4 3GNDR114120RLED2GREENT5BSI-1024-X2.16.3 Unused PWM Signal TerminationUnused PWM signals can be left unconnected.2.17 Analogue Audio2.17.1 Analogue Audio SignalsIf only single channel (mono) line input or headphone output is required, it is recommended to usethe left channel.<strong>Apalis</strong>Pin<strong>Apalis</strong>Signal NameI/OTypePowerRailDescription306 AAP1_MICIN I Analogue 3.3V Microphone input310 AAP1_LIN_L I Analogue 3.3V Left line input312 AAP1_LIN_R I Analogue 3.3V Right line input316 AAP1_HP_L O Analogue 3.3V Headphone left output (can also be used as line left output)318 AAP1_HP_R O Analogue 3.3V Headphone right output (can also be used as line right output)2.17.2 Reference SchematicsTable 31: Analogue Audio SignalsDepending on the module, the headphone output signals can have a DC offset. Since the <strong>Apalis</strong>standard does not provide a virtual headphone ground, series capacitors are needed. If theheadphone output signals are used only as line output signals, 1µF series capacitors are sufficient.If the signals are used for driving headphones, larger capacitors (47µF and more) arerecommended.The line-in and microphone signals do not require serial capacitors since they are already placedon the module. Some microphones (e.g. the widely used electret microphones) require a phantompower. The reference schematic below shows a suitable solution for common electret microphonecapsules. Please note that some microphones require that the phantom power is provided on themiddle ring of the 3.5mm jack while others need to be powered over the tip of the 3.5mm jackwhich is also used for the audio signals.<strong>Toradex</strong> AG l Altsagenstrasse 5 l 6048 Horw l Switzerland l +41 41 500 48 00 l www.toradex.com l info@toradex.com Page | 55
<strong>Apalis</strong> <strong>Carrier</strong> <strong>Board</strong> <strong>Design</strong> <strong>Guide</strong>AVCCGNDC41100nF16VX1H314AVCC320AVCC3033043083135V_SWGNDC132.2uF6.3VAGNDAGNDAGNDAGNDMM70-314-310B1IC11Vin3.3V_SW3E4N/C<strong>Apalis</strong> - Audio8 of 25Audio VCC CircuitVoutGNDNCP511SN33T1GAlternative Audio VCC CircuitAAP1_MICINAAP1_LIN_LAAP1_LIN_RAAP1_HP_LAAP1_HP_R523.3V_SWGNDAVCCAGNDNANAC122.2uF6.3VL2L3L1306310312316318220R@100MHz2AAAP1_MICINAAP1_LIN_LAAP1_LIN_RAAP1_HP_LAAP1_HP_R220R@100MHz2ANA220R@100MHz2AGNDAVCCAGNDC142.2uF6.3VGNDAAP1_LIN_LAAP1_LIN_RAAP1_HP_LAAP1_HP_RAAP1_MICIN15pFNA47uF 6.3V +C447uFC5 + 6.3V15pF 50VNAGNDFigure 51: Analogue Audio Reference SchematicC1150VC915pF50V+C3AAP1_HP_AC_LAAP1_HP_AC_RC815pF 50VNAGNDR88100RC115pF50VC615pF50VC215pF50VC715pF50VAVCC R8 2.2KR3 2.2KAAP1_MIC_PWRC1047uFPlace close to6.3VMicrophone ConnectorTop JackX26C323334351LINE IN - BlueSHIELDSHIELDSHIELDSHIELDAGND3 of 3JA3333L-D11P-4FAGNDMiddle JackX26B222324251HEADP. OUT - Green2 of 3JA3333L-D11P-4FAGNDBottom JackX26A23451MIC IN - Pink2 of 3JA3333L-D11P-4FX26DS1S2S3S4SHIELDJA3333L-D11P-4F2.17.3 Unused Analogue Audio Signal TerminationThe unused analogue audio signals can be left unconnected. Please note, even if the analogueaudio interface is not used at all, the analogue 3.3V power pins of the module (pin 314 and 320)still needs to be powered. Alternatively, the analogue power can be connected to the digital 3.3Vpower rail.2.18 Digital AudioThe digital audio interface can be used for connecting additional audio codecs on the carrier boardor for other compatible audio equipment (e.g. DSP, Bluetooth adapter etc.). There are differentaudio codec standards available, such as, I2S, AC’97, or HDA. Check the correspondingdatasheets of the modules for the information which codec standards are supported. The I2S is themost likely to be compatible between different modules. Beside the standards, some modulesmight also have additional proprietary interfaces available.2.18.1 Digital Audio Signals<strong>Apalis</strong>Pin<strong>Apalis</strong>Signal NameI/OTypePowerRailDescription202 DAP1_D_IN I CMOS 3.3V Serial input data stream196 DAP1_D_OUT O CMOS 3.3V Serial output data stream204 DAP1_SYNC O CMOS 3.3V Synchronization/ field select/ left-right channel select200 DAP1_BIT_CLK O CMOS 3.3V Serial bit clock194 DAP1_MCLK O CMOS 3.3V External Peripheral Clock2.18.2 Reference SchematicsTable 32: Digital Audio SignalsThe supported audio codec interface standards vary between the modules. The following referenceschematic shows the implementation of a HDA codec. Carefully check the direction of the signals.For example, the Realtek ALC889 HDA audio codec names its data input signal as SDATA_OUT.This means, the SDATA_OUT needs to be connected to the DAP1_D_OUT signal of the <strong>Apalis</strong>module.<strong>Toradex</strong> AG l Altsagenstrasse 5 l 6048 Horw l Switzerland l +41 41 500 48 00 l www.toradex.com l info@toradex.com Page | 56
<strong>Apalis</strong> <strong>Carrier</strong> <strong>Board</strong> <strong>Design</strong> <strong>Guide</strong>It is recommended to place 22R series resistors to the signal lines. Place these resistors close to thesignal outputsX1VDAP1_MCLKDAP1_D_OUTDAP1_RESET#DAP1_BIT_CLKDAP1_D_INDAP1_SYNC<strong>Apalis</strong> - Digital Audio22 of 25MM70-314-310B1194196198200202204RA99BRA99CRA99DRA26ARA26B22R22R22R22R22RDAP1_D_OUTDAP1_RESET#DAP1_BIT_CLKDAP1_D_INDAP1_SYNCTP18TP34TP35DAP1_D_OUT 5DAP1_D_IN 8DAP1_BIT_CLK 6DAP1_SYNC 10DAP1_RESET# 11DAP1_PC_BEEP 12C2843GND10V 10uFDAP1_S/PDIF_INDAP1_S/PDIF_OUT4748IC28SDATA_OUTSDATA_INBIT_CLKSYNCRESET#PC_BEEPGPIO_1S/PDIF_IN/GPIO_1S/PDIF_OUTMIC1_LMIC1_RLINE1_LLINE1_RFRONT_LFRONT_RPORT_B_LMIC_1_BIAS_LPORT_B_RMIC_1_BIAS_RPORT_C_LV_REF_CPORT_C_RPORT_D_LPORT_D_R21 DAP1_HDA_MIC1_L28 DAP1_HDA_MIC1_VREF_L22 DAP1_HDA_MIC1_R32 DAP1_HDA_MIC1_VREF_R23 DAP1_HDA_LINE1_L29 DAP1_HDA_LINE1_VREF24 DAP1_HDA_LINE1_R35 DAP1_HDA_FRONT_L36 DAP1_HDA_FRONT_RNA5V_SWC24310uF10VAGND2NAL312A120R@100MHzNAC244100nF16VL332A120R@100MHz3.3V_SWGNDAGND2TIED TOGETHER AT ONE POINT ONLYUNDER OR NEAR THE CODEC+C2414.7uF10VL302A120R@100MHzGNDL322A120R@100MHzC24510uF NA10V NAC238100nF16VC246100nF16VC24210uF10VC247100nF16VTP19TP20TP33GNDC24010uF10VC24910uF10VC25210uF6.3VDAP1_3.3V_DV19C239100nF16V R23 40R 7NADAP1_5V_AV2538C24810uF10V 2642R209DAP1_HDA_JDREF20KDAP1_CD_LDAP1_CD_GNDDAP1_CD_RGNDC2501uF16VC251100nF16V181920DV_COREDV_DDDV_SSDV_SSAV_DDAV_DDAV_SSAV_SSCD_LCD_GNDCD_RVREF_FILTALC888-GRFigure 52: HDA Reference Schematic334027NCJDREFLINE2_LLINE2_RMIC2_LMIC2_RCENTERLOW FREQUSIDE-LSIDE-RSURR_LSURR_RPORT_E_LV_REF_EPORT_E_RPORT_F_LMIC_BIAS_FPORT_F_RGPIO_0PORT_G_LPORT_G_RPORT_H_LPORT_H_RPORT_A_LV_REF_APORT_A_RSENSE_B/SRC_ASENSE_A/SRC_B14 DAP1_HDA_LINE2_L31 DAP1_HDA_LINE2_VREF15 DAP1_HDA_LINE2_R16 DAP1_HDA_MIC2_L30 DAP1_HDA_MIC2_VREF17 DAP1_HDA_MIC2_R2 DAP1_F_HEAD_PRES#43 DAP1_HDA_CENTER44 DAP1_HDA_LOW_FREQ45 DAP1_HDA_SIDESURROUND_L46 DAP1_HDA_SIDESURROUND_R39 DAP1_HDA_SURROUND_L37 DAP1_HDA_SURROUND_VREF41 DAP1_HDA_SURROUND_R34 DAP1_HDA_SENSE_B13 DAP1_HDA_SENSE_A2.18.3 Unused Digital Audio Interface Signal TerminationUnused digital audio interface signals can be left unconnected.2.19 S/PDIF (Sony-Philips Digital Interface I/O)S/PDIF is a widely used digital interface for multi-channel audio. For consumer audio equipment,there are two variants of the physical layer available. The first variant uses 75Ω electrical coaxialcables and RCA connectors. The second variant uses fiber optic cable with TOSLINK connectors.2.19.1 S/PDIF Signals<strong>Apalis</strong>Pin<strong>Apalis</strong>Signal NameI/OTypePowerRailDescription215 SPDIF1_OUT O CMOS 3.3V Serial data output217 SPDIF1_IN I CMOS 3.3V Serial data input2.19.2 Reference SchematicsTable 33: S/PDIF SignalsFor the fiber optic variant, both the transmitter and receiver is required. There are TOSLINKconnectors available with built-in transmitters and receivers. The coaxial signal is specified as lowvoltage signal (max. output 0.6V, min input 0.5V) while the <strong>Apalis</strong> S/PDIF signals are 3.3V logiclevel. Therefore, level shifters are required. The following reference schematic shows a very simplesolution. Some projects may require a galvanically isolated solution<strong>Toradex</strong> AG l Altsagenstrasse 5 l 6048 Horw l Switzerland l +41 41 500 48 00 l www.toradex.com l info@toradex.com Page | 57
<strong>Apalis</strong> <strong>Carrier</strong> <strong>Board</strong> <strong>Design</strong> <strong>Guide</strong>X1MSPDIF1_OUTSPDIF1_IN<strong>Apalis</strong> - SPDIF13 of 25MM70-314-310B1215 RA26C217 RA26D22R22RR275R160R SPDIF1_OUT_OPTC287 5V_SWR276100pF220R10VNA NAGND GNDC170R47nF16V321C313100nFGND GNDR17220RR18120ROptical OutX21VINVCCTXGNDPLT133/T9Coax OutX222RCJ-04712AL17220R@100MHzIC18IC174242R20Y AY A75R55VCC3.3V_SW VCC3.3V_SWC20C191313NC GND100nF NC GND100nF16V16VSN74LVC1G04DCKR GND SN74LVC1G04DCKR GNDFigure 53: S/PDIF Reference SchematicR2110kC18100nF16VGNDX23 Coax In2R1975RRCJ-0471GND GND2.19.3 Unused S/PDIF Interface Signal TerminationUnused S/PDIF interface signals can be left unconnected.2.20 Touch Panel InterfaceThe <strong>Apalis</strong> module standard features a touch panel interface for resistive touch screens. This allowsintegrating touch screen solution with minimum amount of components on the carrier board. Thestandard supports only four-wire resistive touch screens. Some modules may support five-wiretouch as well. Read the relevant datasheet of the module for more information.2.20.1 Resistive Touch Signals<strong>Apalis</strong>Pin<strong>Apalis</strong>Signal NameI/OTypePowerRailDescription315 AN1_TSPX I/O Analogue 3.3V X+ (4-wire)317 AN1_TSMX I/O Analogue 3.3V X- (4-wire)319 AN1_TSPY I/O Analogue 3.3V Y+ (4-wire)321 AN1_TSMY I/O Analogue 3.3V Y- (4-wire)2.20.2 Reference SchematicsTable 34: Digital Audio SignalsIn order to reduce noise that is picked up by the display or long cables, it is recommended to addcapacitor to the touch screen signals. 1nF to 10nF is a good choice. It is also recommended to addclamping diodes in order to protect the input of the touch screen controller against ESD.X1I<strong>Apalis</strong> - Touch9 of 25MM70-314-310B1AN1_TSPXAN1_TSMXAN1_TSPYAN1_TSMY315317319321AN1_TSPXAN1_TSMXAN1_TSPYAN1_TSMYAN1_TSPXAN1_TSPYAN1_TSMXAN1_TSMYD845632GND1GNDC1001nF50VC1011nF50VC1021nF50VC1031nF50V654321X16TSW-103-07-G-D2.54mm MaleRCLAMP0504SFigure 54: Touch Interface Reference Schematic<strong>Toradex</strong> AG l Altsagenstrasse 5 l 6048 Horw l Switzerland l +41 41 500 48 00 l www.toradex.com l info@toradex.com Page | 58
<strong>Apalis</strong> <strong>Carrier</strong> <strong>Board</strong> <strong>Design</strong> <strong>Guide</strong>2.20.3 Unused Touch Panel Interface Signal TerminationUnused touch panel signals can be left unconnected. It is recommended to disable thecorresponding driver.2.21 Analogue InputsThe <strong>Apalis</strong> modules feature up to four analogue input channels. The supported sampling rates andresolutions depend on the modules. The input voltage span is from 0V to 3.3V. The ADC referenceis the analogue input voltage rail. The analogue input channels are not designed to be used forhigh precision measurement tasks. The interface is intended to be used for battery voltagemonitoring (additional circuit required), ambient light sensors, simple analogue joystick inputdevices, etc.2.21.1 Analogue Input Signals<strong>Apalis</strong>Pin<strong>Apalis</strong>Signal NameI/OTypePowerRailDescription305 AN1_ADC0 I Analogue 3.3V ADC input (3.3V max)307 AN1_ADC1 I Analogue 3.3V ADC input (3.3V max)309 AN1_ADC2 I Analogue 3.3V ADC input (3.3V max)311 AN1_TSWIP_ADC3 I Analogue 3.3VADC input (3.3V max), some modules might use this input for thefive wire resistive touch interface.Table 35: Analogue Input Signals2.21.2 Unused Analogue Inputs Signal TerminationThe unused analogue input signals can be left unconnected or tied to the ground. It isrecommended to disable the corresponding inputs in the driver or disable the whole ADC block ifunused.2.22 Clock OutputThe <strong>Apalis</strong> standard reserves two module edge connector pins as clock outputs. One output isintended to be used for the digital audio interface while the other can be used for the camerainterface. The clock outputs could also be used for other purposes if not required by the dedicatedfunction. Please note that on some modules, the possible output frequencies is limited. There mightalso be limitations due to the other clock sources that are used in the module. Read carefully therelevant datasheets.2.22.1 Clock Output Signals<strong>Apalis</strong>Pin<strong>Apalis</strong>Signal NameI/OTypePowerRailDescription194 DAP1_MCLK O Analogue 3.3V Clock output for the digital audio interface193 CAM1_MCLK O Analogue 3.3V Clock output for the parallel and serial camera interface2.22.2 Schematic and Layout ConsiderationsTable 36: Clock Output SignalsThe clock output signals can have quite a high frequency, especially for single ended clock signals.This could lead to major problems due to electromagnetic interferences (EMI). The clock signalsshould be kept as short as possible. High slew rates of the signal can increase the EMI problems.Therefore, it is desirable to reduce the slew rate as much as the signal quality allows it. Therefore,series resistors should be placed close to the clock output of the module. Start with a value of 22Ω.<strong>Toradex</strong> AG l Altsagenstrasse 5 l 6048 Horw l Switzerland l +41 41 500 48 00 l www.toradex.com l info@toradex.com Page | 59
<strong>Apalis</strong> <strong>Carrier</strong> <strong>Board</strong> <strong>Design</strong> <strong>Guide</strong>Try to increase this value until the corresponding interface fails due to the signal quality of theclock signal. Decrease the serial resistor again in order to have a suitable margin.Instead of using the clock output signals, some of the interfaces also allow using a differentasynchronous clock reference. For example, if the audio codec needs to be located far away fromthe <strong>Apalis</strong> computer module, it might be a better solution to use an oscillator instead of thereference clock output of the module. This oscillator can be placed close to the audio codec. Checkwhether the audio codec has any restrictions in using an asynchronous clock source.2.22.3 Unused Clock Output Signal TerminationUnused clock output signals can be left unconnected. The output should be disabled for reducingpower consumption and EMI problems.2.23 GPIOThe <strong>Apalis</strong> form factor features 8 dedicated general purpose input output pins (GPIO). Beside these8 GPIOs, several pins can be used as GPIO if their primary function is not in use. The Table 2 inSection 2.1.1 shows an overview of the interfaces. Some interfaces are stated as “GPIO Capable”This means, all <strong>Apalis</strong> modules shall provide GPIO functionality on these pins as secondaryfunction. The interfaces that are listed as optional GPIO capable may be compatible on somemodules.For carrier board designs that provide the highest compatibility with all <strong>Apalis</strong> modules, it isrecommended to use the 8 dedicated GPIO signals first. If additional GPIO signals are requiredstill, unused signal pins of the interfaces that are stated as “GPIO Capable” should be used.2.23.1 GPIO SignalsThe following table contains only the dedicated GPIO pins of the <strong>Apalis</strong> modules. Consult therelevant datasheet of the modules for information on the other MXM3 pins that can be used asGPIO interface.<strong>Apalis</strong>Pin<strong>Apalis</strong>Signal NameI/OTypePowerRailDescription1 GPIO1 I/O CMOS 3.3V General purpose GPIO3 GPIO2 I/O CMOS 3.3V General purpose GPIO5 GPIO3 I/O CMOS 3.3V General purpose GPIO7 GPIO4 I/O CMOS 3.3V General purpose GPIO11 GPIO5 I/O CMOS 3.3V General purpose GPIO13 GPIO6 I/O CMOS 3.3V General purpose GPIO15 GPIO7 I/O CMOS 3.3V17 GPIO8 I/O CMOS 3.3V2.23.2 Unused GPIO TerminationGeneral purpose GPIO, used on the evaluation board as resetsignal for the PCIe switchGeneral purpose GPIO, used on the evaluation board forenabling the FANTable 37: Dedicated GPIO SignalsThe GPIO signals do not need to be terminated if they are not in use.<strong>Toradex</strong> AG l Altsagenstrasse 5 l 6048 Horw l Switzerland l +41 41 500 48 00 l www.toradex.com l info@toradex.com Page | 60
<strong>Apalis</strong> <strong>Carrier</strong> <strong>Board</strong> <strong>Design</strong> <strong>Guide</strong>3 Power Management3.1 Power Signals3.1.1 Digital Supply Signals<strong>Apalis</strong><strong>Apalis</strong>PowerI/O TypePinSignal NameRailDescription10, 30, 36, 52, 58, 66, 78, 90,102, 108VCC I PWR 3.3V Main power supply input for the module9, 23, 29, 39, 45, 51, 57, 69,75, 81, 93, 105, 111, 117, 129,141, 147, 153, 165, 189, 199,213, 219, 237, 241, 267, 285, GND I PWR Common signal and power ground142, 182, 192, 206, 218, 226,238, 244, 250, 256, 268, 280,292, 298174 VCC_BACKUP I PWR 3.3VRTC supply, can be left unconnected ifinternal RTC is not used3.1.2 Analogue Supply Signals<strong>Apalis</strong>Pin<strong>Apalis</strong>Signal NameTable 38: Digital supply signalsI/OTypePowerRail314, 320 AVCC I PWR 3.3VDescriptionPower supply for the analogue part of themodule303, 313, 304, 308 AGND I PWR Ground for the analogue part of the moduleTable 39: Analogue supply signalsThe analogue power supply is used on the module for the analogue circuits. 3.3V needs to beprovided to this input even if the analogue interfaces are not used in the design. In this case, thepins can be connected to the 3.3V digital supply for the module. For a better audio quality andimproved resistive touch performance, it is recommended that separate filters are added to theanalogue power supply rail. For the best quality, a separate power supply with linear voltageregulator is recommended.3.1.3 Power Management Signals<strong>Apalis</strong>Pin<strong>Apalis</strong>Signal NameI/OTypePowerRailDescription28 RESET_MICO# I CMOS 3.3V Active low reset input26 RESET_MOCI# O CMOS 3.3V Active low reset output24 POWER_ENABLE_MOCI O CMOS 3.3V Signal for the carrier board to enable the peripheral voltage rails37 WAKE1_MICO# I CMOS 3.3VActive low main module wake input signal - needs a pull-upresistor on the baseboard if wake function is usedTable 40: Power management signalsTo make the direction of the power management signals clear, the ending MICO or MOCI areappended to the signal names. MICO is the abbreviation for “Module Input, <strong>Carrier</strong> board Output”while MOCI stands for “Module Output, <strong>Carrier</strong> board Input”<strong>Toradex</strong> AG l Altsagenstrasse 5 l 6048 Horw l Switzerland l +41 41 500 48 00 l www.toradex.com l info@toradex.com Page | 61
<strong>Apalis</strong> <strong>Carrier</strong> <strong>Board</strong> <strong>Design</strong> <strong>Guide</strong>3.2 Power Block Diagram7-24 VinputJack7-24VEnable3.3VBuck3.3VVCCModuleVCC_BACKUPRTCBatteryEnable5VBuck5VPWR_OKRTC3.3VFilterAVCCAnalogCircuitFor better quality usededicated LDO from 5V railPOWER_ENABLE_MOCIPeripheralDevices on<strong>Carrier</strong> <strong>Board</strong>WAKE1_MICO#RESET_MOCI#Power ManagementRESET_MICO#Figure 55: Power Block Diagram3.3 Power StatesThe <strong>Apalis</strong> module and carrier board supports different power states. The following table describestheir behavior during the different states and shows which power rails and peripherals are active.These are just the standard power state. If additional power saving is necessary, it is possible tointroduce other states in which some of the carrier board peripherals are switched off. In this case,free GPIO can be used to switch off unused peripheral power rails.<strong>Toradex</strong> AG l Altsagenstrasse 5 l 6048 Horw l Switzerland l +41 41 500 48 00 l www.toradex.com l info@toradex.com Page | 62
Remove VCCfrom ModuleApply VCCto Module<strong>Apalis</strong> <strong>Carrier</strong> <strong>Board</strong> <strong>Design</strong> <strong>Guide</strong>Abbr. Name Description Module <strong>Carrier</strong> <strong>Board</strong>UPG Unplugged No power is applied to thesystem, except the RTC batterywhich might be available.OFF Off System is off but the carrierboard input supply is available.SUS Suspend System is suspended and waitsfor wakeup sources to trigger.No main VCC and AVCCapplied. Maybe VCC_BACKUP isavailable.The main VCC is available, butthe CPU and peripherals are notrunning. Only the PMIC isrunning.CPU is suspended. Wakeupcapable peripherals are runningwhile others might be switchedoff.RUN Running System is running. All power rails are available. CPUand peripherals are running.RST Reset System is put in reset state byholding RESET_MICO# low.All power rails are available. CPUand peripherals are in resetstate.Table 41: Available <strong>Apalis</strong> power statesNo power supply input. RTCbattery maybe inserted.<strong>Carrier</strong> board provides power formodule and the peripheralsupplies are not availablePower rails are available oncarrier board whereasperipherals may have beenstopped by the software.All power rails are available andperipherals are running.All power rails are available.Peripherals are in the reset state.The following figure shows a sequence diagram for the different power states. The moduleautomatically enters into the running mode when the main power rail is applied to the module. Inthe running mode, the system can be set to a suspend state by the software. There might bedifferent wake up sources available. Consult the datasheet for a specific <strong>Apalis</strong> module for moreinformation about the available wakeup events. All <strong>Apalis</strong> modules support module wakeup usingthe signal WAKE1_MICO#. If compatibility between different <strong>Apalis</strong> modules is needed, use thispin as general wake signal.In the running state, a shutdown request can be triggered by the software. This turns off all powerrails on the module and requests the carrier board to switch of the power rails for the peripherals.The module can be brought back to the running mode in two ways. The module main voltage rail(VCC) need to be removed and applied again. If needed, this could also be done with a button anda small circuit. While the method of removing the main voltage works with all the modules, thesecond method is dependent on the <strong>Apalis</strong> module. Some modules allow to being switched onagain by putting the RESET_MICO# signal to low (e.g. by pressing the reset button). Consult therelevant datasheet for more information about the available methods to turn the module back on.Remove VCCfrom ModuleUPGRemove VCCfrom ModuleRESET_MICO#Suspend requestOFFRUNSUSShut down requestWake eventFigure 56: Power states and transitions<strong>Toradex</strong> AG l Altsagenstrasse 5 l 6048 Horw l Switzerland l +41 41 500 48 00 l www.toradex.com l info@toradex.com Page | 63
<strong>Apalis</strong> <strong>Carrier</strong> <strong>Board</strong> <strong>Design</strong> <strong>Guide</strong>3.4 Power SequencesThe <strong>Apalis</strong> module starts booting as soon as the main voltage rail is applied to the module. If an<strong>Apalis</strong> system should boot directly when the main power is applied to it, the carrier board needs toramp up the 3.3V main voltage for the module as soon as power is applied (e.g. 7-27 V). The<strong>Apalis</strong> module will ramp up the internal power rails. When this rails are stable, thePOWER_ENABLE_MOCI goes high in order to signal the carrier board that the peripheral suppliesneed to ramp up. The peripheral power rails on the carrier board need to ramp up in a correctsequence. The sequence starts normally with the highest voltage (e.g. 5V) followed by the lowervoltages (e.g. 3.3V then 1.5V and so on). Peripherals normally require that a lower voltage rails isnever present if a higher rail is missing. Check the datasheet of all peripheral components on thecarrier board for a proper sequencing.Especially PCIe devices require stable power supplies for at least 100ms before releasing the reset.The <strong>Apalis</strong> modules guarantees to apply the reset output RESET_MOCI# not earlier than 120msafter the POWER_ENABLE_MOCI goes high. This gives the carrier board a maximum time of 20msfor ramping up all power rails. Some <strong>Apalis</strong> module might have longer delay, but in order to becompatible with all <strong>Apalis</strong> modules, count on the previous stated numbers.State UPG UPG -> RUN RUN7-27V <strong>Carrier</strong> <strong>Board</strong> inVCC input for ModuleNormal Power up (OFF -> RUN)Module internal RailsPOWER_ENABLE_MOCIModule internal Reset5V for Perpherals on CB3.3V for Perpherals on CBRESET_MOCI#>0msRESET_MICO#WAKE1_MICO#120msDepending on the operating system, a shutdown sequence can be initiated. Some system maybenefit from shutting down instead of just removing the main power supply since it is possible tobring the mass storage devices to a controlled state. Check whether a shutdown is preferable for acertain operating system. Some operating system may not provide the shutdown function.Since it is not allowed that a lower voltage rail is present when the higher one is already shutdown, the sequence of shutting down the peripheral voltages needs to be considered. The lowervoltages (e.g. peripheral 3.3V) need to ramp down before the higher ones do (e.g. peripheral 5V).<strong>Toradex</strong> AG l Altsagenstrasse 5 l 6048 Horw l Switzerland l +41 41 500 48 00 l www.toradex.com l info@toradex.com Page | 64
Reset Sequence (RUN -> Reset -> RUN)<strong>Apalis</strong> <strong>Carrier</strong> <strong>Board</strong> <strong>Design</strong> <strong>Guide</strong>StateRUNRUN -> OFFOFF7-27V <strong>Carrier</strong> <strong>Board</strong> inVCC input for ModuleModule internal RailsShut Down (RUN -> OFF)POWER_ENABLE_MOCIModule internal Reset5V for Perpherals on CB3.3V for Perpherals on CBRESET_MOCI#>0msRESET_MICO#WAKE1_MICO#Figure 58: Shut-down sequenceWhen the RESET_MICO# is asserted, a reset cycle is initiated. The module internal reset and theexternal reset output RESET_MOCI# are asserted as long as RESET_MICO# is asserted. If the resetinput RESET_MICO# is de-asserted, the internal reset and the RESET_MOCI# will remain low for atleast 1ms until they are also de-asserted and the module starts booting again. This guarantees aminimum reset time of 1ms even if the reset input RESET_MICO# is triggered for a short time.Some <strong>Apalis</strong> modules may implement a power cycle during reset.State RUNReset RUN7-27V <strong>Carrier</strong> <strong>Board</strong> inVCC input for ModuleModule internal RailsPOWER_ENABLE_MOCIModule internal Reset5V for Perpherals on CB3.3V for Perpherals on CBRESET_MOCI#RESET_MICO#WAKE1_MICO#>1msFigure 59: Reset sequence>1ms<strong>Toradex</strong> AG l Altsagenstrasse 5 l 6048 Horw l Switzerland l +41 41 500 48 00 l www.toradex.com l info@toradex.com Page | 65
Resume from Suspend (SUS -> RUN)Suspend (RUN -> SUS)<strong>Apalis</strong> <strong>Carrier</strong> <strong>Board</strong> <strong>Design</strong> <strong>Guide</strong>The available suspend capabilities depends on the <strong>Apalis</strong> module. The standard approach for thecarrier board is keep all peripheral supplies up, even in suspend mode. If some of the peripheralrails need to be switched off in the suspended state, a free GPIO can be used for this purpose.Ensure that the voltage power-up and power-down sequencing requirements are not violated.StateRUNRUN -> SUSSUS7-27V <strong>Carrier</strong> <strong>Board</strong> inVCC input for ModuleModule internal RailsPOWER_ENABLE_MOCIModule internal Reset5V for Perpherals on CB3.3V for Perpherals on CB>0msSome Peripherals might beSwitched off by a GPIOSome Peripherals might beSwitched off by a GPIORESET_MOCI#RESET_MICO#WAKE1_MICO#Figure 60: Suspend sequenceDifferent wake sources are available for different modules. The standard wake source isWAKE1_MICO#. If peripheral voltage rails are switched off by GPIO signals, make sure that theramping up of the voltages follows the requirement.State SUS SUS -> RUN RUN7-27V <strong>Carrier</strong> <strong>Board</strong> inVCC input for ModuleModule internal RailsPOWER_ENABLE_MOCIModule internal Reset5V for Perpherals on CBSome Peripherals might beSwitched on by a GPIO>0ms3.3V for Perpherals on CBSome Peripherals might beSwitched on by a GPIORESET_MOCI#RESET_MICO#WAKE1_MICO#Figure 61: Resume from suspend sequence<strong>Toradex</strong> AG l Altsagenstrasse 5 l 6048 Horw l Switzerland l +41 41 500 48 00 l www.toradex.com l info@toradex.com Page | 66
<strong>Apalis</strong> <strong>Carrier</strong> <strong>Board</strong> <strong>Design</strong> <strong>Guide</strong>3.5 Reference SchematicsPlace enough power supply bypass capacitors on the voltage inputs of the peripheral devices (see<strong>Toradex</strong> Layout <strong>Design</strong> <strong>Guide</strong>). Place a bypass capacitor on each power input pin of the <strong>Apalis</strong>module. Be aware of the total capacity on a voltage rail when switching the voltage. If the rails areswitched on too fast, the current peaks for charging all the bypass capacitors can be very high. Thiscan produce unacceptable disturbances or can trigger an overcurrent protection circuit. In suchcases, the slew rate of switching circuits speed may need to be limited. The following figure showsa simple voltage rail switch circuit. C1 and R1 limit the switching speed. The values need to beoptimized according to the requirements. It is recommended that a bypass capacitor (C2) is placedclose to the switching transistor.+V3.3R2 100KENABLE_V3.3_SWITCHEDGNDC2100nF16VC110nF16V26T2SI1016CX1Figure 62: Simple voltage switch circuitIt is possible to reach a suitable power up sequence by cascading the power good (e.g. PGOOD)output signals of the buck regulators with enable signal of the next regulator. ThePOWER_ENABLE_MOCI output features a pull-down resistor on the <strong>Apalis</strong> module. An additionalpull-down resistor can be optionally placed on the carrier board. This pull-up resistor is onlyneeded to prevent unwanted enabling of the peripheral voltages if the module is not inserted. Fordesigns in which the module is never removed, this pull-up is not required.The RESET_MICO# and RESET_MOCI# do not need any pull-up resistors on the carrier board asthese resistors are implemented on the module. The WAKE1_MICO# requires a pull-up resistor onthe carrier board if the wake function is implemented.21GND3T1 IRLML6401R1 47K+V3.3_SWITCHED<strong>Toradex</strong> AG l Altsagenstrasse 5 l 6048 Horw l Switzerland l +41 41 500 48 00 l www.toradex.com l info@toradex.com Page | 67
<strong>Apalis</strong> <strong>Carrier</strong> <strong>Board</strong> <strong>Design</strong> <strong>Guide</strong>X2GND_INPWR_INRAPC722XPower IN231L1L210A10A36R@100MHz36R@100MHzC1510uF50VGNDC1410uF50VGND12V_FILT_UNREG3.3V5V_SW3.3V_SW12V_SW_UNREGLegendModule Main VoltagePeripherical 5VPeripherical 3.3VPeripherical 12VPower Supply Controller12V_FILT_UNREGGNDVREG5GNDGND91032R36 0R 31EN5EN3GNDTONSEL12V_FILT_UNREG22C7 VIN10uF50V5GND33HSTPS5112021VREG5100mA nom.200mA max.! R344.7RV5FILTVREG3100mA nom.200mA max.!VREF2IC5A20GND19C610uF6.3VGND4GNDC6510uF10VGNDC671uF16VC741nF50VV5FILTVREG3VREF2VREG512V5FILT6R42100K117R4310KC871nF50VGNDENVFBPGOODCOMPTPS51120VODRVHVBSTLLDRVLCSPGNDIC5C8141315161817R414.7RGND4C78100nF16V212V_FILT_UNREG6T2B 5FDS6982ASC1 C210uF 10uF50V 50V3 GND GNDT2A8 6.2A7FDS6982AS1R1573.3KNAL21R444.7uH24mRPlace sense resistor close to TPSpin 17 and input capacitorsV5FILT+C3150uF10V+C4150uF10V+NAC5GND3.3V150uF10VX1DMM70-314-310B1POWER_ENABLE_MOCIRESET_MOCI#RESET_MICO#WAKE1_MICO#<strong>Apalis</strong> - System ControlWake ButtonGNDSW1124 of 25TD-03XB34WAKE1_MICO#2426 RESET_MOCI#28373.3VR2100KPOWER_ENABLE_MOCIR1100KGNDOptionalV5FILT3GND29R35100K30R386.2K2C752.7nF50VENVFBPGOODCOMPTPS51120VODRVHVBSTLLDRVLCSPGNDIC5B1272826252324R334.7RGND4C66100nF16V212V_FILT_UNREG6T1B 5FDS6982ASC8 C910uF 10uF50V 50V3 GND GNDT1AR1563.6KNAL20 8.2uH8 6.25A7FDS6982AS C101R3715mRPlace sense resistor close to TPSpin 24 and input capacitorsV5FILT+150uF10V+C11150uF10VGND5V_SWNA+C12150uF10VReset ButtonGNDSW212TD-03XB34RESET_MICO#3.3V_SW CTRL5V_PGOOD21 6R33.3V_SW_EN_R#100KR4T4A5SI-1024-X100K33.3V T33.3V_SW1287C1310nF3625V 3.3V_SW_EN# 4 5T4BSI-1024-XDMP2022LSS-13GND412V CTRLPOWER_ENABLE_MOCI12V_FILT_UNREG T5 12V_SW_UNREG1812V_UNREG_EN_R R5 NA27C16100K 36 C17R6 50V 100nF10uF12V_UNREG_EN_EN# 4 5 50V100KR7 12V_UNREG_EN 1 T6 SI4447DY-T1-E3 GNDC18 BSS138-7-F100K10nF25V32GNDGNDFigure 63: Simple power supply reference schematicRESET_MOCI#RESET_MOCI#<strong>Toradex</strong> AG l Altsagenstrasse 5 l 6048 Horw l Switzerland l +41 41 500 48 00 l www.toradex.com l info@toradex.com Page | 68
<strong>Apalis</strong> <strong>Carrier</strong> <strong>Board</strong> <strong>Design</strong> <strong>Guide</strong>4 Mechanical and Thermal Consideration4.1 Module ConnectorThe <strong>Apalis</strong> module is based around the MXM3 (Mobile PCI-Express Module) edge connector. Thisconnector has been adopted by various manufacturers for use in the embedded market. There aremany suitable connectors from different manufacturers available in different stacking height. If themodule is fixed to the carrier board with the MXM3 SnapLock system, a board stacking heightbetween the carrier board surface and Module bottom side of 3mm is required. In this case, theMM70-314-310B1 from JAE is recommended. Beside JAE, MXM3 connectors are also availablefrom Aces, SpeedTech, and Foxconn.Figure 64: MXM3 Connector<strong>Apalis</strong> Module3mmSpacerMXM ConnectorFigure 65: <strong>Board</strong> Stacking Height<strong>Carrier</strong> <strong>Board</strong>4.2 Fixation of the ModuleThe MXM3 connector itself does not features a locking mechanism. The mobile graphic cards usingthe MXM3 connector are all screwed down to the carrier board for fixation. The <strong>Apalis</strong> modulefeatures two holes which allow the module to be screwed to the carrier board. This is a preferredsolution for systems that are exposed to high vibrations. Spacers need to be placed between thecarrier board and the module in order to guarantee the required stacking height of the MXM3connector. Please note that the screw holes of the <strong>Apalis</strong> modules are in a different location tothose in the mobile graphic cards.Figure 66: Screw fixation<strong>Toradex</strong> AG l Altsagenstrasse 5 l 6048 Horw l Switzerland l +41 41 500 48 00 l www.toradex.com l info@toradex.com Page | 69
<strong>Apalis</strong> <strong>Carrier</strong> <strong>Board</strong> <strong>Design</strong> <strong>Guide</strong>During the development process, it may be necessary to replace the module several times.Screwing the module to the carrier board during development can be very inconvenient. The <strong>Apalis</strong>module standard defines a mechanism of fixing the module to the carrier board with a clipmechanism called MXM SnapLock. The clip is also used as holder of Mini PCI Express Cards. Theclips are available with different stacking height and need to be consistent with the stacking heightof the MXM3 connector. For the proposed stacking height of 3mm, a suitable MXM SnapLock clip isthe Molex 48099-5701. If MXM SnapLock is used, the spacers at the edge of the module andunder the CPU are optional if no cooling solution is required. As the MXM SnapLock connector canbe assembled as a normal SMD component while the spacers often need an additional productionprocess, the unique MXM SnapLock fixing method can be cost optimized solution also for volumeproduction.Figure 67: SnapLock fixation4.3 Thermal SolutionSome <strong>Apalis</strong> modules may require a cooling solution when used in certain temperature range. Thecooling solution needs to transport the heat (which is mainly produced by the SoC) to the externalenvironment. The location and height of the SoC is not guaranteed to be the same betweendifferent <strong>Apalis</strong> modules. Therefore, cooling solution may need to be optimized for the differentmodules.Figure 68: Bottom Side of Heat SinkFor every type of <strong>Toradex</strong> <strong>Apalis</strong> module, an optimized heats sink is available. The heat sink can beused as passive or active cooling solution. Passive means that the natural convection is used totransport the heat from the surface to the air. The efficiency of the natural convection is dependenton the housings and the environment, but it has no moving parts and does not produce additionalnoise. If the passive cooling is not sufficient, a fan can be mounted on top of the heat sink. Thisincreases the efficiency dramatically. In order to reduce the noise of the fan, the speed of the fanmight be regulated according to the SoC temperature by using one of the free PWM signals.<strong>Toradex</strong> AG l Altsagenstrasse 5 l 6048 Horw l Switzerland l +41 41 500 48 00 l www.toradex.com l info@toradex.com Page | 70
<strong>Apalis</strong> <strong>Carrier</strong> <strong>Board</strong> <strong>Design</strong> <strong>Guide</strong>Figure 69: Mounted Heat SinkIn order to guarantee good thermal conductivity between SoC and the heat sink required foreffective heat dissipation, pressure needs to be applied to the thermal interface material betweenSoC and spreader. As the <strong>Apalis</strong> module PCB is only 1.2mm thick, adding pressure in the middle ofthe board would cause undesired bending and flex, which could damage the module. To preventsuch bending, every <strong>Apalis</strong> module features a pad on the bottom side of the module. This padallows the addition of a support standoff between module and carrier board.If a cooling system is used that applies force to the center area of the module PCB, it is stronglyrecommended that the additional spacer be added under the module.Spacer addedunder SoCFigure 70: PCB bending problemThe figure below shows a cross-section trough of a heat sink, mounted on an <strong>Apalis</strong> module. Theoverall height from carrier board surface to the top of the heat sink is 14mm without a fan. Theadditional spacer under the center of the module needs to have a height of 3mm.SoCHeats SinkSpacer 3mm14mmSpacer 8mmSpacer 3mmFigure 71: Stacking height of heat sink<strong>Carrier</strong> <strong>Board</strong><strong>Toradex</strong> AG l Altsagenstrasse 5 l 6048 Horw l Switzerland l +41 41 500 48 00 l www.toradex.com l info@toradex.com Page | 71
<strong>Apalis</strong> <strong>Carrier</strong> <strong>Board</strong> <strong>Design</strong> <strong>Guide</strong>4.4 Module Size3.5025.40827524.203.202.60641453.751.452.901.801 +/-0.05Figure 72: Module dimensions top side (dimensions in mm)On the bottom side, all modules feature a pad with a diameter of 6mm in the middle of the PCB. Astandoff placed on the carrier board that connects with this location, supports the module if thecooling solution applies force. At both edges of the module, ten test pads are available. Thesepads are used by the module manufacturer for test purposes.4137.5062.202.541.3025Figure 73: Module dimensions bottom side (dimensions in mm)4.5 Connector and MXM SnapLock Land Pattern RequirementsThe following figure shows the dimensions of the required land pattern for the standoffs and theMXM SnapLock connector. A carrier board does not need to feature both methods for fixing themodule (SnapLock and spacers with screws), but must implement one of them. The pad and holesizes for the standoffs depends on the assembled parts. Contact the supplier of the standoff inorder to get the land pattern requirements.<strong>Toradex</strong> AG l Altsagenstrasse 5 l 6048 Horw l Switzerland l +41 41 500 48 00 l www.toradex.com l info@toradex.com Page | 72
1.10<strong>Apalis</strong> <strong>Carrier</strong> <strong>Board</strong> <strong>Design</strong> <strong>Guide</strong>1.601.106.503.404.704.801637.5041511.6075Figure 74: SnapLock and standoff land pattern (dimensions in mm)The proposed land pattern of the MXM3 module connector is slightly different form the one thatcan be found in the datasheet of the connector. The reason is that the <strong>Apalis</strong> module standarddoes not combine power supply pins to large pads. In addition, the pin numbering is different.2.95Pin3210.5037Module Insertion Edge1.50Pin173 Pin165Pin23Pin17 Pin11.601.10Pin3203.30Pin174Pin164Pin24Pin18 Pin2582Figure 75: Module connector land pattern (dimensions in mm)4.6 <strong>Carrier</strong> <strong>Board</strong> Space RequirementsThe required PCB area for the module depends on the module fixing method and the coolingsolution. The following picture shows the maximum required area if the SnapLock is used incombination with the suitable <strong>Toradex</strong> heat sink. Custom heat sink solutions might need additionalspace on the carrier board.<strong>Toradex</strong> AG l Altsagenstrasse 5 l 6048 Horw l Switzerland l +41 41 500 48 00 l www.toradex.com l info@toradex.com Page | 73
R4<strong>Apalis</strong> <strong>Carrier</strong> <strong>Board</strong> <strong>Design</strong> <strong>Guide</strong>82754291012.2059514.6062.50Figure 76: Maximum carrier board space requirement (dimensions in mm)If a system does not need a cooling solution and the module is fixed by screwing it down, therequired carrier board area becomes smaller.8212.2048.7591.20Figure 77: Minimum carrier board space requirement (dimensions in mm)If components need to be placed under the module, the maximum required component space ofthe <strong>Apalis</strong> module needs to be considered. The following figure shows the maximum occupiedvolume at the bottom side of the <strong>Apalis</strong> module.<strong>Toradex</strong> AG l Altsagenstrasse 5 l 6048 Horw l Switzerland l +41 41 500 48 00 l www.toradex.com l info@toradex.com Page | 74
<strong>Apalis</strong> <strong>Carrier</strong> <strong>Board</strong> <strong>Design</strong> <strong>Guide</strong>Figure 78: Maximum space requirement of components on module (bottom view)On the bottom side of the module, components with a maximum height of 1.8mm are permitted.Components soldered on the top side of the module can be up to a maximum of 3mm in height.71860.509.455.250.505.307.502.751.20Figure 79: Maximum height of components on module (dimensions in mm)These height restrictions of components on the module leave a space of at least 1.2mm betweencarrier board surface and module components when using a module connector with 3mm stackingheight. To minimize the risk of any mechanical conflict, it is recommended not to placecomponents on the carrier board directly under the module that are taller than 1mm.Module ComponentsTop Side0.80Heatsink<strong>Apalis</strong> Module<strong>Carrier</strong> <strong>Board</strong>1.20Module ComponentsBottom SideFigure 80: Maximum height of carrier board components under module<strong>Toradex</strong> AG l Altsagenstrasse 5 l 6048 Horw l Switzerland l +41 41 500 48 00 l www.toradex.com l info@toradex.com Page | 75
<strong>Apalis</strong> <strong>Carrier</strong> <strong>Board</strong> <strong>Design</strong> <strong>Guide</strong>5 Appendix A – Physical Pin Definition and LocationSignal Group Module Bottom Side MXM3 Pins Module Top Side Signal GroupGPIOGPIO1 1 2 PWM1GPIO2 3 4 PWM2GPIO3 5 6 PWM3GPIO4 7 8 PWM4GND 9 10 VCCGPIO5 11 12 CAN1_RXGPIO6 13 14 CAN1_TXGPIO7 15 16 CAN2_RXGPIO8 17 18 CAN2_TXPWMCANSATAPCI-ExpressReserved for typespecificfeaturesGND 23 24 POWER_ENABLE_MOCISATA1_RX+ 25 26 RESET_MOCI#SATA1_RX- 27 28 RESET_MICO#GND 29 30 VCCSATA1_TX- 31 32 ETH1_MDI2+SATA1_TX+ 33 34 ETH1_MDI2-SATA1_ACT# 35 36 VCCWAKE1_MICO# 37 38 ETH1_MDI3+GND 39 40 ETH1_MDI3-PCIE1_RX- 41 42 ETH1_ACTPCIE1_RX+ 43 44 ETH1_LINKGND 45 46 ETH1_CTREFPCIE1_TX- 47 48 ETH1_MDI0-PCIE1_TX+ 49 50 ETH1_MDI0+GND 51 52 VCCPCIE1_CLK- 53 54 ETH1_MDI1-PCIE1_CLK+ 55 56 ETH1_MDI1+GND 57 58 VCCTS_DIFF1- 59 60 USBO1_VBUSTS_DIFF1+ 61 62 USBO1_SSRX+TS_1 63 64 USBO1_SSRX-TS_DIFF2- 65 66 VCCTS_DIFF2+ 67 68 USBO1_SSTX+GND 69 70 USBO1_SSTX-TS_DIFF3- 71 72 USBO1_IDTS_DIFF3+ 73 74 USBO1_D+GND 75 76 USBO1_D-TS_DIFF4- 77 78 VCCTS_DIFF4+ 79 80 USBH2_D+GND 81 82 USBH2_D-TS_DIFF5- 83 84 USBH_ENTS_DIFF5+ 85 86 USBH3_D+TS_2 87 88 USBH3_D-TS_DIFF6- 89 90 VCCTS_DIFF6+ 91 92 USBH4_SSRX-GND 93 94 USBH4_SSRX+TS_DIFF7- 95 96 USBH_OC#TS_DIFF7+ 97 98 USBH4_D+TS_3 99 100 USBH4_D-TS_DIFF8- 101 102 VCCTS_DIFF8+ 103 104 USBH4_SSTX-System ControlGigabit EthernetGND 105 106 USBH4_SSTX+TS_DIFF9- 107 108 VCC UARTUSB<strong>Toradex</strong> AG l Altsagenstrasse 5 l 6048 Horw l Switzerland l +41 41 500 48 00 l www.toradex.com l info@toradex.com Page | 76
<strong>Apalis</strong> <strong>Carrier</strong> <strong>Board</strong> <strong>Design</strong> <strong>Guide</strong>TS_DIFF9+ 109 110 UART1_DTRGND 111 112 UART1_TXDTS_DIFF10- 113 114 UART1_RTSTS_DIFF10+ 115 116 UART1_CTSGND 117 118 UART1_RXDTS_DIFF11- 119 120 UART1_DSRTS_DIFF11+ 121 122 UART1_RITS_4 123 124 UART1_DCDTS_DIFF12- 125 126 UART2_TXDTS_DIFF12+ 127 128 UART2_RTSGND 129 130 UART2_CTSTS_DIFF13- 131 132 UART2_RXDTS_DIFF13+ 133 134 UART3_TXDTS_5 135 136 UART3_RXDTS_DIFF14- 137 138 UART4_TXDTS_DIFF14+ 139 140 UART4_RXDGND 141 142 GNDTS_DIFF15- 143 144 MMC1_D2TS_DIFF15+ 145 146 MMC1_D3GND 147 148 MMC1_D4TS_DIFF16- 149 150 MMC1_CMDTS_DIFF16+ 151 152 MMC1_D5GND 153 154 MMC1_CLKTS_DIFF17- 155 156 MMC1_D6TS_DIFF17+ 157 158 MMC1_D7TS_6 159 160 MMC1_D0TS_DIFF18- 161 162 MMC1_D1TS_DIFF18+ 163 164 MMC1_CD#GND 165MMCParallel CameraI2CSPDIFSPICAM1_D7 173 174 VCC_BACKUPCAM1_D6 175 176 SD1_D2CAM1_D5 177 178 SD1_D3CAM1_D4 179 180 SD1_CMDCAM1_D3 181 182 GNDCAM1_D2 183 184 SD1_CLKCAM1_D1 185 186 SD1_D0CAM1_D0 187 188 SD1_D1GND 189 190 SD1_CD#CAM1_PCLK 191 192 GNDCAM1_MCLK 193 194 DAP1_MCLKCAM1_VSYNC 195 196 DAP1_D_OUTCAM1_HSYNC 197 198 DAP1_RESET#GND 199 200 DAP1_BIT_CLKI2C3_SDA 201 202 DAP1_D_INI2C3_SCL 203 204 DAP1_SYNCI2C2_SDA 205 206 GNDI2C2_SCL 207 208 VGA1_RI2C1_SDA 209 210 VGA1_GI2C1_SCL 211 212 VGA1_BGND 213 214 VGA1_HSYNCSPDIF1_OUT 215 216 VGA1_VSYNCSPDIF1_IN 217 218 GNDGND 219 220 HDMI1_CECSPI1_CLK 221 222 HDMI1_TXD2+SPI1_MISO 223 224 HDMI1_TXD2-SPI1_MOSI 225 226 GNDSDIODigital AudioVGAHDMI<strong>Toradex</strong> AG l Altsagenstrasse 5 l 6048 Horw l Switzerland l +41 41 500 48 00 l www.toradex.com l info@toradex.com Page | 77
<strong>Apalis</strong> <strong>Carrier</strong> <strong>Board</strong> <strong>Design</strong> <strong>Guide</strong>Digital RGBAnalogue andTouchSPI1_CS 227 228 HDMI1_TXD1+SPI2_MISO 229 230 HDMI1_TXD1-SPI2_MOSI 231 232 HDMI1_HPDSPI2_CS 233 234 HDMI1_TXD0+SPI2_CLK 235 236 HDMI1_TXD0-GND 237 238 GNDBKL1_PWM 239 240 HDMI1_TXC+GND 241 242 HDMI1_TXC-LCD1_PCLK 243 244 GNDLCD1_VSYNC 245 246 LVDS1_A_CLK-LCD1_HSYNC 247 248 LVDS1_A_CLK+LCD1_DE 249 250 GNDLCD1_R0 251 252 LVDS1_A_TX0-LCD1_R1 253 254 LVDS1_A_TX0+LCD1_R2 255 256 GNDLCD1_R3 257 258 LVDS1_A_TX1-LCD1_R4 259 260 LVDS1_A_TX1+LCD1_R5 261 262 USBO1_OC#LCD1_R6 263 264 LVDS1_A_TX2-LCD1_R7 265 266 LVDS1_A_TX2+GND 267 268 GNDLCD1_G0 269 270 LVDS1_A_TX3-LCD1_G1 271 272 LVDS1_A_TX3+LCD1_G2 273 274 USBO1_ENLCD1_G3 275 276 LVDS1_B_CLK-LCD1_G4 277 278 LVDS1_B_CLK+LCD1_G5 279 280 GNDLCD1_G6 281 282 LVDS1_B_TX0-LCD1_G7 283 284 LVDS1_B_TX0+GND 285 286 BKL1_ONLCD1_B0 287 288 LVDS1_B_TX1-LCD1_B1 289 290 LVDS1_B_TX1+LCD1_B2 291 292 GNDLCD1_B3 293 294 LVDS1_B_TX2-LCD1_B4 295 296 LVDS1_B_TX2+LCD1_B5 297 298 GNDLCD1_B6 299 300 LVDS1_B_TX3-LCD1_B7 301 302 LVDS1_B_TX3+AGND 303 304 AGNDAN1_ADC0 305 306 AAP1_MICINAN1_ADC1 307 308 AGNDAN1_ADC2 309 310 AAP1_LIN_LAN1_TSWIP_ADC3 311 312 AAP1_LIN_RAGND 313 314 AVCCAN1_TSPX 315 316 AAP1_HP_LAN1_TSMX 317 318 AAP1_HP_RAN1_TSPY 319 320 AVCCAN1_TSMY 321Table 42: Physical pin definition and locationDual ChannelLVDSAnalogue Audio<strong>Toradex</strong> AG l Altsagenstrasse 5 l 6048 Horw l Switzerland l +41 41 500 48 00 l www.toradex.com l info@toradex.com Page | 78
<strong>Apalis</strong> <strong>Carrier</strong> <strong>Board</strong> <strong>Design</strong> <strong>Guide</strong>DISCLAIMER:Copyright © <strong>Toradex</strong> AG. All rights reserved. All data is for information purposes only and notguaranteed for legal purposes. Information has been carefully checked and is believed to beaccurate; however, no responsibility is assumed for inaccuracies.Brand and product names are trademarks or registered trademarks of their respective owners.Specifications are subject to change without notice.<strong>Toradex</strong> AG l Altsagenstrasse 5 l 6048 Horw l Switzerland l +41 41 500 48 00 l www.toradex.com l info@toradex.com Page | 79