Mizu VoIP Server Tutorial
Mizu VoIP Server Tutorial
Mizu VoIP Server Tutorial
Create successful ePaper yourself
Turn your PDF publications into a flip-book with our unique Google optimized e-Paper software.
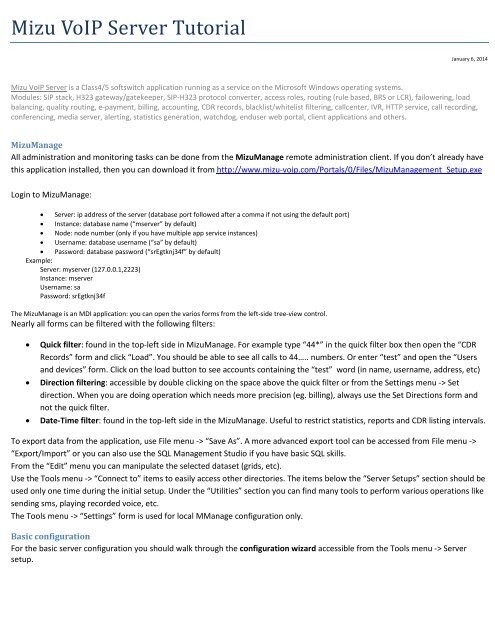
<strong>Mizu</strong> <strong>VoIP</strong> <strong>Server</strong> <strong>Tutorial</strong><br />
January 6, 2014<br />
<strong>Mizu</strong> <strong>VoIP</strong> <strong>Server</strong> is a Class4/5 softswitch application running as a service on the Microsoft Windows operating systems.<br />
Modules: SIP stack, H323 gateway/gatekeeper, SIP-H323 protocol converter, access roles, routing (rule based, BRS or LCR), failowering, load<br />
balancing, quality routing, e-payment, billing, accounting, CDR records, blacklist/whitelist filtering, callcenter, IVR, HTTP service, call recording,<br />
conferencing, media server, alerting, statistics generation, watchdog, enduser web portal, client applications and others.<br />
<strong>Mizu</strong>Manage<br />
All administration and monitoring tasks can be done from the <strong>Mizu</strong>Manage remote administration client. If you don’t already have<br />
this application installed, then you can download it from http://www.mizu-voip.com/Portals/0/Files/<strong>Mizu</strong>Management_Setup.exe<br />
Login to <strong>Mizu</strong>Manage:<br />
• <strong>Server</strong>: ip address of the server (database port followed after a comma if not using the default port)<br />
• Instance: database name (“mserver” by default)<br />
• Node: node number (only if you have multiple app service instances)<br />
• Username: database username (“sa” by default)<br />
• Password: database password (“srEgtknj34f” by default)<br />
Example:<br />
<strong>Server</strong>: myserver (127.0.0.1,2223)<br />
Instance: mserver<br />
Username: sa<br />
Password: srEgtknj34f<br />
The <strong>Mizu</strong>Manage is an MDI application: you can open the varios forms from the left-side tree-view control.<br />
Nearly all forms can be filtered with the following filters:<br />
• Quick filter: found in the top-left side in <strong>Mizu</strong>Manage. For example type “44*” in the quick filter box then open the “CDR<br />
Records” form and click “Load”. You should be able to see all calls to 44….. numbers. Or enter “test” and open the “Users<br />
and devices” form. Click on the load button to see accounts containing the “test” word (in name, username, address, etc)<br />
• Direction filtering: accessible by double clicking on the space above the quick filter or from the Settings menu -> Set<br />
direction. When you are doing operation which needs more precision (eg. billing), always use the Set Directions form and<br />
not the quick filter.<br />
• Date-Time filter: found in the top-left side in the <strong>Mizu</strong>Manage. Useful to restrict statistics, reports and CDR listing intervals.<br />
To export data from the application, use File menu -> “Save As”. A more advanced export tool can be accessed from File menu -><br />
“Export/Import” or you can also use the SQL Management Studio if you have basic SQL skills.<br />
From the “Edit” menu you can manipulate the selected dataset (grids, etc).<br />
Use the Tools menu -> “Connect to” items to easily access other directories. The items below the “<strong>Server</strong> Setups” section should be<br />
used only one time during the initial setup. Under the “Utilities” section you can find many tools to perform various operations like<br />
sending sms, playing recorded voice, etc.<br />
The Tools menu -> “Settings” form is used for local MManage configuration only.<br />
Basic configuration<br />
For the basic server configuration you should walk through the configuration wizard accessible from the Tools menu -> <strong>Server</strong><br />
setup.
Don’t change any setting that you don’t fully understand, just click on the<br />
“Next” button in this case. Most of the settings are self-explanatory with a short description near.<br />
Take special attention for the IP and bind IP settings if your server has multiple IP’s assigned.<br />
After you have finished with the configuration wizard you might have to continue with the following tasks:<br />
- add your outbound routes and traffic senders: Access -> Users and devices -> Sip Proxy and Traffic Senders<br />
- add your outbound routes and traffic senders: Access -> Users and devices -> Sip Proxy and Traffic Senders, Routing<br />
- add users: Access -> Users and devices -> Power User, Enduser<br />
- fine-tune other settings: billing, blacklists, etc.<br />
For more advanced options you will have to change global config options manually on the “Configurations” form. (Under “Other”).<br />
If you are not sure where to find a specific configuration option, search for your keyword in the “Configurations” form and also in<br />
the admin guide.<br />
Listing users<br />
Users can represent real people, devices or virtual endpoints.<br />
Open the “Users and Devices” form (below the “Access” section) and click on the “Load” button.<br />
You can apply various filtering using the user “Type” checkbox-list, the dropdown-list on the top of the form or the already<br />
discussed direction filter or quick filter.<br />
For example to list all outbound routes whose username or name contains the “carrier” word, select the “SIP <strong>Server</strong>” and type<br />
“carrier” in the quick filter.<br />
Creating users<br />
The best way to create new users is to clone an existing working account with the same user type.<br />
For this, launch the “Users and Devices” form, select a user type, and click on the “Load” button. Then select any user entry and<br />
click on the “New User” button. You will be asked if you would like to create a new default user record or just clone the currently<br />
selected user. Usually you will select clone and just change the username, password, ip and authorization type for the new user.<br />
Endusers are the most commonly used type (retail customers/company employees). Usually you will select “Username/password”<br />
authorization for this type of users and enter a valid username and password. The username can be also used as a real phone<br />
number; will be used also as the caller-id if not specified otherwise. Endusers can make voice or video calls between them usually<br />
for free of charge. IM and presence is also enabled by default. By default the server will route the RTP if needed (if users are behind<br />
NAT) or allow it to bypass your server saving your bandwidth. Sub-Endusers can represent <strong>VoIP</strong> devices, extension, child accounts<br />
or callshop cabins. Calls from sub-endusers account are billed for the parent Enduser.<br />
Traffic sender users are used for receiving traffic from other SIP servers and carriers. The authorization type is usually set to “Auth<br />
ip must match” and you have to enter a correct “Auth Ip” (IP address based authentication). If you don’t have special requirements,<br />
the only thing that you have to communicate to your peers to be able to send calls to your server is only your IP address. (Your<br />
server needs a public IP for this or you have to setup proper port forwarding).<br />
For outbound traffic you need one (or more) SIP <strong>Server</strong> user. The most important parameter here is the “IP” where the <strong>VoIP</strong> calls<br />
will be sent. Then you will have configure these also on the Routing form. To be able to send and receive traffic to/from another SIP<br />
server or carrier you will have to add it as both a “traffic sender” and “sip server” user.<br />
To import endusers from other data sources, use the Tools menu -> Add or import users.<br />
You can also generate users in bulk from the “Generate calling cards or users” menu item.<br />
Add DID numbers or extensions [optional]<br />
Unless in other traditional softswitch in the <strong>Mizu</strong><strong>VoIP</strong> server you can just add a new user with the “username” and “password”<br />
settings to be reachable for incoming calls also. Then the “username” field (which can be a phone number) will act as a SIP<br />
username for authentication but also as an extension number or a DID number. You can also use the same username/password to<br />
login on the enduser web-portal and in any other operations requiring authentication.<br />
If one user has multiple DID number assigned, then you can add then using the “…” button near the “Other numbers” edit box<br />
(Users and devices form, Edit tab). If more user have to share the same DID number, then simply add it to the required users as<br />
“other number” with type 0. The call will be routed to the “best” device (based on the user status whether it is registered or in-call).
Setup outbound routing<br />
This is needed if you would like to route the calls from the users to another servers or carriers (for example calls to mobile and<br />
landline numbers)<br />
For outgoing calls it is not enough to add a “SIP server” user from the “Users and devices” form. Add it with any meaningful<br />
username and make sure to set the IP field correctly on the Edit tab. (This field can also contain a domain name instead of IP<br />
address). Some carriers require the usage of a techprefix which can be entered in the “Tech Prefix” field. Others settings are rarely<br />
used.<br />
You must also add this server(s) in your routing.<br />
Open the “Routing” form. In the left side you have to define your pattern which will restrict the condition when the actual route<br />
entries can be used. If all fields are empty and the time definition is set to “All times” then all patterns will match. You can make<br />
restriction if you make specification here (caller, called prefix, time restriction, etc) . Make sure that you increase the priority for the<br />
pattern (to be higher than the your “general” pattern where you have not made any restrictions)<br />
On the right side you will have to add one or more sip proxy user. If you set more than one route with equal priority, then you have<br />
load balancing, LCR or BRS (depending on the “brs_lcr” global config option); otherwise the traffic will be routed after the<br />
prioritizations (will flow to the lower priority servers only if you have reached the maximum port limitations or because automatic<br />
failowering). For more details please read the routing guide.<br />
Register to your outbound server [optional]<br />
Usually for a B2B usage, uppers servers (your carrier or <strong>VoIP</strong> service provider) will setup IP based authentication. This is the<br />
favorized method for a high amount of calls. If your outbound server (where you are sending traffic and receive incoming calls)<br />
needs username/password based digest authentication instead of IP based authentication, you can set it from the “SIP server” user<br />
configuration. Create a SIP server user, then switch to the “Edit” page. On the bottom of the page you can find a grid named “Proxy<br />
authentication”. Here you can add the login details (multiple username/passwords can be used for your convenience). Then select<br />
“Username/password must match” from the “Authorization” drop-down list.<br />
These are the basic and most commonly used authentication settings. There are many other combinations, for example you can forward the<br />
username/password as received from your users. For more details please consult the Admin Guide.<br />
Setup inbound routing [optional]<br />
This is needed if you would like to route the calls from the users to another servers or carriers (for example calls to mobile and<br />
landline numbers).<br />
If you would like to accept traffic from other servers (for example you are doing a wholesale business), then you must create a<br />
“Traffic sender” user. Usually you can use IP based authentication. For this, add the peer IP to the “Auth IP” field.<br />
For each incoming calls, the server will first check if the called party is a local user. If not, than the call are routed regarding the<br />
rules which is set by the “Routing” form.<br />
Actually you could also use “Enduser” users for the same thing, but for a bigger traffic volume it is always to differentiate normal<br />
endusers from “traffic sender” so your statistics will be easier to understood.<br />
First test calls<br />
For a test call create 2 enduser accounts with username/password authentication.<br />
Register with two softphones and call from the first account to the second account.<br />
Softphone configuration:<br />
• domain: your server IP or domain name (and the server port if your server is not using the standard 5060 UDP port)<br />
• proxy: you can leave it empty<br />
• username: the “username” field from the newly created user (tb_users.username)<br />
• password: the “password” field from the newly created user (tb_users.username)<br />
No any other special settings are required (such as NAT, STUN, etc).<br />
The network setting should be automatically handled by the server. If you don’t hear any voice you might change the RTP routing for the user(s) to<br />
“always route RTP” from <strong>Mizu</strong>Manage -> Users and devices -> Edit tab.
During the call, you can open the “Current calls” form in the <strong>Mizu</strong>Manage to see the details.<br />
After the call you can see the CDR by opening the “CDR records” form in the <strong>Mizu</strong>Manage.<br />
If there are no CDR records, it means that the call has not reached the server (wrong network settings on server or client side)<br />
In case of call failure you can check the disconnect reason from the CDR record or for more details open the last logfile<br />
(“log_xxx.dat” files near the mserver.exe). To find application errors, open the last log file in the server app directory and search for<br />
“ERROR” (you can modify the trace details with the “loglevel” configuration option: from 1 to 5). Important errors can be found also<br />
from <strong>Mizu</strong>Manage -> Logs form.<br />
Setup billing [on commercial servers]<br />
User to user calls are not charged by default (this can be changed with the “internal_endusercost” global configuration option).<br />
All other calls are checked against the user credit and prepaid/postpaid setting which can be set from Users and devices form<br />
(select a user and switch to the “Billing” tab)<br />
From here you can assign a billing packet for the user explicitly but the better way is to setup one or more packets to be valid for all<br />
your users, for a group of users or on special circumstances (caller, called, techprefix, time, etc)<br />
These packets (call rating) can be set on the “Price setup” form (below the “Billing” section)<br />
• On the left column add a billing group with any name (“default” is ok). This is used only to logically group your tariffs but<br />
not used by the server.<br />
• On the middle column specify your conditions. You should have at least one Enduser cost type without any further<br />
restriction on the traffic direction (so it will be applied for all endusers/directions/time)<br />
• On the right column enter or import your pricelist applied in the conditions defined by the middle column.<br />
For a default price enter prefix “*” (this will be applied to all destinations that is not specified explicitly)<br />
Make sure you have set the proper currency (in the global configuration, in the price setup and also for your users)<br />
Read the Billing guide for more details.<br />
The users can recharge their credits with various built-in methods:<br />
• by pin code (recharge cards), calling cards (“Pincodes” form)<br />
• ePayments, credit card payments (via a payment gateway which can be set from the wizard or from the<br />
“Configuration” form)<br />
• http and database API<br />
• credit transfer between users (from/to)<br />
• PayPal (can be set from the “Configuration” form)<br />
• postpaid/invoice (invoices form)<br />
These methods are accessible from:<br />
• enduser web interface<br />
• client applications (built-in the softphone)<br />
• http and database API<br />
• IVR<br />
• sms<br />
• desktop, mobile or web applications<br />
• any third party payment method can be easily added (see the database interface and http interface<br />
documentations)<br />
Monitoring<br />
The <strong>Mizu</strong> server provides endless possibilities for monitoring both real-time and statistics. Some of the most important tasks are<br />
the followings:<br />
List the active sessions: Monitoring -> “Current Calls” form<br />
Call detail record: Monitoring -> CDR Records form<br />
Statistics by users: Monitoring ->Advanced Statistics -> Group By: caller<br />
Statistics by day: Monitoring ->Advanced Statistics -> Group By: day<br />
By using the “Analyze” form you can have a quick overview about the system.
Other more advanced statistics can be generated by using the Advanced Statistics form and using different<br />
fields/options/grouping/directions.<br />
All statistics can be filtered by the “set direction” form or the “quick filer” edit-box and by a time interval selection.<br />
Statistics can be exported as csv or html from File menu -> Save as. For other data formats you can use the Export/Import wizard.<br />
Real time monitoring<br />
Start the MSupervisor application to get notified about errors and malfunctions. (This application should be available in the start<br />
menu if you have installed the <strong>Mizu</strong>Manage)<br />
Automatic reports<br />
The server can send daily reports for administrators or email/sms alerts on malfunctions. For this you have to setup an “Admin”<br />
user with a valid email address. Then set the following fields to 1 (after your needs): “sendemailalert”, “senddailyemal”,<br />
“sendmonthlyemail”, “sendsmsreport”, “sendsmsalert”<br />
The server will be able to send SMS messages only if an SMS provider is configured (see the Admin Guide)<br />
CDR Records<br />
CDR records can be listed by using the “CDR records” form. By default only the most important fields are listed (date-time, connect<br />
time, call duration, etc). You can see more details if you check the “All fields” checkbox.<br />
To quickly list the CDR records that belongs to a user, open the “Users and devices” form. Find the user record, then right-click on it<br />
and select “Set Direction”. Than go back to the CDR record form and click on the “Load/Reload” button.<br />
If you have enabled voice recording for some users, than you can play the recorded audio by filtering for “Recorded Conversation”<br />
(select the desired record and click on the Play button)<br />
Dial plans<br />
You can manipulate number format, SIP headers or the Caller-ID from the following settings:<br />
• Users and devices form: caller-id, username, other numbers (DID match), tech prefix<br />
• Routing form: you can only specify routing direction here without number changes<br />
• Rules form: this is a powerful module which you can use to change almost anything (including caller-id, called number<br />
format and many others)<br />
• Global configuration: a few global configuration options might also affect the dial plan<br />
• Prefix rules and the dial plan form: use the “Rules” form instead when possible.<br />
You can find more details in the AdminGuide below the Routing section.<br />
Call forwarding, voicemail, call recording, missed call notifications [optional]<br />
These settings can be found on the “Users and devices” form by selecting an enduser record then switching to the “Functions” tab.<br />
To listen to a conversation, open the “Current calls” form and right click to a call, then select “voice here”.<br />
To record the calls, go to the “users and devices” -> “functions” tab and tick the “record” checkbox. Then playback the recorded<br />
voices from the “CDR Records” form.<br />
Enduser / reseller / callshop web portals [on commercial servers]<br />
The server has a built-in web interface (enduser control panel) usually listening on port 80 or 8080, accessible as<br />
http://serverdomainorip:port (the port can be changed after your needs). Login with any valid user account. For the customization<br />
options login as an admin user (load or create any admin user from <strong>Mizu</strong>Manage Users and devices form).<br />
This is an optional module which you might deploy only if you are working with retail customers. You can also integrate this with<br />
your existing website (simple way: just put in an iFrame and if users are already logged in on your website, you can automate the<br />
login also to this control panel, so users will not have to type their credentials again; There are several options to customize the<br />
colors to match you design). The control panel will display different content depending on the logged in users and can be also used:<br />
• as a callshop interface<br />
• by your business customers (traffic senders)<br />
• by administrators for basic tasks
Optionally you can rewrite our webportal to match your needs (The portal was written in C++. Request source code from support)<br />
or write your own portal and use the http and/or database API. You will find the documentation here.<br />
If you already have a website, then you can easily integrate it with <strong>VoIP</strong> capabilities using the above mentioned methods.<br />
Reseller<br />
Resellers typically will use the web frontend for all their activity. First you should login on the web interface with as an admin user<br />
(you can create admin user from MManage “Users and devices” form). First edit the portal settings after your needs then create<br />
one or more “top” resellers. Then these resellers can login and create its own sub-resellers after they have created their tariff<br />
list(s).<br />
Callshop<br />
To create a “callshop owner” open the “Users and devices” form in the <strong>Mizu</strong>Manage and create a new Enduser then from the<br />
“Functions” tab tick the “Is Callshop” checkbox. From now the user can login on the web user interface, create its cabins (which are<br />
actually represented as sub-endusers) and monitor it’s cabins activity.<br />
IVR setup [optional]<br />
The IVR module is used for various tasks like access numbers, calling-card operation, customer support etc.<br />
You can assign different IVR’s to different access numbers by using the “Campaigns” form. To create a new campaign, just click on<br />
the + sign and enter a “name” for the new record. The most important configuration for an IVR campaign is the script. Switch to the<br />
“details” tab to select a “Script”.<br />
Scripts can be created by using the “IVR” form. The server is shipped with several preconfigured script examples, but you should<br />
easily add new scripts or modify the existing ones by following the admin guide or the IVR documentation.<br />
Service access numbers [optional]<br />
You can setup your calling card or callback business by using access numbers and assigning them to one of the existing or newly<br />
created IVR’s. You should be able to request DID numbers from your existing <strong>VoIP</strong> carrier or by contacting other companies e.g.<br />
www.didx.net. In this case you will have to add it as a Traffic Sender user usually with IP based authentication (fill the AuthIP box<br />
with the provider IP or domain name)<br />
After you have terminated with the traffic sender configuration, you can add the access numbers like usual endusers. Type the<br />
phone number in the “username” field or you can also use the “SIP number” field for the same reason. Then switch to the<br />
“Functions” tab and set the “Campaign ID” and the “Callback access” (if the DID number will be used as a callback access number);<br />
optionally you can enable A number authentication (PIN less dialing). The campaign id means the ID field from the tb_ccampaigns<br />
table (You can see them by opening the “Campaigns” form).<br />
For more complex authentication and billing options please consult the admin guide.<br />
SMS [optional]<br />
To setup an outbound sms routing, you have to contact a company providing SMS services. (For example Clickatel)<br />
Then open the “Configurations” form and search for “smsurl”. Enter the details in this format:<br />
http://api.clickatell.com/http/sendmsg?api_id=APID&user=USERNAME&password=PASSWORD&to=[tonum]&text=[message]<br />
Pricing is done after the “smsprice” global config options or you can setup detailed pricing by using the “price setup” form.<br />
Users will be able to send sms messages by using a softphone, the webportal or there is a possibility to create an SMS sender<br />
application yourself by using the http or database api.<br />
For incoming SMS applications (SMS callback, balance request, etc) you will have to request a two way SMS service (to get a DID<br />
number)
Webphone, softphone and mobile clients [optional]<br />
<strong>Mizu</strong>tech provides customized <strong>VoIP</strong> clients for web, desktop and mobile as part of the “all in one package” or separately:<br />
• Browser webphone<br />
• Windows softphone<br />
• Android softphone<br />
• iOS softphone<br />
• Symbian dialer<br />
• Third-party<br />
Integration [optional]<br />
The <strong>VoIP</strong> service is based on open protocols so you can integrate it in any environment:<br />
• use any third party SIP or H323 softphone or device (in softphone settings, just type your server domain or IP and a valid<br />
enduser username/password)<br />
• its standard SQL database access and HTTP API can be used to integrate with existing website or software<br />
• export/import any data (such as <strong>VoIP</strong> users) from the SQL Management studio or from <strong>Mizu</strong>Manage Export/Import wizard<br />
Backup<br />
All data is stored in the database, so you have to make sure that you always have a working backup for it. A nightly backup to some<br />
other PC on the LAN is an affordable solution for this (depending on your business requirements).<br />
You can setup scheduled backup or (nearly) real time log shipping from SQL <strong>Server</strong> Management Studio or alternatively the <strong>Mizu</strong><br />
<strong>Server</strong> can schedule your backups (see the detailed documentation).<br />
Optionally you can use a dual server setup. This will increase the performance and in this way, you can always have a hot backup<br />
server in case if the active server fails.<br />
To clone a VOIP server, just backup its database and restore it on your new server. Also install the <strong>VoIP</strong> server software (or copy the<br />
old directory) and make sure that your vserver.ini points to the new database.<br />
The only setting that must be changed is the local IP global config option. For more details check the cloning guide.<br />
If you migrate the application to another server a new license file might be needed from <strong>Mizu</strong>tech.<br />
Common terms<br />
SIP: The Session Initiation Protocol (SIP) the most important signaling protocol used for <strong>VoIP</strong><br />
H323: is an ITU recommended standard which is currently mostly replaced by SIP<br />
RTP: media channel protocol (used for audio/video/fax routing)<br />
SIP Trunk: in-bound or out-bound links. In <strong>Mizu</strong>Manage this can be set as “SIP <strong>Server</strong>” and “Traffic sender” users<br />
Global Configuration: configurations applied to all users stored in tb_settings. Changes can be made from the “Configurations” form<br />
User Configuration: configurations specific to a user. Changes can be made from the “Users and Devices” form<br />
Dial Plan: describe the format of the phone number. In <strong>Mizu</strong>Manage this can be changed by global configuration options, rules, prefix rules and from the “dial<br />
plan” forms.<br />
Callback: DID or toll free number configured as enduser with iscallback set to the required IVR<br />
Click-to-call: a html button placed on websites to request an immediate connection with another person by phone call. Can be implemented using the webphone<br />
ASR: Answer Seizure Ratio. The percent of the connected calls compared to all calls<br />
ACD: Average Call Duration (usually measured in seconds)<br />
IVR: Interactive Voice Recognition (used for calling-card for example)<br />
ANI / CLI: Automatic Number Identification or Caller Line Identification (important on IVR systems for user authentication)<br />
ANI callback: same as callback with User-ID based authorization (A number)<br />
LCR: least cost routing (routing the traffic to the least cost outbound server)<br />
BRS: best route selection (price + quality + other statistics and settings)<br />
Resources<br />
For more details, please consult the Admin Guide and other server related documentations on our website.<br />
For more help, contact serversupport@mizu-voip.com. We offer free install, configuration, training and support services for our<br />
customers.<br />
Copyright © 2008-2014 <strong>Mizu</strong>tech SRL


