I&O Manual - ECCS Control System - Categories On Thermal ...
I&O Manual - ECCS Control System - Categories On Thermal ...
I&O Manual - ECCS Control System - Categories On Thermal ...

Create successful ePaper yourself
Turn your PDF publications into a flip-book with our unique Google optimized e-Paper software.
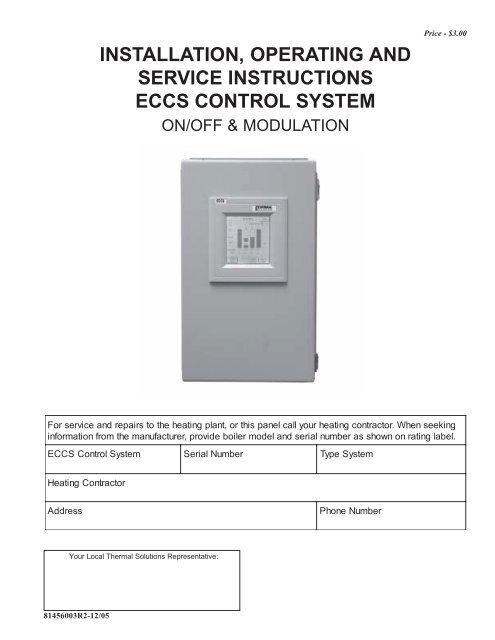
INSTALLATION, OPERATING AND<br />
SERVICE INSTRUCTIONS<br />
<strong>ECCS</strong> CONTROL SYSTEM<br />
ON/OFF & MODULATION<br />
Price - $3.00<br />
For service and repairs to the heating plant, or this panel call your heating contractor. When seeking<br />
information from the manufacturer, provide boiler model and serial number as shown on rating label.<br />
<strong>ECCS</strong> <strong>Control</strong><br />
<strong>System</strong><br />
Serial<br />
Number<br />
Type <strong>System</strong><br />
Heating Contractor<br />
Address<br />
Phone Number<br />
Your Local <strong>Thermal</strong> Solutions Representative:<br />
81456003R2-12/05
IMPORTANT INFORMATION - READ CAREFULLY<br />
NOTE: The equipment shall be installed in accordance with those installation regulations required in the area where the<br />
installation is to be made. These regulations shall be carefully followed in all cases. Authorities having jurisdiction<br />
shall be consulted before installations are made.<br />
All wiring on boilers installed in the USA shall be in accordance with the National Electrical Code and/or local regulations.<br />
All wiring on boilers installed in Canada shall be in accordance with the Canadian Electrical Code and/or local regulations.<br />
The following terms are used throughout this manual to bring attention to the presence of hazards of various risk levels, or to<br />
important information concerning product life.<br />
DANGER<br />
Indicates an imminently hazardous situation<br />
which, if not avoided, will result in death,<br />
serious injury or substantial property<br />
damage.<br />
CAUTION<br />
Indicates a potentially hazardous situation<br />
which, if not avoided, may result in<br />
moderate or minor injury or property<br />
damage.<br />
WARNING<br />
Indicates a potentially hazardous situation<br />
which, if not avoided, could result in death,<br />
serious injury or substantial property<br />
damage.<br />
NOTICE<br />
Indicates special instructions on<br />
installation, operation, or maintenance<br />
which are important but not related to<br />
personal injury hazards.<br />
2
Parameter Limits and Factory Defaults<br />
Initial Setup<br />
Parameter<br />
Range<br />
Factory Setting<br />
Password<br />
Level<br />
Total<br />
Boilers<br />
2 - 6<br />
3 5 25<br />
Boiler<br />
Type, Mod or <strong>On</strong>/Off<br />
1 - 2<br />
1 5 25<br />
Proportional<br />
0 - 25<br />
25<br />
5 25<br />
Integral<br />
0 - 2<br />
1 5 25<br />
Derivative<br />
0 - 1<br />
0 5 25<br />
Start<br />
Trigger (% of firing rate)<br />
50<br />
- 100<br />
90<br />
2 21<br />
Stop<br />
Trigger (% of firing rate)<br />
1 - 50<br />
25<br />
2 21<br />
<strong>On</strong> Point (degrees below setpoint) 1 - 15<br />
5 2 21<br />
Off<br />
Point (degrees above setpoint) 1 - 15<br />
5 2 21<br />
Start<br />
Time Delay (seconds)<br />
90<br />
- 900<br />
120<br />
2 21<br />
Stop<br />
Time Delay (seconds)<br />
0 - 1200<br />
120<br />
2 21<br />
Setpoint<br />
(degrees Fahrenheit)<br />
140<br />
- 230<br />
180<br />
1 20<br />
DHW Priority<br />
140<br />
- 230<br />
180<br />
1 20<br />
Local/Remote<br />
Switch<br />
Local/Remote<br />
Page<br />
Local<br />
0 23<br />
Rotation Time (hrs)<br />
8 - 720<br />
24<br />
2 22<br />
Rotation Enable/Disable<br />
<strong>On</strong>-Of<br />
f<br />
Off<br />
2 22<br />
Customer<br />
Setting<br />
Change Sequence<br />
Lead<br />
Lag<br />
Lag<br />
Lag<br />
Lag<br />
Lag<br />
#1<br />
#2<br />
#3<br />
#4<br />
#5<br />
1 - total blr<br />
1 2 22<br />
1 - total blr<br />
2 2 22<br />
1 - total blr<br />
3 2 22<br />
1 - total blr<br />
4 2 22<br />
1 - total blr<br />
5 2 22<br />
1 - total blr<br />
6 2 22<br />
Change<br />
Sequence Button<br />
2 22<br />
Enter<br />
Lead/Lag Sequence<br />
2 22<br />
Outdoor Reset & WWSD<br />
Low Air Temp<br />
-60<br />
- 50<br />
10<br />
3 23<br />
High Water Temp<br />
150<br />
- 240<br />
180<br />
3 23<br />
High Air Temp<br />
50<br />
- 120<br />
55<br />
3 23<br />
Low Water Temp<br />
140<br />
- 180<br />
140<br />
3 23<br />
WWSD <strong>System</strong> Pumps <strong>On</strong>/Off<br />
0 - 1<br />
0 3 25<br />
WWSD Boilers <strong>On</strong>/Off<br />
0 - 1<br />
0 3 25<br />
WWSD Enable/Disable<br />
Outdoor<br />
Switch<br />
Reset Enable/Dis Switch<br />
<strong>On</strong> - Off<br />
<strong>On</strong> - Off<br />
Off<br />
3 25<br />
Off<br />
2 23<br />
3
Table of Contents<br />
i. Programmable Ranges.................................................... 3<br />
Section 1. Component Description .................................... 5<br />
Section 2. Principles of Operation ..................................... 6<br />
2.1. <strong>System</strong> Description<br />
2.2. Lead Lag<br />
2.3. Unavailable Boilers<br />
2.4. Auto Rotate .................................................. 7<br />
2.5. Outdoor Reset<br />
2.6. Warm Weather Shutdown & Enable/Disable<br />
2.7. Modbus Communication<br />
2.8. Trending<br />
2.9. Local/Remote Operation<br />
2.10 Domestic Hot Water Priority............................. 8<br />
2.11 Alarms<br />
Section 3. Installation.......................................................... 9<br />
3.1.Unpacking ....................................................... 9<br />
3.1.1. Inspection<br />
3.2. Mounting ....................................................... 9<br />
3.2.1. Panel<br />
3.2.2. <strong>System</strong> Water Temp Sensor<br />
3.2.3. Outdoor Air Temp Sensor<br />
Figure 3.1: Panel Mounting Layout .... 10<br />
3.3. Electrical ....................................................... 11<br />
3.3.1. General<br />
3.3.2. Wiring Power Supply to Panel<br />
3.3.3. Wiring Panel to Boilers<br />
3.3.4. Wiring Panel to Sensors<br />
Figure 3.2: Panel Layout ............................ 12<br />
Figure 3.3: <strong>System</strong> Wiring .......................... 13<br />
Figure 3.4: <strong>ECCS</strong> Panel Wiring ................... 14<br />
Figure 3.5: Boiler Wiring Diagram .............. 15<br />
Section 5. Touch Screen Programming .............................. 19<br />
5.1. Screen Description ....................................... 19<br />
5.2. General Guidelines for Using the<br />
Touchscreen ................................................. 19<br />
Figure 5.1 Touch Screen Login .................. 19<br />
Figure 5.2 Main Screen .............................. 20<br />
Figure 5.3 <strong>System</strong> Setup Screen................. 20<br />
Figure 5.4 Lead Lag Trigger Setup Screen . 21<br />
Figure 5.5 Sequence and Rotation Screen . 22<br />
Figure 5.6 Outdoor Reset Setup Screen ..... 23<br />
Figure 5.7 Boiler Parameters Screen ........... 23<br />
Figure 5.8 Alarm History Screen ................ 24<br />
Figure 5.9 Alarm Pop Up Screen ................ 24<br />
Figure 5.10 Warm Weather Shutdown<br />
Screen ....................................... 25<br />
Figure 5.11 Initial Setup Screen ................. 25<br />
Figure 5.12 Trend Screen ........................... 26<br />
Figure 5.13 Trend Screen Zoom <strong>Control</strong> .... 26<br />
Figure 5.14 Time/Date Screen ...................... 27<br />
Section 6. Troubleshooting Guide .................................... 28<br />
Section 7. Appendix ......................................................... 30<br />
7.A. Temperature <strong>Control</strong>ler Operation for<br />
Modulating Boilers (Modbus) ....................... 30<br />
7.1. Description ................................................... 30<br />
7.2. Setup ............................................................ 30<br />
7.3. Modbus Version Used on Boilers<br />
<strong>Control</strong>led by the <strong>ECCS</strong> <strong>System</strong> ..................... 30<br />
Figure 7.1 Process Data ............................. 30<br />
7.4. Adjustments ................................................. 31<br />
7.5. <strong>System</strong> Specifications .................................. 31<br />
Section 4. Setting the Modbus Module Address ............. 16<br />
4.1. Communication Setup for Boilers ................. 16<br />
4.2. Setting the Address of the Honeywell<br />
Modbus Module .......................................... 16<br />
4.3. Setting the Modbus Address of the Fireye<br />
Micro M ........................................................ 16<br />
Figure 4.1: Honeywell S7810M Modubus<br />
Module Mounting ..................................... 17<br />
Figure 4.2: S7810M Address Switches and<br />
Baud Rate Jumper ...................................... 18<br />
4
Section 1: Component Description<br />
COMPONENT DESCRIPTION Part #<br />
1) <strong>ECCS</strong> <strong>Control</strong> Panel– houses the touch screen, PLC, analog input/output card, and terminal strips. ...................... 60156400<br />
Built to UL 508A Standard. Refer to Figure 2, Panel Layout<br />
2) <strong>System</strong> water temperature sensor with Thermowell .................................................................................................. 80160721<br />
RTD Pt 1000<br />
3) Outdoor air temperature sensor ................................................................................................................................. 80160722<br />
RTD Pt. 1000<br />
4) Touch Screen ............................................................................................................................................................. 80160912<br />
5.7” monochromatic<br />
5) PLC 226XM 120Vac in, 24 Vac out ......................................................................................................................... 80160910<br />
24 Inputs<br />
16 Outputs<br />
6) RTD Module ............................................................................................................................................................. 80160917<br />
2 RTD Inputs<br />
7) Analog Input Module ............................................................................................................................................................... 80160911<br />
4 (4-20 ma or 0-10 Vsignal inputs)<br />
1 (output)<br />
8) PLC Memory Cartridge ............................................................................................................................................................. 80160925<br />
9) PLC Battery Cartridge ............................................................................................................................................................... 80160924<br />
Components in the boiler that interface with the <strong>ECCS</strong> panel.<br />
10) Modbus version of the boiler temperature controller ................................................................................................ 80160908<br />
11) Honeywell Modbus Module for the Flamesafeguard. ............................................................................................... 80160909<br />
5
Section 2: Principles of Operation<br />
2.1 SYSTEM DESCRIPTION<br />
The <strong>ECCS</strong> (Electronic <strong>Control</strong>s and Communication<br />
<strong>System</strong>) is a Lead Lag sequencer for modulating and<br />
on/off boilers capable of auto rotation, Outdoor reset,<br />
and communication using a Modbus protocol.<br />
All the control signals between the boiler and the <strong>ECCS</strong><br />
panel are transmitted over a 3 wire shielded cable using<br />
the Modbus protocol. This includes the enable/disable<br />
signal, the modulating signal, and the local/remote<br />
signal.<br />
<strong>System</strong> water temperature is continuously monitored<br />
through the header water temperature sensor. The<br />
system compares this temperature to the setpoint which<br />
is fixed or generated from the outdoor reset curve. If<br />
the system water temperature falls below the adjustable<br />
system ON POINT set on the screen (refer to Figure<br />
5.3) the lead boiler will turn on via a signal from the<br />
<strong>ECCS</strong> system. For a modulating boiler, The PID<br />
control will generate a signal and send it to the boilers<br />
via the MODBUS. If the firing rate goes above the<br />
START TRIGGER Point set on the screen for the<br />
amount of time set in the START DELAY, the first lag<br />
boiler will start. <strong>On</strong>ce the lag boiler starts it will drive<br />
to the same firing rate as the lead boiler. Both boilers<br />
will fire in tandem, at the same firing rate. Additional<br />
lag boilers will start by the same criteria in the order<br />
that set as the LEAD LAG SEQUENCE. Boilers will<br />
be shed in the reverse order of which they came on<br />
(AKA: First <strong>On</strong>, Last Off). As load is shed the boilers<br />
will use the STOP TRIGGER point and the STOP<br />
DELAY parameters set on the screen.<br />
For <strong>On</strong>/Off boilers, additional boilers will be added<br />
when the system water temperature drops below the<br />
system ON POINT for the time set in the boiler START<br />
DELAY. Boilers will be shed in reverse order using<br />
the OFF POINT and STOP DELAY parameters.<br />
The Lead Lag (LL) system will be capable of running a<br />
maximum number of 6 boilers. Parameters in the<br />
temperature controller and flame safeguard are<br />
transmitted via the Modbus connection to the PLC and<br />
Touch screen.<br />
2.2 LEAD LAG<br />
2.2.1. In a Lead Lag (LL) system (refer to Figure 5.4),<br />
one boiler is designated as a lead boiler. The lead<br />
boiler will always be the first boiler to come on and the<br />
last boiler to shut off. The lag boilers will always<br />
come on after the lead in order of their number. The<br />
first lag (lag#1) will always be the second boiler to<br />
come on, the second lag (lag#2) will always be the<br />
third to come on, etc. They will turn off in reverse<br />
order.<br />
6<br />
2.2.2. There is a sequence preprogrammed from the<br />
factory as a default of: Lead = boiler 1, Lag #1 =<br />
boiler 2, Lag #2 = boiler 3, etc., in sequential order.<br />
Sequence can be changed to any order that is<br />
desired. Numbers cannot be duplicated or out of<br />
range.<br />
2.2.3. To change the lead lag sequence go to the<br />
SEQUENCE AND ROTATION SCREEN<br />
(Figure 5.5). From the main screen press the system<br />
setup button, then the Enter Lead Lag Sequence<br />
button.<br />
2.2.4. The system will turn on the lead boiler when the<br />
temperature drops below the <strong>System</strong> ON POINT. The<br />
boiler will turn the lead off only if it is the only<br />
boiler running and the temperature is above the<br />
<strong>System</strong> OFF POINT.<br />
The <strong>ECCS</strong> system turns on additional boilers when the<br />
firing rate of the lead boiler rises above the START<br />
TRIGGER (See Figure 5.4: Lead Lag Trigger Setup<br />
Screen) point for the length of time in the BOILER<br />
START DELAY box. The START TRIGGER is the<br />
percentage of the firing rate that a modulating boiler<br />
must reach in order to start the delay timer. <strong>On</strong>ce the<br />
delay timer finishes timing, the next boiler in the<br />
sequence will start. If the firing rate drops below the<br />
START TRIGGER before the timer is complete, the<br />
timer will reset.<br />
ON/OFF boilers will sequence in accordance with the<br />
<strong>System</strong> ON and OFF POINTS. See Figure 5.4 under<br />
Setpoint differential.<br />
2.3. UNAVAILABLE BOILERS<br />
2.3.1. If a boiler is unavailable for any one of the<br />
following reasons the LL sequence will remove them<br />
and adjust the sequence until they become available<br />
again. The purpose of this is to save time between<br />
stages if there is an unavailable boiler. If the<br />
desired lead boiler is unavailable, Lag #1 will<br />
become the lead and other boilers will shift<br />
accordingly. The program will rotate based on the<br />
sequence that has been entered onto the screen.<br />
Flame fail – If the boiler has a flame failure the boiler<br />
will be removed from the LL sequence until the unit<br />
has been reset.<br />
Boiler in Local mode – If the Local/Remote switch is<br />
in Local the boiler will be removed from the LL<br />
sequence until the unit has been placed back in<br />
Remote.
2.3.3. When a boiler becomes available again (fault<br />
cleared, switch from local to remote, etc.) the system<br />
will put it back in the sequence. If the desired lead<br />
becomes available it will start immediately and may<br />
shut down the last boiler running in the sequence<br />
depending on how many boilers are required.( EX: In a<br />
3 boiler system, if 2 boilers are running and only 2 are<br />
required when the lead comes back in service it will<br />
shut down the last lag boiler. If 2 are running and 3 are<br />
required it will not shut down the last lag boiler.)<br />
2.4 AUTO ROTATE<br />
When this function is selected by pressing the Auto<br />
Rotate button (refer to Figure 5.5) the sequence will<br />
automatically rotate based on how long the lead boiler<br />
runs. The rotation time will be set by the operator.<br />
After rotation time is reached, the Lead boiler will move<br />
to the end of the sequence and the second boiler will<br />
become the lead.<br />
When the rotation time is reached, the next boiler in the<br />
sequence will start. After the unit is running for a few<br />
minutes the sequence will rotate, dropping out the old<br />
lead boiler. This will insure the same amount of boilers<br />
are running before and after rotation occurs.<br />
If the sequence is changed manually, the rotation timer<br />
will start from the beginning.<br />
2.5 OUTDOOR RESET<br />
The outdoor reset function (refer to Figure 5.6)<br />
generates a setpoint based on a curve programmed on<br />
the screen and the outdoor air temperature. Two points<br />
are entered and a linear curve is generated.<br />
An RTD temperature sensor will send a signal to the<br />
RTD module for the PLC.<br />
If outdoor reset is enabled through a switch on the<br />
screen, the setpoint will be generated by the curve for<br />
outdoor reset programmed on the screen.<br />
2.6 WARM WEATHER SHUTDOWN/ENABLE<br />
DISABLE<br />
The Warm Weather Shutdown (WWSD) (refer to<br />
Figure 5.10) function will shutdown either the boilers,<br />
the system pumps or both depending on the selections<br />
on the WWSD screen. When the outdoor air<br />
temperature goes above the temperature set in the high<br />
outdoor air temperature box on the outdoor reset<br />
screen, shutdown will occur.<br />
The outputs for energizing a relay for controlling the<br />
system pumps, O:0.0 and O:0.1 (Refer to figure 3.5) will<br />
energize when the system goes into a WWSD<br />
condition. This is a fail-safe condition. If power is lost<br />
to the <strong>ECCS</strong> panel the pumps will still operate.<br />
7<br />
<strong>On</strong>ce the OAT>HAT setting, a 60 sec timer starts. If the<br />
condition is still true at the end of the 60 seconds the<br />
WWSD function will energize. If both the boilers and<br />
the pumps are selected to shut down, the boilers will<br />
shut down first and 30 seconds later the system pumps<br />
will shut down. This is done to minimize cycling around<br />
the HAT, which triggers the WWSD function.<br />
The WWSD function (or can be used as an Enable/<br />
Disable signal for all boilers) can also be activated with<br />
an external contact closure between terminals L+ and<br />
I:0.1 (Refer to figure 3.5). Ensure that the WWSD<br />
function is not enabled on the <strong>ECCS</strong> panel. This will<br />
function only when the boilers are in the remote mode<br />
and being controlled by the <strong>ECCS</strong> panel. If the boilers<br />
are in the local mode they will not be shut down<br />
by this function. There will be a 1 minute delay before<br />
shutdown once the contact is closed.<br />
2.7 MODBUS COMMUNICATION<br />
The <strong>ECCS</strong> Panel uses the Modbus protocol to<br />
communicate with all the boilers in the system. The<br />
Flame Safeguard and the temperature controller both<br />
have Modbus communication capability. Information<br />
such as faults, alarms, flame signal, cycles, hours,<br />
setpoint, and on/off points can all be communicated to<br />
the touch screen.<br />
2.8 TRENDING<br />
<strong>System</strong> water temperature and outdoor air temperature<br />
are trended for total of 8 hrs (refer to Figure 5.13). The<br />
standard screen shows one hour of time and that trend<br />
can be zoomed in or out from 7.5 minutes to 8 hours.<br />
Points on trend are recorded every 30 seconds.<br />
2.9 LOCAL/REMOTE OPERATION<br />
A Local/Remote switch is located on the Boiler<br />
Parameter screen on the touch screen (refer to Figure<br />
5.7). Some boilers may have an optional physical<br />
selector switch on the front of the boiler.<br />
The Local/Remote selector switch enables the boilers<br />
to be controlled from either the temperature sensor on<br />
the individual boiler (Local) or controlled from the<br />
<strong>System</strong> water temperature sensor (Remote). If the boiler<br />
is in the remote mode, the display on the individual<br />
boiler temperature control will flash Re F (Remote Firing<br />
Rate) and the remote setpoint. If in the local mode, the<br />
display will show the local setpoint without flashing.<br />
*Fail-safe Operation*<br />
If power is lost to the <strong>ECCS</strong> panel, the boilers will<br />
automatically revert back to the local mode.
2.10 DOMESTIC HOT WATER (DHW) PRIORITY<br />
Domestic hot water priority is accomplished by<br />
providing a contact closure to the <strong>ECCS</strong> panel from a<br />
domestic hot water tank. The <strong>ECCS</strong> panel sends out<br />
24V on terminal L+ and receives voltage back on<br />
terminal I0:0 when DHW priority is called for. When<br />
I0:0 receives a signal the following sequence occurs:<br />
1.) The control compares the DHW setpoint (which is<br />
set on the <strong>System</strong> Setup Screen, See Figure: 5.3.) to the<br />
system generated by Outdoor reset curve or fixed<br />
setpoint. If the DHW setpoint is higher, the DHW<br />
setpoint will become the new setpoint. If the DHW<br />
setpoint is lower than the existing setpoint it will not<br />
change the setpoint.<br />
2.) If the system is in the WWSD mode, the system<br />
will be taken out of the WWSD mode and start<br />
boilers until the system water temperature is brought<br />
up to the DHW setpoint.<br />
NOTICE<br />
The <strong>ECCS</strong> <strong>System</strong> WILL NOT start any<br />
pumps or open valves in the DHW piping.<br />
This must be provided by others.<br />
2.11 ALARMS<br />
a. The ECCs will annunciate and record alarms on the<br />
screen that come from the individual boilers. Any of<br />
the faults from the flamesafeguard are annunciated<br />
through Modbus communication to the <strong>ECCS</strong> panel.<br />
The format for the alarms can be viewed in Fig 5.9.<br />
The alarm will indicate which boiler is in alarm, the<br />
fault code #, and a description of the 7 most common<br />
faults. This includes Main Flame Failure, Main Flame<br />
Ignition Failure, Pilot flame failure, Air flow failure,<br />
lockout interlock, Running interlock and Flame<br />
detected. If it is one of the other 100+ possible<br />
alarms it will just display the fault code for the Flame<br />
safeguard. In addition there are alarms for High water<br />
temperature(above 230F), Low water temperature<br />
(below 120F), and communication failure.<br />
A communication failure occurs when the<br />
communication over the Modbus is interrupted by<br />
either losing power to the boiler or there is a break in<br />
the wiring.<br />
b. The <strong>ECCS</strong> stores 100+ alarms in the history<br />
screen. Every alarm is time and date stamped when it<br />
Occurs, when it was Acknowledged, and when it was<br />
Cleared. See Fig 5.8. The screen does not have any<br />
permanent memory so if the power is turned off to the<br />
panel the alarm history is lost.<br />
c. As long as an alarm is active, there will be a small<br />
box with an exclamation point in it at the bottom of<br />
the screen. This will also have the # of active<br />
alarms at the bottom of the box.<br />
d. External alarm indication – A 24vdc relay(supplied<br />
by others) can be power by the <strong>ECCS</strong> between<br />
terminals O:0.7 and M for an alarm indication. Refer<br />
to Fig 3.4.<br />
2.12 EXTERNAL ENABLE/DISABLE<br />
See 2.6 Warm Weather Shut Down on page 7.<br />
8
Section 3: Installation<br />
3.1 UNPACKING<br />
3.1.1. Inspection<br />
CAUTION<br />
Do not lay panel down on touch screen.<br />
Panel weighs approximately 25 lbs.<br />
Use proper lifting techniques when handling.<br />
a. Inspect the shipment carefully for any signs of<br />
damage. All equipment is carefully manufactured,<br />
inspected and packed before shipment. Our<br />
responsibility ceases upon delivery of the <strong>ECCS</strong><br />
panel to the carrier in good condition. The<br />
consignee must file any claims for damage or<br />
shortage in shipment immediately against the<br />
carrier. <strong>Thermal</strong> Solutions Products, LLC will<br />
allow noclaims for variances or shortages unless<br />
presented within thirty (30) days after receipt of<br />
equipment.<br />
b. The <strong>ECCS</strong> system will include:<br />
(1) Panel with touch screen mounted in front door.<br />
PLC inside with terminal strips and breaker.<br />
(1) <strong>System</strong> water temperature sensor and<br />
thermowell.<br />
(1) Outdoor air temperature sensor.<br />
WARNING<br />
Carefully read all instructions before<br />
installing panel. Failure to follow all<br />
instructions in proper order can cause<br />
personal injury or death.<br />
3.2 MOUNTING<br />
3.2.1. Panel<br />
a. The <strong>ECCS</strong> system must be installed to conform<br />
with the requirements of the local and state<br />
authority having jurisdiction, or in the absence of<br />
such requirements, to the latest release of the<br />
National Electric Code, ANSI/NFPA 70.<br />
b. Provide clearance around panel for wiring conduit<br />
and access to panel.<br />
Allow 26" in front of panel to allow door to be<br />
opened and personnel access to touch screen.<br />
Allow 4” on bottom, top and sides to allow<br />
clearance for conduit.<br />
c. Mount in the vertical position. Door hinges on left<br />
side with touch screen facing out. See Figure 3.1<br />
for physical size and details on mounting holes.<br />
d. Panel is rated for NEMA 12 service. When<br />
attaching conduit, enter from bottom of panel to<br />
prevent water from gravitating down the conduit<br />
into the box.<br />
3.2.2. <strong>System</strong> Water Temperature Sensor<br />
a. Mount the thermowell and sensor in a 3/4"<br />
coupling in the common header downstream of all<br />
boiler connections. Maintain a minimum distance<br />
of 10 pipe diameters for connections. See Figure<br />
3.3 <strong>System</strong> Wiring.<br />
3.2.3. Outdoor Air Temperature Sensor<br />
a. Mount the temperature sensor on an outside wall<br />
out of direct sunlight, preferably a north facing<br />
wall.<br />
b. Do not mount sensor near exhausts of any kind,<br />
this may affect readings.<br />
WARNING<br />
Installation of this panel should be<br />
undertaken only by trained and skilled<br />
personnel from a qualified service agency.<br />
9
Figure 3.1: Panel Mounting Layout<br />
10
3.3.ELECTRICAL<br />
NOTICE<br />
3.3.1. General<br />
DANGER<br />
Always positively assure electrical power<br />
is disconnected before attempting work<br />
on or near electrical components or<br />
systems. Electrical shock will/can cause<br />
death or serious injury.<br />
Never work on or near electrical<br />
components when the possibility of<br />
water contact exists. Electrical shocks<br />
will/can result.<br />
Power may need to be disconnected at<br />
more than one location on one or more<br />
voltage supplies.<br />
Electrical work must be performed by<br />
licensed, skilled and experienced<br />
personnel.<br />
Always follow the electrical diagrams<br />
provided with the <strong>ECCS</strong> system. Consult<br />
manufacturer if problems or questions<br />
arise.<br />
Always positively assure electrical work<br />
is performed correctly according to the<br />
authority having jurisdiction before<br />
connecting the power supply.<br />
a. The <strong>ECCS</strong> system must be installed to conform<br />
with the requirements of the local and state<br />
authority having jurisdiction, or in the absence of<br />
such requirements, to the latest release of the<br />
National Electric Code, ANSI/NFPA 70.<br />
b. Panel is built and labeled to UL508A standards.<br />
c. Refer to the wiring diagram supplied with the<br />
panel, the wiring diagram for the boiler, the<br />
system wiring diagram, and the Panel layout<br />
diagram for wiring information.<br />
d. Do not route the communication cable in conduit<br />
with line voltage circuits.<br />
e. Maximum wire length:<br />
Communication bus, 4000 ft.<br />
Low voltage conductors are not to be routed<br />
with line voltage conductors.<br />
3.3.2. Wiring Power Supply to Panel<br />
a. The <strong>ECCS</strong> panel requires 120Vac brought into<br />
the panel. Connect the 120V leg directly to the 4-<br />
amp breaker on the terminal strip. The Neutral<br />
wire connects to the N terminal. The ground wire<br />
connects to the green/yellow terminal.<br />
b. 120Vac supply to the panel must be protected by<br />
a fused disconnect, maximum 20A (by others).<br />
3.3.3. Wiring Panel to Boilers<br />
a. All the wiring going from the <strong>ECCS</strong> panel to the<br />
boilers is low voltage DC, 24V or less. Use<br />
minimum 22ga., 3 wire shielded cable. Belden<br />
Part# 8771 or equivalent.<br />
b. Modbus Signal - 3 wire, 22ga. shielded cable run<br />
from terminals A, B, C in the panel to terminals A,<br />
B, C in THE CLOSEST BOILER. The wire must<br />
be wired from the closest boiler to the next boiler<br />
and repeated until the last boiler is reached. In<br />
other words this must be a continuous chain (daisy<br />
chain configuration). A 120-ohm resistor must be<br />
added to the last device. (See Figure 3.3 <strong>System</strong><br />
Wiring). The resistor is taped to the inside of the<br />
panel for shipping.<br />
3.3.4. Wiring Panel to Sensors<br />
a. <strong>System</strong> water temperature sensor - Run a 2 wire,<br />
22 ga. shielded cable from terminals a+ and a- in<br />
the <strong>ECCS</strong> panel to the wire leads on the<br />
temperature sensor. Attach shield at panel to<br />
terminal marked shield. See Figure 3.4 <strong>ECCS</strong><br />
Panel Wiring Diagrams.<br />
b. Outdoor air temperature sensor - Run a 2 wire, 22<br />
ga. shielded cable from terminals b+ and b- in the<br />
<strong>ECCS</strong> panel to the wire leads on the outdoor<br />
temperature sensor. Attach shield at panel to<br />
terminal marked shield. See Figure 3.4 <strong>ECCS</strong><br />
Panel Wiring Diagram.<br />
NOTICE<br />
Sensor wiring is susceptible to electrical<br />
interference. Insure the shield on cable is<br />
grounded on one end only.<br />
11
12<br />
Figure 3.2: Panel Layout
13<br />
Figure 3.3: <strong>System</strong> Wiring
Figure 3.4: <strong>ECCS</strong> Panel Wiring Diagram<br />
14
15<br />
Figure 3.5: Boiler Wiring Diagram
Section 4: Setting the Modbus Addresses<br />
4.1 COMMUNICATION SETUP FOR BOILERS<br />
Each Modbus device in each boiler must be addressed to<br />
properly communicate with the <strong>ECCS</strong> system. The<br />
Temperature <strong>Control</strong>ler must be addressed through the<br />
configuration level and the flame safeguard will be<br />
addressed according to the following instructions. Refer to<br />
Appendix A, system wiring, or individual component<br />
manuals.<br />
4.2 SETTING THE ADDRESS OF THE HONEYWELL<br />
MODBUS MODULE<br />
Addressing for the HW Modbus Module correlates to the<br />
Temp <strong>Control</strong>lers Modbus addressing on the same unit.<br />
There are 2 dials on the bottom of the module that need to<br />
be set and a jumper that needs to be removed. Refer to<br />
Figure 4.1: Honeywell S7810M Modbus Module Mounting<br />
and 4.2: S7810M Address Switches and Baud Rate Jumper.<br />
4.3 SETTING THE MODBUS ADDRESS OF THE<br />
FIREYE MICRO M<br />
Addressing for the Fireye correlates to the Temperature<br />
<strong>Control</strong>lers Modbus addressing on the same unit. Refer to<br />
MicroM manual for instructions.<br />
Fireye MicroM<br />
Fireye<br />
Temperature Parameter<br />
<strong>Control</strong>ler Baud Rate @<br />
(C113)<br />
19,200<br />
Unit Address<br />
Boiler<br />
1 0160<br />
11<br />
Boiler<br />
2 0260<br />
12<br />
Boiler<br />
3 0360<br />
13<br />
Boiler<br />
4 0460<br />
14<br />
Boiler<br />
5 0560<br />
15<br />
Boiler<br />
6 0660<br />
16<br />
Honeywell<br />
Temperature<br />
<strong>Control</strong>ler<br />
(C113)<br />
S7810M<br />
Modbus<br />
Module<br />
Baud Rate @<br />
19,200<br />
remove<br />
jumper<br />
10"s<br />
Dial<br />
1"s<br />
Dial<br />
Boiler<br />
1<br />
0160<br />
1 1<br />
Boiler<br />
2<br />
0260<br />
1 2<br />
Boiler<br />
3<br />
0360<br />
1 3<br />
Boiler<br />
4<br />
0460<br />
1 4<br />
Boiler<br />
5<br />
0560<br />
1 5<br />
Boiler<br />
6<br />
0660<br />
1 6<br />
16
Figure 4.1: Honeywell S7810M Modbus TM Module Mounting<br />
17
Note: View from bottom of module<br />
Figure 4.2: S7810M Address Switches and Baud Rate Jumper<br />
18
Section 5: Touch Screen Programming<br />
5.1. SCREEN DESCRIPTION<br />
The touch screen is 116x87mm or (5.7"). The display uses<br />
CCFL(cold cathode Florescence Lamps) back lighting with<br />
320x240 pixels. Resistive/analog touch screen technology.<br />
5.2. GENERAL GUIDLENES FOR USING THE<br />
TOUCH SCREEN<br />
1) Touching the screen with the nail of the finger, an<br />
eraser on a pencil, or a pen cap is more effective<br />
than the skin on the tip of the finger.<br />
2) All inputs will have boxes around the value. A value<br />
without a box around it is for display only and<br />
cannot be changed.<br />
3) When you touch an input box, a keypad will be<br />
displayed for entering the desired value.<br />
4) Some inputs are password protected. If an input<br />
box is pressed and a Login box is displayed asking<br />
for a password, press the area where the password<br />
should be. A keypad will be displayed to enter the<br />
password. (See below.)<br />
5) When the correct password is entered the box<br />
will disapear and the desired value can now be<br />
entered into the input box by pressing it again and<br />
using the keypad that is displayed.<br />
6) Entering the password once will disable the need<br />
to enter it again on that security level and lower<br />
for 5 minutes.<br />
Press this area to<br />
enter password<br />
Figure 5.1: Touch Screen Login<br />
19
B1 = Boiler #1<br />
Bar graph shows<br />
firing rate as % of<br />
modulation<br />
Shows Firing rate<br />
as a numerical %<br />
of modulation.<br />
100% - Highfire<br />
1% - Low fire<br />
0% - Off<br />
Indicates if the boiler<br />
is the lead boiler, has<br />
a fault, or is operating<br />
in manual<br />
Boiler water outlet<br />
temperature<br />
Press button to access alarm history<br />
Figure 5.2: Main Screen<br />
Press input box to enter Setpoint<br />
Press button to enter a<br />
curve for outdoor reset<br />
<strong>On</strong>/off points set by<br />
the differential on<br />
the trigger points<br />
Press button to go to<br />
the trigger points<br />
screen<br />
Domestic Hot Water<br />
Setpoint<br />
Press button to<br />
enter a Lead<br />
Lag sequence<br />
Figure 5.3: <strong>System</strong> Setup Screen<br />
20
SETTING THE TRIGGERS AND THE START /STOP TIME DELAYS FOR THE LEAD LAG SYSTEM<br />
The value entered in this box will be subtracted from the setpoint to create<br />
the boiler <strong>On</strong> point. This <strong>On</strong> point has two separate functions–<br />
1)If the system has ON/OFF boilers, it will use the ON POINT as a trigger<br />
to turn on the next boiler.<br />
2)If the system is using modulating boilers only the lead boiler will use<br />
the on point to turn on.<br />
0% of firing rate =<br />
low fire<br />
100% of firing rate<br />
= high fire<br />
Input box. Firing rate of<br />
the running boiler<br />
which when reached<br />
will start the timer to<br />
start the next boiler in<br />
sequence. The limits of<br />
this value are between<br />
50 and 100.<br />
Input box. Firing<br />
rate of the running<br />
boiler which when<br />
reached will start<br />
the timer to stop the<br />
last boiler in the<br />
sequence. The<br />
limits of this value<br />
are 0 - 50.<br />
Adjustable start time<br />
delay which delays<br />
the starting of the next<br />
boiler in the sequence<br />
once the start trigger<br />
is made. The limits of<br />
this value are 90-900.<br />
Adjustable stop time<br />
delay which delays<br />
the stopping of the last<br />
running boiler in the<br />
sequence once the stop<br />
trigger is made. The<br />
limits of this value are<br />
0-1200.<br />
Figure 5.4: Lead Lag Trigger Setup Screen<br />
The value entered in this<br />
box will be added to the<br />
setpoint to create the<br />
boiler Off point. This<br />
Offpoint has two separate<br />
functions–<br />
1)If the system has<br />
ON/OFF boilers, it<br />
will use the Off point<br />
as a trigger to turn<br />
off the last running<br />
boiler.<br />
2)If the system is using<br />
modulating boilers<br />
only the lead boiler<br />
will use the the Off<br />
point to turn off.<br />
Example, using the values above (Modulating boilers) :<br />
Boiler 1 is on and reaches 90% of firing rate. The firing rate<br />
will have to stay above 90% for 120 sec for the next boiler<br />
in the sequence to start. If it drops below 90% before the 120<br />
second time delay is complete, the timer will reset.<br />
Example (<strong>On</strong>/Off boilers) : Assume a setpoint of 180 °F.<br />
The <strong>On</strong> and Off points are programmed on the screen at 5<br />
and 5. Therefore the boilers will turn on a 175 °F and off at<br />
185 °F. The boilers have a differential of 10°F.<br />
Boiler 1 is on and the temp at the system water temperature<br />
sensor drops below 175 °F for 120 sec., the next boiler in the<br />
sequence will start. If the system water temperature rises to<br />
175 °F before the time is complete, the timer will reset.<br />
21
ENTERING THE LEAD LAG SEQUENCE AND ROTATION TIME<br />
NOTICE<br />
Some boilers may shut down depending<br />
on the new sequence entered.<br />
The input boxes must<br />
be pressed and a<br />
keypad will be displayed<br />
on the screen to enter<br />
a new value.<br />
When the CHANGE SEQUENCE button is pressed,<br />
the input boxes and the sequence enter button will be<br />
displayed.<br />
Press and drag the<br />
AUTO ROTATE<br />
switch to turn on/off<br />
the automatic<br />
rotation of the<br />
sequence.<br />
Press the input box to<br />
set rotation time. Range<br />
is between 8 hours and<br />
720 hours. When in the<br />
auto rotate mode the<br />
sequence will<br />
automatically rotate as<br />
follows:<br />
Before rotation 1 (lead),<br />
2, 3, 4, 5.<br />
After rotation 2 (lead), 3,<br />
4, 5, 1.<br />
Figure 5.5: Sequence and Rotation Screen<br />
22
Outdoor Reset Switch.<br />
Press and drag toggle<br />
switch from OFF to ON.<br />
The setpoint will now<br />
be generated by the<br />
curve entered above.<br />
Entering temperatures in these 4 input<br />
boxes will generate a linear curve in<br />
which a setpoint based on outdoor air<br />
temperature will be generated.<br />
This is the setpoint which<br />
is generated based on the<br />
outdoor air curve entered<br />
and the outdoor air<br />
temperature.<br />
Pressing this button will<br />
go to the screen to set<br />
up the Warm Weather<br />
Shutdown Options.<br />
CAUTION<br />
This system cannot protect the boiler from cold water returning back to the boiler as is the case<br />
when coming out of a warm weather shutdown scenario. In order to protect the boiler from<br />
condensing, a primary/secondary piping arrangement or mixing valve must be installed in the<br />
piping.<br />
Figure 5.6: Outdoor Reset Setup Screen<br />
This is the setpoint of the boiler water at the outlet of<br />
the boiler. When in local the boiler will use this as its<br />
operating setpoint.<br />
The values for Setpoint,<br />
<strong>On</strong> point and Off point are<br />
for display only and come<br />
directly from the boiler<br />
temperature controller via<br />
a Modbus connection.<br />
These values come<br />
directly from the Flame<br />
Safeguard via a Modbus<br />
connection.<br />
Pressing and dragging this<br />
switch with your finger will<br />
change control from local to<br />
remote operation.<br />
Figure 5.7: Boiler Parameters Screen<br />
23
Pressing the Alarm History button<br />
on the main screen will get you to<br />
this screen<br />
Records Date and time the fault<br />
occurs(O), was Acknowledged(A),<br />
and cleared(C).<br />
Buffer can hold<br />
up to 110 fault<br />
messages.<br />
Figure 5.8: Alarm History Screen<br />
THIS BOX WILL AUTOMATICALLY APPEAR OVER ANY SCREEN WHEN A FAULT OCCURS<br />
Boiler # fault occured on<br />
Description<br />
fault<br />
of<br />
Fault code<br />
The Alarm Indicator will stay at the bottom of all<br />
screens until all faults have been cleared. The # at<br />
the bottom of the box indicates how many faults are<br />
active. Pressing this button will bring up a screen<br />
showing all the active alarms.<br />
Pressing the ACK button<br />
Acknowledges the alarm and<br />
makes the box disappear.<br />
Figure 5.9: Alarm Pop-up Screen<br />
24
Figure 5.10: Warm Weather Shutdown Screen<br />
Figure 5.11: Initial Setup Screen<br />
25
Figure 5.12: Trend Screen<br />
This trend will record header temperature and outdoor air temperature for up to 8 hours. Screen normally shows a one hour<br />
snapshot. Using the – and the + keys will zoom out to 8 hours or zoom in to 7.5 minutes (refer to Figure 5.13 Trend Screen Zoom<br />
<strong>Control</strong>). Each time a button is pressed, the graph will double or half (depending on button pressed) the time increment. Data is<br />
recorded every 30 seconds.<br />
Figure 5.13: Trend Screen Zoom <strong>Control</strong><br />
26
Figure 5.14 Time/Date Screen<br />
In order to access the time/date screen, press an invisible button in the<br />
upper right hand corner of the Boiler 1 Parameter Screen (figure 5.7)<br />
27
Section 6: Trouble Shooting Guide<br />
PROBLEM<br />
No boilers running<br />
Temperature<br />
OFF POINT.<br />
POSSIBLE CAUSE<br />
of water higher than the<br />
Boilers in local mode and boiler water<br />
temperature is above OFF POINT.<br />
POSSIBLE REMEDY<br />
Boilers will come on automatically when system<br />
water temperature drops below ON POINT.<br />
Switch to remote or wait for temperature to drop<br />
below ON POINT.<br />
B reaker in <strong>ECCS</strong> Panel in OFF or tripped. Turn on breaker in <strong>ECCS</strong> Panel.<br />
Touch Screen is not lit<br />
Power feeding <strong>ECCS</strong> Panel is OFF or<br />
tripped.<br />
Improper power supply to panel.<br />
Power<br />
to screen is not connected.<br />
Improper power supply to screen.<br />
Turn on breaker feeding <strong>ECCS</strong> Panel.<br />
Check power voltage and correct as needed.<br />
Panel requires 120VAC wired to 4 amp circuit<br />
breaker inside panel.<br />
Check wiring and correct as needed, 24VDC<br />
Screen uses 24VDC from PLC. Check voltage<br />
and correct if needed.<br />
B ad touch screen.<br />
Replace screen.<br />
No data being<br />
displayed on screen<br />
and no communication<br />
error or data on<br />
screen is not updating<br />
Modbus communication wires shorted<br />
together on any temperature controller or<br />
flame safeguard.<br />
Check Modbus wires A & B on all controllers for<br />
location where wires are touching each other<br />
and separate.<br />
P LC not in run mode.<br />
Flip switch on front of PLC to run position.<br />
P ower off to boiler.<br />
Turn power on to boiler.<br />
Alarm "Boiler #<br />
Communication<br />
Failure"<br />
Alarm "Boiler # Main<br />
Flame Failure"<br />
Modbus wiring disconnected on boiler<br />
showing alarm.<br />
Shield on wire not grounded properly.<br />
Baud rate setting on Fireye or Honeywell<br />
controller is wrong.<br />
Incorrect baud rate set on temperature<br />
controller.<br />
Modbus wiring A, B, C is not consistent<br />
throughout boiler devices.<br />
Boiler address not correct on flame<br />
safeguard or temperature controller.<br />
Boiler has faulted on a flame failure while<br />
in run mode.<br />
Connect Modbus wiring (3 wire shielded cable)<br />
to terminals A, B, C on devices.<br />
Shield should be grounded on one end of<br />
daisy chain only (panel end). Shields at wire<br />
junctions should be tied together.<br />
Set baud rate to 19,200.<br />
Configuration parameter check C113. Second<br />
value from right shall be a 6. Adjust as needed.<br />
Insure same wire is daisy chained to all A<br />
terminals, B to B terminals, and C to C<br />
terminals.<br />
Check appendix for correct setting on Modbus<br />
devices. See Section 4.<br />
Check controller manual. Reset flame<br />
safeguard controller.<br />
Alarm "Boiler # Pilot<br />
Flame Failure"<br />
Alarm "Boiler #<br />
Airflow Switch"<br />
B oiler has faulted while lighting pilot. Refer to boiler manual troubleshooting guide.<br />
F an did not energize.<br />
Refer to boiler manual troubleshooting guide.<br />
A ir flow switch set wrong or not working. Adjust or replace switch.<br />
F an running too slow.<br />
Check VFD to determine cause and correct.<br />
28
Section 7: Appendix A – Temperature <strong>Control</strong>ler Operation for Modulating<br />
Boilers (Modbus)<br />
7.1. DESCRIPTION<br />
The microprocessor based temperature<br />
controller is utilized for all modulating<br />
<strong>Thermal</strong> Solutions water boilers. The basic<br />
function of the controller is to modulate the<br />
firing rate of the burner in response to the<br />
boiler heat load. The controller monitors the<br />
boiler water temperature through the use of<br />
a sensor located in the boiler pressure<br />
vessel. The controller compares the boiler<br />
water temperature to the controller’s user<br />
defined operating set-point temperature.<br />
An output signal from the microprocessor<br />
varies the blower speed through the use of a<br />
variable frequency drive (VFD). The gas<br />
valve regulates an appropriate amount of<br />
gas flow for a given air flow or blower<br />
speed. The user may adjust the operating<br />
set-point temperature for a given<br />
application. In addition, the controller has the ability to<br />
change to an alternate set-point through an external signal<br />
for low load conditions (i.e. weekend use, night setback).<br />
Outdoor reset is another standard feature, allowing the<br />
boiler operating temperature to vary based on the outdoor<br />
ambient temperature. The typical result is a higher seasonal<br />
efficiency.<br />
7.2. SET-UP<br />
All of the control parameters have been set at the<br />
factory. There are a few parameters called “Process<br />
Parameters” that must be defined by a qualified<br />
operator. The table below will help serve as a<br />
reference and record when making adjustments.<br />
To alter any of these process parameters follow the<br />
following steps:<br />
• To obtain access into the programming mode<br />
of the controller, briefly press the button<br />
“PGM”.<br />
• You will see “SP1” displayed on the second<br />
line in green LEDs. The previously set<br />
operating temperature will be displayed on the<br />
first line in red LEDs. To increase or decrease<br />
the setpoint 1 value (SP1) use the up and<br />
down arrow keys respectively (st).<br />
• To set the value for “SP2”, briefly press the<br />
“PGM” key and follow the same instructions<br />
above.<br />
• To return to the operating mode press<br />
“EXIT”, otherwise the unit will automatically<br />
return to the operating mode after 30 seconds<br />
of no activity.<br />
To make other adjustments, contact your local<br />
representative or consult the factory.<br />
7.3. MODBUS VERSION USED ON BOILERS CONTROLLED BY THE <strong>ECCS</strong> SYSTEM<br />
The <strong>ECCS</strong> control system communicates with the temperature controller using a Modbus communication system. A three wire<br />
shielded cable is connected in a daisy chain configuration to each temperature controller at the CA,CB,CG terminals. This<br />
controller accepts modulating, enable/disable, and local/remote commands from a remote source. Information such as setpoint,<br />
water temperature, frequency feedback, on/off points, etc can also be transmitted back to the control panel.<br />
Parameter<br />
Display<br />
Value<br />
Range<br />
Factory<br />
Setting<br />
User Setting<br />
Setpoint<br />
1<br />
SP1<br />
125-200<br />
180<br />
Setpoint<br />
2<br />
SP2<br />
125-200<br />
0<br />
Digital Setpoint Shift<br />
(optional)<br />
dSP<br />
125-200<br />
0<br />
Outside Temperature<br />
(optional)<br />
Pre-definition of External<br />
Setpoint (optional)<br />
TA<br />
SP.E<br />
C onsult Factory<br />
—<br />
C onsult Factory<br />
—<br />
Figure 7.1 Process Data<br />
30
Actual Boiler Water<br />
Temperature (red display)<br />
Setpoint value (green display)<br />
Solid–local mode<br />
Flashing Ref–(Remote firing rate)<br />
Burner <strong>On</strong><br />
Call for Heat<br />
Decrease Value<br />
Indicates <strong>Manual</strong><br />
Operation<br />
Limit Comparator<br />
Increase Value<br />
Programming Key<br />
EXIT Key<br />
7.4 ADJUSTMENTS<br />
Often during troubleshooting conditions it may become<br />
necessary to manually adjust the firing rate. Follow the<br />
instructions below to make manual firing rate adjustments.<br />
• Press “EXIT” button and hold for 5 -10<br />
seconds.<br />
• The red light above manual operation (hand)<br />
symbol illuminates.<br />
• Press s button to raise firing rate. Press t<br />
button to lower firing rate.<br />
• 0 = 50% of Maximum firing rate and 100 =<br />
100% of Maximum firing rate<br />
• Press “EXIT” button and hold for 5 –10<br />
seconds to return to automatic firing rate<br />
control.<br />
• Automatic mode has been re-activated once<br />
the red light above the manual operation<br />
symbol goes out.<br />
7.5 SYSTEM SPECIFICATIONS<br />
Input voltage ....................................... 100-240vac 48/63hz<br />
Operating temperature ........................................... 0-120° F<br />
Environmental ........................................ NEMA 4 external,<br />
Internal 95%rh noncondensing<br />
Transducer supply ........................................ 24VDC, 30ma<br />
Analog Input 1 ..................Pt100,Ni100, PT1000, Ni 1000,<br />
... Thermocouple (J, K, T or N),4-20ma and Analog 0-10v<br />
Analog Input 2 ........... 1k pot,4-20ma, 0-1VDC, 0-10 VDC<br />
Analog Input 3 ............................................. Pt1000,Ni1000<br />
Output 1 release to modulate...... 24-240VAC 2Amps max<br />
Output 2 and 3 open/close .......... 24-240VAC 2Amps max<br />
Output 4 programmable ............. 24-240VAC 2Amps max<br />
Output 5 analog output ..... 0-10 VDC (500 ohm load min),<br />
....................................0-20 or 4-20ma (500ohm load max)<br />
Modbus RTU port ... 4800 Baud, 9600 Baud, 19,200 Baud<br />
................................................................ unit Address 1-99<br />
Size ................................... 1/8 din, 130mm mounting depth<br />
Data storage ......................................................... EEPROM<br />
Approvals ...................................................... UL, CSA, CE<br />
31
NOTES
NOTES
THERMAL SOLUTIONS PRODUCTS, LLC.<br />
(“Seller”)<br />
LIMITED WARRANTY<br />
LIMITED WARRANTY<br />
Subject to the terms and conditions herein and except as provided<br />
below with respect to products or parts not manufactured by<br />
<strong>Thermal</strong> Solutions Products, LLC, Seller warrants to the original<br />
owner at the original installation site that products manufactured<br />
by Seller (“Products”) comply, at the time of manufacture, with<br />
recognized hydronics industry regulatory agency standards and<br />
requirements then in effect and will be free from defects in<br />
materials and workmanship for a period of 3 years from date of<br />
shipment (the “Warranty Period”) SPECIAL NOTE: The<br />
warranty of any boiler found to be operating as a “Water Heater”<br />
shall revert back to <strong>Thermal</strong> Solution’s standard water heater<br />
warranty.<br />
For products or parts not manufactured by <strong>Thermal</strong> Solutions,<br />
the warranty obligations of <strong>Thermal</strong> Solutions shall, in all<br />
respects, be limited to one year.<br />
REMEDY<br />
A. The sole remedy for breach of this warranty is expressly<br />
limited to the repair or replacement of any part found to be<br />
defective under conditions of normal use within the<br />
Warranty Period. Labor for removal and/or installation is<br />
not included.<br />
B. Warranty - The owner must notify the original installer of<br />
the Product and Seller (Attention: <strong>Thermal</strong> Solutions<br />
Products, LLC, P.O. Box 3244, Lancaster, PA 17604-<br />
3244), in writing, within the Warranty Period, providing a<br />
detailed description of all claimed defects. Transportation to<br />
a factory or other designated facility for repairs of any<br />
products or items alleged defective shall, in all events, be the<br />
responsibility and at the cost of the owner.<br />
EXCLUSIONS<br />
Seller shall have no liability for and this warranty does not cover:<br />
A. Incidental, special or consequential damages, such as loss of<br />
the use of products, facilities or production, inconvenience,<br />
loss of time or labor expense involved in repairing or<br />
replacing the alleged defective Product.<br />
B. The performance of any Product under conditions varying<br />
materially from those under which such Product is usually<br />
tested under industry standards as of the time of shipment.<br />
C. Any damage to the Product due to abrasion, erosion,<br />
corrosion, deterioration, abnormal temperatures or the<br />
influence of foreign matter or energy.<br />
D. The design or operation of owner’s plant or equipment or of<br />
any facility or system of which any Product may be made a<br />
part.<br />
E. The suitability of any Product for any particular application.<br />
F. Any failure resulting from misuse, modification not<br />
authorized by Seller in writing, improper installation or lack<br />
of or improper maintenance.<br />
G. Equipment furnished by the owner, either mounted or<br />
unmounted, or when contracted for by the owner to be<br />
installed or handled.<br />
H. Leakage or other malfunction caused by:<br />
1. Defective installations in general and specifically, any<br />
installation which is made:<br />
a. in violation of applicable state or local plumbing<br />
housing or building codes,<br />
b. without a certified ASME, pressure relief valve, or<br />
c. contrary to the written instructions furnished with the<br />
unit<br />
2. Adverse local conditions in general and, specifically,<br />
sediment or lime precipitation in the tubes and/or headers<br />
or corrosive elements in the atmosphere.<br />
3. Misuse in general and, specifically, operation and<br />
maintenance contrary to the written instructions<br />
furnished with the unit, disconnection, alteration or<br />
addition of components or apparatus, not approved by<br />
seller, operation with fuels or settings other than those<br />
set forth on the rating plate or accidental or exterior<br />
damage.<br />
I. Production of noise, odors, discoloration or rusty water.<br />
J. Damage to surrounding area or property caused by leakage<br />
or malfunction.<br />
K. Costs associated with the replacement and/or repair of the<br />
unit including: any freight, shipping or delivery charges, any<br />
removal, installation or reinstallation charges, any material<br />
and/or permits required for installation reinstallation or<br />
repair, charges to return the boiler and or components.<br />
Seller’s liability under this warranty shall not in any case exceed<br />
the amount paid for the Product found to be defective.<br />
THIRD-PARTY WARRANTIES<br />
For goods or components not manufactured by Seller, the<br />
warranty obligations of Seller shall, in all respects, conform and<br />
be limited to one year from the date of shipment<br />
SEVERABILITY<br />
To the extent that any provision of this warranty would be void or<br />
prohibited under applicable law, such provisions shall be limited<br />
in effect to the minimum extent necessary to render the remaining<br />
provisions hereof enforceable.<br />
NO OTHER WARRANTIES<br />
Seller makes no implied warranty of merchantability or<br />
fitness for a particular purpose, or other warranties with<br />
respect to any products or services except as expressly set<br />
forth in this limited warranty.