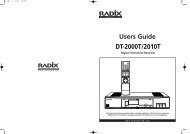
Programming the Receiver - Radix
Programming the Receiver - Radix
Programming the Receiver - Radix

Create successful ePaper yourself
Turn your PDF publications into a flip-book with our unique Google optimized e-Paper software.
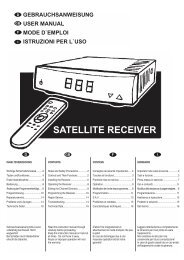
(A) FTA<br />
(B) Slimline FTA<br />
(C) CI (Common Interface)<br />
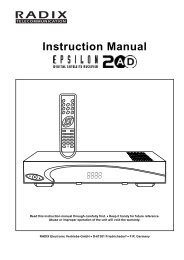
Instructions for Use<br />
DIGITAL SATELLITE RECEIVER<br />
Please read through <strong>the</strong> whole of <strong>the</strong> instructions for use first! • Do not throw it away!<br />
The guarantee expires if <strong>the</strong> device is damaged due to faulty operation!<br />
1 Introduction<br />
You should be able to watch your favourite programmes as quickly as possible, so we have designed <strong>the</strong> menu<br />
to meet all your needs. Please read <strong>the</strong>se instructions thoroughly so that you can use your reciever safely and<br />
confidently and operate all <strong>the</strong> features offered.<br />
We hope you get lots of pleasure from our product.<br />
Impressum:<br />
Instructions for FTA/Common Interface Satellite <strong>Receiver</strong>s<br />
We reserve <strong>the</strong> right to change or modify at any time.<br />
Issued 10/2002, Version 1.0<br />
GB
Contents<br />
2 Contents<br />
Chapter Contents Page<br />
1 Introduction . . . . . . . . . . . . . . . . . . . . . . . . . . . . . . . . . . . . . . . . . . . . . . . . . . . . . .1<br />
2 Contents . . . . . . . . . . . . . . . . . . . . . . . . . . . . . . . . . . . . . . . . . . . . . . . . . . . . . . . .2<br />
3 Important safety information . . . . . . . . . . . . . . . . . . . . . . . . . . . . . . . . . . . . . . .3<br />
4 The device and its functions . . . . . . . . . . . . . . . . . . . . . . . . . . . . . . . . . . . . . . . . .4<br />
4.1 Remote control . . . . . . . . . . . . . . . . . . . . . . . . . . . . . . . . . . . . . . . . . . . . . . . . . . .4<br />
4.2 <strong>Receiver</strong> with link to <strong>the</strong> connected devices . . . . . . . . . . . . . . . . . . . . . . . . . . . . . .5<br />
5 Installing <strong>the</strong> receiver . . . . . . . . . . . . . . . . . . . . . . . . . . . . . . . . . . . . . . . . . . . . . .7<br />
6 Starting <strong>the</strong> receiver . . . . . . . . . . . . . . . . . . . . . . . . . . . . . . . . . . . . . . . . . . . . . . .8<br />
7 Using <strong>the</strong> receiver . . . . . . . . . . . . . . . . . . . . . . . . . . . . . . . . . . . . . . . . . . . . . . . . .9<br />
7.1 Switching on / off . . . . . . . . . . . . . . . . . . . . . . . . . . . . . . . . . . . . . . . . . . . . . . . . . .9<br />
7.2 Channel selection . . . . . . . . . . . . . . . . . . . . . . . . . . . . . . . . . . . . . . . . . . . . . . . . .9<br />
7.3 Volume control / mute . . . . . . . . . . . . . . . . . . . . . . . . . . . . . . . . . . . . . . . . . . . . . .9<br />
7.4 Radio mode . . . . . . . . . . . . . . . . . . . . . . . . . . . . . . . . . . . . . . . . . . . . . . . . . . . .10<br />
7.5 Selecting <strong>the</strong> audio mode (incl. Dolby Digital) . . . . . . . . . . . . . . . . . . . . . . . . . . .10<br />
7.6 Timer function . . . . . . . . . . . . . . . . . . . . . . . . . . . . . . . . . . . . . . . . . . . . . . . . . . .10<br />
8 Channel lists and information . . . . . . . . . . . . . . . . . . . . . . . . . . . . . . . . . . . . . . . .12<br />
8.1 Channel lists and sorting manager . . . . . . . . . . . . . . . . . . . . . . . . . . . . . . . . . . . .12<br />
8.2 Channel guide and channel content information . . . . . . . . . . . . . . . . . . . . . . . . . .13<br />
8.2.1 Detailed information about <strong>the</strong> channel content . . . . . . . . . . . . . . . . . . . . . . . . . .13<br />
8.2.2 Information about <strong>the</strong> current channel content . . . . . . . . . . . . . . . . . . . . . . . . . . .14<br />
9 <strong>Programming</strong> <strong>the</strong> receiver in <strong>the</strong> main menu . . . . . . . . . . . . . . . . . . . . . . . . . . . .14<br />
9.1 General settings . . . . . . . . . . . . . . . . . . . . . . . . . . . . . . . . . . . . . . . . . . . . . . . . .14<br />
9.2 Favorite List Manager . . . . . . . . . . . . . . . . . . . . . . . . . . . . . . . . . . . . . . . . . . . . .15<br />
9.3 Channel manager . . . . . . . . . . . . . . . . . . . . . . . . . . . . . . . . . . . . . . . . . . . . . . . .16<br />
9.3.1 Auto search . . . . . . . . . . . . . . . . . . . . . . . . . . . . . . . . . . . . . . . . . . . . . . . . . . . . .16<br />
9.3.2 Manual search . . . . . . . . . . . . . . . . . . . . . . . . . . . . . . . . . . . . . . . . . . . . . . . . . .17<br />
9.3.3 Transponder editor . . . . . . . . . . . . . . . . . . . . . . . . . . . . . . . . . . . . . . . . . . . . . . .17<br />
9.3.4 Channel data transfer . . . . . . . . . . . . . . . . . . . . . . . . . . . . . . . . . . . . . . . . . . . . .17<br />
9.3.5 Reinstallation . . . . . . . . . . . . . . . . . . . . . . . . . . . . . . . . . . . . . . . . . . . . . . . . . . .17<br />
9.3.6 Delete all Channels . . . . . . . . . . . . . . . . . . . . . . . . . . . . . . . . . . . . . . . . . . . . . . .18<br />
9.4 Parental Lock Manager . . . . . . . . . . . . . . . . . . . . . . . . . . . . . . . . . . . . . . . . . . . .18<br />
9.5 Antenna Positioner . . . . . . . . . . . . . . . . . . . . . . . . . . . . . . . . . . . . . . . . . . . . . . .18<br />
9.6 System information and software update . . . . . . . . . . . . . . . . . . . . . . . . . . . . . . .19<br />
9.7 Common interface (optional) . . . . . . . . . . . . . . . . . . . . . . . . . . . . . . . . . . . . . . . .20<br />
10 Troubleshooting . . . . . . . . . . . . . . . . . . . . . . . . . . . . . . . . . . . . . . . . . . . . . . . . . .21<br />
11 Disposal . . . . . . . . . . . . . . . . . . . . . . . . . . . . . . . . . . . . . . . . . . . . . . . . . . . . . . .21<br />
Technical data . . . . . . . . . . . . . . . . . . . . . . . . . . . . . . . . . . . . . . . . . . . . . .Appendix<br />
Page 2 Version 1.0
3 Important Safety Information<br />
Important Safety Information<br />
This device is solely for receiving satellite programmes and must only be used according to its intended purpose,<br />
as described in <strong>the</strong>se instructions. Please ensure that <strong>the</strong> receiver is kept out of reach of children. The following<br />
additional instructions must also be adhered to in order to protect your health and to safeguard your device<br />
against damage.<br />
WARNING:<br />
Never remove <strong>the</strong> housing or parts of it!<br />
Prevent all moisture and foreign bodies from penetrating <strong>the</strong> device!<br />
CAUTION:<br />
Do not cover up <strong>the</strong> ventilation openings on <strong>the</strong> device, risk of fire from overheating!<br />
CAUTION:<br />
Only use original spare parts or those recommended by your specialist dealer,<br />
o<strong>the</strong>rwise <strong>the</strong>re is a risk of injuries and damage to property! The guarantee expires if<br />
you fail to observe this!<br />
ATTENTION:<br />
Switch off <strong>the</strong> device during thunderstorms and if it is not to be used for a long time!<br />
Remove <strong>the</strong> antenna cable too during thunderstorms!<br />
ATTENTION:<br />
Only ever use a clean cloth, slightly moistened with clean water to clean <strong>the</strong> receiver,<br />
do not use any chemical additives!<br />
Version 1.0 Page 3<br />
GB
The Device and its Functions<br />
4 The device and its functions<br />
4.1 Remote control (2 Versions)<br />
On/Off button<br />
Electronic Program Guide<br />
Menu button<br />
Back<br />
Last channel<br />
Timer button<br />
Audio-Mode (Channel assignment)<br />
Continuous Page (favorite list)<br />
Select button (back)<br />
NOTE:<br />
OK-button<br />
ON/OFF Button<br />
Menu Button<br />
Electronic Program Guide<br />
Exit menu<br />
Mute Button<br />
Select button (back)<br />
OK Button<br />
Timer button<br />
Audio Mode (Channel assignment)<br />
Subtitle button<br />
(No function for FTA)<br />
Radio-button<br />
Mute button<br />
Exit menu<br />
Program information<br />
Subtitle button (No function for FTA)<br />
Volume button<br />
Select button (up)<br />
Select button (continiue)<br />
Select button (down)<br />
Previous Page (Favorite list)<br />
Number buttons<br />
Number buttons<br />
Select button (up)<br />
Ensure that you insert <strong>the</strong> batteries in <strong>the</strong> remote control<br />
with <strong>the</strong> correct polarity (+/-)!<br />
Radio button<br />
Back<br />
Continous Page (favorite list)<br />
Program information<br />
Volume button<br />
Select button (continue)<br />
Select button (down)<br />
Previous Page (favorite list)<br />
No function<br />
on this model<br />
Last channel<br />
Page 4 Version 1.0
<strong>Receiver</strong> with Link to <strong>the</strong> Connected Devices<br />
4.2 <strong>Receiver</strong> with link to <strong>the</strong> connected devices (3 Versions)<br />
(A) FTA<br />
(B) Slimline FTA<br />
Power 4-Digit LED Programme<br />
Number Display<br />
Selector Switch (channel)<br />
Power<br />
Selector Switch<br />
(channel)<br />
4-Digit LED Programme<br />
Number Display<br />
Front of <strong>Receiver</strong><br />
Front of <strong>Receiver</strong><br />
Antenna<br />
Antenna<br />
TV<br />
TV<br />
Scart connection TV<br />
Audio connection<br />
for HiFi system<br />
(analog)<br />
Scart connection TV<br />
Version 1.0 Page 5<br />
VIDEO-connector<br />
F-Type connector<br />
F-Type connector<br />
IF-Input<br />
Antenna cable<br />
(coaxial)<br />
for digital signal<br />
Audio connection<br />
for HiFi system<br />
(digital)<br />
Audio connection<br />
for HiFi system<br />
(analog)<br />
RS 232 for<br />
connection<br />
to PC<br />
IF-Input<br />
Antenna cable<br />
(coaxial)<br />
for digital signal<br />
DIGITAL<br />
AUDIO<br />
WARNING:<br />
WARNUNG:<br />
WARNING:<br />
WARNUNG:<br />
VIDEO<br />
IF INPUT<br />
+13V/+18VDC<br />
400mA MAX.<br />
TV<br />
L<br />
AUDIO<br />
R<br />
95V-264V<br />
50/60Hz MAX35W<br />
RS 232<br />
95V-264V<br />
50/60Hz MAX35W<br />
L<br />
AUDIO<br />
R<br />
CAUTION<br />
CAUTION CAUTION<br />
RS 232<br />
IF OUTPUT<br />
IF INPUT<br />
+13V/+18VDC<br />
400mA MAX.<br />
IF OUTPUT<br />
VCR<br />
DIGITAL AUDIO<br />
TV<br />
VCR<br />
IF Output for<br />
Analog <strong>Receiver</strong><br />
RS 232 for<br />
connection<br />
to PC<br />
IF Output for<br />
Analog <strong>Receiver</strong><br />
F-type connector<br />
F-type connector<br />
Scart connection<br />
Video-Recorder<br />
Scart connection<br />
Video-Recorder<br />
Mains connection<br />
(95 V - 264 V)<br />
Mains connection<br />
(95 V - 264 V)<br />
externer<br />
<strong>Receiver</strong><br />
(analog)<br />
Video<br />
Recorder<br />
Hi-Fi<br />
System<br />
(analog)<br />
Hi-Fi<br />
System<br />
externer Video<br />
Hi-Fi Hi-Fi<br />
<strong>Receiver</strong> Recorder<br />
System System<br />
(analog) (analog) (digital)<br />
(digital)<br />
Rear of <strong>Receiver</strong>, connection to o<strong>the</strong>r devices<br />
Rear of <strong>Receiver</strong>, connection to o<strong>the</strong>r devices<br />
GB
<strong>Receiver</strong> with Link to <strong>the</strong> Connected Devices<br />
(C) CI Common Interface<br />
Front of <strong>Receiver</strong><br />
95V-264V<br />
50/60Hz MAX35W<br />
WARNING: ARNING:<br />
WARNUNG: ARNUNG:<br />
Mains connection<br />
(95 V - 264 V)<br />
Common Interface Slots<br />
for Conditional Access<br />
Module (CAM)<br />
Audio connection<br />
for HiFi system<br />
(analog)<br />
CAUTION CAUTION<br />
Hi-Fi<br />
System<br />
(digital)<br />
Eject button<br />
Power 4-Digit LED Programme<br />
Selector Switch (channel)<br />
Number Display<br />
Audio connection<br />
for HiFi system<br />
(digital)<br />
DIGITAL<br />
AUDIO<br />
L<br />
AUDIO<br />
R<br />
Hi-Fi<br />
System<br />
(analog)<br />
Scart connection TV<br />
Rear of <strong>Receiver</strong>, connection to o<strong>the</strong>r devices<br />
TV<br />
VCR<br />
TV<br />
Scart connection<br />
Video-Recorder<br />
Video<br />
Recorder<br />
Antenna<br />
IF-Input<br />
Antenna cable<br />
(coaxial)<br />
for digital signal<br />
Page 6 Version 1.0<br />
RS 232<br />
RS 232 for<br />
connection<br />
to PC<br />
IF INPUT<br />
+13V/+18VDC<br />
400mA MAX.<br />
IF OUTPUT<br />
externer<br />
<strong>Receiver</strong><br />
(analog)<br />
F-Type connector<br />
IF Output for<br />
Analog <strong>Receiver</strong><br />
F-type connector
5 Installing <strong>the</strong> <strong>Receiver</strong><br />
ATTENTION:<br />
Installing <strong>the</strong> receiver<br />
Never place <strong>the</strong> device close to heat sources or in a place where <strong>the</strong>re is strong radiation<br />
from <strong>the</strong> sun.<br />
Lay all <strong>the</strong> cables so that <strong>the</strong>y cannot be damaged, e.g. on sharp edges.<br />
Only connect <strong>the</strong> device to a mains with 95 V – 264 V~, 50/60 Hz supply.<br />
ATTENTION:<br />
Only connect <strong>the</strong> device to <strong>the</strong> mains after correctly linking it to <strong>the</strong> video recorder,<br />
television and any o<strong>the</strong>r additional receiver (analogue).<br />
• Use a double-shielded coaxial cable for <strong>the</strong> coaxial connection cable from <strong>the</strong> LNB to <strong>the</strong><br />
receiver.<br />
ATTENTION:<br />
When fitting <strong>the</strong> F-connector ensure that no protruding wires from <strong>the</strong> metal braiding come<br />
into contact with <strong>the</strong> inner conductor (see Fig.). There is a risk of a short cut and damage to<br />
<strong>the</strong> receiver on contact!<br />
Wire mesh<br />
Bent Wire<br />
Core<br />
• Tighten <strong>the</strong> lock nut of <strong>the</strong> F-connector by hand. Ensure that <strong>the</strong> lock nut is notover-tightened.<br />
The receiver has already been pre-programmed in <strong>the</strong> factory; this means that you can<br />
receive hundreds of programmes immediately. You can of course alter this programming or<br />
replace it completely. In order to use all <strong>the</strong> benefits of <strong>the</strong> user menu (e.g. channel & programme<br />
information), you must make several adjustments which are described in detail in<br />
<strong>the</strong> following chapters.<br />
Version 1.0 Page 7<br />
GB
Starting <strong>the</strong> <strong>Receiver</strong><br />
6 Starting <strong>the</strong> <strong>Receiver</strong><br />
• Switch on your television and set it to receiver reception (AV or SCART input).<br />
• Press <strong>the</strong> On / Off button on <strong>the</strong> receiver or on <strong>the</strong><br />
remote control.<br />
The receiver display indicates with ON that it is ready<br />
for use. You will see <strong>the</strong> following image on <strong>the</strong> screen:<br />
• Set your language. The orange dialogue field shows<br />
you how to do this and which remote control buttons<br />
you require.<br />
The following display shows you what to do next.<br />
General settings<br />
If you have pressed <strong>the</strong> OK button, you will see <strong>the</strong><br />
“General Settings“ menu. The screen menu shows you<br />
<strong>the</strong> buttons which you can use - and which function <strong>the</strong>y<br />
have.<br />
Example:<br />
“BACK“ – return to <strong>the</strong> previous screen menu.<br />
“Exit“ – return to <strong>the</strong> TV display.<br />
“Menu“ – go to <strong>the</strong> main menu.<br />
• Set your time zone by selecting a country in your time<br />
zone under 1.<br />
• Select “On” under 2 for summer time and “OFF“ for<br />
wintertime.<br />
• Under 3: enter <strong>the</strong> screen format of your television.<br />
• Under 4 select <strong>the</strong> optimal video format for your television.<br />
• Specify <strong>the</strong> required language under 5,6 and 7.<br />
• Set 8 ”DiSEqC 1.2“ ON, if your parabolic antenna has a control motor, which can receive and implement <strong>the</strong><br />
receiver’s control signals (more details under Item 9.5: Antenna Positioner).<br />
ATTENTION:<br />
Welcome !<br />
Select <strong>the</strong> language of your choice [UP/DN]<br />
and press [OK] to confirm selection.<br />
• If DiSEqC is set to 1.2, <strong>the</strong> function of DiSEqC 1.0 (A, B, C, D) is no longer guaranteed<br />
• Subtitle function is only for CI model<br />
• Regarding <strong>the</strong> Video format, <strong>the</strong> slim-line FTA model only supports CVBS format.<br />
Page 8 Version 1.0<br />
D<br />
GB<br />
F<br />
I<br />
E<br />
TR<br />
AR
Using <strong>the</strong> <strong>Receiver</strong><br />
After completing <strong>the</strong>se settings, you can already view <strong>the</strong> broadcaster’s pre-programmed channels. To do this<br />
you must activate <strong>the</strong> factory pre-programming, i.e.:<br />
• Press <strong>the</strong> Exit button, to download <strong>the</strong> channel data. After a short waiting period, you will receive and be able<br />
to see <strong>the</strong> television channels.<br />
If you do not want to use <strong>the</strong> factory pre-programming, you can enter <strong>the</strong> main menu (see Item 9) and enter all<br />
<strong>the</strong> settings yourself by pressing <strong>the</strong> Menu button.<br />
7 Using <strong>the</strong> <strong>Receiver</strong><br />
7.1 Switch On / Off<br />
By pressing <strong>the</strong> ON / OFF button on <strong>the</strong> receiver or on <strong>the</strong> remote control, <strong>the</strong> device switches to Operation<br />
(“ON“ or channel number on display) or Standby (dot on <strong>the</strong> display).<br />
7.2 Channel selection<br />
• Use <strong>the</strong> number buttons to enter <strong>the</strong> number of <strong>the</strong><br />
required channel or select it from a channel list.<br />
NOTE:<br />
The channel number has four digits.<br />
You can also enter from one to three-digit number<br />
(e.g. 1, 13, 203), and press <strong>the</strong> OK button to confirm.<br />
• Press <strong>the</strong> UP or DOWN button, to get to <strong>the</strong> next<br />
highest or next lowest channel.<br />
• Press <strong>the</strong> LAST button, to return to <strong>the</strong> last viewed<br />
channel/programme.<br />
Each time you change <strong>the</strong> channel, <strong>the</strong> screen shows you <strong>the</strong> channel name and number, <strong>the</strong> time and <strong>the</strong> time<br />
at which <strong>the</strong> current and following programmes start. You can call up this information yourself by pressing <strong>the</strong><br />
INFO button.<br />
7.3 Volume control / Mute<br />
• Use <strong>the</strong> volume buttons on <strong>the</strong> remote control to adjust <strong>the</strong> volume.<br />
If you do not make any changes for several seconds, <strong>the</strong> display disappears.<br />
• Press <strong>the</strong> Mute button (see 4.1), to switch off <strong>the</strong> sound:<br />
• Press this button again, to cancel <strong>the</strong> mute setting (switch on sound).<br />
Version 1.0 Page 9<br />
15<br />
GB
Using <strong>the</strong> <strong>Receiver</strong><br />
7.4 Radio mode<br />
In addition to <strong>the</strong> TV channels, many broadcasters also transmit <strong>the</strong>ir radio programmes in digital Hi-Fi quality.<br />
• Press <strong>the</strong> Radio button (see 4.1), to switch from TV mode to radio mode.<br />
• Press <strong>the</strong> Radio button again to switch back from radio mode to TV mode.<br />
7.5 Selecting <strong>the</strong> audio mode (incl. Dolby digital)<br />
• Press <strong>the</strong> AUDIO button. Use <strong>the</strong> > button to select one of <strong>the</strong> languages offered by <strong>the</strong> broadcaster (BL).<br />
• Press <strong>the</strong> UP / DOWN button and set one of <strong>the</strong> following options:<br />
Stereo – sound from left and right<br />
Mono (L) – sound only from <strong>the</strong> left<br />
Mono (R)– sound only from <strong>the</strong> right<br />
AC3 – Dolby Digital<br />
• Press <strong>the</strong> AUDIO button again or <strong>the</strong> EXIT button, to quit this menu.<br />
NOTE:<br />
The real purpose of this function is to transmit various language channels to <strong>the</strong> TV image. However, several<br />
channel operators use this facility to transmit various radio programmes. Limited reception can result from this.<br />
7.6 Timer function<br />
You can use <strong>the</strong> timer function so that your receiver automatically switches on or off or changes <strong>the</strong> channel at<br />
a preset time so that you can record a programme using a connected video recorder. You can also use this<br />
function to automatically change channels if you don’t want to miss <strong>the</strong> start of a programme, but want to watch<br />
ano<strong>the</strong>r channel until <strong>the</strong>n.<br />
The timer function enables you to set up a list with all <strong>the</strong> required timer settings, in which you can set <strong>the</strong> date<br />
and time for <strong>the</strong> receiver to be switched on and off, <strong>the</strong> channel and if necessary <strong>the</strong> daily or weekly repeat of<br />
each switching operation.<br />
If you are currently watching a channel and a timer switching operation is pending, <strong>the</strong> receiver reminds you by<br />
overlaying a message that <strong>the</strong> timer switching operation will take place in one minute. When this time is reached,<br />
<strong>the</strong> receiver switches over to <strong>the</strong> required channel and “Rec“ is displayed on <strong>the</strong> screen. After <strong>the</strong> preset<br />
time has expired, <strong>the</strong> receiver switches back to <strong>the</strong> original channel.<br />
NOTE:<br />
• When you record an AC3 channel, audio mode should be set up to “stereo“ before starting to record.<br />
(Also you will see <strong>the</strong> warning message to change to stereo mode 1 minute before <strong>the</strong> recording begins.)<br />
• If <strong>the</strong> channel is recorded in AC3 mode, <strong>the</strong> audio will not be recorded because <strong>the</strong> audio signal will be<br />
transmitted through to Digital Audio Output only.<br />
Page 10 Version 1.0
Proceed as follows to program <strong>the</strong> timer:<br />
• Press <strong>the</strong> “Timer“ button on <strong>the</strong> remote control.<br />
Using <strong>the</strong> <strong>Receiver</strong><br />
If you have not entered <strong>the</strong> current date or time, you will now be asked to do so. Use <strong>the</strong> number buttons.<br />
Once you have set this information you will see <strong>the</strong> following display:<br />
In this list you can see all <strong>the</strong> timer settings already<br />
entered and can enter new timer settings and delete<br />
existing entries. Under “Type“ you can see whe<strong>the</strong>r a<br />
switching operation is carried out as a one-off, daily or<br />
weekly.<br />
• Press “OK” if you want to enter a new timer setting.<br />
You will <strong>the</strong>n see <strong>the</strong> following display:<br />
In this menu you can enter all <strong>the</strong> settings for <strong>the</strong> timed<br />
switching operation. Then select menu item 8 and confirm<br />
with “OK“ to return to <strong>the</strong> list.<br />
• To delete an entry from <strong>the</strong> list, select it using <strong>the</strong> UP<br />
or DOWN button and <strong>the</strong>n press <strong>the</strong> < or <strong>the</strong> > button.<br />
Then confirm with “OK“.<br />
• Press “Exit“, to return to TV mode.<br />
Version 1.0 Page 11<br />
GB
Channel Lists and Information<br />
8 Channel Lists and Information<br />
8.1 Channel lists and sorting manager<br />
Digital television offers hundreds of channels. Your receiver enables you to select channels using your own personal<br />
channel lists so that you do not lose track and above all can quickly change to <strong>the</strong> channel you want.<br />
The manufacturer has already pre-set several hundred broadcasters, which are listed in <strong>the</strong> “Overall Video List“<br />
and in <strong>the</strong> “Overall Radio List“. Apart from <strong>the</strong> overall lists, you can prepare five “personal lists “ and name <strong>the</strong>m<br />
as you wish. You can easily program <strong>the</strong> “Personal Lists“; <strong>the</strong> instructions are in Chapter 9.2. Proceed as follows<br />
to change form one list to ano<strong>the</strong>r even when a channel is running:<br />
• Press <strong>the</strong> OK button, while you are watching a<br />
channel.<br />
• Press <strong>the</strong> green button (Timer), if you want to change<br />
<strong>the</strong> user list.<br />
One of <strong>the</strong> channel lists is overlaid on <strong>the</strong> screen and <strong>the</strong><br />
current channel is marked. Use <strong>the</strong> UP/ DOWN buttons<br />
or <strong>the</strong> < > buttons to select ano<strong>the</strong>r channel. If you press<br />
<strong>the</strong> OK button, <strong>the</strong> television switches to <strong>the</strong> selected<br />
channel.<br />
Press <strong>the</strong> red button (audio) on <strong>the</strong> remote control, to call<br />
up <strong>the</strong> sorting manager.<br />
You can now sort <strong>the</strong> channels in <strong>the</strong> list using <strong>the</strong><br />
sorting manager as follows:<br />
Alphabetically (A – Z)<br />
Sorts <strong>the</strong> channels in <strong>the</strong> list alphabetically from A to Z.<br />
Alphabetically (Z – A)<br />
Sorts <strong>the</strong> channels in <strong>the</strong> list alphabetically from Z to A.<br />
FTA / Scrambled Program<br />
Sorts <strong>the</strong> channels in <strong>the</strong> list according to free and<br />
scramble channels (FTA = Free-to-air).<br />
Satellite<br />
Sorts <strong>the</strong> channels in <strong>the</strong> list according to satellite. You can select four satellites (e.g. Satellite 1: Astra, Satellite<br />
2: Hotbird ...). After sorting, all <strong>the</strong> Astra channels are at <strong>the</strong> beginning of <strong>the</strong> list, followed by all <strong>the</strong> Hotbird<br />
channels, etc.).<br />
Service Providers<br />
Sorts <strong>the</strong> channels in <strong>the</strong> list according to service provider. You can select four providers (c.f. “Satellite“ ).<br />
Page 12 Version 1.0
Theme<br />
Channel Lists and Information<br />
Sorts <strong>the</strong> channels in <strong>the</strong> list according to channel content (topics). You can choose four <strong>the</strong>me (c.f. “Satellite“),<br />
to which you can assign <strong>the</strong> following topics:<br />
· Movie / Drama<br />
· News / Current affair<br />
· Show / Game Show<br />
· Sports<br />
· Children’s / Youth<br />
· Music / Ballet / Dance<br />
· Arts / Culture<br />
· Soc. / Pol. / Econ.<br />
· Education / Science<br />
· Leisure / Hobbies<br />
· Special<br />
• Press <strong>the</strong> INFO button, while you are viewing <strong>the</strong> channel and channel list.<br />
In addition, technical information about <strong>the</strong> selected channel is now displayed and <strong>the</strong> television display changes<br />
to mini display mode.<br />
Press <strong>the</strong> EPG button, to display detailed channel information about <strong>the</strong> current channel instead of <strong>the</strong> technical<br />
information.<br />
• Press <strong>the</strong> INFO button again to return to <strong>the</strong> channel list.<br />
8.2 Channel guide and channel content information<br />
NOTE:<br />
Not all <strong>the</strong> TV broadcaster transmit <strong>the</strong> channel &/or programme content information!<br />
8.2.1 Detailed information about <strong>the</strong> channel content<br />
• Press <strong>the</strong> EPG button, while you are watching a channel (EPG = Electronic Programme Guide).<br />
The channel guide now shows <strong>the</strong> channel in mini image mode on <strong>the</strong> television.<br />
Next to this you will see a list with all today’s programmes just like in a television magazine.<br />
• Use UP / DOWN to select <strong>the</strong> programme for which<br />
you would like to read <strong>the</strong> detailed programme<br />
information.<br />
• Press <strong>the</strong> INFO button, to display detailed programme<br />
channel information.<br />
• Press <strong>the</strong> > button, if you want to view <strong>the</strong> list of<br />
programmes on <strong>the</strong> next or following days.<br />
Version 1.0 Page 13<br />
GB
<strong>Programming</strong> <strong>the</strong> <strong>Receiver</strong><br />
8.2.2 Information about <strong>the</strong> current channel content<br />
• Press <strong>the</strong> INFO button, while you are watching a<br />
programme.<br />
Your screen displays your channel name and number,<br />
<strong>the</strong> time and <strong>the</strong> current and following programme with<br />
<strong>the</strong> starting time (as shown in <strong>the</strong> Figure under 7.2).<br />
• Press <strong>the</strong> INFO button again to display detailed<br />
information about <strong>the</strong> current programme.<br />
• Now press <strong>the</strong> > button, to receive this information for<br />
<strong>the</strong> programme which follows.<br />
• Press <strong>the</strong> INFO or EXIT button to quit this menu.<br />
9 <strong>Programming</strong> <strong>the</strong> <strong>Receiver</strong>s in <strong>the</strong> Main Menu<br />
In order to receive additional or o<strong>the</strong>r channels than<br />
those of <strong>the</strong> pre-programmed broadcasters, you can<br />
install <strong>the</strong> broadcasters yourself. In addition, you can<br />
also use a large number of service functions, from<br />
antenna positioning to programme lists through to<br />
access authorisation.<br />
9.1 General settings<br />
You already used this menu item when starting up <strong>the</strong><br />
receiver (Chapter 5). Of course, you can change <strong>the</strong> settings<br />
at any time to e.g. adjust to a new device location.<br />
NOTE:<br />
When changing from summer to wintertime and vice verso, you must enter <strong>the</strong> change under menu item 1.<br />
Page 14 Version 1.0
9.2 Favorite List Manager<br />
It is necessary to programme a “Personal list“, in order<br />
to be able to use all receiver’s service functions offered.<br />
5 lists are already installed under <strong>the</strong> names List A to<br />
List E.<br />
Enter a name under “1. Edit List Name“. Name it according<br />
to content, for example “News“ or “Sport“, or according<br />
to <strong>the</strong> user <strong>the</strong> list – your imagination is set no limits.<br />
Menu item 1 allows you to change <strong>the</strong> name chosen at<br />
any time.<br />
Use “2. Add / Remove channels“ to build up your lists.<br />
• Use UP/DOWN to move <strong>the</strong> required channel in <strong>the</strong><br />
overall video list (right-hand side) and confirm your<br />
selection with “OK“.<br />
The channels have been copied into your personal list.<br />
Here it has <strong>the</strong> current list number (four digits).<br />
In order to include a radio broadcaster in your personal<br />
list you have to first change form <strong>the</strong> “Overall Video List“<br />
to <strong>the</strong> “Overall Radio List“ using <strong>the</strong> Radio button. The<br />
rest of <strong>the</strong> steps are identical to those above.<br />
If you want to delete a channel from your list:<br />
<strong>Programming</strong> <strong>the</strong> <strong>Receiver</strong><br />
• Use <strong>the</strong> Timer button to enter <strong>the</strong> personal list and <strong>the</strong>n use <strong>the</strong> UP/DOWN buttons to move to <strong>the</strong> required<br />
channel. Confirm <strong>the</strong> deletion of this channel with “OK“.<br />
If a broadcaster’s name is not as you wish, you can change it as often as you want under <strong>the</strong> menu item 3.<br />
If you want to change broadcaster’s position within <strong>the</strong> list to that of your television magazine, you can do this<br />
using <strong>the</strong> menu item 4. To do this, mark a broadcaster, shift it to <strong>the</strong> new position and confirm with “OK“.<br />
In order to create space in <strong>the</strong> overall list to search for new broadcasters, individual broadcasters which are not<br />
needed can be moved from <strong>the</strong> overall list into <strong>the</strong> “Recyled“. Use “5. Remove channels of Total list “.<br />
Version 1.0 Page 15<br />
GB
<strong>Programming</strong> <strong>the</strong> <strong>Receiver</strong><br />
9.3 Channel manager<br />
You can use <strong>the</strong> channel manager to load new broadcasters<br />
into your receiver’s memory.<br />
To make <strong>the</strong>se adjustments you require data which you<br />
can obtain from your specialist dealer for example or from<br />
trade magazines.<br />
DiSEqC Control and 22 kHz switching signal<br />
DiSEqC-Settings:<br />
Polarisation:<br />
Vertical/Horizontal<br />
LNB-Band: 9,75/10,6 GHz<br />
DiSEqC Sound:<br />
OPTION:<br />
If you do now have DiSEqC controlled satellite equipment, <strong>the</strong> “upper / lower band“ must be entered manually.<br />
Do this by switching “22 kHz“ on or off.<br />
9.3.1 Auto search<br />
1 2 3 4 5 6 7 8 9 10 11 12 13 14 15 16<br />
SAT A SAT B SAT C SAT D<br />
14 V 14 V 18 V 18 V 14 V 14 V 18 V 18 V 14 V 14 V 18 V 18 V 14 V 14 V 18V 18 V<br />
9,75 10,6 9,75 10,6 9,75 10,6 9,75 10,6 9,75 10,6 9,75 10,6 9,75 10,6 9,75 10,6<br />
A A A A B B B B A A A A B B B B<br />
1 1 1 1 1 1 1 1 2 2 2 2 2 2 2 2<br />
Quite a lot of data is already pre-programmed for <strong>the</strong> automatic<br />
search. Standard satellite equipment uses so-called universal<br />
LNBs with a local oscillator frequency of 9750 MHz for<br />
<strong>the</strong> lower band and 10600 MHz for <strong>the</strong> upper band. The<br />
receiver’s basic settings contain this data, as well as <strong>the</strong><br />
ASTRA and HOTBIRD satellites. You only have to adjust this<br />
data in <strong>the</strong> menu if your satellite equipment deviates from this<br />
or you want to enter o<strong>the</strong>r settings.<br />
During <strong>the</strong> search you will see a bar on which you can follow<br />
<strong>the</strong> search through <strong>the</strong> frequency. The o<strong>the</strong>r information<br />
shown has <strong>the</strong> following meaning:<br />
DF: Satellite frequency<br />
SR: Symbol rate<br />
.../...: Number of transponders found / possible<br />
New: number of stored channels.<br />
If <strong>the</strong> search fails, check and correct all <strong>the</strong> settings one after<br />
<strong>the</strong> o<strong>the</strong>r. The Items 5 and 10 “0/12-Volt Output“ do not have<br />
any function in this model.<br />
Page 16 Version 1.0
9.3.2 Manual search<br />
(This menu was divided into two sections on <strong>the</strong> real screen, move<br />
from one part to <strong>the</strong> o<strong>the</strong>r using “BACK“.)<br />
You should leave <strong>the</strong> settings for this menu to a professional,<br />
unless you yourself are almost a professional.<br />
Network search:<br />
Each individual transponder provides <strong>the</strong> information for<br />
<strong>the</strong> complete satellite system (Prerequisite: The provider always<br />
keeps <strong>the</strong> list up to date). When entering a transponder and with<br />
network search “ON“ it automatically searches for all transponders,<br />
which belong to this network.<br />
However, <strong>the</strong> network definition varies among <strong>the</strong> different satellite<br />
operators so that all <strong>the</strong> channels of a satellite or only selected<br />
channel clusters are taken into consideration.<br />
PID (Packed Identifier):<br />
The PID number is <strong>the</strong> identifier for video and audio signals in <strong>the</strong><br />
digital data stream of <strong>the</strong> DVB MPEG-2 signals.<br />
<strong>Programming</strong> <strong>the</strong> <strong>Receiver</strong><br />
Die to poor labelling, some channels cannot be identified, wi<strong>the</strong>r during automatic, nor during manual search. In<br />
this case, you can enter <strong>the</strong> PID numbers so that you can receive <strong>the</strong>se channels too.<br />
The Item 5 “0/12-Volt Output“ does not have any function in this model.<br />
9.3.3 Transponder editor<br />
Here satellite data can be changed, added to or deleted. This function is only intended for service purposes and<br />
absolutely no influence on <strong>the</strong> operation of your receiver.<br />
NOTE:<br />
If all <strong>the</strong> data for a satellite is deleted, <strong>the</strong> satellite itself is also deleted.<br />
9.3.4 Channel data transfer<br />
This menu item has been included to assist <strong>the</strong> specialist trade. It is used to transfer self-selected preferential<br />
programming from a master device to several slave devices. This preferential programming takes into consideration<br />
<strong>the</strong> uniform interests of a group of customers, e.g. special regional or ethnic characteristics.<br />
Master and slave receivers are linked to each o<strong>the</strong>r via RS 232 interfaces for transmission of <strong>the</strong> program data.<br />
NOTE:<br />
During <strong>the</strong> data transfer, all o<strong>the</strong>r receiver functions are blocked. The transmission can only be interrupted by<br />
removing <strong>the</strong> mains plug.<br />
9.3.5 Reinstallation<br />
If you have changed or deleted <strong>the</strong> pre-programmed data you can reset <strong>the</strong> device back to <strong>the</strong> factory settings.<br />
To do this, you will need <strong>the</strong> password (Chapter 9.4).<br />
Version 1.0 Page 17<br />
GB
<strong>Programming</strong> <strong>the</strong> <strong>Receiver</strong><br />
9.3.6 Delete all Channels<br />
ATTENTION:<br />
After carrying out this function (password required) all <strong>the</strong> settings are deleted and <strong>the</strong> receiver has to be<br />
reprogrammed!<br />
If you want to renew <strong>the</strong> whole programming, first delete all <strong>the</strong> channels and programs.<br />
Your receiver <strong>the</strong>n greets you again with <strong>the</strong> “Welcome!“ menu as in Chapter 6.<br />
9.4 Parental Lock Manager<br />
Various functions of <strong>the</strong> receiver require an password to<br />
be entered, this was set to 0 0 0 0 in <strong>the</strong> factory.<br />
You can protect <strong>the</strong> device with an access block to prevent<br />
unauthorised use of your receiver.<br />
• Enter <strong>the</strong> password in menu item 4 of <strong>the</strong> main menu<br />
and <strong>the</strong>n switch <strong>the</strong> “Access Block ON“.<br />
The password <strong>the</strong>n has to be entered each time <strong>the</strong><br />
receiver is switched on.You can activate <strong>the</strong> channel or<br />
programme block analogous to <strong>the</strong> program block under<br />
Item 1 to prevent uncontrolled viewing of certain channels<br />
or programmes. The password <strong>the</strong>n has to be entered to remove <strong>the</strong> block each time a channel is selected.<br />
The password can be changed if necessary using menu item 3.<br />
NOTE:<br />
In case of emergencies: If you have forgotten your password, your trade dealer can ask <strong>the</strong> manufacturer for a<br />
general password for you.<br />
9.5 Antenna Positioner<br />
The settings described in <strong>the</strong> following require very specialist<br />
knowledge and skills. Therefore, please contact an<br />
experienced professional.<br />
Prerequisites:<br />
Parabolic antennae have a control motor, which can<br />
receive and implement <strong>the</strong> receiver’s control signals. The<br />
antenna is correctly adjusted mechanically so that it can<br />
precisely follow <strong>the</strong> satellites’ orbits. This is necessary to<br />
receive <strong>the</strong> strongest possible signal.<br />
“7. DiSEqC “ has been set to “1.2“ in <strong>the</strong> “General<br />
Settings” menu.<br />
The satellite receiver “knows“ <strong>the</strong> positions of <strong>the</strong> individual satellites relative to each o<strong>the</strong>r. Therefore in order to<br />
select a certain satellite in <strong>the</strong> “Antenna Positioner“ menu it is sufficient to select and find a certain satellite, and<br />
to set it to maximum signal strength and save <strong>the</strong> settings. All <strong>the</strong> o<strong>the</strong>r known satellites are set and stored with<br />
<strong>the</strong> “recalculate position“ command.<br />
Page 18 Version 1.0
Of course, you can also search for newly created satellites,<br />
however you may <strong>the</strong>n only use <strong>the</strong> menu items 1 - 4.<br />
The spatial limits within which <strong>the</strong> parabolic antenna can<br />
move without touching a hindrance are specified in <strong>the</strong><br />
“1. Set-Up Limits “ sub-menu.<br />
To do this, <strong>the</strong> antenna is first moved as far as possible in<br />
<strong>the</strong> eastern direction and this position <strong>the</strong>n fixed with “Set<br />
East Limit “. Then, again using menu item 1, it is moved<br />
and <strong>the</strong> western direction and fixed with “Set West Limit“.<br />
If <strong>the</strong> structural circumstances change <strong>the</strong> set positions<br />
can be deleted using “Disable Limits“ and <strong>the</strong>n reset later.<br />
<strong>Programming</strong> <strong>the</strong> <strong>Receiver</strong><br />
The menu item “5. Go to Reference“ resets <strong>the</strong> antenna’s control motor to <strong>the</strong> delivered condition (zero position<br />
– middle).<br />
NOTE:<br />
If your antenna does not have a motor control, you can use <strong>the</strong> “Antenna Control“ menu to check <strong>the</strong><br />
signal strength.<br />
9.6 System information and software update<br />
Under this menu item you will find information about <strong>the</strong><br />
software version of your receiver and can update <strong>the</strong><br />
software version.<br />
The software version is updated by downloading <strong>the</strong> new<br />
software via <strong>the</strong> satellites. Prerequisite for this is that a<br />
more up to date version is available.<br />
If you confirm <strong>the</strong> “software update“ with “OK“ you are<br />
first asked to enter <strong>the</strong> password.<br />
Ei<strong>the</strong>r enter <strong>the</strong> four characters you chose under “Access<br />
Authorisation“ as your password, or enter 0 0 0 0, if you<br />
haven’t yet set a password.<br />
Version 1.0 Page 19<br />
GB
<strong>Programming</strong> <strong>the</strong> <strong>Receiver</strong><br />
In <strong>the</strong> following menu you can see <strong>the</strong> receiver settings<br />
for downloading <strong>the</strong> new software version and can make<br />
changes too if required.<br />
If you confirm “9. Air Download Start“ with “OK“, <strong>the</strong><br />
receiver first checks whe<strong>the</strong>r a more up-to-date software<br />
version is available.<br />
If this is not <strong>the</strong> case, “No available software found!<br />
Please try again later on“ is displayed.<br />
After successfully downloading a new software version<br />
“Software update completed!!!“ is displayed and <strong>the</strong><br />
receiver automatically restarts.<br />
9.7 Common interface (optional)<br />
Your receiver is fitted with two PCMCIA slots, which enable <strong>the</strong> use of two CI-CA modules. You can use <strong>the</strong>se<br />
modules to view <strong>the</strong> pay by view, not free encoded channels, which are transmitted by satellite in <strong>the</strong> same way<br />
as <strong>the</strong> uncoded channels.<br />
In addition to <strong>the</strong> CI-CA module, in order to be able to view an encoded channel you also require a multi access<br />
module with a CI slot and <strong>the</strong> channel provider’s relevant smart card.<br />
When you have <strong>the</strong>n paid <strong>the</strong> subscription or a one-off<br />
charge for <strong>the</strong> channel provider’s smart card, <strong>the</strong> CI-CA<br />
module in your receiver can compare <strong>the</strong> transmitted<br />
code with <strong>the</strong> smart card in <strong>the</strong> multi access module. If<br />
<strong>the</strong>y match <strong>the</strong> channel is deciphered and you can view<br />
<strong>the</strong> channel.<br />
Please ask your specialist dealer about multi-access<br />
modules and smart cards on offer and <strong>the</strong> charges.<br />
If you want to see which CI-CA modules are installed in<br />
your receiver, or if you want to make adjustments to <strong>the</strong><br />
CI_CA modules, press “Menu“ and <strong>the</strong>n select Item 7<br />
“Common Interface Manager“. You will <strong>the</strong>n see <strong>the</strong><br />
following display:<br />
Software Update<br />
S/W Update Completed !!!<br />
Page 20 Version 1.0
Troubleshooting<br />
If a CI_CA module has been installed, <strong>the</strong> receiver automatically determines <strong>the</strong> type of module and displays it<br />
in this menu.<br />
When selecting a module you have access to <strong>the</strong> various options available to this type of module. These include<br />
permits, advance booking, details of channel packages, etc.<br />
10 Troubleshooting<br />
NOTE:<br />
Large quantities of data are transmitted and processed simultaneously in digital receiver technology.<br />
Switching from one channel to ano<strong>the</strong>r <strong>the</strong>refore takes a bit longer than you are used to with an analogue<br />
device.<br />
A sand timer or <strong>the</strong> message “please wait” appears during <strong>the</strong> waiting time.<br />
Malfunction<br />
Noise, but screen menu visible<br />
No stereo sound<br />
Remote control doesn’t react<br />
11 Disposal<br />
Possible cause<br />
Satellite equipment defective or<br />
incorrectly set, LNB defective<br />
High signal losses at <strong>the</strong> cable<br />
Defective LNB<br />
Plug-in connector faulty<br />
(water, corrosion)<br />
Wrong cable between <strong>the</strong> TV and<br />
<strong>the</strong> receiver<br />
Batteries empty<br />
Remote control not pointed in <strong>the</strong><br />
direction of <strong>the</strong> device when used<br />
Corrective measures<br />
Check <strong>the</strong> cable and <strong>the</strong> connector,<br />
Reorientate <strong>the</strong> antenna, check<br />
<strong>the</strong> LNB<br />
Replace <strong>the</strong> satellite cable or use a<br />
signal amplifier<br />
Replace LNB<br />
Repair link<br />
Check <strong>the</strong> scart cable<br />
Replace <strong>the</strong> batteries<br />
Correct <strong>the</strong> position of <strong>the</strong> remote<br />
control<br />
The device, <strong>the</strong> packaging (e.g. polystyrene) and <strong>the</strong> batteries must not be disposed on in <strong>the</strong> normal domestic<br />
waste. Dispose of all <strong>the</strong> materials separately according to <strong>the</strong> regulations at <strong>the</strong> specially allocated locations.<br />
Please find out about <strong>the</strong> applicable regulations (environmental agency, etc.).<br />
Version 1.0 Page 21<br />
GB
Technische Daten • Technical Data • Caractéristiques Techniques<br />
Datos Técnicos • Dati Tecnici • Teknik Özellikler<br />
Version (A) FTA + (B) Slimline FTA + (C) CI Common Interface<br />
Tuner/Front-End Demodulator<br />
· IF Input Frequency<br />
· IF Loop through output<br />
· Input Impedance<br />
· Input Signal Level<br />
· LNB Polarization<br />
Switching Voltage<br />
· Band Switching<br />
· I/Q Output<br />
· Demodulation according<br />
· Type<br />
· Symbol Rate<br />
· Viterbi Decoding Rate<br />
· Reed Solomon Decoding<br />
Baseband Video/Audio Output<br />
· Video Output Impedance<br />
· Video Output Level<br />
· Audio Output Impedance<br />
· Audio Output Level<br />
· Digital audio output Level<br />
Rear Panel<br />
· IF Input<br />
· IF Loop through output<br />
· Audio Output<br />
· Digital Audio output<br />
· Video Output<br />
· 2 SCART Output<br />
· RS232 Serial Port<br />
· Power Cord<br />
· Remodulator<br />
Input, output<br />
Remote Control Unit<br />
· Type<br />
· Battery<br />
· 32 Keys<br />
· 1 Key for CI Model<br />
General Data<br />
· Input Power Voltage<br />
· Power Consumption<br />
· Dimension (W x D x H)<br />
950 ~ 2150MHz<br />
950 ~ 2150MHz<br />
75ohms<br />
-65dbm ~ -25dbm<br />
13/18Vdc@Max 400mA,<br />
Short Circuit Protection<br />
22Khz Tone, DISEQC1.2<br />
Unbalanced Output,<br />
Controlled by AGC Input<br />
DVB-S<br />
QPSK<br />
1 ~ 45 Msps<br />
1/2, 2/3, 3/4, 4/5, 5/6, 7/8<br />
FEC: 204,188, t=8<br />
75 ohms<br />
1Vp_p<br />
600 ohms Unbalanced<br />
3.0 Vp_p With Volume Control<br />
0.5 Vp-p with 75 ohm terms<br />
Version (A) FTA + (C) CI Common Interface<br />
Microprocessor and Main Memories<br />
· Microprocessor Type<br />
· Flash ROM<br />
(for program memory)<br />
· SDRAM ( for decoding)<br />
ST 20-C2 (STI5518)<br />
1M x 16 bit<br />
4M x 16bit<br />
F-Female Type<br />
F-Female Type<br />
2 RCA (Left, Right)<br />
1 RCA, Optical jack (option)<br />
S-VIDEO (option)<br />
1TV (CVBS,RGB),1VCR (CVBS)<br />
9 Pin D-Female Type<br />
Europe Flexible Cord<br />
IEC male/female (option)<br />
IR (Carrier Freq. 38KHz)<br />
2 x 1.5V AA or 2 x 1.5V AAA<br />
Power, 0~9, Mute, Info, Up,<br />
Down, Left, Right, Back,<br />
Radio, Menu, Exit, Epg, OK,<br />
Volume up/down, Last, Page<br />
up/down, Timer, Audio, A/D<br />
Subtitle<br />
AC95 ~ 260V, 50/60Hz<br />
Max 30 Watts<br />
337 x 240 x 69mm<br />
Transport Demultiplexer<br />
· Demultiplex<br />
· PID Handling Capability<br />
· SI Filtering<br />
Video Decoding Parameters<br />
· Video Decoding<br />
· Aspect Ratio<br />
· Resolution<br />
Audio Decoding Parameters<br />
· Audio Decoding<br />
· Operating Mode<br />
· Sampling Frequency<br />
Data Service Port<br />
· Connector<br />
· Protocol<br />
· Data Rate<br />
Front Panel<br />
· 4 Digits LED Display<br />
· 3 Buttons<br />
· IR Sensor<br />
· 2 Slots (only for CI Model)<br />
Version (B) Slimline FTA<br />
· Microprocessor Type<br />
· Flash ROM<br />
(for program memory)<br />
· SDRAM (for decoding)<br />
According to ISO/IEC 13818-1<br />
32 PID<br />
According to DVB-SI spec<br />
(ETS 300 468)<br />
ISO/IEC 13818-2 MP@ML<br />
4:3, 16:9<br />
Max. 720 x 576<br />
ISO/IEC 13818-3 Layer I & II<br />
Mono, Stereo<br />
32, 44.1, 48 KHz<br />
9 Pin D-Female Type<br />
RS-232 Asynch<br />
Max 115200 bps<br />
Microprocessor and Main Memories<br />
Rear Panel<br />
· IF Input<br />
· IF Loop through output<br />
· Cinch Output<br />
· 2 SCART Output<br />
· RS232 Serial Port<br />
· Power Cord<br />
Remote Control Unit<br />
· Type<br />
· Battery<br />
· 32 Keys<br />
General Data<br />
· Input Power Voltage<br />
· Power Consumption<br />
· Dimension (W x D x H)<br />
· Weight<br />
· Operation Temperature<br />
ST20-C2 (STi5518)<br />
1M x 16 bit<br />
4M x 16 bit<br />
F-Female Type<br />
F-Female Type<br />
AUDIO (Left, Right), VIDEO,<br />
Digital Out (SPDIF)<br />
1TV, 1VCR<br />
9 Pin D-Female Type<br />
Europe Flexible Cord<br />
IR (Carrier Freq. 38KHz)<br />
2 x 1.5V AA or 2 x 1.5V AAA<br />
Power, 0~9, Mute, Info, Up,<br />
Down, Left, Right, Back,<br />
Radio, OK, Menu, Exit, EPG,<br />
AD, Timer Last, Page up/down,<br />
Subtitle, Audio, Volume up/down<br />
AC95~250V, 50/60Hz<br />
Max 30 Watts<br />
275 x 156 x 56 mm<br />
1.1Kg<br />
0 ~ 40 Deg.<br />
Version 1.0 Anhang · Appendix · Appendice · Apéndice · Appendice · Ek