Setting Up and Programming the Digital Receiver - Radix
Setting Up and Programming the Digital Receiver - Radix
Setting Up and Programming the Digital Receiver - Radix

You also want an ePaper? Increase the reach of your titles
YUMPU automatically turns print PDFs into web optimized ePapers that Google loves.
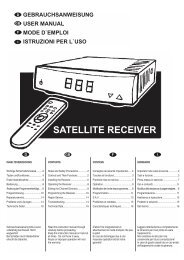
Instruction Manual<br />
Read this instruction manual through carefully first. • Keep it h<strong>and</strong>y for future reference.<br />
Abuse or improper operation of <strong>the</strong> unit will void <strong>the</strong> warranty.<br />
RADIX Electronic Vertriebs-GmbH • D-61381 Friedrichsdorf • F.R. Germany
Introduction<br />
1 Introduction<br />
Publisher’s statement:<br />
Congratulations on your decision to purchase a RADIX digital satellite receiver. All of our<br />
manufacturing facilities have been certified under <strong>the</strong> stringent ISO 9002 quality st<strong>and</strong>ard.<br />
If <strong>the</strong> unit must be sent in for repair, repack it <strong>and</strong> all of its associated accessory items in<br />
<strong>the</strong>ir original packagings, which should be kept on h<strong>and</strong> for this purpose. Enclose a copy<br />
of <strong>the</strong> sales invoice or sales slip, along with a detailed description of <strong>the</strong> problem(s)<br />
involved, <strong>and</strong> ship <strong>the</strong> unit to us with all shipping charges prepaid.<br />
With your purchase of our E P S I L O N 2 A/D digital satellite receiver you are ready for <strong>the</strong><br />
future, since digital television will become <strong>the</strong> st<strong>and</strong>ard <strong>and</strong> replace analog television<br />
broadcasting due to <strong>the</strong> wide variety of programming that may be transmitted <strong>and</strong> <strong>the</strong><br />
numerous supplementary services if offers, such as an onscreen electronic programselection<br />
guide.<br />
Our E P S I L O N 2 A/D digital satellite receiver is capable of receiving both analog <strong>and</strong><br />
digital television broadcasts.<br />
You may use <strong>the</strong> universal remote control supplied with <strong>the</strong> unit for controlling analog<br />
satellite receivers, o<strong>the</strong>r digital satellite receivers, television sets, <strong>and</strong> video recorders.<br />
We wish you many years of enjoyment <strong>and</strong> trouble-free service from our product.<br />
EPSILON 2 AD Instruction Manual<br />
RADIX Electronic Vertriebs-GmbH • D-61381 Friedrichsdorf • F.R. Germany<br />
© RADIX Electronic Vertriebs-GmbH, 1998<br />
We reserve <strong>the</strong> right to alter products or <strong>the</strong>ir specifications at any time without prior notice.<br />
Edition 07/98, Version 1.0<br />
Printed in Korea<br />
Technical documentation: Bartha Docuteam • D-64625 Bensheim • F.R. Germany<br />
Page 2 Version 1.0
2 Contents<br />
Section Title Page<br />
1 Introduction 2<br />
2 Contents 3<br />
3 Safety Precautions 5<br />
4 The <strong>Receiver</strong> <strong>and</strong> Its Operation 6<br />
4.1 The Remote Control 6<br />
4.2 The <strong>Receiver</strong> Unit 9<br />
5 Installing <strong>the</strong> <strong>Receiver</strong> 10<br />
5.1 Prerequisites <strong>and</strong> Ambient Conditions 10<br />
5.2 Connecting <strong>the</strong> <strong>Receiver</strong> to <strong>the</strong> Satellite Antenna <strong>and</strong> O<strong>the</strong>r Equipment 10<br />
5.2.1 Single-Antenna Operation 11<br />
5.2.2 Dual-Antennae Operation 11<br />
6 <strong>Programming</strong> <strong>and</strong> Operating <strong>the</strong> Analog-<strong>Receiver</strong> Section 12<br />
6.1 <strong>Setting</strong> <strong>the</strong> Basic Parameters from <strong>the</strong> System Menu 12<br />
6.2 Preselecting Channels from <strong>the</strong> Main Menu (Display Page 1) 13<br />
6.3 Preselecting Channels from <strong>the</strong> Main Menu (Display Page 2) 14<br />
6.4 Preselecting Channels from <strong>the</strong> Main Menu (Display Page 3) 15<br />
7 <strong>Setting</strong> <strong>Up</strong> <strong>and</strong> <strong>Programming</strong> <strong>the</strong> <strong>Digital</strong> <strong>Receiver</strong> 16<br />
7.1 Switching On <strong>the</strong> <strong>Receiver</strong> 16<br />
7.2 Language Selection 17<br />
7.3 <strong>Setting</strong> <strong>the</strong> Correct Local Time 17<br />
7.4 <strong>Setting</strong> Decoder Status 18<br />
Selecting <strong>the</strong> TV Aspect Ratio: 18<br />
Changing <strong>the</strong> DiSEqC: 18<br />
Clearing <strong>the</strong> <strong>Receiver</strong>’s Memory: 19<br />
Information on Decoder Status (System Information): 19<br />
7.5 Automatic Channel Preselection 20<br />
7.5.1 Selecting <strong>the</strong> Satellite to be Used 20<br />
7.5.2 Adjusting <strong>the</strong> DiSEqC-Controller <strong>and</strong>/or <strong>the</strong> 22-kHz Control Signal 21<br />
7.5.3 Entering <strong>the</strong> Low-Noise Block (LNB) Converter’s Local-Oscillator Frequency 22<br />
7.5.4 Checking Signal Strength 22<br />
7.5.5 Automatic Channel Search 23<br />
7.6 Manual Channel Preselection 24<br />
7.6.1 Entering <strong>the</strong> Downlink Frequency 24<br />
7.6.2 Entering <strong>the</strong> Symbol Rate 25<br />
7.6.3 Selecting <strong>the</strong> Polarization 25<br />
7.6.4 Conducting a Manual Search 26<br />
Contents<br />
Version 1.0 Page 3
Contents<br />
8 Operating <strong>the</strong> <strong>Digital</strong> <strong>Receiver</strong> 27<br />
8.1 Switching On <strong>the</strong> <strong>Receiver</strong> 27<br />
8.2 Channel Selection 27<br />
8.3 Using Channel Directories 28<br />
8.3.1 Displaying Channel Directories <strong>and</strong> Selecting Channels 28<br />
8.3.2 Editing Channel Directories (Arranging Channels in Preferred Orders) 28<br />
8.3.3 Obtaining Fur<strong>the</strong>r Information on Channels 30<br />
8.4 Adjusting <strong>the</strong> Volume of <strong>the</strong> Sound Track/Muting 31<br />
8.5 Radio Reception 31<br />
8.6 Selecting a Language <strong>and</strong> Audio Mode 31<br />
8.7 Using <strong>the</strong> <strong>Receiver</strong> With a Video Recorder 32<br />
8.8 Onscreen Program Guides 32<br />
9 <strong>Programming</strong> <strong>the</strong> Remote Control 34<br />
10 Troubleshooting Tips 35<br />
11 Disposing of <strong>the</strong> <strong>Receiver</strong>, Its Packagings, <strong>and</strong> Accessory Items 35<br />
12 Addenda I - VI<br />
12.1 List of Broadcast Channels, Complete with Selection Data (Analog<br />
Channels Only) I<br />
12.2 List of Manufacturers’ Code Numbers for Satellite <strong>Receiver</strong>s III<br />
12.3 Time-Zone Table V<br />
12.4 Technical Data VI<br />
Page 4 Version 1.0
3 Safety Precautions<br />
Safety Precautions<br />
This receiver is intended exclusively for <strong>the</strong> reception of satellite broadcasts, <strong>and</strong> should be used for that<br />
purpose only. Keep <strong>the</strong> receiver out of children’s reach. In <strong>the</strong> interest of your own personal safety <strong>and</strong><br />
preventing damage to <strong>the</strong> receiver, you should observe <strong>the</strong> following precautions:<br />
DANGER:<br />
Do not open its housing’s cover panel, since that will expose sources of<br />
electric-shock hazards. All work on <strong>the</strong> receiver should be performed by<br />
authorized specialists only.<br />
DANGER:<br />
Keep <strong>the</strong> receiver dry <strong>and</strong> well-protected against ingress of moisture, since if<br />
any moisture enters <strong>the</strong> receiver, that might create electric-shock hazards.<br />
DANGER:<br />
Do not insert any objects into any openings or ventilation louvres on <strong>the</strong><br />
receiver’s housing, since that will subject you to electric-shock hazards.<br />
WARNING:<br />
Make certain that <strong>the</strong> ventilation louvres on <strong>the</strong> receiver’s housing remain<br />
unobstructed at all times, since o<strong>the</strong>rwise <strong>the</strong> receiver might overheat <strong>and</strong><br />
catch fire.<br />
WARNING:<br />
Use only factory-original replacement parts or such recommended by your<br />
dealer, since using any o<strong>the</strong>r parts might result in personal injuries <strong>and</strong>/or<br />
property damage. Failure to observe this warning will void <strong>the</strong> equipment<br />
warranty.<br />
NOTE:<br />
Switch <strong>the</strong> receiver off during thunderstorms <strong>and</strong> whenever it remains out of<br />
service for extended periods.<br />
NOTE:<br />
To clean <strong>the</strong> receiver, wipe it off with a damp cloth only. Do not use any<br />
chemical cleaners.<br />
Version 1.0 Page 5<br />
GB
The <strong>Receiver</strong> <strong>and</strong> Its Operation<br />
4 The <strong>Receiver</strong> <strong>and</strong> Its Operation<br />
4.1 The Remote Control<br />
ON/OFF-Key<br />
MANU-key<br />
Volume-Control Key (decrease volume)<br />
Cursor-Control Key (cursor left)<br />
Light-Emitting Diode<br />
Muting Key<br />
Television Selector Key<br />
<strong>Digital</strong>-<strong>Receiver</strong> Selector Key<br />
Channel-Directory Key<br />
(Low-Threshold <strong>Setting</strong> Key)<br />
Blue-Screen Selector Key<br />
TV/Radio Selector Key<br />
(West-Orientation Key)<br />
Analog/<strong>Digital</strong> Mode-Selector Key<br />
Numerical Keys<br />
Cursor-Control Key (cursor up)<br />
Volume-Control Key (increase volume)<br />
Cursor-Control Key (cursor right)<br />
Cursor-Control Key (cursor down)<br />
<strong>Programming</strong> Key<br />
Video-Recorder Selector Key<br />
External-Analog-<strong>Receiver</strong> Selector Key<br />
Exit-Menu/Save Key<br />
Designations enclosed in paren<strong>the</strong>ses apply to both <strong>the</strong> analog-receiver<br />
section <strong>and</strong> <strong>the</strong> antenna controller (an optional accessory item).<br />
NOTE:<br />
When inserting <strong>the</strong> batteries into <strong>the</strong> remote control, make certain that<br />
<strong>the</strong>y are inserted with <strong>the</strong> correct polarity.<br />
Last-Channel Selector Key (Tuner A/B)<br />
Audio-Mode Selector Key (channel allocation)<br />
Channel-Information Key (East-Orientation Key)<br />
Program-Guide Key (Satellite-Position Key)<br />
Enables/Disables Scart Output<br />
to Video Recorder<br />
Page 6 Version 1.0
Key Function During:<br />
Marking(s) Color Operation Installation<br />
The <strong>Receiver</strong> <strong>and</strong> Its Operation<br />
red ON/OFF-switch ON/OFF-switch<br />
0,1,2,3, ... gray Entry of channel Entry of parameternumbers<br />
settings<br />
MENU blue Menu key for calling up Channel selection<br />
6(/(&7 <strong>and</strong> exiting onscreen<br />
menus<br />
CHp blue Selects <strong>the</strong> next larger Selects/marks a field of<br />
channel number or <strong>the</strong> <strong>the</strong> onscreen menu<br />
preceding line of <strong>the</strong><br />
onscreen menu<br />
CHq blue Selects <strong>the</strong> next lower Selects/marks a field of<br />
channel number or <strong>the</strong> <strong>the</strong> onscreen menu<br />
following line of <strong>the</strong><br />
onscreen menu<br />
u blue Increases sound volume Selects/marks a field of<br />
<strong>the</strong> onscreen menu<br />
t blue Reduces sound volume Selects/marks a field of<br />
<strong>the</strong> onscreen menu or<br />
corrects an incorrect<br />
numerical entry<br />
TV blue Selects television-set<br />
operation<br />
VCR blue Selects video-recorder<br />
operation<br />
SAT blue Selects analog satellite- Channel selection<br />
receiver mode<br />
DVB blue Selects digital satellite- Channel selection<br />
receiver mode<br />
MUTE gray Mutes <strong>the</strong> sound track<br />
SET gray Saves a channel selection<br />
FAV(LT) gray <strong>Digital</strong> mode: Calls up<br />
RCL display of <strong>the</strong> channel<br />
list (listed in <strong>the</strong> preferred<br />
order)<br />
Analog mode: Recalls <strong>the</strong><br />
low-threshold setting for<br />
resetting<br />
Version 1.0 Page 7<br />
GB
The <strong>Receiver</strong> <strong>and</strong> Its Operation<br />
Key Function During:<br />
Marking(s) Color Operation Installation<br />
EXIT(STO) gray <strong>Digital</strong> mode: STOP, exit Deletes an entry or effects a<br />
REV <strong>the</strong> current menu return to <strong>the</strong> preceding menu<br />
Analog mode: N/A Saves <strong>the</strong> settings made<br />
BACK gray Analog mode: Selects blue screen<br />
tt VCR: Fast rewind<br />
AUD(#) gray <strong>Digital</strong> mode: Selects audio mode<br />
u VCR: Play<br />
LAST(T A/B) gray <strong>Digital</strong> mode: Selects <strong>the</strong> last<br />
uu channel viewed<br />
VCR: Fast forward<br />
RADIO(W) gray <strong>Digital</strong> mode: Toggles TV/Radio<br />
II VCR: Pause<br />
GUIDE(SAT) gray <strong>Digital</strong> mode: Calls up <strong>the</strong> program guide<br />
n VCR: STOP<br />
INFO(E) gray digital: Calls up fur<strong>the</strong>r channel information<br />
l VCR: Record<br />
A/D gray Toggles analog/digital mode<br />
VCR OUT gray Selects video output (via <strong>the</strong> Scart jack)<br />
Page 8 Version 1.0
4.2 The <strong>Receiver</strong> Unit<br />
ON/OFF-Switch Four-Digit LED-Display<br />
Channel-Selector<br />
(indicates <strong>the</strong> current channel number)<br />
Controls <strong>and</strong> displays on <strong>the</strong> receiver’s front panel<br />
AC95 265V<br />
50Hz MAX30W<br />
WARNING:<br />
WARNUNG:<br />
AVERTISSEMENT:<br />
AVIS:<br />
VORSICHT:<br />
Line-Cord Receptacle<br />
(95 VAC - 265 VAC)<br />
Analog-Signal IF-Input Connector<br />
for a Coaxial Antenna Cable<br />
CAUTION<br />
IF INPUT<br />
+13V/+18V<br />
400mA MAX.<br />
ANALOG<br />
Connectors on <strong>the</strong> receiver’s rear panel<br />
VIDEO<br />
L<br />
AUDIO<br />
R<br />
Audio Output to a<br />
Hi-Fi System<br />
Scart Jack for a TV-Set<br />
The <strong>Receiver</strong> <strong>and</strong> Its Operation<br />
Version 1.0 Page 9<br />
TV<br />
Scart-Jack for a<br />
Video Recorder<br />
VCR DECODER<br />
Scart Jack for a<br />
Channel Decoder<br />
<strong>Digital</strong>-Signal IF-Input Connector<br />
for a Coaxial Antenna Cable<br />
RS 232<br />
RS-232 Serial<br />
Interface for a PC<br />
IF INPUT<br />
+13V/+18V<br />
400mA MAX.<br />
IF OUTPUT<br />
DIGITAL<br />
IF-Output Jack<br />
for an External<br />
Analog <strong>Receiver</strong><br />
GB
Installing <strong>the</strong> <strong>Receiver</strong><br />
5 Installing <strong>the</strong> <strong>Receiver</strong><br />
5.1 Prerequisites <strong>and</strong> Ambient Conditions<br />
NOTE:<br />
Keep <strong>the</strong> receiver well away from sources of heat <strong>and</strong> locations where it might be<br />
subjected to bright sunlight.<br />
Route all cabling such that it will not become damaged by, e.g., sharp edges.<br />
Connect <strong>the</strong> receiver to a 230 VAC (± 10%), 50 Hz, electrical outlet.<br />
The antenna assembly should have been installed <strong>and</strong> aligned in accordance with its manufacturer’s<br />
instructions.<br />
All information needed for programming <strong>the</strong> receiver’s digital section should be readily available:<br />
− <strong>the</strong> local time zone (<strong>the</strong> departure from CET, or GMT in <strong>the</strong> UK <strong>and</strong> Irel<strong>and</strong>),<br />
− whe<strong>the</strong>r st<strong>and</strong>ard time or daylight-savings time is currently in effect<br />
− <strong>the</strong> aspect ratio of <strong>the</strong> television set to be employed<br />
− <strong>the</strong> LNB local-oscillator frequency that applies to your locality (which must be entered into <strong>the</strong> field<br />
entitled “LNB Local Freq.”)<br />
− if <strong>the</strong> receiver is to be manually programmed, <strong>the</strong> channel frequencies <strong>and</strong> symbol rates for <strong>the</strong><br />
channels to be programmed (available from satellite-television magazines or dealers).<br />
The receiver consists of an analog section (analog receiver) <strong>and</strong> a digital section (digital receiver).<br />
The analog receiver is ready for immediate use, since it has been preprogrammed at <strong>the</strong> factory.<br />
However, you may make any changes that may be necessary by following <strong>the</strong> programming instructions<br />
to be given below.<br />
The digital receiver, on <strong>the</strong> o<strong>the</strong>r h<strong>and</strong>, must be programmed by users prior to use in accordance with <strong>the</strong><br />
instructions to be given below.<br />
5.2 Connecting <strong>the</strong> <strong>Receiver</strong> to <strong>the</strong> Satellite Antenna <strong>and</strong> O<strong>the</strong>r Equipment<br />
The receiver may be operated with ei<strong>the</strong>r a single satellite antenna or a pair of satellite antennae. You<br />
will have to manually set <strong>the</strong> receiver to ei<strong>the</strong>r single-antenna or dual-antennae mode, depending upon<br />
whe<strong>the</strong>r you will be connecting it to one satellite antenna or a pair of satellite antennae using one or two<br />
(coaxial) antenna cables, respectively. To perform this setting, proceed as follows:<br />
NOTE:<br />
Before proceeding, correctly connect <strong>the</strong> receiver to <strong>the</strong> video recorder, television<br />
set, any fur<strong>the</strong>r (analog) receivers to be employed, <strong>and</strong> <strong>the</strong>n to an electrical outlet.<br />
• Press <strong>the</strong> blue DVB-key on <strong>the</strong> remote control. The red indicator lamp (LED) on<br />
<strong>the</strong> remote control will briefly illuminate.<br />
• Press <strong>the</strong> A/D-key on <strong>the</strong> remote control <strong>and</strong> hold it depressed for 3 seconds,<br />
which will switch <strong>the</strong> receiver to st<strong>and</strong>by mode..<br />
• Use <strong>the</strong> t or u keys to select ei<strong>the</strong>r SING (single-antenna mode) or DUAL<br />
(dual-antennae mode).<br />
• Press <strong>the</strong> ON/OFF key.<br />
• If <strong>the</strong> receiver is to be operated in single-antenna mode, use <strong>the</strong> coaxial cable<br />
supplied with <strong>the</strong> receiver to interconnect <strong>the</strong> “IF OUTPUT DIGITAL“ <strong>and</strong> “IF<br />
INPUT ANALOG“ jacks on its rear panel (cf. Section 5.2.1, below).<br />
Page 10 Version 1.0
5.2.1 Single-Antenna Operation<br />
AC95~265V<br />
50Hz MAX30W<br />
5.2.2 Dual-Antennae Operation<br />
~<br />
~<br />
AC95~265V<br />
50Hz MAX30W<br />
WARNING:<br />
WARNUNG:<br />
AVERTISSEMENT:<br />
AVIS:<br />
VORSICHT:<br />
WARNING:<br />
WARNUNG:<br />
AVERTISSEMENT:<br />
AVIS:<br />
VORSICHT:<br />
CAUTION<br />
CAUTION<br />
RF INPUT<br />
+13V/+18V<br />
400mA MAX.<br />
ANALOG<br />
RF INPUT<br />
+13V/+18V<br />
400mA MAX.<br />
ANALOG<br />
VIDEO<br />
L<br />
AUDIO<br />
R<br />
Hi-Fi<br />
System<br />
VIDEO<br />
L<br />
AUDIO<br />
R<br />
Installing <strong>the</strong> <strong>Receiver</strong><br />
Version 1.0 Page 11<br />
TV<br />
TV<br />
VCR DECODER<br />
Video<br />
Recorder<br />
Antenna<br />
RS 232<br />
Analog<br />
Decoder<br />
Antenna Antenna<br />
Hi-Fi<br />
System<br />
TV<br />
TV<br />
VCR DECODER<br />
Video<br />
Recorder<br />
RS 232<br />
Analog<br />
Decoder<br />
RF INPUT<br />
+13V/+18V<br />
400mA MAX.<br />
RF OUTPUT<br />
DIGITAL<br />
RF INPUT<br />
+13V/+18V<br />
400mA MAX.<br />
RF OUTPUT<br />
DIGITAL<br />
External<br />
Analog<br />
<strong>Receiver</strong><br />
GB
<strong>Programming</strong> <strong>and</strong> Operating <strong>the</strong> Analog-<strong>Receiver</strong> Section<br />
6 <strong>Programming</strong> <strong>and</strong> Operating <strong>the</strong> Analog-<strong>Receiver</strong> Section<br />
• Switch <strong>the</strong> receiver on by pressing <strong>the</strong> ON/OFF-key.<br />
• Press <strong>the</strong> A/D-key on <strong>the</strong> remote control in order to switch<br />
from using <strong>the</strong> receiver’s digital section to using its analog<br />
section.<br />
NOTE:<br />
You may suppress <strong>the</strong> picture for <strong>the</strong> current channel <strong>and</strong> obtain a blue screen by<br />
pressing <strong>the</strong> BACK-key, if desired. The system menu will be displayed onscreen<br />
even in <strong>the</strong> absence of an input signal.<br />
• You may also suppress <strong>the</strong> sound track for <strong>the</strong> current channel<br />
by pressing <strong>the</strong> MUTE-key, if desired, in which case <strong>the</strong> message<br />
“SOUND OFF“ will appear onscreen. Pressing <strong>the</strong> MUTE-key a<br />
second time will restore <strong>the</strong> sound track.<br />
6.1 <strong>Setting</strong> <strong>the</strong> Basic Parameters from <strong>the</strong> System Menu<br />
• Simultaneously press <strong>the</strong> p <strong>and</strong> q keys on <strong>the</strong> receiver’s<br />
front panel while <strong>the</strong> receiver is in st<strong>and</strong>by mode <strong>and</strong> hold<br />
<strong>the</strong>m depressed for 3 seconds.<br />
The following menu will <strong>the</strong>n be displayed onscreen:<br />
SYSTEM MENU<br />
LANGUAGE : ENGLISH<br />
DRO SHIFT : 00.00MHZ<br />
LNB FREQ. : 9.75GHZ<br />
SMATV : OFF<br />
• Use <strong>the</strong> p <strong>and</strong> q keys to shift <strong>the</strong> cursor to <strong>the</strong> desired position<br />
(<strong>the</strong> highlighted display line).<br />
• Use <strong>the</strong> t <strong>and</strong> u keys to select <strong>the</strong> desired setting.<br />
• Select <strong>the</strong> desired language (Deutsch, English, Français, Italiano).<br />
• Select an LNB-local-oscillator frequency of 9.75 GHz/10.00 GHz.<br />
• Adjust <strong>the</strong> local-oscillator frequency in steps of 0.25 MHz until it<br />
agrees with your LNB (<strong>the</strong> available frequency-adjustment range<br />
is ± 15.00 MHz).<br />
• Select “ON” if you intend to use <strong>the</strong> receiver’s SMATV-feature<br />
(DiSEqC Version 1.0)<br />
• Press <strong>the</strong> STORE-key.<br />
The data have now been saved <strong>and</strong> <strong>the</strong> receiver will automatically switch off.<br />
Page 12 Version 1.0
<strong>Programming</strong> <strong>and</strong> Operating <strong>the</strong> Analog-<strong>Receiver</strong> Section<br />
6.2 Preselecting Channels from <strong>the</strong> Main Menu (Display Page 1)<br />
• Press <strong>the</strong> MENU-key on <strong>the</strong> remote control while <strong>the</strong><br />
receiver is switched on.<br />
The following menu will <strong>the</strong>n be displayed onscreen:<br />
MAIN MENU<br />
> CHANNEL : 400<br />
BAND : KU-09.75GHZ<br />
FREQ. : 12150.00MHZ<br />
POLARITY : HORZ.<br />
22KHZ : OFF<br />
DECODER : NO<br />
CONTRAST : 5<br />
P. LOCK : OFF<br />
• Ei<strong>the</strong>r use <strong>the</strong> t <strong>and</strong> u keys to select a channel/broadcaster,<br />
or<br />
• enter a 3-digit channel number.<br />
• If necessary, reset <strong>the</strong> local-oscillator frequency<br />
(5.15 GHz/9.75 GHz or 10.00 GHz/10.60 GHz).<br />
If your antenna is capable of receiving C-b<strong>and</strong> broadcasts, you may reconfigure <strong>the</strong><br />
receiver setup in order to allow receiving <strong>the</strong>m by using a setting of C-05.15 GHz.<br />
• Use <strong>the</strong> t <strong>and</strong> u keys or <strong>the</strong> numerical keys to adjust/reset<br />
<strong>the</strong> channel frequency to <strong>the</strong> desired value (cf. <strong>the</strong> addendum<br />
for a list of available channel frequencies).<br />
• Select ei<strong>the</strong>r horizontal or vertical polarization.<br />
• Switch <strong>the</strong> 22-kHz control frequency ON or OFF.<br />
• Select <strong>the</strong> desired decoder status (NONE/MAC/PAL1/PAL2).<br />
• Select <strong>the</strong> desired picture contrast.<br />
• Switch <strong>the</strong> child-protection feature ON in order that <strong>the</strong> channel<br />
selection can only be altered by a numerical entry, <strong>and</strong> can no<br />
longer be altered using <strong>the</strong> p <strong>and</strong> q keys.<br />
While <strong>the</strong> cursor ( > ) is in <strong>the</strong> bottom display line, you may use <strong>the</strong> q key to switch<br />
to <strong>the</strong> next menu. While it is in <strong>the</strong> top display line, pressing <strong>the</strong> p key will return<br />
you to <strong>the</strong> preceding menu.<br />
Version 1.0 Page 13<br />
GB
<strong>Programming</strong> <strong>and</strong> Operating <strong>the</strong> Analog-<strong>Receiver</strong> Section<br />
6.3 Preselecting Channels from <strong>the</strong> Main Menu (Display Page 2)<br />
• Press <strong>the</strong> q key to exit Display Page1 <strong>and</strong> call up<br />
Display Page 2.<br />
MAIN MENU<br />
> AUDIO L : 7.02MHZ<br />
R : 7.20MHZ<br />
DE-EMPH : STEREO/ADAPT<br />
B/W : 150KHZ<br />
L/R DIST. : 180KHZ<br />
AUDIO : INTERNAL<br />
RADIO : OFF<br />
• Use <strong>the</strong> t <strong>and</strong> u keys or numerical keys to adjust/reset<br />
<strong>the</strong> left-channel audio-subcarrier frequency.<br />
Before <strong>the</strong> right-channel audio-subcarrier frequency can be adjusted or reset, L/R<br />
must be set to “FREE.” To make this adjustment, proceed as follows:<br />
• Use <strong>the</strong> t <strong>and</strong> u keys or <strong>the</strong> numerical keys to set <strong>the</strong><br />
desired right-channel audio-subcarrier frequency.<br />
• Select audio deemphasis <strong>and</strong> <strong>the</strong> desired b<strong>and</strong>width:<br />
STEREO/ADAPT – MONO/ADAPT –<br />
MONO/50u – MONO/J17.<br />
If <strong>the</strong> deemphasis parameters have been set to “MONO,” you may select an audio<br />
b<strong>and</strong>width of 150/280/400/600 kHz.<br />
• Set <strong>the</strong> L/R channel separation to “FREE” or 180 kHz.<br />
If this has been set to “FREE,” <strong>the</strong> b<strong>and</strong>widths of <strong>the</strong> left <strong>and</strong> right audio channels<br />
may be independently adjusted or reset. If it has been set to 180 kHz, <strong>the</strong><br />
b<strong>and</strong>width for <strong>the</strong> right channel will automatically track that set for <strong>the</strong> left channel.<br />
• Select “AUDIO EXTERNAL” (i.e., via a Scart loop) or<br />
“AUDIO INTERNAL,” which will only be possible if<br />
“DECODER” has been set to a setting o<strong>the</strong>r than “NONE.”<br />
• Select “RADIO ON” if you would like to have a black screen<br />
while listening to <strong>the</strong> radio.<br />
Page 14 Version 1.0
<strong>Programming</strong> <strong>and</strong> Operating <strong>the</strong> Analog-<strong>Receiver</strong> Section<br />
6.4 Preselecting Channels from <strong>the</strong> Main Menu (Display Page 3)<br />
The settings of Display Page 3 should be altered by a trained specialist only.<br />
• Press <strong>the</strong> q key while <strong>the</strong> cursor is in <strong>the</strong> bottom display<br />
line to transit from Display Page 2 to Display Page 3:<br />
MAIN MENU<br />
> TONE BURST : A<br />
SWITCH INPUT : 1<br />
• Reset DiSEqC to A or B.<br />
• Switch <strong>the</strong> SMATV-feature ON if you want your receiver to<br />
receive DiSEqC-signals, which will only be possible if <strong>the</strong><br />
SMATV-feature has been enabled from <strong>the</strong> system menu.<br />
Version 1.0 Page 15<br />
GB
<strong>Setting</strong> <strong>Up</strong> <strong>and</strong> <strong>Programming</strong> <strong>the</strong> <strong>Digital</strong> <strong>Receiver</strong><br />
7 <strong>Setting</strong> <strong>Up</strong> <strong>and</strong> <strong>Programming</strong> <strong>the</strong> <strong>Digital</strong> <strong>Receiver</strong><br />
7.1 Switching On <strong>the</strong> <strong>Receiver</strong><br />
• Actuate <strong>the</strong> ON/OFF switch on <strong>the</strong> receiver.<br />
The display will indicate “ON” to indicate that <strong>the</strong> receiver is<br />
on, <strong>and</strong> <strong>the</strong> following display page will appear onscreen:<br />
Press MENU key to setup<br />
• Press <strong>the</strong> MENU-key on <strong>the</strong> remote control. The following<br />
menu will <strong>the</strong>n be displayed onscreen:<br />
Main Menu<br />
Language<br />
Time <strong>Setting</strong><br />
Installation<br />
Decoder Status<br />
Language English<br />
Time Offset GMT+00:00<br />
Setup Value<br />
MENU/EXIT<br />
Page 16 Version 1.0
7.2 Language Selection<br />
<strong>Setting</strong> <strong>Up</strong> <strong>and</strong> <strong>Programming</strong> <strong>the</strong> <strong>Digital</strong> <strong>Receiver</strong><br />
• Use <strong>the</strong> p <strong>and</strong> q keys to highlight <strong>the</strong> “Language”<br />
field, as shown below:<br />
Main Menu<br />
Language<br />
Time <strong>Setting</strong><br />
Installation<br />
Decoder Status<br />
English<br />
7.3 <strong>Setting</strong> <strong>the</strong> Correct Local Time<br />
• Press <strong>the</strong> MENU-key on <strong>the</strong> remote control.<br />
• Use <strong>the</strong> CHp <strong>and</strong> CHq keys to bring <strong>the</strong> desired choice of language<br />
(Deutsch/English/Français/Italiano) into <strong>the</strong> field at <strong>the</strong> bottom of <strong>the</strong> screen.<br />
• Press <strong>the</strong> MENU-key to confirm your selection or <strong>the</strong> EXIT-key to<br />
ab<strong>and</strong>on <strong>the</strong> current selection <strong>and</strong> make ano<strong>the</strong>r selection.<br />
• Use <strong>the</strong> CHp <strong>and</strong> CHq keys (designated by p or q below <strong>and</strong> in <strong>the</strong><br />
o<strong>the</strong>r sections to follow) to highlight <strong>the</strong> “Time <strong>Setting</strong>” field, as shown below:<br />
Main Menu<br />
Language<br />
Time <strong>Setting</strong><br />
Installation<br />
Decoder Status<br />
Offset<br />
GMT<br />
Time <strong>Setting</strong><br />
Language<br />
MENU/EXIT<br />
• Press <strong>the</strong> MENU-key to enable altering <strong>the</strong> value of “OFFSET.”<br />
• Use <strong>the</strong> p <strong>and</strong> q keys to select <strong>the</strong> offset for your time zone (cf. <strong>the</strong><br />
addendum).<br />
• Use <strong>the</strong> t <strong>and</strong> u keys to select “SUMMER” (daylight-savings time).<br />
• Use <strong>the</strong> p <strong>and</strong> q keys to switch “SUMMER” (daylight-savings time) ON/OFF.<br />
• Press <strong>the</strong> MENU-key to confirm your selection.<br />
Version 1.0 Page 17<br />
Summer<br />
OFF<br />
MENU/EXIT<br />
1 - 2<br />
1 - 1<br />
GB
<strong>Setting</strong> <strong>Up</strong> <strong>and</strong> <strong>Programming</strong> <strong>the</strong> <strong>Digital</strong> <strong>Receiver</strong><br />
7.4 <strong>Setting</strong> Decoder Status<br />
Selecting <strong>the</strong> TV Aspect Ratio:<br />
Changing <strong>the</strong> DiSEqC:<br />
• Use <strong>the</strong> p <strong>and</strong> q keys to highlight <strong>the</strong> “Decoder Status” field.<br />
• Press <strong>the</strong> MENU-key.<br />
• Use <strong>the</strong> p <strong>and</strong> q keys to highlight <strong>the</strong> “TV Aspect Ratio” field.<br />
• Press <strong>the</strong> MENU-key.<br />
Decoder Status<br />
TV Aspect Ratio<br />
DiSEqC Change<br />
All Channel Clear<br />
System Information<br />
4 : 3 16 : 9<br />
Setup Value<br />
MENU/EXIT<br />
• Use <strong>the</strong> t <strong>and</strong> u keys to select <strong>the</strong> aspect ratio, 4:3 or 16:9,<br />
for your television set.<br />
• Press <strong>the</strong> MENU-key to confirm your selection.<br />
NOTE:<br />
You will not be able to work with <strong>the</strong> <strong>Digital</strong> Satellite Equipment Control (DiSEqC)<br />
unless your satellite system is equipped with a DiSEqC-switch.<br />
CAUTION:<br />
This feature is used for reconfiguring receiver setup when changes have been<br />
made to an existing DiSEqC-distributor. These settings should thus be altered by<br />
trained specialist personnel only.<br />
• Use <strong>the</strong> p <strong>and</strong> q keys to highlight <strong>the</strong> “DiSEqC Change” field.<br />
Decoder Status<br />
TV Aspect Ratio<br />
DiSEqC Change<br />
All Channel Clear<br />
System Information<br />
OLD NEW<br />
1 1<br />
Setup Value<br />
Page 18 Version 1.0<br />
1 - 4 - 1<br />
LNB Polar Vertical<br />
B<strong>and</strong> Low<br />
Sat System A<br />
1 - 4 - 2<br />
MENU/EXIT
<strong>Setting</strong> <strong>Up</strong> <strong>and</strong> <strong>Programming</strong> <strong>the</strong> <strong>Digital</strong> <strong>Receiver</strong><br />
• Press <strong>the</strong> MENU-key.<br />
• Use <strong>the</strong> p <strong>and</strong> q keys to highlight <strong>the</strong> “OLD” DiSEqC-setting.<br />
• Use <strong>the</strong> t <strong>and</strong> u keys to transit to <strong>the</strong> “NEW” field.<br />
• Use <strong>the</strong> p <strong>and</strong> q keys to select <strong>the</strong> new DiSEqC-setting.<br />
• Press <strong>the</strong> MENU-key to confirm your selection.<br />
• Press <strong>the</strong> EXIT-key.<br />
Clearing <strong>the</strong> <strong>Receiver</strong>’s Memory:<br />
CAUTION:<br />
If this procedure is performed, all saved settings will be deleted <strong>and</strong> <strong>the</strong> receiver<br />
will have to be reprogrammed.<br />
• Use <strong>the</strong> p <strong>and</strong> q keys to highlight <strong>the</strong> “All Channel Clear” field.<br />
Decoder Status<br />
TV Aspect Ratio<br />
DiSEqC Change<br />
All Channel Clear<br />
System Information<br />
Input password<br />
• Press <strong>the</strong> MENU-key.<br />
Setup Value<br />
• Use <strong>the</strong> numerical keys to enter <strong>the</strong> number “9815” (<strong>the</strong> password).<br />
• Press <strong>the</strong> MENU-key to confirm that all stored data should be cleared<br />
from <strong>the</strong> receiver’s memory.<br />
Information on Decoder Status (System Information):<br />
• Use <strong>the</strong> p <strong>and</strong> q keys to highlight <strong>the</strong> “System Information“ field.<br />
Decoder Status<br />
TV Aspect Ratio<br />
DiSEqC Change<br />
All Channel Clear<br />
System Information<br />
Data : 20.07.98<br />
Revision : ME 1.0<br />
Firmware : 2.08A / 0.12 / 0.30<br />
Setup Value<br />
Version 1.0 Page 19<br />
1 - 4 - 3<br />
MENU/EXIT<br />
1 - 4 - 4<br />
MENU/EXIT<br />
GB
<strong>Setting</strong> <strong>Up</strong> <strong>and</strong> <strong>Programming</strong> <strong>the</strong> <strong>Digital</strong> <strong>Receiver</strong><br />
7.5 Automatic Channel Preselection<br />
7.5.1 Selecting <strong>the</strong> Satellite to be Used<br />
The displayed data concerns <strong>the</strong> revision of <strong>the</strong> decoder firmware current at <strong>the</strong><br />
time <strong>the</strong> receiver was manufactured, which might be of value if <strong>the</strong> receiver should<br />
ever require servicing.<br />
• Press <strong>the</strong> EXIT-key to exit <strong>the</strong> “Decoder Status“ menu.<br />
NOTE:<br />
Four satellites have been factory preprogrammed. Contact your dealer or a<br />
television repair shop specializing in satellite-television systems if you would like to<br />
have fur<strong>the</strong>r satellites programmed.<br />
• Use <strong>the</strong> p <strong>and</strong> q keys to highlight <strong>the</strong> “Installation“ field.<br />
• Press <strong>the</strong> MENU-key.<br />
Installation<br />
Satellit<br />
Einstellungen<br />
Signal Stärke<br />
DiSEqC/22KHz Autom. Suchlauf<br />
LNB Lokal-Freq Manueller Suchlauf<br />
Satellit ASTRA DiSEqC AUS<br />
LNB Lokal 10600MHz 22KHz EIN<br />
• Use <strong>the</strong> p <strong>and</strong> q keys to highlight <strong>the</strong> “Satellite“ field.<br />
• Press <strong>the</strong> MENU-key <strong>and</strong> <strong>the</strong>n use <strong>the</strong> p <strong>and</strong> q keys to select one of <strong>the</strong><br />
following satellites: ASTRA/EUTELSAT 13°/ASIASAT2/PANAMASAT2.<br />
Installation<br />
Satellite<br />
Setup Value<br />
Signal Strength<br />
DiSEqC/22KHz Auto Search<br />
LNB Lokal-Freq Manual Dearch<br />
ASIASAT2<br />
• Press <strong>the</strong> MENU-key to confirm your choice.<br />
MENU/EXIT<br />
MENU/EXIT<br />
You may now preselect <strong>the</strong> desired channels for <strong>the</strong> particular<br />
satellite that you have selected.<br />
Page 20 Version 1.0<br />
1 - 3<br />
1 - 3 - 1
<strong>Setting</strong> <strong>Up</strong> <strong>and</strong> <strong>Programming</strong> <strong>the</strong> <strong>Digital</strong> <strong>Receiver</strong><br />
7.5.2 Adjusting <strong>the</strong> DiSEqC-Controller <strong>and</strong>/or <strong>the</strong> 22-kHz Control Signal<br />
NOTE:<br />
This adjustment is used for selecting <strong>the</strong> correct segment of <strong>the</strong> frequency b<strong>and</strong>s.<br />
The DiSEqC-controller, which may be used only if <strong>the</strong> satellite system in use is<br />
equipped with a DiSEqC-switch, incorporates <strong>the</strong> correct settings for all of <strong>the</strong><br />
various parameters involved: upper/lower b<strong>and</strong>, horizontal/vertical polarization,<br />
<strong>and</strong> <strong>the</strong> type of satellite system involved.<br />
In <strong>the</strong> event that <strong>the</strong> satellite system involved is not DiSEqC-controlled, <strong>the</strong> setting<br />
for “<strong>Up</strong>per/Lower B<strong>and</strong>” will have to be manually entered by toggling <strong>the</strong> “22kHz“<br />
setting ON/OFF.<br />
Most commercially available satellite systems employ so-called “general-purpose”<br />
LNB’s where a setting of “22 kHz ON” will automatically effect a switch to <strong>the</strong> upper<br />
b<strong>and</strong>, where all digital satellite channels will be found (<strong>the</strong> factory default setting is<br />
22 kHz ON).<br />
• Use <strong>the</strong> p <strong>and</strong> q keys to highlight <strong>the</strong> “DiSEqC/22kHz“ field.<br />
• Press <strong>the</strong> MENU-key:<br />
Installation<br />
Satellite<br />
Signal Strength<br />
DiSEqC/22KHz Auto Search<br />
LNB Lokal-Freq Manual Search<br />
22KHz<br />
OFF<br />
Setup Value<br />
• Use <strong>the</strong> p <strong>and</strong> q keys to toggle <strong>the</strong> “22kHz“ setting ON/OFF<br />
or select <strong>the</strong> DiSEqC-controller required.<br />
• Press <strong>the</strong> MENU-key to confirm your choice.<br />
MENU/EXIT<br />
CAUTION:<br />
These settings should be altered by specially trained personnel only.<br />
In order to be able to receive <strong>the</strong> greatest possible number of channels, you will<br />
have to repeat <strong>the</strong> automatic-search procedures (cf. Section 7.5.5, below) for each<br />
<strong>and</strong> every available DiSEqC-setting <strong>and</strong> for both settings of <strong>the</strong> 22-kHz control<br />
signal {ON/OFF).<br />
Version 1.0 Page 21<br />
1 - 3 - 2<br />
GB
<strong>Setting</strong> <strong>Up</strong> <strong>and</strong> <strong>Programming</strong> <strong>the</strong> <strong>Digital</strong> <strong>Receiver</strong><br />
7.5.3 Entering <strong>the</strong> Low-Noise Block (LNB) Converter’s Local-Oscillator Frequency<br />
Commercially available satellite systems employ so-called “general-purpose” LNB’s that employ a localoscillator<br />
frequency of 10,600 MHz for <strong>the</strong>ir upper b<strong>and</strong>. In <strong>the</strong> event that your LNB uses some o<strong>the</strong>r<br />
local-oscillator frequency, you may set up your receiver to accommodate it as follows:<br />
• Use <strong>the</strong> p <strong>and</strong> q keys to highlight <strong>the</strong> “LNB Local Freq“ field:<br />
• Press <strong>the</strong> MENU-key.<br />
Installation<br />
7.5.4 Checking Signal Strength<br />
Satellite<br />
Setup Value<br />
Signal Stength<br />
DiSEqC/22KHz Auto Search<br />
LNB Lokal-Freq Manual Search<br />
5150 MHz<br />
• Use <strong>the</strong> numerical keys to enter <strong>the</strong> local-oscillator frequency<br />
employed by your LNB.<br />
• Press <strong>the</strong> MENU-key to confirm your entry.<br />
MENU/EXIT<br />
You should check <strong>the</strong> alignment of your satellite antenna on a regular basis if you want to have <strong>the</strong> bestpossible<br />
reception.<br />
• Use <strong>the</strong> p <strong>and</strong> q keys to highlight <strong>the</strong> “Signal Strength”<br />
field <strong>and</strong> <strong>the</strong>n press <strong>the</strong> MENU-key.<br />
Installation<br />
Satellite<br />
Setup Value<br />
Signal Strength<br />
DiSEqC/22KHz Auto Search<br />
LNB Lokal-Freq Manual Search<br />
SNR<br />
[STATUS]<br />
The legend “[STATUS]” will appear onscreen for a few seconds, when it will be<br />
replaced by “[LOCK],” accompanied by a triangular figure. If <strong>the</strong> latter has only<br />
yellow <strong>and</strong> red segments, <strong>the</strong>n <strong>the</strong> received signal strength is weak.<br />
Page 22 Version 1.0<br />
1 - 3 - 3<br />
1 - 3 - 4<br />
EXIT
7.5.5 Automatic Channel Search<br />
<strong>Setting</strong> <strong>Up</strong> <strong>and</strong> <strong>Programming</strong> <strong>the</strong> <strong>Digital</strong> <strong>Receiver</strong><br />
• Cautiously realign <strong>the</strong> antenna until <strong>the</strong> triangular figure reaches<br />
maximum size.<br />
You will <strong>the</strong>n have <strong>the</strong> best-possible reception of <strong>the</strong> broadcast signal.<br />
If <strong>the</strong> legend “[UNLOCK]” should appear following “[STATUS],” check <strong>the</strong> cabling<br />
interconnecting <strong>the</strong> antenna <strong>and</strong> <strong>the</strong> receiver <strong>and</strong> <strong>the</strong> parameter settings covered<br />
in <strong>the</strong> preceding sections.<br />
• Press <strong>the</strong> EXIT-key to exit this menu.<br />
Once <strong>the</strong> settings covered under Sections 7.5.1 through 7.5.4, above, have all been made, you may<br />
conduct an automatic channel search over those downlink frequency b<strong>and</strong>s that have been set.<br />
• Use <strong>the</strong> p <strong>and</strong> q keys to highlight <strong>the</strong> “Auto Search“ field:<br />
Installation<br />
Satellite<br />
Setup Value<br />
Signal Strength<br />
DiSEqC/22KHz Auto Search<br />
LNB Lokal-Freq Manual Search<br />
Search complete<br />
DF:3734 SR:5.832 3/26 New:5<br />
• Press <strong>the</strong> MENU-key to start <strong>the</strong> search.<br />
While <strong>the</strong> search is in progress, a clock will appear at <strong>the</strong> lower right-h<strong>and</strong> corner of<br />
<strong>the</strong> screen. You will also see a blue bar indicating <strong>the</strong> extent of <strong>the</strong> frequency b<strong>and</strong><br />
that has thus far been searched. The o<strong>the</strong>r items appearing onscreen have <strong>the</strong><br />
following meanings:<br />
DF: .... - The satellite down-link frequency involved<br />
SR:.... - The symbol rate<br />
.../... - The ratio of <strong>the</strong> total number of transponders found to <strong>the</strong> total number<br />
of transponders available within <strong>the</strong> preset frequency b<strong>and</strong> involved<br />
New:... - The total number of new channels saved to <strong>the</strong> receiver’s memory<br />
When <strong>the</strong> search has been concluded, <strong>the</strong> clock will disappear from <strong>the</strong> screen <strong>and</strong><br />
<strong>the</strong> message “Search OK“ should appear onscreen. If instead of this message <strong>the</strong><br />
message “Search fail” should appear onscreen, <strong>the</strong>n <strong>the</strong> settings made above will<br />
have to be checked, one after <strong>the</strong> o<strong>the</strong>r, in <strong>the</strong> order in which <strong>the</strong>y were made <strong>and</strong><br />
corrected wherever necessary until <strong>the</strong> search is successful.<br />
• Press <strong>the</strong> EXIT-key to exit this menu <strong>and</strong> view a list of those<br />
channels that were found.<br />
Version 1.0 Page 23<br />
1 - 3 - 5<br />
EXIT<br />
GB
<strong>Setting</strong> <strong>Up</strong> <strong>and</strong> <strong>Programming</strong> <strong>the</strong> <strong>Digital</strong> <strong>Receiver</strong><br />
7.6 Manual Channel Preselection<br />
7.6.1 Entering <strong>the</strong> Downlink Frequency<br />
Once <strong>the</strong> settings of Sections 7.5.1 through 7.5.4, above, have been concluded, you may manually<br />
preselect any of <strong>the</strong> channels falling within <strong>the</strong> various preset downlink frequency b<strong>and</strong>s, as follows:<br />
• While in <strong>the</strong> “Installation“ menu, use <strong>the</strong> p <strong>and</strong> q keys to<br />
highlight <strong>the</strong> “Manual Search” field.<br />
• Press <strong>the</strong> MENU-key.<br />
• Use <strong>the</strong> p <strong>and</strong> q keys to highlight <strong>the</strong> “Down Frequency” field:<br />
• Press <strong>the</strong> MENU-key to confirm your selection.<br />
Manual Search<br />
Down Frequency<br />
Symbol Rate<br />
LNB Polarity<br />
Start Search<br />
Setup Value<br />
LNB Local 5150MHz DiSEqC 4<br />
Down Freq 3700MHz LNB Polar Horizontal<br />
Symbol Rate 28.100MHz 22KHz ON<br />
• Use <strong>the</strong> numerical keys to enter <strong>the</strong> desired downlink frequency<br />
(refer to satellite-television magazines for lists of <strong>the</strong> downlink<br />
frequencies of <strong>the</strong> various broadcast channels).<br />
• Pressing <strong>the</strong> EXIT-key will delete <strong>the</strong> entire entry.<br />
MENU/EXIT<br />
• Pressing <strong>the</strong> t key will delete <strong>the</strong> rightmost digit of <strong>the</strong> entry.<br />
• Once <strong>the</strong> entry is correct, press <strong>the</strong> MENU-key to confirm it.<br />
Manual Search<br />
DownFrequency<br />
Symbol Rate<br />
LNB Polarity<br />
Start Search<br />
Setup Value<br />
3700 MHz<br />
Page 24 Version 1.0<br />
1 - 3 - 6<br />
1 - 3 - 6 - 1<br />
MENU/EXIT
7.6.2 Entering <strong>the</strong> Symbol Rate<br />
7.6.3 Selecting <strong>the</strong> Polarization<br />
<strong>Setting</strong> <strong>Up</strong> <strong>and</strong> <strong>Programming</strong> <strong>the</strong> <strong>Digital</strong> <strong>Receiver</strong><br />
• Use <strong>the</strong> p <strong>and</strong> q keys to highlight <strong>the</strong> “Symbol Rate“ field<br />
<strong>and</strong> <strong>the</strong>n press <strong>the</strong> MENU-key to confirm your selection.<br />
Manual Search<br />
Down Frequency<br />
Symbol Rate<br />
LNB Polarity<br />
Start Search<br />
• Use <strong>the</strong> numerical keys to enter <strong>the</strong> desired symbol rate (SR)<br />
(refer to satellite-television magazines for lists of symbol rates).<br />
• Pressing <strong>the</strong> EXIT-key will delete <strong>the</strong> entire entry.<br />
• Pressing <strong>the</strong> t key will delete <strong>the</strong> rightmost digit of <strong>the</strong> entry.<br />
• Once <strong>the</strong> entry is correct, press <strong>the</strong> MENU-key to confirm it.<br />
NOTE:<br />
If a DiSEqC-controller is in use, this setting will be preset by<br />
<strong>the</strong> controller <strong>and</strong> thus need not be repeated.<br />
• Use <strong>the</strong> p <strong>and</strong> q keys to highlight <strong>the</strong> “Polarization“ field.<br />
• Press <strong>the</strong> MENU-key.<br />
Setup Value<br />
28.100 MHz<br />
Manual Search<br />
Down Frequency<br />
Symbol Rate<br />
LNB Polarity<br />
Start Search<br />
Horizontal Vertical<br />
Setup Value<br />
• Use <strong>the</strong> t <strong>and</strong> u keys to select ei<strong>the</strong>r “Horizontal“ or<br />
“Vertical" polarization (listed in satellite-television magazines).<br />
• Press <strong>the</strong> MENU-key to confirm your entry.<br />
1 - 3 - 6 - 2<br />
MENU/EXIT<br />
1 - 3 - 6 - 3<br />
MENU/EXIT<br />
Version 1.0 Page 25<br />
GB
<strong>Setting</strong> <strong>Up</strong> <strong>and</strong> <strong>Programming</strong> <strong>the</strong> <strong>Digital</strong> <strong>Receiver</strong><br />
7.6.4 Conducting a Manual Search<br />
Once <strong>the</strong> settings of Sections 7.6.1 through 7.6.3, above, have been concluded, you may initiate a<br />
manual search.<br />
• Use <strong>the</strong> p <strong>and</strong> q keys to highlight <strong>the</strong> “Start Search“ field.<br />
Manual Search<br />
Down Frequency<br />
Symbol Rate<br />
LNB Polarity<br />
Start Search<br />
Search OK<br />
DF:4000 SR:28.125 New:18<br />
Setup Value<br />
• Press <strong>the</strong> MENU-key to start <strong>the</strong> search.<br />
While <strong>the</strong> search is in progress, a clock will appear at <strong>the</strong> lower right-h<strong>and</strong> corner of<br />
<strong>the</strong> screen. You will also see a blue bar indicating <strong>the</strong> extent of <strong>the</strong> frequency b<strong>and</strong><br />
that has thus far been searched. The o<strong>the</strong>r items appearing onscreen have <strong>the</strong><br />
following meanings:<br />
DF: .... - The satellite downlink frequency involved<br />
SR:.... - The symbol rate<br />
New:... - The total number of new channels saved to <strong>the</strong> receiver’s memory<br />
Once <strong>the</strong> search has been successfully concluded, <strong>the</strong> message “Search OK“ will<br />
appear onscreen.<br />
• Press <strong>the</strong> EXIT-key to exit <strong>the</strong> menu <strong>and</strong> view <strong>the</strong><br />
channel found.<br />
If <strong>the</strong> search fails to locate a channel, one of <strong>the</strong> following error messages will<br />
appear onscreen:<br />
“Tuning fail“ - Check <strong>the</strong> symbol rate.<br />
1 - 3 - 6 - 4<br />
“Search fail“ - Check <strong>the</strong> local-oscillator frequency, <strong>the</strong> signal<br />
strength, <strong>the</strong> 22-kHz setting, <strong>and</strong> <strong>the</strong> choice of satellite<br />
to be involved.<br />
“No free channel“ - Check <strong>the</strong> downlink frequency.<br />
“Search cancel“ - The search was cancelled by pressing <strong>the</strong> EXIT-key<br />
before <strong>the</strong> search could be concluded.<br />
Page 26 Version 1.0<br />
EXIT
8 Operating <strong>the</strong> <strong>Digital</strong> <strong>Receiver</strong><br />
Operating <strong>the</strong> <strong>Digital</strong> <strong>Receiver</strong><br />
Once all of <strong>the</strong> above settings have been made, your receiver will be ready for use.<br />
8.1 Switching On <strong>the</strong> <strong>Receiver</strong><br />
8.2 Channel Selection<br />
NOTE:<br />
<strong>Digital</strong> television broadcasting involves <strong>the</strong> transmission <strong>and</strong> processing of large<br />
quantities of data. Switching from one channel to ano<strong>the</strong>r thus takes a bit longer<br />
than in <strong>the</strong> case of analog television broadcasting.<br />
An hourglass or <strong>the</strong> text message “Please wait” will appear onscreen during this<br />
waiting period.<br />
• Press <strong>the</strong> ON/OFF-switch on <strong>the</strong> receiver’s front panel.<br />
• Press <strong>the</strong> ON/OFF-key on <strong>the</strong> remote control.<br />
• Use <strong>the</strong> numerical keys to enter <strong>the</strong> number of <strong>the</strong> desired channel (cf. also<br />
Section 8.3.1, below, regarding procedures for selecting channels from a list).<br />
NOTE:<br />
Although channel numbers invariably have 3 digits, e.g., 001, those with only one<br />
or two significant digits may be entered as single-digit or dual-digit numbers, e.g., 1<br />
or 13. The receiver will have tuned in <strong>the</strong> selected channel after a delay of about<br />
3 seconds.<br />
• Use <strong>the</strong> p or q keys to select <strong>the</strong> next or preceding channel, respectively.<br />
• Pressing <strong>the</strong> LAST-key will return you to <strong>the</strong> last channel viewed.<br />
Each time you change <strong>the</strong> channel, <strong>the</strong> new channel number, date, day of <strong>the</strong><br />
week, time of day, <strong>and</strong> <strong>the</strong> message “New channel change” will be displayed<br />
onscreen for a few seconds.<br />
If <strong>the</strong> new channel’s downlink frequency is <strong>the</strong> same as that of <strong>the</strong> current channel,<br />
<strong>the</strong> new channel will be tuned in <strong>and</strong> <strong>the</strong> associated data displayed onscreen.<br />
However, if its downlink frequency differs from that of <strong>the</strong> current channel, <strong>the</strong><br />
message “RF signal tuning” will appear onscreen while <strong>the</strong> new channel is being<br />
tuned in.<br />
If <strong>the</strong> message “No signal“ appears in this menu, <strong>the</strong>n <strong>the</strong> channel chosen cannot<br />
be received by your satellite antenna.<br />
These onscreen messages will be deleted after about 3 seconds have elapsed or<br />
whenever <strong>the</strong> EXIT-key is pressed<br />
This menu displays <strong>the</strong> channel number <strong>and</strong> channel-tuning data, along with <strong>the</strong><br />
current date, day of <strong>the</strong> week, <strong>and</strong> time of day.<br />
Version 1.0 Page 27<br />
GB
Operating <strong>the</strong> <strong>Digital</strong> <strong>Receiver</strong><br />
8.3 Using Channel Directories<br />
Due to <strong>the</strong> large number of digital television channels, channel directories are used for selecting channels<br />
<strong>and</strong> arranging <strong>the</strong>m in preferred orders.<br />
8.3.1 Displaying Channel Directories <strong>and</strong> Selecting Channels<br />
• Press <strong>the</strong> FAV-key on <strong>the</strong> remote control while viewing<br />
a television program:<br />
Favorite Video<br />
P001 GDTV<br />
P002 Hunan SRTV<br />
P003 DW-tv<br />
P004 MCM<br />
P005 RAI internation<br />
FAV/RADIO/INFO/MENU<br />
You will <strong>the</strong>n have <strong>the</strong> following facilities available:<br />
• Using <strong>the</strong> W <strong>and</strong> X keys to browse through <strong>the</strong><br />
pages of <strong>the</strong> directories, each of which lists a<br />
total of 10 channels.<br />
• Using <strong>the</strong> S <strong>and</strong> T keys for selecting channels.<br />
• Using <strong>the</strong> numerical keys to enter channel numbers.<br />
• Using <strong>the</strong> RADIO-key to switch to radio reception.<br />
• Using <strong>the</strong> INFO-key to call up additional information on<br />
broadcast channels.<br />
• Using <strong>the</strong> MENU-key to save your edited channel directories.<br />
8.3.2 Editing Channel Directories (Arranging Channels in Preferred Orders)<br />
The following data appear in both television-channel directories <strong>and</strong> radio-station directories.<br />
NOTE:<br />
The channel currently running in <strong>the</strong> background will change if its channel number<br />
is highlighted for several seconds.<br />
• Pressing <strong>the</strong> FAV-key (“Favorite Menu” key) while a channel directory is<br />
displayed onscreen will allow you to create or edit a directory listing your<br />
favorite channels.<br />
Page 28 Version 1.0
Moving Channels:<br />
Deleting Channels:<br />
Favorite Video – Edit<br />
P001 GDTV<br />
P002 Hunan SRTV<br />
P003 DW-tv<br />
P004 MCM<br />
P005 RAI internation<br />
MOVE DELETE<br />
• Use <strong>the</strong> t <strong>and</strong> u to highlight <strong>the</strong> “Move” field.<br />
• Press <strong>the</strong> MENU-key to confirm your selection.<br />
Operating <strong>the</strong> <strong>Digital</strong> <strong>Receiver</strong><br />
Networkname<br />
Frequency<br />
Symbol Rate<br />
Information<br />
• Ei<strong>the</strong>r use <strong>the</strong> p <strong>and</strong> q keys to select <strong>the</strong> channel to be moved or enter its<br />
channel number using <strong>the</strong> numerical keys.<br />
• Press <strong>the</strong> MENU-key to highlight <strong>the</strong> channel to be moved.<br />
The channel involved will <strong>the</strong>n be displayed in blue.<br />
• Ei<strong>the</strong>r use <strong>the</strong> p <strong>and</strong> q keys to <strong>the</strong> select its destination location or enter its<br />
channel number using <strong>the</strong> numerical keys.<br />
• Press <strong>the</strong> MENU-key to move <strong>the</strong> channel to <strong>the</strong> destination location.<br />
• Repeat <strong>the</strong> above procedures until all channels have been arranged in <strong>the</strong><br />
desired order.<br />
• Press <strong>the</strong> EXIT-key twice in succession to exit editing mode.<br />
• Press <strong>the</strong> FAV-key while a channel directory is displayed onscreen in order to<br />
enable deletion of one or more channels from that directory.<br />
• Use <strong>the</strong> t <strong>and</strong> u keys to highlight <strong>the</strong> “Delete” field.<br />
• Press <strong>the</strong> MENU-key to confirm your selection.<br />
Version 1.0 Page 29<br />
TV (PIG)<br />
GB
Operating <strong>the</strong> <strong>Digital</strong> <strong>Receiver</strong><br />
Favorite Video – Edit<br />
P001 GDTV<br />
P002 Hunan SRTV<br />
P003 DW-tv<br />
P004 MCM<br />
P005 RAI internation<br />
MOVE DELETE<br />
• Use <strong>the</strong> p <strong>and</strong> q keys to highlight <strong>the</strong> channel to be deleted.<br />
• Press <strong>the</strong> MENU-key. The channel involved will be displayed in blue.<br />
• Press <strong>the</strong> “1“-key to delete <strong>the</strong> channel, or press <strong>the</strong> “0”-key to abort <strong>the</strong><br />
deletion procedure.<br />
Repeat <strong>the</strong> above procedures, commencing with <strong>the</strong> selection of <strong>the</strong> channel to be<br />
deleted, until all channels to be deleted have been deleted..<br />
• Press <strong>the</strong> EXIT-key to return to <strong>the</strong> “Edit” menu.<br />
8.3.3 Obtaining Fur<strong>the</strong>r Information on Channels<br />
Networkname<br />
Frequency<br />
Symbol Rate<br />
Information<br />
• Press <strong>the</strong> INFO-key while a channel directory is displayed onscreen.<br />
Favorite Video – Edit<br />
P001 GDTV<br />
P002 Hunan SRTV<br />
P003 DW-tv<br />
P004 MCM<br />
P005 RAI internation<br />
MOVE DELETE<br />
The picture for <strong>the</strong> channel currently running will be displayed at <strong>the</strong> upper righth<strong>and</strong><br />
corner of <strong>the</strong> screen <strong>and</strong> fur<strong>the</strong>r technical information on that channel will be<br />
displayed in <strong>the</strong> lower section of <strong>the</strong> screen.<br />
Page 30 Version 1.0<br />
TV (PIG)<br />
Networkname<br />
Frequency<br />
Symbol Rate<br />
TV (PIG)<br />
Information
8.4 Adjusting <strong>the</strong> Volume of <strong>the</strong> Sound Track/Muting<br />
8.5 Radio Reception<br />
• Press <strong>the</strong> MUTE-key to mute <strong>the</strong> sound track.<br />
Operating <strong>the</strong> <strong>Digital</strong> <strong>Receiver</strong><br />
• Ei<strong>the</strong>r press <strong>the</strong> MUTE-key a second time or press <strong>the</strong> volume-control key (u)<br />
to cancel muting <strong>and</strong> restore <strong>the</strong> sound track.<br />
• Use <strong>the</strong> t <strong>and</strong> u keys to adjust <strong>the</strong> volume.<br />
VOL. 15<br />
The volume setting will be displayed in terms of a range (MIN, 1 - 30, MAX).<br />
The display will disappear from <strong>the</strong> screen if no volume adjustments have been<br />
made for several seconds.<br />
In addition to digital television broadcasting, <strong>the</strong>re are many radio stations that broadcast radio programs<br />
in digital Hi-Fi quality.<br />
• Press <strong>the</strong> RADIO-key to switch from TV-mode to radio-reception mode.<br />
• Use <strong>the</strong> p or q keys to select <strong>the</strong> radio station with <strong>the</strong> next higher or lower<br />
broadcast frequency, respectively.<br />
• Press <strong>the</strong> LAST-key to return to <strong>the</strong> radio station that was last tuned in.<br />
• Press <strong>the</strong> RADIO-key a second time to return to TV-mode.<br />
All of <strong>the</strong> facilities available for creating <strong>and</strong> editing television-channel directories may also be used for<br />
creating <strong>and</strong> editing radio-station directories while in radio-reception mode.<br />
8.6 Selecting a Language <strong>and</strong> Audio Mode<br />
Some radio station broadcast radio programs in several languages <strong>and</strong>/or audio<br />
modes.<br />
• Press <strong>the</strong> AUDIO-key <strong>and</strong> <strong>the</strong>n press one of <strong>the</strong> t or u keys to highlight <strong>the</strong><br />
left-h<strong>and</strong> field in order to select one of <strong>the</strong> languages broadcast by <strong>the</strong> station.<br />
Version 1.0 Page 31<br />
MUTE<br />
Audio Mode<br />
BL 1: Stereo (L+R)<br />
GB
Operating <strong>the</strong> <strong>Digital</strong> <strong>Receiver</strong><br />
• Use p <strong>and</strong> q keys to select <strong>the</strong> language desired.<br />
• Press one of <strong>the</strong> t or u keys to highlight <strong>the</strong> right-h<strong>and</strong> field.<br />
8.7 Using <strong>the</strong> <strong>Receiver</strong> With a Video Recorder<br />
8.8 Onscreen Program Guides<br />
• Use <strong>the</strong> p <strong>and</strong> q keys to select one of <strong>the</strong> following options:<br />
Stereo (L+R) – Left <strong>and</strong> right stereo channels<br />
Mono1 (L+L) – Left stereo channel only<br />
Mono2 (R+R) – Right stereo channel only<br />
Swap (R+L) – Left <strong>and</strong> right stereo channel interchanged<br />
• Press <strong>the</strong> AUDIO-key a second time to confirm your selection.<br />
This feature will be needed if you intend to operate <strong>the</strong> receiver in dualantennae<br />
mode <strong>and</strong> record television programs on a video cassette recorder<br />
(VCR). The VCR-output jack will <strong>the</strong>n transmit information on whe<strong>the</strong>r <strong>the</strong><br />
television program to be recorded is coming from <strong>the</strong> receiver’s analog or digital<br />
section.<br />
• Press <strong>the</strong> VCR OUT-key to access <strong>the</strong> menu items used or selecting <strong>the</strong> type of<br />
signal to be sent to <strong>the</strong> VCR Scart-output jack.<br />
VCR-SCART output<br />
<strong>Digital</strong> Analog<br />
• Use <strong>the</strong> t <strong>and</strong> u to select <strong>the</strong> type of signal (output signal from <strong>the</strong> receiver’s<br />
analog or digital section) to be made available at <strong>the</strong> VCR-Scart output jack.<br />
• Press <strong>the</strong> MENU-key to confirm your selection.<br />
In addition to broadcasting digital video <strong>and</strong> audio signals, television broadcasters have <strong>the</strong> option of<br />
transmitting information on <strong>the</strong>ir programming schedules in <strong>the</strong> form of a data stream. Pressing <strong>the</strong><br />
GUIDE-key will call up this information for display onscreen.<br />
• Press <strong>the</strong> GUIDE-key while watching a television program to call up <strong>the</strong><br />
following display page (this facility is unavailable during radio reception):<br />
Program Guide – Video<br />
Data : 21/2/1998<br />
End time : 10:30<br />
Content :<br />
Rating :<br />
Story :<br />
Video :<br />
Audio :<br />
EBU data :<br />
Press EXIT to stop search<br />
Page 32 Version 1.0
Operating <strong>the</strong> <strong>Digital</strong> <strong>Receiver</strong><br />
This information largely consists of programming schedules, along with additional<br />
information provided by broadcasters, such as:<br />
Video Format: Content:<br />
4:3 Movies/drama<br />
16:9 News<br />
16:9 (pan vector) Shows/game shows<br />
> 16:9 Sports<br />
Children’s programs/programs for young people<br />
Audio Mode: Music/dance<br />
Single mono Art/cultural programs<br />
Dual mono Social matters/politics/business<br />
Stereo Educational programs/science<br />
Multilingual Recreation<br />
Surround sound Special topics<br />
EBU-Data: Approved for:<br />
Teletext subtitles Children over 7 years old<br />
Teletext<br />
Subtitles<br />
Subtitles (4:3)<br />
Subtitles (16:9)<br />
Subtitles (2.21:1) GB<br />
Version 1.0 Page 33
<strong>Programming</strong> <strong>the</strong> Remote Control<br />
9 <strong>Programming</strong> <strong>the</strong> Remote Control<br />
The remote control may be programmed using two different methods, ei<strong>the</strong>r by entering a three-digit<br />
manufacturer’s code (manufacturer’s ID) taken from <strong>the</strong> addendum or by means of a systematic search.<br />
Method 1: Entering <strong>the</strong> Manufacturer’s Code:<br />
Method 2: Systematic Search:<br />
Step 1: Press <strong>the</strong> SET-Taste <strong>and</strong> hold it depressed for about 3 seconds until<br />
<strong>the</strong> red LED illuminates.<br />
Step 2: Press <strong>the</strong> key for <strong>the</strong> type of device to be controlled:<br />
SAT Analog satellite receivers<br />
DVB <strong>Digital</strong> satellite receivers<br />
TV Television sets<br />
VCR Video cassette recorders<br />
Step 3: Look up <strong>the</strong> manufacturer’s code for <strong>the</strong> particular model to be<br />
controlled in <strong>the</strong> addendum, which will be listed under <strong>the</strong><br />
manufacturer’s name. If more than one code is listed, try out each of<br />
<strong>the</strong>m in turn.<br />
Switch on <strong>the</strong> device to be controlled.<br />
Point <strong>the</strong> remote control at that device.<br />
Enter (one of) its three-digit manufacturer’s code(s) using <strong>the</strong> numerical<br />
keys. The device will switch off if <strong>the</strong> code entered is <strong>the</strong> correct one.<br />
Step 4: Press <strong>the</strong> SET-key to save <strong>the</strong> entry. The red LED will blink three times<br />
<strong>and</strong> <strong>the</strong>n be extinguished.<br />
If nothing happens, repeat Steps 1 through 4 using ano<strong>the</strong>r choice of<br />
manufacturer’s code.<br />
Step 1: As for Method 1.<br />
Step 2: As for Method 1.<br />
Step 3: Switch on <strong>the</strong> device to be controlled.<br />
Point <strong>the</strong> remote control at that device.<br />
Repeatedly press <strong>the</strong> red ON/OFF-key <strong>and</strong> continue repeatedly<br />
pressing it until <strong>the</strong> device switches off.<br />
NOTE:<br />
Many devices are ra<strong>the</strong>r slow to switch off. You should thus wait a few seconds to<br />
see if <strong>the</strong> device switches off between presses of <strong>the</strong> ON/OFF-key.<br />
Page 34 Version 1.0
10 Troubleshooting Tips<br />
Troubleshooting Tips<br />
Step 4: Press <strong>the</strong> SET-key to save <strong>the</strong> setting. The red LED will<br />
blink three times <strong>and</strong> <strong>the</strong>n be extinguished.<br />
If nothing happens, repeat Steps 1 through 4.<br />
When programming of <strong>the</strong> remote control has been concluded:<br />
• Press <strong>the</strong> blue key for <strong>the</strong> type of device to be controlled.<br />
• The red LED will briefly illuminate. You may <strong>the</strong>n use <strong>the</strong> remote control for<br />
controlling <strong>the</strong> device, as specified in <strong>the</strong> table of Section 4.1, above, for <strong>the</strong><br />
particular type of device involved.<br />
Problem Possible Cause(s) Suggested Remedies<br />
Remote control<br />
inoperative.<br />
No picture, but <strong>the</strong><br />
onscreen menu is<br />
present.<br />
White/black snow on<br />
several channels<br />
(analog reception only).<br />
Snow still present<br />
following fine tuning<br />
(analog reception only).<br />
Audio interference<br />
(analog reception only)<br />
The batteries are discharged. Replace <strong>the</strong> batteries.<br />
The wrong blue key was Press <strong>the</strong> blue key for <strong>the</strong> particular type<br />
pressed.<br />
of device involved.<br />
The remote control is not Point <strong>the</strong> remote control at <strong>the</strong> device<br />
pointed at <strong>the</strong> device to be<br />
controlled.<br />
involved.<br />
The satellite system is Check <strong>the</strong> satellite-antenna cable <strong>and</strong><br />
defective, <strong>the</strong> antenna is all connectors. Realign <strong>the</strong> antenna.<br />
misaligned, or <strong>the</strong> LNB is<br />
defective.<br />
Check <strong>the</strong> LNB.<br />
The antenna is misaligned. Realign <strong>the</strong> antenna. Fine tune <strong>the</strong><br />
receiver-LNB from <strong>the</strong> System menu.<br />
High signal attenuation on <strong>the</strong><br />
cable connecting <strong>the</strong> receiver<br />
to <strong>the</strong> satellite antenna.<br />
Replace <strong>the</strong> satellite-antenna cable<br />
or use a signal amplifier.<br />
The LNB is defective. Replace <strong>the</strong> LNB.<br />
Bad contacts at one or more<br />
connectors (water has gotten<br />
into <strong>the</strong>m or <strong>the</strong>ir contacts are<br />
corroded).<br />
The satellite antenna employed<br />
is too small or <strong>the</strong> LNB is<br />
defective.<br />
Audio frequency incorrectly<br />
set.<br />
Repair or replace <strong>the</strong> connector(s)<br />
involved.<br />
Replace <strong>the</strong> antenna with a larger one.<br />
Replace <strong>the</strong> LNB.<br />
Set <strong>the</strong> correct audio frequency.<br />
11 Disposing of <strong>the</strong> <strong>Receiver</strong>, Its Packagings, <strong>and</strong> Accessory Items<br />
The satellite receiver, its packagings, <strong>and</strong> its batteries are not household waste <strong>and</strong> must be disposed of<br />
separately. Inquire with your local authorities regarding applicable regulations <strong>and</strong> proper disposal<br />
procedures <strong>and</strong>, if you must dispose of <strong>the</strong>m, do so in accordance <strong>the</strong>rewith.<br />
You should save all packagings for later use in <strong>the</strong> event that <strong>the</strong> receiver must be transported, e.g., if<br />
you move house, or sent in for repair, since only <strong>the</strong>y provide <strong>the</strong> necessary degrees of protection.<br />
Version 1.0 Page 35