Setting Up and Programming the Digital Receiver - Radix
Setting Up and Programming the Digital Receiver - Radix
Setting Up and Programming the Digital Receiver - Radix
You also want an ePaper? Increase the reach of your titles
YUMPU automatically turns print PDFs into web optimized ePapers that Google loves.
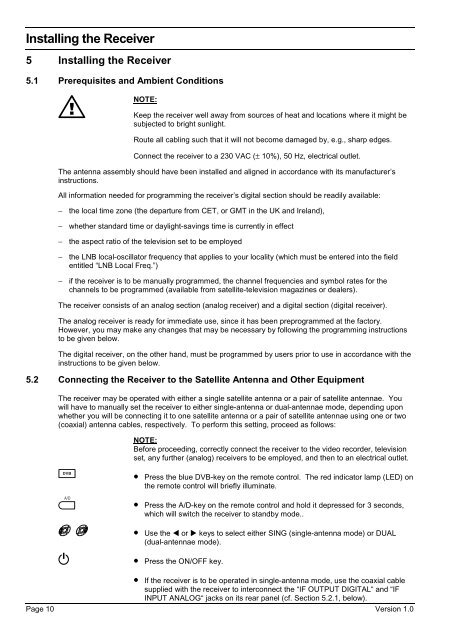
Installing <strong>the</strong> <strong>Receiver</strong><br />
5 Installing <strong>the</strong> <strong>Receiver</strong><br />
5.1 Prerequisites <strong>and</strong> Ambient Conditions<br />
NOTE:<br />
Keep <strong>the</strong> receiver well away from sources of heat <strong>and</strong> locations where it might be<br />
subjected to bright sunlight.<br />
Route all cabling such that it will not become damaged by, e.g., sharp edges.<br />
Connect <strong>the</strong> receiver to a 230 VAC (± 10%), 50 Hz, electrical outlet.<br />
The antenna assembly should have been installed <strong>and</strong> aligned in accordance with its manufacturer’s<br />
instructions.<br />
All information needed for programming <strong>the</strong> receiver’s digital section should be readily available:<br />
− <strong>the</strong> local time zone (<strong>the</strong> departure from CET, or GMT in <strong>the</strong> UK <strong>and</strong> Irel<strong>and</strong>),<br />
− whe<strong>the</strong>r st<strong>and</strong>ard time or daylight-savings time is currently in effect<br />
− <strong>the</strong> aspect ratio of <strong>the</strong> television set to be employed<br />
− <strong>the</strong> LNB local-oscillator frequency that applies to your locality (which must be entered into <strong>the</strong> field<br />
entitled “LNB Local Freq.”)<br />
− if <strong>the</strong> receiver is to be manually programmed, <strong>the</strong> channel frequencies <strong>and</strong> symbol rates for <strong>the</strong><br />
channels to be programmed (available from satellite-television magazines or dealers).<br />
The receiver consists of an analog section (analog receiver) <strong>and</strong> a digital section (digital receiver).<br />
The analog receiver is ready for immediate use, since it has been preprogrammed at <strong>the</strong> factory.<br />
However, you may make any changes that may be necessary by following <strong>the</strong> programming instructions<br />
to be given below.<br />
The digital receiver, on <strong>the</strong> o<strong>the</strong>r h<strong>and</strong>, must be programmed by users prior to use in accordance with <strong>the</strong><br />
instructions to be given below.<br />
5.2 Connecting <strong>the</strong> <strong>Receiver</strong> to <strong>the</strong> Satellite Antenna <strong>and</strong> O<strong>the</strong>r Equipment<br />
The receiver may be operated with ei<strong>the</strong>r a single satellite antenna or a pair of satellite antennae. You<br />
will have to manually set <strong>the</strong> receiver to ei<strong>the</strong>r single-antenna or dual-antennae mode, depending upon<br />
whe<strong>the</strong>r you will be connecting it to one satellite antenna or a pair of satellite antennae using one or two<br />
(coaxial) antenna cables, respectively. To perform this setting, proceed as follows:<br />
NOTE:<br />
Before proceeding, correctly connect <strong>the</strong> receiver to <strong>the</strong> video recorder, television<br />
set, any fur<strong>the</strong>r (analog) receivers to be employed, <strong>and</strong> <strong>the</strong>n to an electrical outlet.<br />
• Press <strong>the</strong> blue DVB-key on <strong>the</strong> remote control. The red indicator lamp (LED) on<br />
<strong>the</strong> remote control will briefly illuminate.<br />
• Press <strong>the</strong> A/D-key on <strong>the</strong> remote control <strong>and</strong> hold it depressed for 3 seconds,<br />
which will switch <strong>the</strong> receiver to st<strong>and</strong>by mode..<br />
• Use <strong>the</strong> t or u keys to select ei<strong>the</strong>r SING (single-antenna mode) or DUAL<br />
(dual-antennae mode).<br />
• Press <strong>the</strong> ON/OFF key.<br />
• If <strong>the</strong> receiver is to be operated in single-antenna mode, use <strong>the</strong> coaxial cable<br />
supplied with <strong>the</strong> receiver to interconnect <strong>the</strong> “IF OUTPUT DIGITAL“ <strong>and</strong> “IF<br />
INPUT ANALOG“ jacks on its rear panel (cf. Section 5.2.1, below).<br />
Page 10 Version 1.0


