Setting Up and Programming the Digital Receiver - Radix
Setting Up and Programming the Digital Receiver - Radix
Setting Up and Programming the Digital Receiver - Radix

You also want an ePaper? Increase the reach of your titles
YUMPU automatically turns print PDFs into web optimized ePapers that Google loves.
7.5.5 Automatic Channel Search<br />
<strong>Setting</strong> <strong>Up</strong> <strong>and</strong> <strong>Programming</strong> <strong>the</strong> <strong>Digital</strong> <strong>Receiver</strong><br />
• Cautiously realign <strong>the</strong> antenna until <strong>the</strong> triangular figure reaches<br />
maximum size.<br />
You will <strong>the</strong>n have <strong>the</strong> best-possible reception of <strong>the</strong> broadcast signal.<br />
If <strong>the</strong> legend “[UNLOCK]” should appear following “[STATUS],” check <strong>the</strong> cabling<br />
interconnecting <strong>the</strong> antenna <strong>and</strong> <strong>the</strong> receiver <strong>and</strong> <strong>the</strong> parameter settings covered<br />
in <strong>the</strong> preceding sections.<br />
• Press <strong>the</strong> EXIT-key to exit this menu.<br />
Once <strong>the</strong> settings covered under Sections 7.5.1 through 7.5.4, above, have all been made, you may<br />
conduct an automatic channel search over those downlink frequency b<strong>and</strong>s that have been set.<br />
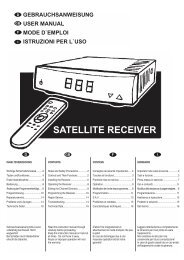
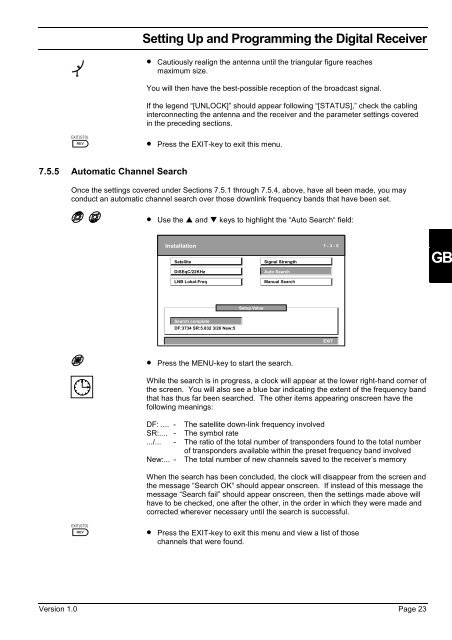
• Use <strong>the</strong> p <strong>and</strong> q keys to highlight <strong>the</strong> “Auto Search“ field:<br />
Installation<br />
Satellite<br />
Setup Value<br />
Signal Strength<br />
DiSEqC/22KHz Auto Search<br />
LNB Lokal-Freq Manual Search<br />
Search complete<br />
DF:3734 SR:5.832 3/26 New:5<br />
• Press <strong>the</strong> MENU-key to start <strong>the</strong> search.<br />
While <strong>the</strong> search is in progress, a clock will appear at <strong>the</strong> lower right-h<strong>and</strong> corner of<br />
<strong>the</strong> screen. You will also see a blue bar indicating <strong>the</strong> extent of <strong>the</strong> frequency b<strong>and</strong><br />
that has thus far been searched. The o<strong>the</strong>r items appearing onscreen have <strong>the</strong><br />
following meanings:<br />
DF: .... - The satellite down-link frequency involved<br />
SR:.... - The symbol rate<br />
.../... - The ratio of <strong>the</strong> total number of transponders found to <strong>the</strong> total number<br />
of transponders available within <strong>the</strong> preset frequency b<strong>and</strong> involved<br />
New:... - The total number of new channels saved to <strong>the</strong> receiver’s memory<br />
When <strong>the</strong> search has been concluded, <strong>the</strong> clock will disappear from <strong>the</strong> screen <strong>and</strong><br />
<strong>the</strong> message “Search OK“ should appear onscreen. If instead of this message <strong>the</strong><br />
message “Search fail” should appear onscreen, <strong>the</strong>n <strong>the</strong> settings made above will<br />
have to be checked, one after <strong>the</strong> o<strong>the</strong>r, in <strong>the</strong> order in which <strong>the</strong>y were made <strong>and</strong><br />
corrected wherever necessary until <strong>the</strong> search is successful.<br />
• Press <strong>the</strong> EXIT-key to exit this menu <strong>and</strong> view a list of those<br />
channels that were found.<br />
Version 1.0 Page 23<br />
1 - 3 - 5<br />
EXIT<br />
GB