You also want an ePaper? Increase the reach of your titles
YUMPU automatically turns print PDFs into web optimized ePapers that Google loves.
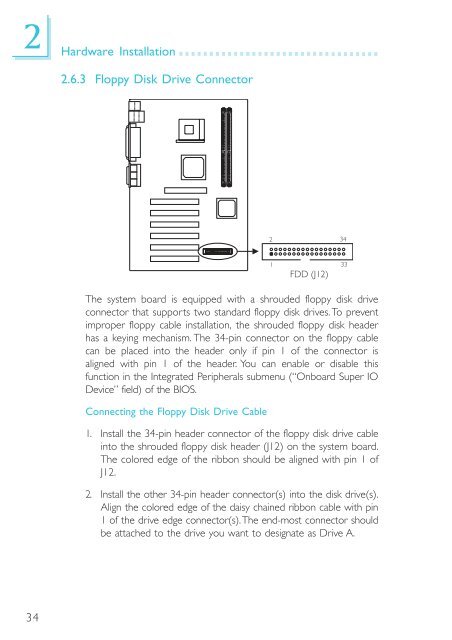
12Hardware Installation2.6.3 Floppy Disk Drive Connector2341FDD (J12)33The system board is equipped with a shrouded floppy disk driveconnector that supports two standard floppy disk drives. To preventimproper floppy cable installation, the shrouded floppy disk headerhas a keying mechanism. The 34-pin connector on the floppy cablecan be placed into the header only if pin 1 of the connector isaligned with pin 1 of the header. You can enable or disable thisfunction in the Integrated Peripherals submenu (“Onboard Super IODevice” field) of the BIOS.Connecting the Floppy Disk Drive Cable1. Install the 34-pin header connector of the floppy disk drive cableinto the shrouded floppy disk header (J12) on the system board.The colored edge of the ribbon should be aligned with pin 1 ofJ12.2. Install the other 34-pin header connector(s) into the disk drive(s).Align the colored edge of the daisy chained ribbon cable with pin1 of the drive edge connector(s). The end-most connector shouldbe attached to the drive you want to designate as Drive A.34


