TRX 350 4x4 - 4 Wheel Online
TRX 350 4x4 - 4 Wheel Online
TRX 350 4x4 - 4 Wheel Online

You also want an ePaper? Increase the reach of your titles
YUMPU automatically turns print PDFs into web optimized ePapers that Google loves.
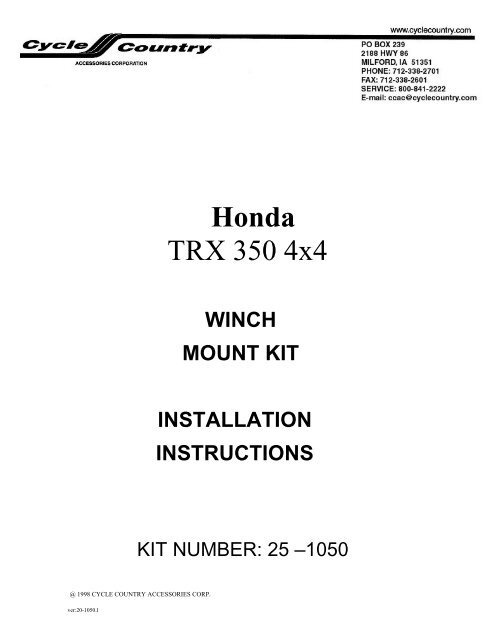
Honda<strong>TRX</strong> <strong>350</strong> <strong>4x4</strong>WINCHMOUNT KITINSTALLATIONINSTRUCTIONSKIT NUMBER: 25 –1050@ 1998 CYCLE COUNTRY ACCESSORIES CORP.ver:20-1050.l
HONDA <strong>TRX</strong> <strong>350</strong> <strong>4x4</strong>Kit number: 25-1050COMPLETE WINCH KITLOCATION Pt:\R.T.NO. QTY. DESCRIPTION1 WNH3000A 1 WINCH MOUNT PLATE2 WNH3001A 1 WINCH ATTACHING BRACKET3 WNH3002 1 L-BRACE6 UC78 1 7/8” U-CLAMP7 UCS34 1 3/4" SPACER /U-CLAMP8 UC1 1 1" U-CLAMP9 UCS78 1 7/8" SPACER/U-CLAMP10 CB516-2 1 5/16” X 2" CARRIAGE BOLTLN516NY 1 5/16" LOCKNUT -NYLOCK11 CB516-1 1 5/16" X 1" CARRIAGE BOLTLN516NY 1 5/16” LOCKNUT -NYL.OCK13 FW516 1 5/16" FLATWASHER14 B38-1 1 3/8” X 1” BOLTSLN38NY 1 3/8” LOCKNUTS-NYLOCK15 B38-112 2 3/8” X 1-1/2” BOLTSLN38NY 2 3/8” LOCKNUTS-NYLOCK16 MB8-30 2 8mm x 30mm METRIC BOLTSLW516 2 5/16” LOCKWASHERSFW516 2 5/16" FLATWASHERSBagged Items6...UC78 (1) 7/8” U-Clamp7...UCS34 (1) 3/4” Spacer/U-ClampSPOOLSIDEMOTORSIDEFRONT2
HONDA <strong>TRX</strong> <strong>350</strong> <strong>4x4</strong> WINCH ATTACHING KITASSEMBLY INSTRUCTIONS**Some components of this kit may be already assembled. All directions referring to right and left arewhen the rider is sitting on the machine. Please Note: The cable clamp, roller hawse, and cable stop areincluded with the winch.For use with the 1000 Lb. Winch only.1. Remove the two 8mm bolts that attach the lower brush guard support tube to each side ofthe front frame tube that the Serial No. is on. DO NOT REPLACE THESE BOLTS. They willbe replaced by 8mm x 30mm bolts.2. Remove the Winch Mount Plate from the Winch Attaching Bracket. NOTE: It is helpful toleave the 3/8" x 1-1/2" bolts in the Winch Attaching Bracket for now, hold them in place withthe locknuts.3. Using the two 8mm x 30mm bolts, lockwashers and flatwashers, attach the WinchAttaching Bracket to the ATV frame. NOTE: The flatwashers go between the AttachingBracket and the Brush Guard support tubes. FINGER TIGHTEN ONLY.4. Attach the Winch Unit to the Winch Mount Plate. Use the 3/8" x 1" bolt that is in the WinchMount Plate. NOTE: The bolt is in the proper hole and attaches to the front hole in the WinchUnit. Align the rear hole in the Winch Unit with the rear hole in the Mount Plate, hold in placeand TIGHTEN THE 3/8” x 1” BOLT SECURELY.5. Remove the nuts from the bolts that are in the Winch Attaching Bracket that you havealready mounted to the ATV. Motor end first, and up from the bottom, insert the Winch upand in front of the Winch Attaching Bracket. Rotate the Winch so that the rear Winch Mounthole and the hole in the Winch Mount Plate align on the bolts in the Attaching Bracket. Placethe locknuts on the bolts. DO NOT TIGHTEN COMPLETELY.6. Using the 5/16" x 1" carriage bolt, install the L-Brace to the Winch Mount Plate. NOTE: TheL-Brace mounts on top of the Mount Plate, DO NOT FULLY TIGHTEN THE CARRIAGE BOLT.1986 MODELS: On 1986 Models the 5/16" flatwasher may have to be placed between the L-Brace and the Winch Mount Plate to prevent the Winch Motor from contacting the ATV frame.7. Using the chart below, determine which U-Clamps and U-Clamp Spacers and whichmounting hole to use when bolting the Clamp to the L-Brace.1986 <strong>TRX</strong><strong>350</strong> 7/8” CLAMP 3/4” SPACER TOP HOLE1987 <strong>TRX</strong><strong>350</strong> 7/8” CLAMP 3/4” SPACER TOP HOLE1987 FOREMAN 1” CLAMP 7/8” SPACER BOTTOM HOLE1988 FOREMAN 1” CLAMP 7/8” SPACER TOP HOLE3
Place the proper U-Clamp and U-Clamp Spacer on the Brush Guard. Connect the L-Brace tothe U-Clamp with the 5/16” x 2” Carriage Bolt and Nylock Nut.TIGHTEN ALL BOLTS SECURELYLEFT SIDE VIEWOF BRUSH GUARD AREA8. SEE SWITCH AND WIRING INSTRUCTIONS.Using the winch, CAREFULLY raise the blade and OBSERVE the Push Tube Frame.RELEASE THE WINCH SWITCH SO THE PUSH TUBE FRAME STOPS 1" FROM THE ATVFRAME. Place the Winch Cable Stop on the winch cable, so the Cable stop is against theWinch body. TIGHTEN THE CABLE STOP SECURELY.ALWAYS RELEASE THE WINCH SWITCH WHEN THE CABLE STOPS AGAINST THE WINCHBODY.DO NOT FEED OUT EXCESS CABLE WHEN LOWERING THE BLADE. RELEASE WINCHSWITCH WHEN THE BLADE CONTACTS THE GROUND4
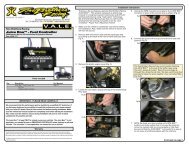
CAUTIONBE AWARE OF THE CABLE STOP CONTACTING THE ROLLERHAWSE WHEN THE CABLE IS WOUND IN.FAILURE TO RELEASE THE SWITCH MAY CAUSE DAMAGE TOWINCH PARTS OR TO THE ATV.When using the Winch to raise and lower a Cycle Country Plow, aCable Stop must be installed.Hook the Winch Cable to the CYC0345 (U608) (item #4 on your 15-0001 push tubekit) through the slotted hole. Carefully raise the blade until the top of the push tubeare no closer than 1” anywhere on the ATV. Place the Cable Stop onto the WinchCable up against the Winch Hawse. Secure the Cable Stop to the Winch Cable usingthe Cable Clamp Assembly as shown in the pictures below.5
ONE YEAR LIMITED WARRANTY1701 38TH AVE WPO BOX 257SPENCER, IA 51301PHONE: 712-262-4191FAX: 712-262-0248SERVICE: 800-841-2222E-MAIL: ccac@cyclecountry.comFor the period of one year from the purchase date Cycle Country AccessoriesCorporation will replace for the original purchaser, free of charge, any part or parts, whenfound, upon examination by Cycle Country Accessories Corporation, to be defective inmaterial, workmanship, or both.All transportation cost incurred by the purchaser in submitting the material toCycle Country Accessories Corporation for replacement under this warranty must beborne by the purchaser. If Cycle Country Accessories Corporation determines that theproduct must be returned to the factory for credit please call 1-800-841-2222 for an RMAnumber and shipping instructions.The warranty does not apply to parts that have been damaged by accident,alteration, abuse, improper lubrication, normal wear, or other causes beyond CycleCountry Accessories Corporation’s control. Products such as engines, electric motors,and actuators may carry an original manufacturer’s warranty. Please call Cycle CountryAccessories Corporation for information.6