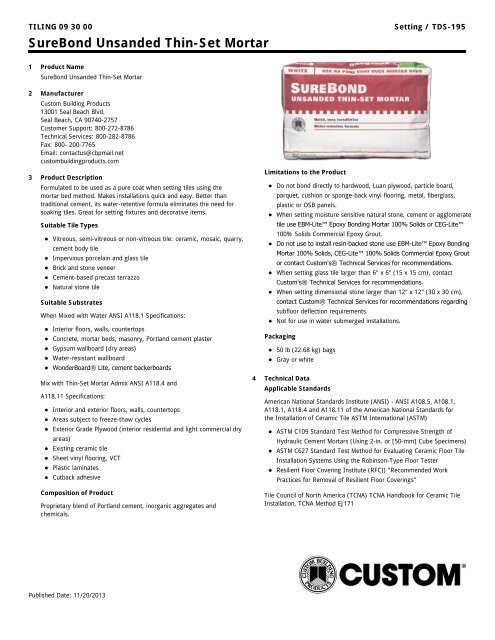
SureBond Unsanded Thin-Set Mortar - Custom Building Products
SureBond Unsanded Thin-Set Mortar - Custom Building Products
SureBond Unsanded Thin-Set Mortar - Custom Building Products

You also want an ePaper? Increase the reach of your titles
YUMPU automatically turns print PDFs into web optimized ePapers that Google loves.
TILING 09 30 00<strong>SureBond</strong> <strong>Unsanded</strong> <strong>Thin</strong>-<strong>Set</strong> <strong>Mortar</strong><strong>Set</strong>ting / TDS-1951 Product Name<strong>SureBond</strong> <strong>Unsanded</strong> <strong>Thin</strong>-<strong>Set</strong> <strong>Mortar</strong>2 Manufacturer<strong>Custom</strong> <strong>Building</strong> <strong>Products</strong>13001 Seal Beach Blvd.Seal Beach, CA 90740-2757<strong>Custom</strong>er Support: 800-272-8786Technical Services: 800-282-8786Fax: 800- 200-7765Email: contactus@cbpmail.netcustombuildingproducts.com3 Product DescriptionFormulated to be used as a pure coat when setting tiles using themortar bed method. Makes installations quick and easy. Better thantraditional cement, its water-retentive formula eliminates the need forsoaking tiles. Great for setting fixtures and decorative items.Suitable Tile TypesVitreous, semi-vitreous or non-vitreous tile: ceramic, mosaic, quarry,cement body tileImpervious porcelain and glass tileBrick and stone veneerCement-based precast terrazzoNatural stone tileSuitable SubstratesWhen Mixed with Water ANSI A118.1 Specifications:Interior floors, walls, countertopsConcrete, mortar beds, masonry, Portland cement plasterGypsum wallboard (dry areas)Water-resistant wallboardWonderBoard® Lite, cement backerboardsMix with <strong>Thin</strong>-<strong>Set</strong> <strong>Mortar</strong> Admix ANSI A118.4 andA118.11 Specifications:Interior and exterior floors, walls, countertopsAreas subject to freeze-thaw cyclesExterior Grade Plywood (interior residential and light commercial dryareas)Existing ceramic tileSheet vinyl flooring, VCTPlastic laminatesCutback adhesiveComposition of ProductProprietary blend of Portland cement, inorganic aggregates andchemicals.Limitations to the ProductDo not bond directly to hardwood, Luan plywood, particle board,parquet, cushion or sponge-back vinyl flooring, metal, fiberglass,plastic or OSB panels.When setting moisture sensitive natural stone, cement or agglomeratetile use EBMLite Epoxy Bonding <strong>Mortar</strong> 100% Solids or CEGLite100% Solids Commercial Epoxy Grout.Do not use to install resinbacked stone use EBMLite Epoxy Bonding<strong>Mortar</strong> 100% Solids, CEGLite 100% Solids Commercial Epoxy Groutor contact <strong>Custom</strong>'s® Technical Services for recommendations.When setting glass tile larger than 6" x 6" (15 x 15 cm), contact<strong>Custom</strong>'s® Technical Services for recommendations.When setting dimensional stone larger than 12" x 12" (30 x 30 cm),contact <strong>Custom</strong>® Technical Services for recommendations regardingsubfloor deflection requirements.Not for use in water submerged installations.Packaging50 lb (22.68 kg) bagsGray or white4 Technical DataApplicable StandardsAmerican National Standards Institute (ANSI) - ANSI A108.5, A108.1,A118.1, A118.4 and A118.11 of the American National Standards forthe Installation of Ceramic Tile ASTM International (ASTM)ASTM C109 Standard Test Method for Compressive Strength ofHydraulic Cement <strong>Mortar</strong>s (Using 2-in. or [50-mm] Cube Specimens)ASTM C627 Standard Test Method for Evaluating Ceramic Floor TileInstallation Systems Using the Robinson-Type Floor TesterResilient Floor Covering Institute (RFCI) "Recommended WorkPractices for Removal of Resilient Floor Coverings"Tile Council of North America (TCNA) TCNA Handbook for Ceramic TileInstallation, TCNA Method EJ171Published Date: 11/20/2013
TILING 09 30 00<strong>SureBond</strong> <strong>Unsanded</strong> <strong>Thin</strong>-<strong>Set</strong> <strong>Mortar</strong><strong>Set</strong>ting / TDS-195Environmental Consideration<strong>Custom</strong>® <strong>Building</strong> <strong>Products</strong> is committed to environmentalresponsibility in both products produced and in manufacturingpractices. Use of this product can contribute to LEED® certification.5 InstructionsGeneral Surface PrepSurfaces must be structurally sound, clean, dry and free from grease,oil, dirt, curing compounds, sealers, adhesives or any othercontaminant that would prevent a good bond. Glossy or paintedsurfaces must be sanded, stripped and cleaned of waxes, dirt or anycontaminants. Concrete must be cured 28 days and accept waterpenetration. Concrete must be free of efflorescence and not subject tohydrostatic pressure. Concrete slabs should have a broomed orbrushed finish to enhance the bond. Plywood flooring including thoseunder resilient flooring must be structurally sound and meet all ANSIand deflection requirements. For questions about proper subfloorinstallation, call Technical Services. Smooth concrete surfaces, existingglazed tile, terrazzo, or polished stone should be roughened orscarified. Sheet vinyl must be well-bonded and stripped of old finish.Roughen the surface by sanding or scarifying, rinse and allow to dry.Expansion joints should never be bridged with setting material. Do notsand flooring materials containing asbestos. Ambient temperature,surfaces and materials should be maintained at a temperature above50° F (10° C) or below 100° F (38° C) for 72 hours.Bonding to Cement SurfacesConcrete or plaster must be fully cured and must accept waterpenetration. Test by sprinkling water on various areas of the substrate.If water penetrates, then a good bond can be achieved; if waterbeads, surface contaminants are present, and loss of adhesion mayoccur. Contaminants should be mechanically removed beforeinstallation. Concrete must be free of efflorescence and not subject tohydrostatic pressure. Concrete slabs should have a broomed orbrushed finish to enhance the bond. Smooth concrete slabs must bemechanically abraded to ensure a good bond.Bonding to Plywood SurfacesPlywood floors, including those under resilient flooring, must bestructurally sound and must meet all ANSI A108.01 Part 3.4requirements. See TCNA F150-13 tile installations, TCNA F141-13 andF250-13 for stone. For questions about proper subfloor installationrequirements, call <strong>Custom</strong>® Technical Services.Bonding to BackerboardsAs an alternative to an additional layer of plywood, WonderBoard®backerboard may be installed over plywood subfloors. Refer to TCNAF14413 tile installations, TCNA F25013 for stone. Call <strong>Custom</strong>®Technical Services when installing natural stone over plywoodsubfloor.Bonding to Existing Surfacing MaterialExisting Ceramic Tile, Resilient Flooring or Plastic Laminates: Resilientflooring or plastic laminates must be well-bonded, as well as clean andfree of all contaminates. Roughen the surface by sanding or scarifying;rinse and allow to dry. Do not sand flooring that contains asbestos. Forexisting well-bonded ceramic tile, mechanically abrade the surface.Rinse and allow to dry. When sanding, an approved respirator shouldbe used.Bonding to Cutback AdhesiveAdhesive layers must be removed, as they reduce mortar bondstrength to cement surfaces. Use extreme caution; adhesives maycontain asbestos fibers. Do not sand or grind adhesive residue, asharmful dust may result. Never use adhesive removers or solvents, asthey soften the adhesive and may cause it to penetrate into theconcrete. Adhesive residue must be wet scraped to the finishedsurface of the concrete, leaving only the transparent staining from theglue. To determine desirable results, do a test bond area beforestarting. Refer to the RFCI Pamphlet, "Recommended Work Practicesfor Removal of Resilient Floor Coverings", for further information.Expansion Joint placementExpansion joints and cold joints, as described in ANSI A108.01, shouldnever be bridged with setting material. They must be brought throughthe tile work and filled with an appropriate elastomeric sealant, suchas <strong>Custom</strong>'s® 100% Silicone. Contact <strong>Custom</strong>'s® Technical Servicesfor the proper treatment of control or saw cut joints. Refer to TCNAEJ171, F125 and F125A.Mixing Ratios - powder to waterThoroughly mix 2 gallons (7.57 L) of clean, cool water and a 40 lb(18.2 kg) bag of mortar to a smooth, paste-like consistency.Mixing ProceduresMix by hand or use a low 150-200 RPM speed 1/2" (13 mm) drill toachieve a smooth, paste-like consistency. Let the mixture slake orstand 5-10 minutes; stir again and use. Stir occasionally, but do notadd more water. When properly mixed, troweled ridges will standwithout slump.Application of ProductInstallation must conform to ANSI A108.1A. Use a properly-sized notchtrowel to ensure proper coverage under tiles. Using the flat side of thetrowel, apply a skim coat of mortar to the surface. With the notch sideof the trowel held at a 45° angle, apply additional mortar to thesurface, combing in one direction. Press the tile firmly into place in aperpendicular motion across ridges, moving back and forth. Theperpendicular motion flattens ridges and closes valleys, allowingmaximum coverage. Adjust the tile promptly and beat it in with abeating block and rubber mallet. Periodically pull up a tile and checkthe back to ensure proper adhesive coverage. If the material hasskinned over (not sticky to the touch), recomb with the notch trowel; iftoo dry, remove and replace the dry material with fresh material. <strong>Thin</strong>setmortar should not be used to fill low spots in the flooring. For largeformat tile and uneven flooring, use mortars designed for medium bedapplications. <strong>Mortar</strong> thickness should be less than 1/16" thick.Curing of ProductCuring time is affected by ambient and surface temperatures andhumidity. Use the following as a guideline. Allow 24 hours beforegrouting or light traffic.Cleaning of equipmentClean with water before the material dries.Published Date: 11/20/2013
TILING 09 30 00<strong>SureBond</strong> <strong>Unsanded</strong> <strong>Thin</strong>-<strong>Set</strong> <strong>Mortar</strong><strong>Set</strong>ting / TDS-195StorageStore in a cool, dry area.Health PrecautionsThis product contains Portland cement and free silica. Avoid eyecontact or prolonged contact with skin. Wash thoroughly afterhandling. If eye contact occurs, flush with water for 15 minutes andconsult a physician. Do not breathe dust; wear a NIOSH approvedrespirator.Conformance to <strong>Building</strong> CodesInstallation must comply with the requirements of all applicable local,state and federal code jurisdictions.6 Availability & CostItem Code Size Color PackageSBW40* 40 lb (18.2 kg) White Bag7 Product Warranty<strong>Custom</strong>® <strong>Building</strong> <strong>Products</strong> warrants to the original consumerpurchaser that its product shall be free from defects in material andworkmanship under normal and proper usage for a period of one yearfollowing the date of original purchase. <strong>Custom</strong>'s® sole liability underthis warranty shall be limited to the replacement of the product. Somestates, countries or territories do not allow the exclusion or limitationof incidental or consequential damages, so the above limitation orexclusion may not apply to you. This warranty will not extend to anyproduct which has been modified in any way or which has not beenused in accordance with <strong>Custom</strong>'s® printed instructions. <strong>Custom</strong>®makes no other warranties either expressed or implied. This warrantygives you specific legal rights, and you may have other rights that varyfrom state to state or from one country/territory to another. Click fordetails and complete warranty information.8 Product MaintenanceProperly installed product requires no special maintenance.9 Technical Services InformationFor technical assistance, contact <strong>Custom</strong>® <strong>Building</strong> <strong>Products</strong>.10 Filing SystemAdditional product information is available from the manufacturer uponrequest.Expected WearProperly installed tile will last for more than 60 years.Related <strong>Products</strong>Polyblend® Sanded GroutPublished Date: 11/20/2013
TILING 09 30 00<strong>SureBond</strong> <strong>Unsanded</strong> <strong>Thin</strong>-<strong>Set</strong> <strong>Mortar</strong><strong>Set</strong>ting / TDS-195CoverageSQUARE FOOT COVERAGE PER 40 LB BAG (SQUARE METER PER 18.2 KG)Trowel Size Min Coverage Max Coverage3/16" x 5/32" (5 x 4 mm) V-Notch 170 sq. ft. (15.7 M²)Published Date: 11/20/2013