Ranch Tonneau Cover Installation Guide - RealTruck.com
Ranch Tonneau Cover Installation Guide - RealTruck.com
Ranch Tonneau Cover Installation Guide - RealTruck.com
- No tags were found...
You also want an ePaper? Increase the reach of your titles
YUMPU automatically turns print PDFs into web optimized ePapers that Google loves.
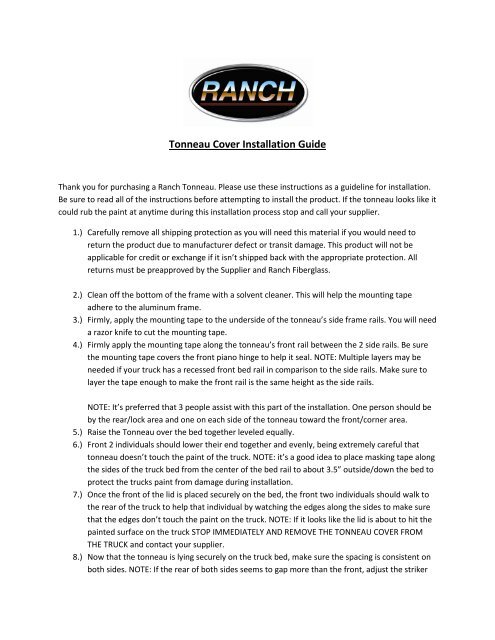
<strong>Tonneau</strong> <strong>Cover</strong> <strong>Installation</strong> <strong>Guide</strong>Thank you for purchasing a <strong>Ranch</strong> <strong>Tonneau</strong>. Please use these instructions as a guideline for installation.Be sure to read all of the instructions before attempting to install the product. If the tonneau looks like itcould rub the paint at anytime during this installation process stop and call your supplier.1.) Carefully remove all shipping protection as you will need this material if you would need toreturn the product due to manufacturer defect or transit damage. This product will not beapplicable for credit or exchange if it isn’t shipped back with the appropriate protection. Allreturns must be preapproved by the Supplier and <strong>Ranch</strong> Fiberglass.2.) Clean off the bottom of the frame with a solvent cleaner. This will help the mounting tapeadhere to the aluminum frame.3.) Firmly, apply the mounting tape to the underside of the tonneau’s side frame rails. You will needa razor knife to cut the mounting tape.4.) Firmly apply the mounting tape along the tonneau’s front rail between the 2 side rails. Be surethe mounting tape covers the front piano hinge to help it seal. NOTE: Multiple layers may beneeded if your truck has a recessed front bed rail in <strong>com</strong>parison to the side rails. Make sure tolayer the tape enough to make the front rail is the same height as the side rails.NOTE: It’s preferred that 3 people assist with this part of the installation. One person should beby the rear/lock area and one on each side of the tonneau toward the front/corner area.5.) Raise the <strong>Tonneau</strong> over the bed together leveled equally.6.) Front 2 individuals should lower their end together and evenly, being extremely careful thattonneau doesn’t touch the paint of the truck. NOTE: it’s a good idea to place masking tape alongthe sides of the truck bed from the center of the bed rail to about 3.5” outside/down the bed toprotect the trucks paint from damage during installation.7.) Once the front of the lid is placed securely on the bed, the front two individuals should walk tothe rear of the truck to help that individual by watching the edges along the sides to make surethat the edges don’t touch the paint on the truck. NOTE: If it looks like the lid is about to hit thepainted surface on the truck STOP IMMEDIATELY AND REMOVE THE TONNEAU COVER FROMTHE TRUCK and contact your supplier.8.) Now that the tonneau is lying securely on the truck bed, make sure the spacing is consistent onboth sides. NOTE: If the rear of both sides seems to gap more than the front, adjust the striker
ackets down. If the rear seems consistently too close that you will need to adjust the strikerbrackets up. (Striker brackets are what the latches hold on to while the tonneau is closed) Thestriker brackets can be adjusted by simply loosening the 2 bolts and using the slide tracks toslide it up or down.9.) Once your spacing is even on all sides, slightly open the tonneau, lower the tailgate, and closethe tonneau again. Verify that the tonneau is still at your desired spacing.10.) With the tonneau still closed, climb into the bed of the truck with a 9/16 wrench, a flashlight,and two clamps. Clamp the lid to the bed as close to the shipping tabs as possible. (ShippingTabs are the black squares hanging down from frame used to fasten shipping boards to frame)Be sure to tighten the clamps fully so they can’t be shifted by hand. Tighten the clamps slowlyto assure the tonneau doesn’t shift. If the tonneau shifts loosen the clamps and repeat step 10.11.) Now that the front clamps are in place slightly open the tonneau cover and close the tailgate.Close the tonneau cover and recheck your spacing on all sides. If movement occurred, loosenthe front clamps and repeat step 10.12.) Open the lid and install the rear two clamps as close to the shipping tabs as possible. Beforetightening the clamps <strong>com</strong>pletely, be sure that the rotary latches are in line to grab onto thestriker bracket arm when the lid is closed. Adjust the frame, strikers, and rotaries as necessaryalways keeping in mind the exterior spacing.13.) Now that the tonneau is clamped and installed on the truck properly, open the tonneau slightlyand lower the tailgate. Locate the copper bump stops attached to the frame about ½ way downon both sides. To adjust them up and down simply turn them left or right. Adjust the bumpstops so that they just touch the bottom of the tonneau cover while it’s in it’s closed position.14.) If the tonneau cover closes and latches properly you are finished. If one or both of the latchesaren’t catching loosen the rotary latches just enough that they can be forced to move with yourhand. (Rotary latches are the parts that are located on the bottom of the tonneau near bothrear corners. They have cables attached to them and they grab onto the striker brackets to holdthe tonneau closed. ) With the latches loose, close the tonneau cover. The latches willautomatically adjust to the correct angle for latching. With the cover, still closed tighten therotary latches so they don’t shift out of place.15.) If the tonneau still doesn’t close try raising the striker brackets slightly until the cover latchescorrectly. If latching issues continue contact your supplier for more instructions.Thanks again for your purchase and we hope you enjoy your new cover!<strong>Ranch</strong> Fiberglass28564 Holiday PlaceElkhart, IN 46517


