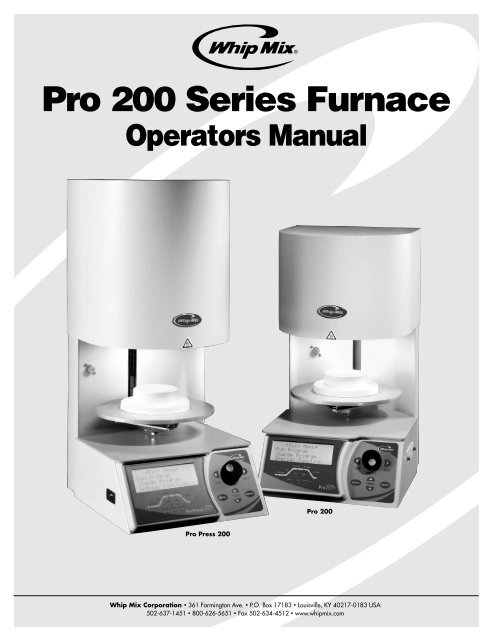
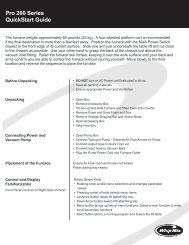
Pro 200 Series Furnace Operations Manual - Whip Mix
Pro 200 Series Furnace Operations Manual - Whip Mix
Pro 200 Series Furnace Operations Manual - Whip Mix
You also want an ePaper? Increase the reach of your titles
YUMPU automatically turns print PDFs into web optimized ePapers that Google loves.
<strong>Pro</strong> <strong>200</strong> <strong>Series</strong> <strong>Furnace</strong> <strong>Operations</strong> <strong>Manual</strong>Table of ContentsChapter One — Getting StartedExternal Component Locator.................................................4Before Unpacking...................................................................5Unpacking..............................................................................5Press Version.........................................................................5Press Regulator Set-Up.........................................................5Installing the Vacuum Pump...................................................5Quick-Cool Jet Installation for<strong>Pro</strong> <strong>200</strong> <strong>Furnace</strong>s with Air Cool Jet....................................6Power.....................................................................................7Front Panel Controls...............................................................7Menu Selection Buttons.........................................................8Information Display and Entry................................................9Start <strong>Pro</strong>gram.........................................................................9Abort <strong>Pro</strong>gram........................................................................9Using the <strong>Furnace</strong>................................................................10Chapter Two — Special FunctionsSetting the Night Mode Temperature and Activation............11Change Idle Temperature.....................................................11Set Vacuum Level.................................................................12Select Constant Vacuum......................................................12Set Displayed Temperature Units (Celsius or Fahrenheit)....12Set <strong>Pro</strong>gram Start Delay......................................................13Set Music Volume Level.......................................................13Set to All Capital Text or <strong>Mix</strong>ed Upper/Lower CaseText Display.......................................................................13Select Displayed Language..................................................13Saving <strong>Pro</strong>grams to a Flash Drive (Exporting).....................14Transferring User Firing <strong>Pro</strong>grams toOther <strong>Furnace</strong>s (Importing)..............................................14Low Fusing Adjust................................................................15High Fusing Adjustment.......................................................15Testing Your <strong>Furnace</strong>............................................................16Calibrate Oven.....................................................................16Chapter Three — Change <strong>Pro</strong>gram MenuLook at a <strong>Pro</strong>gram................................................................17Add/Edit a <strong>Pro</strong>gram..............................................................18Press Firing Cycle <strong>Pro</strong>gram (<strong>Pro</strong> Press <strong>200</strong> only)...............20Copy/Change a <strong>Pro</strong>gram......................................................22Move a <strong>Pro</strong>gram...................................................................22Erase a <strong>Pro</strong>gram..................................................................22Chapter Four — Run <strong>Pro</strong>gram MenuRunning a <strong>Pro</strong>gram – Repeat <strong>Pro</strong>grams..............................23Features and Displays AvailableWhile a <strong>Pro</strong>gram is Running.............................................23The LED Graph....................................................................24Running a Pressing <strong>Pro</strong>gram...............................................25Running a Re-Press <strong>Pro</strong>gram..............................................25Chapter Five — MaintenanceCleaning The <strong>Furnace</strong>..........................................................26Argon....................................................................................26Purge/Decontamination........................................................27Trouble Shooting Guide........................................................27Vacuum Test.........................................................................28Fuses....................................................................................28If More Help is Needed.........................................................28Replacement Parts..............................................................29Technical Specifications.......................................................29<strong>Pro</strong> <strong>Series</strong> Accessories........................................................30Fahrenheit to Centigrade......................................................31Centigrade to Fahrenheit......................................................313
<strong>Pro</strong> <strong>200</strong> <strong>Series</strong> <strong>Furnace</strong> <strong>Operations</strong> <strong>Manual</strong>Quick-Cool Jet Installation for<strong>Pro</strong> <strong>200</strong> <strong>Furnace</strong>s with Air Cool JetPreparation:1. Remove the vacuum pump from its box.2. Remove the brass hose barb from the <strong>Furnace</strong>accessory box.3. Remove the muffler from the output end of thevacuum pump. (The input and output valves areidentified by arrow indicators on the vacuum pumpnear inlet or outlet.)4. Install the brass barb to output end of the vacuumpump. (Where the muffler used to be.)5. There should be two hoses included. One in theaccessory box, the other inside the vacuum pumpbox. Use the hose included in the accessory box forthe Quick-Cool Air Jet.This side goes to theQuick Cool JetInstallation:1. Push one end of the clear hose included in theaccessory box over the output barb fitting at theoutput end of the vacuum pump.2. Place the other end over the silver Quick-Cool Jetbarb located on the upper right back of the furnace.(See below.)3. Using the other pink hose, place one end over theinput side barb of the vacuum pump.4. Place the other end over the vacuum barb at the backof the furnace.5. Plug the power cord into the power outlet at the backof the furnace next to the furnace power inlet.Quick-CoolJet BarbMain PowerInletVacuum PumpPower OutletVacuumHoseBarbUsing the Quick-Cool Jet:The Quick-Cool Jet will activate when a program has beenstarted with a lower entry temperature than the furnace'scurrent temperature.1. To enable the Quick-Cool Jet, select and run aprogram with an entry temperature lower than thecurrent temperature.2. Once a program is complete, start the next programand the Quick-Cool Jet will engage.Output Barbgoes hereInputBarb6
<strong>Pro</strong> <strong>200</strong> <strong>Series</strong> <strong>Furnace</strong> <strong>Operations</strong> <strong>Manual</strong>Menu Selection ButtonsThe three menu selection items (Run <strong>Pro</strong>gram, Change<strong>Pro</strong>gram and Special Functions) will display differentoptions. The menu options can be seen by turning theSelector Knob.Run <strong>Pro</strong>gram — Press the Run <strong>Pro</strong>gram Selection to:• Select a program to run.Change <strong>Pro</strong>gram — the following actions may be initiatedby first pressing the Change <strong>Pro</strong>gram item from the MainMenu, then turning the Selector Knob to display thefollowing options:• Look at a program• Add/Edit a program• Copy/change a program• Move a program• Erase a programSpecial Functions — press the Selector Knob and turnthe Selector Knob to one of the following actions:• Start Night mode• Change Idle temperatures• Set vacuum level• Select degree C (Centigrade, centimeters),or F (Fahrenheit, inches)• Set program start delay• Set Night mode temperature• Select between constant vacuum pump orintermittent cycle vacuum pump• Change volume level of sounds• Select upper or lower case letters on the display• Select Displayed Language(English, French, German, Italian, Spanish)• Cal Low Fusing• Cal High Fusing• Cal Press (On <strong>Pro</strong> Press Only)• Copy firing programs from <strong>Furnace</strong> to Memory Card(Export <strong>Pro</strong>grams)• Copy firing programs from Memory Card to <strong>Furnace</strong>(Import <strong>Pro</strong>grams)• Export Settings• Import Settings• Test <strong>Furnace</strong>• Calibrate Oven8
<strong>Pro</strong> <strong>200</strong> <strong>Series</strong> <strong>Furnace</strong> <strong>Operations</strong> <strong>Manual</strong>Information Display and EntryDISPLAY — All information and user prompts will beshown on the display (four lines, twenty characters each).SELECTOR KNOB — Turn the Selector Knob left or rightto select menu options or to adjust parameters.NEXT — Press the Next button to proceed to the nextstep within a function or program. (OR just push theSelector Knob inward to proceed).LAST — Press this button to return to the preceding stepwithin a function or program. If a program is not displayedthen the furnace will beep to indicate an error.TABLE UP — Press the up arrow button to manuallyraise the table. Press the up arrow button a second timeand the table will stop.TABLE DOWN — Press the down arrow button tomanually lower the table. Press the down arrow buttona second time and the table will stop.The table control button will not operate while a programis running.Start <strong>Pro</strong>gram• Immediately After Power-On Self-Test Completes —Rotate the Selector Knob to select a <strong>Pro</strong>gram, thenpress the Selector Knob to initiate the <strong>Pro</strong>gram.• Immediately After a Previous <strong>Pro</strong>gram Completes —Pressing the Selector Knob after a program hasjust finished will restart the same program. Or rotatethe Selector Knob to a new <strong>Pro</strong>gram selection andpress the Selector Knob to initiate the <strong>Pro</strong>gram.Abort <strong>Pro</strong>gram• Press the Abort key on the Keypad. The temperaturewill begin dropping to Idle temp and the Table willautomatically lower.9
<strong>Pro</strong> <strong>200</strong> <strong>Series</strong> <strong>Furnace</strong> <strong>Operations</strong> <strong>Manual</strong>Using the <strong>Furnace</strong>After the furnace has completed the self-test at power up,the Firmware Version appears on the screen, then theDisplay prompts the entry of a <strong>Pro</strong>gram number for firing.Press the Menu button to bring up the Main Menu, thenSelect the Special Functions menu item and proceed withthe initial setup of essential default values for functions like:• Idle Temperature• Vacuum Threshold Level for Intermittent Vacuum mode• Temperature Display Units (C or F)• <strong>Pro</strong>gram Start Delay Time (Default is none)• Night Mode Temperature• Constant Vacuum Pump(Default is “NO” for Intermittent Vacuum)• Sound Volume Adjust• Capital Letter Display (Default is mixed upper andlower case display)• Displayed LanguageNote: It is very important to set up the operatingFEATURES of the furnace before you attempt toprogram the furnace or run programs. For bestRESULTS in learning to use your new furnace,use the following steps, in this order:1. Set up the operating features of the furnaceby reading and following the instructions inChapter 2 — Special Functions. This is VERYIMPORTANT because these operating featureswill affect how you enter and run programs.2. Learn to program the furnace by readingChapter 3 — Change <strong>Pro</strong>gram. Enter a fewof your own programs.3. Read Chapter 4 — Run <strong>Pro</strong>gram to understandhow to run programs and what features areavailable while running a program.10
<strong>Pro</strong> <strong>200</strong> <strong>Series</strong> <strong>Furnace</strong> <strong>Operations</strong> <strong>Manual</strong>Set <strong>Pro</strong>gram Start DelayThe furnace has a unique feature that allows the operatorto program a delay to occur before the start of all programs.This delay occurs before the entry time set into eachprogram begins. This feature may be changed withoutaffecting the programs or calibrations stored in the furnace.1. Press the Main Menu button.2. Select Special Functions, push the Selector KnobOR press the Next button.3. Turn the Selector Knob until the second line on thedisplay reads PROG START DELAY.4. Press the Next button to look at or change the startdelay time.5. The display will read TIME = 0.00 or any time delaypreviously entered. Turn the Selector Knob tochange the time as desired.6. Push the Selector Knob OR press the Next buttonto save your selection. You will be returned to theMain Menu automatically.Note: The delay feature subtracts from thetime it takes to heat the muffle to the entryTEMPERATURE so the delay time may appearSHORTER than originally programmed. As anexample; let’s assume the delay is set for 30minutes, the entry temperature is 500° C, andthe time it takes the furnace to reach 500° Cfrom the point which you entered the delayis 15 minutes. The furnace would count down15 minutes to the beginning of the programand then would begin heating to the entryTEMPERATURE. This gives us a total of 30 minutesbefore the table rises to the muffle.Set Music Volume Level1. Press the Special Functions button.2. Turn the Selector Knob until display readsCHANGE MUSIC VOLUME.3. Push the Selector Knob OR press the Next key. Continueto turn the Selector Knob to the desired volume. Thecursor will appear to the left of the volume selected:4. Rotate the Selector Knob and a sequence of toneswill begin playing to give you an audible referencefor the corresponding sound level. When the volumelevel is set to your liking, push the Selector Knob ORpress the Next button to save your selection. You willbe returned to the Main Menu automatically.Set to All Capital Text or <strong>Mix</strong>edUpper/Lower Case Text Display1. Press the Special Functions button.2. Turn the Selector Knob until display readsCAPITAL LETTER?3. Push the Selector Knob OR press the Next button.4. If you want all Capital Letters displayed, rotate theSelector Knob to Yes and push the Selector KnobOR press the Next button. If you do not want all Capitalletters, rotate to No for mixed upper/lower case lettersand press the Selector Knob OR press the Next button.Select Displayed Language1. Press the Special Functions button.2. Turn the Selector Knob until the display readsSELECT LANGUAGE.3. Push the Selector Knob OR press the Next button.4. Choose from the following list of languages:> EnglishFrancaisDeutchItalianoEspanol5. Rotate the Selector Knob until the cursor points tothe desired language and push the Selector KnobOR press the Next button to save your selection. Youwill be returned to the Main Menu automatically.13
<strong>Pro</strong> <strong>200</strong> <strong>Series</strong> <strong>Furnace</strong> <strong>Operations</strong> <strong>Manual</strong>Saving <strong>Pro</strong>grams to a Flash Drive(Exporting)1. Place the Flash Drive in the USB slot on the left side ofthe furnace with the shiny metal contact facing upward.2. Select the Special Functions item from the Main Menu.3. Turn the Selector Knob until the display readsEXPORT PROGRAM, then press the Next button.4. The display will show Check USB Driver, thenExporting >>>>>>>5. The furnace will signal the end of the transfer withan audible tone.Transferring User Firing <strong>Pro</strong>gramsto Other <strong>Furnace</strong>s (Importing)Once you have exported programs to the Flash Drive,either via the furnace EXPORT PROGRAM function ORvia the PC Software, you can load these programs on adifferent furnace or return them to the same furnace.1. Place the Flash Drive in the USB slot on the left side ofthe furnace with the shiny metal contact facing upward.2. Select the Special Functions item from the Main Menu.3. Turn the Selector Knob until the display reads IMPORTPROGRAM, then press the Next button.4. The display will show Check USB Driver, thenImporting >>>>>>>5. The furnace will signal the end of the transfer with anaudible tone.14
<strong>Pro</strong> <strong>200</strong> <strong>Series</strong> <strong>Furnace</strong> <strong>Operations</strong> <strong>Manual</strong>Low Fusing AdjustCalibration (800° C/1470° F or below)1. Select the Special Functions item from the Main Menu.2. Turn the Selector Knob until display readsCAL LOW FUSING.* Special FunctionsSelect Language> Cal Low FusingCal High Fusing3. Press the Next button.The display will show the current Low Fusing porcelaincalibration offset. For new furnaces this should be “0”. Ifthe Selector Knob is rotated clockwise note that the “0”value changes to a positive value, and if rotated counterclockwiseit changes to a negative value. If you need toraise ALL your Low Fusing program firing temperatures bythe same amount you can dial in a positive value then pressthe Next button to accept the offset value. Conversely,if you want to lower ALL your Low Fusing program firingtemperatures by the same amount, dial in a negative valueand press the Next button to accept the offset value.High Fusing AdjustmentCalibration (801° C/1471° F or above)1. Select the Special Functions item from the Main Menu.2. Turn Selector Knob until display readsCAL HIGH FUSING.* Special FunctionsSelect Language> Cal Low FusingCal High Fusing3. Press the Next button.The display will show the current High Fusing porcelaincalibration offset. For new furnaces this should be “0”. Ifthe Selector Knob is rotated clockwise note that the “0”value changes to a positive value, and if rotated counterclockwiseit changes to a negative value. If you need to raiseALL of your High Fusing program firing temperatures bythe same amount you can dial in a positive value then pressthe Next button to accept the offset value. Conversely, ifyou want to lower ALL of your High Fusing program firingtemperatures by the same amount, dial in a negative valueand press the Next button to accept the offset value.Example: If your porcelain appears to be overfired by 25°,you would enter a negative (-25) twenty-five degree value tolower the effective firing temperature of ALL the Low Fusingprogram.4. Turn the Selector Knob to enter the number ofdegrees you would like to adjust the temperature.Low Temp Adj0C(-50C - +50C)5. Press the Next button. The adjustment will be storedand you will be returned to the main menu.Example:If porcelain looks under-fired, increase temperature.If porcelain looks over-fired, decrease temperatureExample: If your porcelain appears to be overfired by 25°,you would enter a negative (-25) twenty-five degree valueto lower the effective firing temperature of ALL the LowFusing programs.4. Turn the Selector Knob to enter the number ofdegrees you would like to adjust the temperature.High Temp Adj0C(-50C - +50C)5. Press the Next button. The adjustment will be storedand you will be returned to the main menu.Example:If porcelain looks under-fired, increase temperature.If porcelain looks over-fired, decrease temperature15
<strong>Pro</strong> <strong>200</strong> <strong>Series</strong> <strong>Furnace</strong> <strong>Operations</strong> <strong>Manual</strong>Testing Your <strong>Furnace</strong>The <strong>Pro</strong> <strong>Series</strong> <strong>Furnace</strong>s are capable of performingseveral tests to aid in diagnosing the furnace should aproblem occur. A TOPS technician or Technical Supporttechnician may ask you to run one or more of these teststo aid in diagnosing the problem. The tests include:• Vacuum test• Muffle test• Motor Up test• Motor down test• Muffle hour reading. (The muffle hour readingis incremented by 1 for each hour the muffletemperature is above 605° C.)• Press test (in <strong>Pro</strong>Press <strong>200</strong>)To Begin Test:1. Select the Special Functions item from the Main Menu.2. Turn the Selector Knob until the display readsTEST FURNACE.3. Push the Selector Knob OR press the Next button.4. Turn the Selector Knob until the test you require isdisplayed.5. Push the Selector Knob. (The individual test, whichwas selected, will now begin.)6. Pressing the Next button will pause the test. Pressingthe Next button again will restart.7. Pressing the Menu button will end the test and returnyou to the Main Menu.Calibrate OvenCaution: This item of the Special Functions menuis typically reserved for <strong>Whip</strong> <strong>Mix</strong> certifiedtechnicians. Entering numbers other than theFOUR described below could result in programand calibration loss.With this screen it is possible to activate the followingfeatures:• Fast Cool With Vacuum On (for cooling muffleto entry temp between programs) Lowers the liftand runs the vacuum pump until the furnace reachesthe entry temperature for a program. To activate thisfunction, start a program with an entry temperaturelower than the current temperature.• Enable <strong>Pro</strong>gram Password <strong>Pro</strong>tection (Call <strong>Whip</strong><strong>Mix</strong> TOPS Technicians.)• On <strong>Pro</strong> Press <strong>200</strong>; use Timed Press; Yes/NoChanges preference between Re-Press and TimedPress, press programs are factory set and includevacuum.• Load Code from “Flash Drive” Enables you to orderand upgrade software.To access one of the four functions, do the following:Password FunctionNumbers1. Fast Cool with Vacuum On Password 3152. Enable <strong>Pro</strong>gram Password <strong>Pro</strong>tection<strong>Pro</strong>tects all programs from alteration3. Select Timed Press or Re-press TimeIf Yes is selected, then you will beprompted to enter the Repress Time.In this program 4 minutes will automaticallybe added to the time you enter.The default program is timed press whichdoes not add and additional 4 minutes.(Call <strong>Whip</strong> <strong>Mix</strong>TOPS Technician)Password 3154. Load code from Flash Drive (Call <strong>Whip</strong> <strong>Mix</strong>TOPS Technician)Push the Selector Knob OR press the Next button. Enterthe password and access the selected function.1. Select the Special Functions item from the Main Menu.2. Turn the Selector Knob to CALIBRATE OVEN.3. Push the Selector Knob OR press the Next button.4. Turn the Selector Knob to select the numericalpassword needed.16
<strong>Pro</strong> <strong>200</strong> <strong>Series</strong> <strong>Furnace</strong> <strong>Operations</strong> <strong>Manual</strong>Chapter Three — Change <strong>Pro</strong>gram MenuThe Master Suite DVD provided with the furnace is analternate means of adding or editing programs using aPC application. A memory stick is then used to transferthe programs from the PC to the furnace. Refer to theseparate instructions provided in pdf format on the DVD.The following is an example of a program descriptor. The<strong>Pro</strong>gram Number is displayed first, then a “-” character.The next fifteen characters contain the name entered todescribe this program.The Change/Edit <strong>Pro</strong>gram menu item allows you to add,change, move, copy, print, or erase programmed firingcycles. This mode is reached by selecting the Change/Edit <strong>Pro</strong>gram Item from the Main Menu.All of the features described here may be performed whilea program is running. Both the <strong>Pro</strong> <strong>200</strong> and <strong>Pro</strong> Press <strong>200</strong>furnaces use a unique method of numbering and namingprograms to help the operator select the correct programto run.The <strong>Pro</strong>gram Number is shown first (0-199), followed bythe <strong>Pro</strong>gram Name.12 STNS- Body AddIn the example, the user has entered BODY ADD toindicate that this is a body add-on program. The followingexamples show how a user could make programidentification easy:12 SYNS- BODY ADD [Synspar porcelain body add program]13 SYNS- GLAZE [Synspar porcelain glaze program]20 VITA- DE GAS [Vita porcelain de-gas program]Look at a <strong>Pro</strong>gramThe Look at a <strong>Pro</strong>gram feature allows the operator to viewa program without changing any values:1. Select the Change <strong>Pro</strong>gram from the Main Menu.2. Turn the Selector Knob until LOOK AT PROGRAMis displayed.3. Push the Selector Knob OR press the Next buttonto select this feature.4. Turn the Selector Knob to find the program youwish to view.5. Push the Selector Knob OR press the Next button tocontinue viewing each step through the program.* Look At <strong>Pro</strong>gram *Dry Time 10:00Entry Temp450CPress Knob = ContinueThis firing parameter cannot be changed while looking ata program.Pushing the Selector Knob OR pressing the Nextbutton will let you look at the next parameter in aprogram. Pressing the Last button will let you look at thepreceding item in a program.* Look At <strong>Pro</strong>gram *Rate Rise45C/MHold Temp940CHold Time 00:01:00When the last item in a program has been viewed thedisplay will return to the Main Menu.The first line displays a parameter in the firing cycleprogram and its value.17
<strong>Pro</strong> <strong>200</strong> <strong>Series</strong> <strong>Furnace</strong> <strong>Operations</strong> <strong>Manual</strong>Add/Edit a <strong>Pro</strong>gramAdd/Edit a <strong>Pro</strong>gram is usedto enter a new program orEdit a pre-existing program.This selection will describehow to enter either a 1-Stageor a 2-Stage program.The first four firing cycles are normal porcelain firingcycles. The following procedure describes how to enter anormal porcelain program.1. Press the Main Menu button.2. Select the CHANGE PROGRAM item and push theSelector Knob OR press the Next button.3. Turn the Selector Knob until ADD/EDIT PROGRAMis displayed.4. Push the Selector Knob OR press the Next button.A cursor pointing to the current program number willbe displayed. If there is a name displayed after theprogram number this is a pre-existing program whichyou may edit by selecting it.5. To Add a program, rotate the Selector Knob to find theprogram number to which you want to add your newprogram. If you select a program number that alreadyhas a program entered, you will overwrite the existingprogram with the new one by entering new values.Select <strong>Pro</strong>gram> 001–ENTRYTIMEPress Knob = Continue6. Push the Selector Knob OR press the Next button toselect a program for Addition or Editing. The displaywill present the “stage” type selection as below:Select Type> 1–stage2–stagePressHEAT RISEVACUUMHOLD TIMECOOLTIMEIf the program you wish to Add requires only a singleRate Rise and Hold Temperature, select 1-Stage. Ifthe program requires an initial Rate Rise and HoldTemperature, followed by a secondary Rate Rise andHold Temperature, select 2-Stage.Push the Selector Knob OR press the Next buttonto select the program type.7. The display will change as shown below:* Add/Edit <strong>Pro</strong>gram *Enter <strong>Pro</strong>gram Name001 –Normal PorcelainThe ^ symbol under the line identifies the currentcharacter position being entered. Rotate the SelectorKnob to bring up the desired character, then push theSelector Knob OR press the Next button to advance tothe next character in the <strong>Pro</strong>gram Name. You may enterup to 15 characters. If you do not require all 15 charactersthen simply hold down the Next button to space throughthe unneeded characters or press the Selector Knoband jump to the first Parameter entry screen.8. Dry Time EntryDry Time is the time it takes the table to go from the fulldown/open position to the table up/closed position.This will occur with several pauses in up motion duringthe travel to allow the work piece to dry gradually.The range of values is 00 minutes, 00 seconds, to amaximum of 99 minutes.Rotate the Selector Knob to select the time value,then push the Selector Knob OR press the Nextbutton to store the parameter.* Add/Edit <strong>Pro</strong>gram *Dry Time 00:03:00(00:00:00–01:39:00)9. Entry TemperatureEntry Temperature is the temperature at which the tableis closed completely and the temperature rise begins.The range of values is 25° C (77° F) to a maximum of980° C (1796° F).Rotate the Selector Knob to select the temperaturevalue, then push the Selector Knob OR press theNext button to store the parameter.* Add/Edit <strong>Pro</strong>gram *Entry Temp400C(25C – 980C)10. Rate RiseRate Rise or ramp up, is the number of degrees perminute the temperature will rise after the table hasclosed.The range of values is 0° C/Minute (0° F) to amaximum of 100° C/Minute (180° F).Rotate the Selector Knob to select the heat ratevalue, then push the Selector Knob OR press theNext button to store the parameter.* Add/Edit <strong>Pro</strong>gram *Rate Rise40C/M(00C/M – 100C/M)18
<strong>Pro</strong> <strong>200</strong> <strong>Series</strong> <strong>Furnace</strong> <strong>Operations</strong> <strong>Manual</strong>11. Hold TemperatureHold Temperature or the top temperature is the final,highest temperature in a 1-Stage <strong>Pro</strong>gram, and anintermediate stopover temperature in a 2-Stage<strong>Pro</strong>gram.The range of values is 400° C (752° F) to a maximumof 1<strong>200</strong>° C (2192° F).Rotate the Selector Knob to select the temperaturevalue, then push the Selector Knob OR press theNext button to store the parameter.* Add/Edit <strong>Pro</strong>gram *Hold Temp920C(400C – 1<strong>200</strong>C)12. Hold TimeHold Time is the length of time the furnace stays atthe top Hold Temperature. If the <strong>Pro</strong>gram is a 2-Stage<strong>Pro</strong>gram, there will be separate Hold Times for bothHold Temperature 1 and Hold Temperature 2.The range of values is 00 hours, 00 seconds, to amaximum of 18 hours.Rotate the Selector Knob to select the time value,then push the Selector Knob OR press the Nextbutton to store the parameter.* Add/Edit <strong>Pro</strong>gram *Hold Time 00:00:30(00:00:00–99:00)Note: If you are Adding a 2-Stage <strong>Pro</strong>gram, theRate Rise 2, followed by the Hold Temperature 2,and the Hold Time 2 parameters will appear here.If not, the Table Down Temperature will appearnext.13. <strong>Pro</strong>gram Fusing Adjustment ParameterAdd/Edit <strong>Pro</strong>gramFuse Adjust>NoIMPORTANT NOTE: The Fusing Adjustment <strong>Pro</strong>gramPARAMETER is similar to the HIGH FUSING ADJUSTand LOW FUSING ADJUST functions from the SpecialFunctions Menu in that any value entered herewill either add to, or subtract from, the HoldTemperature parameter in the program. The<strong>Pro</strong>gram level Fuse Adjust parameter adjuststhe Hold Temperature ONLY FOR THE PROGRAM ITIS ENTERED IN, WHERAS THE SPECIAL FUNCTIONS/ HIGHFUSING ADJUST AFFECTS ALL PROGRAMS WITH A HOLDTEMPERATURE >800 C AND THE SPECIAL FUNCTIONS/LOWFUSING ADJUST AFFECTS ALL PROGRAMS
<strong>Pro</strong> <strong>200</strong> <strong>Series</strong> <strong>Furnace</strong> <strong>Operations</strong> <strong>Manual</strong>17. Use VacuumThe default value for Use Vacuum is YES.First, enter the Level of Vacuum desired. This is the valueat which the pump will cut off if you are using IntermittentVacuum (See Special Functions selections for choosingIntermittent or Constant Vacuum) If the value drops morethan 2 cm of mercury lower than the value specified hereduring Intermittent Vacuum use, the vacuum pump willautomatically start and run until the programmed Level isonce again reached, then automatically cut off. This willoccur as many times as required.The range of Vacuum Level settings is 28 cm of mercuryto a maximum of 75 cm of mercury, although pumpsweaken over time and usage. 71 cm of mercury is thedefault Level.Rotate the Selector Knob to select the vacuum value,then push the Selector Knob OR press the Nextbutton to store the parameter.18. Start VacuumAdd/Edit <strong>Pro</strong>gramUse Vacuum>YesThis parameter controls when the vacuum pumpcomes on. The selections are made by rotating theSelector Knob as in the example below. The rangewill be different depending on the values already putinto the program.• Rate Rise (1)• Hold Time (1)• Rate Rise 2 (2-Stage <strong>Pro</strong>gram)• Hold Time 2 (2-Stage <strong>Pro</strong>gram)Range: 406 C to 900 CRange: 0 to 30 SecondsRange: 900 C to 1025 CRange: 0 to 4 MinutesRotate the Selector Knob to select the setting, thenpush the Selector Knob OR press the Next buttonto store the parameter.19. Release VacuumThis parameter controls when the vacuum is released,and either air or argon (If Use Argon = Yes) is allowedto enter the muffle. The selections are made byrotating the Selector Knob as in the example below.The range will be different depending on the valuesalready put into the program.• Rate Rise (1)• Hold Time (1)• Rate Rise 2 (2-Stage <strong>Pro</strong>gram)• Hold Time 2 (2-Stage <strong>Pro</strong>gram)• When Table OpensRange: 425 C to 900 CRange: 0 to 30 SecondsRange: 900 C to 1025 CRange: 6 Seconds to 4 MinutesRotate the Selector Knob to select the setting, thenpush the Selector Knob OR press the Next button tostore the parameter. This is the final parameter. Youwill automatically be returned to the Main Menu.Press Firing Cycle <strong>Pro</strong>gram(<strong>Pro</strong> Press <strong>200</strong> only)The following procedures describe how to enter apressing program:1. Press the Main Menu button:2. Select the CHANGE PROGRAM Item and push theSelector Knob OR press the Next button.3. Turn the Selector Knob until ADD/EDIT PROGRAMis displayed.4. Push the Selector Knob OR press the Next button.5. A cursor pointing to the current program number willbe displayed. If there is a name displayed after theprogram number this is a pre-existing program whichyou may Edit by selecting it.To Add a program, rotate the Selector Knob to findthe program number you want to add your newprogram into. If you select a program number thatalready has a program entered, you may overwritethe existing program with the new one.6. Push the Selector Knob OR press the Next button toselect a program for Addition or Editing. The displaywill present the stage type selection as below:* Add/Edit <strong>Pro</strong>gram *Enter <strong>Pro</strong>gram Name001 –If the program you wish to Add requires only a singleRate Rise and Hold Temperature, select 1-Stage.If the program requires an initial Rate Rise andHold Temperature, followed by a secondary RateRise and Hold Temperature, select 2-Stage. Pushthe Selector Knob OR press the Next button toselect the program type.7. The display will change as shown below:* Add/Edit <strong>Pro</strong>gram *Enter <strong>Pro</strong>gram Name008 –The ^ symbol under the position identifies the currentcharacter being entered. Rotate the Selector Knobto bring up the desired character, then push theSelector Knob OR press the Next button to advanceto the next character in the <strong>Pro</strong>gram Name. You mayenter up to 15 characters. If you do not require all15 characters then simply continue to press the Nextbutton until the cursor is all the way to the right sideand the display changes to the one below:Select Type1–stage2–stage> Press20
<strong>Pro</strong> <strong>200</strong> <strong>Series</strong> <strong>Furnace</strong> <strong>Operations</strong> <strong>Manual</strong>8. Entry TemperatureEntry Temperature is the temperature at which thetable will close completely.The range of values is 25° C (77° F) to a maximum of980° C (1796° F).Rotate the Selector Knob to select the temperaturevalue, then push the Selector Knob OR press theNext button to store the parameter.9. Rate RiseRate Rise is the number of degrees per minute thetemperature will rise after the table has closed.The range of values is 0° C/Minute (0° F) to amaximum of 100° C/Minute (180° F).Rotate the Selector Knob to select the heat ratevalue, then push the Selector Knob OR press theNext button to store the parameter.10. Hold TemperatureHold Temperature is the final, highest temperaturein a 1-Stage <strong>Pro</strong>gram, or an intermediate stopovertemperature in a 2-Stage <strong>Pro</strong>gram.The range of values is 400° C (752° F) to a maximumof 1<strong>200</strong>° C (2192° F).Rotate the Selector Knob to select the temperaturevalue, then push the Selector Knob OR press theNext button to store the parameter.11. Hold TimeHOLD TIME is displayed. This is the amountof time desired to hold the porcelain at the finaltemperature, before the furnace begins to press.The range of values is 00 minutes, 00 seconds, to amaximum of 99 minutes.Rotate the Selector Knob to select the time value,then push the Selector Knob OR press the Nextbutton to store the parameter.Note: If you are Adding a 2-Stage <strong>Pro</strong>gram, the RateRise 2, followed by the Hold Temperature 2, andthe Hold Time 2 parameters will appear here. Ifnot, the Table Down Temperature will appear next.Note: Re-Press is selected in the Calibrate Ovensection of this <strong>Manual</strong>, using password 315.12. Fusing Adjustment ParameterFuse Adjust?> UnderfiresIMPORTANT NOTE: The Fusing Adjustment <strong>Pro</strong>gramPARAMETER is similar to the HIGH FUSING ADJUST andLOW FUSING ADJUST functions from the SpecialFunctions Menu in that any value entered herewill either add to, or subtract from, the HoldTemperature PARAMETER in the program. The <strong>Pro</strong>gramlevel Fuse Adjust PARAMETER adjusts the HoldTemperature ONLY FOR THE PROGRAM IT IS ENTERED IN,WHERAS THE SPECIAL FUNCTIONS/ HIGH FUSING ADJUSTAFFECTS ALL PROGRAMS WITH A HOLD TEMPERATURE>800° C (1472° F) AND THE SPECIAL FUNCTIONS/LOW FUSINGADJUST AFFECTS ALL PROGRAMS
<strong>Pro</strong> <strong>200</strong> <strong>Series</strong> <strong>Furnace</strong> <strong>Operations</strong> <strong>Manual</strong>Copy/Change a <strong>Pro</strong>gramThe Copy/Change a program feature allows a program tobe copied from one program number to another and thenchanged. This feature is very useful when there are onlyminor differences between programs.<strong>Pro</strong>cedures:1. Press the Main Menu button.2. Select Change <strong>Pro</strong>gram, push the Selector KnobOR press the Next button.3. Turn the Selector Knob until COPY/CHANGE PROGis displayed. Push Selector Knob OR press the Nextbutton to select this feature.4. COPY FROM: is displayed. The second line displays aprogram number and name. Turn the Selector Knobto find the program to be copied. Push the SelectorKnob OR press the Next button to continue.5. COPY TO: is displayed. Turn the Selector Knob toselect a location for the copied program. If a programthat is already entered is selected, you will write overthe existing program. Push the Selector Knob ORpress the Next button.6. At this point, changes to the program may be madein the same manner as described in the sectionAdd a <strong>Pro</strong>gram on page 19. Refer to that section forinstructions specific to each type of firing program.Note: The name of the new program must bechanged because the furnace does not allowDUPLICATE program names.Move a <strong>Pro</strong>gramThe Move program feature allows a program to be movedfrom one number to another. This feature is useful forgrouping programs for operator convenience.<strong>Pro</strong>cedure:1. Press the Main Menu button.2. Select Change <strong>Pro</strong>gram, push the Selector KnobOR press Next button.3. Turn the Selector Knob until MOVE PROGRAMis displayed. Push Selector Knob OR press Nextbutton to select this feature.4. MOVE FROM: is displayed. The second line displaysa program number and name. Turn the SelectorKnob to find the program you wish to move. Push theSelector Knob OR press Next button.5. MOVE TO: is displayed. Turn the Selector Knob tofind the program number you wish to move to. If youselect a program that is all ready entered, you willwrite over the existing program. Push the SelectorKnob OR press the Next button to finish. You willbe returned to the Main Menu automatically.Erase a <strong>Pro</strong>gramThis feature allows you to erase a program from memory.The space occupied by any program erased will becomeavailable for adding a new program.<strong>Pro</strong>cedure:1. Press the Main Menu button.2. Select Change <strong>Pro</strong>gram, push the Selector KnobOR press Next button.3. Turn the Selector Knob until ERASE A PROGRAMis displayed. Push the Selector Knob OR pressNext button to select this feature.4. ERASE A PROGRAM: is displayed. Turn the SelectorKnob to find the program you wish to erase. Push theSelector Knob OR press Next button to continue.5. ERASE ??? NO is displayed. Turn the SelectorKnob to YES to erase this program or NO to abort.Push the Selector Knob OR press Next button tocontinue. You will be returned to the Main Menuautomatically.22
<strong>Pro</strong> <strong>200</strong> <strong>Series</strong> <strong>Furnace</strong> <strong>Operations</strong> <strong>Manual</strong>Chapter Four — Run <strong>Pro</strong>gram MenuTurn the Selector Knob until the desired program isdisplayed. If the table has not been lowered, do so now.The Run <strong>Pro</strong>gram mode allows you to run programs andto view programs as they are running.Press the Start <strong>Pro</strong>gram button to begin this program.Continue through this chapter to learn all of the displaysand features available while a program is running.Running a <strong>Pro</strong>gram – Repeat <strong>Pro</strong>gramsThe furnace features a one-button repeat feature. If aprogram needs to be repeated, simply press the SelectorKnob and the last program run will be repeated.Note: You must burn the moisture out of themuffle before firing the first time. See theNOTATION under “Change Idle Temperature” onPAGE 10.Note: This feature is disabled if any SpecialFunctions have been accessed or if the Change<strong>Pro</strong>gram feature has been used after the lastprogram was run.Loading Your Work Into the <strong>Furnace</strong>Press the down arrow key to lower the work platform.Place your work on the firing tray, press the Start <strong>Pro</strong>gramKey and it will raise automatically under program control.Features and Displays AvailableWhile a <strong>Pro</strong>gram is RunningThe following illustration shows the display when aprogram is running:>Rotating the Selector Knob while the <strong>Pro</strong>gram is runningwill display additional information in four, successivescreens:The first alternate screen:HH:MM:SSThe second alternate screen:NoTime Left:Step Left:NEXT = SKIP STEPNext = Option ChangePressing the Next button will toggle the “No” in the screenabove to “Yes”. Pressing the Next button a second timewill change the “Yes” to “No”.Note: If the Next button is pressed from thisscreen the program will skip to the nextprogram segment.23
<strong>Pro</strong> <strong>200</strong> <strong>Series</strong> <strong>Furnace</strong> <strong>Operations</strong> <strong>Manual</strong>The LED GraphThe LED graph follows the running <strong>Pro</strong>gram’s progressand provides a quick visual reference on how far theprogram has progressed.The illustrations below demonstrate the progression ofLEDs on a 1-Stage <strong>Pro</strong>gram:The illustrations below demonstrate the progression ofLEDs on a 2-Stage <strong>Pro</strong>gram:>Pre Dry segment:>Pre Dry segment:>First Rise segment:*Argon feature is only available on <strong>Pro</strong> <strong>200</strong>**Press function is only available on <strong>Pro</strong> Press <strong>200</strong>>Rate Rise segment:>First Hold segment>Hold Temp segment:>Second Rise segment:>Closed Cool segment:>Second Hold segment:>Open Cool segment:>Closed Cool segment:>Open Cool segment:24
<strong>Pro</strong> <strong>200</strong> <strong>Series</strong> <strong>Furnace</strong> <strong>Operations</strong> <strong>Manual</strong>Running a Pressing <strong>Pro</strong>gram(<strong>Pro</strong> Press <strong>200</strong> only)The <strong>Pro</strong> Press <strong>200</strong> can press into a 100, <strong>200</strong>, or 300 gram investment mold. Configure the firing tray and press insert asshow below for each size mold.1. If the muffle temperature is below the entrytemperature specified in the program, the table willraise to the closed position while the temperaturerises. If the muffle temperature is above the entrytemperature specified in the program, the tablewill remain down while the muffle cools. When theprogrammed entry temperature is reached, thefurnace will begin to beep continuously.2. After Pressing the Next button, the table will lower.Place the ring onto the firing table and press the Nextbutton. The display will read:3. The Pressing program will begin running.Note: If the Re-Press feature is disabled,(Calibration Password 315 set to “Timed Press= Yes”) then the Press time specified in thePressing <strong>Pro</strong>gram parameters will be the actualPress Time. If the Re-Press feature is enabled,(Calibration Password 315 set to “Timed Press = No”)then the Press Time will be four minutes plus theamount of Re-Press time specified.Next = Raise tableRunning a Re-Press <strong>Pro</strong>gramTo run a Re-Press <strong>Pro</strong>gram, Calibration Password number315 must be set to “Timed Press = No”Press the Special Functions Key, then rotate the Selectorknob to the “Calibration Password” prompt and press theNext key. At the password entry prompt rotate the Selectorknob until the display says “315” and press Next key.Timed Press = NoRotate the Selector Knob until the screen looks like theone above and press the Next button. This has activatedthe Re-Press mode.1. If the muffle temperature is below the entrytemperature specified in the program, the table willraise to the closed position while the temperaturerises. If the muffle temperature is above the entrytemperature specified in the program, the table willremain down while the muffle cools. When the entrytemperature is reached, the furnace will begin tobeep continuously. The display will read:Next = Raise table2. If the table is up, press the Next button, the table willlower. With the table in the down position, place thering onto the firing table and press the Next button.3. The Pressing program will begin running.4. The temperature will now rise to the final temperatureselected in the program. When the final temperatureis reached, the hold time will begin.5. When the hold time has expired the display will readas shown below. The furnace will begin the firstpress. The first press will continue for four minutes.After the first press has been completed re-pressingwill occur if password 315 is activated.(See the Calibrate Oven section of this manual forfurther information.)Pressing6. When running a re-press program the furnace willautomatically press for four minutes and then theadditional “Re-Press” time. The display will now sayRE-PRESSING and the furnace will begin to re‐pressthe work for the amount of time specified in theprogram. When the re-press time has expired, the presswill fully retract and the table will lower automatically.Re-Pressing25
<strong>Pro</strong> <strong>200</strong> <strong>Series</strong> <strong>Furnace</strong> <strong>Operations</strong> <strong>Manual</strong>Chapter Five — MaintenanceCleaning The <strong>Furnace</strong>Your new furnace may be cleaned by using a soft cloth andkitchen cleaners such as Fantastic ® or Formula 409 ® . The frontpanel should be cleaned with a window cleaner such as Windex ® .Never clean the display window with a dry cloth or tissue asthis will scratch the surface.Always moisten the cleaning cloth with a cleaner such asWindex ® or water.Only clean the table with Windex ® or water and a towel. Usingother cleaners will harm the anodized surface. You will encounterproblems if 409 ® or Fantastic ® is used to clean the table.CAUTION!!! NEVER OPEN THE INTERIOR OFTHE CHASSIS BEFORE FIRST REMOVING THE ACELECTRICAL POWER CORD. THERE ARE DEADLYVOLTAGES INSIDE.If, for any reason, you need to access the interior of thechassis for the purpose of minor servicing or replacementof components such as valve plungers, you must removethe chassis top plate via two screws on the rear of thechassis, then slide the chassis top plate towards the frontof the furnace, then lift it up and set it aside. DO NOTremove the six screws on the bottom of the chassis in anattempt to remove the entire chassis top assembly as thebottom portion contains various electrical connectionswhich will prevent the removal of the bottom or subjectthe electrical connections to damaging stress unless firstdisconnected from the top.NOTE: IF HAZARDOUS MATERIAL IS SPILLED ON ORINSIDE THE FURNACE, CONTACT WHIP MIX TECHNICALSUPPORT IF THERE IS ANY DOUBT AS HOW TO SAFELYREMOVE THE MATERIAL.Argon Gas Requirements and Installation (<strong>Pro</strong> <strong>200</strong> only)Enter your own program based on the manufacturer’s instructionsfor the de-contamination material you are using.USE ONLY ARGON GAS IN THE <strong>Pro</strong> <strong>200</strong> FURNACE. ATTACHINGANY FLAMMABLE OR NOXIOUS GAS TO THIS FURNACECOULD CAUSE EXPLOSION OR PERSONAL INJURY!The best source of Argon is from your local bottled gas dealer.Usually the same dealer who furnishes Oxygen can alsosupply Argon. If not, he can recommend a reliable source.There are generally three grades of Argon available and yourdealer can tell you the cost of each. Most furnace buyers usethe lower cost commercial or industrial grade of Argon.The same dealer should be able to supply a regulator for thebottled Argon. It should have a gauge showing the pressureinside the tank, and a smaller gauge showing the pressureapplied to the outside system. The smaller gauge should readno more than 120 PSI maximum applied to the furnace.The furnace requires between one and two PSI of Argongas pressure. The use of more pressure will not improve theperformance of the furnace. If you plan to use the Argongas feature of this furnace you should also purchase a lowpressureArgon post regulator kit.The low-pressure post regulator kit attaches to the regulatorsupplied by your gas supplier. Installation of the low pressureregulator is as follows:DO NOT REMOVE THE REGULATOR SUPPLIED BYYOUR BOTTLED GAS SUPPLIER. THE LOW PRESSUREREGULATOR IS IN ADDITION TO THE REGULATORSUPPLIED FOR YOUR BOTTLE.1. The regulator supplied by the bottled gas companyusually has a hose barb fitting to attach your hose.Remove this fitting.2. The low-pressure regulator kit has a 1/4 inch male pipethread fitting supplied on one end. The other end hasa hose barb fitting for the supply hose to the furnace.Attach the male pipe thread end to the regulator onthe bottle. The first gauge reads the bottle pressure,the second gauge reads the pre-regulator pressure,and the third gauge reads from 0 to 15 PSI. Do notattach the gas to the furnace yet.3. Attach one end of the supplied hose to the lowpressureregulator. Do not attach the other end to thefurnace yet.4. Turn on the gas supply to the regulators.5. Adjust the pre-regulator (supplied by your gas dealer) toaround 20 PSI.6. Pull the red locking ring on the low-pressure regulatortowards the black Selector Knob on the bottom of theregulator to release the Selector Knob. Turn the blackSelector Knob fully counterclockwise. The pressureshould be 0.7. Turn the black Selector Knob clockwise until the lowpressuregauge reads between 1.0 and 1.5 PSI.8. Push the red locking ring up towards the gauge. This willlock the pressure setting.9. Turn off the gas supply from the bottle. Be sure to turn offthe supply when the gas is not being used to avoid theloss of gas due to fitting leaks.10. Attach the hose to the Argon connector on the back ofthe furnace.The furnace is now ready to run titanium and sinteringprograms, which require Argon gas.Note: The pressure reading may jump higherthan 1.5 PSI between firing and at times duringthe purging process. This is normal. PressureMAY be checked during the inert cool step inthe firing sequence. At that time Argon is beingapplied at a constant pressure to the furnace.The gauge should read between 1 and 1.5 PSI. YouMAY adjust the regulator at this time26
<strong>Pro</strong> <strong>200</strong> <strong>Series</strong> <strong>Furnace</strong> <strong>Operations</strong> <strong>Manual</strong>Fahrenheit to Centigrade° F ° C ° F ° C ° F ° C ° F ° C100 38 630 332 1,160 627 1,690 921110 43 640 338 1,170 632 1,700 927120 49 650 343 1,180 638 1,710 932130 54 660 349 1,190 643 1,720 938140 60 670 354 1,<strong>200</strong> 649 1,730 943150 66 680 360 1,210 654 1,740 949160 71 690 366 1,220 660 1,750 954170 77 700 371 1,230 666 1,760 960180 82 710 377 1,240 671 1,770 966190 88 720 382 1,250 677 1,780 971<strong>200</strong> 93 730 388 1,260 682 1,790 977210 99 743 393 1,270 688 1,800 982220 104 750 399 1,280 693 1,810 988230 110 760 404 1,290 699 1,820 993240 116 770 410 1,300 704 1,830 999250 121 780 416 1,310 710 1,840 1,004260 127 790 421 1,320 716 1,850 1,010270 132 800 427 1,330 721 1,860 1,016280 138 810 432 1,340 727 1,870 1,021290 143 820 438 1,350 732 1,880 1,027300 149 830 443 1,360 738 1,890 1,032310 154 840 449 1,370 743 1,900 1,038320 160 850 454 1,380 749 1,910 1,043330 166 860 460 1,390 754 1,920 1,049340 171 870 466 1,400 760 1,930 1,054350 177 880 471 1,410 766 1,940 1,060360 182 890 477 1,420 771 1,950 1,066370 188 900 482 1,430 777 1,960 1,071380 193 910 488 1,440 782 1,970 1,077390 199 920 493 1,450 788 1,980 1,082400 204 930 499 1,460 793 1,990 1,088410 210 940 504 1,470 799 2,000 1,093420 216 950 510 1,480 804 2,010 1,099430 221 960 516 1,490 810 2,020 1,104440 227 970 521 1,500 816 2,030 1,110450 232 980 527 1,510 821 2,040 1,116460 238 990 532 1,520 827 2,050 1,121470 243 1,000 538 1,530 832 2,060 1,127480 249 1,010 543 1,540 838 2,070 1,132490 254 1,020 549 1,550 843 2,080 1,138500 260 1,030 554 1,560 849 2,090 1,143510 266 1,040 560 1,570 854 2,100 1,149520 271 1,050 566 1,580 860 2,110 1,154530 277 1,060 571 1,590 866 2,120 1,160540 282 1,070 577 1,600 871 2,130 1,166550 288 1,080 582 1,610 877 2,140 1,171560 293 1,090 588 1,620 882 2,150 1,177570 299 1,100 593 1,630 888 2,160 1,182580 304 1,110 599 1,640 893 2,170 1,188590 310 1,120 604 1,650 899 2,180 1,193600 316 1,130 610 1,660 904 2,190 1,199610 321 1,140 616 1,670 910 2,<strong>200</strong> 1,204620 327 1,150 621 1,680 916 2,210 1,210Centigrade to Fahrenheit° C ° F ° C ° F ° C ° F ° C ° F ° C ° F35 95 300 572 565 1,049 830 1,526 1,095 2,00340 104 305 581 570 1,058 835 1,535 1,100 2,01245 113 310 590 575 1,067 840 1,544 1,105 2,02150 122 315 599 580 1,076 845 1,553 1,110 2,03055 131 320 608 585 1,085 850 1,562 1,115 2,03960 140 325 617 590 1,094 855 1,571 1,120 2,04865 149 330 626 595 1,103 860 1,580 1,125 2,05770 158 335 635 600 1,112 865 1,589 1,130 2,06675 167 340 644 605 1,121 870 1,598 1,135 2,07580 176 345 653 610 1,130 875 1,607 1,140 2,08485 185 350 662 615 1,139 880 1,616 1,145 2,09390 194 355 671 620 1,148 885 1,625 1,150 2,10295 203 360 680 625 1,157 890 1,634 1,155 2,111100 212 365 689 630 1,166 895 1,643 1,160 2,120105 221 370 698 635 1,175 900 1,652 1,165 2,129110 230 375 707 640 1,184 905 1,661 1,170 2,138115 239 380 716 645 1,193 910 1,670 1,175 2,147120 248 385 725 650 1,202 915 1,679 1,180 2,156125 257 390 734 655 1,211 920 1,688 1,185 2,165130 266 395 743 660 1,220 925 1,697 1,190 2,174135 275 400 752 665 1,229 930 1,706 1,195 2,183140 284 405 761 670 1,238 935 1,715 1,<strong>200</strong> 2,192145 293 410 770 675 1,247 940 1,724 1,205 2,201150 302 415 779 680 1,256 945 1,733 1,210 2,210155 311 420 788 685 1,265 950 1,742 1,215 2,219160 320 425 797 690 1,274 955 1,751 1,220 2,228165 329 430 806 695 1,283 960 1,760 1,225 2,237170 338 435 815 700 1,292 965 1,769 1,230 2,246175 347 440 824 705 1,301 970 1,778 1,235 2,255180 356 445 833 710 1,310 975 1,787 1,240 2,264185 365 450 842 715 1,319 980 1,796 1,245 2,273190 374 455 851 720 1,328 985 1,805 1,250 2,282195 383 460 860 725 1,337 990 1,814 1,255 2,291<strong>200</strong> 392 465 869 730 1,346 995 1,823 1,260 2,300205 401 470 878 735 1,355 1,000 1,832 1,265 2,309210 410 475 887 740 1,364 1,005 1,841 1,270 2,318215 419 480 896 745 1,373 1,010 1,850 1,275 2,327220 428 485 905 750 1,382 1,015 1,859 1,280 2,336225 437 490 914 755 1,391 1,020 1,868 1,285 2,345230 446 495 923 760 1,400 1,025 1,877 1,290 2,354235 455 500 932 765 1,409 1,030 1,886 1,295 2,363240 464 505 941 770 1,418 1,035 1,895 1,300 2,372245 473 510 950 775 1,427 1,040 1,904 1,305 2,381250 482 515 959 780 1,436 1,045 1,913 1,310 2,390255 491 520 968 785 1,445 1,050 1,922 1,315 2,399260 500 525 977 790 1,454 1,055 1,931 1,320 2,408265 509 530 986 795 1,463 1,060 1,940 1,325 2,417270 518 535 995 800 1,472 1,065 1,949 1,330 2,426275 527 540 1,004 805 1,481 1,070 1,958 1,335 2,435280 536 545 1,013 810 1,490 1,075 1,967 1,340 2,444285 545 550 1,022 815 1,499 1,080 1,976 1,345 2,453290 554 555 1,031 820 1,508 1,085 1,985 1,350 2,462295 563 560 1,040 825 1,517 1,090 1,994 1,355 2,47131
IT 11522 08/11


