Hugs User Guide 805U1601 Rev 20 - Stanley Healthcare Solutions
Hugs User Guide 805U1601 Rev 20 - Stanley Healthcare Solutions
Hugs User Guide 805U1601 Rev 20 - Stanley Healthcare Solutions

You also want an ePaper? Increase the reach of your titles
YUMPU automatically turns print PDFs into web optimized ePapers that Google loves.
<strong>Stanley</strong> <strong>Healthcare</strong> <strong>Solutions</strong>309 Legget DriveOttawa, ON K2K 3A3CanadaTelephone: 1-866-559-6275 or 1-613-592-6997Facsimile: 1-613-592-4296Web site: www.stanleyhealthcare.com© 1997–<strong>20</strong>10 XMARK Corporation. All Rights Reserved. Printed in Canada.<strong>805U1601</strong> <strong>Rev</strong> <strong>20</strong>. June <strong>20</strong>10. Software release 6.2.
Limitation of LiabilityThis Product has been designed for use to assist in the prevention of infant abductionand/or mother/infant mismatching.The range, accuracy, function and performance of this Product may vary from thepublished specifications due to many factors, including, but not limited to, siteimpairments from structural effects, metal objects in the vicinity, placement of thereceiver and transmitter, interference from other electrical devices, atmosphericeffects, installation, and maintenance. There may be other factors, which also affectperformance of this Product.XMARK Corporation (“XMARK”) does not guarantee that this Product will detect100% of infant abductions and/or mother/infant mismatches, nor does XMARKguarantee that this Product will be free from returning false reports of infantabductions and/or mother/infant mismatches.Monthly testing and maintenance of this Product, as described in the Productdocumentation, is essential to verify the system is operating correctly and to ensurethat the probability of detecting an alarm and/or locating the transmitter aremaximized.The failure to undertake regular testing and maintenance will increase the risk ofsystem failure and failure to detect infant abductions and/or mother/infantmismatches. The failure to undertake regular testing and maintenance will increasethe risk of false reports of infant abductions and/or mother/infant mismatches.XMARK hereby disclaims all warranties, express or implied, arising out of or inconnection with any of its Products of the use or performance thereof, includingbut not limited to, where allowable by law, all other implied warranties orconditions of merchantability, fitness for a particular purpose and those arising bystatute or otherwise in law or from a course of dealing or usage of trade.XMARK’s liability to you or anyone claiming through or on behalf of you withrespect to any claim or loss arising out of the use or misuse of XMARK’s Product,defective products or materials, improper installation or maintenance of XMARK'sProduct or products or the system in which they are incorporated, or alleged to haveresulted from an act or omission of XMARK or any person, negligent or otherwise,shall be limited to the following, at XMARK’s sole option:1) the repair or replacement of defective Product or materials supplied byXMARK during the warranty period as set out in the Productdocumentation; or,2) a refund of the purchase price of the Product supplied by XMARK.In no event shall XMARK be liable for general, specific, indirect, consequential,incidental, exemplary or punitive damages or any losses or expenses suffered by youor anyone else, whether or not XMARK, or its employees, officers, agents, resellersor installers has been informed of the risk of such loss or expense and whether ornot such losses or expenses were foreseeable.
AGRADECIMENTOSÉ com muita felicidade e a força daqueles que me acompanharam nessa jornada quededico com carinho meus sinceros agradecimentos. Agradeço a Deus, meu primeiro mestre.Que se fez presente em todos os momentos dessa minha conquista e pela oportunidade dealcançar um dos meus muitos sonhos.Aos meus pais, por todo o amor, dedicação, educação, paciência e confiança duranteesta etapa, a minha eterna gratidão por sempre acreditar em mim e me apoiar. Ao meu irmão,que, ao seu jeito, demonstrou firmeza ao meu lado.A minha trajetória de vida não seria a mesma sem a presença do meu avô, “JoãoChagas”, a quem agradeço os conselhos e dedicação incansável e paciente, pelos conselhos eincentivo aos estudos. À minha avó, quanta preocupação, quanto amor, quanto cuidado.A minha família, os meus tios e tias, primos e primas, pela força e por ter acreditadoem mim e por ter me ajudado sempre que precisei. Que aposta vocês deram, o presente àscustas do meu futuro. Obrigada!Ao meu companheiro de toda caminhada, Diogo! Agradeço pela paciência e apoio aolongo de todas as fases da minha vida acadêmica, sem ele nada disso teria sido possível. Quesufoco. Quanto silêncio, carinho, aconchego, amizade, companheirismo, palavrasacolhedoras. Venci, amor! Obrigada pela paciência e força.Agradeço a minha amiga Yara, pelas idéias e reflexões. Em momento algum mediuesforço em me apoiar nas horas de exaustão e descrença com o rigor acadêmico. Aos Amigosque fiz durante esses anos de faculdade Andréia, Paulo, Cássia, Fernanda, Morgana, e outrosque não cito mais que fizeram parte da minha trajetória acadêmica.À minha orientadora, Profª Marina por ter acreditado em mim e me orientado eajudado na produção deste trabalho, agradeço imensamente por sua generosidade ao aceitaressa pesquisa- sem me conhecer- acreditando na minha proposta. Agradeço pelas críticas,ensinamentos, amizade, compreensão, supervisão, orientação, fizeram este trabalho se tornarpossível.Agradeço aos profissionais da saúde que, por suas participações foram responsáveispela produção da pesquisa. A todos que de alguma forma contribuíram para a realização destetrabalho respondendo ao questionário.Muito obrigada!
Warnings• Do not operate other software programs at the same time as the <strong>Hugs</strong> software - donot use these or other software:1 Disk compression - do not use compressed disk drives. Drive compressiontechnology is not recommended.2 When using anti-virus software do not schedule the scan to run as it will slowdown the system response time due to the amount of CPU resources itconsumes.3 Back-up programs - the only back-up program supported while running thePS system is the SQL Studio Express included on the Patient Security (PS)Server Software Installation DVD. If any other backup program is used, thePSS would need to be stopped to allow access to the database for backing up.When the PSS is running, it seizes the database not allowing other programsto access it.• Turn off power management for all computers used in the Patient Security system -power management can interfere with the proper operation of the PS systemsoftware.• Turn off Auto-Updater - restarts of the Server computer as a result of auto-updaterwill bring the system down unexpectedly. OS and security updates should beapplied on a planned schedule.
ContentsAbout <strong>Hugs</strong> Functions ....................................................................................... 4-14Displaying Tag History ....................................................................................... 4-15Discharging an Infant ......................................................................................... 4-16Transporting an Infant ....................................................................................... 4-17Transport Return............................................................................................................4-18Updating the Transport Time....................................................................................4-19Transport Time Expired ...............................................................................................4-21Suspending Tamper Alarms............................................................................. 4-24Resume Tamper .............................................................................................................4-25Editing Tag Memos.............................................................................................. 4-26Setting Pictures..................................................................................................... 4-28Locating Tags ........................................................................................................ 4-32Disabling BabySense .......................................................................................... 4-34Customizing the Census List............................................................................ 4-36Modifying the Layout of the Alarms-Events Window............................. 4-39Modify Screens Terminology.....................................................................................4-39Printing the Census List ..................................................................................... 4-44Only This Client ..............................................................................................................4-44All Tags ..............................................................................................................................4-48Manually Admitting a Tag ................................................................................ 4-525 – ReportsReports Manager Window...................................................................................5-2Report Types.............................................................................................................5-3Report Formats................................................................................................................. 5-6Accessing Reports...................................................................................................5-7Generating Reports ................................................................................................5-8Using the Charts Feature......................................................................................5-9Examples of Reports .....................................................................................................5-11Filtering Reports ................................................................................................... 5-17Creating Custom Reports.................................................................................. 5-18Viewing Reports Remotely ............................................................................... 5-<strong>20</strong>Printing and Exporting Reports ...................................................................... 5-21<strong>Hugs</strong> <strong>User</strong> <strong>Guide</strong>vii
ContentsPrinting Commands ..................................................................................................... 5-21Printing Reports............................................................................................................. 5-21Exporting Reports ......................................................................................................... 5-236 – <strong>User</strong> AdministrationAdmin Window ....................................................................................................... 6-2Admin Window Tabs.......................................................................................................6-2<strong>User</strong> Accounts.......................................................................................................... 6-3<strong>User</strong> Permissions ..............................................................................................................6-3Creating <strong>User</strong> Accounts .................................................................................................6-5Editing a <strong>User</strong> Account...................................................................................................6-8Deleting a <strong>User</strong> Account................................................................................................6-9Access Cards (Passcards)....................................................................................6-10Clearing Access Cards (Passcards) .......................................................................... 6-11<strong>User</strong> Defined Fields (Columns) ........................................................................6-12Alarm Notes............................................................................................................6-19Procedures ..............................................................................................................6-22Resetting Low Battery Tags ..............................................................................6-25Setting Transport Times.....................................................................................6-26Suspend Tamper Timeout.................................................................................6-27Setting Alarm/Event Timers..............................................................................6-28Card Reader Setup ...............................................................................................6-30Tag Diagnostics.....................................................................................................6-31Interpreting Results...................................................................................................... 6-31Specific Tags ...................................................................................................................6-337 – TestingTesting <strong>Guide</strong>lines.................................................................................................. 7-2A – Tag Instructions and MaintenanceApplying and Removing <strong>Hugs</strong> Tags ................................................................A-2Assessing Tag Fit.....................................................................................................A-4Cleaning Tags...........................................................................................................A-5viii<strong>Hugs</strong> <strong>User</strong> <strong>Guide</strong>
Maintaining Tags.................................................................................................... A-6Storing .................................................................................................................................A-6Battery Status....................................................................................................................A-7Handling Information ....................................................................................................A-7Regular Maintenance .....................................................................................................A-8Between Uses....................................................................................................................A-8Out of Service Tags .........................................................................................................A-8B – Alarm Quick ReferenceI – Indexix<strong>Hugs</strong> <strong>User</strong> <strong>Guide</strong>
Chapter 1CHAPTER 0INTRODUCTIONThe <strong>Hugs</strong> <strong>User</strong> <strong>Guide</strong> provides instructions on how to use all aspects andfeatures of the <strong>Hugs</strong> ® application software. It is intended for facility staff whoare responsible for using and maintaining the <strong>Hugs</strong> system. Although there aresections on setting tag and alarm parameters, the general assumption is thatyour <strong>Hugs</strong> system has been installed and verified by your authorized <strong>Hugs</strong>dealer.<strong>Hugs</strong> <strong>User</strong> <strong>Guide</strong> 1–1
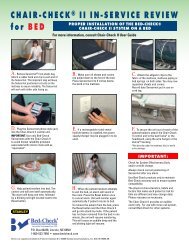
<strong>Hugs</strong> System Components<strong>Hugs</strong> Resource KitThe <strong>Hugs</strong> Resource Kit provides helpful information and tools needed toimplement the <strong>Hugs</strong> system. The <strong>Hugs</strong> Resource Kit contains the following:• <strong>Hugs</strong> <strong>User</strong> <strong>Guide</strong>• <strong>Hugs</strong> Quick Reference <strong>Guide</strong>• Tag Dispenser and Test items• Training tags and bandsIf you did not receive the <strong>Hugs</strong> Resource Kit, please contact your <strong>Hugs</strong> dealer.<strong>Hugs</strong> System ComponentsFigure 1.1 <strong>Hugs</strong> Resource KitThe <strong>Hugs</strong> system includes the following components:• <strong>Hugs</strong> tags• <strong>Hugs</strong> Application Software• Infrastructure Components• Receivers• Exciters• Patient Security Server• Workstations<strong>Hugs</strong> <strong>User</strong> <strong>Guide</strong> 1–3
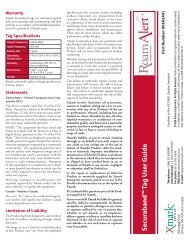
<strong>Hugs</strong> Application Software<strong>Hugs</strong> System ComponentsThe <strong>Hugs</strong> application software is installed from the <strong>Hugs</strong> Application SoftwareCD by your dealer. Once installed, the <strong>Hugs</strong> application is launched byclicking the <strong>Hugs</strong> icon on the desktop.Figure 1.3 <strong>Hugs</strong> Application Software CD<strong>Hugs</strong> <strong>User</strong> <strong>Guide</strong> 1–5
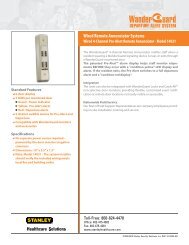
<strong>Hugs</strong> System ComponentsReceiversReceivers are radio frequency reception devices installed at regular intervalsthroughout the monitored area of the facility. Receivers receive the <strong>Hugs</strong> tagtransmissions (within a 35 - 50 ft radius), time stamp them, and relay them tothe Patient Security Server via a LonWorks network. Receivers are installed inceilings, usually out of view.The Patient Security Server monitors the operation of each Receiver to ensure ahigh level of operational confidence. If the Receiver fails to operate for anyreason, an alarm occurs.Figure 1.4 Receiver1–6 <strong>Hugs</strong> <strong>User</strong> <strong>Guide</strong>
What's New in this Release?What's New in this Release?The <strong>Hugs</strong> Application Software CD includes a Read Me file containing thelatest information on enhancements to the <strong>Hugs</strong> software. Please read this fileevery time the software is upgraded or installed.This section describes the new <strong>Hugs</strong> 6.2 features available to users with theappropriate permissions.Print Census ListUsing the Quick Access Menu, users can choose to print active <strong>Hugs</strong> tags fromone computer only or print a list of all tags in the system.Quick HistoryAllows the user to instantly review the last 10 events from the Alarms/Eventswindow by clicking the Quick History tab.Discharge Mother Tag (Kisses only)You can now discharge a Mother tag from the software without discharging the<strong>Hugs</strong> tag (for scenarios when the mother is able to go home but the infantcannot).Modify <strong>Hugs</strong> Window Layout<strong>User</strong>s with appropriate permission can now modify the layout of the variousareas on the alarm screen.New Administrator Functions in the Admin tabThe Tag Diagnostics feature has been added to the Admin tab in the <strong>Hugs</strong>window.Enhanced <strong>User</strong>-Defined FieldsThe <strong>User</strong> Defined fields can now be displayed in different colors in the Detailsarea for easier viewing.Status BarThe Status Bar now displays information about the connection status of theServer software. The current system time also appears in the bottom-rightcorner of the <strong>Hugs</strong> window.<strong>Hugs</strong> <strong>User</strong> <strong>Guide</strong> 1–9
What's New in this Release?Duplicate NamesWhen you admit an infant with the same name as an infant already enrolled inthe system, a duplicate name warning icon appears next to both names in theCensus List.1–10 <strong>Hugs</strong> <strong>User</strong> <strong>Guide</strong>
Chapter <strong>20</strong>USER INTERFACECHAPTERThis chapter describes the main elements of the <strong>Hugs</strong> application interface andexplains how to change basic display settings.<strong>Hugs</strong> <strong>User</strong> <strong>Guide</strong> 2–1
Overview of the Main InterfaceOverview of the Main InterfaceQuickAccessmenuNote:The <strong>Hugs</strong> application main interface includes the following:• Alarms-Events tab• Census tab• Reports tab• Admin tab• Quick Access menu• Status bar• <strong>User</strong> InformationThe tabs appearing at the top of the <strong>Hugs</strong> window (Alarms-Events, Census, Reportsand Admin) may be different depending on your access permissions and defaultsettings.Alarms-EventstabCensustabReportstabAdmintab<strong>User</strong>InformationStatus barFigure 2.1 <strong>Hugs</strong> Application Window2–2 <strong>Hugs</strong> <strong>User</strong> <strong>Guide</strong>
About TabsOverview of the Main InterfaceTo access the different screens (Census, Alarms-Events etc.), select theappropriate tab located at the top of the <strong>Hugs</strong> window.Select the appropriate tab to open the individual screensfor Alarms, Census, Reports or Admin.Changing Font SizeYou can increase/decrease the text font size in the <strong>Hugs</strong> window by holdingdown Ctrl + Shift and pressing the + (plus to increase) or - (minus to decrease)sign.For example, by pressing the following three keys together:Ctrl Shift +The text goes fromtoEach time you press the + sign, the text size increases slightly. Similarly, holdingdown Ctrl Shift - decreases the font size in the <strong>Hugs</strong> window.<strong>Hugs</strong> <strong>User</strong> <strong>Guide</strong> 2–3
Overview of the Main InterfaceAlarms-Events TabTo view the Alarms-Events screen, select the Alarms-Events tab at the top of the<strong>Hugs</strong> window. The Alarms-Events screen is divided into two areas as follows:• Facility map(s) on the left side• Alarms-Events on the right side• Quick History tabThe number in parentheses indicatesthe number of alarms/events currentlyactive in the <strong>Hugs</strong> system.Map AreaThe Map area displays floors or protected areas in your facility, and provides aquick overview of system activity and alarms. The location of system devicessuch as Exciters (designating exits) can be seen at a glance. Using the Locatefeature, the general location of tags can be displayed, symbolized by the redhearts icon in the Map area.Maps must be added to the system before they appear in the Map area.2–4 <strong>Hugs</strong> <strong>User</strong> <strong>Guide</strong>
Overview of the Main InterfaceChanging the Map Area SizeThe Map area can be increased or decreased in size. To change the size, movethe mouse pointer to the border between the two windows until the ||symbol appears. Click and hold the left mouse key and drag the border to thedesired position. The mouse pointer now drags the window border. Move theborder to the desired position and click the left mouse button.Note:You must have permission to Modify Screens in order to change the size or locationof areas in the <strong>Hugs</strong> window.Alarms-Events BoxAll alarms are displayed on the right side of the Alarms-Events area, whichappears automatically whenever an alarm occurs. For more information aboutthe Alarms box, see “Alarms-Events Box” on page 3-3.<strong>Hugs</strong> <strong>User</strong> <strong>Guide</strong> 2–5
Overview of the Main InterfaceDetails BoxThe Details box in the Alarms-Events area displays information about the Alarmor Event.The system may be configured to display the <strong>User</strong> Defined fields in differentcolors to make them easier to see. For information about <strong>User</strong> Defined fields, see“<strong>User</strong> Defined Fields (Columns)” on page 6-12.Procedure BoxThe Procedure box only appears in the Alarm window if Procedures have beenconfigured by your Administrator. For more information about adding facilityspecificprocedures to the Alarm window, see “Procedures” on page 6-22.Quick History TabClick the Quick History tab on the Alarms-Events screen to instantly review thelast 10 alarms\events that have occurred on the Pedz computer. See “QuickHistory” on page 3-28.2–6 <strong>Hugs</strong> <strong>User</strong> <strong>Guide</strong>
Overview of the Main InterfaceCensus TabSelect the Census tab at the top of the <strong>Hugs</strong> window to display the Census List(see Note below).The number in parentheses indicatesthe number of tags/infants currentlyadmitted in the <strong>Hugs</strong> system.Note:The Census List may look different depending on your access permissions and howyour system was configured (for example: Zones and <strong>User</strong>-Defined fields such asRoom# may not appear)The Census List displays information about each active tag in the system,allowing staff to perform a number of actions on the tag. Staff can configure theCensus list to display only the information that they wish to view. Staff can add,remove, rename or reorder columns or add drop-down selections to quicklypopulate the fields. See “Customizing the Census List” on page 4-36.The tag list can also be sorted, using any column as the determining factor. Forexample, click on the Name column. The list sorts alphabetically in ascendingorder.<strong>Hugs</strong> <strong>User</strong> <strong>Guide</strong> 2–7
Overview of the Main InterfaceCensus ToolbarWhen the Census tab is selected, the following toolbar appears at the top of thewindow:Note:The toolbar icons may vary depending on your access permissions and the settingsmade by your System Administrator.Color CodingThe different row colors that are used in the <strong>Hugs</strong> Census List are shown here:White - No activityRed - AlarmYellow - TransportedOrange - Suspend TamperBlue - Disable BabySenseGray - Auto DischargeBrown - Low BatteryDuplicate Names in the Census ListIf an infant is admitted into the <strong>Hugs</strong> system with the same name as an existingentry, the following duplicate name icon appears next to the two names in theCensus List:For more information about duplicate names, see “Duplicate Names” onpage 4-8.2–8 <strong>Hugs</strong> <strong>User</strong> <strong>Guide</strong>
Overview of the Main InterfacePop-Up Menu Commands<strong>User</strong>s with the appropriate permissions can:• Check the history of a tag• Discharge a tag• Transport an infant• Initiate or clear a timeout for adjusting a band (Suspend Tamper)• Edit a tag’s memo• Assign an image to a tag• Locate a tag on the floor plan• Suspend or Enable the BabySense featureThese settings are available from a pop-up menu that is displayed by clicking onthe heart icon for a tag or by clicking in the tag row and selecting theappropriate toolbar icon. In addition, a number of settings can be made directlyfrom within the Census list itself. Select an infant’s row, and then click on thefield of interest to change the setting. See “Changing Tag/Infant Information”on page 4-10.HistoryDisplays the History window, with a complete list of Events/alarms and activitysince the tag was admitted. See “Displaying Tag History” on page 4-15 fordetails.DischargeDischarges the tag from the system. See “Discharging an Infant” on page 4-16for details.<strong>Hugs</strong> <strong>User</strong> <strong>Guide</strong> 2–9
Overview of the Main InterfaceTransportAllows the temporary transport of an infant through a protected exit. See“Transporting an Infant” on page 4-17.Transport Return/Update TransportAcknowledges a return to the protected area and resumes tag monitoring after aTransport. These commands only appear in the pop-up menu once Transporthas been previously selected. See “Transport Return” on page 4-18 and“Updating the Transport Time” on page 4-19.Suspend/Resume TamperSuspends Tamper Alarms for the selected tag so that the band can be changed oradjusted. See “Suspending Tamper Alarms” on page 4-24.Edit MemoOpens the memo window for entering notes on the tag. See “Editing TagMemos” on page 4-26 for details.Set/Show/Clear PictureAssigns a picture to the selected tag. See “Setting Pictures” on page 4-28 fordetails.LocateUse the Locate command to display the tag icon on the floor plan. The Locatecommand only appears when the Enable Locate feature has been configured inthe PS System Manager. See “Locating Tags” on page 4-32.Disable/Enable BabySenseDisables/enables the BabySense feature for the selected tag. See “DisablingBabySense” on page 4-34.2–10 <strong>Hugs</strong> <strong>User</strong> <strong>Guide</strong>
Overview of the Main InterfaceChanging the Columns in the Census ListThe Census List’s column width and size can be changed.Column WidthColumn widths can be increased or decreased to display more or lessinformation. Columns can also be decreased until they no longer appear,effectively removing them from the display.To change a column’s width, move the mouse pointer to the border betweentwo columns until the || symbol appears. Click and hold the left mousebutton and drag the border to change the column width. To hide a column,drag the border to the left until the column no longer appears. To display thecolumn again, move the mouse pointer to display the || symbol then clickand drag the column border to the right.Use Customize Census to hide or rename columns. For more information aboutcustomizing the Census List, see “Customizing the Census List” on page 4-36.Census List SizeThe Census list window can be increased or decreased in size. Place the mousepointer over the bottom-right corner of the window to display the || symboland then click and drag the window to the desired size.<strong>Hugs</strong> <strong>User</strong> <strong>Guide</strong> 2–11
Overview of the Main InterfaceReports TabThe Reports tab only appears at the top of the <strong>Hugs</strong> window if staff haveappropriate permissions to access the Reports feature. For more informationabout Reports, see “Reports” on page 5-1.Figure 2.2 Reports Tab2–12 <strong>Hugs</strong> <strong>User</strong> <strong>Guide</strong>
Admin TabOverview of the Main InterfaceThe Admin tab only appears at the top of the <strong>Hugs</strong> window if staff haveappropriate permissions to access the Administrative functions. It is used toadminister <strong>User</strong> Accounts, set timers, enable Alarm Procedures and add theProcedures text. For more information about the Admin tab, see “<strong>User</strong>Administration” on page 6-1.Figure 2.3 Admin Tab<strong>Hugs</strong> <strong>User</strong> <strong>Guide</strong> 2–13
Overview of the Main InterfaceQuick Access MenuClick the red hearts button at the top-left corner of the <strong>Hugs</strong> window to viewthe Quick Access menu. The following menu items appear:• Admit - Only used under special circumstances. See “Manually Admittinga Tag” on page 4-52.• Page - Used if your system has been configured for pagers.• Change Password - Displays the Change Password dialog box. See“Changing Your Password” on page 4-5.• Census List Customization - Rename, show or hide columns in theCensus List. See “Customizing the Census List” on page 4-36.• Print Census List - Used to print the Census List for one computer, or alltags in the system. See “Printing the Census List” on page 4-44.• Modify Screens - Allows <strong>User</strong>s with appropriate permission the ability tochange the layout of the areas on the Alarms-Events screen. See“Modifying the Layout of the Alarms-Events Window” on page 4-39.• Help - Displays the <strong>Hugs</strong> Help file. See “<strong>Hugs</strong> Help File” on page 2-15.• About - Displays the <strong>Hugs</strong> application version number.• Exit - Used to close and exit the <strong>Hugs</strong> application.Click this button to view theQuick Access menu.2–14 <strong>Hugs</strong> <strong>User</strong> <strong>Guide</strong>
Overview of the Main Interface<strong>Hugs</strong> Help FileThe <strong>Hugs</strong> system software includes a Help file with information about using andconfiguring the <strong>Hugs</strong> system software. To open the Help file, select Help fromthe Quick Access menu.Status BarThe Status Bar, located at the bottom of the <strong>Hugs</strong> window indicates whether ornot a connection has been established to the <strong>Hugs</strong> application as well as displaysthe system time.While logging in, the progress of the <strong>Hugs</strong> connection appears - indicating thestatus of the Server software during startup.The progress bar automatically clears when the Server is up and running.<strong>User</strong> InformationThe <strong>User</strong> information appears at the top-right corner of the <strong>Hugs</strong> window. Itindicates the <strong>User</strong> logged in and displays the Log out button.<strong>Hugs</strong> <strong>User</strong> <strong>Guide</strong> 2–15
Touch Screen InterfaceTouch Screen InterfaceThe <strong>Hugs</strong> system software supports an optional touch screen interface thatreplaces the mouse and keyboard. All menus and buttons are accessed bytouching them with the finger, and data is entered via a virtual keyboard.The <strong>Hugs</strong> system software is compatible with any touch screen using theMicroTouch standard, which is used by a large number of manufacturers.Initial SetupThe touch screen functions of the <strong>Hugs</strong> system software are enabled by SystemAdministrator. The virtual keyboard appears and the Toolbar buttonsautomatically enlarge.Using the Touch ScreenThe touch screen display looks very similar to a standard monitor. To access amenu or select a button, simply touch it with your finger. When an editable fieldis selected, a virtual keyboard appears automatically, as in the example below.Type in the information and then touch the virtual Enter key. The keyboard willbe hidden automatically.2–16 <strong>Hugs</strong> <strong>User</strong> <strong>Guide</strong>
PrintingPrintingYou can print a variety of information generated by the <strong>Hugs</strong> system, includingthe tags listed in the Census list, and reports generated with the Reportfunction.NoteThe Print feature only works if there is a printer configured for the PC where youare creating the report.Census ListFor more information about printing the Census List, see “Printing the CensusList” on page 4-44.ReportsTo print selected Reports, click the Print button in the Reports toolbar. See“Printing and Exporting Reports” on page 5-21.Print PreviewFor Reports, the software can also preview what the printed report will looklike. Click the Print Preview button. See “Printing Reports” on page 5-21.<strong>Hugs</strong> <strong>User</strong> <strong>Guide</strong> 2–17
2 - 18 <strong>Hugs</strong> <strong>User</strong> <strong>Guide</strong>
Chapter 30ALARMS AND EVENTSCHAPTERThe <strong>Hugs</strong> system software automatically generates messages when certainevents or alarms occur.Events are non-urgent reminders. They appear in the Alarms-Events window,and do not require immediate action. The software continues to operatenormally.Alarms signal an important risk to the security of the infant, and must beresponded to right away. When an alarm occurs, the Alarms-Events areaappears on the computer display. The software continues to operate, and theAlarms-Events tabs flash in red until the alarm has been cleared.This chapter describes the most common alarms and events. Refer to AppendixA - “Alarm Quick Reference” for a complete list of alarms.NoteAlarms should only be cleared once the security of the identified infant has beenverified. Facility procedure should be followed when responding to alarms.<strong>Hugs</strong> <strong>User</strong> <strong>Guide</strong> 3–1
Facility MapsFacility MapsZonesThe settings for the maps and zones will have been completed by yourauthorized <strong>Hugs</strong> dealer.Maps are used to represent the area covered by the <strong>Hugs</strong> system. Depending onthe size of the facility, more than one map may be required to provide anappropriate level of detail. (Icons for a single device can be added to more thanone map.)When an alarm occurs, the software automatically displays the appropriate map,and shows the location of the tag in alarm if it is at an Exciter (exit).Maps must be in the graphical bitmap (.bmp) or JPEG (.jpg) form, and can beeither color or gray scale. For consistent colors across several <strong>Hugs</strong> systemcomputers, choose the same number of display colors within each computer.Zones are a way of dividing the area covered by the <strong>Hugs</strong> system into sections,and customizing the system alarm responses in each section to suit your securityrequirements. The benefit is that users in one area only see alarms that occur intheir section.How Zones workEach Exciter in the <strong>Hugs</strong> system is assigned to a Zone. When admitting a tag,indicate in which Zone the tag is currently located. Then, every time the tag seesan Exciter, the Zone information is updated automatically. The tag alarms areonly reported to the Zone that the tag has been assigned to during theadmittance procedure.PCs can also be configured to display alarms from only selected Zones. Staff atthat PC receive immediate notification of the alarm, while staff in other areas arenot disturbed.3–2 <strong>Hugs</strong> <strong>User</strong> <strong>Guide</strong>
AlarmsAlarmsAlarms in the Census ListIn the Census window, the <strong>Hugs</strong> tag row will be highlighted in red indicatingthat the tag is in an alarm state:Tag in an alarm stateAlarms-Events BoxAll Alarms are displayed in the Alarms-Events box, which appears automaticallyon the right side of the <strong>Hugs</strong> window, whenever an Alarm occurs. The redcircle icon indicates an Alarm has been declared, as opposed to the yellowcaution sign displayed for Events. For information about Events, see “Events”on page 3-22.<strong>Hugs</strong> <strong>User</strong> <strong>Guide</strong> 3–3
AlarmsThe tab heading in the Alarms-Events box, as well as the tab heading at the topof the <strong>Hugs</strong> window, flashes in red until the alarm is clearedNoteIf another tab (i.e., Census) is opened, and an alarm occurs, the Alarms-Events areaautomatically opens with both tabs flashing in red.Duplicate Names in the Alarms BoxIf an infant with a duplicate name is in an alarm state, the duplicate name iconappears next to the name in the Alarms box.3–4 <strong>Hugs</strong> <strong>User</strong> <strong>Guide</strong>
AlarmsThe following tables describes the Alarm window elements/settings and menuoptions:Table 3.1Alarms Box Elements/SettingsElements/SettingTitle BarDescriptionTypeDate/TimeDetailsProcedureClearMuteDescriptionThe title bar lists the total number of current alarms.This lists the tag or device causing the alarm. For tags,the description is the same as the one shown in theCensus list.Displays the type of alarm. See Appendix A-1 for acomplete list of alarm types.Displays the date and time the alarm occurred.This text box displays more information about the alarm,including where the alarm occurred, and the mostrecently known location of the tag.This area shows procedures for responding to alarms.These procedures must be added to the software.This button clears the alarm from the software.This button mutes the alarm.Table 3.2Alarms Box CommandsElements/SettingClear AlarmClear AllDescriptionClears the selected alarm.Clears all current alarms.Alarms Box Popup Menu Commands (Clear, Clear All)Procedure:To access Alarms box popup menu commands1 Right-click on any alarm in the list of alarms in the Alarms box.2 Click Clear to clear the highlighted alarm or click Clear All to clear allalarms displayed in the Alarms-Events box.<strong>Hugs</strong> <strong>User</strong> <strong>Guide</strong> 3–5
Clearing AlarmsClearing AlarmsAlarms can be cleared by clicking the Clear button. However, your system mayhave been configured to prompt you to perform a couple of steps before clearingthe alarm. This section describes how to clear an alarm with all the availableoptions configured in your system by your System Administrator.NoteProcedure:Alarms should only be cleared once the security of the identified infant has beenverified. Facility procedure should be followed when responding to alarms.To clear alarms1 Verify the location of the alarm in the Details area in the Alarms-Events box.2 If specific procedures for your facility have been added in the software,follow the instructions described in the Procedure box.3 If your facility requires you to record notes about the alarm, the AlarmNotes area appears.3–6 <strong>Hugs</strong> <strong>User</strong> <strong>Guide</strong>
Clearing Alarms4 Select a message from the “Select note from list or enter reason” dropdownmenu by clicking the down arrow, or enter notes about the alarm.5 If an attempt is made to clear the alarm before entering a note, the AlarmNotes box flashes red.6 After all security measures have been followed, select the alarm to becleared in the Alarms List and then click the Clear button.You mustselect theappropriatealarm byclicking itin the list.Once it ishighlighted,then clickClear.7 The alarm is cleared and disappears from the Alarms-Events list.<strong>Hugs</strong> <strong>User</strong> <strong>Guide</strong> 3–7
Muting AlarmsMuting AlarmsAlarms should only be muted when the facility’s procedure for verifying theinfant’s safety has been initiated. The alarm is muted for a pre-configuredamount of time set by the System Administrator.Procedure:To mute alarms1 Click the Mute button at the bottom-right side of the Alarms-Events box.3–8 <strong>Hugs</strong> <strong>User</strong> <strong>Guide</strong>
Example Response Procedures for AlarmsExample Response Procedures for AlarmsTag Exit (Door) AlarmsExit Alarms occur when:or• An infant wearing a tag is removed from the safe area through a protecteddoorway without first being authorized for transporting or beingdischarged• An infant gets too close to an open protected doorThe <strong>Hugs</strong> system software displays the following message.Example Response Procedure1 Identify the infant and the location of the alarm.2 Initiate your facility’s procedures. If specific procedures for your facilityhave been added in the software, follow the instructions described in theProcedure area.3 If your facility requires you to record notes on the events surrounding thealarm, the Alarm Notes area appears. Select your notes and click Clear. <strong>Hugs</strong> <strong>User</strong> <strong>Guide</strong> 3–9
Example Response Procedures for AlarmsTag Tamper AlarmsTamper Alarms indicate that the band has become disconnected from the tagdue to unauthorized tampering. The Alarm window displays the followingmessage:Example Response Procedure1 Identify the infant and the location of the alarm. The location is shown inthe Details box.2 Initiate your facility’s procedures. If specific procedures for your facility havebeen added in the software, follow the instructions described in theProcedure area.3 If your facility requires you to record notes on the events surrounding thealarm, the Alarm Notes area appears. Select your notes and click Clear.4 Remove the tag and re-apply it with a new band using the Suspend Tampercommand.3–10 <strong>Hugs</strong> <strong>User</strong> <strong>Guide</strong>
Example Response Procedures for AlarmsSupervision Timeout AlarmsA Supervision Alarm occurs when the system has failed to detect the“Heartbeat” signal for a tag within the Supervision Timeout period. TheHeartbeat message is the regular signal sent out by an admitted tag to indicatethat it is OK. If the system is configured to generate an alarm, the followingmessage appears in the Alarm window.Example Response Procedure1 Identify the infant and the location of the alarm. The location is shown in theDetails box.2 Initiate your facility’s procedures. If specific procedures for your facility havebeen added in the software, follow the instructions described in the Procedurearea.3 After all security measures have been followed, click on the Clear button.This will cancel the alarm. If your facility requires you to record notes onthe events surrounding the alarm, the Alarm Notes area appears. Enter yournotes and click OK.If there appears to be nothing wrong, but a Supervision alarm occursrepeatedly, discharge the tag, remove it, and set it aside for evaluation. Besure that a new tag is applied to the infant.<strong>Hugs</strong> <strong>User</strong> <strong>Guide</strong> 3–11
Example Response Procedures for AlarmsTag Loose AlarmsThis alarm appears if a Check Tag Tightness event has occurred, and the bandon the tag has not been tightened.The Tag Loose alarm warns you that the tag is not securely applied, and thataction should be taken immediately. Identify the infant, and tighten the band sothat the tag fits snugly on the infant. The following message appears in theAlarm window.Example Response Procedure1 Identify the infant and the location of the alarm. The location is shown inthe Details box.2 Initiate your facility’s procedures. If specific procedures for your facility havebeen added in the software, follow the instructions described in theProcedure area.3 After all security measures have been followed, click on the Clear button.This will cancel the alarm. If your facility requires you to record notes on theevents surrounding the alarm, the Alarm Notes area appears. Enter yournotes and click OK.3–12 <strong>Hugs</strong> <strong>User</strong> <strong>Guide</strong>
Example Response Procedures for AlarmsImproperly Applied Tag AlarmsAn Improperly Applied Tag alarm alerts the user that a newly admitted tag hasnot been correctly applied to the infant. The following message appears in theAlarm window.Example Response Procedure1 Identify the infant and the location of the alarm. The location is shown inthe Details box.2 Initiate your facility’s procedures. If specific procedures for your facilityhave been added in the software, follow the instructions described in theProcedure area.3 After all security measures have been followed, click on the Clear button.This will cancel the alarm. If your facility requires you to record notes onthe events surrounding the alarm, the Alarm Notes area appears. Enter yournotes and click OK.4 Remove the tag and re-apply with a new band using the Suspend Tampercommand.<strong>Hugs</strong> <strong>User</strong> <strong>Guide</strong> 3–13
Example Response Procedures for AlarmsBand Detached AlarmsThese alarms occur if a Tamper or Improperly Applied Tag alarm is cleared, butthe tag is still not securely applied. Band Detached alarms are declared between 1and 5 minutes after the Tamper or Improperly Applied Tag alarm is cleared.The following message appears in the Alarm window.Example Response Procedure1 Identify the infant and the location of the alarm. The location is shown inthe Details box.2 Initiate your facility’s procedures. If specific procedures for your facility havebeen added in the software, follow the instructions described in theProcedure area.3 After all security measures have been followed, click on the Clear button.This will cancel the alarm. If your facility requires you to record notes on theevents surrounding the alarm, the Alarm Notes area appears. Enter yournotes and click OK.4 Remove the tag and re-apply it with a new band using the Suspend Tampercommand.3–14 <strong>Hugs</strong> <strong>User</strong> <strong>Guide</strong>
Example Response Procedures for AlarmsAuto Discharged TagsUnder certain circumstances, the software automatically discharges a tag fromthe system. This is called Auto Discharge, and occurs under one the followingconditions:a) A tag has been manually admitted, but has not been detected by thesystem.When a tag is manually admitted, the system begins to look for the tag’sHeartbeat messages. If it does not receive any within 7 minutes the tagis discharged. (If Supervision Timeout Alarms are enabled and theSupervision period is set to less than 7 minutes, the tag will bedischarged at the same time as the Supervision Alarm appears in theAlarm window.)b) A tag has been in Tamper Alarm condition for over 7 minutes.After approximately 7 minutes in Tamper mode, the tag automaticallygoes to sleep. Since the system is no longer receiving messages from thetag, it is discharged. To avoid this, it is important to make sure thatthe band is properly re-applied when a Tamper Alarm occurs; justclearing the alarm in the <strong>Hugs</strong> system software will not fix theproblem.In both these circumstances, the tag is not being safely monitored, and thesystem discharges it and generates the dialog box below. The tag is alsohighlighted in gray in the Census List. Notice how the wording below differsfrom the standard Discharge dialog box: the tag has already been discharged,and the user is only being asked to acknowledge that this has occurred.Note:Frequent Auto Discharge messages are an indication of improper system use.Facility procedures should clearly define when and how to manually admit aninfant. In addition, Tamper and all other alarms must be responded topromptly. Auto-discharged tags stay in the system until they are manuallydischarged by the user.Example Response Procedure1 Discharge the tag (highlighted in gray in the Census List). See “Dischargingan Infant” on page 4-16.2 Apply a new tag to re-admit the infant into the <strong>Hugs</strong> system.<strong>Hugs</strong> <strong>User</strong> <strong>Guide</strong> 3–15
Example Response Procedures for AlarmsTag Transport Time Expired AlarmsThe <strong>Hugs</strong> system software can be configured to generate an alarm when atransported tag has not returned to the system within the Transport period. Thefollowing message appears in the Alarm window.Example Response Procedure1 Identify the infant and the location of the alarm.2 Initiate your facility’s procedures. If specific procedures for your facility havebeen added in the software, follow the instructions described in theProcedure area.3 If your facility requires you to record notes on the events surrounding thealarm, the Alarm Notes area appears. Select your notes and click Clear.3–16 <strong>Hugs</strong> <strong>User</strong> <strong>Guide</strong>
Tag Low Battery AlarmsExample Response Procedures for AlarmsWhen the battery power in a tag falls below a certain threshold, a Low BatteryAlarm is automatically generated in the Alarm window.NoteExample Response Procedure1 Identify the tag with the low battery.The tag continues to function even with a low battery, and does not need tobe removed from the infant immediately.2 Initiate your facility’s procedures. If specific procedures for your facilityhave been added in the software, follow the instructions described in theProcedure area.3 Click on the Clear button in the Alarm window.If your facility requires you to record notes on the events surrounding thealarm, the Alarm Notes area appears. Enter your notes and click OK.The alarm re-occurs once a day until the tag is discharged from the system.4 When you discharge the tag, a message appears reminding you about thelow battery.<strong>Hugs</strong> <strong>User</strong> <strong>Guide</strong> 3–17
Example Response Procedures for AlarmsNote5 Separate the low-battery tag from tags to be reused, and inform the SystemAdministrator. Information for the tag ID number must also be reset. See“Resetting Low Battery Tags” on page 6-25 for details.A tag with low battery indication should be removed from use within 48 hours of thealarm.Low Battery Tag - Cannot be Admitted AlarmA <strong>Hugs</strong> tag that has generated a Low Battery Alarm cannot be reused, and willnot auto enroll in the software. If you attempt to reuse the tag, the followingalarm appears:Warning:The tag is not being monitored by the system, and the infant is not beingprotected. Remove the tag immediately, and apply a new tag.Information for the tag ID number must also be reset. See“Resetting LowBattery Tags” on page 6-25 for details.3–18 <strong>Hugs</strong> <strong>User</strong> <strong>Guide</strong>
Example Response Procedures for AlarmsDuplicate Tag ID AlarmsDuplicate Tag ID Alarms occur when the system detects a newly admitted tagwith the same ID number as a tag already admitted. The following messageappears in the Alarm window.Example Response Procedure1 Identify the tag with the duplicate ID number.2 Initiate your facility’s procedures. If specific procedures for your facilityhave been added in the software, follow the instructions described in theProcedure area.3 Discharge the tag, and remove the two tags with the same ID number fromboth infants. Make sure a new tag is applied to both infants, and completethe admittance procedure.4 Clear the Alarm by clicking on the Clear button. If your facility requires you to record notes on the events surrounding thealarm, the Alarm Notes area appears. Enter your notes and click OK.5 Inform the System Administrator of the duplicate tag.<strong>Hugs</strong> <strong>User</strong> <strong>Guide</strong> 3–19
Example Response Procedures for AlarmsAdmit Acknowledgement AlarmThis alarm occurs when the auto-admit pop-up box for a <strong>Hugs</strong> tag has not beenaddressed within a configured amount of time.Example Response Procedure1 Acknowledge the tag’s admittance by completing the Name and all otherfields in the Admit pop-up box. Click OK.2 Initiate your facility’s procedures. If specific procedures for your facility havebeen added in the software, follow the instructions described in theProcedure area.3 If your facility requires you to record notes on the events surrounding thealarm, the Alarm Notes area appears. Select your notes and click Clear.3–<strong>20</strong> <strong>Hugs</strong> <strong>User</strong> <strong>Guide</strong>
Example Response Procedures for AlarmsDoor Ajar AlarmsA Door Ajar alarm occurs when an exit protected by an Exciter has been leftopen for a configurable period of time. If the Door Ajar event is also enabled forthe Exciter, the alarm appears a few seconds or minutes after the event (thistime is also configurable). The Alarm window displays the following message.Example Response Procedure1 Identify the Exciter. The Exciter is identified in the Type column.2 Initiate your facility’s procedures. If specific procedures for your facilityhave been added in the software, follow the instructions described in theProcedure area.3 After all security measures have been followed, click on the Clear button.This will cancel the alarm. If you facility requires you to record notes on theevents surrounding the alarm, the Alarm Notes area appears. Enter yournotes and click OK.<strong>Hugs</strong> <strong>User</strong> <strong>Guide</strong> 3–21
EventsEventsEvents BoxEvents are non-urgent reminders of certain aspects of system operation. Certainevents will escalate to an alarm if not addressed within a pre-determined amountof time.All events are displayed in the Alarms-Events box, which appears automaticallyon the right side of the <strong>Hugs</strong> window, whenever an event occurs. Events aredisplayed in the Alarms-Events window symbolized by the small, yellow cautionicon.3–22 <strong>Hugs</strong> <strong>User</strong> <strong>Guide</strong>
Clearing EventsThe following tables describes the Events box elements/settings and menuoptions:Table 3.3 Events Box Elements/SettingsElements/SettingTitle BarDescriptionTypeDate/TimeDetailsProcedureClearMuteDescriptionThe title bar lists the total number of current events.This lists the tag or device causing the event. For tags,the description is the same as the one shown in theCensus list.Displays the type of event.Displays the date and time the event occurred.This text box displays where the event occurred.This area shows procedures for responding to events.These procedures must be added to the software.This button clears the event from the software.This button mutes the event.Table 3.4Events Box CommandsElements/SettingClear AlarmClear AllDescriptionClears the selected event.Clears all current events.Clearing EventsEvents can be cleared by clicking the Clear button. The following Events canclear automatically:• Door Ajar Event (clears when door is closed)• Loiter Event (clears when infant moved away from door)• Admit Acknowledgment Event• Check Tag TightnessThe following Events may escalate to an Alarm if not addressed within aconfigured time period:• Admit Acknowledgment Event (to an Admit Acknowledgement Alarm)• Check Tag Tightness (to a Tag Loose Alarm)• Door Ajar Event (to a Door Ajar Alarm)<strong>Hugs</strong> <strong>User</strong> <strong>Guide</strong> 3–23
Example Response Procedures for EventsExample Response Procedures for EventsCheck Tag Tightness EventThe Check Tag Tightness event notifies you that the tag on an infant is notsecurely applied. If the tag has not sensed the infant for some time (this period isconfigurable; see “Setting Alarm/Event Timers” on page 6-28 for details), anotice like the one shown here is generated in the Events window.Example Response Procedure1 Identify the infant. This is shown in the Description column.2 Tighten up the band so that it is snug on the infant.3 Check that the event has auto cleared in the Events box. This should happenwithin a few seconds of the tag being tightened.3–24 <strong>Hugs</strong> <strong>User</strong> <strong>Guide</strong>
Example Response Procedures for EventsAdmit Acknowledgement EventThis occurs when the auto-admit pop-up box has not been addressed within aconfigured amount of time.Example Response Procedure1 Enter the appropriate infant information in the fields of the Admit pop-upbox.2 Once the Admit notification box is addressed, the event clears itself.<strong>Hugs</strong> <strong>User</strong> <strong>Guide</strong> 3–25
Example Response Procedures for EventsDoor Ajar EventThe system generates a Door Ajar event when an exit protected by an Exciter hasbeen left open for a configurable period. The following message appears in theEvents box. Door Ajar events clear automatically when the door is closed.Example Response Procedure1 Identify the Exciter. The Exciter is identified in the Type column.2 Initiate your facility’s procedures. If specific procedures for your facility havebeen added in the software, follow the instructions described in theProcedure area.3 After all measures have been followed, click on the Clear button. This willcancel the event.3–26 <strong>Hugs</strong> <strong>User</strong> <strong>Guide</strong>
Example Response Procedures for EventsLoiter EventThis occurs when an infant has been near a monitored exit for a certain periodof time. A message like the following appears in the Event window. Loiterevents clear automatically when the infant is moved away from the door.Example Response Procedure1 Identify the infant and the Exciter. The location is shown in the Detailsbox.2 Initiate your facility’s procedures. If specific procedures for your facilityhave been added in the software, follow the instructions described in theProcedure area.3 After all measures have been followed, click on the Clear button. This willcancel the event.<strong>Hugs</strong> <strong>User</strong> <strong>Guide</strong> 3–27
Quick HistoryQuick History<strong>User</strong>s with the appropriate permissions can click the Quick History tab on theAlarms-Events screen to instantly review the last 10 alarms/events that haveoccurred on the <strong>Hugs</strong> computer.To close the Quick History tab, click another tab in the <strong>Hugs</strong> window.3–28 <strong>Hugs</strong> <strong>User</strong> <strong>Guide</strong>
Chapter 40CENSUS LIST AND DAILYCHAPTERPROCEDURESDaily procedures for the <strong>Hugs</strong> system involve the monitoring and managementof infants admitted into the system. These procedures include admitting tags,transporting tags for tests or other purposes, and discharging tags when theinfant is leaving the hospital. Every facility must devise specific procedures forthese actions, and assign the person or group responsible for carrying them out.<strong>Hugs</strong> <strong>User</strong> <strong>Guide</strong> 4–1
Launching <strong>Hugs</strong>Launching <strong>Hugs</strong>Procedure:To launch <strong>Hugs</strong>1 Double-click the red hearts <strong>Hugs</strong> icon on the desktop.2 The <strong>Hugs</strong> application launches.Logging in to the SoftwareProcedure:The Login procedure is designed to restrict access to the <strong>Hugs</strong> system toauthorized personnel only. You must log in every time you use the software.To log in to <strong>Hugs</strong> for the first time1 If this is the first time that you are logging in, the following dialog boxappears.2 Enter the Server Name and click Continue. If you do not know the Servername, ask your IT person. The Login dialog box appears.3 In the <strong>User</strong> Name field, enter your name as set in your <strong>User</strong> Account.4 In the Password field, enter your password.5 Click Login. You can now use the software.4–2 <strong>Hugs</strong> <strong>User</strong> <strong>Guide</strong>
Logging in to the SoftwareProcedure:To log in to <strong>Hugs</strong>1 Touch any key to display the Login dialog box.2 In the <strong>User</strong> Name field, enter your name as set in your <strong>User</strong> Account.3 In the Password field, enter your password.4 Click Login. You can now use the software.Logging in with Your Access CardIf your system includes an optional access card reader, you can log in to thesoftware using your access card.Procedure:To use your access card for the first time1 Log in to the software with your <strong>User</strong> Name and Password, as describedabove.2 Once you are logged in, the following dialog box appears.3 Swipe your access card through the card reader or present your card overthe reader to enter the data into the system. You are now logged in.Using your access card for subsequent loginsTo log in, simply pass your access card through the card reader or present yourcard over the reader. An acknowledgment appears briefly.<strong>Hugs</strong> <strong>User</strong> <strong>Guide</strong> 4–3
Logging in to the SoftwareLogging OutAlthough the software can be configured to automatically log staff out after aperiod of inactivity, all staff should be encouraged to manually log out at the endof their session. This is done by clicking on the Log out button in the upperrightcorner of the <strong>Hugs</strong> window.4–4 <strong>Hugs</strong> <strong>User</strong> <strong>Guide</strong>
Changing Your PasswordChanging Your PasswordDepending on your facility’s security procedures, you may be required tochange your password occasionally.Procedure:To change your password1 From the Quick Access menu, click Change Password.2 The Change Password dialog box appears.3 Enter your old password in the Old Password field. Then enter your newpassword in the New Password field and again in the Confirm Passwordfield.4 Click OK to save your new password.5 A confirmation dialog box appears. Click OK.<strong>Hugs</strong> <strong>User</strong> <strong>Guide</strong> 4–5
Admitting an InfantAdmitting an InfantAn infant is automatically admitted into the <strong>Hugs</strong> system when a band is appliedto the tag on the infant’s ankle. The tag becomes active and automatically sendsan admit message to the Patient Security Server.A dialog box appears in the <strong>Hugs</strong> system software requesting confirmation of thetag admittance. The <strong>Hugs</strong> system software can be configured to admit tagsautomatically without generating this dialog box; see “Return Prompt” onpage 4-23.NoteThe Admitted dialog box remains open until the OK button is clicked. However, thesystem still monitors the tag during this time.If your system has been configured to require you to select a Zone for theadmittance procedure and you click OK without selecting a Zone, a yellowhighlight appears in the Zone field:If your system has not been configured to require you to select a Zone for theadmittance procedure, the following screen appears:4–6 <strong>Hugs</strong> <strong>User</strong> <strong>Guide</strong>
Admitting an InfantProcedure:Note:To admit an infantEnter correct information in all displayed fields according to hospital policy.1 In the Name field enter a name or other information for the infant. Thefield can accept up to 60 characters.2 If your facility uses Zones, select the Zone where the infant is currentlylocated from the Zone dropdown list box. Zone information isautomatically updated whenever the tag sees an Exciter.Note:3 Select and fill in the information for any custom fields that have beendefined (such as Room #). See “<strong>User</strong> Defined Fields (Columns)” onpage 6-12.4 Click OK to complete the admittance procedure.If an alarm occurs before a Zone is selected and before OK is clicked, then all PCswill display the alarm.<strong>Hugs</strong> <strong>User</strong> <strong>Guide</strong> 4–7
Admitting an InfantDuplicate NamesIf you admit an infant with the identical name as one already in the system, awarning icon appears in the following areas:• Census List• Alarms list• Map areaCensus ListThe warning icon appears next to the infant bearing the same name. When aninfant with a duplicate name is discharged, the warning icon is removed fromthe remaining entry in the Census List.Alarms ListIf an alarm is declared for an infant with a duplicate name, the warning icon alsoappears next to the name in the Alarms-Events list as shown here:4–8 <strong>Hugs</strong> <strong>User</strong> <strong>Guide</strong>
Admitting an InfantMap AreaIf an Exit alarm or the Locate feature is used, the warning icon appears next tothe duplicate infant’s name in the Map area.<strong>Hugs</strong> <strong>User</strong> <strong>Guide</strong> 4–9
Changing Tag/Infant InformationChanging Tag/Infant InformationYou can change the tag/infant’s name as well as any other <strong>User</strong> Defined fieldsthat have been created in the Census List.This section describes the following:• How to edit an infant’s name or description• How to edit <strong>User</strong> Defined fields (column headings created by yourAdministrator)Procedure:To change an infant’s name/information1 Click anywhere in the infant/tag row to highlight it.2 Click in the Name field and type in a new name or description.3 When finished, hit the return key or click OK.4–10 <strong>Hugs</strong> <strong>User</strong> <strong>Guide</strong>
Changing Tag/Infant InformationEditing <strong>User</strong> Defined Fields (Drop-down lists and text)New columns added to the Census List by your System Administrator are called<strong>User</strong> Defined fields. You can edit the data directly in these columns for eachpatient. For example, you can update a room number when the patient changesrooms.Procedure:To edit a <strong>User</strong>-Defined field (drop-down list)1 Click anywhere in the row to highlight it.2 Click in the <strong>User</strong>-Defined column to display all the available options andselect a new value.3 The updated value is displayed. In this example, the infant has now beenassigned to a new room number.<strong>Hugs</strong> <strong>User</strong> <strong>Guide</strong> 4–11
Changing Tag/Infant InformationProcedure:To edit a <strong>User</strong>-Defined field (Text field)1 Click anywhere in the row to highlight it and then click in the field you wishto edit.2 Edit the text as necessary.3 Click OK to save the changes. The updated text is displayed.4–12 <strong>Hugs</strong> <strong>User</strong> <strong>Guide</strong>
Changing a Tag’s ZoneChanging a Tag’s ZoneZone information is updated automatically whenever a tag sees an Exciter, butyou can also manually change the Zone location. Alarms are reported in thezone to which the infant has been assigned. For more information about Zones,see “Zones” on page 3-2.Procedure:To change a tag’s zone1 Click to highlight the tag row and then click again in the Zone field.2 Select the new Zone from the dropdown list. When finished, press thereturn key or click OK.<strong>Hugs</strong> <strong>User</strong> <strong>Guide</strong> 4–13
About <strong>Hugs</strong> FunctionsAbout <strong>Hugs</strong> FunctionsAuthorized users can perform a function for a <strong>Hugs</strong> tag using one of thefollowing methods:1 Toolbar IconsOR• On the Census List, click on the tag/infant row to highlight it.• Click the toolbar icon representing the requested function.2 Pop-Up Menu• On the Census List, click the red heart icon next to the appropriate tag/infant.• Select a <strong>Hugs</strong> function from the pop-up menu.4–14 <strong>Hugs</strong> <strong>User</strong> <strong>Guide</strong>
Displaying Tag HistoryDisplaying Tag HistoryThe History window gives a complete list of events, including alarms, for thetag since it was admitted (to a maximum of 31 days), along with the date andtime.Procedure:To display the tag’s history1 Click anywhere in the infant/tag row to highlight it, then click the Historytoolbar icon OR click on the hearts icon by the name of the appropriateinfant to access the pop-up menu and select the History command.2 The History window appears.3 Click Close to exit the History window.<strong>Hugs</strong> <strong>User</strong> <strong>Guide</strong> 4–15
Discharging an InfantDischarging an InfantProcedure:“Discharging” is the expression used to indicate the permanent removal of aninfant from the <strong>Hugs</strong> system. Once an infant is discharged, the tag is no longermonitored by the <strong>Hugs</strong> system. This should typically only occur when an infantis being taken home from the hospital.To discharge an infant1 Click anywhere in the infant/tag row to highlight it, then click theDischarge toolbar icon OR click on the hearts icon by the name of theappropriate infant to access the pop-up menu and select the Dischargecommand.2 The Discharge dialog box appears. Confirm that you have selected the righttag. Click OK to complete the Discharge procedure. Immediately removethe tag and clean for reuse.Note:Once a tag is discharged, it continues to transmit for about 10 minutes (the PatientSecurity Server ignores these messages), and then goes into “sleep” mode ready to beused again. (The tag can be reused within this 10 minute period, but it will not AutoAdmit. It must be manually admitted.)4–16 <strong>Hugs</strong> <strong>User</strong> <strong>Guide</strong>
Transporting an InfantTransporting an InfantThe Transport command allows an infant to be transported out of theprotected area temporarily for tests or other purposes without generating anExit alarm.Procedure:To Transport an infant1 Click anywhere in the infant/tag row to highlight it, then click theTransport toolbar icon OR click on the hearts icon by the name of theappropriate infant to access the pop-up menu and select the Transportcommand. (You can also click on the Transport field directly and click Yesto authorize the tag for the default Transport period.)2 The Transport dialog box appears. Confirm that you have selected the righttag, and then enter the length of the Transport in hours and minutes in theDuration spin box (the maximum time is 99 hours and 59 minutes).<strong>Hugs</strong> <strong>User</strong> <strong>Guide</strong> 4–17
Transporting an Infant3 Use the up and down arrows in the Duration spin box to select the amountof time that the infant will be out of the protected area. You can also click toselect the hours or minutes, and enter a time directly into the HH or MMfields.4 If your facility uses Zones, select All Zones in the Transport Zones area.5 Click OK to complete the Transport procedure. In the Census window, thetag row will be highlighted in yellow.Note:A Transport Return must be completed when the infant returns to the unit.Transport ReturnOnce the infant has been returned to the protected area after being transported,you must authorize a return to re-admit the tag into the system and resumemonitoring. The tag’s history is retained. The system can be configured toprompt you to authorize a Transport Return for the tag when the time periodhas expired, or when it is detected at an Exciter.NoteProcedure:Never authorize a return for a tag that has not been returned to the monitored area,as Supervision Timeout alarms will occur.To authorize a Transport Return1 Click anywhere in the infant/tag row to highlight it, then click theTransport Return icon OR click on the hearts icon by the name of theappropriate infant to access the pop-up menu and select the TransportReturn command.4–18 <strong>Hugs</strong> <strong>User</strong> <strong>Guide</strong>
Transporting an Infant2 The tag’s status of Transported is cleared from the Census List and the rowcolor changes back to white.3 Very Important! Verify that the infant is assigned to the proper zone. Tochange the zone, see “Changing Tag/Infant Information” on page 4-10.Updating the Transport TimeProcedure:To update the Transport timeThe Transport time can be manually adjusted/extended by an authorized user.There is also an option to configure an alarm if the Transport time expiresbefore the tag is returned back to the protected area.1 Select the tag row to highlight it and click directly on the Transport time(HH:MM:SS) or click Update Transport from the pop-up menu.Click on the clock and enter a newtime. Click OK.ORClick UpdateTransport from thepop-up menu.<strong>Hugs</strong> <strong>User</strong> <strong>Guide</strong> 4–19
Transporting an Infant2 Use the up and down arrows, or click and enter a time directly into the HHor MM fields.3 If your facility uses Zones, select All Zones in the Transport Zones area.4 Click OK.5 The new time appears under Transport in the Census window.4–<strong>20</strong> <strong>Hugs</strong> <strong>User</strong> <strong>Guide</strong>
Transporting an InfantTransport Time ExpiredIf the infant is not returned to the safe area within the Transport period, one oftwo things will happen, depending on the settings for your system (see “SettingTransport Times” on page 6-26 for more information):• A Tag Transport Time Expired alarm occurs (see “Supervision TimeoutAlarms” on page 3-11);• Or, the following message appears in the software:Click on Update Transport to extend the length of the Transport time, orselect Transport Return to return the infant back in to the unit. Make surethat the infant has actually been returned before you select this secondoption.Note:Make sure that the infant has actually been returned before you select the secondoption.<strong>Hugs</strong> <strong>User</strong> <strong>Guide</strong> 4–21
Transporting an InfantOther Transport OptionsKeypad/Swipe Card TransportIf keypads (or swipe card devices) have been installed at Exciters, you cantransport infants locally without using the Transport feature on the <strong>Hugs</strong>computer. When you enter a passcode on the keypad (or swipe a card) to bypassthe Exciter, the tag is automatically authorized for transporting.Note:You can only transport ONE TAG AT A TIME!You will know that the tag has been authorized for transport because it will behighlighted yellow in the Census List.BypassIt is also possible to bypass an Exciter from within the <strong>Hugs</strong> map window: rightclickon the Exciter icon on the facility map, and select Bypass from the pop-upmenu. The icon turns yellow. Subsequent tags entering the Exciter’s detectionarea will be authorized to exit automatically for the default Transport period setby your Administrator (see “Setting Transport Times” on page 6-26).4–22 <strong>Hugs</strong> <strong>User</strong> <strong>Guide</strong>
Transporting an InfantReturn PromptWhen a transported tag comes within range of an Exciter, a message isautomatically generated in the <strong>Hugs</strong> system software asking the user to confirmthe infant’s return, or update the Transport time.NoteProcedure:The Return Prompt does not occur in the first 10 minutes of a Transport so that thestaff member can leave the protected area. (If the tag is transported for less than 10minutes, the Return Prompt is enabled 2 minutes before the Transport time expires.)When the Return Prompt appears1 The following dialog box appears in the <strong>Hugs</strong> system software.2 To return the tag back into the system, click Transport Return.3 You may also choose to extend the Transport period. Click on UpdateTransport. The Transport dialog box appears. Update the Transport periodin the Duration spin box, and then click OK.<strong>Hugs</strong> <strong>User</strong> <strong>Guide</strong> 4–23
Suspending Tamper AlarmsSuspending Tamper AlarmsThe Suspend Tamper command suspends Tamper Alarms for the selected tagfor a period of 1 to 5 minutes (as set by the System Administrator) so that theband can be changed without generating a Tamper Alarm.Procedure:To suspend a Tamper Alarm1 Click anywhere in the infant/tag row to highlight it, then click the SuspendTamper icon OR click on the hearts icon by the name of the appropriateinfant to access the pop-up menu and select the Suspend Tampercommand. You can also click in the Suspend Tamper field, and click Yes.2 The tag will be highlighted in orange in the Census window while SuspendTamper is in effect, and the Suspend field displays the remaining time.Note:To avoid a Tamper alarm, the tag and band must be re-applied when the Suspendtime expires.4–24 <strong>Hugs</strong> <strong>User</strong> <strong>Guide</strong>
Suspending Tamper AlarmsResume TamperProcedure:To Resume Tamper1 To end the Suspend Tamper timeout, click anywhere in the infant/tag rowto highlight it, then click the Resume Tamper icon OR click on the heartsicon by the name of the appropriate infant to access the pop-up menu andselect the Resume Tamper command.2 You can also click in the Resume Tamper field, and click Yes.<strong>Hugs</strong> <strong>User</strong> <strong>Guide</strong> 4–25
Editing Tag MemosEditing Tag MemosProcedure:You can create/edit a memo for any tag currently admitted into the <strong>Hugs</strong>system. This feature is useful for recording extra information about the infant,such as the infant’s location when he or she has been transported out of thesystem for a short period of time. When there is a memo for an infant, the memoicon automatically appears under Memo in the Census List.To create/edit a memo1 Click anywhere in the infant/tag row to highlight it, then click the EditMemo toolbar icon OR click on the hearts icon by the name of theappropriate infant to access the pop-up menu and select the Edit Memocommand.2 In the text field, enter the contents of the memo.(You do not have to enter hard returns at the end of the line. The text wrapsautomatically.)3 Click Save to save your memo and close the dialog box.4–26 <strong>Hugs</strong> <strong>User</strong> <strong>Guide</strong>
Editing Tag Memos4 A memo icon automatically appears under Memo in the Census List.5 The contents of the memo appear automatically whenever the mousepointer is moved over the tag row in the Census List.6 The memo is saved until deleted, or the infant is discharged.<strong>Hugs</strong> <strong>User</strong> <strong>Guide</strong> 4–27
Setting PicturesSetting PicturesIf your system has been configured for showing pictures, you can set a picture todisplay from the Census List.Procedure:To set pictures1 Click anywhere in the infant/tag row to highlight it, then click the SetPicture icon OR click on the hearts icon by the name of the appropriateinfant to access the pop-up menu and select the Set Picture command.2 In the Open dialog box, navigate to the folder containing the picture. Clickon it once to select it, and then click Open.4–28 <strong>Hugs</strong> <strong>User</strong> <strong>Guide</strong>
Setting Pictures3 The picture is now associated with the tag. To preview it, select ShowPicture from the pop-up menu or click the Show Picture icon in thetoolbar.4 Repeat these steps for each tag that you wish to assign a picture to.Showing PicturesOnce a picture is set to display, you can preview it at any time by selecting ShowPicture from the popup menu or clicking the Show Picture toolbar icon.The picture appears and can be moved around the <strong>Hugs</strong> window.<strong>Hugs</strong> <strong>User</strong> <strong>Guide</strong> 4–29
Setting PicturesIf your system has been setup to show the Picture window during an alarm, thepicture appears in the Picture area below the facility map when an alarm isdeclared.For instructions on how to move the picture window to another location, see“Modifying the Layout of the Alarms-Events Window” on page 4-39.4–30 <strong>Hugs</strong> <strong>User</strong> <strong>Guide</strong>
Setting PicturesClearing PicturesYou can delete a picture by selecting Clear Picture from the pop-up menu.ORYou can clear the picture from the Picture popup window.<strong>Hugs</strong> <strong>User</strong> <strong>Guide</strong> 4–31
Locating TagsLocating TagsA call-out displaying the tag’s description and pointing to the Exciter (exit)location, automatically appears on the facility map when the infant is at an Exit.When the infant moves away from the Exit, the call-out disappears from thefacility map.To view the infant’s general location on the facility map at any time, you can usethe Locate feature. Your system must be configured to locate tags in order to usethis feature.Procedure:To locate tags1 Click anywhere in the infant/tag row to highlight it, then click the Locateicon OR click on the hearts icon by the name of the appropriate infant toaccess the pop-up menu and select the Locate command.4–32 <strong>Hugs</strong> <strong>User</strong> <strong>Guide</strong>
Locating Tags2 The facility map slides up from the bottom of the window and displays a redheart icon indicating the infant’s general location for approximately 30seconds.3 Click the Close button in the upper-right corner to close the facilitymap.<strong>Hugs</strong> <strong>User</strong> <strong>Guide</strong> 4–33
Disabling BabySenseDisabling BabySenseThe Disable BabySense command disables the BabySense features (Check TagTightness events and Tag Loose alarms) for the selected tag so that no off-skinnotification occurs. You may wish to do this, for instance, if the infant will beexamined by a physician.The BabySense feature remains disabled until BabySense is reactivated, or untilthe tag is discharged from the system.Procedure:To Disable the BabySense feature1 Click anywhere in the infant/tag row to highlight it, then click the DisableBabySense icon OR click on the hearts icon by the name of the appropriateinfant to access the pop-up menu and select the Disable BabySensecommand.2 The tag row is highlighted in light blue in the Census window while DisableBabySense is in effect.4–34 <strong>Hugs</strong> <strong>User</strong> <strong>Guide</strong>
Disabling BabySense3 To re-activate the BabySense feature, select Enable BabySense from thepop-up menu.<strong>Hugs</strong> <strong>User</strong> <strong>Guide</strong> 4–35
Customizing the Census ListCustomizing the Census ListYou can change the name or visibility of any of the column headings in theCensus List. By default, the following columns are displayed in the Census List:• Name• ID• Memo• Transport• Suspend• AdmittedProcedure:To rename/show/hide column headings1 Click on the red hearts button in the upper-left corner of the <strong>Hugs</strong> windowto display the Quick Access menu and click Census List Customization.Click here to display theQuick Access menu.4–36 <strong>Hugs</strong> <strong>User</strong> <strong>Guide</strong>
Customizing the Census List2 The following dialog box appears.3 Select the column you wish to rename in the Columns list and clickRename. You can also select the column and click in the field to highlight it.Enter a new name directly in the field.4 Click Apply.5 The column is renamed.<strong>Hugs</strong> <strong>User</strong> <strong>Guide</strong> 4–37
Customizing the Census List6 To display or hide columns, select or clear the check boxes next to thecolumn name. If a check mark appears next to the column name, then thatcolumn will display in the Census List.Select or clearany checkbox to displayor remove acolumn fromthe CensusList.7 If you wish to have a hidden column reappear, select the check box next tothe column name in the Columns list.8 Click Close to close the Census List Customization dialog box.4–38 <strong>Hugs</strong> <strong>User</strong> <strong>Guide</strong>
Modifying the Layout of the Alarms-Events WindowModifying the Layout of the Alarms-EventsWindow<strong>User</strong>s with appropriate permission can change the layout of the Alarm windowby moving the Camera area or Alarms box to different sides of the applicationwindow.If you drag the area (pane) to the edge of the application window, it becomesdocked. You can dock a pane horizontally (at the top or bottom of theapplication window) or vertically (at the left or right side of the applicationwindow).Modify Screens TerminologyThis section describes the terminology used for the Modify Screens feature.Double BarsDouble bars appear above the areas (panes) that you can move around after theModify Screens feature has been enabled.<strong>Hugs</strong> <strong>User</strong> <strong>Guide</strong> 4–39
Modifying the Layout of the Alarms-Events WindowDocking ArrowsThe word “dock” means to secure or move a smaller area into, or next to, a fixedborder.The docking arrows only appear in the application window once you click thedouble bars and begin to drag the pane to a new location.Docking arrows4–40 <strong>Hugs</strong> <strong>User</strong> <strong>Guide</strong>
Modifying the Layout of the Alarms-Events WindowDocking PositionsThe following table describes the available positions for docking the pane.The right-pointing arrow indicates that the pane will bedocked vertically on the right side of the window.The left-pointing arrow indicates that the pane will be dockedvertically on the left side of the window.The top-pointing arrow indicates that the pane will be dockedhorizontally at the top of the window.The bottom-pointing arrow indicates that the pane will bedocked horizontally on the bottom of the window.Procedure:To modify the layout of the Alarms-Events window1 Click the Quick Access menu button, and then click Modify Screens.2 Click anywhere in the application window to close the Quick Access menu.<strong>Hugs</strong> <strong>User</strong> <strong>Guide</strong> 4–41
Modifying the Layout of the Alarms-Events Window3 Select the pane you wish to move and click on the double bars associatedwith that pane. A 4-headed arrow appears.4 Drag and drop the area onto one of the docking arrows. A blue-shadedregion appears outlining the new location. If this location is OK, release themouse button.4–42 <strong>Hugs</strong> <strong>User</strong> <strong>Guide</strong>
Modifying the Layout of the Alarms-Events Window5 The area is now docked in the new location.6 To change the width of a vertically docked pane or the height of ahorizontally docked pane, move the pointer over the outside edge until itchanges to a double-headed arrow, and then drag the edge of the pane to thenew size.<strong>Hugs</strong> <strong>User</strong> <strong>Guide</strong> 4–43
Printing the Census ListPrinting the Census ListThe active/currently admitted tags in the Census List can be printed for onecomputer or for all tags in the system.All columns will be printed EXCEPT for Transport and Suspend.Only This ClientProcedure:To print a list of tags in the Census List for one computer (output tofile)1 Click on the red hearts icon in the upper-left corner of the <strong>Hugs</strong> window todisplay the Quick Access menu and click Print Census List.2 To print the current Census List from this computer, click Only ThisClient.4–44 <strong>Hugs</strong> <strong>User</strong> <strong>Guide</strong>
Printing the Census List3 The following dialog box appears.4 Select the Printer from the drop-down list.<strong>Hugs</strong> <strong>User</strong> <strong>Guide</strong> 4–45
Printing the Census List5 To save the Census List to a file, select the Print to File check box.6 The following dialog box appears.7 Enter an Output File Name (this is the file location e.g. C:\Census Lists) forthe file and click OK.8 The file is saved in the location specified above.4–46 <strong>Hugs</strong> <strong>User</strong> <strong>Guide</strong>
Printing the Census ListProcedure:To print a list of tags in the Census List for one computer (output toprint)1 Follow Steps 1 to 4 in the previous Procedure.2 Ensure the Print to File check box is cleared. Click OK.3 The Census List is printed with the current date and time.<strong>Hugs</strong> <strong>User</strong> <strong>Guide</strong> 4–47
Printing the Census ListAll TagsYou can print a list of all tags in the <strong>Hugs</strong> system.Procedure:To print All Tags in the <strong>Hugs</strong> system (output to file)1 Click on the red hearts icon in the upper-left corner of the <strong>Hugs</strong> window todisplay the Quick Access menu and click Print Census List.2 To print all tags in the <strong>Hugs</strong> system, click All Tags.4–48 <strong>Hugs</strong> <strong>User</strong> <strong>Guide</strong>
Printing the Census List3 The following dialog box appears.4 Select the Printer from the drop-down list.<strong>Hugs</strong> <strong>User</strong> <strong>Guide</strong> 4–49
Printing the Census List5 To save the Census List to a file, select the Print to File check box.6 The following dialog box appears.7 Enter an Output File Name (this is the file location e.g. C:\Census Lists) forthe file and click OK.8 The file is saved in the location specified above.4–50 <strong>Hugs</strong> <strong>User</strong> <strong>Guide</strong>
Printing the Census ListProcedure:To print a list of all tags (output to print)1 Follow Steps 1 to 4 in the previous Procedure.2 Ensure the Print to File check box is cleared. Click OK.3 All tags in the <strong>Hugs</strong> system are printed with the current date and time.<strong>Hugs</strong> <strong>User</strong> <strong>Guide</strong> 4–51
Manually Admitting a TagManually Admitting a TagManually admitting a tag is rarely required, and should only be performed by asupervisor or other senior staff member.A tag may be manually admitted if it has been accidentally discharged.Procedure:To manually admit a tag1 Click on the red hearts icon in the left-corner of the <strong>Hugs</strong> window to displaythe Quick Access menu and click Admit.4–52 <strong>Hugs</strong> <strong>User</strong> <strong>Guide</strong>
Manually Admitting a Tag2 The Admit dialog box appears. Depending on how your system has beenconfigured, you may be requires to select a Zone before clicking OK.3 Enter the three-digit tag ID number in the Tag ID field. This mustcorrespond to the number shown on the front of the tag.4 In the Name field enter a name or other information for the infant. Thefield can accept up to 60 characters.5 Select the Zone where the infant is currently located from the Zonedropdown list box. (This box will only appear if Zones have been set byyour dealer.)6 Click OK to complete the admittance procedure.<strong>Hugs</strong> <strong>User</strong> <strong>Guide</strong> 4–53
4–54 <strong>Hugs</strong> <strong>User</strong> <strong>Guide</strong>
Chapter 5CHAPTER 0REPORTSThe <strong>Hugs</strong> system software contains a number of tools for gathering, viewingand analyzing the data generated by the system. This chapter reviews thevarious reporting options.Note:Reports can only be accessed from the <strong>Hugs</strong> window if you have the appropriateaccess privileges.<strong>Hugs</strong> <strong>User</strong> <strong>Guide</strong> 5–1
Reports Manager WindowReports Manager WindowThe Reports Manager window is shown here:5–2 <strong>Hugs</strong> <strong>User</strong> <strong>Guide</strong>
Report TypesReport TypesThis section describes the Report Types available from the Reports window inthe <strong>Hugs</strong> application.Alarm & Event ReportsThis group of reports concerns device and system alarms and events for eachtype of device in the system.TypeAlarm NotesAll Alarm & EventRecordsAll AlarmsAll EventsExciter AlarmsHA Noise Alarms<strong>Hugs</strong> Tag AlarmsI/O AlarmsI/O Channel AlarmsKisses AlarmsLAR AlarmsLonWorks NetworkAlarmsPassport Tag AlarmsPC AlarmsPedz Tag AlarmsSystem AlarmsDescriptionThe notes recorded by users when an alarm wascleared. The “Ask for note on clearing the alarm” featuremust be active to generate this report.Lists the history of all alarms and events, including whenthey occurred and when they were cleared.Lists all alarms that have occurred in the system.Lists all events that have occurred in the system.Alarms recorded for Exciters.High Ambient Noise Alarms recorded for Receivers.Alarms recorded for <strong>Hugs</strong> tags.Alarms recorded for I/O Modules.Alarms associated with the inputs and outputs of I/OModules.Low battery alarms for Kisses tags (optionalcomponent).Alarms recorded for Receivers.Alarms associated with the LonWorks network.Alarms recorded for Passport tags.Alarms recorded for PCs, such as Maximum LoginAttempts Exceeded alarms.Alarms recorded for Pedz tags.System information, such as when the <strong>Hugs</strong> systemsoftware was started and shutdown, and logininformation.<strong>Hugs</strong> <strong>User</strong> <strong>Guide</strong> 5–3
Report TypesConfiguration HistoryThese reports detail changes made to configuration settings for each devicewithin the system. Summary reports are not available for this group.TypeAll ConfigurationRecordsExciter Configuration<strong>Hugs</strong> Tag ConfigurationIO ConfigurationMap ConfigurationPager ConfigurationPassport tagConfigurationPC ConfigurationPedz Tag ConfigurationReceiver ConfigurationSystem Configuration<strong>User</strong> ConfigurationExciter ReportsTwo reports are available for Exciters.TypeBypassedTags At ExciterDescriptionComplete configuration history for the system.Configuration history of all Exciters in the system.Alarm and other general configuration history, andchanges made to each <strong>Hugs</strong> tag.Configuration history of all I/O Modules in the system.Configuration history of all maps in the system.Configuration history of all pagers in the system.Alarm and other general configuration history, andchanges made to each Passport tag.Configuration history of all PCs in the system.Alarm and other general configuration history, andchanges made to each Pedz tag.Configuration history of all Receivers in the system.Configuration history for settings made in the Systempane of the PS System Manager, including Zone andsound settings.Generates a list of users of the software, based on theuser accounts created in the <strong>User</strong>s pane of the Admintab. (see “<strong>User</strong> Accounts” on page 6-3).DescriptionShows when the Exciter was bypassedShows a list of tags that were detected at the Exciter, theReceiver that received the signal and the RSSI.5–4 <strong>Hugs</strong> <strong>User</strong> <strong>Guide</strong>
Report Types<strong>Hugs</strong> Tags ReportsThis group contains reports for various <strong>Hugs</strong> tag activities.TypeAll <strong>Hugs</strong> Records<strong>Hugs</strong> Low Battery Tags<strong>Hugs</strong> Tags Admitted<strong>Hugs</strong> Tags At Exit<strong>Hugs</strong> Tags Discharged<strong>Hugs</strong> Tags Memos<strong>Hugs</strong> Tags Returnedafter Transport<strong>Hugs</strong> Tags Transported<strong>Hugs</strong> Tags UsageOther ReportsTypeAll Log RecordsBabySense andDamaged BandRecordsKisses Low BatteryTagsReceiver StatisticsDescriptionMiscellaneous reports on system activity.Tag MessagesThe complete history for the selected tag(s), includingalarms.The Tag ID and description for low battery <strong>Hugs</strong> tags.The date and time that each tag was admitted into thesystem.The dates and times that tags were near an Exciter. TheReceiver that received the signal and the RSSI are alsoshown.The dates and times that tags were discharged from thesystem.Memos recorded for tags using the Edit Memocommand. (see “Editing Tag Memos” on page 4-26).The dates and times that tags were returned in to thesystem.The dates and times that tags were transported out ofthe system.The usage history for all <strong>Hugs</strong> tags, showing the numberof times admitted, the first admit date and the mostrecent admit date.DescriptionGenerates a report of all system activity. Depending onthe date range you set, this could be a very large report.Lists all records relating to the BabySense feature.The Tag ID and description of the low battery Kisses tag.This creates a report containing technical information onall Receivers.This report lists priority messages, such as Tampermessages, received from <strong>Hugs</strong> tags. The Log PriorityTag Messages command must be selected in theSystem pane of the PS System Manager to enable thisreport.<strong>Hugs</strong> <strong>User</strong> <strong>Guide</strong> 5–5
Report TypesSystem ConfigurationThis group gives summary information on the current configuration on theselected device type.TypeCCTV ServersDevice ConfigurationExciters<strong>Hugs</strong> Tags<strong>Hugs</strong> Tag ConfigurationIO ModulesKisses TagsReceiversMapsPassport TagsPassport TagsConfigurationPCsPedz TagsPedz TagsConfigurationSettingsSystem Configuration<strong>User</strong> Groups<strong>User</strong>sDescriptionConfiguration of the server(s) for the integrated CCTVoption.Current configuration of all Receivers, Exciters and I/OModules in the system.Current configuration of all Exciters.Generates a list of all <strong>Hugs</strong> tags ever seen by thesystem.Current configuration of <strong>Hugs</strong> tags in the system.Current configuration of all I/O Modules.Generates a list of all Kisses tags in the system.Current configuration of all Receivers.Lists all maps in the system.Generates a list of all Passport tags ever seen by thesystem.Current configuration of Passport tags in the system.Current configuration of all PCs.Generates a list of all Pedz tags ever seen by thesystem.Current configuration of Pedz tags in the system.This report provides a condensed profile of your system,including such information as the tag limit granted byyour license and a summary of alarms received.Timeout and password expiry settings for all usergroups.The username and full name of all users in the system,along with the password expiry setting.Report FormatsThere are two formats to view reports as follows:• Report View - This view provides full written details for specified events andis available for all reports. Columns can be sorted alphabetically by clickingany column title. This view is also helpful for trending issues.• Summary View - This view provides “at a glance” numbers of specifiedevents. It is only available for some reports.5–6 <strong>Hugs</strong> <strong>User</strong> <strong>Guide</strong>
Accessing ReportsAccessing Reports<strong>User</strong>s with appropriate permissions can access the Reports tab in the <strong>Hugs</strong>system.Procedure:To access Reports1 Click on the Reports tab at the top of the <strong>Hugs</strong> window.2 The Reports Manager window opens.<strong>Hugs</strong> <strong>User</strong> <strong>Guide</strong> 5–7
Generating ReportsGenerating ReportsThe <strong>Hugs</strong> system software can generate a range of reports based on the systemactivity data stored in the database. You must have appropriate user permissionsto access the Reports feature.Procedure:To generate a report1 Click on the Reports tab at the top of the <strong>Hugs</strong> window to open the Reportswindow.2 Select the report type from the drop-down menu on the left-hand side of theReports window.3 The reports for your selection appear in the window below the dropdownmenu. Select the report you wish to run.4 In the Database dropdown menu, select to view reports from the activedatabase (usually called “Xmark”), or the backup database(“XmarkBackup”).5 Optional settingsFor certain types of reports, the following settings may also be made:a Select the date range for the report by clicking the calendar icons toselect the Start Time and End Time. If you would like the report to endat the current time, leave the End Time field blank.b For some types of reports, like those for <strong>Hugs</strong> tags, you can also enterthe ID number in the ID field. The report will only show informationfor that particular tag or device.c Select Report or Summary. Alarm and certain other reports give you the option of a full report or a5–8 <strong>Hugs</strong> <strong>User</strong> <strong>Guide</strong>
Using the Charts Featuresummary that shows how many alarms occurred within certain periodsof time. Select the time span (hours, days, weeks, months) in the TimeSpan menu. You can also choose to generate a chart for summaryreports by clicking on the Chart check box (see “Accessing Reports” onpage 5-7).6 Click Run to generate the report.The report appears on the monitor, and may be printed. First click on thePrinter Ready button in the upper right hand corner. This formats the reportfor printing. Then click on the Print icon on the toolbar.Using the Charts FeatureThe Reports window enables you to create charts for summary reports. This is auseful way to present information in a graphical format for easierunderstanding.Procedure:To display a chart1 Click on the Reports tab at the top of the <strong>Hugs</strong> window to open theReports window.2 Select the report type from the drop-down menu on the left-hand side ofthe Reports window.3 The reports for your selection appear in the window below the dropdownmenu. Select the report you wish to run.4 In the Database dropdown menu, select to view reports from the activedatabase (usually called “Xmark”), or the backup database (“XmarkBackup”).<strong>Hugs</strong> <strong>User</strong> <strong>Guide</strong> 5–9
Using the Charts Feature5 Click Summary, and then select the Charts check box. Summary Reportscan be viewed/printed in chart view such as a graph or pie chart.6 Click Run to generate the report.7 You can select the type of chart to display from the dropdown menu to theupper right of the chart. Choose from Bar Horizontal, Bar Horizontal 3D,Bar Vertical, Bar Vertical 3D, Doughnut, Doughnut Exploded, Pie, Pie 3D,Pie Exploded, Pie Exploded 3D and Pie Half Eaten.To save the chart for use in another program, right-click on it and select SavePicture As... from the shortcut menu that appears.5–10 <strong>Hugs</strong> <strong>User</strong> <strong>Guide</strong>
Using the Charts FeatureExamples of ReportsThis section shows several examples of various Reports that can be generated.<strong>Hugs</strong> Tag Alarm SummaryThis report provides a summary of all the <strong>Hugs</strong> Tag Alarms in the rangeselected. It is useful for providing a snapshot of alarm numbers for a period oftime.Procedure:To view the <strong>Hugs</strong> Tag Alarm summary1 Click on the Reports tab at the top of the <strong>Hugs</strong> window to open theReports window.2 Select Alarm & Event Reports and <strong>Hugs</strong> Tag Alarms as indicated below:3 Click the Summary option.4 Click Run to generate the report.<strong>Hugs</strong> <strong>User</strong> <strong>Guide</strong> 5–11
Using the Charts FeatureAlarm Notes ReportThis report is useful for determining causes and corrective action for alarms.Procedure:To view the Alarm Notes Report1 Click on the Reports tab at the top of the <strong>Hugs</strong> window to open the Reportswindow.2 Select Alarm & Event Reports and Alarm Notes as indicated below:3 Click Run to generate the Alarm Notes Report. You can also click on theEvent column heading to sort the list alphabetically.5–12 <strong>Hugs</strong> <strong>User</strong> <strong>Guide</strong>
Using the Charts Feature<strong>Hugs</strong> Tag Usage ReportRunning the <strong>Hugs</strong> Tag Usage Report for the last 60 - 90 days allows you to:• provide a list of tags in service at your facility• demonstrate if tag usage is evenly distributedTipProcedure:Send a copy to your Dealer when ordering tags to prevent duplicate Tag numbers.To generate a Tag Usage Report1 Click on the Reports tab at the top of the <strong>Hugs</strong> window to open theReports window.2 Select <strong>Hugs</strong> Tags Reports and <strong>Hugs</strong> Tags Usage.<strong>Hugs</strong> <strong>User</strong> <strong>Guide</strong> 5–13
Using the Charts Feature3 Click Run to generate the <strong>Hugs</strong> Tag Usage Report. You can click on the IDheader to sort the Tags numerically.<strong>Hugs</strong> <strong>User</strong> ListYou can generate a report listing all current users with <strong>User</strong> Names and FullNames.Procedure:To generate a list of current <strong>User</strong>s1 Click on the Reports tab at the top of the <strong>Hugs</strong> window to open the Reportswindow.2 Select System Configuration and <strong>User</strong>s.5–14 <strong>Hugs</strong> <strong>User</strong> <strong>Guide</strong>
Using the Charts Feature3 Click Run to generate the <strong>User</strong>s List. You can click on the FullNameheader to sort the <strong>User</strong>s alphabetically.All Logs Records ReportThis report contains the records of every action logged to the database and isvery useful for viewing the entire chain of events for a particular incident. Forexample, a Staff member reporting that a tag auto-discharged without warning.WarningProcedure:The file size can be very large! Keep search criteria (start and end dates)extremely narrow. If searching for events for a particular patient, enter theTag ID number to reduce the file size.To generate an All Log Records Report1 Click on the Reports tab at the top of the <strong>Hugs</strong> window to open theReports window.2 Select Other Reports and All Log Records.<strong>Hugs</strong> <strong>User</strong> <strong>Guide</strong> 5–15
Using the Charts Feature3 Click Run to generate the All Log Records Report. You can click on the anyheader to sort the lists alphabetically.5–16 <strong>Hugs</strong> <strong>User</strong> <strong>Guide</strong>
Filtering ReportsFiltering ReportsUse the filtering option to remove columns of data you do not wish to see.Procedure:To filter reports1 Once you run a report, click the Filtering button in the upper-right corner.2 The Filter dialog box appears.3 Select column headings that you do not wish to see from the ShownColumns and click the >> button to move them to the Hidden Columns.Click OK.4 The report window reappears without the column(s) in the HiddenColumns list.<strong>Hugs</strong> <strong>User</strong> <strong>Guide</strong> 5–17
Creating Custom ReportsCreating Custom ReportsNoteProcedure:The software supports custom reports for any data stored in the database. Aknowledge of SQL is required to create custom reports.The default reports cannot be copied over or deleted. If you wish to modify a defaultreport, create a variant using the procedure below.To create custom reports1 In the Reports window, select any report, and then select the Advancedcheck box. If you wish to make a variant of an existing report, select thatreport as your model.2 In the text box, create your report. You can view your report by clicking onRun SQL.5–18 <strong>Hugs</strong> <strong>User</strong> <strong>Guide</strong>
Creating Custom Reports3 To return to the editing screen from the report, right-click in the Reportwindow, and select Back.If you need to revert to the original SQL statement, click on Get SQL. Allyour changes will be lost.3 Save your report by clicking on the Save as Report button to open thefollowing dialog box.4 Select the group to store the report in under Report Group, then assign aname to the report under Report Name.5 Click Save to return to the Reports window. The new report can now by runfrom the Reports window.Procedure:To delete a Custom ReportTo delete a custom report, select it in the list window, click on the Advancedcheck box, and then click Delete. The default system reports cannot be deleted.<strong>Hugs</strong> <strong>User</strong> <strong>Guide</strong> 5–19
Viewing Reports RemotelyViewing Reports RemotelyNoteYou can access the Reports window not just on the PCs of the <strong>Hugs</strong> system, butany PC that has access to the Reports engine. You need Internet Explorer version5.5 or higher to display reports.By default, report data transmitted to a remote computer using the method describedhere is not encrypted. Data encryption is possible by activating the Secure SocketLayer (SSL) for PS Reports on the PC that contains the PS Reports engine. This PCmust be running the Windows Server operating system.Procedure:To view reports remotely1 Open Internet Explorer.2 In the Address field, enter the Reports URL.3 A login screen appears. Enter the user name and password that you use forlogging in to the <strong>Hugs</strong> system.NoteLeave the default settings in the SQL Server Instance and Database fields. Theseare for advanced use only.4 Click Log In. The Reports window appears, giving you access to all systemreports.5–<strong>20</strong> <strong>Hugs</strong> <strong>User</strong> <strong>Guide</strong>
Printing and Exporting ReportsPrinting and Exporting Reports<strong>User</strong>s with appropriate permissions can print any Report from the <strong>Hugs</strong> systemfrom the Reports window.For information about printing the Census List, see “Printing the Census List”on page 4-44.The Print dialog box offers standard Windows printing options. Click on theProperties button to choose paper size and other settings. Each printer has itsown settings. Refer to your printer’s documentation for more information.Note: The Print feature only works if you have a printer configured for the PC whereyou are creating the report.Printing CommandsThe following Printing commands are available on the Reports window:Printing Reports• Export - see “Exporting Reports” on page 5-23• Filtering - see “Filtering Reports” on page 5-17• Printer Ready - see “Printing Reports” on page 5-21• Print - see“Printing Reports” on page 5-21Procedure:To print a report1 Generate a Report (see “Generating Reports” on page 5-8).2 View a “printer-friendly” version of the report by clicking the Printer Readybutton located at the top right-side of the Reports window.<strong>Hugs</strong> <strong>User</strong> <strong>Guide</strong> 5–21
Printing and Exporting Reports3 The Report is formatted for printing as shown here:4 Click the Print button in the toolbar to print the Report.5 The Print dialog box appears.6 Select your settings and click OK.5–22 <strong>Hugs</strong> <strong>User</strong> <strong>Guide</strong>
Exporting ReportsPrinting and Exporting ReportsReports can be exported to different file formats (for example, .csv, .xls).Procedure:To export a Report1 Generate a Report and click Export.2 Choose the file type for exporting and click OK.<strong>Hugs</strong> <strong>User</strong> <strong>Guide</strong> 5–23
5 - 24 <strong>Hugs</strong> <strong>User</strong> <strong>Guide</strong>
Chapter 60USER ADMINISTRATIONCHAPTERNote:This chapter describes how to use the Admin tab in the <strong>Hugs</strong> applicationwindow to administer <strong>User</strong> Accounts, <strong>User</strong> Defined fields, Notes andProcedures as well as resetting low battery tags.The Admin tab only appears in the <strong>Hugs</strong> window if you have Administrator accesspermissions. Contact your dealer if you need assistance with editing or creating new<strong>User</strong> Groups.<strong>Hugs</strong> <strong>User</strong> <strong>Guide</strong> 6–1
Admin WindowAdmin WindowThe Admin Window is shown here:Admin Window TabsThe following tabs are available on the Admin window:• <strong>User</strong>s - used to manage <strong>User</strong> accounts - see “<strong>User</strong> Accounts” on page 6-3.• <strong>User</strong> Defined Fields - used to create new columns in the Census List - see“<strong>User</strong> Defined Fields (Columns)” on page 6-12.• Notes and Procedures - used to define a pre-set list of Notes and facilityspecificProcedures for Alarms- see “Alarm Notes” on page 6-19 and“Procedures” on page 6-22.• Application - used to reset Low Battery tags; enable Notes and Procedures;and set default values for the Transport and Tamper features - see “SettingTransport Times” on page 6-26.• Tag Diagnostics - used to diagnose issues with <strong>Hugs</strong> tags - see “TagDiagnostics” on page 6-31.6–2 <strong>Hugs</strong> <strong>User</strong> <strong>Guide</strong>
<strong>User</strong> Accounts<strong>User</strong> AccountsOnce you have created standard <strong>User</strong> Groups with permissions, you can createa <strong>User</strong> account for each person who will be using the system.<strong>User</strong> PermissionsBelow is a complete list of user permissions available in the software.Configuration AccessPermissionModify configurationAdd/Delete/Edit <strong>User</strong>sLonWorks NetworkPermissionPerform LonWorksnetwork /tag diagnosticsChange the LonWorksnetwork configurationTagsPermissionDischarge TagsSignout/Transport TagsSuspend TagsDisable BabysenseManual Admit TagsDisplay Tag StatusDisplay Tag HistoryEdit Tag MemoDischarge <strong>Hugs</strong> Tagswithout final matchEdit Tag DescriptionsDischarge KissesAutomatic Admit TagsDescriptionThe user can change settings in the PS SystemManager.The user can create, delete and change user accounts.DescriptionThe user can access the Tag Diagnostics window.The user can configure LonWorks devices.DescriptionThe user can discharge tags.The user can Transport an infant for a configurable period oftime.The user can suspend the tag.The user can disable the Babysense feature for the tag.The user can manually admit tags.The user can check the status of tags in the Census List.The user can check the history of tags in the Census List.The user can create or edit memos for tags.Must have Kisses license (optional). The user candischarge a tag without a Kisses match.The user can change a tag’s description in the Census List.The user can discharge a Kisses tag.The user can acknowledge Auto Admit messages andenter information for the infant.<strong>Hugs</strong> <strong>User</strong> <strong>Guide</strong> 6–3
<strong>User</strong> AccountsGeneral Software AdministrationPermissionExit/Close theapplicationPerform backup/restoreoperationsOther SoftwareAdministration FeaturesOpen/Hide the AlarmWindowMiscellaneousPermissionClear alarms/eventsView ReportsChange passwordBypass the ExciterSend PagesReset the IO OutputChannelUse CCTV featuresMute AlarmsPrintDescriptionThe user can exit the <strong>Hugs</strong> application software.Not used.The user can perform other routine maintenance,including viewing menu items, accessing Print setup,changing column widths, and using the Modify Screensfeature. For more information about this feature, see“Modifying the Layout of the Alarms-Events Window” onpage 4-39.The user can open and hide (minimize) the Alarmwindow. If this permission is not granted, the Alarmwindow will stay on top until the alarm is cleared.DescriptionThe user can clear alarms in the Alarms-Events window.The user can access the Reports tab.The user can change his or her password in the Logindialog box.The user can bypass an Exciter to allow a <strong>Hugs</strong> tag topass through.The user can send pages using the Send Pagecommand.The user can reset the Output for an I/O Module.The user has access to integrated CCTV functionality(this is an optional feature). If this permission is notallowed, the user will not see CCTV footage during analarm.The user can mute alarms.The user can print the Census List and view the QuickHistory tab in the Alarms-Events window.6–4 <strong>Hugs</strong> <strong>User</strong> <strong>Guide</strong>
Creating <strong>User</strong> Accounts<strong>User</strong> AccountsBy default, there is a single <strong>User</strong> account created, Admin, with full access to thesystem. This account cannot be changed or deleted, and should be assigned tothe System Administrator or another senior staff member. Be sure to assign anew password.Procedure:To create a <strong>User</strong> Account1 Select the Admin tab in the <strong>Hugs</strong> window.2 Click the Add button, and enter a name for the user in the Login Nameand Full Name fields. The Login Name must be entered every time the userlogs in. The Full Name is useful for managing the system, and is stored inthe database.<strong>Hugs</strong> <strong>User</strong> <strong>Guide</strong> 6–5
<strong>User</strong> Accounts3 Enter a Password for the user; or leave the default password 12345(1234_Abc for enhanced passwords) and check <strong>User</strong> must change passwordat next Login. This forces the user to change his or her password the firsttime he or she logs in to the system.Optional settings:a For systems with Wiegand keypads, enter a unique Keypass code (anynumber up to 65,434) for each user.b For systems with TAP pager systems, enter the ID number of the pagercarried by the user. This is necessary for the user to receive pages.c For systems using the access card reader option, see “Access Cards(Passcards)” on page 6-10.4 Click the Apply Group button.5 To clear all permissions previously assigned to the user, click Clear AllPermissions.6 Select one of the Groups from the list. Once a user has been assigned to agroup, his or her user permissions can be customized. A full list of thepermissions is described under “<strong>User</strong> Permissions” on page 6-3.7 Click Save at the top of the Admin screen. The new <strong>User</strong> appears in the listof <strong>User</strong>s on the left side of the screen.6–6 <strong>Hugs</strong> <strong>User</strong> <strong>Guide</strong>
<strong>User</strong> Accounts8 Select the new <strong>User</strong> from the list on the left side of the screen. Enter aTimeout value under Settings. This is the user’s duration of inactivitybefore the software automatically logs out the user (the maximum time is99 hours and 59 seconds). This security feature helps to ensure that thesoftware cannot be used by unauthorized persons.9 Under Max Password Age (days) enter the maximum number of days thatthe same password can be used (from 1 to 999 days). After this period hasexpired, the user will be prompted to change their password. Entering 0allows the user to keep using the same password indefinitely.10 Click Save to save the settings.<strong>Hugs</strong> <strong>User</strong> <strong>Guide</strong> 6–7
<strong>User</strong> AccountsEditing a <strong>User</strong> AccountTo change the permission levels of an existing user account, select the user in thelist window and select or clear the check boxes.You can change all fields except the Login Name. This ensures that each user ofthe system has a unique account, so that the database accurately records whoperformed what actions.If you need to transfer access to the system from one staff member to another,delete the first staff member’s account and then create a new account for the newstaff member.6–8 <strong>Hugs</strong> <strong>User</strong> <strong>Guide</strong>
<strong>User</strong> AccountsDeleting a <strong>User</strong> AccountTo delete an existing user account, select the user in the <strong>User</strong>s list window andclick the Delete button.Locking and Unlocking an AccountYou can lock and unlock a user account by selecting or clearing the AccountLocked check box. When an account is locked, the user cannot access thesystem.If the Lock <strong>User</strong> Account after Max Retries Exceeded setting is enabled in theSystem settings, this box will automatically be checked when a user has failed toenter the right password after the number of attempts specified under MaxLogin Attempts. To restore system access to the user, clear the Account Lockedcheck box and click Save.<strong>Hugs</strong> <strong>User</strong> <strong>Guide</strong> 6–9
Access Cards (Passcards)Access Cards (Passcards)The <strong>Hugs</strong> system supports the use of Access Cards for the login procedure. If a<strong>User</strong> loses their Passcard, they can still log on to the <strong>Hugs</strong> computer using their<strong>User</strong> Name and Password. In order to use passcards, you must enable thePasscard feature.Procedure:To enable the Passcard feature1 Select the Admin tab > <strong>User</strong>s in the <strong>Hugs</strong> window and click on a <strong>User</strong>.2 If you have the card, click Set Card. Swipe the card (or present over thereader) when prompted.Note3 If you do not have the card, click Clear Card and the user will be promptedto swipe the card (or present over reader) with the next login.4 Click Save.The <strong>User</strong> will only have to provide their card access information if they have clickedClose when prompted for the information, or if they already had a card and nowhave a new one.6–10 <strong>Hugs</strong> <strong>User</strong> <strong>Guide</strong>
Access Cards (Passcards)Clearing Access Cards (Passcards)You must to clear the old Access Card information from the software beforereassigning that card to a new user.Procedure:To clear access card information1 Select the Admin tab > <strong>User</strong>s in the <strong>Hugs</strong> window.2 Select the appropriate <strong>User</strong> in the list window.3 Click the Clear Card button.4 Click Save.NoteThe user will have to log on with their user name and password to access the software,and will then be prompted to swipe their new access card (or present over the reader)to enter it into the software.<strong>Hugs</strong> <strong>User</strong> <strong>Guide</strong> 6–11
<strong>User</strong> Defined Fields (Columns)<strong>User</strong> Defined Fields (Columns)You can create new column headings in the Census List. By default, thefollowing columns are displayed in the Census List:• Name• ID• Memo• Transport• Suspend• AdmittedNote:You can create up to 24 <strong>User</strong> Defined fields for your <strong>Hugs</strong> application.<strong>User</strong> Defined Field TerminologyThe following terms are used on the <strong>User</strong> Defined Fields screen:FieldWhen you create a Field, it appears as a column heading in the Census List.6–12 <strong>Hugs</strong> <strong>User</strong> <strong>Guide</strong>
<strong>User</strong> Defined Fields (Columns)DataThe term Data is used to describethe contents in a drop-down list.You cannot add Data to a textfield.Procedure:To add a new column to the Census List1 Select the Admin screen tab at the top of the <strong>Hugs</strong> window and select the<strong>User</strong> Defined Fields tab.2 Click Add Field.<strong>Hugs</strong> <strong>User</strong> <strong>Guide</strong> 6–13
<strong>User</strong> Defined Fields (Columns)3 A confirmation dialog box opens. Click Yes.4 Enter a new column name in the Field/Data field (Item 1) for the newcolumn heading you wish to add to the Census List.5 Click the arrow next to the Type field and select from the following options:• Text - text in the column can be modified directly in the Census List• Drop Down - a list box appears when you click the field in the Censuslist• Unique Drop Down - the value in the list box can only be used once(for example, a room number)6–14 <strong>Hugs</strong> <strong>User</strong> <strong>Guide</strong>
<strong>User</strong> Defined Fields (Columns)6 The Show on Admit Dialog check box is selected by default. Clear thecheck box if you do not wish to have this column appear in the Admit dialogbox.7 To display this field in the Detail area of the Alarms-Events box during analarm, select the Show in Details check box.8 When you create a field with a drop-down or unique drop-down list, it isautomatically populated with the first data item entitled Data 1.9 Type the data for the new column and hit Enter.Optionally, click the arrownext to the black square to display the available colors for the text to appearin the Census List (and Details area if selected in Step 7).<strong>Hugs</strong> <strong>User</strong> <strong>Guide</strong> 6–15
<strong>User</strong> Defined Fields (Columns)10 To populate the list with more data, click the Add Data button.11 The new column(s) automatically appears in the Census List.6–16 <strong>Hugs</strong> <strong>User</strong> <strong>Guide</strong>
<strong>User</strong> Defined Fields (Columns)Procedure:To delete a <strong>User</strong>-Defined column or dataOnly those columns headings that have been created by the Administrator canbe deleted. The default column headings (see “Customizing the Census List” onpage 4-36) can only be hidden from view.1 Select the Admin screen tab at the top of the <strong>Hugs</strong> window and select the<strong>User</strong> Defined Fields tab.2 Select the column you wish to delete under Field/Data and click the Deletebutton.3 Click the Delete button at the bottom of the screen. Click Yes on theConfirmation dialog box.4 The column is removed from the list of <strong>User</strong> Defined fields as well as theCensus List.<strong>Hugs</strong> <strong>User</strong> <strong>Guide</strong> 6–17
<strong>User</strong> Defined Fields (Columns)5 Similarly, to remove data from the field, select the data and click Delete.6–18 <strong>Hugs</strong> <strong>User</strong> <strong>Guide</strong>
Alarm NotesAlarm NotesThe <strong>Hugs</strong> system can be configured to prompt staff to enter a brief notewhenever an alarm is cleared. The Alarm Notes box displays a choice of pre-setmessages (Quick Pick list) about the alarm; or if they prefer, they can type theirown message. The notes are stored in the database.Quick Pick ListProcedure:To create Alarm Notes1 Select the Admin screen tab at the top of the <strong>Hugs</strong> window and then selectthe Application tab.<strong>Hugs</strong> <strong>User</strong> <strong>Guide</strong> 6–19
Alarm Notes2 Select the Ask for notes on cleared alarm check box.3 Select the Notes and Procedures tab.4 Click Add and type a note in the space provided.6–<strong>20</strong> <strong>Hugs</strong> <strong>User</strong> <strong>Guide</strong>
Alarm Notes5 Hit Enter to save the note. The note appears under Alarm Notes.6 Continue to enter as many notes as needed.<strong>Hugs</strong> <strong>User</strong> <strong>Guide</strong> 6–21
ProceduresProceduresThe Alarms-Events window can be configured to display facility-specificresponse procedures when an alarm occurs. This ensures that staff members (ornew users, per diem, float staff etc.) have an “at a glance” clinical procedurewhen they respond to an alarm. An example is shown below.NoteSee Appendix B- “Alarm Quick Reference” for descriptions of all alarms.6–22 <strong>Hugs</strong> <strong>User</strong> <strong>Guide</strong>
ProceduresProcedure:To add procedures to the Alarm Window1 Select the Admin screen tab at the top of the <strong>Hugs</strong> window and then selectthe Application tab.2 Click the Enable alarm procedures check box.3 Select the Notes and Procedures tab.4 Expand the heading by clicking the plus sign (+) and select the alarm(s) forwhich you wish to add a procedure under Procedures.<strong>Hugs</strong> <strong>User</strong> <strong>Guide</strong> 6–23
Procedures5 Enter a Procedure in the text box next to the list of Procedures.6 Click Save.7 Continue to enter as many Procedures as needed.6–24 <strong>Hugs</strong> <strong>User</strong> <strong>Guide</strong>
Resetting Low Battery TagsResetting Low Battery TagsA review of the Low Battery Tags list should be a part of regular maintenance ofthe system.Warning:Procedure:When a <strong>Hugs</strong> tag has generated a Low Battery Alarm, the tag ID numbermust be reset. This allows your facility to reuse that tag ID number whenordering a replacement tag. Otherwise, the software will not allow a tag withthat ID number to be enrolled in the system.This procedure should only be done when the low battery tag has been disposedof.To Reset Low Battery Tags1 Select the Admin screen tab at the top of the <strong>Hugs</strong> window and then selectthe Application tab.2 Under Low Battery Tags, select the tag that you wish to reset.3 Click the Reset button.4 Hit Enter to save the settings.<strong>Hugs</strong> <strong>User</strong> <strong>Guide</strong> 6–25
Setting Transport TimesSetting Transport TimesYou can set the Transport time that automatically appears under the Transportcolumn in the Census List.Note:Procedure:The Transport time that is displayed under Transport in the Census List can alwaysbe adjusted for each patient at any time.To modify the Transport default setting1 Select the Admin screen tab at the top of the <strong>Hugs</strong> window and then selectthe Application tab.2 Under General, adjust the Default Transport time (hh:mm) spin timer orclick directly in the hh:mm field and enter the new default time that youwish to set.3 Hit Enter to save the settings.6–26 <strong>Hugs</strong> <strong>User</strong> <strong>Guide</strong>
Suspend Tamper TimeoutSuspend Tamper TimeoutThe Suspend Tamper timeout is the duration that tamper alarms are disabled togive staff time to do short procedures. The default value is set to two minutesbut you can set any duration between one and five minutes.Procedure:To set Suspend Tamper Timeout1 Select the Admin screen tab at the top of the <strong>Hugs</strong> window and then selectthe Application tab.2 Adjust the Suspend Tamper Timeout (mm) spin timer or click directly inthe mm field and enter the new time that you wish to set.3 Hit Enter to save the settings.<strong>Hugs</strong> <strong>User</strong> <strong>Guide</strong> 6–27
Setting Alarm/Event TimersSetting Alarm/Event TimersYou can adjust the timeout values for the following alarms and events:• Admit Acknowledge Alarm• Admit Acknowledge Event• Check Tag Tightness Event• Band Detached AlarmProcedure:To adjust the alarm/event timers1 Select the Admin screen tab at the top of the <strong>Hugs</strong> window and then selectthe Application tab.2 Click the appropriate alarm or event to highlight it in the list under EventConfiguration.6–28 <strong>Hugs</strong> <strong>User</strong> <strong>Guide</strong>
Setting Alarm/Event Timers3 Adjust the Timeout (mm:ss) spin timer or click directly in the mm:ss fieldand enter the new time that you wish to set.4 Hit Enter to save the settings.<strong>Hugs</strong> <strong>User</strong> <strong>Guide</strong> 6–29
Card Reader SetupCard Reader SetupProcedure:Card reader port options can be configured under the Admin tab. These settingsare usually configured by the dealer during system setup.To configure Card Reader options1 Select the Admin screen tab at the top of the <strong>Hugs</strong> window and then selectthe Application tab.2 Under Card reader setup, click the arrow and select an option from thedrop-down list of available COM ports.3 Click Apply to save the settings.6–30 <strong>Hugs</strong> <strong>User</strong> <strong>Guide</strong>
Tag DiagnosticsThe column headings in the Tag Diagnostics window are described here:Rows beginning with the red exclamation mark are priority messages and needto be addressed immediately.6–32 <strong>Hugs</strong> <strong>User</strong> <strong>Guide</strong>
Tag DiagnosticsSpecific TagsUse this procedure to view messages for specific tags.Procedure:To view messages for a specific tag1 Select the Admin screen tab at the top of the <strong>Hugs</strong> window and then selectthe Tag Diagnostics tab.2 Select the specific areas to be diagnosed for the quality of receiver coverage,or click the Select All button to select all protected areas.<strong>Hugs</strong> <strong>User</strong> <strong>Guide</strong> 6–33
Tag Diagnostics3 Enter the ID number of the tag of interest (the default is All Tags) in theTag(s) field. To view message for several tags, enter each ID number,separated by commas. Click Apply.4 Select the Enable Message Display check box.5 Messages received from the selected tag(s) appear in the Tag Diagnosticswindow.6 To stop messages, clear the Enable Message Display check box.6–34 <strong>Hugs</strong> <strong>User</strong> <strong>Guide</strong>
Tag Diagnostics7 Clear all results displayed under Tag Diagnostics by clicking the Clear Listbutton.<strong>Hugs</strong> <strong>User</strong> <strong>Guide</strong> 6–35
6–36 <strong>Hugs</strong> <strong>User</strong> <strong>Guide</strong>
Chapter 7CHAPTER 0TESTINGNoteYour facility was thoroughly tested and verified when the <strong>Hugs</strong> system wasinstalled, however, it is suggested to perform checks on a regular basis to ensureoptimal performance, as conditions can change over time.This chapter provides a list of guidelines to follow when checking your <strong>Hugs</strong>system. It is recommended to have a Testing Procedure or PreventativeSchedule in place. Check with your dealer if you need assistance creating orimplementing this schedule.Regular use of the <strong>Hugs</strong> system should immediately identify any coverage issues.<strong>Hugs</strong> <strong>User</strong> <strong>Guide</strong> 7–1
Testing <strong>Guide</strong>linesTesting <strong>Guide</strong>linesUse the following list as a guideline when regularly checking your <strong>Hugs</strong> system:DoorsYou must test the Exciter and Receiver coverage on a monthly basis to ensurethat all door locks (if configured) and alarms are working properly. See ExampleProcedure below:Example Procedure to Check Doors1 Select a tag that will be used only for testing purposes and name it Test Tag.2 Use this tag to verify all doors and exits in the protected area.3 Run a Report to view the activity for this tag. See “<strong>Hugs</strong> Tag AlarmSummary” on page 5-11.Low Battery ListLow Battery alarms are generated when a tag’s battery power drops below acertain threshold. You must separate the low-battery tag from tags to be reused,and inform the System Administrator. Information for the tag ID number mustalso be reset. A tag with low battery indication should be removed from use within48 hours of the alarm.See “Resetting Low Battery Tags” on page 6-25 for details.Tag InventoryTag usage must be rotated to ensure that the same tags are not being used all thetime. Run a Report to verify Tag Usage. See “<strong>Hugs</strong> Tag Usage Report” onpage 5-13.7–2 <strong>Hugs</strong> <strong>User</strong> <strong>Guide</strong>
Appendix A0TAG INSTRUCTIONS ANDCHAPTERMAINTENANCEThis appendix includes the following sections:• Applying and Removing <strong>Hugs</strong> Tags• Assessing Tag Fit• Cleaning Tags• Maintaining Tags<strong>Hugs</strong> <strong>User</strong> <strong>Guide</strong> A–1
Applying and Removing <strong>Hugs</strong> TagsApplying and Removing <strong>Hugs</strong> TagsThe <strong>Hugs</strong> tag should be placed on the opposite extremity or below otherhospital bracelets.To apply the tag1 Align the band with the tag slot.2 Make sure “This side out” is on the outside, away from the infant’s skin.3 Insert the band into the tag slot starting from the bottom of the tag.4 Pull through until the brown material extends beyond the slot.5 Wrap the tag around the baby’s ankle, with the tag on the outer aspect of theankle and insert the loose end of the band into the second tag slot.6 Pull the band through, and listen for the battery status chime (two shortbeeps). Check that the tag is snug and won’t rotate. The bottom (black) sideA–2 <strong>Hugs</strong> <strong>User</strong> <strong>Guide</strong>
Applying and Removing <strong>Hugs</strong> Tagsof the tag and the band must be in light contact with the baby’s skin. See“Assessing Tag Fit” on page A-4.7 Trim both ends of the band. You do not need to round the edges since theydo not come in contact with the infant’s skin.To remove the tag1 Discharge the tag from the system.2 Carefully cut the band with a pair of safety scissors. Work band pieces fromthe bottom of the tag using aside-to-side rocking motion.3 Return the tag for cleaning and reuse.<strong>Hugs</strong> <strong>User</strong> <strong>Guide</strong> A–3
Assessing Tag FitAssessing Tag FitWhen you apply a tag to the infant, you need to make sure that a secure fit isobtained. A secure fit is defined as a fit snug enough to prevent the tag fromslipping over the heel while ensuring that the back of the tag maintains lightcontact with the infant’s skin.Procedure:To assess a tag’s fitIt is recommended that a staff member examine each <strong>Hugs</strong> tag and tag siteregularly (per hospital policy) for appropriate fit and the absence of any skinirritation.• If skin irritation is noted, re-locate the tag site immediately.• If the <strong>Hugs</strong> tag appears to be too tight, as evidenced by tag or bandimpressions on the infant’s skin or the inability to move the tag on the skinsurface, remove the tag immediately and apply a new band.• If the <strong>Hugs</strong> tag appears to be too loose, tighten it by pulling gently on theband end until the fit is secure.A–4 <strong>Hugs</strong> <strong>User</strong> <strong>Guide</strong>
Cleaning TagsCleaning TagsThe tag is not sterilized at the factory. You may wish to clean it before first use.The <strong>Hugs</strong> tag can be cleaned using a soft-bristle brush. For minimal surfacedegradation and cracking over time, use the following guidelines:• First, consult with your Infection Control representative for cleanersavailable to your hospital that have been approved for use on plastics.• Use a disinfectant with no more than <strong>20</strong>% alcohol or enzymatic cleanerswith a mild pH such as Enzol or Maxizyme.• Do not use pathogenic cleaners specified for TB.• Do not soak the tag.*• Do not use an autoclave to clean the tag or serious damage may result.*NoteIt is very important to keep the tag from being totally submersed in water since itcompletes the electrical circuit thereby falsely admitting the tag! When you removethe “active” tag from the flowing water, a nuisance alarm triggers.<strong>Hugs</strong> <strong>User</strong> <strong>Guide</strong> A–5
Maintaining TagsMaintaining TagsStoring• Avoid leaving tags in a detection field for long periods of time as this mayresult in false alarms and can significantly reduce battery life.• Do not store <strong>Hugs</strong> and Kisses tags together for the first hour after beingdischarged, since unintentional bonding may occur.• Separate low battery tags from tags to be reused.• The <strong>Hugs</strong> tags should be stored at room temperature in the shielded bagsprovided or in the tag dispenser as shown below. The tags can be stackedto save space and it provides an easy way to rotate tag usage (tags are placedin at the top of the dispenser and removed from the bottom).Figure A.1 <strong>Hugs</strong> Tag DispenserA–6 <strong>Hugs</strong> <strong>User</strong> <strong>Guide</strong>
Maintaining TagsBattery Status<strong>Hugs</strong> Tags• The <strong>Hugs</strong> system software automatically displays a Low Batterynotification if the <strong>Hugs</strong> tag enters a low battery state during use.• If you do not hear the battery status chime (two short beeps) whileapplying the band to the tag, immediately pull the tag from service andgive it to your System Administrator or Dealer for Tag Diagnostics. Applya new tag to the infant.• The front of the <strong>Hugs</strong> tag shows the warranty date. The tag may havemany months of use after this date, but you should exercise caution whenusing a tag out of warranty. Always listen for the battery status chime, andcheck that the tag has Auto Admitted in the <strong>Hugs</strong> system software.Handling InformationBattery Handling - this device contains a lithium battery. Do not force open,heat to 212°F (100°C), or dispose of in fire.X-rays - Do not directly expose the tag to X-rays. (The tag is not affected bystray radiation.)MRI - this tag contains metal components and is not approved for use nearMRI.<strong>Hugs</strong> <strong>User</strong> <strong>Guide</strong> A–7
Maintaining TagsRegular MaintenanceBetween UsesUse the following tips to ensure that you get maximum use from the tags:• Examine tags regularly for physical damage when they are received andbefore each use• Rotate tag usage - last in, last out• Check the tag’s warranty date on the front of the <strong>Hugs</strong> tag. The tag mayhave many months of use after this date, but you should exercise cautionwhen using a tag out of warranty. Always listen for the battery statuschime, and check that the tag has Auto Admitted in the <strong>Hugs</strong> systemsoftware.<strong>Hugs</strong> tags must “sleep” for ten (10) minutes between uses. If a <strong>Hugs</strong> and Kissestag have been bonded for any length of time, the <strong>Hugs</strong> tag must “sleep” for anhour before being put back into service since the <strong>Hugs</strong> tag retains its bondinformation for one hour after discharge.Out of Service TagsWhen a tag has reached the low battery state or is unfit for use (cracked surface,past the warranty date etc.), return it to your System Administrator.A–8 <strong>Hugs</strong> <strong>User</strong> <strong>Guide</strong>
Appendix B0ALARM QUICK REFERENCECHAPTERThe Quick Reference Table lists all alarms generated by the <strong>Hugs</strong> systemsoftware.<strong>Hugs</strong> <strong>User</strong> <strong>Guide</strong> B–1
Appendix B- AlarmsAlarm Message Cause Response<strong>Hugs</strong> tags“Tag ExitAlarm”“GatewayAlarm”“TagTamper”“Supervisiontimeout”“Duplicate<strong>Hugs</strong> Tag IDDetected”“ImproperlyApplied Tag”“BandDetachedAlarm”“TransportTimeexpired”“Tag loose—checkimmediately”“AdmitAcknowledgementAlarm”“Tag LowBattery”“Low BatteryTag –CANNOT beAdmitted”Tag has entered aExciter’s field while thedoor is open withoutbeing authorized forTransport.Tag has passed througha Gateway and has notreturned within thetimeout period.The band on the tag hasbeen cut or interferedwith.Tag is no longer seen bythe system.The system has detecteda newly admitted tag withthe same ID number as atag already admitted.Tag has not been appliedproperly.A Tamper or ImproperlyApplied Tag Alarm hasbeen cleared, but the tagis still not securelyapplied.A transported tag has notbeen returned within theTransport period.A Check Tag Tightnessevent has occurred, andthe band on the tag hasnot been tightened.There are tags in thesystem that have beenAuto Admitted without tagadmittance information(description, zone,Mother) being entered.The tag’s battery isnearing the end of its life.<strong>User</strong> has applied to aninfant a tag that hasgenerated a low batteryalarm in the past.Possible abduction attempt. Implementsecurity procedure immediately.Possible abduction attempt. Implementsecurity procedure immediately.Possible abduction attempt. Implementsecurity procedure immediately.Tag’s Heartbeat signal has not been seen bythe system for the timeout period. Confirmthat the infant is within the safe area.Locate both tags, and remove them from thesystem. Return one tag to <strong>Stanley</strong><strong>Healthcare</strong> <strong>Solutions</strong>, with a complete list ofall current tags.Check the tag and apply properly.Check the tag and apply properly. Replaceband if alarm persists.Locate infant. Transport Return or UpdateTransport period as appropriate.Locate the infant, and tighten the band sothat the tag fits snugly.You must acknowledge the tag’s admittancethen clear the alarm. The Event (if stillshowing) will automatically clear from theEvent window.Remove the tag from the system when theinfant is discharged or within 48 hours.Remove the tag from the infant immediately,and apply a new tag. Also reset batteryalarm information for the tag.B–2 <strong>Hugs</strong> <strong>User</strong> <strong>Guide</strong>
Appendix B- AlarmsAlarm Message Cause ResponseReceivers“HighAmbientNoise”Average noise around theReceiver has exceededthe RSSI threshold value.1 Check that the Receiver is properlyinstalled. Single-antenna Receiver:antenna points downward. Dual-antennaReceiver: main antenna pointsdownward, secondary antenna pointsaway from metal.2 Generate a Receiver Stats report. Thisshows the RSSI, measured every 30minutes. Check for a pattern in noisevariation. It may be possible to:a) Identify noise sources, such as newor mobile equipment. Eliminatethese or;b) Optimize the RSSI Threshold. Set itabove the highest RSSI recorded inthe last week. Raising the thresholdmay reduce Receiver coverage, andif set too high, effectively disable theReceiver. Retest coverage afterevery change.3 If coverage is inadequate as a result ofraising the RSSI Threshold, theReceiver will have to be moved, oranother Receiver added.Test Receiver coverage in the area of theindicated Receiver.“CoverageChanged”The RSSI Threshold forthe Receiver has beenraised.Memory error in theReceiver.“Receiverstatus error”The most likely cause is interrupted firmwaredownload. Download the firmware again. Ifthe problem persists, replace the Receiver.Run Auto Configure, and install the Receiverinto the software.“ReceiverUnknown toSystem”“Communicationfailure”System has detected aconfigured Receiver thatit has no record of.System cannotcommunicate with theReceiver. It is no longerseen on the LonWorksnetwork.System is not receivingmessages from theReceiver.Inspect the Receiver. Check power andnetwork connections. If these appear normal,replace the Receiver: contact your dealer or<strong>Stanley</strong> <strong>Healthcare</strong> <strong>Solutions</strong>.“Supervisiontimeout”These alarms auto-clear when the conditionends. Intermittent alarms may be caused bytemporary conditions, such as unusually highnetwork traffic, or heavy demands on theCPU. If the alarm appears constantly,replace the device: contact your dealer or<strong>Stanley</strong> <strong>Healthcare</strong> <strong>Solutions</strong>.<strong>Hugs</strong> <strong>User</strong> <strong>Guide</strong> B–3
Appendix B- AlarmsExciters/RangeExtendersExciters/RangeExtendersPCsAlarm Message Cause Response“Master/SlaveConflict”“Exciter dooropen”“Low Signal/PowerDown”“DeviceError”“Communicationfailure”“Door Ajar”“Service pinmessage”“Supervisiontimeout”“Supervisiontimeout”“CPU alarmthresholdexceeded”Error between two (ormore) Exciters or RangeExtenders linked in aMaster/Slaveconfiguration.An Exciter/RangeExtender configured forDoor Open Alarms hasbeen opened.Exciter/Range Extender’ssignal is low, or thedevice has lost power.Exciter/Range Extenderis malfunctioning.System cannotcommunicate with theExciter/Range Extender.It is no longer seen on theLonWorks network.The exit protected by theExciter has been leftopen for the Timeoutperiod.The service pin on theExciter/Range Extenderwas pressed.System is not receivingmessages from theExciter/Range Extender.Server has lostcommunication with aClient PC.CPU loading on theServer has exceeded theset threshold.Check that the Exciters/Range Extendersare linked via their M/S terminals. Make sureeach device is properly configured in the PSSystem Manager. (The alarm will auto-clearwhen the condition ends.)Investigate why door was opened.Implement security procedure if appropriate.Check the Exciter/Range Extender. Makesure that the network and power connectionsare secure, and that the antenna (red wireinside case) has not been damaged. Checkthat the device is not sitting on metal. (Thealarm will auto-clear when the conditionends.)Replace the Exciter/Range Extender.Inspect the device. Check power andnetwork connections. If these appear normal,replace the device: contact your dealer or<strong>Stanley</strong> <strong>Healthcare</strong> <strong>Solutions</strong>.Identify the Exciter and implement facility’ssecurity procedure.This feature is for test purposes to checkcommunication between the device and theServer.These alarms auto-clear when the conditionends. Intermittent alarms may be caused bytemporary conditions, such as unusually highnetwork traffic, or heavy demands on theCPU. If the alarm appears constantly,replace the device: contact your dealer or<strong>Stanley</strong> <strong>Healthcare</strong> <strong>Solutions</strong>.Contact the operator of the Client PC, andhave them reconnect to the LAN.Contact your dealer or <strong>Stanley</strong> <strong>Healthcare</strong><strong>Solutions</strong> for guidance.B–4 <strong>Hugs</strong> <strong>User</strong> <strong>Guide</strong>
Appendix B- AlarmsAlarm Message Cause ResponseI/OModulesPagerSystemLonWorksNetworkAlarmsSystemAlarms“I/O ModuleInput Open”“I/O ModuleInputClosed”“Communicationfailure”“Supervisiontimeout”“PagerComm Error”“Supervisiontimeout”“Messagequeueoverflow”“Maximumloginattempt”“Databaserecord limitexceeded”The input device of an I/OModule is in the openstate.The input device of an I/OModule is in the closedstate.System cannotcommunicate with the I/OModule. It is no longerseen on the LonWorksnetwork.System is not receivingmessages from the I/OModule.The software could notsend a page message.Network devices aredefined in the system butno messages have beenreceived from any devicefor 30 seconds.The queue of messagesfor the LonWorks devicehas exceeded themaximum allowed.A user has failed to enterthe correct password.The maximum number oftags or devices, asgranted in the softwarelicense, has beenexceeded.This alarm is a configurable setting.Response depends on facility procedures.This alarm is a configurable setting.Response depends on facility procedures.Inspect the I/O Module. Check power andnetwork connections. If these appear normal,replace the I/O Module: contact your dealeror <strong>Stanley</strong> <strong>Healthcare</strong> <strong>Solutions</strong>.These alarms auto-clear when the conditionends. Intermittent alarms may be caused bytemporary conditions, such as unusually highnetwork traffic, or heavy demands on theCPU. If the alarm appears constantly,replace the device: contact your dealer or<strong>Stanley</strong> <strong>Healthcare</strong> <strong>Solutions</strong>.Check that the Pager is connected to theServer and powered.Check that the network wire is securelyconnected to the card. If the connectionseems OK, there may be a problem with theLonWorks card. Contact your dealer or<strong>Stanley</strong> <strong>Healthcare</strong> <strong>Solutions</strong>.This is a temporary condition caused byunusually high network traffic, or heavydemands on the CPU.This is a configurable alarm. The maximumnumber of login attempts is set in the Systemtab of the PS System Manager. The username of the person attempting to log in isrecorded in the database.Obtain a new license from <strong>Stanley</strong><strong>Healthcare</strong> <strong>Solutions</strong>, and update the licenseusing the Update License command.<strong>Hugs</strong> <strong>User</strong> <strong>Guide</strong> B–5
Appendix B- AlarmsB–6 <strong>Hugs</strong> <strong>User</strong> <strong>Guide</strong>
IndexIndexAAccess Card, 4-3clearing, 6-11entering information, 6-6Add Data, 6-16Add Field, 6-13Admin Tab, 2-13Admitting an Infant, 4-6Alarm Notes, 6-19Alarm Notes Report, 5-12Alarm Quick Reference, B-1Alarm Window, 3-3Alarm Window Elements/Settings, 3-5, 3-23Alarm/Event Timers, 6-28Alarmsalarm types, B-1Band Detached Alarms, 3-14clearing, 3-6Door Ajar Alarms, 3-17Exit Alarms, 3-9Improperly Applied TagAlarms, 3-13suspending Tamper Alarms tochange a band, 4-34Tag Loose alarms, 3-12Tamper Alarms, 3-10Transport Time ExpiredAlarms, 3-11Alarms-Events Box, 3-3All Tags, 4-48Applying Tags, A-2Auto Discharged Tags, 3-15BBabySenseCheck Tag Tightness event, 3-24suspending for a tag, 4-34Tag Loose alarms, 3-12Band Detached Alarms, 3-14Batteryreset tags, 6-25status, A-7Bypassing an Exciter, 4-22CCard reader setup, 6-30Census Listcolumn width, 2-11popup menu commands, 2-9window size, 2-11Census Tab, 2-7Census Toolbar, 2-8Changing Columns, 2-11Changing Your Password, 4-5Charts Feature, 5-9Check Tag Tightness Event, 3-24Cleaning Tags, A-5Clear, 3-5, 3-23Clear Alarm, 3-5, 3-23Clear All, 3-5, 3-23Clearing Access Cards, 6-11Clearing Alarms, 3-6Clearing Events, 3-28Clearing Pictures, 4-29Color Coding, 2-8Configuration History, 5-4<strong>Hugs</strong> <strong>User</strong> <strong>Guide</strong> I–1
IndexCustom Reports, 5-18Customizing the Census List, 4-36DDaily Procedures, 4-1Description, 3-5, 3-23Details, 3-5, 3-23Details Box, 2-6Disable BabySense, 2-10, 4-34Discharge, 2-9Discharging an Infant, 4-16Displaying Pictures, 4-28Displaying Tag History, 4-15docking a pane, 4-39Docking Positions, 4-41Door Ajar Alarms, 3-17Door Ajar Event, 3-26Duplicate Names, 2-8, 4-8Duplicate Tag ID Alarms, 3-19EEdit Memo, 4-26Enable Message Display, 6-34Event Window, 3-22Exciterbypassing, 4-22overview, 1-7Exit Alarms, 3-9Exporting Reports, 5-23FFacility Maps, 3-2Fitting, A-4Font Size, 2-3GGetting Help, 2-15HHeartbeat message, 1-2Heartbeat signal, 3-11Help File, 2-15History, 2-9, 4-15<strong>Hugs</strong> Resource Kit, 1-3<strong>Hugs</strong> System Components, 1-3<strong>Hugs</strong> System Overview, 1-2<strong>Hugs</strong> Tagadmitting, 4-6alarm types, B-2BabySense, suspending for atag, 4-34changing Zones, 4-13discharging, 4-16History, 2-9manually admitting, 4-44Memos, 4-26resetting low batteryinformation, 6-25suspending Tamper Alarms tochange a band, 4-34tag memos, 4-26Transport Return, 4-23transporting, 4-17<strong>Hugs</strong> Tagsoverview, 1-4<strong>Hugs</strong> Tags EventsCheck Tag Tightness event, 3-24Door Ajar event, 3-26Loiter event, 3-27<strong>Hugs</strong> Tags Reports, 5-5I–2 <strong>Hugs</strong> <strong>User</strong> <strong>Guide</strong>
IndexIImproperly Applied Tag Alarms, 3-13KKeypadsassigning users a code for, 6-6LLatex-Free Parts, 1-4Limitation of Liability, 1-3Locate, 2-10, 4-32Locating Tags, 4-32Locking a <strong>User</strong> Account, 6-9Log, 5-5Logging Out, 4-4Login, 4-2changing your password, 4-5logging out, 4-4timeout setting, for individualusers, 6-7with access card, 4-3Loiter Event, 3-27Low Battery Alarmssecond alarm warning, 3-18MMain Interface, 2-2Manual Admit, 4-44Map Windowsize, changing, 2-5Modify Screens, 1-9, 2-5, 4-39, 6-4MRI, A-7Mute, 3-5, 3-23Muting Alarms, 3-8NNotes and Procedures tab, 6-<strong>20</strong>OOnly This Client, 4-44PPager SystemsTAPentering ID number in useraccount, 6-6Passcards, 6-10Password, 4-5Passwordsassigning, 6-6changing, 4-5Patient Security (PS) Server, 1-8Permissions, 6-3Pictures, 4-28Popup Menu Commands, 2-9Print, 6-4Printer Ready button, 5-21Printing, 2-17Procedure Box, 2-6Procedures, 3-5, 3-23, 6-22QQuick Access Menu, 2-14Quick History, 3-28Quick History Tab, 2-6RReceivers, 1-6Removing Tags, A-2<strong>Hugs</strong> <strong>User</strong> <strong>Guide</strong> I–3
IndexRename column, 4-37Report View, 5-6Reportscharts, 5-9custom reports, 5-18filtering, 5-17formats, 5-6Generating, 5-8printing, 5-21types of, 5-3viewing remotely, 5-<strong>20</strong>Reports Tab, 2-12Reset Low Battery Tags, 6-25Resource, 1-3Resume Tamper, 4-25Return Prompt, 4-23Returning an Infant, 4-23confirm infant’s return, 4-23Row colors, 2-8SSafe Area, definition, 1-2Screen Tabs, 2-3Select note from list or enterreason, 3-7Set Picture, 2-10Setting Transport Times, 6-26Show columns, 4-38Show in Details, 6-15Show on Admit Dialog, 6-15Software CD, 1-5Status Bar, 2-15Storing, A-6Summary View, 5-6Supervision Alarms, 3-11Suspend Tamper, 4-24Suspend Tamper Timeout, 6-27Suspend/Resume Tamper, 2-10Suspending BabySense, 4-34Suspending Tamper Alarms, 4-34System Alarms, 3-22TTag Diagnostics, 6-31tag dispenser, A-6Tag Fitting, A-4Tag Inventory, 7-2Tag Loose Alarms, 3-12Tag Maintenance, A-1Tag Memos, 4-26Tag/Infant Information, 4-10Tamper Alarms, 3-10suspending, 4-34Testing, 7-1Toolbar, 2-8Touch Screen Interface, 2-16Transport, 2-10Transport Return, 4-18TransportReturn/UpdateTransport, 2-10Transport timeupdate, 4-19Transport Time Expired Alarms, 3-11Transport Times, 6-26Transporting an Infant, 4-17UI–4 <strong>Hugs</strong> <strong>User</strong> <strong>Guide</strong>
IndexUnlocking a <strong>User</strong> Account, 6-9Update Transport, 4-19Updating the Transport Time, 4-19<strong>User</strong> Accounts, 6-3changing, 6-8creating, 6-5Deleting, 6-9locking and unlocking, 6-9<strong>User</strong> Administration, 6-1<strong>User</strong> Information, 2-15<strong>User</strong> Permissions, 6-3<strong>User</strong>-Defined Fields (Columns), 6-12WWarnings, 1-5What’s New, 1-9Workstation, 1-8XX-rays, A-7ZZoneschanging for a tag, 4-13how they work, 3-2<strong>Hugs</strong> <strong>User</strong> <strong>Guide</strong> I–5
IndexI–6 <strong>Hugs</strong> <strong>User</strong> <strong>Guide</strong>