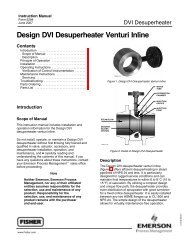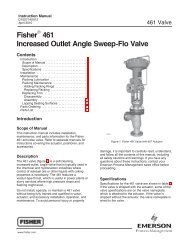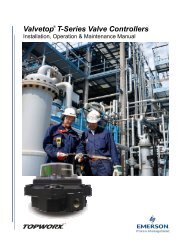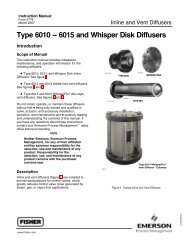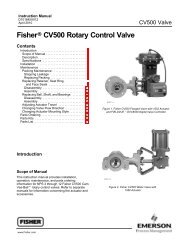
Fisher V500 Rotary Control Valve
Fisher V500 Rotary Control Valve
Fisher V500 Rotary Control Valve

You also want an ePaper? Increase the reach of your titles
YUMPU automatically turns print PDFs into web optimized ePapers that Google loves.
<strong>V500</strong> <strong>Valve</strong>CAUTIONDo not apply full actuator signal(pressure or power) to the actuator inthe next step. Full signal may wedgethe valve plug into the seat ring. Use aregulated signal source and graduallyincrease the signal to slowly stroke theactuator.4. Adjust actuator travel and stroke the actuator sothat the plug is close to but not contacting the seatring at full actuator travel. If available on electricactuators, use a manual handwheel to position theplug.5. Adjust travel, using full actuator signal, until thevalve plug contacts the seat ring around its fullcircumference. This contact self-centers the seatring on the valve plug.6. Continue to adjust travel until a gap of 0.001 inchexists between the seat ring and retainer, as shownin figure 13, at full actuator travel.7. Refer to the actuator instruction manual to lockthe actuator travel adjustment.Changing <strong>Valve</strong> Flow DirectionThe <strong>V500</strong> valve may be installed in either forward orreverse flow service. Forward flow enters the seatring first, then flows past the valve plug. If changingflow direction is necessary, release all pressure fromthe valve and actuator. Remove the control valveassembly from the pipeline and rotate the assemblyabout the valve shaft to put the retainer end of thevalve where the other end was. Refer to theprocedure for Changing Actuator Mounting Style ifthe actuator must be repositioned, and refer to theInstallation section to install the control valveassembly. Be sure to reposition the flow directionarrow on the valve body.Instruction ManualFebruary 2010Changing Actuator Mounting StyleRefer to figure 3 of this manual and the actuatorinstruction manual when changing mounting stylesor positions. Right-hand mounting places theactuator on the right side of the valve as viewed fromthe upstream side of the valve; left-hand mountingplaces the actuator on the left side of the valve.Remember that the upstream side of the valve inletis the retainer end of the valve body for forward flowand the other end of the valve body is the upstreamside for reverse flow.Complete the Adjusting Actuator Travel procedurewhenever the actuator is removed.Parts OrderingA serial number is assigned to each valve andstamped on the nameplate. Always refer to the valveserial number when corresponding with yourEmerson Process Management sales office. Whenordering replacement parts, also specify the partname and desired material.WARNINGUse only genuine <strong>Fisher</strong> replacementparts. Components that are notsupplied by Emerson ProcessManagement should not, under anycircumstances, be used in any <strong>Fisher</strong>valve, because they may void yourwarranty, might adversely affect theperformance of the valve, and couldcause personal injury and propertydamage.NoteNeither Emerson, Emerson ProcessManagement, nor any of their affiliatedentities assumes responsibility for theselection, use, or maintenance of anyproduct. Responsibility for theselection, use, and maintenance of anyproduct remains with the purchaserand end user.18