Create successful ePaper yourself
Turn your PDF publications into a flip-book with our unique Google optimized e-Paper software.
FREEExtended Warrantywith online registration!Extend the warranty on your<strong>Ambush</strong> series camera to18 months by registeringyour purchase atwww.cuddeback.com.Click “<strong>Support</strong>” then“Product Registration”.Activation required within2 weeks of registration.About batteriesA. <strong>Cuddeback</strong> recommends Rayovac ® , Duracell ® ,and Energizer ® alkaline batteries only. Lesserbatteries may not perform as required, especiallyin cold temperatures.I. Change all batteries at the same time.Never mix old and new batteries.II. Do not mix standard, alkaline,or rechargeable batteries.III. Remove all batteries when the camera willnot be used for an extended period of time.Please get the latest camera firmwareBefore using this camera we recommend you visitwww.cuddeback.com to get the latest firmware.Latest firmware can improve camera performance.
Trophy Room ® manages yourimages, and now your<strong>Cuddeback</strong> ® camera, too!1) NEW – includes camera troubleshootingand support tools.2) NEW - hunting and scouting tips; articlesfrom our pro staff.3) Plus: 1-click image copy from SD cardto your PC. Fast Guard Duty image viewing.Image organization, enhancement, andclassification. Complete moon & sun datafor each image.Trophy Room data screen exampleMake viewing and managing your<strong>Cuddeback</strong> ® images easy withTrophy Room ® –<strong>Cuddeback</strong>’s free PC programFree download atwww.cuddeback.comSee page 20 for more details
STOPNeed Help?Don’t contact yourdealer.Use one of these support options: Download Trophy Room ® and use its support tools help and troubleshooting options <strong>Ambush</strong> ® IR model shownCuddeSafe ® Protects your<strong>Cuddeback</strong> ® <strong>Ambush</strong> ® camera frombears, thieves and the elements! Fits <strong>Cuddeback</strong> <strong>Ambush</strong> ® scouting cameras The store you purchased this productfrom does not carry parts nor are theyable to service your camera. Email orcall us and our customer service staffwill be happy to help you.
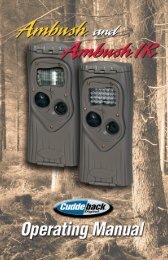
Care and treatmentA. Don’t abuse your camera. Treat it like thesophisticated piece of electronics that it is.I. Treat it gently – do not abuse or dropII. Keep SD card dry and never insert wetSD cards into the camera<strong>Ambush</strong> ® cameraOperating InstructionsWhat You Need Rayovac ® or Duracell ® When <strong>Ambush</strong> ® is working it displays an electronic“worm” on the LCD. This worm scrolls around theLCD to indicate that you must not remove the SDcard, must not turn the rotary knob, or must notpress any button. Please be patient and wait forthe worm to go away before removing the SD card.III.Avoid letting water enter the camera “worm”
Zone Control<strong>Cuddeback</strong>’s patent pending Zone Control allows you toselect wide angle view or Centered Subject view. Positionthe shutter as appropriate for your needs. Be aware thatwide view mode can generate more blank images as deermove at the edges of the view.Zone ControlWide Angle SettingZone ControlCenter Subject SettingStep 1 – Familiarize yourself with the <strong>Ambush</strong> ®Take a moment to familiarize yourself with <strong>Ambush</strong> ® camera’s parts.FrontFlash LensBack<strong>Ambush</strong>InfraredLEDs/IR<strong>Ambush</strong> IRand BlackFlashTestLEDMotion-HeatSensorCameraLensUser InterfaceDoorBattery DoorBackSD CardSocketTopMountBracketLCDScreenA/BButtonsBackUserInterfaceLEDRotaryKnobStrapSlots 5
Step 2 – Installing Batteries and SD Card OFF position. provide longer battery life and better night IR images.Make sure to observe correct polarity. Close thedoor and tighten the thumb screw completely. A series of numbers displayed. These are the <strong>Ambush</strong> ®camera’s hardware and software version numbers. polarity with clipped corner on the card to the right.Battery InstallBottom ViewSD Card InstallStep 3 – Setting up the <strong>Ambush</strong> ® Time position,press A and B to set. Time is AM/PM format. Date position,press A and B to set. Year position,press A and B to set. Step 8 – More Features Step 4 – Attaching <strong>Ambush</strong> ® to a Tree We recommend you first try your <strong>Ambush</strong> ® cameraat home. recommend mounting <strong>Ambush</strong> ® about <strong>Ambush</strong> ® . <strong>Ambush</strong> ®will detect animals at distances from directly in front Note that detectiondistance varies greatly with air temperature, animalsize, and the speed the animal is moving.
<strong>Ambush</strong> ® features ourGenius Mounting System.This system allows you toattach the bracket to a treeand then slide <strong>Ambush</strong> ® onand off the bracket asneeded. attached to the tree, makesure both thumb screws onthe back of <strong>Ambush</strong> ® are tightenedcompletely. Then slide <strong>Ambush</strong> ®onto the bracket. from <strong>Ambush</strong>’s interfere withthe <strong>Ambush</strong> ® sensor or camera. <strong>Ambush</strong> ® to make sure it is pointed whereyou expect the animals to be. Aim <strong>Ambush</strong> ® levelwith the ground to maximize detection range andperformance. You can use the <strong>Ambush</strong> ® test feature <strong>Cuddeback</strong> ® has optional mounting methods available, mounting posts. See your retailer or visitwww.cuddeback.com for details.Step 5 – Checking the <strong>Ambush</strong> ® Detection Zone Test position. Close thecover and tighten the thumb screw. Put <strong>Ambush</strong> ® convenient method to enable test mode, seeStep 7 - Checking your <strong>Ambush</strong> ® for details). Walk back and forth in front of <strong>Ambush</strong> ® . The red <strong>Ambush</strong>’s sensor has position your <strong>Ambush</strong> ® series as desired.Step 6 – Arming the <strong>Ambush</strong> ®You can program the <strong>Ambush</strong> ® to record still images, orstill images AND videos. Turn the rotary knob to eitherthe Video Off setting or the Video On setting as desired.The settings represent the amount of time <strong>Ambush</strong> ® willwait before it is armed and ready to take another image.This delay time prevents multiple images of the sameanimal. Here is our recommendation for the variousArmed When first armed, <strong>Ambush</strong> ® will display the indicateddelay for 5 seconds and then begin counting down from <strong>Ambush</strong> ® will armand be ready to record images. When <strong>Ambush</strong> ® detects asubject, and takes a picture, a “worm” will be displayed
After the image issaved to the SD card, the LCD will display the delay ® is ready to record the next image.Step 7 – Checking <strong>Ambush</strong> ®When you check <strong>Ambush</strong> ® it is not necessary to turn therotary knob. Instead, press the A or B button to temporarilysuspend Armed mode and view pertinent information,such as the number of images on the SD card and battery information will be displayed. Here is the sequence ofinformation that is displayed each time the A or B buttonis pressed. bt:99 Test indicates <strong>Ambush</strong> ® is in Test mode and will the current delay setting will be displayed.You can leave <strong>Ambush</strong> ® <strong>Ambush</strong> ® This allows you to close the cover and leave the areawithout triggering an image.Step 8 – More FeaturesMenu Position various activities. Press A to advance to the next menuitem, press B to activate the displayed menu action. Battery Level – the battery level is displayed in theformat bt:99, which is a percentage of remainingbattery power. Press the A button to advance to thenext menu item. CLr clear all images and content on the SD card. Pressand hold B to clear the card. The worm will When finished,the LCD will display the amount of space on the SDcard in MBs. Press A to advance to the next menu item. Pic – Lets you take a test picture. Press B to takea picture. Press A to advance to the next menu item. <strong>Ambush</strong> ® : FLSH
<strong>Ambush</strong> ® IR/Black Flash: LEd <strong>Ambush</strong> ® IR/Black strength. Press B to power. The test will stop when the batteries do not the batteries to maximize the illumination range. StAt Date, Armed Days, and Image Counter. ActivationDate is the first day you used the camera. ArmedDays is how many days the camera has been used.Image Counter is the total number of images takenwith the camera. LOAd – Lets you to install new firmware. We mayupdate the <strong>Ambush</strong> ® firmware to improve itsperformance. If a firmware update is required youwill need to download a firmware file from ourwebsite. Instructions will be provided with the firmware.Please see www.cuddeback.com for details. Werecommend you check our website for updates atthe beginning of your scouting season. Firmware Version rotary knob to a new setting or press A to return tothe battery level display.Setting <strong>Ambush</strong> ® ParametersSome <strong>Ambush</strong> ® features can be changed by the user.<strong>Ambush</strong> ® can also be programmed to become a timelapse camera. (Note - In the text that follows the underlineditems are default settings. For most users thesesettings are not required and you can leave PO set to 0).Step 0: Enable or disable parameters OR selectTime Lapse Operation Parameter Zero, which is the parameter on/off control. P0:0 P0:1 as desiredP0:tL = time lapse mode. Attack is put into timelapse mode as explained later.Step 1: Press the A key to display P1 (strobe flash power) ® (This setting isignored on the <strong>Ambush</strong> ® IR/Black Flash and will be displayedas P1:--)
P1:1 = P1:2 P1:3 = P1:4 Step 2: Press the A key to display P2 (video length) ® video length. P2:1 P2:2 P2:3 Step 3: Press the A key to display P3 (video operating time) ® video operating time(This setting is ignored on the <strong>Ambush</strong> ® and will be displayed asP3:--) P3:1 = record videos only at nightP3:2 = record videos only during the dayP3:3 = record videos during day & nightStep 4: Press the A key to display P4 (operating time) ® will take pictures. P4:1 = operate only at nightP4:2 = operate only during the dayP4:3 = operate during day & nightStep 5: Press the A key to display P5 (quality)P5 controls the <strong>Ambush</strong> ® image and video quality. P5:1 = standard resolution 5MP images/videoP5:2 = high quality 5MP images/videoNote – image quality is improved by optimizing the be clearer when zooming, but file size is significantlyincreased. Most users will not benefit from this feature,which is mainly intended for research professionals thatrequire the best image quality possible.Step 6: Press the A key to display P6 (camera ID) Step 7: Press the A key to display P7 (FAP Mode) rearm immediately after the image or video is saved to the not affected. Note – using FAP mode can result inblank images. P7:0 P7:1
Time Lapse / Guard Duty Mode (P0= tL)Time Lapse/Guard Duty mode is enabled when Parameter time lapse or Guard Duty.Guard DutyGuard Duty allows you to continuously monitor a fieldor other location by continuously taking pictures at a At night, <strong>Ambush</strong> ® will function as a normal takingpictures when animals are detected. The camera the folder per minute will extend operating time. We recommend you use our Trophy Room PCprogram to view Guard Duty images. Available forfree at www.cuddeback.comTime Lapse Mode Motion sensing is disabled when time lapse is enabled.
No Card Mode - Using <strong>Ambush</strong> ® Without anSD CardWhen <strong>Ambush</strong> ® is used without an SD card, images arestored in <strong>Ambush</strong>’s internal image memory. <strong>Ambush</strong> ®features an internal from internal memory to an SD card.Transfer to SD card: If you use <strong>Ambush</strong> ® without an SDcard, follow these steps to transfer the images from theinternal memory to an SD card. ® is not armed, turn the rotary knob toany of the Armed positions. If <strong>Ambush</strong> ® is armed, press A to display the numberof images in internal memory. ® . will be displayed. internal memory will be copied to the SD card.The LCD will display the worm on the left, and thepercentage of files copied on the right. Please waitwhile images are being copied. is complete and all the images on the internal memoryhave been erased. press and hold B.Battery Life and Battery Low WarningBattery life in <strong>Ambush</strong> ® will vary depending upon batteryquality, ambient temperature, the number of imagestaken, how long <strong>Ambush</strong> ® has been operating, and otherfactors. Battery life you get may be more or less thanthese numbers depending on the circumstances.<strong>Ambush</strong> ® on usage.<strong>Ambush</strong> ® IR and <strong>Ambush</strong> ® Black Flash Note - using video mode greatly reduces battery life.Replace <strong>Ambush</strong> ® batteries when: BLOW icon appears on the LCD. When <strong>Ambush</strong> ® does not appear to operate correctly.In some cases the batteries may be too low to turn Battery Squeeze<strong>Ambush</strong> ® will attempt to use every amount of powerfrom the batteries. <strong>Ambush</strong> ® will alter its performance toprevent erroneous operation when battery voltage is verylow. Battery Squeeze is enabled when battery voltage seconds for day. This allows the batteries to recover and
Viewing ImagesYou will need an external viewing device or computer to Make sure to only remove the SD card when the worm isnot visible. Here is a list of some viewing options. <strong>Ambush</strong>’s images (Note: not all SD based camerascan view <strong>Ambush</strong>’s images, please test anycamera before purchasing). the original SD card with you to view on your PCor other device. ® viewer will allow you toview the images, copy the images to a second SDcard and erase the images from the SD card. Youcan then put the original SD card back into<strong>Ambush</strong>® ® allows you totransfer images from multiple cameras to a singleSD card. Go to www.cuddeback.com for more ® ®may not be able to copy all the images taken inGuard Duty mode. If you are using Guard Duty we Use Windows PC to Manage <strong>Cuddeback</strong> ® Imageswith Trophy Room ®Trophy Room ® software makes it easy to manage your<strong>Cuddeback</strong> ® images.Trophy Room ® your PC and organizes them by year and date. to find your images. Displays sun and moon data for each image, includingmoon phase, moon rise and set, sunrise and set, andmoon and sun position in the sky at the time theimage was taken.Trophy Room ® data screen example deer you can enter point count and give deer a nameto allow easy monitoring of trophy animals.
ased upon your images. Includes CuddeCharts with which you can analyze yourimages to determine peak movement patterns basedupon sun and moon phase and position. Includes Crystal Ball ® with which you can use thedata you’ve collected and analyzed with CuddeChartsto tional moon tables, only tailored to you. ® images taken inGuard Duty mode. FREE and works with all <strong>Cuddeback</strong> ® cameras.You can download it at www.cuddeback.com.Appendix ASD Card Requirements number the more images that can be saved on the card.<strong>Ambush</strong> ® We have extensively tested <strong>Ambush</strong> ® with most majorbrands of SD cards, however, low quality cards areavailable that may not operate in <strong>Ambush</strong> ® . We recommendusing SanDisk ® brand cards which are readily availableat stores that sell cameras. You can also order cardsdirectly from <strong>Cuddeback</strong> ® . See www.cuddeback.comfor information.<strong>Ambush</strong> Series(all 3 models)<strong>Ambush</strong> IR &<strong>Ambush</strong> Black Flash<strong>Ambush</strong>(flash)Card & VideoModeThis table shows approximately how many imagesand videos fit on a SD card:Card Size Video Images Videos* Images Videos** Guard Duty Mode On2 GB Off 1000 0 2000 0 5 days2 GB On 200 200 400 400 n/a4 GB Off 2000 0 4000 0 10 days4 GB On 400 400 800 800 n/a8 GB Off 4000 0 8000 0 20 days8 GB On 800 800 1600 1600 n/a16 GB Off 8000 0 16000 0 40 days16 GB On 1600 1600 3200 3200 n/aAssumes a 12 hour day with3600 images taken per day.Video mode is always disabledin Guard Duty mode. For thischart we assume each GuardDuty image is 100KB.*Assumes that 75% of images are at night when the videos are not recorded.**With the <strong>Ambush</strong> IR every image will also record a video.For this chart we assume each JPG is 1MB and each video is 4MB.Your actual JPG and video file sizes will be different.
Patents PendingFor use with all<strong>Cuddeback</strong> ®scouting camerasPatents PendingFor use with all<strong>Cuddeback</strong> ®scouting camerasPan & tiltPut your <strong>Cuddeback</strong>virtually anywhere!No tree needed!Set-up issimple asI, 2, 3...1 2 3Insert PostMount intofirm ground.Aim yourcamera invirtually anydirection – up,down or all around!Insert 2thumb screwsinto bracketAdjustcamera angleand tightenInsert2 thumb screwsinto bracket
Patents PendingFor use with all<strong>Cuddeback</strong> ®scouting camerasPatents PendingGenius Combo Kit – includes 2 mounts!- Pan & Tilt Mount- Tilt Mount- Lock Clip- Universal Plate (works with all cameras)- Mounting ScrewsSlideon/offTiltadjustPut a Genius TiltMount bracket inall your favoritehunting spots!Genius Pan & Tilt MountGenius Tilt Mount
Visit <strong>Cuddeback</strong>.comand enter your best photosand videos in the monthly<strong>Cuddeback</strong> photo contest.Vote for your favoritephoto andvideo.Enter as often as you like.You could win a free <strong>Cuddeback</strong>!
www.cuddeback.comNon Typical, Inc., P.O. Box 10447, Green Bay, WI 54307-0447920-347-3810


