
Create successful ePaper yourself
Turn your PDF publications into a flip-book with our unique Google optimized e-Paper software.
Some of <strong>Cuddeback</strong> pro staff withtheir favorite “Cuddy Bucks”“<strong>Cuddeback</strong> takes greatpictures, is extremely reliableand the batteries last forever!”Jay Gregory –Host, The Wild Outdoors“When I’m in search of a bigbuck, I use my <strong>Cuddeback</strong>.This buck is one that I havebeen after for the past couple of years.Each year I get a photo of him, confirmingthat he is still alive.”Pat Reeve – Driven 24/7Owner’s <strong>Manual</strong>“As a TV producer and bowhunter for ESPN... I primarilylook for ‘Cuddy Bucks’ walkingduring camera light hours.Thanks <strong>Cuddeback</strong>!!”Tom Miranda – Advantage Adventures“It’s photos like this thatmake me proud of myfood plots and put in theextra effort in the fall!”Mike Wheeler – Wheeler’s Whitetailscuddebackdigital.comNon Typical, Inc. 860 Park Lane,Park Falls, WI 545521-715-762-2260The # 1 digital scouting camera
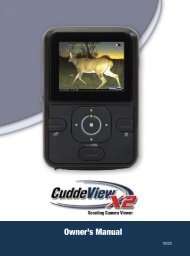
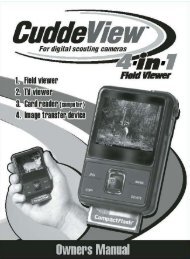
New from <strong>Cuddeback</strong> ... the CuddeView 4-in-1 Field ViewerCuddeView is the ONLY device youneed to view, transfer and delete yourdigital scouting camera images.1. View images in the field -Use CuddeView to view your scouting camera images in the field.2. View images on your computer -CuddeView serves as a PC or laptop card reader so you can downloadimages to your computer for viewing or storage (cable included;requires USB port and Windows XP/Vista operating system).• Compatible with CompactFlash and SD cards• View, transfer or delete images• Built-in rechargeable lithium battery• Built-in LED light• Includes FREE CuddeVision ImageManagement PC Software that will helpyou organize your scouting camera images23. View images on your TV -CuddeView comes with a TV cable so you can see your scoutingcamera images larger-than-life on your TV (TV requires RCAvideo-in port).4. Transfer images -Eliminate card swapping! Check each scouting camera and, usingCuddeView, transfer images from each camera’s CF/SD card to asingle, high-capacity (we recommend 2.0GB) SD/CF “archive” card.Once the images are transferred, delete the images from thecamera card and re-insert the clean card into your camera.The archive card now holds all your images.To learn more, visit <strong>Cuddeback</strong>digital.com
<strong>Cuddeback</strong> Digital Photo and Video SubmissionWe want to see your images and videos in our online gallery. The topphotos/videos are selected each year by scouting camera expert Walt Larsenand placed in categories for the <strong>Cuddeback</strong> Digital Scouting Camera contest.You pick the winners!~ 2006 Contest Winner ~Great <strong>Cuddeback</strong> prizes are awarded for best images and videos during our<strong>Cuddeback</strong> Digital Scouting Camera Contest . Visit www.cuddebackdigital.comfor details and to enter your images into our photo gallery.By submitting images, you give <strong>Cuddeback</strong> permission to use the submitted images for any and all marketingpurposes, no monetary compensation will be awarded. Images that are not <strong>Cuddeback</strong> or images thathave been altered in any way will not be considered for contests.4<strong>Excite</strong>Table of contentsCuddeView . . . . . . . . . . . . . . . . . . . . . . . . . . . . . . . . . . . . . . . . . . . . . . . . . . . . . . . . . 2 - 3Introduction . . . . . . . . . . . . . . . . . . . . . . . . . . . . . . . . . . . . . . . . . . . . . . . . . . . . . . . . . . . 6<strong>Cuddeback</strong> Stores Images on Compact Flash Cards . . . . . . . . . . . . . . . . . . . . . . . . . . . . 7Step 1 Familiarize yourself with <strong>Cuddeback</strong> . . . . . . . . . . . . . . . . . . . . . . . . . . . . . . . . . . . 8Step 2 Turning <strong>Cuddeback</strong> ON/Installing batteries . . . . . . . . . . . . . . . . . . . . . . . . . . . 9 - 10Step 3 Learn the Keypad & Display . . . . . . . . . . . . . . . . . . . . . . . . . . . . . . . . . . . . . . . . 11Step 4 (S KEY) is for setting up <strong>Cuddeback</strong> . . . . . . . . . . . . . . . . . . . . . . . . . . . . . . 11 - 12Step 5 (M KEY) is for controlling <strong>Cuddeback</strong> . . . . . . . . . . . . . . . . . . . . . . . . . . . . . . . . . 13Step 6 Attaching <strong>Cuddeback</strong> to a Tree . . . . . . . . . . . . . . . . . . . . . . . . . . . . . . . . . . . . . . . 14Step 7 Checking <strong>Cuddeback</strong> . . . . . . . . . . . . . . . . . . . . . . . . . . . . . . . . . . . . . . . . . . . . . . 15Step 8 Viewing Images . . . . . . . . . . . . . . . . . . . . . . . . . . . . . . . . . . . . . . . . . . . . . . 15 - 18Turning <strong>Cuddeback</strong> On and Off . . . . . . . . . . . . . . . . . . . . . . . . . . . . . . . . . . . . . . . . . . . 19Motion/Heat Detector Sensitivity Level . . . . . . . . . . . . . . . . . . . . . . . . . . . . . . . . . . . . 21Formatting the Compact Flash Card . . . . . . . . . . . . . . . . . . . . . . . . . . . . . . . . . . . . 21 - 22Diagnostics Display . . . . . . . . . . . . . . . . . . . . . . . . . . . . . . . . . . . . . . . . . . . . . . . . 22 - 23Displaying the Model of <strong>Cuddeback</strong> . . . . . . . . . . . . . . . . . . . . . . . . . . . . . . . . . . . . . . . 23Technical Information . . . . . . . . . . . . . . . . . . . . . . . . . . . . . . . . . . . . . . . . . . . . . . 23 - 24File System . . . . . . . . . . . . . . . . . . . . . . . . . . . . . . . . . . . . . . . . . . . . . . . . . . . . . . . . . 24Image & Event File Format . . . . . . . . . . . . . . . . . . . . . . . . . . . . . . . . . . . . . . . . . . . . . . 25Detection Zone & Sensitivity Adjustment . . . . . . . . . . . . . . . . . . . . . . . . . . . . . . . . . . . 25TV Requirements . . . . . . . . . . . . . . . . . . . . . . . . . . . . . . . . . . . . . . . . . . . . . . . . . . . . . 26Warranty Information . . . . . . . . . . . . . . . . . . . . . . . . . . . . . . . . . . . . . . . . . . . . . . . 27 - 28Service . . . . . . . . . . . . . . . . . . . . . . . . . . . . . . . . . . . . . . . . . . . . . . . . . . . . . . . . . . . . . 29BearSafe . . . . . . . . . . . . . . . . . . . . . . . . . . . . . . . . . . . . . . . . . . . . . . . . . . . . . . . . 30 - 315
IntroductionThe <strong>Cuddeback</strong> <strong>Excite</strong> gives you the fast trigger speed and long battery life <strong>Cuddeback</strong> isfamous for! It features a custom 2.0 megapixel digital camera and a premium strobeflash that illuminates out to 40 feet! You can adjust the delay and the sensitivity. The<strong>Excite</strong> will give you years of reliable performance!We have tested variousbrands of batteries and theseare our results.A. Rayovac - 800 images at25 degrees, 1600 imagesat 70 degreesB. Duracell - 600 images at25 degrees, 1400 imagesat 70 degreesC. Energizer - 500 images at25 degrees, 1200 imagesat 70 degreesD. Other brands - other batterybrands typically took lessimagesE. Below 25 degrees batterylife will be less than shownTest Method - Cameras wereset to take 4 images per hour,with 50% of them being flashimages. Test results are forcomparison only, your actualresults may be different.Temperature, flash operation,video mode, battery age, andother factors can affect batterylife.What You Need...Before you can use your <strong>Cuddeback</strong>, youwill need the following items:1) One or more Compact Flash Cards. We recommenda size of 256MB or bigger. Thehigher the number on the card, the moreimages that can be saved on the card.2) Four D Cell Batteries (we recommendDuracell or Rayovac). Refer to the batterycomparison table on the left.3) A #25 Torx screwdriver if you want to attachthe camera to a tree with the supplied screw.4) A bungee, strap, or wire if you want to attach<strong>Cuddeback</strong> to a tree without the Torx screw.6TIP - We do not recommend attaching <strong>Cuddeback</strong> to a tree with a strap or bungee.Rodents may chew the strap causing the camera to fall from the tree. If you do not usethe security screw, we recommend that you use wire to secure <strong>Cuddeback</strong> to the tree.The following items are optional:5) A small padlock if you want to preventtampering. Note: Only certain sized padlockswill fit. See diagram at right for measurements.6) USB cable if you want to attach <strong>Cuddeback</strong> toyour computer's USB port.7) Video cable & TV if you want to view imageswith a TV.CUDDEBACK STORES IMAGES ONCOMPACT FLASH CARDSImages are stored on a Compact Flash card(not included). The Compact Flash card slotis located on the bottom of the camera.• Install the card. There is a small lip on thecard. The lip needs to be pointed down(towards the batteries). Slide the card infirmly.• Remove the card by pulling the card out.• You can use any type of CompactFlash Card.WARNINGRemove or insert CF card ONLY whenslide switch is in the OFF position.7BShown actual sizeA Shackle Diameter 3/16"B Vertical Clearance 9/16"C Horizontal Clearance 5/8"Figure 1LEARN - We suggest you have your<strong>Cuddeback</strong> and batteries with you asyou read this manual and perform thesteps described. In short time, youwill have mastered your <strong>Cuddeback</strong>.CA
STEP 1 - FAMILIARIZE YOURSELF WITH CUDDEBACKTake a moment to familiarize yourself with <strong>Cuddeback</strong>'s parts.Fresnel LensFlash LensLEDCamera windowFigure 3Battery100%Figure 4Figure 5STEP 2 - TURNING CUDDEBACK ON1) Slide the On/off Switch to the OFF position(figure 4).2) Remove the Compact Flash card if it isinstalled (figure 5).3) Install 4 brand new alkaline D cell batteries.(figure 6). We recommend Rayovac orDuracell brand batteries only!4) Install the Compact Flash card.5) Slide switch to ON. Do not press any keyat this time.6) In a few seconds the battery level will bedisplayed (figure 7). In a few seconds thedate & time will be displayed (figure 8).LCD screenOperation keysMounting hole forwood screw (wingnut/bolt included foralternative mounting)Sensitivity adjustmentCover screwreceptacleBattery plate screwUSB port Flash Card Figure 2portTV connection port On/Off switch 84/05/0611:13 AMFigure 7Figure 8TIP - Always remove the Compact FlashCard when removing or installing batteries.This will make it easier to remove the batteryplate and prevent damage to the card.TIP - Don't be afraid to press the keys tolearn <strong>Cuddeback</strong> operation. You can notdamage your <strong>Cuddeback</strong> by pressing keys.If you need to start over slide the powerswitch to OFF, and then back to ON torestart <strong>Cuddeback</strong>.9
How to install batteries into your <strong>Cuddeback</strong>1.Unscrewbatterythumbscrew.➤Bottom Lip3.Insertbatteries.➤CenterLip5.Screw batterythumb screwback in.10Batteryorientation2.Pull metalplate andthumbscrew upand out.4.Replace metal plate.Push down to securefirmly behind centerand bottom lips.To remove batteries1. Unscrew battery thumb screw.2. Pull metal plate up and out.3. Remove batteries.4. Replace metal plate.5. Screw in thumb screw.Figure 6What each key does!Figure 9Enables/disables camera;also used to viewinformationSet key – sets date, time,delays, etc.Up key used to changesettings, viewDown key}informationGeneral purpose keySTEP 4 -KEY IS FOR SETTING UP CUDDEBACKis used to change <strong>Cuddeback</strong>'s settings.With each press of , a different setting will bedisplayed (Figure 10).After you view or change the setting, press toview the next parameter.STEP 3 - LEARN THE KEYPAD & DISPLAY<strong>Cuddeback</strong> is programmed by using a 2 lineLCD display and 5 keys. (Figure 9).The KEY is used to enable or disable thecamera and to view information. The KEYis used to set the date, time, delay and othersettings. The KEY & KEY are used tochange settings or view information. KEYis a general purpose key used for various tasks.Moving from One Menu to the NextPress to change settings. Press againto move to the next setting.LEARN - To see how this works, press multiple times.Press to view information. Press againto move to the next display.LEARN - To see how this works, press multiple times.11Delay01 min1) Camera Delay. After taking a picture, the camera will wait this amount of timebefore arming itself for the next picture.Figure 10
a) If [Camera Delay] is not displayed on theLCD, press numerous times until[Camera Delay] is displayed (figure 11).b) Press or to change the setting.c) The range is 1 minute to 60 minutes.2) Set Date (figure 12)a) If [Set Date] is not displayed on the LCD,press numerous times until[Set Date] is displayed.b) Press to advance the month.c) Press to advance the day.Delay01 minSet Date4/05Figure 11Figure 124/05/0611:13 AMImages19Figure 15Figure 16STEP 5 - KEY IS FORCONTROLLING CUDDEBACKPress to view information and to set theoperating mode.1) View Date and Time (figure 15) - Pressuntil the date/time is displayed on the LCDdisplay.2) View Images Saved - Press again.The LCD will display the number of imagessaved on the Compact Flash card.(figure 16).3) Set Year (figure 13)a) If [Set Year] is not displayed on the LCD,press (S) numerous times until[Set Year] is displayed.b) Press to reduce the year.c) Press to advance the year.4) Set Time (figure 14)a) If [Set Time] is not displayed on the LCD,press numerous times until[Set Time] is displayed.b) Press to advance the hour.The AM/PM indicator will change toindicate an AM or PM hour.c) Press to advance the minutes.12Set Year2006Set Time11:16 AMFigure 13Figure 14TIP - After Live Mode is displayed,there is a 45 second delay beforethe motion sensor starts. Thisgives you time to install the coverand move out of the area withouttriggering the camera.After setting up <strong>Cuddeback</strong>, installthe cover and leave the area. Youcan leave the Camera Mode inStandby or Test and <strong>Cuddeback</strong>will automatically arm itself within12 minutes.TestModeFigure 173) Set the Camera Mode - Press again.One of <strong>Cuddeback</strong>'s 3 camera modes(Standby, Test, and Live) will be displayed(figure 17). Press or as needed tochange the camera mode.a) Standby - <strong>Cuddeback</strong> will not trigger thecamera.b) Test Mode - The red LED will illuminatewhen activity is sensed but the camera willnot trigger.c) Live Mode - <strong>Cuddeback</strong> will trigger thecamera when activity is sensed. The redLED will NOT illuminate. About 45 secondsafter [Live Mode] is displayed, theLCD will clear.13
STEP 6 - ATTACHING CUDDEBACK TO A TREEFor best image quality, install <strong>Cuddeback</strong> about10 feet from the place animals are expected.Attach <strong>Cuddeback</strong> to a suitable tree 3 to 4 feetabove the ground (figure 18).TIP - To determine the detection area, you can enableTEST MODE. Then walk slowly back and forth in frontof the camera. The red LED will illuminate when thecamera senses you. The camera will NOT triggerwhen in TEST MODE.<strong>Cuddeback</strong> can sense and record images at distancesof 50 feet or more. However, you will get the bestimage quality if <strong>Cuddeback</strong> is set closer to the animals.There are four ways to attach <strong>Cuddeback</strong> to a tree.1) Attach with the supplied Torx® screw(stored on back of <strong>Cuddeback</strong>)(figure 19).You will need a #25 Torx screwdriver (notsupplied) (figure 20).2) Use a cord or bungee (not supplied) in conjunctionwith the eyebolt (supplied) tosecure <strong>Cuddeback</strong> to a tree.3) Use a tripod or other device (not supplied)attached to the socket on the back of thecamera. The socket has standard 1/4-20threads and is compatible with mosttripods.4) Use <strong>Cuddeback</strong> BearSafe (see page 30for details).Figure 20Figure 19Figure 18TIP - We recommend using apadlock (not included) to securethe battery cover. This will assurethat nobody tampers with your<strong>Cuddeback</strong> Digital Camera.Saved26Figure 21Figure 22STEP 7 - CHECKING CUDDEBACKTo field-check <strong>Cuddeback</strong>, remove the cover andpress . A series of messages will be displayed.Press until [Images Saved] is displayed(figure 21). This is how many images are saved onthe card (or internal memory if you do not have acard installed).TIP - When checking <strong>Cuddeback</strong>, the camera may activateand take a picture of you. You can cancel thisimage by pressing (C) when the message [Picture!] ison the display.STEP 8 - Viewing ImagesThere are 4 ways to view the images that<strong>Cuddeback</strong> has taken.1) Replace the Compact Flash card with adifferent card. Take the original card homeand view the images on your computer orother device.2) Attach a computer to <strong>Cuddeback</strong>'s USB port(described later in this section).3) You can view images in the field or at homewith a TV attached to <strong>Cuddeback</strong> (describedlater in this section).4) You can view images in the field with aportable field viewer or camera (figure 22)(see page 2 for details).1415
TO VIEW IMAGES WITH A PC ATTACHED TOCUDDEBACK USB PORT“This buck is a legend around ourcommunity. Now, thanks to my<strong>Cuddeback</strong> NoFlash he is on my wall.Thank you <strong>Cuddeback</strong>.”George Riser, Saint Clairsville, OH“This picture was taken on a NoFlashthe morning before deer season. I didn'thave any troubles waking up the nextmorning!!”John Wagner, Stoughton, WIFigure 231) Press until [Images Saved] appears(figure 24).2) Press or . [Viewing] will appear onthe display (figure 25).3) Wait Approximately 10 seconds and then attachyour computer to <strong>Cuddeback</strong> with the appropriateUSB cable (not supplied)(figure 23). Yourcomputer must be using Windows XP.4) Your computer should recognize <strong>Cuddeback</strong>and bring up a window to display or copy theimages. We recommend copying the imagesto your computer hard disk. Use the softwareon your computer to view and print theimages.5) Press when you are finished.TO VIEW IMAGES ON A TV/CAMCORDERATTACHED TO CUDDEBACK“I recently got this big Florida whitetail,10-point with my <strong>Cuddeback</strong> Expert 3.0megapixels...what an awesome camera!”Sean Leavine, Wesley Chapel, FL“I passed on this buck many times thisyear. Thanks for an awesome camera,the infrared works awesome!!”Al Babnaeu, Firth, IDTIP - To view images with this method, you need aportable TV or camcorder. Your TV or camcordermust have a VIDEO IN connector. Connect the TV orcamcorder to the <strong>Cuddeback</strong> with a video cable.<strong>Cuddeback</strong> uses an RCA plug, your TV will have itsown style. Radio Shack can supply you with the correctcable for your TV or camcorder. We recommendyou bring your <strong>Cuddeback</strong> with you to Radio Shack ifyou elect to purchase a cable.1617
1) Attach a TV or camcorder to the TVconnector on <strong>Cuddeback</strong>.2) Press until [Images Saved] appears(figure 24).3) Press or . [Viewing] will appear onthe display (figure 25). An image will appearon the TV.4) View additional images by pressing or .5) Press when you are finished viewing images.To Erase an Image that is being Viewed on the TV1) View an image with the TV as described above.2) Press . The LCD will prompt [Clear ImageC = Yes] (figure 26).3) To clear the image, press .4) To continue without clearing the image,press .Saved18ViewingClearC = YesFigure 24Figure 25Figure 26Battery100%Figure 29Figure 30TURNING CUDDEBACK ON AND OFFTo disarm <strong>Cuddeback</strong> and prevent it from takingpictures, slide the On/off switch to the OFF position.The date and time will be maintained.To turn <strong>Cuddeback</strong> on, slide the On/off switch tothe ON position (figure 29). If messages do notappear on the LCD, replace the D Cell batteries.When you slide the On/off switch to OFF, theremay be a delay before <strong>Cuddeback</strong> turns off.Viewing the Battery LevelWhen you start <strong>Cuddeback</strong>, the display showsthe battery level of the 4 D Cell batteries. Batterylevel reading is 100%, 75%, 50%, 25%, or 10%(figure 30). When the batteries fail, the message"Battery Failed" will be displayed.To Erase All Images on the Card1) Press until [Images Saved] appears.2) Press . The LCD will prompt [Clear AllImages C = Yes] (figure 27).3) To clear all images, press . The LCD willprompt [Confirm? C = Yes] (figure 28).4) To clear all images press . All images willbe cleared.5) To continue without clearing the images,press , , or .All ImaC = YesConfirm?C = YesFigure 27TIP - Batteries fail sooner in cold temperature.When temperatures are below 30 degree Fahrenheit,you may want to replace the batteries when thebattery level is 25%.STORING CUDDEBACKIf you intend to store your <strong>Cuddeback</strong> for morethan a month or two, we recommend that youremove the batteries to eliminate any chance ofbattery leakage.18Figure 2819
“I placed a <strong>Cuddeback</strong> next to anothercamera for a comparison. The first nightout, my old camera took 24 photos, the<strong>Cuddeback</strong> took 118! Thank you for agreat product.”John Parker, Clarksville, TN“We never knew the quality of bucks wehad until we installed our NoFlash. Everymorning is like Christmas. Thanks for agreat product!”Roscoe Howell, Wetumpka, ALMOTION / HEAT DETECTOR SENSITIVITY LEVELThe sensitivity of <strong>Cuddeback</strong>'s motion/heat sensorcan be changed.1) Press numerous times until [Utilities? C =Yes] is displayed.2) Press [Sense Level] is displayed (figure 31).3) Press or to change the setting. Selectone of the following settings.1) Standard2) High. We recommend using this setting.FORMATTING THE COMPACT FLASH CARD<strong>Cuddeback</strong> will automatically format theCompact Flash card if required. However, youcan also manually format the card.1) Press until [Utilities? C = Yes] is displayed.2) Press [Sense Level] is displayed.3) Press [Format Card? C = Yes] is displayed.TIP - Detection performancevaries with air temperatures andanimal size. If you photographmore small animals than youwould like, or see more blankimages, lower the sensitivity.Blank images are typically causedby very fast moving animals andbirds. Setting a sensitivity level ofStandard will reduce these occurrences.However, because a digitalimage does not cost anything, werecommend using the high settingand allow for the few blankimages that may occur.Sense LeveHighFigure 31“I thought color, balance and the woodspond in the background make it anexceptional photo. Thanks <strong>Cuddeback</strong>.”Gene Wensel, Libertyville, IA“I set up my camera over a scrape andcaught this bruiser licking his chops,literally! Another great buck caughtby <strong>Cuddeback</strong>...”Chad Hayes, Portage, WI4) Press if you want to format the CompactFlash card. Press to continue withoutformatting the card.5) The display will show [Confirm? C = Yes].6) To confirm that you really want to format thecard, press again.7) [Please wait] will be displayed. When formattingis complete [DONE] will be displayed.TIP - Formatting will completelyerase all files from the CompactFlash card and all IMAGES CANNEVER BE RECOVERED.2021
When to Format a Compact Flash Card1) Format your card when you want to erase all images and other files on the card.2) If you experience problems with a Compact Flash card formatting the card willgenerally correct the problem.3) If you are using a card that was previously used in some other product (camera,computer, etc.), you should format the card before using it.UtilitiesC = YesFigure 34DIAGNOSTICS DISPLAY<strong>Cuddeback</strong> can display diagnostic informationthat can assist when troubleshooting<strong>Cuddeback</strong>. You will seldom, if ever, need thisinformation.1) Press until [Utilities? C = Yes] isdisplayed. (figure 34)2) Press . The display will prompt[Sense Level].3) Press numerous times until a series ofnumbers and letters are displayed. Thosenumbers are described below.4) Press again to cancel this display andadvance to the model display(described next).The M number is a 3 digit number that willchange as activity is sensed. A reading around125 indicates no activity, readings above andbelow 125 indicates activity.The A number is a 3 digit number thatindicates the amount of ambient light - 0indicates dark and 255 indicates full light.The B number is a 3 digit number thatindicates the condition of the batteries, thelarger the number the stronger the batteries.Range is 90 to about 140.The T number is a 3 digit number that representsthe internal temperature of theelectronics (figure 35).DISPLAYING THE MODEL OF CUDDEBACK<strong>Cuddeback</strong> model and version is displayed.The top line of the display shows the <strong>Cuddeback</strong>model. The bottom line shows the softwareversion (figure 36). Press to continue.TECHNICAL INFORMATIONHow <strong>Cuddeback</strong> Saves ImagesImages taken with your <strong>Cuddeback</strong> cameraare stored in <strong>Cuddeback</strong>'s internal memory oron a Compact Flash card. <strong>Cuddeback</strong> doesnot include a Compact Flash card. Cards arereadily available from most stores that selldigital cameras.M117A034B141T013M - motion sensor fieldA - ambient sensor fieldB - battery level fieldT - temperature field<strong>Excite</strong>D86 A04Figure 35Figure 362223
Using <strong>Cuddeback</strong> without a Compact Flash cardWhen <strong>Cuddeback</strong> is used without a Compact Flash card, images are stored in<strong>Cuddeback</strong>'s internal image memory. Approximately 20 images can be saved. Imageresolution is reduced when <strong>Cuddeback</strong> is operated without a Compact Flash card.Images can be transferred from internal memory to a Compact Flash card. Set the slideswitch to OFF. Insert a CF card, slide the switch to ON. Wait until the date & time aredisplayed. The internal images have now been copied to the CF card.IMAGE & EVENT FILE FORMATThe <strong>Cuddeback</strong> Compact Flash folder structure is as follows:\DCIM\100CUDDY\event.txtDirectory where images are savedEvent file is saved in the root folderImages are named in the format CDY_0001.JPG. The number will increment witheach image.File System - FAT (FAT16) and FAT32Personal Computers (PCs) and digital cameras will either use a FAT (also referred to asFAT16) or a FAT32 file system on the Compact Flash card. <strong>Cuddeback</strong> is compatiblewith both file systems.1) You should not have to worry about the file system unless you have problemswith a digital camera reading the card. If this happens, format your CompactFlash card in the digital camera first and then install the card into your<strong>Cuddeback</strong>.2) The default file system for the <strong>Cuddeback</strong> is FAT32. <strong>Cuddeback</strong> will format 64 MBcards and higher as FAT32. Most new digital cameras will use the FAT32 file system.3) Some digital cameras use the FAT or FAT16 file system. If you want to read<strong>Cuddeback</strong> images with these cameras, you should format the CF card in the digitalcamera and not with the <strong>Cuddeback</strong> camera.4) You can also format your CF cards with your PC. You can use either FAT or FAT32formats. We recommend you use FAT32 unless you need to view your images on adevice that does not support FAT32.24DETECTION ZONE & SENSITIVITY ADJUSTMENT<strong>Cuddeback</strong> can detect an animal up to 100 feet. However, this detection range isdependent upon ambient air temperatures. The cooler the temperatures the farther<strong>Cuddeback</strong> can sense an animal. In very hot weather (above 80° F), the sensor mayonly sense up to 20 feet. You can change the sensitivity of <strong>Cuddeback</strong>'smotion/heat sensor using the method described on page 21.However, you can also adjust the sensitivity by moving a small black removablejumper located below the LCD display. When this jumper is in the lower position,standard sensitivity is selected. When this jumper is in the upper position, highsensitivity is selected. We recommend leaving the jumper in the upper position.In hot weather (above 80° F) you may always want to use the jumper in the upperposition to increase the detection distances. You may need to use a small tweezersto access the jumper. If you lose the jumper, your <strong>Cuddeback</strong> will still function properlywith the sensitivity set to standard. If you are getting false detections, lower thesensitivity using the jumper or software menu.25
TV REQUIREMENTSYou can use a portable TV or Camcorder to view images in the field. You willneed: 1) a portable TV with a built in video-in connector, 2) a patch cord to attachthe TV to the <strong>Cuddeback</strong>'s TV connector (both are available at Radio Shack andother electronic stores). The patch cord must have an RCA jack on one end toattach to <strong>Cuddeback</strong>, and the opposite cable end must have a connector compatiblewith the portable TV you select. We recommend you bring your <strong>Cuddeback</strong> tothe TV retailer so he can assist in getting you the correct cable. Radio Shack has aselection of TVs and cables that will work with your <strong>Cuddeback</strong>.Images displayed on the TV/camcorder will be at a low resolution. Best imageresolution will be obtained on your computer display or on printed images.© Non Typical, Inc. 2007<strong>Cuddeback</strong> is protected by United States patent # 6,744,980.<strong>Cuddeback</strong> and <strong>Cuddeback</strong> logo are registered trademarks of Non Typical, Inc.TheftStop is a trademark of Non Typical, Inc.Specifications and features subject to change without notice.26LIMITED WARRANTY1. Limited Warranty. Non Typical, Inc. (“Non Typical”) warrants the Product to be free frommalfunctions and defects in both materials and workmanship for one (1) year from the dateof purchase (“Warranty Period”). Non Typical will repair or replace, at its option, the Productif it fails to function properly during the Warranty Period, subject to the conditions and/orlimitations stated herein. Such repair or replacement is your sole remedies under thisLimited Warranty.2. Limitations. Limited Warranty service will not be provided unless the Product, returned inthe manner set forth below, is accompanied by a copy of your original dated sales receipt.Non Typical reserves the right to require you to provide your original dated sales receipt.This Limited Warranty does not cover the following:a. Any defect in or damage to the Product that occurs due to mishandling of the Product;b. Any defect in or damage to the Product that occurs due to repair, modification, or othersimilar activity performed by anyone other than Non Typical;c. Any defect in or damage to the Product that occurs due to transport, dropping, shock, orother similar activity after your purchase of the Product;d. Any defect in or damage to the Product that occurs due to careless or improper storage, orimproper use or maintenance of the Product;e. Any defect in or damage to the Product that occurs due to exhausted batteries;f. Any defect in or damage to the Product that occurs due to sand, mud, or other foreignobjects entering the inside of the Product; org. Any defect in or damage to the Product related to accident, misuse, abuse, use with incompatibleaccessories or attachments, your failure to follow proper operating instructions provided byNon Typical, claims made after the duration of the Warranty Period, or your failure to follow theinstructions set forth below with respect to return of the Product to Non Typical.3. ALL OTHER EXPRESS AND IMPLIED WARRANTIES FOR THE PRODUCT, INCLUDING THEIMPLIED WARRANTIES OF MERCHANTABILITY AND FITNESS FOR A PARTICULAR PURPOSEARE HEREBY DISCLAIMED. NON TYPICAL EXPRESSLY DISCLAIMS ALL WARRANTIES NOTSTATED IN THIS WARRANTY. ANY IMPLIED WARRANTIES THAT MAY BE IMPOSED BY LAWARE LIMITED IN DURATION TO THE TERMS OF THIS EXPRESS LIMITED WARRANTY.27
LIMITED WARRANTY (continued)3. (CONTINUED)SOME JURISDICTIONS DO NOT ALLOW THE EXCLUSION OF IMPLIED WARRANTIES OR LIMI-TATIONS ON HOW LONG AN IMPLIED WARRANTY LASTS, SO THE ABOVE EXCLUSIONS ORLIMITATIONS MAY NOT APPLY TO YOU. IN NO EVENT WILL NON TYPICAL BE LIABLE TO YOU,OR ANY THIRD PARTY, FOR ANY DAMAGES IN EXCESS OF THE PURCHASE PRICE OF THEPRODUCT. IN ADDITION, NON TYPICAL SHALL IN NO EVENT BE LIABLE TO YOU, OR ANYTHIRD PARTY, FOR ANY DIRECT OR INDIRECT DAMAGES OR OTHER SPECIAL, INCIDENTAL,EXEMPLARY OR CONSEQUENTIAL DAMAGES ARISING OUT OF THE USE OF OR INABILITY TOUSE THE PRODUCT. SOME JURISDICTIONS DO NOT ALLOW THE EXCLUSION OR LIMITATIONOF INCIDENTAL OR CONSEQUENTIAL DAMAGES FOR SOME PRODUCTS, SO THE EXCLUSIONSOR LIMITATIONS MAY NOT APPLY TO YOU. THIS LIMITED WARRANTY GIVES YOU SPECIFICLEGAL RIGHTS, AND YOU MAY ALSO HAVE OTHER RIGHTS WHICH MAY VARY FROM JURIS-DICTION TO JURISDICTION.4. Notwithstanding any terms of this Limited Warranty to the contrary, no warranty coverageshall be provided for any Product purchased from, through or with the assistance or involvementof any Internet auction web site.OBTAINING SERVICE FOR YOUR PRODUCTSTEP 1: You can get answers to common questions, run a troubleshooting wizard, or authorizea product return on our web site (www.cuddebackdigital.com). Click on product support.STEP 2: Call Non Typical at (715) 762-2260.As a condition of the warranty coverage for your Product, you are required to contact NonTypical by telephone at (715) 762-2260 before returning your Product for service. Do not contactthe dealer from whom you purchased the Product. Returning your Product without firstcalling Non Typical will void this Limited Warranty and will significantly delay service.Service calls should be made during Non Typical normal business hours of Monday throughFriday from 8:00 a.m. to 4:30 p.m., Central Standard Time.STEP 3: Obtain a Return Material Authorization number from Non Typical.If Non Typical's staff instructs you to return your Product, you will be given a RMA number.Your RMA number must be written on the outside of the carton in which you ship the Productto Non Typical. Packages without a RMA number will incur significant service delays.STEP 4: Package your product for shipping and include a copy of your sales receipt.Non Typical is not responsible for damage to your Product due to ineffective packaging or damageto the Product while in transit to Non Typical. You should ship your Product in a sturdycarton with sufficient internal packaging materials to avoid damage. Do not include batterieswithin your Product unless instructed to do so by a Non Typical technician.In order to qualify for service under this Limited Warranty, any Product returned to Non Typical for servicemust be accompanied by a copy of or, if requested by Non Typical, the original dated sales receipt.STEP 5: Return your product to the factory.Ship your product to the factory:Non Typical, Inc.Attn: RMA 860 Park LanePark Falls, WI 54552STEP 6: Non Typical will send you a Post Card.After we receive your Product, we will send you a post card with an estimated return date.You do not need to call us for confirmation that your package has arrived at the factory. If yourProduct is out of warranty, an estimate will be sent to you for approval before repairs are conducted.2829
3031