Instrukcja obsługi - Jula
Instrukcja obsługi - Jula
Instrukcja obsługi - Jula
Create successful ePaper yourself
Turn your PDF publications into a flip-book with our unique Google optimized e-Paper software.
SVENSKAFELSÖKNINGI händelse av ett strömavbrott eller om strömbrytaren trycks in medan istillverkning pågår kan småisstycken bildas och fastna i maskinen så att den automatiska isskopan kärvar. Om detta inträffar:stäng av maskinen, för isskopan försiktigt till det bakre läget, avlägsna isstyckena och starta ommaskinen.Starta om ismaskinen genom att första trycka på STOP-knappen och sedan på START-knappen. Omisskopan inte överför isbitarna till isuppsamlaren när isbitarna släpper från evaporatorfingrarna,samtidigt som M-lampan blinkar, kontrollera om vattenbrickan är horisontell eller balanserad. Om såinte är fallet, tryck försiktigt på isskopan med ett finger. Starta sedan om ismaskinen.Problem Möjliga orsaker ÅtgärderKompressorn arbetar onormaltmed ett surrande ljud.DEFICIENT-lampan tänds.Nätindikatorn är inte tänd.Isbitarna är för stora ochsammanklumpade.Villkoren föristillverkningscykeln äruppfyllda, men ingen istillverkas.Kontrollamporna ICEFULL ochDEFICIENT tänds samtidigt.Nätspänningen är för låg.Det finns inget vatten imaskinen.Bränd säkring / ingen ström.Temperaturen i vattenbehållareneller den omgivande temperaturenär för låg.Köldmedel läcker ellertätningssystemet är blockeratVattenbehållaren vinklas inte.Stäng av ismaskinen och startaden inte förrän nätspänningen ärnormal.Tryck på STOP-knappen, fyll påvatten och tryck sedan på STARTknappenför att starta ommaskinen, eller när vattennivån ärtillräcklig startar maskinen omautomatiskt.Byt ut säkringen / slå påströmmen.Stäng av maskinen och återställistillverkningscykeln. Starta sedanom maskinen.Kontakta din återförsäljare förservice.Kontrollera avseende blockerandeisbitar. Om inga isbitar blockerarmaskinen, kontakta dinåterförsäljare för service.Rätten till ändringar förbehålles. Vid eventuella problem, kontakta vår serviceavdelning på telefon0200-88 55 88.<strong>Jula</strong> AB, Box 363, 532 24 SKARAwww.jula.se6
NORSKNORSKLes bruksanvisningen nøye før bruk!SIKKERHETSANVISNINGERFor å redusere faren for brann, elektriske støt og andre personskader er det viktig at du følgeranvisningene nedenfor når du bruker ismaskinen. Kople ismaskinen til et jordet strømuttak. Fjern ikke jordpluggen fra støpselet. Bruk ikke skjøtekabel. Kople ismaskinen fra strømuttaket før vedlikehold. Bruk ikke strømadapter. Dra ikke i strømkabelen når du skal ta støpselet ut av stikkontakten - hold i støpselet. Bruk ikke ismaskinen hvis den ikke fungerer som den skal eller hvis strømkabelen eller støpselet erskadet på noen måte. Av sikkerhetsårsaker må strømkabelen kun skiftes ut eller repareres av etautorisert serviceverksted. Ta kontakt med forhandleren.1. Indre foring2. Vannbeholder3. Plate for isoppsamling4. Sensor for ”Fullismaskin”5. Isskål6. Vannplate7. Evaporator8. Vanninnløp9. Plugg for vaanntømming10. Kompressor11. Vannpumpe12. Strømkabel13. Lokk14. Kontrollpanel15. VinduMerkespenningSikringKapasitet isproduksjonIsstørrelseKapasitet oppbevaringHøyeffektiv kompressorVolum vannbeholderMål (b x d x h)VektFunksjoner og egenskaperTEKNISKE DATABESKRIVELSEBRUK7220 – 240 V / 50 Hz250 volt AC, 3,15 A, 5 x 20 mm15 – 18 kg per døgn3 størrelser: Små, Middels, Store600 gramKFK-fri (R134a)2,0 liter340 x 410 x 365 mm15 kg Ismaskinens portabilitet gjør den perfekt for bruk på hytta, i båten, på kontoret og på alle andre stederder du trenger å produsere is. Den er mikrodatamaskinbasert og gir rask og enkel produksjon av is.Hver syklus består av følgende trinn:1. Påfylling av vann2. Isproduksjon3. Utslipp av vann4. Frigjøring av isbiter5. Overføring av isbiter6. Oppbevaring av isbiter
NORSKFEILSØKINGVed et strømbrudd eller hvis strømbryteren trykkes inn under isproduksjonen, kan det danne seg småisbiter som fester seg i maskinen slik at det automatiske isskålen setter seg fast. Hvis dette skjer: Slåav maskinen, før isskålen forsiktig til bakre posisjon, fjern isbitene og start maskinen på nytt.Start ismaskinen på nytt ved å trykke på STOP-knappen og deretter på START-knappen. Hvisisskålen ikke overfører isbitene til isoppsamleren når isbitene løsner fra evaporatorfingrene samtidigsom M-lampen blinker, må du kontrollere at vannplaten står horisontalt eller er balansert. Hvis denikke er det, trykker du forsiktig på isskålen med en finger. Start deretter ismaskinen på nytt.Problem Mulige årsaker LøsningKompressoren arbeiderunormalt med en surrende lyd.DEFICIENT-lampen tennes.Strømindikatoren lyser ikke.Isbitene er for store ogsammenklumpede.Vilkårene forisproduksjonssyklusen eroppfylt, men det lages ingen is.Kontrollampene ICEFULL ogDEFICIENT tennes samtidig.Nettspenningen er for lav.Det er ikke vann i maskinen.Sikring gått / ingen strøm.Temperaturen i vannbeholdereneller omgivelsestemperaturen erfor lav.Det lekker kjølemiddel ellertetningssysemet er blokkert.Vannbeholderen vinkles ikke.Slå av ismaskinen, og start denikke igjen før nettspenningen ernormal.Trykk på STOP-knappen, fyll påvann og trykk deretter på STARTknappenfor å starte maskinen pånytt, eller når vannivået ertilstrekkelig, starter maskinenautomatisk på nytt igjen.Skift ut sikringen / slå påstrømmen.Slå av maskinen og tilbakestillisproduksjonssyklusen. Startderetter ismaskinen på nytt.Ta kontakt med forhandleren for åfå utført service.Kontroller med tanke påblokkerende isbiter. Hvis ingenisbiter blokkerer maskinen, må dukontakte forhandleren for å fåutført service.Med forbehold om endringer. Ved eventuelle problemer kan du kontakte vår serviceavdeling på telefon67 90 01 34.<strong>Jula</strong> Norge AS, Solheimsveien 6–8, 1471 LØRENSKOGwww.jula.no10
POLSKIPOLSKIZASADY BEZPIECZEŃSTWAPrzed użyciem uważnie przeczytaj instrukcję obsługi!W celu zminimalizowania ryzyka pożaru, porażenia prądem i innych obrażeń ciała ważne jestprzestrzeganie poniższych wskazówek podczas korzystania z kostkarki. Kostkarkę należy podłączyć do uziemionego gniazdka elektrycznego. Nie usuwaj bolca uziemiającego z wtyczki. Nie używaj przedłużaczy. Przed przystąpieniem do konserwacji odłącz kostkarkę z gniazdka. Nie używaj zasilaczy sieciowych. Nigdy nie ciągnij za kabel zasilający w celu wyciągnięcia wtyczki z gniazdka – chwytaj za wtyczkę. Nie korzystaj z kostkarki, jeśli nie działa prawidłowo lub jeśli kabel zasilający albo wtyczka sąuszkodzone. Ze względów bezpieczeństwa kabel zasilający może zostać poddany wymianie lubnaprawie wyłącznie w autoryzowanym serwisie. Zasięgnij porady swojego sprzedawcy.1. Wewnętrzna izolacja2. Zbiornik wody3. Tacka do zbierania lodu4. Czujnik „Pełnejkostkarki”5. Nabierak do lodu6. Tacka na wodę7. Parownik8. Dopływ wody9. Korek do spuszczaniawody10. Sprężarka11. Pompa wody12. Kabel zasilający13. Pokrywa14. Panel sterowania15. OknoFunkcje i właściwościNapięcie znamionoweBezpiecznikIlość wytwarzanego loduRozmiar kostekSkładowana ilośćWysokowydajna sprężarkaPojemność zbiornika na wodęWymiary (szer. x gł. x wys.)MasaDANE TECHNICZNEOPISOBSŁUGA11220–240 V / 50 Hz250 V AC, 3,15 A, 5 x 20 mm15–18 kg na dobę3 rozmiary: Małe, Średnie, Duże600 gramówBez freonu (R134a)2,0 litry340 x 410 x 365 mm15 kg Możliwość przenoszenia kostkarki sprawia, że jest ona idealna do zastosowania w domkuletniskowym, na łodzi, w biurze i w innych miejscach, gdzie przydatny jest lód. Kostkarka wyposażona jest w mikrokomputer i oferuje szybkie i proste wytwarzanie lodu.Każdy cykl składa się z następujących kroków:1. Uzupełnianie wody2. Wytwarzanie lodu3. Wylewanie pozostałej wody4. Uwalnianie kostek lodu5. Transport kostek lodu6. Składowanie kostek lodu
POLSKINiezawodna i praktyczna w użyciu.Lampki kontrolne i sygnały dźwiękowe informują, kiedy lód jest gotowy i kiedy należy napełnićzbiornik wody.Możliwość wytwarzania kostek lodu w trzech rozmiarach. Na panelu sterowania możesz wybraćmałe, średnie lub duże kostki.Panel sterowaniaSTART: Naciśnij ten przycisk, aby włączyć kostkarkę. Przycisk używany jest także do uruchamianiaprocesu wytwarzania lodu.STOP: Naciśnij ten przycisk, aby wyłączyć kostkarkę.SELECT: Naciśnij ten przycisk, a następnie przycisk S, aby otrzymać małe kostki (Small), przycisk M,aby otrzymać średnie kostki (Medium) lub przyciskL, aby uzyskać duże kostki (Large). Wybrana opcjazostanie zachowana do momentu wyboru innej lub odłączenia zasilania. Ustawienie standardowe to M.Zalecamy, aby wybrać S, gdy temperatura otoczenia wynosi poniżej 15ºC.DEFICIENT: Ta lampka kontrolna zapala się przy towarzyszącym sygnale dźwiękowym ”„DI”, kiedynależy napełnić zbiornik wody. Naciśnij przycisk STOP, uzupełnij wodę, a następnie przycisk START, abyponownie uruchomić urządzenie.ICEFULL: Ta lampka kontrolna zapala się przy towarzyszącym sygnale dźwiękowym „DI - DI”, gdykostkarka zapełniona jest lodem. Naciśnij przycisk STOP, wyjmij trochę kostek lodu, a następnie naciśnijprzycisk START, aby ponownie uruchomić urządzenie.Lokalizacja i warunki przestrzennePodczas transportu nie należy przechylać kostkarki pod kątemwiększym niż 45 stopni.Nie obracaj kostkarki. Może to spowodować problemy ze sprężarkąi systemem uszczelniającym.Umieść urządzenie pionowo na płaskim, stabilnym podłożu.Dopilnuj, aby ponad kostkarką i wokół niej było co najmniej 15 cmwolnej przestrzeni, co zapewni dostateczną wentylację.Po ustawieniu kostkarki na miejscu odczekaj dwie godziny, zanimużyjesz jej po raz pierwszy.Regularnie czyść izolację wewnętrzną, tackę do zbierania lodu,zbiornik wody i parownik.Nie ustawiaj kostkarki w pobliżu pieców, grzejników lub innych źródełciepła.Przed pierwszym użyciemCzujnik temperatury Podczas transportu nie należy przechylać urządzenia o więcej niż 45°. Nie obracaj urządzeniaspodem do góry, może to uszkodzić sprężarkę i/lub system uszczelniający. Usuń całe opakowanie. Sprawdź urządzenie, kabel, wtyczkę i wszystkie akcesoria w celu wykryciaewentualnych uszkodzeń, które mogły się zdarzyć podczas transportu. Umieść urządzenie na płaskim, poziomym podłożu. Pozostaw 150 mm wolnej przestrzeni nadurządzeniem, za nim i po bokach, aby zapewnić wystarczającą wentylację. Nie umieszczajurządzenia w pobliżu źródeł ciepła. Po umieszczeniu urządzenia w miejscu użytkowania otwórz przednie drzwiczki na co najmniej 2godziny przed pierwszym użyciem urządzenia. Sprawdź, czy napięcie sieciowe zgadza się z napięciem na tabliczce znamionowej narzędzia.12
POLSKIPodczas trzech pierwszych cykli kostki lodu mogą być małe i/lub nieregularne.Jeżeli w ciągu dwóch cykli woda nie zostanie przepompowana do miski, a w zbiorniku znajduje sięwystarczająca jej ilość, otwórz klapkę spustową i wypuść kilka kropel wody.Uruchamianie kostkarki1. Otwórz pokrywę i napełnij zbiornik wodą. Dopilnuj, by poziom wody nie znalazł się ponad tacką dozbierania lodu.2. Naciśnij przycisk START.3. Wybierz wielkość kostek, naciskając przycisk SELECT, a następnie przycisk odpowiadający żądanejwielkości (S, M lub L).Sposób funkcjonowania kostkarkiWoda pompowana jest ze zbiornika do tacki na wodę. Trwa to około 25 sekund.Rozpoczyna się cykl produkcji lodu. Parownik w tacce na wodę rozpoczyna wytwarzać lód nawypustkach parownika.Zakończenie produkcji lodu zajmuje około 8–12 minut, w zależności od wybranej wielkości kostek.Następnie tacka na wodę pochyla się pod kątem do przodu, aby pozostała woda mogła spłynąćz powrotem do zbiornika wody, a kostki lodu zostały uwolnione z wypustek. Przy wypuszczaniukostek lodu słychać charakterystyczny dźwięk.Po około 30 sekundach tacka na wodę wraca do pozycji startowej, po czym nabierak do loduwprowadza kostki do części składowej kostkarki. Po powrocie tacki na lód do pozycji początkowejrozpoczyna się kolejny cykl produkcji lodu.ObsługaRegularnie sprawdzaj poziom wody w zbiorniku. W przypadku wyczerpania się wody zapali sięlampka DEFICIENT, a kostkarka wyłączy się. Naciśnij przycisk STOP i napełnij zbiornik wodą. Gdylampka zgaśnie, odczekaj trzy minuty, zanim wciśniesz przycisk START. Kostkarka zaczniewytwarzać lód. Jeśli poziom wody jest wystarczający, urządzenie uruchomi się automatycznie.Gdy kostki w pojemniku na lód osiągną poziom czujnika PEŁNA KOSTKARKA, urządzenie wyłączysię i zapali się lampka ICEFULL. Gdy poziom lodu znajdzie się poniżej czujnika, a temperaturaczujnika wzrośnie do około 4ºC, urządzenie ponownie przejdzie do cyklu produkcji lodu.Im większy rozmiar kostek wybierzesz, tym dłużej potrwa cykl produkcji lodu. Jeśli temperaturaotoczenia nie przekracza 15ºC, należy wybrać małe lub średnie kostki, aby uniknąć tworzenia sięgrudek.Dla osiągnięcia najlepszych rezultatów należy używać wody o temperaturze pomiędzy 7 a 35ºC przytemperaturze otoczenia od 15 do 25ºC.Uwagi Napełniaj zbiornik na wodę wyłącznie czystą wodą pitną. To normalne, że powierzchnie sprężarki i kondensatora osiągają temperatury pomiędzy 70 a 90ºCpodczas pracy kostkarki. Dlatego powierzchnie otaczające urządzenie mogą się znacznie nagrzewać. Szybki proces zamrażania powoduje, że kostki lodu mogą wyglądać trochę „mętnie” ze względu nazawarte w nich powietrze. Nie wpływa to jednak na jakość i smak lodu.KONSERWACJAAby zapewnić otrzymywanie czystych kostek lodu, należy wymieniać wodę w zbiorniku co24 godziny.Jeżeli sprężarka wyłączy się z jakiejś przyczyny, np. przy wyczerpaniu się wody w zbiorniku, przyprzepełnieniu urządzenia lodem lub przy przerwie w dostawie prądu, odczekaj trzy minuty, nimponownie włączysz urządzenie.Odkręć korek spustowy i opróżnij zbiornik wody, jeśli nie będziesz używać kostkarki przez dłuższyokres czasu. Zakręć korek po opróżnieniu zbiornika.Przepłucz zbiornik na wodę przed pierwszym użyciem i po dłuższej przerwie.Regularnie czyść kostkarkę. Przed czyszczeniem zawsze odłączaj kostkarkę od zasilania i usuwajkostki lodu. Do czyszczenia wnętrza i obudowy kostkarki używaj roztworu wody z octem.Nie rozpylaj na urządzenie substancji chemicznych i cieczy, takich jak benzyna czy olej.Po czyszczeniu dokładnie osusz urządzenie.13
POLSKIWYKRYWANIE USTEREKW przypadku przerwy w dostawie prądu lub wciśnięciu przełącznika w trakcie cyklu produkcji lodumogą powstawać małe kawałki lodu, które utkną w urządzeniu i spowodują zakleszczenie sięautomatycznego nabieraka lodu. W takim przypadku: wyłącz urządzenie, ostrożnie przesuń nabierakdo tylnej pozycji, usuń kawałki lodu i uruchom urządzenie ponownie.Uruchom urządzenie ponownie, wciskając najpierw przycisk STOP, a następnie przycisk START.Jeżeli nabierak lodu nie przenosi kostek do pojemnika na lód po uwolnieniu ich z wypustekparownika, a jednocześnie miga lampka M, sprawdź, czy tacka na wodę znajduje się w pozycjipoziomej i czy jest wyważona. Jeśli nie, ostrożnie dociśnij nabierak lodu palcem. Następnie uruchomkostkarkę ponownie.Usterka Możliwe przyczyny Środki zaradczeSprężarka dziwnie pracuje,wydając brzęczące dźwięki.Pali się lampka DEFICIENT.Wskaźnik zasilania nie świecisię.Kostki lodu są za duże i zbitew grudki.Warunki dla rozpoczęciaprodukcji lodu są spełnione, alelód nie jest wytwarzany.Lampki kontrolne ICEFULLi DEFICIENT zapalają sięjednocześnie.Zbyt niskie napięcie zasilania.Brak wody w urządzeniu.Spalony bezpiecznik / brakprądu.Zbyt niska temperaturaw zbiorniku wody lubtemperatura otoczenia.Wyciek czynnika chłodniczegolub zablokowany systemuszczelniający.Zbiornik wody nie nachyla siępod kątem.Wyłącz kostkarkę i uruchom jąponownie dopiero wtedy, gdynapięcie będzie właściwe.Naciśnij przycisk STOP, uzupełnijwodę, a następnie naciśnij START,aby uruchomić urządzenieponownie. Gdy poziom wody jestwystarczający, urządzenieuruchomi się automatycznie.Wymień bezpiecznik / włącz prąd.Wyłącz urządzenie i zresetuj cyklprodukcji lodu. Następnie uruchomkostkarkę ponownie.Skontaktuj się ze sprzedawcąw celu dokonania serwisu.Sprawdź urządzenie pod kątemzablokowanych kostek lodu. Jeżelikostki lodu nie zablokowałyurządzenia, skontaktuj się zesprzedawcą w celu dokonaniaserwisu.Z zastrzeżeniem prawa do zmian. W razie ewentualnych problemów skontaktuj się telefoniczniez naszym działem obsługi klienta pod numerem 801 600 500.<strong>Jula</strong> Poland Sp. z o.o., ul. Malborska 49, 03-286 Warszawa, Polskawww.jula.pl14
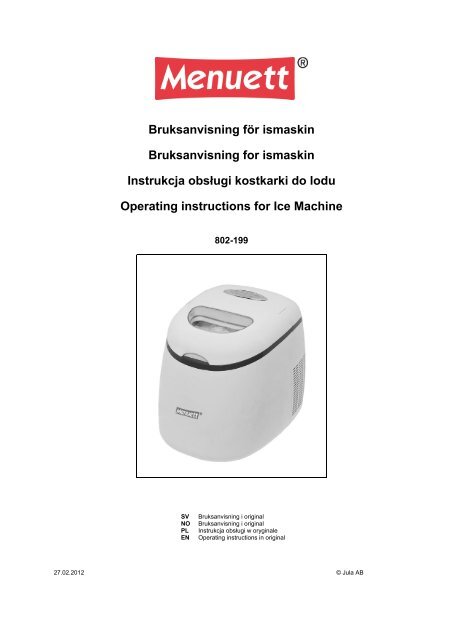
ENGLISHENGLISHSAFETY INSTRUCTIONSRead these instructions carefully before use!It is important to follow the instructions below when using the ice machine to reduce the risk of fire,electric shock and other personal injury. Connect the ice machine to an earthed power outlet. Do not remove the earth pin from the plug. Do not use an extension cable. Unplug the ice machine from the power outlet before maintenance. Do not use a mains adapter. Never pull on the power cord to disconnect the plug from the socket. Always hold the plug to removeit. Do not use the ice machine if it is not working correctly or if the power cord and/or plug are damagedin any way. For safety reasons, the power cord must only be replaced or repaired by an authorisedservice centre. Consult your dealer.1. Inner lining2. Water reservoir3. Tray for ice collection4. Sensor for “Full icemachine”5. Ice scoop6. Water tray7. Evaporator8. Water intake9. Plug for draining water10. Compressor11. Water pump12. Power cord13. Lid14. Control panel15. WindowFunctions and featuresRated voltageFuseCapacity, ice productionIce sizeCapacity, storageHighly efficient compressorVolume, water reservoirDimensions (w x d x h)WeightTECHNICAL DATADESCRIPTIONOPERATION15220 – 240V/50 Hz250 volt AC, 3.15 A, 5 x 20 mm15 – 18 kg per day3 sizes: Small, Medium, Large600 gramsCFC free (R134a)2.0 litres340 x 410 x 365 mm15 kg This ice machine is portable, making it ideal for use in a holiday cottage, on the boat, at the office andwherever you need to make ice. Microcomputer-based, offering fast and simple ice production.Each cycle comprises the following steps:1. Filling with water2. Ice production3. Discharge of water4. Releasing ice cubes5. Transferring ice cubes
ENGLISH6. Storing ice cubes Reliable operation and practical to use. The control lamps and audio signals indicate when the ice is ready and when the water container isempty and needs to be filled. The ice cubes can be made in three sizes. Choose small, medium or large ice cubes on the controlpanel.Control panelSTART: Press this button to turn on the ice machine. The button is also used to activate ice production.STOP: Press this button to turn off the ice machine.SELECT: Press this button and then the S button to produce small ice cubes, the M button for mediumice cubes and the L button for large ice cubes. The selected setting is retained until it is changed or thereis a power failure. The standard setting is M. We recommend that you select S when the ambienttemperature is below 15°C.DEFICIENT: This control lamp comes on and the “DI” audio signal is issued when you need to fill up thewater reservoir. Press the STOP button, fill with water and then press the START button to restart the icemachine.ICEFULL: This control lamp comes on and the “DI - DI” audio signal is issued when the ice machine isfull of ice cubes. Press the STOP button, remove some ice cubes and then press the START button torestart the ice machine.Location and space requirementsThe ice machine must not be tipped more than 45° when transported.Do not turn the ice machine upside down. Problems can arise with thecompressor and the sealing system.Place the ice machine upright on a flat, firm surface.Make sure that there is at least 15 cm of free space above and aroundthe ice machine to ensure adequate ventilation.When you have positioned the ice machine, wait for two hours beforeusing it for the first time.Clean the inner lining, the ice collection tray, the water reservoir andthe evaporator regularly.Do not place the ice machine near an oven, a radiator or any otherheat source.Temperature sensorBefore/First Use of Your Ice MakerDuring transportation, the incline angle of the cabinet should not be over 45° .Do not turn the Icemaker upside down. As this may damage the compressor and sealed system.Remove all packing material and carefully check your ice maker to ensure it is in good condition andthat there is no damage to the ice maker or power cord and plug.The Ice maker should be placed horizontally on a level surface.To ensure proper ventilation for yourIce maker allow 150mm of space at the top, the back and on each side. Do not install the Ice makernear an oven, radiator, or any other heat source.Before using the Ice maker for the first time, please wait 2 hours after positioning it, and keep thefront lid open for at least 2hoursEnsure that the voltage indicated on the ice maker corresponds with the voltage in your home.16
ENGLISHFor the first three cycles,the ice may be small and irregular in size.If no water is pumped up to the water tray over two cycles but the water in water tank is enough,thenplease open the drain cap,and let several drops water runs out.Starting the ice machine1. Open the lid and fill the water reservoir with water. Ensure that the water level is not above the icecollection tray.2. Press the START button.3. Select an ice size by pressing the SELECT button and then the button for the required size (S, M orL).How the ice machine worksWater is pumped into the water tray from the water reservoir. This takes approx. 25 seconds.The ice production cycle starts. The evaporator in the water tray starts to form ice on the evaporatorfingers.It takes 8 to 12 minutes, depending on the selected ice size, to complete the ice production cycle.After this, the water tray is angled forward, the remaining water runs back to the water reservoir andthe ice cubes are released from the fingers. You will hear a sound when the ice cubes come loose.After approx. 30 seconds the water tray is angled backwards, after which the ice scoop moves the icecubes into the ice collection section. The next ice production cycle begins when the ice tray hasreturned to the starting position.OperationRegularly check the water level in the reservoir. If the water runs out, the DEFICIENT control lampcomes on and the ice machine is turned off. Press the STOP button and fill the water reservoir. Whenthe control lamp goes out, wait for three minutes before pressing the START button. The ice machinestarts to produce ice, or when the water level is sufficient the machine restarts automatically.When the ice cubes in the ice container reach the FULL ICE MACHINE sensor, the ice machine turnsoff and the ICEFULL lamp comes on. When the ice level is below the sensor and the sensor’stemperature rises to approx 4°C, the machine restarts the ice production cycle.The larger the ice cube size you select, the longer it takes to complete the ice production cycle. Whenthe ambient temperature is below 15°C, you should select small or medium ice cubes to prevent themfrom sticking together.For optimum results, the water temperature should be between 7°C and 35°C and the ambienttemperature between 15°C and 25°C.NotesOnly fill the water reservoir with clean drinking water.It is normal for the surfaces of the compressor and the condenser to reach temperatures of 70°C to90°C when the ice machine is in use. Surrounding surfaces can therefore become very hot.The rapid freezing process means that the ice cubes may look slightly “cloudy” due to air beingtrapped in the ice cubes. This does not affect the quality or taste of the ice cubes.MAINTENANCEReplace the water in the reservoir every 24 hours to ensure you get clean ice cubes.If the compressor stops for any reason, e.g. if the water runs out, there is too much ice in the machineor there is a power failure, wait for three minutes before restarting the machine.Remove the drain plug and empty the water reservoir if you do not intend to use the ice machine foran extended period. Screw the plug back in after emptying.Rinse out the water reservoir before using the machine for the first time and after long breaks.Clean the ice machine regularly. Always unplug the ice machine from the power outlet and removethe ice cubes before cleaning. Use a solution of water and vinegar to clean the inside and outside ofthe ice machine.Do not spray chemicals or liquids such as acid, petrol or oil onto the machine.Dry the machine carefully after cleaning.17
ENGLISHTROUBLESHOOTINGIn the event of a power failure or if the power switch has been pressed while ice production is inprogress, small pieces of ice may form and stick inside in the machine, causing the automatic icescoop to seize. If this happens: Turn off the machine, move the ice scoop carefully to the rearposition, remove the pieces of ice and restart the machine.Restart the ice machine by first pressing the STOP button and then the START button. If the icescoop does not transfer the ice cubes to the ice collector when the ice cubes are released from theevaporator fingers, at the same time as the M lamp flashes, check whether the water tray is horizontalor balanced. If this is not the case, carefully press the ice scoop with your finger. Then restart the icemachine.Problem Possible cause ActionThe compressor is workingabnormally with a buzzingsound.The mains voltage is too low.The DEFICIENT lamp comeson.The power indicator is not lit.The ice cubes are too large andstuck together in clumps.The conditions for the iceproduction cycle are right, butno ice is being produced.The ICEFULL and DEFICIENTlamps are lit simultaneously.There is no water in themachine.Burnt fuse/no power.The temperature in the waterreservoir or the ambienttemperature is too low.Refrigerant is leaking or thesealing system is blocked.The water reservoir is notangled.Turn off the ice machine and donot restart it until the mains voltageis normal.Press the STOP button, fill withwater and then press the STARTbutton to restart the machine, orwhen the water level is sufficient,the machine will restartautomatically.Replace the fuse/turn on thepower.Turn off the machine and reset theice production cycle. Then restartthe machine.Contact your dealer for a service.Check for ice cube blockage. If nocubes are blocking the machine,contact your dealer for a service.<strong>Jula</strong> reserves the right to make changes. In the event of problems, please contact our servicedepartment.www.jula.com18


