
You also want an ePaper? Increase the reach of your titles
YUMPU automatically turns print PDFs into web optimized ePapers that Google loves.
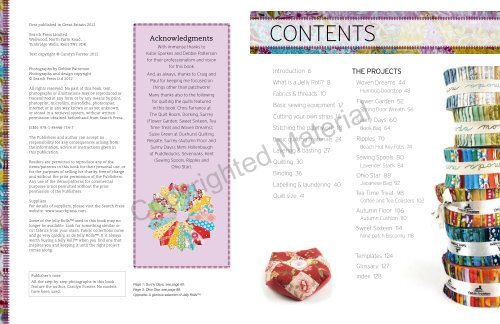
First published in Great Britain 2012<strong>Search</strong> <strong>Press</strong> LimitedWellwood, North Farm Road,Tunbridge Wells, Kent TN2 3DRText copyright © Carolyn Forster 2012Photographs by Debbie PattersonPhotographs and design copyright© <strong>Search</strong> <strong>Press</strong> Ltd 2012All rights reserved. No part of this book, text,photographs or illustrations may be reproduced ortransmitted in any form or by any means by print,photoprint, microfilm, microfiche, photocopier,internet or in any way known or as yet unknown,or stored in a retrieval system, without writtenpermission obtained beforehand from <strong>Search</strong> <strong>Press</strong>.ISBN: 978-1-84448-754-7The Publishers and author can accept noresponsibility for any consequences arising fromthe information, advice or instructions given inthis publication.Readers are permitted to reproduce any of theitems/patterns in this book for their personal use, orfor the purposes of selling for charity, free of chargeand without the prior permission of the Publishers.Any use of the items/patterns for commercialpurposes is not permitted without the priorpermission of the Publishers.SuppliersFor details of suppliers, please visit the <strong>Search</strong> <strong>Press</strong>website: www.searchpress.com.Some of the Jelly Rolls used in this book may nolonger be available. <strong>Look</strong> for something similar orcut fabrics from your stash. Fabric collections comeand go very quickly, as do Jelly Rolls. It is alwaysworth buying a Jelly Roll when you find one thatinspires you and keeping it until the right projectcomes along.Publisher’s noteAll the step-by-step photographs in this bookfeature the author, Carolyn Forster. No modelshave been used.AcknowledgmentsWith immense thanks toKatie Sparkes and Debbie Pattersonfor their professionalism and visionfor this book.And, as always, thanks to Craig andPaul for keeping me focused onthings other than patchwork!Many thanks also to the followingfor quilting the quilts featuredin this book: Chris Farrance atThe Quilt Room, Dorking, Surrey(Flower Garden, Sweet Sixteen, TeaTime Treat and Woven Dreams);Susie Green at Duxhurst Quilting,Reigate, Surrey (Autumn Floor andSunny Days); Mimi Hollenbaughat Puddleducks, Sevenoaks, Kent(Sewing Spools, Ripples andOhio Star).Page 1: Sunny Days, see page 60.Page 3: Ohio Star, see page 88.Opposite: A glorious selection of Jelly Rolls.CONTENTSIntroduction 6What is a Jelly Roll? 8Fabrics & threads 10Basic sewing equipment 12Cutting your own strips 14Stitching the patchwork 18Basic quilting materials 24Layering & basting 27Quilting 30Binding 36Labelling & laundering 40Quilt size 41Copyrighted MaterialTHE PROJECTSWoven Dreams 44Humbug Doorstop 48Flower Garden 52Spring Door Wreath 56Sunny Days 60Book Bag 64Ripples 70Beach Hut Key Fobs 74Sewing Spools 80Lavender Stack 84Ohio Star 88Japanese Bag 92Tea Time Treat 98Coffee and Tea Coasters 102Autumn Floor 106Autumn Cushion 110Sweet Sixteen 114Nine-patch Biscornu 118Templates 124Glossary 127Index 128
CUTTING YOUROWN STRIPSIf you already have a stash of fabrics that you want to use for a JellyRoll project, then there is nothing to stop you cutting your own stripsfrom them. The easiest way to do this is to use a rotary cutter, a cuttingmat and a ruler that is 2½in (6.5cm) wide. This makes the measurementyou want easy to see, and ensures quick and accurate cutting. Ofcourse, you can use whatever width of ruler you have to hand, inwhich case you might find it helpful to mark the line that you will mostfrequently be using with some tape to draw your eye to it easily.Follow the steps below to ensure neat and accurate cutting. Notethat these instructions assume that you are right handed and work fromleft to right; if you are left handed, work from right to left.Begin by pre-washing, drying and ironing the fabric. Hold it up withthe two selvedges together and make sure the fabric is not twisted. Ifit is, move the fabric to straighten it out. This may mean that the cutedges are now not even, but these will be trimmed off in any case.CUTTING EQUIPMENTRulersVarious specialist acrylic rulers are available thatwork with a rotary cutter and self-healing cutting matto cut the fabric easily and quickly in layers wherenecessary. The various types that you could usefor the projects in this book are described with therelevant project instructions.Rotary cutterLike a pizza wheel, a rotary cutter cuts through up toabout eight layers of fabric at a time. Keep the bladesharp and free of nicks, and cut through as many oras few layers as you are comfortable with.NoteMost fabrics that aredesigned for patchwork aresold in widths of 42–44in(106–112cm). This is usefulto remember if you arebuying fabric especially forthis purpose.1Fold your fabric in half as accurately as possible,wrong sides facing and with the selvedges together,and lay it on the cutting mat. Place the fabric with theselvedges at the bottom and aligned with a horizontalline on the background grid.Copyrighted Material3Lift off the ruler and remove the fabric. Replace theruler so that it lies 2½in (6.5cm) from the edge andcut your first strip.2Use the ruler and cutter to trim off the raw edgeon the left-hand side: align the ruler with avertical line on the grid and trim off a straight edgeapproximately ¾in (2cm) in from the side. Hold the rulerin place and push the cutter away from you, startingat the selvedge. Keep the cutter firmly against the rulerwhile cutting to ensure a straight and even edge.4Remove the ruler and put the fabric strip to oneside. Replace the ruler and continue, cutting asmany strips as you need.Self-healing cutting matThis is a purpose-made mat, available from craftstores, on which to cut your fabric using the rulersand cutters. It is marked into a grid that you can useto help you measure and cut the fabric in straightlines. Buy the largest size you can afford, as thelarger the cutting mat, the less you will need to foldyour fabric.A selection of rulers, a rotary cutter and cutting mat.NoteYou can pile up to eight layers of fabrictogether for cutting, but you will need a sharpblade and a firm hand. Work with as many oras few layers as you are comfortable with.14 15
STITCHING THEPATCHWORKHere are some hints and tips to help you whenstitching your patchwork on the sewing machine.Before you beginRead through all the instructions before you start ona project. Make sure you have all the materials andequipment you need, and that you are familiar withthe techniques used. For the projects in this book:• all seam allowances are ¼in (0.5cm) unlessotherwise stated• all fabric cut off the bolt is cut across the width,including your Jelly Roll strips if you arecutting these yourself (see page 14), unlessotherwise stated• all fabric quantities are based on a 42in(106.5cm) useable width of fabric.Threading the needleWhen threading the needle, I always find it easier tohold the thread and put the needle over the thread,rather than trying to poke a piece of thread throughthe needle’s eye. If you find threading the needledifficult, then invest in a needle threader. For pullingthe needle through the layers when using some ofthe bulkier threads, use a ‘grabber’ to help.Stitch lengthWhen machine stitching, set your straight-stitchlength to 11 or 2.0 to 2.5, depending on how yourmachine is calibrated. It needs to be small enoughto hold the fabrics together, but large enough tounpick easily, if the need arises.When you are sewing fabric strips together thatwill then be cut and re-sewn (see page 20), youmay want to set the stitch length a little smaller thanusual so that the stitches do not come undone easilywhen they are cut through.<strong>Press</strong>ingThis is done with a hot iron and a pressing pad orironing board. Whether you use steam or not is up toyou; some people think it distorts the work, but thishasn’t been my experience.I do press my work from the front and not fromthe back. I find that by doing this I eliminate the littlepleats that often occur when you press from theback, which then have to be removed by pressingfrom the front, so the process takes twice as long!Take care to position the work and the seam youwant to press correctly; you will then find you canpress in one stroke.Finger pressingFingerpressing.Finger pressing (shown above) involves squeezingthe fabric between your fingers and is a quickmethod of marking the fabric. It leaves a semipermanentcrease and is a more accurate way ofmarking than pinning. It also eliminates the needto put a pin in that will then immediately need tobe removed.CHAIN PIECINGThis method of joining fabricpieces involves continuouslyfeeding the fabric pieces in underthe machine foot, one after theother, with a gap of about ½in(1cm) between them. The piecesare held together by the sewingthread, hence the term ‘chainpiecing’. The advantage of thismethod is that it saves on threadwhen you have to sew lots ofpatches together in pairs.1Lay two fabric pieces together,right sides facing, and stitchalong the seam. When you reachthe end, position the next pair offabric pieces ready for stitching,leaving a gap of about ½in (1cm).Stitch across the gap and thenalong the next seam.2When you have stitched allthe fabric pieces, simplysnip through the threads joiningthem together.Copyrighted Material18 19
SEW-AND-CUT TECHNIQUEUsually, when sewing a patchwork, you will cut out lots of the shapesthat you need individually and then sew them together. Sometimes,however, it is quicker and more accurate to sew a set of strips of fabrictogether first and then cut them into units. This method is useful whenyour design includes blocks made from squares or rectangles, as onthe Sweet Sixteen and Autumn Floor quilts, or when the design is madeup of lots of long strips, for example Ohio Star.Here I will show you how to sew a nine-patch block. It is a squaremade from nine patches of fabric. Instead of cutting out nine separatelittle squares then sewing them together, you can stitch strips togetherin rows then cut them up and re-sew to create the block.1Lay two strips together, rightsides facing, and align the rawedges. Stitch down one side.2Fold open the strips and lay athird strip on top of thesecond, right sides facing. Stitchdown the seam, starting from theend you have just finished at.NoteStarting to stitch fromalternate ends of thefabric (see step 2 below)prevents the fabric fromstretching in one directionand distorting.3<strong>Press</strong> the fabric on the front,ensuring all the seams arepressed in the same direction.6Repeat steps 1–5 with adifferent set of fabrics, ifdesired, as I did for the blockshown. Lay two patchwork stripstogether, right sides facing. Ensurethe seams are aligned, and arepressed in opposite directions.9<strong>Press</strong>the seams flat by ironingon the front of the fabric.7Place the fabric under theneedle with the seams facingin the direction of sewing. Sew thestrips together, guiding the seamsunder the needle as you stitch.Copyrighted Material8Fold open the patchwork andplace the third strip on topof the second, right sides facing.Stitch the strips together as before.NoteAlways place the largest pieceon the bottom and the stripyou are adding on the top.4Cutoff the selvedge, following the method onpage 16, step 1.5Cut the fabric into strips. Here, they are 2½in(6.5cm) wide.The finished block.20 21
FLOWERGARDENMeasurementsQuilt size: 72 x 72in(183 x 183cm)Block size: 18½ x 18½in(47 x 47cm)Fabric requirementsFlowers: One Jelly RollI have used a number of different prints for the backgroundsto the blocks, adding to the floweriness of the quilt! Someof the prints are floral while others have a dotty design thatreminds me of seeds in the wind. Choose the same fabric forthe backgrounds for a more coordinated look.Flower centres: 11¾in (30cm)Backgrounds for the blocks:13ft (4m) or 16 fat quartersCut sixteen squares measuring16½ x 16½in (42 x 42cm).Frames: 4½ft (1.4m)Cut one piece 16½in (42cm)wide. Sub-cut this into 3in(7.5cm) strips. This will yieldfourteen strips.Cut two pieces 18½in (47cm)wide. Layer on top of eachother and sub-cut into a total ofsixteen 3in (7.5cm) strips. Usingthe remaining fabric, trim to16½in (42cm) and sub-cut into3in (7.5cm) strips. You need twoto complete the total of sixteen16½in (42cm) wide stripsneeded for the quilt blocks.Backing fabric: 14ft (4.3m)Cut into two equal lengths,remove selvedges and jointogether lengthways. <strong>Press</strong> theseam open.Copyrighted MaterialWadding: 82 x 82in (208.5cm)Binding: 21½in (55cm)Cut eight strips 2½in (6.5cm)wide.Tools: Creative Grids® 18º circlesegment ruler or templates forflower centre and petals (seepage 126)Freezer paper for appliqué52 53
LAVENDER STACKI love to place these in drawers and linen cupboards tofreshen everything with the scent of lavender. A stack of twoor three pillows tied together makes a lovely gift. To makethem into pincushions, omit the lavender bags and fill withbran or birdcage grit, as this will help sharpen your pinswhen they are pushed and pulled through the cushion.1Sew the spools block. Layer itwith a square of wadding andlining and baste the layers together.Outline quilt around the shapes,¼in (0.5cm) from the seams and½in (1cm) from the raw edges,using little-stitch quilting (see page32). Trim the wadding and liningfabric to the block size.MeasurementsEach cushion is 6in (15cm)squareRequirementsOne ‘spools’ block per cushionfrom the Sewing Spools quiltWadding:One 8in (20.5cm) squareLining:One 8in (20.5cm) squareBacking:6½in (16.5cm) squareLavender pouches:One 6 x 3in (15 x 7.5cm)rectangle of calico (muslin)Dried lavenderCopyrighted MaterialPolyester fillingRibbon or tape (optional)2Lay the quilted block in the middle of thebacking fabric, right sides together. Pinthem together. Starting in the middle of one side,sew a ¼in (0.5cm) seam allowance all aroundthe edge of the block, leaving a 1½in (4cm)gap to turn through. Sew diagonally across thecorners to get a better finish.84 85
The quilted block attached to the backing fabric, before beingturned out.3Trim off the seam allowances at the corners toreduce bulk.6Fillthe pouch withdried lavender.Copyrighted Material4Turnthe cushion right side out through the gapand stuff with polyester filling.5Fold the rectangle of calico (muslin) in half andstitch along two sides to form a square pouch.7Stitch across the top of thepouch, either by machine or byhand, insert it in the cushion andsew up the gap.Make two or three cushions and tie them together with tape or, for a more feminine feel,silk ribbon.86 87