
You also want an ePaper? Increase the reach of your titles
YUMPU automatically turns print PDFs into web optimized ePapers that Google loves.
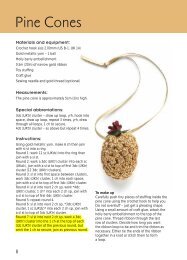
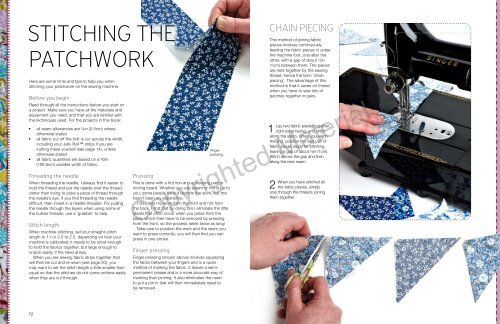
STITCHING THEPATCHWORKHere are some hints and tips to help you whenstitching your patchwork on the sewing machine.Before you beginRead through all the instructions before you start ona project. Make sure you have all the materials andequipment you need, and that you are familiar withthe techniques used. For the projects in this book:• all seam allowances are ¼in (0.5cm) unlessotherwise stated• all fabric cut off the bolt is cut across the width,including your Jelly Roll strips if you arecutting these yourself (see page 14), unlessotherwise stated• all fabric quantities are based on a 42in(106.5cm) useable width of fabric.Threading the needleWhen threading the needle, I always find it easier tohold the thread and put the needle over the thread,rather than trying to poke a piece of thread throughthe needle’s eye. If you find threading the needledifficult, then invest in a needle threader. For pullingthe needle through the layers when using some ofthe bulkier threads, use a ‘grabber’ to help.Stitch lengthWhen machine stitching, set your straight-stitchlength to 11 or 2.0 to 2.5, depending on how yourmachine is calibrated. It needs to be small enoughto hold the fabrics together, but large enough tounpick easily, if the need arises.When you are sewing fabric strips together thatwill then be cut and re-sewn (see page 20), youmay want to set the stitch length a little smaller thanusual so that the stitches do not come undone easilywhen they are cut through.<strong>Press</strong>ingThis is done with a hot iron and a pressing pad orironing board. Whether you use steam or not is up toyou; some people think it distorts the work, but thishasn’t been my experience.I do press my work from the front and not fromthe back. I find that by doing this I eliminate the littlepleats that often occur when you press from theback, which then have to be removed by pressingfrom the front, so the process takes twice as long!Take care to position the work and the seam youwant to press correctly; you will then find you canpress in one stroke.Finger pressingFingerpressing.Finger pressing (shown above) involves squeezingthe fabric between your fingers and is a quickmethod of marking the fabric. It leaves a semipermanentcrease and is a more accurate way ofmarking than pinning. It also eliminates the needto put a pin in that will then immediately need tobe removed.CHAIN PIECINGThis method of joining fabricpieces involves continuouslyfeeding the fabric pieces in underthe machine foot, one after theother, with a gap of about ½in(1cm) between them. The piecesare held together by the sewingthread, hence the term ‘chainpiecing’. The advantage of thismethod is that it saves on threadwhen you have to sew lots ofpatches together in pairs.1Lay two fabric pieces together,right sides facing, and stitchalong the seam. When you reachthe end, position the next pair offabric pieces ready for stitching,leaving a gap of about ½in (1cm).Stitch across the gap and thenalong the next seam.2When you have stitched allthe fabric pieces, simplysnip through the threads joiningthem together.Copyrighted Material18 19