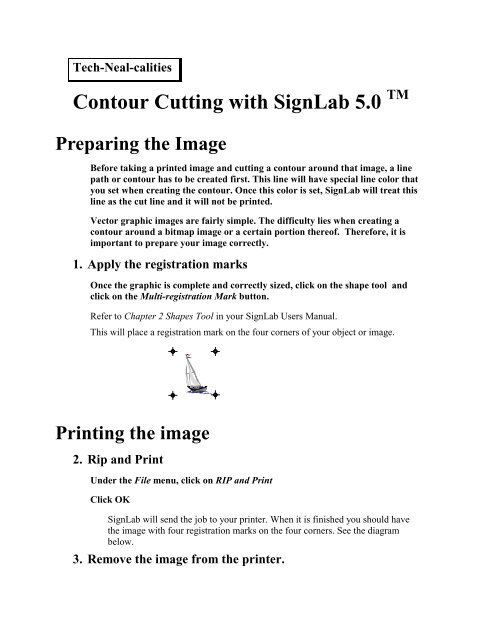
Contour Cutting with SignLab 5.0 TM Preparing the Image - Graphtec
Contour Cutting with SignLab 5.0 TM Preparing the Image - Graphtec
Contour Cutting with SignLab 5.0 TM Preparing the Image - Graphtec
- No tags were found...

You also want an ePaper? Increase the reach of your titles
YUMPU automatically turns print PDFs into web optimized ePapers that Google loves.
Place <strong>the</strong> radio button next to <strong>the</strong> skew point and, using <strong>the</strong> arrow keys on <strong>the</strong>cutter, move <strong>the</strong> point tool to <strong>the</strong> same registration mark that corresponds to <strong>the</strong>blinking mark on <strong>the</strong> screen.Click on GET POSITION.12. Find <strong>the</strong> ‘stretch’ registration point.Place <strong>the</strong> radio button next to <strong>the</strong> third point (<strong>the</strong> point determining <strong>the</strong> stretch)and, using <strong>the</strong> arrow keys on <strong>the</strong> cutter, move <strong>the</strong> point tool to <strong>the</strong> sameregistration mark that corresponds to <strong>the</strong> blinking mark on <strong>the</strong> screen.Click on GET POSITION.Tip: With <strong>the</strong> three points set, click on <strong>the</strong> WALK button. The tool will ‘walk’ on all<strong>the</strong> registration marks.13. If you have not done so already, place <strong>the</strong> cutter tool into<strong>the</strong> holder and click OK.The software will now cut <strong>the</strong> contour.If you are communicating to <strong>the</strong> cutter via <strong>the</strong> parallel port(LPT1:, LPT2:) do <strong>the</strong> following:14. Click <strong>the</strong> little radio button so that it appears next to <strong>the</strong>Plotter jog.The first registration mark will start to flash.15. Find <strong>the</strong> ORIGIN registration point.Locating <strong>the</strong> point in this modeThe jog box now appears on your screen. A symbol (a circle <strong>with</strong> crosshairs)representing <strong>the</strong> plotter head will appear. Center <strong>the</strong> symbol (representing <strong>the</strong>plotter head) on <strong>the</strong> selected registration mark by dragging <strong>the</strong> mouse while holding<strong>the</strong> right mouse button. Make minor adjustments using <strong>the</strong> arrow keys on <strong>the</strong>computer keyboard.Note: For <strong>the</strong> FC4100 series <strong>the</strong> light point will turn on. O<strong>the</strong>r models should use apen or <strong>the</strong> bombsight loupe.Click on SET POSITION.16. Find <strong>the</strong> SKEW registration point.The jog box now appears on your screen.
Place <strong>the</strong> radio button next to <strong>the</strong> skew point and, repeating <strong>the</strong> aboveprocedure “Locating <strong>the</strong> points in this mode”, move <strong>the</strong> point tool to <strong>the</strong> sameregistration mark that corresponds to <strong>the</strong> blinking mark on <strong>the</strong> screen.Click on SET POSITION.17. Find <strong>the</strong> STRETCH registration point.Place <strong>the</strong> radio button next to <strong>the</strong> third point (determining <strong>the</strong> stretch) and,repeating <strong>the</strong> above procedure “Locating <strong>the</strong> points in this mode”, move <strong>the</strong>point tool to <strong>the</strong> same registration mark that corresponds to <strong>the</strong> mark on <strong>the</strong>screen.Click on GET POSITION.18. If you have not done so already, place <strong>the</strong> cutter tool into<strong>the</strong> holder and continue by clicking OK.The software will now cut <strong>the</strong> contour.