UserGuideV61+SP5 - FF-Automation
UserGuideV61+SP5 - FF-Automation
UserGuideV61+SP5 - FF-Automation

You also want an ePaper? Increase the reach of your titles
YUMPU automatically turns print PDFs into web optimized ePapers that Google loves.
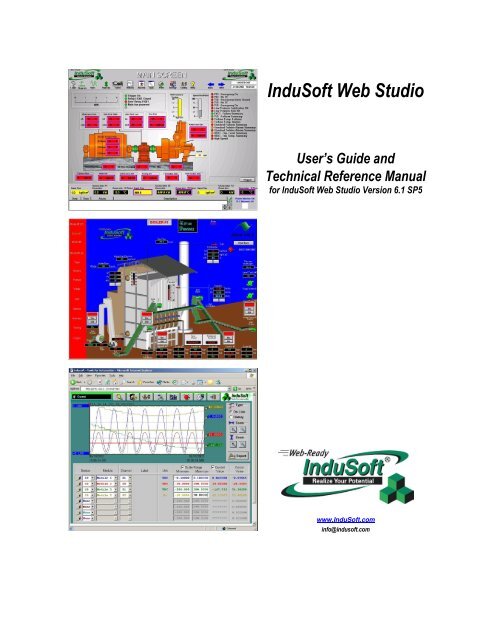
InduSoft Web StudioUser’s Guide andTechnical Reference Manualfor InduSoft Web Studio Version 6.1 SP5www.InduSoft.cominfo@indusoft.com
IWS Users GuideCopyrightCopyright © 2003-2009 by InduSoft ® . All rights reserved worldwide.No part of this publication may be reproduced or transmitted in any form or by any means without written authorizationfrom InduSoft.InduSoft is a registered trademark of InduSoft. CEView is a trademark of InduSoft.The information contained within this document is subject to change without notice.InduSoft does not assume responsibility for any errors or inaccuracies that may occur in this publication.Windows, Windows 2000, Windows CE, Windows XP, and Windows Vista are registered trademarks of MicrosoftCorporation in the United States and other countries.Other brand or product names are trademarks or registered trademarks of their respective owners.PN: IND-UG-001iiInduSoft Web Studio v6.1 SP5
ContentsAbout this Publication .................................................................................................................. xiWho Should Read this Publication ............................................................................................ xiiConventions .............................................................................................................................. xiiText Conventions ................................................................................................................ xiiMouse and Selection Conventions .................................................................................... xiiiWindows Conventions ....................................................................................................... xiiiAdditional Resources ............................................................................................................... xvWorking with Technical Support .............................................................................................. xvChapter 1: What is InduSoft Web Studio? ............................................................................ 1–1Product Overview ................................................................................................................... 1–1Product Features .................................................................................................................... 1–2Chapter 2: Installing InduSoft Web Studio ........................................................................... 2–1Before You Begin ................................................................................................................... 2–1Installing IWS ......................................................................................................................... 2–3Installing CEView ................................................................................................................... 2–5Uninstalling InduSoft Web Studio and CEView ..................................................................... 2–6Licensing Your Product .......................................................................................................... 2–8Product Versions ............................................................................................................. 2–9Invalid Licenses ............................................................................................................. 2–10Execution Modes .................................................................................................................. 2–10Protection Types .................................................................................................................. 2–12License Settings ................................................................................................................... 2–13Installing Hardkey Licenses for InduSoft Web Studio .......................................................... 2–14Installing a New License ................................................................................................ 2–14Upgrading the Current Hardkey License ....................................................................... 2–14Installing a SoftKey License for InduSoft Web Studio ......................................................... 2–16Installing a New License ................................................................................................ 2–16Upgrading the Current License ...................................................................................... 2–17Installing a SoftKey License for CEView .............................................................................. 2–21Installing or Upgrading a License (Locally) ................................................................... 2–21Installing or Upgrading a License (Remotely) ............................................................... 2–24Chapter 3: Working with the IWS Development Environment ............................................ 3–1Navigating the Development Environment Window ............................................................... 3–1Using the Title Bar ........................................................................................................... 3–2Using the Menu Bar ......................................................................................................... 3–3Using the Toolbars .......................................................................................................... 3–5Using the Workspace ...................................................................................................... 3–6Using the Screen/Worksheet Editor ..................................................................................... 3–11Using the Database Spy ...................................................................................................... 3–23Using the Output Window .................................................................................................... 3–24Using the Status Bar ...................................................................................................... 3–26InduSoft Web Studio v6.1 SP5iii
IWS Users GuideContentsCustomizing the Workspace ................................................................................................ 3–28Standard Interfaces .............................................................................................................. 3–28Object Properties Dialog ................................................................................................ 3–28Virtual Keyboard ............................................................................................................ 3–30Fonts .............................................................................................................................. 3–31Color Interface ............................................................................................................... 3–33Performing Common Tasks ................................................................................................. 3–37Accessing Projects and Files ......................................................................................... 3–38Using Common Buttons ................................................................................................. 3–39Managing the Development Environment Windows...................................................... 3–40Using Select All ............................................................................................................. 3–43Cutting, Copying, Pasting Objects ................................................................................. 3–43Finding System Information ........................................................................................... 3–44Searching for Tags and Screen Objects ....................................................................... 3–45Using the Tag Properties Toolbar ................................................................................. 3–46Replacing Tags .............................................................................................................. 3–49Testing Displays ............................................................................................................ 3–50Verifying the Application ................................................................................................ 3–51Running Applications ..................................................................................................... 3–52Restoring Defaults ......................................................................................................... 3–52Saving Your Work .......................................................................................................... 3–52Printing Project Screens ................................................................................................ 3–53Tips and Tricks ..................................................................................................................... 3–55Configuring the Focus of the Object Properties Window on the Screen Editor ............ 3–55Importing a Database ........................................................................................................... 3–55Importing from Other InduSoft Web Studio Databases ................................................. 3–59Importing from OPC Server Databases ......................................................................... 3–62Importing from CSV Databases ..................................................................................... 3–63Importing from ODBC Databases .................................................................................. 3–64Importing from PanelBuilder32 Databases ................................................................ 3–65Importing from RSLogix 5000 CSV Databases ......................................................... 3–66Importing from OMRON CX Programmer Databases ................................................... 3–68Importing from PanelMate Plus Databases ............................................................... 3–69Importing from TwinCAT PLC Databases ..................................................................... 3–71Development Modules ......................................................................................................... 3–75Graphics ........................................................................................................................ 3–75Tasks ............................................................................................................................. 3–76General Communications..................................................................................................... 3–76Chapter 4: Understanding IWS Structure ............................................................................. 4–1Understanding the Internal Structure and Data Flow ............................................................. 4–1Executing/Switching IWS Modules ........................................................................................ 4–3Executing/Switching the Background Task ............................................................................ 4–9Chapter 5: Working with Tags ............................................................................................... 5–1What is a Tag? ....................................................................................................................... 5–1ivInduSoft Web Studio v6.1 SP5
ContentsIWS Users GuideDesigning a Tag ..................................................................................................................... 5–3Choosing the Tag Type ................................................................................................... 5–3Choosing a Tag Data Type .............................................................................................. 5–6Sharing Tags with a Web Thin Client .............................................................................. 5–7Choosing Tag Properties ................................................................................................. 5–7Creating Application Database Tags ................................................................................... 5–13Adding Tags to the Application Datasheet .................................................................... 5–13Adding Tags “On-the-Fly” .............................................................................................. 5–14Resetting the Tags Database ........................................................................................ 5–15Creating Classes .................................................................................................................. 5–17Setting Tag Properties ......................................................................................................... 5–19Configuring the Parameters Tab Properties .................................................................. 5–19Configuring the Alarms - Type Tab Properties .............................................................. 5–21Configuring the History Tab Properties ......................................................................... 5–23Using Tags in Your Application ............................................................................................ 5–24Editing Tags ......................................................................................................................... 5–24From the Application Tags Datasheet ........................................................................... 5–25Deleting Tags ....................................................................................................................... 5–26Chapter 6: Creating and Configuring a Project .................................................................... 6–1Creating a New Project Application ....................................................................................... 6–1Using a Template ............................................................................................................ 6–4Specifying a Default Screen Resolution .......................................................................... 6–4Sharing PC-Based Control Software Program Database Tags ...................................... 6–4Specifying Additional Project Settings ................................................................................... 6–7Providing Project Identification Information ..................................................................... 6–8Setting the Options Tab Parameters ............................................................................... 6–9Setting the Runtime Desktop Parameters ..................................................................... 6–19Setting the Communication Parameters ........................................................................ 6–23Specify Web Thin Client Parameters ............................................................................ 6–25Enabling Warning Messages ......................................................................................... 6–29Starting Runtime Modules on the Target System ................................................................ 6–31Chapter 7: Configuring Screens and Graphics .................................................................... 7–1Working in an Object-Oriented Environment ......................................................................... 7–1Working with Screen Attributes .............................................................................................. 7–2Specifying Background Color ................................................................................................. 7–7Using Objects and Dynamics ................................................................................................. 7–8Using the Mode Toolbar .................................................................................................. 7–8Using the Align and Distribute Toolbar .......................................................................... 7–10Using Groups of Screens ..................................................................................................... 7–16Using the Web Toolbar .................................................................................................. 7–18Using the Bitmap Toolbar .............................................................................................. 7–22Using the Static Objects Toolbar ................................................................................... 7–24Using the Dynamic Properties Toolbar .......................................................................... 7–31Using the Active Objects Toolbar .................................................................................. 7–44InduSoft Web Studio v6.1 SP5v
IWS Users GuideContentsUsing the Library ................................................................................................................ 7–131Using Paste Link .......................................................................................................... 7–132Symbols Folder ............................................................................................................ 7–132Chapter 8: Configuring Task Worksheets ............................................................................ 8–1Configuring an Alarms Task ................................................................................................... 8–2Configuring a Trend Task..................................................................................................... 8–14Converting Trend History Files from Binary to Text ...................................................... 8–21Converting Trend History Files from Text to Binary ...................................................... 8–22Creating Batch History ................................................................................................... 8–22Configuring a Recipes Task ................................................................................................. 8–24Configuring a Reports Task ................................................................................................. 8–26Configuring an ODBC Task ................................................................................................. 8–28Configuring a Math Task ...................................................................................................... 8–31Configuring a Scheduler Task .............................................................................................. 8–33Configuring an External Databases Task ............................................................................ 8–35Database Connections .................................................................................................. 8–35Database Worksheet ..................................................................................................... 8–37Chapter 9: Event Settings ...................................................................................................... 9–1Configuring the Events Settings ...................................................................................... 9–2Chapter 10: Communication ................................................................................................ 10–1Configuring a Driver ............................................................................................................. 10–2Configuring the Driver Worksheets.............................................................................. 10–10Executing the Driver .................................................................................................... 10–19Configuring OPC ................................................................................................................ 10–20Configuring an OPC Client .......................................................................................... 10–20OPC Troubleshooting .................................................................................................. 10–23Configuring an OPC Server ......................................................................................... 10–24Configuring TCP/IP ............................................................................................................ 10–25Configuring the Client .................................................................................................. 10–25Setting Custom Parameters ........................................................................................ 10–25Configuring the TCP/IP Server .................................................................................... 10–26Configuring DDE ................................................................................................................ 10–27Configuring DDE Client ............................................................................................... 10–28Configuring the DDE Server ........................................................................................ 10–29Chapter 11: Configuring a Security System ....................................................................... 11–1Entering a Password ..................................................................................................... 11–1Defining Groups ................................................................................................................... 11–2Defining Users ...................................................................................................................... 11–7Remote Security System ............................................................................................. 11–14Setting the Security Access Level ............................................................................... 11–16Logging On/Off ................................................................................................................... 11–17Chapter 12: Testing and Debugging Your Application ..................................................... 12–1Testing Your Application ...................................................................................................... 12–1Debugging Applications from the Database Spy ................................................................. 12–2viInduSoft Web Studio v6.1 SP5
ContentsIWS Users GuideDebugging Applications from the Output Window ............................................................... 12–4Using the LogWin Module (NT and CE) ............................................................................... 12–7Using Remote Tools ............................................................................................................. 12–8Using Remote Database Spy ........................................................................................ 12–9Using Remote LogWin ................................................................................................. 12–10Chapter 13: Configuring a Web Solution ............................................................................ 13–1Configuring the Application for Different Architectures ........................................................ 13–2Architecture 1: Web server and Web Thin Clients in the same network ....................... 13–2Architecture 2: Web server and Web Thin Clients in the same network; Web server anddata server in different stations ............................................................................... 13–4Architecture 3: Redundant servers and Web Thin Client stations in the same network 13–6Architecture 4: Web server and Web Thin Clients in different networks ....................... 13–8Installing and Registering the ISSymbol Control Layer ..................................................... 13–11How It Works ............................................................................................................... 13–13Testing the Application ....................................................................................................... 13–14Installing Secure Viewer as Alternative to Web Browser ................................................... 13–17Chapter 14: Managing Applications Remotely ................................................................... 14–1Downloading the Application ................................................................................................ 14–1Configuring the Target Station....................................................................................... 14–1Configuring the Development Station ............................................................................ 14–3Monitoring/Managing Applications from the Remote Station ............................................... 14–6Configuring Windows CE to Automatically Run an Application ........................................... 14–6Chapter 15: Scripting Languages: IWS and VBScript ....................................................... 15–1Working with the IWS Scripting Language, Expressions, and Functions ............................ 15–1Using Tags ........................................................................................................................... 15–1Specifying Data Types ......................................................................................................... 15–1Accessing the Tags Database ....................................................................................... 15–2Arithmetic Operators ...................................................................................................... 15–2Logic Operators ............................................................................................................. 15–3Using Functions ................................................................................................................... 15–4Overview of VBScript ........................................................................................................... 15–5VBScript in IWS .................................................................................................................... 15–6Global Procedures ......................................................................................................... 15–8Graphic Module - Graphics Script ............................................................................... 15–11Graphic Module - Screen Script .................................................................................. 15–13Graphic Module - Command Dynamic ........................................................................ 15–15Graphic Module - ActiveX Events ................................................................................ 15–17Background Task - Startup Script................................................................................ 15–19Background Task - Script Groups ............................................................................... 15–20Language Reference .......................................................................................................... 15–22Constants ..................................................................................................................... 15–22Errors ........................................................................................................................... 15–25Functions ..................................................................................................................... 15–28Keywords ..................................................................................................................... 15–29Methods ....................................................................................................................... 15–29InduSoft Web Studio v6.1 SP5vii
IWS Users GuideContentsObjects and Collections ............................................................................................... 15–29Operators ..................................................................................................................... 15–30Properties .................................................................................................................... 15–31Statements................................................................................................................... 15–32Tips and Tricks ................................................................................................................... 15–33VBScript Editor - IntelliSense ...................................................................................... 15–33VBScript compared to VBA ......................................................................................... 15–35Screen Events ............................................................................................................. 15–36MsgBox() and InputBox() functions ............................................................................. 15–37Support for ActiveX objects ......................................................................................... 15–37Logical Operator NOT ................................................................................................. 15–37Boolean Tags and Boolean Variables ......................................................................... 15–38Windows CE Support .................................................................................................. 15–39Scope and Lifetime of Variables .................................................................................. 15–40Declaring Variables ..................................................................................................... 15–40Creating Constants ...................................................................................................... 15–40Precedence of VBScript Operators ............................................................................. 15–41Using Conditional Statements ..................................................................................... 15–42Looping Through Code ................................................................................................ 15–44VBScript Procedures ................................................................................................... 15–47Chapter 16: Using the Translation Tool/Editor .................................................................. 16–1Project Settings for Automatic Translation ........................................................................... 16–2Configuring Object Properties for Screen Objects ........................................................ 16–3Translation Editor ................................................................................................................. 16–4Editing Worksheets ........................................................................................................ 16–5Saving Your Worksheets...................................................................................................... 16–8Executing the Translation Functions .................................................................................... 16–9Using the SetTranslationFile() Function ............................................................ 16–9Using the Ext() Function ........................................................................................... 16–11Closing the Translation Editor ............................................................................................ 16–12Chapter 17: IWS Database Interface .................................................................................... 17–1General Concepts ................................................................................................................ 17–2SQL Relational Databases ............................................................................................ 17–2History Format ............................................................................................................... 17–4Primary and Secondary Databases ............................................................................... 17–5Default Database ........................................................................................................... 17–6Linking the Database Through a Remote DB Provider ................................................. 17–7Configuring Database Settings ............................................................................................ 17–8Database Configuration Dialog...................................................................................... 17–9Studio Database Gateway ................................................................................................. 17–13Advanced Settings ....................................................................................................... 17–15Database Troubleshooting ................................................................................................. 17–25Database FAQ ............................................................................................................. 17–25Database Appendix A: Using ODBC Databases ............................................................... 17–29viiiInduSoft Web Studio v6.1 SP5
ContentsIWS Users GuideDatabase Appendix B: Using Microsoft SQL Server ......................................................... 17–30Database Appendix C: Using ORACLE databases ........................................................... 17–32Database Appendix D: Using Microsoft Access Databases .............................................. 17–34Database Appendix E: Using SQL Server CE ................................................................... 17–35Database Appendix F: Using Sybase ................................................................................ 17–36Database Appendix G: Using Microsoft Excel ................................................................... 17–36Database Appendix H: Using MySQL ................................................................................ 17–40Chapter 18: Troubleshooting ............................................................................................... 18–1Before Contacting Technical Support .................................................................................. 18–2Verifying Your Application .................................................................................................... 18–4Common Errors .................................................................................................................... 18–5Database & Security System ......................................................................................... 18–5Graphics ........................................................................................................................ 18–5Tasks ............................................................................................................................. 18–7Communication .............................................................................................................. 18–8General Troubleshooting ............................................................................................. 18–10Appendix A. InduSoft Web Studio Functions....................................................................... A-1Function Prototypes and Descriptions ................................................................................. A-12Log Message Functions ....................................................................................................... A-13Arithmetic Functions ............................................................................................................. A-14Statistical Functions ............................................................................................................. A-30Logarithmic Functions .......................................................................................................... A-35Logical Functions ................................................................................................................. A-38String Functions ................................................................................................................... A-42Date and Time Functions ..................................................................................................... A-73Trigonometric Functions....................................................................................................... A-81Opening and Closing Windows Functions ........................................................................... A-89Security Functions ................................................................................................................ A-94Module Activity Functions .................................................................................................. A-104File Functions ..................................................................................................................... A-138Graphic Functions .............................................................................................................. A-162Translation Functions ......................................................................................................... A-172Multimedia Functions ......................................................................................................... A-174System Information Functions ........................................................................................... A-175Tags Database Functions .................................................................................................. A-208Loop Function .................................................................................................................... A-212ODBC Functions ................................................................................................................ A-213Mail Functions .................................................................................................................... A-242Dial-Up Functions ............................................................................................................... A-248ActiveX Functions .............................................................................................................. A-271Event Logger Functions ..................................................................................................... A-274FTP Functions .................................................................................................................... A-276DB/ERP Functions ............................................................................................................. A-281Index 1InduSoft Web Studio v6.1 SP5ix
About this PublicationThis User Guide and Technical Reference was designed to help you get the best resultsfrom your InduSoft ® Web Studio software. This publication provides technicalinformation and step-by-step instructions for all the tasks you need to createWeb-enabled HMI/SCADA applications.The information in this publication is organized into the following chapters:This chapter: Describes the purpose, content, and organization of the InduSoft WebStudio User Guide and Technical Reference. In addition, this chapter contains thefollowing information:– Explains the formatting, mouse, and Windows conventions used– Lists other publications providing information about InduSoft Web Studio– Explains how to contact a technical support representative Chapter 1. What is InduSoft Web Studio? Provides a high-level overview of the product’suses, features, and functions.Chapter 2. Installing InduSoft Web Studio: Provides step-by-step instructions for installing,licensing, starting, and uninstalling InduSoft Web Studio and CEView.Chapter 3. Working with the IWS Development Environment: Describes the InduSoft WebStudio interface (or development environment), and explains some basic skills andtechniques you must understand before creating a new application.Chapter 4. Understanding IWS Structure: Describes the internal structure of InduSoft WebStudio, including how data flows through the runtime modules and how thesemodules are executed.Chapter 5. Working with Tags: Explains basic concepts about the product database, tagtypes (arrays, classes, and pointers), tag values and parameters. Following theconcepts discussion, this chapter provides instructions for creating and editingtags for your applications.Chapter 6. Creating and Configuring a Project: Provides step-by-step instructions forcreating and configuring a new project application.Chapter 7. Configuring Screens and Graphics: Explains how to use the different InduSoftWeb Studio development tools to create your application screens and graphics.Chapter 8. Configuring Task Worksheets: Explains how to create and configure thedifferent InduSoft Web Studio task worksheets for your project applications.Chapter 9. Event Settings. Describes the logging and event-retrieval features.Chapter 10. Communication: Describes how to configure InduSoft Web Studio toread and write your application tag variables to or from a device’s memory. Theinformation includes instructions for configuring drivers and OPC, TCP/IP, andDDE (Dynamic Data Exchange) communication.Chapter 11. Configuring a Security System: Explains how to set-up and manage a securitysystem for your applications.Chapter 12. Testing and Debugging Your Application: Discusses how to test and debugapplications using tools such as the Database Spy and Output windows. Thischapter includes a list of possible error messages and methods for correcting thoseerrors.Chapter 13. Configuring a Web Solution: Explains how configure and run your applicationon the Web.InduSoft Web Studio v6.1 SP5xi
IWS Users GuideWhat is InduSoft Web Studio?Chapter 14. Managing Applications Remotely: Explains how to download, monitor, anddebug applications from a remote runtime workstation.Chapter 15. Scripting Languages: IWS and VBScript: Describes InduSoft Web Studio’sbuilt-in scripting language, as well as the support for VBScript in IWS.Chapter 16. Using the Translation Editor: Explains how to use the InduSoft Web StudioTranslation Editor to translate the text in your applications from one language toanother.Chapter 17. IWS Database Interface: Explains how to connect InduSoft Web Studio tocompatible databases.Chapter 18. Troubleshooting: Provides instructions for verifying applications, describessome common development errors, and explains what to do if you need to contacta support representative.Appendix A. Studio Functions: Contains tables and information describing the differentfunctions available with InduSoft Web Studio and CEView.Who Should Read this PublicationThis User Guide and Technical Reference is a comprehensive document designed toprovide useful information for both novice and advanced InduSoft Web Studio users. New Users: This publication uses a step-by-step, hands-on approach to theapplication development process. Be sure to read the introductory chaptersdescribing the product’s features and development environment. Experienced Users: This publication offers advanced instructions, tips, andtroubleshooting information to help you get the most out of your productapplications. Note:We assume you are familiar with working in a Windows environment, and wedo not attempt to explain Windows navigation, file management, and soforth. If you are unfamiliar with any of these procedures, we recommendusing the Windows Help feature (Start → Help) or consulting your MicrosoftWindows documentation.ConventionsThis section describes the text, mouse, and Windows conventions used throughout allInduSoft publications.Text ConventionsThe following text conventions and formatting techniques are used in this publicationto help you quickly identify certain kinds of information:File names and screen/message text are indicated using bold, monospace text(for example: \DRunStartup.exe).When you are required to provide information, such as a file name, the entry isenclosed in angle brackets < > and indicated using bold, italic monospace text(for example, \Redist\CEView\\).In this example, you must type the project folder name and processor type tocomplete the entry.xiiInduSoft Web Studio v6.1 SP5
What is InduSoft Web Studio?IWS Users GuideButtons, menu options, and keyboard keys are indicated using a narrow boldtypeface (for example, “Press the Enter key.”)Text requiring special emphasis (such as warnings, new terms, or product names)is indicated using italics to draw your attention to the item (for example, “Do notsave the file.”)In addition, this publication segregates some text into Tip, Note, and Caution boxes tohelp you identify information quickly and easily.– Tips () provide useful information to save development time or to improveapplication performance.– Notes () provide information related to the surrounding text (usually theparagraph just preceding the note) to help you further understand a concept orto provide supplemental information.– Cautions () provide information necessary to prevent errors that can causeproblems when running the application, and may result in damage.Mouse and Selection ConventionsBecause most PCs used for application development run a version of Windows with amouse, this publication assumes you are using a mouse. Generally, a PC mouse isconfigured so that the left mouse button is the primary button and the right mousebutton is the secondary button.This publication uses the following mouse and selection conventions:Double-click means to quickly click twice on an object with the left mouse button.Right-click means to click once on an object with the right mouse button.Click and Select means to click once on an object with the left mouse button.In general, you click on buttons and select from lists.Select also means you should use your pointing device to highlight or specify anitem on the computer screen. Selecting an object with a touch screen is usually thesame as selecting with a mouse, except that you use your finger to touch (select) ascreen object or section. To select objects with your keyboard, you typically use theTab key to move around options, the Enter key to open menus, and the Alt key witha letter key to select an object that has an underlined letter.Drag means to press down the appropriate mouse button and move the mousebefore releasing the button. Usually an outline of the object will move with themouse cursor.Instructions to select multiple menu bar and/or menu options use arrows toillustrate the selection sequence. For example, if you see the following . . .Select Start → Programs → InduSoft Web Studio → Register to register your product.. . . you should click the Windows Start button, select the Programs option, select theInduSoft Web Studio option, and select the Register option.Windows ConventionsThis publication uses the following Windows conventions: Dialog boxes (or dialogs) are windows that allow you to enter information. Text boxes (or fields) are areas in a dialog where you can type in text.InduSoft Web Studio v6.1 SP5xiii
IWS Users GuideWhat is InduSoft Web Studio? Radio buttons are white circles in which a black dot appears or disappearswhen you click on the button. The dot indicates the option or function is enabled(active) and a clear circle indicates the option or function is disabled (inactive). Check-boxes are white squares in which a check ( ) appears or disappears whenyou click on it. A check indicates the option or function is enabled (active) and aclear box indicates the option or function is disabled (inactive).Buttons are boxes containing text or graphics that perform an action within theprogram. Buttons appear “pressed” when you click on them.Button TypeDescriptionClick to perform an action.For example, click Save to save your project or click Cancel to cancel the current operation.Click a button containing text with ellipses (...) to open a related dialog.For example, click the Options button to open the Options dialog.Click to perform an action.For example, click the Open Library button to open the Symbol Library dialog.Some buttons are toggles, which means that clicking the button turns a particular feature,mode, or display on or off.For example, click the Output Window button to switch between turning the Output window(LogWin) display on and off in the development environment window.Button Examples TableLists are panes (white boxes) in windows or dialogs containing two or moreselectable options.Combo-Boxes have arrows that, when clicked, show part or all of an otherwiseconcealed list.Interface refers to the entire InduSoft Web Studio window (developmentenvironment).Dockable windows are windows that you can drag to an edge of the interface andmerge with that edge.Toolbars are dockable windows containing only buttons and text boxes.xivInduSoft Web Studio v6.1 SP5
What is InduSoft Web Studio?IWS Users GuideAdditional ResourcesFor more information about InduSoft Web Studio, the following resources areavailable:ResourceRelated PublicationsInduSoft Web SiteDescription• InduSoft Web Studio Getting Started Guide: Designed for first-time users, thispublication contains information about the basic functions of InduSoft WebStudio. This publication is provided in the Documentation folder on the IWSCD-ROM or from the Help menu located on the main menu bar.• Individual Driver User Guides: Explain how to configure individual InduSoftdrivers, according to their unique protocol characteristics. One customizeduser guide is included with each InduSoft driver. These publications areprovided in the DRV subdirectory of the InduSoft Web Studio folder on theIWS CD-ROM or from the Help menu located on the main menu bar.• InduSoft Web Studio Frequently Asked Questions (FAQ): Lists the mostcommonly asked questions and answers about InduSoft Web Studio.Visit www.InduSoft.com for information about InduSoft products, availabledownloads and demos, product FAQ, driver information, training opportunities,distributors, and the latest InduSoft news.Information Resources TableWorking with Technical SupportInduSoft’s expert support engineers are committed to resolving your issues andquestions as quickly and accurately as possible. Our technical support centers arelocated in Austin, Texas and Sao Paulo, Brazil.Support OfficeContact InformationAustin, Texas Telephone: 877-INDUSOFT (877-463-8763)Fax: 512-349-0375Email: support@indusoft.comSaõ Paulo, Brazil Telephone: +55 11 5505-5676Fax: +55 11 5505-5676 ext. 13Email: support@indusoft.com.brInduSoft Support Offices TableYour technical support options include: Electronic support Telephone support Product version updates Access to the InduSoft technical support Web page (http://www.InduSoft.com) FaxBack systemInduSoft Web Studio v6.1 SP5xv
IWS Users GuideWhat is InduSoft Web Studio?When requesting technical support, please have the following information available:Name of Submitter:Contact Information:Preferred contact method: E-mail Telephone Mobile Phone OtherIndustrial Sector (For exampleAutomotive, Pharmaceutical,Manufacturing):Number of supervisor stations: One Two Three OtherField Equipment (For Example, Allen Bradley Data Highway Plus):Manufacturer:Model:Amount:Protocol:InduSoft Driver(s):Computer Environment:Topic Sub-Item CharacteristicsHardware32-bit WorkstationHardwareVendorModel numberProcessorClockRAM MemoryOther information you think engineering should know about the hardware:Customer Information Form (continued)xviInduSoft Web Studio v6.1 SP5
What is InduSoft Web Studio?IWS Users GuideComputer Environment (cont.):Topic Sub-Item CharacteristicsSoftwareOperating SystemHardwareTypeVersionService PackLanguageOther information you think engineering should know about the software:Topic Sub-Item CharacteristicsSoftwareMicrosoft InternetExplorerHardwareSoftwareVersionService PackLanguageOther information you think engineering should know about the Microsoft InternetExplorer installation:Topic Sub-Item CharacteristicsSoftwareInduSoftHardwareSoftwareVersionService PackOther information you think engineering should know about the Microsoft InternetExplorer installation:InduSoft Web Studio v6.1 SP5xvii
IWS Users GuideWhat is InduSoft Web Studio?Computer Environment (cont.):Topic Sub-Item CharacteristicsSoftwareCEViewHardwareSoftwareVersionService PackOther information you think engineering should know about the CEView installation:Problem Description:Customer Information FormxviiiInduSoft Web Studio v6.1 SP5
Chapter 1: What is InduSoft Web Studio?InduSoft Web Studio (or IWS) is a powerful, fully integrated software program thatenables you to design and build feature-rich HMI (Human-Machine Interface) orSCADA (Supervisory Control and Data Acquisition) applications for:Data acquisitionLocal supervisory stationsRemote supervisory stationsData concentrators on distributed processesData communications with corporate systemsProduct OverviewIWS applications run on microcomputers connected in real-time to machines orprocessors through programmable controllers, remote I/O devices, and otherdata-acquisition equipment.These applications consist of animated operator-interface screens, configurable PLC(programmable logic controller) drivers and other controllable I/O devices, anapplication tags database, and optional modules such as alarm monitors, logic, trendcharts, recipes, schedulers, and a security system. IWS applications interface withindustrial I/O systems and other Windows applications in the runtime environmentusing the following protocols:ODBC (Open Database Connectivity)DDE (Dynamic Data Exchange)NetDDE (Network Dynamic Data Exchange)OPC (Open Connectivity)TCP/IP (Transmission Control Protocol/Internet Protocol)After developing an application, you can run it on your development workstation ordownload the application to a runtime workstation (using a serial or TCP/IPconnection) and run it using InduSoft Web Studio or CEView runtime software. Theworkstation processes scan data from connected devices according to parametersdefined in the application and then react to, display, store and upload the data.The InduSoft Web Studio product consists of:Development system software that runs on a desktop, laptop or industrial PCrunning Windows ® 2K/XP/VistaRuntime system software that runs on an operator interface workstation runningWindows 2K/XP/Vista or Windows CE Note:The runtime system software (CEView) for the Windows CE operating systemis usually pre-loaded on the HMI. If necessary, you can update the CEViewversion of the development system software by downloading the currentversion to the HMI.InduSoft Web Studio v6.1 SP5 1–1
IWS Users GuideWhat is InduSoft Web Studio?Product FeaturesThe InduSoft Web Studio product provides the following features:Integrated Windows development environment with toolbars, dialogs, and menus:– Shortcut menus, which can be accessed by right-clicking on any area of thedevelopment environment (Options vary according to context)– Customizable fly-over toolbars– Tasks, objects, and controls organized in a tree-view explorerFull-featured objects and dynamics (the ability to modify object properties, executecommands, or inset values to tags used to build screens on the fly at runtime):– Configurable objects such as buttons, rectangles, ellipse, polygons, lines, andtext– Dynamic properties such as bar graphs, color, resizing, position, hide/unhide,rotation, command, hyperlink, and text input/output– Online and historical alarm list displays– Online and historical trending– Alignment and distribution tools– Background bitmap layer creation and editing– Graphics importation– ActiveX object containersOnline remote management and configurationMicrosoft DNA architecture compliance, with full OPC and XML supportWeb interface enabled, which exports application screens to a “thin” clientthrough the Internet/intranet and by exchanging data online through theTCP/IP protocolSymbol library with more than 100 symbols and dynamic objects, such aspushbuttons, meters, sliders, switches, text and numeric displays, LED-styleindicators, pipes, bumps, icons, vehicles, valves, frames, motors, gauges, andcommon controlsDebugging tools:– Database Spy window to monitor/force tag values and execute functions– LogWin module to record OPC, DDE, and TCP/IP transactions, modulesactivation, trace tags, and so forth– Cross-referencing to locate tags throughout the project– Online system and network diagnosticsPowerful and flexible Tags Database (Boolean, Integer, Real, and String tags),array tags, classes, and indirect tag-pointersOpen architecture with API exchanges and tag values with external softwareTranslation editor, which enables you to translate an application into severaldifferent languages, and switch between them while the runtime system is onlineTCP/IP client and server modules to exchange tag values and configureredundancy systems1–2 InduSoft Web Studio v6.1 SP5
What is InduSoft Web Studio?IWS Users GuideMore than 200 drivers for different devices (such as PLC) from severalmanufacturers; such as Allen-Bradley, Siemens, GE-Fanuc, as well as standardprotocols such as MODBUS RTU/ASCII, DeviceNet, Profibus, Interbus, and soforthOPC Server and OPC Client with integrated OPC BrowserScreen and object password-protected runtime security (256 levels)Logical expressions and a scripting language with more than 200 functionsRecipe and Report (ASCII, UNICODE, and RTF formats) builders integrated intothe productEvent scheduler based on date, time, or data condition (100ms resolution)Multi-layer application, which means modular worksheets and screens can bemerged easily to other applicationsFull integration with PC-based control programs (imports tag databases) such asISaGRAF, SteepleChase, Think&Do, and ASAPDial-Up functions to trigger, monitor, and hang-up a dial-up connection with theRAS Server of remote stationsFunctions to send e-mail from IWS (or CEView)Real-time project documentationScreen resolution converter Note:IWS provides different product types for each level of application responsibility.However, IWS does not support some features in certain product types (such asCEView). You can review the TargetVersions.pdf document on the InduSoftWeb Studio CD-ROM for detailed information about the limitations of eachproduct-type limitations.InduSoft Web Studio v6.1 SP5 1–3
IWS Users GuideWhat is InduSoft Web Studio?1–4 InduSoft Web Studio v6.1 SP5
Chapter 2: Installing InduSoft Web StudioThis chapter explains how to install, license, run, and uninstall InduSoft Web Studio(IWS) and CEView.You can install IWS from the InduSoft Web Studio CD-ROM or create 3.5-inchinstallation diskettes. For Windows CE applications, you can use IWS to downloadCEView (runtime software) to the Windows CE HMI by serial or TCP/IP link.The IWS installation program automatically creates the necessary directories, copiesfiles to your hard drive, and creates the InduSoft Web Studio icon in your Desktop folder. Notes:If you will be using Windows CE: You use IWS to download CEView (the runtime software) to the Windows CEHMI using a serial or TCP/IP link. When you install InduSoft Web Studio on Windows 2K/XP/Vista computers,IWS stores the CEView runtime files in the following folder:\Redist\CEView\\Where:– is the installation directory chosen during theinstallation (C:\Program Files\InduSoft Web Studio is the defaultinstallation directory).– is the processor platform. InduSoft provides a CEViewruntime for most processor platforms supported by the WinCE operatingsystem.Before You Begin Note:You must have Administrator privileges for the Windows 2K/XP/Vistaworkstation on which you are installing (or uninstalling) InduSoft Web Studio.Before installing the IWS software, you must do the following:Uninstall any older versions of IWS (or install the newer version to a differentdirectory). Also, you cannot install the same version of IWS in two different pathson the same computer.System RequirementsTo develop applications with IWS, you must install the following hardware andsoftware:– PC-compatible computer with a Intel ® Pentium IV-compatible processor, suchas Centrino, AMD, Celeron, or higher– Windows 2000/XP/Vista or Windows 2003 Server operating system for thedevelopment system– Windows 2000/XP/Vista or Windows CE v3.00 operating system for runtimeInduSoft Web Studio v6.1 SP5 2–1
IWS Users GuideInstalling InduSoft Web Studio Caution:InduSoft Web Studio and its remote clients are not supported anyoperating systems that are no longer supported by Microsoft itself. Note:We recommend Windows XP Professional over Windows XP HomeEdition/Media Center, because it includes Internet Information Services(IIS) that can be used as your application’s Web server.– Minimum of 256MB random-access memory (RAM) (512MB or higherrecommended)– MS Internet Explorer 6.0 or higher– Minimum of 500MB free hard disk space to install the product and theapplication (the history files/databases will demand additional disk space)– Ethernet adapter– 100% IBM-compatible VGA or SVGA display adapter with 64MB Video RAM(VRAM) or higher– Microsoft-compatible pointing device (such as a mouse, trackball, ortouch-screen)– Standard keyboard with function keys F1 through F12– CD-ROM drive (optional – to install the system files)– Parallel printer port (optional – to be used with Parallel Hardkey licensingmethod)– USB port (optional – to be used with USB Hardkey licensing method)– Serial COM ports and adapters (optional) Notes: The requirements described above are based on typical applications.Depending on your specific application, the minimum requirements mayvary. Applications developed with InduSoft Web Studio can run under devicespowered with the Windows CE operating system (Windows CE v3.0 orWindows CE .NET) such as industrial HMIs or PDAs (PocketPC). Consultyour vendor for the hardware requirements when running your applicationunder the Windows CE operating system. When using a Hardkey instead of a Softkey to license the product, either theparallel or the USB port must be available in the local computer. Some of the items listed above as optional may be mandatory depending onyour application. For instance, if you need to exchange data with a PLC viaa serial interface, the computer must provide a serial COM port.2–2 InduSoft Web Studio v6.1 SP5
Installing InduSoft Web StudioIWS Users GuideInstalling IWSUse the following procedure to install IWS from the CD-ROM: Turn on the power to your development computer and be sure that no otherprograms are running. Insert the installation CD-ROM into the computer’s CD-ROM drive.A CDBrowser window should display automatically:CDBrowser WindowIf the InduSoft CDBrowser window does not display, you can start the programfrom the Windows Explorer. Navigate to the :\Installation directory (where is your CD-ROM drive), and run the Setup.exe file (clicking the InduSoft WebStudio icon launches this file).The CDBrowser window contains the following folders:– Read First: Contains the Readme document (in .pdf format) with importantinformation you should read before using the current product.– Viewer Utilities: Contains Microsoft PowerPoint Viewer (needed to view theInduSoft presentations provided in .ppt format), Adobe ® Reader ® (needed toview the InduSoft documents provided in .pdf format), and WinZip ® (forunzipping the compressed files).– About InduSoft: Contains a short PowerPoint presentation about InduSoft.– Installation: Contains an InduSoft Web Studio icon. Double-clicking this iconstarts the installation program.– Documentation: Contains all IWS documentation in .pdf format.– Sample Applications: Contains sample applications to help you develop your ownapplications and provide examples for you while you use InduSoft Web Studio.– Add-Ons: Contains a demo version of the Symbol Factory ActiveX program—anextensive symbol library that simplifies application development. Alsocontains the PanelBuilder Import Wizard for importing your existingPanelBuilder applications into IWS, and the Users Guide for the PanelBuilderImport Wizard.InduSoft Web Studio v6.1 SP5 2–3
IWS Users GuideInstalling InduSoft Web Studio In the Browser window, double-click the Installation folder and then double-clickthe InduSoft Web Studio icon to start the InduSoft Web Studio Installation Wizard. A Setup dialog displays to inform you that the Wizard is loading. Follow the instructions provided by the Wizard to proceed with the installation,which includes:– Reading and accepting the License Agreement– Entering a user name and your company name– Choosing a destination location (accept the default)– Selecting the components to install (accept the default)A Setup Status dialog displays while the program installs, and the Setup Completedialog displays when the installation is finished:Setup Complete Dialog You must restart your computer to continue, so click the Yes, I want to restart mycomputer now radio button, and then click Finish. After restarting your computer, double-click the InduSoft Web Studio icon on thedesktop or select Start → Programs → InduSoft Web Studio → InduSoft Web Studio to startthe IWS program.From the DesktopFrom the Start MenuStarting InduSoft Web Studio Tip:You can run the development environment under any video setting; however,to run applications on a CE platform, we recommend configuring your Displayvideo settings to a resolution of 800x600 (or higher) and using 256 colors (or2–4 InduSoft Web Studio v6.1 SP5
Installing InduSoft Web StudioIWS Users Guidehigher) for a more pleasing environment. Application resolution (screen size) isindependent of the operating system resolution. Note:Microsoft .NET Framework 1.1 is automatically installed, starting with IWS v.6Service Pack 3. See Using ODBC Databases, in Chapter 17: IWS DatabaseInterface, for more information.Installing CEView Note:The runtime system software (CEView) for the Windows CE operating system isusually pre-loaded on the HMI. If necessary, you can update the CEView versionof the development system software by downloading the current version to theHMI.When you install InduSoft Web Studio on Windows 2000/XP/Vista, IWS stores theCEView runtime files in the following folder:\Redist\\\Where: is the installation directory chosen during theinstallation (C:\Program Files\InduSoft Web Studio v6.1 is the defaultinstallation directory). is the operating system version where CEView will be installed. TheCEView subfolder stores the files for WinCE v3.0. The WinCE 4.0 folder stores thefiles for WinCE v4.0. The WinCE 4.1 folder stores the files for WinCE v4.1 and soon. is the processor platform. InduSoft provides a CEView runtimefor most processor platforms supported by the WinCE operating system.To install CEView, use the following steps: Power-on the WinCE device, and the Remote Agent dialog should launchautomatically.If the dialog does not display, copy the CEServer.exe file from the \InduSoft WebStudio v6.1\Redist\CEView\\BIN directory on theWin2K/XP/Vista computer where you installed IWS, paste the file into the\ folder of your WinCE device, and run the file. Note:There are different ways to copy a file into a WinCE device (for example, youcan map a shared folder from the Win2K/XP/Vista computer in the WinCEdevice or you can use ActiveSync). If you need assistance copying this file intothe WinCE device, contact InduSoft technical support. After executing the CEServer.exe file, the Remote Agent dialog launches in theWinCE device.InduSoft Web Studio v6.1 SP5 2–5
IWS Users GuideInstalling InduSoft Web Studio Click the Setup button in the Remote Agent dialog and configure the link (Serial orTCP/IP) to connect the WinCE device to the Win2K/XP/Vista computer. Note:InduSoft recommends using the TCP/IP link between the WinCE device andyour Win2K/XP/Vista computer to download and upload files. Start InduSoft Web Studio on the Win2K/XP/Vista computer. Select Project → Execution Environment from the main menu bar. When the Execution Environment dialog displays, select a connection type (NetworkIP, Serial Port or Microsoft ActiveSync) and configure its settings (for example, IP Addressor COM Port).Execution Environment Dialog Click the Connect button to connect InduSoft Web Studio to the WinCE device. Click the Install System Files button from the Execution Environment dialog (Target tab)to download the CEView files to the WinCE device.Uninstalling InduSoft Web Studio and CEViewIf you find it necessary to remove InduSoft Web Studio from your system, follow theseinstructions: Caution:Before starting the uninstall procedure, be sure to back-up any files you may finduseful later into the …\InduSoft Web Studio v6.1\ folder.Also, be certain that you have a current (or newer) version of the InduSoft WebStudio installation CD-ROM or diskettes so you can re-install the software later ifnecessary.2–6 InduSoft Web Studio v6.1 SP5
Installing InduSoft Web StudioIWS Users Guide From the Windows task bar, select Start > Settings > Control Panel to open theControl Panel.Opening the Control Panel Double-click on the Add/Remove Programs icon in the Control Panel window: When the Add/Remove Programs Properties dialog displays, select InduSoft WebStudio from the list and click the Add/Remove button.Removing InduSoft Web Studio When the Confirm File Deletion dialog displays, click the Yes button.InduSoft Web Studio v6.1 SP5 2–7
IWS Users GuideInstalling InduSoft Web StudioThe Uninstall Shield Wizard and the Remove Programs from Your Computer dialogsdisplay.Removing Programs: Progress Screen When the Uninstall successfully completed message displays, and the OKbutton becomes active, click the OK button. Verify that InduSoft Web Studio is no longer listed in the Add/Remove ProgramsProperties dialog. Click the Close button ( ), to close the Add/Remove Programs Properties dialog,and then close the Control Panel window. Open the Windows Explorer and browse to the directory containing the InduSoftWeb Studio directory. Verify that all of the InduSoft Web Studio files and folders were deleted. (You mustmanually delete any that remain.) Note:The uninstall tool cannot automatically delete files you created or modified inthe \InduSoft Web Studio v6.1\Projects\ or in the C:\Documents andSettings\\My Documents\InduSoft Web Studio v6.1 Projectsfolder.Licensing Your ProductThis section explains how to license your InduSoft Web Studio (IWS) and CEViewproducts. Notes: These instructions are valid for InduSoft Web Studio v5.1 or later. CEView runtime files for each platform are stored in the development stationduring IWS installation. You can use the IWS remote management tools todownload CEView runtime files to the WinCE device.2–8 InduSoft Web Studio v6.1 SP5
Installing InduSoft Web StudioIWS Users GuideProduct VersionsIWS and CEView should both have the same version number, which uses the followingsyntax:X.Y+SPWW (for example, InduSoft Web Studio v6.1+SP5 and CEView v6.1+SP5)Where:X: Represents the Family version. The Family version changes only when majorenhancements are added to the product technologies and concepts.Y: Represents the Sub-version: The Sub-version changes when minor enhancementsand/or new features are added to the product.WW: Represents the Service Pack. The Service Pack version changes when you mustinstall add-on packages to accomplish the following:– Upgrade files for the version previously installed– Fix bugs in the product (showstoppers and no-workarounds)– Provide minor enhancements before releasing the next version of the productEach Service Pack release supersedes the previous Service Pack release. Forexample, SP2 includes all the contents of SP1 and all newly upgraded files, bugfixes, and enhancements. SP3 includes all the contents of SP2 and all newupgraded files, bug fixes, enhancements and so on. Caution:Both IWS and CEView can execute applications built in previous versions of theproduct. However, older versions of IWS and CEView cannot execute applicationsbuilt or modified in newer versions of the product.For example, you cannot execute version 6.1 applications using IWS version 6.0but you can execute version 6.0 applications with IWS version 6.1. IMPORTANT!We issue each license for a specific Family version and Sub-version (X.Y), and thelicense is valid for that version (including Service Packs) only. However, a licenseis not valid for a newer Family version or Sub-version of the product. Any time youinstall a new version of IWS or CEView, you must upgrade the current license tothe new version being installed. If you are installing a Service Pack only, you arenot required to upgrade your license.InduSoft Web Studio v6.1 SP5 2–9
IWS Users GuideInstalling InduSoft Web StudioInvalid LicensesWhen you try to run IWS with an invalid license, you will receive a very specificwarning message that gives you the information you need to resolve the issue.Examples:Version of software is higher than the license versionSelected Target System is not supported by the licenseExecution ModesInduSoft Web Studio and CEView support the following execution modes:Execution Mode InduSoft Web Studio CEViewEvaluation ModeDemo ModeLicensed for Engineering OnlyLicensed for Runtime OnlyLicensed for Engineering + Runtime = Apply; = Does NOT ApplyEvaluation Mode: Enables all of the product’s engineering and runtime features.The first time you install IWS on a computer, the product runs for 40 (forty) hoursin Evaluation Mode. This evaluation period includes any time you run a product2–10 InduSoft Web Studio v6.1 SP5
Installing InduSoft Web StudioIWS Users Guidemodule (engineering or runtime). You can use this evaluation period continuouslyor not (for example: 10 hours a day for 4 days, 5 hours a day for 8 days, 10 hoursa day for 3 days plus 5 hours a day for 2 days, and so on).After running for 40 hours in the Evaluation Mode the evaluation periodterminates and IWS automatically converts to and runs in Demo Mode (seefollowing description) until you install a valid license (Hardkey or Softkey). Youcannot reactivate Evaluation mode—even if you uninstall and then reinstall theproduct on your computer. Note:Every version of the product has an evaluation period that is independent ofevery other InduSoft Web Studio version. For example, if your IWS version6.1 evaluation period expires and you are running in Demo Mode becauseyou have not installed a license, when you install IWS version 6.1 on thesame computer, the newer version will begin its own 40-hour evaluationperiod and the 6.1 version will continue running in Demo Mode only.Demo Mode: Enables you to download and upload applications to remote stations,and to run applications for testing and/or demonstration purposes. You canexecute runtime tasks and use the debugging tools (LogWin and Database Spy),but they shut down automatically after running for two hours continuously. Youcan restart the Demo Mode again and run for another two hours, and so on.You cannot create or modify screens, worksheets, or application settings inDemo Mode.The following menu options are available in Demo Mode:File View Project Tools HelpOpen ProjectExitToolbarsStatus BarZoomLibrarySettingsStatusRun ApplicationStop ApplicationSend Project to TargetExecutionEnvironmentLogonRegister ControlsConvert ResolutionVerify ApplicationSystem InformationAll OptionsLicensed for Engineering Only: Enables all workbench options for an unlimited time.This mode also allows you to execute the runtime tasks and debugging tools(Database Spy, Output window, and LogWin module) for 24 hours continuously.After the 24-hour period these tasks shut down, but you can restart them againand run for another 24 hours, and so on. You can use this license for developmentand testing only.Licensed for Runtime Only: Enables you to run all runtime and debugging tools(Database Spy, Output window, and LogWin module) for unlimited time, but youcannot create or modify screens and/or worksheets.The menu options available in Runtime Only mode are the same as the optionslisted for Demo Mode (see previous table).Licensed for Engineering + Runtime: Enables all engineering tools, runtime tasks, anddebugging tools (Database Spy, Output window, and LogWin module) for anunlimited period of time.InduSoft Web Studio v6.1 SP5 2–11
IWS Users GuideInstalling InduSoft Web Studio IMPORTANT!Every license sets restrictions, such as which Product Types are supported for thatlicense. Consult your software vendor about which product types are available andwhich features are enabled for each type. Notes:The IWS Execution Environment tools are always available so you can upload ordownload files from or to remote stations (such as remote WinCE devices) usingthe Execution Environment dialog (Project > Execution Environment).You can select Help → About from the main menu bar to see which execution mode youare running. The About InduSoft Web Studio screen contains information about thecurrent execution mode. If you are running Evaluation mode, the amount of time youhave remaining displays in the Execution Mode field.Verifying Version, Execution Mode, and Remaining Evaluation TimeProtection TypesInduSoft Web Studio and CEView support the following protection types:Protection Type InduSoft Web Studio CEViewHardkey Softkey = Apply; = Does NOT ApplyHardkey: An encapsulated chip that must be physically connected to the computer’sparallel port (LPT1) or the USB interface.The IWS license resides in the hardkey, and you cannot share this licensesimultaneously with more than one other copy of IWS in the network. If youconnect the hardkey to another computer, you will be transferring the license tothat computer.Using the hardkey does not prevent you from connecting another device (such as aprinter) to the computer’s parallel port—the hardkey should be electronicallytransparent to other devices connected to the parallel port. You simply connect the2–12 InduSoft Web Studio v6.1 SP5
Installing InduSoft Web StudioIWS Users Guidehardkey to the computer and then connect the printer cable to the hardkey.However, you may encounter problems if you install more than one hardkey (fordifferent products) on the same parallel port. On the other hand, while using theUSB hardkey, the USB port cannot be shared with any other device. Caution:Be careful when installing or removing a hardkey from the computer’s parallelport. We strongly recommend that you turn off the computer and disconnectit from the power supply before installing or removing a hardkey.Softkey: When you install IWS or CEView, the program generates a unique codecalled a Site Code. You can send this site code to your software vendor, who willthen generate a license code called a Site Key to match your site code. The site keyinstalls the IWS or CEView license on your computer or WinCE device. Note:When you use a softkey, IWS records the license in the computer’s (or WinCEdevice’s) non-volatile memory. If this device is damaged, you will lose thelicense.License SettingsBoth hardkey and softkey licenses set the following parameters:Product Type: Specifies which features and restrictions are enabled for theapplication (such as maximum number of tags supported, maximum number ofdrivers running simultaneously, and so on). Consult your software vendor aboutwhich product types are available and which features are enabled for each type.Execution Mode: Specifies the following options– Engineering Only: Configures and runs the application for testing duringdevelopment only. You cannot use this license as a long-term, runtime license.– Runtime Only: Runs the application for unlimited time. You cannot use thislicense to develop or modify the application.– Engineering + Runtime: Configures, modifies, and runs the application for anunlimited time.Number of Web Thin Clients: Specifies how many Web Thin Clients are supportedsimultaneously by the server. You can connect one or more Web Thin Clients tothe server simultaneously (for an additional charge), but the license installed onthe server must support these additional Web Thin Clients.Options for adding Web Thin Clients are as follows:– Server for InduSoft Web Studio (Win2K/XP/Vista): Connects 0 (No Web Thin Clients),1, 2, 4, 8, 16, 32, 64, 128, or 256 Web Thin Clients to the serversimultaneously.– Server for CEView (WinCE): Connects 0 (No Web Thin Clients), 1, 2, 4, or 8 WebThin Clients to the server simultaneously.Version Supported: When you generate a license, the license will specify the productversion it supports.InduSoft Web Studio v6.1 SP5 2–13
IWS Users GuideInstalling InduSoft Web StudioInstalling Hardkey Licenses for InduSoft Web StudioThis section explains how to install and upgrade a hardkey license on aWindows 2K/XP/Vista computer.Installing a New LicenseTo install a new IWS license, use the following steps: Install InduSoft Web Studio on your computer using the instructions providedearlier in this chapter. Connect the hardkey to the parallel port (LPT1) or USB interface on the computerwhere you installed IWS. Caution:Be careful when you install or remove a hardkey from your computer. Westrongly recommend that you turn off the computer and disconnect it fromthe power supply before installing or removing the hardkey. Run InduSoft Web Studio.Upgrading the Current Hardkey LicenseTo upgrade your current IWS license, perform the following steps: Close all InduSoft Web Studio development and runtime modules. Ensure the hardkey is connected to the parallel port (LPT1) or USB interface on thecomputer where you installed IWS. Select Start > Programs > InduSoft Web Studio >Register to execute the Register module. When the Protection Manager dialog displays, enable the Hardkey button in theProtection Type section and then click the Check button.Protection Manager: Select Hardkey– If you do not have a valid hardkey connected to the computer’s parallel port(LPT1) or USB interface, the following error message displays:No Hardkey2–14 InduSoft Web Studio v6.1 SP5
Installing InduSoft Web StudioIWS Users Guide– If you do have a valid hardkey connected to the computer’s parallel port (LPT1)or USB interface, the Hardkey Settings dialog displays, which contains thecurrent license settings recorded on the hardkey.Checking the Hardkey Settings Click the Change License button to open the Change License – Hardkey dialog:Change License Dialog Copy the code from the Site Code text box and send it to your software vendor. Your software vendor should send back a Site Key to match the site code.Type this site key into the Site Key field of the Change License – Hardkey dialog andthen click the Authorize button.You will be prompted to confirm the operation. If the program accepts (validates)your site key, the following message displays:Register: Successful Completion Note:If your new Site Key is not valid, an error message displays. If this happens,double-check that you entered the Site Key correctly. If you entered the keycorrectly and still receive an error message, contact your software vendor forassistance.You can upgrade any license setting (Product Type, Execution Mode, or Number of WebThin Clients) simultaneously supported by the server, or upgrade the software versionthat is being supported currently. The upgrade cost will depend on your currentlicense settings and the settings of the upgrade license.InduSoft Web Studio v6.1 SP5 2–15
IWS Users GuideInstalling InduSoft Web StudioInstalling a SoftKey License for InduSoft Web StudioThis section explains how to install and upgrade a SoftKey license for IWS(on Win 2K/XP/Vista). Note:You must have Administrator privileges for the Windows 2K/XP/Vistaworkstation on which you are installing or modifying a softkey license.Installing a New LicenseTo install a new IWS softkey license, use the following steps: Install InduSoft Web Studio on your computer using instructions provided earlierin this chapter. Execute the Register module by selecting Start → Programs → InduSoft Web Studio →Register.Click (enable) the Softkey radio button in the Protection Type group, and then clickthe Check button.Protection Manager: Softkey Note:If you have a hardkey license installed on your computer, the Register dialogdisplays a “Warning: this will change the protection method of thesoftware. Continue anyway?” message.To continue with the softkey installation, click Yes.2–16 InduSoft Web Studio v6.1 SP5
Installing InduSoft Web StudioIWS Users GuideThe Softkey Settings dialog displays.– If you already have a valid InduSoft Web Studio softkey license installed, thecurrent license settings display.– If you have not previously installed a license on your computer, the Status textbox displays a License not found message.Checking the Softkey Settings Click the Change License button on the Softkey Settings dialog. When the Change License – Softkey dialog displays, copy the code informationfrom the Site Code text box and send it to your software vendor.Change License: SoftkeyYour software vendor will send back a Site Key that matches this Site Code. Type theSite Key into the Site Key field of the Change License – Softkey dialog and then clickthe Authorize button.You will be prompted to confirm the operation. If the program accepts (validates)your Site Key, the following message displays:Successful Site Key Installation Note:If your new Site Key is not valid, an error message displays. If this happens,double-check that you entered the site key correctly. If you entered the keycorrectly and still receive an error message, contact your software vendor forassistance.Close the Register module and run InduSoft Web Studio.Upgrading the Current LicenseTo upgrade your current IWS license, use the following steps:InduSoft Web Studio v6.1 SP5 2–17
IWS Users GuideInstalling InduSoft Web Studio Before upgrading a softkey license, you must re-install InduSoft Web Studio on thesame computer where you installed the previous license. Caution:Do not uninstall InduSoft Web Studio before getting an upgraded license fromyour software vendor or you will lose your current license and it will not bepossible to upgrade. (You will have to order a new license.) From the newly installed version of InduSoft Web Studio, open the \BIN subfolderand run the SKEYUPG.exe program.The Upgrade Softkey dialog displays as shown:Upgrade Softkey Dialog In the Upgrade Softkey dialog, click the button and when the Browse dialogdisplays, select the path (location) where the previous (already licensed) version ofIWS was installed. The specified path information automatically displays in thePath text box in the Old Version section.Finding the Previously Installed Softkey Click the Save SKEYUPG.BIN file button to save the information necessary to generatethe upgraded license. Copy the SKEYUPG.BIN file from the directory where you executed theSKEYUPG.exe program and send it to your software vendor. Your software vendor will send you a Site Key matching the information saved inthe SKEYUPG.BIN file.2–18 InduSoft Web Studio v6.1 SP5
Installing InduSoft Web StudioIWS Users Guide Execute the Register module ( Register) for the newly installed version of InduSoftWeb Studio (where you executed the SKEYUPG.exe program to generate theSKEYUPG.BIN file). When the Protection Manager dialog displays, click (enable) the Softkey button inthe Protection Type section and click the Check button.Protection Manger: Select SoftkeyThe Softkey Settings dialog displays.– If you have not previously installed a license on your computer, the Status textbox displays a “License not found” message:Softkey Settings Dialog– If you already have a valid InduSoft Web Studio Softkey license installed, thecurrent license settings display:Softkey Settings: License FoundYou can upgrade any license setting (Product Type, Execution Mode, or Number ofWeb Thin Clients) simultaneously supported by the server, or upgrade whichsoftware version is being supported. The upgrade cost will depend on your currentlicense settings and the settings of the upgrade license.InduSoft Web Studio v6.1 SP5 2–19
IWS Users GuideInstalling InduSoft Web Studio In the Softkey Settings dialog, click the Change License button to open the ChangeLicense – Softkey dialog:Change License: Softkey Type the site key sent by your software vendor into the Site Key field of the ChangeLicense – Softkey dialog. Click the Authorize button.If the Site Key is accepted (validated), the following message displays:Successful Site Key Installation Note:If the new site key is not valid, an error message displays. If this happens,verify that you entered the site key correctly. If you typed the site key correctlyand still receive an error message, contact your software vendor for furtherassistance. Close the Register module and run InduSoft Web Studio.2–20 InduSoft Web Studio v6.1 SP5
Installing InduSoft Web StudioIWS Users GuideInstalling a SoftKey License for CEViewThere are two ways to register a CEView license on your WinCE device:Locally: Using the Remote Agent from the WinCE device as the interface.Remotely: Using InduSoft Web Studio to send the license to the WinCE device. Note:You can purchase some WinCE devices with the CEView license alreadyloaded. Consult your software vendor about this possibility.Installing or Upgrading a License (Locally)To install a new (or upgrade an existing) CEView softkey license (locally), use thefollowing procedure: Download the Remote Agent program (CEServer.exe) into the \ path of the WinCE device. The \ must retainthis data after you reboot the WinCE device. Note:The \ path can vary with each WinCE devicemanufacturer.After installing IWS on the Win2K/XP/Vista computer, the Remote Agent programfile (CEServer.exe) is stored in the following path:\Redist\\\BIN\CEServer.exeWhere:– is the directory where you installed IWS (forexample, C:\Program Files\InduSoft Web Studio v6.1\).– indicates the operating system version (for example, CEViewfor Windows CE v3.0, WinCE 4.0 for Windows CE v4.0, WinCE 4.1 forWindows CE v4.1, and so forth).– is the WinCE device processor type (for example, x86). Note:In some WinCE devices, the \ points to a FlashCardmemory that is connected to the device. Also, before downloading the RemoteAgent (CEServer.exe) to your WinCE device, be sure it is not already loaded inthe \.InduSoft Web Studio v6.1 SP5 2–21
IWS Users GuideInstalling InduSoft Web Studio Tips: There are two ways to download the Remote Agent program (CEServer.exe) toa WinCE device:– You can use the Microsoft ActiveSync ® utility to download/upload filesfrom a Win2K/XP/Vista station to a WinCE device. You can downloadActiveSync from the Microsoft Web site at no charge.– You can use the following command syntax to map a shared folder from aWin2K/XP/Vista computer to most WinCE devices:net use [] [Remote Name] [/user:]After executing this command successfully, open a Command Promptwindow and use a COPY command to copy files to the WinCE device. We strongly recommend that you configure the WinCE device to execute theRemote Agent program automatically when you power on the WinCE device.See the WinCE device manufacturer’s documentation for information abouthow to configure the Startup program on the device. If the Remote Agent program (CEServer.exe) does not start automaticallywhen you power on the WinCE device, you can run it manually from the\.Remote Agent Dialog From the Remote Agent dialog, click the Setup button to open the Setup dialog:Setup Dialog2–22 InduSoft Web Studio v6.1 SP5
Installing InduSoft Web StudioIWS Users Guide Click the License button to open the License dialog:License Dialog Click the Change License button to open the Change License dialog:Change License Dialog– Copy the site code information (provided in the Site Code text box) and send it toyour software vendor.– Your software vendor will send back a Site Key that matches this site code.Type the Site Key into the Site Key field on the Change License dialog, and clickthe Authorize button.If the site key is accepted (validated), the following message displays:Successful Site Key Installation Note:If the new site key is not validated, an error message displays. If this happens,double-check that you entered the site key correctly. If you typed the keycorrectly and get an error message, contact your software vendor for furtherassistance.InduSoft Web Studio v6.1 SP5 2–23
IWS Users GuideInstalling InduSoft Web StudioInstalling or Upgrading a License (Remotely)To install a new (or upgrade an existing) CEView SoftKey license (remotely), use thefollowing procedure: Execute the three first steps described in the previous section. In the Setup dialog, specify the Device Connection type by clicking (enabling) theSerial Port or TCP/IP button. (If you enable Serial Port, you also must select a port fromthe combo-box list). Click OK to close the dialog. Run InduSoft Web Studio on the Win2K/XP/Vista station and connect this stationto the WinCE device using either a serial or TCP/IP link. From the IWS main menu bar, select Project > Execution Environment to open theExecution Environment dialog:Execution Environment Dialog Specify a target station by clicking one of the following radio buttons in the TargetStation:– Local– Network IP and type the IP address into the field provided– Serial Port and select a port from the combo-box list provided– Microsoft ActiveSync When the Connect button becomes active, click the button to connect to the WinCEdevice on which the Remote Agent is running. (If you select Network IP, you must alsoenter the IP address in the text box provided.) Tip:TCP/IP links provide better communication performance than serial links.2–24 InduSoft Web Studio v6.1 SP5
Installing InduSoft Web StudioIWS Users GuideThe Status field must display the following message:Connected to CEView Connecting to CEView Select the CE License tab to see which license settings are currently installed onyour WinCE device.CEView License Settings From the License Codes section of the Execution Environment dialog, copy theinformation from the Site Code field and send it to your software vendor.– Your software vendor will send you a Site Key that matches this site code. Typethis site key into the Site Key field.– Click the Send button to send the code to the Remote Agent running on the WinCEdevice.The Remote Agent program will attempt to install the new license using the site keysent from InduSoft Web Studio. If the site key is accepted (validated), the followingmessage displays:Successful Site Key InstallationInduSoft Web Studio v6.1 SP5 2–25
IWS Users GuideInstalling InduSoft Web Studio Note:If the new site key is not valid, an error message will display. If this happens,double-check that you typed the site key correctly. If you entered the site keycorrectly and still receive an error message, contact your software vendor forfurther assistance. Caution:After sending the license to the WinCE device, be sure to save its registrysettings. If you do not save these settings, you will lose the license afterrebooting the device.2–26 InduSoft Web Studio v6.1 SP5
Chapter 3: Working with the IWS DevelopmentEnvironmentThis chapter provides an overview of the InduSoft Web Studio developmentenvironment. This information is organized into the following sections:Navigating the Development Environment WindowUsing the Screen/Worksheet EditorUsing the Database SpyUsing the Output WindowCustomizing the WorkspaceDevelopment ModulesGeneral CommunicationsNavigating the Development Environment WindowInduSoft Web Studio uses standard, Windows-like tools and interfaces to provide anintegrated and user-friendly developmentenvironment:IWS Development EnvironmentInduSoft Web Studio v6.1 SP5 3–1
IWS Users GuideWorking with the IWS Development EnvironmentThis development environment consists of the following features:Title barMenu barToolbarsWorkspaceScreen/Worksheet EditorDatabase Spy windowOutput window (LogWin)Status bar Note:Other IWS tools, such as the Symbol Library and the Translation Editor alsocontain some of these features (such as menu bars).Using the Title BarThe title bar is located along the top of the development environment window and itcontains the InduSoft icon, the product name, and the name of the active screen orworksheet (if any).Example Title BarThe title bar also contains the following buttons (from left to right): Minimize button ( ): Click to minimize the development environment window. Restore Down/Maximize button ( / ): Click to toggle the development environmentwindow between two sizes:– Restore Down reduces the window to its original (default) size– Maximize enlarges the window to fill your computer screen Close button ( ): Click to save the database and then close the developmentenvironment. If you modified any screens or worksheets, the program prompts youto save your work. This button’s function is similar to selecting the Exit commandfrom the File menu. Note:Closing the development system does not close the runtime system.3–2 InduSoft Web Studio v6.1 SP5
Working with the IWS Development EnvironmentIWS Users GuideUsing the Menu BarThe menu bar is located just below the title bar.Menu BarThe menu bar provides access to the following menus and their menu options:File: Contains options that enable you to manage application files.Edit: Contains options that enable you to manage screens and worksheets.View: Contains options that enable you to manage visible tools and providesshortcuts to dialogs you open most frequently.Insert: Contains options that enable you to configure application tags, tag classes,documents, drivers, users, security settings, screens, and ActiveX objects.Project: Contains options that enable you to execute applications locally andremotely, and provides links used to configure general application settings.Tools: Contains options that provide links to auxiliary development tools.Window: Contains options that enable you to manage open screens and worksheets.Help: Contains options that provide links to information about the InduSoft WebStudio product and InduSoft.When you click on the menu name, a pulldown menu displays containing a variety ofrelated options.For example, when you click View, the following pulldown menu displays:View Pulldown Menu Notes: Individual menu options are discussed in detail throughout this publicationwhenever their use relates to performing a specific task. In many cases, menu option functionality is duplicated using buttons on thevarious toolbars. For example, you can click theto open the Print dialog.button or select File → PrintInduSoft Web Studio v6.1 SSP4 3–3
IWS Users GuideWorking with the IWS Development EnvironmentPULLDOWN MENU FEATURESCertain features on a pulldown menu provide a clue as to what you can expect whenyou select a menu item. Ellipses ( ): Indicates a dialog or window will open when you select this option.For example, when you select the New option, the New dialog displays. Arrows ( ): Indicates a cascade menu (a second pulldown menu) willdisplay when you select this option. For example, when you select the Toolbarsoption, the following cascade menu displays:Toolbars Cascade MenuKeyboard Combinations and Function Keys: Indicates an alternate method (shortcut) forselecting that option from the pulldown menu. For example,– Pressing the Ctrl and p keys simultaneously is the same as selecting the Printoption from the File menu.– Pressing the Alt and 1 keys simultaneously opens/closes the Output window.– Pressing the F4 function key opens the Zoom window. Toggle buttons ( ) or ( ): Click the button to alternate between turning thefeature on or off .For example, if you click once on the Standard button shown in the figure above, youwill turn off the Standard toolbar so it will not display in the developmentenvironment. Click the button again, and the toolbar will display. Similarly,clicking the Workspace button), toggles the Workspace display on and off .Option Name only: Indicates that when you click the option name, IWS will perform thetask immediately or put you in the right mode to perform the task. For example, ifyou select File → Save, IWS immediately saves the active application screen.3–4 InduSoft Web Studio v6.1 SP5
Working with the IWS Development EnvironmentIWS Users GuideDOCKING THE MENU BARThe menu bar is a dockable feature, which means you can move it to another locationin the development environment window.To move and dock the menu bar: Click on the menu bar and drag it to a new location. Release the mouse button to attach or dock the menu bar to its new position.Using the ToolbarsInduSoft Web Studio provides several toolbars that enable you to perform differenttasks within the program. This section describes the function and default location ofeach toolbar.The following toolbars contain general purpose tools, and they are located acrossthe top of the Workspace, just below the menu bar by default:– Standard– Tag Properties– Execution Control– Web– Align and DistributeThe following toolbars contain screen editing tools, and they are located along theright side of the development environment window by default:– Mode– Static Objects– Active Objects– Dynamic Properties– Bitmap Notes: The Bitmap toolbar is hidden by default. Select View → Toolbars → Bitmap fromthe main menu bar to display the Bitmap toolbar. Detailed instructions for using these toolbars and toolbar options areprovided throughout this publication when you will use them to perform aspecific task.DOCKING A TOOLBARAll toolbars are dockable, which means you can move them to another location in thedevelopment environment window. To move and dock any of the toolbars: Click on the toolbar and drag it to a new location. Release the mouse button to attach or dock the toolbar to its new position. Tip:Position your cursor on a button and the status bar (located at the bottom of theIWS interface) will provide a brief description of that button.InduSoft Web Studio v6.1 SSP4 3–5
IWS Users GuideWorking with the IWS Development EnvironmentUsing the WorkspaceThe Workspace window is a user-friendly interface that enables you to find anyapplication component (such as tags, screens, worksheets, and so forth) quickly andeasily.You can resize, move, or hide the Workspace window to suit your development style.The Workspace contains four tabs:Database: Provides access to all database tags and security-system componentsconfigured for the current application.Graphics: Provides access to all screens and symbols in the application.Tasks: Provides access to all task worksheets in the application.Comm: Provides access to all drivers configured to establish communication withanother device or software program using available protocolsOn each tab, the application components (represented by an icon and uniquedescription) are organized into a tree-view display similar to the following:Workspace TabsClick the button or double-click the folder to view the contents of (expand) the folderor click the button to close the folder.If you right-click on any component in the Workspace, a menu displays with optionsrelated to that component. For example, the following pop-up menu enables you toOpen the Application Tags database, Insert (create) a new tag, or Refresh the current viewof the Application Tags database:Right-Click to Open a Pop-Up Menu3–6 InduSoft Web Studio v6.1 SP5
Working with the IWS Development EnvironmentIWS Users GuideIf you double-click on the button or name of any component in a folder, a related IWSdialog, worksheet, or screen displays so you can edit that component. For example:Double-click Developmentto open the Group AccountDialogDouble-click Datasheet Viewto open the Application TagsWorksheetDouble-click Main.scr to openthe Main.scr Display ScreenThe rest of this section describes each of the Workspace tabs.InduSoft Web Studio v6.1 SSP4 3–7
IWS Users GuideWorking with the IWS Development EnvironmentDATABASE TABSelect the Database tab to access all of the database tags andsecurity-system components that are available for the currentapplication. This tab contains the following folders:Application Tags contains tags you created during applicationdevelopment (such as screen tags or tags that readfrom/write to field equipment). Tip:You can sort the data in the Application Tags sheetand/or insert/remove additional columns to/from thesheet by right-clicking on it and choosing theapplicable option from the pop-up menu.Classes contain compound tags, called class tags, created toassociate a set of values (rather than a single value) with anobject.Shared Database contains tags that were created in aPC-based control software program and then imported intothe IWS Tags database.For example you can import SteepleChase tags into IWS soIWS can read/write data from a SteepleChase PC-basedcontrol product.System Tags contains predefined tags with predetermined functions that are used byIWS for specific, supervisory tasks (for example, Date tags hold the current date instring format).All internal tags are read-only, which means you cannot add, edit, or remove thesetags from the database.Security: Contains all of the group and individual usersecurity accounts configured for the current application.Global Procedures: Contains VBScript functions andsub-routines that can be called by any other script in theapplication.Event Settings: Contains logging and event-retrieval features.You can view, add, and edit tags in the Application Tags,Classes, Shared Database, or System Tags folders as follows:Double-click Datasheet View to open a Tags worksheet, whichyou use to create or modify tags for your application.Open a Tag List or Member List folder and double-click on any of the existing tagnames to open a Properties dialog. You can use the parameters on this dialog tomodify the tag’s current properties.To modify an existing Security account, open the Groups or Users folder anddouble-click on a group or user name. When a Group Account/User Account dialogdisplays, use the parameters on the dialog to change the existing account properties.3–8 InduSoft Web Studio v6.1 SP5
Working with the IWS Development EnvironmentIWS Users Guide Notes: Chapter 5: Working with Tags provides instructions for creating and editingtags in the IWS Tags database. Chapter 11: Configuring a Security System provides instructions for configuringa security system for your application.GRAPHICS TABSelect the Graphics tab to access all of the screens, Web pages, Library objects, andsymbols in the application.This tab contains the following folders:Screens: Contains all of the display screens created for thecurrent application.Group Screen: Contains the entire screen groups (individualscreens combined into manageable groups) created for thecurrent application. (Note: Screen groups are not availablefor Windows CE.)Web Pages: Contains all the Web pages (screens saved inHTML format) created for the application.Symbols: Contains all of the user-defined symbols, whichcan be groups of images and/or text. You can createcustom symbols for the application and save them into this folder.Graphics Script: Contains predefined functions that are executed when certain screenactions occur, such as when the Web Thin Client is launched on a remote station.Library: Contains the library of common symbols and graphics provided withInduSoft Web Studio. Double-click the Library button to open the IWS SymbolLibrary utility, consisting of a list pane (containing all of the symbol groups) and adisplay screen.Layout: Displays all screens currently open in the Screen Editor and allows you tovisualize how the screens fit together during runtime.To open a screen, Web page, or symbol for editing, double-click the appropriate button. Note:Specific instructions for editing screens, Web pages, or symbols are provided laterin this chapter (“Using the Screen/Worksheet Editor” on page 3–11) and inChapter 7: Configuring Screens and Graphics.TASKS TABSelect the Tasks tab to access all task worksheets in the current application.This tab contains the following task folders:Alarms: Contains the Alarm worksheets used to configure alarmgroups and the tags related to each alarm group in theapplication. You also use the Alarm task to define the alarmmessages generated by IWS.Trend: Contains the Trend worksheets used to configure historygroups that store trend curves for the application. You can usethe Trend task to declare which tags must have their valuesstored on disk, and to create history files for trend graphs. IWSInduSoft Web Studio v6.1 SSP4 3–9
IWS Users GuideWorking with the IWS Development Environmentstores the samples in a binary history file (*.hst), and displays both history andon-line samples in a trend graph screen.Recipes: Contains the Recipe worksheets used to configure how data is exchangedbetween the application database and disk files in ASCII or DBF format, and howvalues are transferred between files and real-time memory.Reports: Contains the Report worksheets used to configure reports (text type) thatare sent to a printer or a disk. Reports tasks allow you to configure text reports withsystem data, which makes report creation easier and more efficient.ODBC: Contains the ODBC worksheets used to configure how the ODBC interfaceruns in a network environment and uses standard Windows ODBC configuration.You configure ODBC tasks to exchange data between IWS and any databasesupporting the ODBC interface.Math: Contains the Math worksheets used to configure and implement additionalroutines to work with different IWS tasks. IWS executes Math worksheets asBackground Tasks during runtime. You can configure Math worksheets to providefree environments for logical routines and mathematical calculations required bythe application.Script: Contains the Startup Script and other VBScript groups.Scheduler: Contains the Scheduler worksheets used to configure events usingdefined mathematical expressions, which are executed according to time, date, orother monitored event.External Databases: Contains the DB worksheets that communicate with externaldatabases using the standard ADO.NET interface (as an alternative to ODBC).To open Task worksheets for editing, double-click the task button and the worksheetwill display in the Screen/Display window. Note:Detailed instructions for editing worksheets are provided in Chapter 8:Configuring Task Worksheets.COMMUNICATIONS TABSelect the Communications tab to access all of the drivers configured for your application.Drivers are used to establish communication with other devices or software programsusing available protocols.This tab contains the following folders:Drivers: Contains the Driver worksheetsused to configure a communicationinterface (or interfaces) between theproject application and remoteequipment (such as a PLC ortransmitters).A communication driver is a .dll filethat contains specific information aboutthe remote equipment and implementsthe communication protocol.OPC: Contains the OPC worksheets used to configure OPC interfaces between theapplication and an OPC Server. An InduSoft Web Studio OPC Client moduleenables the IWS system to communicate with any device that implements an OPC3–10 InduSoft Web Studio v6.1 SP5
Working with the IWS Development EnvironmentIWS Users GuideServer by implementing the OPC standard described in the OLE for Process ControlData Access Standard Version 2.0 document published by the OPC Foundation.TCP/IP: Contains the TCP/IP worksheets used to configure TCP/IP Client interfacesfor other InduSoft stations.IWS TCP/IP Client and Server modules enable two or more applications to keeptheir databases synchronized using the TCP/IP protocol to provide communicationbetween applications.DDE: Contains the DDE worksheets used to configure a DDE Client for a DDEServer application (such as Microsoft Excel or any other Windows program thatsupports this interface).DDE (Dynamic Data Exchange) is a protocol that enables dynamic data exchangebetween Windows applications. A DDE conversation is an interaction betweenserver and client applications. IWS provides interfaces that run as clients or asservers. Note:By default, the DDE Client module from IWS supports DDE Servers that handlestring data in the UNICODE format. If the DDE Server handles string data in theASCII ANSI format, the following setting must be configured manually in the.APP file (you can use Notepad to edit this file):[Options]DDEANSI=1To open worksheets in the Drivers, OPC, TCP/IP, or DDE folders for editing,double-click the worksheet button and the worksheet will display in theScreen/Worksheet window. Note:Detailed instructions for editing communication worksheets are provided inChapter 10: Communication.Using the Screen/Worksheet EditorUse the powerful, object-oriented screen editor to create and edit a variety of screensand worksheets for your applications. You can input information using your mouseand keyboard, output control data to your processes, and automatically updatescreens based on data input from your processes.Other screen editor features include:Simple point-and-click, drag-and-drop interfaceGrouping objects to preserve the construction steps of individual objectsEditing objects without having to ungroup internal object components or groupsHandling bitmap objects and background bitmapsStatus line support in application windows and dialogsInduSoft Web Studio v6.1 SSP4 3–11
IWS Users GuideWorking with the IWS Development EnvironmentScreen/Workspace EditorThe following toolbars contain general purpose tools that enable you to performdifferent tasks within the program.Standard toolbar: Provides icons (shortcuts) that duplicate functionality found onthe File, Edit, and View menus.Standard Toolbar– New button ( ): Click to open the New dialog and create new applications(projects) or files as part of your open application. Note:Using the New button is the same as selecting File → New from the menu baror typing the Ctrl+N key combination.– Open Project button ( ): Click to locate and open an InduSoft Web Studioapplication. Note:Using the Open Project icon is the same as selecting File → Open Project from themenu bar or opening the InduSoft Web Studio folder from WindowsExplorer and double-clicking on the project name.– Save button ( ): Click to save any active screens or worksheets.3–12 InduSoft Web Studio v6.1 SP5
Working with the IWS Development EnvironmentIWS Users Guide Notes: Using the Save icon is the same as selecting File → Save from the menu baror typing the Ctrl+S key combination. The Save function becomes available only when you modify the active file.– Save All button ( ): Click to save all open screens or worksheets. Note: Using the Save All icon is the same as selecting File → Save All from themenu bar. The Save All function becomes available only when you modify a screen orworksheet.– Cut button ( ): Click to remove a selected object from the screen/worksheetand store it on the clipboard, replacing any previously stored selections on theclipboard. Use in combination with the Paste button. Note:Using the Cut icon is the same as selecting Edit → Cut from the menu bar ortyping the Ctrl + X key combination.– Paste button ( ): Click to place the contents of the clipboard into the upper leftcorner of the active screen. You can Paste a cut or copied object multiple timesto a several screens/worksheets. Note:Using the Paste icon is the same as selecting Edit → Paste from the menu baror typing the Ctrl + V combination.– Copy button ( ): Click to duplicate a selected object and store it on theclipboard. You can then use the Paste button to move the copied object toanother location on the same screen or to another screen. NoteUsing the Copy icon is the same as selecting Edit → Copy from the menu baror typing the Ctrl+C key combination.– Delete button ( ): Click to delete the selection. If you accidentally delete anobject, you can restore it using the Undo button. Note:Using the Delete icon is the same as selecting Edit → Delete from the menubar or typing the Ctrl+X key combination.InduSoft Web Studio v6.1 SSP4 3–13
IWS Users GuideWorking with the IWS Development Environment– Undo button ( ): Click to cancel the last action performed while working on ascreen or worksheet. You can cancel up to 20 actions taken before your lastaction. The actions in object properties do not increase Undo steps. Note:Using the Undo icon is the same as selecting Edit → Undo from the menu baror typing the Ctrl+Z key combination.– Print button ( ): Click to print the active screen or worksheet or specifyprint/printer properties. Note:Using the Print icon is the same as selecting File → Print from the menu bar ortyping the Ctrl+P key combination.– Workspace Window button ( ): Toggle to display (open) or remove (close) theWorkspace window. Note:Using the Workspace Window icon is the same as selecting View → Toolbars →Workspace from the menu bar or typing the Alt+ 0 key combination.– Output Window button ( ): Toggle to display (open) or remove (close) the Outputwindow. Notes: Using the Output Window icon is the same as selecting View → Toolbars →Output from the menu bar or typing the Altl+1 key combination. See also “Using the Output Window” on page 3–24.– Database Spy Window button ( ): Toggle to display (open) or remove (close) theDatabase Spy window. Notes: Using the Database Spy Window icon is the same as selecting View → Toolbars→ Database Spy from the menu bar or typing the Alt+2 key combination. See also “Using the Database Spy” on page 3–23.brary button ():??Click to Xopen a library of previously configured objects.– rary button ():??Click to Xopen a library of previously configured objects. Note: Using the Library icon is the same as selecting View → Library from themenu bar. See also Chapter 7: Configuring Screens and Graphics.3–14 InduSoft Web Studio v6.1 SP5
Working with the IWS Development EnvironmentIWS Users Guide– Layout button ( ):This interface displays all screens currently open in the ScreenEditor and allows you to:* Modify the Screen Attributes: Right-click on the screen displayed on the Layouttab and use the alignment options or the Screen Attributes link to modify thescreen position. You can also click and drag the screen to change itsposition (Top and Left) or resize it (Width and Height).* Visualize how the screens fit together during the runtime. This option isespecially useful when creating pop-up/dialog screens or groups ofscreens. Note:The screens open in the Layout tab according to the order that they areopen in the development environment. When you change the position ofthe screen tabs in the development environment (to the left or to the right),you will change the order in which these screens will be displayed in theLayout tab. Tip:Right-click on the title of the Layout tab to display the option toenable/disable the Auto Scale. If you enable this option, the screens willbe auto-scaled automatically to fit in the Layout tab.– Zoom button ( ): Click to change the cursor to the zoom mode. Click and dragthe mouse on the screen to select the area where you want to zoom. Right-clickon the screen to change the cursor to selection mode again.– Zoom combo-box ( ): Select the zoom scale from the combo-box.– Context Sensitive Help button ( ): Click on this button and then click on the areawhere you want to read the help information.Tag Properties toolbar: Provides a text box and several icons (shortcuts) that enableyou to create, locate, and access different tags, functions, and tag properties.Tag Properties Toolbar– Tagname text box ( ): Type a name into the text box to create a newtag for your application. The Cross Reference and Tag Properties buttons willreference this tag name for their actions.– Object Finder button ( ): Click to open the Object Finder dialog, which lists allTags and Functions currently configured for the application. See “Using theObject Finder” on page 3–47.– Cross Reference button ( ): Click to search all application screens andworksheets for the tag noted in the Tagname text box. This function writes a log,detailing all the occurrences of the tag, to the XRef tab in the Output window.See “Using the X-ref Option” on page 3–48.InduSoft Web Studio v6.1 SSP4 3–15
IWS Users GuideWorking with the IWS Development Environment– Tag Properties button ( ): Click to configure parameters for each tag. The TagProperties dialog displays so you can specify these parameters. (For moreinformation about specifying tag properties, see “Setting Tag Properties” inChapter 5. Working with Tags.)– Global Tags Replace button ( ): Allows you to replace any tag(s) from alldocuments (screens and worksheets) of the whole application. You can editboth the From and the To column.Execution Control toolbar: Allows you to execute and manage an application locallyor from a remote location.Execution Control Toolbar– Test Display button ( ): Activates the test display mode, which allows you toconfigure the application while viewing graphical dynamics online in thedevelopment environment. The test display mode does not enable you to usethe Command, input Text I/O dynamics, or execute worksheets.– Stop display test button ( ): Stops the test display mode.– Run Application button ( ): Launches the runtime modules specified as Automaticon the Project Status dialog (Execution Tasks tab).– Stop Application button ( ): Stops all runtime tasks.– Send project to target button ( ): Allows you to send the application to the remotetarget station.– Execution Environment button ( ): Allows you to manage remote workstations. Note:For more information, see Chapter 12: Testing and Debugging Your Applicationand Chapter 14: Managing Applications Remotely.Web toolbar: Allows you to open and navigate HTML files.Web Toolbar Note:You must install Internet Explorer v4.1 (or higher) before you can use any ofthe tools on the Web toolbar. See Chapter 7: Configuring Screens and Graphics,and Chapter 13: Configuring a Web Solution for more information.– Back button ( ): Click to return to the last URL address you opened in thedevelopment environment.3–16 InduSoft Web Studio v6.1 SP5
Working with the IWS Development EnvironmentIWS Users Guide– Forward button ( ): Click to return to a URL address you opened before clickingthe Back button in the development environment.– Stop button ( ): Click to cancel the file-downloading process from a specifiedURL address.– Refresh button ( ): Click to reload a URL address specified in the Address textbox.– Home button ( ): Click to open the Home Page configured in your InternetExplorer Web browser.– Address text box ( ): Type a Web page URL address into thetext box to open (download) that page to your Internet Explorer Web browser.– Go button ( ): Click to download the pages specified in the Address text box.Align and Distribute toolbar: Allows you to edit screen objects. You can resize, align,flip, rotate, space, and group objects.Align and Distribute Toolbar Note:See “Using the Align and Distribute Toolbar” on page 7–10 in “Chapter 7:Configuring Screens and Graphics” for a more detailed description andexamples of these buttons.– Resize height button ( ): Click to set the height of all selected objects to theheight of the last object selected (the object with the filled handles). You can useResize height to resize one object by setting its height equal to its width.InduSoft Web Studio v6.1 SSP4 3–17
IWS Users GuideWorking with the IWS Development Environment– Resize width button ( ): Click to set the width of all selected objects to thewidth of the last object selected (the object with the filled handles). You can useResize width to resize one selected object by setting its width equal to its height.– Align left button ( ): Click to align all selected objects to the left edge of the lastobject selected.– Align right button ( ): Click to align all selected objects to the right edge of thelast object selected.– Align top button ( ): Click to align all selected objects to the top edge of the lastobjected selected.– Align bottom button ( ): Click to align all selected objects to the bottom edge ofthe last object selected.– Center vertically button ( ): Click to align all selected objects to the verticalcenter of the last object selected.– Center horizontally button ( ): Click to align all selected objects to the horizontalcenter of the last object selected.– Evenly space horizontally button ( ): Click to put an equal amount of horizontalspace between a series of objects (two or more).– Evenly space vertically button ( ): Click to put an equal amount of vertical spacebetween a series of objects (two or more).– Flip horizontally button ( ): Click to invert the selected object horizontally. Theobject rotates around an imaginary line through its horizontal center until it isa mirror image of the original object.– Flip vertically button ( ): Click to invert the selected object vertically. The objectrotates around an imaginary line through its vertical center until it is a mirrorimage of the original object.– Rotate button ( ): Click to rotate the selected object 90 degrees (a quarterturn) clockwise.– Move to back button ( ): Click to move a selected object or objects behind allother objects on the screen. IWS assigns the object the lowest ID# and movesthat object behind all other objects on the screen.– Move to front button ( ): Click to move a selected object or objects in front of allother objects on the screen. IWS assigns the object the highest ID# and movesthat object behind all other objects on the screen.– Group button ( ): Click to combine multiple objects into a single object tofacilitate object selection and manipulation. (You can access each part of thegroup in the Object Properties dialog.)– Ungroup button ( ): Click to separate a grouped object into its individualcomponents.3–18 InduSoft Web Studio v6.1 SP5
Working with the IWS Development EnvironmentIWS Users GuideThe following toolbars contain screen-editing tools. These toolbars are located alongthe right side of the interface window by default and they are enabled only while youare editing graphic screens:Mode toolbar: Allows you to edit your screens.Mode Toolbar Note:See “Using the Mode Toolbar” on page 7–8 in Chapter 7: Configuring Screensand Graphics for a more detailed description.– Selection button ( ): Click to display a cursor that allows you to select or moveobjects on the screen.– Bitmap Editor button ( ): Click to switch between the two, basic editing layers(Objects layer and Background Picture layer).– Fill Color button ( ): Click to specify a default fill color for Closed Polygons,Ellipses, Rounded Rectangles, and Rectangles.– Fonts button ( ): Click to specify the font and color for selected text objects, orto specify a default font and color for new text objects.– Line Color button ( ): Click to specify a line color for selected objects or to set adefault color for new objects.– Background Color button ( ): Click to specify a background color for the screen.– Grid button ( ): Click to specify whether to show or hide the grid on the screeneditor.Static Objects toolbar: Allows you to create polygons, rectangles, lines, and otherobjects for your screen.Static Objects Toolbar Note:See “Using the Static Objects Toolbar” on page 7–24 in Chapter 7: ConfiguringScreens and Graphics for a more detailed description.– Open Polygon button ( ): Click to draw an open polygon with a border in thespecified foreground color.– Closed Polygon button ( ): Click to draw a closed polygon, using a border in thespecified foreground color.– Line button ( ): Click to draw an orthogonal line in the drawing area.InduSoft Web Studio v6.1 SSP4 3–19
IWS Users GuideWorking with the IWS Development Environment– Ellipse button ( ): Click to draw ellipses, chords, arcs, and rings.– Rounded Rectangle button ( ): Click to draw rounded rectangles (empty or filled).– Rectangle button ( ): Click to create rectangles.– Button button ( ): Click to create custom-sized buttons.– Text button ( ): Click to create text objects.Active Objects toolbar: Allows you to create dynamic objects. Active objects typicallyrequire more parameters than static objects and provide embedded dynamics.QuickTime and aTI<strong>FF</strong> (Uncompressed) decompressorare needed to see this picture.Active Objects Toolbar Note:See “Using the Active Objects Toolbar” on page 7–44 in Chapter 7: ConfiguringScreens and Graphics for a more detailed description and examples.– Alarm/Event Control Object button ( ): Click to add an Alarm/Event Control Objectto your application screen.– Trend Control button ( ): Click to display data points (values) from different datasources in a graphic format.– ActiveX Control button ( ): Click to open the Insert ActiveX Control dialog, whichyou can use this dialog place ActiveX components on your screen.– Grid button ( ): Click to specify an area of the screen to create a new Gridobject.– Combo-Box button ( ): Click to select a single label from a combo-box list oflabels.– Check Box button ( ): Click to create a check-box object on your screen.– Radio Button ( ): Click to create a radio button object on your screen.– List Box Object button ( ): Click to create a list box object on your screen.Generally, when you execute an application, the active list box object displays alist of messages.– Smart Message Objects button ( ): Click to create one or more smart messageobjects, which you can use to display messages and graphics when you executethe application.– Pushbuttons button ( ): Click to create a pushbutton object using theCommand dynamic object property with an object or pre-configuredpushbuttons.– .NET Control button ( ): Click to open the .NET Framework Components dialog,which you can use to place .NET Framework components on your screen.3–20 InduSoft Web Studio v6.1 SP5
Working with the IWS Development EnvironmentIWS Users GuideDynamic Properties toolbar: Allows you to apply dynamics to objects or a group ofobjects. Dynamics enable you to modify object properties on the fly (duringruntime) according to tag values. Some dynamics also enable you to executecommands or insert values (set points) to the tags.Dynamic Properties Toolbar Note:See “Using the Dynamic Properties Toolbar” on page 7–31 in Chapter 7:Configuring Screens and Graphics for a more detailed description.– Command button ( ): Click to add the command property to a selected object orgroup of objects. The command property enables you to click on the object orpress a pre-defined key to execute the command at runtime.– Hyperlink button ( ): Click to add the hyperlink property to a selected object orgroup of objects. Applying this property allows you to click on the object(s)during execution to launch the default browser and load the specified URL.– Bargraph button ( ): Click to add bar graph properties to a selected object, andthen double-click on the object to open the Object Properties dialog.– Text I/O button ( ): Click to add the dynamic input or output text property to aselected text object. Applying the Text I/O property allows you to insert anddisplay tag values in real time if you are using the keyboard or on-screenkeypad to run an application.– Colors button ( ): Click to add the color change property to a selected object.The Colors dynamic allows you to specify up to four Change Limit colors.– Position button ( ): Click to specify when and where to display an object, usingthe specified tag values.– Resize button ( ): Click to increase or decrease the size of a selected object orsymbol.– Dynamic Rotation button ( ): Click to rotate a line.Bitmap toolbar: Allows you to access the bitmap screen editor tools. (This toolbar isavailable only when the Background Picture layer is active. You enable theBackground Picture layer in the Screen Attributes dialog.)Bitmap Toolbar Note: The Bitmap toolbar is hidden by default. See “Using the Bitmap Toolbar” on page 7–22 in Chapter 7: ConfiguringInduSoft Web Studio v6.1 SSP4 3–21
IWS Users GuideWorking with the IWS Development EnvironmentScreens and Graphics for a more detailed description.– Select Area button ( ): Click to select an area within the Bitmap Screen Editor.– Flood Fill button ( ): Click the Flood Fill button, and then click on the screen topaint the surrounding area with the color you specified with the Fill Color button.– Pixel Editing button ( ): Click to open an Edit Image dialog, where you can drawdetailed bitmaps, pixel by pixel.– Erase Area button ( ): Click to remove a selected area from the screen.– Change Colors button ( ): Click to change the transparent fill color for a selectedarea. Note:Before you can use this button, you should have already specified a fillcolor (Fill Color button), selected a transparent color (Select Transparent Colorbutton), and defined the area to fill (Select Area button).– Select Transparent Color button ( ): Click to specify a transparent color(referenced by the Change Colors button).– Toggle Transparent Color button ( ): Click to cause the color selected using theSelect Transparent Color button to become transparent for bitmaps selected in theBitmap Screen Editor.3–22 InduSoft Web Studio v6.1 SP5
Working with the IWS Development EnvironmentIWS Users GuideUsing the Database SpyThe Database Spy window (located under the Workspace by default) is an IWSdebugging tool that allows you to:Monitor and force values to database tagsExecute and test functionsExecute and test math expressionsSample Database Spy WindowThe Database Spy window consists of the following elements: Hide Docked Window button ( ): Click to toggle between opening and closing thewindow. (Alternatively, you can use themenu or Alt+2 to open and close this window.)button on the View → Toolbars Contract/Expand button ( ): Click to toggle between contracting and expanding theDatabase Spy window.DB tabs: Click each tab to access a spreadsheet with the following components– Name: Displays tag names, function names, and equations– Value: Displays returned values and equation results– Quality: Displays a quality evaluation (Good or Bad) of the tag or function source– Continuous: Displays whether IWS is re-evaluating the tag, function, or equationcontinuouslyScroll bars: Use to view areas of the Database Spy that are obscured from viewbecause of the window size or the size of the current spreadsheet. Notes: The Database Spy is dockable, which means you can move it to anotherlocation in the development environment. Click on the titlebar and drag it to anew location. Release the mouse button to attach or dock the window to its newlocation. Detailed instructions for using the Database Spy are provided in Chapter 12:Testing and Debugging Your Application.InduSoft Web Studio v6.1 SSP4 3–23
IWS Users GuideWorking with the IWS Development EnvironmentUsing the Output WindowThe Output window (located next to the Database Spy by default) is another IWSdebugging tool that is similar in function to a LogWin module.Sample Output WindowThough it functions on a smaller scale than the LogWin, the Output window enablesyou to monitor components in your application directly from the developmentenvironment. (For a description of the LogWin module, see Chapter 12: Testing andDebugging Your Application.)The Output window contains the following elements:XRef tab: Use this tab to search for and display the location (path, file name,column, and row) of every instance where a specific tag is being used within yourapplication. (See also “Using the X-ref Option” on page 3–48.) Hide Docked Window button ( ): Click to open or close the window.Alternatively, you can select View → Toolbars from the menu bar and click thebutton or press Alt+1 to open/close the window. Contract/Expand button ( ): Click to contract and expand the Output window.Scroll Bars: Click and drag to view areas of the Output window that are obscured fromview because of the window size or the length of your data. Notes: The Output window is dockable, which means you can move it to anotherlocation in the development environment. Click on the title bar and drag thewindow to a new location. Release the mouse button to attach or dock thewindow to its new location. Detailed instructions for using the Output window are provided in Chapter12: Testing and Debugging Your Application.CONFIGURING THE LOG TO SHOW ADDITIONAL INFORMATIONNote: By default, the log shows only debugging and error messages — that is,messages indicating that your IWS application is not running properly. If the logshowed all messages generated by IWS, it would quickly overflow with information,making it unusable.3–24 InduSoft Web Studio v6.1 SP5
Log Settings - Options TabWorking with the IWS Development EnvironmentIWS Users GuideTo configure the log to show specific additional information:1. Right-click anywhere in the Output window and choose Settings from the pop-upmenu. The Log Settings dialog is displayed.2. In the Log Options tab of the dialog, click (enable) the specific types of messagesthat you want the log to show.Log Settings — Options TabField Read Commands and Field Write Commands checkboxes: Show any read and/orwrite commands that are sent to connected devices.Protocol Analyzer checkbox: Show messages generated by configured devicedrivers.OPC Messages checkbox: Show messages generated by OPC communications.TCP/IP Messages checkbox: Show messages generated by TCP/IPcommunications.Recipe/Report checkbox: Show messages generated by the Recipe and Reporttasks.Display Open/Close checkbox: Display a message whenever a screen is opened orclosed.Logon/Logout checkbox: Display a message whenever a user logs on or logs out.(For more information, please see Security.)Trace Messages checkbox: Show messages generated by the Trace() function.This function is used to generate customized messages from within your IWSapplication.Database Messages checkbox: Show messages generated by the ODBC andADO.NET database interfaces.DDE Messages checkbox: Show messages generated by DDE communications.Insert date/time checkbox: Timestamp each message.InduSoft Web Studio v6.1 SSP4 3–25
Log Settings - Tags TabIWS Users GuideWorking with the IWS Development Environment3. In the Log Tags tab of the dialog, click the Add… button to browse for application tags.Log Settings — Tags TabThe Output window will display a message whenever the value of a selected tagchanges.4. Click OK to save your settings and close the Log Settings dialog.Using the Status BarThe status bar (located along the bottom of the IWS window) contains fields used toidentify toolbar buttons and provide information about the active screen (if any).ID fieldScreen Coordinate fieldHint fieldCaps Lock fieldScroll Lock fieldObject Size fieldNum Lock fieldExample Status BarNo Drag fieldThe fields are as follows (from left to right):Hint field: Provides a short description of any toolbar button or display objecttouched by the cursor.Caps Lock field: Indicates whether the keyboard Caps Lock is on (CAP) or off (empty).Num Lock field: Indicates whether the keyboard Num Lock is on (NUM) or off (empty).Scroll Lock field: Indicates whether the keyboard Scroll Lock is on (SCRL) or off(empty).ID field: Displays the ID number of a selected screen object.Screen Coordinate field: Displays the current location of the cursor (or pointer) on theactive screen. Where: X is the number of pixels from the left edge of the screen andY is the number of pixels from the top of the screen.Object Size field: Displays the size (in pixels) of a selected object, where W is the widthand H is the height.No DRAG field: Indicates whether dragging is disabled (No Drag) or enabled (empty)in the active screen. You can toggle the No Drag feature by pressing Ctrl+D.3–26 InduSoft Web Studio v6.1 SP5
Working with the IWS Development EnvironmentIWS Users Guide Note:Use the Ctrl+D shortcut to enable/disable the No Drag feature when you edit thescreen. You can use the No Drag feature to avoid moving objects on a screenwhen you are changing their properties.InduSoft Web Studio v6.1 SSP4 3–27
IWS Users GuideWorking with the IWS Development EnvironmentCustomizing the WorkspaceInduSoft Web Studio allows you to customize the development environment: Hide Docked Window button ( ): Click to toggle between opening and closing thewindow. (Alternatively, you can use themenu or Alt+2 to open and close this window.)button on the View → Toolbars Contract/Expand button ( ): Click to toggle between contracting and expanding theDatabase Spy window.Standard InterfacesThe standard interfaces discussed in this section consist of basic interfaces that youuse frequently as you work within the InduSoft Web Studio development environment.These include:Object Properties dialogVirtual KeyboardFontsColor InterfaceObject Properties DialogThe Object Properties dialog is the interface which allows you to configure the settings forthe objects and dynamics designed with the Screen Editor of InduSoft Web Studio. Itcan be launched just be double-clicking on the object or by selecting the object(clicking once on it) and selecting the menu option View > Properties (Shift+F2):Object Properties DialogThe content of this dialog depends on the object (or group of objects) selected by theuser. However, the following interfaces are common for any object (or group of objects):Field Remarks SyntaxReplace(Pin button)When the pin button is released, the focus is passed to the objecton the screen as soon as that object is selected. When the pinbutton is pressed the focus is kept on the Object Propertieswindow,\ even when you click the objects on the screen.Launches the Replace Dialog, where you can replace strings, tagsor properties for the selected object (or group of objects).ButtonButton3–28 InduSoft Web Studio v6.1 SP5
Working with the IWS Development EnvironmentIWS Users GuideField Remarks SyntaxHintTooltip displayed during the runtime, when the user keeps themouse cursor on the object for a few seconds. This option is usefulto provide hints to the operator during the runtime (quick-help).The text on the Hint field is also written to the System Tag Hintduring the runtime. Therefore, you can trigger actions based on thevalue of this tag when the mouse cursor is moved on specificobject.The combo-box at the right side of the dialog allows the user toselect the specific object, dynamic or group of objects that must beedited.Text and/or {Tag}(up to 256 chars)Combo-box Note:The Enable Tooltip option must be enabled (checked) on the Project Settings dialog.Otherwise, the tooltips are NOT displayed during the runtime when the user pointsthe mouse cursor on the objects. You can enable/disable this feature for the localserver (Project Settings > Runtime Desktop) and/or for the Web Thin Client stations(Project Settings > Web).REPLACE DIALOGWhen pressing the Replace button from the Object Properties window, the Replacedialog is launched:Object Properties: Replace DialogInduSoft Web Studio v6.1 SSP4 3–29
IWS Users GuideWorking with the IWS Development EnvironmentThis dialog provides a fast and simple tool to replace strings (String Value tab), tagsand/or properties for an object (or group of objects). This dialog display grids whereyou can edit the To column with the string, tag and/or property that must be replaced.The main interfaces in this dialog as described in the following table:Field Remarks SyntaxReplace by PartsAllows you to filter the type of information that can be replaced: Tags only: Displays only the tags configured directly (e.g.: Second, Time,Level, and so forth). Tags + Properties: Displays both the tags configured directly and theproperties configured as mnemonics (e.g.: #PumpStatus). Custom Properties: Displays only the mnemonics configured as customproperties (e.g.: #PumpStatus:).When checked allows the user to replace each part of a tag separately: Main TagName, Array Index, Class Member and Tag Field. It is very useful when you wantto replace a specific settings (e.g.: Array Index) for different tags configured in thesame Group of Objects.ButtonButton Caution:When pressing the Replace button after selecting the Group of Objects option in theObject Properties dialog, the replace feature affects all objects and dynamics whichare part of the selected Group of Objects. However, when pressing Replace buttonafter selecting a specific object or dynamic (e.g.: Button, Color, etc), the replacefeature affects ONLY the selected object or dynamic.Virtual KeyboardThe IWS Virtual Keyboard (VK) allows the user to enter data (text or numbers) duringthe runtime using a touch-screen device, rather than a physical keyboard.You can enable the VK for your application on the Runtime Desktop dialog (Projectpulldown menu item->Settings->Runtime Desktop tab). You can designate a DefaultVirtual Keyboard, as well as apply a Scale (size) to all Virtual Keyboards during theruntime.When configuring objects and dynamics that support data input, you can assign a VKto the object by the VK combo-box (either the default or a specific one). The followingstandard VKs are available:Name Picture DescriptionAlphaNumericThis VK is used to enteralphanumeric values(chars and/or numbers).3–30 InduSoft Web Studio v6.1 SP5
Working with the IWS Development EnvironmentIWS Users GuideEnhKeypadKeypadThis VK is used to enteralphanumeric values(characters and/ornumbers) in devices thatprovide a small display(e.g. PDAs). The ->button lets users scrollthough different panelsuntil they find thecharacter they want.This VK is used to enternumeric values (numbersonly).There are two ways to launch a Virtual Keyboard during the runtime:Click on the object where a new value (data) can be entered (e.g. Text with Text I/Odynamic configured with Input Enabled).Execute the Keypad() built-in function.You can change the language of the Virtual Keyboard by theSetKeyboardLanguage() built-in function. Tips: You can create new languages for any Virtual Keyboard by editing theVK.INI file from the \BIN sub-folder of IWS, where is the label of the language for the VKs (e.g. VKEN.INI =Virtual Keyboards in English; VKGE= Virtual Keyboards in German, andso forth). Consult your software vendor for more information about howto edit and configure this file. By default, the VK is launched close to the object on the screenassociated with it. However, you can configure the following settings inthe .APP file, so the VK will be always open in a fixedposition:[Keypad]PosX=0 //Coordinate (in pixels) of the TOP coordinate where the VKmust be launched.PosY=0 //Coordinate (in pixels) of the LEFT coordinate where the VKmust be launched.FontsIWS supports any UNICODE font available on the operating system where IWS isrunning. Therefore, it is possible to configure interfaces using characters for languagesthat do not use the standard western characters, such as Japases, Chinese, Arabic,Cyrillic, etc.InduSoft Web Studio v6.1 SSP4 3–31
IWS Users GuideWorking with the IWS Development EnvironmentThe font used on the development environment of IWS (Worksheets, Dialogs, etc.) isthe default font installed by the operating system and dependent on the language of theoperating system. Click the Edit Set Font menu option to select a different font fordevelopment.When editing the objects that display text during the runtime, you can set the font thatwill display the text by clicking on the Fonts button in the Object Properties window.The Font button launches the standard Fonts dialog:Font DialogYou can set the font name, style, size, effects and script. Tip:You can change the font style of several objects simultaneously by selecting themall (press the shift key down while you click each one), and then clicking on theFonts icon from the Mode toolbar of the screen editor.The icon displayed to the left of the font name indicates the font technology.Icon Technology RemarksTrueTypeOpenTypeOutlineTrueType and OpenType fonts are outline fonts that are rendered from line andcurve commands. OpenType is an extension of TrueType. Both can be scaled androtated. Both look good in all sizes and on all output devices supported by Windows.Windows provides a selection of OpenType fonts, including Arial, Courier New,Lucida Console, Times New Roman, Symbol, and Wingdings.Type 1, by Adobe Systems, Inc., is an outline font that is designed to work withPostScript printers. The outlines can be scaled and rotated. With OpenTypetechnology, Windows fully supports Type 1 fonts.N/AVectorVector fonts are supported because a number of programs still depend on them.Vector fonts are rendered from a mathematical model. They are used primarily with3–32 InduSoft Web Studio v6.1 SP5
Working with the IWS Development EnvironmentIWS Users GuideN/ARasterplotters. Windows supports three vector fonts: Modern, Roman and Script.Raster fonts are supported because a number of programs still depend on them.Raster fonts are stored in files as bitmap images and are composed of a series ofdots whether they are displayed on the screen and on paper.It is strongly recommended that you use only TrueType or OpenType fonts. Fontsdesigned with other technologies (e.g. Courier) cannot be scaled properly and couldcause issues during the runtime. Caution:When you design screens, the fonts you use are the ones available in theoperating system of your development station. The fonts on the runtime station,however, may look different (e.g. different size in pixels), even if all settings are thesame on both stations. This situation occurs more frequently when applicationsare run on the Windows CE operating system, where the fonts do not alwaysmatch the proportions of the equivalent fonts on Windows 2K/XP/Vista.Therefore, it is important to test the graphic interfaces (screens) on the actualruntime platform during the development of the application. You should not waituntil after the whole application has been developed, or it may become necessaryto re-design the screens so the text objects display properly on the runtimeplatform.Color InterfaceYou can edit the color of a component with the Color interface. Click the icon in the toolbar: Click the desired color from the twenty that display when the pop-up box opens:The selected color will be applied to the component that you are editing. Click More Colors… if you want to apply a different color. The Colors dialog willopen, displaying the 143 standard colors from your operating system.InduSoft Web Studio v6.1 SSP4 3–33
IWS Users GuideWorking with the IWS Development EnvironmentColors Dialog Click the Custom tab to edit the HSL (Hue, Sat, Lum) or RGB (Red, Green, Blue)codes of any of the 143 standard colors, creating a custom color.Custom Colors Tab Click the OK button to apply the selected color to the component that is beingedited. Depending on the component that you are editing, the Fill Effects option isavailable from the pop-up interface (see step 2 above). Click this option to applygradient colors with different styles and variants. The Fill Effects dialog will open.3–34 InduSoft Web Studio v6.1 SP5
Working with the IWS Development EnvironmentIWS Users GuideFill Effects Dialog Select two colors in the Start and End fields, select the Style, and click on thechosen Variant. Finally, click the OK button to apply the fill effect to the componentwhich is being edited. Note:For applications for the WinCE operating system, the Fill Effects interface isavailable only for the Rectangle object. Caution:Although Fill Effect is a useful tool for enhancing the look and feel of yourscreens, the operating system takes a longer time to fill an object with fill effectsthan with plain colors. You should develop criteria for using the feature withoutdecreasing the performance of the system, especially under the WinCE operatingsystem.Using the Color dynamic, , you can modify the color of a static object during theruntime. When configuring this dynamic with Type = By Color, you can set the colorthat will be applied in the object during the runtime, by the color code. The followingtable provides the code values as well as the RGB values for the most commonly usedcolors:ColorNameR (Red)RGB CodeG (Green) B (Blue)Code ValueBlack 0 0 0 0Dark Red 128 0 0 128Red 255 0 0 255Pink 255 0 255 16711935InduSoft Web Studio v6.1 SSP4 3–35
IWS Users GuideWorking with the IWS Development EnvironmentRose 255 153 204 13408767Brown 153 51 0 13209Orange 255 102 0 26367Light Orange 255 153 0 39423Gold 255 204 0 52479Tan 255 204 153 10079487Olive Green 51 51 0 13107Dark Yellow 128 128 0 32896Lime 153 204 0 52377Yellow 255 255 0 65535Light Yellow 255 255 153 10092543Dark Green 0 51 0 13056Green 0 128 0 32768Sea Green 51 153 102 6723891Bright Green 0 255 0 65280Light Green 204 255 204 13434828Dark Teal 0 51 102 7877376Teal 0 128 128 8421376Aqua 51 204 204 13421619Turquoise 0 255 255 16776960Light Turquoise 204 255 255 16777164Dark Blue 0 0 128 8388608Blue 0 0 255 16711680Light Blue 51 102 255 16737843Sky Blue 0 204 255 16737843Pale Blue 153 204 255 16764057Indigo 51 51 153 10040115Blue-Gray 102 102 153 10053222Violet 128 0 128 8388736Plum 153 51 102 6697881Lavender 204 153 255 16751052Gray-80% 51 51 51 3355443Gray-50% 128 128 128 8421504Gray-40% 150 150 150 9868950Gray-25% 192 192 192 12632256White 255 255 255 167772153–36 InduSoft Web Studio v6.1 SP5
Working with the IWS Development EnvironmentIWS Users Guide Tip:The RGBColor() and RGBComponent() functions can be used to manipulate colorcodes during the runtime. Note:The number of colors available when developing the application depends on thecolor settings configured on the operating system of the development station. Thenumber of colors available when running the application (runtime) depends onthe color settings configured on the operating system of the runtime station.Performing Common TasksThe common tasks discussed in this section consist of basic procedures that you usefrequently as you work within the InduSoft Web Studio development environment.These tasks include:Accessing Projects and FilesUsing Common ButtonsManaging the Development Environment WindowsChanging the Screen ResolutionUsing Pop-Up MenusUsing Select AllCutting, Copying, Pasting ObjectsUsing the Symbols LibraryFinding System InformationSearching for Tags and Screen ObjectsReplacing TagsTesting DisplaysVerifying the ApplicationRunning ApplicationsRestoring DefaultsSaving Your WorkPrinting Project ScreensInduSoft Web Studio v6.1 SSP4 3–37
IWS Users GuideWorking with the IWS Development EnvironmentAccessing Projects and FilesTo create a new project, see Chapter 6: Creating and Configuring a Project.OPENING PROJECTSTo open a project, from the Main menu bar, select File > Open Project.Selecting the Open Project option displays the Open dialog, which lists all existingfolders. You can use the Open dialog to locate and open an InduSoft Web Studioproject.Open Dialog Note:Alternatively, you can open a new project using one of the following two methods: Click the Open Project buttondialog.on the Standard toolbar to display the Open Open Windows Explorer, locate the InduSoft Web Studio folder, and thendouble-click on the project name.OPENING FILESFrom the Main menu bar, select File > Open File. Selecting the Open File option displays theOpen dialog (as shown in the preceding section), which lists all existing folders. Tolocate and open an InduSoft Web Studio application file from this dialog, click the Filesof type combo-box button, and then click on a file name to select it from the list.CLOSING PROJECTSFrom the Standard toolbar, select File → Save to save any active screens or worksheets.The Save option becomes enabled (active) only after you modify the active file.3–38 InduSoft Web Studio v6.1 SP5
Working with the IWS Development EnvironmentIWS Users Guide Note:You can also use the Save button ( ) on the Standard toolbar or type Ctrl+s tosave the open, active screen/worksheet.From the Standard toolbar, select File > Save As to save active screens or worksheets,and to specify a (new) name and location for the file.Select the Save As HTML option to save the active display in HTML format.You can also select File > Save All from the menu bar to save all open screens orworksheets. The Save All option becomes enabled (active) only after you modify theactive file. Note:Using File > Save All is the same as using the Save All button (toolbar.) on the StandardSelect the File > Save All As HTML option to save all displays of the applications in HTMLformat. You have to close all documents before executing this command.Select File > Save Screen Group As HTML to save the Screen Group in HTML format, makingthem available to the remote Web Thin Client through a Web Browser.CLOSING FILESFrom the menu bar, select File > Close to close the active screen or worksheet. IWSprompts you to save all unsaved changes before it closes the screen/worksheet. Note:Using File > Close is the same as using the Exit button () located on the title bar.You can also select File > Close All. Selecting the Close All option closes all open screens orworksheets. IWS prompts you to save all unsaved changes before it closes thescreens/worksheets.Using Common ButtonsThe following table describes buttons that typically appear on IWS dialog and windows:ButtonOKApplyCancelOpenPurposeClick this button to execute and save all changes, and close the dialog or window.Click this button to execute and save all changes, but leave the dialog or window open. This buttonenables you to see the effects of your changes before closing the dialog/window.Click this button to close the dialog or window immediately (discarding any changes).Click this button to open a file. Generally, this button is associated with a combo-box or list pane.You use the combo-box or list pane to specify a file and then click the Open button to open the file.InduSoft Web Studio v6.1 SSP4 3–39
IWS Users GuideWorking with the IWS Development EnvironmentButtonCloseBrowseBackNextReplaceRemovePurposeClick this button to close the open file, screen, dialog, and so forth.Click this button to open a Browse dialog to search for a file or folder to open.Click this button to progress to the previous screen in a sequence of screens.Click this button to progress to the next screen in a sequence of screens.Click to open a Replace dialog, which enables you to change tags or strings associated with aselected screen object.Click to remove a selected (highlighted) object from a list or a display screen.Common Buttons TableManaging the Development Environment WindowsWhen you click the Window menu on the main menu bar, the following options areavailable to help you manage your open screens and worksheets:Cascade arranges the open screens or worksheets in a cascade within theScreen/Worksheet window.Cascading Screens3–40 InduSoft Web Studio v6.1 SP5
Working with the IWS Development EnvironmentIWS Users GuideTile Horizontally arranges the open screens or worksheets:Horizontally Tiled ScreensTile Vertically arranges the open screens or worksheets:Vertically Tiled ScreensArrange Icons moves and arranges minimized screens or worksheets along the bottomof the Screen/Worksheet window.Close closes only the active (selected) screen or worksheet.Close All closes all open screens or worksheets.Currently Open: Lists all of the open screens or worksheets. You can select a namefrom the list to bring that screen or worksheet to the top of the group.Windows…: Contains options that enable you to manage open displays andworksheets.InduSoft Web Studio v6.1 SSP4 3–41
IWS Users GuideWorking with the IWS Development EnvironmentSelect a name from the list tobring that screen or worksheet tothe top of the group.List of ScreensChanging the Screen ResolutionClose all open documents and then select Tools > Convert Resolution to open the ConvertResolution dialog, which allows you to change the resolution of your application.Convert Resolution Dialog3–42 InduSoft Web Studio v6.1 SP5
Working with the IWS Development EnvironmentIWS Users GuideTo change the application resolution: Click (enable) the radio button of the resolution you want to use to convert theapplication. Click the Convert button. Click the Close button to close the dialog when you are finished.Before converting the application to the new resolution, IWS backs up all screens attheir previous size in a Backup folder located in the Screen folder in your\\ directory. The asterisk (*) next to the resolution denotes the current(base) resolution. (Note: When you select a new resolution, all screens will be scaledfrom this new base resolution.)Using Pop-Up MenusIf you right-click on any component in the Workspace, a menu displays with optionsrelated to that component. For example, the following pop-up menu enables you toOpen the Application Tags database, Insert (create) a new tag, or Refresh the current viewof the Application Tags database:Right-Click to Open a Pop-Up MenuUsing Select AllFrom the menu bar, select Edit > Select All to select all objects on the active screen, orpress Ctrl+A on the keyboard.Cutting, Copying, Pasting ObjectsFrom the menu bar, select Edit > Cut to remove a selected item from a screen and store iton the Windows clipboard (replacing any previously selected objects stored on theclipboard). You use Cut in conjunction with the File > Paste option to move an object toanother location on the same screen or onto a different screen. Note:Using the Cut menu option is the same as using Cut buttonStandard toolbar.located on theFrom the menu bar, select Edit > Copy to duplicate a selected item and store it on theWindows clipboard. Use Copy in conjunction with the Paste option to place a copiedobject in another location on the same screen or onto a different screen. You can pastea copied object multiple times.InduSoft Web Studio v6.1 SSP4 3–43
IWS Users GuideWorking with the IWS Development Environment Note:Using the Copy menu option is the same as using Copy buttonStandard toolbar.located on theFrom the menu bar, select Edit > Paste to place the contents of the Windows clipboard(cut or copied objects) onto the active screen. If the clipboard contains an object, IWSwill paste that object into the upper left corner of the screen. You can paste a cut orcopied object multiple times. Note: You can easily copy (drag) selected items by holding down the Ctrl key + leftmouse button. Using the Paste menu option is the same as using Paste buttonStandard toolbar.located on theYou can select Edit > Undo to undo the last action performed (and up to 20 actions takenprior to the last action) while working on a screen. (Object Properties actions do notincrease Undo steps). Note:Using the Undo menu option is the same as using Undo buttonStandard toolbar.located on theFinding System InformationFrom the menu bar, select Tools >System Information to open the System Informationwindow, which provides information about the following:System Information: Displays details about your operating system.Network Resources: Displays details about your computer's network.Applications: Lists the applications that are running.Processes: Displays all Windows tasks that are running.Services: Lists the Windows NT/2000 services being used by IWS(Windows NT/2000 only).3–44 InduSoft Web Studio v6.1 SP5
Working with the IWS Development EnvironmentIWS Users GuideSystem Information Window Note:Although you open the System Information window from IWS, this windowprovides general information about the local station and the network only. TheSystem Information window does not provide specific information about theapplication.Searching for Tags and Screen ObjectsUSING THE FIND OPTIONSelect Edit > Find to open the Find dialog, which allows you to search for a word in theactive worksheet.Find DialogType the text string in the Find What text box and then specify search parameters byclicking on one or more of the following:Match whole word only: IWS searches for the specified term, and does not includeinstances where the specified term is part of a larger word. For example, if youspecify back, IWS finds only back, not backward.Match case: IWS searches for term using the specified capitalization. For example, ifyou specify TankLevel, IWS does not search for tanklevel.Direction: Controls which direction IWS searches the worksheet (Up or Down).InduSoft Web Studio v6.1 SSP4 3–45
IWS Users GuideWorking with the IWS Development EnvironmentClick on the Find Next button to begin the search. (Click the button again to resumesearching the worksheet.)USING GO TO OPTIONFrom the main menu, select Edit >Go to to jump to a line in an open worksheet or toselect an object using the object’s ID number. IWS applies a sequential identificationnumber (ID) to each object created on the screen. When you select an object, the IDnumber displays in the status bar. Objects are numbered according to how they arelayered, starting with the number zero (the backmost object). These objects arerenumbered when you bring them to front or back. When you group objects, they allbecome one layer.Line DialogTo jump to a line or an object, select Go to. When the Line dialog displays, type the linenumber or object ID number into the Number text box and click the OK button. Tip:If you have many superimposed objects, and it is not possible to select an objectusing the pointing device, you can use the Go to option to edit the properties of anobject that is under other objects.Using the Tag Properties ToolbarThe Tag Properties toolbar provides a text box and several buttons (shortcuts) thatenable you to create, locate, and access different tags, functions, and tag properties.Tag Properties Toolbar3–46 InduSoft Web Studio v6.1 SP5
Working with the IWS Development EnvironmentIWS Users GuideUSING THE OBJECT FINDERClick the Object Finder button to open the Object Finder dialog, which lists all Tagsand Functions currently configured for the application.Object Finder DialogTo select an existing tag/function, double-click on the tag/function name, andthen click OK to close the dialog. The selected name displays in the Tagname text box.To select a specific array index, click the Index button after specifying the array tagname.To select a specific member name, click the Member button after specifying the classtag name.To create a new tag, click the New button.When the New Tag dialog displays, enter the following information, then click OK toclose the dialog:– Name– Array Size– Type (Boolean, Integer, Real, String, Class:Control, Class:msgonline, orClass:Alr)– Description– Web data (local or server)InduSoft Web Studio v6.1 SSP4 3–47
IWS Users GuideWorking with the IWS Development EnvironmentUSING THE X-REF OPTIONClick the Cross Reference button to search all application screens and worksheets forthe tag noted in the Tagname text box. This function writes a log, detailing all theoccurrences of the tag, to the XRef tab in the Output window. For example, the resultsof searching for a BlinkFast tag are as follows:XRef ResultsSee also “Using the Output Window” on page 3–24.USING THE GLOBAL TAGS REPLACE OPTIONWhen you select the Global Tags Replace button from the Tag Properties toolbar, theGlobal Replace dialog displays:Global Replace DialogFrom the Global Replace dialog, you can replace any tag(s) from all documents (screensand worksheets) of the whole application. You can edit both the From and the Tocolumn.When replacing composed tags (array size > 0 and/or Type = Class), you canconfigure a specific array position (for example, TagA[1]) or class member (forexample, TagB.MemberX) or both (for example, TagC[3].MemberY). If you configureonly the Main Tag Name (for example, TagC) in the From column, all tags from this maintag will be modified for the tag configured in the To column.3–48 InduSoft Web Studio v6.1 SP5
Working with the IWS Development EnvironmentIWS Users GuideIf an invalid replacement is configured (for example, replace the Main Tag tag from aclass type tag for a simple tag (not a class tag), the OK button will be disabled. When theOK button is pressed, the tags configured on the Global Replace dialog will be replacedin the order that they were configured on the dialog interface. Note:You must close all documents (screens and worksheets) before executing thiscommand.When changing the tag name on the Tags Database worksheet, IWS will ask you if youintend to replace this tag through the whole application.The Replace option will be created in the Edit menu. By using this option, the GlobalReplace dialog is prompted, however, the changes are applied only to the currentscreen or worksheet in focus.Replacing TagsDouble-click the object to open the Object Properties dialog. To replace tags, select theReplace button located on the Object Properties dialog.Object Properties DialogYou can select one or more replacement tags by selecting the Replace Strings tab. Currenttags used are displayed. You can type the New Tag to the right of each Current Tag.Replace Tags TabYou can also select one or more replacement strings by selecting the Replace Strings tab.Current strings used are displayed. You can type the New String to the right of eachCurrent String.When you are finished, click the OK button.InduSoft Web Studio v6.1 SSP4 3–49
IWS Users GuideWorking with the IWS Development EnvironmentReplace Strings TabTesting DisplaysFrom the menu bar, select Project > Test Display to activate the test display mode, whichallows you to configure the application while viewing graphical dynamics online in thedevelopment environment. The test display mode does not enable you to use theCommand or input Text I/O dynamics nor execute worksheets. Note:Using the Test Display menu option is the same as using theExecution Control toolbar.button on theTo stop the test display mode, select Project > Stop display test. Note:Using the Stop display test menu option is the same as using theExecution Control toolbar.button on the3–50 InduSoft Web Studio v6.1 SP5
Working with the IWS Development EnvironmentIWS Users GuideVerifying the ApplicationFrom the menu bar, select Tools > Verify Application to recompile all Math worksheets,expressions, and screen logic, as well as to update current HTML files using thesettings configured on the Web tab of the Project Settings dialog.QuickTime and aTI<strong>FF</strong> (Uncompressed) decompressorare needed to see this picture.Verifying an ApplicationIf there are any tags used in the application that are not defined in the database, thenIWS will indicate where (i.e., the screen or worksheet file) those tags are used.QuickTime and aTI<strong>FF</strong> (Uncompressed) decompressorare needed to see this picture.Invalid Tag Found in Screen File Tip:When you save a screen or worksheet, IWS includes a pointer to the currentdatabase version. When you execute the application, IWS compares the screen orworksheet database to the current application database and if there is amismatch, IWS recompiles the expressions.To avoid doing these tasks during application runtime, we recommend runningthe Verify Application tool before downloading and/or finishing an application. Youshould also use this function when converting an application to a new version ofthe program. Note:Selecting the Verify Application tool will delete all temporary files (e.g., *.txt, *.macand *.tag files) from the application folder to save disk space and clean theapplication before downloading it to the runtime station.Verifying an application does not automatically download it to the runtimestation. To download the application, you must use the Send project to target tool.InduSoft Web Studio v6.1 SSP4 3–51
IWS Users GuideWorking with the IWS Development EnvironmentRunning ApplicationsFrom the menu bar, select Project > Run Application to launch the runtime modulesspecified as Automatic on the Project Status dialog (Execution Tasks tab).When you start the Viewer module, it opens the screen(s) currently being edited.If you do not specify any Automatic tasks, InduSoft Web Studio will launch theViewer and BGTask tasks automatically when you execute Run Application.If you are not currently editing screens in the development environment, theViewer module opens the screen specified in the Startup screen field on the RuntimeDesktop tab (Project Settings dialog). Note:Using the Run Application option is the same as using theExecution Control toolbar.button on the Caution:Run Application affects the application from the target station (configured in theExecution Environment dialog). Be sure you know which target station isconfigured (local or remote) before executing the Run Application command.To stop all runtime tasks, select Project > Stop Application. Caution:Stop Application affects the application from the target station (configured in theExecution Environment dialog). Be sure you know which target station isconfigured (local or remote) before executing the Stop Application command. Note:Using the Stop Application option is the same as using theExecution Control toolbar.button on theRestoring DefaultsFrom the menu bar, select View > Restore Defaults after adding or modifying the interfaceto return to the IWS default development environment. You will need to close andreopen IWS for the changes to take effect.Saving Your WorkClick the Save buttonto save any active screens or worksheets. Notes: Using the Save button is the same as selecting File → Save from the menu bar ortyping the Ctrl+S key combination. The Save function becomes available only when you modify the active file.Click the Save All buttonto save all open screens or worksheets.3–52 InduSoft Web Studio v6.1 SP5
Working with the IWS Development EnvironmentIWS Users Guide Note: Using the Save All button is the same as selecting File → Save All from the menubar. The Save All function becomes available only when you modify a screen orworksheet.Printing Project ScreensFrom the menu bar, select File > Print Setup to open the Print Setup dialog. From thisdialog you can specify which printer to use and configure different printing options,such as paper size and print orientation (portrait or landscape).Print Setup Dialog Note:To specify a default printer: Go to your Windows Start menu and select Start > Settings > Printers. When the Printers dialog displays, right-click on a printer name. When the pop-up menu displays, select Set As Default. A check displays next to Set As Default indicating the selected printer is thedefault.InduSoft Web Studio v6.1 SSP4 3–53
IWS Users GuideWorking with the IWS Development EnvironmentTo preview a screen before printing, select File > Print Preview to open the Print Previewwindow.Previewing an Alarm WorksheetUse the buttons located along the top of the Print Preview window as follows:Click Print to open the Print dialog and print the screen or worksheet (same as usingthe File > Print command).Click Next Page to view the next page in a series of pages.Click Prev Page to view the previous in a series of pages.Click Two Page to view two pages at a time.Click Zoom In to check details.Click Zoom Out to change back to the default size. Notes: The Next Page, Prev Page, and Two Page buttons become active only when youare printing more than one page. The Zoom Out button becomes active after you Zoom In.Click Close to close the Print Preview window.You can also select File > Print from the menu bar open the Print dialog (identical to thePrint Setup dialog discussed previously). You can use the Print dialog to print the activescreen or worksheet. Note:Selecting the Print menu option is the same as using the Print buttonStandard toolbar.on the3–54 InduSoft Web Studio v6.1 SP5
Working with the IWS Development EnvironmentIWS Users GuideTips and TricksThis section provides useful tips and tricks to help you take full advantage of the toolsprovided by IWS, enhancing your productivity when developing applications with IWS.Configuring the Focus of the Object Properties Window on theScreen EditorWhen you double-click any object (or group of objects) in the Screen Editor, the ObjectProperties window is launched, allowing you to configure the selected object’s settings.The content of this dialog window varies according to the specific object/dynamic thatis being edited. However, there is always a pin button in the left upper corner of thisdialog window:Object Properties DialogThe pin button looks like this, , when it is released, and like this, , when it ispressed.When the pin button is released, the focus is passed to the object on the screen as soonas that object is selected. Therefore, we recommend you keep this button releasedwhen you want to manipulate (copy, paste, cut or delete) the objects. Although theObject Properties window is on the top, the keyboard commands (Ctrl+C, Ctrl+V,Ctrl+X or Del) are sent directly to the objects.When the pin button is pressed the focus is kept on the Object Properties window, evenwhen you click the objects on the screen. We recommend you keep this button pressedwhen you want to modify the settings of the objects. You can click an object and typethe new property value directly in the Object Properties window (it is not necessary toclick on the window to bring focus to it). Also, when the pin button is pressed, theObject Properties window does not automatically close when you click on the screen.Importing a DatabaseThe Import Wizard is a powerful tool that reduces engineering time during applicationdevelopment. Using the Import Wizard, you can import tags from different data sourcesdirectly to the IWS Tags Database. Depending on the data source, you can import notInduSoft Web Studio v6.1 SSP4 3–55
IWS Users GuideWorking with the IWS Development Environmentonly the tag names, but also the communication interface (the link between the tagsand the PLC addresses).When you select File > Import Wizard, an Import Database Wizard dialog displays tostep you through the process of importing tags. There are three steps for importingtags from these data source types:InduSoft Web Studio DatabaseOPC Server DatabaseCSV DatabaseODBC DatabasePanelBuilder32 DatabaseRSLogix 5000 CSV DatabasePanelMate Plus DatabaseOMRON CX Programmer DatabaseTwinCAT PLC DatabaseSTEP1: SELECT THE SOURCE TYPEImport Wizard – Selecting the Data Source TypeClick the data Source Type, which is where the tags are being imported from. Click theNext button.3–56 InduSoft Web Studio v6.1 SP5
Working with the IWS Development EnvironmentIWS Users GuideSTEP 2: CONFIGURE THE SOURCE TYPE SETTINGSImport Wizard – Selecting the Source Type SettingsMost of the settings in the second window depend on the data Source Type selected inthe first step. The screenshot above is an example of one data Source Type (OPC ServerDatabase). The settings that are common for any data Source Type are describedbelow:Options box: Select Do not import duplicated tags if you do not want imported tags tooverwrite tags with the same name that already exist in the Tags Database of thecurrent application. Select Replace duplicates with tags imported to overwrite tagsin the Tags Database with imported tags of the same name.Use Prefix: Check to specify a prefix (up to 4 characters) to be concatenated to thename of the imported tags. It is useful to use a prefix to differentiate the importedtags from the tags created manually. Note:To use the Remote option, InduSoft Web Studio must be running on theremote computer.After configuring the settings in this dialog window, click the Next button.InduSoft Web Studio v6.1 SSP4 3–57
IWS Users GuideWorking with the IWS Development EnvironmentSTEP 3: FILTER THE TAGSThe screenshot above is an example of one data Source Type (OPC Server Database).The fields and settings that are common for all data Source Types include thefollowing:Grid: Displays the list of tags found on the data source.Field NameCheck-boxTag NameSizeTypeDescriptionDescriptionCheck to import the tag from the data source to the Tags Database of the current application.Name of the tagArray size of the tagData type of the tag (Boolean, Integer, Real, String or Class:)Description of the tagCheck button: Click to select/import all tags in the grid.Uncheck button: Click to uncheck all tags in the grid.Filter button: Click to filter the tags. The Filter dialog window will display, allowing youto specify a mask for each column in the grid. Wild cards (* and ?) can be used tofilter data.Clear filter button: Click to reset the filter.Import Filtered Tags Only check-box: Check this option to import only the tags that arevisible in the grid (filtered).Status box: Displays a message describing the status of the tag currently selected inthe grid. This information is especially useful to indicate why a tag cannot beimported.3–58 InduSoft Web Studio v6.1 SP5
Working with the IWS Development EnvironmentIWS Users GuideLegend box: Describes the meaning of the colors that represent tag status:Color Legend DescriptionRedErrorTag cannot be imported because it is not supported byIWS. See the Status box for a detailed description ofthe error.Blue Tag will be imported Tag will be imported after you click the Finish button.Gray Tag can be imported Tag can be imported but it has not been checked.Database size box: Displays summary information regarding the current ImportWizard:LabelCurrentImportingReplacingDescriptionIndicates the number of tags configured in the Application Tags database of the currentapplicationIndicates the number of tags selected to be importedIndicates the number of tags configured in the Application Tags database of the currentapplication that will be replaced by an imported tag with the same name.After selecting the tags to import, click the Finish button, or click Cancel to abort theoperation.The other settings vary according to the data source selected in step one. They aredescribed in the specific sections for each data source type that follow:– Importing from Other InduSoft Web Studio Databases– Importing from OPC Server Databases– Importing from CSV Databases– Importing from ODBC Databases– Importing from PanelBuilder32 Databases– Importing from RSLogix 5000 CSV Databases– Importing from OMRON CX Programmer Databases– Importing from PanelMate Plus Databases– Importing from TwinCAT PLC DatabasesImporting from Other InduSoft Web Studio DatabasesThis wizard allows you to import the interfaces (tags and worksheets) of other IWSapplications. When you import only the tags, rather than the whole application, from aremote computer, the TCP/IP Client worksheet can be automatically created to link thetags between both stations (the local and the remote), and to share the value of thesetags between both stations during the runtime.InduSoft Web Studio v6.1 SSP4 3–59
IWS Users GuideWorking with the IWS Development EnvironmentImport from InduSoft Web Studio Database WizardFieldImport tags onlyImport the wholeapplicationDescriptionWhen this option is selected, the tags from the other application will be imported tothe current application. The other interfaces of the application (worksheets) will notbe imported.When this option is selected, the following interfaces from the other application willbe imported to the current application: Tags Database Global Procedures Tags Database Global Procedures Screens Group Screens Web Pages Alarms Trend Recipes Reports ODBC Math Script Scheduler Drivers OPC3–60 InduSoft Web Studio v6.1 SP5
Working with the IWS Development EnvironmentIWS Users GuideDo not importduplicatedReplace duplicatedwith importedLocalRemoteGenerate TCP/IPClient worksheetUse Prefix TCP/IP DDEThis option is useful for merging applications and importing template application(s).Note:When selecting the option to Import the whole application, the following worksheetswill be always imported, regardless of existing worksheets with the same number inthe current application: ODBC, Math, Script, Scheduler, Drivers, OPC, TCP/IP andDDE. If there are worksheets with the same number in the current application, theworksheets imported from the other application will be inserted as additionalworksheets in the current application (the number of each worksheet is automaticallyincreased to avoid replacing files on the current application.When this option is selected, the following interfaces are not imported in case thereis already an equivalent interface in the current application: Tags Database (tags with the same name will not be imported) Global Procedures (the Global Procedures will not be imported at all) Screens (screens with the same name will not be imported) Group Screens (group screens with the same name will not be imported) Web Pages (Web pages with the same name will not be imported) Alarms (alarms assigned to tags with the same name will not be imported) Trends (trend logs assigned to tags with the same name will not be imported) Recipes (recipes with the same name will not be imported) Reports (reports with the same name will not be imported) Script (the Startup Script will not be imported at all)When this option is selected, the interfaces from the other application will beimported, and the interfaces from the current application with the same name (if any)will be overwritten.Select this option to import tags from an application stored in the local computer intothe current application. To do so, click the Browse button and select the *.APP file ofthe application that has the tags you want to import.Select this option to import tags from an application running in a remote station. Typethe IP Address (or the host name) of the remote computer, in the Remote field. Thetags from the current application from the remote computer will be available forimport. This option is available for importing tags only, but it is not available forimporting the whole application.When you select Remote (instead of Local) and check this option, IWS will configurethe TCP/IP Client worksheet automatically to exchange data with a remoteapplication.Check to specify a prefix (up to 4 characters) to be concatenated to the name of theimported tags. It is useful to use a suffix to differentiate the imported tags from thetags created manually.InduSoft Web Studio v6.1 SSP4 3–61
IWS Users GuideWorking with the IWS Development EnvironmentImporting from OPC Server DatabasesThis wizard allows you to import tags from either a local OPC Server or a remote one.When you import tags from the OPC Server, the OPC Client worksheet is automaticallycreated to link the tags, eliminating the need to configure the communication interfacebetween the OPC Client from IWS and the external OPC Server.Import OPC Server Database WizardLocal/Remote: Provide the following options:ServerLocalRemoteDescriptionSelect this option to import tags from an OPC Server installed in the local computer.Select this option to import tags from an OPC Server installed in a remote computer.Type the IP Address (or the host name) of the remote computer where IWS isrunning in the Remote field.Merge Local and Remote OPC Servers check-box: If you selected a Remote server, check thisoption to display the list of OPC Servers installed in the local computer and also inthe remote computer. Uncheck this check-box to display only the list of OPCServers installed in the remote computer.Identifier combo-box: Displays the list of available OPC Servers.Branch: Click on the Browse button to select the branch of the OPC Server fromwhich the tags (items) will be imported. Leave this field blank if you want to importtags from all branches configured in the OPC Server.Use the item path for the tagname check-box: Check this option to concatenate the pathname to the item name when importing tags from the OPC Server. Uncheck thisoption to use only the item names configured in the OPC Server.In the grid displayed in Step 3 () for this Data Source Type, there is an additionalfield with the label OPC, which displays the name of the items from the OPC Server.3–62 InduSoft Web Studio v6.1 SP5
Working with the IWS Development EnvironmentIWS Users Guide Note:See Steps 1, 2 and 3 in the section above, for the settings and fields thatare common for all Source Types.Importing from CSV DatabasesThis wizard allows you to import tags from a text file in the CSV (Comma SeparatedValues) format, or any similar format.Import CSV Database WizardFile Name: Press the Browse button to select the text file from which the tags will beimported.Data Column box: Select a number for each tag property that corresponds to itscolumn number in the import file. For example, if the Tag, Array Size and Type arelisted in the second, third and first columns in the import file, respectively, select 2in Tag, 3 in Array Size and 1 in Type. The Tag property (tag name) is mandatory, but theother properties are optional.For properties that are not included in the text file, select the option Not used. IWS willinsert defaults or leave the field blank, according to the following table:PropertyDefault ValueArray Size 0TypeDescriptionWeb DataIntegerLocalDelimiters checkbox: Select the delimiter(s) used in the text file to divide one columnfrom another. For a CSV file, the delimiter is Comma (the default). You can selectInduSoft Web Studio v6.1 SSP4 3–63
IWS Users GuideWorking with the IWS Development Environmentmore than one delimiter at a time, and you can use the Other option to enter acustom delimiter. Note:See Steps 1, 2 and 3 in the section above, for the settings and fields thatare common for all Source Types.Importing from ODBC DatabasesThis wizard allows you to import tags from an external SQL Relational Database suchas Microsoft Access, SQL Server, Oracle, My SQL, Sybase and others, through theODBC (Open DataBase Connectivity) interface.Import ODBC Database WizardSelect Data Source button: Click to select the ODBC Data Source Name (DSN) linked tothe database from which the tags will be imported. The DSN must have previouslybeen created with the Data Sources (ODBC) window (Control Panel >Administrative Tools > Data Sources [ODBC] ). After you select a DSN, the otherfields in this window will be populated automatically with information from theselected database.Table combo-box: Select the table that holds the tags in the import database.Tag combo-box: Select the name of the column that holds the tags in the importdatabase.Array Size combo-box: Select the name of the column that holds the array size for thetags in the import database.Type combo-box: Select the name of the column that holds the tag type in the importdatabase.Description combo-box: Select the name of the column that holds the tag description inthe import database.3–64 InduSoft Web Studio v6.1 SP5
Working with the IWS Development EnvironmentIWS Users GuideWeb Data combo-box: Select the name of the column that holds the Web Data for thetags in the import database. Note:See Steps 1, 2 and 3 in the section above, for the settings and fields that arecommon for all Source Types.Importing from PanelBuilder32 Databases Caution:This wizard is sold as an add-on and requires a license to be enabled. Consult yoursoftware for further information.This wizard allows you to import not only the tags, but also the screens, alarmconfiguration and communication interface from a text file (report) exported by thePanelBuilder32 software. Using this wizard, you can convert PanelView application(developed with PanelBuilder32) into the IWS format and run them under anyplatform supported by IWS.Import PanelBuilder Database Wizard Note:See Steps 1, 2 and 3 in the section above, for the settings and fields that arecommon for all Source Types.Import Screens: Check this option to import the graphical screens (including theirobjects and dynamics) to IWS.InduSoft Web Studio v6.1 SSP4 3–65
IWS Users GuideWorking with the IWS Development EnvironmentImport Comm. Configuration: Check this option to import the communication interface(tags linked to PLC addresses) to IWS.Report File: Press the Browse button to select the name of the text file exported fromPanelBuilder32 (report printed to a text file).ControlLogix Only: When importing an application that was configured to exchangedata with ControlLogix PLCs, IWS can convert the communication interface toEthernet/IP (ABCIP driver). To do so, type the IP Address of the PLC and its slotnumber. This information will be used to create the communication interface forthe imported application. If the original application was already configured to usethe Ethernet/IP interface, these fields can be left blank, because the IP Addressand CPU Slot Number are retrieved from the application file itself.In the grid displayed in Step 3 for this Data Source Type, there is an additional fieldwith the label Address, which displays the tag addresses from the PanelBuilderproject. Tip:Please consult the documentation for this import wizard for detailed informationabout how to export an application from the *.PBA format to the text (*.TXT)format, using PanelBuilder32, and import it into IWS. Note:IWS does not support some special characters (e.g., [ ] . – ) in tag names. Whenyou import your PaneBuilder database into IWS, these special characters will beconverted into underscores ( _ ).Importing from RSLogix 5000 CSV DatabasesThis wizard allows you to import tags from a program for ControlLogix/FlexiLogix PLCdeveloped with RSLogix 5000 and exported to a CSV file. When you import tags fromthe RSLogix 5000 CSV file, the ABCIP driver worksheet is automatically created tolink the tags imported with the PLC, eliminating the need to configure thecommunication interface between IWS and the PLC manually.3–66 InduSoft Web Studio v6.1 SP5
Working with the IWS Development EnvironmentIWS Users GuideImporting Data from the RSLogix 5000 CSV DatabasePLC Options box: Provides the following options:OptionScope (Folder Name):Use Full ScopeDo Not Use ScopeUse Limited ScopePLC IP AddressDescriptionSelect Use Full Scope to import the tags using the full scope configured inthe PLC program.Select Do Not Use Scope to ignore the scope of the tags configured in thePLC program.Select Use Limited Scope to set the number of characters from the Scopethat must be used when importing the tags from the PLC program.Type the IP Address of the PLC. This information will be used to configure thecommunication driver worksheets automatically.CSV File: Click the Browse button to select the CSV file exported by the RSLogix5000 with the list of tags configured in the PLC program. L5K File: Click the Browse button to select the L5K file saved by the RSLogix 5000with the list of UDT (User Defined Type) tags configured in the PLC program. Thisfile is optional for the wizard. However, if this file is not selected, the UDT tags willnot be imported.Create class tags when suitable: Check this check-box to create tags and classes for UDTtags imported from the PLC program. Uncheck this check-box to import tags assingle tags (rather than class type) from the PLC program.In the grid displayed in Step 3 (Importing a Database) for this Data Source Type,there is an additional field with the label Address, which displays the name of theitems from the RSLogix program. Note:See Steps 1, 2 and 3 in the section above, for the settings and fields that arecommon for all Source Types.InduSoft Web Studio v6.1 SSP4 3–67
IWS Users GuideWorking with the IWS Development EnvironmentImporting from OMRON CX Programmer Databases Caution:This import wizard creates the communication driver for the OMRONcommunication driver, which is enabled only for customers that purchase theproduct directly from OMRON. Consult your software vendor for further details.Moreover, the OMRON communication driver communicates with the OMRONPLCs by the FINS Gateway, which is supported for the Windows 2000/XPoperating systems. Therefore, the FINS Gateway must be installed on the computerto enable communication between IWS and the PLCs through the OMRON driver.This wizard allows you to import tags from a program for OMRON PLCs developed withCX Programmer and exported to a CXT file. When importing tags from the CXProgrammer CXT file, the OMRON driver worksheet is automatically created to link thetags imported with the PLC, eliminating the need to configure the communicationinterface between IWS and the PLC manually.Import OMRON CX Programmer Database WizardPrefix: This box allows you to concatenate one of the following types of prefixes to thetags imported from the CX Programmer program:PrefixCustomPLCProgramDescriptionCheck this option to concatenate a custom prefix with up to 8 characters to the name of theimported tags.Check this option to concatenate either the PLC name or the PLC Number to the name of theimported tags.Check this option to concatenate either the Program name or the Program Number to thename of the imported tags.Serial Auto Address: This box allows you to configure the Network Address and theInitial Node Address for the PLCs configured in the product with Serialcommunication (if any):3–68 InduSoft Web Studio v6.1 SP5
Working with the IWS Development EnvironmentIWS Users GuideSettingNetworkAddressNodeAddressDescriptionThis setting will be applied to all PLCs configured in the project with Serial communication.This setting will be applied to the first PLC configured in the project with Serial communication.This setting will be incremented and applied to subsequent PLCs configured in the productwith Serial communication.CXT File: Click the Browse button to select the CXT file, exported by CX Programmer,from which the tags will be imported.In the grid displayed in Step 3 for this Data Source Type, there is an additional fieldwith the label Address, which displays the name of the tags from the CX Programmerprogram. Note:See Steps 1, 2 and 3 in the section above, for the settings and fields that arecommon for all Source Types.Importing from PanelMate Plus Databases Caution:This wizard is sold as an add-on and requires a license to be enabled. Consult yoursoftware for further information.InduSoft Web Studio v6.1 SSP4 3–69
IWS Users GuideWorking with the IWS Development EnvironmentThis wizard allows you to import not only the tags, but also the screens, alarmconfiguration and communication interface from a project created with PanelMatePlus software. Using this wizard, you can convert a PanelMate application(developed with PanelMate Plus) into the IWS format and run it under any platformsupported by IWS.Import PanelMate Database WizardImport Screens: Check this option to import the graphical screens (including theirobjects and dynamics) to IWS.PanelMate Model: Press the Browse button to select the directory where the databasefiles of the PanelMate Plus project that you intend to import are stored.Application: After selecting the correct path on the PanelMate Model field, theapplications available in this directory will be available in this combo-box. Selectthe application that you intend to import before pressing the Next button. Tip:Please consult the documentation for this import wizard for detailed informationabout how to export an application from the PanelMate Plus software into IWS. Note:See Steps 1, 2 and 3 in the section above, for the settings and fields that arecommon for all Source Types.3–70 InduSoft Web Studio v6.1 SP5
Working with the IWS Development EnvironmentIWS Users GuideImporting from TwinCAT PLC DatabasesThis wizard allows you to import database variables from a TwinCAT PLC applicationthat has been developed with Beckhoff’s TwinCAT software. Also, when you run theimport, IWS automatically creates and configures a TWCAT driver worksheet,eliminating the need to manually configure the communication between IWS andTwinCAT.The Import TwinCAT PLC Database Wizard dialog allows you to configure the followingsettings:AMS Net ID: Enter the AMS Net ID of the TwinCAT PLC that you want to communicatewith. For example: 5.0.112.206.1.1TCP Port: Select the port on which the PLC’s runtime system has been configured torun. You can select one of the standard ports (e.g. 801, 811, 821 or 831), or enter acustom port number.Symbol File: Click the Browse button to select the TwinCAT symbol file (.SYM or .TPY)that contains the variables to be imported. For more information, please see“Exporting the Symbol File from TwinCAT” below.InduSoft Web Studio v6.1 SSP4 3–71
IWS Users GuideWorking with the IWS Development EnvironmentEXPORTING THE SYMBOL FILE FROM TWINCATThe TwinCAT development software automatically exports the application database toa “symbol file” every time you rebuild your TwinCAT application project. However,TwinCAT exports the entire database by default, including many system and libraryvariables that IWS cannot import. Before you run the import wizard, you mustreconfigure your TwinCAT project options to export only the POUs and Global Variablesand then rebuild your TwinCAT application project to generate a fresh symbol file. Note:As of version 2.8, the TwinCAT development software exports the symbol file inboth .SYM and .TPY formats:.SYM is a legacy format that is included for backward compatibility. Beckhoffrecommends that it be used only with TwinCAT OPC Server..TPY is a new, XML-based format that should be used in all other situations,including importing into IWS.To reconfigure your project options and generate a fresh symbol file:1. Open your TwinCAT application project using the TwinCAT development software.2. Choose Project → Options from the menu bar. The Options window is displayed.3. Select Symbol configuration from the Category list:QuickTime and aTI<strong>FF</strong> (Uncompressed) decompressorare needed to see this picture.Selecting “Symbol configuration”4. Click (check) the Dump symbol entries option.5. Click the Configure symbol file… button. The Set object attributes dialog is displayed.3–72 InduSoft Web Studio v6.1 SP5
Working with the IWS Development EnvironmentIWS Users Guide6. For the sake of expediency, you should first disable the export of all objects andthen reenable only the objects that you want to export to IWS — typically, the POUsand Global Variables. Select all of the objects in the tree and uncheck all options forthem at the bottom of the dialog. For example:QuickTime and aTI<strong>FF</strong> (Uncompressed) decompressorare needed to see this picture.Configuring the symbol file Note:You may need to check Export variables of object in order to activate the othercheckboxes and then uncheck them.InduSoft Web Studio v6.1 SSP4 3–73
IWS Users GuideWorking with the IWS Development Environment7. Reselect only the POUs and Global Variables that you want to export to IWS. Do notselect libraries. With the objects selected, check all of the options at the bottom of thedialog. For example:QuickTime and aTI<strong>FF</strong> (Uncompressed) decompressorare needed to see this picture.8. Click OK to close the Set object attributes dialog, and then click OK again to close theOptions window.9. Choose Project → Rebuild All from the menu bar. The system will rebuild theapplication project, generating a symbol file that contains the desired POUs andGlobal Variables.You are now ready to import the variable names into InduSoft Web Studio.3–74 InduSoft Web Studio v6.1 SP5
Working with the IWS Development EnvironmentIWS Users GuideDevelopment ModulesThis section discusses an overview of graphics and tasks development modules.For more information, see Chapter 7: Configuring Screens and Graphics andChapter 8: Configuring Task Worksheets.GraphicsThe most basic function performed by InduSoft Web Studio is to provide a window intothe process. The ability to display the status of the process by interacting withinstrumentation (or computers), is described as the Human-Machine Interface (HMI).InduSoft Web Studio allows you to create applications that can monitor processesusing high-resolution color screens.The InduSoft Web Studio graphic tools consist of two modules:The Screen/Worksheet Editor on the InduSoft Web Studio desktop (used to createor import graphics)The application runtime ViewerYou can use animation links to create dynamic graphic objects or symbols. Animationlinks cause objects and symbols to change appearance to reflect changes in the valueof a tag or an expression. Each screen is an association of static and dynamic objects.Screens can have an optional bitmap that acts as a background in the object window.On the following screen for example, the static images can be part of a bitmap in thebackground object and objects with animation in the dynamic object layer can reflectthe changes in the plant, giving the illusion that the screen is three-dimensional.Sample CEView Emulation ScreenAll InduSoft Web Studio configuration tasks require a Windows-compatible pointingdevice, such as a mouse or touch pad. You can run an application in the Viewerwithout a pointing device if you configure keypad or keyboard keys for all commands.InduSoft Web Studio v6.1 SSP4 3–75
IWS Users GuideWorking with the IWS Development EnvironmentTasksYou use the IWS Tasks tab to configure task-specific worksheets, each composed of aHeader (where you define global information for the worksheet) and a Body (where youconfigure the tags and expressions used in each task).You can configure the following task-specific worksheets: Alarm Groups : Use to define an alarm group, its characteristics, and its messagesthat are reported in alarm conditions. The main purpose of the alarms is to informthe operators about any problem or change of state during the process so thatcorrective action can be taken.To show alarm messages on the screen, you must create the alarm object on thescreen. Trend Groups : Use to define trend groups, which keep track of process variablesbehavior. You can store samples in a history file and show both history and onlinesamples in a screen trend graph. Recipes : Use to read and write ASCII files from and to the hard disk, and totransfer values between files and real-time memory. Typically, you use this moduleto store process recipes, but these files can store any type of information such asoperation logs, passwords, and so forth. You also can use this module to store datain XML format. Reports : Use to configure your own reports with system data, in either ASCII orRTF format. The main purpose of this module is to make report creation easier andmore efficient. Math Worksheets : Use to implement additional routines to work with the basicfunctions of the InduSoft Web Studio modules. A Math Worksheet is a group ofprogramming lines that are executed as one of the application Background Tasks.You can configure the mathematics in blocks in different worksheets.This worksheet provides a free environment for logical routines and mathematicalcalculations that the project may need. For these purposes, the scripting languageis simple and easy to use. Scheduler : Use to generate the time bases used in an application. The Scheduleris capable of triggering events. ODBC Configuration : Use to enable InduSoft Web Studio applications to access anydatabase that is compatible with the ODBC protocol (such as Access, Excel, Oracle,SQL Server and so on). Note:The ODBC interface is not available for WinCE applications.General CommunicationsYou can enable InduSoft Web Studio applications to communicate (exchange datavalues) with other applications, remote devices (such as a PLC or transmitters), andany devices that implement OPC or DDE Servers.To enable communication, you configure the task worksheets provided by IWS.Instructions for configuring these worksheets are provided in Chapter 10:Communication in the following sections:3–76 InduSoft Web Studio v6.1 SP5
Working with the IWS Development EnvironmentIWS Users GuideConfiguring a Driver: Explains how to configure a Driver worksheet to implement acommunication protocol (OPC, TCP/IP, or DDE).Configuring OPC: Explains how to configure an OPC worksheet to managecommunication between local or remote OPC Clients and Servers.Configuring TCP/IP: Explains how to configure a TCP/IP worksheet to managecommunication between two IWS applications.Configuring DDE: Explains how to configure a DDE worksheet to managecommunication between local or remote DDE Clients and Servers.Use the Comm tab to access all worksheets configured to establish communication withanother device or software using available protocols.InduSoft Web Studio v6.1 SSP4 3–77
Chapter 4: Understanding IWS StructureThis chapter explains the internal structure of IWS, including how data flows throughthe IWS runtime environment and how the various runtime modules are executed. IMPORTANT!To avoid unexpected behaviors and guarantee the best performance whenexecuting applications, we strongly recommend that you read and understand theinformation in this chapter before you start developing complex applications.Understanding the Internal Structure and Data FlowIWS runtime environment runs on an operator interface workstation (runningWindows 2K/XP/Vista/CE) and consists of the following modules or threads (programelements that can execute independently of other program elements):Background Task (a supervisory task): Executes other internal tasks (IWSworksheets). For example, the Background task executes scripts configured in theMath and Scheduler worksheets and manages parameters configured in the Alarm,Recipe, Report, and Trend worksheets.Database Spy (debugging tool):– Executes functions and/or expressions for testing purposes– Reads data (such as tag values) from the Tags database– Writes data (such as tag values) to the Tags databaseDDE Client: Manages DDE communication with a DDE Server (local or remote),according to parameters configured in the DDE Client worksheets.DDE Server: Manages DDE communication with a DDE Client (local or remote).LogWin (debugging tool): Traces messages generated from other modules/tasks.Driver Runtime: Manages the read/write commands configured in the Driverworksheets.OPC Client: Manages OPC communication with an OPC Server (local or remote),according to parameters configured in the OPC Client worksheets.OPC Server: Manages OPC communication with an OPC Client (local or remote).ODBC Runtime: Manages ODBC data communication with any SQL relationaldatabase, according to parameters configured in the ODBC worksheets.TCP/IP Client: Manages TCP/IP communication with a remote TCP/IP Server module(from IWS), according to parameters configured in the TCP/IP Client worksheets.TCP/IP Server: Manages TCP/IP communication messages with a remote TCP/IPClient module (from IWS).Viewer: Executes all scripts (On Open, On While, On Close, Command, Hyperlink, and soforth) configured for application screens and updates the screen objects.None of the preceding runtime modules exchange data directly with another moduleor task. Instead, runtime modules send data to and receive data from the Tagsdatabase, which is the “heart” of IWS.The Tags database manages the flow of data between modules. In addition, the Tagsdatabase stores all tag values and the status of all properties associated with each tag(such as alarm conditioning, timestamp, quality, and so forth).InduSoft Web Studio v6.1 SP5 4–1
IWS Users GuideUnderstanding IWS Structure Note:Tags are variables (such as communication points in field equipment, calculationresults, alarm points, and so forth) that are used in screens and worksheets.For detailed information about tags, tag values, and tag properties see Chapter 5:Working with Tags.IWS Data FlowEach IWS module contains a virtual table of the tags that are relevant for that moduleat the current time. The Tags database uses this table to determine which informationmust be updated in each module. For example, the Viewer contains a virtual table thatlists all tags configured for all of the open application screens. If a tag value changes,the Tags database sends a message to the Viewer, and then the Viewer updates thevalue in all objects where the tag is configured.4–2 InduSoft Web Studio v6.1 SP5
Understanding IWS StructureIWS Users GuideFor example, if a driver reads a new value from the PLC (programmable logiccontroller), the driver updates the tag associated with this value in the Tags database.Then, if this new information must display on the application screen, the Tagsdatabase sends the new tag value to the Viewer task, and the Viewer updates thescreen.Data Flow ExampleNote that the driver does not send new tag values directly to the Viewer. In addition,there is no pooling between tasks—the Tags database receives the updatedinformation and immediately forwards it to all runtime tasks requiring thatinformation. IMPORTANT!The Viewer module will update an object only when (at least) one of the object’s tagvalues change.If you configure a dynamic object (such as Text I/O) with a function that does notrequire a tag (for example, NoInputTime()), the Viewer will not update the objectbecause there is are no tags associated with that object.IWS’s architecture significantly improves the internal data flow performance andmakes it easy for you to add new internal tasks. Even though each task worksindependently, it can access information from any other task through the Tagsdatabase.Executing/Switching IWS ModulesIWS is a SCADA system composed of modules that must be executed simultaneously.Based on the multi-tasking concept, each runtime module (Viewer, Driver, and soforth) is a thread and the operating system switches from one thread to otherautomatically.InduSoft Web Studio v6.1 SP5 4–3
IWS Users GuideUnderstanding IWS StructureIt is a common misconception that you execute a SCADA system when you execute aPLC program. A PLC program contains a simple loop:PLC Program LoopHowever, in a SCADA system, there are several modules running simultaneously, andmost of them can read and write data. Because a SCADA system modifies data (tagvalues) continuously during task execution, the preceding diagram is not applicable.IWS only has one process—Studio Manager.exe. When you execute a runtimeapplication, the Studio Manager.exe process starts the Tags database and all of theruntime modules configured for the application. You can specify which modules (suchas Viewer and Driver) will start during the runtime (see “Starting Runtime Modules onthe Target System” on page 6–31).Each process keeps a list of active threads for the operating system. Actually, eachprocess activates and deactivates each thread during the runtime, according to thealgorithm of each process. Also, when you create a thread you specify a priority value.The operating system continuously scans all currently active threads, and executesthe threads according to their priority value—executing the higher-priority threadsfirst. When threads with higher-priority values are active, the threads withlower-priority values are not executed at all. If there is more than one thread with thesame priority value, and there are no other threads with higher-priority values, theoperating system keeps switching between the threads with the same priority.4–4 InduSoft Web Studio v6.1 SP5
Understanding IWS StructureIWS Users Guide Note:All IWS threads are set to priority 7, which is THREAD_PRIORITY_NORMAL.(Most programs contain this priority value.)Real-time program (such as SoftPLCs and Device Drivers) threads are assigned ahigher-priority value (THREAD_PRIORITY_HIGHEST); however, these programsmust provide a mechanism to keep them inactive for some period of time or thethreads with normal priority would never be executed.IWS uses the UNICOMM.DLL library for serial drivers. This library creates aTHREAD_PRIORITY_HIGHEST thread that “sleeps” (remains inactive) until dataarrives in the serial channel. When IWS detects new data in the serial channel,the THREAD_PRIORITY_HIGHEST thread “wakes up” (becomes active) andtransfers the data from the operating system buffer to the thread buffer, where itcan be read by the Driver. This thread is the only highest-priority thread createdby IWS.If you allowed threads to remain active all the time, the CPU usage would be 100% allthe time, which must be avoided for performance reasons. Every program provides amechanism to prevent threads from staying active all the time.IWS uses the following parameters to prevent threads from staying activecontinuously:TimeSlice (from operating system): Causes the operating system to switchautomatically between active threads with the same priority value.By default, the operating system executes each active thread for approximately20ms and then switches to the next active thread. In other words, if there aremultiple active threads with the same priority value waiting to be executed, theoperating system will not execute any one active thread for more than 20ms.TimeSlice (from IWS): Specifies how long each IWS thread can remain continuouslyactive.You use this parameter in addition to the operating system’s TimeSlice parameter.You configure a TimeSlice value for each IWS thread (except the Background Task) andspecify how long each thread can remain continuously active. As long as a threadis active, the operating system can switch to that thread.Period (from IWS): Specifies the maximum amount of time each IWS thread (exceptthe Background Task) can remain inactive. Caution:We strongly recommend that you do not modify these default values unless it isabsolutely necessary. Configuring these parameters incorrectly can cause theentire system to malfunction (for example: CPU usage will go to 100%) and/orcause some tasks to perform poorly.If you must change the parameter defaults, note the values before making yourchanges so if a malfunction occurs you can return to the original settings.InduSoft Web Studio v6.1 SP5 4–5
IWS Users GuideUnderstanding IWS StructureTo change the IWS TimeSlice and Period parameter default values: From the IWS installation directory (for example, C:\ProgramFiles\\bin), double-click \BIN to open the folder. Double-click the Program Settings.INI file to open the file in Microsoft ®Notepad.The following is a list of all parameters contained in this .ini file and their defaultvalues (in milliseconds).[Period]DBSpy=1000UniDDEClient=200UniDDE=200Driver=20LogWin=100UniODBCRT=100OPCClient=20OPCServer=20TCPClient=100TCPServer=100Viewer=50[TimeSlice]UniDDEClient=100Driver=10OPCClient=10OPCServer=10TCPClient=200TCPServer=200Viewer=200 Note:You may not see all of these parameters listed when you open your ProgramSettings.INI file. However, even if a parameter is not visible in your list,IWS still uses that parameter and its default value.– To change the default value of a displayed parameter: In Notepad, delete the defaultvalue and type the new value in its place.– To change the default value of a parameter that is not displayed in your list: In Notepad, typethe parameter name exactly as shown in the following list, the equal sign, andthen the new value. Save the file (File → Save) and close Notepad (File → Exit).4–6 InduSoft Web Studio v6.1 SP5
Understanding IWS StructureIWS Users GuideThe following figure illustrates how IWS executes a generic thread (such as theViewer).Where:Executing a Generic ThreadSignal is the Period time period (set to 50ms for this example).Signal shows when the thread is active for the operating system.Signal is the TimeSlice time period (set to 30ms for this example).Signal shows the execution of the thread itself.In this example, IWS generates a Period message every 50ms (signal ). When IWSgenerates this message, its thread becomes active and remains active until thespecified TimeSlice time period (from IWS) expires. The thread then remains inactiveuntil IWS generates the next Period message (signal ).While the thread is active, the operating system is responsible for executing thatthread. However, just because a thread is active does not mean the operating systemwill execute it immediately – the operating system may be executing other threads, forexample.When the operating system executes the thread, the TimeSlice timer starts countingand the thread is executed for 20ms (TimeSlice from the operating system). After the20ms period, the operating system automatically switches to the next active thread(such as the Driver), and so on.In the above example, the TimeSlice time was set to 30ms, which means the operatingsystem is not supposed to execute the thread more than once in each TimeSlice of IWS.However, if you specify higher values for the IWS TimeSlice time period, it is likely thatthe operating system will execute the same thread more than once in the sameTimeSlice time period.InduSoft Web Studio v6.1 SP5 4–7
IWS Users GuideUnderstanding IWS StructureIn the next example, the Period and the TimeSlice values were changed as follows, butthe default operating system TimeSlice period (20 ms) was not changed.Signal is the Period time period (set to 100ms).Signal shows when the thread is active for the operating system.Signal is the IWS TimeSlice time period (set to 80ms).Signal shows the execution of the thread itself.Setting a Higher TimeSliceNotice that the thread can be executed more than once in the same TimeSlice timeperiod. When the IWS TimeSlice time period expires, the operating system interruptsthe thread execution; however, even though the IWS Period and TimeSlice parametersare set to 100ms and 80ms respectively, the operating system will not execute thisthread continuously for more than 20ms, because the operating system TimeSlice timeperiod is set to 20ms.When the operating system is not executing the Viewer thread, the CPU can executeany other thread or remain idle (if there are no other active threads to execute).Remember, the IWS Period and TimeSlice parameters were created to prevent all threadsfrom being active at the same time to prevent 100% CPU usage.During thread execution, the thread must handle its pending messages. For example,the Viewer module must update any related screen objects. If there are no messagespending, the thread deactivates itself and gives control back to the operating system.The operating system immediately switches to the next active thread. In other words,a thread can interrupt its own execution — even if the operating system TimeSlice timeperiod has not yet expired (which occurs frequently in real-world applications). Note:The Database Spy, DDE Server, LogWin, and ODBC Runtime modules do not havean IWS TimeSlice parameter. Consequently, after each thread handles all of itspending messages, the threads become inactive until the next Period message foreach one of the threads occurs.The Background Task is the exception to the execution/switching process just discussed.The mechanism for executing/switching the Background Task is described in the nextsection.4–8 InduSoft Web Studio v6.1 SP5
Understanding IWS StructureIWS Users GuideExecuting/Switching the Background TaskThe Background Task executes scripts from the Math and Scheduler worksheets (forexample, messages from Alarm and Trend worksheets). In addition, the BackgroundTask executes all Recipe and Report commands when the Recipe() or Report()functions are executed during the runtime.Although the Alarm, Math, Scheduler, and Trend tasks are not threads, you canspecify or change their Period time in the Program Settings.INI file located in theC:\Documents and Settings\\Local Settings\ApplicationData\InduSoft Web Studio v6.1 folder (see “Executing/Switching IWS Modules” onpage 4–3).The Period default values (in milliseconds) are as follows:[Period]Math=100Sched=50Alarm=100Trend=1000These values mean that every 100ms, IWS generates a Period message to the Mathtask. Every 50ms, IWS generates a Period message to the Scheduler task, and so on. Caution:We strongly recommend that you do not modify the Background Task default valuesunless it is absolutely necessary. Configuring any of these parameters incorrectlycan cause your entire system to malfunction (for example, CPU usage will go to100%) and/or cause some tasks to perform poorly.If you must change the parameter defaults, note the values before making yourchanges so if a malfunction occurs you can return to the original settings.Keep in mind that the Background Task thread has the same priority as other threads inIWS (Drivers, Viewer, and so forth), which means that the operating system will notexecute this task continuously for more than 20ms.The Background Task executes the Recipe and Report commands when the Recipe() orReport() functions are executed. Because the Recipe() and Report() functions aresynchronous, once the Background Task starts executing the functions, it will not switchto another task (Alarm, Math, Scheduler, or Trend) until it completely executes thefunctions. Executing a Recipe() or Report() function usually takes a fewmilliseconds.The Backgound Task must switch between the Alarm, Math, Scheduler, and Trend tasks.When Background Task switches to the Scheduler task, it will not switch to another task(Alarm, Math, or Trend) until all Scheduler worksheets are executed. After executing allScheduler worksheets, the Background Task will not execute the Scheduler again until itreceives the next Period message for the Scheduler task.The Backgound Task applies the same behavior when executing the Alarm and Trendtasks — when the Backgound Task switches to the Alarm or Trend task, it will not switchto another task until it handles all pending messages. So, the Backgound Task will notexecute the Alarm or Trend task again, until IWS generates the next Period message foreach of these tasks.InduSoft Web Studio v6.1 SP5 4–9
IWS Users GuideUnderstanding IWS StructureThe Backgound Task typically executes the Alarm, Scheduler, and Trend tasks in a fewmilliseconds. However, it can take longer to execute the Math task because it usuallycontains loops and complex scripts. Consequently, the mechanism used to executethe Alarm, Scheduler, and Trend tasks cannot be applied to the Math task.The Background Task executes the Math task for no more than 10ms continuously beforeswitching to other task (such as the Scheduler). The Background Task cannot execute theMath task again for the next 50ms; however, the Background Task can execute othertasks (Alarm, Recipe, Report, Scheduler, or Trend) during this 50ms period. After theBackground Task executes all of the Math worksheets, it will not begin a new scan of theMath worksheets until IWS generates a new Period message for the Math task.It is important to re-emphasize that this process was created to prevent 100% CPUusage all the time. Caution:We recommend caution when using the Math() function in a Schedulerworksheet or for a screen object (such as the Command dynamic).When the Scheduler task executes a Math() function, no other task can beexecuted by the Background Task until the Scheduler executes the entire Mathworksheet called by the Math() function. This process can take severalmilliseconds or even seconds, depending on how you configured the script in theMath worksheet (especially for loops).If you configure a Math() function for a screen object, the Viewer stops updatingthe screen until the Viewer executes the entire Math worksheet called by theMath() function.If you must use the Math() function for the Scheduler task or a screen object, werecommend using the following procedure to prevent process delays: Specify one auxiliary tag with the value 1 and the Scheduler or Viewer taskwill send a message to the Tags database to update this tag value. Configure the tag in the Execution field of the Math worksheet to be executed.When the Background Task scans the Math worksheet, IWS will execute theworksheet. Reset the tag in the last line of the Math worksheet (write the value 0 to theauxiliary tag).As a result, the Background Task will not execute the Math worksheet in the nextscan unless the auxiliary tag is set to the value 1 again.4–10 InduSoft Web Studio v6.1 SP5
Chapter 5: Working with TagsAs stated in Chapter 4, the Tags database is the heart of IWS because it manages theflow of data between runtime modules and it stores all tags, tag values, and tagproperties. The Tags database is the medium used by all modules to read or write tagvalues.This chapter explains basic concepts about the tags, tag values, and tag propertiesused in the IWS Tags database—including how to create and edit tags for yourprojects. Note:We recommend that you read and understand the concepts discussed in Chapter4: Understanding the IWS Structure, before you read this chapter.What is a Tag?Tags are variables that are designed to receive results from expressions specified inscreens and worksheets (such as communication points in field equipment,calculation results, alarm points, and so forth).All tags are organized into one of the following categories (which are represented byfolders on the Database tab in the Workspace):Application Tags are tags you create during applicationdevelopment.For example:– Screen tags– Tags that read from/write to field equipment– Control tags– Auxiliary tags used to perform mathematicalcalculationsClasses are compound tags that you create to associate a setof values (rather than a single value) with a class. Classstructures permit a high-degree of encapsulation withinthe Tags database.Shared Database tags are created in a PC-based controlsoftware program and then imported into the IWS Tagsdatabase.For example you might create tags in SteepleChase andimport them into IWS so IWS can read/write data from aSteepleChase PC-based control product. Note:Because you must configure a project before you can share tags, instructionsfor this procedure are provided in Chapter 6: Creating and Configuring aProject. See “Sharing PC-Based Control Software Program Database Tags” onpage 6–4.InduSoft Web Studio v6.1 SP5 5–1
IWS Users GuideWorking with TagsYou cannot modify shared tags within IWS—you must modify the tags in theoriginal PC-based control program, and then re-import them into the Tagsdatabase.System Tags are predefined tags with predetermined functions that are used for IWSsupervisory tasks. For example,– Date tags hold the current date in string format– Time tags hold the current time in string formatMost internal tags are read-only, which means you cannot add, edit, or removethese tags from the database.To see a list of the system tags, select the Database tab in the Workspace, open theSystem Tags folder, and open the Tag List subfolder. The above figure shows apartial list of system tags.After creating a tag, you can use it anywhere within the application, and you can usethe same tag for more than one object or attribute.5–2 InduSoft Web Studio v6.1 SP5
Working with TagsIWS Users GuideDesigning a TagBefore you can create a tag for its intended purpose, you must understand what typesof tags you can create and the basic elements or characteristics of a tag, including:Tag data typesShared or notTag propertiesAfter reading the information provided in this section, you should be able to createtags to properly suit your application needs.Choosing the Tag TypeIWS allows you to create the following types of tags:Basic tags hold a single value.Array tags are a set of tags that use the same name with unique indexes.Class tags are a set of compound tags that consist of user-defined data types(Boolean, Integer, Real or String) or data-type structures.Indirect tags are pointers that provide indirect access to another tag type, includingclass tags.A discussion of these tag types follows.BASIC TAGSA basic tag receives a single value. Typically, most tags defined for an IWS applicationare basic tags. Some examples of a basic tag include:TankID (to identify different tanks in your application)Temperature (to identify the current temperature of an object)Status (to identify whether an object is open or closed)InduSoft Web Studio v6.1 SP5 5–3
IWS Users GuideWorking with TagsARRAY TAGSAn array tag consists of a set of tags that all have the same name, but use uniquearray indexes (a matrix of n lines and one column) to differentiate between each tag.An array index can be a fixed value, another tag or an expression. Maximum arraysizes are determined by product specifications.You can use array tags to:Simplify configurationsEnable multiplexing in screens, recipes, and communication interfacesSave development time during tag declarationYou specify array tags in one of two formats:For a simple array tag, type []For a complex array tag (where the array index is an expression consisting of a tagand an arithmetic operation), type [+c]Where:– is the tag name– [] is the unique index (fixed value or another tag)– + is any arithmetic operation– c is a numerical constant Notes: You must specify a maximum index for each array tag by typing a value (n)in the Array Size column of an Application Tags datasheet or in the Array Size fieldon a New Tag dialog. (See “Creating Application Database Tags” on page 5–13).When you create an n-position array tag, IWS actually creates n+1 positions(from 0 to n). For example, if you specify ArrayTag[15], the array will have16 elements; where 0 is the start position and 15 is the end position. You must not use spaces in an array tag.When IWS reads a tag it begins with the first character and continues until itfinds the first space or null character. Consequently, the system does notrecognize any characters following the space as part of the array tag.For example, if you type a[second + 1] IWS regards a[second as the tag andconsiders it invalid because IWS does not find (recognize) the closing bracket.However, if you type a[second+1], this is a valid array tag.You can specify an array tag wherever you would use a variable name. Also, becausearray tags greatly simplify configuration tasks and can save development time, wesuggest using them whenever possible.For example, suppose you want to monitor the temperature of four tanks. Theconventional configuration method is:temperature1 high temperature on tank 1temperature2 high temperature on tank 2temperature3 high temperature on tank 3temperature4 high temperature on tank 45–4 InduSoft Web Studio v6.1 SP5
Working with TagsIWS Users GuideYou can use array tags to simplify this task as follows (where [n] represents the tanknumber):temperature[n] high temperature on tank [n]The following table contains some additional examples of an array tag:Array Tag ExampleTank[1], Tank[2], Tank[500]Tank[tk]Tank[tk+1]DescriptionSimple arrays, where the array indexes (1, 2, and 500) arenumerical constants. For example, tank numbers.A simple array, where the array index (tk) is a tag.For example, a tag representing the tank number.A complex array, where the array index (tk+1) is anexpression. For example, the value of tk (tank number) plus 1.Array Tag Examples Note:When using another tag to reference the index of an array, if the value of the tag isoutside the size of the array, then the following results are given: If is greater than the size of the array, then MyArray[]will point to the end position of the array; and If is less than 0, then MyArray[]will point to the startposition of the array (i.e., MyArray[0]).CLASS TAGSClass tags are compound tags that permit a high-degree of encapsulation within theTags database. Where basic tags receive a single value, classes are designed to receivemultiple values.You can create a class-type tag by grouping basic or array tags, which then becomethe class members. The maximum number of members for any class depends on theproduct specification.You specify class-type tags in one of two formats:For a simple class tag the syntax is .. (Where theperiod is used as a separator.)For example, if you wanted to monitor several different conditions (such astemperature, level and pressure) in a tank, you might create a class tag as follows:Tank.TemperatureTank.LevelTank.PressureFor creating a complex class tag (using an array tag) the syntax is[].. (Where again, theperiod is used as a separator.)If you wanted to monitor the temperature, level, and pressure conditions inmultiple tanks, you might create a class tag as follows:InduSoft Web Studio v6.1 SP5 5–5
IWS Users GuideWorking with TagsTank[tk].TemperatureTank[tk].LevelTank[tk].PressureWhere tk is an array index, representing the tank number.INDIRECT TAGSIndirect tags “point” to other database tags (including class-type tags). Using indirecttags can save development time because they keep you from having to create duplicatetags (and the logic built into them).You create an indirect tag from any string-type tag simply by typing the “@” symbol infront of the tag name @.To reference a simple tag, assume the strX tag (a string tag) holds the value“Tank,” which is the name of another tag, then reading from or writing to @strXprovides access to the value of the Tank tag.To reference a class-type tag and member, you simply create a string tag thatpoints to the class tag and the member. For example, if a tag strX (a string tag)holds the value “Tank.Level,” which is the name of the class tag, then readingfrom or writing to @strX provides access to the value of the Tank.Level tag.You can also point directly to a class-type tag member; by identifying a class-type thatpoints to a class member. For example: to access the Tank.Level member of theclass, you must store the Tank value within the strX tag and use the syntax,@strX.Level.Choosing a Tag Data TypeAnother consideration when designing a tag is what type of data the tag will receive.IWS recognizes the following, standard tag data types:Boolean (one bit): Boolean or digital variables (0 or 1). Typically used for turningobjects off and on or for closing and opening objects.Integer (four bytes): Integer number (positive, negative, or zero). Equivalent to theC-type, signed long integer (ranging from –2147483648 to 2147483647). Typicallyused for counting whole numbers or setting whole number values.Real (floating point, eight bytes): Real number that is stored internally as a doubleword. Equivalent to a C-type double. Typically used for measurements or fordecimal or fractional values.String (alphanumeric data, up to 1024 characters): Character string that holdsletters, numbers, or special characters. Supports both ASCII and UNICODEcharacters.For example: Recipe product X123, 01/01/90, *** On ***CHANGING HOW BOOLEAN TAGS RECEIVE NUMERIC VALUESBy default, if any numeric value other than 0 (i.e. ≠0) is written to a Boolean tag, thenthe tag automatically assumes a value of 1. You can change this behavior, ifnecessary, by editing the .app file to change the followingsetting:[Options]BooleanTrueAboveZero=5–6 InduSoft Web Studio v6.1 SP5
Working with TagsIWS Users GuideIf BooleanTrueAboveZero is set to the default 0, then the application will behave asdescribed above. If BooleanTrueAboveZero is set to 1, then the application willbehave as follows:When you write any numeric value less than or equal to 0 (i.e. ≤0) to a Boolean tag,the tag assumes a value of 0 (false).When you write any numeric value greater than 0 (i.e. >0) to a Boolean tag, the tagassumes a value of 1 (true). Caution:This is a global runtime setting. If you only want to change how certain tags arehandled, then you should not change this setting.Sharing Tags with a Web Thin ClientIWS allows you to decide whether a tag value can be shared with (displayed on) a WebThin Client station.Local: Prevents a tag value on the Server station from being shared with Web ThinClient stations.Server: Enables a tag value to display on an HTML page, which makes the valueavailable to a Web Thin Client.If you want to view and manage your applications remotely, you must be sure tospecify the Server option for all tags related to the management process. Forexample, if you want the ability to respond to alarms remotely, you must enablethe Server option for all tags related to alarm management.Choosing Tag PropertiesTag properties are attributes (or parameters) that are inherent to a database tag (suchas minimum/maximum values, size, description, and so forth).When you define tags for an IWS application, you can specify tag properties that areused during runtime as tag fields. These runtime tag fields are described in thefollowing table.Tag FieldNameDescription of ValueAssociated with Each FieldTag Type Associated with FieldR/RWBoolean Integer Real StringNameMemberNameSizeThe name of the tag, as configured in theApplication Tags database.The name of the class member, in a properlyconfigured Class. NOTE: The syntax must be:.->MemberNameExample: Tank.Lvl->MembeName = LvlArray Size. If the tag is not an array tag, it returnsthe value 0. R R RInduSoft Web Studio v6.1 SP5 5–7
IWS Users GuideWorking with TagsTag FieldNameDescription of ValueAssociated with Each FieldTag Type Associated with FieldR/RWBoolean Integer Real StringIndexThe index number of an element in an Array. (AnArray is any Tag of size greater than 0.) NOTE: Thesyntax must be:.[]->IndexExample: Tag[1]->Index = 1 RDescription Description of tag (in Tags Database) RWQualityTag quality (192=GOOD; 0=BAD).Field updates every time tag receives expressionresults or a communication task value (Driver orOPC).Invalid expressions (such as division by zero) orreading communication errors associated with tagwill set the tag quality to BAD automatically. RTimeStamp Time & date when tag changes value. RUnitMaxMinDisplayValueA brief description (up to 9 characters) of theEngineering Unit (i.e. the unit of measurement) forthe Tag value. For example, Kg, BTU, psi.Maximum value that can be written to the tag duringruntime.Minimum value that can be written to the tag duringruntimeA converted Tag value that is only displayedon-screen:DisplayValue = (Value / UnitDiv) + UnitAddThis is used when the actual Tag values have oneEngineering Unit (see Unit above) but need to bedisplayed on-screen in another Engineering Unit(see DisplayUnit below). For example, Celsiusdegrees and Farenheit degrees.If user input changes DisplayValue during runtime,then the conversion is reversed before the changeis actually written to the Tag:Value = (DisplayValue − UnitAdd) * UnitDiv RW RW RW RW5–8 InduSoft Web Studio v6.1 SP5
Working with TagsIWS Users GuideTag FieldNameDescription of ValueAssociated with Each FieldTag Type Associated with FieldR/RWBoolean Integer Real StringDisplayUnitUnitDivUnitAddDisplayMaxA brief description (up to 9 characters) of theEngineering Unit for DisplayValue.NOTE: This field can only be set by using theSetDisplayUnit() andSetTagDisplayUnit() functions.Number by which the Tag value is divided to getDisplayValue. To perform no division, UnitDivshould be 1.NOTE: This field can only be set by using theSetDisplayUnit() andSetTagDisplayUnit() functions.Number added to the Tag value to getDisplayValue. To perform no addition, UnitAddshould be 0.NOTE: This field can only be set by using theSetDisplayUnit() andSetTagDisplayUnit() functions.The maximum value that can be input toDisplayValue during runtime:DisplayMax = (Max / UnitDiv) + UnitAddIf DisplayMax is changed during runtime, then Maxis also changed as follows:Max = (DisplayMax − UnitAdd) * UnitDiv R R R RWDisplayMinThe minimum value that can be input toDisplayValue during runtime:DisplayMin = (Min / UnitDiv) + UnitAddIf DisplayMin is changed during runtime, then Min isalso changed as follows:Min = (DisplayMin − UnitAdd) * UnitDiv RWB0 … B31Value (0 or 1) of any of the 32 bits (b0, b1, b2, …b31) of an integer tag. (B0: LSB B31: MSB). RWInduSoft Web Studio v6.1 SP5 5–9
IWS Users GuideWorking with TagsTag FieldNameDescription of ValueAssociated with Each FieldTag Type Associated with FieldR/RWBoolean Integer Real StringAlrStatusInteger value containing the status of all currentlyactive alarms associated with the tag. Each bit ofthis integer value indicates a specific status, asfollows:• Bit 0 (LSB): HiHi Alarm active• Bit 1: Hi Alarm active• Bit 2: Lo Alarm active• Bit 3: LoLo Alarm active• Bit 4: Rate Alarm active• Bit 5: Deviation+ Alarm active• Bit 6: DevM Alarm active RFor example:If Tag->AlrStatus returns value 2, “Hi” alarm is active.If Tag->AlrStatus returns value 3, “HiHi” and “Hi” alarms are active simultaneously.If Tag->AlrStatus returns value 0, there are no active alarms associated with this tag.For Boolean tags, only 1 (bit 1), 4 (bit 2) or 16 (bit 4) values are returned.5–10 InduSoft Web Studio v6.1 SP5
Working with TagsIWS Users GuideField NameDescription of ValueAssociated with Each FieldTag Type Associated with FieldBoolean Integer Real StringR=Read OnlyRW=Read+WriteAckAlrDisableThis field can have two values:• 0: No alarms associated with this tag requireacknowledgment.• 1: At least one alarm associated with this tagrequires acknowledgment.NOTE: This works as a global acknowledge forthe tag and goes to 0 only when all alarms forthe tag have been acknowledged.This field can have two values:• 0: Enables alarm associated with tag.When an alarm condition occurs, the alarmbecomes active.• 1: Disables alarm associated with tag.If alarm condition occurs, alarm will notbecome active. RW RWHiHiHiLoLoLoRateDevPDevM• If 0, HiHi alarm is inactive.• If 1, HiHi alarm is active.• If 0, Hi alarm is inactive.• If 1, Hi alarm is active.• If 0, Lo alarm is inactive.• If 1, the Lo alarm is active.• If 0, LoLo alarm is inactive.• If 1, the LoLo alarm is active.• If 0, Rate alarm is inactive.• If 1, the Rate alarm is active.• If 0, DevP alarm is inactive.• If 1, the DevP alarm is active.• If 0, DevM alarm is inactive.• If 1, DevM alarm is active. R R R R R R RHiHiLimit Limit value for HiHi alarm. RWHiLimit Limit value for Hi alarm. RWLoLimit Limit value for Lo alarm. RWInduSoft Web Studio v6.1 SP5 5–11
IWS Users GuideWorking with TagsField NameDescription of ValueAssociated with Each FieldTag Type Associated with FieldBoolean Integer Real StringR=Read OnlyRW=Read+WriteLoLoLimit Limit value for LoLo alarm. RWRateLimit Limit value for Rate alarm. RWDevSetpoint Set point value for DevP and DevM alarms. RWDevPLimit Limit value for DevP alarm. RWDevMLimit Limit value for DevM alarm. RWTag Fields TableTo access a tag field at runtime, type the tag name and field (using the syntax:TagName->Field) into the Database Spy, a command window, or an execution field. Cautions: You cannot use tag fields (such as Bit fields) to configure Alarm or Trendworksheets. Although you can apply tag properties to system tags, those properties will notpersist if you download your application to a CE device. Note:If an application tries to write a value to the Tags database that falls outside therange specified in the Min and Max fields, the database will not accept the newvalue and will write a warning message to the IWS Output window.If you specify a zero (0) for the Min and Max fields, the application can write any tagtype value to the Tags database.5–12 InduSoft Web Studio v6.1 SP5
Working with TagsIWS Users GuideCreating Application Database TagsThis section explains the process for creating basic, array, and pointer tags for yourproject applications. Notes:When specifying a tag name, you must adhere to the following guidelines: Your tag names must be unique — you cannot specify the same name for twodifferent tags (or functions). If you type an existing tag name, IWS recognizesthat the name exists and will not create the new tag. You must begin each tag name with a letter. Otherwise, you can use letters,numbers, and the underscore character (_) in your tag name. You cannot use the following symbols in a tag name:` ~ ! @ # $ % ^ & * ( ) - = \ + \ [ ] { } < > ? You can use a maximum of 255 characters for a tag name or a class membername. You can use uppercase and lowercase characters. Tag names are not casesensitive. Because IWS does not differentiate between uppercase and lowercasecharacters, you can use both to make tag names more readable(For example: TankLevel instead of tanklevel). Some other example tag namesinclude: Temperature, pressure1, count.To save development time, IWS allows you to create and edit tags from a variety oflocations within the development environment.You can add tags using the Application Tags datasheetYou can add tags “on-the-fly” from a pop-up menu or from any Tag or Expression textbox (located on Object Properties dialogs, worksheets, and so forth)Instructions for adding tags with each method are provided in the next two sections.Adding Tags to the Application DatasheetUse the following steps to create tags from the Application Tags datasheet: Select the Database tab and open the Application Tags folder. Double-click the Datasheet View icondatasheet:to open the Application TagsApplication Tags Datasheet Locate an empty line in the datasheet and configure the following fields.(Hint: You can use the keyboard Tab key to move to the next column.)InduSoft Web Studio v6.1 SP5 5–13
IWS Users GuideWorking with Tags– Name field: Type a name using the syntax described for the tag type you arecreating (see “Creating Application Database Tags”) that adheres to theguidelines described on page 5–13.– Array Size field:For an array tag, type a value to specify the maximum index of the array.For any other tag type, type zero (0).– Type combo-box: Click the arrow to select a tag data type (Boolean, Integer, Real, orString) from the list. (If necessary, review “Choosing a Tag Data Type” on page5–6.)– Description field (optional): Type a description for documentation purposes only.– Web Data combo-box: Click the arrow to specify whether the tag value will beshared with (displayed on) Web Thin Client stations.Local: Prevents a Server tag value from being shared with Web Thin Clientstations. For example, you want to view a tag value on your workstation andnot interfere with the value being displayed on other Web Thin Clientworkstations.Server: Shares a Server tag value with Web Thin Client stations. For example,you want other Web Thin Client workstations to share/view control values(such as On or Off). Click in a new line to create another tag or, if you have no other tags to create, saveyour tag(s) to the Tags database (File → Save) and close the Application Tagsdatasheet.The following example shows a variety of tags configured in an Application Tagsdatasheet.Example Application Tags DatasheetAdding Tags “On-the-Fly”As an alternative to opening the Application Tags datasheet every time you want tocreate a new tag, IWS enables you to create individual tags “on-the-fly” by:Right-clicking on the Applications Tags folder, the Datasheet View icon, orTag List subfolder and selecting Insert Tag from the pop-up menu.5–14 InduSoft Web Studio v6.1 SP5
Working with TagsIWS Users GuideInserting a TagTyping a new tag name into any Tag/Exp text box (available from Object Propertiesdialogs, worksheets, and so forth). When a Question dialog asks if you want tocreate a new tag, click Yes.Creating a New TagUsing either of the preceding methods causes a New Tag dialog to display:New Tag DialogThe fields and combo-boxes on this dialog correspond in name and function to thecolumns on the Application Tags datasheet. Consequently, you can configure thisdialog using the instructions provided on page 5–13. When you are finished, click OKto save the tag to the Tags database and close the New Tag dialog.Resetting the Tags DatabaseSelect Tools > Reset Tags Database to “reload” the tags database on the local station. Thiscommand affects all tags stored in the Application Tags folder. This option is useful forresetting the application tags and restoring the values they had when the applicationwas loaded for the first time. When you stop the application but leave the developmentenvironment open, the tags are not reset by default when the application is startedagain. Therefore, you can execute this command to reset them before the applicationruns again.InduSoft Web Studio v6.1 SP5 5–15
IWS Users GuideWorking with TagsWhen this command is executed, the Startup Value configured for each tag (TagsProperties dialog) is written to the respective tag. If you did not configure any StartupValue for a numeric tag (Boolean, Integer or Real), the value 0 (zero) is written to thetag. If you did not configure any Startup Value for a string tag, the empty value (“”) iswritten to the tag.This command is disabled (in gray) if there is at least one runtime task running on thelocal station. You must close all runtime tasks (Project > Stop application) before thiscommand can be executed. Note:The tags stored in the System Tags folder and in the Shared Tags folder (if any) arenot affected by this command. Tip:If you want to reset the application tags automatically whenever you run theapplication (Project > Run Application), you can check the option Reset Tags Databasewhen starting application on the Preferences tab of the Project Settings dialog.5–16 InduSoft Web Studio v6.1 SP5
Working with TagsIWS Users GuideCreating ClassesTo create a new class tag: From the Database tab, right-click the Classes folder, and select Insert Class from theresulting pop-up menu. When the Insert Class dialog displays, type a name into the Name field using thesyntax on page 5–5 and the guidelines described on page 5–13.Insert Class Dialog Click OK to close the Insert Class dialog and the Class: worksheet displaysautomatically. Configure the columns in this worksheet as follows:– Name field: Type a class member name (see page 5–5).– Type combo-box: Click the arrow to select the class member’s data type (Boolean,Integer, Real, or String) from the list.– Description field (optional): Type a description of the class member (fordocumentation purposes only).Sample CTank Worksheet Click in the next blank line and provide the information for the next class memberyou want to include in this class. Or, if you are finished adding members, you canclose the Class worksheet.You can expand the Classes folder and subfolders to see the data structure:Expanded Classes FolderInduSoft Web Studio v6.1 SP5 5–17
IWS Users GuideWorking with Tags Next, use the instructions provided in “Creating Application Database Tags” onpage 5–13, to create and associate a tag with the new class.Note that when you click the arrow button to view the Type list, your new classname (CTank) is included (see line 5 in the following figure). Select the class namefrom this list.Creating the Tank Class Tag When you are done, save your work and close the worksheet.5–18 InduSoft Web Studio v6.1 SP5
Working with TagsIWS Users GuideSetting Tag PropertiesThis section explains how to configure tag properties. From the Database tab, open the Application Tags datasheet (or display the tag listin the Workspace) and highlight the tag for which you want to set properties. Click the Tags Properties buttonon the Tags Properties toolbar.A Tag Properties dialog displays similiar to the following:Tag Properties DialogA Tag Properties dialog can consist of one, two, or three tabs depending on the type oftag you selected in the datasheet:Parameters: Use this tab to configure retention, startup, and unit properties.Alarms - Type: Use this tab to enable, configure, and view alarm properties.History - Type: Use this tab to enable, configure, and view historical properties. Note:Not all properties are available for all tag types. Consequently, the features oneach tab will vary, depending on the tag type you selected. For example, Minimumand Maximum values are not necessary for String tags.Review the table on page 5–7 to see which properties are available for the differenttag types.Instructions for configuring the parameters on each tab follow.Configuring the Parameters Tab PropertiesThis section explains how to configure all of the different parameter properties.Remember, the availability of each parameter depends on the tag type you selected.InduSoft Web Studio v6.1 SP5 5–19
IWS Users GuideWorking with TagsTag Properties: Parameters TabRetentive Value check-box: Enable ( ) this box to save the tag value continuously incase the system shuts down unexpectedly. When you restart the system, the tagwill have retained the last-saved value. Caution:Specifying the Retentive Value parameter for tags with changing values cancause frequent hard disk access, which slows performance.Retentive Parameters check-box: Enable ( ) this box to save all changes made to thetag fields during runtime.Startup Value field: Type a tag value for the system load. The tag uses this value if youdisable the Retentive Value option.Min field (accessible during runtime): Type a minimum value for the tag inengineering units.Max field (accessible during runtime): Type a maximum value for the tag inengineering units. Caution:IWS cannot accept tag values that fall outside the specified Min/Max ranges.However, IWS will generate a message in the Output window to let you knowthat the system tried to write a value that was outside the defined ranges.Unit field (accessible during runtime): Type a string (up to nine (9) characters) tospecify the tag units (such as Ohms, deg., or MHz) for display purposes.Dead Band check-box: Enable ( ) this box and type a value into the text box providedto apply a dead band value to the tag.A dead band value represents a variation allowed above or below the central valueof the tag (not recognized for alarms). When the tag value exceeds the dead bandallowance, IWS generates an alarm.Smoothing check-box: Enable ( )this box to reduce the rate of change for the tagvalue.5–20 InduSoft Web Studio v6.1 SP5
Working with TagsIWS Users GuideFor example, if you specify Smoothing for a tag containing the value 50, and thevalue changes to 60 in the next search, IWS stores the average of 50 + 60 in thedatabase and the new value will equal 55.Configuring the Alarms - Type Tab PropertiesThis section explains how to view and configure all of the alarm properties for aselected tag.Tag Properties Dialog: Alarms - Type TabAlarms Enabled check-box: Enable ( ) this box to turn on the alarm function forthis tag.Remote Ack tag field: Type a tag to allow a recipient to acknowledge an alarmremotely, which occurs when the tag values change.Dead Band Value field: Type a value to specify a dead band variation. IWS uses thisvalue to filter alarms.For example, if you configure the TEMP1 tag with an Hi Limit = 90 and a DeadBand Value = 5, then IWS will generate an alarm when TEMP1 is ≥ 90. The alarmnormalizes (that is, returns to normal) when TEMP1 ≤ 85.Translation Enabled check-box: Enabling ( ) this box allows IWS to translate alarmmessages into another language(s). (For more information about translatingapplications, read Chapter 16: Using the Translation Editor.) Note:IWS automatically saves Alarm messages with the Translation Enabled attributeenabled by default. These messages are saved to a file called Alarm.txt,which is located in your application’s \DATABASE\ directory.Alarm type check-boxes (available during runtime): Enable ( ) one or more of thefollowing alarm types for this tag– HiHi: Enables Very High alarms.InduSoft Web Studio v6.1 SP5 5–21
IWS Users GuideWorking with Tags– Hi: Enables High alarms– Lo: Enables Low alarms– LoLo: Enables Very Low alarms– Rate: Creates an alarm based on rate of change– Deviation: An alarm based on deviation from a given set point is present.Example:ooIf SetPoint = 50, Deviation + = 5, Deviation − = 5, and Deviation Dead Band= 0.5;IWS generates an alarm when the temp ≥ 55 or temp ≤ 45; ando A return to the normal occurs when temp ≤ 54.5 or temp ≥ 45.5.When you enable any of the preceding alarm types the following fields display onthe Alarms tab:Alarm Tab FieldsConfigure these fields (which correspond to Alarm worksheet columns) as follows:– Limit: Type a value to specify limits for that alarm type. Note that the Rateparameter also provides a drop-down list that allows you to specify a rate forthis limit 1/s(econd), 1/min(ute), and 1/hour.– Message: Type a message string to display when IWS generates an alarm.– Group: Type a value indicating which group number (worksheet number) thistag belongs. IWS uses this value to filter alarms by one or more user group(s).You also can use a comma or a dash to specify more than one group (forexample, 1,3,5-6).– Priority: Type an integer number (from 0 to 255) to indicate priority in a group.Tags with a higher priority must have a higher priority value.– Selection: Type a string which will be used to filter alarm messages. This stringcan have a maximum of seven characters (all others characters will beignored).Deviation SetPoint field (accessible during runtime): Type a value indicating areference point for the deviation.5–22 InduSoft Web Studio v6.1 SP5
Working with TagsIWS Users GuideDeviation Dead Band field (accessible during runtime): Type a value indicating areference dead band value for the deviation.Off check-box: Enable ( ) this box to generate an alarm when the tag value is zero.On check-box: Enable ( ) this box to generate an alarm when the tag value is one.Changed check-box: Enable ( ) this box to generate an alarm whenever the tagvalue changes.Mnemonic pane: Use the Off, On, and Ack fields to configure mnemonics (for example,Closed or Open) for the Off, On, and Ack alarm states (Boolean tags only). Duringruntime, the Alarm/Event Control Object displays these mnemonics in the Valuecolumn for Boolean tags associated with the alarm message. Note:If you do not configure a mnemonic, the Alarm/Event Control Object displaysthe tag value (0 or 1) in the Value column.Configuring the History Tab PropertiesThis section explains how to view and configure history properties for a selected tag.These properties correspond to columns on a Trend worksheet (which will bediscussed on page 8–13). IWS disables these tab properties if you have a Trendworksheet open. Before using this dialog, you must have already created Trendgroups.Tag Properties Dialog: History Tab Notes: History does not support string-type tags. IWS automatically saves history (.hst) files in the Application folder, unless youexplicitly change this default location.From the Tag Properties dialog, enable history logging as follows:History Enabled check-box: Enable ( ) this box to store tag value samples.Group Number field: Type the group number associated with this tag.Log Dead Band field: Type a value to specify a Dead Band variation for logging purposes.When the tag value is equal to or greater than this value, IWS will take a sample forthe history file.InduSoft Web Studio v6.1 SP5 5–23
IWS Users GuideWorking with TagsSetting this value does not affect the Dead Vand value you may have specified on theAlarm tab. Note:Although you can apply tag properties to system tags, if you download systemtags to a CE device, the tag properties will not persist through the download. Youwill lose the properties.Using Tags in Your ApplicationOnce you have added a tag to the application database, you can use that tag in yourapplication by associating it to objects on the display screen.The basic process for associating tag to screen objects consists of the following steps: In the application screen, select the object to which you want to apply the tag. Click one of the following property buttonsProperties dialog displays.and an Object Locate the Tag text box for that property and type the tag name into the field.Tag text box names and locations will vary, depending on the type of property youare using. For example:Object Properties for Text I/O:Tag/Expression text box.Object Properties for Alarm:Click Selection button to openAlarm Filters dialog with Print tag,Ack tag, and Ack All tag text boxes.Applying Tags to an ObjectComprehensive instructions for applying tags to screen objects will be providedthroughout this manual where appropriate.Editing TagsYou can change the properties of a tag at any time during development or runtime.This section describes two methods you can use to edit tags. Note:You can right-click on a tag property and use standard Windows commands tocut (Ctrl+X), copy (Ctrl+C), or paste (Ctrl+V) any tag and its properties. You can alsoUndo (Ctrl+Z) the last modification to a field.5–24 InduSoft Web Studio v6.1 SP5
Working with TagsIWS Users GuideFrom the Application Tags DatasheetUse the following steps to edit one or more tags in the Application Tags datasheet: Select the Database tab and double-click on the Datasheet View button . When the Application Tags datasheet opens, locate your tag. Double-click in the column containing the information to be changed, and type thenew information into the datasheet. When you are finished editing, select File → Save to save your changes to the Tagsdatabase. Tip:You can sort the data in the Application Tags sheet and/or insert/removeadditional columns to/from the sheet by right-clicking on it and choosingthe applicable option from the pop-up menu.FROM THE TAG LIST FOLDERUse the following steps to edit one or more tags from the Tag List folder: Select the Database tab and double-click on the the Tag List folder to view a list of allyour tags. Locate your tag and double-click on the tag name to open a Properties dialog. Note:You also can right-click on the tag’s icon and select Properties from thepop-up menu.Properties DialogThe Properties dialog contains fields and combo-boxes that correspond in nameand function to the columns on the Application Tags datasheet. Make your changes in the Properties dialog as follows:– To change the current Tag Type or Web Data properties, click the arrow buttonand select the new information from the list.– To change the Array Size or Description, highlight the existing text and type thenew information into the text box. Click OK to save your changes to the Tags database and close the Properties dialog.InduSoft Web Studio v6.1 SP5 5–25
IWS Users GuideWorking with Tags Tip:You can sort the data in the Application Tags sheet and/or insert/removeadditional columns to/from the sheet by right-clicking on it and choosingthe applicable option from the pop-up menu.Deleting Tags Caution:Before deleting a tag, we strongly recommend using the Object Finder button onthe Tag Properties toolbar (see “Using the Object Finder” on page 3–47) to verifythat you are not using the tag in another part of the application (screens, mathsheets, so forth). If you delete a tag from the application database that is beingused in another part of the application, you will cause a compiling error and yourapplication will function poorly.To delete a tag from the Tags database, use the following steps: Open the project Application Tags datasheet as described on page 5–25. Locate and click on the tag name you want to delete. Cut the tag from the datasheet as follows:Select Edit → Cut from the main menu bar.– Right-click on the tag name and select Cut from the pop-up menu.– Press the Ctrl+x from the keyboard. When the pop-up displays with the “Are You Sure?” prompt, click Yes to continueor No to cancel the deletion. Save the datasheet (File → Save).5–26 InduSoft Web Studio v6.1 SP5
Chapter 6: Creating and Configuring a ProjectThis chapter explains how to create and configure projects in InduSoft Web Studio.The information in this chapter is organized as follows:Creating a New Project ApplicationSpecifying Additional Project SettingsStarting Runtime Modules on the Target SystemCreating a New Project ApplicationUse the following steps to create a new project application: From the main menu bar, select File → New. When the New dialog displays, select the Project tab.New Dialog: Project TabYou must provide a name for the project application and indicate where to storethe project and all of its related files (such as the configuration file). Type a name into the Application name text box—keeping the following guidelines inmind:– You must follow the usual Windows naming conventions.– Do not use spaces in the name if you want to access your project from the Web.(URLs do not recognize spaces.)Naming the ProjectInduSoft Web Studio v6.1 SP5 6–1
IWS Users GuideCreating and Configuring a Project Notes: IWS stores all projects in the C:\Documents and Settings\\MyDocuments\InduSoft Web Studio v6.1 Projects\ directory by default,so this path will display in the Location text field (a view-only field)automatically. The Configuration file text box also is a view-only field. IWS automaticallystores your project configuration file in the same folder as your project.Storing Project and Configuration Files To save your project to a location other than the default directory, click the Browsebutton to locate and select a folder. Select a license level from the Target platform list to indicate the platform on whichyou will be running this project.Target Platform ListTo verify your current license level, exit all open IWS modules and then selectStart → Programs → InduSoft Web Studio → Register. When the Protection Manager dialog displays, click the Check button to open theHardkey Settings or Softkey Settings dialog (depending on your license protectiontype), which contains your license information. Close both dialogs when you are done.Verifying Your License Level6–2 InduSoft Web Studio v6.1 SP5
Creating and Configuring a ProjectIWS Users Guide IMPORTANT!If you try to open or develop an application that was originally developed usinga higher license level than exists on your current computer, IWS will preventyou from opening the application and put you into Demo mode.To correct this situation, select Project → Settings from the main menu bar.When the Project Settings dialog displays, select the Options tab, and click theTarget Station arrow button. IWS displays only those target platforms you areauthorized to use. Select one of these target platforms to accomodate yourcurrent license level.Although you can change your license level later (using the Project Settingsdialog), we recommend that you verify and select the correct license level now,so you will not waste time developing applications requiring a license level youare not authorized to use on the runtime device.Also, we recommend developing for the lowest license level if you will berunning your application on multiple computers with different licenses. When you are finished configuring the Project tab, click OK to close the New dialog.The Project Wizard dialog displays automatically, as follows:Project Wizard Dialog Use this dialog to specify a template, set the default screen resolution, and toindicate that you want to share tags with another software product database, suchas Steeplechase or ISaGRAF.Instructions for using these features are provided in the following sections.InduSoft Web Studio v6.1 SP5 6–3
IWS Users GuideCreating and Configuring a ProjectUsing a TemplateIWS gives you the option of using a template to create your project application orstarting from scratch with no pre-configured screens or worksheets. To indicate yourpreference, select one of the following options from the Templates pane in the ProjectWizard dialog:Sample Application (recommended if you are using IWS for the first-time): Select thisoption to use the IWS sample application as a template for your application. Thesample application contains pre-configured screens and tags, a header, footer,and some background logic. Using this option provides a good base for yourproject and can save development time.Selecting a TemplateToolbar and menus: Select this option to use just the pre-configured (basic) toolbars,menus, and tags from the sample application. This option also saves developmenttime, but does not include extraneous screens and tags that you might not use.Empty Application: Select this option to create a project application with nopre-configured features or defaults. Experienced users may prefer this option toavoid having to spend time removing extraneous screens, tags, and so forth.Specifying a Default Screen ResolutionUse the buttons in the Resolution pane to specify a default resolution (display size) foryour project’s application screens.Selecting a Default Resolution Note:You can adjust the screen resolution “on-the-fly” by selecting Tools → ConvertResolution. The Convert Resolution feature uses the default screen resolution as a baseand converts the size of all of your project application screens accordingly.Sharing PC-Based Control Software Program Database TagsYou can configure your project to share database tags created in a PC-based controlsoftware program, such as SteepleChase or SixNet. When you define a sharing6–4 InduSoft Web Studio v6.1 SP5
Creating and Configuring a ProjectIWS Users Guiderelationship and select a database, IWS will retrieve the tags and add them to yourIWS application database. IWS also configures your application’s Driver worksheetsand tags for use in the other program. Note:You cannot modify shared tags within IWS—you must modify the tags in theoriginal PC-based control program, and then re-import them into the Tagsdatabase.To define a shared relationship between IWS and a PC-based software controlprogram, use the following steps: From the Shared Tags panel on the Project Wizard dialog, select one of thefollowing software programs from the Name drop-down list.– First ISaGRAF– ISaGRAF– Think & Do– SteepleChase– SixNet When the Configure button becomes active, click the button to open theConfigure: dialog.Sharing Tags In the Application Directory pane, click (enable) one of the following buttons:– Create: Create a directory for a new application.– Select: Provide the location of an existing application directory.Type the directory path and folder name into the Select field, or click the Browsebutton to select a location.InduSoft Web Studio v6.1 SP5 6–5
IWS Users GuideCreating and Configuring a Project Note:The remaining parameters on the Configure: dialog will varydepending on the program you selected in the first step.Every PC-based control program has its own, customized interface. Before youcan share information between a PC-based control application and IWS, youmust provide the information about the control program interface. Using the manufacturer’s documentation for your PC-based control program,configure the remaining parameters on the Configure: dialog:ParameterDescriptionServer Name text fieldIWS automatically completes this field. To change the default,type the appropriate information into the text box.Automatic exchange data check-box Enabling ( ) this box allows the two programs to exchange dataautomatically.Communication with Simulation Mode check-box Enabling ( ) this box allows the two programs to communicate inSimulation Mode.IP Address text field (Think and Do only)Type the IP address of the shared PC-based control application.Project Options Pane:Name text field (Steeplechase and SixNet only)Status text field (Steeplechase only)Version text field (Steeplechase only)Last Modification text field (SixNet only)Update button (Steeplechase and SixNet only)Type the name of the shared PC-based control application.Type the current status of the shared PC-based controlapplication. (For example, )Type the current version of the shared PC-based controlapplication.Type the date when the shared PC-based control application waslast updated.Click this button to update your IWS application with data from theshared PC-based control application.Configure: Parameters Table6–6 InduSoft Web Studio v6.1 SP5
Creating and Configuring a ProjectIWS Users GuideSpecifying Additional Project SettingsAfter creating a new project, you can use the following steps to configure someadditional parameters for that project: From the menu bar, select Project → Settings to open the Project Settings dialog,which controls settings that affect the overall application.Project Settings Dialog – Identification TabThe Project Settings dialog contains five tabs:– Identification– Options– Runtime Desktop– Communication– Web– PreferencesDescriptions of each tab, and instructions for configuring parameters on thesetabs, are in the next section. When you finish configuring the parameters on the Project Settings dialog, click OKto close the dialog. Note:Although you can change the Project Settings parameters at any time duringapplication development, we recommend configuring these parameters at thebeginning of your project.For example, the Startup screen field defines which screen will open when youstart the application, so if you try to emulate or run the application without alegitimate value in this field, IWS will generate an an error message.InduSoft Web Studio v6.1 SP5 6–7
IWS Users GuideCreating and Configuring a ProjectProviding Project Identification InformationWhen you open the Project Settings dialog, the Identification tab displays by default:Project Settings Dialog: Identification Tab Use the text fields on this tab to provide the information about your project.Configuring these fields is optional, but the information can be very useful if youare sharing your project application with coworkers, customers, and so forth.– Description: Provide a brief description of your project (such as its purpose).– Revision: Type the current revision number/letter to keep track of revisionsmade to your application.– Company: Type a company name to associate your project with a particularcompany (for example, your company name or a client’s company name).– Author: Type the name of the project author.– Field Equipment: Provide the name or type of equipment on which your projectapplication is running.– Notes: Enter any notes you think will be useful. When you are finished, click another tab to continue or close the dialog.6–8 InduSoft Web Studio v6.1 SP5
Creating and Configuring a ProjectIWS Users GuideSetting the Options Tab ParametersSelect the Options tab to configure the following:Enable language translationSpecify a target systemSpecify how long to save an Alarm History fileIndicate whether to share tags with another software applicationSpecify how to buffer Driver and OPC write commandsSpecify a TCP portConfigure settings for the default databaseProject Settings Dialog – Options TabA description of the Options Tab parameters follows:– Target system: Use the combo box to specify the target system for the currentproject. The target system sets the application restrictions (such as number oftags supported) and must match your license. The description of the mainlicense restrictions for each target system is displayed below the combo-boxwhere you chose it. Caution:If you specify a Target System level that does not match the actual licenselevel on the target station, the application may not run properly.– Resolution: Displays the application resolution.InduSoft Web Studio v6.1 SP5 6–9
IWS Users GuideCreating and Configuring a Project– Automatic Translation: Click (enable) the Enable Translation check box to enablethe translation feature. Type the directory path and a translation file name intothe Translation File name field. IWS uses this translation file as the defaultlanguage when you start the application.– Alarm History and Events: Type a value into the History Life Time (days) field tospecify how long to keep alarm and event history files. After the specifiednumber of days, IWS automatically deletes existing alarm/event history filesthat are older than the period specified. If you type zero in this field, IWS doesnot delete any history files automatically. In such a case, you should create anexternal procedure to clean the old history files; otherwise, the free memory inthe computer will eventually be depleted.– History Format: Select the format of the Alarm/Event history, as follows:TypeProprietaryDatabaseBinaryDescriptionSaves the history data in the \Alarm sub-folder of the application (by default) intext files using the proprietary format of Studio.Saves the history data in the SQL Relational Database specified by the user,using the built-in ADO interface.Saves the history data in the \Alarm sub-folder of the application (by default) inbinary files using the proprietary format of Studio.– Default Database: Allows you to configure a Default Database, which can beshared by different tasks and objects. See Configuring a Default Database forAll Task History for more information.– Shared Tags: Select a third-party software from the combo-box. Click theConfigure button to configure the settings for importing tags from one of thefollowing data sources into the Shared Database folder:NameFirst ISaGRAFISaGRAFThink & DoSteepleChaseSixNetOpen ControlStratonDescriptionDoes not share tags with any external softwareImport tags from a First ISaGRAF project into the Shared Tags folder of the currentapplication, and, if enabled, configure the communication interface with the ISAGRdriver automatically.Import tags from a ISaGRAF project into the Shared Tags folder of the currentapplication, and, if enabled, configure the communication interface with the ISAGRdriver automatically.Import tags from a Think & Do project into the Shared Tags folder of the currentapplication, and, if enabled, configure the communication interface with the TND driverautomatically.Import tags from a SteepleChase project into the Shared Tags folder of the currentapplication, and configure the communication interface with the VLC driverautomatically.Import tags from a SixNet project into the Shared Tags folder of the currentapplication, and configure the communication interface with the SNET driverautomatically.Import tags from an OpenControl project into the Shared Tags folder of the currentapplication, and configure the communication interface with the OC driverautomatically.Import tags from a Straton project into the Shared Tags folder of the currentapplication, and configure the communication interface with the STRAT driver6–10 InduSoft Web Studio v6.1 SP5
Creating and Configuring a ProjectIWS Users Guideautomatically. Note:Each PC-based control has its own, customized interface that requires you toprovide information about the PC-based control application in order to share tagswith the IWS application.ENABLING LANGUAGE TRANSLATIONOne of the utilities provided with IWS is a Translation Editor, which enables you totranslate applications from one language into another automatically—and translatethese applications into as many languages as necessary.If you want to translate your project into another language, you must enabletranslation and specify a default translation file from the Automatic Translation panelon the Options tab: Enable ( ) the Enable Translation check-box. Use the Translation Filename text box to specify a default translation file name andlocation.The project’s default translation file (.csv) controls the languagein which your development environment and project applications will display.For example, if you specify a Spanish default translation file, your developmentenvironment and project applications will display in Spanish by default.– If the default file name and location are acceptable, no action is required.– If you want to specify a different translation file or location, type the file nameand location into the text box. Note:You can save translation files to any directory, but we strongly recommendsaving these files in your project’s Web folder so they can be used by a WebThin Client.For example, if your default development language is English and you want tomake the file available to Web Thin Clients, you might change the defaultworksheet name to English.csv and save the file in the following folder:C:\Program Files\InduSoft Web Studio v6.1\Projects\\Web\English.csv Click the Advanced button for additional translation settings:Automatic Translation: Advanced SettingsInduSoft Web Studio v6.1 SP5 6–11
IWS Users GuideCreating and Configuring a Project Startup Column Name: You can create a CSV file with translation for more than onelanguage. The text in the original language used when the application was createdare in the first column of the CSV file. Each different language is added in additionalcolumns. The first row of the CSV file indicates the name of each column. You canspecify in this field the name of the column that must be used to translate theapplication by default, when launching the application. If this field is left in blank,the application is launched with its original language. The user can set a differentlanguage during the runtime by executing the SetTranslationFile() function. Ignore space chars at the end and beginning of the text: When this option is checked, the spacecharacter at the end or at the beginning of each text is ignored for translationpurposes. This option is useful to avoid duplicated entries in the translation tabledue to space chars configured by mistake when creating the objects or just foralignment. Keep original text when translation is blank: When this option is checked, the original text iskept when there is not any text configured as a translation for it in the columncurrently set for translation of the application. If this option is unchecked, theoriginal text is omitted from the application during the runtime, when there is notany translated text for it in the currently set for translation of the application.After enabling translation for your project application, continue to Chapter 16: Usingthe Translation Editor for a description of the Translation Editor utility and to finishconfiguring your project for translation.SPECIFYING THE TARGET SYSTEM’S LICENSE LEVELThe target system on which you will run your application sets the applicationrestrictions (such as how many tags will be supported). Consequently, the targetsystem’s license level and your development station’s license level must match or yourapplication may not run properly.Click the Target system combo-box arrow button, and select your target system’s licenselevel from the list.Target System PanelThe default screen resolution displays in the field just below the combo-box.This resolution is the default value you specified when you created the project. Note:To change this resolution “on-the-fly,” close all open screens and selectTools → Convert Resolution from the menu bar. When the Convert Resolution dialogdisplays, enable the size you want to use, and then click the Convert button.6–12 InduSoft Web Studio v6.1 SP5
Creating and Configuring a ProjectIWS Users GuideSAVING ALARM HISTORY FILESThe Alarm History panel allows you to control how long to keep alarm history files storedon your system.Type a value into the File Life Time (days) field to specify how many days to keep the alarmfiles. For example, if you specify 7 days, IWS automatically deletes all alarm files thatare more than a week old.Alarm History PanelSHARING TAGS WITH A PC-BASED CONTROL APPLICATIONThe process for configuring this panel is identical to the process described for creatinga new project. Review “Sharing PC-Based Control Software Program Database Tags”on page 6–4.COMMUNICATING WITH DRIVERS AND OPC (BU<strong>FF</strong>ER)Because IWS contains multiple modules that can affect values in the Tags database,and given that only one module can run at a time, it is possible that a tag’s value canchange several times before the driver or OPC Client receives the changed value tosend to the PLC or OPC Server. Consequently, IWS gives you the option of bufferingthe tag values.If you choose to use the buffer, IWS sends every change to a tag value to the PLC orOPC Server—in the order in which the change happened.If you decide not to use the buffer, then IWS sends only the current value to the PLC orOPC Server.Use the Communication panel parameters to specify how changes are written bydrivers and OPC devices to target devices, such as PLCs and OPC Servers.Click the Driver and OPC combo-box button, and select one of the following options fromthe list.Send last state: Writes just the current tag value to the device or OPC Server.(Selecting this option conserves memory.)Send every state: Writes all tag value changes to the device or OPC Server. (Selectingthis option uses more memory, but ensures a complete and accurate view of theactions that occur.)Communication PanelInduSoft Web Studio v6.1 SP5 6–13
IWS Users GuideCreating and Configuring a ProjectSPECIFYING A TCP PORTUse the Port text field on the TCP panel to specify a port for the IWS TCP/IP Client andServer modules to use. Type the port number into the text field:TCP PanelCONFIGURING DATABASE SETTINGS TO SAVE ALARM AND/OR EVENT HISTORYConfiguring a database interface with IWS is basically linking tasks from IWS (Alarms,Events or Trends) to tables of external databases via a specific Database Provider thatsupports the database you have chosen.Each history task (Alarm, Events or Trend) can be configured to save data either tofiles with the proprietary format from Studio or to external SQL Relational Databases.Use the Options tab to configure the database to save Alarm and Event history. (SeeConfiguring Database Settings for Saving Trend History for instructions for savinghistory for the trend tasks.)Use the History Format combo-box to select Database, then click either the Alarm Databaseor the Event Database button. The Database Configuration dialog window will open.Note: Both Alarms and Events must be saved in the IWS proprietary format, orboth Alarms and Events must be saved in external Relational Databases;however, they can be saved on different databases. Each Trend worksheet can be configured to save data either in the IWSproprietary format or in an external SQL Relational Database.Database Configuration Dialog WindowThe Database Configuration dialog window allows you to configure the necessarysettings to link IWS to an external SQL Relational Database.6–14 InduSoft Web Studio v6.1 SP5
Creating and Configuring a ProjectIWS Users GuideDatabase Configuration WindowDatabase combo-box: Allows you to select either Primary or Secondary. WithPrimary, all settings displayed in the Database Configuration window apply to thePrimary Database interface. Otherwise, they apply to the Secondary Databaseinterface. You can configure the Secondary database in the following modes:– Disabled: In this mode, IWS saves data in the Primary Database only. If thePrimary Database is unavailable for any reason, the data is not saved anywhereelse. This option may cause loss of data if the Primary Database is not available.– Redundant: In this mode, IWS saves data in both Primary and SecondaryDatabases. If one of these databases is unavailable, IWS keeps saving data onlyin the database that is available. When the database that was unavailablebecomes available again, IWS synchronizes both databases automatically.– Store and Forward: In this mode, IWS saves data in the Primary Database only. Ifthe Primary Database becomes unavailable, IWS saves the data in theSecondary Database. When the Primary Database becomes available again,IWS moves the data from the Secondary Database into the Primary Database.Using the Secondary Database, you can increase the reliability of the system anduse the Secondary Database as a backup when the Primary Database is notavailable. This architecture is particularly useful when the Primary Database islocated in the remote station. In this case, you can configure a SecondaryDatabase in the local station to save data temporarily if the Primary Database isnot available (during a network failure, for instance).Use application default check-box: When this option is checked, IWS uses the settingsconfigured in the Default Database for the task that is being configured(Connection string, User name, Password, Retry Interval and Advanced Settings).When this option is not checked, you can configure these settings individually tothe current task.Connection string field: This field defines the database where IWS will write and readvalues as well as the main parameters used when connecting to the database.InduSoft Web Studio v6.1 SP5 6–15
IWS Users GuideCreating and Configuring a ProjectInstead of writing the Connection string manually, you can press the browsebutton (…) and select the database type from the Data Link Properties window.Data Link Properties windowNote:The list of Database Providers shown in the Data Link Properties windowdepends on the providers actually installed and available in thecomputer where you are running IWS. Consult the operating systemdocumentation (or the database documentation) for further informationregarding the settings of the Provider for the database that you are using.User name field: User name used to connect to the database. The user nameconfigured in this field must match the user name configured in the database.Password field: Password used to connect to the database. The password configuredin this field must match the password configured in the database.Retry Interval field: If IWS is unable to connect to the database for any reason, itretries automatically to connect to the database after the number of secondsconfigured in this field have passed.Advanced button: After pressing this button, you have access to customize somesettings. For most applications, the default value of these settings do not need tobe modified and should be kept.6–16 InduSoft Web Studio v6.1 SP5
Creating and Configuring a ProjectIWS Users GuideDatabase Configuration Advanced window– Milliseconds combo box: You can configure how the milliseconds will be savedwhen saving the date in the database. Each database saves the date indifferent formats; for example, some databases do not support milliseconds ina Date field. The following options are available:• Default: Uses the format pre-defined for the current database. Thedatabases previously tested by InduSoft are previously configured with themost suitable option. When selecting Default, IWS uses the settingpre-configured for the current database type. If you are using a databasethat has not been previously configured by InduSoft, the Default optionattempts to save the milliseconds in a separate field.• Disable: Does not save the milliseconds at all when saving the date in thedatabase.• Enable: Saves the milliseconds in the same field where the date is saved.• Separate Column: Saves the milliseconds in a separated column. In this case,the date is saved in one field (without the milliseconds precision) and thenumber of milliseconds is saved in a different column. This option isindicated where you want to save timestamps with the precision ofmilliseconds but the database that you are using does not supportmilliseconds for the Date fields. Tip:The default option for each database is configured in the StudioADO.inifile, stored in the \BIN sub-folder of IWS. See “Studio Database Gateway,”in Chapter 17: IWS Database Interface, for information about how toconfigure the StudioADO.ini file.– Save time difference check-box: When this option is checked (default), IWS savesthe Time Zone configured in the computer where the application is running ineach register of the database. This option must be enabled to avoid problemswith daylight savings time.– Database Gateway: Enter the Host Name/IP Address where the Studio databasegateway will be running. The TCP Port number can also be specified, but if youare not using the default, you will have to configure the Studio databasegateway with the same TCP Port. See “Studio Database Gateway,” in Chapter17: IWS Database Interface, for information about how to configure theadvanced settings for the Studio ADO Gateway.InduSoft Web Studio v6.1 SP5 6–17
IWS Users GuideCreating and Configuring a Project– Disable Primary Key: For some modules, IWS will try to define a primary key to thetable in order to speed up the queries. If you are using a database that does notsupport primary keys (e.g. Microsoft Excel), you should check this field.Table pane: This area allows you to configure the settings of the Table where thedata will be saved. All tasks can share the same database. However, each task(Alarm, Events, Trend worksheets) must be linked to its own Table. InduSoft doesnot check for invalid configurations on this field, therefore you should make surethat the configuration is suitable for the database that you are using.Use default name check-box: When this option is checked (default), IWS saves and/orretrieves the data in the Table with the default name written in the Name field.Automatically create check-box: When this option is checked (default), IWS creates atable with the name written in the Name field automatically. If this option is notchecked, IWS does not create the table automatically. Therefore, it will not be ableto save data in the database, unless you have configured a table with the nameconfigured in the Name field manually in the database.Name: Specifies the name of the Table from the database where the history data willbe saved.Refresh button: If the database configured is currently available, you can press theRefresh button to populate the Name combo-box with the name of the tablescurrently available in the database. In this way, you can select the table where thehistory data should be saved instead of writing the Table name manually in theName field.Run-Time pane: Use this area to set run-time values. The following fields areavailable:Status (output) check-box: The tag in this field will receive one of the followingvalues:ValueDescription0 Disconnected from the database. The database is notavailable or your configuration is incorrect.1 The database is connected successfully.2 The database is being synchronized.Reload (output): Specify a reload tag if you are using curly brackets in any of theconfiguration fields. When you want to reconnect to the database using theupdated values on your tags, set the tag on this field to 1. IWS will update theconfiguration when trying to perform an action in the database, setting the tagback to 0 when it is finished.Configuring a Default Database for All Task HistoryAlthough IWS allows you to configure a different database for each task, typically thesame database type (e.g. SQL Server, MS Access, Oracle, and so forth) is used by alltasks of the same project. Therefore, in order to save time when configuring theapplication, IWS allows you to configure the Default Database. When configuring eachtask, you can choose to use the settings configured for the Default Database. If youchoose this method, it will not be necessary to re-configure the same settings for eachtask, since they share the same database.The settings for the Default Database can be configured by pressing the Configurebutton from the Default Database box on the Options tab of the Project Settings dialog.6–18 InduSoft Web Studio v6.1 SP5
Creating and Configuring a ProjectIWS Users GuideThe Default Database Configuration dialog window opens.Default Database Configuration WindowPlease refer to the previous section, Database Configuration Dialog Window, for helpcompleting the fields in this window.Setting the Runtime Desktop ParametersWhen you run an application on the runtime (or target) workstation, IWS displays theappliation in a Viewer window. You can configure the appearance of this Viewerwindow as follows: Select the Runtime Desktop tab on the Project Settings dialog:InduSoft Web Studio v6.1 SP5 6–19
IWS Users GuideCreating and Configuring a ProjectProject Settings Dialog – Runtime Desktop Tab Enable ( ) the one or more of the following check-boxes to display those featureson the Viewer window (or disable the boxes to hide the feature): Note:IWS saves all of these display properties in the application’s .APP file.– Titlebar: Displays a title bar along the top of the window. Type a name into thetext field to change the default title bar text.– Minimize Box, Maximize Box, and Close Box: Displays three buttons so you canminimize, maximize, or close the Viewer window.– Start Maximized: Maximizes the window automatically when you run theapplication.6–20 InduSoft Web Studio v6.1 SP5
Creating and Configuring a ProjectIWS Users Guide– Menu: Displays a menu bar on the Viewer window.To specify which menus and menu options will be available from the menu bar,click the Options button. When the Runtime menu options dialog displays, clickthe following check-boxes to display or hide the menu/menu options. Whenyou are finished, click OK to close the dialog.Runtime Menu Options Dialog– Resize Border: Allows you to resize the Viewer window during runtime.– Status Line: Displays a status bar along the bottom of the Viewer window.– Startup screen: Displays a specified application screen or screen group when youstart the application at runtime. Click on the combo box and select a screen(.SCR) or screen group (.SG) from the list. Note:Another way to specify a screen or screen group as the startup screen is toright-click on it in the Workspace and then choose Set as startup from thepop-up menu.– Show ???? when quality is not GOOD: Displays question marks (???) instead of a tag’svalue when the tag quality is not good.– Hide Taskbar: Hides the Windows taskbar by default.– Enable ToolTips: Displays Windows ToolTips when you run the application.To configure tool tips for an object in your application, double-click the objectto open the Object Properties dialog and type your tip into the Hint field.– Auto Screen Scaling: Scales the application screen automatically when you resizethe Viewer window. This feature is available for local applications running onWindows 2K/XP/Vista (or Web Thin Clients). This parameter is not availablefor local applications running on Windows CE.– Show Object Edge: Changes the object edge when you move the cursor over anyobject where the Command dynamic was applied.– Change Mouse Cursor Changes the mouse cursor when you move the cursor overany object where the Command dynamic was applied.– Mouse Cursor: Displays a mouse cursor in the Viewer window. Note:The Mouse Cursor option is not supported in Windows CE running on Armv4Iprocessors.InduSoft Web Studio v6.1 SP5 6–21
IWS Users GuideCreating and Configuring a Project– Virtual Keyboard: When this option is checked, the Virtual Keyboard (see page3–30) is enabled for the application. (This option does not apply when theapplication is running on a Web Thin Client; for more information, see “SpecifyWeb Thin Client Parameters” on page 6–25.) The keyboard allows the user toenter data during runtime on touchscreen panels — that is, without typing ona physical keyboard. For example, a Text object with the Text I/O dynamicproperty applied and the Input Enabled option checked.You can establish a default configuration for the virtual keyboard:– Default: Select the default keyboard type to be used in the application, whenno keyboard type is specified by the calling object or function.– Scale: Using this option, you can shrink or enlarge the keyboard to fit thesize of the target display. A value of 100% represents the default size ofeach keyboard type.– Show Hint checkbox and field: When this option is checked, a hint isdisplayed in the title bar of the keyboard. For objects, the hint is configuredin the Object Properties dialog. Otherwise, enter a string or string Tag in theShow Hint field to serve as a defaut hint.– Show Min/Max Fields option: When this option is checked, the minimum andmaximum allowed values are displayed at the bottom of the keyboard. Forobjects, these values are configured in the Object Properties dialog.Otherwise, the Min and Max properties of the associated Tag are used bydefault. Note:The Min and Max fields are displayed only on the Keypad keyboardtype, and only when the associated Tag is defined as Integer or Real. IfMin is greater than Max, then input will be disabled. If Min/Maxconfigured on the object is different from Min/Max configured in theTag properties, then the application will attempt to scale the inputaccordingly. When you are finished, click another tab to continue or close the dialog.6–22 InduSoft Web Studio v6.1 SP5
Creating and Configuring a ProjectIWS Users GuideSetting the Communication ParametersUse this tab to specify communication parameters relating to the application ingeneral.Project Settings > Communcation Tab– Driver and OPC: Select the method used by all communication drivers and OPCClient worksheets configured in the current application when writing values tothe remote PLC/device:* Send every state: When the communication task is configured to write valuesupon a change of tag value, all changes in the tag value are buffered in aqueue and sent to the device when the communication task (Driver or OPC)is executed.* Send last state: When the communication task is configured to write valuesupon a change of tag value, only the current (last) value of the tag is sent tothe device when the communication task (Driver or OPC) is executed.When this method is selected, if the tag changed value more than oncewhile the communication task was not being executed, the transientvalues of the tag are not sent to the device. This is the desired behavior formost applications.– TCP: Configure the settings for the TCP/IP Client and TCP/IP Server modules:* Port: TCP Port used by the TCP/IP Client and TCP/IP Server modulesrunning in the current computer. When changing this value in the localapplication, be sure to change the same value in the remote applicationthat is communicating with the local one.* Send Period (ms): Period (in milliseconds) used between two consecutivemessages sent by the TCP/IP Client or TCP/IP Server modules to updatetag values in the remote station. Typically, a lower number equals betterperformance and higher traffic in the network.InduSoft Web Studio v6.1 SP5 6–23
IWS Users GuideCreating and Configuring a Project* Enable binary bontrol: Check this option to enable binary control when theTCP/IP Client or the TCP/IP Server module sends messages to the remotestation. Binary control increases the security of the system; however, itdecreases the efficiency (performance) of the communication. Whenconnecting two stations via the TCP/IP Client and TCP/IP Server module,make sure this setting is either enabled in both applications or disabled inboth.6–24 InduSoft Web Studio v6.1 SP5
Creating and Configuring a ProjectIWS Users GuideSpecify Web Thin Client ParametersUse the following procedure to specify the Web Thin Client parameters: Select the Web tab on the Project Settings dialog:Project Settings Dialog: Web Tab Configure the parameters on this tab as follows:– Data Server IP field: Type the IP address (or host name) of your Data Serverstation. The Data Server station is the computer or device where the TCP/IPServer module of IWS is running. If this field is left blank, then the Web ThinClient will assume that the Web Server (i.e. the address entered into thebrowser) is also the Data Server. Tip:You can use the IP address 127.0.0.1 (locallost) to access the TCP/IPserver on the local computer (regardless of its IP address on the network).This option is useful for local tests; however, you are not able to access thedata server from remote computers using this configuration.– Send Period (ms) field: Type a value to specify the send period (in milliseconds)used to exchange data between the server and the Web Thin Client stations. Itmeans that the Web Thin Client will send a package with the new tag values tothe server every n millisecond(s).The Send Period of the server is configured in Project Settings > Communication. Thedefault value is 1000 (milliseconds). You can set a lower value in this field toincrease the update rate between the server and the Web Thin Clients. Doingso may result in higher traffic in the network (the network will be accessedmore frequently) if the tags are changing continuously (faster than 1 second).InduSoft Web Studio v6.1 SP5 6–25
IWS Users GuideCreating and Configuring a Project– Disable Remote Client Commands check box: Click to enable this box, to prevent aremote client from issuing commands from your Web Thin Client to yourserver. When this option is enabled, the Web Thin Client can read data fromthe server, but cannot send data (tag values, set-points) to the data server. Inthis case, the Web Thin Client station becomes a Read Only station.– Enable ToolTips check box: Click to enable this box, to display the ToolTipsconfigured on the objects of the screens when viewing them on the Web ThinClient (Web browser).– Auto Screen Scaling check box: Click to enable this box, to automatically scalescreens displayed in a Web browser window. Using this option, the screen fitsto the size of the Web browser window, regardless of its resolution. Note:The Auto Screen Scaling option is not valid for Web browsers running underWindows CE operating systems.– Enable File Compression check box: Click to enable this box to compress the filesstored on the \Web folder of the application. This option is useful for reducingdownload time, particularly if you have a slow connection between your serverand the Web Thin Client.– Log (Enable check box and FileName text field): Click to enable the check box, andtype a file name into the text field to generate a log file on the Web Thin Clientstation. You can use this log file for debugging purposes.– Virtual Keyboard: When this option is checked, the Virtual Keyboard (see page3–30) is enabled for the application running on a Web Thin Client. Thekeyboard allows the user to enter data during runtime on touchscreen panels— that is, without typing on a physical keyboard. For example, a Text objectwith the Text I/O dynamic property applied and the Input Enabled optionchecked.You can establish a default configuration for the virtual keyboard:– Default: Select the default keyboard type to be used in the application, whenno keyboard type is specified by the calling object or function.– Scale: Using this option, you can shrink or enlarge the keyboard to fit thesize of the target display. A value of 100% represents the default size ofeach keyboard type.– Show Hint checkbox and field: When this option is checked, a hint isdisplayed in the title bar of the keyboard. For objects, the hint is configuredin the Object Properties dialog. Otherwise, enter a string or string Tag in theShow Hint field to serve as a defaut hint.– Show Min/Max Fields option: When this option is checked, the minimum andmaximum allowed values are displayed at the bottom of the keyboard. Forobjects, these values are configured in the Object Properties dialog.Otherwise, the Min and Max properties of the associated Tag are used bydefault. Note:The Min and Max fields are displayed only on the Keypad keyboardtype, and only when the associated Tag is defined as Integer or Real. IfMin is greater than Max, then input will be disabled. If Min/Maxconfigured on the object is different from Min/Max configured in the6–26 InduSoft Web Studio v6.1 SP5
Creating and Configuring a ProjectIWS Users GuideTag properties, then the application will attempt to scale the inputaccordingly.– IP Security button: Click this button to open the IP Security dialog.IP Security DialogUse the parameters on this dialog to specify the range of IP addresses for thecomputers that are allowed to access the application as Web Thin Clients. Thisoption is useful when you can control the IP Address of the Web Thin Clientcomputers allowed to connect to the Server.Click the Enable check box, and when the Edit pane parameters become active,type IP addesses in the From and To fields to specify the IP address range. Usethe Add and Remove buttons to move the IP addresses into the IP Address Rangelist. When a Web Thin Client attempts to connect to the server, it checks for anIP address for the Web Thin Client station that is within any range configuredin the IP Security dialog box. If one is not found, the server refuses theconnection request from the Web Thin Client station. Note:By default, IP security applies only to Web Thin Clients connecting to theData Server. You can also implement IP security for databasesynchronization between applications running on different stations (see“Configuring TCP/IP” on page 10–25). To do this, insert the followingparameter into the application file (*.app):[TCP]UseWebIPSecurity=1– Advanced button: Click this button to open a dialog where you can edit theAdvanced Web settings. For most cases, these settings do not need to bemodified. However, depending on the architecture used in your project, youhave the flexibility to configure advanced settings. Secondary Data Server IP Address field: Type the IP address (or host name) of thesecondary data server station. The data server station is the computer ordevice where the TCP/IP server module of IWS is running. This field must befilled when you are using redundant data servers from the Web ThinInduSoft Web Studio v6.1 SP5 6–27
IWS Users GuideCreating and Configuring a ProjectClients. If the primary data server fails, the Web Thin Client will attempt toconnect to the secondary data server automatically. BackUp URL field: Type the URL where the web files are stored (files from the\Web sub-folder of the application). This URL is used to download the filesfrom the secondary Web server when the primary Web server is notavailable. Note:When using Web browsers running under Windows CE v3.0 operatingsystem or Windows CE Pocket PC, the backup URL field must beconfigured with the URL of the primary Web server, even if you do nothave a redundant architecture. ISSymbol download path field: When the Web Thin Client connects to the server,it attempts to load the ISSymbol control. If ISSymbol is not registered in thelocal computer (Web Thin Client), the browser will attempt to download itfrom the URL specified in this field. The default URL is a Web site whereInduSoft keeps the most updated version of ISSymbol available fordownload. You may need to configure a different location, especially whenthe Web Thin Client computer is not connected to the internet. TheISSymbolVM.cab (stored in the \BIN sub-folder of IWS) must be available inthe URL configured in this field. Tip:When the Web Thin Client stations do not have access to the internet, itis recommended that the ISSymbolVM.cab file be made available at theWeb server station, and that the URL be configured for it in this field. Note:Web browsers running under the Windows CE operating system are notable to download ISSymbol control (ISSymbolCE.ocx) automaticallyfrom a remote location. ISSymbolCE.ocx must be manually registeredin the Windows CE device to be used as a Web Thin Client. Web Tunneling Gateway check box: Check this option to enable the WebTunneling Gateway. Depending on the architecture of your project, you mayneed to use the Web Tunneling Gateway to route the Web Thin Clientcomputers to the data server. HTTP Port: Select this option when using HTTP with the Web server ofMicrosoft IIS. You can specify the TCP port used by your HTTP Web server(80 is the default TCP port for HTTP protocol). SSL Port: Select this option when using SSL (Secure Socket Layer) with theMicrosoft IIS Web server. You can specify the TCP port used by your HTTPSWeb server (443 is the default TCP port for HTTPS protocol). IP Address: IP address of the Web server computer where the Web TunnelingGateway is running. This must be the IP address of the Web serveraccessible from the Web Thin Client station(s). Secondary IP Address: IP address of the Web server computer where thesecondary Web Tunneling Gateway is running. This must be the IP address6–28 InduSoft Web Studio v6.1 SP5
Creating and Configuring a ProjectIWS Users Guideof the secondary Web server accessible from the Web Thin Client station(s).This field must be configured when you are using redundant Web servers. Tip:Most of the Web settings can be modified dynamically by theSetWebConfig() function. It is especially useful when you want tocreate an application just once, and make sure that the Web settingsare automatically configured when you run the application in differentstations with different IP Addresses.Enabling Warning MessagesIWS allows you to control whether warning messages will display before theapplication screens are downloaded to the target system. Select the Preferences tab.QuickTime and aTI<strong>FF</strong> (Uncompressed) decompressorare needed to see this picture.Project Settings Dialog – Preferences Tab Enable ( ) or disable (project…) the options that you want to include in your applicationWARNING MESSAGES– Display warning message before downloading screen to the target system option: When thisoption is checked and IWS is connected to a remote station (as configured inthe Execution Environment dialog), you are prompted to download the updatedscreen to the remote station immediately after saving a screen on the screeneditor. If this option is not checked, then the screen is downloadedautomatically, regardless of any confirmation.InduSoft Web Studio v6.1 SP5 6–29
IWS Users GuideCreating and Configuring a Project– Display confirmation message when renaming application tags option: When this option ischecked and you modify the name of any tag in the Application Tagsworksheet, you are prompted to replace the old tag name with the new tagname in the whole application. If this option is checked, IWS will execute theglobal replace command to replace the old tag name with the new tag name inall documents of the application (screens and worksheets).– Display confirmation message when changing the screen position and size option: When thisoption is checked, you are prompted to update the screen attributes (Width,Height, Top and Left) after modifying them on the Layout interface.– Display warning message after saving symbols option: When this option is checked, awarning message is shown after saving symbols.QUALITY FEEDBACK SERVICEThis section allows you to configure IWS or CEView to generate log files and/ordump files that can be used to diagnose hardware and software problems, such asmemory leaks and unexpected errors. These files are saved in the \Web\Dumpdirectory of the running application.– Generate a log file when an unexpected error happens option: When this option ischecked, the runtime modules append the Log File (\Web\Dump\Dump.txt)whenever an internal exception (error) occurs. These exceptions may notnecessarily crash the runtime modules, but they can affect the stability of thesystem and should be investigated. Note:The Log File is continually appended until it reaches its maximum size of2MB. After it reaches its maximum size, the existing file is deleted and anew file is created.– Generate a dump file when an unexpected error happens option: When this option ischecked, the runtime modules generate a new Dump File (\Web\Dump\*.dmp)with useful information about the conditions of the error. This is a binary filethat can only be read by the software vendor. Note:Dump Files are named WinXXX.dmp — where XXX is an identifying number(in hexadecimal format) automatically generated by the system — in orderto prevent an existing file from being overwritten when an new erroroccurs. Therefore, if more than one error occurs, then you will findmultiple Dump Files in the directory. The Log File indicates the name ofthe Dump File associated with each error.6–30 InduSoft Web Studio v6.1 SP5
Creating and Configuring a ProjectIWS Users Guide– Enable log of memory option: When this option is checked, the runtime modulesappend the Log File every 15 minutes with information about the currentmemory allocation. (The first log entry is written out 15 minutes after theruntime module is started.) This information can be used to identify memoryleaks.Even if none of these Quality Feedback options are checked, a post-mortem Dump File(\Web\Dump\WinDump.dmp) will always be generated when the runtime module isterminated by a fatal error. However, for debugging purposes, it is stronglyrecommend that you enable all options in this section and then send the Log File andall Dump Files to your software vendor.OTHER OPTIONS Reset Tags Database when starting application option: When this option is checked, theapplication tags are reset automatically whenever you start the application(Project > Run Application). See “Resetting the Tags Database” on page 5–15 foradditional details about this feature. Enforce Web functionality equivalence in local application displays option: When this option ischecked, the development software will automatically warn you when you try toselect fuctions or features that are incompatible with the remote runtime modules(e.g. Indusoft Secure Viewer and Web Thin Client). Note:This option is unchecked by default in order to maintain compatibility withprevious versions of InduSoft Web Studio. Auto reload application on Viewer/Web Clients when it is changed option: When this option ischecked, remote stations (i.e. Web Thin Clients and Secure Viewers) will check theserver to see if they have the most recent version of the application. If they do not,then they will automatically load the new version. When you are finished, click another tab to continue, or close the dialog.Starting Runtime Modules on the Target SystemAfter specifying a target system for your project application, InduSoft Web Studioallows you to specify which of your project’s runtime modules start automatically onthe target system and which modules must be started manually. Note:IWS configures certain modules to start automatically by default, but enables youto change these defaults.With the Project Status dialog, you can:– Configure the tasks that must be automatically executed when the applicationis launched (Execution Tasks tab)– Start/stop each run-time task manually (Execution Tasks tab)– Review information about the development system and your applications(Information tab)The Execution Tasks tab displays the list of available tasks for the current application.Their status and startup modes (Automatic or Manual) are also displayed.InduSoft Web Studio v6.1 SP5 6–31
IWS Users GuideCreating and Configuring a ProjectTo specify how modules will start on the target system, use the following steps: From the main menu bar, select Project → Status to open the Project Status dialog. Select the Execution Tasks tab, which lists all of the runtime modules associated withyour project application and their current start-up status. Note:The Execution Tasks tab is available only when the Target Station option from theExecution Environment dialog (Project → Execution Environment) is set to Local.This list consists of three columns, including the Task Name, runtime Status, andcurrent Startup setting (Automatic or Manual) of each runtime task. For example, seethe following figure:QuickTime and aTI<strong>FF</strong> (Uncompressed) decompressorare needed to see this picture.Project Status Dialog: Execution Tasks TabThe list of tasks available in this dialog depends on the Target system configured onthe Options tab. The following table lists the tasks that are not available forapplications designed for the Windows CE operating system:TaskBackground TaskDatabase Client RuntimeDatabase SpyDDE Client RuntimeDDE ServerHAD OPC ServerDriver RuntimeLogWinAvailable for WinCE runtime OSYesYesNoNoNoNoYesNo6–32 InduSoft Web Studio v6.1 SP5
Creating and Configuring a ProjectIWS Users GuideTaskODBC RuntimeOPC Client RuntimeStudio Scada OPC ServerTCP/IP Client RuntimeTCP/IP ServerViewerAvailable for WinCE runtime OSNoYesYesYesYesYes Notes: Because there are so many drivers and new drivers are being added all thetime, the Driver runtime module starts all of the drivers configured in thecurrent project application. Started does not display in the Status column when you start the Drivermodule; instead an icon for each driver displays in the lower right-handcorner of the Windows taskbar. To stop an individual driver, right-click the icon and select Exit from thepop-up menu.Driver Runtime - OMETHDriver Runtime - KOYOVerify that Drivers are Running You can configure tasks for automatic execution when the application is launchedby clicking the name on the Execution Tasks tab, pressing the Startup button andthen choosing Automatic.Startup Dialog– The tasks configured with Startup = Automatic are automatically executedwhen the application is launched; the tasks configured with Startup = Manualare not.– You can also Start/Stop each run-time task by clicking the name and thenpressing the Start or Stop button.InduSoft Web Studio v6.1 SP5 6–33
IWS Users GuideCreating and Configuring a Project Note:If the Execution Tasks tab is not visible, click Project -> ExecutionEnvironment and make sure the Target Station is set to Local. TheExecution Tasks tab is available only when the Target Station is set tolocal. Tip:You can also start/stop each task during the runtime by using theStartTask() and EndTask() built-in functions. You can also use theIsTaskRunning() function to check if each task is running during theruntime. Caution:The commands triggered by this dialog will be executed in the remotestation (not in the local computer) when you are connected to a remotestation. The Information tab from the Project Status dialog displays the list of tasks availablefor the current application, as illustrated in the following picture:Project Status Dialog: Information TabThe most important information displayed in this dialog is the Applicationdatabase (initial), which provides the number of application tags configured in thecurrent application. This information is useful to evaluate which license is moresuitable for the application. When you are finished, click OK to close the Project Status dialog.6–34 InduSoft Web Studio v6.1 SP5
Creating and Configuring a ProjectIWS Users GuideAfter you create and configure a project, you can design your application screens andcreate your task worksheets.Instructions for creating screens are provided in Chapter 7: Configuring Screensand Graphics.Instructions for creating worksheets are provided in Chapter 8: Configuring TaskWorksheets.InduSoft Web Studio v6.1 SP5 6–35
IWS Users GuideCreating and Configuring a Project6–36 InduSoft Web Studio v6.1 SP5
Chapter 7: Configuring Screens and GraphicsThis chapter provides information on configuring screens and graphics. Beforecreating an application screen, you should consider the structure of the screen.Windows 2K/XP/Vista applications permit you to open more than one screen at atime, but for Windows CE applications you create a default screen with a header andfooter (to use as a template), and then you insert objects on the screen. You then savethe template screen under different names to create the different screens.Typically, an InduSoft Web Studio application screen consists of three basic areas (orscreen types):Header: Objects located at the top of a screen to provide standard information (date,time, and so forth).Footer: Objects located at the bottom of a screen (typically an alarm object showingthe last alarm).Regular: Area between the header and the footer to provide information aboutprocesses, alarm screens, trends, and so forth.Using this structure to develop screens provides the following advantages:You can tie screens together according to their utility in the application.You can configure links and dynamics, common to all screens, just once.You can give the application a default format.You can build modular screens and use them in other projects.Working in an Object-Oriented EnvironmentSelect the Graphics tab to access all of the screens, Web pages, Library objects, andsymbols in the application.Graphics TabThis tab contains the following folders:Screens: Contains all of the display screens created for the current application.Group Screen: Contains the entire screen groups (individual screens combined intomanageable groups) created for the current application. Note:Screen groups are not available for Windows CE.InduSoft Web Studio v6.1 SP5 7–1
IWS Users GuideConfiguring Screens and GraphicsWeb Pages: Contains all the Web pages (screens saved in HTML format) created forthe application.Library: Contains the library of common symbols and graphics provided withInduSoft Web Studio. Double-click the Library button to open the IWS SymbolLibrary utility, consisting of a list pane (containing all of the symbol groups) and adisplay screen.Symbols: Contains all of the user-defined symbols, which can be groups of imagesand/or text. You can create custom symbols for the application and save them intothis folder.Working with Screen AttributesThe Screens folder contains screens with finished graphic compilations and workingdrafts. To view a screen, expand the Screens folder and screens display to the right ofthe Workspace window. Double-click on a screen to open it.To create a new screen, open the Screen Attributes dialog using one of the followingmethods: Click the New button ( ) on the Standard toolbar. When the New Document dialogopens, click Display, and then click OK. Right-click on the Screens folder, select Insert, and click the prompt pop-up:Creating a New Screen Select File → New from the menu bar. When the New Document dialog opens, clickDisplay, and then click OK.7–2 InduSoft Web Studio v6.1 SP5
Configuring Screens and GraphicsIWS Users Guide Select Insert → Screen from the menu bar. When the New Document dialog opens,click Display, and then click OK.Screen Attributes DialogTo display the Screen Attributes dialog for an existing screen, select View > ScreenAttributes from the menu bar.Use the parameters on the Screen Attributes dialog as follows:Description text box: Type a description of the screen attribute for documentationpurposes. The text you enter in this field displays in the status bar (by default)located at the bottom, left of the screen when you are in Run Application mode.Background Picture area: Specify the following parameters for the background.– Enable background check-box: Click (check) to enable or (uncheck) to disable(default) the use of background bitmaps.– Enable Background combo-box: Click to select one of the following Windows2K/XP/Vista background options:• BMP• TIF• DXF• EPS• WMF• IMG• JPG• WPG• PCD• PNG• FMF• FPX• FAX• TGA Note:Windows CE supports .BMPs only.– Shared Image check-box: Click (check) to save a .BMP file in a compressed form.Activated only when the Enable Background check-box has been selected.InduSoft Web Studio v6.1 SP5 7–3
IWS Users GuideConfiguring Screens and Graphics Caution:You cannot read the saved .BMP file in compressed format if you modify orinstall the Windows set-up values in an environment using a differentnumber of colors. We recommend saving the screens in uncompressedformat in case you want to switch among different configurations. InWindows CE, bitmaps must be 16-color.Size area: Type an integer number into the Width and/or Height boxes to specify thesize (in pixels) of the selected window.Location area: Type an integer number into the Top and/or Left fields to specify thelocation of the window (in pixels) in relation to the current screen. Caution:If you use the mouse (pointer) to resize a window (Thin or Resizing style) directly,and then select View > Screen Attributes from the menu bar, IWS prompts you toupdate the current screen size and location.Security field: Specify the same window security level (default is zero) the user’saccess is defined using Security on the Database tab.Hide check-box: Click (check) to keep the screen loaded in memory after calling itfor the first time, which facilitates faster loading when you open the screen. IWSexecutes Screen Logics normally.Enabling this feature (default is disabled) causes a high use of GDI resources,consequently we recommend that during development, you monitor theseresources using the InfoResources function.Runtime Properties area: Specify the following parameters to define the windowproperties when you are running the application.– Titlebar: Click this box to enable/disable a Titlebar for the new screen. Even ifyou do not check this check-box, you can configure text for the Titlebar;however, the Titlebar displays only if this option is checked. Tips: You can modify the Titlebar text dynamically during the runtime byconfiguring tags between curly brackets. The value of the tag(s) isconcatenated with the text in the Titlebar. Configuring dynamic text in the Titlebar is useful even if it is not visibleon the screens. When the Print command is triggered from the Grid orAlarm/Event Control objects, the text from the Titlebar of the screenwhere the object is configured is printed in the header of the pages.– System Menu check-box: Click (check) to enable the system menu.– Maximize Box check-box: Click (check) to activate the Maximize button.– Minimize Box check-box: Click (check) to activate the Minimize button.– Style: Click to select a window style (default is Replace).* Overlapped opens a window without closing any other window.* Popup opens a window that remains in front of other windows, but leavesother windows enabled.* Dialog opens a window that remains in front of other windows, but disablesthe other windows until you close the opened window.7–4 InduSoft Web Studio v6.1 SP5
Configuring Screens and GraphicsIWS Users Guide* Replace opens a window and closes any other Replace and Popup stylewindows.– Border: Click to select a border style:* None: No border and does not allow a title bar or resizing.* Thin: Thin border window that cannot be resized during runtime.* Resizing (default): Normal border that you can resized during runtime.– Don’t Redraw text box: Type a tag or value to control how screen dynamics arerefreshed. Specifying a value higher than zero disables all screen dynamics.– Screen Logics area: Click (check) the boxes to execute mathematical functions inone or more of these events: On Open, While Open, On Close.After enabling an event, click on the corresponding button to open a dialogwhere you can enter the following information:* Tag Name: Type a tag name to receive a return value from the Expressioncolumn.* Expression: Type a mathematical expression or function to be performed. Thereturn value is applied to the Tag Name field.* Trigger (While Open dialog only). Type a tag to work as a trigger (any valuechange) to execute this worksheet. If you leave this field blank, IWSexecutes the worksheet in the minimum time slice your system canperform.– Focus area: Use the following options to set the behavior of the focus whenusing a group of screens (more than one screen open simultaneously):* Receive focus on open: Check this option to bring the focus to the first objectsensitive to focus, when it is opened.* Share tab order with other screens: Check this option to switch the focus fromobjects from this screen to objects configured in other screens. This willoccur after you press the Tab key while the last object sensitive to focus is infocus on this screen.* Tab Order: Type a number (0 - 32767) to set the tab order. When there aremore than one screen open, and you keep pressure on the Tab key (duringthe runtime), the focus switches from the screens with the smaller TabOrder number, to the screens with higher Tab Order numbers, and back tothe screen with the lowest Tab Order number (and so on). Tip:To set the order that the screens from the group will be opened when thegroup of screens is called, right-click on the screen group name from theGraphics tab of the workspace.InduSoft Web Studio v6.1 SP5 7–5
IWS Users GuideConfiguring Screens and Graphics Click the Save button ( ) on the Standard toolbar or select File → Save (orFile → Save As) from the menu bar to save the new screen. When the Save (orSave As) dialog displays, type .scr (or ) into the File namefield.Specifying the File NameExpand the folders in the Graphics tab to see the saved screen:Checking for the New Screen7–6 InduSoft Web Studio v6.1 SP5
Configuring Screens and GraphicsIWS Users GuideSpecifying Background ColorTo change the background color of the screen, click the Background Color button ( ),located on the Tools toolbar or right-click on the blank screen and choose BackgroundColor from the pop-up menu.When the Color dialog displays, click a color, and then click OK.Color Dialog Tip:Double-click on a color to select that color and automatically close the Color dialog. Note:Depending on the palette configured for your system, the colors of graphic objectsimported into the environment may have color distortion. If this happens, changethe palette configured for your system.InduSoft Web Studio v6.1 SP5 7–7
IWS Users GuideConfiguring Screens and GraphicsUsing Objects and DynamicsThe InduSoft Web Studio product provides full-featured objects and dynamics (theability to modify object properties, execute commands, or inset values to tags used tobuild screens on the fly at runtime).Using the Mode ToolbarThe Mode toolbar provides buttons for general screen editing.Mode ToolbarThe Mode toolbar contains the following buttons: Selection button ( ): Click to display a cursor that allows you to select or moveobjects on the screen. Bitmap Editor button ( ): Click to switch between the two, basic editing layers:– Objects layer: The layer on which you create the dynamic objects for yourscreen.– Background Picture layer: The static background layer of the same screen.– When the Background Picture layer is active, the Bitmap toolbar displaysautomatically. Note:You automatically disable the Bitmap Editor button when you uncheck (disable) theEnable Background check-box (.BMP-type only) on the Screen Attributes dialog. Fill Color button ( ): Click to specify a default fill color for the following objects:– Closed Polygons– Ellipses– Rounded Rectangles– Rectangles Tip:To save development time, select several objects (of any type specified in the precedinglist) and use Fill Color to specify a default fill color for all of them at once. Fonts button ( ): Click to specify the font and color for selected text objects, or tospecify a default font and color for new text objects. Tip:To save development time, select several text objects and use the Fonts buttonto specify font and color settings for all of the objects at once. (You cannot usethis function for grouped text objects however.)7–8 InduSoft Web Studio v6.1 SP5
Configuring Screens and GraphicsIWS Users Guide Line Color button ( ): Click to specify a line color for selected objects or to set adefault color for new objects, including the following:– Open Polygons– Closed Polygons– Lines– Ellipses– Rounded Rectangles– RectanglesWhen you click the Line Color button, the Line Selection dialog is displayed. Use thisdialog to specify line styles and color for the selected objects:Line Selection Dialog Tip:To save development time, you can select several of the preceding objects anduse the Line Color button to specify a line color for all of the objects at once. Background Color button ( ): Click to specify a background color for the screen. Note:You automatically disable this button when you check the Enable Backgroundcheck-box on the Screen Attributes dialog. Grid button ( ): Click to specify whether to show or hide the grid on the screeneditor. Tip:You can use the Grid dialog to configure the default settings for a grid. To openthis dialog, right-click on the screen and select Grid Settings when the pop-upmenu displays.InduSoft Web Studio v6.1 SP5 7–9
IWS Users GuideConfiguring Screens and GraphicsUsing the Align and Distribute ToolbarThe Align and Distribute toolbar provides buttons that allow you to edit screen objects.Align and Distribute ToolbarUse the following toolbar options for resizing: Resize height button ( ): Click to set the height of all selected objects to the heightof the last object selected (the object with the filled handles). You can use Resizeheight to resize one object by setting its height equal to its width. Resize width button ( ): Click to set the width of all selected objects to the width ofthe last object selected (the object with the filled handles). You can use Resize widthto resize one selected object by setting its width equal to its height. Tip:You can use Resize width and Resize height to create circles from an ellipse or squaresfrom rectangles. Select only one object before using these tools.You also can use your cursor, mouse, and keyboard arrow buttons to resize objects onyour screen. When you select an object (or group of objects) with the cursor, selectionhandles (black squares) display at each corner and at the midpoint of each side. Youcan use these handles as follows:To enlarge an object, click on a handle and drag your cursor (or pointer) in thedirection indicated by the arrows that display. Clicking and dragging a cornerresizes the entire object (height and width, while clicking on a side resizes theobject in one direction only (height only or width only).To enlarge an object with finer resizing control, click on a handle and do not release the leftmouse button. Click the arrow keys to resize the object (in the direction indicatedby the resizing arrows) one pixel at a time. Release the mouse button when you arefinished resizing the object.To select and resize an open or closed polygon, draw a selection box around the polygonand group it (as described in “Object Grouping and Ungrouping Buttons”, page7–16). You can then click on a handle and drag it to resize the object.To change the shape of an open or closed polygon, click on a handle and a boxed squaredisplays at the base of your cursor. Drag the handle to move its position andchange the shape of the polygon. Notes: All objects with dynamic properties and Group of Symbols objects (includingmost symbols and library objects) have multiple Object Properties dialogsand properties. Use the drop-down list on the Object Properties dialog (View →Object Properties) to access these different dialogs and properties. If you resize a symbol or group of objects, IWS resizes all objects within thesymbol or group accordingly.7–10 InduSoft Web Studio v6.1 SP5
Configuring Screens and GraphicsIWS Users GuideOBJECT ALIGNMENT BUTTONSWhen you select a series of objects (two or more), you can align those objects based onthe location of the last object selected. As you select objects, solid handles display onthe last object selected, and the handles on all previously selected objects becomeempty (unfilled) boxes. Note:In all of the figures provided, the rectangle represents the last object selected.Use the following alignment buttons to align a series of objects. Align left button ( ): Click to align all selected objects to the left edge of the lastobject selected. For example:Aligning Objects Left Align right button ( ): Click to align all selected objects to the right edge of the lastobject selected. For example:Aligning Objects Right Align top button ( ): Click to align all selected objects to the top edge of the lastobjected selected. For example:Aligning Object TopsInduSoft Web Studio v6.1 SP5 7–11
IWS Users GuideConfiguring Screens and Graphics Align bottom button ( ): Click to align all selected objects to the bottom edge of thelast object selected. For example:Aligning Object Bottoms Center vertically button ( ): Click to align all selected objects to the vertical center ofthe last object selected. For example:Centering Objects Vertically Center horizontally button ( ): Click to align all selected objects to the horizontalcenter of the last object selected. For example:Centering Objects Horizontally7–12 InduSoft Web Studio v6.1 SP5
Configuring Screens and GraphicsIWS Users Guide Evenly space horizontally button ( ): Click to put an equal amount of horizontalspace between a series of objects (two or more). For example:Spacing Objects Horizontally Evenly space vertically button ( ): Click to put an equal amount of vertical spacebetween a series of objects (two or more). For example:Spacing Objects Vertically Note:The spacing functions may move the last object selected (with solid handles) by nomore than a few pixels to equally space all of the objects.Use the following buttons to change the orientation of a single selected object orgrouped object. (You cannot use these buttons with multiple objects selected.) Flip horizontally button ( ): Click to invert the selected object horizontally. Theobject rotates around an imaginary line through its horizontal center until it is amirror image of the original object. For example:Flipping Objects HorizontallyInduSoft Web Studio v6.1 SP5 7–13
IWS Users GuideConfiguring Screens and Graphics Flip Vertically button ( ): Click to invert the selected object vertically. The objectrotates around an imaginary line through its vertical center until it is a mirrorimage of the original object. For example:Flipping Objects Vertically Rotate button ( ): Click to rotate the selected object 90 degrees (a quarter turn)clockwise. For example:Rotating ObjectsCHANGING OBJECT LAYERS BUTTONSUse the following object layer buttons to move selected object(s) behind or in front ofanother screen object(s). Notes: IWS assigns a unique identification number (ID#) to every object on the screen.These ID#s always start at zero and range up to the total number of objects onthe screen. You can click on an object to display its ID# in the status bar. IWS uses ID#s to determine whether an object displays in front of, or behind,another object on the screen. Objects with lower ID#s display behind objectswith higher ID#s. If you select a group of objects and move them the behind or in front of anotherobject, the selected group of objects maintain their original display order.7–14 InduSoft Web Studio v6.1 SP5
Configuring Screens and GraphicsIWS Users Guide Move to back button ( ): Click to move a selected object or group behind all otherobjects on the screen. IWS assigns the object the lowest ID# and moves that objectbehind all other objects on the screen. For example:Moving Objects to Back (Selecting the Blue Rectangle) Note:Alternatively, right-click on an object and select Move to back from the object’spop-up menu. Move to front button ( ): Click to move a selected object or group in front of all otherobjects on the screen. IWS assigns the object the highest ID# and moves thatobject behind all other objects on the screen. For example:Moving Objects to Front (Selecting the Red Circle) Note:Alternatively, right-click on an object and select Move to front from the object’spop-up menu. Move backward button ( ): Click to move the selected object or group one layerbelow the next object on the screen. (Alternatively, right-click on the object andselect Move backward from its pop-up menu.) IWS assigns the selected object thenext available ID# less than the object behind which it was moved. Move forward button ( ): Click to move the selected object or group one layer abovethe next object on the screen. (Alternatively, right-click on the object and selectMove forward from its pop-up menu.) IWS assigns the selected object the firstavailable ID# greater than the object in front of which it was moved.InduSoft Web Studio v6.1 SP5 7–15
IWS Users GuideConfiguring Screens and GraphicsOBJECT GROUPING AND UNGROUPING BUTTONSUse the following buttons to group and ungroup two or more selected objects. Note:All objects with dynamic properties and Group of Symbols objects (whichinclude most symbols and library objects) have multiple Object Properties dialogsand properties. You can use the drop-down list on the Object Properties dialog(View → Object Properties) to access these different dialogs and properties. Group button ( ): Click to combine multiple objects into a single object tofacilitate object selection and manipulation. (You can access each part of thegroup in the Object Properties dialog.) Note:Alternatively, you can right-click on an object and select Group from theobject’s pop-up menu. Ungroup button ( ): Click to separate a grouped object into its individualcomponents. Notes: Alternatively, you can right-click on an object and select Ungroup from theobject’s pop-up menu. A complex grouped object can consist of several sets of grouped objects(known as subgroups). Consequently, you may find it necessary to ungroupall of the subgroups to completely ungroup a complex object.Using Groups of ScreensIWS provides a screen-grouping feature that allows you to open a linked set of screensat the same time. Note:This feature is not supported for CEView applications or for screens that will beexported in HTML format.From the menu bar, select Insert > Screen Group to open the Insert Screen Group dialog,where you can create a new group of screens for your application.7–16 InduSoft Web Studio v6.1 SP5
Configuring Screens and GraphicsIWS Users GuideInsert Screen Group DialogTo create a new screen group, type a group name into the Name text box or click on ascreen provided in the List of screens. Click on OK when you are done. Note: You also can create a new screen group from the Graphics tab in theWorkspace. Right-click on the Group Screen folder then select Insert screengroup from thepop-up menu. The Group Screen folder combines individual display screensfrom the Screens folder into more manageable groups. Select File > Save Screen Group As HTML to save the Screen Group in HTML format,making them available to the remote Web Thin Client through a WebBrowser.To set the order that the screens from one group should be opened when the group iscalled, right-click on the screen group name (from the Graphics tab of the Workspace).Click on Set Open Order in the pop-up menu.Set Open Order DialogInduSoft Web Studio v6.1 SP5 7–17
IWS Users GuideConfiguring Screens and GraphicsUsing the Web ToolbarThe Web toolbar provides buttons that allow you to open and navigate HTML files.Web Toolbar Note:You must install Internet Explorer v4.1 (or higher) before you can use any of thetools on the Web toolbar. Back button ( ): Click to return to the last URL address you opened in thedevelopment environment. Forward button ( ): Click to return to a URL address you opened before clickingthe Back button in the development environment. Stop button ( ): Click to cancel the file-downloading process from a specified URLaddress. Refresh button ( ): Click to reload a URL address specified in the Address text box. Home button ( ): Click to open the Home Page configured in your InternetExplorer Web browser. Address text box ( ): Type a Web page URL address into the textbox to open (download) that page to your Internet Explorer Web browser. Go button ( ): Click to download the pages specified in the Address text box.SAVING SCREENS IN HTML FORMATIWS also enables you to save screens in the HTML format. You cannot create theHTML pages contained in the Web Pages folder; instead, they are generated frompre-existing screens. For information on how to configure and run a Web Thin Clientapplication, see Chapter 13: Configuring a Web Solution.To create an HTML page, you must first create a display screen. Configure a screen asyou usually would (create objects, add properties, and so on), but keep in mind thatthis screen will become a Web page. Save the screen as usual when you finish. Then,with the screen still open, select File > Save As HTML. Caution:The Web pages that are generated when you select File > Save As HTML areindependent of the screen file from which they were generated. Consequently, ifyou change that display screen, the changes will not appear on the Web pageuntil you select File > Save As HTML again.Select File > Save Screen Group As HTML to save the Screen Group in HTML format, makingthem available to the remote Web Thin Client through a Web Browser.7–18 InduSoft Web Studio v6.1 SP5
Configuring Screens and GraphicsIWS Users GuideTo view your Web pages, you must first configure the Web settings on the ProjectSettings dialog (Web tab).Project Settings Dialog: Web Tab Open the dialog and type the IP address (from which to run the application) in theData Server IP field. The Data Server station is the computer or device where theTCP/IP Server module of IWS is running. If this field is left blank, then the WebThin Client will assume that the Web Server (i.e. the address entered into thebrowser) is also the Data Server. Tip:You can use the IP address 127.0.0.1 (locallost) to access the TCP/IPserver on the local computer (regardless of its IP address on the network).This option is useful for local tests; however, you are not able to access thedata server from remote computers using this configuration. Type a value in the Send Period field to specify the send period (in milliseconds) usedto exchange data between the Server and the Web Thin Client stations. Click (enable) the following check-boxes if applicable:– Disable Remote Client Commands check-box: Click (enable) this box to prevent aremote client from issuing commands from your Web Thin Client to yourServer.– Enable ToolTips check-box: Click (enable) this box to see Windows ToolTips whenviewing the application screens on the Web Thin Client (browser).– Auto Screen Scaling check-box: Click (enable) this box to automatically scalescreens displayed in a Browser window.InduSoft Web Studio v6.1 SP5 7–19
IWS Users GuideConfiguring Screens and GraphicsEnable this parameter if you are running remotely on a Web Thin Client, andyou want IWS to scale screens automatically when you resize the Browserwindow.– Enable File Compression check-box: Click (enable) this box to compress the filesstored on the \Web folder of the application. This option is useful for reducingdownload time, particularly if you have a slow connection between your Serverand the Web Thin Client. Click the IP Security button to open the IP Security dialog. Use the parameters onthis dialog to specify the range of IP addresses for the computers that are allowedto access the application as Web Thin Clients.IP Security DialogWhen the Edit pane parameters become active, type IP addresses in the From andTo fields to specify the IP address range. Use the Add and Remove buttons to movethe IP addresses into the IP Address Range list. IWS permits the computers listed inthis pane to access applications as Web Thin Clients. Note:By default, IP security applies only to Web Thin Clients connecting to theData Server. You can also implement IP security for database synchronizationbetween applications running on different stations (see “Configuring TCP/IP”on page 10–25). To do this, insert the following parameter into the applicationfile (*.app):[TCP]UseWebIPSecurity=1 To enable logging for the Web Thin Client, move to the Log pane and click (enable)the Enable check-box and type a file name into the Filename field to generate a log fileon the Web Thin Client station. You can use this log file for debugging purposes. To enable the Virtual Keyboard for the Web Thin Client stations, independentlyfrom the local station, click the Virtual Keyboard check-box. You can establish adefault configuration for the virtual keyboard:– Default: Select the default keyboard type to be used in the application, when nokeyboard type is specified by the calling object or function.7–20 InduSoft Web Studio v6.1 SP5
Configuring Screens and GraphicsIWS Users Guide– Scale: Using this option, you can shrink or enlarge the keyboard to fit the size ofthe target display. A value of 100% represents the default size of each keyboardtype.– Show Hint checkbox and field: When this option is checked, a hint is displayed inthe title bar of the keyboard. For objects, the hint is configured in the ObjectProperties dialog. Otherwise, enter a string or string Tag in the Show Hint field toserve as a defaut hint.– Show Min/Max Fields option: When this option is checked, the minimum andmaximum allowed values are displayed at the bottom of the keyboard. Forobjects, these values are configured in the Object Properties dialog. Otherwise,the Min and Max properties of the associated Tag are used by default. Note:The Min and Max fields are displayed only on the Keypad keyboardtype, and only when the associated Tag is defined as Integer or Real. IfMin is greater than Max, then input will be disabled. If Min/Maxconfigured on the object is different from Min/Max configured in theTag properties, then the application will attempt to scale the inputaccordingly. Click OK to close the Project Settings dialog. Notes: If you change any of the Web information on the Project Settings dialog, youmust re-verify the application for the new setting to take effect. To verify theapplication, select Tools → Verify from the menu bar. (If you have any windowsopen in the development system, IWS prompts you close them before you verifythe application). Because the Web pages display information from the application through theWeb server, you must be running the runtime system, Web server, and theTCP/IP server to view your Web pages.InduSoft Web Studio v6.1 SP5 7–21
IWS Users GuideConfiguring Screens and GraphicsUsing the Bitmap ToolbarUse the Bitmap toolbar to access the Bitmap Screen Editor tools. (This toolbar isavailable only when the Background Picture layer is active. You can enable theBackground Picture layer in the Screen Attributes dialog.)Bitmap ToolbarThe Bitmap toolbar contains the following buttons: Select Area button ( ): Click to select an area within the Bitmap Screen Editor. Flood Fill button ( ): Click the Flood Fill button, and then click on the screen topaint the surrounding area with the color you specified with the Fill Color button. Pixel Editing button ( ): Click to open an Edit Image dialog, where you can drawdetailed bitmaps, pixel by pixel.Edit Image Dialog Erase Area button ( ): Click to remove a selected area from the screen. Change colors button ( ): Click to change the transparent fill color for a selectedarea. Note:Before you can use this button, you should have already specified a fill color(Fill Color button), selected a transparent color (Select Transparent Color button),and defined the area to fill (Select Area button). Select Transparent Color button ( ): Click to specify a transparent color (referencedby the Change Colors button).7–22 InduSoft Web Studio v6.1 SP5
Configuring Screens and GraphicsIWS Users Guide Toggle Transparent Color button ( ): Click to cause the color selected using the SelectTransparent Color button to become transparent for bitmaps selected in the BitmapScreen Editor. Tip:You can use the Copy (Ctrl+C) and Paste (Ctrl+V) commands to exchange bitmappictures between IWS’s Bitmap Screen Editor and any other bitmap editor(Paint Brush, for example).InduSoft Web Studio v6.1 SP5 7–23
IWS Users GuideConfiguring Screens and GraphicsUsing the Static Objects ToolbarThe Static Objects toolbar provides buttons you can use to create polygons, rectangles,lines, and other objects for your screen.Static Objects ToolbarThe Static Objects toolbar contains the following buttons: Open Polygon button ( ): Click to draw an open polygon with a border in thespecified foreground color.To draw an open polygon in the drawing area:– Click the left mouse button to set the starting point of the polygon.– Move the cursor to a new location and click again to place the second vertex.– Repeat this process until you create the desired polygon shape.– Double-click to stop drawing the polygon.To view the object properties, double-click on the polygon object and the ObjectProperties dialog is displayed:Object Properties Dialog: Open PolygonUse the Object Properties dialog to specify the following parameters for the polygon:– Line: Specify a border line style by clicking the No Line, Solid Line, or Dashed Linebutton.– Color: Specify a border line color by clicking the Color button. When the Colordialog opens, click on a color to select it and then close the dialog.– Weight: Specify the borderline width (in pixels) by typing a number representingthe line width into the text box. Closed Polygon button ( ): Click to draw a closed polygon, using a border in thespecified foreground color.To draw a closed polygon in the drawing area:– Click the left mouse button to set the starting point of the polygon.– Move the cursor to a new location and click again to place the second point.– Repeat this process until you create the desired polygon shape.– Double-click or right-click to stop drawing the polygon.7–24 InduSoft Web Studio v6.1 SP5
Configuring Screens and GraphicsIWS Users GuideTo view the object properties, double-click on the polygon object. The ObjectProperties dialog is displayed:Object Properties Dialog: Closed PolygonUse the Object Properties dialog to specify the following parameters for the polygon:– Line: Specify a border line style by clicking the No Line, Solid Line, or Dashed Linebutton.– Color: Specify a border line color by clicking the Color button. When the Colordialog opens, click a color to select it and then close the dialog.– Weight: Specify the borderline width (in pixels) by typing a number representingthe line width into the text box.– Fill: To specify whether the polygon is filled, click No Fill or Fill.If you enable the Fill option, you can specify a fill color by clicking on the Colorbutton. When the Color dialog displays, click a color to select it and close thedialog. Line button ( ): Click to draw an orthogonal line in the drawing area, as follows:– Click the left mouse button to set the starting point of the line.– Drag the cursor to adjust the line size.– Click again to place the object.To view the object properties, double-click on the object. The Object Propertiesdialog is displayed:Object Properties: LineUse the Object Properties dialog to specify the following parameters for theorthogonal line:– Line: Specify a line style by clicking the No Line, Solid Line, or Dashed Line button.– Color: Specify a line color by clicking the Color button. When the Color dialogopens, click a color to select it and then close the dialog.– Weight: Specify the line width (in pixels) by typing a number representing theline width into the text box.InduSoft Web Studio v6.1 SP5 7–25
IWS Users GuideConfiguring Screens and Graphics Ellipse button ( ): Click to draw ellipses, chords, arcs, and rings. For example:Oval, Chord, Arc, and Ring Tip:The Ring style is particularly useful when you are creating plumbing drawings.To create an ellipse, use the following steps:– Click in the drawing area and drag the mouse/cursor to create an oval shape.– Release the mouse button to stop drawing the oval.– Use the Object Properties dialog to change the shape to a chord, arc, or ring.Double-click on the object to view the Object Properties dialog:Object Properties: EllipseUse the Object Properties dialog to specify the following parameters for the ellipse:– Style: Specify the object style by selecting Ellipse, Arc, Chord, or Ring from thedrop-down list. Next, select Left-Bottom, Left-Top, Right-Bottom, or Right-Top from theStyle list to choose the quadrant into which the ellipse is drawn.For example to represent a half-circle pipe, create two Ring objects. Specify oneas Left-Bottom and the other as Right-Bottom then join the two objects to create ahalf-pipe.– Fill: To specify whether the ellipse is filled, click No Fill or Fill.If you select the Fill option, specify a fill color by clicking on the Color rectangle.When the Color dialog displays, click on a color to select it and close the dialog.– Line: Specify a line style for the ellipse border by clicking the No Line, Solid Line, orDashed Line button.– Color: Specify the ellipse borderline color by clicking the Color button to open theColor dialog. Click the color to select it, and then close the dialog.– Weight: Specify a line width for the ellipse border by typing a numberrepresenting the line width (in pixels) into the text box provided. Rounded Rectangle button ( ): Click to draw rounded rectangles (empty or filled), asfollows:– Click in the drawing area and drag the mouse/cursor to create the rectangle.– Release the mouse button to stop drawing the object.7–26 InduSoft Web Studio v6.1 SP5
Configuring Screens and GraphicsIWS Users GuideDouble-click on the object to view the Object Properties dialog:Object Properties: Rounded Rectangle Notes: You cannot use the rounded rectangle button to create a bar graph forWindows CE applications. A rounded rectangle has one extra tracker in the lower left corner, whichenables you to modify the arc angle.Use the Object Properties dialog to specify the following parameters for theorthogonal line:– Line: Specify a borderline style by clicking the No Line, Solid Line, or Dashed Linebutton.– Color: Specify a borderline color by clicking the Color button to open the Colordialog. Click the color to select it, and then close the dialog.– Weight: Specify a borderline width by typing a number representing the linewidth (in pixels) into the text box provided.– Fill: Specify whether the rectangle is filled by clicking No Fill or Fill.If you select the Fill option, specify a fill color by clicking on the Color button.When the Color dialog displays, click a color to select it and close the dialog.– Color: Specify a fill color by clicking the Color button to open the Color dialog.Click a color to select it, and then close the dialog.– Caption: This option is not enabled for this object. Rectangle button ( ): Click to create rectangles, as follows:– Click in the drawing area and drag the mouse/cursor to draw the rectangle.– Release the mouse button when the rectangle is the size you want.Double-click on the object to view the Object Properties dialog:QuickTime and aTI<strong>FF</strong> (Uncompressed) decompressorare needed to see this picture.Object Properties: RectangleUse the Object Properties dialog to specify the following parameters for theorthogonal line:InduSoft Web Studio v6.1 SP5 7–27
IWS Users GuideConfiguring Screens and Graphics– Type: Specify a border line style by clicking on None, Solid, Dashed, Etched, Raised orSunken.– Color: Specify a border line color by clicking the Color button to open the Colordialog. Click the color to select it, and then close the dialog.– Weight: Specify a border line width by typing a number representing the linewidth (in pixels) into the text box provided.– Fill: Specify whether to fill the rectangle by clicking No Fill or Fill.If you select the Fill option, specify a fill color by clicking on the Color rectangle.When the Color dialog displays, click a color to select it and close the dialog.– Color: Specify a fill color by clicking the Color button to open the Color dialog.Click a color to select it, and then close the dialog.– Caption: Press this button to open the Caption dialog where you can edit the textthat can be written inside the rectangle object.QuickTime and aTI<strong>FF</strong> (Uncompressed) decompressorare needed to see this picture.Selecting the Caption Button* Caption: Enter the text that you want to display inside the rectangle object.You can include a tag by enclosing it in curly brackets (e.g. {tagname}).* Extern translation: Click (check) to enable translation during runtime using theTranslation Tool.* Fonts: Specify a font style for the caption by clicking the Fonts button.* Align: Specify the alignment for the caption of the rectangle.* Multiline: Allows the caption of the rectangle to be shown in more than oneline, when checked.* Wrap Text: When checked, the object automatically wraps the text whennecessary.* Auto Format: When checked, if the caption includes a decimal value enclosedby curly brackets (e.g. {1.2345} ) or a tag of Real type (see Caption above),then the value will be formatted according to the virtual table created by theSetDecimalPoints() function.* Auto gray out: Turns the caption of the rectangle to gray when the Commanddynamic applied to the rectangle is disabled by the Disable field or due to theSecurity System. Button button ( ): Click to create custom-sized buttons, as follows:– Click in the drawing area and drag the mouse/cursor to create the buttonshape.– Release the mouse button when the button is the size you want.Double-click on the object to view the Object Properties dialog:7–28 InduSoft Web Studio v6.1 SP5
Configuring Screens and GraphicsIWS Users GuideQuickTime and aTI<strong>FF</strong> (Uncompressed) decompressorare needed to see this picture.Object Properties: ButtonUse the Object Properties dialog to specify the following parameters for the button:– Caption: Specify a caption by typing the text into the text box. You can include atag by enclosing it in curly brackets (e.g. {tagname}).– Fonts: Specify a font style for the caption by clicking the Fonts button.When the Fonts dialog displays, specify the following parameters:* Font (typeface)* Font style* Size* Effects* Color* Script style– Weight: Specify a border line width by typing a number representing the linewidth (in pixels) into the text box.– Align: Specify the alignment for the caption of the button.– Fill Color: Specify the Fill Color for the button.– Extern translation (optional): Specify an external translation file for the buttonlabel by clicking (checking) the box.– Multiline: Allows the caption of the button to be shown in more than one line,when checked.– Wrap Text: When checked, the object automatically wraps the text whennecessary.– Auto gray out: Turns the caption of the button to gray when the Commanddynamic applied to the button is disabled by the Disable field or due to theSecurity System.– Auto Format: When checked, if the caption includes a decimal value enclosed bycurly brackets (e.g. {1.2345} ) or a tag of Real type (see Caption above), then thevalue will be formatted according to the virtual table created by theSetDecimalPoints() function. Text button ( ): Click to create text objects, as follows:– Click in the drawing area. When a cursor displays, you can type a line of text.– After entering the text string, double-click on the new text object to view theObject Properties dialog.InduSoft Web Studio v6.1 SP5 7–29
IWS Users GuideConfiguring Screens and GraphicsObject Properties: TextUse the Object Properties dialog to specify the following orthogonal lineparameters:– Caption: Specify a text string by typing a caption in the text box.– Align: Align the text by selecting Left, Center, or Right from the combo-box.– Fonts: Specify a font style for the text by clicking the Fonts button. When theFonts dialog displays, you can specify the following parameters:* Font (typeface)* Font style* Size* Effects* Color* Script– Border: Specify a text border by clicking the Border box.To select a border color, click the Color rectangle. When the Color dialogdisplays, click a color to select it, then close the dialog.– Background: Specify a background color by clicking the Color button. When theColor dialog displays, click a color to select it, then close the dialog.– Transparent check box: Enable (check) this option to not show the backgroundcolor. Disable (uncheck) to show the background color.– Extern translation (optional): Specify an external translation file for the text byclicking (checking) this box.7–30 InduSoft Web Studio v6.1 SP5
Configuring Screens and GraphicsIWS Users GuideUsing the Dynamic Properties ToolbarUse the Dynamic Properties toolbar to apply dynamics to objects or a group of objects.Dynamics enable you to modify object properties on the fly (during runtime) accordingto tag values. Some dynamics also enable you to execute commands or insert values(set points) to the tags.Dynamic Properties ToolbarThe Dynamic Properties toolbar contains the following buttons: Command property ( ): Click to add the command dynamic to a selected object orgroup of objects. The command dynamic enables you to click on the object or pressa pre-defined key to execute the command at runtime. Double-click the object to view its object properties.QuickTime and aTI<strong>FF</strong> (Uncompressed) decompressorare needed to see this picture.Object Properties: CommandThe Command dynamic provides one tag for each one of the events supported byit. Notice that more than one event can be configured simultaneously for the sameCommand dynamic:EventOn DownOn WhileOn UpOn Right DownOn Right UpOn Double ClickDescriptionExecutes the command/script once when the user clicks on the object with the leftmouse button.Keeps executing the command/script continuously while the mouse pointer is pressedon the object. The period (in milliseconds) of execution for the command/script is set inthe Rate field from the Configuration dialog screen, except for the VBScript option,which is executed as fast as possible.Executes the command/script once when the user releases the left mouse button on theobject.Executes the command/script once when the user clicks on the object with the rightmouse button.Executes the command/script once when the user releases the right mouse button onthe object.Executes the command/script once when the user double-clicks on the object with theleft mouse button.InduSoft Web Studio v6.1 SP5 7–31
IWS Users GuideConfiguring Screens and Graphics Notes: IWS treats the touch-screen actions the same way it treats the mousepointer actions. In other words, it is transparent for IWS if an event wastriggered by a touch-screen interface or by a regular mouse pointer. The events On Right Down, On Right Up and On Double Click are notsupported by CEView applications (running on the Windows CE operatingsystem). When creating an application for a touch-screen device, it is important tokeep in mind that events On Right Down and On Right Up cannot betriggered on such devices.– Type: This setting defines the type of action that must be executed by the eventof the Command dynamic. Notice that each event has its own type. Therefore,the same Command dynamic can be configured with different types of actionfor different events. The following types are supported:TypeBuilt-in LanguageVBScriptOpen ScreenClose ScreenSet TagDescriptionAllows you to configure a script using the IWS buil-in language. When thistype is selected, the user can configure up to 12 expressions for each event inthe Expression column. The expressions are executed sequentially from thefirst row until the last one when the event is triggered. The result of eachexpression is written to the tag configured in the Tag column (if any). Consultthe IWS Built-in Language chapter for further information about this the IWSBuilt-in Language.Allows you to configure a script using the standard VBScript language. Whenthis type is selected, the user can configure a script in the VBScript editor forthe Command dynamic. Consult the VBScript chapter for further informationabout the VBScript language.Allows you to configure the Command dynamic to open a specific screenwhen the event is triggered during the runtime. This type is equivalent to theIWS built-in function Open(). You can either type the screen name in theOpen Screen field or browse it. Furthermore, you can type a string tagbetween curly brackets {TagName} in this field. When the event is executed,IWS will attempt to open the named screen.Allows you to configure the Command dynamic to close a specific screenwhen the event is triggered during the runtime. This type is equivalent to theIWS built-in function Close(). You can either type the screen name in theClose Screen field or browse it. You can also type a string tag between curlybrackets {TagName} in this field. When the event is executed, IWS willattempt to close the named screen.Allows you to configure the Command dynamic to set a tag when the event istriggered during the runtime. You can either type the tag name in the Set Tagfield or browse it. When the event is executed, IWS will write the value 1 to thetag configured in this field.7–32 InduSoft Web Studio v6.1 SP5
Configuring Screens and GraphicsIWS Users GuideTypeReset TagToggle TagDescriptionAllows you to configure the Command dynamic to reset a tag when the eventis triggered during the runtime. You can either type the tag name in the ResetTag field or browse it. When the event is executed, IWS will write the value 0to the tag configured in this field.Allows you to configure the Command dynamic to toggle a tag when theevent is triggered during the runtime. You can either type the tag name in theToggle Tag field or browse it. When the event is executed, IWS will togglethe value of the tag configured in this field.– Config: Launches the Configuration dialog screen, where the Commanddynamic can be fully configured. This dialog allows you to configure theCommand settings, as follows:QuickTime and aTI<strong>FF</strong> (Uncompressed) decompressorare needed to see this picture.Configuration DialogThe event tabs (e.g. On Down, On While, etc.) and the Type menu are the same as inthe Object Properties dialog described above. The remaining settings are sharedfor all events:– Key pane: Shortcut used to trigger the events On Down, While Down andOn Up using a keyboard. (In other words, pressing this keyboard shortcutis the same as clicking the left mouse button.) This option is especiallyuseful when creating applications for runtime devices that do not provide amouse or touch-screen interface — the keyboard is the only physicalinterface available to interact with the application during runtime.ooShift, Ctrl, or Alt boxes: Click to create a key combination key, meaningthe Shift, Ctrl and/or Alt key must be pressed with the key specified inthe drop-down list.Click the browse button ( … ) to open the Key Modifer dialog, whichenables you to modify your combination keys. You can choose Left, Rightor Left or Right to specify the position on the keyboard of the Shift, Ctrl orAlt key in the key combination. If you choose Left or Right, the commandInduSoft Web Studio v6.1 SP5 7–33
IWS Users GuideConfiguring Screens and Graphicswill be executed any time either of these keys is pressed in combinationwith the key specified in the drop-down list.– Options pane:ooEnable Focus checkbox: When this option is checked, the object that theCommand dynamic was applied to can receive the focus duringruntime by the navigation keys.Force checkbox: When this option is checked, any tag that receives avalue will generate events based on its change, even if the value of thetag in question does not change. For instance, if a tag has the value 0and the Command dynamic overwrites the same value 0 to this tag, anyother task in IWS will recognize that this tag changed value (even if itdid not) after executing the dynamic. This option is useful when youwant to make sure that actions driven by tag changes (e.g. Write on TagChange from a communication driver) are triggered after the Commanddynamic is executed. Note:For applications created with InduSoft Web Studio version 6.1 SP3or earlier, the Force option is enabled by default and cannot bedisabled.oooooBeep checkbox: When this option is checked, a short beep is playedwhen the Command is executed. This option is useful to provide anaudio feed-back to the user, indicating that the Command wasexecuted. It does not indicate, however, if the action triggered by theCommand dynamic was successful or not.Release checkbox: When this option is checked, the On Up event isexecuted when you drag the cursor (or your finger) out of the objectarea (whether the button was released or not). This option is useful tomake sure that the On Up event will always be executed after an OnDown event, even if the user releases the mouse cursor out of the objectarea before releasing it.Confirm checkbox: When this option is checked, user will have to answera confirmation question before executing the command. This option isuseful for decreasing the accidental triggering of critical events duringruntime.E-Sign checkbox: When this option is checked, the user will be promptedto enter the Electronic Signature before executing the command.Key Only checkbox: When this option is checked, the user can only usethe keyboard shortcut (configured in the Key pane described above) toexecute commands.– Disable: Disables action by the user when the result of the expressionconfigured in this field is TRUE (value different from 0).– Security: Security access level required to use the Command dynamic.7–34 InduSoft Web Studio v6.1 SP5
Configuring Screens and GraphicsIWS Users Guide Hyperlink button ( ): Click to add the hyperlink property to a selected object orgroup of objects. Applying this property allows you to click on the object(s) duringexecution to launch the default browser and load the specified URL.Double-click on the object to open the Object Properties dialog:Object Properties: HyperlinkYou can use this dialog to specify the following parameters:– Hyperlink Type combo-box: Click the combo-box button to select a URL protocolfrom the list. IWS uses this protocol when it loads the URL.– E-Sign check-box: When this option is checked, the user is prompted to enterthe Electronic Signature before executing the dynamic.– URL field: Type the URL address you want to load (for example: InduSoft.com). Tip:You are not required to enter the protocol type in the URL field. When youselect a protocol type from the Hyperlink Type list, IWS automatically adds theprotocol’s prefix to the URL address.– Disable field: Type a value greater than zero into this field to disable thehyperlink command property for the selected object(s).– Security field: Type a value into this field to specify a security level for theobject(s). If a user logs on, and does not have the required security level, IWSdisables the hyperlink command for the object(s).InduSoft Web Studio v6.1 SP5 7–35
IWS Users GuideConfiguring Screens and Graphics Bargraph button ( ): Click to add bar graph properties to a selected object, andthen double-click on the object to open the Object Properties dialog.Object Properties: BarGraph Note:You cannot use the rounded rectangle button to create a bar graph forWindows CE applications.Use the Object Properties dialog to specify the following parameters:– Tag/Expression field: Type a tag or expression that determines the bar graphlevel. You also can click the button to browse your directories for an existingtag or expression.– Minimum Value field: Type a numeric constant or a tag value into this field todefine the minimum value used to calculate the size of the bars.– Maximum Value field: Type a numeric constant or a tag value into this field todefine the maximum value used to calculate the size of the bars. Tip:IWS also allows you to enter constants in tag/numeric value fields.Constant values (defined by the # character) are equivalent to numericvalues, except that constants display in the Tag Replace dialog. You mayfind constants useful for documentation purposes or for creating genericobjects. For example: #Name:100.Where the value (100) following the semicolon (:) is the constant, and Nameis a constant mnemonic only and not added to the database.– Foreground Color: To specify a fill color for the bars, click the combo-box button.When the Color dialog displays, click on a color to select it, and then close thedialog.– Direction pane: Click the Vertical or Horizontal radio button to specify the directionof the bar graph.– Orientation pane: Click the Up, Center, or Down button to specify the orientation ofthe maximum and minimum values when drawing the bars.7–36 InduSoft Web Studio v6.1 SP5
Configuring Screens and GraphicsIWS Users Guide Text I/O button ( ): Click to add the dynamic input or output text property to aselected text object. Applying the Text I/O property allows you to insert and displaytag values in real time if you are using the keyboard or on-screen keypad to run anapplication. Note:You can apply this dynamic property only to text objects containing the# character (each # represents one character) to be replaced by a value duringthe runtime.Double-click on the object to open the Object Properties dialog. You can use thisdialog to specify the following parameters:Object Properties: Text I/O– Tag/Expression text field: Type one of the following into the field:* A tag on which to perform an input or output operation; or* An expression on which to perform an output operation only.You can click the button to browse your directories for an existing tag orexpression.– Input Enabled check-box: Enable (check) this option to allow data entries. Disable(uncheck) the option and this dynamic only executes the data outputs.– Fmt combo-box: Click to select how the numeric value (if any) of the specifiedtag or expression will be formatted and displayed on-screen. Available optionsinclude Decimal, Hexa (i.e. hexadecimal), Binary and Auto. If you select Auto, thenthe value will be formatted according to the virtual table created by theSetDecimalPoints() function. Note:This option does not actually change the specified tag or expression in anyway.For example, Tag/Expression is set to a tag of Integer type, Input Enabled ischecked, and Fmt is set to Hexa. You may input a new value in hexadecimalformat, but it is saved in the application database as an integer.– Minimum Value field: Enable (check) this option to define a minimum value for thetag associated with this text object. A user will not be permitted to input anumber lower than this value.– Maximum Value field: Enable (check) this option to define a maximum value forthe tag associated with this text object. A user will not be permitted to input anumber greater than this value.InduSoft Web Studio v6.1 SP5 7–37
IWS Users GuideConfiguring Screens and Graphics– Confirm check-box: Enable (check) this option to require users to confirm anynew values set during runtime.– Auto Size checkbox: Click (check) this option to automatically resize the Textobject to fit the output. This option is not available if Input Enabled is checked(see above).– Password check-box: Enable (check) this option to hide password text entries byreplacing the text with asterisks (*).– E-Sign check-box: When this option is checked, the user is prompted to enterthe Electronic Signature before changing the tag value.– VK field: Virtual Keyboard type used for this object. You need to enable theVirtual Keyboard option on the Project > Settings > Runtime Desktop interface beforeconfiguring the Virtual Keyboard for this interface.– Disable field: Type a value greater than zero in this field to disable the tag’s datainput property.– Security field: Type a value in this field to specify the security level for a specificdata input object (as defined in the Security section).Colors button ( ): Click to add the color change property to a selected object. TheColors dynamic allows you to modify the color of a static object during the runtimebased on the value of a tag or expression.Double-click on the object to open the Object Properties dialog box.Object Properties: ColorsYou can use this dialog to specify the following parameters:– Type field: Determines the mode in which this dynamic works:* By Limit: When selecting this type, you can specify up to four limits (ChangeLimit) for this dynamic and a color for each limit. When the value of the tagor expression configured in the Tag/Expr field reaches the limits, the colorassociated with the respective limit is applied to the object.* By Color: When selecting this type, you can specify the code of the color thatmust be applied to the object directly in the Tag/Expr field. Using this code,you can apply any color supported by your device to the object. Tip:You can configure the RGBColor() function in the Tag/Expr field whenType = By Color. This allows you to configure the color by its RGB codes.See IWS Development Environment -> Standard Interfaces -> ColorInterface for a table with the codes for the most commonly used colors.7–38 InduSoft Web Studio v6.1 SP5
Configuring Screens and GraphicsIWS Users Guide– Tag/Expression field: Type the name of a tag or expression you want to monitor.When Type = By Limit, IWS compares the result of the tag/expression with thespecified Change Limits to determine the proper color for the selected object.When Type = By Color, the result of this field sets the color that will be appliedto the object.– Change Limit field: Type a limit value (a numeric constant or tag) for the colorchange. The numbers must be configured in ascendant order according to thefollowing sequence of the fields displayed on the Object Properties dialogwindow: Upper left, lower left, upper right and lower right field. If you click onthe More button, you can configure up to 16 different limits for the colordynamic.Color Limits Dialog Box– Color combo-box: Click the combo-box button to associate a color with eachcolor change limit. When the Color dialog opens, click a color to select it, andthen close the dialog.– Blink combo-box: Click the combo-box button to specify whether the colorchange will blink, and how fast it will do so. Note:The following fields are automatically disabled (grayed out) when Type =By Color: Change Limit, Color and Blink.InduSoft Web Studio v6.1 SP5 7–39
IWS Users GuideConfiguring Screens and Graphics Position button ( ): Click to specify when and where to display an object, using thespecified tag values.Double-click on the object to open the Object Properties dialog:Object Properties: Position (with Slider not enabled)Object Properties: Position (with Slider enabled)You can use this dialog to specify the following parameters:– Show on condition field: Configure a tag/expression in this field to control whenthe object is shown. When the value of the tag/expression is TRUE (i.e. greaterthan 0), the object is shown. When the value is FALSE (i.e. less than or equal to0), the object is hidden. You can also leave the field blank to always show theobject.– Slider checkbox: Click (check) this option to operate the object like a slider,which means that you can drag the object around the screen to input values tothe configured tags. (See Move below.)Click the Slider button to configure additional settings:• Disable field: Configure a tag/expression in this field to control when slidingis disabled. When the value of the tag/expression is TRUE (i.e. greater than0), sliding is disabled. When the value is FALSE (i.e. less than or equal to0), sliding is enabled.• Security field: Enter the security level required to use the object as a slider.– Move area: Configure these settings to determine how the object moves on thescreen.• Tag/Expression fields: The meaning of these fields changes depending onwhether the Slider option is enabled (see above).ooExpression field: If the Slider option is not enabled, then configuretags/expressions in these fields to determine the horizontal andvertical positions of the object on the screen.Tag field: If the Slider option is enabled, then configure only tags in thesefields to receive input values as the user drags the object around thescreen.• Range fields: Enter the minimum and maximum possible values for theconfigured tag/expression. Values outside of the range are ignored.7–40 InduSoft Web Studio v6.1 SP5
Configuring Screens and GraphicsIWS Users Guide• Position fields: Enter values in these field to specify how much change inposition (in pixels) you can move an object on the screen according to theestablished condition. Positive values move the object right and down;negative values move the object left and up.The actual position of the object is proportional to the value of Tag/Expressionwithin Range.• Reference combo-box: Select one of the following options as a referencepoint, to be used while moving the object on the screen. Specifying thisoption is necessary only if you want to resize the object as you move it.oooooLeft: Left corner of the object.Right: Right corner of the object.Center: Center of the object.Top: Upper corner of the object.Bottom: Lower corner of the object. Resize button ( ): Click to increase or decrease the size of a selected object orsymbol. Double-click on the object/symbol to open the Object Properties dialog:Object Properties: ResizeUse the Object Properties dialog to specify the following parameters:– Tag fields: Type values in the Height and Width fields to increase or decrease theobject’s horizontal and vertical size.– Range fields: Type values to specify upper and lower tag limits, which IWS usesto increase and decrease the object size.– Size (%) fields: Type values to specify a percentage range, which IWS uses toincrease and decrease the object size.– Reference combo-boxes: Select one of the following reference points to determinehow the object increases size horizontally and vertically.* Left: From the left side* Right: From the right side* Center: Horizontally and vertically from the center of the object* Top: From the upper side* Bottom: From the lower sideInduSoft Web Studio v6.1 SP5 7–41
IWS Users GuideConfiguring Screens and Graphics Dynamic Rotation button ( ): Click to rotate a line. Double-click on the line to openthe Object Properties dialog:Object Properties: Dynamic RotationUse this dialog to specify the following parameters:– Tag/Expression field: Enter a Tag name or expression to associate with theRotation property. The value of Tag/Expression determines the actual rotationof the object; as the value changes, so does the amount of rotation.– Range area: Enter the Minimum and Maximum values allowed for Tag/Expression.Values less than the minimum and greater than the maximum aredisregarded.– Rotation (degrees) area: Enter the Start and End positions (in degrees) of theobject. The actual rotation is proportional to the value of Tag/Expressionwithin Range. An object can rotate up to 360 degrees, and it rotates clockwiseby default. Tip:For example, a Rotation property has the following settings: Minimum is 0,Maximum is 100, Start is 0, and End is 180. If the current value ofTag/Expression is 50 (i.e. halfway between Minimum and Maximum), thenthe actual rotation of the object is 90 degrees (i.e. halfway between Startand End). A value of 25 is equal to 45 degrees, a value of 75 is equal to 135degrees, and so on.– Reference combo-box: Select one of the following as a pivot point on which torotate the object:• Left-Top: Upper-left corner of the object.• Left-Bottom: Lower-left corner of the object.• Center: Center of the object.• Right-Top: Upper-right corner of the object.• Right-Bottom: Lower-right corner of the object.You can fine tune the pivot point by configuring the Offset settings describedbelow.7–42 InduSoft Web Studio v6.1 SP5
Rotation Property Advanced dialogConfiguring Screens and GraphicsIWS Users Guide– Advanced button: Click to open the Advanced dialog, where you can configurethe following settings:Object Properties: Rotation Property – Advanced Dialog• Offset (pixels) area: Enter the number of pixels by which to offset theReference (i.e. pivot point) on the X axis and/or Y axis.• Counter Clockwise checkbox: Click (enable) this option to make the objectrotate counterclockwise instead of clockwise.InduSoft Web Studio v6.1 SP5 7–43
image\Tech0223.gifIWS Users GuideConfiguring Screens and GraphicsUsing the Active Objects ToolbarThe Active Objects toolbar provides buttons you can use to create dynamic objects.Active objects typically require more parameters than static objects.Active Objects ToolbarThe Active Objects toolbar contains the following buttons: Alarm/Event Control Object button ( ): Click to add an Alarm/Event Control Object toyour application screen.To create and configure an Alarm/Event Control Object:– Click the Alarm/Event Control button.– Click in the display, and drag the mouse to create and adjust the object’sshape.Double-click on the object to open the following Object Properties dialog:Object Properties: Alarm/Event ControlUse the Alarm/Event Control Object Properties dialog to configure the Alarm/EventControl Object, as follows:– Select an alarm object mode in the Type pane:* On Line: Click (enable) this button to display current alarm messages.* History: Click (enable) this button to display alarm messages from the Alarmhistory database.7–44 InduSoft Web Studio v6.1 SP5
Configuring Screens and GraphicsIWS Users Guide– Click (enable) the Show gridlines check-box to display gridlines in the object:Displaying a Grid– Click (enable) the Show Header check-box to display a header on the object:Displaying a HeaderInduSoft Web Studio v6.1 SP5 7–45
IWS Users GuideConfiguring Screens and Graphics– Click the Font button to open the Font dialog where you can specify displayproperties for the alarm text.Font DialogUse the Font, Font Style, and Size lists to specify a typeface, font style, and size.* Click (enable) the check-boxes in the Effects pane to Strikeout (strikeout text)or Underline (underlining) the alarm text, or use the combo-box to specify acolor for the alarm text. (Note: The Sample pane shows how the text will lookin the object.)* By default, IWS uses Western-style fonts. If you want to change the default,click the Script combo-box button and select from the list. (Note: The contentsof this combo-box list will depend on your operating system.)* When you are finished, click OK to close the Font dialog.7–46 InduSoft Web Studio v6.1 SP5
Configuring Screens and GraphicsIWS Users Guide– Click the Columns button to open the Columns dialog where you can specifydisplay properties for columns in the Alarm/Event Control Object.Columns Dialog* Use the Key box to assign a shortcut to each column. This allows you to sortthe information on the Alarm Control object by any column, using keyboardkeys instead of the mouse cursor.* The Available list contains all of the column types available for this object.* The Visible list contains all of the column types currently in use for theobject.* Click the buttons to move selections between the two lists. Tip:Use the Columns dialog to display the most recently replaced value withthe new value. To do so, move both Value and Previous from the Availablelist to the Visible list.* Click the Move Up or Move Down buttons to rearrange the order of columns inthe Visible list.* Use the Label and Width fields in the Properties pane to change the defaultcolumn labels and widths at runtime.* Use the Align combo-box to specify alignment (Left, Center, or Right) for thealarm message text within a specified column.* Click (enable) the Available during runtime check-box to allow the user to addselected columns to the visible list during runtime.* When you are finished, click OK to close the Columns dialog. Note:When acknowledging an alarm, the Alarm Control object sends a messageto the Alarm Task with the following information: Tag, Alarm to beacknowledged (Hi, HiHi, Lo, etc), User Name and Station. This is a solutionto control acknowledged alarms from a Web Thin Client.InduSoft Web Studio v6.1 SP5 7–47
image\Tech0228.gifIWS Users GuideConfiguring Screens and Graphics– To filter alarm messages during runtime, click the Filters button. The Filtersdialog displays so you can specify filtering parameters for the Alarm/EventControl Object.Filters Dialog* Use the Group field to filter alarm messages by one or more user group(s).Type the Group number into the text field (for example, 1). You also can usea comma or a dash to specify more than one group (for example, 1,3,5-6)* Use the Selection field to filter alarm messages by the Selection text configuredon the Alarm worksheet.* Use the From and To parameters in the Priority pane to filter alarm messagesbased on priority. Type values into the text fields to delimit the priorityrange.* Use the Tagname, Message, and/or Username text fields in the Search in columnspane to specify criteria for filtering alarm messages. Type a tagname,message, and/or user name into the text field for which you want IWS tosearch.* Use the parameters in the Interval pane to filter alarm messages by the lastx number of messages (Latest) or based on a period of time (Period).7–48 InduSoft Web Studio v6.1 SP5
Configuring Screens and GraphicsIWS Users Guide Notes: You can configure tag names (string tags) between curly brackets { } inthe Group, Selection, Tagname, Message, and Username fields to modify thefiltering options during runtime. You can configure integer tag names for the fields in the Priority paneand/or on the latest field from the Interval pane to modify these valuesduring runtime. You can configure string tag names for the Period fields in the Intervalpane to modify those values during runtime. You can use wildcards (* and ?) when specifying values for the Selection,Tagname, Message, and Username fields.* Use the Filter Expression pane to configure an expression that will filterunwanted messages out of the alarm display. Only messages that satisfy theexpression will be shown.To enter an expression, click on the Edit button; the Alarm Filter Expressiondialog is displayed. The filter expression must follow the basic syntax of…[]''…where the is the name of a column in the Alarm/EventControl object. For example:[Activation Time]>'08/17/2007 15:00'This filter will only show alarm messages with activation times greater (later)than 15:00 on 08/17/2007. Notes: The maximum number of characters is 1024 for Engineering Mode and2048 for Runtime Mode. The Display Value and State columns are not supported by the filterexpression. Tips: You can combine several conditions simultaneously by using the logicoperators AND, OR, and NOT. For example:[Type]='HiHi' OR [Type]='LoLo' AND [ActivationTime]>'08/17/2007 15:00' You can use wildcards ( * and ? ) in the filter expression. It is not necessary to use the square brackets when the is only one word (e.g. Value). You can change the filter expression during runtime by specifyingString tags in curly brackets. For example:[Value]='{AlarmFilterValue}' To use more than 1024 characters in the filter expression duringruntime, you must use more than one tag between curly bracketsInduSoft Web Studio v6.1 SP5 7–49
image\Tech0229.gifIWS Users GuideConfiguring Screens and Graphicsusing the {TagName1} AND {TagName2} syntax.* Use the parameters in the Initial Sort pane to set the default sorting order.Select a column type from the Column combo-box, click the Asc or Desc radiobutton to sort in ascending or descending order. Click the Allow sort in runtimecheck-box if you want to enable the sort to occur during runtime.– Click the Advanced button to open the Advanced dialog where you can specifyadvanced properties for the Alarm/Event Control Object.Advanced DialogUse the parameters in the Date and Time Format pane to control which dateand time information displays in the alarm message. Click (enable) thecheck-box to include that element in the display. (Note: MS stands formilliseconds.)Hint: Watch the Sample text to preview how the information will look in the alarmmessage.7–50 InduSoft Web Studio v6.1 SP5
Configuring Screens and GraphicsIWS Users GuideUse the parameters in the Ack pane to control how alarms are acknowledged.* Security field: Type a numeric value to specify which security levels canacknowledge an alarm message. Only those users with the specified levelcan respond.* Ack all tag field: Type a tag to receive a value. When the tag changes value, itindicates that all messages in the alarm object have been acknowledged.* Ack tag field: Type a tag to receive a value. When the tag changes value, itindicates that the message at the top of the alarm object has beenacknowledged.* Confirm check-box: Click (enable) this box to display a confirmation dialogwhen the user tries to acknowledge a single alarm.* Enable comment (individual ack only) check-box: Click (enable) this box to allowthe user to enter comments about the alarm, just after acknowledging it.Use the parameters in the Run-time dialog triggers pane to control:* Columns field: Type a tag to receive a value. When the tag changes value, itopens a dialog allowing you to customize the columns visible in the object.* Filters field: Type a tag to receive a value. When the tag changes value, itopens a dialog allowing you to filter the columns visible in the object.Use the parameters in the Delete Message pane to control who can deletealarm messages from the Alarm History:* Security: Use this field to specify which security level can delete alarmmessages. Only those users with the specified security level will be allowedto delete an alarm message.* Confirm: Click (enable) this box to require the user to confirm a messagedeletion before IWS actually deletes the selected alarm message.* Print trigger field: Type a tag in this field to print an alarm summary from yourdefault printer when this tag changes value.* PDF Trigger field: Type a Tag in this field. When the value of the Tag changes,the data currently filtered in the Alarm/Event Control is distilled to a PDFfile and saved to the path specified in the PDF Filename field below.* PDF Filename field: Enter a complete file path and name where the PDF file isto be saved. You can also enter a tag name using the {tag} syntax. Note:PDF Trigger and PDF Filename are not supported in applications running onWindows CE or Web Thin Client.* Total items field: Type an integer tag to see how many alarms remain after IWSfilters the alarm object using parameters specified on the Filters dialog.* Auto Format checkbox: When checked, decimal values in the Display Value,Previous and Value columns will be formatted according to the virtual tablecreated by the SetDecimalPoints() function.* Selected tag field: Type a string tag to enable the end user to click on an alarmmessage to see the name of the tag associated with that alarm event.* First Row Text field: Type a string tag. This tag will receive the text of all fieldsfrom the first row of the Alarm/Event Control. The fields are tab delimited.Whenever the first row changes — either due to a new Alarm/Event, orInduSoft Web Studio v6.1 SP5 7–51
IWS Users GuideConfiguring Screens and Graphicssimply because the rows are reordered — the value of the configured tag isupdated.* Summary Changes field: Type an integer tag. This tag will receive a runningcount of the number of changes in the Alarm/Event Control. For example,when a new Alarm occurs or when an Alarm is acknowledged, the value ofthe configured tag will be incremented. Reordering the rows is not countedas a change.* Click the Navigation Triggers button to open the following dialog:Navigation Triggers DialogYou can make the on-screen Alarm Control object scroll up, scroll down,page up, page down, go to home (beginning) of page, or go to end of page byconfiguring tags in the corresponding fields. Whenever the values of theconfigred tags change, the Alarm Control object will navigate that way. Thisis useful for adding navigation controls to the screen; for example, if youconfigure the same tag to the Up field in this dialog and a Pushbutton object,then the Alarm Control object will scroll up whenever the Pushbutton objectis pressed.When you are finished, click OK to close the Advanced dialog.– Use the Win color box to select a background color for the Alarm/Event ControlObject. Click the color box to open the color palette pop-up, and then simplyclick a color to select it.– Click (enable) the Ext translation check-box to enable the external translation ofalarm messages using the Translation Tool. (See Chapter 16: Using theTranslation Editor for more information.)– E-Sign check-box: When this option is checked, the user is prompted to enterthe Electronic Signature before executing the dynamic.– VK field: Virtual Keyboard type used for this object. You need to enable theVirtual Keyboard option on the Project > Settings > Runtime Desktop interface beforeconfiguring the Virtual Keyboard for this interface. Trend Control object ( ): Click to display data points (values) from different datasources in a graphic format. The main features provided by the Trend Controlobject are:– Display of multiple pens simultaneously– Support for different Data Sources, such as Tag, Batch, Database and Text File– Capability to generate X/Y graphs from the configured data sources (pleaserefer to Trend Control Object - Appendix A, which follows this section, for anexample of X/Y chart)7–52 InduSoft Web Studio v6.1 SP5
Configuring Screens and GraphicsIWS Users Guide– Simultaneous display of an unlimited number of data points. This featuremight be limited by the hardware used since available memory andperformance will vary.– Built-in toolbar, which provides interfaces for the user to interact with theTrend Control object during the runtime– Built-in legend, which displays the main information associated to each penlinked to the object– Zooming and auto-scaling tools– Horizontal and vertical orientation Note:For compatibility with applications created in older versions of IWS(legacy), the Trend object is still supported and available from the Legacytoolbar. However, since the Trend Control object provides allfunctionalities of the previous Trend object in addition to otheradvantages, it is recommended that you use the Trend Control object withnew projects.Trend Control - Development InterfaceThis section describes the development interface and all the settings available toyou as you configure the object on the screen.Although the Trend Control object supports flexible configurations to meet thespecific needs of your application, most of the settings are set by defaults based onthe most common interfaces. Therefore, in many cases, you will only configuredata points (displayed during the runtime), which can be done easily by clickingthe Points button from the Object Property window.Click the Trend Control tool to add it to your application screen. Double-click onthe object to launch its Object Properties dialog window, as follows:InduSoft Web Studio v6.1 SP5 7–53
IWS Users GuideConfiguring Screens and GraphicsTrend Control Object Properties Dialog* Border box: Specify a border line Type (style) by clicking on None, Solid,Dashed, Etched, Raised or Sunken. You can also select the color of theborder line with the color box to the right of the Type field.* Fill box: If you click Fill, you can choose a background color for the TrendControl object by selecting it from the color box to the right of this radiobutton. If you select No Fill, the background of the Trend Control object willremain transparent.The rest of the buttons on this dialog launch other dialogs for configuring specificsettings for the Trend Control object:* The Data Sources button on the Trend Control Object Properties dialoglaunches this dialog:Data Sources DialogThe data source defines the location of the values from the data point(s)associated with it. Many points can share the same data source – you donot need to create one data source for each data point.The data source tag is available by default to the Trend Control object. Youcan add additional Data Sources with the New button. The name you enterwill be used as an alias to link the data points to this new data source.The other fields in this dialog allow you to edit the data source settings:– Source Type: Select the source type of the location of the data point values.– X-Axis field: Enter the name of the field (column) from the data sourcethat holds the X axis data.– Max Buffer: The maximum amount of data (in bytes) that will be held inruntime memory.7–54 InduSoft Web Studio v6.1 SP5
Configuring Screens and GraphicsIWS Users Guide– Load Progress: The tag in this field will receive a real value (0-100) thatrepresents the percentage of the Data Source load progress.– Sort: This option is useful for plotting data from a Text file. When enabled(checked), it sorts the data and shows the Cursor column value until theMax Buffer is filled. When disabled (unchecked), the data are not sortedand the Cursor column value is not shown.– Data Source Settings: Click to define the settings for the selected SourceType.Data SourceTypeThe following table summarizes the settings for each Data Source Type:Description X-Axis field Data Source SettingsBatchBatch generatedby the Trend taskof IWSDisabled. The X-Axisdata will be retrievedautomatically on thecorrect position fromthe proprietary Batchfile generated by IWS.Enter the data point values’ Batch Name for theirretrieval. You can configure a tag between curly bracketsin this field to change this setting dynamically during theruntime.DatabaseSQL RelationalDatabaseField name thatcontains the X-AxisdataConfigure the settings to link this Data Source to the SQLRelational Database that holds the data point values. SeeDatabase Configuration Dialog Window in Chapter 17 orfurther information about this dialog interface. Pleaserefer to Trend Control Object - Appendix B, which followsthis section, for an example of configuring databases.Text FileText file (e.g. CSVfile) with datapoint valuesseparated by aspecific delimiterNumber of the columnthat holds the X-Axisdata. The number 0refers to the firstcolumn, 1 refers to thesecond column, and soforth.Enter the name of the text file that holds the data points.The default path is the current application path. You canconfigure a tag between curly brackets in this field tochange this setting dynamically during the runtime.You can also choose one or more delimiters for the dataInduSoft Web Studio v6.1 SP5 7–55
IWS Users GuideConfiguring Screens and Graphicsstored in the text file. The value of each row is written inthe text file between two delimiters. When using a commaas a delimiter, the grid object is able to read data fromCSV files. You can even choose a custom delimiter bychecking the Other option. Please refer to Trend ControlObject - Appendix A, which follows this section, for anexample of configuring text files.* The Points button on the Trend Control Object Properties dialog launchesthis dialog:Points DialogThe value of each data Point can be represented in the Trend Control objectas a pen, during the runtime. You can select which data Points will bevisible during the runtime (add/remove pens to the chart), regardless ofhow many data Points you associate with the Trend Control object.The following table summarizes the properties of each Data Point:PropertyPointLabelColorData SourceDescriptionData Point ID. Each data Point has a unique ID, which is assigned automaticallywhen the data Point is created in this interface.The label associated with the Data Point can be displayed on the Legend, duringthe runtime, providing a short reference to the user for each data Point.Color of the pen used to draw the values of the Data Point on the Trend ControlobjectData Source that holds the values for the data Point. The Data Source Tag isavailable by default. See the Data Sources button above for further informationabout how you can make additional Data Sources available for the object.7–56 InduSoft Web Studio v6.1 SP5
Configuring Screens and GraphicsIWS Users GuidePropertyTag/FieldMinMaxStyleOptionsHideDescriptionThe meaning of this parameter depends on the Data Source Type associatedwith the data Point: Tag: Type the name of the tag with values to display. If the tag is configuredin the Trend task, the history data is automatically retrieved; otherwise, onlythe online values are displayed. Batch: Type the name of the tag with values to be retrieved from the BatchHistory file generated by the Trend Task, and displayed on the object. Database: Type the name of the field (column) in the SQL RelationalDatabase that holds the data Point values. Text File: Type the number of the column that holds the data Point values.The number 0 refers to the first column, 1 refers to the second column, andso on.Minimum value displayed in the Y scale for the data PointMaximum value displayed in the Y scale for the data PointConfigure the style for the pen (color, type, state, etc.). See the Pen Style dialogbelow for further information.Configure optional settings for each data Point. You can use the dialog toconfigure these settings or type their values directly in the Options field, usingthe comma character as the delimiter. See Options dialog above for furtherinformation about these settings.You can configure a tag in this field. When this tag has the value 0, the penassociated with the point is displayed on the object; otherwise, it is hidden.* Pen Style dialog: This dialog allows you to configure the style of the pen usedto draw the data Point values on the object during the runtime. Also, it canbe launched during the runtime, allowing the user to customize thesesettings on-the-fly.You have the option of defining a Hi Limit and a Lo Limit for each data Point,with the Options dialog. The Pen Style Dialog allows you to configuredifferent settings for the pen (e.g. color), both when its values are within thelimits (Normal State) and not within the limits (Out of Limits state).Pen Style DialogInduSoft Web Studio v6.1 SP5 7–57
IWS Users GuideConfiguring Screens and GraphicsAfter you select a State (Normal or Out of Limits), you can configure its penstyle:PropertyUse Normal SettingsTypeWeightDescriptionAvailable only for the Out of Limits state. When checked, the pen willalways be displayed with the settings for the Normal state, even if the datapoint values are not within the limits configured for it.Select the type of the line used to draw the pen.Select the weight (thickness) of the line used to draw the pen.Select the algorithm used to link the points, as follows:ExpansionMarkerColorMarker Size: The consecutive points are interpolated directly to eachother using a line. This option is suitable for analog values. : The consecutive points are linked through vertical andhorizontal lines only (steps). This option is suitable for Booleanvalues.Select the type of marker (if any) which must be displayed on each specificsample retrieved from the Data Source and displayed on the object.Select the color of the Marker (if any) and line used to draw the pen on theobject.Select the size of the Marker (if any). Note:When running the application under the WinCE operating system or onthe Web Thin Client (any OS), the Pen Style dialog box – available duringthe runtime – allows the user to change the pen color only.* Options dialog: Use this dialog to configure optional settings for each dataPoint, as follows:Options Dialog7–58 InduSoft Web Studio v6.1 SP5
Configuring Screens and GraphicsIWS Users GuidePropertyDescriptionEng. UnitLo LimitHi LimitHide ScaleBreak IntervalX Axes off-setCursor ValueDescriptionThis text can be displayed in the legend, providing a short description about thedata point, during the runtime. When using tags, the default description is the oneconfigured for the tag.This text can be displayed in the legend, providing the Engineering Unitassociated to the data point, during the runtime. When using tags, the default unitsare the ones configured for the tag.When the data point value is below this limit, its pen can be displayed with adifferent style (e.g. color) during the runtime. See Pen Style dialog above forfurther information. When using tags, the default Low Limit is the Low Alarm valueconfigured for the tag.When the data point value is above this limit, its pen can be displayed with adifferent style (e.g. color) during the runtime. See Pen Style dialog above forfurther information. When using tags, the default High Limit is the High Alarmvalue configured for the tag.You can configure a tag in this field to control the visibility of the scale (Y axis)associated with this pen during the runtime by changing the value of this tag(0=Show ; 1=Hide).Maximum interval between two consecutive points. If the time between twoconsecutive samples is higher than this number (in seconds), the Trend Controlassumes that there was no data collection in this period and does not draw a linelinking both samples. When the X Axis is configured as numeric, the value on thisfield represents a numeric scalar value. If the X Axis is configured as date/time,the value for this field is given in seconds.This field has some special values: -1 : Do not connect the points. -2 : Connect only points in ascending order.Off-set for this data point from the X-Axis scale configured for the object. Thisoption is useful when you want to display data from two or more data points usinga different X scale (period of time/value) for each one, so you can compare them.When the X Axis is configured as numeric, the value on this field represents anumeric scalar value. If the X Axis is configured as date/time, the value for thisfield is given in seconds.You can configure a tag in this field. During the runtime, the Trend Cursor objectupdates the value of this tag with the value of the intersection between the datapoint pen and the Vertical cursor (if any).InduSoft Web Studio v6.1 SP5 7–59
IWS Users GuideConfiguring Screens and Graphics* Axes button: The Axes button on the Trend Control Object Properties dialoglaunches this dialog:Axes DialogThis dialog allows you to configure the settings for the X and Y axis.– Data Type: The X axis can display either Date/Time values or numericvalues, according to this setting.Data TypeScale FormatDate/TimeNumeric7–60 InduSoft Web Studio v6.1 SP5
Configuring Screens and GraphicsIWS Users Guide Note:The number of decimal points for the X or Y scale (Decimals) can beconfigured with a tag. Therefore, this setting can be modifieddynamically during the runtime.– Period or Range: The settings available in this interface depend on theData Type configured for the X axis, as follows:Data Type Property DescriptionDate/Time(Period)NumericTypeDurationTimeMinMax Start Date/Time: When this option is selected, the value ofthe tag configured in the Time field defines the startingDate/Time for the data displayed on the object. Time Before Now: When this option is selected, the value ofthe tag configured in the Time field defines the amount oftime before the current Date/Time, which will be used as thestarting Date/Time for the data displayed on the object. Auto: When this option is selected, the Trend Control objectworks with Start Date/Time when is it triggered to PauseMode, and it works with Time Before Now when it istriggered to Play Mode.Defines the Period of data displayed on the object. You canconfigure a string tag in this field, so you can change theduration dynamically during the runtime by changing the valueof this tag. The format of the value supported by this property isHH:MM:SS. E.g. 36:00:00 (thirty six hours)This field is optional. The value of the tag configured in this fieldrepresents a period of time, rather than a specific date or time.The meaning of this value depends on the option set for theType property. When the Type is set as Start Date/Time, the value of thetag configured in this field must comply with the format DateTime. E.g.: 02/10/2005 18:30:00. When the Type is set as Time Before Now, the value of thetag configured in this field must comply with one of thefollowing formats:a. Time (string value). E.g. 48:00:00 (forty eight hours)b. Number of hours (real value). E.g. 2.5 (two hours and thirtyminutes)Minimum value displayed in the X axisMaximum value displayed in the X axis Note: The tags configured in the Period / Range fields are automaticallyupdated when the user changes the X scale dynamically duringthe runtime, using the Time bar embedded in the object. If the Time field is left blank (or if the tag configured in this fieldhas the value 0), the object displays data up to the currentDate/Time.InduSoft Web Studio v6.1 SP5 7–61
IWS Users GuideConfiguring Screens and Graphics– Grid (X axis or Y axis): You can configure the number of divisions (verticalor horizontal lines) drawn on the object for the X and/or Y axisrespectively, as well as the color of these lines.– Time bar: When checked, the Time bar is displayed below the X axisduring the runtime; otherwise, it is hidden. The time bar is a standardinterface that can be used by the operator to change the X axis scaleduring the runtime.– Scroll bar: When checked, the Scroll bar is displayed below the X axisduring the runtime; otherwise, it is hidden. The time bar is a standardinterface that can be used by the operator to navigate through the X axisscale during the runtime. Optionally, you can configure a tag in theScroll bar field, which defines the period for the scroll bar. If this field isleft empty, the period is equal to the current value for Duration of the Xaxis.– Cursor: The cursor is an optional ruler orthogonal to the X axis, whichcan be used during the runtime to obtain the value of any pen at aspecific point (intersection of the pen with the cursor). When you clickthis button, the Cursor dialog launches, where you can configure thesettings for the optional vertical cursor as follows:Cursor DialogPropertyEnableColorPosition (0-100)Value OutputDescriptionWhen checked, the vertical cursor is visible during the runtime.Color of the line drawn for the cursorYou can configure a numeric tag in this field, which is proportional to theposition of the cursor on the X axis, from 0 to 100%. When this value ischanged, the position of the cursor is automatically modified.You can configure a string tag in this field that returns the value of the Xaxis in which the cursor is currently positioned.– Position: Defines the position of the X axis, as well as its direction andorientation, as follows:7–62 InduSoft Web Studio v6.1 SP5
Configuring Screens and GraphicsIWS Users GuidePosition DialogPropertyPlacementDirectionOrientationDescriptionPosition where the X axis will be placedDirection of the X axisOrientation of the X axis– Scale: Defines the properties of the Y axis, as follows:PropertyMin / MaxMultiple SectionsFormatDescriptionDefault minimum and maximum values displayed in the Y axis. Usedwhen more than one pen shares the same scale (Multiple Sectionsdisabled), and/or for the points whose Min and Max fields are notconfigured (left blank).When checked, the Y scale is divided automatically into one sectionfor each pen; otherwise, all pens share the same Y scale.Launches a dialog for configuring the format of the labels displayed bythe Y axis.* Legend button: The Legend button on the Trend Control Object Propertiesdialog launches this dialog:Legend DialogInduSoft Web Studio v6.1 SP5 7–63
IWS Users GuideConfiguring Screens and Graphics– Show: When checked, the embedded legend is displayed during theruntime. This interface provides useful information associated with thepens currently linked to the object.– Available / Visible: The fields in the Visible box are displayed in the legendduring the runtime. You can add fields to and remove them from theVisible box using the >> and
Configuring Screens and GraphicsIWS Users Guide– Show toolbar: When this box is checked, the embedded toolbar isdisplayed during the runtime. This interface provides useful buttons totrigger actions associated with the object. You can configure thefollowing settings for each Command (button) available for the toolbar:PropertyShowActivation TagTooltipDescriptionWhen this box is checked, the button is displayed on the toolbarembedded on the Trend during the runtime.You can configure a tag in this field (optional). When the tagchanges value, it triggers the respective command. This optionis useful when you want to create customized interfaces totrigger the commands, instead of (or redundant with) theembedded toolbar.The text configured in this field is displayed as a tooltip duringthe runtime when the mouse cursor is on the icon of the toolbar.* Advanced button: The Advanced button on the Trend Control ObjectProperties dialog launches this dialog:QuickTime and aTI<strong>FF</strong> (Uncompressed) decompressorare needed to see this picture.Advanced DialogRun Mode options: The settings on this area define the behavior of thetrend when in run mode:PropertyUpdate triggerUpdate intervalMove to current time onrunDescriptionWhen the tag configured in this field changes value, the trendobject is updated (refreshed).When the update trigger is issued and the X Axis if of typenumeric, the value on this field will be added to the minimumand maximum values of the X Axis.When this box is checked, X axis shifts to the current timeautomatically when the object is triggered to Play mode, duringthe runtime.InduSoft Web Studio v6.1 SP5 7–65
IWS Users GuideConfiguring Screens and GraphicsPropertyRetrieve boundingsamplesIgnore X FilterShow Progress BarDescriptionWhen this box is checked, the object retrieve the data outboundthe object (first points only). Uncheck this option can improvethe performance, since the points outbound the object will notbe retrieved from the history. On the other hand, the object willnot draw lines linking the first and last samples to theextremities of the object.When this box is checked, the X Filter is ignored to avoid addingthe WHERE or querying clause to the Data Sources.When this box is checked, a progress bar will appear during thetrend load.Run-Time Config: The settings of the Trend object modified during theruntime can be saved in temporary files. This option can be used to:− Keep the settings consistent, so when the user closes the screen andopens it again, or re-starts the application, the settings configuredduring the runtime are not lost.− Create standard settings for different scenarios and load theappropriate configuration during the run-time, based on apre-defined condition or based on the user-selection.The properties of this frame are described in the following table:PropertySave triggerLoad triggerFile NameAuto SaveDescriptionWhen the tag configured in this field changes value (e.g.toggles), the current settings of the Trend object are saved inthe temporary file. This command is not available for the WebThin Client.When the tag configured in this field changes value (e.g.toggles), the settings from the temporary file are loaded andapplied to the Trend object during the runtime.If this field is left blank, the temporary file is saved in theapplication \Web sub-directory with the syntaxTrendControl.stmp (e.g.MyScreen10TrendControl.stmp). The Web Thin Client stationsaves/loads the temporary file in the standard Temp directory ofthe operating system (e.g. \Documents andSettings\\Local Settings\Temp).You can configure a customized file name for the temporary filein this field or even configure a string tag between curlybrackets, so the user can change the name of the configurationfile dynamically during the runtime by changing the value of thistag. If you do not specify any path, the file is saved in theapplication \Web sub-directory by default.When this box is checked, the current settings of the Trend areautomatically saved in the temporary file when the screenwhere the Trend is configured is closed during the runtime. Ifthe box is not checked, the settings are saved only when theSave trigger command is executed.7–66 InduSoft Web Studio v6.1 SP5
Configuring Screens and GraphicsIWS Users Guide Caution:After the screen where the Trend object is configured is saved, thesettings are not automatically loaded from the temporary file whenthe screen is opened again, unless the Load trigger command isexecuted before the screen is closed.Custom point selection: This interface allows you to create your customdialog to modify or insert pens to the object, as follows:PropertyScreenPoint numberAdd IndicatorDescriptionName of the screen which must be launched when the user triggersa command to modify or insert a new pen to the object during theruntime.Point Number (from the Points Dialog), indicating the pointassociated to the pen that will be inserted or modified during theruntime.Flag that indicates that the user triggered an action to insert a newpen (value 1) instead of modifying a pen that is already beenvisualized (value 0).VK: Virtual Keyboard type used for this object.Ext Translation: Enable the external translation for the text displayed bythis object.Auto Format: When checked, decimal values in the Current, Cursor, Max,Min and Scale columns will be formatted according to the virtual tablecreated by the SetDecimalPoints() function. Note:For the Auto Format to work, decimals formatting on the X-axismust be disabled — that is, the Decimals field (in the Axes dialog)must be left blank.InduSoft Web Studio v6.1 SP5 7–67
IWS Users GuideConfiguring Screens and GraphicsTrend Control – Runtime InterfaceWhen enabled, some embedded interfaces can help the user to interact with theTrend Control during the runtime. This section describes these interfaces:* Toolbar: The commands available in the embedded Toolbar are described inthe following table:Command Icon Description Activation TagRunStopPeriodWindow ZoomHorizontal ZoomVertical ZoomZoom InZoom OutCancel ZoomLegend PropertiesPen StyleAdd PenRemove PenMultiple SectionsSet the Trend to the Play Mode. In this mode, the X axis iscontinuously updated (Online Mode). This option is disabled(grayed out) when the trend is already in Play Mode.Set the Trend to the Stop Mode. In this mode, the X axis is notcontinuously updated (History Mode), so the user can visualizehistory data in a frozen period of time. This option is disabled(grayed out) when the trend is already in Stop Mode.Launches an embedded dialog, where the user can modify themain settings of the X axis scaleAllows the user to click on the Trend area and drag the cursor toselect the area that must be visible when the cursor is released.This option is disabled (grayed out) when the Multiple Sectionoption (for the Y scale) is active.Allows the user to click on two points on the Trend area, definingthe Horizontal scale that must be availableAllows the user to click on two points on the Trend area, definingthe Vertical scale that must be available. This option is disabled(grayed out) when the Multiple Section option (for the Y scale) isactive.Allows the user to zoom in (display half of the current X and Yscales) each time they click on the Trend area.Allows the user to zoom out each time they click on the Trendarea.Cancels the current Window, Horizontal or Vertical Zoom andreturns the Trend display to its original scale.Launches an embedded dialog, where the user can modify theLegend main settingsLaunches an embedded dialog, where the user can modify thestyle of the selected pen.Launches a dialog, where the user can add a new pen to theTrend objectRemoves the selected pen from the Trend objectSwitches the Y scale to Multiple Sections (a section for each pen)or Single Section (all pens share the same Y scale section).0 = Play Mode on1 = Play Mode off0 = Stop Mode on1 = Stop Mode offWhen theActivation Tagchanges value(e.g. toggles), thiscommand isexecuted.0 = Zoom In on1 = Zoom In off0 = Zoom Out on1 = Zoom Out offWhen theActivation Tagchanges value(e.g. toggles), thiscommand isexecuted.0 = MultipleSections on1 = MultipleSections off7–68 InduSoft Web Studio v6.1 SP5
Configuring Screens and GraphicsIWS Users GuideCursorAuto ScalePrintTurns the cursor (ruler) to visible or hiddenChanges the Y axis scale to fit all values from the pens that arecurrently being monitored.Prints the current state of the Trend display. (Historical data arenot printed.)0 = Cursor on1 = Cursor offWhen theActivation Tagchanges value(e.g. toggles), thiscommand isexecuted.When theActivation Tagchanges value(e.g. toggles), thiscommand isexecuted.* Legend: The commands available in the embedded Legend are described inthe following table:Command Icon DescriptionSelectionRemoveHidePen StyleScaleLaunches a dialog, where the user can replace the data point associated with theselected pen on the legendRemoves the selected pen from the Trend objectWhen checked, the selected pen is visible; otherwise, it is hidden.Launches an embedded dialog, where the user can modify the style of the selected pen.When this box is checked, the Y axis scale is visible; otherwise, it is hidden. The scalecan be hidden only when the Multiple Sections option is off.* Scroll bar: Using the Scroll bar, the user can slide through the X axis values,according to the period configured for this scale.* Time bar: Using the Time bar, the user can modify the Duration, as well as theStart Date/Time and/or the End Date/Time, for the data displayed on theobject. Changing these values will affect the tags associated with the X axisscale (if any).Trend Control Object – Appendix A – Using the Data Source Text FileThe Trend Control can generate trend charts from any Text File that has the valuesorganized in columns and rows. The columns should be separated from each other byspecial characters (usually the comma). Each sample (pair of values representing apoint in the graph) is represented by a row (a line in the file). Suppose that the userwants to display a chart with the information in the following table:X Value Y1 Value Y2 Value0 0 101 1 202 2 303 3 40We have one variable that represents the X Axis and two variables (Y1 and Y2) that willrepresent different lines in the chart. The first step is to convert the data into a textfile. If we adopt the comma as our separator the file will be as shown below:InduSoft Web Studio v6.1 SP5 7–69
IWS Users GuideConfiguring Screens and GraphicsWe strongly recommend that you save the file in the same folder where the applicationis. By doing so, you do not have to specify the entire path and your application will stillwork, even if it is copied to a different computer.Once you have added the Trend Control to your screen, double click on the object toopen then Object Properties and click on Axis. Change the Data Type of the X Axis tonumeric, and set the ranges as shown in the picture below:Click Ok on this Window and then, in the Object Properties window, click on the DataSources button. The following window will display:7–70 InduSoft Web Studio v6.1 SP5
Configuring Screens and GraphicsIWS Users GuideWe need to create a data source in order to access to the text file. Click on the newbutton, specify the Data Source Name “MyTextFile” and then click Create. You shouldsee the following information now:On the X Axis field we need to indicate which column in our text file represents the XAxis. In our example we are using column zero, so enter with zero for this field, thenclick on the button Data Source Settings, the following Window will display:If you have copied the text file to the application folder, you only have to specify the filename, otherwise, enter with the complete path where the file is located (use the browsebutton as needed). Click Ok on this window and Ok again to finish the data sourceconfiguration and close the Data Source configuration Window.Now we need to define our Y1 and our Y2. They will be represented by points on ourTrend Control. Double click on the Trend Control again to access the Object Propertieswindow and then click on Points. Your next step is to define the points according tothe following figure:InduSoft Web Studio v6.1 SP5 7–71
IWS Users GuideConfiguring Screens and GraphicsAfter following these steps, run your application and you should see something similarto the figure below:Trend Control Object – Appendix B – Using the Data Source DatabaseThe Trend Control can generate trend charts from any Relational Database that canbe accessed through the ADO.Net technology. This Appendix illustrates how to accessa Microsoft Access Database; if you are using another type of database, almost all thedefinitions will apply, however you will need to configure your connection on adifferent way. For information on how to configure other databases, please refer to theAppendixes in the Database Interface section of this manual.Suppose that you have an access database at your C drive named “mydata.mdb” andthat you want to generate a chart based on the information in the following table:7–72 InduSoft Web Studio v6.1 SP5
Configuring Screens and GraphicsIWS Users GuideThe first step is to add the Trend Control to your screen. Now double click on theobject to open then Object Properties and click on Data Sources. The following windowwill display:We need to create a data source in order to access to the database. Click on the newbutton, specify the Data Source Name “MyDB” and then click Create. You should seethe following information now:InduSoft Web Studio v6.1 SP5 7–73
IWS Users GuideConfiguring Screens and GraphicsChange the Source Type to Database and specify Time_Stamp in the X Axis field. Thenclick on the Data Source Settings button, the following window will display:Uncheck the check box Use application default and click on the browse button inorder to configure the connection string. The following window will display:7–74 InduSoft Web Studio v6.1 SP5
Configuring Screens and GraphicsIWS Users GuideSelect the Microsoft Jet 4.0 OLE DB Provider and click Next. In the following window,you should specify the database path:Click Ok to finish the Connection String configuration. Now uncheck the option Usedefault name and select the table from your database as shown below:InduSoft Web Studio v6.1 SP5 7–75
IWS Users GuideConfiguring Screens and GraphicsClick Ok on this window and Ok again to finish the data source configuration andclose the Data Source configuration window.Now we need to define Temperature and Pressure. They will be represented by pointson our Trend Control. Double click on the Trend Control again to access the ObjectProperties window and then click on Points. Your next step is to define the pointsaccording to the following figure:If you run the trend, it will start with the current date/time. In order to see the data inthe chart you will have to properly configure the start date/time as shown below: Trend button ( ): Click to select an area on the screen in which to exhibit trendcurves of tag data. You can display up to eight curves simultaneously in the object,and use configuration fields in the object properties to specify:– Time period to exhibit– Values to exhibit7–76 InduSoft Web Studio v6.1 SP5
Configuring Screens and GraphicsIWS Users Guide– Format of the graphicTo create a trend object:– Click the Trend button.– Click in the display, and drag the mouse to create and adjust the object’sshape.Double-click on the trend object to open the Object Properties dialog:Object Properties: TrendUse the Trend Object Properties dialog to specify the following parameters:– Trigger field: Type (or click the button to select) a variable to define how trendcurves are redrawn. When the value of this tag changes, IWS redraws thedisplayed trend curves. You must complete this field if you specify (enable) OnLine trends, but it is not required for History trends.– Update field: Type a variable for IWS to use in creating the trend. Use this field inconjunction with Crisp trends only.– Curve Type combo-box: Select a curve type from the following options:* X/t: Select to plot curve values according to time* X-Y: Select to plot curve values according to Tag X, another tag in theapplication* Crisp: Select to plot curve values in a format appropriate to interface withVAX stations– Orientation combo-box: Select one of the following to specify how the trend pensare oriented in relation to the screen:* Left-Right: Select to plot from left to right, with latest values on the right* Right-Left: Select to plot from right to left, with latest values on the left– History radio button: Click (enable) to display the application’s historical trendcurves. Caution: To use history-type graphics for this trend object, you must: Create a trend group (from the Trend folder on the Tasks tab) Create tags for this group and set the Save on Tag Change or Save on Triggerparameters on the Trend Group worksheet. These tags will have theirsamples stored on the hard disk.– On Line radio button: Click (enable) to display on-line trend curves for theapplication. Note:If you enable this button, you must enter a value in the Trigger text box toInduSoft Web Studio v6.1 SP5 7–77
IWS Users GuideConfiguring Screens and Graphicsindicate when IWS will redraw the trend curves.– Border Color combo-box: Click to select a color for boarder of the trend graphicarea. When the Color dialog displays, click on a color to select it, and thenclose the dialog.– Background Color combo-box: Click to select a background color for the trendgraphic area. When the Color dialog displays, click on a color to select it, andclose the dialog.– Horizontal Scale button: Click to open the Horizontal Scale dialog, which allowsyou to define horizontal scale properties for the trend curves. Note:The content on this dialog changes, depending on the parameters youspecify on the Object Properties Trend dialog.Sample Horizontal Scale DialogThe following section explains how to set all of the Horizontal Scale parameters.* Scale Visible check-box: Click (check) to display the horizontal scale oruncheck the box to hide the horizontal scale.* Number of Labels field: Type a value to specify how many labels you can use inthe horizontal scale.* Grid area: Use the following parameters to configure a grid for the trendgraphic.Divisions field: Specify how many division lines to use for the grid. If you leavethis field blank, no grid lines display.Color combo-box: Click to select a color for the grid. When the Color dialogdisplays, click on a color to select it, and then close the dialog.* Scale String Format area: Use the following parameters to specify a format forthe text string on horizontal scale.Fonts button: Click this button to open the Fonts dialog, which allows you toselect a style, size, color, and font type for the horizontal axis labels.DD/MM/YY check-boxes (Curve X/Y and Graph X/t only): Click (check) theseboxes to add a date (days/months/year) to the text string in the scale.7–78 InduSoft Web Studio v6.1 SP5
Configuring Screens and GraphicsIWS Users GuideHH:MM:SS check-boxes (Curve X/Y and Graph X/t only): Click (check) theseboxes to add the time (hours:minutes:seconds) to the text string in the scale.* Vertical Cursor area: Use the following parameters to specify a format for thevertical cursor.Enable check-box: Click (enable) to display a vertical cursor.Color combo-box: Click to select a color for the vertical cursor. When theColor dialog displays, click on a color to select it, and close the dialog.Position (0-100) field (becomes active when you enable the vertical cursor): Youmust enter a real tag value, which IWS updates using the cursor position (0corresponding to the left edge and 100 the right edge of the trend).Date/Time output field (becomes active when you enable the vertical cursor):Enter a tag name to receive a string. This string is constantly updated withthe current time of the vertical cursor in the trend.* Horizontal axis Duration field (Curve type X/t only) or Duration (hours) (History andGraph X/t only): Type a tag name or numeric value for width of the trend.For example: If you specify Horizontal axis Duration = 0.03333 (2 minutes) thetrend will display 2 minutes of data from beginning to end.* Hours before now field: Specify a tag to perform scrolling in the trend area. Thevalue of this tag specifies the start time of the trend in relation to the currenttime.For example: If you specify the following, IWS allows you to display the trendgraphic for up to five hours before the current time.Time = 17:00:00Hours before now = 5Duration = 1Trend will show 11:00.00 > 12:00.00 Caution:The Trend Graphic dialog holds a maximum of 32,000 samples. Note:When you use the Hours Before Now parameter, you are handlinghistorical data. Consequently, you must configure the trend pens intoone trend group (using the Trend folder on the Tasks tab).– Type of History Files area (History and Graph X/t only): Use the followingparameters to specify in which format the history files were created.* Date (default): Click to handle files created in date format by trend group(InduSoft format).* Batch: Click to handle files created in batch format by trend group (batch fileformat).* Start Date field (History and Graph X/t only): Specify a date (typically astring-type tag) in DD/MM/YYYY format to specify when to start the historycurves.* Start Time field (History and Graph X/t only): Specify a time (typically astring-type tag) in HH:MM:SS format to start the history curves.InduSoft Web Studio v6.1 SP5 7–79
IWS Users GuideConfiguring Screens and Graphics* Tag X field (Graph X/Y only): Specify a tag for the X-axis. You must specify anarray and declare the index in which the axis starts (for example,MyTagX[1]).* Points field (Graph X/Y only): Specify the number of points (samples) in thegraph dialog.* Max field (Graph X/Y only): Specify a maximum value for the X variable.* Min field (Graph X/Y only): Specify a minimum value for the X variable. Tip:You can use Recipe module (from the Tasks tab) to save and load historicalinformation for the X-Y trend. See Chapter 8: Configuring TaskWorksheets.Vertical Scale button: Click to open the Vertical Scale dialog, which allows you todefine vertical scale properties for the trend curves.Sample Vertical Scale Dialog– Scale Visible check-box: Click (check) to display the vertical scale or uncheck thebox to hide the vertical scale.– Number of Labels field: Type a value to specify how many labels you can use in thevertical scale.– Grid area: Use the following parameters to configure a vertical grid for the trendgraphic.* Divisions field: Specify how many division lines to use for the vertical grid. Ifyou leave this field blank, no grid lines display.* Color drop-down list: Click to select a color for the vertical grid. When theColor dialog displays, click on a color to select it, and then close the dialog.– Scale String Format area: Use the following parameters to specify a format for thetext string on vertical scale.* Fonts button: Click this button to open the Fonts dialog, which allows you toselect a style, size, color, and font type for the vertical axis labels.* Width field: Specify how many digits are permitted for numbers in the verticalscale string.* Decimals field: Specify how many decimal places are permitted in the verticalscale string.7–80 InduSoft Web Studio v6.1 SP5
Configuring Screens and GraphicsIWS Users GuideFor example: If you enter Width = 3 and Decimals = 2, the horizontal scalestring can use three-digit numbers with two decimal places.– Scale Range area: Use the following parameters to calculate how the curvepositions are defined in the Pens dialog. You can use a numeric value or a tagto dynamically change the vertical scale.* Minimum field: Type a minimum value for the trend graphic scale.* Maximum field: Type a maximum value for the trend graphic scale.Pens button: Click to open the Pens dialog:Pens DialogUse the following parameters to configure the pens used to draw each tag curve.– Tag fields: Type the tag names to be monitored in the trend (for example,MyTagY[1]). You can create a generic Trend dialog by specifying an indirect tagto define the tag to monitor.– Line buttons: Click to select a color for the lines in each trend curve. When theColor dialog displays, click a color to select it, and close the dialog. You can useup to eight different colored lines on the trend graph.– Min and Max fields: Specify a minimum and a maximum value of scale (numericor tag) with which to draw the curve. Note:The minimum/maximum values of each tag are not required to have thesame minimum/maximum values as the trend graphic scale.– Cursor Value fields: Type tags to receive the value of the Trend line where itintersects with the vertical cursor. Caution:The On-Line trend allocates memory for each point inside the period ofvisualization. CEView will discharge the older values (even if they areinside the period of visualization) when the memory available is lowerthan a critical limit (1MB by default). In addition, a warning message islaunched locally.InduSoft Web Studio v6.1 SP5 7–81
IWS Users GuideConfiguring Screens and GraphicsSPC button: Click to open the SPC Parameters dialog, which you can use to returnMean, Min, Max, and Standard Deviation (-2s, +2s) values from a selected period for eachpen. (You can also draw the results on the Trend object.)SPC Parameters DialogUse the parameters on this dialog as follows:– Pen combo-box: Click the arrow button to select a pen from the list.– Disable: Type a tag into the text field. If the tag value is other than 0 (false), IWSdisables the SPC feature.– Tag fields: Type a tag name into the text fields to return values for Mean, Min, Max,Median, Sum, and/or Standard Deviation.– Draw check-box: Click (enable) these boxes to draw the results of the Mean, Min,Max, Median, Sum, and/or Standard Deviation -2s/+2s values on the trend graph.– Line button: After enabling the Draw check-box, click this button to set displayparameters for the different pen line(s).When the Line Selection dialog displays, specify the following:* Line pane: Click a radio button to specify a Solid or Dashed Line and type avalue into the Weight text box to set the line thickness.* Color combo-box: Click the arrow button to display a color palette. Click on aColor button to select a pen line color and then click OK to close the colorpalette box. List Box Object button ( ): Click to create a list box object on your screen.Generally, when you execute an application, the active list box object displays alist of messages.On a screen containing only one list box object and no text input boxes, the list boxobject will be active automatically.On a screen containing multiple list box objects and text input boxes, you can usea cursor (pointing device) or the Tab key to select and activate a list box object.You can select a message from the active list box during runtime and write themessage value to a tag. (If a list is too long to fit within the viewable area of a listbox object, the object provides scroll bars.)7–82 InduSoft Web Studio v6.1 SP5
Configuring Screens and GraphicsIWS Users GuideUse the Enter Reqd box on the Object Properties dialog to configure selectedmessages as follows:– Check (enable) the Enter Reqd box and use the keyboard/keypad keys, listcontrol objects from the Library, pointing devices, or user-defined keyscontaining the PostKeys() function to scroll through the message list. Then, usethe Enter key to select the message and write its value to the write tag. You canuse the Esc and Tab keys to return to the previously selected message at anytime prior to pressing the Enter key.– Uncheck (disable) the Enter Reqd field to write the value of a selected(highlighted) message the write tag automatically.To add list box objects to a screen:– Click the List Box button on the Active Objects toolbar.– Click in the screen and drag to create/adjust an expanding rectangle.* Height and the font size determine how many messages are visible.* Width determines how much of the message length is visible.– After creating a rectangle, you can adjust the size and font characteristics toallow more messages to display in the given space.– Double-click on the object to open the Object Properties dialog:QuickTime and aTI<strong>FF</strong> (Uncompressed) decompressorare needed to see this picture.Object Properties: List Box Tip:You also can open the Object Properties dialog by right-clicking on the listbox object or by highlighting the object, pressing the Alt+Enter keys, andselecting Properties from the resulting pop-up menu.You can use this dialog to specify the following parameters:– Value drop-down list (located below the Replace button): Click to select one of thefollowing the tag values used to index the message list.* Boolean* Integer (default)* LSB (least significant bit) Note:For more information, see the discussion about the State field on the MessagesConfiguration dialog.InduSoft Web Studio v6.1 SP5 7–83
IWS Users GuideConfiguring Screens and Graphics– Messages button: Click to open the Messages Configuration dialog.QuickTime and aTI<strong>FF</strong> (Uncompressed) decompressorare needed to see this picture.Message Configuration DialogUse the parameters on this dialog as follows:* State field (read-only): Use this field to view the indexed individual messages.IWS numbers this field based on the Read/Search Tag type you selected:Boolean: Provides two valid states, labeled 0 and 1Integer: Provides 255 valid states, labeled 1 to 255LSB: Provides 32 valid states (32 bits in an integer value) labeled 0 to 31* Message field: Enter the string to be displayed in the List Box object. You caninclude tags in a message by enclosing them in curly brackets (e.g.{tagname}).* Value field: Type a message value matching the specified Read/Search Tag value(also, the same value written to the write tag).If you specify LSB for the Value field, IWS uses the value specified in the Statefield for both the Read/Search Tag and the write tag.* Text Foreground color field: Click to specify a color for the message textforeground. When the Color dialog displays, click on a color to select it, andclose the dialog.* Text Blink check-box: Click (check) to cause a selected message to blink, onceper second, when it displays.* Extern translation: Click (check) to enable translation during runtime using theTranslation Tool.* Auto Format: When checked, if a message includes a decimal value enclosedby curly brackets (e,g, {1.2345} ) or a tag of Real type (see Message above),then the value will be formatted according to the virtual table created by theSetDecimalPoints() function.– Fonts button: Click to open the Font dialog, which allows you to change thecharacteristics (style, size, and so forth) of the message font.– User Enable text box: Type a tag, expression, or a (nonzero) number to select amessage in the runtime application. The default is 1 (true, enabled).– Control Enable text box: Type a tag, expression, or a (nonzero) number to select amessage in the runtime application — depending on the current value of theRead/Search Tag. The default is 1 (true, enabled).7–84 InduSoft Web Studio v6.1 SP5
Configuring Screens and GraphicsIWS Users Guide– IWS bases this parameter on the Value field (Messages Configuration dialog) youassociate with the selected message. Enabling this field allows tag changestriggered by the process to affect which messages you can select.– Read/Search Tag text box: Type an integer or a Boolean tag to point to a selectedmessage based on the message Value field (Messages Configuration dialog). Youcan use the Control Enable and User Enable fields to control whether the operator ora process can alter this tag.– Write Tag text box (optional): Type a string tag to receive the Message value of thelast-selected message. When you close and reopen the screen containing a listbox object, IWS uses this tag value to determine the last message selected inthe list box.– E-Sign check-box: Click (check) to prompt the user to enter the ElectronicSignature before executing the dynamic.– Row check-box: Click (check) to include set up and set down arrows in the listbox object scroll bar.– Page check-box: Click (check) to include page up and page down arrows in thelist box object scroll bar.– Start/End check-box: Click (check) to include home and end arrows in the list boxobject scroll bar.– List wrap check-box: Click (check) to continue displaying and scrolling themessage list (starting at the opposite end) after you scroll to the beginning orend of the list.– Enter Reqd check-box: Clicking (checking) this box allows you to select messagesusing the Enter key only. It prevents the Tab key from selecting messages.– Color boxes: Click a color box to open the Color dialog or the 16-color ColorSelection dialog. Either dialog allows you to specify or change colors for the listbox object. Click a color to select it and then click OK to close the dialog.– Highlight Color box: Specify a color for highlighting messages (default is blue).– Text Color box: Specify a color for highlighting message text (default is black).– Win Color box: Specify a color for the list box background (default is white).– Border Color box: Specify a color for the list box border (default is black). Smart Message Objects button ( ): Click to create one or more smart messageobjects, which you can use to display messages and graphics based on tag valueswhen you execute the application. IWS provides the following smart messageobject types:– Message Display: Enables you to display any one of multiple messages within asingle screen object.– Multistate Indicator: Enables you to display any one of multiple messages within asingle screen object, and also has the ability to display bitmap images with themessages.– Multistate Pushbutton: Enables you to display messages and bitmap images. Thisobject also resembles a multi-position switch in that it allows you to switch(toggle between) messages by clicking on the object during the runtime.These smart message object types vary in their ability to display messages andgraphics, write to a tag, and control how many messages and graphics display onthe screen. However, all of the object types can receive process input (Read Tagvalue)to determine which message to display.To add a smart message object to the screen:InduSoft Web Studio v6.1 SP5 7–85
IWS Users GuideConfiguring Screens and Graphics– Click the Smart Message button and position the mouse on the screen.– Click and drag to create (and adjust the size of) a rectangle.– You use the rectangle’s size and font size to determine how much text and howlarge a bitmap image you can display on the screen. Later, you can change therectangle’s size and font characteristics to allow longer messages to display ina given space.– Double-click on the object to open the Object Properties dialog.Object Properties: Smart MessageYou can use this dialog to specify the following parameters:– Type combo-box: Click to select the smart message object type. The object typesets the behavior of the object during the runtime and the features supportedby it:* Message Display (default)* Multistate Indicator* Multistate Pushbutton– Value drop-down list: Click to select the tag values used to index the messagelist. Select the type of values used to index the message list :* Boolean - Provides two valid states. Use this selection when you want todisplay either one of two different messages, based on a boolean value (0 or1).* Integer (default) - Provides 500 valid states. Use this selection when you wantto display different messages based on specific values from an Integer tag.* LSB (least significant bit) - Provides 32 valid states (32 bits in an integervalue). Use this selection when you want to display different messagesbased on which bit from an integer tag is set. If more than one bit from theInteger tag is set simultaneously, the message associated with the leastsignificant bit that is set (value 1) will be displayed. Note:If Multistate Pushbutton is the Smart Message type, only 16 differentmessages can be associated with the object, even for Integer or LSB valuetypes.– Read Tag/Expr text box: Enter the name of an integer or a Boolean tag. The valueof this tag will determine which message will displayed by the object during theruntime.7–86 InduSoft Web Studio v6.1 SP5
Configuring Screens and GraphicsIWS Users Guide– Write Tag text box (optional and available for Multistate Pushbutton only): Enterthe name of an integer or a Boolean tag. The value associated with the messagecurrently displayed by the object is written to this tag.– Align: Select the alignment of the text displayed by the Smart Message object.– Key (optional and available for Multistate Pushbutton only): Shortcut used to goto the next message (step) using a keyboard when the Multistate Pushbuttontype is selected. This option is especially useful when creating applications forruntime devices that do not provide a mouse or touch-screen interface, whenthe keyboard is the only physical interface available to interact with theapplication during the runtime.– Event drop-down list (available for Multistate Pushbutton only): Select one of thefollowing options to specify when the message is changed:* On Down: Switch to the next message when you click on the object (default).* While Down: Switch to the next message continuously while you hold themouse button down on the object.* On Up: Switch to the next message when you release the mouse button onthe object.– E-Sign (available for Multistate Pushbutton only): When this option is checked,the user will be prompted to enter the Electronic Signature before executingthe dynamic.– Security text box (available for Multistate Pushbutton only): Security SystemAccess Level required for the object/dynamic.– No Line: When this option is checked, the line border of the object is not visible.– Line Weight: Defines the thickness of the line drawn around the object (theborder).– Fonts: Launches the Fonts dialog, where you can configure the font settings forthe text displayed in the object.– Config… button: Launches the Configuration dialog, where you can configurethe messages for the object, as follows:QuickTime and aTI<strong>FF</strong> (Uncompressed) decompressorare needed to see this picture.Sample Smart Message Configuration Dialog* Data Source: The messages displayed by the object can be either configureddirectly on the object (Data Source = Static) or can be read from an externaltext file (Data Source = Text File). When the Data Source = Static, theConfiguration dialog is displayed as pictured above, and you can configureInduSoft Web Studio v6.1 SP5 7–87
IWS Users GuideConfiguring Screens and Graphicsall the settings on the grid. When the Data Source = Text File, theConfiguration dialog displays a field for entering the path and name of thefile from which the messages will be read (the source file). See Source FileFormat for further details about the format of the text file supported by theSmart Message object when the Data Source = Text File.* Extern translation: When this option is checked, the text displayed by theobject will be controlled by the Translation Tool, during the runtime.* Auto Format: When checked, if a message includes a decimal value enclosedby curly brackets (e,g, {1.2345} ) or a tag of Real type (see Text/Messagebelow), then the value will be formatted according to the virtual tablecreated by the SetDecimalPoints() function.The following table describes the meaning of the properties associated with eachmessage, regardless of the Data Source:PropertyText/MessageValueText (FG)Text (BG)Text BlinkRec (FG)Rec (BG)Rec BlinkGraphic FileTransparentEn. TransparentDescriptionMessage (text) that will be displayed when selected during runtime. You can includetags in a message by enclosing them in curly brackets (e.g. {tagname}).You must associate a unique value with each message. During the runtime, the objectwill display the message associated with the value that matches the value of the tagconfigured in the Read Tag field. If there is no such message, the message configuredin the first row (State = Error) displays during the runtime. When the object Type is setas Multistate Pushbutton, the value associated with the current message is alsowritten to the tag configured in the Write Tag field (if any).Foreground color for the messages displayed during the runtime.Background color for the messages displayed during the runtime.If checked, the message text will blink during the runtime.Line color (Border) for the rectangle behind the message.Background (Fill) color for the rectangle behind the message.If checked, the rectangle behind the message will blink during the runtime.Path and name of the bitmap file (*.BMP) (if any) that will be displayed when themessage associated with it is selected during the runtime. If you do not specify thepath, the bitmap file must be stored in the application’s directory.Select the color that will be transparent in the graphic file, if the En. Transparentcheck-box is checked.If checked, the color selected in the Transparent field will be set as transparent in thegraphic file. Note:The properties Graphic File, Transparent and En. Transparent are notavailable for the type Message Display. Tip:You can copy data from this dialog and paste it into an Excel worksheet, andvice versa.SOURCE FILE FORMATThis section describes the format of the text file supported by the Smart Messageobject when the Data Source = Text File. The main advantage of using an external Text Fileinstead of Static Values is that it gives you the flexibility to change the messages7–88 InduSoft Web Studio v6.1 SP5
Configuring Screens and GraphicsIWS Users Guideduring the runtime, by pointing to a different Text File, or even by changing thecontent of the Text File dynamically.The Text File must be created in the CSV format (Comma Separated Values), where thecomma character (“,”) is used to divide the columns (data) in each line (row) of the file.Therefore, you can use any CSV Editor such as Microsoft Notepad and Microsoft Excelto create the CSV file with the messages and their properties for the Smart Messageobject.The description of each property associated with the messages is provided in theSmart Message section. The order of the data in the CSV file is described in thefollowing table:Column # Property Default Value1 Text/Message -2 Value -3 Text (FG) 04 Text (BG) 167772155 Text Blink 06 Rec (FG) 84213767 Rec (BG) 167772158 Rec Blink 09 Graphic File -10 Transparent 011 En. Transparent 0When configuring text messages that have the comma character as part of themessage, you must configure the whole message between quotes (e.g. “Warning, Turnthe motor Off”); otherwise, the comma will be interpreted as a data separator insteadof as part of the message.The first line of this file is equivalent to the State = Error. In other words, if there is nomessage associated with the current value of the tag configured in the Read Tag field,the message configured in the first row (State = Error) is displayed during the runtime.The data configured in the Value column of the first row from this file is irrelevant.This row must always be configured, regardless of the object type (even for MultistatePushbutton).Only the Text/Message and Value columns are mandatory. The other columns areoptional, and the default values will be used if you do not specify any value for them(see table).The fields Text(FG),Text(BG),Rec(FG),Rec(BG) and Transparent can be configured withthe code of the color associated with it. The code can be entered directly in decimalformat (e.g. 255) or in hexadecimal format using the syntax #value (e.g. #0000<strong>FF</strong>).The fields Text Blink, Rec Blink and En. Transparent can be configured with Booleanvalues 0 or 1 (0 = Unchecked; 1 = Checked), or with the keywords FALSE or TRUE(FALSE = Unchecked; TRUE = Checked).Example:Error Message,,0,16777215,1,8421376,16777215,1,error.bmp,0,0Message Zero,0,0,16777215,0,8421376,16777215,0,open.bmp,65280,1Message Ten,10,0,16777215,0,8421376,16777215,0,closed.bmp,65280,1Message Twenty,20,0,16777215,0,8421376,16777215,0,,0,0Message Thirty,30,0,16777215,0,8421376,16777215,0,,0,0InduSoft Web Studio v6.1 SP5 7–89
IWS Users GuideConfiguring Screens and Graphics Tip:You can use the Smart Message editor (Data Source = Static) to configure themessages, values and colors. To do so, select the configuration, copy it and pasteit into an Excel worksheet. Then, you can save the Excel worksheet as a CSV file(File > Save As). This procedure provides you with a user friendly interface forconfiguring the color codes. Pushbuttons button ( ): Click to create a pushbutton object using the Commanddynamic object property with an object or pre-configured pushbuttons.IWS provides the following pre-configured button types, all of which mimic thestandard panel buttons of the same name:– Momentary (default): Changes state (Open or Closed) when you press the buttonand reverts to its initial state when you release the button. This button typealways displays in its normal position when you open the screen.– Maintained: Changes state (Open or Closed) when you press the button, but doesnot revert to its initial state when you release the button. You must press thebutton again to change its present state. This button type maintains its stateacross screen changes.– Latched: Changes state (Open or Closed) when you press the button and remainsin this state until you release it by changing the Reset tag.IWS also provides the following button styles:– Rectangular with a faceplate and indicator light– Rectangular without a faceplate or indicator light (default)– Rectangular with a 3-D– Rectangular with a floating appearanceTo add one or more pre-configured buttons to a screen:– Click the Pushbutton button, and position the mouse (pointer) on the screen.– Click and drag to create/adjust the size of the rectangular button.The button size and text font characteristics determine how much text you candisplay and how much area you can touch on a touch screen. You can resizethe button and change the font characteristics later to permit longer messagesto be shown in a given space.– Double-click on the object to open the Object Properties dialog:Object Properties: Pushbuttons7–90 InduSoft Web Studio v6.1 SP5
Configuring Screens and GraphicsIWS Users Guide Tip:Alternatively, you can right-click on the pushbutton object or highlight theobject, press the Alt+Enter keys, and select Properties from the resulting pop-upmenu to open the Object Properties dialog.You can use this dialog to specify the following parameters:– Type drop-down list: Click to select the pushbutton type (Momentary (default),Maintained, or Latched).– State drop-down list: Click to specify a default state for the pushbutton (NormallyOpen (default) or Normally Closed).Click the button to toggle between its default and non-default state (accordingto its specified Type). For example, in the button’s initial state, it may conformto characteristics specified in the Open area of the Configuration dialog (seebelow). Click the button again to toggle to the opposite state, which in thisexample is Closed, and conform to characteristics specified in the Closed area.– Tag/Exp text box: Type a tag or an expression to accomplish the following:* Type in a tag to receive the Write Value from the appropriate state (Open orClosed) area in the Configuration dialog.* Type an expression to execute On Down, when you press the pushbuttondown. Note:IWS does not write the result of any expression in the Tag/Exp field into atag.– Indicator text box: Type a tag to define an indicator that causes the button tochange to a specified color when the tag value matches one of two specifiedvalues. You must define both the colors and tag values in the Configurationdialog. If you leave this field blank, the indicator changes color automaticallywhen you press the button.– E-Sign check-box: Select (check) this option to prompt the user to enter theElectronic Signature before executing the dynamic.– Reset text box (active for Latched pushbutton type only): Type a tag to controlthe button’s latched state, as follows:* Type a zero into the tag’s value and the button will remain in a latched stateafter you press it.* Type a nonzero value into the tag and a latched button will becomeunlatched after you press it. You must reset the tag value to zero before youcan press the button again.– Key area: Specify a keyboard key or create a key combination to toggle apushbutton when you have no pointing device (mouse or touch screen) or ifyou want to create shortcut keys in addition to pushbuttons.– Key drop-down list: Type a key in the text box or select a non-alphanumeric keyfrom the drop-down list. Enter a single character or key only. Numbers are notvalid entries for this field.– Click (check) the Shift, Ctrl, or Alt box to create a combination key, meaning theShift, Ctrl, or Alt key must be pressed with the key specified in the drop-downlist.InduSoft Web Studio v6.1 SP5 7–91
IWS Users GuideConfiguring Screens and Graphics– Click (check) the box to open the Key Modifier dialog, which enables you tomodify your combination keys. You can choose Left, Right or Left or Right tospecify the position on the keyboard of the Shift, Ctrl or Alt key in thecombination key. If you choose Left or Right, the command will be executed anytime either of these keys is pressed in combination with the key specified in thedrop-down list.Key Modifier Dialog– Disable text box: Type a tag using a nonzero value to disable this pushbutton sothat pressing the button has no effect. This box is empty by default, which alsoenables the command property.– Ext Trans. check-box: Click (check) to translate the text automatically usingpre-configured translation worksheets.– Security text box: Type a value to specify a security level (0 to 255) for thisbutton. If the user does not have the specified security level, the buttonbecomes inactive. If the user has the appropriate security level, or you leavethis field blank, the button remains active.– Config button: Click to open the Configuration dialog, which allows you tospecify style and state parameters for the pushbutton:QuickTime and aTI<strong>FF</strong> (Uncompressed) decompressorare needed to see this picture.Configuration Dialog7–92 InduSoft Web Studio v6.1 SP5
Configuring Screens and GraphicsIWS Users GuideThis dialog provides the following parameters:– Style combo-box: Click the combo-box button to select a pushbutton style(Rectangle (default) or Rectangle with Indicator).– Effect combo-box: Click to select a 3-D effect for the pushbutton.* Floating (default): Buttons resemble a flat object with a shadow* 3D: Buttons have beveled edges and appear to “depress” into the screenwhen pressed.You can use the Style and Effect parameters in combination to create fourdifferent buttons, as shown in the following figures:Pushbutton Styles– Align: Specify the alignment for the caption of the pushbutton.– Button Color box: Click to specify a default color for the button area of apushbutton object that includes an indicator and a faceplate. When the Colordialog displays, click on a color to select it, and close the dialog.– Legend Plate Color box: Click to specify or change a default color for the legendplate area of a pushbutton object that includes an indicator. When the Colordialog displays, click on a color to select it, and close the dialog.A legend plate encloses a button and indicator light. This field becomesinactive if the pushbutton Style does not include an indicator.– Open and Closed areas: The following parameters are used to configure theappearance of a pushbutton object in its open and closed states.– Color box: Click to specify a default color for an indicator in each State. Whenthe Color dialog displays, click on a color to select it, and close the dialog.– If you selected a pushbutton style that does not include an indicator, youcan use this field to specify a button color for each State.– Blink combo-box: Click to specify whether the color you specified in the Colorbox blinks and how fast it blinks for each state (None (no blinking, default),Slow, and Fast).If you set the color to blink, it alternates between the color specified in theColor box and the Legend Plate Color (if an indicator) or the Button Color (if abutton).– Caption text box: Use this text box to enter the caption of the button.Alternatively, if the button style includes an indicator, the legend plate.You can include a tag by enclosing it in curly brackets (e.g. {tagname}).– Fonts button: Click to open the Font dialog, which you can use to specify orchange the message font characteristics for each state.– Text Blink combo-box: Click to specify whether the text you specified blinksand how fast it blinks for each state (None (no blinking, default), Slow, andFast). Unlike a blinking color, blinking text appears and disappears.– Write Value combo-box: Click to select a value in either field. When thepushbutton is in the appropriate state (Open or Closed), IWS writes thisvalue to the tag specified in the Tag/Exp field (Object Properties dialog).InduSoft Web Studio v6.1 SP5 7–93
IWS Users GuideConfiguring Screens and Graphics– Auto Format: When checked, if the caption includes a decimal value enclosed bycurly brackets (e,g, {1.2345} ) or a tag of Real type (see Caption above), thenthe value will be formatted according to the virtual table created by theSetDecimalPoints() function. ActiveX Control button ( ): Click to open the Insert ActiveX Control dialog, whichyou can use to place ActiveX components on your screen.When the dialog opens (as in the following figure), it contains a list of all ActiveXcomponents registered on your computer.Insert ActiveX Control DialogClick on one or more components in the list, and then click the OK button to closethe dialog and display all selected components on your screen.ActiveX controls are components designed according to a standard. Because IWSis an ActiveX container, you can configure and run ActiveX controls in the screenscreated with IWS. ActiveX controls can provide the following interfaces:– Properties: Variables whose values can be read and/or written for theapplication (e.g. Object Color, FileName, URL, and so forth)– Methods: Functions from the ActiveX object that can be triggered by theapplication (e.g. open a dialog, execute a calculation, and so forth)– Events: Internal messages that can trigger the execution of expressions in theapplication (e.g. Mouse_Click, Download_Completed, and so forth)The name of the properties, methods and events supported by each ActiveXdepends on its own implementation.There are two different ways to interface the application with the ActiveX control:– By using the ActiveX functions XGet(), XSet() and XRun()OR– By using the Object Properties window to configure the object Caution: When using ActiveX controls in your application, make sure that thetarget station (runtime station) has the same ActiveX properlyregistered. The IWS application files include links to the ActiveXcontrols; however, the installation of these controls on the targetstation must be executed manually. Furthermore, when ActiveXcontrols are used on screens open in remote Web Thin Clients, theActiveX controls must also be manually installed on the Web Thin7–94 InduSoft Web Studio v6.1 SP5
Configuring Screens and GraphicsIWS Users GuideClient stations. Consult your ActiveX provider for further informationabout how to install. When configuring applications with ActiveX for CEView, make surethat the ActiveX control used in the application is supported on theplatform (Windows CE operating system and process type) where youintend to run the application. Consult your ActiveX provider for furtherinformation about the supported platforms.Double-click the ActiveX control to open the Object Properties dialog box.Object Properties: ActiveX ControlThe Object Properties window displays the name of the ActiveX control. Generally,each ActiveX control is either a *.dll or a *.ocx file registered in your localcomputer. You must assign a name (alias) to the ActiveX control, for theapplication on the Name field (e.g. MyControl). This name is used to reference theobject when configuring the ActiveX functions from IWS language. Note:You should not configure two ActiveX controls on the same screen withthe same name. For instance, if you insert two “Windows Media Player”ActiveX controls on the same screen, and assign the name MyMP1 to oneobject (Name field), you cannot assign the same name to the second objecton the same screen. You would have to assign the name MyMP2, forexample, to the second object.The Property Pages button opens the standard window for configuring the StaticProperties (if any). The layout and the options in this dialog window depend on theimplementeation of each ActiveX control. Use this interface to set properties thatshould not be changed during the runtime (fixed properties).The Configuration button on the Object Properties window opens dialogs thatallow you to do the following:– Associate tags to properties of the ActiveX object– Trigger methods from the ActiveX object based on tag change– Configure scripts, which are executed when Events from the ActiveX objectoccurThe following sections describe how to configure these interfaces.InduSoft Web Studio v6.1 SP5 7–95
IWS Users GuideConfiguring Screens and Graphics Notes: Although the Configuration dialog displays the list of all properties,methods and events, you only have to configure the items that youneed for your project. The screen shots used in the following sections depict the WindowsMedia Player ActiveX control. Although the name of the properties,methods and events varies depending on each ActiveX control, theconfiguration interface is the same for any ActiveX control. Theconcepts described here apply to all of them.– Configuring PropertiesThe Properties tab provides a grid with the following fields:Configuration Dialog – Properties Tab* Property: List all properties available from the ActiveX object, and indicatetheir types:Property IconProperty TypeBooleanIntegerRealString* Tag/Expression: The tag configured in this field is associated with therespective property of the ActiveX object. The Action column will definewhether the value of this tag will be written to the ActiveX property, or if thevalue of the ActiveX property will be written to this tag (or both).7–96 InduSoft Web Studio v6.1 SP5
Configuring Screens and GraphicsIWS Users Guide Note:You can configure an expression in this field if you want to write the result ofan expression to the property of the ActiveX object. However, in this case, thevalue of the property cannot be read back to one tag (unless you use theXGet() function). Therefore, an expression is configured in this field, and theScan field is automatically set to Set.InduSoft Web Studio v6.1 SP5 7–97
IWS Users GuideConfiguring Screens and Graphics* Action: Defines the direction of the interface between the tag or expressionconfigured in the Tag/Expression field and the ActiveX property, accordingto the following table:ActionGetSetGet+SetSet+GetDescriptionRead the value of the ActiveX property and write it to the tag configured in theTag/Expression field.Write the value from the tag or expression configured in the Tag/Expression field into theActiveX property.Executes both actions (Get and Set). However, when opening a screen with the ActiveXobject, IWS executes the Get command before executing any Set command. That is, the tagconfigured in the Tag/Expression field is updated with the value of the ActiveX propertywhen IWS opens the screen where the ActiveX is configured.Executes both actions (Get and Set). However, when opening a screen with the ActiveXobject, IWS executes the Set command before executing any Get command. That is, theActiveX property is updated with the value of the tag configured in the Tag/Expression fieldwhen IWS opens the screen where the ActiveX is configured. Note:When the value of the property is "Read-only" (cannot by overwritten by theapplication), the Action field is automatically set to Get.* Scan: Defines the polling method to get values from the ActiveX propreties,according to the following table:ScanNoAlwaysDescriptionThe value of the ActiveX property is read and written to the tag configured in theTag/Expression field, only when the screen with the ActiveX object is open, and when theActiveX object sends a message to IWS to update this tag.IWS keeps polling the value of the ActiveX property and updating the tag configured in theTag/Expression field with this value. Note:Some ActiveX controls are designed to send messages to their containers(application) indicating that a property changed value and the new valueshould be read (Get) again. However, other ActiveX controls do notimplement this algorithm. In this case, the only way to get the updatedvalues of the ActiveX properties is to keep polling these values from theActiveX control (Scan=Always).7–98 InduSoft Web Studio v6.1 SP5
Configuring Screens and GraphicsIWS Users Guide– Configuring MethodsThe Methods tab provides a grid with the following fields:Configuration Dialog – Methods Tab* Method: List all methods available from the ActiveX object.* Parameters: The tags configured in this field are associated with theparameters of the method of the corresponding ActiveX object. If the methoddoes not support any parameter, the fixed text is displayed in theParameters field. Otherwise, you can type the tags associated in theparameters of the ActiveX object. When the method has more than oneparameter,, you can type one tag for each parameter, separating them by acomma (,). For example, TagA , TagB , TagC. When the method is executed,either the value of the tags are written to the parameters of the method(input parameters), or, after the method is executed, the ActiveX writes thevalue of the parameters to the tags (output parameters). Tip:When you click the Browse button ( ), it will display the list of parameterssupported by the method, allowing you to associate one tag with eachparameter.* Trigger: When the tag configured in this field changes value, the respectivemethod of the ActiveX control is executed.* Return: The tag configured in this field receives the value returned by themethod (if any).InduSoft Web Studio v6.1 SP5 7–99
IWS Users GuideConfiguring Screens and Graphics– Configuring EventsThe Events tab provides a grid with the following fields:Configuration Dialog – Events Tab* Event: List all events available from the ActiveX object.* Parameters: The tags configured in this field are associated with theparameters of the event of the corresponding ActiveX object. If the eventdoes not support any parameter, the fixed text is displayed in theParameters field. Otherwise, you can type the tags associated with theparameters of the ActiveX object. When the event has more than oneparameter, you can type one tag for each parameter, separating them by acomma (,). For example, TagA , TagB , TagC. When the event is generated,either the value of the tags are written to the parameters of the event (inputparameters), or the parameter values are written to the tags (outputparameters). Tip:When you click the Browse button ( ), it will display the list of parameterssupported by the event, allowing you to associate one tag with eachparameter.* Script: The script configured in this field will be executed when the event is triggeredby the ActiveX control. Tip:When you click the Browse button ( ), it will display a dialog with thecomplete script associated with the event. The main dialog window displaysonly the expression configured in the first line of the script.7–100 InduSoft Web Studio v6.1 SP5
Configuring Screens and GraphicsIWS Users Guide .NET Control button ( ): Click to place .NET Framework components on yourscreen..NET Components are designed according to the Microsoft .NET Framework,which is a standard for modular programming technologies. Because IWS is an.NET container, you can configure and run .NET Components in the screenscreated with IWS. .NET Components provide the following interfaces:– Properties: Variables whose values can be read and/or written for theapplication (e.g. Object Color, FileName, URL, and so forth)– Methods: Functions from the .NET Framework component that can be triggeredby the application (e.g. open a dialog, execute a calculation, and so forth)– Events: Internal messages that can trigger the execution of expressions in theapplication (e.g. Mouse_Click, Download_Completed, and so forth)The name of the properties, methods and events supported by each .NETFramework component depends on its own implementation. Caution:When using .NET Framework components in your application, make surethat the target station (runtime station) can support the same componentsand that they are properly installed and registered. The IWS application filesinclude links to the components; however, the installation of thesecomponents on the target station must be done separately. Furthermore,when components are used on screens open in remote Web Thin Clients, thecomponents must also be manually installed on the Web Thin Client stations.The Microsoft Windows operating system installs a large selection ofcomponents by default, but additional components are offered by third-partyproviders. Consult your .NET Framework component provider for furtherinformation about how to install.To select and place a .NET Control object in your application screen:1. Click the .NET Control Object tool on the Active Objects toolbar, or choose Insert >.NET Control from the main menu bar.2. When the .NET Framework Components dialog opens (as in the followingfigure), it contains a list of all .NET Components that are registered on yourcomputer..NET Framework Components DialogInduSoft Web Studio v6.1 SP5 7–101
IWS Users GuideConfiguring Screens and Graphics3. Select a component from the list, and then click OK to place it in yourapplication screen. You can also click the Browse… button to find anunregistered component on your computer. Tip:Registered .NET Components are typically stored in the followingdirectory:C:\WINDOWS\Microsoft.NET\Framework\However, you can have IWS include unregistered components in the .NETFramework Components dialog by editing the .APPfile to add this parameter:For example:[Execution Environment]DotNetControlPath=[Execution Environment]DotNetControlPath=C:\DOTNET CONTROLS BACKUPThereafter, the .NET Framework Components dialog will list all registeredcomponents and all components found in the specified directory.4. By default, a new .NET Control object is placed in the upper-left corner of theapplication screen. Click on the object and drag it to where you want it placed.5. Once the object is placed, double-click on it to open its Object Properties dialog.Object Properties: .NET ControlThe Object Properties window displays the name of the .NET Control. You mustassign a name (alias) to the .NET Control, for the application on the Name field(e.g. CheckBox1). This name is used to reference the component when using thescripting languages. Note:You should not configure two .NET Components on the same screen with thesame name. For instance, if you place two CheckBox components on the samescreen and assign the name CheckBox1 to one object (Name field), you cannotassign the same name to the second object on the same screen. You wouldhave to assign the name CheckBox2, for example, to the second object.The Property Pages button opens the standard window for configuring the StaticProperties (if any). The layout and the options in this dialog window depend on the7–102 InduSoft Web Studio v6.1 SP5
Configuring Screens and GraphicsIWS Users Guideimplementeation of each .NET Component. Use this interface to set properties thatshould not be changed during the runtime (fixed properties).The Members button on the Object Properties window opens dialogs that allow you todo the following: Associate tags to properties of the .NET Component Trigger methods from the .NET Component based on tag change Configure scripts, which are executed when Events from the .NETComponent occurThe following sections describe how to configure these interfaces. Notes:Although the Members dialog displays the list of all properties, methods andevents, you only have to configure the items that you need for your project.The screen shots used in the following sections depict the CheckBoxcomponent. Although the names of properties, methods and events varies bycomponent, the configuration interface is the same for any .NET Component.The concepts described here apply to all of them.– Configuring PropertiesThe Properties tab provides a grid with the following fields:Members Dialog – Properties TabInduSoft Web Studio v6.1 SP5 7–103
IWS Users GuideConfiguring Screens and Graphics* Property: List all properties available from the .NET Component, and indicatetheir types:Property IconProperty TypeBooleanIntegerRealString* Tag/Expression: The tag configured in this field is associated with therespective property of the .NET Component. The Action column will definewhether the value of this tag will be written to the property, or if the value ofthe property will be written to this tag (or both).* Action: Defines the direction of the interface between the tag or expressionconfigured in the Tag/Expression field and the .NET property, according to thefollowing table:ActionGetSetGet+SetSet+GetDescriptionRead the value of the property and write it to the tag configured in theTag/Expression field.Write the value from the tag or expression configured in the Tag/Expression field intothe property.Executes both actions (Get and Set). However, when opening a screen with the .NETComponent, IWS executes the Get command before executing any Set command.That is, the tag configured in the Tag/Expression field is updated with the value of theproperty when IWS opens the screen where the .NET Component is configured.Executes both actions (Get and Set). However, when opening a screen with the .NETComponent, IWS executes the Set command before executing any Get command.That is, the property is updated with the value of the tag configured in theTag/Expression field when IWS opens the screen where the .NET Component isconfigured. Note:When the value of the property is "Read-only" (cannot by overwritten bythe application), the Action field is automatically set to Get.* Scan: Defines the polling method to get values from the propreties. For .NETComponents, all properties scan Always by default. That is, IWS keepspolling the value of the property and updating the tag configured in theTag/Expression field with this value.7–104 InduSoft Web Studio v6.1 SP5
Configuring Screens and GraphicsIWS Users Guide– Configuring MethodsThe Methods tab provides a grid with the following fields:Members Dialog – Methods Tab* Method: Lists all methods available from the .NET Component.* Parameters: The tags configured in this field are associated with thecorresponding method. If the method does not support any parameter, thenthe fixed text is displayed. Otherwise, you can enter the tags thatyou want to associate with the parameter. When the method has more thanone parameter, you can enter one tag for each parameter, separating themby a comma (,). For example, TagA , TagB , TagC. Tip:When you click the Browse button ( ), it will display the list ofparameters supported by the method, allowing you to associate one tagwith each parameter.When the method is executed, either the value of the tags are written to theparameters of the method (input parameters), or, after the method isexecuted, the .NET Component writes the value of the parameters to thetags (output parameters).* Trigger: When the tag configured in this field changes value, the respectivemethod of the .NET Component is executed.* Return: The tag configured in this field receives the value returned by themethod (if any).InduSoft Web Studio v6.1 SP5 7–105
IWS Users GuideConfiguring Screens and Graphics– Configuring EventsThe Events tab provides a grid with the following fields:Members Dialog – Events Tab* Event: Lists all events available from the .NET Component.* Parameters: The tags configured in this field are associated with thecorresponding event. If the event does not support any parameter, then thefixed text is displayed. Otherwise, you can enter the tags that youwant to associate with the parameter. When the event has more than oneparameter, you can enter one tag for each parameter, separating them by acomma (,). For example, TagA , TagB , TagC. Tip:When you click the Browse button ( ), it will display the list ofparameters supported by the event, allowing you to associate one tagwith each parameter.When the event occurs, either the value of the tags are written to theparameters of the method (input parameters), or, after the event occurs, the.NET Component writes the value of the parameters to the tags (outputparameters).* Script: The script configured in this field will be executed when the event istriggered by the .NET Component. Tip:When you click the Browse button ( ), it will display a dialog with thecomplete script associated with the event. The main dialog windowdisplays only the expression configured in the first line of the script.7–106 InduSoft Web Studio v6.1 SP5
Object Properties - Combo BoxConfiguring Screens and GraphicsIWS Users Guide Combo-Box button ( ): Click to select a single label from a combo-box list of labels.If the list is longer that the space allotted, IWS enables a scroll bar for the list.During runtime, if you select a label from the list, the combo-box hides itself andthe selected label displays in the combo-box.Double-click on the combo-box object to open the Object Properties dialog:Object Properties: Combo BoxYou can use this dialog to set the following parameters:– Data Sources button: Click to open the Data Sources dialog (see below).– Fonts button: Click to open a standard Font dialog. Use this dialog to changethe characteristics of a message font.– Label text box: Type a string tag to receive the value of the label currentlydisplayed in the combo box.– Position text box: Type an integer tag, which corresponds to the label currentlydisplayed in the combo box. Changing this tag value changes the label beingdisplayed.– Input Enabled checkbox: Click (check) to allow an operator to select a label bytyping the contents of that label into a tag in the Label field.– Sort checkbox: Click (check) to display the contents of your array of labels inalphabetical order. This parameter is available only when you select the ArrayTag type.– Extern translation checkbox: Click (check) to enable automatic translation of thecombo box labels using the Translation Tool.– Confirm checkbox: Click (check) to prompt an operator to confirm a commandduring runtime.– E-Sign checkbox: When this option is checked, the user will be prompted toenter the Electronic Signature before executing the dynamic.– VK: Virtual Keyboard type used for this object. You need to enable the VirtualKeyboard option on the Project → Settings → Runtime Desktop interface beforeconfiguring the Virtual Keyboard for this interface.– Disable text box: Type a tag with a nonzero value to disable this combo box. Typea zero, or leave the field blank (default) to enable the command property. If youdisable the combo box, it appears grayed out during runtime.– Security text box: Type a security level for the command (0 to 255). If an operatorlogs on and does not have the specified security level, the command becomesinactive. If an operator logs on and does have the specified security level, oryou leave this field blank, the command property remains active.InduSoft Web Studio v6.1 SP5 7–107
Combo Box - AdvancedIWS Users GuideConfiguring Screens and Graphics– Advanced button: Click to open the Combo Box - Advanced dialog:oooAlign combo-box: Click to specify the label alignment (Left, Center, or Right)which affects the alignment in both the combo box and its list.Color box: Click to specify a background color for the combo box. When theColor dialog opens, click a color to select it, then click OK to close the dialog.Drop List Size (Items) field: Enter an integer (or a tag of Integer type) to specifythe number of items that should be displayed at one time when the userclicks on the combo box. The higher the number of items, the longer thedrop list will appear. Note:If this number is less than the total number of items in the list, thenthe drop list will also scroll.oDecimal Points: Select how decimal values will be displayed on-screen:Auto Format: Decimal values will be formatted according to the virtualtable created by the SetDecimalPoints() function.Custom: Enter the number of decimal places to display (e.g. 2) for alldecimal values.7–108 InduSoft Web Studio v6.1 SP5
Static Labels dialogimage\Tech0347.gifConfiguring Screens and GraphicsIWS Users GuideDATA SOURCESUse the Data Sources dialog to configure the items/labels that will be displayed inthe Combo Box object.Data Sources dialog– Type combo box: Select the type of data source that you want to use, and theclick the Settings… button to configure the source. Each type of source isdescribed in detail below.– Field field (for Text File and Database only): Specify which field/column of the datasource to read from.– Reload field (for Text File and Database only): Enter a tag name. When the value ofthe specified tag changes, the combo box will reload the labels from the datasource.Type: Static LabelsWhen the Type is set to Static Labels, you can configure the following settings:Enter your labels — with one label per line — just as if you were editing a plain textfile. The labels are not sorted in any way, so be sure to put them in the order youwant them displayed during runtime. Note:The first line is designated as position 0, the second line is designated asposition 1, and so forth.InduSoft Web Studio v6.1 SP5 7–109
Array Tag dialogimage\Tech0445.gifIWS Users GuideConfiguring Screens and GraphicsClick OK when you’re done.Type: Array TagWhen the Type is set to Array Tag, you can configure the following settings:– Array Tag: Enter the name of an array tag of String type that contains the itemsfor the combo box.– Number of Items: Specify how much of the array should be displayed in thecombo box. Keeping in mind that the combo box counts array index 0 as thefirst item, if you enter a value of 4, then the combo box will display array index0 through array index 3 — which is a total of four labels.Click OK when you’re done.Type: Text FileWhen the Type is set to Text File, you can configure the following settings:– File: Enter the name of the text file source. You can either type the file nameand its path or click the … button to browse for it. (If the file is stored in theapplication folder, then you can omit the path in the name.) Tip:You can configure tag names between curly brackets (e.g. {TagName}) inthe File field.– Delimiters: Set the delimiter(s) used in the data source file. For instance, if thedata will be read from a CSV (comma separated values) file, you would selectthe Comma option. You can even choose a custom delimiter by checking theOther option and typing the custom delimiter in the field beside it.Click OK when you’re done.7–110 InduSoft Web Studio v6.1 SP5
image\Tech0448.gifConfiguring Screens and GraphicsIWS Users GuideType: DatabaseWhen the Type is set to Database, you can configure the following settings:For more information, please see “Database Configuration Dialog Window” on page6–14. Alarm button ( ): Click to specify an area of the screen in which to display alarmmessages.Next, click in the screen and drag the mouse to designate an area for themessages. When you are finished, double-click on the object to open the ObjectProperties dialog:Object Properties: AlarmYou can use this dialog to specify the following parameters:– On Line button: Click (enable) this button to display on-line alarm messages forthe object.– History button: Click (enable) this button to display alarm messages from thehistory files. Caution:You may have to use the Save to Disk option, located on the Alarm worksheet(Tasks tab), to save alarm messages specified as history files.InduSoft Web Studio v6.1 SP5 7–111
IWS Users GuideConfiguring Screens and Graphics– Border combo-box: Click to define a color for the alarm message border. Whenthe Color dialog displays, click on a color to select it, and then close the dialog.– Win combo-box: Click to define a background color for the Alarm Messagedialog. When the Color dialog displays, click on a color to select it, and thenclose the dialog.– PgUp field: In the runtime, toggling the tag in this field triggers a page upcommand to the list.– PgDown field: In the runtime, toggling the tag in this field triggers a page downcommand to the list.– Message Format area: Use the following parameters to define a format for alarmmessages. You can format alarms to include dates, times (hours), names, tags,and messages.– Font button: Click to open the Fonts dialog and specify a style, size, color, andfont type for the alarm message text.– DD,MM,YY check-boxes: Click (check) to display the alarm date in the messagetext.– HH,MM,SS,MSS check-boxes: Click (check) to display the alarm time in themessage text. Note:If you check the DD,MM,YY and/or HH,MM,SS,MSS boxes, an asterisk (*)character displays between the alarm’s date/time and the alarm message.– Tag field: Specify how many characters to allow for a tag name.– Message field: Specify how many characters to allow for a message.– Ack check-box: Click (check) to add the acknowledgement time to an alarmmessage.– End check-box: Click (check) to add the normalization time to an alarmmessage.– Selection button: Click to open the Alarm Filters dialog, which allows you tospecify filters for alarm messages.Alarm Filters DialogUse the following parameters to specify these filters:7–112 InduSoft Web Studio v6.1 SP5
Configuring Screens and GraphicsIWS Users Guide– Group field: Enter a value to select and display alarm groups in the alarmsummary object.* Enter a zero in the field to select all alarm groups.* Enter any value other than zero to select a specific alarm group.– Selection field: Type the character string you specified in the Selection column onthe Alarm worksheet (Tasks tab). IWS filters display alarms by matching thischaracter string against the string specified on the Alarm worksheet. Note:This character string must be the same as the character string on theAlarm worksheet. Tip:If you enter the character string between curly brackets ({ }), you canmodify the tag value during runtime.– Priority Range fields: Specify a range (based on the alarm priority specified in thepriority column of the Alarm worksheet) in which to filter and display alarmmessages.For example, if you assign alarm priorities 1 to 5 on the Alarm worksheet, andthen assign 0 to 4 in these Priority Range fields, IWS will display alarm priorities1 to 4 and will not display alarm priority 5.– Sort area: Use the radio buttons to sort and display alarm messages as follows:– Time: Click (enable) this button to sort and display alarms according to the timethe alarm was received.– Priority: Click (enable) this button to sort and display alarms according to thepriorities assigned in the Priority Range fields.– Print Tag field: Type a tag name to filter and print all alarms when changes aremade to that tag.– Ack Tag field: Type a tag name to filter and acknowledge the active alarm (top ofalarm object list) when you change that tag. Tip:You can use the internal AckAlr tag to acknowledge the last alarm from theapplication.– Ack All Tag field: Type a tag name to acknowledge all filtered, active alarms whenyou change that tag. Tip:You can use the internal AckAll tag to acknowledge all alarms from theapplication.– View % field: Type a tag in this field (specify a percentage from 0% to 100%) tocontrol how many alarm messages are visible in the alarm list during runtime.You also can use this tag to scroll the alarm list up and down during runtime.InduSoft Web Studio v6.1 SP5 7–113
IWS Users GuideConfiguring Screens and GraphicsAlarms List with Scroll Bar Grid button ( ): The Grid object allows you to read/write data in a tabular formatfrom the data source configured in the object. To draw one, do the following: Click the Grid tool. Click on the screen, click the left mouse button, and drag the mouse across thescreen to create a box of the desired size (while holding down the mousebutton). Release the mouse button, and the Grid Object will display.Creating a Grid Object Right-click on the Grid Object, and select Properties from the menu. TheObject Properties dialog box will open. Use this dialog to configure the GridObject’s parameters:Object Properties: Grid Object– Data Source: Select the data source type. The object supports three data sources:Data SourceText FileClass TagDatabaseDescriptionDisplays data from a text file in the ASCII or Unicode format (e.g. CSV text files).Displays values from a Class Tag, where the members of the tag are fields (columns)of the grid object, and each array position is one row of the grid object.Displays data from an SQL Relational Database, using ADO (ActiveX Database7–114 InduSoft Web Studio v6.1 SP5
Configuring Screens and GraphicsIWS Users GuideObject) to exchange data with the database.– E-Sign: When you check this option, the user will be prompted to enter anelectronic signature before entering or modifying data on the object.– VK: Select a Virtual Keyboard type used for this object. The option selects the default Virtual Keyboard configured on the Project Settings Runtime Desktop interface. You can also specify a different virtualkeyboard for this Grid Object.– Security: Enter the security system access level required for the object/dynamic.– Disable: You can enter an expression in this field to disable data input or actionby the user.– Highlight Color: Select a background color for the selected row, during theruntime.– Text Color: Select a text color for the selected row, during the runtime.– Win Color 1: Select a background color for the odd rows.– Win Color 2: Select a background color for the even rows.– Fonts: Click to launch the Fonts dialog, where you can configure the fontsettings for the text displayed in the Grid object.– Columns: Click to launch the Columns dialog, where you can configure thesettings (such as label, column, width, etc.) for the columns of the Grid object.You can configure the settings for each column displayed by the Grid objectduring the runtime, as follows:Columns Dialog Box* Column: The ID Number defines the position of the column in the table.* Label: Enter a Title for each column, which will display as the heading (first)row of the Grid object. Tip:You can configure tags between curly brackts in the Label field to modifyit dynamically during the runtime. When the label is blank (i.e.: “”), theInduSoft Web Studio v6.1 SP5 7–115
IWS Users GuideConfiguring Screens and Graphicswidth of the column is set to 0 during the runtime. This option is usefulto hide columns during the runtime.* Field: Enter the name of the field (column) in the SQL Relational Databasethat the Grid object is linked to. If this field is left in blank, the textconfigured in the Label field will be used as the Field name. (This setting isavailable only when the Data Source type is set to Database.)* Type: Select the Type of interface that will be used in the column. Theoptions are:TypeTextNumericPictureCheck-boxTimeDateDate/TimeDescriptionDisplays alphanumeric valuesDisplays numeric valuesDisplays the picture (*.bmp or *.ico format) from the data source. Forinstance, if the value from the data source is MyFile.bmp, the gridobject will display the picture from the file MyFile.bmp stored in theapplication’s folder. The picture will be automatically resized to fit thecell of the grid object. The picture file(s) must be stored in the \Websub-folder of the application to support this feature on the Web ThinClient stations. CEView applications support pictures in bitmap format(*.bmp), but not in icon format (*.ico).Displays check-box interfaces. The check-box will be unchecked if thevalue read from the file is 0, or "FALSE"; otherwise, thecheck-box will be checked. By default, IWS will use the value 0 forunchecked and the value 1 for checked.Displays the value in the Time format (e.g. HH:MM:SS). This setting isavailable only when the Data Source type is set to Database.Displays the value in the Date format (e.g. MM/DD/YYYY). This settingis available only when the Data Source type is set to Database.Displays the value in the Date/Time format (e.g. MM/DD/YYYYHH:MM:SS). This setting is available only when the Data Source typeis set to Database. Notes: When the Data Source type is set to Database, it is important tomake sure that the Type for each column configured in the objectmatches the Type of the respective field in the database. When the Data Source type is set to Database, you can configurevalid SQL statements, directly in the Field (e.g. List(DISTINCT[Cell_Name]) AS [Cell Name]). You can also configure tag namesbetween curly brackets to modify this setting during the runtime(e.g. {MyFieldName}). Tip:If Picture is the column type, the Grid object displays a default icon ( ) ifthe picture file is not found during the runtime. You can configure adifferent picture to be displayed when the file is not found by copyingthe picture file to the \Web sub-folder of the application and configuring7–116 InduSoft Web Studio v6.1 SP5
Configuring Screens and GraphicsIWS Users Guideits name on the .APP file, as follows:[Objects]GridDefaultPicture=* Width: Enter a width of the column, in pixels.* Align: Select an Alignment for the data shown in the column. There are threeoptions: Left, Right or Center.* Input: Enable (check) to allow the user to enter data in this column duringthe runtime.* Key: Designate a shortcut for sorting the values in this field. A shortcut is acombination of keys pressed on a keyboard at one time (e.g. CTRL + C, CTRL+ V, etc.). This option is especially useful when creating applications forruntime devices that do not provide a mouse or touch-screen interface andonly have a keyboard for interacting with the application during theruntime. Note:When the Data Source type is set to Class Tag, and the Columns dialogis left blank, the object displays the values from all members of theClass Tag with the following default column settings:Label = Type = TextWidth = Align = CenterInput = Enabled (checked)Key = * Show ID Column: Check to display the number of each row, automatically.* Allow sorting columns: Check to enable the user to sort the values in thecolumns during the runtime, either by clicking on the label or by using theshortcut configured for each column. This option is disabled if the Showheader option from the Advanced dialog is not checked. Tip:Use the Move Up and Move Down buttons to reorder the display of thecolumns.– Data: Click to launch the Data dialog, where you can specify a data source forthe Grid object.This dialog allows you to configure the data source settings, as follows:* Data Source – Text FileWhen the Data Source type is set to Text File, you can configure thefollowing settings:InduSoft Web Studio v6.1 SP5 7–117
IWS Users GuideConfiguring Screens and Graphics– File: Enter the name of the text file source. You can either type the filename and its path or click the … button to browse for it. (If the file isstored in the application folder, you can omit the path in the name.)– Delimiters: Set the delimiter(s) used in the data source file. Forinstance, if the data will be read from a CSV (comma separatedvalues) file, you would select the Comma option. You can even choosea custom delimiter by checking the Other option and typing thecustom delimiter in the field beside it. Tip:You can configure tag names between curly brackets {TagName} in theFile field.* Data Source – Class TagWhen the Data Source type is set to Class Tag, you can configure thefollowing interface:– Class Tag: Enter the name of the main class tag source. (Do not specifya specific member of the class tag.) You can specify the initial arrayposition in this field (e.g. Mytag[10]); otherwise, 0 (zero) will be usedas the initial position by default.– Number of Items: Enter the number of array positions from the Class Tagthat should be displayed.– View: When the tag configured in the optional field changes value (e.g.toggles) during the runtime, the grid object launches a dialog,allowing the user to show/hide each column or modify theirpositions.7–118 InduSoft Web Studio v6.1 SP5
Configuring Screens and GraphicsIWS Users Guide* Data Source – DatabaseWhen the Data Source type is set to Database, you can configure thefollowing settings:Please refer to the Database Configuration Dialog Window for furtherinformation about this dialog.InduSoft Web Studio v6.1 SP5 7–119
IWS Users GuideConfiguring Screens and Graphics– Advanced: Click to launch the Advanced dialog, where you can configure severalsettings for the Grid object.This dialog allows you to configure the advanced settings, as follows:QuickTime and aTI<strong>FF</strong> (Uncompressed) decompressorare needed to see this picture.Advanced Dialog* User Enable: If the value of this tag is TRUE (different from 0), the user canselect different rows of the object by clicking on them during the runtime.This field can be configured with a tag or with a numeric value.* Selected Values: The values from each column of the selected row are writtento each position of the array tag configured in this field. Moreover, you canmodify the value of the cells currently selected in the Grid object bychanging the value of array tag configured in this field. The initial arrayposition (offset) can be configured in this field.* Number of Rows: The grid object writes the number of rows currently availablein the grid object to the tag configured in this field.* Row Number: The Grid object writes the number of the row currently selectedduring the runtime. In addition, you can select different rows by writingtheir values in this tag.* Condition: This field can be configured with the data filter expression. Thisexpression must follow the basic syntax of (e.g. ColumnX > 200). When using Text File or Class Tagfor Data Sources, the is the value specified in the Label.When using Database for the Data Source, the column is the value specifiedin the Field. (In this case, if the Field is left blank, the column value specifiedis the Label.) Tips: You can combine several conditions simultaneously in the Condition7–120 InduSoft Web Studio v6.1 SP5
Configuring Screens and GraphicsIWS Users Guidefiled, using the logic operators AND, OR, and NOT. For example,ColumnAge>‘10’ OR ColumnName=‘John’ ANDColumnDate>‘05/20/2003’. You can use wildcards (* and ?) in the Condition field to filter data. You can configure tags between curly brackets {TagName} in theCondition field to change the filtering condition during the runtime.* Print: When the tag configured in this field toggles, the data currently filteredin the object is sent to the printer.* Reload: When the tag configured in this field is toggled, the object reloads thedata from the data source and displays it.* PDF Trigger field: Type a Tag in this field. When the value of the Tag changes,the data currently filtered in the Alarm/Event Control is distilled to a PDFfile and saved to the path specified in the PDF Filename field below.* PDF Filename field: Enter a complete file path and name where the PDF file isto be saved. You can also enter a tag name using the {tag} syntax. Note:PDF Trigger and PDF Filename are not supported in applications running onWindows CE or Web Thin Client.* Save Trigger: When the tag configured in this field is toggled, the data source(Text File or Database) is updated with the current values of the grid object.This field is not available when the Data Source type is Class Tag, becausethe values are automatically updated in the tags as you change a cell in thegrid.* Insert Trigger: When Auto refresh after insert trigger is enabled (checked), the tagconfigured in this field is used as a trigger to refresh the database table.Whenever the value of the tag changes, a new row is added to the table andthe values of the array configured in the Inserted Values field are automaticallyinserted.* Inserted Values: If the Insert Trigger is being used, then the array tag configuredin this field provides the values that will be inserted. This field must onlycontain an array tag, although it can be of any size.* Save on data change: When this option is checked, the values are updated onthe data source (Text File or Database) as soon as the user enters a newvalue on the grid, during the runtime. This option is disabled when the DataSource type is Class Tag, because the values are automatically updated inthe tags as the user changes the value of the cells in the grid.* Enable Slider/Resize: If this box is not checked, the user is unable to scroll thelist by dragging the slider button, or to change the cell’s size during theruntime.* Conditional Check-box: When this option is checked, the user cannot uncheck acheck-box on the Grid during the runtime, unless all preceding check-boxesin the same column are already unchecked. This option is especially usefulwhen you want to oblige the user to follow a pre-defined sequence. This fieldis not available when the Data Source type is Class Tag.* Show Header: When this option is checked, the header of the Grid object isvisible during the runtime, displaying the label of each column.InduSoft Web Studio v6.1 SP5 7–121
IWS Users GuideConfiguring Screens and Graphics* Show gridlines: When this option is checked, the gridlines of the Grid objectare visible during the runtime.* Ext. translation: When this option is checked, the text displayed by the Gridobject will be susceptible to the Translation Tool during the runtime.* Disable TAB to navigate through cells: When this option is checked, the user canonly navigate through the cells of the Grid Object with the arrow keys,rather than the Tab key. You should disable the Tab key for navigation ifyou want it to be used for switching to the next object that supports focuson the screen.* Concatenate Label for picture: When this option is checked, the reference namefor the picture is the result of the concatenation of the name in the Fieldcolumn with the value of the Label column. The result will be _.* Export: This interface allows you to export the data from the grid object to aclass-array tag, regardless of the Data Source selected for the object. Thefollowing fields must be configured to support this feature:FieldClass tagTriggerDescriptionType the main tag name of the class-array tag that will receive the exportedvalues. Each row from the grid object will be exported to one array positionof the array tag, by matching column labels. The initial array position can beconfigured in this field; 0 is the default.When the tag configured in this field changes value (e.g. toggles), the data isexported from the Grid object to the class-array tag configured in the Classtag field. Tips:The Export feature is an easy and powerful tool to transfer data fromdifferent data sources to tags. After exporting the data to tags, you canuse different tasks to manipulate the data, such as the FileWrite()function, or the Recipe or Report tasks to save the data in text files (e.g.CSV files).* Auto Format: When this option is checked, decimal values in columns ofNumeric type will be formatted according to the virtual table created by theSetDecimalPoints() function. This option will work only in columns forwhich Decimal Points are not already configured. For more information,please see “Grid Object: Columns Dialog” above. Check Box Object button ( ): Click this button to create a check box object on yourscreen.The Check Box Object is useful to create interfaces where users can enable/disablean option on the display. To create a Check Box Object:– Click in the drawing area and drag the mouse/cursor to draw the check boxand its label.– Release the mouse button when the object is the size you want.7–122 InduSoft Web Studio v6.1 SP5
Configuring Screens and GraphicsIWS Users Guide– Double-click on the object to view the Object Properties dialog:QuickTime and aTI<strong>FF</strong> (Uncompressed) decompressorare needed to see this picture.Object Properties Dialog: Check BoxUse the Object Properties dialog to specify the following parameters for the CheckBox Object:– Caption: Specify a caption by typing the text into the text box. You can include atag by enclosing it in curly brackets (e.g. {tagname}).– Fonts: Specify a font style for the caption by clicking the Fonts button.– E-Sign: When this option is checked, the user will be prompted to enter theElectronic Signature before executing the command.– Confirm check-box: Click (check) this box to ensure IWS prompts you to confirmthe action at runtime.– Key drop-down list: Select a key from the list to associate that keyboard keywith the object or group of objects. You can then press this key tocheck/uncheck the check-box.– Click (check) the Shift, Ctrl, or Alt box to create a combination key, meaning theShift, Ctrl, or Alt key must be pressed with the key specified in the drop-downlist.– Click (check) the box to open the Key Modifier dialog, which enables you tomodify your combination keys. You can choose Left, Right or Left or Right tospecify the position on the keyboard of the Shift, Ctrl or Alt key in thecombination key. If you choose Left or Right, the command will be executed anytime either of these keys is pressed in combination with the key specified in thedrop-down list.Key Modifier Dialog– Disable field: Type a tag or expression into this field to enable and disable theobject. You disable the check box object when you enter a value different from0.– Security field: Type a value in this field to specify a security level for the object,as defined under Security. When a user logs on, and does not have thespecified security level, IWS disables the object.InduSoft Web Studio v6.1 SP5 7–123
IWS Users GuideConfiguring Screens and Graphics– Tag field: When the user clicks on the check box during the runtime, the valueof this tag is updated. If no feedback was specified, the value of this tag is alsoused to indicate the current status of the object.– True Value: Specify a value that will be used to change the control to TRUE stateand to indicate that the control is in TRUE state. For more information aboutstates, please refer to the states table.– Advanced button: Press this button to open the Advanced dialog:QuickTime and aTI<strong>FF</strong> (Uncompressed) decompressorare needed to see this picture.Advanced dialog* Tri-State: If enabled the control has a third state. The third state will bedisplayed when the tag configured in the Feedback field assumes the valuespecified in the Tri-State field. If the Feedback field is left blank, the third statewill be displayed when the tag configured in the Tag field assumes the valuespecified in the Tri-State field.* Feedback: Value that indicates the state of the object (TRUE, FALSE orThird-State). If the Feedback field is left blank, the tag configured in the Tagfield will be used as the Feedback tag.* Ext Trans.: When this option is checked, the caption of the object supports thetranslation.* Auto gray out: Turns the caption of the object to gray when it is disabled by theDisable field or due to the Security System.* Force: Click (check) this box to force the Tag Database to recognize a tagchange when the user clicks on the object, even if the value of the tag inquestion does not change.* Enable Focus: When this option is checked, the object can receive the focusduring the runtime by the navigation keys.* Push Like: When this option is checked the control is displayed as a button,instead of the check box standard shape.* Fill Color: Specify the fill color for the button. This option is enabled onlywhen the Push Like option is checked.* Auto Format: When checked, if the caption includes a decimal value enclosedby curly brackets (e,g, {1.2345} ) or a tag of Real type (see Caption above),then the value will be formatted according to the virtual table created by theSetDecimalPoints() function.There are two main modes of operation for this object: Normal Mode and Tri-State Mode.These modes are described below:7–124 InduSoft Web Studio v6.1 SP5
Configuring Screens and GraphicsIWS Users GuideNORMAL MODEWhen the Tri-State option is unchecked, the object operates in Normal Mode.Therefore, it can assume two states only:StateShapeShape(Push Like)FALSETRUENormal Mode StatesWhen the value of the tag configured in Feedback is equal to the value of the tagconfigured in True Value, the state is set to TRUE. Otherwise, the state is set toFALSE. If the Feedback field is left blank, the tag configured in the Tag field will beused as the Feedback tag.When the user clicks on the object, the tag configured in the Tag field is updatedaccording to the following table:Current StatusFALSETRUEValue written to the tag configured in the“Tag” field when the user clicks on the objectValue configured in the True Value fieldNOT (Value configured in the True Value field) Note:When the value configured in True Value is a string, the tag configured in the Tagfield will be toggled between an empty string and the True Value. If True Value isleft in blank, the tag configured in the Tag field will be toggled between“UNSELECTED” and an empty string.TRI-STATE MODEWhen the Tri-State option is checked, the object operates in Tri-State Mode. Therefore,it can assume three states:StateShapeShape(Push Like)FALSETRUETRI-STATEInduSoft Web Studio v6.1 SP5 7–125
IWS Users GuideConfiguring Screens and GraphicsWhen the value of the tag configured in Feedback is equal to the value of the tagconfigured in True Value, the state is set to TRUE. When the value of the tagconfigured in Feedback is equal to the value of the tag configured in Tri-State, thestate is set to TRI-STATE. When none of these conditions are satisfied, the state isset to FALSE. If the Feedback field is left in blank, the tag configured in the Tag fieldwill be used as the Feedback tag. Caution:The Tri-State field must not be configured with the same value as the True Valuefield or with an empty string value.Current StatusFALSETRUETRI-STATEValue written to the tag configured in the“Tag” field when the user clicks on the objectValue configured in the True Value fieldNOT (Value configured in the Tri-State field)NOT (Value configured in the True Value field) Note: If “NOT (Value configured in the True Value field)” is equal to Tri-State, the valueassigned to the tag configured in the Tag field will be the minimum signedinteger value different from True Value. When True Value is a string, “NOT (Value configured in the True Value field)” willresult in an empty string. If True Value is an empty string, “NOT (Valueconfigured in the True Value field)” will result in “UNSELECTED”.7–126 InduSoft Web Studio v6.1 SP5
Configuring Screens and GraphicsIWS Users Guide Radio Button Object button ( ): Click this button to create a check box object onyour screen.The Radio Button Object is useful to create interfaces where users can choose oneoption from multiple display options. To create a Radio Button Object:– Click in the drawing area and drag the mouse/cursor to draw the radio buttonand its label.– Release the mouse button when the object is the size you want.– Double-click on the object to view the Object Properties dialog:Object Properties Dialog: Radio ButtonUse the Object Properties dialog to specify the following parameters for the RadioButton Object:– Caption: Specify a caption by typing the text into the text box. You can include atag by enclosing it in curly brackets (e.g. {tagname}).– Fonts: Specify a font style for the caption by clicking the Fonts button.– E-Sign: When this option is checked, the user will be prompted to enter theElectronic Signature before executing the command.– Confirm check-box: Click (check) this box to ensure IWS prompts you to confirmthe action at runtime.– Key drop-down list: Select a key from the list to associate that keyboard keywith the object or group of objects. You can then press this key tocheck/uncheck the radio button.– Click (check) the Shift, Ctrl, or Alt box to create a combination key, meaning theShift, Ctrl, or Alt key must be pressed with the key specified in the drop-downlist.InduSoft Web Studio v6.1 SP5 7–127
IWS Users GuideConfiguring Screens and Graphics– Click (check) the box to open the Key Modifier dialog, which enables you tomodify your combination keys. You can choose Left, Right or Left or Right tospecify the position on the keyboard of the Shift, Ctrl or Alt key in thecombination key. If you choose Left or Right, the command will be executed anytime either of these keys is pressed in combination with the key specified in thedrop-down list.Key Modifier Dialog– Disable field: Type a tag or expression into this field to enable and disable theobject. You disable the radio button object when you enter a value differentfrom 0.– Security field: Type a value in this field to specify a security level for the object,as defined under Security. When a user logs on, and does not have thespecified security level, IWS disables the object.– Tag field: When the user clicks on the radio button during the runtime, thevalue of this tag is updated. If no feedback was specified, the value of this tag isalso used to indicate the current status of the object.– True Value: Specify a value that will be used to change the control to TRUE stateand to indicate that the control is in TRUE state. For more information aboutstates, please refer to the states table.– Advanced: Press this button to open the Advanced dialog:QuickTime and aTI<strong>FF</strong> (Uncompressed) decompressorare needed to see this picture.Advanced Dialog* Tri-State: If enabled the control has a third state. The third state will bedisplayed when the tag configured in the Feedback field assumes the valuespecified in the Tri-State field. If the Feedback field is left blank, the third statewill be displayed when the tag configured in the Tag field assumes the valuespecified in the Tri-State field.7–128 InduSoft Web Studio v6.1 SP5
Configuring Screens and GraphicsIWS Users Guide* Feedback: Value that indicates the state of the object (TRUE, FALSE orThird-State). If the Feedback field is left blank, the tag configured in the Tagfield will be used as the Feedback tag.* Ext Trans.: When this option is checked, the caption of the object supports thetranslation.* Auto gray out: Turns the caption of the object to gray when it is disabled by theDisable field or due to the Security System.* Force: Click (check) this box to force the Tag Database to recognize a tagchange when the user clicks on the object, even if the value of the tag inquestion does not change.* Enable Focus: When this option is checked, the object can receive the focusduring the runtime by the navigation keys.* Push Like: When this option is checked the control is displayed as a button,instead of the radio button standard shape.* Fill Color: Specify the fill color for the button. This option is enabled onlywhen the Push Like option is checked.* Auto Format: When checked, if the caption includes a decimal value enclosedby curly brackets (e,g, {1.2345} ) or a tag of Real type (see Caption above),then the value will be formatted according to the virtual table created by theSetDecimalPoints() function.There are two main modes of operation for this object: Normal Mode and Tri-State Mode.These modes are described below:NORMAL MODEWhen the Tri-State option is unchecked, the object operates in Normal Mode.Therefore, it can assume two states only:StateShapeShape(Push Like)FALSETRUENormal Mode StatesWhen the value of the tag configured in Feedback is equal to the value of the tagconfigured in True Value, the state is set to TRUE. Otherwise, the state is set toFALSE. If the Feedback field is left blank, the tag configured in the Tag field will beused as the Feedback tag.When the user clicks on the object, the tag configured in the Tag field is updatedwith the value configured in the True Value field.TRI-STATE MODEWhen the Tri-State option is checked, the object operates in Tri-State Mode. Therefore,it can assume three states:StateShapeShape(Push Like)InduSoft Web Studio v6.1 SP5 7–129
IWS Users GuideConfiguring Screens and GraphicsStateShapeShape(Push Like)FALSETRUETRI-STATEWhen the value of the tag configured in Feedback is equal to the value of the tagconfigured in True Value, the state is set to TRUE. When the value of the tagconfigured in Feedback is equal to the value of the tag configured in Tri-State, thestate is set to TRI-STATE. When none of these conditions are satisfied, the state isset to FALSE. If the Feedback field is left in blank, the tag configured in the Tag fieldwill be used as the Feedback tag. Caution:The Tri-State field must not be configured with the same value as the True Valuefield or with an empty string value.Current StatusFALSETRUETRI-STATEValue written to the tag configured in the“Tag” field when the user clicks on the objectValue configured in the True Value fieldNOT (Value configured in the Tri-State field)NOT (Value configured in the True Value field)7–130 InduSoft Web Studio v6.1 SP5
Configuring Screens and GraphicsIWS Users GuideUsing the LibrarySymbols are reusable objects (or groups of objects) that you can store for reuse. IWSprovides access to an extensive symbol library that enables you to add and reusesymbols quickly and easily. You also can modify existing symbols in just a fewseconds.From the menu bar, select View > Library to open the following library of previouslyconfigured objects and symbols, including several objects with dynamics:LibraryYou can add symbols from this library to your application screen, which saves timeduring development. You also can upgrade this library with new symbols byright-clicking on a screen button (in the Workspace) and choosing the Send to libraryoption from the resulting pop-up menu. The application inserts the screen into thelibrary with all its objects. Note:Using the Library menu option is the same as using the Library buttonStandard toolbar.on theTo add an image to the display: Click on a category in the left panel to preview available images. Double-click on a category to import a copy of the image to the display screen,which keeps your image and closes the Libraries dialog. Click anywhere in the display screen to place the selected image.InduSoft Web Studio v6.1 SP5 7–131
IWS Users GuideConfiguring Screens and Graphics Note:Most symbols have predefined properties. To change these properties, use theReplace tab located on the Object Properties dialog. You can add a user screen tothe Symbol library. Develop the screen as .scr and copy it to the \LIB directorywhere you installed IWS.Using Paste LinkFrom the main menu bar, select Edit > Paste Link to paste a linked object (only .BMP files)onto the active screen, while maintaining a connection to the source. A linked object isinformation (the object) created in a source file (another project or another screen).Paste Link automatically updates a linked screen object whenever you update thesource file, but the linked object does not become part of the screen. If you put a linkedfile in an application folder or a subfolder, you can download the file with theapplication to the runtime workstation.Note:This option does not work in Windows CE applications.Symbols FolderA Symbol is an Object (or Group of Objects) that is saved to the Symbols folder (in theGraphics tab of the Workspace), so that you can reuse it again and again in yourapplication projects.Every time you reuse a Symbol, you actually make a copy that is linked to the MasterSymbol file in the Symbols folder. (These linked copies are also called “instances” ofthe Symbol.) Thereafter, if you make any changes to the Master Symbol, then thosechanges automatically propagate to every linked copy in every project.You can customize each linked copy of the Master Symbol by defining CustomProperties. For example, when you create a gauge that displays tank levels and thensave that gauge as a Master Symbol, you can define Custom Properties on the Symbolthat will allow each linked copy to display the level of a different tank.Symbols Folder in the Graphics TabCREATING A MASTER SYMBOLTo create a Master Symbol and save it to the Symbols folder:7–132 InduSoft Web Studio v6.1 SP5
Configuring Screens and GraphicsIWS Users Guide1. Design your Symbol just as you would normally draw an application screen,using any combination of Static and Active Objects. For example, three CheckBoxes in a rectangular pane:Drawing Objects in a Screen2. Select the Object(s) or Group that you want to save as a Symbol.Selecting the Objects Note:It is not necessary to make a Group out of two or more Objects beforesaving them as a Symbol. Saving the Objects together as a Symboleffectively groups them as well.3. Right-click on the selected Object(s) and choose Create Linked Symbol from thecontextual menu, or choose Edit > Copy to from the main menu bar.InduSoft Web Studio v6.1 SP5 7–133
IWS Users GuideConfiguring Screens and GraphicsCreating a Linked Symbol4. A standard Save As dialog is displayed, and you are prompted to give the newSymbol a file name. Symbol files (.sym) are saved in the \Symbol directory ofyour application project.Saving the Symbol File5. Click Save to save the file. The Symbol appears in the Symbols folder, in theGraphics tab of the Workspace.7–134 InduSoft Web Studio v6.1 SP5
Configuring Screens and GraphicsIWS Users GuideSymbol File in the Workspace Note:The Symbol also appears in the Application Symbols folder of the Library.The Symbol is ready to be reused in your project, but the way it is currently saved,every copy will have identical properties. You must now define Custom Properties onthe Symbol — that is, the properties you want to be able to customize each time youreuse the Symbol.EDITING THE MASTER SYMBOLYou can edit a Master Symbol after you've initially saved it, to add or delete Objects inthe Symbol or to define Custom Properties on it. Remember that any modificationsyou make to the Master Symbol will automatically propagate to every linked copy inevery application project.To edit a Symbol:1. Right-click on the Symbol file in the Symbols folder, and then choose Edit fromthe contextual menu.Editing the Symbol File Tip:You can also right-click on any instance of the Symbol and choose EditLinked Symbol from the contextual menu.InduSoft Web Studio v6.1 SP5 7–135
IWS Users GuideConfiguring Screens and GraphicsThe Symbol file is opened for editing in its own window. This Symbol Editorworks in the same way as a regular Screen Editor, except that every Object inthe window is part of the Symbol. If you add, move or delete Objects in theSymbol Editor, then you may change the size or shape of the Symbol anddisrupt the layout of any Screens where it is used.Symbol File Opened for EditingBesides adding, moving or deleting Objects in the Symbol, you can also edit theObject Properties as you normally would. You may want some properties to bethe same in every instance of the Symbol, but other properties need to becustomized according to where and how the Symbol is used. In this example,you probably want to customize the captions of the three Check Boxes and theTags which the Check Boxes enable/disable, as well as the caption of the paneitself.2. Select the first Object in the Symbol and open its Object Properties. Forexample, the first Check Box:Object Properties for the First Check Box3. In any field where you would normally configure a Tag, expression, or value,you can instead define a Custom Property using the following sytax:#:…where is a name to identify the property, when you are completingthe properties on an instance of the Symbol (see below), and is anoptional default value for the property. Note:All standard syntax applies to , including Tag names, indirectTags, Arrays, strings, numerical and boolean values, and scriptingexpressions. Also, even if you do not want to assign a default value to theCustom Property, you must type the colon character (:) after the .7–136 InduSoft Web Studio v6.1 SP5
Configuring Screens and GraphicsIWS Users GuideIn this example, we want to be able to customize which Tag the Check Box willenable/disable when it is clicked; in the Tag field, type #Option1Tag: asshown.Defining a Custom Property for the Tag FieldWhen you go to complete the properties on an instance of the Symbol, theOption1Tag property will appear like this:Custom Properties on a SymbolBut more about that later…4. Depending on the context, some Object properties require a specific type ofvalue like a string, boolean or numerical value. For these properties, you mustenclose the Custom Property definition in curly brackets “{ }”. In this example,the Caption field requires a string, so type {#Option1Caption:"Option 1"} asshown.Defining a Custom Property for the Caption FieldAgain, when you go to complete the properties on an instance of the Symbol,the Option1Caption property will appear like this:InduSoft Web Studio v6.1 SP5 7–137
IWS Users GuideConfiguring Screens and GraphicsCustom Properties on a Symbol5. Repeat steps 2 through 4 as needed, to define the rest of the Custom Propertieson the Symbol. In this example, the finished Symbol has all of the followingproperties:Custom Properties on a Symbol6. Save the Symbol and close the Symbol Editor.7. From the main menu bar, choose Tools > Verify Application. This will update allexisting instances of the Symbol in your application project.INSERTING A SYMBOL IN A SCREENTo insert a Symbol in a Screen and then complete its Custom Properties:1. Open the desired Screen file (.scr) from the Screens folder, or insert a newScreen. The Screen file is opened for editing.2. Insert the desired Symbol in the Screen — there are several ways to do this: Double-click on the Symbol file (.sym) in the Symbols folder; Right-click on the Symbol file and choose Insert from the contextualmenu; Right-click in the Screen Editor where you want to insert the Symbol,choose Insert Linked Symbol from the contextual menu, and select theSymbol file using the standard Open File dialog; or7–138 InduSoft Web Studio v6.1 SP5
Configuring Screens and GraphicsIWS Users Guide Select the Symbol from the Library.Regardless of how it is inserted, the Symbol is placed in the Screen as shown.Symbol Placed in a Screen Note:You can also insert Symbols using the menu option Edit > Paste From.However, when using this menu option, the inserted Symbol does not keepany link with the Master Symbol — it is just a simple copy of the Object (orGroup of Objects) used to create the Master Symbol.Once the Symbol is inserted, you can manipulate it like any other Object in theScreen. You can align and distribute it with other Objects, and you can applyDynamic Properties to it. However, the first thing to do is complete the CustomProperties for this instance of the Symbol.3. Open the Object Properties for the Symbol.Object Properties Dialog for the Symbol4. Click Expand to open the Symbol Properties dialog.InduSoft Web Studio v6.1 SP5 7–139
IWS Users GuideConfiguring Screens and GraphicsSymbol Properties Dialog for the Symbol5. Enter the property values as needed. In this example, the three Check Boxesare used to determine whether to alert Tom, Dick and/or Harry. The captionsare updated accordingly, and the Check Box tags are configured with the firstthree indices of a boolean array called AlertOptions.Completed Properties for the Symbol6. Click OK to close the Symbol Properties dialog, and then close the ObjectProperties dialog.The Custom Properties are resolved during runtime, as shown below.Symbol During Editing (left) and Runtime (right)7–140 InduSoft Web Studio v6.1 SP5
Configuring Screens and GraphicsIWS Users Guide Note:Remember, the completed Custom Properties on each instance of a Symbol areindependent from every other instance of that Symbol, but if you make anychanges to the Master Symbol file, then those changes automatically propagate toevery instance.ADDING TOOLTIPS TO CUSTOM PROPERTIESYou can configure a description for each Custom Property available in the Symbol.After creating a Symbol, open it with the Symbol Editor, right-click in the SymbolEditor (not on the Symbol itself) and choose Edit Symbol Properties from the contextualmenu.When assigning values to the Custom Properties of the Symbol on the screens, theuser can read the description as Tooltips just by moving the mouse cursor on theproperty name, as illustrated on the following picture:Tooltip Showing Description of the PropertyMAKING A USER-MADE SYMBOL AVAILABLE TO OTHER APPLICATION PROJECTSUser-made Symbols are normally available only in the application project where theywere initially created and saved. However, you can send a user-made Symbol to theSystem Symbols directory of the Library, to make it available to all applicationprojects:1. Right-click on the Symbol file (.sym) in the Symbols folder and choose Send toSystem Symbols from the contextual menu. A standard Save As dialog isdisplayed, pointing to the \Symbol directory of IWS (instead of the \Symbolsdirectory of the current application project).InduSoft Web Studio v6.1 SP5 7–141
IWS Users GuideConfiguring Screens and GraphicsSaving a Symbol2. Choose a location to save the Symbol file. You can choose one of the existingcategories/directories, or you can create a new one.3. Click Save. The Symbol file is saved chosen location and the Symbol isdisplayed in System Symbols directory of the Library.Symbol in the Library7–142 InduSoft Web Studio v6.1 SP5
Chapter 8: Configuring Task WorksheetsThis chapter provides information on configuring Task worksheets. A task controlshow different tags in the database will be used in relation to your application.Before continuing our application development, we must create a script to simulatecertain variables. Because these variables must be updated constantly, we will createthis simulation in a Math worksheet. In a real world application, these variables wouldbe coming from field equipment such as a PLC or a Soft Control.Use the Tasks tab to access all task worksheets in the current application.QuickTime and aTI<strong>FF</strong> (Uncompressed) decompressorare needed to see this picture.Workspace: Tasks TabThis tab contains the following task folders: Alarms: Contains the Alarm worksheets used to configure alarm groups and thetags related to each alarm group in the application. You also use the Alarm task todefine the alarm messages generated by IWS. Trend: Contains the Trend worksheets used to configure history groups that storetrend curves for the application. You can use the Trend task to declare which tagsmust have their values stored on disk, and to create history files for trend graphs.IWS stores the samples in a binary history file (*.hst), and displays both historyand on-line samples in a trend graph screen.Recipes: Contains the Recipe worksheets used to configure how data is exchangedbetween the application database and disk files in ASCII or DBF format, and howvalues are transferred between files and real-time memory.Reports: Contains the Report worksheets used to configure reports (text type) thatare sent to a printer or a disk. Report tasks allow you to configure text reports withsystem data, which makes report creation easier and more efficient.ODBC: Contains the ODBC worksheets used to configure how the ODBC interfaceruns in a network environment and uses standard Windows ODBC configuration.You configure ODBC tasks to exchange data between IWS and any databasesupporting the ODBC interface.Math: Contains the Math worksheets used to configure and implement additionalroutines to work with different IWS tasks. IWS executes Math worksheets asBackground Tasks during runtime. You can configure Math worksheets to provide freeenvironments for logical routines and mathematical calculations required by theapplication.InduSoft Web Studio v6.1 SP5 8–1
IWS Users GuideConfiguring Task WorksheetsScheduler: Contains the Scheduler worksheets used to configure events usingdefined mathematical expressions, which are executed according to time, date, orother monitored event.To open Task worksheets for editing, double-click the task button and the worksheetwill display in the Screen/Display window.Configuring an Alarms TaskThe Alarms folder enables you to configure alarm groups and tags related to eachgroup. The Alarm task defines the alarm messages generated by IWS. The primarypurpose of an alarm is to inform the operator of any problems or abnormal conditionduring the process so he can take corrective action(s).To insert an Alarm Worksheet, right-click on the Alarms folder and select the optionInsert from the pop-up menu. You can create multiple Alarm groups (worksheets) andeach group can be configured with independent settings, such as message colors,history log enabled/disabled, and so forth.The Alarm task is executed by the Background Task runtime task (BGTask). The Alarmtask handles the status of all alarms and save the alarm messages to the history, ifconfigured to do so. However, the Alarm task does not display the alarm messages tothe operator. The Alarm/Events control object, available on the Active Objects toolbarfrom the screen editor, must be created and configured in a screen in order to displaythe alarms to the operator.Each Alarm worksheet is composed of two areas:Header: Settings applied to all tags and alarms configured in the same alarm group.These settings allow you to configure the formatting of the message and theactions that must be triggered based on alarm events (e.g.: print alarms, sendalarms by email, and so forth).Body: Configure alarm messages and associate them to conditions linked to tags.Alarm Worksheet8–2 InduSoft Web Studio v6.1 SP5
Configuring Task WorksheetsIWS Users Guide Notes:– You can configure the Alarm Group to sent notifications by emailautomatically, based on alarm events. For further details, see Email Settingsbelow.– The alarm properties associated to each tag (configured in the body of thealarm group) can also be edited by the Tag Properties dialog, launched by theTag Properties toolbar. However, before associating a tag to an alarm group,it is necessary to create the alarm group and configure the settings on itsheader, which will be applied to all tags associated to the group.– As of IWS verion 6.1 SP2, the Alarm task has been modified to avoidautomatically acknowledging alarms by another alarm. For example, the Hi(Lo) alarm should not be automatically acknowledged when the HiHi (LoLo)alarm becomes active. To enable the previous behavior, set the following keyin your application (.APP) file:[Alarm]UseLegacyPriorityAck=1 Caution:The settings configured in the body of each Alarm worksheet are stored in the TagsDatabase archive(s). Therefore, changes to the tags database may affect thecontent of the Alarm worksheets (body). Notice that each tag/type cannot beavailable in more than one Alarm group simultaneously because the Alarm Groupis a property associated to each Tag/Alarm Type (e.g.: Tag:Level; Alarm Type: Hi;Alarm Group: 2).HEADER SETTINGSField Remarks SyntaxDescriptionGroup NameEmail SettingsAdvancedOn Line > Display inAlarm ControlsOn Line > Ack RequiredDescription of the alarm group. It is displayed on the workspace.This field is used for documentation only.Name of the alarm group. During the runtime, the operator can filteralarms based on the Group Name by the built-in Filters dialog of theAlarm/Event control object.Launches the Email Settings dialog, where you can configure thesettings for emails sent automatically based on alarm conditions.Launches the Advanced Settings dialog, where you can configurethe settings for emails sent automatically based on alarmconditions.When checked, the alarms are available to be displayed on theAlarm/Event Control object.When checked, the alarms require acknowledgment. In this case,the alarms are displayed on the Alarm/Event Control object (Onlinemode) until they are acknowledged AND normalized.Text(up to 80 chars)Text(up to 32 chars)ButtonButtonCheck-boxCheck-boxInduSoft Web Studio v6.1 SP5 8–3
IWS Users GuideConfiguring Task WorksheetsField Remarks SyntaxOn Line > BeepOn Line > Send toPrinterHistory > Save to DiskHistory > Generate AckMessagesHistory > GenerateNorm MessagesColors in Alarm Controls> EnableColors in Alarm Controls> FG and BGWhen checked, the computer keeps beeping while there arealarm(s) to be acknowledged, currently active.When checked, the alarm messages are sent to the printer as soonas the alarm event occurs. When using this option, you must use amatrix printer (instead of DeskJet or LaserJet) in order to print themessage(s) and feed just one line – otherwise, each alarm will beprinted in a different sheet of paper. The alarms will be printed in thedefault printer. If you want to send alarms to a printer different fromthe default printer, you can specify the printer path/name, editingthe following parameter in the .APPfile:[AlarmLog]Device=When checked, the alarm messages are stored in the history logwhen they become active.When checked, the alarm messages are stored in the history logwhen they are acknowledged.When checked, the alarm messages are stored in the history logwhen they become normalized.When checked, the alarms configured in this group will be displayedwith the colors assigned to each alarm state (Start, Ack or Norm),according to the colors configured in the Alarm Group.You can configure the text foreground color (FG) and backgroundcolor (BG) for the alarms displayed on the Alarms/Events Controlobject. Each alarm state can be displayed with a different colorschema:- Start: Alarm active and not acknowledged- Ack: Alarm active and acknowledged- Norm: Alarm no longer active and not acknowledged.Check-boxCheck-boxCheck-boxCheck-boxCheck-boxColor-boxColor-boxBODY SETTINGSField Remarks SyntaxTag Name Name of the tag associated with the alarm. Tag8–4 InduSoft Web Studio v6.1 SP5
Configuring Task WorksheetsIWS Users GuideField Remarks SyntaxTypeLimitMessagePrioritySelectionType of the alarm: HiHi: Activates the alarm if the tag value is equal or higher thanthe limit. Hi: Activates the alarm if the tag value is equal or higher than thelimit. Lo: Activates the alarm if the tag value is equal or lower than thelimit. LoLo: Activates the alarm if the tag value is equal or lower thanthe limit. Rate: Activates the alarm if the tag value varies faster than therate specified to the alarm. DevP: Activates the alarm if the tag value is equal or higher thanthe Set Point tag plus the limit. DevM: Activates the alarm if the tag value is equal or lower thanthe Set Point tag minus the limit.When using the types Rate, DevP, and DevM it is necessary toconfigure additional settings by the Tag Properties dialog,launched by the Tag Properties toolbar.Limit associated with each alarm. The limits can be modifieddynamically during the runtime, by the tag fields HiHiLimit, HiLimit,LoLimit, LoLoLimit, Rate, DevP and DevM (e.g.:TagLevel->HiLimit).Message associated to the alarm. The message can be displayedon the Alarm/Event Control object and/or stored in the AlarmHistory and/or sent by Email, depending on the settings configuredin the Header of the Alarm group.Priority number associated to the alarm. When displaying alarmson the Alarm/Event Control object, the operator can filter and/orsort the alarms by priority.Alias associated to the alarm (e.g.: AreaA, AreaB, etc). Whendisplaying alarms on the Alarm/Event Control object, the operatorcan filter and/or sort the alarms by their selection value.Combo-boxNumberText and/or {Tag}(up to 256 chars)Number(from 0 to 255)Text(up to 7 chars)EMAIL SETTINGSInduSoft Web Studio has the ability to send emails automatically when alarm eventsoccur. The emails are sent using the standard SMTP (Simple Message TransferProtocol). Therefore, you just need a valid email account with a SMTP Server and POP3server – it is NOT necessary to install any additional software, such as MicrosoftOutlook. Caution:Before being email to send emails, it is necessary to execute successfully theCNFEmail() function (from the built-in language) at least once. This function setsthe email account parameters used when sending emails from the applicationInduSoft Web Studio v6.1 SP5 8–5
IWS Users GuideConfiguring Task Worksheets(e.g.: SMTP server, user name, password, and so forth).Alarm Worksheet: Email SettingsField Remarks SyntaxEnable send automatic email Name of the tag associated with the alarm. Check-boxTo, Cc, BccSubjectSend 1 message per email.Target addresses to whom the emails will be sent. You canconfigure multiple email addresses in each box (To, Ccand/or Bcc) by separating the addresses with the semi-coloncharacter (“;”).When selecting “Use alarm message”, the alarm messageitself is used as the subject of the email to be sent. Whenselecting “Custom”, you can configure a custom text to beused as Subject when sending the alarm.When checking this option, each alarm is sent in anindividual email and all emails are sent when the SendTrigger is triggered. Otherwise, all alarm messages arebuffered and sent in only one email when the Send Trigger istriggered. You cannot disable (uncheck) this option when theSubject option is configured with “Use alarm message”.Text and/or {Tag}(up to 1024 chars)Radio-button andText (up to 1024characters)Check-box8–6 InduSoft Web Studio v6.1 SP5
Configuring Task WorksheetsIWS Users GuideField Remarks SyntaxRemove failed messagesfrom the bufferSend email when alarm isCurrent StatusCurrent ErrorMessage FormatSend TriggerWhen checking this option, the emails are removed from thebuffer after attempting to send them, even if there was anerror (failure) and the email was not sent. Otherwise, themessages are kept in the buffer until they are sentsuccessfully or when the buffer reaches its maximum size.Allow you to configure which alarm events should generateemails: Active: When the alarm becomes active. Ack: When the alarm is acknowledged. Norm: When the alarm is normalized.Notice that each event can be enabled/disabled individually.The tag configured in this field, if any, is updated with thecurrent status of the current or last email that the applicationattempted to send: -2: Incorrect version of the INDMail.DLL library. -1: The INDMail.DLL library is corrupted. 0: SendEmailExt() function is not being executed. 1: Sending email(s) 2: Last email was sent successfully. 3: There was an error sending the last email.The tag configured in this field, if any, is updated with theerror message describing the result of the last email that theapplication attempted to send. Therefore, when configuringa tag in this field, this tag must be a String type.This interface allows you to configure the actual format of themessage sent by email, based on the alarm event(s): Day, Month, Year, Hour, Minute, Second, MS: Theoptions checked will compose the timestamp for the alarmmessages. MS stands for milliseconds. Items: The options checked will compose the emailmessage for each alarm. You can configure the order ofthe items, by using the Move Up and Move Down buttons. Separator: Allow you to choose the separator usedbetween the items checked in this interface.While you configure these settings, the Sample field displaysan example of the format of the message according to thesettings being configured.When the alarm events are generated, they are kept in aninternal buffer (memory). When the tag configured in thisfield changes of value, the email(s) on the internal buffer aresent to the addresses configured in the To, Cc and Bccfields. After being successfully sent, the emails are removedfrom the internal buffer.Check-boxCheck-boxTagTagCheck-box andRadio-buttonTagInduSoft Web Studio v6.1 SP5 8–7
IWS Users GuideConfiguring Task WorksheetsField Remarks SyntaxMax buffer sizeBuffer sizeClear BufferDisable sendMaximum number of alarm messages (events) that can bestored in the internal buffer simultaneously. When this limit isreached, the buffer follows a FIFO (First-In, First-Out)behavior, discharging the older messages as soon as thenewer messages are generated, guaranteeing that thebuffer does not exceed the limit configured in this field.The tag configured in this field, if any, is updated with thenumber of messages (events) currently stored in the internalbuffer.When the tag configured in this field changes of value, allmessages (events) currently stored in the buffer are deleted.These messages will never be sent.When the value of the tag configured in this field is TRUE,the email feature is temporarily disabled. Alarm eventsgenerated while the email feature is disabled will not bestored in the internal buffer. Also, emails will NOT be sent inthis condition, even if the tag configured in the field SendTrigger changes of value.Tag or NumberTagTagTagADVANCEDAlarm Worksheet: AdvancedField Remarks SyntaxDisableTotal AlarmsWhen the value of the tag configured in this is TRUE, allalarms configured in this group are temporarily disabled.This option is useful to disable alarms under specialconditions (e.g.: during maintenance).The tag configured in this field, if any, is updated with thenumber of alarms from this group, which are currently active.TagTag8–8 InduSoft Web Studio v6.1 SP5
Configuring Task WorksheetsIWS Users GuideField Remarks SyntaxTotal UnackRemote Ack TriggerDead Band Time > ActivationDead Band Time >NormalizationDead Band Time > TimeStamp/ValueThe tag configured in this field, if any, is updated with thenumber of alarms from this group, which are currently activeAND have not been acknowledged yet.When the tag configured in this field change of value, allactive alarms from this group are acknowledged. This optioncan be used to acknowledge alarms regardless of any actionfrom the operator.Each alarm must remain continuously in its alarm conditionfor the period of time specified in this field before becomingactive. This option is useful to avoid generating alarms onintermittent conditions (e.g.: noise). If this field is left in blank,the alarm becomes active as soon as its condition is true.Each alarm must remain continuously out from its alarmcondition for the period of time specified in this field beforebecoming normalized. This option is useful to avoidnormalizing alarms on intermittent conditions (e.g.: noise). Ifthis field is left in blank, the alarm becomes normalized assoon as its condition is no longer true.Each alarm maintains a time stamp of the last significantactivity, along with the value of the tag at that time. You canselect the type of activity that updates the time stamp: Activation/Norm (default): The time when the dead bandended — that is, when the alarm becomes activated ornormalized. Last Tag Change: The time when the value of the tag lastchanged during the dead band. Start Condition: The time when the dead band started.TagTagTag or NumberTag or NumberComboInduSoft Web Studio v6.1 SP5 8–9
IWS Users GuideConfiguring Task WorksheetsALARM HISTORYThe alarm history can be saved either with the InduSoft Web Studio proprietaryformat or to an external SQL Relational database by ADO. The alarm history settingscan be configured by the Project Settings > Options dialog.Project Settings: Options TabThe Alarm History and Events interface allows you to configure the following settings:Field Remarks SyntaxHistory Life Time (days)The history for alarm/event messages older than the number ofdays specified in this field are automatically deleted, following aFIFO (First-In, First-Out) behavior. If this field is left in blank, thehistory of alarms/events is not deleted automatically.Number8–10 InduSoft Web Studio v6.1 SP5
Configuring Task WorksheetsIWS Users GuideField Remarks SyntaxHistory FormatAlarm DatabaseDefines the format of the history of alarms/events: Proprietary: Saves the history in the proprietary format. Thealarm messages are saved in a text file with the nameALxxyyzz.ALH, where:o xx: Last two digits of the current year.o yy: month.o dd: dayThere will be one history file for each day. By default, the alarmhistory files created with the proprietary format are stored in the\Alarm sub-folder of the application. However, it is possible todirect the alarms to a different directory by using theSetAlarmPath() function from the built-in language. Database: Saves the history in a third-party SQL RelationalDatabase (e.g.: SQL Server). InduSoft Web Studio does notprovide the database itself.When selecting Database as the format for the history of alarms, thespecific settings to interface with the third-party SQL RelationalDatabase can be configured by the dialog launched when pressingthis button. For further details about support for third-party SQLRelational Databases, see Chapter 17: IWS Database Interface.Combo-box-When saving the alarm history in the proprietary format, each alarm event is saved ina new line, using the pipe character (“|”) to delimiter the different fields, as illustratedbelow:P1|P2|P3|P4|P5|P6|P7|P8|P9|P10|P11|P12|P13|P14|P15|P16|P17|P18|P19|P20|P21P1|P2|P3|P4|P5|P6|P7|P8|P9|P10|P11|P12|P13|P14|P15|P16|P17|P18|P19|P20|P21..P1|P2|P3|P4|P5|P6|P7|P8|P9|P10|P11|P12|P13|P14|P15|P16|P17|P18|P19|P20|P21The format of the history both in proprietary format and in the SQL RelationalDatabase format is described in the following table:ProprietaryFormatSQL Relational DatabaseField Number Field Name Field TypeRemarksFileVersionP1 - - File version (Current = 003) 001P2Start Date (DD/MM/YYYY) 001Al_Start_Time Date/TimeP3 Start Time (HH:MM:SS) 001P4 Al_Tag Text Tag Name 001InduSoft Web Studio v6.1 SP5 8–11
IWS Users GuideConfiguring Task WorksheetsProprietaryFormatSQL Relational DatabaseField Number Field Name Field TypeRemarksFileVersionP5 Al_Message Text Alarm Message 001P6 Al_Ack NumberP7 Al_Active NumberAck, where: 0 Indicates the alarm was acknowledged or does notrequire acknowledgment 1 Indicates the alarm was not acknowledgedActive, where: 0 Indicates the alarm is not active 1 Indicates the alarm is active001001P8 Al_Tag_Value Number Tag Value when the event occurred 001P9 Al_Group Number Alarm Group Number 001P10 Al_Priority Number Priority Number 001P11 Al_Selection Text Selection 001P12 Al_Type NumberP13 Al_Ack_Req NumberType, where: 1 is HiHi 2 is Hi(On) 4 is Lo(Off) 8 is LoLo 16 is Rate(Change) 32 is DevP 64 is DevMAck required, where: 0 Alarm requires acknowledgement (Ack) 1 Alarm does not require acknowledgement001001P14Normalization Date (DD/MM/YYYY) 001Al_Norm_Time Date/TimeP15 Normalization Time (HH:MM:SS) 001P16Ack Date (DD/MM/YYYY) 001Al_Ack_Time Date/TimeP17 Ack Time (HH:MM:SS) 001P18 Al_User User Name 002P19 Al_User_Comment Comment 002P20 Al_User_Full User Full Name 003P21 Al_Station Station 0038–12 InduSoft Web Studio v6.1 SP5
Configuring Task WorksheetsIWS Users GuideProprietaryFormatSQL Relational DatabaseField Number Field Name Field TypeRemarksFileVersionP22 Al_Prev_Tag_Value Number Previous Value 003P23 Bias Number Time Zone Bias 003- Al_Start_Time_ms Number- Al_Norm_Time_ms Number- Al_Ack_Time_ms Number- Al_Deleted NumberNumber of milliseconds for the Start Time timestamp. Thisfield is used when the database does not support ms in aTimeStamp field.Number of milliseconds for the Norm Time timestamp.This field is used when the database does not support msin a TimeStamp field.Number of milliseconds for the Ack Time timestamp. Thisfield is used when the database does not support ms in aTimeStamp field. 0: Alarm message was not deleted by the user (notvisible). 1: Alarm message was deleted by the user (visible).003003003003- Last_Update Date/Time Timestamp of the last update for this event. 003- Last_Update_ms NumberNumber of milliseconds for the Last Event timestamp.This field is used when the database does not support msin a TimeStamp field.003For detailed information about saving alarm history files, including instructions forconfiguring database settings, see Chapter 17: IWS Database Interface.InduSoft Web Studio v6.1 SP5 8–13
IWS Users GuideConfiguring Task WorksheetsConfiguring a Trend TaskThe Trend folder enables you to configure history groups that store trend curves. Youcan use the Trend task to declare which tags must have their values stored on disk, andto create history files for trend graphs. IWS stores the samples in a binary history file(*.hst), and shows both history and on-line samples in a screen trend graph.To show a trend graph on the screen, you must click the Trend tool on the ActiveObjects toolbar to create a trend object.Use one of the following methods to insert a new Trend worksheet:Right-click on the Trend folder and select Insert from the pop-up.Select File → New from the menu bar or click on the New tool on the Standard toolbarto display the New Document dialog. Click Trend Worksheet, and thenclick OK.A new worksheet displays, as follows:Trend WorksheetThe Trend worksheet is divided into two areas:Header area (top section), which contains information for the whole groupBody area (bottom section), where you define each tag in the group. This sectioncontains several columns (only two are shown in the preceding figure).Use the Header parameters on this worksheet as follows:Description field: Type a description of the worksheet for documentation purposes.Type combo-box: Click the arrow button to select a trend type from the list. Thefollowing options are available:– Proprietary* File Format: Binary* Default Path: …\\Hst\GGYYDDMM.HST , where:YY = Two last digits of the yearMM = MonthDD = Day8–14 InduSoft Web Studio v6.1 SP5
Configuring Task WorksheetsIWS Users GuideNote: IWS provides the HST2TXT.EXE and TXT2HIST.EXE programs, whichenable you to convert trend history files saved on proprietary format (.hst) totext files (.txt) and vice versa. For more information about these programs, see“Converting Trend History Files from Binary to Text” on page 8–21and“Converting Trend History Files from Text to Binary,” on page 8–22.– Database* Database Type: Chosen by the user* Default Table Name: TRENDGGG (GGG = Trend Worksheet Number – e.g.TREND001 for the Trend Worksheet 001)Note: For more information about the structure of the Database table that IWSuses to save history files, see Data Saved in Trend History File.Database Configuration: Opens the Database Configuration dialog to enter therequisite settings to link IWS to an external SQL Relational Database, for thepurpose of saving the trend history.Database Configuration WindowDatabase combo-box: Allows you to select either Primary or Secondary. WithPrimary, all settings displayed in the Database Configuration window apply to thePrimary Database interface. Otherwise, they apply to the Secondary Databaseinterface. You can configure the Secondary database in the following modes:– Disabled: In this mode, IWS saves data in the Primary Database only. If thePrimary Database is unavailable for any reason, the data is not savedanywhere else. This option may cause loss of data if the Primary Database isnot available.– Redundant: In this mode, IWS saves data in both Primary and SecondaryDatabases. If one of these databases is unavailable, IWS keeps saving dataonly in the database that is available. When the database that was unavailablebecomes available again, IWS synchronizes both databases automatically.InduSoft Web Studio v6.1 SP5 8–15
IWS Users GuideConfiguring Task Worksheets– Store and Forward: In this mode, IWS saves data in the Primary Database only. Ifthe Primary Database becomes unavailable, IWS saves the data in theSecondary Database. When the Primary Database becomes available again,IWS moves the data from the Secondary Database into the Primary Database.Using the Secondary Database, you can increase the reliability of the system anduse the Secondary Database as a backup when the Primary Database is notavailable. This architecture is particularly useful when the Primary Database islocated in the remote station. In this case, you can configure a SecondaryDatabase in the local station to save data temporarily if the Primary Database isnot available (during a network failure, for instance).– Use application default check-box: When this option is checked, IWS uses thesettings configured in the Default Database for the task that is beingconfigured (Connection string, User name, Password, Retry Interval andAdvanced Settings). When this option is not checked, you can configure thesesettings individually to the current task.– Connection string field: This field defines the database where IWS will write andread values as well as the main parameters used when connecting to thedatabase. Instead of writing the Connection string manually, you can press thebrowse button (…) and select the database type from the Data Link Propertieswindow.Note:The list of Database Providers shown in the Data Link Properties windowdepends on the providers actually installed and available in thecomputer where you are running IWS. Consult the operating systemdocumentation (or the database documentation) for further information8–16 InduSoft Web Studio v6.1 SP5
Configuring Task WorksheetsIWS Users Guideregarding the settings of the Provider for the database that you are using.– User name field: User name used to connect to the database. The user nameconfigured in this field must match the user name configured in the database.– Password field: Password used to connect to the database. The passwordconfigured in this field must match the password configured in the database.– Retry Interval field: If IWS is unable to connect to the database for any reason, itretries automatically to connect to the database after the number of secondsconfigured in this field have passed.– Advanced button: After pressing this button, you have access to customize somesettings. For most applications, the default value of these settings do not needto be modified and should be kept.* Milliseconds combo box: You can configure how the milliseconds will be savedwhen saving the date in the database. Each database saves the date indifferent formats; for example, some databases do not support millisecondsin a Date field. The following options are available:• Default: Uses the format pre-defined for the current database. Thedatabases previously tested by InduSoft are previously configured withthe most suitable option. When selecting Default, IWS uses the settingpre-configured for the current database type. If you are using a databasethat has not been previously configured by InduSoft, the Default optionattempts to save the milliseconds in a separate field. Tip:The default option for each database is configured in the StudioADO.inifile, stored in the \BIN sub-folder of IWS. See the Studio DatabaseGateway section for information about how to configure theStudioADO.ini file.• Disable: Does not save the milliseconds at all when saving the date in thedatabase.• Enable: Saves the milliseconds in the same field where the date is saved.• Separate Column: Saves the milliseconds in a separated column. In thiscase, the date is saved in one field (without the milliseconds precision)and the number of milliseconds is saved in a different column. ThisInduSoft Web Studio v6.1 SP5 8–17
IWS Users GuideConfiguring Task Worksheetsoption is indicated where you want to save timestamps with the precisionof milliseconds but the database that you are using does not supportmilliseconds for the Date fields.* Save time difference check-box: When this option is checked (default), IWSsaves the Time Zone configured in the computer where the application isrunning in each register of the database. This option must be enabled toavoid problems with daylight savings time.* Database Gateway: Enter the Host Name/IP Address where the Studiodatabase gateway will be running. The TCP Port number can also bespecified, but if you are not using the default, you will have to configure theStudio database gateway with the same TCP Port. See “Studio DatabaseGateway” for information about how to configure the Studio ADO Gateway.* Disable Primary Key: For some modules, IWS will try to define a primary key tothe table in order to speed up the queries. If you are using a database thatdoes not support primary keys (e.g. Microsoft Excel), you should check thisfield.– Table pane: This area allows you to configure the settings of the Table where thedata will be saved. All tasks can share the same database. However, each task(Alarm, Events, Trend worksheets) must be linked to its own Table. InduSoftdoes not check for invalid configurations on this field, therefore you shouldmake sure that the configuration is suitable for the database that you areusing.– Use default name check-box: When this option is checked (default), IWS savesand/or retrieve the data in the Table with the default name written in the Namefield.– Automatically create check-box: When this option is checked (default), IWS createsa table with the name written in the Name field automatically. If this option isnot checked, IWS does not create the table automatically. Therefore, it will notbe able to save data in the database, unless you have configured a table withthe name configured in the Name field manually in the database.– Name: Specifies the name of the Table from the database where the history datawill be saved.– Refresh button: If the database configured is currently available, you can pressthe Refresh button to populate the Name combo-box with the name of the tablescurrently available in the database. In this way, you can select the table wherethe history data should be saved instead of writing the Table name manually inthe Name field.Run-Time pane: This area allows you to enter with IWS tags. The following fields areavailable:– Status (output) check-box: The tag in this field will receive one of the followingvalues:ValueDescription0 Disconnected from the database. The database is notavailable or your configuration is incorrect.1 The database is connected successfully2 The database is being synchronized– Reload (output): If you are using in curly brackets in any of the configurationfields, you have to specify the reload tag. When you want to reconnect to the8–18 InduSoft Web Studio v6.1 SP5
Configuring Task WorksheetsIWS Users Guidedatabase using the updated values on your tags, set the tag on this field to 1.IWS will update the configuration when trying to perform an action in thedatabase and will set the tag back to 0 when it is finished.For instructions for configuring a default database for all task history (Alarm, Eventand Trend), see Configuring a Default Database for All Task History on page 6–18.For more information about saving Trend history, including an explanation of thefields saved, see Chapter 17: IWS Database Interface.Save Options pane: Use the following parameters to define when and how to savetrend history files:* Save On Trigger check-box and field: Click (enable) and type a tag name to savetrend samples when someone changes the specified tag. (Tag change can bean event from the Scheduler.)* Save On Tag Change check-box: Click (enable) to always save the trend samplewhen a value change occurs in any of the tags from that group.Advanced button: Click to display the following window:Trend Advanced Settings– Batch pane: The Batch pane provides the following fields:* Start/Stop (input): Enter the tag that will start/stop your batches. When thetag in this field is set to TRUE (different from 0), IWS will either start savingdata to your batch file (if you are using proprietary format), or add a newregister to the BatchHistory table on your database, indicating that a batchhas been started. Note that historical data will be saved according to theconfiguration in the fields Save Trigger and Save On Tag Change options onthe Trend Worksheet.* Name (input): This field represents the batch name; its meaning depends onthe format selected on the Trend Worksheet:– If you selected Proprietary in the Type field, the Name should comply withthe format [Path], where:Path: An optional field. If the path is not specified, the batch history filewill be stored in the same path as the .app file.FileName: Name of the batch history file.– If you selected Database in the Type field, the value in this field will bestored in the Batch_Name field of the BatchHistory table.Tip:You can enter tag names between curly brackets in this field (e.g.InduSoft Web Studio v6.1 SP5 8–19
IWS Users GuideConfiguring Task WorksheetsC:\MyBatches\{MyTagWithName}{MyTagWithNumber}.hst).* Delete (input): When the tag specified in this field changes its value, thebatch will be deleted. With the Proprietary format, the batch history file will beremoved. With the Database format, it will set the Delete field in theBatchHistory table to true, but the saved historical data will remain. TheTrend object only sees batches that have the delete field set to 0 (zero).* Existent (output): The tag entered on this field will receive the value 1 if thebatch specified in the Name field already exists; otherwise the tag will receivethe value 0.* Description (output): This field is available only when using the Databaseformat. When the tag in the Start/Stop field changes to TRUE, the register thatis added to the BatchHistory table will display the string in this field.Tip:You can enter tag names between curly brackets in this field (e.g. {MyTag}).* Save data even if batch is not running: If this field is unchecked, the historical datawill be saved only when the tag in the Start/Stop field is TRUE.Tip:The Batch Historical data can be displayed to the user either in Graphicalformat or Table format. The Trend object and Grid object sections explainhow to display information on these formats.– Disk Space Control pane: The following options are available:* History Life Time (days) field: Specify how many days to keep the history file onthe disk. After the specified period, IWS automatically erases the file. Usethis option only for files based on a date.* Compress After (days) field: Specify how many days to keep the trend history file(*.hst) on the disk before compressing the file. After the specified period,IWS automatically compresses the file. Use this option only for files basedon a date. This option is not available for WinCE applications.* Disable All Data Saving: Enter with a tag in this field. When the value on this tagis TRUE (different from zero), the trend task stops recording data for thisworksheet.Use the Body parameters on the Trend worksheet as follows:Tag Name field: Type the tag name to be saved in the history file. Caution:After adding or removing tags from a Trend worksheet, any history files(*.HST) you previously created will no longer be compatible with the newsetting. Consequently, the data from those history files will no longer bedisplayed by the trend object.Dead Band field: Type a value to filter acceptable changes when Save on Tag Change isused. For example, Dead Band has value = 5. If the tag value is 50 and changes to 52,the system will not register this variation in the database, because it is less than 5.If the change is equal to or greater than 5, the new value will be saved to thehistory file.8–20 InduSoft Web Studio v6.1 SP5
Configuring Task WorksheetsIWS Users GuideField field: Name of the field in the database where the tag will be stored. If this fieldis left blank, the name of the tag will be used as the tag name. Array tags andclasses will have the characters ‘[’ , ‘]’ and ‘.’ Replaced by ‘_’.Examples:Tag NameMyArray[1]MyClass.Member1MyClass[3].Member2Default FieldMyArray_1MyClass_Member1MyClass_3_Member2 Note:The Trend task can accept only up to 240 tags in a single worksheet. If you manuallyconfigure more than 240 tags in the same worksheet, then the Trend task will generatean error when you start the finished application.Converting Trend History Files from Binary to TextBy default, IWS saves trend history files in a binary format (.hst). Because you maywant to have these files in .txt format, IWS provides the hst2txt.exe program toconvert trend history files from binary into text format.To convert a file, use the following procedure: From a DOS window, change directory (cd) to the IWS Bin directory.c:\>cd \Program Files\InduSoft Web Studio v6.1\Bin At the command prompt, copy the Hst2txt.exe into the same directory where the.hst file is located.At the command prompt, type Hst2txt.exe and specify the following parameters:: Name of the trend history file to convert[]: Data separator character (default is )[]: Extended functionality (convert data with more than 10 characters)[]: Start time in hours (HH), minutes (MM), and seconds (SS)[]: Finish time in hours (HH), minutes (MM), and seconds (SS)[]: Include milliseconds in the Time column (Type 1 to print the millisecondsvalue in the text file created from the .hst file.)For example:Hst2txt.exe 01952010.hstThe program creates a plain text .hdr (header) file and .txt file that can be viewedusing any text editor (for example, Notepad).The .hdr file contains the name of the tags configured in the Trend worksheet.The .txt file contains the tag values saved in the history file.After the program converts the file, type Exit to close the DOS window. Note:Alternatively, you can use the HST2TXT function in a Math worksheet toconvert binary files into text format automatically without having to use aDOS window.InduSoft Web Studio v6.1 SP5 8–21
IWS Users GuideConfiguring Task WorksheetsConverting Trend History Files from Text to BinaryIWS provides the txt2hst.exe program to convert text files back into binary format.To convert a file, use the following procedure: From a DOS window, change directory (cd) to the IWS Bin directory.c:\>cd \Program Files\InduSoft Web Studio v6.1\Bin At the command prompt, copy the txt2hst.exe into the same directory wherefthe .txt file is located.At the command prompt, type txt2hst.exe and specify the following parameters:: Name of the ASCII file with history data to convert[]: Data separator character (default is )[]: Extended functionality (data value with more than 10 characters)[]: Start time of data value in hours (HH), minutes (MM), andseconds (SS)[]: Finish time of data value in hours (HH), minutes (MM), andseconds (SS)For example:Txtt2hst.exe 02950201.txtThe program creates a .hdr (header) file and converts the .txt file into a .hstbinary file.After the program converts the file, type Exit to close the DOS window. Note:You cannot create a math script for the txt2hst.exe program and use it in aMath worksheet to convert text files into binary format as you can forhst2txt.exe. The math script shortcut is available for binary files only.Creating Batch HistoryIWS provides powerful tools that enable the user to create and manage batchhistorical information. The user is able to create batches by using the followingformats: Proprietary: When using the proprietary format, each batch will be stored on adifferent historical file. The user can save historical data in both the normalhistorical file and batch files at the same time (see the “Configuring a Trend Task”in Chapter 8: Configuring Task Worksheets, for more information about thesefiles). Database: The historical data used for the batch is saved in the same table as thenormal historical data; an additional table called BatchHistory keeps registerswith the information about the batches. The list below describes the fields on theBatchHistory table:Field Name Data Type DescriptionGroup_Number IntegerTrend group number. This is the number of the worksheetthat you are creating to specify the tags that will be storedon your batch history.8–22 InduSoft Web Studio v6.1 SP5
Configuring Task WorksheetsIWS Users GuideBatch_Name String Name of the batchStart_Time TimeStamp Date and Time that the batch was started.End_Time TimeStamp Date and Time that the batch was finishedPri_Table String ReservedSec_Table String ReservedDescription String Batch descriptionDeleted Boolean 0: Batch has not been deleted1: Batch has been deletedTip:You can customize the name of the table and the name of the columnscreated in the database by editing the .APP file, asfollows:[Trend]=[Trend]BatchHistory=For example:[TREND001PRI]BatchHistory=MyTableForPrimaryDB[TREND001SEC]BatchHistory=MyTableForSecondaryDB[Trend]Group_Number=Trend_WorksheetBatch_Name=Load_NumberInduSoft Web Studio v6.1 SP5 8–23
IWS Users GuideConfiguring Task WorksheetsConfiguring a Recipes TaskThe Recipe folder enables you to configure Recipe worksheets for data interchangebetween the application database and disk files in ASCII, XML, or DBF format;transferring values between files and real-time memory.You typically use a Recipe worksheet used to store process recipes, but you can storeany type of information (such as operation logs, passwords, and so forth) in these files.The Recipes task reads and writes tag values into files, and it transfers tag values fromthe application to a file or from a file to the application. Note:IWS sequentially increments the number that identifies the Recipe worksheet foreach newly created worksheet.Use one of the following methods to create a new Recipe worksheet:Right-click on the Recipes folder, and then click the prompt screen.Select File > New from the menu bar or click on the New button on the Standardtoolbar to open the New Document dialog. Select Recipe Worksheet and click OK.A new Recipe worksheet displays:Recipe WorksheetThe Recipe worksheet is divided into two areas:Header area (top section), which contains information for the whole groupBody area (bottom section), where you define each tag in the group.Use the Header parameters on this worksheet as follows:Description field: Type a description of the worksheet for documentation purposes.Save As XML: Click (check) to save information in XML format, or (uncheck) to save inthe .DAT format. Caution:You can load information in a .DAT file into different tags using a secondRecipe worksheet, but you must load information in an .XML file into tags withthe same name as the tag from which the data originated.8–24 InduSoft Web Studio v6.1 SP5
Configuring Task WorksheetsIWS Users Guide Note:As with HTML pages, you must be running the Web server to view XML datafrom the Web. Unlike the HTML pages in the runtime system, XML pages donot need to have the application running to view the XML data. (You must berunning Internet Explorer version 5.0 or higher to view XML data.)File Name field: Type a file name related to the recipe group, using static text (File1)or a dynamic tag value ({FileNameTag}).Register Number field: Type a tag to define the register number to be read or writteninto a DBF file. IWS enables this field for older applications created to use DBFfiles, but disables this field for newer projects.Unicode check-box: Click (enable) to save the recipe in UNICODE format (two bytesper character) or (disable) to save the recipe in ANSI format (one byte percharacter). Note:When saving a worksheet, you can save it using any name you choose (you are notrequired to use a predefined file name). A configuration file using the defaultextension .RCP (or .XSL if you specify Save As XML) contains the recipeconfiguration and the File Name field contains the data file name to be read orwritten.Use the Body parameters on this worksheet as follows:Tag Name field: Type tag names to update with file contents or with values to write toa file. If the tag is an array, you must specify the first position to use.If the tag is an Array or a Class (or both), then IWS automatically enables everyarray position and class member by default. To configure a specific array positionand/or class member, type it in the Tag Name field as normal. For example,level[3].member.Number of Elements field: Specify how many positions of the array tag are in use.Tip:You can configure a tag name between curly brackets {TagName} in thisfield, allowing the user to change the Number of Elements configured in theRecipe for each array tag dynamically, during the runtime. Caution:When you define an array tag, its initial position is zero, although IWS usesthe tag in case of invalid position configuration.To read or write a recipe group, use the InduSoft Scripting Language Recipe function.InduSoft Web Studio v6.1 SP5 8–25
IWS Users GuideConfiguring Task WorksheetsConfiguring a Reports TaskThe Reports folder contains a definition of reports (text type) to be sent to a printer ordisk. The Reports task allows you to configure your own report (text type) with data fromthe system. The main purpose of this task is to make report creation easier and moreefficient. Note:IWS sequentially increments the number that identifies the Report worksheet foreach newly created worksheet.To print a report, use an InduSoft Scripting Language function anywhere anexpression is allowed.Use one of the following methods to insert a new Report worksheet:Right-click on the Reports folder and click on the prompt screen.Select File → New from the menu bar or click the New icon on the Standard toolbar toopen the New Document dialog. Select Report Worksheet and click OK.A new worksheet displays:Report WorksheetThe Report worksheet is divided into two areas:Header area (top section), which contains information for the whole group.Body area (bottom section), where you define the tag and text to be used ingenerating the report.Use the Header parameters on this worksheet as follows:Description field: Type a description of the worksheet for documentation purposes.Disk Append check-box: When printing to a file,– Check the box to add (append) the new report to the end of an existing file– Uncheck the box to replace the existing report in that file with the new reportUnicode check-box: Click (enable) to save the report in UNICODE format (two bytesper character) or (disable) to save the report in ANSI format (one byte percharacter).8–26 InduSoft Web Studio v6.1 SP5
Configuring Task WorksheetsIWS Users GuideLock Value into the (Tag/Expression) length check-box: Click (enable) to automaticallytruncate the values of Tags/Expressions in the report to fit between the curlybrackets, as they are positioned in the Body of the report (see below). This helps topreserve the layout of the report. If this option is left unchecked, then the fullvalues of Tags/Expressions in the report will be displayed.Output File field: Type a tag name for the output file (using the {tag} syntax) wheredata is stored when you are printing to a file. Where the tag value is part of the filename.For example: report{day}.outWhere the generated file might be report1.out, report2.out ..., according to thetag day value. Note:A report configuration file uses .RCP as the default extension. The Output Filefield is the file where data is stored.Edit RTF file button: Click to access the report as an RTF file, which you can edit forlayout modification and so forth.Use the Body portion of this worksheet for report formatting. You can configure areport using data in the system and indicating where to print the tag values. Each tagname will replace the {tag_name} tag name. For real type tags, use the followingsyntax: {tag_name n}, where n is the number of decimal characters you want printed. Note:If you are using the standard report editor (text only: ASCII or UNICODE), thenthe number of characters reserved for the tag value will be equal to the number ofcharacters used to type the tag name (including the two “curly” brackets). Forexample, if you configure {TagA} in the report body, reserve six characters for thetag value in the report file. This behavior is not valid for reports in RTF format.InduSoft Web Studio v6.1 SP5 8–27
IWS Users GuideConfiguring Task WorksheetsConfiguring an ODBC TaskThe ODBC interface runs in a network environment and uses the standard WindowsODBC configuration. The ODBC task is capable of data interchange between IWS andany database supporting this interface.In addition to configuring the ODBC worksheet, you must configure the WindowsODBC standard driver. IWS refers to the User DNS (Data Source Name), which youconfigure through the Control Panel. For more information, refer to your Windowsdocumentation. Note:IWS sequentially increments the number that identifies the ODBC worksheet foreach newly created worksheet.Use one of the following methods to insert a new ODBC worksheet:Right-click on the ODBC folder and click on the prompt screen.Select File → New from the menu bar or click the New icon on the Standard toolbar toopen the New Document dialog. Select ODBC Worksheet and click OK.A new worksheet displays:ODBC WorksheetODBC worksheets are executed under the ODBC Client Runtime task. However,creating a new worksheet does not automatically enable the task; you must use theExecution Tasks dialog (Project → Status) to configure the task to start at runtime. Formore information, please see “Starting Runtime Modules on the Target System” onpage 6–31.8–28 InduSoft Web Studio v6.1 SP5
Configuring Task WorksheetsIWS Users GuideThe ODBC worksheet is divided into two areas:Header area (top section), which contains information for the whole group, definestags to start read and write events, sets return values, handles database accessparameters, and so forth.Body area (bottom section), where you define each tag in the group and relate tagsto fields in the current register from the database table.Use the Header parameters on this worksheet as follows:Description field: Type a description of the worksheet for documentation purposes.Data Source field: Type the same Data Source Name (DSN) specified in the WindowsControl Panel containing information about specific database access. You canchange the Data Source name during runtime by configuring a tag between curlybrackets in this field. For example:{DSNNameTag}User field: Type a user name to access to the database. You can change the Username during runtime by configuring a tag between curly brackets in this field.Password field: Type the user’s password. You can change the Password duringruntime by configuring a tag between curly brackets in this field.Table field: Type a table name in the database. You can change the Table nameduring runtime by configuring a tag between curly brackets in this field.Condition field: Type a search condition or filter.Status field: Type a return value (fill in with a tag name). The tag should report 0 forsuccess and use another value for an error code.Transaction field: Type a tag that changes value when the transaction is executed.Select, Next, Insert, Delete, or Update Trigger fields: Type a tag to work as a trigger, whereeach value change causes the system to execute the corresponding command. Atleast one trigger field is required.Use the Body parameters on this worksheet as follows:Tag Name field: Type the names of tags to update with file contents or tags whosevalues should be written to a file.Column: Type the location in which to find data in the file (for example, in an Excelfile, if you type in Column 1, Row 1, the entire column gets defined as column 1).You must use the Windows Control Panel to set up the ODBC interface for Excel files.The procedure is as follows: Click the Start > Settings > Control Panel. When the Control Panel window displays, double-click on the ODBC button to openthe ODBC Data Source Administrator dialog. In the ODBC Data Source Administrator dialog, click Excel Files in the User DataSources list, and then click the Configure button. When the ODBC Microsoft Excel Setup dialog displays, type the Windowsconfiguration name to be used in the DSN field on ODBC worksheet into the DataSource Name field. Click the Select Workbook button to configure the Excel file you want to use. Return to the ODBC Data Source Administrator dialog and verify that your UserDSN displays in the list. Click OK to close the dialog. After configuring the ODBC Windows interface, you must configure the IWS ODBCworksheets. From the Tasks tab, insert a new ODBC worksheet.InduSoft Web Studio v6.1 SP5 8–29
IWS Users GuideConfiguring Task Worksheets Be sure you set the ODBC Runtime to start automatically from the Execution Tasks tab(Project → Project Status).To start this configuration, you simply need to run the project. Your application willhandle the Select, Next, Insert, Delete, and Update triggers to allow data to exchangethroughout rows in Excel and tags configured in the worksheet.Consult your Windows documentation for the meaning of specific error codes.The following is a list of IWS error codes:Select command1 - Error in the ODBCPREPARE function.2 - Error in the ODBCBINDCOL function.3 - Error in the ODBCEXECUTE function.4 - Error in the ODBCSETCH function.Next command5 - Error in the ODBCSETCH function.Insert command6 - Error in the ODBCPREPARE function.7 - Error in the ODBCEXECUTE function.8 - Error in the ODBCCOMMITE function.Update command9 - Error in the ODBCPREPARE function.10 - Error in the ODBCEXECUTE function.11 - Error in the ODBCCOMMITE function.Delete command12 - Error in the ODBCPREPARE function.13 - Error in the ODBCEXECUTE function.14 - Error in the ODBCCOMMITE function.8–30 InduSoft Web Studio v6.1 SP5
Configuring Task WorksheetsIWS Users GuideConfiguring a Math TaskThe Math folder allows you to implement additional routines to work with the basicfunctions of different IWS tasks. A Math worksheet contains a group of programminglines that IWS executes as a Background Task during runtime. You can configure theMath worksheet to provide free environments for logical routines and mathematicalcalculations needed by the project. For these purposes, the InduSoft ScriptingLanguage is very simple and easy to use. Note:IWS sequentially increments the number that identifies the Math worksheet foreach newly created worksheet.Use one of the following methods to insert a new Math worksheet:Right-click on the Math folder and then click on the prompt screen.Select File → New from the menu bar or click the New button on the Standard toolbarto open the New Document dialog. Select Math Worksheet and click OK.A new worksheet displays:Math WorksheetThe Math worksheet is divided into two areas:Header area (top section), which contains information for the whole groupBody area (bottom section), where you define each tag, expression, andProgramming Lines (logical routines and mathematical calculations throughfunctions and logical operations) in the group.Use the Header parameters on this worksheet as follows:Description field: Type a description of the worksheet for documentation purposes.Execution field: Type an expression, a single tag, or a constant value to determinewhen the worksheet should execute.InduSoft Web Studio v6.1 SP5 8–31
IWS Users GuideConfiguring Task Worksheets Caution:IWS executes the worksheet only when the Execution field result is not zero. If youalways want the worksheet to execute, type a 1 (constant value) in the Executionfield.Use the Body parameters on this worksheet as follows:Tag Name field: Type a tag to receive a return value from the specified calculation inthe Expression column.Expression field: Type an expression to send the return value to the specified tag inthe Tag Name column.8–32 InduSoft Web Studio v6.1 SP5
Configuring Task WorksheetsIWS Users GuideConfiguring a Scheduler TaskThe Scheduler folder generates events with defined mathematical expressions to beexecuted according to the time, date, or any monitored event. Note:IWS sequentially increments the number that identifies the Scheduler worksheetfor each newly created worksheet. Different scheduler groups have onlyorganizational purposes.Use one of the following methods to insert a new Scheduler worksheet:Right-click on the Scheduler folder and click on the prompt screen.Select File → New from the menu bar or click the New icon on the Standard toolbar toopen the New Document dialog. Select Scheduler Worksheet and click OK.A new worksheet displays:Scheduler WorksheetThe Scheduler worksheet is divided into two areas:Header area (top section), which contains information for the whole group.Body area (bottom section), where you define each tag, expression, and conditionfor the group.Use the Header parameters on this worksheet as follows:Description field: Type a description of the worksheet for documentation purposes.Event drop-down list: Click to select an event type from the following– Calendar: Generates time bases greater than 24 hours. For example, you candefine an event that prints a report every day at a specific time. Note:Be sure to complete the Date field if you want a specific date for eventexecution.InduSoft Web Studio v6.1 SP5 8–33
IWS Users GuideConfiguring Task Worksheets– Clock: Generates time bases smaller than 24 hours (intervals in minutes orseconds). This function is frequently used with trend graphics. For example,you can define a tag that will be incremented each hour.– Change: Event related to the change of a tag in the Trigger field.Trigger field: Type a tag that triggers a change event when the value of this tagchanges. When the Trigger tag changes, IWS returns the value specified in the Valuefield to the tag. This field is used only by the change event.Time field: Specify a time interval in which an event must occur when used by clock– hours (0 to 23), minutes (0 to 59), and seconds (0 to 59). You also can use thisfield to specify a specific time to be used by calendar events. Date field: Specify a specific date on which a calendar event must occur –day (1 to 31), month (1 to 12), and year (1900 to 2099). If you leave the field blank,the event occurs daily. This field is used only by the calendar event.Tag field: Type a tag to receive the value returned by the Expression field.Expression field: Type an expression who’s return value will be sent to the tag. Thisfield is used by all events.Disable field: Contains a disable condition for the specified function. Leave this fieldblank or use an expression value equal to zero (logically true) to execute thefunction. Use an expression value equal to one and the function will not execute(Disable ≥ 1).8–34 InduSoft Web Studio v6.1 SP5
Configuring Task WorksheetsIWS Users GuideConfiguring an External Databases TaskIn addition to ODBC, IWS also supports Microsoft .NET ActiveX Data Objects(ADO.NET) for interfacing between the Application Tags database and other externaldatabases. Note:For more information about ADO.NET support in IWS — including how tocommunicate with remote databases using the Studio Database Gatewaysoftware — please see “IWS Database Interface” on page 17–1.To interface with an external database, you must first configure a connection to thedatabase and then build a worksheet that associates application tags with thedatabase fields.Database ConnectionsTo create a new connection to a target database:1. In the Workspace, open the External Databases folder and then right-click onConnections.2. Choose Insert from the pop-up menu.QuickTime and aTI<strong>FF</strong> (Uncompressed) decompressorare needed to see this picture.Inserting a New Database ConnectionThe Database Connection dialog is displayed.QuickTime and aTI<strong>FF</strong> (Uncompressed) decompressorare needed to see this picture.Database Connection dialogInduSoft Web Studio v6.1 SP5 8–35
IWS Users GuideConfiguring Task Worksheets3. In the Name field, enter the name that you want to use to reference the targetdatabase. You can create multiple database connections, but each connectionmust have a unique name.4. In the Connection String field, click the browse button … to open a standard DataLink Properties dialog. Use the dialog to configure a connection string for thetarget database. Note:The list of Database Providers shown in the Data Link Properties dialogdepends on the providers actually installed and available in the stationwhere you are running IWS. For more information about using the DataLink Properties dialog, please refer to Windows Help.5. In the User Name and Password fields, enter an appropriate login for the targetdatabase. The login should already be created on the database server, and itshould have enough privileges to read from and write to the database tables.6. If you are connecting to a remote database through the Studio DatabaseGateway, then click the Advanced button to open the advanced settings dialog,as shown below.QuickTime and aTI<strong>FF</strong> (Uncompressed) decompressorare needed to see this picture.Database Connection (Advanced) dialog7. In the Host field, enter the IP address of the station that is running the StudioDatabase Gateway software (STADOSvr.exe). In the Port field, enter the portnumber on which the software has been configured to run.Other settings to configure, if necessary:Disable Primary Keys checkbox: IWS will try to define a primary key to the tablein order to speed up the queries. If you are using a database that does notsupport primary keys (e.g. Microsoft Excel), then you should check thisbox.Disable Milliseconds in Date/Time Columns checkbox: IWS will try to includemilliseconds when saving a date/time in the database. If you are using adatabase that does not support milliseconds, then you should check thisbox.8. Click OK to close the dialog and save the connection configuration.8–36 InduSoft Web Studio v6.1 SP5
Configuring Task WorksheetsIWS Users GuideDatabase connections are saved as XML files in the \\Config directory. Each file is given the same name as the name of theconnection (as entered in the Name field of the Database Connection dialog), withthe .XDC file extension. For example, the connection configuration DB1 is saved inthe file…\\Config\DB1.XDCDatabase Worksheet Note:This feature emulates Structured Query Language (SQL) database operations.You should be familiar with how SQL commands are formed and executed beforeyou use this feature.Database worksheets allow asynchronous execution of database operations, and theyoffer a user-friendly interface for building SQL commands. Use one of the followingmethods to create a new database worksheet:ooRight-click on the External Databases folder and choose Insert from the pop-upmenu; orChoose File → New from the main menu bar (or click the New tool on theStandard toolbar) to open the New Document dialog, select DB Worksheet, andclick OK.A new worksheet is displayed, as shown below:QuickTime and aTI<strong>FF</strong> (Uncompressed) decompressorare needed to see this picture.Database worksheets are saved in the \\Config directory, withthe .XDB file extension. Each new worksheet is automatically numbered in the order ofits creation. For example, the first worksheet created is saved in the file…\\Config\DB001.XDBInduSoft Web Studio v6.1 SP5 8–37
IWS Users GuideConfiguring Task WorksheetsDatabase worksheets are executed under the Database Client Runtime task. However,creating a new worksheet does not automatically enable the task; you must use theExecution Tasks dialog (Project → Status) to configure the task to start at runtime. Formore information, please see “Starting Runtime Modules on the Target System” onpage 6–31.Also, database worksheets run only on the server, and all triggers must be configuredwith server tags.WORKSHEET HEADERThe header of the database worksheet is configured as follows:Description field: Enter a description of the worksheet, for documentation purposes.Status field: Enter a numeric tag that will receive error codes for any databasecommand errors generated during runtime.Completed field: Enter a numeric tag that will be toggled when database commandsare successfully executed.Error Message field: Enter a tag of String type that will receive detailed errormessages.Connection combo-box: Click to select a connection to the target database. Allavailable connections are listed, as configured with the Database Connectiondialog described above.Type combo-box: Click to specify how the dataset will be selected for the worksheet.ooTable: Enter a table name and an optional filter condition. (The filter conditionis equivalent to the SQL “Where” clause.) All rows of the table that match thefilter condition are selected.SQL: Enter a custom SQL “Select” statement. Note:Table, Condition and SQL Statement can all be tags of String type, allowing you tochange the selection during runtime. However, you must release an existingselection before you open a new one; see Close Query below.Cursor Triggers area…oooSelect field: Enter any tag; when the value of the tag changes, a new cursoropens the first row of the dataset and copies those values to the tagsconfigured in the worksheet body.Next field: Enter any tag; when the value of the tag changes, the cursor moves tothe next row of the dataset and copies those values to the tags configured inthe worksheet body.Advanced button: Click to open the Advanced Cursor Operations dialog…8–38 InduSoft Web Studio v6.1 SP5
Configuring Task WorksheetsIWS Users GuideQuickTime and aTI<strong>FF</strong> (Uncompressed) decompressorare needed to see this picture.– Close Query field: Enter any tag; when the value of the tag changes, thecursor releases the selected dataset.– Previous field: Enter any tag; when the value of the tag changes, the cursormoves to the previous row of the dataset and copies those values to the tagconfigured in the worksheet body.– Total number of rows field: Enter a numeric tag that will receive the totalnumber of rows in dataset.– Current row number field: Enter a numeric tag that will receive the number ofthe current row (i.e. the position of the cursor). When a dataset is firstopened using the Select trigger, this number is 1. Each Next triggerincrements this number, and each Previous trigger decrements it.Table Triggers area…oooInsert field: Enter any tag; when the value of the tag changes, a new row isinserted with the current values of the tags configured in the worksheet body.Update field: Enter any tag; when the value of the tag changes, all rows of theselected dataset are overwritten with the current values of the tags configuredin the worksheet body.Delete field: Enter any tag; when the value of the tag changes, all rows of theselected dataset are deleted. Note:Table triggers are available only when Type is set to Table, because theseoperations work on the entire table row.WORKSHEET BODYIn the body of the worksheet, you can map application tags to the columns (fields) ofthe selected dataset. For each row of the body, enter a Tag Name and its correspondingColumn. Which columns are available depends on how the dataset is selected, and howthe dataset is selected may change during runtime, so be sure to map all necessarycolumns.InduSoft Web Studio v6.1 SP5 8–39
Chapter 9: Event SettingsThis chapter describes InduSoft Web Studio’s new logging and event-retrievalfeatures. An event can be any tag change, generating reports or recipes, opening andclosing screens, logging onto and logging off the security system, and so forth.InduSoft Web Studio saves all of these events in a log file, which can be retrieved bythe Alarm/Event Control object.Event log files are stored in the application’s \Alarm folder (the same folder whereInduSoft Web Studio saves alarm history files). The event log file names must conformto the evYYMMDD.evt format, where:YY represents the last two digits of the year in which the event log file wasgeneratedMM represents the month in which the event log file was generatedDD represents the day on which the event log file was generatedFor example, a log file for May 7, 2003 would be ev030507.evt.The event files (*.evt) are ASCII text files created according to the following format:P1|P2|P3|P4|P5|P6|P7|P8|P9|P10|P11|P12|P13P1|P2|P3|P4|P5|P6|P7|P8|P9|P10|P11|P12|P13...P1|P2|P3|P4|P5|P6|P7|P8|P9|P10|P11|P12|P13P1 = File version (Current > 1)P2 = Event Type. 1 > SECURITY SYSTEM. 2 > DISPLAY. 3 > RECIPE. 4 > REPORT. 5 > CUSTOM MESSAGES. 6 > SYSTEM WARNING. 7 > LOG TAGSP3 = Event Time (DD/MM/YYYY HH:MM:SS.SSS)P4 = Tag NameP5 = Tag ValueP6 = Source (Not used)P7 = User NameP8 = User Full NameP9 = Event MessageP10 = StationP11 = CommentP12 = Previous ValueInduSoft Web Studio v6.1 SP5 9–1
IWS Users GuideEvent SettingsP13 = Time Difference (Bias)Configuring the Events SettingsUse the steps to configure the event-retrieval feature: Select the Database tab. This tab contains a new icon called Event Settings:Database Tab: Event Settings Right-click the Event Settings icon and select Open from the pop-up to open the EventSettings dialog:Selecting Event SettingsEvent Settings Dialog9–2 InduSoft Web Studio v6.1 SP5
Event SettingsIWS Users Guide Configure the parameters on the Event Settings dialog as follows:– Enable event logger check-box: Enable (check) this box to enable event-logging.– Disable text box: Type a tag into this field. If the tag value is other than 0 (false),InduSoft Web Studio automatically disables the Event Logger.– Security System check-box: Enable (check) this box to include security systemevents in the historic event file. IWS logs the following security system events:* Log On / Log Off users* User created/removed using the CreateUser() or RemoveUser() functions* User blocked/unblocked using the BlockUser() or UnblockUser()functions* User blocked by the security system after several attempts to enter aninvalid password* Password expired* Password modified* Invalid Log On attempt– Display check-box: Enable (check) this box to include screen Open and Closeevents in the historical event file.– Recipe check-box: Enable (check) this box to include recipe load, save, init, anddelete events in the historical event file.– Report check-box: Enable (check) this box to include reports saved to disk orsend to printer events in the historical event file.– Custom Messages check-box: Enable (check) this box to include events generatedby the SendEvent(strEvent) function in the historical event file.– System Warning check-box: Enable (check) this box to include general systemwarnings (such as Division by zero, Attempted to access invalid arrayindex, and so forth) in the historical event file. IWS logs the following systemwarning events:* Errors that occur when sending alarms by email* Tag was blocked/unblocked* Division by zero* Connection/Disconnection of the remote security system– Tags check-box: Enable (check) this box to enable and log tag changes in thehistorical event file. Configure the tags you want to log in the Tags table asfollows:* Tag Name column: Type the name of the tag you want to log in the event file.* Dead Band column: Type a value for comparing and filtering acceptablechanges.For example, if you specify a Dead Band value = 5 for a tag value = 50 and thetag value changes to 52, the system will not register this variation in theevent log file, because the variation is less than 5. However, if the tag valuechange is equal to or greater than 5, the system will save the new value tothe history file.* Message column: Type a string (message) related to this tag change. You canspecify tags in messages using the {tag name} syntax.The Tags parameter can be useful if you want to generate a log file of events that arenot necessarily alarm conditions (for example, Motor On, Motor Off, and so forth).InduSoft Web Studio v6.1 SP5 9–3
IWS Users GuideEvent SettingsUse the History Format combo-box to save events data in either the Proprietary historyfile format from IWS or to an external SQL Relational database. The options for bothare as follows:Proprietary– File Format: Text (UNICODE). IWS uses the vertical bar character (|) to separatethe fields.– Default Path: …\\Alarm\EVYYDDMM.EVT , where:DatabaseYY = Two last digits of the yearMM = MonthDD = Day– Database Type: Chosen by the User– Default Table Name: EventHistoryThe information saved in the history file is described in the following table.Field Name Data Type RemarksVersionEvent_TypeEvent_TimeIntegerIntegerTimeStampThis field is created only when the File Format is Proprietary. Currentversion: 0021: SECURITY SYSTEM2: DISPLAY3: RECIPE4: REPORT5: CUSTOM MESSAGES6: SYSTEM WARNING7: LOG TAGSEvent_Info String Tag NameTimestamp indicating when the event occurred.When the File Format is Proprietary, IWS saves the Event Time in thefollowing format: MM/DD/YYYY HH:MM:SS.MSS.Value Real Tag value when the event occurredSource String Name of the task that generated the eventUser String User logged when the event occurred.User_Full String Full name of the user logged when the event occurred.Message String Event messageStation String Name of the station (computer) where the event occurred.CommentPrevious_ValueDeletedBiasStringRealBooleanIntegerComment (optional) typed by the operator when the event occurred. Thisfield only exists for Version >=2Tag value that occurred before the event. This field only exists for Version>=20: Event message was not deleted1: Event message was deletedThis field is created only when the File Format is Database.Difference (in minutes) from the Time Stamp columns and the GMT time.This field only exists for Version >=29–4 InduSoft Web Studio v6.1 SP5
Event SettingsIWS Users GuideLast_UpdateTimeStampTime Stamp when the register was created/modified. This field is used tosynchronize the databases when using the Secondary Database in additionto the Primary Database. This field is created only when the File Format isDatabase.Tip:When saving the Events in a SQL Relational Database (File Format =Database)you can customize the name of the columns created in thedatabase by editing the .APP file as follows:[EventLogger]=For example:[EventLogger]Event_Info=InformationMessage=Event_MessageFor detailed information about saving events history files, including instructions forconfiguring database settings, see Chapter 17: IWS Database Interface.InduSoft Web Studio v6.1 SP5 9–5
IWS Users GuideEvent Settings9–6 InduSoft Web Studio v6.1 SP5
Chapter 10: CommunicationThis chapter explains how you enable InduSoft Web Studio applications tocommunicate (exchange data values) with other applications, remote devices (such asa PLC or transmitters), and any devices that implement OPC or DDE Servers.To enable communication, you configure the task worksheets provided by IWS.Instructions for configuring these worksheets are provided the following sections:Configuring a Driver: Explains how to configure a Driver worksheet to implement acommunication protocol (OPC, TCP/IP, or DDE).Configuring OPC: Explains how to configure an OPC worksheet to managecommunication between local or remote OPC Clients and Servers.Configuring TCP/IP: Explains how to configure a TCP/IP worksheet to managecommunication between two IWS applications.Configuring DDE: Explains how to configure a DDE worksheet to managecommunication between local or remote DDE Clients and Servers.Use the Comm tab to access all worksheets configured to establish communication withanother device or software using available protocols.Workspace: Comm TabThe folders on the Comm tab are described on the following pages.InduSoft Web Studio v6.1 SP5 10–1
IWS Users GuideCommunicationConfiguring a DriverA communication driver is a DLL containing specific information about the remoteequipment and implements the communication protocol. To develop a newcommunication driver, InduSoft provides a driver toolkit. Consult InduSoft for furtherinformation.The Drivers folder allows you to define the communication interface (or interfaces)between the project and remote equipment; such as a PLC, a single-loop, andtransmitters. Note:Consult the Help menu for a description of the functions and characteristics thatare standard for all drivers. When developing an application, you can also referto the specific documentation provided with each communication driver. Thisdocumentation is usually located in the DRV directory.To configure a communication driver, you must specify the interface parameters (forexample, the station address and the baud rate), specify the equipment addresses,and then link them to InduSoft tags.Use one of the following methods to add or remove a configured driver:Right-click on the Drivers folderSelect Insert → Drivers from the menu barBoth methods open a Communication Drivers dialog, which displays a list of availabledrivers.QuickTime and aTI<strong>FF</strong> (Uncompressed) decompressorare needed to see this picture.Communication Drivers Dialog BoxUse the parameters on this dialog, as follows:Available Drivers field: Lists all available drivers and a brief description of each.Help button: Click to open the Help menu, which contains detailed configurationinstructions for the driver currently highlighted in the Available Drivers field.Select>> button: Click to select the driver currently highlighted in the Available Driversfield.10–2 InduSoft Web Studio v6.1 SP5
CommunicationIWS Users GuideSelected Drivers field: Lists all selected drivers and their descriptions (if available).Remove button: Click to remove a driver currently highlighted in the Selected Driversfield.When you click OK in the Communications Driver dialog, you create a subfolder for theselected driver(s) in the Drivers folder located on the Comm tab.You can right-click on a driver subfolder to access the Settings option, which opens theCommunications Parameters dialog.QuickTime and aTI<strong>FF</strong> (Uncompressed) decompressorare needed to see this picture.Sample Communications Parameters Dialog BoxSerial Encapsulation field: Enables serial drivers to communicate with modem, TCP/IPor UDP connections. This setting is supported only for serial drivers developedwith the UNICOMM library, which includes most of the serial drivers available inthe product. Caution:The option Modem is not supported for Pocket PC v3.00 or older. Note:This section covers only the Direct option, which enables the driver to connectusing a normal serial channel. Please refer to Using TCP/IP and UDPEncapsulation and Using Modem Connections below for more information onother encapsulation modes. “Serial Encapsulation Tests” lists the driversthat have been tested with modem, TCP/IP and UDP connections.COM field: Click to select a serial communication port.Baud Rate, Data Bits, Stop Bits, and Parity fields: Click to select parameters for a serialport configuration.Long1, Long2, String1, and String2 fields: These fields are driver custom settings. In theexample above, the the driver uses Long1 to set up the error detection method andString1 to define the PLC family type.InduSoft Web Studio v6.1 SP5 10–3
IWS Users GuideCommunicationAdvanced button: Click to open the Advanced settings dialog. Use this dialog tochange the default driver parameters.QuickTime and aTI<strong>FF</strong> (Uncompressed) decompressorare needed to see this picture.Advanced Settings Dialog BoxSpecify or change the default driver parameters as follows:Timeout (ms) area– Start Message field: Specify the timeout for the message start.– End Message field: Specify the timeout for the message end.– Interval between char field: Specify the timeout between each character.– Wait CTS field: Specify the timeout for the Clear to Send wait.Handshake area– Control RTS drop-down list: Specify whether to use the “Request to Send”control.– Verify CTS drop-down list: Specify whether to use the “Clear to Send” type ofverification.Disable DTR check box: Click (enable) this box to disable the DTR function (the driverwill not set the DTR signal before starting the communication).Enable IR check box (available on the Windows CE platform only): Click (enable) thisbox to enable the serial driver to use an Infrared interface (COM2 port) instead of astandard serial port to communicate with the device (such as the PLC, I/O,hand-held computers, and so forth).Protocol area– Retries field: Type a numeric value to specify how many times the driver willattempt to execute the same communication command before considering acommunication error for this command.– Station field: Some slave drivers such as the Modbus Slave (MODSL) require aslave network address. Use this field to specify the slave address.Buffers length (bytes) area– Tx Buffer field: Specify the transmission buffer length (in bytes).– Rx Buffer field: Specify the reception buffer length (in bytes).10–4 InduSoft Web Studio v6.1 SP5
CommunicationIWS Users GuideSimultaneous Requests area (available only on selected drivers):– Maximum field: Specify the maximum number of requests that may be sentsimultaneously to all connected devices.– Maximum per station field: Specify the maximum number of requests that may besent simultaneously to a single device. Note:The maximum number of simultaneous requests depends on the device andprotocol specifications. Please consult the device manufacturer’sdocumentation.IWS provides two interfaces, which you can use to configure the driver (associatingtags from the InduSoft application to device addresses):MAIN DRIVER SHEET: Provides the easiest method for configuring communicationbetween InduSoft application tags and device addresses. This interface allows youto automatically group tags to provide the best performance during runtime. Youcannot use this interface to control the time needed to scan a group of tagsindividually.STANDARD DRIVER SHEETS: Allows you to control the time needed to scan a group oftags individually.You can use both sheets at the same time.USING TCP/IP AND UDP ENCAPSULATIONMost of the serial drivers available in IWS allow the use of TCP/IP or UDP/IPencapsulation. The encapsulation mode has been designed to provide communicationwith serial devices connected to terminal servers on your ethernet or wirelessnetworks. A terminal server can be seen as a virtual serial port. It converts TCP/IP orUDP/IP messages on your Ethernet or Wireless network to serial data. Once themessage has been converted to a serial form, you can connect standard devices thatsupport serial communications to the terminal server. The following diagram providesone example of applying this solution:TCP/IP EncapsulationInduSoft Web Studio v6.1 SP5 10–5
IWS Users GuideCommunicationYou can enable the encapsulation by following the steps below: Right-click on the driver’s folder, and select Settings form the menu that displays.This will give you access to the communication parameters:QuickTime and aTI<strong>FF</strong> (Uncompressed) decompressorare needed to see this picture. In the Serial Encapsulation field, select TCP/IP or UDP/IP:QuickTime and aTI<strong>FF</strong> (Uncompressed) decompressorare needed to see this picture.Selecting a Serial Encapsulation The following fields are available:IP Address field: Specify the IP Address for the Terminal Server. This field acceptstags between curly brackets.Port Number field: Enter the TCP/IP or UDP/IP port number.Status Tag field: This field is available only when using TCP/IP. The tag on this fieldreceives the value 1 when the TCP/IP connection is established; otherwise, itreceives 0.Server Mode field: The TCP/IP encapsulation allows the Server Mode, making theremote client responsible for establishing the connection to enable thecommunication.10–6 InduSoft Web Studio v6.1 SP5
CommunicationIWS Users GuideUSING MODEM CONNECTIONSMost of the serial drivers available in IWS allow the use of modem connections. Themodem connection has been designed to enable communications with remote serialdevices connected through a phone line. The following diagram provides one exampleof applying this solution:Modem ConnectionYou can enable the modem connection by following the steps below: Right click on the driver’s folder, and select Settings from the menu that displays.This will give you access to the communication parameters:QuickTime and aTI<strong>FF</strong> (Uncompressed) decompressorare needed to see this picture. In the Serial Encapsulation field, select Modem:QuickTime and aTI<strong>FF</strong> (Uncompressed) decompressorare needed to see this picture.Selecting a ModemInduSoft Web Studio v6.1 SP5 10–7
IWS Users GuideCommunication Caution:The option Modem is not supported for Pocket PC v3.00 or older. The following fields are available:Name drop-down list: Select the modem that the driver will use to establish theconnection. If you do not know the modem name, use the Auto Detect option. TheAuto Detect 1 will use the first modem available, Auto Detect 2 will use the second, AutoDetect 3 will use the third, and Auto Detect 4 will use the fourth.Phone field: Enter a phone number that the driver will use to connect to the remotedevice. This field accepts tags between curly brackets.Settings button: Click on this button to configure the modem settings. The windowthat displays when you click on this button depends on the operating system thatyou are using and on the modem type.Caution:The settings configured by clicking on this button are not saved with yourapplication. The information is saved on the operating system registry, andthey are valid only in the computer that you are interacting with. If youinstall your application on another computer, you will have to reconfigurethese settings.Connection button: Click to open the Connection Control window. The defaultconnection settings should suffice for most of the applications. However, you cantake full control over the connection, and also enable incoming calls, by clickingon this button.QuickTime and aTI<strong>FF</strong> (Uncompressed) decompressorare needed to see this picture.Connection Control Dialog– Dial out trigger field: When the value of the tag configured in this field changes,the driver will try to connect to the remote device. If the connection has alreadybeen established, the command is ignored. You do not have to use this field ifyou are using Auto Connect.– Hang up trigger field: When the value of the tag configured in this field changes,the driver will disconnect from the remote device. If the device is disconnectedthe command is ignored. You do not have to use this field if you are usingDisconnect call if idle for more than.– Auto Connect field: When this option is enabled, the driver will try to connect tothe remote device before sending any information. If the connection fails, thenext attempt will be made after the Retry Interval has expired.10–8 InduSoft Web Studio v6.1 SP5
CommunicationIWS Users Guide– Disconnect call if idle for more than field: When this option is checked, the driver willautomatically disconnect from the remote device if no communication isperformed after the time you specified.– Enable incoming calls field: Check this option if you want to enable the driver toreceive calls from the remote device. You can use the Hang up trigger to dropthe call once it has been established. Notice that one driver can use bothincoming calls and outgoing calls.Status area– Code field: Enter with a tag that will receive one of the following codes when thedriver is running:CodeDescription0 Disconnected1 Connected2 Dialing3 Dropping4 Closing line– Description field: Enter with a tag that will receive a complete description of thecurrent status. The description is associated with the Code field; however, itbrings some additional information about the current status.SERIAL ENCAPSULATION TESTSMost of the serial drivers should work with every serial encapsulation mode. However,most of the drivers were developed before encapsulation modes had been created. Thefollowing table lists the drivers fully tested with certain encapsulation modes; if thedriver that you intend to use is not listed and you are unsure if it will work, pleasecontact your distributor.Driver Modem TCP/IP UDP/IPMODSL ⌧ ⌧ ⌧ABKE ⌧ ⌧ ⌧MODBU ⌧ ⌧OMETH ⌧ ⌧ = Item has been tested = Item has not been testedInduSoft Web Studio v6.1 SP5 10–9
IWS Users GuideCommunicationConfiguring the Driver WorksheetsThis section explains how to configure the MAIN and STANDARD DRIVER SHEETs (orCommunication tables) to associate application tags with the device addresses. Youcan configure multiple Driver worksheets—each of which is divided into a Headersection and Body section. The MODBU driver will be used for demonstrationpurposes. Note:Not all drivers require a MAIN DRIVER SHEET. Some drivers only require oneStandard Worksheet. Consult the driver documentation for specificinstructions.CONFIGURING THE STANDARD DRIVER WORKSHEETUse the following steps to create a new Standard Driver Worksheet: From the IWS development environment, select the Comm tab, located below theWorkspace pane. In the Workspace pane, expand the Drivers folder and right-click the MODBUsubfolder.When the pop-up menu displays, select the Insert option:Inserting a Driver WorksheetThe Driver worksheet (.drv) contains two sections: Header: Contains all the information about the reads and writes commands Body: Contains the operator’s addresses10–10 InduSoft Web Studio v6.1 SP5
CommunicationIWS Users GuideConfiguring the HeaderThe Driver worksheet header contains configuration information required for thedriver’s functions. Initially, you must create a new Driver Configuration worksheet foreach area with which you want to communicate.Header Section of Driver WorksheetThe header contains the following fields:Description: Type a description of the worksheet, such as area types, their ranges,and if the worksheet is Read, Write, or Both. This description displays in theWorkspace, in the Drivers folder.Increase read priority: For read worksheets (and there can be more read worksheetswith the same read trigger or enabled when idle) and a write event happens, theworksheet with the highest priority will be the first worksheet on the next readingcalled by the read trigger or the “read when idle” event.Read Trigger: Contains a tag that always generates a read event when value of thetag in the field changes.Enable Read when Idle: Contains a tag or value that always enables a continuous readwhen it the value is greater than zero.Read Completed: Contains a tag value that toggles when a read event is finished.Read Status: Contains a tag that always has its value filled with an integer value,when a read event finishes. If this value equals zero, the event is completedsuccessfully. If any other value displays, the event completed with an error. Youcan view the error message in the Logwin module (for NT/2000) or check theMODBU.MSG file in the InduSoft Web Studio's DRV directory.Write Trigger: Contains a tag that generates a write event for the entire worksheet,whenever the value of the tag changes. IMPORTANT!When using this feature, the driver writes the tag value to the PLCs memory.This operation writes using blocks, from the first worksheet operator up tothe last. If there is an operator that has not been declared in the worksheet,and its address is between the first and the last block, the tag will receive thevalue zero. Therefore, be sure about what you want to write when using thistrigger, and verify whether there is any kind of hole in the worksheet that cancause problems for the system or the PLC's program.InduSoft Web Studio v6.1 SP5 10–11
IWS Users GuideCommunicationEnable Write on Tag Change: When the value of one of the tags in the body is differentfrom the write trigger, IWS writes the changed tag in the worksheet (its value isgreater than zero).Write Completed: Contains a tag value that toggles when a writing event finishes.Write Status: Contains a tag that always fills with an integer value, when a readingevent finishes. If this value is equal to zero, the event is successful. Any other valueindicates an error. You can view the error message in the Logwin module (forNT/2000) or check the OMPLC.MSG file in the InduSoft Web Studio's \DRVdirectory.Station: Must (if indicated in the driver’s help file) contain the CPU's ID, UnitNumber, or PLC Address it relates to this specific worksheet. Each driver has adifferent syntax for this field.For example, the GE Fanuc SNP driver allows you to identify the PLC using allASCII characters, but the OMRON Host Link Protocol allows from only 1 to 31addresses called Unit Numbers.Typically, you use the address of the PLC in a device network.You can also enter a tag between curly brackets (for example: {tag}) Notes: You cannot test the existence of tags entered inside curly brackets (orentered in a different form from tags in other fields), because they have notbeen created in the Tags database yet. In other words, if you type anuncreated tag, the system cannot work properly. Station is a string field and must be filled in correctly or the driver will notwork properly.Header: Must contain the worksheet header. This field is extremely important. Eachdriver has a different syntax for this field; however, you must type something likethe operator’s type, followed by the initial address.The following table contains some examples:Driver Header MeaningMODBUS 4X:100 4X indicates that this worksheet will communicate with the HoldingRegisters, from the address 100 on. In the AEG 984 case, from theaddress 400100 on.OMPLC (HostLink)IR:0IR indicates that this worksheet will communicate with the I/O and InternalRelays, from the address 0 on. In the C200H case, from the addressIR00000 on.FANUC (SNP) %M %M indicates that this worksheet will communicate with the %M discreteinternal operator. There’s no initial address to this driver.ABKE (DF1) N7:0 N7 indicates that this worksheet will communicate with the N7 file, fromthe address 0 on. In the PLC-5/40 case, from the address N7:0.AS511 (SiemensPG Port)DB5:10DB5 indicates that this worksheet will communicate with the Data Blocknumber 5, from the Data word 10 on.10–12 InduSoft Web Studio v6.1 SP5
CommunicationIWS Users GuideSo, for each driver this syntax can vary. Most of the time, this is the address of thePLC in a device network.For example, let’s use the MODBUS syntax:Where:: is the reference with which you want to communicateFor example, if the header is 4X:1, IWS will read the worksheet from 4000001until the highest offset configured in the Address column.You can use the following references:0X: Coil Status1X: Input Status (read only)3X: Input Register (read only)4X: Holding RegisterID: Report Slave (read only)There are no limits for the initial address, but be careful when specifying addresslimits. For example, on the PLC there is no 30500. The Header field accepts thesyntax 3X:500, but the runtime will not find this register.Where Read Only is indicated, the write functions will not work. It is not safe tospecify write for the Input Status, Input Registers, and the Report Slave functions.This field can also be filled with a tag between curly brackets (for example: {tag}). Note:As with the Station field, you cannot test the existence of tags entered insidecurly brackets (or entered in a different form from tags in other fields), becausethey have not been created in the Tags database yet. In other words, if youtype an uncreated tag, the system cannot work properly.When you first create a new Driver worksheet, the field is blank. After you place thecursor on this field (even you try to make it blank again) IWS automatically insertsthe default 0X:1 string. From this point on, you cannot make the field blank again.You can however, change the value to another valid header. Min / Max: Becomes enabled after you enable ( ) the check-box. When selected, thisparameter enables a range of values that can be converted into an engineeringformat. These fields determine the minimum and maximum range of values. Forexample, memory holds values from 0 to 4095 meaning 0% to 100% in the userinterface. This setting takes effect for all tags in the worksheet. In this example, thetag parameters Min and Max must be set 0 to 100 respectively.InduSoft Web Studio v6.1 SP5 10–13
IWS Users GuideCommunicationConfiguring the BodyThe Driver worksheet’s body section assigns the PLC's memory address to declaredtags and handles the engineering units.Body Section of Driver WorksheetThe Body section contains four columns:Tag Name: Contains tags used by the communication driver.Address: Contains addresses to read and write tag values to in the equipment.As with the Header field, this column is different for every driver. Typically, you typethe offset from the initial address you configured for the Header field. In some cases,you can indicate the specific Address bit.For our driver example case, type the offset from the initial address you configuredfor the Header field. You cannot enter a negative offset—the value 0 will overwrite anegative value.Div / Add / Max / Min: Configure as follows:Column Range of Values MeanDivAddMinMaxAny Integer orRealAny Integer orRealAny Integer orRealAny Integer orRealIn read commands: Tag = (Host value) / DIVIn write commands: Host value = Tag * DIVIn read commands: Tag = (Host value) + ADDIn write commands: Host value = Tag – ADDDefines the minimum value assigned for the tag, when thecorresponding host’s value is equal to the value defined in the field Minof the Driver worksheet’s Header.Defines the maximum value assigned for the tag, when thecorresponding host’s value is equal to the value defined in the field Maxof the Driver worksheet’s Header. Notes:For read operations: =(() / Div)+ AddFor write operations: = ( - Add) * DivIf you do not configure the columns as specified in the preceding table, thecolumns will not be configured and the Driver worksheet tags will receive thesame value as the address configured.10–14 InduSoft Web Studio v6.1 SP5
CommunicationIWS Users GuideUse the following steps to specify header tags: Specify the following tags in the Driver worksheet Header fields. All of the tags will bearrays, and you must type each element on each worksheet.For example, RdTr[1] in the Read Trigger field of the ABKE001.DRV worksheet, andRdTr[5] in the ABKE005.DRV worksheet, and so forth.TagNameSize Type DescriptionRdTr 0 Boolean Boolean tag that will be on the "Read Trigger" fieldsRdEn 0 Boolean Boolean tag that will be on the "Enable Read when Idle" fieldsRdCpl 0 Boolean Boolean tag that will be on the "Read Complete" fieldsRdSt 0 Integer Integer tag that will be on the "Read Status" fieldsWrTr 0 Boolean Boolean tag that will be on the "Write Trigger" fieldsWrEn 0 Boolean Boolean tag that will be on the "Enable Write when Idle" fieldsWrCpl 0 Boolean Boolean tag that will be on the "Write Complete" fieldsWrSt 0 Integer Integer tag that will be on the "Write Status" fieldsStation 0 String String tag that will be on the "Header" fieldHeader 0 String String tag that will be on the "Station" field Specify TAG_DRV as an Array tag, size 10, for the communication tags.InduSoft Web Studio v6.1 SP5 10–15
IWS Users GuideCommunication Configure a Driver worksheet and a PLC Driver screen to look like the followingfigure:Configuring the MODBU Driver WorksheetPLC Driver Screen10–16 InduSoft Web Studio v6.1 SP5
CommunicationIWS Users GuideCONFIGURING THE MAIN DRIVER SHEET (MDS)When you add the MODBU driver to your application, the program automatically addsthe MAIN Driver Worksheet (MDS) to the MODBU driver folder as shown:Selecting the Main Driver SheetYou can use the MDS to associate IWS tags to addresses in the PLC. Most MDSparameters are standard for any driver. Use the following instructions to configure theparameters that are specific to the MODBU driver: Double-click on the Main Driver Sheet icon to open the following worksheet:Main Driver Worksheet Configure the following fields on this worksheet:– Station field: Type the number of the equipment station within the network. Thesyntax in this field varies with each communication driver. Refer to theappropriate driver’s documentation for further information. You can configurea tag name (string) between curly brackets in this field. In this case, the tagvalue will be the Station used by the driver. Therefore, you can change thestation dynamically during the runtime.Tip:Configuring a string tag between curly brackets in the Station field ofthe Main Driver Sheet (MDS) is especially useful when configuringapplications for redundant PLCs. Changing the value of the tagconfigured in the Station field, you can switch automatically from oneInduSoft Web Studio v6.1 SP5 10–17
IWS Users GuideCommunicationPLC to the other in case of a failure of the primary PLC (hot/Stand-by).– I/O Address field: Type the address of each PLC register, using the followingsyntax:: (for example, 4X:20) or:. (for example, 4X:20.6)Where:Type is the register type. Type one of the following: 0X, 1X, 3X, 4X, FP, FPS,FP3, FP3S, DW, or ID.Address is the register address of the device.Bit is the bit number (from 0 – 15) of the word address. This parameter isoptional and can be combined with 3X- or 4X-type addresses only.Caution:You must use a non-zero value in the Station field and you cannot leave thefield blank.10–18 InduSoft Web Studio v6.1 SP5
CommunicationIWS Users GuideExecuting the DriverAfter adding the driver to a project, Studio sets the project to execute the driverautomatically when you start the runtime environment.To verify that the driver runtime task is enabled and will start correctly, perform thefollowing steps: Select Project > Status from the main menu bar.The Project Status dialog displays:Project Status Dialog Verify that the Driver Runtime task is set to Automatic.– If the setting is correct, click OK to close the dialog.– If the Driver Runtime task is set to Manual, select the Driver Runtime line. When theStartup button becomes active, click the button to toggle the Startup mode toAutomatic. Click OK to close the Project Status dialog. Start the application to run the driver.InduSoft Web Studio v6.1 SP5 10–19
IWS Users GuideCommunicationConfiguring OPCThe OPC folder allows you to configure OPC interfaces between the application and anOPC server. The InduSoft OPC Client module enables the IWS system to communicatewith any device that implements an OPC server. Before using the InduSoft OPC Clientmodule, you must install and configure the OPC server on the machines running yourapplication.On the client machine, use the OPC Client Configuration program to configure theserver identifier, communication parameters, and the items you want to connect. Toaccess the client configuration, add a new OPC Client document to the "COMM" table.Configuring an OPC ClientUse the following steps to configure an OPC Client: Select the Comm tab, right-click the OPC folder and insert a new OPC Clientworksheet. Select a registered OPC Server (CimQuestInc.IGOPCAB) from the Server Identifiercombo-box to register InGear OPC AB. Create a new set of tags to communicate with the OPC Server, as shown: In the OPC Client worksheet, type OPC_Status in the OPC Status field. In the first Tag Name column row, type OPC_N7_0.10–20 InduSoft Web Studio v6.1 SP5
CommunicationIWS Users Guide To associate this tag to the OPC Server item, right click on the Item column andclick OPC Browser and browse all the configured OPC Server items. Select the N7_0item.Select N7_0Your OPC Client worksheet should look like the following:OPC Client WorksheetThe OPC Client worksheet contains the following fields:Description: Type a description of the OPC module for documentation purposes only.(The OPC Client module ignores this information.)Server Identifier: Type the name of the server you want to connect. If the server isalready installed on the computer, you can select the server name from the list.Disable: Type a tag or a constant with a value other than zero, to disablecommunication with the OPC server. Specify zero, or leave the field blank to enablecommunication.InduSoft Web Studio v6.1 SP5 10–21
IWS Users GuideCommunicationRead Update Rate (ms): Specify how often the server should update this group (inmilliseconds). Specify zero to indicate the server should use the fastest practicalrate.Percent Deadband: (valid for analog items only): Specify how much percent change inan item value should cause a notification by the server. Status: Current status. Good status is 1.Remote Server Name: Node name or IP address of server on node network.Read after writing check-box: Check this check-box force the OPC Client worksheet toexecute a synchronous read command. This will read the value from an item fromthe OPC Server just after writing a value to this item. This option must be used toguarantee synchronization between the value of the tags on IWS and the itemsfrom the OPC Server, when the PLC program overwrites the values written by IWSthrough the OPC Server.Accept Tag Name in the Item column check-box: When this option is checked, the textconfigured between curly brackets in the Item field is resolved as a Tag Name(string tag). In this case, the value of this tag is used as the name of the item fromthe OPC Server, allowing the user to point to different item names during theruntime, by changing the value of the tag(s) configured in the OPC Clientworksheet (Item column).When the Accept Tag Name in the Item column option is unchecked, all charactersconfigured in the Item column are considered part of the Item name (including thecurly brackets).Tag Name: Type the names of tags linked to the server items.Item: Type the name of the server's items. After selecting an OPC Server, you canselect items from the Server using the OPC Browser. Right-click in the Item fieldand select the OPC Browser option. Tip:You can configure a tag name between curly brackets {TagName} in thisfield, allowing the user to change the item names dynamically, during theruntime.Scan: Specify one of the following:– Screen: IWS performs an update when you open a screen containing thespecified tag.– Always: IWS performs an update in the Read Update Rate specified in theworksheet header.Div field: Specify the division constant when scale adjustment is required. Thisvalue is a division factor in a read operation and a multiplication factor in a writeoperation.Add field: Specify the addition constant when scale adjustment is required. Thisvalue is a addition factor in a read operation and a subtraction factor in a writeoperation.To run the OPC client run-time module, you can choose to run it automatically onstart up, or run the module manually by selecting Project > Status from the menu bar.After running this program, a small icon displays in your system tray.To close the OPC client run-time module, right-click the icon in the system tray, andclick Exit.10–22 InduSoft Web Studio v6.1 SP5
CommunicationIWS Users Guide Note:IWS and CEView also provide an OPC Server communication module namedStudio.Scada.OPC. This module starts automatically when any OPC Client(local or remote) attempts to connect to the Studio.Scada.OPC server. AnOPC Client can exchange data with IWS tags (Application Tags, System Tags,and Shared tags) using the OPC interface.In addition, you can start the OPC Server module automatically when youstart the application. Select the OPC Server module in the Project > Statusdialog, click the Startup button, and specify Automatic. Tip:You can also use the OPC interface to exchange data between remote stationsrunning IWS or CEView. You must configure the OPC Client in one station andyou must execute the OPC Server in the other station.OPC TroubleshootingWhen you are using OPC and have problems establishing communication, you shouldfirst verify the messages in the LogWin.If you are using Windows CE, there are two ways to check the log:1. Remote LogWin2. Local LogFor information about using these logs, please refer to "Using the LogWin Module (NTand CE)" in the Users Guide and Technical Reference Manual.If you find error messages in the log, look them up in this manual/help system, andfollow the documented steps for solving the problems. (Use + F to find them inthe manual; use the Index to find them in the context sensitive help system.)If you feel that you need to contact your distributor for technical support, make surethat you provide them with the following information:1. Log file2. Software vendor and product name of the OPC Server/Client that you are using3. If possible, a copy or an evaluation version of the OPC Server for testing purposes4. The contact information for your OPC Server/Client technical supportThree possible errors and their resolutions are listed below: SecurityError Code: 0x80070005 or -2147024891Reason for error: When the OPC Client tries to connect to the OPC Server, the DCOMlayer usually requires authentication. The computer that is running the OPCServer needs to recognize the user logged on to the OPC Client computer, and sucha user needs to have privileges to access the OPC Server.Solution: The first step is to create a single user in both computers that hasAdministrator privileges and the same password. Log on with this user to bothends, and then try to establish the connection.If you cannot use the same user in both computers because of some specificrequirement of your application, or if the problem persists even after you havelogged on as the same user, please read the documents below. They will help yousolve the security issues:InduSoft Web Studio v6.1 SP5 10–23
IWS Users GuideCommunication1. DCOM Security Configuration – The DCOM Tutorial athttp://www.opcactivex.com/Support/DCOM_Config/DCOMConfigUtility/dcomconfigutility.html2. Using DCOM with Windows XP + SP2 athttp://www.indusoft.com/Using_DCOM_w_WINXPSP2.pdfName ResolutionError: Couldn't create connection with advise sink, error: -2147022986(0x80070776)Reason for error: There is a problem resolving the computer name.Solution: This problem can be solved by specifying the IP address of the serverinstead of specifying the computer name.Proxy for Windows CEError: OPCServer: IIndCP::Advise - Could not query callback interface:0x80040155Reason for error: Your Windows CE device is missing the OPCCOMN_PS.dll.Solution: You should download the .dll to the device and register it. The .dll shouldbe available with your Studio distribution, most probably in \ Redist\Wince \\If you do not find the .dll in the folder for your processor, contact your Studiodistributor.Configuring an OPC ServerThe InduSoft Web Studio OPC Client module enables the InduSoft Web Studio systemto communicate with any device that implements an OPC Server. See themanufacturer’s documentation for configuration instructions.To communicate with a third-party OPC Client and have IWS as the OPC Server, youneed to be sure that the Project > Status > Studio Scada OPC Server is set to Automatic. All of thetags in our database will be automatically available. You can have multipleapplications. Only the current application’s tags are available.10–24 InduSoft Web Studio v6.1 SP5
CommunicationIWS Users GuideConfiguring TCP/IPThe IWS TCP/IP Client/Server modules enable two or more InduSoft applications tokeep their databases synchronized. These modules use InduSoft’s TCP/IP protocol tomake the communication between the applications.Before using the IWS TCP/IP Client/Server modules, you must install and configurethe TCP/IP protocol on the machines that will run these modules.Configuring the ClientOn the client machine, you must use the TCP/IP Client Configuration worksheet toconfigure the Server IP address and the tags you want to share with the server. In the Workspace, select the COMM tab and right-click the TCP folder to insert a newTCP worksheet. Configure the following fields:– Description: Type a description of the worksheet for documentation purposesonly. The TCP/IP Client module ignores this field.– Connection Status: Type a tag name. The TCP/IP Client module updates this tagaccording to connection status. If the tag value is 0 (zero), then the connectionis OK. Otherwise, the Windows Socket library returns an error code.– Disable: Type a tag name in this field. When this tag has any value other than 0,this TCP/IP worksheet will be disabled. Using this field, you canenable/disable the TCP/IP Client worksheet during the runtime.– Server IP Address: Type the server IP Address. The entry can be a string or youcan use a tag enclosed by brackets. For example, if you fill this field with{tag_name}, the TCP/IP Client module will try to connect to the server indicatedby the tag_name tag.– Tag Name: Type the tags you want to share with the server. If the tag is an arrayor a class (or both), every element and member is shared. You should type thetag name only in this field — without specifying the index or class member. Ifyou specify an index or a class, the TCP/IP Client module ignores it.– Remote Tag: Type the name of the tag to be linked with the tag specified in the TagName field. This field is optional. If you leave it in blank, the same tag name willbe used for both the client and the server. Warning:If you need to share an array, then the tag in the server should contain the samenumber of elements as the tag in the client. If the tag is a class, then the classdefinition should be the same in both server and client applications. If you do notfollow these rules, unpredictable results will occur.Setting Custom ParametersYou can configure the following parameters for your Application Configuration (.APP)file (select Project > Settings on the main menu bar):[TCP] Port: TCP/IP port number. Default is 1234. This parameter should be thesame in both the client and server machines.SendPeriod: Time in milliseconds before the client/server module will update the tagvalues of the other machine. Default is 250.InduSoft Web Studio v6.1 SP5 10–25
IWS Users GuideCommunicationConnectRetryTimeout: Time in seconds before the client should retry to connect to theserver. Default is 30.Only the client module uses the ConnectionRetryTimeout.You can run the TCP/IP Client Module automatically or manually. From the mainmenu bar, select Project → Status. On the Execution Tasks tab, set the TCP/IP Client Runtime toManual or Automatic.After running this program, a small icon will display in your system tray.Configuring the TCP/IP ServerOn the server machine, you do not have to configure anything. You just have to runthe IWS TCP/IP Server module. In the development environment window, go to theProject Settings dialog and set the TCP/IP Server to run automatically. From the mainmenu bar, select Project → Status. On the Execution Tasks tab, set the TCP/IP Server toAutomatic. When running this program, a small icon will display in your system tray.To close the IWS TCP/IP Server module, right-click on the icon in the system tray, andselect Exit.10–26 InduSoft Web Studio v6.1 SP5
CommunicationIWS Users GuideConfiguring DDEThe DDE folder allows you to configure a DDE Client configuration to a DDE Serverapplication such as Excel (or any other Windows program supporting this interface).Dynamic Data Exchange (DDE) is a protocol for dynamic data exchange betweenWindows applications, such as Excel. A DDE conversation is an interaction betweenserver and client applications. IWS provides interfaces that run as clients or asservers. See DDE Client Runtime and DDE Server in the Execution Tasks (Project → Status).To run as a server, start the DDE or NetDDE server task as described in ExecutionTasks.To run as a client, configure the DDE interface worksheet on the Comm tab.Network Dynamic Data Exchange (NetDDE) is an extension of DDE that works acrosscomputers on a network.To run IWS as a server to a NetDDE connection, you must start the DDE Serverapplication.To run IWS as a client to a NetDDE connection, use the same DDE interfaceworksheets with the proper configuration to address a IWS application. Notes: When running NetDDE, IWS accepts the WRITE triggers only. To read data, youmust configure a write command on the server computer. By default, the DDE Client module from IWS supports DDE Servers that handlestring data in the UNICODE format. If the DDE Server handles string data inthe ASCII ANSI format, the following setting must be configured manually inthe .APP file (you can use Notepad to edit this file):[Options]DDEANSI=1InduSoft Web Studio v6.1 SP5 10–27
IWS Users GuideCommunicationConfiguring DDE ClientTo open a new DDE worksheet, right-click on the DDE folder and click the promptscreen.A new DDE worksheet displays:DDE WorksheetThe DDE worksheet dialog is divided into two areas:Header area (top section), contains information for the whole group and definesthe tags to start the reading and writing and to receive connection statusBody area (bottom section), where you define tags in the application and itemsrelated to the DDE server applicationEvery DDE interface is based on addressing an application using the following threestructures:Application NameTopicItem10–28 InduSoft Web Studio v6.1 SP5
CommunicationIWS Users GuideConfiguring the DDE ServerThe first task is to find these identifiers in the DDE Server application.Use the parameters in the DDE client worksheet Header area as follows:Description field: Type a description of the DDE worksheet for documentationpurposes.Application Name field: Type the DDE server application name.Topic field: Specify a topic in the server application.Connect field: Type a tag to control the connection of the IWS DDE client and DDEserver application. When this tag is set to 1, it requests a connection to the server.If the connection is not possible or if it fails, IWS sets the tag to zero again. If theconnection is OK, this value remains set to 1.Read Trigger field: Type a tag to command a reading of the table. When this tagchanges value, IWS generates polling to the DDE server. You can use thisparameter with local DDE only; you cannot use it with NetDDE servers.Enable Read when Idle field: Type a tag value higher than zero to enable a reading ofthe equipment.Read Status field: Contains the status of the reading command.Write Trigger field: Type a tag enabling IWS to generate poke commands to the server.Enable Write on Tag Change field: Type a tag value higher than zero to enable thecommunication driver to check continuously for changes in a tag value in theworksheet. When the driver detects a change occurs, it writes the changed tag onthe equipment, along with the tag’s address.Write Status field: Contains the status of the writing command.Use the DDE client Body area parameters as follows:Tag Name field: Type a tag to read or write the IWS database from the DDE serverapplication.Item field: Type the ITEM part of the DDE address on the server. Refer to yourserver software documentation for information about the proper syntax for APP,TOPIC, and ITEM.You can configure the Topic and Item fields with tags on the address using thesyntax: text {tag}. IWS evaluates the value of {tag} to a string and uses it on theaddress. For example:– Topic: topic_{tag_topic_name}_example– Item: {tag_item_name} or A{tag_number}Configuring a NetDDE connection is similar to configuring a DDE connection, exceptfor the Header Application name and topic. Before starting your tests, verify that youenable the DDE Server on the station with which you want to exchange data. Note:When connecting to servers other than IWS, please refer to the serverdocumentation for information about the proper syntax of APP, TOPIC, and ITEM.Use the NetDDE Client worksheet Header parameters to define the tags that startreading and writing, and tags that receive the connection status, as follows:Application Name field: Type \NDDE$, where must be a valid network computer name.InduSoft Web Studio v6.1 SP5 10–29
IWS Users GuideCommunicationTopic field: Type the UNISOFT$ topic name to connect to another IWS station.Use the DDE client worksheet Body parameters to relate each tag to each ITEM part ofthe DDE server address, as follows:Tag Name field: Specify the IWS local database tag name that is related to someremote tag name.Item field: Specify the remote tag name that is related to the local tag name.10–30 InduSoft Web Studio v6.1 SP5
CommunicationIWS Users GuideInduSoft Web Studio v6.1 SP5 10–31
Chapter 11: Configuring a Security SystemYou use the Security System dialog to create groups and users, and to configure theiraccess privileges to InduSoft Web Studio tools and applications.To access this dialog, simply right-click the Security folder on the Database tab andselect Settings from the pop-up menu.Security System DialogThis dialog contains the following features: Enable Security System check-box: Check ( ) this box to enable the IWS SecuritySystem.Main Password button: Opens the Security System Main Password dialog so you candefine passwords granting access to the security system.Groups button: Opens a Groups dialog, where you create and maintain user groups.Users button: Opens a Users dialog, where you create and maintain users.VK pane: Virtual Keyboard type used for the Security System dialogs (LogOn,Change Password, and so on). You need to enable the Virtual Keyboard option on theProject > Settings > Runtime Desktop interface before configuring the Virtual Keyboardfor this interface.Entering a PasswordWhen you click the Main Password button, the Security System Main Password dialogopens so you can enter a password for accessing the InduSoft Web Studio SecuritySystem.Security System Main Password DialogInduSoft Web Studio v6.1 SP5 11–1
IWS Users GuideConfiguring a Security SystemThis dialog contains two fields:New Password field: Type a password.Confirm Password field: Retype the same password to confirm it.If the passwords are different, IWS will prompt you to type it again. IMPORTANT!After defining your password, you must use that password each time you accessthe Security System, therefore it is mandatory that you remember it. Note:Applications developed in InduSoft Web Studio version 6.1 SP2 or later usecase-sensitive passwords — that is, passwords created with both upper andlowercase characters must be entered the same way by the user.Applications developed in earlier versions of IWS use case-insensitive passwords.Defining GroupsThe Group Account dialog enables you to create and maintain user groups,enable/disable operations, and set security level ranges for development and runtimesystems.You access this dialog by clicking on the Groups Account button on the Security Systemdialog. Alternatively, you can open the Groups folder located in the Security folder onthe Database tab, or select Insert → Security Group from the main menu bar.Group Account DialogThe features on this dialog include:Group Account combo-box: Identifies the group to which a user belongs. Note:You cannot delete the Guest group (it is the default group).11–2 InduSoft Web Studio v6.1 SP5
Configuring a Security SystemIWS Users GuideSecurity Level – Development fields and Security Level – Runtime fields: Defines the securitylevel for a group (0 to 255).Every object used for data input on a screen (such as input commands, sliders, orscreens) has a Security Level field. If the object’s security level is not in the groupsecurity range of the user logged in at the moment, then that object will bedisabled. A level 0 (zero) means that the object is always enabled.Engineering Access check-boxes: Controls which engineering (development) tasksusers in this group can access when they log on. IMPORTANT!You also can set the security level for documents (such as worksheets andscreens) to protect them in the development environment.Runtime Access check-boxes: Controls which runtime modules users in this groupcan access when they log on.New button: Opens the New Group Account dialog used to create new groups.Delete button: Deletes the currently selected user group.Before setting up your security system, you must decide which groups and users youwant to configure. You must define the rights of each group in your environment.Use the following procedure to create these groups: In the Workspace, select the Database tab and double-click on the Security folder toview the subfolders. Right-click the Group folder and select Insert Group from the pop-up menu:Inserting a GroupInduSoft Web Studio v6.1 SP5 11–3
IWS Users GuideConfiguring a Security SystemThe Group Account dialog displays:Group Account DialogRemember, you cannot delete the default group called Guest, so you must create anew group, as follows. Click the New button, and when the New Group Account dialog displays, type agroup name into the field provided. (For this example, type Operation.) Click OK toclose the dialog.Entering the Group Name Return to the Group Account dialog and if the new account name is not alreadydisplayed, select Operation from the Group Account combo-box.11–4 InduSoft Web Studio v6.1 SP5
Configuring a Security SystemIWS Users Guide Configure the access rights for this group as shown:Operation Access Rights Click the New button again and create the Maintenance group. Click OK to close theNew Group Account dialog. Select Maintenance from the Group Account combo-box and configure the access rightsfor the group as follows:Maintenance Access Rights Finally, repeat the procedure once more to create the Development group account.InduSoft Web Studio v6.1 SP5 11–5
IWS Users GuideConfiguring a Security System Select Development from the Group Account combo-box and configure the followingaccess rights:Development Access Rights Click OK to save this configuration. Notes: Each group has a range for the level in development and runtime. In some worksheets(for example, in the Math worksheet), you can set an access level to provide thegroup with access to configure that worksheet. When users log into the system they must be associated with a group in thespecified access level range (development) for that worksheet. You also can configure access levels for buttons so that only authorized userscan execute commands (scripts) configured for those buttons in the runtimeenvironment.11–6 InduSoft Web Studio v6.1 SP5
Configuring a Security SystemIWS Users GuideDefining UsersNext, you must create new users and associate these users to the group accounts youjust created. Use the following steps: In the Workspace, select the Database tab and double-click on the Security folder toview the subfolders. Right-click the Users folder and select Insert User from the pop-up menu.Inserting New Users Note:Alternatively, you can access the User Account dialog from the Users folderlocated in the Security folder on the Database tab, or by selecting Insert → Userfrom the main menu bar.The User Account dialog displays:User Account DialogRemember, you cannot delete the default user called Guest, so you must createnew users, as follows.InduSoft Web Studio v6.1 SP5 11–7
IWS Users GuideConfiguring a Security System Click the New button, and when the New User Account dialog displays, type a username into the field provided. (For this example, type Operator_1.) Click OK toclose the dialog.Creating Operator_1 User To associate this user with a group account, return to the User Account dialog andverify that Operator_1 is displayed in the User combo-box. Select Operation from the Security Group combo-box.Operator User Account To specify a password for this user, click the Settings button, and when the Settingsdialog displays, type oper_1. Click OK to close the dialog. Reopen the User Account dialog and add the next user as follows:– Click the New button and when the New User Account dialog displays, typeMaintEng_1 into the User Name field. Click OK to close the dialog.– Associate this user to the Maintenance group account and then click theSettings button to define the main_1 as their password.Creating the MaintEng_1 User11–8 InduSoft Web Studio v6.1 SP5
Configuring a Security SystemIWS Users Guide Reopen the User Account dialog once more and add the last user as follows:– Click New and create the Developer_1 user.– Associate this new user to the Development group account and specify deve_1 astheir password.Creating the Developer_1 User Click OK to save the configuration.Now, if you expand the Security folder, you should be able to open all of the subfoldersand verify all the groups and users that you created.Expanded View of Security Groups and Users Note:You also can use the CreateUser function to create new users. Within theapplication, users created in this manner will appear in the Users folder.InduSoft Web Studio v6.1 SP5 11–9
IWS Users GuideConfiguring a Security SystemSETTINGS BUTTONYou can use the User is blocked check-box and the Settings button (which replaces thePassword button used previously) to control a user’s access to the application. You canaccess these features from the User Account dialog.Use the following steps to open this dialog and configure user access: In the Workspace, expand the Security folder and right-click on a user name. When the pop-up menu displays, select Properties to open the User Account dialog:Security – User Properties: User Account Dialog If necessary, click the User is blocked check-box to block the selected user. Click the new Settings button to open the Settings dialog:User Account: Settings Dialog Configure the parameters on this dialog as follows:– User Full Name text box (optional): Type the user’s full name.– New Password text box: Type the user’s password.– Confirm Password text box: Re-type the user’s password. When you are finished, click OK to apply the changes and close the Settings dialog. Note:Applications developed in InduSoft Web Studio version 6.1 SP2 or later usecase-sensitive passwords — that is, passwords created with both upper andlowercase characters must be entered the same way by the user.Applications developed in earlier versions of IWS use case-insensitive passwords.11–10 InduSoft Web Studio v6.1 SP5
Configuring a Security SystemIWS Users GuideADVANCED BUTTONYou can use the Advanced button to control a user’s access to the application. You canaccess these features from the User Account dialog.Use the following steps to open this dialog and configure user access: In the Workspace, expand the Security and Groups folders, and then right-click ona group name. When the pop-up menu displays, select Properties to open the Group Account dialog.Right-Click Properties Click the Advanced button to open the Advanced dialog:Group Account: Advanced DialogInduSoft Web Studio v6.1 SP5 11–11
IWS Users GuideConfiguring a Security System Configure the parameters on the Advanced dialog as follows:– Options: Allow the user to configure the Advanced Options for the Group.Field Remarks SyntaxMinimum Password SizePassword agingE-signature time-outDisable E-signatureAll users assigned to this group must provide apassword containing at least the minimum number ofcharacters. If a user tries to create a password withless than the required number of characters, InduSoftWeb Studio will reject the password and display awarning message. Configuring the value 0 in this fieldallows the users to enter passwords with any numberof characters during the runtime.Longevity (in days) of the password for all usersassigned to this group. After the specified number ofdays, InduSoft Web Studio will force users assignedto this group to change their passwords. When theuser tries to log in, the Change Password dialogdisplays automatically and the user cannot completethe log-in process until they provide a new password.The password never expires when configuring thevalue 0 in this field.Time-out period (in minutes) for the E-signature.Users assigned to this group must enter their UserIDand password before the specified timeout periodexpires to execute commands requiring an electronicsignature. Before the time-out time expires, the useris asked for a password only – the systemautomatically assumes the username logged in thelast electronic signature. The system resets thetime-out counter just after an electronic signature isexecuted.When the value in this field is TRUE (different fromzero), the E-signature is disabled for the wholeapplication. When configuring a tag in this field, youcan enable/disable the E-signature dynamicallyduring the runtime.Tag or NumberTag or NumberTag or NumberTag or Number Note:You can check the number of hours left to expire the password (based onthe Password aging setting) by using the built-in functionGetUserPWDAging().Also, by default, the user must type a password different from the previouspassword, unless the following setting is configured in the.APP file:[Security]ChangePasswordMode=111–12 InduSoft Web Studio v6.1 SP5
Configuring a Security SystemIWS Users Guide– Auto Log Off: Allows you to log-off the current user automatically.Field Remarks SyntaxLog Off afterCount time after logonCount time after last actionNumber of minutes after which the current user mustbe logged off automatically. If this field is left in blank(or with the value 0), the current user is never loggedoff automatically.When this option is selected, the current user isautomatically logged off after the period of timeconfigured in the Log Off after field elapsed sincewhen the current user was logged on the system.When this option is selected, the current user isautomatically logged off after the period of timeconfigured in the Log Off after field elapsed since thelast action (mouse or keyboard action) wasperformed by the current user.Tag or NumberRadio-buttonRadio-button Note:When logging off the current user, the Guest user (default user name) isautomatically logged on the system. Therefore, it is recommended torestrict the rights for the Guest user.– Account Auto Lock-up: Allows you to block a user after attempting to log-on this user witha wrong password for a number of times.Field Remarks SyntaxEnableLock-up account afterReset counter afterWhen checked, the users assigned to this group canbe blocked automatically during the runtime.Maximum number of times a user can try to log on toan account. If the user exceeds the specifiedmaximum number of attempts (provides an invalidpassword) within the period of time specified in theReset counter after field, InduSoft Web Studio willlock the user account automatically.Defines how long after an invalid log-on attempt,InduSoft Web Studio will wait (in minutes) until itresets the log-on attempts counter. When typing avalid password, the log-on attempts counter is resetautomatically.Check-boxTag or NumberTag or NumberInduSoft Web Studio v6.1 SP5 11–13
IWS Users GuideConfiguring a Security System Note:When a user exceeds the specified number of log-on attempts, InduSoft WebStudio automatically blocks the account and will not reset the counter — evenafter the Reset counter after time expires. The System Administrator must resetthe user account by disabling (unchecking) the User is blocked check-box on theUser Account dialog or by executing the UnblockUser() function.A red circle surrounding a user name in the Workspace indicates that the useris blocked. In addition, the User is blocked box is enabled (checked). The followingfigures are examples that indicate that the Eng user is blocked:Example: User is Blocked When you are finished, click OK to apply your changes and close the Advanceddialog.Remote Security SystemIf your system applications connect through a TCP/IP link, it is now possible todesignate one of your computer stations as the Central security system, from whichother stations can use the Users and Groups definitions. The following figureillustrates this configuration:Remote Security System11–14 InduSoft Web Studio v6.1 SP5
Configuring a Security SystemIWS Users GuideUse the following procedure to configure a central security system: Right-click the Security folder on the Database tab and select Settings from thepop-up menu to open the Security System dialog:Right-Click Security Settings Enable (check) the new Use preferentially the Remote Security System check-box todesignate a remote security system.If the remote applications successfully connect to the security system from theServer station, they will use the security system configured on the Server station.In this case, any change implemented in the security system of the Server stationwill be assumed automatically by the remote applications. Also, the securitysystem functions (such as CreateUser(), RemoveUser(), ChangePassword(),and so forth) will update the Server station’s security system — even if thefunctions are executed from the remote applications. As a result, all applicationson a distributed system can share the same security system settings.If the applications cannot connect because the remote system is not running orcannot be reached, a message (similar to the following) will be logged in the Outputwindow and saved in the event file:Error connecting to Remote Security Server ‘192.168.1.255’In addition, the application(s) will revert to using the local computer’s securitysettings. The remote applications attempt to connect to the Server station’s securitysystem only when there is an event associated with the security system (such as auser logging on). In other words, there is no polling between the remote applicationsand the Server station during runtime.InduSoft Web Studio v6.1 SP5 11–15
IWS Users GuideConfiguring a Security SystemSetting the Security Access LevelYou can use the Security Level-Development check-boxes to set a unique range of accessvalues for each user group. You also can set a unique access range for any InduSoftWeb Studio worksheet (Alarm, Math, Recipe, Report, Scheduler, TCP Client, Trend, andthose not available on CE: DDE Client, OPC Client, and ODBC).If you click on any part of the worksheet body, you can activate the Edit → Access Leveloption from the main menu bar, which opens the Security dialog so you can assign anAccess Level to that worksheet.Security DialogAssigning an access level to a worksheet means that a user would have to have anaccess level that falls within the specified Security Level- Development range to editthat worksheet.For example, UserA of GroupA has a security access level range of 0-10 and UserB ofGroupB has a security access level range of 5-15. To continue the example: Math Worksheet 001 has Access Level = 1 Math Worksheet 002 has Access Level = 7 Math Worksheet 003 has Access Level = 12 Math Worksheet 004 has Access Level = 20Consequently, Only UserA can access Math Worksheet 001 Both users can access Math Worksheet 002 Only UserB can access Math Worksheet 003 Neither user can access Math Worksheet 00411–16 InduSoft Web Studio v6.1 SP5
Configuring a Security SystemIWS Users GuideLogging On/OffAfter defining the user names and passwords, you use the Logon utility (Project → Logon)to log users on and off.Alternatively, you can use the to the InduSoft Web Studio Scripting Languageactivation functions LOGON( ) and LOGO<strong>FF</strong>( ) to log users on or off.Log On DialogUse the features of this dialog as follows:User Name field: Enter the user name to log in.Password field: Enter the user password.Log Off button: Click to log off the current user. Note:When a Logoff is executed, the Guest user is automatically logged on.InduSoft Web Studio v6.1 SP5 11–17
Chapter 12: Testing and Debugging Your ApplicationThis chapter explains how to use different IWS tools to test and debug your projectapplications.Testing Your ApplicationUse the following procedures to test your application:Project > Test Display: Activates the test display mode, which allows you to configurethe application while viewing graphical dynamics online in the developmentenvironment. The test display mode does not enable you to use the Command, inputText I/O dynamics, or execute worksheets. Note:Using the Test Display menu option is the same as using theExecution Control toolbar.button on theProject > Stop display test: Stops the test display mode. Note:Using the Stop display test menu option is the same as using thethe Execution Control toolbar.button onProject > Run Application: Launches the runtime modules specified as Automatic on theProject Status dialog (Execution Tasks tab).– When you start the Viewer module, it opens the screen(s) currently beingedited.– If you do not specify any Automatic tasks, InduSoft Web Studio will launch theViewer and BGTask tasks automatically when you execute Run Application.– If you are not currently editing screens in the development environment, theViewer module opens the screen specified in the Startup screen field on theRuntime Desktop tab (Project Settings dialog). Note:Using the Run Application menu option is the same as using thethe Execution Control toolbar.button on Caution:Run Application affects the application from the target station (configured in theExecution Environment dialog). Be sure you know which target station isconfigured (local or remote) before executing the Run Application command.Project > Stop Application: Stops all runtime tasks.InduSoft Web Studio v6.1 SP5 12–1
IWS Users GuideTesting and Debugging Your Application Caution:Stop Application affects the application from the target station (configured in theExecution Environment dialog). Be sure you know which target station isconfigured (local or remote) before executing the Stop Application command. Note:Using the Stop Application menu option is the same as using thethe Execution Control toolbar.button onDebugging Applications from the Database Spy Notes: The Output Window is dockable, which means you can move it to anotherlocation in the development environment. Simply click once on the titlebar anddrag it to a new location. Release the mouse button to attach or dock thewindow to its new location. For a description of the Database Spy window and its components, review“Using the Database Spy” in Chapter 3: Working with the IWS DevelopmentEnvironment.The Database Spy is a very useful debugging tool because it enables you to:Force values to database tags and monitor the resultsExecute different functions or equationsSample Database Spy WindowThe Database Spy contains four DB tabs where you can enter groups of tags,functions, and/or expressions you want to test and debug.Each DB tab contains a spreadsheet with the following componentsName: Displays the tagname and/or function being evaluated on this line.Value: Displays returned values and equation resultsQuality: Displays a quality evaluation (Good or Bad) of the tag or function sourceContinuous: Displays whether IWS is continuously re-evaluating the tag, function,or equation.Creating different groups enables you to manage multiple testing/debugging tasks.For example, you can create one set of tags on DB1 to test a recipe function, and createanother group of tags on DB2 to test a trending function.12–2 InduSoft Web Studio v6.1 SP5
Testing and Debugging Your ApplicationIWS Users GuideTo use test your application using the Database Spy, use the following process toconfigure the spreadsheet: Double-click on an empty line in the spreadsheet to open the Object Finder dialog.You use the Object Finder dialog to add tags, expressions, or functions to the datacollection process. You can use the New Tag dialog to force values to test a tag orcollect data for a tag. When you right-click on a line in the Database Spy window, a pop-up menudisplays:Right-click to Display Options– New Value: Use this option to change the current value of the selected tag.Selecting this option opens the New value dialog. Type a value into the New Valuetext box and then click OK.New Value Dialog– Continuous: Use this option to enable or disable whether IWS continuouslyre-evaluates the selected expression or tag.– Toggle: Use this option to toggle the tag value between 0 and 1, or to reinitiate(renew) a function or expression– Insert Tag or Expression: Use this option to insert a new tag or expression.– Remove Selection: Use this option to delete the selected expression.– Hide Window: Select to close (hide) the Database Spy window.To reopen the window, you can:* Click the Toggle Database Spy Window icon on the Standard toolbar* Press Alt+2 from the keyboard* Select View → Toolbars → Database Spy to re-open the window.If you are having trouble with any function, copy the function and use the DatabaseSpy trigger to test and debug the function instead of running, tweaking, and thenrunning the function again and again in the development environment.InduSoft Web Studio v6.1 SP5 12–3
IWS Users GuideTesting and Debugging Your Application Note:Some functions, such as report(), recipe(), and math(), must be executed asBackground Tasks during runtime to work properly.Debugging Applications from the Output WindowUse the Output (LogWin) window (located next to the Database Spy) to view debuggingmessages provided by IWS. (Note: You can double-click on a line item to open thatworksheet or screen.)Sample Output WindowFor example, you can check the serial communication with a PLC. Notes: The Output window is dockable, which means you can move it to anotherlocation in the development environment. Simply click once on the titlebar anddrag it to a new location. Release the mouse button to attach or dock thewindow to its new location. See Chapter 3: Working with the IWS Development Environment for a detaileddescription of the Output window.12–4 InduSoft Web Studio v6.1 SP5
Testing and Debugging Your ApplicationIWS Users GuideThe Output window contains the following tabs:Log tab: Similar in function to the LogWin module, but provides limitedfunctionality to reduce time and memory usage within the dev environment. Ituses the first-in, first-out (FIFO) principle to manage space.Right-click in the Output window and a pop-up menu displays:Right-click to Display Options– Settings: Opens the Log Settings dialog where you specify options and tags youwant IWS to look for and log for debugging purposes.Log Settings DialogUse the two tabs on this dialog to specify the kind of information you want IWSto log and display in Output window.* Log Options tab: Enable ( ) the check-boxes to log the following events:Field Read and Field Write CommandsDDE, OPC, TCP/IP, and Trace MessagesRecipes/ReportsOpening and closing the displayLog-ons and Log-outsSerial communicationInserting date/timeInduSoft Web Studio v6.1 SP5 12–5
IWS Users GuideTesting and Debugging Your Application* Log Tags tab: Use the Add button to open the Object Finder dialog, which youcan use to create a list of tags for IWS to monitor. (Steps for using the ObjectFinder dialog are provided in “Debugging Applications from the DatabaseSpy” on page 12–2.) Use the Remove or Remove All buttons to delete tag namesfrom this list.Whenever a specified action occurs or a specified tag changes value, IWS will logthe results in the Output window—along with the driver, modules, and so forththat initiated the change.– Pause: Select (enable) to stop the data collection process temporarily, andre-select (disable) to resume data collection.– Hide Window: Select to close (hide) the Output window.To reopen the window, you can:* Click the Toggle Output Window icon on the Standard toolbar.* Press Alt+1 from the keyboard.* Select View → Toolbars → Output to re-open the window.– Cut, Copy, Delete, Select All: Become active when you select an entry in the Outputwindow.To print the results from the Output window, select the text you want to print.Right-click and select Copy from the pop-up menu. You can then paste theresults into Notepad (or another application) and print the report from there.If you established settings (using the Log Settings dialog) in the developmentenvironment, those settings will transfer to your CE station, along with theapplication, so you can create a log from the CE station. You can change thesettings from your CE station, or change the settings from Development andresend them to your CE station.X-Ref tab: Use the Object Finder field to get a tag, and to find every place in theapplication where the tag is being used. Results appear on this tab, providing pathand filename, column, row in the spreadsheet. So, if something changes in the tag,and produces unexpected or unsuccessful results, you can locate all instances ofthe tag for debugging purposes. Notes: The X-Ref tab does not work for functions, only tags, but does allow you tolook for indexes. See also “Using the Object Finder,” in Chapter 3: Working with the IWSDevelopment Environment.12–6 InduSoft Web Studio v6.1 SP5
Testing and Debugging Your ApplicationIWS Users GuideUsing the LogWin Module (NT and CE)This module provides a continuous record of activities and tags for debugging overlong periods of time. It creates a file into which you can dump the data collectionresults, and this file continues to grow in size until you stop the logging (datacollection) process. Use the LogWin module (local and remote) to record DDE, OPC,and TCP/IP transactions, activate modules, trace tags, and so forth.To initiate LogWin, go to Project → Status locally, or select LogWin from the Tools menu onthe CE box.Initiating LogWinTo debug the Web client, check (enable) Log by selecting Project → Settings from the menubar, and then selecting the Web tab. Check the Enable check-box and type in thepath+filename in the FileName option box. When finished, select OK.QuickTime and aTI<strong>FF</strong> (LZW) decompressorare needed to see this picture.Debugging the Web ClientInduSoft Web Studio v6.1 SP5 12–7
IWS Users GuideTesting and Debugging Your ApplicationUsing Remote ToolsInduSoft Web Studio offers on-line, remote application management andconfiguration (download/upload, commands, system and network diagnostics, anddebugging). You can configure and debug applications remotely using a TCP/IP link.You can use the Execution Control toolbar to execute and manage an applicationlocally or from a remote location.Execution Control Toolbar Test Display button ( ): Allows you to run in test display mode, which allows you toconfigure an application while viewing graphical dynamics on-line in thedevelopment environment. Stop Test Display button ( ): Allows you to stop running in test display mode. Run Application button ( ): Allows you to launch any runtime modules specified asAutomatic. Stop Application button ( ): Allows you to stop all runtime tasks. Caution:Stop Application affects the application from the target station (configured from theExecution Environment dialog). Be sure you know which target station isconfigured (local or remote) before executing Stop Application. Send project to target button ( ): Allows you to send the application to the remotetarget station. Execution Environment button ( ): Allows you to manage remote workstations.With this button, you can:– Connect in a remote station– Send/update system files (CE only)– Send/update application files– Send files– Import application files– Import CE logs– License remotely (CE only) Notes: For a description of the Execution Control toolbar, see Chapter 7: ConfiguringScreens and Graphics. For a description of configuring the Execution Environment, see Chapter 14:Managing Applications Remotely.12–8 InduSoft Web Studio v6.1 SP5
Testing and Debugging Your ApplicationIWS Users GuideUsing Remote Database SpyYou can use the Remote Database Spy tool (located in the Tools menu) to monitor theDatabase Spy of an IWS application project running on a remote computer. Theproject must have the Database Spy execution task enabled, and the remote computermust be in runtime.To use the Remote Database Spy tool:1. From the main menu bar, select Tools > Remote Database Spy. The RemoteComputer dialog is displayed.2. Enter the IP address of the remote computer, as shown below.Entering a Remote IP Note:The IP address 192.168.1.52 is only an example. Please verify the IPaddress of the computer to which you want to connect.3. Click OK to connect to the specified address. If the connection is good, then theRemote Database Spy window is displayed.Remote Database Spy Note:You cannot add or remove tags remotely; the Database Spy tag list must beconfigured on the remote computer itself.When you are done, click Close to disconnect from the remote computer.InduSoft Web Studio v6.1 SP5 12–9
IWS Users GuideTesting and Debugging Your ApplicationUsing Remote LogWinYou can use the Remote LogWin tool (located in the Tools menu) to monitor the Outputlog (LogWin) of an IWS application project running on a remote computer. The projectmust have the LogWin execution task enabled, and the remote computer must be inruntime.To use the Remote Database Spy tool:1. From the main menu bar, select Tools > Remote LogWin. The Remote Computerdialog is displayed.2. Enter the IP address of the remote computer, as shown below.Entering a Remote IP Note:The IP address 192.168.1.52 is only an example. Please verify the IPaddress of the computer to which you want to connect.3. Click OK to connect to the specified address. If the connection is good, then theRemote LogWin window is displayed.Remote LogWinWhen you are done, just close the window to disconnect. Note:For a detailed description of managing applications remotely, see Chapter 14:Managing Applications Remotely.12–10 InduSoft Web Studio v6.1 SP5
Chapter 13: Configuring a Web SolutionIWS allows you to create screens that can be visualized in a remote station using aregular Web browser (e.g. Internet Explorer). The station where the user can visualizethe graphical interface (screens) on the Web browser is herein called the Web ThinClient.Server StationWeb Thin ClientTCP/IP(Ethernet, Internet, Dial-UP)Studio Runtime+ApplicationWeb BrowserIWS is installed on the server station only. Also, the application (screen files, tagsdatabase, configuration worksheets, and so forth) is stored on the server only. In otherwords, you do not need to install IWS or the application on the Web Thin Clientstation(s). This solution provides a high level of flexibility because any computerphysically linked to the server station (TCP/IP link) can access the graphical screenand online/history data from the server, without installing IWS or the application onthe Web Thin Client station(s). Any computer or device (e.g. PDAs powered withWindows CE) running Internet Explorer Web browser v6.0 (or higher) can be a WebThin Client for an IWS application. Moreover, IWS provides a sophisticated SecuritySystem to prohibit unauthorized access to the application. Note:The maximum number of Web Thin Client stations connected simultaneously tothe server depends on the settings of the license installed on the server. Theuser does not have to install any license on the Web Thin Client stations.From the Web Thin Client station, you are able not only to visualize data from theserver but also to change set points and/or send commands to the server. Whenconfiguring the application, you can (optionally) disable all commands from the WebThin Client to the server station. In this case, the Web Thin Client stations can readdata from but cannot send any data to the server.All background tasks (Math, Scheduler and so forth) and communication tasks(Driver, OPC, DDE and so forth) are executed on the server station only. The WebThin Client is able to load the graphical interface configured on the server (screenswith objects and dynamics) and display the online values from the tags configuredin the server, as well as history data (Alarm, Events and Trend history data).InduSoft Web Studio v6.1 SP5 13–1
IWS Users GuideConfiguring a Web SolutionConfiguring the Application for Different ArchitecturesThis section describes the typical architectures applied for Web-based solutions andprovides examples of how to configure the IWS application for each architecture.The definitions of some of the terms used in this section are described below:Web server station: Computer or device running a Web server. The files from the \Websub-folder of the application must be stored in this computer.Data server station: Computer or device running IWS. The IWS application must bestored in this computer.This section does not describe all possible architectures, but it provides the conceptsnecessary to design and configure different scenarios based on the basic architecturesillustrated below.Architecture 1: Web server and Web Thin Clients in the samenetworkServer StationWeb Thin ClientStudio Runtime + ApplicationData Server (TCP/IP Server)Web Server (HTTP Server)TCP/IP(Ethernet, Internet, Dial-UP)This is the most common architecture as well as the simplest to configure. In thisarchitecture, both the Web server (e.g. IIS) and the data server (TCP/IP server modulefrom IWS) are running in the same computer (server station). The Web Thin Clientconnects to the Web server on the server station to download the HTML screen file.Then it connects to the data server to exchange data with IWS.Since both the Web Thin Client and the server station are connected to the samenetwork, the Web Thin Client can access the server station directly through its IPaddress (or host name).Configuration example:This example is based on the following premises: IP address of the server station on the network: 192.168.1.1Home directory of the Web server (HTTP server) on the server station: \Websub-folder of the applicationYou must type the following address on the remote Web browser to access a screen(e.g. myscreen) from the server: http://192.168.1.1/myscreen.html13–2 InduSoft Web Studio v6.1 SP5
Configuring a Web SolutionIWS Users GuideThe Project Settings > Web interface must be configured as follows:Project Settings > Web Interface Note:This architecture is adopted when the server station and the Web ThinClient(s) are directly connected to the same intranet network or via adial-up connection. If the server is connected to the internet, you mustassign a Fix IP address to the server on the internet, and the applicationmust be running in this computer. Consult your ISP provider for furtherinformation about how to get a Fix IP address for your server computeron the internet.InduSoft Web Studio v6.1 SP5 13–3
IWS Users GuideConfiguring a Web SolutionArchitecture 2: Web server and Web Thin Clients in the samenetwork; Web server and data server in different stationsWeb Server StationFiles from the \Webapplication sub-folderWeb Server (HTTP Server)Web Thin ClientData Server StationTCP/IP(Ethernet, Internet, Dial-UP)Studio Runtime + ApplicationData Server (TCP/IP Server)This architecture is especially useful when you want to isolate the Web server (HTTPserver) from the data server (TCP/IP server module from IWS). The common reasons toadopt this architecture are: Allows you to use a standard Web server station shared by several applications in the company.Some companies use one computer as the standard Web server for all web-basedapplications. For physical or safety reasons, you may not want to run the actualapplication in this computer (e.g. It is far in distance from the control room).Therefore, you can run IWS and the application in another computer (data serverstation) and copy just the web files of the application (files from the \Websub-folder of the application) to the Web server station.Hosts the Web pages on a Web site. If you want to store the Web pages on a Web site (e.g.www.mycompany.com), you can upload just the web files of the application (filesfrom the \Web sub-folder of the application) to the Web site and use it as the Webserver station. The application (and IWS) keeps running in another computer,physically connected to the internet.Enables you to use a Linux-based Web server (e.g. Apache). You do not have to install IWS onthe Web server station; therefore, if you want to use a Web server for Linux, youcan run it on the Web server station and run IWS on the data server station.Hides the IP address (or host name) of the data server station from the users on the Web Thin Clientstation. In this architecture, the user has to type the URL of the Web server stationon the Web browser (not the IP address of the data server station). This may bedesirable for safety reasons. Note:It is not necessary for IWS to be installed on the Web server station. Thefollowing components must be available on the Web server station:– Web server (e.g. IIS from Microsoft)– Files from the \Web sub-folder of the application13–4 InduSoft Web Studio v6.1 SP5
Configuring a Web SolutionIWS Users Guide Tip:When you have many data server applications in your project, you canuse this architecture to share the same Web server for all applications.For example, you can link the Web server to the data servers via a switch.This will keep the traffice in the data servers network from increasingwhile the Web Thin Clients are downloading files from the Web serverstation.In this architecture, both the Web server (e.g. IIS) and the data server (TCP/IP servermodule from IWS) are running on different computers. The Web Thin Client connectsto the Web server station to download the HTML screen file. Then it connects to thedata server station to exchange data with IWS.Since all Web Thin Client, Web server and data server stations are connected to thesame network, the Web Thin Client can access the server stations directly throughtheir IP addresses (or host names).Configuration Example:This example is based on the following premises: IP address of the Web server station on the network: 192.168.1.1 IP address of the data server station on the network: 192.168.1.2Home directory of the Web server (HTTP server) on the server station: \Websub-folder of the applicationYou must type the following address on the remote Web browser to access a screen(e.g. myscreen) from the server: http://192.168.1.1/myscreen.htmlYou must configure the Project Settings > Web interface as follows:Project Settings > Web InterfaceInduSoft Web Studio v6.1 SP5 13–5
IWS Users GuideConfiguring a Web SolutionArchitecture 3: Redundant servers and Web Thin Clientstations in the same networkServer Station #1Studio Runtime + ApplicationData Server (TCP/IP Server)Web Server (HTTP Server)Web Thin ClientServer Station #2TCP/IP(Ethernet, Internet, Dial-UP)Studio Runtime + ApplicationData Server (TCP/IP Server)Web Server (HTTP Server)This architecture is similar to Architecture 1. But in this architecture, two serverstations with the same files run the same application in redundancy. The Web ThinClient connects to the server specified by the user in the address field of the Webbrowser. If this server goes down for any reason (e.g. power failure), the Web ThinClient switches to the other server station automatically.This architecture is recommended when it is necessary a high level of availability forthe Web Thin Client stations. In other words, even if one Server Station goes down, theWeb Thin Client stations are able to get data from the other Server Station.Configuration Example: This example is based on the following premises: IP address of server station #1 on the network: 192.168.1.1 IP address of server station #2 on the network: 192.168.1.2Home directory of the Web server (HTTP server) on server station #1: \Websub-folder of the application stored on server station #1.Home directory of the Web server (HTTP server) on server station #2: \Websub-folder of the application stored on server station #2.The user must type the following address on the remote Web browser to access ascreen (e.g. myscreen) from server station #1: http://192.168.1.1/myscreen.htmlThe user must type the following address on the remote Web browser to access ascreen (e.g. myscreen) from server station #2: http://192.168.1.2/myscreen.html13–6 InduSoft Web Studio v6.1 SP5
Configuring a Web SolutionIWS Users GuideThe Project Settings > Web interface must be configured as follows: Tip:It is possible to configure two data servers that share the same Webserver. Just apply the concepts described in both Architectures 2 and 3.Project Settings > Web InterfaceAdvanced Dialog WindowInduSoft Web Studio v6.1 SP5 13–7
IWS Users GuideConfiguring a Web SolutionArchitecture 4: Web server and Web Thin Clients in differentnetworksWeb Server StationWeb Thin ClientFiles from the \Webapplication sub-folderWeb Server (HTTP Server)Web Tunneling Gateway(Intranet)TCP/IPStudio Runtime + ApplicationData Server (TCP/IP Server)Data Server StationThis architecture is common when the Web Thin Clients are connected to the servervia the internet. Usually, the data server computer (computer where the IWS isrunning) is not directly connected to the internet. In this case, the data servercomputer does not have an IP address on the internet. Therefore, it cannot beconnected directly through the internet. The Web Tunneling Gateway (WTG),developed by InduSoft, provides the routing capabilities to solve this problem.The WTG must be installed in the computer with the Fix IP Address on the internet(consult your ISP provider for further information about how to get a Fix IP Address foryour computer on the internet). This computer must have the Microsoft IIS Web serverinstalled and running. The WTG is an ISAPI extension for IIS.Follow the procedure below to install the WTG on the Web server computer:Copy the WebGtw.exe file from the \BIN sub-folder of IWS into any directory of theWeb server computer.Execute the WebGtw.exe file on the Web server computer.The WTG works as a router between the Web Thin Clients (connected to the internet)and the data server computer (connected to the intranet). The same WTG can routeinformation for more than one data server simultaneously. Note:The computer directly connected to the internet (where the WTG isrunning) is the Web server for the application; therefore, the files fromthe \Web sub-folder of the application must be stored in this computer.Configuration example:This example is based on the following premises: IP address of the Web server station (internet): 200.0.0.1 IP address of the Web server station (intranet): 192.168.1.113–8 InduSoft Web Studio v6.1 SP5
Configuring a Web SolutionIWS Users Guide IP address of the data server station on the intranet: 192.168.1.2Home directory of the Web server (HTTP server) on the Web server station: \Websub-folder of the application stored on the Web server station.The user must type the following address on the remote Web browser to access ascreen (e.g. myscreen) from the Web Server Station:http://200.0.0.1/myscreen.htmlThe Project Settings > Web interface must be configured as follows:Project Settings > Web InterfaceAdvanced Dialog WindowInduSoft Web Studio v6.1 SP5 13–9
IWS Users GuideConfiguring a Web Solution Note:If your Web server is able to provide files via HTTPS (SSL – Secure SocketLayer), you can select this option on the Advanced dialog window fromthe Project Settings > Web interface. Tip:The WTG encapsulates the protocol implemented by the TCP/IP servermodule of IWS into HTTP (or HTTPS when the SSL option is selected). Bythis way, it is not necessary to open an additional TCP Port on the firewallbetween the Web server and the Web Thin Clients. The same port used bythe Web server (HTTP or HTTPS) is used by IWS data protocol.13–10 InduSoft Web Studio v6.1 SP5
Configuring a Web SolutionIWS Users GuideInstalling and Registering the ISSymbol Control LayerISSymbol is a component designed by InduSoft that is able to display the screenscreated with IWS on the Web browser and exchange data (tag values and history data)with the TCP/IP server module of IWS. On the Web Thin Client station, the Webbrowser (e.g. Internet Explorer) is the container that hosts the ISSymbol control.ISSymbol works as a control layer between the IWS application and the Web browser –equivalent to the Java Virtual Machine for Java-based applications. This approachprovides a high level of security because ISSymbol does not allow the application toaccess the operating system directly.When the Web browser downloads the HTML page specified by the user, it checks forISSymbol control registration on the current computer. If it does not find it, thebrowser attempts to download registration from the URL specified in the Project Settings> Web > Advanced dialog. The Web browser is not able to display the screens from the IWSapplication if the ISSymbol control is not properly registered in the Web Thin Clientstation. Caution:Make sure your Web browser is enabled to download signed ActiveX controls, inorder to download ISSymbol automatically. Otherwise, you will need to registerISSymbol manually in the Web Thin Client station. Check your Web browser’sdocumentation about security settings if you have questions about how toconfigure these settings.INSTALLING THE ISSYMBOL CONTROL MANUALLYYou can also install the ISSymbol control manually in the Web Thin Client station. Theprocedure to install ISSymbol in each operating system is described below.Windows NT/2000/XP/Vista:1. Copy the following files…– \InduSoft Web Studio v6.1\Bin\ISSymbolReg.exe– \InduSoft Web Studio v6.1\Bin\ISSymbolVM.cab…and paste them into any directory of the Web Thin Client station. Make sure thatboth files are stored in the same directory.2. Run ISSymbolReg.exe to register the ISSymbol control in the Web Thin Clientstation.Windows CE:1. Copy the following files…– \InduSoft Web Studio v6.1\Redist\\\Bin\ISSymbolCE.ocx– \InduSoft Web Studio v6.1\Redist\\\Bin\IndHTTP.dll…and paste them into any directory of the Windows CE device. Make sure thatboth files are stored in the same directory.2. Execute the following command from the Windows CE command prompt:regsvrce.exe "\\ISSymbolCE.ocx"InduSoft Web Studio v6.1 SP5 13–11
IWS Users GuideConfiguring a Web SolutionFor example:regsvrce.exe "\Storage Card\ISSymbolCE.ocx"3. Save the registry settings to keep ISSymbolCE.ocx registered when you reboot theWindows CE device.Windows CE PocketPC:2. Copy the following files…– \InduSoft Web Studio v6.1\Redist\\\Bin\IndHTTP.dll– \InduSoft Web Studio v6.1\Redist\\\Bin\ISSymbolCE.ocx– \InduSoft Web Studio v6.1\Redist\\\Bin\RegSvrCE.exe…and paste them into any directory of the PocketPC device. Make sure that bothfiles are stored in the same directory.3. Execute the RegSvrCE.exe program on the PocketPC device. To registerISSymbolCE.ocx, do the following:– Select the \\ISSymbolCE.ocx file.– Select the Register option.– Click OK. Note:Internet Explorer is not able to download ActiveX controls automatically fromWindows CE and Windows CE PocketPC. Therefore, before using Windows CEdevices as Web Thin Clients, you must register the ISSymbolCE.ocx controlmanually.13–12 InduSoft Web Studio v6.1 SP5
Configuring a Web SolutionIWS Users GuideHow It WorksAfter you open the Web browser, you must type the URL for one Web page available inthe Web Server station (e.g. http://127.0.0.1/main.html) into the Address field. Atthis point, the Web Thin Client executes the following process:1. The Web browser downloads the HTML page of the screen you specified.2. The Web browser checks for ISSymbol control registration in the local computer. Ifit does not find it, the Web browser attempts to download the ISSymbol componentfrom the URL configured in the application (settings saved in the HTML page).Since the ISSymbol control is properly registered in the Web Thin Client station,the Web browser loads it.From this point on, ISSymbol takes over the communication with the serverstation, and the Web browser is used only as a host for ISSymbol.3. ISSymbol connects to the data server. You configure the data server IP Addresswith the Project Settings > Web dialog window. This setting is saved in the HTML page.4. ISSymbol prompts a window on the Web Thin Client, asking for the User Name andPassword. The data you enter is codified by Binary Control and sent to the server.The server station checks the validity of the data and whether you have the rightsto open the startup screen. If so, the process continues. If not, you are promptedwith an error message indicating that the User Name and/or Password are invalid.In this case, the process will not continue. Note:Step 4 is skipped if the Security System is disabled during the configurationof the application.5. ISSYmbol downloads the necessary files to display the screen specified by the user(screen files, tags database, translation files and so forth).6. ISSymbol connects to the data server and reads the value of the tags that aredisplayed in the screen you specified.7. ISSymbol displays the screen on the Web browser and keeps updating the objectsaccording to the values read from the server. Whenever the value of any tagdisplayed on the open screen(s) changes on the server, the new value is sent to theWeb Thin Client (and vice-versa). Therefore, there is no pooling between the WebThin Client and the server station. This method increases the communicationperformance and optimizes the traffic in the network.Notice that there are two servers in this process:Web server (HTTP Server): Provides the files from the server to the Web Thin Clientvia HTTP protocol over TCP/IP.Data server (TCP/IP Server module from IWS): Provides tag values and/or historydata from the application running on the server to the Web Thin Clientcomputer(s).Although both servers are usually running in the same computer, IWS provides theflexibility to run each server in a different station, if necessary. See Web-basedapplication typical architectures for further information.InduSoft Web Studio v6.1 SP5 13–13
IWS Users GuideConfiguring a Web SolutionTesting the ApplicationBefore you begin, use this short checklist to verify that you are ready to test yourapplication in a Web Browser: Verify that the ActiveX component ISSymbol.ocx is installed and registered. Verify that the IIS Web Server is pointing to the Home directory folder and runningor that a copy of the IWS NTWebServer.exe is running in the Home directoryfolder. Verify that the TCP/IP Server is running. VERIFY THAT APPLICATION TAGS ARE SET TO SERVER IF YOU WANT TO VIEWTHE RESULTS OF THOSE TAGS IN THE BROWSER. (REVIEW “CHANGING HOWBOOLEAN TAGS RECEIVE NUMERIC VALUESBy default, if any numeric value other than 0 (i.e. ≠0) is written to a Boolean tag, thenthe tag automatically assumes a value of 1. You can change this behavior, ifnecessary, by editing the .app file to change the followingsetting:[Options]BooleanTrueAboveZero=If BooleanTrueAboveZero is set to the default 0, then the application will behave asdescribed above. If BooleanTrueAboveZero is set to 1, then the application willbehave as follows:When you write any numeric value less than or equal to 0 (i.e. ≤0) to a Boolean tag,the tag assumes a value of 0 (false).When you write any numeric value greater than 0 (i.e. >0) to a Boolean tag, the tagassumes a value of 1 (true). Caution:This is a global runtime setting. If you only want to change how certain tags arehandled, then you should not change this setting.Sharing Tags with a Web Thin Client” in Chapter 5: Working with Tags.)To test your Web-based application, use the following steps: Click on Run application button (on the IWS main menu bar) to execute theapplication locally on your Server station.Check your Windows Task Bar and verify that the TCP/IP Server and BackgroundTasks are running. You may also note that one or more drivers are running.Background TasksDriversVerify that TCP/IP and Background Tasks are Running13–14 InduSoft Web Studio v6.1 SP5
Configuring a Web SolutionIWS Users Guide After the application screen opens, open your Internet Browser (such as InternetExplorer or Netscape) and type the URL address (being sure to include the correctHome directory) to open the .html screen from the Server station(for example, http://192.168.1.1/myscreen.html). When the Log On dialog displays in the Browser, type your log-on name into theUser Name text box, your password into the Password text box, and then click OK toopen the .html screen.Logging On Notes: If you have not defined users in the application’s Security folder, the IWSdefault User Name is Guest with no password. If you disabled any security requirements for your application, the Log Ondialog will not display. When the Log On dialog displays, it is an indication that your TCP/IP Serveris running successfully. If a problem exists with the TCP/IP Server, an errormessage will display instead.After you close the Log On dialog, the following screen displays in the Browserwindow to indicate the download status.Reporting Download StatusInduSoft Web Studio v6.1 SP5 13–15
IWS Users GuideConfiguring a Web SolutionWhen the download is complete, your application screen will display. At this point,the Web Thin Client should be reading information from the screen tags (forexample, the clock should indicate the passage of seconds).IWS Application Running in Browser13–16 InduSoft Web Studio v6.1 SP5
Configuring a Web SolutionIWS Users GuideInstalling Secure Viewer as Alternative to Web BrowserIn some situations, you may not want to have a full-featured Web browser installedand running on a plant floor station. You can install the InduSoft Secure Viewer(Viewer.exe) as an alternative to the browser. This program provides the samefunctionality as a Web Thin Client without the unwanted features of a full browser.When you start the Secure Viewer, it immediately connects to the specified Web andData Servers and loads the IWS application. No user direction is required.INSTALLING THE SECURE VIEWER ON A WINDOWS PCTo install the Secure Viewer on a Windows 2000/XP/Vista computer: Request the Secure Viewer installer from your software vendor, save it to thedesignated computer, and start it. Follow the instructions of the installation wizard. There are only two settings thatmust be configured during installation:Installing the InduSoft Secure Viewer– URL: Enter the URL or filepath of the application file (*.app) on the Web Server.– Server IP: Enter the IP address or hostname of the TCP/IP Server. Finish the installtion and click Finish to close the installer.The installation wizard automatically installs and registers the Web Thin ClientActiveX component (ISSymbol.ocx), so if you have correctly configured the URL andServer IP settings, then the Secure Viewer should be ready to go. Tip: For additional security, add the Secure Viewer to the Startup directory inWindows.InduSoft Web Studio v6.1 SP5 13–17
IWS Users GuideConfiguring a Web SolutionCHANGING THE SECURE VIEWER CONFIGURATIONThe configuration of the Secure Viewer is saved in the viewer.ini file, which shouldbe in the same directory as Viewer.exe.There are two ways to change the configuration of the Secure Viewer after it has beeninstalled. First, you can run the Viewer configuration utility (ViewerCfg.exe) thatwas also installed.Secure Viewer Configuration UtilityThe configuration utility provides the following options:Load button: Click to load a viewer.ini file into the utility for editing.Save button: Click to save your changes to the viewer.ini file.Data Server IP field: Enter the IP address (or host name) of your data server station.The data server station is the computer or device where the TCP/IP Server moduleis running.TCP Port field: Enter the port number of the data server, if it is different than thedefault port of 1234.URL field: Enter the URL or filepath of the application file (*.app) on the WebServer.Enable Splash Window option: Check (enable) this option to see a splash window whenyou start the Secure Viewer.Enable Progress Bar option: Check (enable) this option to see a progress bar while theSecure Viewer loads the application file.13–18 InduSoft Web Studio v6.1 SP5
Configuring a Web SolutionIWS Users GuideAdvanced button: Click to access additional configuration options:Secure Viewer Configuration Utility — Advanced Setting– Secondary Data Server IP field: Type the IP address (or host name) of the secondarydata server station. If the primary data server fails, the Secure Viewer willattempt to connect to the secondary data server automatically.– Web Tunneling Gateway: If you have configured a Web Tunneling Gateway to bridgeyour intranet to the Internet (see “Architecture 4: Web server and Web ThinClients in different networks” on page 13–8), then enter the address(es) for thegateway here.– Log on as Guest option: Check (enable) to have the Secure Viewer automaticallylog on as Guest, eliminating the need to enter a Username or Password.The second way to change the configuration of the Secure Viewer is to manually editthe viewer.ini file with a text editor. The structure of the file is as follows:[Options]nosplash =noprogressbar =ds1 =ds2 =dsp =wtg1 =wtg2 =url =proxyip =proxyp =ceemul =// Enable (0) or disable (1) the splash window// Enable (0) or disable (1) the progress bar// Data Server Primary// Data Server Secondary// Data Server Port// Web Tunneling Gateway Primary// Web Tunneling Gateway Secondary// URL from application file (*.app)// Proxy Address// Proxy Port// Enable (1) or disable (0) CEView emulation Tip: Remember that the viewer.ini file must be saved in the same directoryas the Secure Viewer program (Viewer.exe).InduSoft Web Studio v6.1 SP5 13–19
IWS Users GuideConfiguring a Web SolutionINSTALLING THE SECURE VIEWER ON A WINDOWS CE DEVICEYou can also install the Secure Viewer on a Windows CE device, by copying thenecessary files to the device’s non-volatile memory. To install Secure Viewer: Create and configure a viewer.ini file with the appropriate settings for theWindows CE device. (For more information about creating this file, see theprevious section.) Determine the OS version and processor type of the Windows CE device, and thenfind the corresponding sub-folder in the InduSoft Web Studio program directory.For example, for Windows CE v4.0 running on a MIPS processor, find the\Indusoft Web Studio v6.1\Redist\WinCEv4.0\MIPS\ sub-folder. Select the Secure Viewer program (Viewer.exe) and ISSymbol control(ISSymbolCE.ocx) from this sub-folder, as well as the viewer.ini file you’vealready created, and copy all three to non-volatile memory on the Windows CEdevice. Register the ISSymbol control on the Windows CE device by executing thefollowing command from the Prompt window:regsvrce.exe "\\ISSymbolCE.ocx"Example — regsvrce.exe "\Storage Card\ISSymbolCE.ocx" Save the registry settings to keep ISSymbolCE.ocx registered when you reboot theWindows CE device.Tip: Check the device manufacturer’s documentation for how to save theregistry settings. Start the Secure Viewer by running Viewer.exe.13–20 InduSoft Web Studio v6.1 SP5
Chapter 14: Managing Applications RemotelyThis chapter explains how to download an InduSoft Web Studio application to yourruntime workstation and then monitor/manage that application remotely from avariety of devices.Downloading the ApplicationAfter configuring an application and testing it locally (on your developmentworkstation), you can download the application to a remote runtime workstation thatis running IWS on Windows 2K/XP/Vista or running CEView on a Windows CEdevice.Configuring the Target Station Before you begin, verify that the Remote Agent (CEServer.exe) is running on thetarget (remote) workstation.– On a Windows platform, the CEServer.exe file is located in the \InduSoftWeb Studio v6.1\Redist\\\BIN folder (forNT, the location is the \BIN folder).– On a Windows CE device, the file is located in the \ folder. Run the CEServer.exe on the target workstation, and when the Remote Agentdialog displays, click the Setup button.Remote Agent DialogInduSoft Web Studio v6.1 SP5 14–1
IWS Users GuideManaging Applications RemotelyThe Setup dialog opens:Setup Dialog Use the parameters on this dialog to configure communication between thedevelopment and target stations:– Serial Port: Enable this button to establish a connection to the developmentstation through a serial port. Click the arrow button and select acommunication port from the combo-box list.If you click the Advanced button, the Serial Advanced Settings dialog opens.Serial Advanced Settings DialogYou can use the parameters on this dialog to control the flow of data betweenyour target and development stations:* Baud Rate: Click the arrow button to select a predefined baud rate from thecombo-box list* Control RTS: Enable ( ) this box to use a “Request to Send” control, whereIWS sends an RS-232 signal from the transmitting station to the receivingstation requesting permission to transmit.* Control CTS: Enable ( ) this box to use a “Clear to Send” control, where IWSsends an RS-232 signal from the receiving station to the transmittingstation to indicate the receiving station is ready to accept data.When you finish setting these parameters, click OK to close the SerialAdvanced Settings dialog.14–2 InduSoft Web Studio v6.1 SP5
Managing Applications RemotelyManaging Applications Remotely– TCP/IP: Enable this button to establish a TCP/IP connection to the developmentstation. Note:For performance reasons, we recommend using a TCP/IP connectioninstead of a Serial Link connection. When you are finished, click OK to close the Setup dialog, but leave the RemoteAgent program running in the remote workstation.Configuring the Development StationAfter configuring the target station to receive data, use the following steps to configurethe development station to send the application data: Select Project → Execution Environment from the main menu bar (on the developmentworkstation).Execution Environment DialogThis dialog contains the following tabs:– Target: Use this tab to specify the target station, including:* Local, Network IP address, Serial Port, or Microsoft ActiveSyncNOTE: Microsoft ActiveSync currently works only with Windows CE 3.0, 4.xand 5.0.* Connect/Disconnect the target station* Review station Status* Returns the platform (operating system + processor type) of the target stationafter connecting to it.* Install system files (or Only newer files)– Application: Use this tab to specify the application, including:* Local and Target directory paths* Specify whether to Send (the application) to target station* Send fileOnly newer files checkbox: If this checkbox is checked, then only thenewer app files will be sent to the device.Keep user files checkbox: If this checkbox was checked, then any userfiles in the application directory will be kept.InduSoft Web Studio v6.1 SP5 14–3
IWS Users GuideManaging Applications Remotely* Run/Stop the application* Review application Status– Import: Use this tab to import an application, including* Specify the To and From application path* Get From Target* Get Log File* Review application Status– CE License: Use this tab to specify License Settings and License Codes for aWindows CE license, including* Product Type* Version* Number of Web Thin Clients and Secure Viewers* Site Code* Site Key Select the Target tab and use the following options to specify the target station towhich you are going to connect.– Local: Select this button if you are going to run the application on the samestation on which you developed the application.– Network IP: Select this button and type the IP address of the target station intothe text box if you specified a TCP/IP connection when you configured thetarget station.– Serial Port: Select this button and select a port from the combo-box list if youspecified a Serial Port connection when you configured the target station.– Microsoft ActiveSync: Select this button to connect to devices on which MSActiveSync is enabled.Specifying Link Type and IP Address Click the Connect button to connect to the remote workstation. Note:If the remote workstation is a WinCE device, you can click on the InstallSystem Files button to download the CEView runtime files to the remoteworkstation.14–4 InduSoft Web Studio v6.1 SP5
Managing Applications RemotelyManaging Applications Remotely In the Workspace window, select the Application tab and click the Send to Targetbutton to download the application to the remote workstation.Specifying Link Type and IP Address Caution:When you send an application to the remote target station, the changes take effectonline. In other words, after downloading application files to the target station, thenew application(s) replace the old ones automatically – even if the application isrunning.In addition, if you uncheck (disable) the Only newer files check-box on the Applicationtab (Execution Environment dialog), IWS will remove all of the files in the targetapplication directory before downloading the new files. Note: If the application download is interrupted, IWS requests confirmation andadvises you that the application may not run properly. Using the Send app to target menu option is the same as using the Send app to targetbutton on the Execution Control toolbar.– Send file: Click to browse to the directory and select an individual file to send.– Stop button: Click to stop the application. After downloading all application files, click the Run button to execute theapplication in the remote target workstation.InduSoft Web Studio v6.1 SP5 14–5
IWS Users GuideManaging Applications RemotelyMonitoring/Managing Applications from the Remote StationAfter configuring an application and testing it locally (on your developmentworkstation), you can download the application to a remote runtime workstation thatis running under Windows 2K/XP/Vista or CEView under Windows CE. Before you begin, verify that the Remote Agent (CEServer.exe) is running on theremote target workstation. Note:The CEServer.exe file is located in the following directory on Windows2000/XP computers (for NT, the location is the \BIN folder):\InduSoft Web Studio v6.1\Redist\CEView\\BINThe file should be located in the \ folder on the WinCEdevice. After downloading all application files, click the Run button to execute theapplication in the remote target workstation.Configuring Windows CE to Automatically Run anApplicationBy default, you must manually run your finished IWS application on the Windows CEdevice, either from your PC by using the Application tab of the Execution Environmentdialog (see page 14–1) or on the device itself by clicking the Start button in the RemoteAgent dialog.However, you can configure the Windows CE device to automatically run a specifiedIWS application. To do this, edit the file CEServer.ini on the WIndows CE device toinclude the following setting:[Setup]AppName=Where is the location of the IWS application files on theWindows CE device. For example:[Setup]AppName=\Harddisk\Test\CEserverTestThe next time the Windows CE device boots up and opens the Remote Agent dialog(CEServer.exe), it will read this setting and automatically run the specified IWSapplication.There are three ways to edit the CEServer.ini file:Edit the file directly on the Windows CE device using an attached keyboard or thetouchscreen keypad. The file should be located in the same directory as theCEServer.exe file, which was installed earlier.Mount the Windows CE device as a shared volume on your PC and edit the filethere.Edit the file in the \\Redist directory before you install the systemfiles on the Windows CE device.14–6 InduSoft Web Studio v6.1 SP5
Managing Applications RemotelyManaging Applications Remotely Caution:This last method changes the default copy of CEServer.ini that is included withIWS. Use this method only if:You back up the file before editing it;You are installing the same system files on multiple, identical Windows CEdevices; andYou already know the location (file path) of the IWS application files on thedevice (perhaps by using the normal installation method on a test device).InduSoft Web Studio v6.1 SP5 14–7
Chapter 15: Scripting Languages: IWS and VBScriptWorking with the IWS Scripting Language, Expressions,and FunctionsThis section explains how to work with the InduSoft Web Studio (IWS) scriptinglanguage, expressions, and functions.Using TagsTags are variables that can receive the results of expressions specified in screens andworksheets (such as communication points in field equipment, calculation results,alarm points, and so forth). Note:We recommend that you read and understand the concepts discussed inChapter 5: Working with Tags before you read this chapter.Specifying Data TypesYou can use the IWS Scripting Language in many places, for example:Dynamic object properties in the Application BuilderScreen logic in the Application BuilderScheduler worksheetsMath worksheetsA Math worksheet has two columns:– Tag Name: Names of tags to receive results from expressions specified in theExpression column on the same line.– Expression: Mathematical expressions defined by InduSoft Web Studio.For example, Tag Name a, will receive the result of Expression (10c)-5.Example Math Worksheet IMPORTANT! No attributions are done on the Expression column. If you write A=2 in thiscolumn, IWS will compare A with the number 2. The integer result of thisexpression (Boolean value 0 if false or 1 if true) will be written to the tag in theTag Name column. The system is not case-sensitive. To add comments to an expression line, use the // characters.InduSoft Web Studio v6.1 SP5 15–1
IWS Users GuideScripting Languages: IWS and VBScriptThe following data types are acceptable: Integer numbers (32 bits): 1 23 45 -123 Floating point (8 bytes): 1.234 -775.344 Hexadecimal integer numbers (32 bits): 0x5 0xA0 0xBC4 Strings (1024 characters): “demo” “new demo”Accessing the Tags DatabaseTo write a value in the database, use the tag name directly, for example:In the following script line, the X tag will receive the sum of two tags, level andtemp:Example 1IWS allows you to read and write tags using references or pointers. You candeclare a tag being used as pointer to another tag in two ways:– As a string (a pointer to an undefined type)– As a pointer of a specific kind (recommended)Example 2In the preceding figure Valve_Fill_State is a variable of a string type that is apointer. The @pointer_to_integer variable is a pointer to integer values. Notes:The syntax @tag allows a tag to access another tag by reference.You can use any tag declared as a string as an indirect tag (pointer).Arithmetic OperatorsInduSoft Web Studio supports all the following Arithmetic operators:+ addition- subtraction* multiplication/ division> greater than< less than= equal>= greater than or equal to
Scripting Languages: IWS and VBScriptIWS Users Guide different from (unequal to) Notes:Math functions are calculated from left to right, according to a specific order foreach operator in the formula. To change the order of evaluation, enclose inparentheses the part of the formula to be calculated first. For example, thefollowing formula produces 11 because multiplication is calculated beforeaddition. The formula multiplies 2 by 3 and then adds 5 to the result:5+2*3In contrast, if you use parentheses to change the syntax, 5 and 2 are addedtogether and then multiplied by 3 to produce 21:(5+2)*3Logic OperatorsInduSoft Web Studio supports all the following Logic operators: AND AND, logic NOT NOT, logic OR OR, logic XOR exclusive or, logic & AND, bit | OR, bit ~ NOT, bit ^ XOR, bit >>n rotate right – Rotate n bits to right.
IWS Users GuideScripting Languages: IWS and VBScriptUsing FunctionsThe function tag names used in IWS must conform to the following syntax: num: Numerical tag or value str: String tag or value tag: Tag Name optNum: Optional Numerical tag or value optStr: Optional String tag or value optTag: Optional Tag NameThis syntax identifies the argument types required for each parameter of the IWSfunction.InduSoft Web Studio has more than one hundred functions ready for use. For acomplete list of available functions, see “Appendix A: Studio Functions.”Example of functions:Functions Execution 2K/XP/Vista Win CE Web ClientFalse() Synchronous If() Synchronous True() Synchronous Format() Synchronous GetBit() Synchronous Max() Synchronous Min() Synchronous SendEmail() Synchronous Log() Synchronous Play() Synchronous/Asynchronous IMPORTANT:You can use the Database Spy window to execute any math expression bywriting the expression in the Tag Name field and clicking the Toggle button.The return value of the expression will display in the Value field.15–4 InduSoft Web Studio v6.1 SP5
Scripting Languages: IWS and VBScriptIWS Users GuideOverview of VBScriptThe Microsoft Visual Script Language (VBScript), is a simple, standard and flexiblescripting language that allows you to implement logics and algorithms within the IWSapplication.IWS implements the Microsoft Visual Basic Scripting Edition 5.5 or higher. BecauseIWS hosts VBScript, the user can take advantage of all features provided by thislanguage, such as:Use syntax, operators and functions available in the languageCreate new variables and Procedures (Functions and/or Sub-routines)Access properties, methods and/or events from COM objects, including ActiveXcontrolsExecute the logics in any platform that supports VBScript, including MicrosoftWindows 2K/XP/Vista (IWS Server station), Microsoft Windows CE (CEView) andMicrosoft Internet Explorer (Web Thin Client). Caution:When creating the image for the Microsoft Windows CE device, the hardwaremanufacturer must enable the support for VBScript on it, so CEView will be ableto execute the scripts configured in VBScript language on the device. If you arenot sure if the image loaded on your device supports VBScript, please consult thehardware manufacturer.The aim of this documentation is to provide an overview about the integration ofVBScript with IWS. Furthermore, it can be used as a quick reference for the most usedfeatures of the language. For a full description of the language as well as its interfacesand functions, please consult the Microsoft documentation. At the time that thisdocumentation was written, you could read the VBScript language documentation atMicrosoft Developers Network (MSDN).InduSoft Web Studio v6.1 SP5 15–5
IWS Users GuideScripting Languages: IWS and VBScriptVBScript in IWSThe following table provides a summary of the VBScript interfaces supported by IWS:InterfaceScope for Procedures andVariablesExecutionFunctionalityGlobal Procedures Graphics and Tasks - Declaration ofProceduresGraphics Script Graphics Script interface only Server (Viewer) + Web ThinClientsScreen ScriptCommand DynamicActiveX EventsScreen where the script isconfiguredObject where the script isconfiguredObject where the script isconfiguredServer (Viewer) + Web ThinClientsServer (Viewer) + Web ThinClientsServer (Viewer) + Web ThinClients Declaration ofVariables Declaration ofProcedures Execution Declaration ofVariables Declaration ofProcedures Execution Declaration ofVariables Execution Declaration ofVariables ExecutionStartup Script All Script Sheets from Tasks Server (BGTask) Declaration ofVariables Declaration ofProcedures ExecutionScript Groups Script Group only Server (BGTask) Declaration ofVariables Execution15–6 InduSoft Web Studio v6.1 SP5
Scripting Languages: IWS and VBScriptIWS Users GuideThe following picture illustrates the scope of each VBScript interface and the orderthat they are scanned by IWS:GlobalGlobalProceduresProceduresGraphic Module(Viewer task or Web Thin Client control)GraphicsGraphicsScriptScriptBackground Task(BGTask task)StartupStartupScriptScriptScreen AScreen BScreen NScript GroupsScreen Screen ScriptScriptScreen Screen ScriptScriptScreen Screen ScriptScriptScript Script 001001CommandCommanddynamicdynamicCommandCommanddynamicdynamicCommandCommanddynamicdynamicScript Script 002002ActiveX ActiveX eventseventsActiveX ActiveX eventseventsActiveX ActiveX eventseventsScript Script NNThe illustration shows that the Global Procedures are shared by the Graphic Moduleand the Background Task. However, the other VBScript interfaces are either from theGraphic Module or from the Background Task, and they do not share variables orprocedures between them. They are independent of each other. Note:Although the Graphics Script is scanned by IWS before the Screen Scripts,the procedures and variables declared in the Graphics Script interface areNOT available for any script interface configured on the screens. You mustuse the Global Procedures interface to implement procedures that must beavailable for all screens.When writing your code in a VBScript interface, you can access any tag from the IWStags database or any function from the IWS built-in language by applying the “$”prefix to the tag/function name, as in the examples below:$Time 'Returns the value of the tag Time from the tags database$MyTag 'Returns the value of the tag MyTag from the tags database$Open("main") 'Executes the Open() built-in function to open the"main" screenTherefore, you can create scripts using built-in functions from IWS, tags from the IWStags database, VBScript functions, VBScript variables, ActiveX properties, methods orevents, and any other interface available. The IWS tags are shared by all modules fromIWS, including the Graphic Module and the Background Task.The following VBScript interfaces are available in IWS…InduSoft Web Studio v6.1 SP5 15–7
Global Procedures InterfaceGlobal Procedures - Open OptionIWS Users GuideScripting Languages: IWS and VBScriptGlobal ProceduresThis Global Procedures interface is used create a library of VBScript functions andsub-routines that can be called by any other scripting interface in IWS. Theprocedures declared here are never directly executed during runtime; they must beexplicitly called by another script. Caution:IWS will not prevent you from declaring two or more procedures with the samename. (This includes procedures imported from external files; see “ImportingProcedures from an External File” below.) However, if you do, then yourapplication may behave unexpectedly during runtime. Verify that all of yourglobal procedures are named correctly.To use the Global Procedures interface:1. In the Database tab of the Workspace, right-click on the Global Procedures folderand choose Open from the pop-up menu.The Global Procedures interface is displayed.15–8 InduSoft Web Studio v6.1 SP5
Global Procedures TreeScripting Languages: IWS and VBScriptIWS Users Guide2. Declare your functions and sub-routines in the interface. For example:Option Explicit'Keep the Option Explicit statement in the first line of thisinterface.'Procedures with global scope can be implemented here'Global variables are NOT supported in this interfaceFunction MyAdd(number1, number2)MyAdd = number1 + number2End FunctionSub MyMessage(message)MsgBox(message)End Sub Note:You can declare local variables within each procedure, but you cannot declareglobal variables in this interface. In most cases, you should use tags instead.3. Save your changes (File → Save). The functions and sub-routines are added to theGlobal Procedures folder in the Workspace.ORGANIZING PROCEDURES INTO SUBFOLDERSYou can organize declared procedures into subfolders within the Global Proceduresfolder. To organize procedures:1. In the Global Procedures interface, insert the following line before the proceduresthat you want to group together:'$region:…where is the name of the subfolder. For example:Option Explicit'Keep the Option Explicit statement in the first line of thisinterface.'Procedures with global scope can be implemented here'Global variables are NOT supported in this interfaceInduSoft Web Studio v6.1 SP5 15–9
Global Procedures SubfoldersGlobal Procedures - Import OptionIWS Users GuideScripting Languages: IWS and VBScript'$region:My FunctionsFunction MyAdd(number1, number2)MyAdd = number1 + number2End Function'$region:My SubroutinesSub MyMessage(message)MsgBox(message)End Sub2. Save your changes (File → Save). The procedures are organized into subfolders inthe Workspace.IMPORTING PROCEDURES FROM AN EXTERNAL FILEYou can also import procedures from an external file and add them to the GlobalProcedures folder. This is useful if you have a library of existing procedures that youwant to reuse in different IWS applications.To import procedures:1. Save and close all open screens and worksheets.2. In the Database tab of the Workspace, right-click on the Global Procedures folderand choose Import… from the pop-up menu.15–10 InduSoft Web Studio v6.1 SP5
Global Procedures - Import DialogScripting Languages: IWS and VBScriptIWS Users GuideThe Import - Global Procedures dialog is displayed.3. In the File field, click on the Browse button to open a standard Windows file browserand select a global procedures file. (This is a plain text file that is saved with the.gis file extension.)4. Click the Replace functions if they already exist checkbox to overwrite functions in yourIWS application with functions imported from the global procedures file (*.gis), ifthe functions have the same name.5. In the Functions area, you can import All functions from the global procedures file(*.gis), or import Only selected functions.6. Click the Import button.After the functions are imported, they should be available in the Global Proceduresfolder.Graphic Module - Graphics ScriptThe Graphics Script interface can be edited by its icon from the Graphics tab of theWorkspace:InduSoft Web Studio v6.1 SP5 15–11
IWS Users GuideScripting Languages: IWS and VBScriptThis interface can be used to execute logics on the following events, based onpre-configured sub-routines:Graphics_OnStart(): The code configured within this sub-routine isautomatically executed just once when the graphic module is started. Thisinterface is useful for initializing variables or executing logics that must beimplemented when starting the application.Graphics_WhileRunning(): The code configured within this sub-routine isautomatically executed continuously while the graphic module is running. Therate in which this sub-routine is called depends on the performance of theplatform where the application is running.Graphics_OnEnd():The code configured within this sub-routine is automaticallyexecuted just once when the graphic module is closed. Caution:Do NOT change the name of the pre-configured sub-routines. If you do, thesystem will be unable to call them automatically.On the Server (where IWS or CEView is running):The graphic module is the Viewer task.The Graphics_OnStart() sub-routine is executed once on the Server when theViewer task is launched.The Graphics_WhileRunning() sub-routine keeps being executed on the Serverwhile the Viewer task is running. The Graphics_OnEnd() sub-routine is executedonce on the Server when the Viewer task is shut down.On the Web Thin Client (Web Browser):The graphic module is the ISSymbol control.The Graphics_OnStart() sub-routine is executed once on the Web Thin Clientstation after logging in successfully.The Graphics_WhileRunning() sub-routine keeps being executed on the Web ThinClient station while the ISSymbol control is hosted by the Web Browser.The Graphics_OnEnd() sub-routine is executed once on the Web Thin Clientstation when the Web Browser is shut down (or when the ISSymbol control is nolonger hosted by the Web Browser).The variables and procedures declared in this interface are NOT available for any otherVBScript interface – they have local scope only. Note: The execution of the Graphic Script sub-routines on the server is totallyindependent of the execution on the Web Thin Client stations. The procedures and/or variables created in this interface have local scope:they can be accessed only from the Graphic Script interface of the localstation where they are being executed.Example:'Variables with local scope can be declared and initialized hereDim MyDateMyDate = Date()Dim MyValue15–12 InduSoft Web Studio v6.1 SP5
Scripting Languages: IWS and VBScriptIWS Users GuideMyValue = 100'Procedures with local scope can be implemented hereFunction AreaRec ( side1, side2)AreaRec = side1 * side2End FunctionSub CheckHiLimit (myValue, myHiLimit)If myValue > myHiLimit ThenMsgBox ("Value out of range")End IfEnd Sub' This procedure is executed just once when the graphic module is startedSub Graphics_OnStart()MsgBox("Welcome to the system!")End Sub' This procedure is executed continuously while the graphic module isrunningSub Graphics_WhileRunning()End SubIf $UserName="Guest" ThenEnd If$MyFlag=0' This procedure is executed just once when the graphic module is closedSub Graphics_OnEnd()End Sub$LogOff()Graphic Module - Screen ScriptTo edit the Graphics Script interface, right-click on the screen, and select the ScreenScript option. You can also select View -> Screen Script from the drop-down menu.InduSoft Web Studio v6.1 SP5 15–13
IWS Users GuideScripting Languages: IWS and VBScriptThis interface can be used to execute logics on the following events, based onpre-configured sub-routines:Screen_OnOpen(): The code configured within this sub-routine is automaticallyexecuted just once when its screen is open.Screen_WhileOpen(): The code configured within this sub-routine isautomatically executed continuously while its screen is open. The rate in whichthis sub-routine is called depends on the performance of the platform where theapplication is running.Screen_OnClose():The code configured within this sub-routine is automaticallyexecuted just once when the screen is closed.The variables and procedures declared in this interface are available for the VBScriptinterfaces of the screen where the Screen Script is configured. Caution:Do NOT change the name of the pre-configured sub-routines. If you do, thesystem will be unable to call them automatically. Notes: The execution of the Screen Script sub-routines on the server is totallyindependent of the execution on the Web Thin Client stations. The procedures and/or variables created in this interface have local scope:they can be accessed only from the specific screen where they areimplemented.Example:'Variables available on this screen can be declared and initialized hereDim Counter'Procedures available on this screen can be implemented hereFunction AreaCircle (radius)AreaCircle = Sqr(radius)*$Pi()End Function15–14 InduSoft Web Studio v6.1 SP5
Scripting Languages: IWS and VBScriptIWS Users GuideSub CheckLoLimit (myValue, myLoLimit)If myValue < myLoLimit ThenMsgBox ("Value out of range")End IfEnd Sub' This procedure is executed just once when this screen is openSub Screen_OnOpen()MsgBox("The screen was open!")End Sub' This procedure is executed continuously while this screen is openSub Screen_WhileOpen()If Counter
IWS Users GuideScripting Languages: IWS and VBScript Click the Config… button. Select VBScript as the Type.Use this interface to execute logics when the user clicks on the object where theCommand dynamic is applied (during the runtime) or presses the shortcut (Key)associated with the Command dynamic.Variables declared in this interface are available for this interface only (localscope). In other words, they are not available for any other object in theapplication. You cannot implement procedures in this interface. You can, however,call procedures implemented in the Global Procedures or in the Screen Scriptinterface for the same screen where the Command dynamic is configured. Note:Further information about the Command dynamic is available in chapter 3,which describes the dynamics from the screen editor.Example:'The script below will be executed when the user clicks on the object'where this dynamic is configured$MyValue = InputBox("Please enter the new set-point", "Set-point")15–16 InduSoft Web Studio v6.1 SP5
Scripting Languages: IWS and VBScriptIWS Users GuideGraphic Module - ActiveX EventsTo edit the ActiveX Events interface, select the Script option from the Events tab of theActiveX object inserted on the screen. Click the ActiveX Control icon in the Mode toolbar.The Insert ActiveX Control dialog box opens. Select the ActiveX Control that you wish to use, and then click OK. The object that symbolizes the selected ActiveX Control will display. Right-click onthis object to open the Object Properties dialog. Click the Configuration button. The Configuration dialog will open. Click theEvents tab.InduSoft Web Studio v6.1 SP5 15–17
IWS Users GuideScripting Languages: IWS and VBScript Click the … button in the Script column.Use this interface to execute logics when an ActiveX object triggers an event.Variables declared in this interface are available for this interface only (localscope). In other words, they are not available for any other object in theapplication.You cannot implement procedures in this interface. You can, however, callprocedures implemented in the Global Procedures or in the Screen Script interfacefor the same screen where the ActiveX object is configured. Note:Further information about the ActiveX Events is available in the Using theActive Objects Toolbar section of Chapter 7.15–18 InduSoft Web Studio v6.1 SP5
Scripting Languages: IWS and VBScriptIWS Users GuideExample:'The script below will be executed when the Calendar Control ActiveX'triggers its"AfterUpdate" event$MyYear = CalendarControl1.Year$MyMonth = CalendarControl1.Month$MyDay = CalendarControl1.DayBackground Task - Startup ScriptTo edit the Startup Script interface, click its icon from the Script folder, on the Taskstab of the Workspace:The code configured in this interface is executed just once when the Background taskmodule (BGTask) is started. This interface is useful for initializing variables orexecuting logics that must be implemented when the application is starting.You can declare and initialize variables and implement procedures. However,variables or procedures declared in this interface will be available ONLY to the scriptgroups from the Script task – they are not available to any VBScript interface from theGraphic Module.InduSoft Web Studio v6.1 SP5 15–19
IWS Users GuideScripting Languages: IWS and VBScriptExample:'Variables available for all Script groups from the Script task can bedeclared and initialized hereDim MyVar, CounterMyVar = 100'Procedures available for all Script groups from the Script task can beimplemented hereFunction AreaEquTriangle ( base, high)End FunctionAreaEquTriangle = (base * high) / 2Sub CheckLimits (myValue, myHiLimit, myLoLimit)If (myValue > myHiLimit Or myValue < myLoLimit) ThenMsgBox ("Value out of range")End IfEnd Sub' The code configured here is executed just once when the Background taskis startedIf $GetOS()=3 ThenMsgBox ("Welcome! This application is running under MicrosoftWindows CE operating system.")ElseMsgBox ("Welcome! This application Is running under MicrosoftWindows 2K/XP/Vista operating system.")End IfBackground Task - Script GroupsTo create a new Script Group, right-click the Script folder in the Tasks tab of theWorkspace. Select the Insert option from the pop-up menu:15–20 InduSoft Web Studio v6.1 SP5
Scripting Languages: IWS and VBScriptIWS Users GuideTo edit an existing Script Group interface, click its icon in the Script folder on theTasks tab of the Workspace:The code configured in each Script Group is executed by the Background Task. IWSscans the Script Groups sequentially (based on the number of the group) and executesonly the groups in which the condition configured in the Execution field of the ScriptGroup is TRUE (different from 0). Note:You must use the syntax supported by the IWS built-in language in theExecution field of each Script group. Only the body of the Script groupsupports VBScript language. Caution:When any Script Group is saved during the runtime (on-line configuration), theStartup Script interface will be executed again, and the current value of the localvariables of any Script Group will be reset.Variables declared in the group have local scope for that specific group only. They arenot available for any other VBScript interface. From the Script Group, you can callInduSoft Web Studio v6.1 SP5 15–21
IWS Users GuideScripting Languages: IWS and VBScriptprocedures implemented in the Global Procedures interface or in the Startup Scriptinterface; however, you cannot implement (declare) procedures in the Script Groups.Example:'Variables available only for this group can be declared hereDim myVar, myTestmyTest=1'The code configured here is executed while the condition configured inthe'Execution field is TRUEmyVar = $FindFile("c:\*.txt")If MyVar>0 Then$TagNumOfFiles = myVarEnd IfLanguage ReferenceConstantsColor ConstantsConstant Value DescriptionvbBlack &h00 BlackvbRed &h<strong>FF</strong> RedvbGreen &h<strong>FF</strong>00 GreenvbYellow &h<strong>FF</strong><strong>FF</strong> YellowvbBlue &h<strong>FF</strong>0000 BluevbMagenta &h<strong>FF</strong>00<strong>FF</strong> MagentavbCyan &h<strong>FF</strong><strong>FF</strong>00 CyanvbWhite &h<strong>FF</strong><strong>FF</strong><strong>FF</strong> WhiteComparison ConstantsConstant Value DescriptionvbBinaryCompare 0 Perform a binary comparisonvbTextCompare 1 Perform a textual comparisonDate and Time ConstantsConstant Value DescriptionvbSunday 1 SundayvbMonday 2 MondayvbTuesday 3 TuesdayvbWednesday 4 WednesdayvbThursday 5 Thursday15–22 InduSoft Web Studio v6.1 SP5
Scripting Languages: IWS and VBScriptIWS Users GuidevbFriday 6 FridayvbSaturday 7 SaturdayvbUseSystemDayOfWeek 0 Use the day of the week specified inyour system settings for the first dayof the week.vbFirstJan1 1 Use the week in which January 1occurs (default).vbFirstFourDays 2 Use the first week that has at leastfour days in the new year.vbFirstFullWeek 3 Use the first full week of the year.Date Format ConstantsConstant Value DescriptionvbGeneralDate 0 Display a date and/or time. For realnumbers, display a date and time. Ifthere is no fractional part, displayonly a date. If there is no integerpart, display time only. Date andtime display is determined by yoursystem settings.vbLongDate 1 Display a date using the long dateformat specified in your computer'sregional settings.vbShortDate 2 Display a date using the short dateformat specified in your computer'sregional settings.vbLongTime 3 Display a time using the long timeformat specified in your computer'sregional settings.vbShortTime 4 Display a time using the short timeformat specified in your computer'sregional settings.Miscellaneous ConstantsConstant Value DescriptionvbObjectError -2147221504 User-defined error numbers shouldbe greater than this value.Box Constants - Buttons and IconsConstant Value DescriptionvbOKOnly 0 Display OK button only.vbOKCancel 1 Display OK and Cancel buttons.vbAbortRetryIgnore 2 Display Abort, Retry, and Ignorebuttons.vbYesNoCancel 3 Display Yes, No, and Cancelbuttons.vbYesNo 4 Display Yes and No buttons.vbRetryCancel 5 Display Retry and Cancel buttons.InduSoft Web Studio v6.1 SP5 15–23
IWS Users GuideScripting Languages: IWS and VBScriptvbCritical 16 Display Critical Message icon.vbQuestion 32 Display Warning Query icon.vbExclamation 48 Display Warning Message icon.vbInformation 64 Display Information Message icon.vbDefaultButton1 0 First button is the default.vbDefaultButton2 256 Second button is the default.vbDefaultButton3 512 Third button is the default.vbDefaultButton4 768 Fourth button is the default.vbApplicationModal 0 Application modal. The user mustrespond to the message box beforecontinuing work in the currentapplication.vbSystemModal 4096 System modal. On Win16 systems,all applications are suspended untilthe user responds to the messagebox. On Win32 systems, thisconstant provides an applicationmodal message box that alwaysremains on top of any otherprograms you may have running.Box Constants – SelectedButtonConstant Value DescriptionvbOK 1 OK button was clicked.vbCancel 2 Cancel button was clicked.vbAbort 3 Abort button was clicked.vbRetry 4 Retry button was clicked.vbIgnore 5 Ignore button was clicked.vbYes 6 Yes button was clicked.vbNo 7 No button was clicked.String ConstantsConstant Value DescriptionvbCr Chr(13) Carriage returnVbCrLf Chr(13) & Chr(10) Carriage return–linefeedcombinationvbFormFeed Chr(12) Form feed; not useful in MicrosoftWindowsvbLf Chr(10) Line feedvbNewLine Chr(13) & Chr(10) or Chr(10) Platform-specific newline character;whatever is appropriate for theplatformvbNullChar Chr(0) Character having the value 0vbNullString String having value 0 Not the same as a zero-length string(""); used for calling externalprocedures15–24 InduSoft Web Studio v6.1 SP5
Scripting Languages: IWS and VBScriptIWS Users GuidevbTab Chr(9) Horizontal tabvbVerticalTab Chr(11) Vertical tab; not useful in MicrosoftWindowsTristate ConstantsConstant Value DescriptionvbUseDefault -2 Use default from computer's regionalsettings.vbTrue -1 TRUEvbFalse 0 FALSEVarType ConstantsConstant Value DescriptionvbEmpty 0 Uninitialized (default)vbNull 1 Contains no valid datavbInteger 2 Integer subtypevbLong 3 Long subtypevbSingle 4 Single subtypevbDouble 5 Double subtypevbCurrency 6 Currency subtypevbDate 7 Date subtypevbString 8 String subtypevbObject 9 ObjectvbError 10 Error subtypevbBoolean 11 Boolean subtypevbVariant 12 Variant (used only for arrays ofvariants)vbDataObject 13 Data access objectvbDecimal 14 Decimal subtypevbByte 17 Byte subtypevbArray 8192 ArrayErrorsError NumberVBScript Run-time ErrorsDescription429 ActiveX component can't create object507 An exception occurred449 Argument not optional17 Can't perform requested operation430 Class doesn't support <strong>Automation</strong>506 Class not defined11 Division by zero48 Error in loading DLLInduSoft Web Studio v6.1 SP5 15–25
IWS Users GuideScripting Languages: IWS and VBScript5020 Expected ')' in regular expression5019 Expected ']' in regular expression432 File name or class name not found during <strong>Automation</strong>operation92 For loop not initialized5008 Illegal assignment51 Internal error505 Invalid or unqualified reference481 Invalid picture5 Invalid procedure call or argument5021 Invalid range in character set94 Invalid use of Null448 Named argument not found447 Object doesn't support current locale setting445 Object doesn't support this action438 Object doesn't support this property or method451 Object not a collection504 Object not safe for creating503 Object not safe for initializing502 Object not safe for scripting424 Object required91 Object variable not set7 Out of memory28 Out of stack space14 Out of string space6 Overflow35 Sub or function not defined9 Subscript out of range5017 Syntax error in regular expression462 The remote server machine does not exist or isunavailable10 This array is fixed or temporarily locked13 Type mismatch5018 Unexpected quantifier500 Variable is undefined458 Variable uses an <strong>Automation</strong> type not supported inVBScript450 Wrong number of arguments or invalid propertyassignmentVBScript Syntax Errors15–26 InduSoft Web Studio v6.1 SP5
Scripting Languages: IWS and VBScriptIWS Users GuideError NumberDescription1052 Cannot have multiple default property/method in a Class1044 Cannot use parentheses when calling a Sub1053 Class initialize or terminate do not have arguments1058 'Default' specification can only be on Property Get1057 'Default' specification must also specify 'Public'1005 Expected '('1006 Expected ')'1011 Expected '='1021 Expected 'Case'1047 Expected 'Class'1025 Expected end of statement1014 Expected 'End'1023 Expected expression1015 Expected 'Function'1010 Expected identifier1012 Expected 'If'1046 Expected 'In'1026 Expected integer constant1049 Expected Let or Set or Get in property declaration1045 Expected literal constant1019 Expected 'Loop'1020 Expected 'Next'1050 Expected 'Property'1022 Expected 'Select'1024 Expected statement1016 Expected 'Sub'1017 Expected 'Then'1013 Expected 'To'1018 Expected 'Wend'1027 Expected 'While' or 'Until'1028 Expected 'While,' 'Until,' or end of statement1029 Expected 'With'1030 Identifier too long1014 Invalid character1039 Invalid 'exit' statement1040 Invalid 'for' loop control variable1013 Invalid number1037 Invalid use of 'Me' keyword1038 'loop' without 'do'1048 Must be defined inside a ClassInduSoft Web Studio v6.1 SP5 15–27
IWS Users GuideScripting Languages: IWS and VBScript1042 Must be first statement on the line1041 Name redefined1051 Number of arguments must be consistent acrossproperties specification1001 Out of memory1054 Property Set or Let must have at least one argument1002 Syntax error1055 Unexpected 'Next'1015 Unterminated string constantFunctionsFunction NamesAbs Array Asc AtnCBool CByte CCur CDateCDbl Chr CInt CLngConversions Cos CreateObject CSngCStr Date DateAdd DateDiffDatePart DateSerial DateValue DayDerived Math Escape Eval ExpFilter FormatCurrency FormatDateTime FormatNumberFormatPercent GetLocale GetObject GetRefHex Hour InputBox InStrInStrRev Int, Fix IsArray IsDateIsEmpty IsNull IsNumeric IsObjectJoin LBound LCase LeftLen LoadPicture Log LTrim; RTrim; and TrimMaths Mid Minute MonthMonthName MsgBox Now OctReplace RGB Right RndRound ScriptEngine ScriptEngineBuildVersion ScriptEngineMajorVersionScriptEngineMinorVersion Second SetLocale SgnSin Space Split SqrStrComp String StrReverse TanTime Timer TimeSerial TimeValueTypeName UBound UCase UnescapeVarType Weekday WeekdayName Year15–28 InduSoft Web Studio v6.1 SP5
Scripting Languages: IWS and VBScriptIWS Users GuideKeywordEmptyKeywordsKeywordsDescriptionThe Empty keyword is used to indicate an uninitialized variablevalue. This is not the same thing as Null.False The False keyword has a value equal to 0.NothingNullThe Nothing keyword in VBScript is used to disassociate anobject variable from any actual object.The Null keyword is used to indicate that a variable contains novalid data. This is not the same thing as Empty.True The True keyword has a value equal to -1.MethodClearExecuteRaiseReplaceTestWriteWriteLineMethodsMethodsDescriptionClears all property settings of the Err object.Executes a regular expression search against a specified string.Generates a run-time error.Replaces text found in a regular expression search.Executes a regular expression search against a specified stringand returns a Boolean value that indicates if a pattern match wasfound.Sends strings to the script debugger.Sends strings to the script debugger, followed by a newlinecharacter.NameClass ObjectDebug ObjectErr ObjectMatch ObjectObjects and CollectionsMatches CollectionRegular Expression (RegExp) ObjectSubMatches CollectionObjects and CollectionsDescriptionThe object created using the Class statement. Provides accessto the events of the class.An intrinsic global object that can send output to a scriptdebugger, such as the Microsoft Script Debugger.Contains information about run-time errors. Accepts the Raiseand Clear methods for generating and clearing run-time errors.Provides access to the read-only properties of a regularexpression match.Collection of regular expression Match objects.Provides simple regular expression support.Collection of regular expression submatch strings.InduSoft Web Studio v6.1 SP5 15–29
IWS Users GuideScripting Languages: IWS and VBScriptOperatorsArithmeticSymbol Name Description^Exponentiation- Unary negationRaises a number to the power of anexponent.Finds the difference between twonumbers or indicates the negativevalue of a numeric expression.* Multiplication Multiplies two numbers./ Division\ Integer divisionModModulus arithmeticDivides two numbers and returns afloating-point result.Divides two numbers and returns aninteger result.Divides two numbers and returnsonly the remainder.+ Addition Finds the sum of two numbers.- Subtraction&String concatenationComparisonSymbol Name DescriptionFinds the difference between twonumbers or indicates the negativevalue of a numeric expression.Forces string concatenation of twoexpressions.= Equality Comparison is True if the firstexpression is equal to the secondexpression. Inequality Comparison is True if the firstexpression is different from thesecond expression.< Less than Comparison is True if the firstexpression is less than the secondexpression.> Greater than Comparison is True if the firstexpression is greater than thesecond expression.= Greater than or equal to Comparison is True if the firstexpression is greater than or equalto the second expression.Is Object equivalence Compares two object referencevariables. Comparison is True if bothobject names refer to the sameobject.15–30 InduSoft Web Studio v6.1 SP5
Scripting Languages: IWS and VBScriptIWS Users GuideLogicalSymbol Name DescriptionNot Logical negation Performs logical negation on anexpression.And Logical conjunction Performs a logical conjunction ontwo expressions.Or Logical disjunction Performs a logical disjunction on twoexpressions.Xor Logical exclusion Performs a logical exclusion on twoexpressions.Eqv Logical equivalence Performs a logical equivalence ontwo expressions.Imp Logical implication Performs a logical implication on twoexpressions.AssignmentSymbol Name Description= Assignment Assigns a value to a variable orproperty.PropertiesProperty NameDescriptionFirstIndexGlobalHelpContextHelpFileIgnoreCaseLengthNumberPatternSourceValuePropertiesDescriptionReturns or sets a descriptive string associated with anerror.Returns the position in a search string where a matchoccurs.Sets or returns a Boolean value that indicates if a patternshould match all occurrences in an entire search stringor just the first one.Sets or returns a context ID for a topic in a Help File.Sets or returns a fully qualified path to a Help File.Sets or returns a Boolean value that indicates if a patternsearch is case-sensitive or not.Sets or returns a Boolean value that indicates if a patternsearch is case-sensitive or not.Returns or sets a numeric value specifying an error.Number is the Err object's default property.Sets or returns the regular expression pattern beingsearched for.Returns or sets the name of the object or application thatoriginally generated the error.Returns the value or text of a match found in a searchstring.InduSoft Web Studio v6.1 SP5 15–31
IWS Users GuideScripting Languages: IWS and VBScriptStatementsStatement NameCallClassConstDimDo…LoopEraseExecuteExecuteGlobalExitFor Each…NextFor…NextFunctionIf…Then…ElseOption ExplicitPrivateProperty GetProperty LetProperty SetPublicRamdomizeReDimRemSelectStatementsDescriptionTransfers control to a Sub or Function procedure.Declares the name of a class, as well as a definition ofthe variables, properties, and methods that comprise theclass.Declares constants for use in place of literal values.Declares variables and allocates storage space.Repeats a block of statements while a condition is Trueor until a condition becomes True.Reinitializes the elements of fixed-size arrays anddeallocates dynamic-array storage space.Executes one or more specified statements.Executes one or more specified statements in the globalnamespace of a script.Exits a block of Do...Loop, For...Next, Function, or Subcode.Repeats a group of statements for each element in anarray or collection.Repeats a group of statements a specified number oftimes.Declares the name, arguments, and code that form thebody of a Function procedure.Conditionally executes a group of statements,depending on the value of an expression.Forces explicit declaration of all variables in a script.Declares private variables and allocates storage space.Declares, in a Class block, a private variable.Declares, in a Class block, the name, arguments, andcode that form the body of a Property procedure thatgets (returns) the value of a property.Declares, in a Class block, the name, arguments, andcode that form the body of a Property procedure thatassigns (sets) the value of a property.Declares, in a Class block, the name, arguments, andcode that form the body of a Property procedure thatsets a reference to an object.Declares public variables and allocates storage space.Declares, in a Class block, a private variable.Initializes the random-number generator.Declares dynamic-array variables, and allocates orreallocates storage space at procedure level.Includes explanatory remarks in a program.Executes one of several groups of statements,depending on the value of an expression.15–32 InduSoft Web Studio v6.1 SP5
Scripting Languages: IWS and VBScriptIWS Users GuideSetStopSubWhileWithAssigns an object reference to a variable or property, orassociates a procedure reference with an event.Suspends execution.Declares the name, arguments, and code that form thebody of a Sub procedure.Executes a series of statements as long as a givencondition is True.Executes a series of statements on a single object.Tips and TricksVBScript Editor - IntelliSenseIntelliSense provides an array of options that make language references easilyaccessible. When coding, you do not need to leave the Code Editor or the ImmediateMode command window to perform searches on language elements. You can keepyour context, find the information you need, insert language elements directly intoyour code, and even have IntelliSense complete your typing for you.IntelliSense comprises the following options:List Members: You can display a list of valid members from class tags, fields fromany tag, properties/methods from an ActiveX object, or functions from the IWSbuilt-in language. Selecting from the list inserts the member into your code.When you type the $ character on any VBScript interface, a list box willautomatically open with the list of all tags available for the current application aswell as all functions from the IWS built-in language.When you type the name of a class tag followed by the dot character (.) on anyVBScript interface, a list box will automatically open with the list of all membersfrom the class tag:InduSoft Web Studio v6.1 SP5 15–33
IWS Users GuideScripting Languages: IWS and VBScriptWhen you type the name of a tag followed by the hyphen and greater thancharacters ( -> ) on any VBScript interface, a list box will automatically open withthe list of all fields available for this tag:The items are displayed in alphabetic order, and each item has an icon to identifyits main type, as follows:IconTypeBoolean TagInteger TagReal TagString TagClass TagFunction from the IWS built-in languageWhen you type the name of an ActiveX control that is inserted on the screenfollowed by the dot character (.) on any VBScript interface from the screen wherethe ActiveX object is inserted, a list box will automatically open with the list of allproperties and methods from the object:The items are displayed in alphabetic order, and each item has an icon to identifyits main type, as follows:IconTypeProperty from the ActiveX objectMethod from the ActiveX object15–34 InduSoft Web Studio v6.1 SP5
Scripting Languages: IWS and VBScriptIWS Users GuideParameter Quick Info: The Quick Info option displays pop-up boxes with theinformation about the functions from the IWS built-in language. The informationincludes all the parameters supported by this function, with the currentlyconfigured one in bold text.Complete Word: Complete word finishes a tag, member, field, function, or ActiveXproperty/method name once you have entered enough characters to disambiguatethe term. After you type the first few letters of the name, you can pressCTRL+SPACEBAR to complete the name automatically.VBScript compared to VBAWhile VBScript and Visual Basic for Applications (VBA) are similar and are both basedon the Visual Basic standard language, there are advantages to using VBScript forIWS users:VBScript is supported for the Microsoft Windows CE operating system, and VBA isnot.VBScript brings active scripting to a wide variety of environments, including Webclient scripting in Microsoft Internet Explorer. This prevents operations that maypresent risks for the Web Thin Client user, such as direct access to local files.VBScript was designed to be simple and easy to learn, with some standards fromVBA modified in VBScript to make it more straightforward. For example, inVBScript the user does not have to worry about the type of each variable whendeclaring them because VBScript assumes the proper type for each variableautomatically.The following table lists VBScript features that VBA does not have.CategoryDeclarationsMiscellaneousObjectsScript Engine IdentificationFeature/KeywordClassEvalExecuteRegExpScriptEngineScriptEngineBuildVersionScriptEngineMajorVersionThe following table lists VBA features that VBScript does not have.CategoryArray HandlingCollectionConditional CompilationControl FlowOmitted Feature/KeywordOption BaseDeclaring arrays with lower bound 0Add, Count, Item, RemoveAccess to collections using ! character#Const#If...Then...#ElseDoEventsInduSoft Web Studio v6.1 SP5 15–35
IWS Users GuideScripting Languages: IWS and VBScriptConversionData TypesDate/TimeDDEDebuggingDeclarationError HandlingFile Input/OutputFinancialObject ManipulationObjectsOperatorsOptionsSelect CaseStringsGoSub...Return, GoToOn Error GoToOn...GoSub, On...GoToLine numbers, Line labelsCVar, CVDateStr, ValAll intrinsic data types except VariantType...End TypeDate statement, Time statementLinkExecute, LinkPoke, LinkRequest, LinkSendDebug.PrintEnd, StopDeclare (for declaring DLLs)OptionalParamArrayStaticErlErrorResume, Resume NextAll traditional Basic file I/OAll financial functionsTypeOfClipboardCollectionLikeDeftypeOption BaseOption CompareOption Private ModuleExpressions containing the Is keyword or anycomparison operatorsExpressions containing a range of values using the TokeywordFixed-length stringsLSet, RSetMid StatementStrConvUsing Objects Collection access using !Screen EventsIn addition to the Screen Script, you can configure logics using the IWS built-inlanguage for the On Open, While Open and On Close events for the screen (see the15–36 InduSoft Web Studio v6.1 SP5
Scripting Languages: IWS and VBScriptIWS Users GuideScreen Logic interface from the Screen Attributes dialog). If you configure the ScreenScript (VBScript language) and the Screen Logic (IWS Built-in language), IWS willrespect the following execution order:EventWhen opening the screenWhen closing the screenOrder of execution Screen_OnOpen() sub-routine from the ScreenScript interface (VBScript language) On Open from the Screen Logic interface (IWSBuilt-in language) On Close from the Screen Logic interface (IWSBuilt-in language) Screen_OnClose() sub-routine from the ScreenScript interface (VBScript language)MsgBox() and InputBox() functionsThe MsgBox() and InputBox() functions from the VBScript language allow you todisplay pop-up messages during the runtime. These functions are synchronous.When either one is executed, the remaining instructions from the code will not beexecuted before the pop-up messages launched by the functions are closed. Note:The text displayed in these pop-up messages are not affected by theTranslation Tool of IWS, unless you configure the text explicitly using the$Ext() function from the IWS built-in language.Support for ActiveX objectsUsing the VBScript interfaces for the Graphic module (Graphics Script, Screen Script,Command dynamic and ActiveX events), you can use this syntax to access propertiesand methods directly from any ActiveX object inserted in the screen where the objectis configured.IWS will assign a unique name to the object on the screen. You can use the Nameproperty (Object Properties dialog window) to modify this name.After inserting an ActiveX object on the screen, you can access properties andmethods from this object from any VBScript interface associated with this screen. Usethe syntax ..Examples://Access the value of the property Day from the CalendarControl1 ActiveXobjectCalendarControl1.Day//Triggers the method AboutBox from the CalendarControl1 ActiveX objectCalendarControl1.AboutBoxLogical Operator NOTThe logical operator NOT behaves differently in VBScript than it does in the built-inscripting language.InduSoft Web Studio v6.1 SP5 15–37
IWS Users GuideScripting Languages: IWS and VBScriptNOT OPERATOR IN VBSCRIPTIn VBScript, the NOT operator inverts the bits of a given numeric value, producing itscomplement number according to the “two's complement” system of signed numbersthat is used by computers. The table below illustrates the behavior of the NOToperator in VBScript for the syntax…result = NOT expressionIf expression is…Then result is…-3 2-2 1-1 00 -11 -22 -33 -4 Note:By default, when you attempt to write any numeric value other than 0 to aBoolean tag, the tag automatically assumes a value of 1. Therefore, if VBScript’sNOT operator is applied to a Boolean tag with a value of 1, then the value of thetag does not change; the operator returns a value of −2, but the tag cannot acceptthis value so it again assumes a value of 1.You can configure IWS to treat Boolean tags like Boolean variables in VBScript, sothat the NOT operator in VBScript will work as expected. For more information,please see “Boolean Tags and Boolean Variables” below.NOT OPERATOR IN BUILT-IN LANGUAGEBy contrast, the NOT operator in the built-in scripting language toggles the givennumeric value as if it was a natural boolean. The table below illustrates the behavior ofthe NOT operator in the built-in scripting language for the syntax…result = NOT expressionIf expression is…Then result is…0 1 0 0Boolean Tags and Boolean VariablesBy default, Boolean variables in VBScript are handled differently than Boolean tagsare handled in IWS. The Boolean states of FALSE and TRUE have the same meaning,but the numeric values of TRUE are different, as shown in the table below.Boolean StateNumeric Value in…IWS TagVBScriptFALSE 0 0TRUE 1 –115–38 InduSoft Web Studio v6.1 SP5
Scripting Languages: IWS and VBScriptIWS Users Guide Note:In VBScript, False and True are also reserved as keywords.This difference in how Booleans are handled can seriously affect runtime behavior ifyou use VBScript in your application. Logical and arithmetic operations — especiallythe logical operator NOT — could change tag values in unexpected ways.You can change this behavior, if necessary, by changing your application’s runtimesettings.CHANGING HOW VBSCRIPT HANDLES BOOLEAN TAGSAs stated above, the numeric value of TRUE in a Boolean tag is different than thenumeric value of TRUE in VBScript. You can change this behavior by editing the.app file to change the following setting:[Scripts]VBBoolean=If VBBoolean is set to 0, then the application will behave as described above. IfVBBoolean is set to 1, then VBScript — as it is implemented within IWS — willread/write a value of 1 for TRUE on Boolean tags. (This setting does not apply toInteger or Real tags.)For applications created with IWS v6.1 SP4 or later, the default setting for VBBooleanis 1.For applications created with IWS v6.1 SP3 or earlier and then updated to v6.1 SP4 orlater, the default setting for VBBoolean is 0. This is to maintain backwardcompatibility. Note:Be careful when defining a custom property on a generic object or LinkedSymbol using the #:@ syntax. For example:'The following statements are validIf $MyBoolean = 1 ThenEnd IfIf $MyBoolean = True ThenEnd IfIf #Mne:@MyPointer = True ThenEnd If'The following statement is invalidIf #Mne:@MyPointer = 1 ThenEnd IfWindows CE SupportCEView also support VBScript. The hardware manufacturer of the Microsoft WindowsCE device must enable the support for VBScript on it, so CEView will be able toexecute the scripts configured in VBScript language on the device.InduSoft Web Studio v6.1 SP5 15–39
IWS Users GuideScripting Languages: IWS and VBScriptThe MsgBox() and InputBox() functions can be specifically enabled/disabled by thehardware manufacturer when the image for the Microsoft WindowsCE device iscreated.If you are not sure if the image loaded on your device supports VBScript, pleaseconsult the hardware manufacturer.Scope and Lifetime of VariablesA variable's scope is determined by where you declare it. When you declare a variablewithin a procedure, only code within that procedure can access or change the value ofthat variable. It has local scope and is a procedure-level variable. If you declare avariable outside a procedure, you make it recognizable to all the procedures in yourscript. This is a script-level variable, and it has script-level scope.The lifetime of a variable depends on how long it exists. The lifetime of a script-levelvariable extends from the time it is declared until the time the script is finishedrunning. At procedure level, a variable exists only as the procedure runs. When theprocedure exits, the variable is destroyed. Local variables are ideal as temporarystorage space when a procedure is executing. You can have local variables of the samename in several different procedures because each is recognized only by the procedurein which it is declared.Declaring VariablesA variable is a convenient placeholder that refers to a computer memory locationwhere you can store program information that may change during the time your scriptis running. In VBScript, variables are always of one fundamental data type, Variant.You declare variables explicitly in your script using the Dim statement, the Publicstatement, and the Private statement.For example:Dim DegreesFahrenheitYou declare multiple variables by separating each variable name with a comma.For example:Dim Top, Bottom, Left, RightYou can also declare a variable implicitly by simply using its name in your script. Thatis not generally a good practice because you could misspell the variable name in one ormore places, causing unexpected results when your script is run. For that reason, theOption Explicit statement is configured by default in the Global Procedures interfaceto require explicit declaration of all variables. Unless you delete this statement, youneed to declare all variables explicitly; otherwise, VBScript will generate errors duringthe runtime indicating that the variable does not exist.An expression should have the variable on the left side and the value you want toassign to the variable on the right.For example:MyVar = 100Creating ConstantsA constant is a meaningful name that takes the place of a number or string and neverchanges. VBScript defines a number of intrinsic constants.15–40 InduSoft Web Studio v6.1 SP5
Scripting Languages: IWS and VBScriptIWS Users GuideYou create user-defined constants in VBScript using the Const statement. Using theConst statement, you can create string or numeric constants with meaningful namesand assign them literal values.For example:Const MyString = "This is my string."Const MyAge = 49Note that the string literal is enclosed in quotation marks (" "). Quotation marks arethe most obvious way to differentiate string values from numeric values. Yourepresent Date literals and time literals by enclosing them in number signs (#).For example:Const CutoffDate = #6-1-97#You may want to adopt a naming scheme to differentiate constants from variables.This will prevent you from trying to reassign constant values while your script isrunning. For example, you might want to use a "vb" or "con" prefix on your constantnames, or you might name your constants in all capital letters. Differentiatingconstants from variables eliminates confusion as you develop more complex scripts.Precedence of VBScript OperatorsVBScript has a full range of operators, including arithmetic operators, comparisonoperators, concatenation operators, and logical operators.When several operations occur in an expression, each part is evaluated and resolvedin a predetermined order called “operator precedence.” You can use parentheses tooverride the order of precedence and force some parts of an expression to be evaluatedbefore others. Operations within parentheses are always performed before thoseoutside. Within parentheses, however, standard operator precedence is maintained.When expressions contain operators from more than one category, arithmeticoperators are evaluated first, comparison operators are evaluated next, and logicaloperators are evaluated last. Comparison operators all have equal precedence; that is,they are evaluated in the left-to-right order in which they appear. Arithmetic andlogical operators are evaluated in the following order of precedence.Arithmetic Comparison LogicalNegation (-) Equality (=) NotExponentiation (^) Inequality () AndMultiplication and division (*, /) Less than () XorModulus arithmetic (Mod) Less than or equal to (=) ImpString concatenation (&) Is &When multiplication and division occur together in an expression, each operation isevaluated as it occurs from left to right. Likewise, when addition and subtractionoccur together in an expression, each operation is evaluated in order of appearancefrom left to right.The string concatenation (&) operator is not an arithmetic operator, but in precedenceit falls after all arithmetic operators and before all comparison operators. The Isoperator is an object reference comparison operator. It does not compare objects orInduSoft Web Studio v6.1 SP5 15–41
IWS Users GuideScripting Languages: IWS and VBScripttheir values; it checks only to determine if two object references refer to the sameobject.Using Conditional StatementsYou can control the flow of your script with conditional statements and loopingstatements. Using conditional statements, you can write VBScript code that makesdecisions and repeats actions. The following conditional statements are available inVBScript:If...Then...Else statementSelect Case statementMAKING DECISIONS USING IF...THEN...ELSEThe If...Then...Else statement is used to evaluate whether a condition is True or Falseand, depending on the result, to specify one or more statements to run. Usually thecondition is an expression that uses a comparison operator to compare one value orvariable with another. For information about comparison operators, see ComparisonOperators.If...Then...Else statements can be nested to as many levels as you need.Running Statements if a Condition is TrueTo run only one statement when a condition is True, use the single-line syntax for theIf...Then...Else statement. The following example shows the single-line syntax. Noticethat this example omits the Else keyword.Sub FixDate()End SubDim myDatemyDate = #2/13/95#If myDate < Now Then myDate = NowTo run more than one line of code, you must use the multiple-line (or block) syntax.This syntax includes the End If statement, as shown in the following example:Sub AlertUser(value)If value = 0 ThenEnd IfEnd SubAlertLabel.ForeColor = vbRedAlertLabel.Font.Bold = TrueAlertLabel.Font.Italic = TrueRunning Certain Statements if a Condition is True and Running Others if a Condition isFalseYou can use an If...Then...Else statement to define two blocks of executablestatements: one block to run if the condition is True, and the other block to run if thecondition is False.Sub AlertUser(value)If value = 0 ThenAlertLabel.ForeColor = vbRed15–42 InduSoft Web Studio v6.1 SP5
Scripting Languages: IWS and VBScriptIWS Users GuideAlertLabel.Font.Bold = TrueAlertLabel.Font.Italic = TrueElseAlertLabel.Forecolor = vbBlackAlertLabel.Font.Bold = FalseAlertLabel.Font.Italic = FalseEnd IfEnd SubDeciding Between Several AlternativesA variation on the If...Then...Else statement allows you to choose from severalalternatives. Adding ElseIf clauses expands the functionality of the If...Then...Elsestatement, so you can control program flow based on different possibilities. Forexample:Sub ReportValue(value)If value = 0 ThenMsgBox valueElseIf value = 1 ThenMsgBox valueElseIf value = 2 thenElseEnd IfMsgbox valueMsgbox "Value out of range!"You can add as many ElseIf clauses as you need to provide alternative choices, butextensive use of the ElseIf clauses often becomes cumbersome. A better way to choosebetween several alternatives is the Select Case statement.MAKING DECISIONS WITH SELECT CASEThe Select Case structure provides an alternative to If...Then...ElseIf for selectivelyexecuting one block of statements from among multiple blocks of statements. A SelectCase statement provides capability similar to the If...Then...Else statement, but itmakes code more efficient and readable.A Select Case structure works with a single test expression that is evaluated once, atthe top of the structure. The result of the expression is then compared to the values foreach Case in the structure. If there is a match, the block of statements associated withthat Case is executed, as in the following example.Select Case Document.Form1.CardType.Options(SelectedIndex).TextCase "MasterCard"DisplayMCLogoValidateMCAccountCase "Visa"DisplayVisaLogoValidateVisaAccountCase "American Express"DisplayAMEXCOLogoInduSoft Web Studio v6.1 SP5 15–43
IWS Users GuideScripting Languages: IWS and VBScriptValidateAMEXCOAccountCase ElseEnd SelectDisplayUnknownImagePromptAgainNotice that the Select Case structure evaluates an expression once at the top of thestructure. In contrast, the If...Then...ElseIf structure can evaluate a differentexpression for each ElseIf statement. You can replace an If...Then...ElseIf structurewith a Select Case structure only if each ElseIf statement evaluates the sameexpression.Looping Through CodeLooping allows you to run a group of statements repeatedly. Some loops repeatstatements until a condition is False; others repeat statements until a condition isTrue. There are also loops that repeat statements a specific number of times.The following looping statements are available in VBScript:Do...Loop: Loops while or until a condition is TrueWhile...Wend: Loops while a condition is TrueFor...Next: Uses a counter to run statements a specified number of timesUSING DO LOOPSYou can use Do...Loop statements to run a block of statements an indefinite numberof times. The statements are repeated either while a condition is True or until acondition becomes True.Repeating Statements While a Condition is TrueUse the While keyword to check a condition in a Do...Loop statement. You can checkthe condition before you enter the loop (as shown in the following ChkFirstWhileexample), or you can check it after the loop has run at least once (as shown in theChkLastWhile example). In the ChkFirstWhile procedure, if myNum is set to 9 insteadof 20, the statements inside the loop will never run. In the ChkLastWhile procedure,the statements inside the loop run only once because the condition is already False.Sub ChkFirstWhile()Dim counter, myNumcounter = 0myNum = 20Do While myNum > 10LoopmyNum = myNum - 1counter = counter + 1MsgBox "The loop made " & counter & " repetitions."End SubSub ChkLastWhile()Dim counter, myNumcounter = 015–44 InduSoft Web Studio v6.1 SP5
Scripting Languages: IWS and VBScriptIWS Users GuidemyNum = 9DomyNum = myNum - 1counter = counter + 1Loop While myNum > 10MsgBox "The loop made " & counter & " repetitions."End SubRepeating a Statement Until a Condition Becomes TrueThere are two ways to use the Until keyword to check a condition in a Do...Loopstatement. You can check the condition before you enter the loop (as shown in thefollowing ChkFirstUntil example), or you can check it after the loop has run at leastonce (as shown in the ChkLastUntil example). As long as the condition is False, thelooping occurs.Sub ChkFirstUntil()Dim counter, myNumcounter = 0myNum = 20Do Until myNum = 10LoopmyNum = myNum - 1counter = counter + 1MsgBox "The loop made " & counter & " repetitions."End SubSub ChkLastUntil()Dim counter, myNumcounter = 0myNum = 1DomyNum = myNum + 1counter = counter + 1Loop Until myNum = 10MsgBox "The loop made " & counter & " repetitions."End SubExiting a Do...Loop Statement from Inside the LoopYou can exit a Do...Loop by using the Exit Do statement. Because you usually want toexit only in certain situations, such as to avoid an endless loop, you should use theExit Do statement in the True statement block of an If...Then...Else statement. If thecondition is False, the loop runs as usual.In the following example, myNum is assigned a value that creates an endless loop. TheIf...Then...Else statement checks for this condition, preventing the endless repetition.Sub ExitExample()Dim counter, myNumInduSoft Web Studio v6.1 SP5 15–45
IWS Users GuideScripting Languages: IWS and VBScriptcounter = 0myNum = 9Do Until myNum = 10myNum = myNum - 1counter = counter + 1If myNum < 10 Then Exit DoLoopMsgBox "The loop made " & counter & " repetitions."End SubUSING WHILE...WENDThe While...Wend statement is provided in VBScript for those who are familiar with itsusage. However, because of the lack of flexibility in While...Wend, it is recommendedthat you use Do...Loop instead.USING FOR...NEXTYou can use For...Next statements to run a block of statements a specific number oftimes. For loops, use a counter variable whose value increases or decreases with eachrepetition of the loop.The following example causes a procedure called MyProc to execute 50 times. The Forstatement specifies the counter variable x and its start and end values. The Nextstatement increments the counter variable by 1.Sub DoMyProc50Times()Dim xFor x = 1 To 50NextEnd SubMyProcUsing the Step keyword, you can increase or decrease the counter variable by thevalue you specify. In the following example, the counter variable j is incremented by 2each time the loop repeats. When the loop is finished, the total is the sum of 2, 4, 6, 8,and 10.Sub TwosTotal()Dim j, totalFor j = 2 To 10 Step 2Nexttotal = total + jMsgBox "The total is " & totalEnd SubTo decrease the counter variable, use a negative Step value. You must specify an endvalue that is less than the start value. In the following example, the counter variablemyNum is decreased by 2 each time the loop repeats. When the loop is finished, thetotal is the sum of 16, 14, 12, 10, 8, 6, 4, and 2.Sub NewTotal()Dim myNum, totalFor myNum = 16 To 2 Step -215–46 InduSoft Web Studio v6.1 SP5
Scripting Languages: IWS and VBScriptIWS Users GuideNexttotal = total + myNumMsgBox "The total is " & totalEnd SubYou can exit any For...Next statement before the counter reaches its end value byusing the Exit For statement. Because you usually want to exit only in certainsituations, such as when an error occurs, you should use the Exit For statement inthe True statement block of an If...Then...Else statement. If the condition is False, theloop runs as usual.VBScript ProceduresIn VBScript, there are two kinds of procedures; the Sub procedure and the Functionprocedure.SUB PROCEDURESA Sub procedure is a series of VBScript statements (enclosed by Sub and End Substatements) that perform actions but don't return a value. A Sub procedure can takearguments (constants, variables, or expressions that are passed by a callingprocedure). If a Sub procedure has no arguments, its Sub statement must include anempty set of parentheses ().The following Sub procedure uses two intrinsic (built-in) VBScript functions, MsgBoxand InputBox, to prompt a user for information. It then displays the results of acalculation based on that information. The calculation is performed in a Functionprocedure created with VBScript. The Function procedure is shown after the followingdiscussion.Sub ConvertTemp()temp = InputBox("Please enter the temperature in degrees F.", 1)MsgBox "The temperature is " & Celsius(temp) & " degrees C."End SubFUNCTION PROCEDURESA Function procedure is a series of VBScript statements enclosed by the Function andEnd Function statements. A Function procedure is similar to a Sub procedure, butcan also return a value. A Function procedure can take arguments (constants,variables or expressions that are passed to it by a calling procedure). If a Functionprocedure has no arguments, its Function statement must include an empty set ofparentheses. A Function returns a value by assigning a value to its name in one ormore statements of the procedure. The return type of a Function is always a Variant.In the following example, the Celsius function calculates degrees Celsius from degreesFahrenheit. When the function is called from the ConvertTemp Sub procedure, avariable containing the argument value is passed to the function. The result of thecalculation is returned to the calling procedure and displayed in a message box.Sub ConvertTemp()temp = InputBox("Please enter the temperature in degrees F.", 1)MsgBox "The temperature is " & Celsius(temp) & " degrees C."End SubFunction Celsius(fDegrees)InduSoft Web Studio v6.1 SP5 15–47
IWS Users GuideScripting Languages: IWS and VBScriptCelsius = (fDegrees - 32) * 5 / 9End FunctionGETTING DATA INTO AND OUT OF PROCEDURESEach piece of data is passed into your procedures using an argument . Argumentsserve as placeholders for the data you want to pass into your procedure. You canname your arguments any valid variable name. When you create a procedure usingeither the Sub statement or the Function statement, parentheses must be includedafter the name of the procedure. Any arguments are placed inside these parentheses,separated by commas. For example, in the following example, fDegrees is aplaceholder for the value being passed into the Celsius function for conversion.Function Celsius(fDegrees)Celsius = (fDegrees - 32) * 5 / 9End FunctionTo get data out of a procedure, you must use a Function. Remember, a Functionprocedure can return a value; a Sub procedure can't.USING SUB AND FUNCTION PROCEDURES IN CODEA Function in your code must always be used on the right side of a variableassignment or in an expression. For example:Temp = Celsius(fDegrees)orMsgBox "The Celsius temperature is " & Celsius(fDegrees) & " degrees."To call a Sub procedure from another procedure, type the name of the procedure alongwith values for any required arguments, each separated by a comma. The Callstatement is not required, but if you do use it, you must enclose any arguments inparentheses.The following example shows two calls to the MyProc procedure. One uses the Callstatement in the code; the other doesn't. Both do exactly the same thing.Call MyProc(firstarg, secondarg)MyProc firstarg, secondargNotice that the parentheses are omitted in the call when the Call statement isn't used.15–48 InduSoft Web Studio v6.1 SP5
Chapter 16: Using the Translation Tool/EditorUsing the Translation Tool, you can translate any text from the application that isvisible during the runtime into different languages (idioms). The main advantages ofthis feature are:– You do not need to re-create the screens, alarms or any other interface of yourapplication to translate it into another language. All application files remain inthe original language (e.g., English), and the translations to other languagesare contained in external files.– InduSoft Web Studio is UNICODE-compliant (2 bytes for each character).Therefore, you can translate your application into any language that requiresUNICODE characters (Japanese, Chinese, Koren, etc.) as long as you select aUNICODE font for your project.– The translations can be configured in a standard, comma-delimited text file(*.CSV). Therefore, you can either use the Translation Editor in IWS (Tools >Translation Editor) to write the translated text, or you can use any third-partyeditor that can save CSV files, such as Microsoft Notepad or Microsoft Excel.– The Translation Tool translates entire phrases or paragraphs instead oftranslating word-by-word, allowing you to adjust the translated text accordingto the grammar rules of each language.– You can configure the default translation language when running theapplication by using the Automatic Translation interface. This is available fromthe Options tab of the Project Settings dialog (Project > Settings). In addition to that,you can change the language during the runtime (on-the-fly) by using theSetTranslationFile() built-in function of IWS.– When you execute the SetTranslationFile() function on a Web Thin Clientstation, you apply it to that particular Web Thin Client instance only.Therefore, you can have several Web Thin Clients running simultaneously,and each one can display the screens in a different language.InduSoft Web Studio v6.1 SP5 16–1
IWS Users GuideUsing the Translation Tool/EditorProject Settings for Automatic TranslationWhen configuring an application to support more than one language, you canconfigure the following parameters in the Options tab of the Project Settings dialog(menu Project > Settings):Project Settings Dialog – Options Tab– Translation File Name: The translation file configured in this field will be loaded bydefault when launching the application. This option is useful to configure thedefault translation file name when launching the application. The user can seta different language during the runtime by executing theSetTranslationFile() function.– Enable Translation: When this option is unchecked (clear), the Translation Tool isdisabled and the text elements are displayed only as configured in the originalapplication files.– When you press the Advanced button, you can configure the following settingsfor the Translation Tool:Advanced Dialog16–2 InduSoft Web Studio v6.1 SP5
Using the Translation Tool/EditorIWS Users Guide* Startup Column Name: You can create a CSV file with translation for more thanone language. The original text that was used when the application wascreated is in the first column of the CSV file. Each different language isadded in additional columns. The first row of the CSV file indicates thename of each column. You can specify in this field the name of the columnthat must be used to translate the application by default, when launchingthe application. If this field is left in blank, the application is launched withits original language. The user can set a different language during theruntime by executing the SetTranslationFile() function.* Ignore space chars at the end and beginning of the text: When this option is checked,the space character at the end or at the beginning of each text is ignored fortranslation purposes. This option is useful to avoid duplicated entries in thetranslation table due to space chars configured by mistake when creatingthe objects or just for alignment.* Keep original text when translation is blank: When this option is checked, theoriginal text is kept when there is not any text configured as a translationfor it in the column currently set for translation of the application. If thisoption is unchecked, the original text is omitted from the application duringthe runtime, when there is not any translated text for it in the currently setfor translation of the application.Configuring Object Properties for Screen ObjectsTo enable translation for individual screen objects, use the following procedure: Create the text and screen objects for your application using the toolbarsdescribed in “Using Objects and Dynamics” beginning on page 7–8. When you open the Object Properties dialogs to specify the parameters for eachobject, verify that the Extern translation check-box is enabled ( ).For example, in this figure Extern translation is enabled for the OPC button object:Translation Enabled for the OPC ButtonInduSoft Web Studio v6.1 SP5 16–3
IWS Users GuideUsing the Translation Tool/EditorTranslation EditorThe Translation Editor can be launched by the Tools > Translation Editor menu option:Translation ToolThe file specified in the Translation File Name field from the Options tab of the ProjectSettings dialog (Project > Settings) is open by default. You can open a different translationfile by the File > Open option from the menu of the Translation Editor. Moreover, you cancreate a new translation file with the File > New option from the menu of the TranslationEditor.The first column is reserved for the text in the original language used when creatingthe application. Although you can add text in this column manually, you can alsoimport the text from your application automatically into this column by executing thecommand Import String Application available in the File menu of the TranslationEditor. Tip:You can execute the command File > Import String Application to update the currentworksheet on the Translation Editor as many times as necessary. Whenever thiscommand is executed, the text available in the application which are not alreadyincluded in the worksheet are inserted on it. However, this command does notremove any text from the worksheet, regardless of how it had been inserted on it(manually or automatically).You can write the translation for each different language in additional columns (not inthe first column). You can use the following options from the Edit menu of theTranslation Editor to configure the columns of the translation file:– Insert Column (shortcut F9): Insert a new column on the translation file.– Rename Column (shortcut F10): Allows you to rename the column currentlyselected.– Delete Column (shortcut F11): Delete the column currently selected.16–4 InduSoft Web Studio v6.1 SP5
Using the Translation Tool/EditorIWS Users GuideAfter editing the translation file, you can use the File > Save or File > Save As options fromthe menu of the Translation Editor to save the settings into the translation file (CSVformat).Since InduSoft Web Studio supports translation files in the standard CSV format, youcan either use the Translation Editor or any other editor for CSV files, such asMicrosoft Notepad or Microsoft Excel to create the translation file. The first row of theCSV file indicates the name of each column. The columns are separated using thecomma character (“,”).Although you can create more than one translation file, it is recommended keeping thetranslation for all languages in only one file because it will be easier to keep it updatedwhen modifying the application – using the File > Import String Application just once, youcan update the translation file. Notes:For legacy reasons, the Translation Tool supports files with the extension .TRA.The translation files saved with this extension use the pipe character (“|”) insteadof the comma character (“,”) to separate the text between columns.Editing WorksheetsTo open a worksheet for editing: Select File → Open. When the Open dialog displays, locate and select the worksheet you want to edit. Click OK to close the dialog. Save Typing Time:After typing terms into a worksheet, you can select File → Save As to save a copy ofthe worksheet under a new name, or select Window → New Window to open a newwindow containing a duplicate worksheet, which you can then save under a newname. Then, in the new worksheet, you can keep the terms in one column andreplace the terms in the other column.There are several ways to edit a Translation worksheet: You can change or delete individual terms You can insert lines You can copy from one worksheet to anotherCHANGING OR DELETING TERMSThe procedure for changing or deleting terms in a worksheet is as follows: When the selected worksheet displays in the Translation Editor, double-click onthe term you want to change and type a new term in its place. Press Enter. Save your changes to the worksheet by selecting File → Save or File → Save As. Note:Although you can save translation worksheet files to any directory, we stronglyrecommend saving your files in your project’s Web folder to make them availablefor use on a Web Thin Client.InduSoft Web Studio v6.1 SP5 16–5
IWS Users GuideUsing the Translation Tool/EditorINSERTING LINESIf you wish to insert one or more terms between existing terms in a worksheet, placeyour cursor in a cell, select Edit → Insert Line, and IWS will insert a blank line above theexisting cell. For example:Inserting a LineINSERTING COLUMNSYou can insert a column in basically the same way that you inserted a line, although itdoes not matter where you place your cursor because the new column will always beappended to the right of the existing columns. Just select Edit → Insert Column, and IWSwill insert the new column to the right. For example:Inserting a Column16–6 InduSoft Web Studio v6.1 SP5
Using the Translation Tool/EditorIWS Users GuideRENAMING COLUMNSYou can rename your columns in order to make it easier to identify the translations.Place your cursor anywhere in the column you want to rename, and then select Edit→ Rename Column. The Rename Column dialog is displayed; enter the new name in theNew Name field and click OK. For example:Renaming a ColumnCOPYING TERMS BETWEEN WORKSHEETSThe Translation Editor allows you to cut or copy terms from one Translation worksheetand paste them into another. You also can copy terms from an Excel file and pastethem into a Translation worksheet.To copy terms from one worksheet (or file) to another, use the following steps: Open both worksheets. Locate the term(s) you want to copy and select them with your cursor. You can select multiple entries within a column and copy those entries intoanother column. Copy the term(s) by selecting Edit → Copy, pressing Ctrl+C, or clicking ). In the second worksheet, select the cell(s) where you want to put the new terms,and paste the term(s) by selecting Edit → Paste, pressing Ctrl+V, or clicking ). Repeat the previous steps until you have pasted all the terms you want to share. Save your changes.InduSoft Web Studio v6.1 SP5 16–7
IWS Users GuideUsing the Translation Tool/EditorSEARCHING THE WORKSHEETIf your worksheet contains a lot of terms (you can enter up to 8,193 terms), you can usethe Edit → Find or View → View Line options to search for terms.Selecting Edit → Find opens the Find dialog:Find Dialog– Type a term into the Find What text box, and specify one or more of the followingoptional search parameters:* Match whole word only: Enable ( ) this box to prevent IWS from finding a termembedded within another term. For example, if you did not enable thisoption and tried to search for “and,” IWS might find operand, expand, orstandard.* Match case: Enable ( ) this box to search for a term using the samecapitalization you typed into the Find What text box. For example, if you didnot enable this option and tried to search for “TankLevel,” IWS might findTANKLEVEL or tanklevel.* Up and Down: Enable this button to control the direction in which theprogram searches for your term. The search commences from the activeline. For example, if there are 345 lines in the entire worksheet and yourcurrently on line 325, IWS will search lines 325 through 345 only.– Click Find Next to start (and continue) searching for a term.Use the View → View Line option to jump to a particular line in the worksheet. Whenthe Line dialog displays, type the line number into the Number field and click OK.Line DialogRESTORING DEFAULTSAfter resizing a Translation worksheet or columns in a worksheet, you can selectWindow → Restore Defaults from the Translation Editor menu bar and the window (orcolumn) will revert to its original display size.Saving Your WorksheetsTo save your work after creating or editing a Translation worksheet, select File → Save orFile → Save As from the Translation Editor menu bar.16–8 InduSoft Web Studio v6.1 SP5
Using the Translation Tool/EditorIWS Users GuideExecuting the Translation FunctionsAfter enabling translation for the application and the screen objects, andcreating/editing Translation worksheets, you can execute the following IWS functions:SetTranslationFile(strFileName, optStrColumnName): Specifies theTranslation worksheet file and translates all enabled text within the applicationduring runtime.Ext(strText): Specifies a text string (not related to a screen object) to betranslated. For example, the result of an expression to be viewed by an end user.You can execute both functions synchronously, and they will search the applicationand change the specified text/objects into the new language. Both functions aresupported on Windows 2K/XP/Vista/CE and Web Thin Clients platforms. Note:You can save translation files to any directory; however, we strongly recommendsaving these files in your project’s Web folder so they can be used by a Web ThinClient.For example, if your default development language is English and you want tomake the file available to Web Thin Clients, you might change the defaultworksheet name to English.csv and save the file in the following folder:C:\Program Files\InduSoft Web Studio v6.1\Projects\\WebUsing the SetTranslationFile() FunctionYou can use the SetTranslationFile() function to translate all enabled screenobjects within an application during runtime. (This assumes that you’ve alreadycreated a translation file with the appropriate columns/languages and saved the file inthe project directory.)To execute this function, Create two buttons (or some other screen objects). Double-click on each button to open the Object Properties dialog and specify ameaningful name for each (for example, English and Spanish).Create Two Buttons Select the first button and apply the Command () property. Double-click on the button to open the Object Properties dialog. Click Config to open the expanded Configuration dialog. Select the On Down command tab. Choose “Built-in Language” from the Type menu. Type SetTranslationFile(strFileName, optStrColumnName)into theExpression field — substituting the name of the translation file for strFileName andthe name of the column for optStrColumnName. Because these values are Strings,remember to put them in double-quotes.InduSoft Web Studio v6.1 SP5 16–9
IWS Users GuideUsing the Translation Tool/EditorFor example, SetTranslationFile("SAMPLE.csv", "English")Setting the Translation File Note:If you saved these Translation worksheets in your project’s Web folder to make thefiles available for Web Thin Clients), you also must type the directory path to thatfile. For example,C:\Program Files\InduSoft Web Studio v6.1\\Web\or type ("\Web\.csv"). Apply the Command property to the second button and configure the function asdescribed above, replacing the column name as neededFor example, SetTranslationFile("SAMPLE.csv", "Spanish")16–10 InduSoft Web Studio v6.1 SP5
Using the Translation Tool/EditorIWS Users GuideNow, when you run the application ( ) you can click the buttons to toggle betweenthe two languages, as shown in the following screens:Click the English Buttonand the Screen ObjectsDisplay in EnglishClick the Spanish Buttonand the Screen ObjectsDisplay in SpanishTranslating between English and SpanishIf you want to verify that the translation was successful, you can create a tag (forexample, STATUS) and add it to your application screen. When you run theapplication, the tag will return one of the values listed in the following table.Returned ValueDescription0 Success1 Invalid number of parameters2 Wrong parameter type3 Translation file could not be found or openedUsing the Ext() FunctionYou can use the Ext() function to translate text strings within an application, such asthe results of an operation that you want displayed to an end-user.To execute this function, Open an IWS worksheet (for example a Math worksheet), and type a string-type tagin the Tag Name column. Double-click on each button in the display to open the Object Properties dialog andspecify a meaningful name for each (for example, English and Spanish).The Ext(strText) function returns the text translation using the activeTranslation worksheet.InduSoft Web Studio v6.1 SP5 16–11
IWS Users GuideUsing the Translation Tool/EditorFor example,Ext("Start") // Returned value in Spanish = "Comience"Ext("Stop") // Returned value in Spanish = "Pare"Ext("StrTag")Closing the Translation EditorTo close the Translation Editor, select File → Exit from the Translation Editor menu bar.If you have already saved the open Translation worksheet(s), the Translation Editorwill close immediately.If you have unsaved changes in an open Translation worksheet(s), IWS will promptyou to save your changes.– Click Yes to save the changes and close the window.– Click No to close the window without saving your changes.– Click Cancel to keep the window open and continue working on the openworksheet.16–12 InduSoft Web Studio v6.1 SP5
Chapter 17: IWS Database InterfaceConfiguring a database interface with IWS is basically linking tasks from IWS (Alarms,Events or Trends) to tables of external databases via a specific Database Provider thatsupports the database you have chosen.Each history task (Alarm, Events or Trend) can be configured to save data either tofiles with the proprietary format from Studio or to external SQL Relational Databases.IWS supports ADO.NET to provide an intuitive, simple, flexible and powerful interfacewith standard technologies from MDAc (Microsoft Data Access Components) such asOLE-DB (Object Linking Embedded – Database) and ODBC (Open DatabaseConnectivity). By using this capability, you can connect to any database that is MDACcompatible (please see the Conformance Test Table for the list of databases already tested).The following tasks support the database interface:Alarms: The application can save and/or retrieve the alarm history messages in arelational database.Events: The application can save and/or retrieve the event messages in a relationaldatabase.Trends: The application can save and/or retrieve the Trend history values in arelational database.Viewer: Database information can be displayed both in table format (Alarm andGrid objects) or in a graphical format (Trend object).Web: Because the items listed below are already available in IWS Web interface,you can deploy an application that stores/saves data in a relational database andhave it working over the Web.Using its embedded database interface, IWS can easily provide data from the plantfloor to third-party systems (e.g. ERP) or get data from them.IWS can interface with any relational database supported by a valid ADO.NETProvider, OLE DB Provider or ODBC Driver. However, the conformance tests wereexecuted with the following databases:Database Database Version ADO.NET Provider Assembly VersionMicrosoft SQLServer 2000MicrosoftAccess 2000MicrosoftExcel 2000Oracle8.0 System.Data.SqlClient 1.0.5000.09.0.3821 SR-1 System.Data.OleDbClient 1.0.5000.09.0.3821 SR-1 System.Data.OleDbClient 1.0.5000.010g Release 1 forWindowsSystem.Data.OracleClient 1.0.5000.0Sybase Anywhere 9.0.1.1751 iAnywhere.Data.AsaClient 9.0.1.1751MySQL 4.0.20a ByteFX.MySqlClient 0.7.6.15073Conformance Test TableNote:For information about how to configure a specific database, please refer to theInduSoft Web Studio v6.1 SP5 17–1
IWS Users GuideIWS Database InterfaceAppendixes.General ConceptsThis section describes databases, database providers and the way IWS interfaces withdifferent databases.SQL Relational DatabasesA SQL Relational Database is a set of information stored in tables with fields andregisters, which support SQL commands.Each database can have one or more tables. Each table is composed of fields(columns) and registers (rows). Typically, the fields are pre-defined and theapplication adds or reads one or more registers, according to the query condition.Database DB1Register 1Register 2Register 3Table XField A Field B Field CRegister 1Register 2Register 3Table YField D Field E Field FIWS uses Database Providers (ADO.NET) to interface with SQL Relational Databases.Database Providers are libraries developed to access data from different databasesthrough SQL commands. The ADO.NET Provider for a specific database can besupplied by the operating system or by the database manufacturer.The following picture illustrates how IWS can interface with different databases usinga different Database Provider for each database.17–2 InduSoft Web Studio v6.1 SP5
IWS Database InterfaceIWS Users GuideThe previous picture shows some of the most popular ADO.NET Providers fordatabases. Notice that the Microsoft ADO.NET Provider for ODBC Drivers allows you toaccess the database through an ODBC driver. See Database Appendix A: Using ODBCDatabases for information about how to use this provider. It is also possible that youdo not have an ADO.NET provider, but an OLE DB provider is available. By using theMicrosoft ADO.NET Provider for OLE DB you can get access to the database; theMicrosoft Jet OLE DB provider gives access to applications in the Microsoft Officepackage by using this approach.Note:It is important to note that IWS provides the interface for ADO.NET Providers.However, the ADO.NET Providers and/or the ODBC Driver/OLE DB Providermust be supplied either by the operating system or by the databasemanufacturer. If your connection string does not refer to a valid ADO.NETProvider, the OLE DB Provider will be used.Although most applications typically link to only one type of database, IWS gives youthe flexibility to link each task to a specific database supported by a DatabaseProvider. Furthermore, by using this architecture, you do not need to worry about thespecific characteristics of each database (it is mostly handled by the DatabaseProvider for each database or by the IWS Database Gateway interface). Therefore, theapplication settings are mostly uniform, regardless of the specific database chosen byyou.InduSoft Web Studio v6.1 SP5 17–3
IWS Users GuideIWS Database InterfaceHistory FormatThe IWS tasks that can generate history data (Alarms, Events and Trend) can beconfigured to save data either in the Proprietary history file format from IWS or to anexternal SQL Relational database. You can choose the history file format by the HistoryFormat combo-box available for each task. The following table shows the optionsavailable for each task:Task History Format SettingsAlarmsEventsTrendProprietaryDatabaseProprietaryDatabaseProprietaryDatabaseFile Format: Text (UNICODE). IWS uses the vertical bar character (|) toseparate the fields.Default Path: …\\Alarm\ALYYMMDD.ALH , where:YY = Two last digits of the yearMM = MonthDD = Day.Database Type: Chosen by the userDefault Table Name: AlarmHistoryFile Format: Text (UNICODE). IWS uses the vertical bar character (|) toseparate the fields.Default Path: …\\Alarm\EVYYDDMM.EVT , where:YY = Two last digits of the yearMM = MonthDD = Day.Database Type: Chosen by the userDefault Table Name: EventHistoryFile Format: BinaryDefault Path: …\\Hst\GGYYDDMM.HST , where:GG = Trend group number (in hexadecimal format)YY = Two last digits of the yearMM = MonthDD = Day.Database Type: Chosen by the userDefault Table Name: TRENDGGG (GGG = Trend Worksheet Number –e.g. TREND001 for the Trend Worksheet 001)17–4 InduSoft Web Studio v6.1 SP5
IWS Database InterfaceIWS Users GuidePrimary and Secondary DatabasesIWS supports redundant systems. Therefore, when configuring the databaseinterface, you can configure the Primary Database and, optionally, the SecondaryDatabase. These can be configured in the following modes:Disabled: In this mode, IWS saves data in the Primary Database only. If thePrimary Database is unavailable for any reason, the data is not saved anywhereelse. This option may cause loss of data if the Primary Database is not available.Redundant: In this mode, IWS saves data in both Primary and SecondaryDatabases. If one of these databases is unavailable, IWS keeps saving data only inthe database that is available. When the database that was unavailable becomesavailable again, IWS synchronizes both databases automatically.Store and Forward: In this mode, IWS saves data in the Primary Database only. Ifthe Primary Database becomes unavailable, IWS saves the data in the SecondaryDatabase. When the Primary Database becomes available again, IWS moves thedata from the Secondary Database into the Primary Database. Note:The Primary and Secondary can be different types of databases. However,they must have the same fields.Using the Secondary Database, you can increase the reliability of the system anduse the Secondary Database as a backup when the Primary Database is notavailable. This architecture is particularly useful when the Primary Database islocated in the remote station. In this case, you can configure a SecondaryDatabase in the local station to save data temporarily if the Primary Database isnot available (during a network failure, for instance).InduSoft Web Studio v6.1 SP5 17–5
IWS Users GuideIWS Database InterfaceDefault DatabaseAlthough IWS allows you to configure a different database for each task, typically thesame database type (e.g. SQL Server, MS Access, Oracle, and so forth) is used by alltasks of the same project. Therefore, in order to save time when configuring theapplication, IWS allows you to configure the Default Database. When configuring eachtask, you can choose to use the settings configured for the Default Database. If youchoose this method, it will not be necessary to re-configure the same settings for eachtask, since they share the same database.The settings for the Default Database can be configured by pressing the Configurebutton from the Default Database box on the Options tab of the Project Settings dialog.By clicking on this button the following Window will display:017–6 InduSoft Web Studio v6.1 SP5
IWS Database InterfaceIWS Users GuidePlease refer to the section Configuring Database Settings for information about thefields on this Window.Linking the Database Through a Remote DB ProviderDepending on the architecture of your project, the ADO.NET Provider for the SQLRelational Database may not be available in the same stations where IWS is running.This scenario is especially common when the application is run on the Windows CEoperating system (currently, most of the Providers are not supported for the WindowsCE operating system). In order to solve this problem, InduSoft designed a flexiblesolution that allows you to configure distributed systems, as illustrated in the picturebelow:The application is running in the Studio Application station (where IWS and/orCEView are/is installed). The application can communicate with the IWS DatabaseGateway (running in a remote computer) via TCP/IP. The Gateway implements theinterface with the Database through the Database Provider available in the computerwhere it is running.The IWS Database Gateway does not require complex configuration. Just copy thefiles STADOSvr.exe and StADOSrv.ini from the \BIN sub-folder of IWS and pastethem under any directory of the computer that will be used as the Gateway stationand execute the STADOSvr.exe program. There are advanced settings associated withthe Studio Database Gateway, but they should be changed only under specialcircumstances. See the “Studio Database Gateway” for information on how toconfigure the Studio Database Gateway advanced settings. Tip:The IWS Database Gateway is a TCP/IP Server for the IWS application andit uses the TCP Port 3997 by default. You can specify a different portnumber when executing the STADOSvr.exe program according to thefollowing syntax: STADOSvr.exe . Example: STADOSvr 3998InduSoft Web Studio v6.1 SP5 17–7
IWS Users GuideIWS Database InterfaceConfiguring Database SettingsConfiguring a database interface with IWS is basically linking tasks from IWS (Alarms,Events or Trends) to tables of external databases via a specific Database Provider thatsupports the database you have chosen.Each history task (Alarm, Events or Trend) can be configured to save data either tofiles with the proprietary format from Studio or to external SQL Relational Databases.When selecting Database as the History Format, the database interface settings canbe configured through the following interfaces:TaskAlarmsEventsTrendInterface Select the Project > Settings menu. Select the Options tab on the Project Settings dialog window. Choose Database in the History Format combo-box. Click on the Alarm Database button. Configure the database settings on the Database Configuration dialog. Select the Project > Settings menu. Select the Options tab on the Project Settings dialog window. Choose Database in the History Format combo-box. Click on the Event Database button. Configure the database settings on the Database Configuration dialog. Create or open a Trend worksheet. Choose Database in the History Format combo-box. Click on the Database Configuration button. Configure the database settings on the Database Configuration dialog.Note: Both Alarms and Events are saved in the IWS proprietary format, or bothAlarms and Events are saved in external Relational Databases; however,they can be saved on different databases. Each Trend worksheet can be configured to save data either in the IWSproprietary format or in an external SQL Relational Database.17–8 InduSoft Web Studio v6.1 SP5
IWS Database InterfaceIWS Users GuideDatabase Configuration DialogThe Database Configuration dialog allows you to configure the necessary settings tolink IWS to an external SQL Relational Database.The following picture illustrates the Database Configuration dialog:Database Configuration DialogDatabase combo-box: Allows you to select either Primary or Secondary. WithPrimary, all settings displayed in the Database Configuration window apply to thePrimary Database interface. Otherwise, they apply to the Secondary Databaseinterface. You can configure the Secondary database in the following modes:– Disabled: In this mode, IWS saves data in the Primary Database only. If thePrimary Database is unavailable for any reason, the data is not savedanywhere else. This option may cause loss of data if the Primary Database isnot available.– Redundant: In this mode, IWS saves data in both Primary and SecondaryDatabases. If one of these databases is unavailable, IWS keeps saving dataonly in the database that is available. When the database that was unavailablebecomes available again, IWS synchronizes both databases automatically.– Store and Forward: In this mode, IWS saves data in the Primary Database only. Ifthe Primary Database becomes unavailable, IWS saves the data in theSecondary Database. When the Primary Database becomes available again,IWS moves the data from the Secondary Database into the Primary Database.Using the Secondary Database, you can increase the reliability of the system anduse the Secondary Database as a backup when the Primary Database is notavailable. This architecture is particularly useful when the Primary Database islocated in the remote station. In this case, you can configure a SecondaryInduSoft Web Studio v6.1 SP5 17–9
IWS Users GuideIWS Database InterfaceDatabase in the local station to save data temporarily if the Primary Database isnot available (during a network failure, for instance).Use application default check-box: When this option is checked, IWS uses the settingsconfigured in the Default Database for the task that is being configured(Connection string, User name, Password, Retry Interval and Advanced Settings).When this option is not checked, you can configure these settings individually tothe current task.Connection string field: This field defines the database where IWS will write and readvalues as well as the main parameters used when connecting to the database.Instead of writing the Connection string manually, you can press the browsebutton (…) and select the database type from the Data Link Properties window.Note:The list of Database Providers shown in the Data Link Properties windowdepends on the providers actually installed and available in thecomputer where you are running IWS. Consult the operating systemdocumentation (or the database documentation) for further informationregarding the settings of the Provider for the database that you are using.User name field: User name used to connect to the database. The user nameconfigured in this field must match the user name configured in the database.Password field: Password used to connect to the database. The password configuredin this field must match the password configured in the database.Retry Interval field: If IWS is unable to connect to the database for any reason, itretries automatically to connect to the database after the number of secondsconfigured in this field have passed.17–10 InduSoft Web Studio v6.1 SP5
IWS Database InterfaceIWS Users GuideAdvanced button: After pressing this button, you have access to customize somesettings. For most applications, the default value of these settings do not need tobe modified and should be kept.– Milliseconds combo box: You can configure how the milliseconds will be savedwhen saving the date in the database. Each database saves the date indifferent formats; for example, some databases do not support milliseconds ina Date field. The following options are available:• Default: Uses the format pre-defined for the current database. Thedatabases previously tested by InduSoft are previously configured with themost suitable option. When selecting Default, IWS uses the settingpre-configured for the current database type. If you are using a databasethat has not been previously configured by InduSoft, the Default optionattempts to save the milliseconds in a separate field. Tip:The default option for each database is configured in the StudioADO.inifile, stored in the \BIN sub-folder of IWS. See “Studio Database Gateway”for information about how to configure the StudioADO.ini file.• Disable: Does not save the milliseconds at all when saving the date in thedatabase.• Enable: Saves the milliseconds in the same field where the date is saved.• Separate Column: Saves the milliseconds in a separated column. In this case,the date is saved in one field (without the milliseconds precision) and thenumber of milliseconds is saved in a different column. This option isindicated where you want to save timestamps with the precision ofmilliseconds but the database that you are using does not supportmilliseconds for the Date fields.– Save time difference check-box: When this option is checked (default), IWS savesthe Time Zone configured in the computer where the application is running ineach register of the database. This option must be enabled to avoid problemswith daylight savings time.– Database Gateway: Enter the Host Name/IP Address where the Studio databasegateway will be running. The TCP Port number can also be specified, but if youare not using the default, you will have to configure the Studio databasegateway with the same TCP Port. See “Studio Database Gateway” forinformation about how to configure the advanced settings for the Studio ADOGateway.InduSoft Web Studio v6.1 SP5 17–11
IWS Users GuideIWS Database Interface– Disable Primary Key: For some modules, IWS will try to define a primary key to thetable in order to speed up the queries. If you are using a database that doesnot support primary keys (e.g. Microsoft Excel), you should check this field.Table pane: This area allows you to configure the settings of the Table where thedata will be saved. All tasks can share the same database. However, each task(Alarm, Events, Trend worksheets) must be linked to its own Table. InduSoft doesnot check for invalid configurations on this field, therefore you should make surethat the configuration is suitable for the database that you are using.Use default name check-box: When this option is checked (default), IWS saves and/orretrieves the data in the Table with the default name written in the Name field.Automatically create check-box: When this option is checked (default), IWS creates atable with the name written in the Name field automatically. If this option is notchecked, IWS does not create the table automatically. Therefore, it will not be ableto save data in the database, unless you have configured a table with the nameconfigured in the Name field manually in the database.Name: Specifies the name of the Table from the database where the history dataswill be saved.Refresh button: If the database configured is currently available, you can press theRefresh button to populate the Name combo-box with the name of the tablescurrently available in the database. In this way, you can select the table where thehistory data should be saved instead of writing the Table name manually in theName field.Run-Time pane: This area allows you to enter with IWS tags. The following fields areavailable:– Status (output) check-box: The tag in this field will receive one of the followingvalues:ValueDescription0 Disconnected from the database. The database is notavailable or your configuration is incorrect.1 The database is connected successfully2 The database is being synchronized– Reload (output): If you are using in curly brackets in any of the configurationfields, you have to specify the reload tag. When you want to reconnect to thedatabase using the updated values on your tags, set the tag on this field to 1.IWS will update the configuration when trying to perform an action in thedatabase and will set the tag back to 0 when it is finished.17–12 InduSoft Web Studio v6.1 SP5
IWS Database InterfaceIWS Users GuideStudio Database GatewayThe Studio Database Gateway is a TCP/IP server that interacts with databases usingthe Microsoft .NET Framework 1.1. It can run on the same computer that is runningthe IWS application, or on a different computer. The Database Gateway Host in theAdvanced Settings (see “Database Configuration Dialog” dialog) specifies whether thegateway will be running on the local computer or not. If you are using the localcomputer you should enter either localhost or 127.0.0.1 in the Host name. You donot need to worry about starting or stopping the gateway because it will be doneautomatically by IWS tasks. On the other hand, when running the gateway remotely,you need to start the gateway manually. To do so, copy the files StADOSvr.exe andStudioADO.ini from the IWS BIN folder to the remote computer, then execute theStADOSvr.exe.The gateway can be started multiple times for different TCP/IP port numbers. Thedefault port number is 3997, and it is changed by specifying the desired port numberin the command prompt (e.g. StADOSvr 1111). When running the StADOSvr, it willadd the following icon to the tray bar:When you right-click on the tray bar icon, the following options will display:The Hide option defines whether the debug window will be displayed or not. If youde-select it, the following window will display:QuickTime and aTI<strong>FF</strong> (Uncompressed) decompressorare needed to see this picture.Any failure that occurs during operations with databases will be displayed both in thiswindow and also in the LogWin window. The messages are reported by exceptionsInduSoft Web Studio v6.1 SP5 17–13
IWS Users GuideIWS Database Interfacegenerated by the ADO.NET Provider. (Please refer to “Database Troubleshooting” formore information about error messages in the Gateway module.)You can configure the output in this window by using the Log menu:– Show Log menu option: Shows the Studio Database Gateway log files.– Options menu option: Open the Configure Messages dialog.QuickTime and aTI<strong>FF</strong> (Uncompressed) decompressorare needed to see this picture.Studio Database Gateway: Configure Messages dialogooShow Messages pane: Select Errors Only to show only error messages in the log,or select All Messages to show all database messages.Additional Information pane: Configure to show additional information abouteach database message.Message Type checkbox: Click (check) this option to show the type of themessage.Date/Time checkbox: Click (check) this option to show the timestamp of themessage.Remote IP Address checkbox: Click (check) this option to show the databasegateway’s IP address.17–14 InduSoft Web Studio v6.1 SP5
IWS Database InterfaceIWS Users GuideAdvanced SettingsThe Studio Database Gateway has Advanced Settings that are configured in theStADOSvr.ini file. If you are having problems interfacing with a specific database,you will probably need to change some of these paramters or add new providers to thefile. The following parameters are available:Section of .INI File Parameter Accepted Values DescriptionProviders SaveMSec 1 - Disable2 - Enable3 - Separate ColumnProvidersAssemblyConnectionClassDataAdapterClassAny string thatcontains a .NetFramework assemblyAny connection classinside the assemblyAny data adapterclass inside theassemblyCommandBuilderClass Any command builderclass inside theassemblyThis setting specifies the defaultbehavior for the provider whensaving milliseconds. The defaultcan be changed on the AdvancedSettings in the DatabaseConfiguration Dialogs.Assembly option for all providers.The assembly has all the classesrequired to interface with thedatabase. Most of the providers areinside the System.Data assembly.The Connection Class is the onethat implements theSystem.Data.IDbConnectioninterface.The Data Adapter class is used onoperations where updates to thedatabase are necessary. It must becompatible with the connectionclass specified and it shouldimplement IDbDataAdapter.The Command Builder class is alsoresponsible for updates ondatabases. It must be compatiblewith the connection class.Provider Name of the provider One of the parameters in theconnection string is the "Provider".The Studio ADO Gatewaycompares the value on theconnection string with the value forthis parameter in each provider anddefines the proper one to be used.ColumnDelimiterPrefix Any character orgroup of charactersColumnDelimiterSuffix Any character orgroup of charactersTableDelimiterPrefix Any character orgroup of charactersSpecify a character that will beplaced before column names onSQL statementsSpecify a character that will beplaced after column names on SQLstatementsSpecify a character that will beplaced before table names on SQLstatementsInduSoft Web Studio v6.1 SP5 17–15
IWS Users GuideIWS Database InterfaceSection of .INI File Parameter Accepted Values DescriptionTableDelimiterSuffix Any character orgroup of charactersSpecify a character that will beplaced after table names on SQLstatementsValueString Any string This value indicates how constantvalues are identified on SQLstatements. For Microsoft SQLdatabases for instance, the valueshould be @Value, for ODBCquestion mark (?)ValueStringPrefix Any string This value indicates a prefix to beused before the values. Oraclevalues for instance require theprefix. The SQL statements usevalue identifiers by using theirprefixes, but the parameters in theConnection class do not use theprefix.ValueAddNumber 0 or 1 Indicates whether a sequentialnumber should be added to theValueString to identify theparameter or not. For MicrosoftSQL database, this parametershould have the value 1, becauseparameters are identified by using@Value1, @Value2 …, @ValueN.For ODBC, this parameter shouldbe 0.BoolTypeIntegerTypeRealTypeAny stringrepresenting a validdata type for thedatabaseAny stringrepresenting a validdata type for thedatabaseAny stringrepresenting a validdata type for thedatabaseWhen trying to create columns tostore boolean values, the data typespecified on this parameter will beused. You need to make sure thatthe data type specified is able tosave boolean values.When trying to create columns tostore integer values, the data typespecified on this parameter will beused. You need to make sure thatthe data type specified here is ableto store 32 bit values.When trying to create columns tostore real values, the data typespecified on this parameter will beused. You need to make sure thatthe data type specified here is ableto store 64 real values.17–16 InduSoft Web Studio v6.1 SP5
IWS Database InterfaceIWS Users GuideSection of .INI File Parameter Accepted Values DescriptionProviders StringType Any stringrepresenting a validdata type for thedatabaseTimeStampTypeAny stringrepresenting a validdatatype for thedatabaseWhen trying to create columns tostore string values, the data typespecified on this parameter will beused. You need to make sure thatthe data type specified is able tosave the number of characters thatyou are willing to save on yourapplication.When trying to create columns tostore TimeStamp values, thedatatype specified on thisparameter will be used.EnableTop 0 or 1 When this field is set to 1, the ADOwill place the TOP in the SQLstatement to limit the amount ofregisters requested.SingleConnection 0 or 1 When this field is set to 1, the ADOwill open only one connection withthe database, regardless of howmany tasks or computers arerequesting services from it. Thesynchronization between the taskswill be performed by the gatewayand they will not be able to beexecuted simultaneously if thisoption is enabled.Communication TimeOut 2 Time out to perform insert andupdate operationsTimeOut 5 Time out to perform connectionand query updatesTimeOut 60 Time out to performsynchronizationConnection RegBufSize 128 Size of the internal buffer used bythe database API.The paramters are grouped into three sections — Providers, Communication, andConnection — but all of the parameters for configuring database providers are listedin the Providers section of the file. The default values are specified in the beginningof the file, using the prefix “Default” in each parameter as shown below:[Providers]DefaultSaveMSec=3DefaultAssembly=System.DataDefaultConnectionClass=System.Data.OleDb.OleDbConnectionDefaultDataAdapterClass=System.Data.OleDb.OleDbDataAdapterDefaultCommandBuilderClass=System.Data.OleDb.OleDbCommandBuilderDefaultValueString=@ValueDefaultValueAddNumber=1DefaultBoolType=INTEGERDefaultIntegerType=INTEGERInduSoft Web Studio v6.1 SP5 17–17
IWS Users GuideIWS Database InterfaceDefaultRealType=REALDefaultStringType=VARCHAR(255)DefaultTimeStampType=DATETIMEDefaultSingleConnection=0The next parameter on the file lists the number of providers:Count=5The providers are identified by the “Provider” parameter followed by a number. Whenconnecting to a database, the Provider parameter in the connection string iscompared to the provider’s identification, in order to determine which provider will beused. If there is no provider with the value on the connection string, all the defaultvalues are assumed. Besides its identification, each provider can have its own valueper each parameter. Again, if no value is specified, the default is used. Below is anexample with seven providers:Count=7Provider1=MICROSOFT.JET.OLEDBSaveMSec1=3ColumnDelimiterPrefix1=[ColumnDelimiterSuffix1=]SingleConnection1=1Provider2=SQLOLEDBConnectionClass2=System.Data.SqlClient.SqlConnectionDataAdapterClass2=System.Data.SqlClient.SqlDataAdapterCommandBuilderClass2=System.Data.SqlClient.SqlCommandBuilderColumnDelimiterPrefix2=[ColumnDelimiterSuffix2=]TableDelimiterPrefix2=[TableDelimiterSuffix2=]RealType2=FLOATProvider3=MSDASQLConnectionClass3=System.Data.Odbc.OdbcConnectionDataAdapterClass3=System.Data.Odbc.OdbcDataAdapterCommandBuilderClass3=System.Data.Odbc.OdbcCommandBuilderValueString3=?ValueAddNumber3=0StringType3=VARCHAR(128)EnableTop3=0Provider4=ORAOLEDBAssembly4=System.Data.OracleClientConnectionClass4=System.Data.OracleClient.OracleConnectionDataAdapterClass4=System.Data.OracleClient.OracleDataAdapterCommandBuilderClass4=System.Data.OracleClient.OracleCommandBuilderValueString4=ValueValueAddNumber4=1ValueStringPrefix4=:BoolType4=Number(1)IntegerType4=Number(10)RealType4=NumberStringType4=VARCHAR(255)TimeStampType4=TIMESTAMP(0)EnableTop4=017–18 InduSoft Web Studio v6.1 SP5
IWS Database InterfaceIWS Users GuideProvider5=ASAPROVAssembly5=iAnywhere.Data.AsaClientConnectionClass5=iAnywhere.Data.AsaClient.AsaConnectionDataAdapterClass5=iAnywhere.Data.AsaClient.AsaDataAdapterCommandBuilderClass5=iAnywhere.Data.AsaClient.AsaCommandBuilderValueString5=?ValueAddNumber5=0ColumnDelimiterPrefix5=[ColumnDelimiterSuffix5=]TableDelimiterPrefix5=[TableDelimiterSuffix5=]Provider6=MYSQLPROVAssembly6=ByteFX.MySqlClientConnectionClass6=ByteFX.Data.MySqlClient.MySqlConnectionDataAdapterClass6=ByteFX.Data.MySqlClient.MySqlDataAdapterCommandBuilderClass6=ByteFX.Data.MySqlClient.MySqlCommandBuilderValueString6=@ValueValueAddNumber6=1StringType6=VARCHAR(128)EnableTop6=0Provider7=MSDAORAAssembly7=System.Data.OracleClientConnectionClass7=System.Data.OracleClient.OracleConnectionDataAdapterClass7=System.Data.OracleClient.OracleDataAdapterCommandBuilderClass7=System.Data.OracleClient.OracleCommandBuilderValueString7=ValueValueAddNumber7=1ValueStringPrefix7=:BoolType7=Number(1)IntegerType7=Number(10)RealType7=NumberStringType7=VARCHAR(255)TimeStampType7=TIMESTAMP(0)EnableTop7=0InduSoft Web Studio v6.1 SP5 17–19
IWS Users GuideIWS Database InterfaceIWS DEVELOPMENT ENVIRONMENT > THE WORKSPACE > TASKS TAB > ALARMSFOLDERAlarm summary: When you enable the alarm history file for a group, IWS saves the alarmevents to the history database, according to the File Format configured for the AlarmHistory and Events. The information saved in the history file is described in thefollowing table.Field Name Data Type RemarksVersionAl_Start_TimeIntegerTimeStampAl_Tag String Tag NameAl_Message String Alarm messageAl_AckAl_ActiveBooleanBooleanThis field is created only when the File Format is Proprietary.Current version: 003Timestamp indicating when the alarm started.When the File Format is Proprietary, IWS saves the Date(MM/DD/YYYY) in one field and the Time (HH:MM:SS.MSS) in thenext field.0: Indicates the alarm was acknowledged or does not requireacknowledgment1: Indicates the alarm was not acknowledged0: Indicates the alarm is not active1: Indicates the alarm is activeAl_Value Real Tag value when the alarm event occurredAl_Group Integer Alarm Group NumberAl_Priority Integer Alarm Priority NumberAl_Selection String Alarm Selection valueAl_TypeAl_Ack_ReqAl_Norm_TimeAl_Ack_TimeAl_UserIntegerBooleanTimeStampTimeStampString1: HiHi2: Hi(On)4: Lo(Off)8: LoLo16: Rate(Change)32: DevP64: DevM0: Requires acknowledgement (Ack)1: Does not require acknowledgementTimestamp indicating when the alarm was normalized.When the File Format is Proprietary, IWS saves the Date(MM/DD/YYYY) in one field and the Time (HH:MM:SS.MSS) in thenext field.Timestamp indicating when the alarm was acknowledged.When the File Format is Proprietary, IWS saves the Date(MM/DD/YYYY) in one field and the Time (HH:MM:SS.MSS) in thenext field.User logged when the alarm event occurred. This field only existsfor Version >=117–20 InduSoft Web Studio v6.1 SP5
IWS Database InterfaceIWS Users GuideAl_CommentAl_User_FullAl_StationAl_Previous_Tag_ValueAl_DeletedAl_BiasAl_Last_UpdateStringStringStringRealBooleanIntegerTimeStampComment (optional) typed by the operator when the alarm wasacknowledged. This field only exists for Version >=1Full name of the user logged when the alarm event occurred. Thisfield only exists for Version >=2Name of the station (computer) where the alarm event occurred.This field only exists for Version >=2Tag value that occurred before the alarm event. This field onlyexists for Version >=30: Alarm message was not deleted1: Alarm message was deletedThis field is created only when the File Format is Database.Difference (in minutes) from the Time Stamp columns and theGMT time. This field only exists for Version >=3Time Stamp when the register was created/modified. This field isused to synchronize the databases when using the SecondaryDatabase in addition to the Primary Database. This field is createdonly when the File Format is Database.Tip:When saving the History Alarms in a SQL Relational Database (File Format =Database), you can customize the name of the columns created in the databaseby editing the .APP file, as follows:[Alarm]=For example:[Alarm]Message=Alarm_MessageAck=AcknowledgmentInduSoft Web Studio v6.1 SP5 17–21
IWS Users GuideIWS Database InterfaceIWS DEVELOPMENT ENVIRONMENT > THE WORKSPACE > DATABASE TAB > EVENTSETTINGSEvent log files are saved to the history database, according to the File Formatconfigured for the Alarm History and Events. The information saved in the history fileis described in the following table.Field Name Data Type RemarksVersionEvent_TypeEvent_TimeIntegerIntegerTimeStampThis field is created only when the File Format is Proprietary. Currentversion: 0021: SECURITY SYSTEM2: DISPLAY3: RECIPE4: REPORT5: CUSTOM MESSAGES6: SYSTEM WARNING7: LOG TAGSEvent_Info String Tag NameTimestamp indicating when the event occurred.When the File Format is Proprietary, IWS saves the Event Time in thefollowing format: MM/DD/YYYY HH:MM:SS.MSS.Value Real Tag value when the event occurredSource String Name of the task that generated the eventUser String User logged when the event occurred.User_Full String Full name of the user logged when the event occurred.Message String Event messageStation String Name of the station (computer) where the event occurred.CommentPrevious_ValueDeletedBiasLast_UpdateStringRealBooleanIntegerTimeStampComment (optional) typed by the operator when the event occurred. Thisfield only exists for Version >=2Tag value that occurred before the event. This field only exists for Version>=20: Event message was not deleted1: Event message was deletedThis field is created only when the File Format is Database.Difference (in minutes) from the Time Stamp columns and the GMT time.This field only exists for Version >=2Time Stamp when the register was created/modified. This field is used tosynchronize the databases when using the Secondary Database in additionto the Primary Database. This field is created only when the File Format isDatabase.17–22 InduSoft Web Studio v6.1 SP5
IWS Database InterfaceIWS Users GuideTip:When saving the Events in a SQL Relational Database (File Format =Database)you can customize the name of the columns created in thedatabase by editing the .APP file as follows:[EventLogger]=For example:[EventLogger]Event_Info=InformationMessage=Event_MessageInduSoft Web Studio v6.1 SP5 17–23
IWS Users GuideIWS Database InterfaceIWS DEVELOPMENT ENVIRONMENT > THE WORKSPACE > TASKS TAB > TRENDFOLDERName of history files pane: Specify the following parameters to define the history filename. You can generate trend historical files in two forms: by date or batch (byevents).– Date (default) check box: Click (check) to generate history files based on thedate. Use this option if you have a continuous process. Depending on theoptions selected in the History Format combo-box, IWS saves the Trendhistory data either to proprietary binary files or to a SQL Relational Database.The fields saved in the History Trend are described in the following table:Field Name Data Type RemarksTime_StampTimeStampInteger or Real(depending on the tagtype)TimeStamp (Date and Time) when the data wassaved.IWS will create one field (column) in the databasefor each tag configured in the Trend worksheet.17–24 InduSoft Web Studio v6.1 SP5
IWS Database InterfaceIWS Users GuideDatabase TroubleshootingIWS Database interface provides powerful tools that will help you to identifyconfiguration problems with databases. If you are having problems interfacing with adatabase, you should first enable the Database Messages in the Log Window. You cando so by following the steps below:1. In the IWS Development environment, make sure to enable the Output Window(View-> Toolbars-> Output).2. Right click on the Output Window (usually located in the right corner in thedevelopment environment), and select Settings;3. In the Settings Log Settings window check the Database Messages option;After enabling Database Messages, the Output window will display error messagesrelated to the database. The Database FAQ section that follows lists some commonerrors that you can see in the Output window.Database FAQGENERIC QUESTIONSQ: I configured my database, but the Run-Time modules (Alarm, Trend and Events)are not being saved to the database. I only see the following error message in theOutput window:Database: Error: Error to add new register[CMD_ADD].What should I do?A: Most of the database errors in the Output window will be followed by additionalinformation such as the SQL command being executed, the Connection String andthe Table name. Error messages such as the one described above, will usuallyInduSoft Web Studio v6.1 SP5 17–25
IWS Users GuideIWS Database Interfacehappen after a more detailed message. For example, if your Trend task fails to adda register in the database because the cable is disconnected, you should firstreceive a network error; if the task tries to add more registers before the timespecified in the Retry field (see “Database Configuration Dialog Window”), it willonly display Database: Error: Error to add new register[CMD_ADD]. If youthink that your configuration is correct and you want to debug this type ofproblem, reduce the Retry. Then you should see more detailed information.Q: I configured my Connection String using the browser and the Data Link PropertiesWindow. When I click on the Test button, it says “Test succeeded”. However, whenI run my application, the Database Interface displays error messages, and I amnot able to save data.A: The Data Link Properties Window uses OLE DB to interface with the Database.IWS Database Interface uses ADO.NET; therefore, you can have the OLE DBprovider on your machine and be missing the ADO.NET provider. It is alsopossible that you are using an ADO.NET provider that is not listed in theStADOSvr.ini file. Please refer to “Studio Database Gateway” for more informationabout adding ADO.NET providers to the StADOSvr.ini file.Q: Why, when I update information in one line in the Grid object, is it updating morethan one line in my database?A: The grid object issues an update command in the database using the values in allthe columns for the specific row that you are trying to update. If you have rowswith duplicate values, you might see this problem. If your table has a primary keyor any other unique field that you do not want to display in the Grid object, youcan add it to the Columns but specify the Width 0. This will fix the problem.Q: Why do I have to use a separate Column to store the milliseconds on my database?A: Some databases do not support milliseconds in the Time Stamp field. IWS Databaseinterface, by default, requires another column for the milliseconds. If yourdatabase can handle milliseconds, or if you do not want to record themilliseconds, you can change the default behavior in the Advanced settings. Notethat some databases are able to store milliseconds, but they have lower precision.If you mix different databases with different precisions in redundant mode, youcan get synchronization problems.Q: My application works fine when I run in emulation mode. But when I send to theWindows CE device, it cannot communicate with my database.A: It might be the case that your Windows CE device does not have the .NetFramework or that it does not have the provider that you are using. Try to use thegateway remotely by following the instructions in “Linking the Database Througha Remote DB Provider.”Q: Why am I receiving the message Error to create connection class when I tryto connect to the database?A: The .Net Provider that you are trying to use is not installed on your machine. Thiserror message is usually followed by the provider name; if you are using theSybase database, for instance, the message is followed by[iAnywhere.Data.AsaClient.AsaConnection]. The Provider is theiAnywhere.Data.AsaClient. You can check if the provider is installed on yourmachine by going to the Control Panel->Administrative Tools->Microsoft .Net Framework x.xConfiguration. The provider should be listed in the Assembly Cache.17–26 InduSoft Web Studio v6.1 SP5
IWS Database InterfaceIWS Users GuideQ: What if I have the provider assembly (usually a .dll file), but it is not listed in theAssembly Cache?A: If your assembly has a strong name, you can register it in the Assembly Cacheusing the gcautil program. It should work if you copy your assembly to the samefolder as the StADOSvr.exe (usually the IWS\Bin folder).ORACLEQ: When I lose the connection with an ORACLE database, it does not recover. Ireceive the following message in the logwin: Database: Error: ORA-03114: notconnected to ORACLE. Is that a problem with the IWS Database Interface?A: The Oracle .Net Provider has a problem managing the connection pool. You needto install a QFE 830173. At the time that this document was written, moreinformation about this problem could be found athttp://support.microsoft.com/default.aspx?scid=kb;en-us;830173.Q: When I try to access the database I get the following error message: ORA-00162:external dbid length 19 is greater than maximum (16). What should I do?A: At the time that this document was written, there was a problem on the Oracle.NET Provider; the Server Name (SERVER/TNS) could not exceed 16 characters. Inorder to fix this problem, you should try to reduce your Server Name field. One wayof doing it is to edit the file \WINDOWS\system32\drivers\etc\hosts to add anentry with a smaller server name. For instance, the server name specified by192.168.89.98, has 13 characters, it could be reduced to 3 by adding the followingline in the file:192.168.89.98 oraNow you can configure the Server Name configuration using ORA/TNS instead of192.168.89.98/TNS.MYSQLQ: When I try to access the database from my local machine, it works fine. But whenI move my application to a remote machine, it says, Access Denied.A: Each user on a MySQL database has a property associated with it that indicatesthe computer from which you can get access to the database. By default, thisproperty is set to localhost, so you will only be able to access the database fromthe local computer. You should read the MySQL manual for information aboutchanging this setting.Q: Sometimes when I try to synchronize a remote MySQL database with a localMySQL database, or if I try to use application redundancy, a connection to theADO.NET interface is opened and never closed.A: Go to the Database Configuration dialog and uncheck the Automatically Create option.For more information, see “Database Configuration Dialog” on page 17–9.SYBASEQ: I configured my Sybase database using the Browse button. When I click the testbutton, the test succeeds, but when I try to run my application, I get the followingerror: Database: Error: Parse error: DSN 'MyDatabase' does not exist.What am I doing wrong?InduSoft Web Studio v6.1 SP5 17–27
IWS Users GuideIWS Database InterfaceA: Please refer to Appendix F – Using Sybase for more information about thisproblem.Q: Why, when I try to connect to the Sybase database, am I receiving the error Errorto create connection class [iAnywhere.Data.AsaClient.AsaConnection]?A: You do not have the ADO.NET Provider installed on your computer. The databasesetup program has an option to install the Provider. Rerun the setup program andmake sure to check that option.SQL SERVER CEQ: Why does the gateway shows TypeLoad failure when I try to access my SQLServer CE database?A: This problem usually happens when you do not have the SQL Server CE .NETProvider installed on your CE Device.Q: Why am I getting the error message, There is a file sharing violation. Adifferent process might be using the file?A: You have another program with the SQL Server CE database open. For instance,this will happen if you are using the SQL Server CE configuration software.17–28 InduSoft Web Studio v6.1 SP5
IWS Database InterfaceIWS Users GuideDatabase Appendix A: Using ODBC DatabasesAlmost every database provides an ODBC interface that can be used to interface withit. The database features provided by IWS can be used with ODBC drivers through theADO.NET interface for ODBC. In order to use this capability, you must use Microsoft.NET Framework 1.1 or higher. Note:Microsoft .NET Framework 1.1 is automatically installed, starting with IWS v.6Service Pack 3.The Database Configuration Dialog allows you to provide connection strings that willconnect to an ODBC DSN. The connection string can be built automatically byclicking on the Browse button (…). When the Data Link Window displays, you shouldselect the option Microsoft OLE DB Provider for ODBC Drivers as shown below:By clicking the Next button the following window will display:InduSoft Web Studio v6.1 SP5 17–29
IWS Users GuideIWS Database InterfaceSelect the DSN that you want to connect to and click OK. If you want to specify theuser name and password on this window instead of specifying on the DatabaseConfiguration dialog, remember to check the Allow saving password checkbox.Database Appendix B: Using Microsoft SQL ServerIWS Database Interface allows you to retrieve and store information on Microsoft SQLServer relational databases. You should follow the steps below in order to configurethe SQL Server database:1. Click on the Browse button in the Database Configuration Dialog window. Thefollowing window will display:17–30 InduSoft Web Studio v6.1 SP5
IWS Database InterfaceIWS Users Guide2. Select the Microsoft OLE Provider for SQL Server, and click Next. The followingwindow will display:InduSoft Web Studio v6.1 SP5 17–31
IWS Users GuideIWS Database Interface3. Fill out the fields on this window with your database information. If you arenot using Windows NT Integrated security, remember to check the Allow savingpassword checkbox to save the password when the Data Link Properties window isclosed.4. Click OK to finish the Connection String configuration.Your connection string should be very similar to this one:Provider=SQLOLEDB.1; Integrated Security=SSPI; InitialCatalog=MyDatabase; Data Source=192.168.23.200 Note:These procedures were tested using Microsoft SQL Server 2000.Database Appendix C: Using ORACLE databasesIWS Database Interface allows you to retrieve and store information on ORACLErelational databases. You should follow the steps below in order to configure theORACLE database:1. Click on the Browse button in the Database Configuration Dialog window. Thefollowing window will display:2. Select the Microsoft OLE Provider for Oracle and click Next. The followingwindow will display:17–32 InduSoft Web Studio v6.1 SP5
IWS Database InterfaceIWS Users Guide3. Fill out the fields on this window with your database information. Rememberto check the Allow saving password checkbox to save the password when the DataLink Properties window is closed. The server name information has thefollowing format:/Where:• Server: Computer where the Oracle database is running• TNS: Oracle TNS name Caution:At the time that this document was written, the Server Name field could not beconfigured with more than 16 letters. If more than 16 letters were specified,you would receive the following error: ORA-00162: external dbid length 19is greater than maximum (16). where 19 is the number of letters in theServer Name. Please see “Database Troubleshooting” for more hints toworkaround this problem.4. Click OK to finish the Connection String configuration. Note:These procedures were tested using ORACLE 10g Release 1.InduSoft Web Studio v6.1 SP5 17–33
IWS Users GuideIWS Database InterfaceDatabase Appendix D: Using Microsoft Access DatabasesIWS Database interface allows you to retrieve and store information on MicrosoftAccess Database files. You should follow the steps below in order to set up an accessdatabase:1. Click on the Browse button in the Database Configuration Dialog window. Thefollowing window will display:2. Select the Microsoft Jet 4.0 OLE DB Provider, and click Next. The followingwindow will display:17–34 InduSoft Web Studio v6.1 SP5
IWS Database InterfaceIWS Users Guide3. Type the name of or select the database that you want to access. Caution:Databases such as Microsoft Access are not capable of handling largeamounts of data efficiently. Therefore, if you try to store all your historicaldata in this type of database, the queries might be very slow, and you mightnot get the expected results. If you need to store large amounts of data, werecommend that you either use the proprietary format or a powerful relationaldatabase such as Microsoft SQL Server or ORACLE. Microsoft Access isrecommended as a secondary database, using the option Store and Forward, orto exchange information with third party software. Note:These procedures were tested using Microsoft Access 2000 (9.0.3821).Database Appendix E: Using SQL Server CEIWS can interface with SQL Server CE databases by using the SQL Server CEprovider. This provider is available only for Windows CE, and it must be installed onyour Windows CE device. Because this provider is only available for Windows CE, youhave to enter the Connection String manually. The Connection String should have thefollowing format:Provider=SQLCE; Data Source = Examples:InduSoft Web Studio v6.1 SP5 17–35
IWS Users GuideIWS Database Interface1. Access a fixed database file located in \Harddisk\MyDatabase.sdf:Provider=SQLCE; Data Source = \Harddisk\MyDatabase.sdf2. Access a database file in the location indicated by the string tagDatabaseFile:Provider=SQLCE; Data Source = {DatabaseFile} Caution:Databases such as SQL Server CE are not capable to handle large amounts ofdata efficiently. Therefore if you try to store all your historical data on thistype of database, the queries might be very slow and you might not get theexpected results. If you need to store large amounts of data, we recommendthat you either use the proprietary format or a powerful relational databasesuch as Microsoft SQL Server or ORACLE. SQL Server CE is recommended asa Secondary database using the option Store and Forward or to exchangeinformation with third part software.Database Appendix F: Using SybaseYou need to install the AsaClient provider on your computer; the tests with IWS wereperformed using the architecture explained in the topic Linking the DatabaseThrough a Remote DB Provider.If you are using the browse button to automatically generate the connection string,the string returned will have the following format:Provider=ASAProv.90; Data Source=TestThis format requires that you create an ODBC DSN with the same name as the DataSource (in this case, Test) in order to communicate with the database. If the DSN is notcreated, the following error will display in the LogWin when connecting to thedatabase:Database: Error: Parse error: DSN 'Test' does not existTo void an ODBC DSN, you can enter with the connection string manually as shownin the example below:Provider=ASAProv.90; DBF=C:\ Test.db Note:These procedures were tested using Sybase Server Anywhere 9.0.1.1751.Database Appendix G: Using Microsoft ExcelIWS Database interface allows you to retrieve and store information in Excel files. Themain use of an Excel database is with the Grid object. The steps below show how toconfigure the Grid object to retrieve data from an Excel file:1. Insert a Grid object on your screen;2. Select Database in the Data Source field.3. Click the Data button. The following window will display:17–36 InduSoft Web Studio v6.1 SP5
IWS Database InterfaceIWS Users Guide4. Uncheck the Use application default check box.5. Click the Browse button to build the Connection String. The following windowwill display:6. Select the Microsoft Jet 5.0 OLE DB Provider, and click Next. The followingwindow will display:InduSoft Web Studio v6.1 SP5 17–37
IWS Users GuideIWS Database Interface7. Click the Browse button. The following window will display:8. Select your Excel file, and click Open.9. Select the tab All in the Data Link Properties Window.10. In the extended properties, enter the value Excel 8.0.17–38 InduSoft Web Studio v6.1 SP5
IWS Database InterfaceIWS Users Guide Note:The value in this field might change if you are using a different Excel version.11. Click OK, and you will have a connection string very similar to this one:Provider=Microsoft.Jet.OLEDB.4.0; Data Source=C:\Book1.xls;Extended Properties="Excel 8.0" Tip:You can enter a tag between curly brackets to specify the Excel file that you wantto access. In the example below, the tag TagExcelFile is used to indicate theExcel file:Provider=Microsoft.Jet.OLEDB.4.0; DataSource=C:\{TagExcelFile}.xls; Extended Properties="Excel 8.0"12. Specify the worksheet that you want to access in the Table field. The worksheetname should have the dollar sign ($) at the end, and it must be between squarebrackets ([]). The picture below shows the configuration to access a worksheetcalled Sheet1:InduSoft Web Studio v6.1 SP5 17–39
IWS Users GuideIWS Database Interface Tip:You can enter a tag between curly brackets to specify the worksheet name (e.g.[{TagExcelWorksheet}$]) Note:These procedures were developed based on information provided on theMicrosoft Knowledge Base Article 278973. They were tested using MicrosoftExcel 2000 (9.0.3821).Database Appendix H: Using MySQLIWS Database interface can interface with MySQL databases; however, you mustinstall the .Net provider for it in order have access. The provider required by IWS is theByteFX.MySqlClient. At the time that this document was written, it could bedownloaded from www.sourceforge.net.The connection string should have the following format:Provider=MySqlProv; Data Source=MyDatabaseName;Location=192.168.23.200 Note:If you have the OLE DB Provider for MySQL installed on your computer, you canuse the browse button on the Database Configuration Dialog window to buildyour connection string.17–40 InduSoft Web Studio v6.1 SP5
IWS Database InterfaceIWS Users GuideThe ByteFX.MySqlClient connection uses different keywords for the Data Source andfor the Location parameters in the connection string. The example above is passed tothe connection class in the following format:Database=MyDatabaseName; Data Source=192.168.23.200; Pooling=false Note:These procedures were tested using MySQL v4.0.20a and theByteFX.MySqlClient v0.76.InduSoft Web Studio v6.1 SP5 17–41
IWS Users GuideIWS Database Interface17–42 InduSoft Web Studio v6.1 SP5
Chapter 18: TroubleshootingIf you do find yourself in need of technical assistance, there are certain things that youwill need to know before you contact technical support. Regardless of the problem, youwill need to know the sequence of events that led to you discovering the problem. Itmust be explained in as much detail as possible and you should be careful not toad-lib, as it may drastically affect troubleshooting time and procedures. It's also bestto be in front of the computer you are having problems with, and to keep a pen andpaper handy.InduSoft Web Studio v6.1 SP5 18–1
IWS Users GuideTroubleshootingBefore Contacting Technical SupportSome things you should try before you contact technical support are: Check out the documentationCheck the Help files of your product for more information on your issue. Help canbe found on the menu bar within the application. For online documentationincluding Release Notes and downloads, see the IWS Web site (www.InduSoft.com).You may find that your particular issue has already been documented.Consider recent changes on your systemIf something used to work, think about what may have changed. New softwareinstallation or general system changes can affect performance and generalfunctionality of other software on your system.Try reproducing the problem in a new fileIf the problem can not be reproduced in a new test file, compare the new file withyour original file to find and eliminate the differences. This will help narrow downthe cause of the issue.Try reproducing the problem on another machineIf the problem goes away on another machine, compare what is different betweenthe two systems. If this is the case, there is most likely a system conflict.If you cannot find an answer to your technical question in the product documentationor help system, our Technical Support Specialists are available to assist any customerwith current product maintenance.Please try to define the problem before you contact Technical Support so that you canrepeat the steps that led to the problem and specifically identify when and how theproblem occurred. The support representative will need to know exactly what theproblem is in order to provide help. These steps will help us pinpoint and solve yourproblem more quickly.Please have the following information available:Hardware environment—available memory, processor type, output deviceSoftware environment—operating system, version of Windows®, network platformProduct name, version number, and product registration numberAmount of memory installed on your systemAmount of free hard disk space on your system Screen resolution (screen size in pixels, for example, 1024 by 768)Screen color depth (number of colors or bits, for example, 256 colors or 8-bit color)Graphics card manufacturer, model name, and driver version numberSound card manufacturer and model nameA list of external devices connected to the computerBrief description of the problem or error, and the specific text of any errormessagesDescription of the steps you have taken to troubleshoot the issue, for example,how many machine have you tested on, and is the issue reproducible in a new fileSteps to reproduce the issue, if it is reproducible. If the issue is not reproducible, itmay be an development issue rather than an issue with the product.If your application crashes completely during runtime, it will generate a debuggerreport and save it to:18–2 InduSoft Web Studio v6.1 SP5
TroubleshootingIWS Users Guide\Web\Dump\WindDump.dmpPlease have this file ready to send to Technical Support for analysis.If your problem or question is not urgent, you may choose to email technical support.Email sent to support is answered daily (support@InduSoft.com).If you require additional assistance while using InduSoft Web Studio or this servicepack, the following resources are available by telephone at 877-INDUSOFT(877-463-8763)Related IWS Publications:InduSoft Web Studio Getting Started Guide: Designed for first-time users, thispublication contains information about the basic functions of InduSoft WebStudio. This publication is provided in the Documentation folder on the IWSCD-ROM or from the Help menu located on the main menu bar.Using the Help Menu– Technical Reference: Opens the Context Sensitive Help.– User Guide: Opens the User Guide Manual.InduSoft Web Studio Technical Reference Manual: Describes all the features andtools that comprise the IWS development environment and provides detailedinstructions for using the product. This publication is provided in theDocumentation folder on the IWS CD-ROM or from the Help menu on the mainmenu bar.Drivers User Guides: Explain how to configure individual InduSoft drivers,according to their unique protocol characteristics. One customized user guide isincluded with each InduSoft driver. These publications are provided in the DRVsubdirectory of the InduSoft Web Studio folder on the IWS CD-ROM or from the Helpmenu located on the main menu bar.Visit the InduSoft Web Site at www.InduSoft.com.InduSoft Web Studio v6.1 SP5 18–3
IWS Users GuideTroubleshootingVerifying Your ApplicationFrom the menu bar, select Tools > Verify Application to recompile all Math worksheets,expressions, and screen logic, as well as to update current HTML files using thesettings configured on the Web tab of the Project Settings dialog.QuickTime and aTI<strong>FF</strong> (Uncompressed) decompressorare needed to see this picture.Verifying an ApplicationIf there are any tags used in the application that are not defined in the database, thenIWS will indicate where (i.e., the screen or worksheet file) those tags are used.QuickTime and aTI<strong>FF</strong> (Uncompressed) decompressorare needed to see this picture.Invalid Tag Found in Screen File Tip:When you save a screen or worksheet, IWS includes a pointer to the currentdatabase version. When you execute the application, IWS compares the screen orworksheet database to the current application database and if there is amismatch, IWS recompiles the expressions.To avoid doing these tasks during application runtime, we recommend runningthe Verify Application tool before downloading and/or finishing an application. Youshould also use this function when converting an application to a new version ofthe program. Note:Selecting the Verify Application tool will delete all temporary files (e.g., *.txt, *.macand *.tag files) from the application folder to save disk space and clean theapplication before downloading it to the runtime station.Verifying an application does not automatically download it to the runtimestation. To download the application, you must use the Send project to target tool.18–4 InduSoft Web Studio v6.1 SP5
TroubleshootingIWS Users GuideCommon ErrorsListed below are answers to frequently asked questions about InduSoft Web Studio.Database & Security SystemWhat does the Shared Tags folder store?The Shared Tags folder stores the tags imported from the PC Based Control linkedto the IWS application. The PC Based Control is linked to the IWS application bythe New Project wizard.How do I count how many tags are configured in the application database?From the menu bar, select Project Status, and then the Information tab to calculatethe amount of tags configured in the application. Each array position and eachclass member of the tags configured in the IWS tag database are counted.How do I see the list of “Users” I’ve added during runtime in my application that Ihave created with the CreateUser() function?Execute the following command: “\BIN\Studio Manager.exe”“\BIN\ExtUser.dll” (for example: “E:\ProgramFiles\Studio\BIN\Studio Manager.exe” “E:\ProgramFiles\Studio\BIN\ExtUser.dll”). This command will launch a dialog window.You can see the users created by the CreateUser() function, and you can thencreate or delete users.GraphicsHow do I insert and configure an ActiveX object in a Studio application?To insert an ActiveX object in an IWS application:– Select the menu option Insert ActiveX object… or press the ActiveX Control buttonfrom the Active Objects toolbar.– Select the ActiveX object to be inserted in the application from the list box, andpress the OK button. The ActiveX object will then appear on the screen.(Unregistered ActiveX objects will not be available in this list box.)– Double-click on the ActiveX object and assign a name to it (enter a value in theName field). The dynamic properties and methods list can be viewed by selectingthe Methods button. The static properties can be set by the Properties button (Adetailed description about the objects properties can be found in thecomponent documentation, provided by the component developer).There are three functions to access the ActiveX component during runtime:– XGet(strName,strProperties): Returns the value of the properties from the object . The list of properties which canbe read from the object are listed in the Methods dialog from the object, withthe syntax (PropGet) (for example, Color(PropGet)).– XSet(strName,strProperties,Value): Writes the value to theproperties of the object . The list of propertieswhich can be set to the object are listed in the Methods dialog from the object,with the syntax (PropPut) (for example,Color(PropPut)).InduSoft Web Studio v6.1 SP5 18–5
IWS Users GuideTroubleshooting– XRun(strName, strMethod, Parameter1, Parameter2, …, ParameterN): Executes the method from the object , according to the parameters, , …, . The list of methodsavailable in the object is listed in the Methods dialog from the object, with thesyntax (Method) (for example, OpenFile(Method)). Tip:Before inserting an ActiveX component (usually an OCX file) into the IWSapplication, make sure it has been properly registered in the computer. It’spossible to register an ActiveX object by IWS. Select the menu option Tools >Register Controls, press the Register… button and select the ActiveX file (usuallyan OCX file) that must be registered. Note:The amount of parameters set in the XRun() function can vary from 0 up to255 and it depends each the ActiveX component. It’s possible to use tags toset the parameters; however, the tag type must match the componentparameter type (Boolean, integer, string or real).How do I designate one screen that will open each time I start the application?Open the Project Settings dialog window by the Project Settings menu, select theRuntime Desktop tab, and type the startup screen name in the Startup screen field.How do I insert a background picture on the screen?Right click on the screen and select the option Screen Attributes from the popupmenu. Enable the check-box Enable Background and choose the picture format in thecombo-box besides this label. Copy the picture file to the \Screen folder of theapplication and rename it with the same name of the screen (.scrfile). Using the Shared image option, it’s possible to copy a bitmap file to the \Screenfolder and share this picture with more than one screen. In this case, it’snecessary to type the bitmap name in the Share image field.18–6 InduSoft Web Studio v6.1 SP5
TroubleshootingIWS Users GuideTasksHow do I convert the History Trend to an ASCII file?To convert a History Trend file to an ASCII format, copy the file"\bin\hst2txt.exe" to the path "\\hst\".Alternatively, you can use the HST2TXT function in a Math worksheet to convertbinary files into text format automatically without having to use a DOS window.How do I exchange data with FOX Pro by an ODBC protocol?When exchanging data with FOX Pro database, it’s necessary to set the parameterUseQuote=0 from the [ODBC] section in the .app file.How do I set a DATE field for an ODBC interface with an Oracle package?Configure the “Column” cells in the IWS ODBC worksheet with the syntax.ts (for example: MyDate.ts).How do I execute a Math worksheet during the startup and another Math worksheetduring the application shutdown?Startup: Execute a Math worksheet during the startup by creating a Math worksheetand filling in its Execution field with the expression =0 (for example,StartTag=0). In the last line of the Math worksheet, set the value 1 to the tag. The tag type should be Boolean.Shutdown: Instead of executing the ShutDown() function directly, execute one Mathworksheet and configure the ShutDown() function in the last line of this Mathworksheet.InduSoft Web Studio v6.1 SP5 18–7
IWS Users GuideTroubleshootingCommunicationHow do I address timeout errors?A timeout error (error 1234) typically indicates that runtime instructions are notarriving at the connected PLC. To address the error, you can do the following:– Verify that the selected driver’s communication parameters match the PLCspecifications. (See Configuring a Driver on page 10–2.)– Verify the PLC’s station number and make sure it is properly configured in theStation field of the driver worksheet. (See Configuring the Driver Worksheets onpage 10–10.)– Ensure that all wiring is securely connected and the PLC is set to run.How do I set a “communication error” alarm?Configure a tag in the fields “Write Status” or “Read Status” of the driver worksheetsand configure an alarm whenever this tag is different of 0 (zero).How do I communicate with a Siemens S7-200 PLC without using Prodave software?Siemens S7-200 PLC has a Freeport that can implement any protocol via PLCprogramming. There is PLC free software distributed by Siemens that implementsModbus protocol in the PLC Freeport (for further details contact Siemens support).Using this software in the PLC and Studio Modbus driver (MODBU) you canexchange information between them.How do I start and stop communication drivers during the runtime?There are three functions available to handle the execution of the communicationdrivers during the runtime:– Start all drivers configured in the application:Syntax: StartTask(“Driver”)For example, StartTask(“Driver”)– Start a specific driver configured in the application:Syntax: WinExec(“\bin\StudioManager.exe”+ “+“\bin\Driver.dll”+ “+ “”)For example, WinExec(Asc2Str(34)+“C:\Program Files\InduSoft WebStudio v6.1\BIN\Studio Manager.exe+Asc2Str(34)+” “+Asc2Str(34)+“C:\Program Files\InduSoft Web Studio v6.1\BIN\Driver.dll”+Asc2Str(34)+” “+Asc2Str(34)+ “MODBU”+Asc2Str(34)) Note:The Asc2Str(34) function is used to concatenate quotation marks forpaths where there are space chars.– Stop a specific driver configured in the application:Syntax: EndTask(“Driver”)For example, EndTask(“DriverMODBU”) Tip:You can start or stop other tasks using the StartTask()and EndTask() functions.For example, StartTaks(“Viewer”), Endtask(“Viewer”).18–8 InduSoft Web Studio v6.1 SP5
TroubleshootingIWS Users Guide Caution:The drivers and tasks cannot be started or stopped during the runtimewhen running CEView (under the WinCE operating system).What are the parameters of Studio DDE Server?The Studio DDE Server and NetDDE Server parameters are shown in the tablebelow:Comm. Type Application Topic ItemNetwork DDE //\NDDE$ UNISOFT$ Local DDE UNIDDE DB How to exchange data with Excel by using NetDDE?NetDDE can be used to exchange data, via the DDE protocol, between networkedstations.– Start the DDEServer module from Studio (Project > Status > DDE Server)– Run Excel in the remote station– Open a Excel worksheet and fill the cells which must exchange data withStudio using the following syntax: ='\\\NDDE$'|'UNISOFT$'!For example, ='\\PC\NDDE$'|'UNISOFT$'!second Notes: When running under Windows NT or Windows2000, it is necessary tomake sure that the services Network DDE and Network DDE DSDM arestarted. (Use the Services shortcut from Control Panel to start theseservices). When running under Windows 98, it is necessary to run the program\netdde.exe in both computers (for example,c:\Windows\netdde.exe).Is the Studio OPC interface compliant with OPC specification v1.0a or v2.0?Studio OPC Client and OPC Server modules are compliant with both OPCspecification v1.0a and v2.0.InduSoft Web Studio v6.1 SP5 18–9
IWS Users GuideTroubleshootingGeneral TroubleshootingWhat operating systems are compatible with Studio and CEView?See table below. The symbol “” means that the operating system is NOTsupported and the symbol “” means that the operating system is supported.Operating System Studio CEViewName Version v2.xv3.xthruv4.1v4.2thruv6.0v6.1andhigherv3.x v4.x v5.x v6.xWindows Vista Any Windows XP Any Windows 2000 Any Windows NTv4.0+SP4or higher Windows ME Any Windows 98 Any Windows 95 Any Windows CEv2.12 v3.x v4.0 v4.1 Windows CE.netv4.2 v5.0 v6.0 How do I start IWS automatically when the computer is powered on?Create a shortcut to the …\\bin\RunStartUp.exe in the Startupfolder from the Programs group (…\WINNT\Profiles\All Users\StartMenu\Programs\Startup\).How to disable Dr. Watson?The procedure step-by-step to disable Dr. Watson under Windows NT is describedbelow:– Execute the program \RegEdit.exe (for example,C:\WinNT\Regedit.exe)– Select the path HKEY_LOCAL_MACHINE\SOFTWARE\Microsoft\WindowsNT\CurrentVersion\AeDebug– Set the value 0 (zero) to the parameter “Auto” from the path selected.– Close the Registry Editor window. Caution:Special cautions must be taken when editing parameters in the Registry Editorprogram because some of them can modify the overall behavior of theoperating system.18–10 InduSoft Web Studio v6.1 SP5
TroubleshootingIWS Users GuideThere are two ways to modify the data format in IWS:– Off-Line: Set the parameters Order= (for example, DMY) andSeparator= (for example, / or .) from the [International] sectionfrom the \\Local Settings\Application Data\InduSoftWeb Studio v6.1\Program Settings.ini file. Note:You will need to verify your application to apply date settings to previouslysaved Web pages.– On-Line: Use the function SetDateFormat(,). For example, SetDateFormat(“/”,”MDY”).What features are not supported by CEView?The main features not supported by CEView are: DDE, NetDDE, ODBC, PasteLink,and a number of functions.How do I show a splashwindow when starting an application in CEView?To enable your CE application to show a splash window during startup, add thefollowing key to the device’s CEView.ini file:[OEM]SpashWnd = // default is Splash.bmpSplashWndTime = // default is 1000What are the main steps to create a Web based application?Follow the procedure below:– Develop the application locally. Don’t use features which are not supported byWeb Thin Clients for the screens which will be saved as HTML format.– After saving the screens in the standard format (File > Save), save the screenswhich must be available for the Web Thin Client in HTML format by the menuFile > Save as HTML.– Open the Project Settings dialog window (menu Project > Settings) and select theWeb tab.– Configure the field Data Server IP with the IP address of the Server station (stationwhere Studio is running).– Open the Project Status dialog window (menu Project > Status), select the ExecutionTasks tab and set the TCP/IP Server module as Startup=Automatic.– Open the application tags database and set the option Server instead of Local inthe Web Data column for all tags which must exchange value between the Serverand the Web Thin Client station.– Execute the command Tools > Verify Application to update the Project Settings in theHTML files.– If there is not any Web Server running in the computer, copy the programNTWebServer.exe from the \BIN folder of Studio into the web root (forexample, \\Web) and execute it. The path where thisWeb Server program is executed will be the web root of the station. The WebServer is necessary to export data (web files) in HTTP protocol to the Web ThinClients.– Execute the application in the Server station.– Using a browser (for example, Internet Explorer v4.1+SP1 or newer version) inthe Web Thin Client station, type the URL address to download the screenInduSoft Web Studio v6.1 SP5 18–11
IWS Users GuideTroubleshootingwhich had been saved in HTML format (for example,http:/// .html). Note:The Web Thin Client requires an ActiveX component (ISSymbol.ocx) tohandle the screens on the browser. If the Web Thin Client is connected tothe Internet, this component is downloaded and registered automatically.Otherwise, it’s necessary to copy it to the \\System32 directoryof the Web Thin Client and register it by the command regsvr32ISSymbol.ocx. This file can be found in the \BIN folder from the IWSinstallation directory.How do I maintain communication between a Web Thin Client connecting via proxyand a Web Gateway application running on Microsoft IIS?Microsoft Internet Information Services (IIS) has a configuration option to keepHTTP connections alive. When this option is enabled, it may conflict with Web ThinClients that are connecting via proxy. To disable this option:1. Start Internet Services Manager.2. In the Internet Information Services window, open the local server (* server name).3. Right-click on Default Web Sites and select Properties from the pop-up menu. TheDefault Web Site Properties dialog is displayed.4. Select the Web Site tab of the Default Web Site Properties dialog.5. In the Connections pane of the Web Site tab, uncheck the HTTP Keep-Alives Enabledoption.6. Click OK to save the change and close the dialog.How do I send an email from the IWS application?Follow the procedure below:– Execute the function CNFEMail(strSMTP,strFrom,strPOP3,strUser,strPassword,numTimeOut) to configure the overall parameters used to sendemails. After executing this function once, the parameters set by it are kept inthe system until the application is shut down. So, most of application executethis function just once, after starting the application;– Execute the function SendEMail(strSubject,strMessage,strTO) and/orSendEMailExt(strSubject,strMessage,strTO,strCC,strBCC,strFile1,...,strFileN) each time that an email message must be sent.The main difference between both functions are listed in the next table:Characteristic SendEmail() function SendEmailExt() functionExecution Synchronous AsynchronousSupports Subject text Supports Message text Supports TO addresses Supports CC addresses Supports BCC addresses Supports attached files 18–12 InduSoft Web Studio v6.1 SP5
TroubleshootingIWS Users GuideThe runtime task (TCP/IP, OPC, DDE, ODBC, etc) does not work.Make sure the runtime task is set to as Automatic in the Execution Tasks tab from theProject Status dialog window (Project > Status menu). Select the runtime tasks whichmust be executed (for example, TCP/IP Server), hit the Startup… button and set it asAutomatic.The Browser from the Web Thin Client does not display the screen and launches awarning message regarding ISSymbol.ocx.Make sure the runtime task is set to Automatic in the Execution Tasks tab from theProject Status dialog window (Project > Status menu). Select the runtime tasks whichmust be executed (for example, TCP/IP Server), hit the Startup… button and set it asAutomatic.The Browse of the Web Thin Client launches an error message missing theISSymbol.ocx and does not display the screens from the Server.Issymbol.ocx is the IWS ActiveX object used by the browser from the Web ThinClient to view the Web pages. If the Web Thin Client is connected to the Internet,the ISSymbol.ocx control is automatically downloaded and registered in the WebThin Client station. Otherwise, it’s necessary to copy it to the \WinNT\System32folder of the Web Thin Client station and register it manually. Once it is registeredyour browser will be able to see the pages. Note:Use the command regsvr32 ISSymbol32.ocx to register the ActiveXcomponent in the Web Thin Client.The screens are shown on the Web Thin Client (Browser); however, the data (tagsvalues) are not read from the Server.Make sure the parameter in the column Web Data from the application tagsdatabase is set as Server instead of Local. The tags set as Server keep the same valuein the Server and in the Web Thin Client (Browser). The tags set as Local haveindependent values in the Server and in the Web Thin Client (Browser). Caution:It’s necessary to execute the command Tools > Verify application after modifyingthe tags settings. Otherwise, the changes will not be updated in the web files.The “On Up” expressions configured in the Command dynamic are not executed.The “On Up” expressions from the Command dynamic are not executed if the mousepointer is dragged out the object area before releasing it. If the check-box Releasefrom the Command Object Properties window is enabled, the On Up expression isexecuted even if the mouse pointer is dragged out the object area before releasingit.The Trend History does not work after adding or removing tags in the Trendworksheet.When a tag is inserted or removed FROM a Trend worksheet, the format of thehistory files (*.hst) is modified. The same .hst file cannot have two differentformats; otherwise, the data will not be retrieved from it properly by the Trendobject. If you need to add or remove tags for history files, there are two validprocedures: Create a new Trend worksheet or delete the old *.hst files.InduSoft Web Studio v6.1 SP5 18–13
IWS Users GuideTroubleshootingThe value of indirect tags (@ ) is not shown in the web thin clientapplication.When a screen is saved as HTML, Studio saves a .tagl file in the\WEB subfolder. This file has the list of all tags configured in the screen (objectsand dynamics). When a screen is opened in the Web Thin Client browser, the tagslisted in the .tagl are “enabled” for TCP/IP communication withthe server station. It provides an optimized communication between the serverstation and the Web Thin Client stations.When using indirect tags in this way (@), the tags pointed will notexchange data with the Server, unless they had been configured in the screen. Inother words, the tags that will be pointed in the screen MUST be configured in anyobject of the screen to enable the TCP/IP communication for these tags with theserver station. Tip:Add a transparent rectangle (no fill and no line) in the screen corner. Apply theCommand dynamic to this rectangle and configure the tags (which can be pointedby indirect tags during the runtime in the Web Thin Client station) in theExpression fields (keep the Tag Name fields blank). These tags will be added to the.TAGL file and they will be available for TCP/IP communicationwith the Server station.Which functionalities are not supported by Pocket PC platforms (for example, IPaq,Cassiopeia, Jornada)?WinCE devices powered Pocket PC do not support some functionality which aresupported by WinCE devices powered by the “standard” Windows CE version:Functionality not supported by Pocket PC devicesDCOM (Distributed Component Object Model): It means that all features based on DCOM (for example,remote OPC communication) are not supported by PocketPC devices.DialGetClientIP() function does not work for Pocket PC devicesHow do I enable the “Hibernate” options from the operating system after installingIWS on a notebook?Follow the procedure below:– Run the Registry Editor (\Run\regedit).– Select the following path from the Registry Editor:HKEY_LOCAL_MACHINE\System\CurrentControlSet\Services\Proteq\Parameters– The IoPortAddress parameter from the path mentioned above is set with thehexadecimal value: 0x00000111. Set this parameter with the hexadecimaladdress of the LPT1 parallel port of your notebook (for example, 0x00000378).– Close the Registry Editor and reboot the computer. Tip:The Hexadecimal address of the LPT1 parallel port of the notebook can begotten from the Control Panel (System\Hardware\Device Manager\Ports(COM & LPT)\Printer Port (LPT1)\Properties\Resources). Pick the initialaddress of the I/O Range. Usually it is the hexadecimal address 0x00000378.18–14 InduSoft Web Studio v6.1 SP5
TroubleshootingIWS Users GuideInduSoft Web Studio v6.1 SP5 18–15
Appendix A. InduSoft Web Studio FunctionsThis chapter contains tables and information describing the different functionsavailable with InduSoft Web Studio and CEView.Log Message Functions Execution 2K/XP/Vista Win CE Web ClientTrace Synchronous Arithmetic Functions Execution 2K/XP/Vista Win CE Web ClientAbs() Synchronous Div() Synchronous Format() Synchronous GetBit() Synchronous Mod() Synchronous Pow() Synchronous ResetBit() Synchronous Round() Synchronous SetBit() Synchronous SQRT() Synchronous Swap16() Synchronous Swap32() Synchronous Trunc() Synchronous Statistical Functions Execution 2K/XP/Vista Win CE Web ClientAve() Synchronous Max() Synchronous Min() Synchronous Rand() Synchronous Logarithmic Functions Execution 2K/XP/Vista Win CE Web ClientExp() Synchronous Log() Synchronous InduSoft Web Studio v6.1 SP5 A-1
IWS Users GuideInduSoft Web Studio FunctionsLog10() Synchronous Logical Functions Execution 2K/XP/Vista Win CE Web ClientFalse() Synchronous If() Synchronous Toggle() Synchronous True() Synchronous String Functions Execution 2K/XP/Vista Win CE Web ClientAsc2Str() Synchronous CharToValue() Synchronous CharToValueW() Synchronous ClassMembersToStrVector() Synchronous Ncopy Synchronous Num() Synchronous Str() Synchronous Str2Asc() Synchronous StrCompare() Synchronous StrCompareNoCase() Synchronous StrFromInt() Synchronous StrFromReal() Synchronous StrFromTime() Synchronous StrGetElement() Synchronous StrLeft() Synchronous StrLen() Synchronous StrLower() Synchronous StrRChr() Synchronous StrRight() Synchronous StrSetElement() Synchronous StrStr() Synchronous A-2 InduSoft Web Studio v6.1 SP5
InduSoft Web Studio FunctionsIWS Users GuideString Functions Execution 2K/XP/Vista Win CE Web ClientStrStrPos() Synchronous StrTrim() Synchronous StrTrimAll() Synchronous StrUpper() Synchronous ValueToChar() Synchronous ValueWToChar() Synchronous Date & Time Functions Execution 2K/XP/Vista Win CE Web ClientClockGetDate() Synchronous ClockGetDayOfWeek() Synchronous ClockGetTime() Synchronous DateTime2Clock() Synchronous GetClock() Synchronous Hour2Clock() Synchronous SetSystemDate() Synchronous SetSystemTime() Synchronous Trigonometric Functions Execution 2K/XP/Vista Win CE Web ClientAcos() Synchronous Asin() Synchronous Atan() Synchronous Cos() Synchronous Cot() Synchronous Pi() Synchronous Sin() Synchronous Tan() Synchronous Opening and ClosingWindows FunctionsExecution 2K/XP/Vista Win CE Web ClientClose() Asynchronous InduSoft Web Studio v6.1 SP5 A-3
IWS Users GuideInduSoft Web Studio FunctionsOpen() Asynchronous OpenPrevious() Asynchronous Security Functions Execution 2K/XP/Vista Win CE Web ClientBlockUser() Synchronous CheckESign() Synchronous CreateUser() Synchronous GetUserNames() Synchronous Exec. on ServerGetUserPwdAging() Synchronous GetUserState() Synchronous RemoveUser() Synchronous SetPassword() Synchronous UnblockUser() Synchronous Module Activity Functions Execution 2K/XP/Vista Win CE Web ClientAppActivate() Asynchronous AppIsRunning() Synchronous AppPostMessage() Synchronous AppSendKeys() Synchronous CleanReadQueue() Synchronous Exec. on ServerCloseSplashWindow() Synchronous Exec. on ServerEndTask() Asynchronous Exec. on ServerExitWindows() Asynchronous IsScreenOpen() Synchronous IsTaskRunning() Synchronous Exec. on ServerIsViewerInFocus() Synchronous KeyPad() Asynchronous LogOff() Asynchronous LogOn() Asynchronous Math() Synchronous Exec. on ServerA-4 InduSoft Web Studio v6.1 SP5
InduSoft Web Studio FunctionsIWS Users GuideModule Activity Functions Execution 2K/XP/Vista Win CE Web ClientPostKey() Synchronous Recipe() Synchronous Exec. on ServerReport() Synchronous Exec. on ServerRunGlobalProcedureOnServer() Synchronous RunVBScript() Synchronous SendKeyObject() Synchronous SetAppPath() Synchronous Exec. on ServerSetKeyboardLanguage() Synchronous SetViewerInFocus() Synchronous SetViewerPos() Synchronous ShutDown() Synchronous StartTask() Asynchronous Exec. on ServerViewerPostMessage() Asynchronous Wait() Synchronous WinExec() Asynchronous WinExecIsRunning() Synchronous File Functions Execution 2K/XP/Vista Win CE Web ClientDeleteOlderFiles() Synchronous DirCreate() Synchronous DirDelete() Synchronous DirLength() Synchronous DirRename() Synchronous FileCopy() Synchronous FileDelete() Synchronous FileLength() Synchronous FileRename() Synchronous FileWrite() Synchronous FindFile() Synchronous InduSoft Web Studio v6.1 SP5 A-5
IWS Users GuideInduSoft Web Studio FunctionsFile Functions Execution 2K/XP/Vista Win CE Web ClientFindPath() Synchronous GetFileAttributes() Synchronous GetFileTime() Synchronous GetHstInfo() Synchronous GetLine() Synchronous Hst2Txt() Asynchronous Hst2TxtIsRunning() Synchronous Exec. on ServerPDFCreate() Synchronous Print() Synchronous RDFileN() Synchronous Graphic Functions Execution 2K/XP/Vista Win CE Web ClientAutoFormat() Synchronous GetScrInfo() Synchronous PrintSetup() Asynchronous PrintWindow() Asynchronous ResetDecimalPointsTable() Synchronous RGBColor() Synchronous RGBComponent() Synchronous SetDecimalPoints() Synchronous SetDisplayUnit() Synchronous SetTagDisplayUnit() Synchronous Translation Functions Execution 2K/XP/Vista Win CE Web ClientExt() Synchronous SetTranslationFile() Synchronous Multimedia Functions Execution 2K/XP/Vista Win CE Web ClientPlay() Synchronous/Asynchronous A-6 InduSoft Web Studio v6.1 SP5
InduSoft Web Studio FunctionsIWS Users GuideSystem Info. Functions Execution 2K/XP/Vista Win CE Web ClientDbVersion() Synchronous GetAppHorizontalResolution() Synchronous Exec. on ServerGetAppPath() Synchronous Exec. on ServerGetAppVerticalResolution() Synchronous Exec. on ServerGetComputerIP() Synchronous GetComputerName() Synchronous GetCursorX() Synchronous GetCursorY() Synchronous GetDisplayHorizontalResolution() Synchronous GetDisplayVerticalResolution() Synchronous GetFreeMemoryCE() Synchronous GetHardKeyModel() Synchronous Exec. on ServerGetHardKeySN() Synchronous Exec. on ServerGetIPAll() Synchronous GetMemoryCE() Synchronous GetNetMACID() Synchronous GetOS() Synchronous GetPrivateProfileString() Synchronous GetProductPath() Synchronous GetRegValue() Synchronous GetRegValueType() Synchronous GetServerHostName Synchronous GetTickCount() Synchronous InfoAppAlrDir() Synchronous InfoAppHSTDir() Synchronous InfoDiskFree() Synchronous InfoResources() Synchronous IsActiveXReg() Synchronous InduSoft Web Studio v6.1 SP5 A-7
IWS Users GuideInduSoft Web Studio FunctionsSystem Info. Functions Execution 2K/XP/Vista Win CE Web ClientNoInputTime() Synchronous ProductVersion() Synchronous RegSaveCE() Synchronous SaveAlarmFile() Synchronous SetAppAlarmPath() Synchronous Exec. on ServerSetAppHSTPath() Synchronous Exec. on ServerSetDataFormat() Synchronous SetRegValue() Synchronous SetWebConfig() Synchronous Exec. on ServerSNMPGet() Synchronous WritePrivateProfileSharing() Synchronous Tags Database Functions Execution 2K/XP/Vista Win CE Web ClientExecuteAlarmAck() NA ForceTagChange() Synchronous GetTagValue() Synchronous SetTagValue() Synchronous Loop Function Execution 2K/XP/Vista Win CE Web ClientFor() & Next NA ODBC Functions Execution 2K/XP/Vista Win CE Web ClientODBCBeginTrans() Synchronous Exec. on ServerODBCBindCol() Synchronous Exec. on ServerODBCCanAppend() Synchronous Exec. on ServerODBCCanTransact() Synchronous Exec. on ServerODBCCanUpdate() Synchronous Exec. on ServerODBCClose() Synchronous Exec. on ServerODBCCommitTrans() Synchronous Exec. on ServerA-8 InduSoft Web Studio v6.1 SP5
InduSoft Web Studio FunctionsIWS Users GuideODBC Functions Execution 2K/XP/Vista Win CE Web ClientODBCDelete() Synchronous Exec. on ServerODBCExecuteSQL() Synchronous Exec. on ServerODBCInsert() Synchronous Exec. on ServerODBCIsBOF() Synchronous Exec. on ServerODBCIsDeleted() Synchronous Exec. on ServerODBCIsEOF() Synchronous Exec. on ServerODBCIsFieldNull() Synchronous Exec. on ServerODBCIsFieldNullable() Synchronous Exec. on ServerODBCMove() Synchronous Exec. on ServerODBCMoveFirst() Synchronous Exec. on ServerODBCMoveLast() Synchronous Exec. on ServerODBCMoveNext() Synchronous Exec. on ServerODBCMovePrev() Synchronous Exec. on ServerODBCOpen() Synchronous Exec. on ServerODBCQuery() Synchronous Exec. on ServerODBCRollback() Synchronous Exec. on ServerODBCSetFieldNull() Synchronous Exec. on ServerODBCSetFilter() Synchronous Exec. on ServerODBCSetSort() Synchronous Exec. on ServerODBCUnbindCol() Synchronous Exec. on ServerODBCUpdate() Synchronous Exec. on ServerEmail Functions Execution 2K/XP/Vista Win CE Web ClientCNFEmail() Synchronous GetStatussendEmailExt() Synchronous SendEmail() Synchronous SendEmailExt() Asynchronous Dial-Up Functions Execution 2K/XP/Vista Win CE Web ClientInduSoft Web Studio v6.1 SP5 A-9
IWS Users GuideInduSoft Web Studio FunctionsDial-Up Functions Execution 2K/XP/Vista Win CE Web ClientDialError() Synchronous DialGetClientIP() Synchronous DialGetServerIP() Synchronous DialStatus() Synchronous DialUp() Asynchronous DialUpToCE() Asynchronous FindAllDevices() Synchronous FindModem() Synchronous HangUp() Synchronous PhoneDialUp() Asynchronous PhoneDisableListen() Synchronous PhoneEnableListen() Synchronous PhoneHangUp() Asynchronous PhoneStatus() Synchronous ActiveX Functions Execution 2K/XP/Vista Win CE Web ClientXGet() Asynchronous XRun() Asynchronous XSet() Asynchronous Event Logger Functions Execution 2K/XP/Vista Win CE Web ClientSendEvent() Synchronous FTP Functions Execution 2K/XP/Vista Win CE Web ClientCN<strong>FF</strong>tp() Synchronous ftpGet() Asynchronous ftpPut() Asynchronous ftpStatus() Synchronous A-10 InduSoft Web Studio v6.1 SP5
InduSoft Web Studio FunctionsIWS Users GuideDB/ERP Functions Execution 2K/XP/Vista Win CE Web ClientDBCursorClose() Synchronous DBCursorCurrentRow() Synchronous DBCursorGetValue() Synchronous DBCursorMoveTo() Synchronous DBCursorNext() Synchronous DBCursorOpen() Synchronous DBCursorOpenSQL() Synchronous DBCursorPrevious() Synchronous DBCursorRowCount() Synchronous DBDelete() Synchronous DBExecute() Synchronous DBInsert() Synchronous DBSelect() Synchronous DBUpdate() Synchronous SyncAlarm() Asynchronous Exec. on ServerSyncAlarmStatus() Synchronous Exec. on ServerSyncEvent() Asynchronous Exec. on ServerSyncEventStatus() Synchronous Exec. on ServerSyncTrend() Asynchronous Exec. on ServerSyncTrendStatus() Synchronous Exec. on ServerInduSoft Web Studio v6.1 SP5 A-11
IWS Users GuideInduSoft Web Studio FunctionsFunction Prototypes and DescriptionsThe function tag names used in IWS must conform to the following syntax: num[Name]: Numerical tag or value str[Name]: String tag or value tag[Name]: Tag NameoptNum[Name]: Optional Numerical tag or valueoptStr[Name]: Optional String tag or valueoptTag[Name]: Optional Tag NameThis syntax identifies the argument types required for each parameter of the IWSfunction. Note:These prototypes depict dynamic tags used to pass values to functions; however,you can also enter static values into these functions. To replace string tags withstatic character strings, enter the string between double-quotation marks (forexample, enter “ABCDEFG” instead of strTag). You also can replace staticnumbers with numeric tags (for example, enter 45.6543 instead of numTag).A-12 InduSoft Web Studio v6.1 SP5
InduSoft Web Studio FunctionsIWS Users GuideLog Message FunctionsThis section describes the InduSoft Web Studio Log Message function,Trace(strOutputMessage).Trace( strOutputMessage )GroupExecutionWindows 2K/XP/VistaWindows CEWeb Thin ClientLog MessageSynchronousSupportedSupportedNOT supportedDescription: Displays the contents of strOutputMessage in the LogWin window.Parameter: This function accepts the following parameter:StrOuputMessageString tag containing a message to display in the LogWinExamples:Tag NameExpressionTrace( “Starting Step 5” ) // Starting Step 5 displays in the LogWin window.Trace(Date) // The contents of the tag Date displays in the LogWin window. Note:You will find this function useful for debugging purposes. For example, if youwant to know when IWS is executing a specific math script. Tip:You can concatenate text, expressions, and tag values to compose thestrOutputMessage parameter. For example,Trace(“The tag second has the value”+second+” and the InternalClock = “+GetTickCount( ))InduSoft Web Studio v6.1 SP5 A-13
IWS Users GuideInduSoft Web Studio FunctionsArithmetic FunctionsThis section describes the following InduSoft Web Studio Arithmetic functions: ABS(numValue)Div(numNumerator, numDenominator)Format(strFlag, numValue)GetBit(tagName, numBitNumber)Mod(numNumerator, numDenominator)Pow(numBase, numExponent)ResetBit(“tagName”, numBitNumber)Round(numValue)SetBit(“tagName”, numBitNumber)SQRT(numValue)Swap32(numValue)Swap16(numValue)Trunc(numValue)ABS( numValue )GroupExecutionWindows 2K/XP/VistaWindows CEWeb Thin ClientArithmeticSynchronousSupportedSupportedSupportedDescription: Performs the Absolute value function on the contents of the numValuetag.Parameters:numValueInteger or Real tag containing the number from which the function takes the absolutevalue.Returned Values: Numerical result of the Absolute value function.Examples:Tag NameExpressionTag ABS(“-54.9788”) // Returned value = 54.9788TagABS(numValue) // Returned value = absolute value of the number in the numValue tag.A-14 InduSoft Web Studio v6.1 SP5
InduSoft Web Studio FunctionsIWS Users GuideDiv( numNumerator, numDenominator )GroupExecutionWindows 2K/XP/VistaWindows CEWeb Thin ClientArithmeticSynchronousSupportedSupportedSupportedDescription: Divides the value in numNumerator by the value of numDenominatorand returns only the whole integer number, omitting the remainder.Parameters:numNumeratornumDenominatorInteger or Real tag containing the Numerator of the function.Integer or Real tag containing the Denominator of the function.Returned Values: Numerical result of the function as an integer.Examples:Tag NameExpressionnumValue Div(100, 8) // Returns the value 12.5numValue Div(16, 4) // Returns the value 4numValue Div(100,12.5) //Returns the value 8 Tip:Use the MOD( ) function to get the remainder of the division.InduSoft Web Studio v6.1 SP5 A-15
IWS Users GuideInduSoft Web Studio FunctionsFormat( strFlag, numValue )GroupExecutionWindows 2K/XP/VistaWindows CEWeb Thin ClientArithmeticSynchronousSupportedSupportedSupportedDescription: Modifies the format of a numerical value, according to the flag.Parameters:strFlagnumValueSets the format in accordance with the %m.nF syntax.Where:• m (Applicable for flags d, x, X, o, b, f, e, E, g, G, s, c, and h): Sets the minimumnumber of characters returned by the function, adding blank space chars on the left ofthe returned value or 0 (zero) chars (see examples).• n (Applicable for flags f, e, E, g, and G): Sets the minimum number of decimalcharacters for the floating values returned by the function.• F: Determines how the value is formatted• d: Decimal• x: Hexadecimal (chars in lower case)• X: Hexadecimal (chars in uppercase)• o: Octal• b: Binary• f: Float• e: Scientific notation (e in lowercase)• E: Scientific notation (E in uppercase)• g: Round the value (e in lowercase, when applicable)• G: Round the value (E in lowercase, when applicable)• s: String• c: ASCII char• h: Hour (hh:mm:ss)Alternatively, the format can be set using the ##.### syntax, where the numericalvalue is rounded to the given number of decimal places.Numerical value to be formatted.Returned Values: String value that is formatted according to the parametersconfigured in the function.Examples:Tag NameExpressionTag Format("%d",12.34) // returned value = “12”Tag Format("%04d",12.34) // returned value = “0012”A-16 InduSoft Web Studio v6.1 SP5
InduSoft Web Studio FunctionsIWS Users GuideTag NameExpressionTag Format("%4d",12.34) // returned value = “12”TagTagTagTagTagTagFormat("%x",26) // returned value = “1a”Format("%04x",26) // returned value = “001a”Format("%4x",26) // returned value = “1a”Format("%X",26) // returned value = “1A”Format("%04X",26) // returned value = “001A”Format("%4X",26) // returned value = “1A”Tag NameExpressionTag Format("%o",16) // returned value = “20”Tag Format("%04o",16) // returned value = “0020”Tag Format("%4o",16) // returned value = “20”Tag Format("%b",2) // returned value = “10”Tag Format("%4b",2) // returned value = “0010”Tag Format("%04b",2) // returned value = “0010”Tag Format("%0.1f",12.34) // returned value = “12.3”Tag Format("%06.1f",12.34) // returned value = “0012.3”Tag Format("%6.1f",12.34) // returned value = “12.3”TagTagTagTagTagTagFormat("%e",12.34) // returned value = “1.234000e+001”Format("%0.1e",12.34) // returned value = “1.2e+001”Format("%09.1e",12.34) // returned value = “01.2e+001”Format("%9.1e",12.34) // returned value = “ 1.2e+001”Format("%E",12.34) // returned value = “1.234000E+001”Format("%0.1E",12.34) // returned value = “1.2E+001”InduSoft Web Studio v6.1 SP5 A-17
IWS Users GuideInduSoft Web Studio FunctionsTagTagTagFormat("%09.1E",12.34) // returned value = “01.2E+001”Format("%9.1E",12.34) // returned value = “ 1.2E+001”Format("%0.1g",12.34) // returned value = “1e+001”Tag Format("%0.2g",12.34) // returned value = “12”Tag Format("%0.3g",12.34) // returned value = “12.3”Tag Format("%05.3g",12.34) // returned value = “012.3”Tag Format("%5.3g",12.34) // returned value = “ 12.3”Tag NameTagExpressionFormat("%0.1G",12.34) // returned value = “1E+001”Tag Format("%0.2G",12.34) // returned value = “12”Tag Format("%0.3G",12.34) // returned value = “12.3”Tag Format("%05.3G",12.34) // returned value = “012.3”Tag Format("%5.3G",12.34) // returned value = “ 12.3”Tag Format("%s",12.34) // returned value = “12”Tag Format("%04s",12.34) // returned value = “0012”Tag Format("%4s",12.34) // returned value = “12”TagTagTagFormat("%c",97) // returned value = “a”Format("%4c",97) // returned value = “a”Format("%04c",97) // returned value = “000a”Tag Format("%h",30) // returned value = “00:00:30”Tag Format("%h",60) // returned value = “00:01:00”Tag Format("%h",90) // returned value = “00:01:30”Tag Format("%h",3600) // returned value = “01:00:00”A-18 InduSoft Web Studio v6.1 SP5
InduSoft Web Studio FunctionsIWS Users GuideTag NameExpressionTag Format( "##.#", 26.56789 )// Returned value = "26.6"Tag Format( "#.##", 26.56789 )// Returned value = "26.57"Tag Format( "##.##", 26.56789 )// Returned value = "26.57" Note:The Format(strFlag, numValue) function allows the same flags to followthe % symbol that are used for the standard C function printf( ); however,you can format only one value in each cell. Tip:You will find the Format( ) function especially useful when you areformatting the number of characters for values to be printed in reports. Also,you must use this function to convert the number of seconds in the followingformat:hh:mm:ss(strFlag =%h)The h and m parameters are optional.InduSoft Web Studio v6.1 SP5 A-19
IWS Users GuideInduSoft Web Studio FunctionsGetBit( tagName, numBitNumber )GroupExecutionWindows 2K/XP/VistaWindows CEWeb Thin ClientArithmeticSynchronousSupportedSupportedSupportedDescription: Isolates a single bit in a numerical tagParameters:tagNamenumBitNumberThe name of an Integer tag where the bit value will be taken from.A numerical tag, which holds the number of the bit to be isolated. (0…31)Returned Values: Returns the numerical value (0 or 1) that corresponds to the value ofthe isolated bit.Examples:Tag NameTagTagExpressionGetBit(numSource, 4) // If the tag numSource held the value 15, this function wouldreturn the value 0.GetBit(numSource,1) // If the tag numSource held the value 19, this function wouldreturn the value 1. Tip:You also can use the Bit field to read/write values from specific bits in aninteger tag.For example, enter Second->b0 to access the LSB (Least Significant Bit of theSecond tag), and Second->b31 to access the MSB (Most Significant Bit of theSecond tag).A-20 InduSoft Web Studio v6.1 SP5
InduSoft Web Studio FunctionsIWS Users GuideMod( numNumerator, numDenominator )GroupExecutionWindows 2K/XP/VistaWindows CEWeb Thin ClientArithmeticSynchronousSupportedSupportedSupportedDescription: Divides the value of numNumerator by the value of numDenominiatoronly and returns the remainder as a real number.Parameters:numNumeratornumDenominatorInteger or Real tag containing the Numerator of the function.Integer or Real tag containing the Denominator of the function.Returned Values: Returns the remainder after dividing numNumerator bynumDenominator.Examples:Tag NameExpressionTag Mod(50, 4) // Returned value = 2Tag Mod(16,4) // Returned value = 0Tag Mod(100, 8.2) //Returned value = 1.600 Note:Use the DIV( ) function to get the integer result of the division.InduSoft Web Studio v6.1 SP5 A-21
IWS Users GuideInduSoft Web Studio FunctionsPow( numBase, numExponent )GroupExecutionWindows 2K/XP/VistaWindows CEWeb Thin ClientArithmeticSynchronousSupportedSupportedSupportedDescription: Returns the result of raising numBase to the power of numExponent.Parameters:numBasenumExponentInteger or Real tag containing the Base of the function.Integer or real tag containing the Exponent of the function.Returned Values: Returns the result of raising the base to the exponent.Examples:Tag NameExpressionTag Pow(2, 3) // Returned value = 8Tag Pow(10,4) // Returned value = 10000A-22 InduSoft Web Studio v6.1 SP5
InduSoft Web Studio FunctionsIWS Users GuideResetBit(“tagName”, numBitNumber)GroupExecutionWindows 2K/XP/VistaWindows CEWeb Thin ClientArithmeticSynchronousSupportedSupportedSupported Description: Sets a single bit in a numerical tag to 0.Parameters:“tagName”numBitNumberName of an Integer tag where the bit value will be reset.Numerical tag holding the number of the bit to be reset. (0…31)Returned Values:0 No error1 Invalid parameter2 Tag does not existExamples:Tag NameTagTagExpressionResetBit(“numSource”, 4) // If the tag numSource held the value 16, this functionwould return the value 0 and numSource would hold the value 0.ResetBit(“numSource”,1) // If the tag numSource held the value 19, this functionwould return the value 0 and numSource would hold the value 17. Note:To enter the name of the integer tag directly (instead of using the tagNameparameter) you must enter the name between double-quotes. For example,SetBit(“Second”,1). Tip:You can use the Bit field to read/write values from specific bits in an integertag. For example, enter Second->b0 to access the LSB (Least Significant Bit ofthe Second tag), and Second->b31 to access the MSB (Most Significant Bit ofthe Second tag).Round( numValue )InduSoft Web Studio v6.1 SP5 A-23
IWS Users GuideInduSoft Web Studio FunctionsGroupExecutionWindows 2K/XP/VistaWindows CEWeb Thin ClientArithmeticSynchronousSupportedSupportedSupportedDescription: Rounds numValue to the nearest integer.Parameters:numValueA Real tag that holds the value to be rounded.Returned Values: Returns the integer result of the round function.Examples:Tag NameExpressionTag Round(“345.87”) // Returned value = 346Tag Round(“65.323”) // Returned value = 65A-24 InduSoft Web Studio v6.1 SP5
InduSoft Web Studio FunctionsIWS Users GuideSetBit( “tagName”, numBitNumber )GroupExecutionWindows 2K/XP/VistaWindows CEWeb Thin ClientArithmeticSynchronousSupportedSupportedSupported Description: Sets a single bit in a numerical tag to 1. Parameters:“tagName”Name of an Integer tag where the bit value will be set.numBitNumberNumerical tag holding the number of the bit to be set. (0…31)Returned Values:0 No error1 Invalid parameter2 Tag does not existExamples:Tag NameTagTagExpressionGetBit(“numSource”, 4) // If the tag numSource held the value 0, this function wouldreturn the value 0 and numSource would hold the value 16.GetBit(“numSource”,1) // If the tag numSource held the value 17, this function wouldreturn the value 0 and numSource would hold the value 19. Note:To enter the name of the integer tag directly (instead of using the tagNameparameter) you must enter the name between double-quotes. For example,SetBit(“Second”,1). Tip:You can also use the Bit field to read/write values from specific bits of aninteger tag. For example, enter Second->b0 to access the LSB (LeastSignificant Bit of the Second tag), and Second->b31 to access the MSB (MostSignificant Bit of the Second tag).InduSoft Web Studio v6.1 SP5 A-25
IWS Users GuideInduSoft Web Studio FunctionsSQRT(numValue)GroupExecutionWindows 2K/XP/VistaWindows CEWeb Thin ClientArithmeticSynchronousSupportedSupportedSupportedDescription: Takes the square root of numValue.Parameters:NumValue Integer or Real tag to be square rooted.Returned Values: Returns the square root of the value in the numValue tag.Examples:Tag NameExpressionTag SQRT(25) // Returns the value 5Tag SQRT(67) // Returns the value 8.185353 Note:If numValue has a negative value, then this function returns the value 0 andsets the quality of the returned tag to BAD.A-26 InduSoft Web Studio v6.1 SP5
InduSoft Web Studio FunctionsIWS Users GuideSwap16( numValue )GroupExecutionWindows 2K/XP/VistaWindows CEWeb Thin ClientArithmeticSynchronousSupportedSupportedSupportedDescription: Swaps the two lower bytes of a tag.Parameters:numValueInteger tag that holds the numeric value of the bytes to be swapped.Returned Values: Returns the numeric value after swapping the bytes.Examples:Tag NameTagTagExpressionSwap16(16) // 16 = 0000000000010000 in binary.Returned value = 4096 = 0001000000000000 in binary.Swap16(43760) // 43760 = 1010010111110000 in binary.Returned value = 61610 = 1111000010100101 in binary.InduSoft Web Studio v6.1 SP5 A-27
IWS Users GuideInduSoft Web Studio FunctionsSwap32( numValue )GroupExecutionWindows 2K/XP/VistaWindows CEWeb Thin ClientArithmeticSynchronousSupportedSupportedSupportedDescription: Swaps two words in a tag.Parameters:numValueInteger tag that holds the numeric value of the words to be swapped.Returned Values: Returns the numeric value after swapping the words.Examples:Tag NameTagTagExpressionSwap32(16) // 16 = 00000000000000000000000000010000 in binary.Returned value = 1048576 = 00000000000100000000000000000000 in binary.Swap32(246333120) // 286333120 = 1010101010101010101111111100000000 inbinary. Returned value = -1094709586= 11111111000000001010101010101010 inbinary.A-28 InduSoft Web Studio v6.1 SP5
InduSoft Web Studio FunctionsIWS Users GuideTrunc( numValue )GroupExecutionWindows 2K/XP/VistaWindows CEWeb Thin ClientArithmeticSynchronousSupportedSupportedSupportedDescription: Truncates the value of numValue.Parameters:numValue Real tag to be truncated.Returned Values: Returns the integer portion of the real number value of numValue.Examples:Tag NameExpressionTag Trunc(234.987) // Returned value = 234Tag Trunc(-3465.9) // Returned value = -3465.9InduSoft Web Studio v6.1 SP5 A-29
IWS Users GuideInduSoft Web Studio FunctionsStatistical FunctionsThis section describes the following InduSoft Web Studio Statistical functions: Avg(numValue1, numValue2, …, numValueN)Avg(“tagArray”, numSample, optnumIgnore)Max(numValue1, numValue2, …, numValueN)Max(“tagArray”, numSample, optnumIgnore)Min(numValue1, numValue2, …, numValueN)Min(“tagArray”, numSample, optnumIgnore)Rand()A-30 InduSoft Web Studio v6.1 SP5
InduSoft Web Studio FunctionsIWS Users GuideAvg( numValue1, numValue2, …, numValueN )Avg( “tagArray”, numSample, optnumIgnore )GroupExecutionWindows 2K/XP/VistaWindows CEWeb Thin ClientStatisticalSynchronousSupportedSupportedSupportedDescription: Calculates the average value of a set of numbers.Parameters:numValue (1…N)“tagArray”numSampleoptnumIgnoreInteger or Real tags containing the numbers to be averaged together.Name of array tag (Real or Integer) containing the values to be averaged.Integer tag containing the number of array elements to be averaged.Optional Integer or Real tag containing the value to be ignored in calculatingthe average.Returned Values: Returns the average of the values.Examples:Tag NameExpressionTag Avg(1,2.34,5,7,4,8,9.4) // Returned value = 5.248571Tag Avg(1, 5, -9, 0, 5, 3) // Returned value = 0.833333TagTagAvg(“tagArray[1]”,3) // If tagArray[1]=10, tagArray[2]=20 and tagArray[3]=60, then theReturned Value = 30Avg(“tagArray[1]”,3,10) // If tagArray[1]=10, tagArray[2]=20 and tagArray[3]=60, then theReturned Value = 40 Note:This function has two formats: If the first parameter is a numerical tag or value, you must use theAvg(numValue1, numValue2, …, numValueN) format. If the first parameter is an array tag in double-quotes or a string tag, youmust use the Avg(“tagArray”, numSample, optnumIgnore) format.Max( numValue1, numValue2, …, numValueN )Max( “tagArray”, numSample, optnumIgnore )InduSoft Web Studio v6.1 SP5 A-31
IWS Users GuideInduSoft Web Studio FunctionsGroupExecutionWindows 2K/XP/VistaWindows CEWeb Thin ClientStatisticalSynchronousSupportedSupportedSupportedDescription: Returns the maximum value of a set of numbers.Parameters:numValue (1…N)“tagArray”numSampleoptnumIgnoreInteger or Real tags containing the numbers to be analyzed.Name of array tag (Real or Integer) containing the values to be analyzed.Integer tag containing the number of array elements to be analyzed.Integer or Real tags containing the value to be ignored in the analysis.Returned Values: Returns the maximum value of the set.Examples:Tag NameExpressionTag Max(1,2.34,5,7,4,8,9.4) // Returned value = 9.4Tag Max(1, 5, -9, 0, 5, 3) // Returned value = 5TagTagMax(“tagArray[1]”,3) // If tagArray[1]=10, tagArray[2]=20 and tagArray[3]=60, then theReturned Value = 60Max(“tagArray[1]”,3,10) // If tagArray[1]=10, tagArray[2]=20 and tagArray[3]=60, thenthe Returned Value = 60 Note:This function has two formats:• If the first parameter is a numerical tag or value, you must use theMax(numValue1, numValue2, …, numValueN) format.• If the first parameter is an array tag in double-quotes or a string tag, youmust use the Max(“tagArray”, numSample, optnumIgnore) format.A-32 InduSoft Web Studio v6.1 SP5
InduSoft Web Studio FunctionsIWS Users GuideMin(numValue1, numValue2, …, numValueN)Min(“tagArray”, numSample, optnumIgnore)GroupExecutionWindows 2K/XP/VistaWindows CEWeb Thin ClientStatisticalSynchronousSupportedSupportedSupportedDescription: Returns the minimum value of a set of numbers.Parameters:numValue (1…N)“tagArray”numSampleoptnumIgnoreInteger or Real tags containing the numbers to be analyzed.Name of an array tag (Real or Integer) containing the values to be analyzed.Integer tag containing the number of array elements to be analyzed.Integer or Real tags containing a value to be ignored in the analysis.Returned Values: Returns the minimum value of the set.Examples:Tag NameExpressionTag Min(1,2.34,5,7,4,8,9.4) // Returned value = 1Tag Min(1, 5, -9, 0, 5, 3) // Returned value = -9TagTagMin(“tagArray[1]”,3) // If tagArray[1]=10, tagArray[2]=20 and tagArray[3]=60, then theReturned Value = 10Min(“tagArray[1]”,3,10) // If tagArray[1]=10, tagArray[2]=20 and tagArray[3]=60, then theReturned Value = 20 Note:This function has two formats:If the first parameter is a numerical tag or value, you must use theMin(numValue1, numValue2, …, numValueN) format.If the first parameter is an array tag in double-quotes or a string tag, youmust use the Min(“tagArray”, numSample, optnumIgnore) format.InduSoft Web Studio v6.1 SP5 A-33
IWS Users GuideInduSoft Web Studio FunctionsRand()GroupExecutionWindows 2K/XP/VistaWindows CEWeb Thin ClientStatisticalSynchronousSupportedSupportedSupported Description: Generates a random number between 0 and 1. Returned Values: Returns a real number between 0 and 1. Examples:Tag NameExpressionTag Rand() // Returned value = ?, Where: 0
InduSoft Web Studio FunctionsIWS Users GuideLogarithmic FunctionsThis section describes the following InduSoft Web Studio Logarithmic functions: Exp(numValue)Log(numValue)Log10(numValue)Exp( numValue )GroupExecutionWindows 2K/XP/VistaWindows CEWeb Thin ClientLogarithmicSynchronousSupportedSupportedSupportedDescription: Calculates the value of e (e = 2.718282) raised to the power of numValueParameters:NumValue Integer or Real tag containing the exponent of e.Returned Values: Returns the value of e^(numValue).Examples:Tag NameExpressionTag Exp(1)// Returned value = 2.718282Tag Exp(5.25896) // Returned value = 192.281415InduSoft Web Studio v6.1 SP5 A-35
IWS Users GuideInduSoft Web Studio FunctionsLog( numValue )GroupExecutionWindows 2K/XP/VistaWindows CEWeb Thin ClientLogarithmicSynchronousSupportedSupportedSupportedDescription: Calculates the natural log of numValueParameters:NumValueInteger or Real tag from which the natural log is taken.Returned Values: Returns the value of ln(numValue).Examples:Tag NameExpressionTag Log(2.718282)// Returned value = 1Tag Log(100) // Returned value = 4.605170 Note:If numValue has a negative value, this function returns the value 0 and setsthe quality of the returned tag to BAD.A-36 InduSoft Web Studio v6.1 SP5
InduSoft Web Studio FunctionsIWS Users GuideLog10( numValue )GroupExecutionWindows 2K/XP/VistaWindows CEWeb Thin ClientLogarithmicSynchronousSupportedSupportedSupportedDescription: Calculates the log base 10 of numValue.Parameters:NumValue Integer or Real tag, from which the log base 10 is take.Returned Values: Returns the value of log10(numValue).Examples:Tag NameExpressionTag Log10(1000)// Returned value = 3Tag Log10(43.05) // Returned value = 1.633973 Note:If the numValue has a negative value, then this function will return the value0 and it will set the quality of the returned tag to BAD.InduSoft Web Studio v6.1 SP5 A-37
IWS Users GuideInduSoft Web Studio FunctionsLogical FunctionsThis section describes the following InduSoft Web Studio Logical functions: False(numExpression)If(numExpression, numThen, optnumElse)Toggle(numValue)True(numExpression)False( numExpression )GroupExecutionWindows 2K/XP/VistaWindows CEWeb Thin ClientLogicalSynchronousSupportedSupportedSupportedDescription: Determines whether the content of numExpression is logically false.Parameters:numExpressionTag or expression to be used in the function.Returned Values:0 If the tag or expression is not logically false.1 If the tag or expression is logically false.Examples:Tag NameExpressionTag False(1)// Returned value = 0Tag False(5 < 2) // Returned value = 1 Tip:You will find this function especially useful if you need to return the value 0when the expression returns any value other than 0.A-38 InduSoft Web Studio v6.1 SP5
InduSoft Web Studio FunctionsIWS Users GuideIf( numExpression, numThen, optNumElse )GroupExecutionWindows 2K/XP/VistaWindows CEWeb Thin ClientLogicalSynchronousSupportedSupportedSupportedDescription: Determines whether the contents of numExpression are logically true,and then returns the value of numThen or optnumElse accordingly.Parameters:numExpressionnumThenoptnumElseTag or expression used as the condition in the function.Tag or expression used if the condition is logically true.Optional tag or expression used if the condition is logically false.Returned Values:numThenoptnumElseNo value returnedIf the numExpression is logically true.If the numExpression is logically false.If the numExpression is logically false and there is no optnumElse in thefunction.Examples:Tag NameExpressionTag If(5>4,10, 6)// Returned value = 10Tag If(5TagB,If(TagATagB AND TagA=10,1,0).InduSoft Web Studio v6.1 SP5 A-39
IWS Users GuideInduSoft Web Studio FunctionsToggle( numValue )GroupExecutionWindows 2K/XP/VistaWindows CEWeb Thin ClientLogicalSynchronousSupportedSupportedSupportedDescription: Returns the toggled value from the contents of numValue tag.Parameters:numValueBoolean tag containing the value to be toggled.Returned Values: Numerical result (0 or 1) of the value to be toggled.Examples:Tag NameTagTagExpressionToggle(myBoolTag)// Returned value = 1 if myBoolTag equals 0, or 0 if myBoolTag equals 1Toggle(numValue)// Returned value = toggled value of the number in the numValue tag Tip:This function does not actually change the value of the tag, but it can be usedin a command or operation that does.A-40 InduSoft Web Studio v6.1 SP5
InduSoft Web Studio FunctionsIWS Users GuideTrue( numExpression )GroupExecutionWindows 2K/XP/VistaWindows CEWeb Thin ClientLogicalSynchronousSupportedSupportedSupportedDescription: Determines whether the contents of numExpression are logically true.Parameters:numExpression Tag or expression to be used in the function.Returned Values:0 If the tag or expression is not logically true.1 If the tag or expression is logically true.Examples:Tag NameExpressionTag True(1)// Returned value = 1Tag True(5 < 2) // Returned value = 0 Tip:You may find this function especially useful if you need to return the value 1when the expression returns a value other than 0.InduSoft Web Studio v6.1 SP5 A-41
IWS Users GuideInduSoft Web Studio FunctionsString FunctionsThis section describes the following InduSoft Web Studio String functions: Asc2Str(numChar1, numChar2, …, numCharN)CharToValue(“tagName”, “tagArray”)CharToValueW(“tagName”, “tagArray”)ClassMembersToStrVector (“strClassTag”, numStartPos, numNumPos,“strArrayTag”, optBooStartPosTarget)NCopy(strSource, numStartChar, numQtdChar)Num(strValue)Str(numValue)Str2Asc(strChar)StrCompare(strValue1, strValue2)StrCompareNoCase(strValue1, strValue2)StrFromInt(numValue, numBase)StrFromReal(numValue, numPrecision, "strType")StrFromTime(numUTCTime, numType)StrGetElement(strSource, strDelimiter, numElementNumber)StrLeft(strSource, numQtdChar)StrLen(strSource)StrLower(strSource)StrRChr(strSource, strCharSequence)StrRight(strSource, numQtdChar)StrSetElement(strSource, strDelimiter, numElementNumber, strValue)StrStr(strSource, strCharSequence)StrStrPos(strSource, strCharSequence)StrTrim(strReference, optNumFlag)StrTrimAll(strReference, optStrTrimChar)StrUpper(strSource)ValueToChar(“tagArray”, numChars)ValueWToChar(“tagArray”, numChars)A-42 InduSoft Web Studio v6.1 SP5
InduSoft Web Studio FunctionsIWS Users GuideASCII TablesCharacter Set (0 - 127)Code Char Code Char Code Char Code Char0 32 [space] 64 @ 96 `1 33 ! 65 A 97 a2 34 " 66 B 98 b3 35 # 67 C 99 c4 36 $ 68 D 100 d5 37 % 69 E 101 e6 38 & 70 F 102 f7 39 ' 71 G 103 g8 ** 40 ( 72 H 104 h9 ** 41 ) 73 I 105 i10 ** 42 * 74 J 106 j11 43 + 75 K 107 k12 44 , 76 L 108 l13 ** 45 - 77 M 109 m14 46 . 78 N 110 n15 47 / 79 O 111 o16 48 0 80 P 112 p17 49 1 81 Q 113 q18 50 2 82 R 114 r19 51 3 83 S 115 s20 52 4 84 T 116 t21 53 5 85 U 117 u22 54 6 86 V 118 v23 55 7 87 W 119 w24 56 8 88 X 120 x25 57 9 89 Y 121 y26 58 : 90 Z 122 z27 59 ; 91 [ 123 {28 60 < 92 \ 124 |29 61 = 93 ] 125 }30 - 62 > 94 ^ 126 ~31 63 ? 95 _ 127 Character Set (128 – 255)Code Char Code Char Code Char Code Char128 € 160 [space] 192 À 224 à129 161 ¡ 193 Á 225 á130 ‚ 162 ¢ 194 Â 226 âInduSoft Web Studio v6.1 SP5 A-43
IWS Users GuideInduSoft Web Studio Functions131 ƒ 163 £ 195 à 227 ã132 ‚‚ 164 ¤ 196 Ä 228 ä133 … 165 ¥ 197 Å 229 å134 † 166 ¦ 198 Æ 230 æ135 ‡ 167 § 199 Ç 231 ç136 ˆ 168 ¨ 200 È 232 è137 ‰ 169 © 201 É 233 é138 Š 170 ª 202 Ê 234 ê139 ‹ 171 ‹‹ 203 Ë 235 ë140 Œ 172 ¬ 204 Ì 236 ì141 173 205 Í 237 í142 Ž 174 ® 206 Î 238 î143 175 ¯ 207 Ï 239 ï144 176 ° 208 Ð 240 ð145 ' 177 ± 209 Ñ 241 ñ146 ' 178 ² 210 Ò 242 ò147 " 179 ³ 211 Ó 243 ó148 " 180 ´ 212 Ô 244 ô149 · 181 µ 213 Õ 245 õ150 – 182 214 Ö 246 ö151 — 183 · 215 × 247 ÷152 ˜ 184 ¸ 216 Ø 248 ø153 185 ¹ 217 Ù 249 ù154 š 186 º 218 Ú 250 ú155 › 187 ›› 219 Û 251 û156 œ 188 ¼ 220 Ü 252 ü157 189 ½ 221 Ý 253 ý158 ž 190 ¾ 222 Þ 254 þ159 Ÿ 191 ¿ 223 ß 255 Note:** Values 8, 9, 10, and 13 convert to backspace, tab, linefeed, and carriagereturn characters, respectively. They have no graphical representation, butdepending on the application, they may affect the visual display of text. indicates that it is not supported on the current platform.A-44 InduSoft Web Studio v6.1 SP5
InduSoft Web Studio FunctionsIWS Users GuideAsc2Str( numChar1, numChar2, …, numCharN )GroupExecutionWindows 2K/XP/VistaWindows CEWeb Thin ClientStringSynchronousSupportedSupportedSupportedDescription: Converts decimal values into their corresponding ASCII characters.Parameters:numChar (1-N)Tag or expression containing a decimal value to be converted into an ASCIIcharacter.Returned Values: Returns a string of ASCII characters corresponding to the decimalvalues entered.Examples:Tag NameTagTagExpressionAsc2Str(67) // Returned value = CAsc2Str(83, 116, 117, 100, 105, 111) // Returned value = IWSInduSoft Web Studio v6.1 SP5 A-45
IWS Users GuideInduSoft Web Studio FunctionsCharToValue( “tagName”, “tagArray” )GroupExecutionWindows 2K/XP/VistaWindows CEWeb Thin ClientStringSynchronousSupportedSupportedSupportedDescription: Converts a string into an array of integer values (using bytes).Parameters:“tagName”“tagArray”The name of the string tag, whose value will be converted.The name of the array tag receiving the integer values.Returned Values: No values are returned from this function.Examples:Tag NameExpressionCharToValue( “StrTag”, “Array[1]”) // If StrTag = “ IWS” then Array[1] will be set to83 (“S” in ASCII), Array[2] to 116 (“t” in ASCII) and so on. Note:You cannot use this function for UNICODE characters because it converts thelower byte of UNICODE characters only.A-46 InduSoft Web Studio v6.1 SP5
InduSoft Web Studio FunctionsIWS Users GuideCharToValueW(“tagName”, “tagArray”)GroupExecutionWindows 2K/XP/VistaWindows CEWeb Thin ClientStringSynchronousSupportedSupportedSupportedDescription: Converts a string into an array of integer values (using words instead ofbytes).Parameters:“tagName”“tagArray”The name of the string tag, whose value will be converted.The name of the array tag receiving the integer values.Returned Values: No values are returned from this function.Examples:Tag NameExpressionCharToValue(“StrTag”, “Array[1]”) // If StrTag = “ IWS” then Array[1] would be set to 29779(“St” in ASCII), Array[2] to 25717 (“ud” in ASCII) and so on. Note:This function can be useful when converting UNICODE characters intocodes.InduSoft Web Studio v6.1 SP5 A-47
IWS Users GuideInduSoft Web Studio FunctionsClassMembersToStrVector ( “strClassTag”, numStartPos,numNumPos, “strArrayTag”, optBooStartPosTarget )GroupExecutionWindows 2K/XP/VistaWindows CEWeb Thin ClientStringSynchronousSupportedSupportedSupportedDescription: Transfers values from class tags to array tags.Parameters:strClassTagnumStartPosnumNumPosstrArrayTagoptBooStartPosTargetThe string value containing the class tag name.Start position (array index) of the strClassTagNumber of positions (array indexes) to be transferred from the strClassTag.String value containing the array tag that will receive the values from thestrClassTag.Start position (array index) of the strArrayTag. If omitted, the default valeu 1 isused.Returned Values:-6 Array size of strClassTag is not big enough fornumStartPos-5 strClassTag tag is not a Class Tag-4 strClassTag tag not found-3 strArrayTag tag not found-2 Invalid data type of the parameters-1 Invalid number of parameters0 Transferred successfullyExamples:Tag NameExpressionTag ClassMembersToStrVector ( "Classtag", 5, 3, “Arraytag” )Tag ClassMembersToStrVector ( "Classtag", 5, 3, “Arraytag” , 0)A-48 InduSoft Web Studio v6.1 SP5
InduSoft Web Studio FunctionsIWS Users GuideTagClassMembersToStrVector ( TagName, 0, 1, ArrayName) Note:If the strClassTag tag has more than one member, the value of each memberwill be transferred to the strArrayTag. Therefore, it is importatnt to makesure that the array size of the strArrayTag tag is big enough to receive allvalues from the strClassTag tag.NCopy( strSource, numStartChar, numQtdChar )GroupExecutionWindows 2K/XP/VistaWindows CEWeb Thin ClientStringSynchronousSupportedSupportedSupportedDescription: Copies a defined section of a larger string.Parameters:strSourcenumStartCharnumQtdCharString tag containing the source string.Integer tag containing a number corresponding to the first character being copied.Integer tag containing the number of characters to be copied.Returned Values: Returns a string that is part of the source string (as defined by thefunction).Examples:Tag NameTagTagExpressionNcopy(“IWS version 6.1”, 7, 7) // Returned value = versionNcopy(“Technical Reference Manual”, 0, 9) // Returned value = Technical Note:The first character in the string will be assigned the value 0.InduSoft Web Studio v6.1 SP5 A-49
IWS Users GuideInduSoft Web Studio FunctionsNum( strValue )GroupExecutionWindows 2K/XP/VistaWindows CEWeb Thin ClientStringSynchronousSupportedSupportedSupportedDescription: Converts a string into a float.Parameters:StrValueString tag containing the number of characters to be converted into floatformat.Returned Values: Returns the number (formerly in a string format) in float format.Examples:Tag NameExpressionTag Num(“321654.987”) // Returned value = 321654.987Tag Num(“5.6589626246”) // Returned value = 5.6589626246 Note:The float string cannot use characters other than the numbers (0…9) and adecimal point (.) or the program returns the value 0.0.A-50 InduSoft Web Studio v6.1 SP5
InduSoft Web Studio FunctionsIWS Users GuideStr( numValue )GroupExecutionWindows 2K/XP/VistaWindows CEWeb Thin ClientStringSynchronousSupportedSupportedSupportedDescription: Converts a number into a string.Parameters:numValueInteger or float tag containing a number to be converted to a string.Returned Values: Returns the string, in a float format.Examples:Tag NameExpressionTag Str(321654.987) // Returned value = “321654.987”Tag Str(5.65896246) // Returned value = “5.658962”InduSoft Web Studio v6.1 SP5 A-51
IWS Users GuideInduSoft Web Studio FunctionsStr2Asc( strChar )GroupExecutionWindows 2K/XP/VistaWindows CEWeb Thin ClientStringSynchronousSupportedSupportedSupportedDescription: Converts an ASCII character into its corresponding ASCII code.Parameters:strCharString Tag containing an ASCII character to be converted into ASCII code.Returned Values: Returns a decimal value corresponding to the ASCII characterentered.Examples:Tag NameExpressionTag Str2Asc(“C”) // Returned value = 67Tag Str2Asc(“o”) // Returned value = 111A-52 InduSoft Web Studio v6.1 SP5
InduSoft Web Studio FunctionsIWS Users GuideStrCompare( strValue1, strValue2 )GroupExecutionWindows 2K/XP/VistaWindows CEWeb Thin ClientStringSynchronousSupportedSupportedSupportedDescription: Compares two strings to see if they are identitical.Parameters:strValue1strValue2A string, or a tag of String type. This is the first string in the comparison.A string, or a tag of String type. This is the second string in the comparison.Returned Values:−1 The value of strValue1 is less than the value of strValue2.0 strValue1 and strValue2 are identical.1 The value of strValue1 is greater than the value of strValue2.Examples:Tag NameTagTagTag1 = "Text"Tag2 = "Text"ExpressionStrCompare( "Text1", "Text2" )// Returned value = −1StrFromReal( Tag1, Tag2 )// Returned value = 0TagTag1 = "Text1"Tag2 = "Text2"StrFromReal( Tag1, Tag2 )// Returned value = −1InduSoft Web Studio v6.1 SP5 A-53
IWS Users GuideInduSoft Web Studio FunctionsStrCompareNoCase( strValue1, strValue2 )GroupExecutionWindows 2K/XP/VistaWindows CEWeb Thin ClientStringSynchronousSupportedSupportedSupportedDescription: Compares two strings to see if they are identitical, ignoring the case ofletters (i.e. the lower-case “a” is considered to have the same value as theupper-case “A”).Parameters:strValue1strValue2A string, or a tag of String type. This is the first string in the comparison.A string, or a tag of String type. This is the second string in the comparison.Returned Values:−1 The value of strValue1 is less than the value of strValue2.0 strValue1 and strValue2 are identical.1 The value of strValue1 is greater than the value of strValue2.Examples:Tag NameTagExpressionStrCompareNoCase( "Text1", "TEXT1" )// Returned value = 0TagTag1 = "Text1"Tag2 = "TEXT1"StrFromRealNoCase( Tag1, Tag2 )// Returned value = 0A-54 InduSoft Web Studio v6.1 SP5
InduSoft Web Studio FunctionsIWS Users GuideStrFromInt( numValue, numBase )GroupExecutionWindows 2K/XP/VistaWindows CEWeb Thin ClientStringSynchronousSupportedSupportedSupportedDescription: Converts an integer into its string representation in another basenumber system, such as binary (base-2) or octal (base-8). Note:If you do not need to change the base, then use the Str() function instead.Parameters:numValuenumBaseAn integer, or a tag of Integer type. This is the numeric value to beconverted into a string.An integer, or a tag of Integer type. This specifies which base numbersystem to convert into.Returned Values: This function returns a string representation of the given integer, inthe specified base number system. The returned value can be stored in any tag ofString type.Examples:Tag NameTagTagExpressionStrFromInt( 26, 2 )// Returned value = "11010"StrFromInt( 26, 8 )// Returned value = "32"InduSoft Web Studio v6.1 SP5 A-55
IWS Users GuideInduSoft Web Studio FunctionsStrFromReal( numValue, numPrecision, "strType" )GroupExecutionWindows 2K/XP/VistaWindows CEWeb Thin ClientStringSynchronousSupportedSupportedSupportedDescription: Converts a real number into its string representation, in eitherfloating-point or exponential notation.Parameters:numValuenumPrecisionstrTypeAny numeric value, or a tag of Real type. This is the value to be convertedinto a string.An integer, or a tag of Integer type. This specifies how many decimal placeswill be shown.A single-character string. This specifies how the returned value will beformatted, as described in the following table:Value ofstrTypefeEDescriptionFormatted in floating-point notation.Formatted in exponential notation with a lower-case “e”.Formatted in exponential notation with an upper-case “E”.Returned Values: This function returns a string representation of the given numericvalue, with the specified precision and notation. The returned value can be storedin any tag of String type.Examples:Tag NameTagTagTagExpressionStrFromReal( 263.355, 2, "f" )// Returned value = "263.36"StrFromReal( 263.355, 2, "e" )// Returned value = "2,63e+002"StrFromReal( 263.355, 2, "E" )// Returned value = "2,63E+002"A-56 InduSoft Web Studio v6.1 SP5
InduSoft Web Studio FunctionsIWS Users GuideStrFromTime( numUTCTime, numType )GroupExecutionWindows 2K/XP/VistaWindows CEWeb Thin ClientStringSynchronousSupportedSupportedSupportedDescription: Converts a timestamp from UTC standard notation into a formattedstring, adjusted to reflect the Time Zone setting in the Control Panel of the localcomputer. Note:The Coordinated Universal Time (UTC) standard counts the number ofseconds elapsed since 12:00 AM GMT on January 1, 1970. Each day consistsof 86,400 seconds.Parameters:numUTCTimenumTypeAn integer, or a tag of Integer type. A timestamp given in UTC standardnotation.An integer, or a tag of Integer type. Specifies the format of the resultingstring, as described in the following table:Value ofnumType Description123Displays the date in the same format that is selected in theControl Panel on the local computer.Displays the time in the same format that is selected in theControl Panel on the local computer.Displays a standard 24-character string that shows both dateand time.4 Displays the abbreviated name of the day of the week.5 Displays the full name of the day of the week.Returned Values: This function returns a string representation of the giventimestamp, with the specified formatting. The returned value can be stored in anytag of String type.Examples: Note:The examples below are for a computer set to Eastern Standard Time (or UTC–05:00).InduSoft Web Studio v6.1 SP5 A-57
IWS Users GuideInduSoft Web Studio FunctionsTag NameTagTagTagTagTagExpressionStrFromTime( 86400, 1 )// Returned value = "1/1/70"StrFromTime( 86400, 2 )// Returned value = "07:00:00 PM"StrFromTime( 86400, 3 )// Returned value = "Thu Jan 01 19:00:00 1970"StrFromTime( 86400, 4 )// Returned value = "Thu"StrFromTime( 86400, 5 )// Returned value = "Thursday"A-58 InduSoft Web Studio v6.1 SP5
InduSoft Web Studio FunctionsIWS Users GuideStrGetElement(strSource, strDelimiter, numElementNumber)GroupExecutionWindows 2K/XP/VistaWindows CEWeb Thin ClientStringSynchronousSupportedSupportedSupportedDescription: Gets a specific element from a string source.Parameters:strSourcestrDelimiterString tag containing the source string.Char used as delimiter between the elements.numElementNumber Number of the element which will be returned by the function. The firstelement has the number 1. The second element has the number 2, and soon.Returned Values: Returns the element (string value) retrieved from the strSource.Examples:Tag NameTagTagExpressionStrGetElement(“a|b|c”, “|”, 2) // Returned value = “b”StrGetElement(“a,b,c”, “,”, 3) // Returned value = “c”InduSoft Web Studio v6.1 SP5 A-59
IWS Users GuideInduSoft Web Studio FunctionsStrLeft( strSource, numQtdChar )GroupExecutionWindows 2K/XP/VistaWindows CEWeb Thin ClientStringSynchronousSupportedSupportedSupportedDescription: Copies the first characters of a larger string.Parameters:strSourcenumQtdCharString tag containing the source string.Integer tag containing the number of characters to be copied.Returned Values: Returns a string containing the left-most characters in the sourcestring.Examples:Tag NameTagTagExpressionStrLeft(“IWS version 6.1”, 8) // Returned value = IWS vStrLeft (“Technical Reference Manual”, 9) // Returned value = TechnicalA-60 InduSoft Web Studio v6.1 SP5
InduSoft Web Studio FunctionsIWS Users GuideStrLen( strSource )GroupExecutionWindows 2K/XP/VistaWindows CEWeb Thin ClientStringSynchronousSupportedSupportedSupportedDescription: Determines the length of a string.Parameters:strSourceString tag containing the string.Returned Values: Returns an integer that is the number of characters in the string.Examples:Tag NameExpressionTag StrLen(“IWS version 6.1”) // Returned value = 18Tag StrLen(“Technical Reference Manual”) // Returned value = 26InduSoft Web Studio v6.1 SP5 A-61
IWS Users GuideInduSoft Web Studio FunctionsStrLower( strSource )GroupExecutionWindows 2K/XP/VistaWindows CEWeb Thin ClientStringSynchronousSupportedSupportedSupportedDescription: Converts a string to all lower case characters.Parameters:strSourceString tag containing the string to be converted.Returned Values: Returns the string, where all the characters are in lowercase.Examples:Tag NameExpressionTag StrLower(“IWS version 6.1”) // Returned value = “IWS version 6.1”TagStrLower(“Technical Reference Manual”) // Returned value = “technical referencemanual”A-62 InduSoft Web Studio v6.1 SP5
InduSoft Web Studio FunctionsIWS Users GuideStrRChr( strSource, strChrSequence )GroupExecutionWindows 2K/XP/VistaWindows CEWeb Thin ClientStringSynchronousSupportedSupportedSupportedDescription: Isolates the final occurrence of a character sequence within a string.Parameters:StrSourceStrCharSequenceString tag containing the source string.String tag containing the reference string.Returned Values: Returns a string of characters following the last occurrence of acharacter within the source string.Examples:Tag NameExpressionTag StrRChr(“IWS version 6.1”, “i”) // Returned value = “ion 6.1”TagStrRChr(“Technical Reference Manual”, “a”) // Returned value =”al”InduSoft Web Studio v6.1 SP5 A-63
IWS Users GuideInduSoft Web Studio FunctionsStrRight( strSource, numQtdChar )GroupExecutionWindows 2K/XP/VistaWindows CEWeb Thin ClientStringSynchronousSupportedSupportedSupportedDescription: Copies the last characters in a larger string.Parameters:StrSourceNumQtdCharString tag containing the source string.Integer tag containing the number of characters to be copied.Returned Values: Returns a string containing the right-most characters in a sourcestring.Examples:Tag NameExpressionTag StrRight(“IWS version 6.1”, 8) // Returned value = “sion 6.1”TagStrRight(“Technical Reference Manual”, 9) // Returned value = “ce Manual”A-64 InduSoft Web Studio v6.1 SP5
InduSoft Web Studio FunctionsIWS Users GuideStrSetElement( strSource, strDelimiter, numElementNumber,strValue )GroupExecutionWindows 2K/XP/VistaWindows CEWeb Thin ClientStringSynchronousSupportedSupportedSupportedDescription: Gets a specific element from a string source.Parameters:strSourcestrDelimiterString tag containing the source string.Char used as delimiter between the elements.numElementNumber Number of the element where the string value will be written by the function.The first element has the number 1. The second element has the number 2,and so on.strValueString value that will be written to the numElementNumber of the strSourcestring tag.Returned Values: Returns the string value updated from the strValue.Examples:Tag NameTagTagExpressionStrSetElement(StringTag,“|”, 2, “abcd”)StrSetElement(StringTag,“,”, 3, “defg”)InduSoft Web Studio v6.1 SP5 A-65
IWS Users GuideInduSoft Web Studio FunctionsStrStr( strSource, strCharSequence )GroupExecutionWindows 2K/XP/VistaWindows CEWeb Thin ClientStringSynchronousSupportedSupportedSupportedDescription: Isolates the first occurrence of a character sequence within a string.Parameters:strSourcestrCharSequenceString tag containing the source string.String tag containing the reference string.Returned Values: Returns the string of characters following the first occurrence of acharacter within the source string.Examples:Tag NameExpressionTag StrStr(“IWS version 6.1”, “i”) // Returned value = “ion 6.1”Tag StrStr(“Technical Reference Manual”, “a”) //Returned value =”al Reference Manual”A-66 InduSoft Web Studio v6.1 SP5
InduSoft Web Studio FunctionsIWS Users GuideStrStrPos( strSource, strCharSequence )GroupExecutionWindows 2K/XP/VistaWindows CEWeb Thin ClientStringSynchronousSupportedSupportedSupportedDescription: Finds the first occurrence of a character within a string.Parameters:strSourcestrCharSequenceString tag containing the source string.String tag containing the reference string.Returned Values: Returns an integer corresponding to the first occurrence of acharacter within the source string.Examples:Tag NameExpressionTag StrStrPos(“IWS version 6.1”, “i”) // Returned value = 4Tag StrStrPos(“Technical Reference Manual”, “a”) // Returned value = 7 Note:The first character in the string assigned the value 0.InduSoft Web Studio v6.1 SP5 A-67
IWS Users GuideInduSoft Web Studio FunctionsStrTrim( strReference, optNumFlag )GroupExecutionWindows 2K/XP/VistaWindows CEWeb Thin ClientStringSynchronousSupportedSupportedSupportedDescription: Removes unwanted spaces from a string.Parameters:strReferenceoptNumFlagA string tag containing the source string.An optional integer tag.• If optNumFlag = 0, then IWS removes spaces from both thebeginning and end of the string.• If optNumFlag = 1, then IWS removes spaces from the beginning ofthe string only.• If optNumFlag = 2, then IWS removes spaces from the end of thestring only.• If optNumFlag = 3, then IWS removes all spaces except for singlespaces between words.Returned Values: Returns a string equal to strReferance minus the specified spacecharacters. The returned value can be stored in any tag of String type.Examples:Tag NameTagTagTagTagTagExpressionStrTrim( " Studio version 6.1 " )// Returned value = "Studio version 6.1"StrTrim( " Studio version 6.1 ", 0 )// Returned value = "Studio version 6.1"StrTrim( " Studio version 6.1 ", 1 )// Returned value = "Studio version 6.1 "StrTrim( " Studio version 6.1 ", 2 )// Returned value = " Studio version 6.1"StrTrim( " Studio version 6.1 ", 3 )// Returned value = "Studio version 6.1"A-68 InduSoft Web Studio v6.1 SP5
InduSoft Web Studio FunctionsIWS Users GuideStrTrimAll( strReference, optStrTrimChar )GroupExecutionWindows 2K/XP/VistaWindows CEWeb Thin ClientStringSynchronousSupportedSupportedSupportedDescription: Eliminates a specific char from the whole string.Parameters:strReferenceoptStrTrimCharA string tag containing the source string.Char that will be removed from the string. If this parameter is omitted, thespace char will be removed from the string by default.Returned Values: Returns a string equal to strReferance minus the charactersremoved by the function.Examples:Tag NameExpressionTag StrTrimAll(“IWS version 6.1 “,””) // Returned value = “IWS version 6.1“Tag StrTrimAll(“IWS version 6.1 “,” “.””) // Returned value = “IWS version 6.1“InduSoft Web Studio v6.1 SP5 A-69
IWS Users GuideInduSoft Web Studio FunctionsStrUpper( strSource )GroupExecutionWindows 2K/XP/VistaWindows CEWeb Thin ClientStringSynchronousSupportedSupportedSupportedDescription: Converts a string to all uppercase characters.Parameters:strSourceString tag containing the string.Returned Values: Returns the string with all characters in uppercase.Examples:Tag NameExpressionTag StrUpper(“IWS version 6.1”) // Returned value = “IWS version 6.1”TagStrUpper(“Technical Reference Manual”) // Returned value = “TECHNICALREFERENCE MANUAL”A-70 InduSoft Web Studio v6.1 SP5
InduSoft Web Studio FunctionsIWS Users GuideValueToChar( “tagArray”, numChars )GroupExecutionWindows 2K/XP/VistaWindows CEWeb Thin ClientStringSynchronousSupportedSupportedSupportedDescription: Converts a string into an array of integer values (using bytes).Parameters:“tagArray”NumCharsName of array tag containing the integer values of the characters to be converted.Integer tag containing the number of characters to be converted.Returned Values: Returns a string with characters defined by values in the Array tags.Examples:Tag NameTagTagExpressionValueToChar(“Array”, 3) // If Array[0] = 65, Array[1] = 66, and Array[2] = 67 then thereturned value will be “ABC”ValueToChar(“Array[10]”, 3) // If Array[10] = 65, Array[11] = 66, and Array[12] = 67 thenthe returned value will be “ABC” Note:You cannot use this function for UNICODE characters, because it convertsthe lower bytes of UNICODE characters only.InduSoft Web Studio v6.1 SP5 A-71
IWS Users GuideInduSoft Web Studio FunctionsValueWToChar( “tagArray”, numChars )GroupExecutionWindows 2K/XP/VistaWindows CEWeb Thin ClientStringSynchronousSupportedSupportedSupportedDescription: Converts a string into an array of integer values (using words).Parameters:“tagArray”numCharsName of array tag containing integer values of the characters to be converted.Integer tag containing the number of characters to be converted.Returned Values: Returns a string with characters defined by values in the Array tags.Examples:Tag NameExpressionTag ValueWToChar(“Array”, 3) // If Array[0] = 29779, Array[1] = 25717, and Array[2] = 28521then the returned value will be “ IWS” Note:You may find this function especially useful when converting UNICODEcharacters into codes.A-72 InduSoft Web Studio v6.1 SP5
InduSoft Web Studio FunctionsIWS Users GuideDate and Time FunctionsThis section describes the following InduSoft Web Studio Date and Time functions: ClockGetDate(numSeconds)ClockGetDayOfTheWeek(numSeconds)ClockGetTime(numSeconds)DateTime2Clock(strDate, strTime)GetClock()Hour2Clock(strTime)SetsystemDate(strDate)SetSystemTime(strTime)ClockGetDate( numSeconds )GroupExecutionWindows 2K/XP/VistaWindows CEWeb Thin ClientDate and TimeSynchronousSupportedSupportedSupportedDescription: Calculates the date, based on how many seconds have elapsed since19:00:00 EST 12/31/1969 (taking into account the current time zone of thecomputer).Parameters:numSeconds Integer tag containing the number of seconds elapsed since 19:00:00 ETS 12/31/1969.Returned Values: Returns the date calculated in string format.Examples:Tag NameTagTagExpressionClockGetDate(0)// If the computer is in the Central time zone.Returned value = 12/31/1969ClockGetDate(1018886359) // If the computer is in the Central time zone.Returned value = 04/15/2002 Note:This function takes into account the current Time Zone as specified in theControl Panel of the local computer.InduSoft Web Studio v6.1 SP5 A-73
IWS Users GuideInduSoft Web Studio FunctionsClockGetDayOfTheWeek( numSeconds )GroupExecutionWindows 2K/XP/VistaWindows CEWeb Thin ClientDate and TimeSynchronousSupportedSupportedSupportedDescription: Calculates the day of the week, based on how many seconds haveelapsed since 19:00:00 EST 12/31/1969 (taking into account the current timezone of the local computer).Parameters:numSeconds Integer tag containing the number of seconds elapsed since 19:00:00 ETS 12/31/1969Returned Values: Returns the day of the week (calculated in integer format) as follows:– 0 = Sunday– 1 = Monday– 2 = Tuesday– 3 = Wednesday– 4 = Thursday– 5 = Friday– 6 = SaturdayExamples:Tag NameTagTagExpressionClockGetDayOftheWeek(0)// If the computer is in the Central time zone.Returned value = 3ClockGetDate(1018886359) // If the computer is in the Central time zone.Returned value = 1 Note:This function takes into account the current Time Zone, as specified in theControl Panel of the local computer.A-74 InduSoft Web Studio v6.1 SP5
InduSoft Web Studio FunctionsIWS Users GuideClockGetTime( numSeconds )GroupExecutionWindows 2K/XP/VistaWindows CEWeb Thin ClientDate and TimeSynchronousSupportedSupportedSupportedDescription: Calculates the time based on how many seconds have elapsed since19:00:00 EST 12/31/1969 (taking into account the current time zone as specifiedon the local computer.Parameters:NumSeconds Integer tag containing the number of seconds elapsed since 19:00:00 ETS 12/31/1969.Returned Values: Returns the time calculated in string format.Examples:Tag NameTagTagExpressionClockGetTime(0) // If the computer is in the Central time zone.Returned value = 18:00:00ClockGetTime(1018886359) // If the computer is in the Central time zone.Returned value = 10:59:19 Note:This function takes into account the current Time Zone, as specified in theControl Panel of the local computer. Tip:To convert the number of seconds strictly into the HH:MM:SS format, youmust use the Format() function instead of the ClockGetTime() function.InduSoft Web Studio v6.1 SP5 A-75
IWS Users GuideInduSoft Web Studio FunctionsDateTime2Clock(strDate, strTime)GroupExecutionWindows 2K/XP/VistaWindows CEWeb Thin ClientDate and TimeSynchronousSupportedSupportedSupportedDescription: Calculates how many seconds have elapsed since 19:00:00 EST12/31/1969 (taking into account the current time zone specified on the localcomputer.)Parameters:StrDateStrTimeString tag containing the date to be used in the calculation.String tag containing the time to be used in the calculation. Returned Values: Returns the number of seconds that have elapsed since 19:00:00EST 12/31/1969.Examples:Tag NameTagTagExpressionDateTime2Clock (“12/31/1969”, “18:00:00”) // If the computer is in the Central time zone.Returned value = 0DateTime2Clock (“04/15/2002”, “10:59:19”) // If the computer is in the Central time zone.Returned value = 01018886359 Note:This function takes into account the current Time Zone, as specified in theControl Panel of the local computer.A-76 InduSoft Web Studio v6.1 SP5
InduSoft Web Studio FunctionsIWS Users GuideGetClock()GroupExecutionWindows 2K/XP/VistaWindows CEWeb Thin ClientDate and TimeSynchronousSupportedSupportedSupportedDescription: Calculates how many seconds have elapsed since 19:00:00 EST12/31/1969 at the moment the function was run (taking into account the currenttime zone, as specified on the local computer). Returned Values: Returns the number of seconds that have elapsed since 19:00:00EST 12/31/1969 at the moment the function was run.Examples:Tag NameExpressionTag GetClock() // If executed at 10:59:19 AM April 15 th 2002 CST. Returned value = 101886359Tag GetClock() // If executed at 00:00:00 January 1st 1970 GMT. Returned value = 0 Note:This function takes the current Time Zone into account, as specified in theControl Panel of the local computer.InduSoft Web Studio v6.1 SP5 A-77
IWS Users GuideInduSoft Web Studio FunctionsHour2Clock( strTime )GroupExecutionWindows 2K/XP/VistaWindows CEWeb Thin ClientDate and TimeSynchronousSupportedSupportedSupportedDescription: Converts time in the HH:MM:SS format into seconds.Parameters:strTimeString tag containing the number of hours, minutes, and seconds in HH:MM:SS format.Returned Values: Returns the number of seconds equivalent to the total number ofhours, minutes, and seconds specified.Examples:Tag NameExpressionTag Hour2Clock(“01:00:00”) // Returned value = 3600Tag Hour2Clock(“10:01:01”) // Returned value = 36061A-78 InduSoft Web Studio v6.1 SP5
InduSoft Web Studio FunctionsIWS Users GuideSetsystemDate( strDate )GroupExecutionWindows 2K/XP/VistaWindows CEWeb Thin ClientDate and TimeSynchronousSupportedSupportedSupportedDescription: Sets the date in the operating system’s clock.Parameters:strDateString tag containing the date in MM/DD/YYYY format in which to set the clock.Returned Values: Returns no values.Examples:Tag NameExpressionSetSystemDate(“04/15/2002”) // Sets the system clock to April 15 th 2002.InduSoft Web Studio v6.1 SP5 A-79
IWS Users GuideInduSoft Web Studio FunctionsSetSystemTime( strTime )GroupExecutionWindows 2K/XP/VistaWindows CEWeb Thin ClientDate and TimeSynchronousSupportedSupportedSupportedDescription: Sets the time in the operating system’s clock.Parameters:strTimeString tag containing the time in HH:MM:SS format in which to set the clock.Returned Values: No Returned Value.Examples:Tag NameExpressionSetSystemTime(“15:45:18”) // Sets the system clock to 3:45:18 PM.A-80 InduSoft Web Studio v6.1 SP5
InduSoft Web Studio FunctionsIWS Users GuideTrigonometric FunctionsThis section describes the following InduSoft Web Studio Trigonometric functions: ACos(numValue)ASin(numValue)ATan(numValue)Cos(numAngle)Cot(numAngle)Pi()Sin(numAngle)Tan(numAngle)ACos(numValue)GroupExecutionWindows 2K/XP/VistaWindows CEWeb Thin ClientTrigonometricSynchronousSupportedSupportedSupportedDescription: Calculates the Arc Cosine of a value.Parameters:NumValueNumerical tag from which the Arc Cosine will be taken.Returned Values: Returns the Arc Cosine of numValue in radians.Examples:Tag NameExpressionTag ACos(1) // Returned value = 0.000000Tag ACos(0) // Returned value = 1.570796InduSoft Web Studio v6.1 SP5 A-81
IWS Users GuideInduSoft Web Studio FunctionsASin( numValue )GroupExecutionWindows 2K/XP/VistaWindows CEWeb Thin ClientTrigonometricSynchronousSupportedSupportedSupportedDescription: Calculates the Arc Sine of a value.Parameters:NumValueNumerical tag, from which to take the Arc Sine.Returned Values: Returns the Arc Sine of numValue in radians.Examples:Tag NameExpressionTag ASin(1) // Returned value = 1.570796Tag ASin(0) // Returned value = 0.000000A-82 InduSoft Web Studio v6.1 SP5
InduSoft Web Studio FunctionsIWS Users GuideATan( numValue )GroupExecutionWindows 2K/XP/VistaWindows CEWeb Thin ClientTrigonometricSynchronousSupportedSupportedSupportedDescription: Calculates the Arc Tangent of a value.Parameters:NumValueNumerical tag, from which to take the Arc Tangent.Returned Values: Returns the Arc Tangent of numValue in radians.Examples:Tag NameExpressionTag ATan(1) // Returned value = 0.785398Tag ATan(0) // Returned value = 1.570796InduSoft Web Studio v6.1 SP5 A-83
IWS Users GuideInduSoft Web Studio FunctionsCos( numAngle )GroupExecutionWindows 2K/XP/VistaWindows CEWeb Thin ClientTrigonometricSynchronousSupportedSupportedSupportedDescription: Calculates the Cosine of a value.Parameters:NumAngleNumerical tag containing the Angle (in radians) from which to calculate the Cosine.Returned Values: Returns the Cosine of numAngle.Examples:Tag NameExpressionTag Cos(1.570796) // Returned value = 0.000000Tag Cos(0) // Returned value = 1.000000A-84 InduSoft Web Studio v6.1 SP5
InduSoft Web Studio FunctionsIWS Users GuideCot( numAngle )GroupExecutionWindows 2K/XP/VistaWindows CEWeb Thin ClientTrigonometricSynchronousSupportedSupportedSupportedDescription: Calculates the Cotangent of a value.Parameters:NumAngleNumerical tag containing the Angle (in radians) from which to calculate the Cotangent.Returned Values: Returns the Cotangent of numAngle.Examples:Tag NameExpressionTag Cot(0.785398) // Returned value = 1.000000Tag Cot(0) // Returned value = 0.00000 Note:Although mathematically the tangent of Pi is infinite, IWS only returns thelargest number possible.InduSoft Web Studio v6.1 SP5 A-85
IWS Users GuideInduSoft Web Studio FunctionsPi()GroupExecutionWindows 2K/XP/VistaWindows CEWeb Thin ClientTrigonometricSynchronousSupportedSupportedSupportedDescription: Calculates Pi.Returned Values: Returns Pi.Examples:Tag NameExpressionTag Pi() // Returned value = 3.141593 Note:Even though the Pi() function does not have any arguments, you mustinclude the parentheses or IWS will look for a tag named Pi.A-86 InduSoft Web Studio v6.1 SP5
InduSoft Web Studio FunctionsIWS Users GuideSin( numAngle )GroupExecutionWindows 2K/XP/VistaWindows CEWeb Thin ClientTrigonometricSynchronousSupportedSupportedSupportedDescription: Calculates the Sine of a value.Parameters:NumAngleNumerical tag containing the Angle (in radians) from which to calculate the Sine.Returned Values: Returns the Sine of numAngle.Examples:Tag NameExpressionTag Sin(0) // Returned value = 0.000000Tag Sin(1.570796) // Returned value = 1.000000InduSoft Web Studio v6.1 SP5 A-87
IWS Users GuideInduSoft Web Studio FunctionsTan( numAngle )GroupExecutionWindows 2K/XP/VistaWindows CEWeb Thin ClientTrigonometricSynchronousSupportedSupportedSupportedDescription: Calculates the Tangent of a value.Parameters:NumAngleNumerical tag containing the Angle (in radians) from which to calculate the Tangent.Returned Values: Returns the Tangent of numAngle.Examples:Tag NameExpressionTag Tan(0) // Returned value = 0.00000Tag Tan(0.785398) // Returned value = 1.00000 Note:Although mathematically the tangent of ½ Pi is infinite, IWS only returns thelargest number possible.A-88 InduSoft Web Studio v6.1 SP5
InduSoft Web Studio FunctionsIWS Users GuideOpening and Closing Windows FunctionsThis section describes the following InduSoft Web Studio Screen functions:Close(strScreen, optNumID)Open(strScreen, optnumX1 , optnumY1 , optnumX2 , optnumY2,numResizeFlag, optNumID)OpenPrevious(optNumX1 , optNumY1 , optNumX2 , optNumY2)Close( strScreen, optNumID )GroupExecutionWindows 2K/XP/VistaWindows CEWeb Thin ClientOpening and Closing WindowsAsynchronousSupportedNot SupportedNot Supported Note:This function cannot be used with Tasks (see page 8–1) or in a VBScriptsample in the Global Procedures interface (see page 15–8).Description: Closes an open screen.Parameters:strScreenoptNumIDString tag containing the name of the screen to be closed.A numeric value or tag; the specific instance number of the screen. (The ID is assignedwhen the screen is opened with the Open() function.) This is an optional parameter;the default ID is 0.Returned Values: No returned values.Examples:Tag NameExpressionClose( "main" )// Closes the “main” screen.Close( "alarms" )// Closes the “alarms” screen.Close( "main", 10 )// Closes the “main” screen with ID 10.InduSoft Web Studio v6.1 SP5 A-89
IWS Users GuideInduSoft Web Studio Functions Caution:When you open a screen using the Replace style, it automatically closes thescreens with Replace and/or Popup attributes that are overlapped by newscreen. In this case, it is not necessary to call the Close() function.Open( strScreen, optnumX1, optnumY1, optnumX2, optnumY2,numResizeFlag, optNumID )GroupExecutionWindows 2K/XP/VistaWindows CEWeb Thin ClientOpening and Closing WindowsAsynchronousSupportedSupportedSupported Note:This function cannot be used with Tasks (see page 8–1) or in a VBScriptsample in the Global Procedures interface (see page 15–8).Description: Opens the specified screen.Parameters:strScreenoptnumX1optnumY1optnumX2optnumY2numResizeFlagString tag containing the name of the screen to be opened.Optional Integer tag contains the X coordinate for upper-left corner ofscreen in pixels.Optional Integer tag contains the Y coordinate for upper-left corner ofscreen in pixels.Optional Integer tag contains the X coordinate for lower-right corner ofscreen in pixels.Optional Integer tag contains the X coordinate for lower-right corner ofscreen in pixels.Specifies whether objects in the screen will be resized when the screen isopened:• 0 — Objects in the screen will not be resized.• 1 — Objects in the screen will be automatically resized to fit the newdimensions of the screen, as specified by the coordinates describedabove. The resizing is done at the moment the screen is opened, so ifthe user changes the screen size after the screen is opened, then theobjects will not be resized.NOTE: This parameter is required if all four coordinates are specified.A-90 InduSoft Web Studio v6.1 SP5
InduSoft Web Studio FunctionsIWS Users GuideoptNumIDYou can open multiple instances of the same screen. In this case, eachinstance is identified by a different ID, and to close a specific instance youmust specify the ID in the Close() function. This is an optionalparameter; the default ID is 0.optStrMnemonicList A string that describes how the custom properties of any generic objectsor linked symbols in the screen will be completed when the screen isopened. This string has the following syntax…#:…where is the name of the property and is thetag, expression or literal value that the property will receive. You candeclare two or more mnemonics, as long as they are separated by spaces.See the Examples section below for an example. Note:• You can open the screen at the current mouse location by using Open("ScreenName", 1 ), or Open( "ScreenName", 1, −1, −1, −1, … ) ifthe parameters at the end are needed.• If optNumX2 and optNumY2 are less than optNumX1 and optNumY1, or if allfour coordinates are set to −1, then the parameters are ignored and theScreen Attributes settings are used by default.• If optNumX1 equals optNumX2 and optNumY1 equals optNumY2, then thescreen size specified in Screen Attributes is used by default but the screenlocation is centered at optNumX1 and optNumY1.Returned Values:0 Function executed successfully.1 Function did not execute successfully.Examples:Tag NameExpressionTag Open( "main" )// Opens the screen using the Screen Attributes settings.Tag Open( "main", 1 )// Opens the screen at the current mouse location.Tag Open( "main", 1, −1, −1, −1, 0, 10)// Opens the screen at the current mouse location, and assigns the screen ID 10.Tag Open( "main", 500, 250, 500, 250, 0, 10)// Opens the screen centered at X=500 Y=250.InduSoft Web Studio v6.1 SP5 A-91
IWS Users GuideInduSoft Web Studio FunctionsTagOpen( "main", −1, −1, −1, −1, 1, 0, "#Mne1:Tag1 #Mne2:Tag2")// Opens the screen, replacing the custom properties Mne1 and Mne2 with Tag1 and Tag2,respectively. Caution:• Some Web servers are case-sensitive. If you plan to convert your screensinto HTML format you should use only lowercase letters for the screenname.• If you call the Open() function from a Task such as the Script Task, thenthe screen will open only on the server station. In other words, thefunction will not work on Web Thin Clients or Secure Viewers.A-92 InduSoft Web Studio v6.1 SP5
InduSoft Web Studio FunctionsIWS Users GuideOpenPrevious( optNumX1 , optNumY1 , optNumX2 , optNumY2 )GroupExecutionWindows 2K/XP/VistaWindows CEWeb Thin ClientOpening and Closing WindowsAsynchronousSupportedSupportedSupported Note:This function cannot be used with Tasks (see page 8–1) or in a VBScriptsample in the Global Procedures interface (see page 15–8).Description: Re-opens the last screen that was closed.Parameters:optnumX1optnumY1optnumX2optnumY2Optional integer tag contains the X coordinate for upper-left corner of screen in pixels.Optional integer tag contains the Y coordinate for upper-left corner of screen in pixels.Optional integer tag contains the X coordinate for lower-right corner of screen in pixels.Optional integer tag contains the Y coordinate for lower-right corner of screen in pixels.Returned Values:0 Function did not execute successfully1 Function executed successfullyExamples:Tag NameExpressionOpenPrevious()OpenPrevious0,0,800,600()InduSoft Web Studio v6.1 SP5 A-93
IWS Users GuideInduSoft Web Studio FunctionsSecurity FunctionsThis section describes the following InduSoft Web Studio Security functions: BlockUser(strUserName) CheckESign( )CreateUser(strUserName, strGroup, strPassw, strUserFullName)GetUserNames(strUsers , nUserType , strGroups)GetUserPwdAging(strUser)GetUserState(strUserName)RemoveUser(strUserName)SetPassword(strUserName, optStrNewPassword)UnblockUser(strUserName)BlockUser( strUserName )GroupExecutionWindows 2K/XP/VistaWindows CEWeb Thin ClientSecuritySynchronousSupportedSupportedSupportedDescription: Used to block an existing user from the security system.Parameters:StrUserNameString tag containing the name of the user to block.Returned Values:0 User blocked successfully1 Invalid number of parameters2 Wrong parameter type3 User does not exist4 It is not possible to write the data successfullyExamples:Tag NameTagTagExpressionBlockUser(“Bob”)BlockUser(“Albert”)A-94 InduSoft Web Studio v6.1 SP5
InduSoft Web Studio FunctionsIWS Users Guide Note:You cannot use this function to create a user name that is already being usedin the application. Users created with this function do not display in thedevelopment environment Security folder because they are stored in asecondary database. Tip:You can use the ExtUser.exe program (located in the Bin folder) to managethe users in this secondary database.CheckESign( )GroupExecutionWindows 2K/XP/VistaWindows CEWeb Thin ClientSecuritySynchronousSupportedSupportedSupportedDescription: Prompts the user to enter their User Name and Password. This can beused to secure specific expressions, just as the E-Sign option is used to secureActive Objects and Dynamic Properties.Parameters: There are no parameters for this function. Calling the function displaysa security dialog, where the user must enter their User Name and Password.Returned Values:FALSETRUEUser Name and Password not acceptedUser Name and Password acceptedExamples:Tag NameExpressionCheckESign( )InduSoft Web Studio v6.1 SP5 A-95
IWS Users GuideInduSoft Web Studio FunctionsCreateUser( strUserName, strGroup, strPassw,strUserFullName )GroupExecutionWindows 2K/XP/VistaWindows CEWeb Thin ClientSecuritySynchronousSupportedSupportedSupportedDescription: Creates a new user.Parameters:strUserNamestrGroupstrPasswordstrUserFullNameString tag containing the name of the user to be created.String tag containing the name of the group to which the user will belong.String tag containing a password for the user.String tag containing the full name of the user.Returned Values:0 New user created successfully1 Invalid number of parameters2 Wrong parameter type3 User already exists4 Group does not exist5 It is not possible to safely write the data6 It is not possible to use the CreateUser() function7 User full name already exists8 Reentrant function call not allowed9 User clicked on Cancel button when using the standard Create User window10 Invalid password, check the minimum password size specified for the groupExamples:Tag NameTagTagExpressionCreateUser(“Bob”, “Admin”, “Chocolate”, "Bob Smith")CreateUser(“Albert”, “Engineering”, “EMC2”, "Albert Jones")A-96 InduSoft Web Studio v6.1 SP5
InduSoft Web Studio FunctionsIWS Users Guide Note:You cannot use this function to create a user name that is already being usedin the application. Users created with this function do not display in thedevelopment environment Security folder because they are stored in asecondary database. Tip:You can use the ExtUser.exe program (located in the Bin folder) to managethe users in this secondary database.InduSoft Web Studio v6.1 SP5 A-97
IWS Users GuideInduSoft Web Studio FunctionsGetUserNames ( “tagUsers” , optnumUserType , “opttagGroups”)GroupExecutionWindows 2K/XP/VistaWindows CEWeb Thin ClientSecuritySynchronousSupportedSupportedSupported / Executed on ServerDescription:Parameters:“tagUsers”Name of the array tag that will receive usersoptnumUserType 0- Return all users1- Only users created during run-time2- Only users created using the development environment“opttagGroups” Name of the array tag that will receive the group for each specific userReturned Values: Number of users or a negative number that can be one of thefollowing:-1 Invalid number of parameters-2 “tagUsers” is invalid-3 optnumUserType is invalid-4 opttagGroups is invalid-5 Error, function cannot be called in the web thin clientNatural number set: Number of usersExamples:Tag NameNumberOfUsersNumberOfUsersNumberOfUsersNumberOfUsersExpressionGetUserNames("UsersArray") //Retrieves all users, store their names in theUsersArray tag and the number of users in the NumberOfUsers tag.GetUserNames("UsersArray", 1) //Retrieves all users created during run-time, storetheir names in the UsersArray tag and the number of users in the NumberOfUserstag.GetUserNames("UsersArray", 2) //Retrieves all users created in the developmentenvironment, store their names in the UsersArray tag and the number of users in theNumberOfUsers tag.GetUserNames("UsersArray", 2, “Groups”) //Retrieves all users created in theA-98 InduSoft Web Studio v6.1 SP5
InduSoft Web Studio FunctionsIWS Users Guidedevelopment environment, store their names in the UsersArray tag and the numberof users in the NumberOfUsers tag. The group name per each user is stored in theGroups tag.GetUserPwdAging( strUser )GroupExecutionWindows 2K/XP/VistaWindows CEWeb Thin ClientSecuritySynchronousSupportedSupportedSupported Description: Returns the time remaining before the password a specific user expires. Parameters:strUser String tag containing the name of the user.Returned Values:≤0 Number of hours since password expired.0 Specified user is not logged on.>0 Number of hours remaining until password expires. Note:If the function is not executed properly (e.g. User Name is invalid), or if thespecified user is not logged on, then the function returns BAD quality.Examples:Tag NameTagHoursToExpireTagHoursToExpireExpressionGetUserPwdAging(“John”)// returns the number of hours before the password for the User “John” expires.GetUserPwdAging(UserName)// returns the number of hours before the password for current User logged on thesystem expires.InduSoft Web Studio v6.1 SP5 A-99
IWS Users GuideInduSoft Web Studio FunctionsGetUserState( strUserName )GroupExecutionWindows 2K/XP/VistaWindows CEWeb Thin ClientSecuritySynchronousSupportedSupportedSupportedDescription: Use to see the current status of a selected user.Parameters:StrUserNameString tag containing the name of the user.Returned Values:0 User is unblocked1 User is blocked3 User does not exist4 It is not possible to safely write the dataExamples:Tag NameTagTagExpressionGetUserState(“Bob”)GetUserState(“Albert”)A-100 InduSoft Web Studio v6.1 SP5
InduSoft Web Studio FunctionsIWS Users GuideRemoveUser( strUserName )GroupExecutionWindows 2K/XP/VistaWindows CEWeb Thin ClientSecuritySynchronousSupportedSupportedSupportedDescription: Removes a user from the system.Parameters:StrUserNameString tag containing the name of the user to be removed.Returned Values:0 User removed successfully1 Invalid number of parameters2 Wrong parameter type3 User does not exist4 It is not possible to safely write the dataExamples:Tag NameTagTagExpressionRemoveUser(“Bob”)RemoveUser(“Albert”) Note:You can use this function to remove only those users you created using theCreateUser() function.InduSoft Web Studio v6.1 SP5 A-101
IWS Users GuideInduSoft Web Studio FunctionsSetPassword( strUserName, optStrNewPassword )GroupExecutionWindows 2K/XP/VistaWindows CEWeb Thin ClientSecuritySynchronousSupportedSupportedSupportedDescription: Use to specify a new user password.Parameters:StrUserNameOptStrNewPasswordString tag containing the name of the user.Optional string tag containing the new password.Returned Values:0 The new password has been set1 User is blocked3 User does not exist4 It is not possible to safely write the data5 Operation was cancelledExamples:Tag NameTagTagExpressionSetPassword(“Bob”)SetPassword(“Albert,” “anemarie”) Note:If you omit the optStrNewPassword parameter, the SetPassword() function willlaunch an Enter a new password dialog, so the user can configure a newpassword.A-102 InduSoft Web Studio v6.1 SP5
InduSoft Web Studio FunctionsIWS Users GuideUnblockUser( strUserName )GroupExecutionWindows 2K/XP/VistaWindows CEWeb Thin ClientSecuritySynchronousSupportedSupportedSupportedDescription: Use to unblock a blocked user in the system.Parameters:StrUserNameString tag containing the name of the user to unblock.Returned Values:0 User unblocked successfully1 Invalid number of parameters2 Wrong parameter type3 User does not exist4 It is not possible to safely write the dataExamples:Tag NameTagTagExpressionUnblockUser(“Bob”)UnblockUser(“Albert”)InduSoft Web Studio v6.1 SP5 A-103
IWS Users GuideInduSoft Web Studio FunctionsModule Activity FunctionsThis section describes the following InduSoft Web Studio Module Activity functions: AppActivate(strAppTitle, optnumActiv)AppIsRunning(strAppTitle)AppPostMessage(strAppTitle, numwParam, numlParam)AppSendKeys(strKeys1, strKeys2, … , strKeysN)CleanReadQueue()CloseSplashWindow()EndTask(strTask)ExitWindows(numExitCode)IsScreenOpen(strScreen, optNumID)IsTaskRunning(strTask)IsViewerInFocus()KeyPad( "strTagName", "optStrKeyboardName", optnumIsPassword,"optStrHint", optnumMin, optnumMax ) LogOff( )Logon(optStrUser, optStrPassword)Math(numWorksheet)PostKey(numKeydownOrKeyup, numwParam, numlParam)Recipe(strFunction)Report("strFunction", optnumOrientation) RunGlobalProcedureOnServer(strNameProcedure, param1, param2, … )RunVBScript(strScript, "opttagReturnError")SendKeyObject(numEvent, strMainKey, optnumShift, optnumCtrl,optnumAlt, optStrTargetScreen, optNumID)SetAppPath(strPath)SetKeyboardLanguage(strLanguage)SetViewerInFocus()SetViewerPos(numLeft, numTop, optnumWidth, optnumHeight)ShutDown()StartTask(strTask)ViewerPostMessage(strScrTitle, numwParam, numlParam, optNumID)Wait(numMillisec)WinExec(strCommand, optnumState)WinExecIsRunning(numHandle, "stroptReturn")A-104 InduSoft Web Studio v6.1 SP5
InduSoft Web Studio FunctionsIWS Users GuideAppActivate( strAppTitle, optnumActiv )GroupExecutionWindows 2K/XP/VistaWindows CEWeb Thin ClientModule ActivityAsynchronousSupportedSupportedSupportedDescription: Activates an application that is already open.Parameters:StrAppTitleOptnumActiveString tag containing the name of the application to be activated.Optional integer tag containing the integer that corresponds to an activationoption. See Windows documentation for more details on these options.• 0 = SW_HIDE• 1 = SW_SHOWNORMAL• 2 = SW_SHOWMINIMIZED• 3 = SW_SHOWMAXIMIZED• 4 = SW_SHOWNOACTIVATE• 5 = SW_SHOW• 6 = SW_MINIMIZE• 7 = SW_SHOWMINNOACTIVATE• 8 = SW_SHOWNA• 9 = SW_RESTORE (Default)Returned Values: No returned values.Examples:Tag NameExpressionAppActivate(“Microsoft Word – test.doc”, 5)InduSoft Web Studio v6.1 SP5 A-105
IWS Users GuideInduSoft Web Studio FunctionsAppIsRunning( strAppTitle )GroupExecutionWindows 2K/XP/VistaWindows CEWeb Thin ClientModule ActivitySynchronousSupportedSupportedSupportedDescription: Verifies whether an application is open and running.Parameters:strAppTitleString tag containing the name of the application.Returned Values:1 Application is running.0 Application is not running.Examples:Tag NameTagExpressionAppIsRunning(“Microsoft Word – test.doc”)A-106 InduSoft Web Studio v6.1 SP5
InduSoft Web Studio FunctionsIWS Users GuideAppPostMessage( strAppTitle, numwParam, numlParam )GroupExecutionWindows 2K/XP/VistaWindows CEWeb Thin ClientModule ActivitySynchronousSupportedSupportedSupportedDescription: Sends a message to the active application.Parameters:strAppTitlenumwParamnumlParamString tag containing the name of the application.Integer tag containing an integer corresponding to the Windows message wParamInteger tag containing an integer corresponding to the Windows message lParamReturned Values: No returned values.Examples:Tag NameExpressionTag AppPostMessage(“Microsoft Word – test.doc”, 3, 1)InduSoft Web Studio v6.1 SP5 A-107
IWS Users GuideInduSoft Web Studio FunctionsAppSendKeys( strKeys1, strKeys2, ..., strKeysN )GroupExecutionWindows 2K/XP/VistaWindows CEWeb Thin ClientModule ActivitySynchronousSupportedNot SupportedSupportedDescription: Sends keyboard commands to the active application.Parameters:StrKeys (1-N)String tags containing the keyboard commands to be used.Returned Values: No returned values.Examples:Tag NameExpressionAppSendKeys(“S”, ”t”, ”u”, ”d”, ”i”, “o”, “”)AppSendKeys(“F”) Note:You can specify , , or in the text to send a code equal tothe Alt, Ctrl, or Shift keyboard commands. To send the < character, specify
InduSoft Web Studio FunctionsIWS Users GuideCleanReadQueue()GroupExecutionWindows 2K/XP/VistaWindows CEWeb Thin ClientModule ActivitySynchronousSupportedNot SupportedSupported / Executed on ServerDescription: Removes all reading messages from the communications module.Returned Values: No returned values.Examples:Tag NameExpressionCleanReadQueue() Note:You should not use this function in new applications, but this function is stillvalid for applications built using earlier versions of the InduSoft Web Studio.InduSoft Web Studio v6.1 SP5 A-109
IWS Users GuideInduSoft Web Studio FunctionsCloseSplashWindow()GroupExecutionWindows 2K/XP/VistaWindows CEWeb Thin ClientModule ActivitySynchronousSupportedNot SupportedSupported / Executed on ServerDescription: Closes the IWS splash screen.Returned Values: No returned values.Examples:Tag NameExpressionCloseSplashWindow()A-110 InduSoft Web Studio v6.1 SP5
InduSoft Web Studio FunctionsIWS Users GuideEndTask( strTask )GroupExecutionWindows 2K/XP/VistaWindows CEWeb Thin ClientModule ActivityAsynchronousSupportedNot SupportedSupported / Executed on ServerDescription: Stops the IWS module that is currently running.Parameters:strTaskString tag containing the name of the task to stop (must be one of the following):• BGTASK: Background Tasks• VIEWER: Viewer• DBSPY: Database Spy• LOGWIN: LogWin• DRIVER : Driver• UNIDDECL: DDE client• UNINDDE: DDE server• UNIODBC: ODBC• TCPSERVER: TCP/IP Server• TCPCLIENT: TCP/IP Client• OPCCLIENT: OPCReturned Values: No returned values.Examples:Tag NameExpressionEndTask(“Viewer”) Note:To close a driver, you must use the following syntax:EndTask(“Driver”)Where is the name of the driver’s .dll file. For example,EndTask(“DriverMODBU”)InduSoft Web Studio v6.1 SP5 A-111
IWS Users GuideInduSoft Web Studio FunctionsExitWindows( numExitCode )GroupExecutionWindows 2K/XP/VistaWindows CEWeb Thin ClientModule ActivityAsynchronousSupportedNot SupportedSupportedDescription: Closes windows in a specified manner.Parameters:numExitCodeInteger tag containing a number (0–2) specifying how Windows will be exited.• 0 = Reboot Windows• 1 = Log Off Windows• 2 = Shutdown WindowsReturned Values: No returned values.Examples:Tag NameExpressionExitWindows(1)A-112 InduSoft Web Studio v6.1 SP5
InduSoft Web Studio FunctionsIWS Users GuideIsScreenOpen( strScreen, optNumID )GroupExecutionWindows 2K/XP/VistaWindows CEWeb Thin ClientModule ActivitySynchronousSupportedSupportedNot Supported Note:This function cannot be used with Tasks (see page 8–1) or in a VBScriptsample in the Global Procedures interface (see page 15–8).Description: Verifies that a screen is open.Parameters:strScreenoptNumIDString tag containing the name of the screen to be verified.A numeric value or tag; the specific instance number of the screen. (The ID is assignedwhen the screen is opened with the Open() function.) This is an optional parameter;the default ID is 0.Returned Values:0 Screen is not open.1 Screen is open.Examples:Tag NameExpressionTag IsScreenOpen( "main" )// Is “main” screen open?Tag IsScreenOpen( "main", 10 )// Is “main” screen with ID 10 open?InduSoft Web Studio v6.1 SP5 A-113
IWS Users GuideInduSoft Web Studio FunctionsIsTaskRunning( strTask )GroupExecutionWindows 2K/XP/VistaWindows CEWeb Thin ClientModule ActivitySynchronousSupportedNot SupportedSupported / Executed on ServerDescription: Verifies that a task is running.Parameters:strTaskString tag containing the name of the task to be verified.Returned Values:0 Task is not running.1 Task is running.Examples:Tag NameTagExpressionIsTaskRunning(“viewer”)A-114 InduSoft Web Studio v6.1 SP5
InduSoft Web Studio FunctionsIWS Users GuideIsViewerInFocus()GroupExecutionWindows 2K/XP/VistaWindows CEWeb Thin ClientModule ActivitySynchronousSupportedNot SupportedNot SupportedDescription: Verifies that the Viewer module is in focus on the screen.Returned Values:0 Viewer is not in focus.1 Viewer is in focus.Examples:Tag NameTagExpressionIsViewerInFocus()InduSoft Web Studio v6.1 SP5 A-115
IWS Users GuideInduSoft Web Studio FunctionsKeyPad( "strTagName", "optStrKeyboardName",optnumIsPassword, "optStrHint", optnumMin, optnumMax )GroupExecutionWindows 2K/XP/VistaWindows CEWeb Thin ClientModule ActivityAsynchronousSupportedSupportedSupportedDescription: Opens a Virtual Keyboard dialog to write to the specified Tag.Parameters:"strTagName"The name of the Tag to which the Virtual Keyboard will write."optStrKeyboardName" Type of Virtual Keyboard that will be launched (e.g. AlphaNumeric,EnhKeypad, or Keypad). If this parameter is omitted, then the defaultVirtual Keyboard will be launched.optnumIsPassword"optStrHint"optnumMinoptnumMaxIf this parameter is set with any value different from 0 (zero), thecharacters typed in the Virtual Keyboard will appear as asterisks ("*").This option is useful when the user is typing a password.The value specified for this parameter is displayed in the title bar of theVirtual Keyboard.Minimum and maximum numeric values for the Tag when using theKeypad keyboard type. (These values are ignored for all other keyboardtypes.) These parameters are optional, but you must specify both tohave them implemented. If you specify only one parameter — forexample, Min but not Max — then it will be ignored.Returned Values:0 Success1 Error2 Tag does not exist3 Reentrant error, function is already executing4 Invalid number of parameters5 Internal error, contact Technical Support for more informationA-116 InduSoft Web Studio v6.1 SP5
InduSoft Web Studio FunctionsIWS Users GuideExamples:Tag NameExpressionTag KeyPad( "tagA" )Tag KeyPad( "tagA", "EnhKeypad" )Tag KeyPad( "tagA", "EnhKeypad", 1 )Tag KeyPad( "tagA", "EnhKeypad", 1, "My Input", 0, 100 )InduSoft Web Studio v6.1 SP5 A-117
IWS Users GuideInduSoft Web Studio FunctionsLogOff( )GroupExecutionWindows 2K/XP/VistaWindows CEWeb Thin ClientModule ActivityAsynchronousSupportedSupportedSupportedDescription: Logs off the current user and logs on the guest user.Returned Values: No returned values.Examples:Tag NameExpressionLogOff()Logon( optStrUser, optStrPassword)GroupExecutionWindows 2K/XP/VistaWindows CEWeb Thin ClientModule ActivityAsynchronousSupportedSupportedSupportedDescription: Logs on the specified user using the specified password. If no user isprovided, opens a logon dialog.Parameters:optStrUseroptStrPasswordOptional string tag containing the name of the User to log on.Optional string tag containing the user’s log-on password.Returned Values: No returned values.Examples:Tag NameExpressionLogon()Logon(“Albert”, “EMC2”)A-118 InduSoft Web Studio v6.1 SP5
InduSoft Web Studio FunctionsIWS Users GuideMath( numWorksheet )GroupExecutionWindows 2K/XP/VistaWindows CEWeb Thin ClientModule ActivitySynchronousSupportedSupportedSupported / Executed on ServerDescription: Executes the specified math worksheet.Parameters:numWorksheetNumerical tag containing the number of the math worksheet to be executed.Returned Values: No returned values.Examples:Tag NameExpressionMath(6) Caution:Running a math worksheet from inside another module will pause thatmodule until the math worksheet finishes. Consequently, use this functiononly when absolutely necessary to avoid decreasing the performance of theother modules.InduSoft Web Studio v6.1 SP5 A-119
IWS Users GuideInduSoft Web Studio FunctionsPostKey(numKeydownOrKeyup, numwParam, numlParam)GroupExecutionWindows 2K/XP/VistaWindows CEWeb Thin ClientModule ActivitySynchronousSupportedSupportedSupported Note:This function cannot be used with Tasks (see page 8–1) or in a VBScriptsample in the Global Procedures interface (see page 15–8).Description: Posts keys to the screen in the viewer.Parameters:numKeydownOrKeyup Numerical tag containing a 0 (to indicate a Key down event) or a 1(to indicate a Key up event).numwParamnumlParamNumerical tag containing key code to be sent.Numerical tag containing message lParam.Returned Values: No returned values.Examples:Tag NameExpressionPostKey(0, 0x24, 0)A-120 InduSoft Web Studio v6.1 SP5
InduSoft Web Studio FunctionsIWS Users GuideRecipe( strFunction )GroupExecutionWindows 2K/XP/VistaWindows CEWeb Thin ClientModule ActivitySynchronousSupportedSupportedSupported / Executed on ServerDescription: Activates a specified recipe function.Parameters:strFunctionString tag specifing the operation to be preformed and the recipe sheet to be usedin the [Operation]:[Recipe sheet]format.Operations:• Save: Saves data to a data file.• Load: Loads data from a data file.• Delete: Deletes a data file.• Init: Initializes a data file with a value of 0 in all the tags.Returned Values:0 No error1 If the tag is numeric2 Expression does not contain “:”3 Previous command to the invalid “:”4 Task not found by the system5 Disk errorExamples:Tag NameTagTagExpressionRecipe(“Save:Recipe1”)Recipe(“Load:Recipe5”) Cautions: You must be running the Background Task (Execution Tasks tab on the ProjectStatus window) to execute the recipe functions. When this function is called on a Web Thin Client, the command is sent tothe Server (via TCP/IP) and the Recipe task on the Server executes thecommand. Therefore, be aware that tags configured with a Scope of Localrather Server will still be updated on the Server.InduSoft Web Studio v6.1 SP5 A-121
IWS Users GuideInduSoft Web Studio FunctionsReport("strFunction" , optnumOrientation)GroupExecutionWindows 2K/XP/VistaWindows CEWeb Thin ClientModule ActivitySynchronousSupportedSupportedSupported / Executed on ServerDescription: Sends a Report worksheet to output (hard disk, printer, or PDF).Parameters:"strFunction"String specifying the operation to perform and the report sheet to use in thesyntax “[Operation]:[Report worksheet] format, where:[Operation]:• Disk: Saves data to a data file.• Prn: Prints data directly to the default printer.• Pdf: Generates a PDF file of the report.[Report worksheet]:Name of the report that must be either saved to the disk, sent to the printer orsent/generate a pdf file (the report file name must include the .REPextension).optnumOrientation Set the paper orientation as follows:0 (default) = Portrait1 = LandscapeThis parameter is ignored when the Operation configured in the “strFunction”parameter is other than Prn. Note:Some features of this function are not supported when running theapplication on a Windows CE device: it cannot generate PDFs; it cannotchange paper orientation using the optnumOrientation parameter; and itdoes not support Report worksheets in RTF format.Returned Values:0 Success1 "strFunction" is configured with a numeric value (invalid)2 Expression does not contain “:” (invalid)3 Expression contains invalid Operation before the “:”4 Background Task is not running (see Tip below)5 Disk error (e.g. disk full, read-only file cannot be overwritten, or invalid path)6 Specified Report worksheet does not existA-122 InduSoft Web Studio v6.1 SP5
InduSoft Web Studio FunctionsIWS Users Guide Tip:The Background Task must be running in order to execute this function.Otherwise, the operation will not be executed and the function will return thevalue 4 indicating error. For more information, see “Project Status” on page6–31.Examples:Tag NameExpressionReport("Disk:Report1.rep")Report("Prn:Report2.rep", 0)Report("Prn:Report3.rep", 1)Report("Pdf:Report1.rep")InduSoft Web Studio v6.1 SP5 A-123
IWS Users GuideInduSoft Web Studio FunctionsRunGlobalProcedureOnServer(strNameProcedure, param1,param2, … )GroupExecutionWindows 2K/XP/VistaWindows CEWeb Thin ClientModule ActivitySynchronousSupportedSupportedSupportedDescription: Runs a function or sub-routine, as declared in the Global Proceduresinterface. The procedure is run on the server, but it can be called by any local orremote client.Parameters:strNameProcedureA string or a tag of String type; the name of the function or sub-routine to berun.param1, param2, … Parameters that are passed to the procedure. Parameters must be passedas strings.Returned Values: This function returns whatever value is returned by the calledprocedure.Examples: Given the following procedure that is declared in the Global Proceduresinterface:Function AddMe(intNumber)If intNumber >= 6 ThenAddMe = 0ElseAddMe = intNumber + 2End IfEnd FunctionTag NameExpressionTag RunGlobalProcedureOnServer( "AddMe", "2" )// Executes the procedure and returns a value of 4.A-124 InduSoft Web Studio v6.1 SP5
InduSoft Web Studio FunctionsIWS Users GuideRunVBScript( strScript , "opttagReturnError" )GroupExecutionWindows 2K/XP/VistaWindows CEWeb Thin ClientModule ActivitySynchronousSupportedSupportedNot SupportedDescription: Executes an statement in VBScript language.Parameters:strScriptScript statement that must be executed by the function.optTagReturnError Name of the tag that will receive the error (if any) generated by the statement– e.g.: “Division by zero”. The tag name must be configured betweendouble-quotes and it must be a String tag.Returned Values:o 0: Error.o 1: Success.Examples:Tag NameTagResultExpressionRunVBScript(“MsgBox(Time)”)// Executes the MsgBox function from VBScript and displays the current time.RunVBScript(TagStatement)// Executes the statement configured in the value of the string tagTagStatement.RunVBScript(“$TagC=$TagA/$TagB”,”TagError”)// Writes in TagC the result of TagA divided by TagB. The error generated bythe operation (if any) is written to the string tag TagError (e.g.: “Division byzero”). Tip:This function is useful to execute VBScript statements from interfaces thatsupport the built-in language only – e.g.: Scheduler groups. You can also callVBSCript functions created in the Global Procedures. Note:The runtime station must support the VBScript statements configured in thisfunction in order to execute them.InduSoft Web Studio v6.1 SP5 A-125
IWS Users GuideInduSoft Web Studio FunctionsSendKeyObject(numEvent, strMainKey, optnumShift,optnumCtrl, optnumAlt, optStrTargetScreen, optNumID)GroupExecutionWindows 2K/XP/VistaWindows CEWeb Thin ClientModule ActivitySynchronousSupportedNot SupportedNot Supported Note:This function cannot be used with Tasks (see page 8–1) or in a VBScriptsample in the Global Procedures interface (see page 15–8).Description: Sends key codes to objects on the open screens. You can trigger"Command" dynamics from these objects using this function.Parameters:numEventstrMainKeyNumerical tag specifying the key event code, as follows:• 0: On Down• 1: While Down• 2: On UpString tag containing the key to be sent to the object. The following tagsare acceptable:• "F1" ... "F20"• "+ "• "-"• "/"• "*"• "HOME"• "END"• "INSERT"• "DELETE"• "DOWN"• "UP"• "LEFT"• "RIGHT"• "PAGEUP"• "PAGEDOWN"• "SPACE"• "RETURN"• "BACKSPACE"• "ESCAPE"• "A" ... "Z"optnumShiftoptnumCtrloptnumAltoptStrTargetScreenoptNumIDOptional numerical tag, which indicates whether to send Shift.Optional numerical tag, which indicates whether to send Ctrl.Optional numerical tag, which indicates whether to send Alt.A string or a tag of String type; the name of the screen to receive the keyevent code.A numeric value or tag; the specific instance number of the screen. (The IDis assigned when the screen is opened with the Open() function.) This isan optional parameter; the default ID is 0.Returned Values: No returned values.A-126 InduSoft Web Studio v6.1 SP5
InduSoft Web Studio FunctionsIWS Users GuideExamples:Tag NameExpressionSendKeyObject( 0, "R", 1, 0, 0, "main", 10 )// Sends Shift-R to the “main” screen with ID 10. Notes: numEvent defines how the function executes expressions specified for OnDown, On While, or On Up of the object’s Command dynamic. The On While event requires special attention. Each time theSendKeyObject() function is executed, IWS executes the expressionsconfigured for the On While sheet (from the object’s Command dynamic) justonce. The numShift, numCtrl, numAlt, and strTargetScreen parameters are optional;however, if you configure one of them, you must configure the others too.InduSoft Web Studio v6.1 SP5 A-127
IWS Users GuideInduSoft Web Studio FunctionsSetAppPath(strPath)GroupExecutionWindows 2K/XP/VistaWindows CEWeb Thin ClientModule ActivitySynchronousSupportedNot SupportedSupported / Executed on ServerDescription: Sets the new path for the application. After this function is executed,IWS will look for all the configuration files (screens, alarms, trends, database,events) in this new path.Parameters:StrPathString tag containing the file path.Returned Values:0 Failed to set path.1 Succeeded in setting pathExamples:Tag NameExpressionSetAppPath(“C:\ InduSoft Web Studio\”) Note:If the computer is on a network, you can use the /// syntax to define a location on another node of the network.A-128 InduSoft Web Studio v6.1 SP5
InduSoft Web Studio FunctionsIWS Users GuideSetKeyboardLanguage(strLanguage)GroupExecutionWindows 2K/XP/VistaWindows CEWeb Thin ClientModule ActivitySynchronousSupportedSupportedSupportedDescription: Use this function to set the language of the Virtual Keyboards.Parameters:StrLanguageString tag with the language used for the virtual keyboards. The currently availableoptions are: “EN” (English, default), and “GE” (German).Returned Values:0 Success1 ErrorExamples:Tag NameTagTagExpressionSetKeyboardLanguage(“EN”)SetKeyboardLanguage(TagLanguage)InduSoft Web Studio v6.1 SP5 A-129
IWS Users GuideInduSoft Web Studio FunctionsSetViewerInFocus()GroupExecutionWindows 2K/XP/VistaWindows CEWeb Thin ClientModule ActivitySynchronousSupportedNot SupportedSupportedDescription: Sets the focus to the Viewer task.Returned Values: No returned values.Examples:Tag NameExpressionSetViewerInFocus()A-130 InduSoft Web Studio v6.1 SP5
InduSoft Web Studio FunctionsIWS Users GuideSetViewerPos(numLeft, numTop, optnumWidth, optnumHeight)GroupExecutionWindows 2K/XP/VistaWindows CEWeb Thin ClientModule ActivitySynchronousSupportedNot SupportedSupportedDescription: Sets the height, width, and position of the Viewer.Parameters:NumLeftNumTopOptnumWidthOptnumHeightNumerical tag specifying the left-side position of the Viewer in pixels.Numerical tag specifying the top-side position of the Viewer in pixels.Optional numerical tag specifying the Viewer width in pixels.Optional numerical tag containing the Viewer height in pixels.Returned Values:0 Error1 SuccessExamples:Tag NameExpressionTag SetViewerPos(50, 50, 640, 480) Note:When you omit the optional parameters (numWidth and numHeight), IWS getssize of the Viewer window from the application resolution.InduSoft Web Studio v6.1 SP5 A-131
IWS Users GuideInduSoft Web Studio FunctionsShutDown()GroupExecutionWindows 2K/XP/VistaWindows CEWeb Thin ClientModule ActivitySynchronousSupportedSupportedNot SupportedDescription: Shuts down all of the active application modules.Returned Values: No returned values.Examples:Tag NameExpressionShutDown() Caution:This function does not close the development environment, Database Spy, orLogWin.A-132 InduSoft Web Studio v6.1 SP5
InduSoft Web Studio FunctionsIWS Users GuideStartTask(strTask)GroupExecutionWindows 2K/XP/VistaWindows CEWeb Thin ClientModule ActivityAsynchronousSupportedNot SupportedSupported / Executed on ServerDescription: Starts an IWS module not currently running.Parameters:StrTaskString tag containing the name of the task to start (must be one of the following tasks):• BGTASK: Background Tasks• VIEWER: Viewer• DBSPY: Database Spy• LOGWIN: LogWin• DRIVER: Driver• UNIDDECL: DDE Client• UNINDDE: DDE Server• UNIODBC: ODBC• TCPSERVER : TCP/IP Server• TCPCLIENT: TCP/IP Client• OPCCLIENT: OPCReturned Values: No returned values.Examples:Tag NameExpressionEndTask(“Viewer”) Note:The StartTask(“Driver”) function starts all drivers configured in theapplication.To start a specific driver, you must use the Winexec() function. For example,Winexec(“\BIN\Studio Manager.exe”+” “+”\Bin\Driver.dll”+” “+””)InduSoft Web Studio v6.1 SP5 A-133
IWS Users GuideInduSoft Web Studio FunctionsViewerPostMessage(strScrTitle, numwParam, numlParam,optNumID)GroupExecutionWindows 2K/XP/VistaWindows CEWeb Thin ClientModule ActivityAsynchronousSupportedSupportedSupported Note:This function cannot be used with Tasks (see page 8–1) or in a VBScriptsample in the Global Procedures interface (see page 15–8).Description: Sends an internal message to the Viewer.Parameters:strScrTitlenumwParamnumlParamoptNumIDString tag containing the name of the screen to which the message will be posted.Numerical tag containing the wParam of the Windows message.Numerical tag containing the lParam of the Windows message.A numeric value or tag; the specific instance number of the screen. (The ID is assignedwhen the screen is opened with the Open() function.) This is an optional parameter;the default ID is 0.Returned Values: No returned values.Examples:Tag NameExpressionViewerPostMessage( "main", 16, 3, 1, 10 )// Sends message 16 to the “main” screen with ID 10.A-134 InduSoft Web Studio v6.1 SP5
InduSoft Web Studio FunctionsIWS Users GuideWait(numMillisec)GroupExecutionWindows 2K/XP/VistaWindows CEWeb Thin ClientModule ActivitySynchronousSupportedSupportedSupportedDescription: Interrupts the Math worksheet’s execution for a specified number ofmilliseconds.Parameters:NumMillisec Integer tag containing the number of milliseconds to wait.Returned Values: No returned values.Examples:Tag NameExpressionWait(1000) Caution:You can use the Wait(numMillisec) function in Math worksheets only.However, it is dangerous to use this function anywhere in your application.Wait(numMillisec) pauses the application, and any information cominginto the application during a wait will be ignored.InduSoft Web Studio v6.1 SP5 A-135
IWS Users GuideInduSoft Web Studio FunctionsWinExec(strCommand, optnumState, optnumSync,“opttagReturnOrHandle”)GroupExecutionWindows 2K/XP/VistaWindows CEWeb Thin ClientModule ActivityAsynchronous / AsynchronousSupportedSupportedSupportedDescription: Executes a Windows command line.Parameters:strCommandoptnumStateoptnumSyncString tag containing the command line to execute.Optional numeric tag or constant containing an integer that definesthe initial state of a new application:• 0: Hides the application and gives control to another one.• 1: Activates and displays the application (default).• 2: Activates the application and displays it as an icon.• 3: Activates the application and maximizes it.• 4: Shows the application with its recent size. The application isstill active.• 7: Shows the application as an icon. The application is stillactive.Optional numeric tag or constant that specifies if the function willexecute synchronously or asynchronously. When executingsynchronously, the function will return when the executable finishits execution; when executing asynchronously the function willreturn immediately. To verify if an program started asynchronouslyhas been finished, one should use the fourth parameter and theWinExecIsRunning function.• 0: Asynchronous mode.• 1: Synchronous mode.Default is 0.“opttagReturnOrHandle” You should specify a string with the tag name that will receiveeither the Return code (when executing Synchronously) of theexecutable file or the program handle that can be used in theWinExecIsRunning function to determine whether the executableis still running.Returned Values:0 Command was not executed successfully.1 Command was executed successfully.A-136 InduSoft Web Studio v6.1 SP5
InduSoft Web Studio FunctionsIWS Users GuideExamples:Tag NameTagTagTagTagExpressionWinExec( "C:\WinNT\System32\notepad.exe", 4 ) // Starts the Notepad and continuesexecuting the next lines in the scriptWinExec( "C:\WinNT\System32\mspaint.exe" ) // Starts MS Paint and continuesexecuting the next lines in the scriptWinExec( "C:\MyTasks.bat", 0, 1, “result” ) // Starts a batch file, executes it in hiddenmode, and continues executing the next lines in the script only when the batch finishesits execution. The result is stored in the result integer tag.WinExec( "C:\MyTasks.bat", 0, 0, “handle” ) // Starts a batch file, executes it in hiddenmode and goes to the next line in the script. The tag handle receives a number that canbe passed to the WinExecIsRunning function to determine whether the batch is stillexecuting or not [WinExecIsRunning(handle)].WinExecIsRunning(numHandle, “opttagReturn”)GroupExecutionWindows 2K/XP/VistaWindows CEWeb Thin ClientModule ActivitySynchronousSupportedSupportedSupportedDescription: Indicates whether a program started by the WinExec() function is stillrunning.Parameters:numHandle“opttagReturn”Handle number stored in the tag in the WinExec stroptReturnorHandleparameter.Tag that receives the code returned by the program executed by theWinExec() function.Returned Values:0 Successful execution-1 Invalid parameter(s)-2 Failed to open file. Disk is write-protected or file name is invalid.Examples:Tag NameTagTagExpressionWinExecIsRunning(numHandle)WinExecIsRunning(numHandle, “return”)InduSoft Web Studio v6.1 SP5 A-137
IWS Users GuideInduSoft Web Studio FunctionsFile FunctionsThis section describes the following InduSoft Web Studio File functions: DeleteOlderFiles (strPath, strMask, strDate)DirCreate (strDirectory , optBooFullPath)DirDelete (strDirectory , optBooEmptyOnly)DirLength (strPath)DirRename (strPath , strDirectoryFrom , strDirectoryTo)FileCopy (strSourceFile, strTargetFile, optnumTimeOut)FileDelete(strFile)FileLength(strFile)FileRename(strOldName, strNewName)FileWrite(strFileName, strWriteText, numoptAppend)FindFile(strFile, "opttagFilesFound", optnumTimeOut)FindPath(strPathName)GetFileAttributes(strFile)GetFileTime(strFileName, numFormat)GetHstInfo(strFileName, numInfoType)GetLine(strFileName, strSeqChar, "tagStore", optnumCase,"optOveflowTag")HST2TXT(strStartDate, strStartTime, numDuration, numGroup,strTargetFile, optStrSeparator, optnumMilliseconds, optStrFormat,optnumInterval)HST2TXTIsRunning()PDFCreate(strSourceFile, optStrPdfFile)Print()RDFileN("tagSelectedFile", strSearchPath, strMask, numChangeDir)A-138 InduSoft Web Studio v6.1 SP5
InduSoft Web Studio FunctionsIWS Users GuideDeleteOlderFiles(strPath, strMask, strDate)GroupExecutionWindows 2K/XP/VistaWindows CEWeb Thin ClientFileSynchronousSupportedSupportedSupportedDescription: Deletes files that are older than a date matching the configured maskfrom the configured path.Parameters:StrPathStrMaskStrDateString tag containing the path to the files that will be deleted.String tag containing the mask of the files to be deleted.String tag containing the cut-off date. Any files older than this date will be deleted.Returned Values: Returns the number of files deleted.Examples:Tag NameExpressionTag DeleteOlderFiles(“C:\ IWS\Application\HST\”, “*.hst”, “04/12/2002”) Note:You must configure the third parameter (StrDate) using the date formatspecified for the application (such as MDY or DMY) with the appropriateseparator ( /, :, ., and so forth.)InduSoft Web Studio v6.1 SP5 A-139
IWS Users GuideInduSoft Web Studio FunctionsDirCreate(strDirectory, optBooFullPath)GroupExecutionWindows 2K/XP/VistaWindows CEWeb Thin ClientFileSynchronousSupportedSupportedSupportedDescription: Creates the specified directory.Parameters:strDirectoryoptBooEmptyOnlyString tag or value containing the name and file path of the directory to create.Optional flag. If omitted or if this parameter has the value 0, the directory iscreated only if all previous directories exist. If this parameter has the valuedifferent from 0, the full path specified in the strDirectory parameter is created.Returned Values:-1 Invalid parameters0 Failed to create the directory (e.g. Drive does not exist.)1 Directory created successfully.Examples:Tag NameTagTagExpressionDirCreate(“C:\Studio\Temp”) // The Temp folder is created in the C:\Studio path (only ifthe C:\Studio path already exists).DirCreate(“C:\Studio\Temp”,1) // The C:\Studio\Temp full path is created. Note:When this function is executed from a Web Thin Client station, the directoryis checked on the server station (but not on the Web Thin Client).A-140 InduSoft Web Studio v6.1 SP5
InduSoft Web Studio FunctionsIWS Users GuideDirDelete(strDirectory, optBooEmptyOnly)GroupExecutionWindows 2K/XP/VistaWindows CEWeb Thin ClientFileSynchronousSupportedSupportedSupportedDescription: Deletes the specified directory.Parameters:strDirectoryoptBooEmptyOnlyString tag or value containing the name and file path of the directory to delete.Optional flag. If this parameter has a value of 1, then the directory is deletedonly if it is empty. By default (i.e., the parameter is omitted or has a value of 0),the directory is deleted whether it is empty or not.Returned Values:-2 Attempted to delete a non-empty directory when this action is not allowed(optBooEmptyOnly 0)-1 Invalid parameters0 Failed to delete the directory (e.g. Directory does not exist.)1 Directory deleted successfully.Examples:Tag NameTagTagExpressionDirDelete(“C:\Studio\Temp”) // The Temp folder from C:\Studio is deleted.DirDelete (“C:\Studio\Temp”,1) // The Temp folder from C:\Studio is deleted only if it isempty. Note:When this function is executed from a Web Thin Client station, the directoryis checked on the server station (but not on the Web Thin Client). Tip:This function supports wildcard (* and ?).InduSoft Web Studio v6.1 SP5 A-141
IWS Users GuideInduSoft Web Studio FunctionsDirLength(strPath)GroupExecutionWindows 2K/XP/VistaWindows CEWeb Thin ClientFileSynchronousSupportedSupportedSupportedDescription: Returns the size of a specific directory.Parameters:strPathString tag or value containing the path of the directory that will be checked.Returned Values:-2 Directory does not exist.-1 Invalid parameters>=0 Size (in bytes) of the files and sub-folders in the directoryExamples:Tag NameTagExpressionDirLength(“C:\Studio”) // Returns the size (in bytes) of all files and sub-folders fromC:\Studio. Caution:This function is synchronous, and it may take some seconds to return thecorrect value; therefore, it must be used with caution. Note:When this function is executed from a Web Thin Client station, the directoryis checked on the server station (but not on the Web Thin Client).A-142 InduSoft Web Studio v6.1 SP5
InduSoft Web Studio FunctionsIWS Users GuideDirRename(strPath, strDirectoryFrom, strDirectoryTo)GroupExecutionWindows 2K/XP/VistaWindows CEWeb Thin ClientFileSynchronousSupportedSupportedSupportedDescription: Renames directories.Parameters:strPathstrDirectoryFromstrDirectoryToString tag or value containing the path of the directory that will be renamed.String tag or value containing the original name of the directory that will berenamed.String tag or value containing the target name used to rename the originaldirectory.Returned Values:-1 Invalid parameters0 Failed to rename the directory (e.g. strDirectoryFrom does not exist.)1 Directory renamed successfully.Examples:Tag NameTagExpressionDirRename(“C:\Studio\”,”Temp”, “New”) // The Temp folder from the C:\Studio\ folder isrenamed to New. Note:When this function is executed from a Web Thin Client station, the directoryis renamed on the server station (but not on the Web Thin Client). Tip:This function supports wildcard (* and ?).InduSoft Web Studio v6.1 SP5 A-143
IWS Users GuideInduSoft Web Studio FunctionsFileCopy (strSourceFile, strTargetFile, optnumTimeOut)GroupExecutionWindows 2K/XP/VistaWindows CEWeb Thin ClientFileSynchronousSupportedSupportedSupportedDescription: Copies the file(s) configured in the strSourceFile parameter to thepath/file configured in the strTargetFile parameter.Parameters:strSourceFilestrTargetFileoptnumTimeOutString tag containing the path and mask of the file(s) to be copied.String tag containing the path where the file(s) are to be copied.Numerical tag containing an integer to set the timeout time for the operation.Returned Values:-1 Timeout time expired.0 Failed to copy file(s).1 File(s) copied successfully.Examples:Tag NameExpressionTag FileCopy(“C:\ IWS\Application\HST\*.hst”, “C:\Temp\Hst\”, 1000)Tag FileCopy(“C:\ IWS\Application\ropert.txt”, “C:\Temp\Tuesday_Report.txt”, 500) Caution:This function is originally synchronous (for example, the scan does not go onuntil the function finishes the copying procedure). Consequently, using thisfunction for slow network connections may cause problems.If you use the optnumTimeOut parameter, the function returns the value –1 afterthe specified timeout time and the scan continues. Though the functionreturns a –1, it does not cancel the copying procedure. Instead, it creates aninternal process to finish the copying procedure.A-144 InduSoft Web Studio v6.1 SP5
InduSoft Web Studio FunctionsIWS Users GuideFileDelete(strFile)GroupExecutionWindows 2K/XP/VistaWindows CEWeb Thin ClientFileSynchronousSupportedSupportedSupportedDescription: Deletes the specified file.Parameters:strFileSting tag containing the name and file path of the file to delete.Returned Values:0 Failed to delete fileRealReturns the size of the file deletedExamples:Tag NameTagExpressionFileDelete(“C:\ IWS\readme.txt”)InduSoft Web Studio v6.1 SP5 A-145
IWS Users GuideInduSoft Web Studio FunctionsFileLength (strFile)GroupExecutionWindows 2K/XP/VistaWindows CEWeb Thin ClientFileSynchronousSupportedSupportedSupportedDescription: Returns the size of a file.Parameters:strFileString tag containing the name and file path of the file.Returned Values: Returns the size of the specified file in bytes.Examples:Tag NameExpressionTag FileLength( "C:\readme.txt" )FileRename(strOldName, strNewName)GroupExecutionWindows 2K/XP/VistaWindows CEWeb Thin ClientFileSynchronousSupportedSupportedSupportedDescription: Renames the specified file.Parameters:strOldNamestrNewNameString tag containing the path and old name of the file.String tag containing the path and new name of the file.Returned Values: No returned values.Examples:Tag NameExpressionFileRename(“C:\readme.txt”, “C:\pleasereadme.txt”)A-146 InduSoft Web Studio v6.1 SP5
InduSoft Web Studio FunctionsIWS Users GuideFileWrite(strFileName, strWriteText, numoptAppend)GroupExecutionWindows 2K/XP/VistaWindows CEWeb Thin ClientFileSynchronousSupportedSupportedSupportedDescription: Writes an ASCII string into a specified file. If the file does not exist, thefunction will create the file.Parameters:strFileNameString tag containing the file name.strWriteText String tag containing text to be written to the specified file.numoptAppendNumber tag: If you omit this parameter or specify zero (0), the function replaces the contentsof the existing file with the text specified for strWriteText. If you specify a value other than zero (1, 2, 3, …), the function adds the newtext specified using strWriteText as a new line to the file.Returned Values:0 Successful execution-1 Invalid parameter(s)-2 Failed to open file. Disk is write-protected or file name is invalid.Examples:Tag NameTagTagExpressionFileWrite(“c:\test.txt”, “This is a test”)FileWrite(TagFileName, TagText)Tag FileWrite(TagFileName, TagText, 1)InduSoft Web Studio v6.1 SP5 A-147
IWS Users GuideInduSoft Web Studio FunctionsFindFile(strFile, "opttagFilesFound", optnumTimeOut)GroupExecutionWindows 2K/XP/VistaWindows CEWeb Thin ClientFileSynchronousSupportedSupportedSupportedDescription: Searches a fileParameters:strFile“opttagFilesFound”optnumTimeOutString tag contains the file mask for which to search.Optional string tag array receives path and name of each file found.Optional numerical tag contains an integer to set the timeout inmilliseconds for this function.Returned Values:-1 Timeout0 No files foundNNumber of files foundExamples:Tag NameTagExpressionFindFile(“*.txt”)Tag FindFile(“*.doc”, “StringArray”, 1000) Caution:This function is synchronous originally (for example, the scan does not go onuntil the function returns a value). If you have a slow network connection,this function may cause application problems.If you use the optnumTimeOut parameter, the function returns the value –1 afterthe specified timeout time and the scan continues.A-148 InduSoft Web Studio v6.1 SP5
InduSoft Web Studio FunctionsIWS Users GuideFindPath(strPathName)GroupExecutionWindows 2K/XP/VistaWindows CEWeb Thin ClientFileSynchronousSupportedSupportedSupportedDescription: Verifies whether a directory exists.Parameters:strPathNameString tag containing the file path for which to search.Returned Values:0 Path not found1 Path foundExamples:Tag NameTagExpressionFindPath(“C:\WINNT\”)InduSoft Web Studio v6.1 SP5 A-149
IWS Users GuideInduSoft Web Studio FunctionsGetFileAttributes(strFile)GroupExecutionWindows 2K/XP/VistaWindows CEWeb Thin ClientFileSynchronousSupportedSupportedSupportedDescription: Reads the attributes of a specified file.Parameters:strFileString tag, containing the file from which to read the attributes.Returned Values:-1 Error1 Read only2 Hidden4 System16 Directory32 Archive128 Normal256 TemporaryExamples:Tag NameTagExpressionGetFileAttributes(“C:\readme.txt”)A-150 InduSoft Web Studio v6.1 SP5
InduSoft Web Studio FunctionsIWS Users GuideGetFileTime(strFileName, numFormat)GroupExecutionWindows 2K/XP/VistaWindows CEWeb Thin ClientFileSynchronousSupportedSupportedSupportedDescription: Reads the time and date the file was last modified.Parameters:strFileName String tag containing the file name to be read.numFormatNumerical tag, which specifies the format of the returned data.• 0: Returns the date and time from the file.• 1: Returns only the file date.• 2: Returns only the file time.Returned Values: Returns the date and or time the file was last modified.Examples:Tag NameTagExpressionGetFileTime(“C:\readme.txt”)InduSoft Web Studio v6.1 SP5 A-151
IWS Users GuideInduSoft Web Studio FunctionsGetHstInfo(strFileName, numInfoType)GroupExecutionWindows 2K/XP/VistaWindows CEWeb Thin ClientFileSynchronousSupportedSupportedSupportedDescription: Returns the Start Time, End Time, and Duration of the specified history(*.HST) file.Parameters:strFileNamenumInfoTypeString tag containing the name of the history file to be read.Numerical tag, which specifies the type of information to be returned.• 0: Returns the Start Time of the file.• 1: Returns the End Time of the file.• 2: Returns the Duration (in hours) of the file.Returned Values: If the file cannot be read or the specified information cannot bereturned, then an error is generated:-1 Failed to retrieve the Start Time; verify the history file exists and is valid.-2 Failed to retrieve the End Time; verify the history file exists and is valid.-3 Internal application error; please contact Technical Support.-4 The Studio TCP/IP server returned a Time that is incompatible with the format specifiedin the application screen or Web page. Please use the Verify Application command toupdate the application and try again.Examples:Tag NameExpressionTag GetHstInfo( "batch", 0 )Tag GetHstInfo( "hst/02060801.hst", 1 )Tag GetHstInfo( "C:\batch.bat", 2 )A-152 InduSoft Web Studio v6.1 SP5
InduSoft Web Studio FunctionsIWS Users GuideGetLine(strFileName, Search, "tagStore", optnumCase,optOveflowTag, optRunFromServer)GroupExecutionWindows 2K/XP/VistaWindows CEWeb Thin ClientFileSynchronousSupportedSupportedSupportedDescription: Searches a sequence of characters (string) or for a specific line in anASCII file and stores (in a string tag) the contents of the whole line in a string tag.Parameters:strFileNameSearch“tagStore”optnumCaseoptOverflowTagString tag containing the path and name of the file to be searched. The namecan be a fully qualified name (e.g.: C:\File.txt) or simply a file name(e.g.: File.txt). In the second case the application will search for the filein the following paths:Local Station: The application will search for the file in the Application Folder,and if it is not found, in the Application\Web folder.Web Thin Client: If the parameter optRunFromServer is set to 0, thepath where the file will be searched is undetermined. If is set to 1, it will searchfor the file in the URL typed in the Browser, and if the file is not found, in theBackup URL.Note: For Web Enabled applications, we recommend setting theoptRunFromServer parameter to 1 and placing your files in theApplicatoin\Web folder.There are two options for this parameter, based on its data type:Numeric Tag/Constant: Number of the line pointed by the function. Thefunction will try to find the line specified in this parameter and copy its contentsto the “tagStore” parameter. The first line in the file is line 0.String Tag/Constant: Sequence of characters for which to search. Thefunction will try to find a line in the file that contains this sequence of charactersand copy the contents of the first occurrence to the “tagStore”parameter.Name of the string tag receiving the contents of the line pointed by thefunction.Optional numerical tag specifying whether the search is case-sensitive.• 0: Not case-sensitive• 1: Case-sensitiveOptional name of a numerical tag receiving the result of overflow verification.• 0: OK• 1: OverflowInduSoft Web Studio v6.1 SP5 A-153
IWS Users GuideInduSoft Web Studio FunctionsOptOverflowTagOptional numerical tag ignored when the function is called on local stations.On Web Thin Clients this parameter indicates the following:• 0: Retrieves the file from the Web Thin Client machine (do not use this valuewith non-fully qualified names)• 1: Retrieves the file from the Web Server. If the file name is not a URL thefunction will ignore the application path and search for the file in the applicationURL where the screen files are located.Returned Values:NAmount of lines in which the sequence was found in the target ASCII file.0 String was not found in the target ASCII file-1 ASCII File was not found-2 Invalid strFileName parameter-3 Invalid strSeqChar parameter-4 Invalid strStoreTag parameter-5 Invalid optNumCase parameter-6 Invalid optnumOverflowTag parameter-7 Invalid number of parameters-8 Invalid line numberExamples:Tag NameExpressionTag GetLine( "C:\TechRef v51.doc", "Studio version", "ReturnLine" )Tag GetLine( "C:\readme.txt", 1, "ReturnedLine", 0, "Overflow" )// returns the second line of the file Note:This function only searches for text in ASCII files.A-154 InduSoft Web Studio v6.1 SP5
InduSoft Web Studio FunctionsIWS Users GuideHST2TXT(strStartDate, strStartTime, numDuration, numGroup,strTargetFile, optStrSeparator, optnumMilliseconds,optStrFormat, optnumInterval)GroupExecutionWindows 2K/XP/VistaWindows CEWeb Thin ClientFileAsynchronousSupportedSupportedSupportedDescription: Convert information from the Trend history file(s) in proprietary binaryformat (*.hst) to a plain text (*.txt) or comma-delimited (*.csv) file.Parameters:strStartDateString tag containing the start date of the data.strStartTimenumDurationnumGroupstrTargetFileoptStrSeparatorString tag containing the start time of the data.Numerical tag containing duration of the data in hours.Numerical tag containing trend group number.String tag containing path and name of the file to be written. If omitted, thefunction creates a file with the same name of the proprietary binary file, butusing the extension TXT.Optional string tag containing the data separator character for file. Ifomitted, the function uses the TAB character (\t) to separate the values inthe text file.optnumMilliseconds Optional numeric tag. If this parameter is false (0), the text file created willnot show milisecond-precision on the timestamp of each history sample.optStrFormatString tag, which specifies the order of the Month (M), Day (D), and Year(Y) for the time-stamp format exported to the text file:“DMY”: Day, Month, Year“MDY”: Month, Day, Year“YMD”: Year, Month, DayIf omitted, the function uses the format DMY for the timestamp in the textfile.optnumIntervalOptional numeric tag specifying the sampling interval. Only line itmes atthis interval are written to the TXT file; all other line items in the Trendhistory are discarded.For example, if optnumInterval has a value of 10, then only everytenth line item is written out.InduSoft Web Studio v6.1 SP5 A-155
IWS Users GuideInduSoft Web Studio FunctionsReturned Values:-3 Invalid number of parameters-2 Dll functions not found-1 IndHst.dll not found0 Function was executed successfully1 Error. Previous execution of the HST2TXT has not yet been completedExamples:Tag NameExpressionTag HST2TXT( "04/14/2002", "06:30:00", 0.1, 3,"C:\Studio\data.txt", "\" )Tag HST2TXT( "04/14/2002", "06:30:00", 0.1, 3,"C:\Studio\data.csv", "," , “MDY” )Tag HST2TXT( "04/14/2002", "06:30:00", 0.1, 3,"C:\Studio\data.csv", "," , “MDY”, 10 ) Tip:When using the comma (,) as optStrSeparator, the function creates a file inthe CSV format (Comma Separated Values). It is useful for exporting the Trendhistory data into a file that can be opened with Microsoft Excel.A-156 InduSoft Web Studio v6.1 SP5
InduSoft Web Studio FunctionsIWS Users GuideHST2TXTIsRunning()GroupExecutionWindows 2K/XP/VistaWindows CEWeb Thin ClientFileSynchronousSupportedNot SupportedSupported / Executed on ServerDescription: Returns the status of the HST2TXT() function.Returned Values:0 HST2TXT is still running.-1 Last conversion process was executed properly.-2 Reserved.-3 File not fond. There are no history files in the configured time interval for the groupspecified.-4 Cannot open HST file.-5 Cannot create/open ASCII file.-6 Cannot read file information from HST file-7 Invalid file type.-8 Cannot read header information from HST file.-9 Invalid number of tag in the header information (0 > nTags > 250)-10 Cannot create Header file (.hdr)-20 IndHst.dll was not found.-30 Cannot access dll function.Examples:Tag NameTagExpressionHST2TXTIsRunning()InduSoft Web Studio v6.1 SP5 A-157
IWS Users GuideInduSoft Web Studio FunctionsPDFCreate( strSourceFile, optStrPdfFile )GroupExecutionWindows 2K/XP/VistaWindows CEWeb Thin ClientFileSynchronousSupportedNot SupportedSupportedDescription: Creates a PDF file from the specified source file.Parameters:strSourceFileoptStrPdfFileString specifying the file path and name of the desired source file (*.doc, *.txt,or *.rtf). If a complete path is not specified, then the function will look for thesource file in the application folder.Optional string specifying the file path and name of the created PDF file. If afile path is not specified, then the PDF file will be saved in the same locationas the source file. If this parameter is omitted — that is, if no file path or nameis specified at all — then the PDF file will be saved in the same location andwith the same name as the source file. Only a new extension is added. Forexample, \\MyDocument.rtf -> \\MyDocument.pdf Note:When entering the file name without a path, a leading backlash ("\") isoptional.Returned Values:0 Success1 Error in PDF profile information3 Error saving PDF file4 Job canceled101 Error initializing PDF resource102 Specified source file not found103 Error generating PDF file104 Wrong number of parameters105 Wrong parameter type Caution:This function only supports the execution of one job at a time. If more thanone user or command attempts to call the function at the same time, then thefunction will fail and return a value of 101.A-158 InduSoft Web Studio v6.1 SP5
InduSoft Web Studio FunctionsIWS Users GuideExamples:Tag NameExpressionPDFCreate( "C:\Report1.rtf" )PDFCreate( "C:\Report2.doc", "C:\Converted1.pdf" )PDFCreate( "C:\Report3.txt", "C:\Data\Converted1.pdf" )InduSoft Web Studio v6.1 SP5 A-159
IWS Users GuideInduSoft Web Studio FunctionsPrint( strFilePath , optnumOrientation)GroupExecutionWindows 2K/XP/VistaWindows CEWeb Thin ClientFileAsynchronousSupportedSupportedSupportedDescription: Prints a text file.Parameters:strFilePathPath and name of the text file that will be printed.optnumOrientation Set the paper orientation as follows:0 (default) = Portrait1 = Landscape Note:The optnumOrientation parameter is not supported when running theapplication under the Windows CE operating system.Returned Values: No returned values.Examples:Tag NameExpressionPrint(“C:\ReadMe.txt”)Print(“C:\ReadMe.txt”, 1)Print(TagFileName, 0) Note:This function can be used to print the contents of text files only. Informationin any other format (e.g. pictures, binary files, etc.) cannot be printed withthis function.A-160 InduSoft Web Studio v6.1 SP5
InduSoft Web Studio FunctionsIWS Users GuideRDFileN("tagSelectedFile", strSearchPath, strMask,optNumChangeDir)GroupExecutionWindows 2K/XP/VistaWindows CEWeb Thin ClientFileSynchronousSupportedSupportedSupportedDescription: Launches a File Browser window allowing you to select a file.Parameters:"tagSelectedFile"strSearchPathstrMaskoptNumChangeDirName of the string tag receiving the name and path of a selected file. Thetag name must be configured between quotes. Moreover, it must be avalid tag name — it cannot be a VBScript variable name, for example.String tag containing the file path (directory) to search.String tag containing the mask used to filter the files.Optional numerical tag that indicates whether the operator will be able tochange the browsing directory. If this parameter is omitted or set TRUE(1), then the window opened by this function will allow the operator tonavigate to different directories. If it is set FALSE (0), then the window willbe restricted to the directory specified by strSearchPath.Returned Values:0 Success1 One of the parameters is not a string2 Parameter 1 contains an invalid tag name3 The user canceled the operationExamples:Tag NameExpressionTag RDFileN("FileName", “C:\ IWS\”, “*.doc”, 1)InduSoft Web Studio v6.1 SP5 A-161
IWS Users GuideInduSoft Web Studio FunctionsGraphic FunctionsThis section describes the following InduSoft Web Studio Graphic functions: AutoFormat( numValue ) GetScrInfo( strScreenName, "tagResult", optNumResultType, optNumID )PrintSetup()PrintWindow( strScreenName , optnumOrientation, optNumID,optStrMnemonicList )ResetDecimalPointsTable() RGBColor( numRed, numGreen, numBlue ) RGBComponent ( numColor , numComponent ) SetDecimalPoints( numBaseValue , numDecimalPoints ) SetDisplayUnit( strUnitOrigin, strDisplayUnit, numDiv, numAdd ) SetTagDisplayUnit( strTagName, strDisplayUnit, numDiv, numAdd )AutoFormat( numValue )GroupExecutionWindows 2K/XP/VistaWindows CEWeb Thin ClientGraphicSynchronousSupportedSupportedSupportedDescription: Automatically formats a real number to a preset number of decimalplaces, according to the virtual table of settings created by theSetDecimalPoints() function. (This is similar to the Format() function, exceptthat you do not need to specify the number of decimal places.)Parameters:numValueA numeric value, or a tag of Real type; the real number to be formatted.Returned Values: This function returns a formatted string.Examples: In the following examples, the SetDecimalPoints() function hasalready been used to set three decimal places for values greater than equal to 1.5and one decimal place for values less than or equal to −3.Tag NameExpressionTag AutoFormat( 1.543210 )// Returned value = "1.543"Tag AutoFormat( −3.123456 )// Returned value = "−3.1"A-162 InduSoft Web Studio v6.1 SP5
InduSoft Web Studio FunctionsIWS Users GuideGetScrInfo( strScreenName, "tagResult", optNumResultType,optNumID )GroupExecutionWindows 2K/XP/VistaWindows CEWeb Thin ClientGraphicSynchronousSupportedSupportedSupportedDescription: Retrieves information from the application about an open screen.Parameters:ooostrScreenName: A string or a tag of String type; the name of the screen forwhich information is required.tagResult: A string enclosed by quotes; the name of the tag that will receivethe information retrieved by the function.optStrInfoType: A numeric value or tag; the type of information to beretrieved by the function. This is an optional parameter; the default value is 0.ValueDescription0 Writes the following coordinates to each consecutive position of the array tag configured inthe tagResult parameter: TOP, LEFT, BOTTOM and RIGHT.1 Writes the TOP coordinate to the tag configured in the tagResult parameter.2 Writes the LEFT coordinate to the tag configured in the tagResult parameter.3 Writes the BOTTOM coordinate to the tag configured in the tagResult parameter.4 Writes the RIGHT coordinate to the tag configured in the tagResult parameter.ooptNumID: A numeric value or tag; the specific instance number of the screen.(The ID is assigned when the screen is opened with the Open() function.) Thisis an optional parameter; the default ID is 0.Returned Values:ValueDescription0 Success-1 The first and second parameters are not strings.-2 Memory allocation error-3 optStrInfoType is zero, but the tagResult parameter is not an array tag.-4 Invalid tag configured in the tagResult parameter.Examples:Tag NameExpressionTagErrorCode GetScrInfo( "main" , "TagXY[0]" )// Retrieves the TOP, LEFT, BOTTOM and RIGHT coordinates of the “main” screen andthen writes them to the first four positions of the array tag TagXY.InduSoft Web Studio v6.1 SP5 A-163
IWS Users GuideInduSoft Web Studio FunctionsTag NameExpressionTagErrorCode GetScrInfo( "main", "TagXY", 3 )// Retrieves the BOTTOM coordinate of the “main” screen and then writes it to TagXY.TagErrorCode GetScrInfo( "main" , "TagXY", 2, 10 )// Retrieves the LEFT coordinate of the “main” screen with ID 10 and then writes it toTagXY.PrintSetup()GroupExecutionWindows 2K/XP/VistaWindows CEWeb Thin ClientGraphicAsynchronousSupportedSupportedSupported Note:This function cannot be used with Tasks (see page 8–1) or in a VBScriptsample in the Global Procedures interface (see page 15–8).Description: Opens the standard setup dialog from the operating system, where theprinter can be selected and configured.Returned Values: No returned values.Examples:Tag NameTagExpressionPrintSetup()A-164 InduSoft Web Studio v6.1 SP5
InduSoft Web Studio FunctionsIWS Users GuidePrintWindow( strScreenName , optnumOrientation )GroupExecutionWindows 2K/XP/VistaWindows CEWeb Thin ClientGraphicAsynchronousSupportedSupportedSupported Note:This function cannot be used with Tasks (see page 8–1) or in a VBScriptsample in the Global Procedures interface (see page 15–8).Description: Prints a screenshot of an application screen. The screen does not needto be open and active; the function can print a screen running in the backgroundor even closed screen file.Parameters:strScreenNameA string or a tag of String type; the name of the screen to be printed. If thisparameter is omitted, then the currently active screen will be printed. Thisparameter must be omitted when executing the function under WindowsCE.optnumOrientation Set the paper orientation as follows:0 (default) = Portrait1 = LandscapeNOTE: The optNumOrientation parameter is not supported whenrunning the application under Windows CE.optNumIDA numeric value or tag; the specific instance number of the screen. (The IDis assigned when the screen is opened with the Open() function.) This isan optional parameter; the default ID is 0.optStrMnemonicList A string that describes how the custom properties of any generic objects orlinked symbols in the screen will be completed when the screen is printed.This string has the following syntax…#:…where is the name of the property and is thetag, expression or literal value that the property will receive. You candeclare two or more mnemonics, as long as they are separated by spaces.See the Examples section below for an example.NOTE: The optStrMnemonicList parameter does not work for ascreen that is already open; if the screen has been opened, then thecustom properties have already received their default values.Returned Values: No returned values.InduSoft Web Studio v6.1 SP5 A-165
IWS Users GuideInduSoft Web Studio FunctionsExamples:Tag NameExpressionPrintWindow( )// Prints the currently active screen in portrait orientation.PrintWindow( "Main", 1 )// Prints the “Main” screen in landscape orientation.PrintWindow( TagScreenName )// Prints the screen specified by TagScreenName.PrintWindow( "Main", 1, 10 )// Prints the “Main” screen with ID 10.PrintWindow ( "Main", 1, 0, "#Mne1:Tag1 #Mne2:Tag2" )// Prints the “Main” screen, replacing the custom properties Mne1 and Mne2 with Tag1 andTag2, respectively. Note:You can use the PrintWindow() function to print graphical reports thatinclude Alarm/Event Control and Trend Control objects.ResetDecimalPointsTable()GroupExecutionWindows 2K/XP/VistaWindows CEWeb Thin ClientGraphicSynchronousSupportedSupportedSupportedDescription: Resets the virtual table of settings created by the SetDecimalPoints()function.Parameters: There are no parameters for this function.Returned Values: There are no returned values for this function.Examples:Tag NameExpressionResetDecimalPointsTable( )// Resets the virtual table of settings.A-166 InduSoft Web Studio v6.1 SP5
InduSoft Web Studio FunctionsIWS Users GuideRGBColor ( numRed, numGreen, numBlue )GroupExecutionWindows 2K/XP/VistaWindows CEWeb Thin ClientGraphicSynchronousSupportedSupportedSupportedDescription: Returns the number of the color defined by the RGB (Red, Green andBlue) codes.Parameters:numRednumGreennumBlueRed code from the RGB codeGreen code from the RGB codeBlue code from the RGB codeReturned Values: This function returns the number of the color defined by the RGB(Red, Green and Blue) codes.Examples:Tag NameTagColorTagColorExpressionRGBColor(51,153,102) // This function returns the value13434828, which is the color code for Sea Green.RGBColor(TagRed,TagGreen,TagBlue) // This functionreturns the color code of the RGB values set in the tagsTagRed, TagGreen and TagBlue, respectively. Tip:See the list of RGB Codes and Color values for the most used colors in the IWSDevelopment Environment -> Standard Interfaces -> Color Interface section.InduSoft Web Studio v6.1 SP5 A-167
IWS Users GuideInduSoft Web Studio FunctionsRGBComponent ( numColor , numComponent )GroupExecutionWindows 2K/XP/VistaWindows CEWeb Thin ClientGraphicSynchronousSupportedSupportedSupportedDescription: Returns the code of one of the RGB components from the given colorcode.Parameters:numColornumComponentColor code from which one component value will be extracted.Specify which RGB component will be extracted from the color (0=Red ; 1=Green;2=Blue)Returned Values: This function returns the code of one of the RGB components fromthe given color code.Examples:Tag NameTagRedTagGreenTagBlueTagComponentExpressionRGBColor(13434828,0) // This function returns the value 51, which is the Redcomponent of the color code 13434828 (Sea Green).RGBColor(13434828,1) // This function returns the value 153, which is the Greencomponent of the color code 13434828 (Sea Green).RGBColor(13434828,2) // This function returns the value 102, which is the Bluecomponent of the color code 13434828 (Sea Green).RGBColor(TagCode, TagComponent) // This function returns the value of the color codeand component specified by the tags TagCode and TagComponent, respectively. Tip:See the list of RGB Codes and Color values for the most used colors in theColor Interface chapter.A-168 InduSoft Web Studio v6.1 SP5
InduSoft Web Studio FunctionsIWS Users GuideSetDecimalPoints( numBaseValue , numDecimalPoints )GroupExecutionWindows 2K/XP/VistaWindows CEWeb Thin ClientGraphicSynchronousSupportedSupportedSupportedDescription: Sets the number of decimal places to be displayed, for a specified rangeof real numbers. This setting will be used by all objects and dynamic propertiesthat have the Auto Format option enabled, as well as by the AutoFormat() function.Furthermore, if you call this function more than once with different parameters foreach call, then you can build a virtual table of format settings. You can set adifferent number of decimal places for each range of real numbers, and all of thesettings are saved for the duration of runtime or until you reset the table using theResetDecimalPointsTable() function. Note:This formatting does not change the actual value of any tag or expression. Itonly changes how the value is displayed by on-screen objects.Parameters:numBaseValueA numeric value, or a tag of Integer or Real type; the base value of the rangeof real numbers. For negative values, the range includes all real numbersless than or equal to that value. For positive values, the range includes allreal numbers greater than or equal to that number. (You can set the otherlimit of the range by calling the function again with a new set of parameters.)numDecimalPoints A numeric value, or a tag of Integer type; the number of decimal places to bedisplayed, for the range of real numbers specified by numBaseValue.Returned Values:Value Description0 Error1 SuccessExamples:Tag NameExpressionTag SetDecimalPoints( 1.5, 3 )// Displays three decimal places for all real numbers greater than or equal to 1.5.Tag SetDecimalPoints( −3, 1 )// Displays one decimal place for all real numbers less than or equal to −3.InduSoft Web Studio v6.1 SP5 A-169
IWS Users GuideInduSoft Web Studio FunctionsSetDisplayUnit( strUnitOrigin, strDisplayUnit, numDiv,numAdd )GroupExecutionWindows 2K/XP/VistaWindows CEWeb Thin ClientGraphicSynchronousSupportedSupportedSupportedDescription: Finds all tags and all Grid object and Trend Control object values thathave a specific engineering unit (as stored in the Unit tag field), and then sets theDisplayUnit, UnitDiv, and UnitAdd fields on those tags. For more information, see“Setting Tag Properties” on page 5–19. Note:This function only affects how the tag values are displayed on screen; it doesnot change the actual tag values in any way.Parameters:strUnitOriginstrDisplayUnitnumDivnumAddA string or a tag of String type; the engineering unit to be matched.A string or a tag of String type; the new value for the DisplayUnit tag field.A numerical value or tag; the new value for the UnitDiv tag field.A numerical value or tag; the new value for the UnitAdd tag field.Returned Values:Value Description0 Success.–1 Wrong number of parameters.–2 strUnitOrigin parameter is empty.–3 numDiv parameter is invalid (equal to 0).Examples:Tag NameExpressionTag SetDisplayUnit( "C", "F", 0.555556, 32 )// For all tags and object values with a Unit of "C", the DisplayUnit tag field is set to “F”, theUnitDiv tag field is set to 0.555556, and the UnitAdd tag field is set to 32.A-170 InduSoft Web Studio v6.1 SP5
InduSoft Web Studio FunctionsIWS Users GuideSetTagDisplayUnit( strTagName, strDisplayUnit, numDiv,numAdd )GroupExecutionWindows 2K/XP/VistaWindows CEWeb Thin ClientGraphicSynchronousSupportedSupportedSupportedDescription: Sets the DisplayUnit, UnitDiv, and UnitAdd tag fields on a specific tag. Formore information, see “Setting Tag Properties” on page 5–19. Note:This function only affects how the tag values are displayed on screen; it doesnot change the actual tag values in any way.Parameters:strTagNamestrDisplayUnitnumDivnumAddA string or a tag of String type; the name of the specific tag on which theDisplayUnit, UnitDiv and UnitAdd tag fields will be set.NOTE: If this parameter is given a tag, then that tag should contain the nameof the tag on which the tag fields will be set.A string or a tag of String type; the new value for the DisplayUnit tag field.A numerical value or tag; the new value for the UnitDiv tag field.A numerical value or tag; the new value for the UnitAdd tag field.Returned Values:ValueDescription0 Success.–1 Wrong number of parameters.–2 Specified tag doesn’t exist.–3 numDiv parameter is invalid (equal to 0).Examples:Tag NameExpressionTag SetTagDisplayUnit( "TagTemp", "F", 0.555556, 32 )// For the tag “TagTemp”, the DisplayUnit tag field is set to “F”, the UnitDiv tag field is set to0.555556, and the UnitAdd tag field is set to 32.InduSoft Web Studio v6.1 SP5 A-171
IWS Users GuideInduSoft Web Studio FunctionsTranslation FunctionsThis section describes the following InduSoft Web Studio Translation functions: Ext(strText)SetTranslationFile(strFileName, optStrColumnName)Ext(strText)GroupExecutionWindows 2K/XP/VistaWindows CEWeb Thin ClientTranslationSynchronousSupportedSupportedSupportedDescription: Translates specified text.Parameters:srtTextString tag containing the text to be translated.Returned Values: Returns the text translation using the active translation file.Examples:Tag NameTagTagExpressionExt(“Start”) // Returned value if translating to Portuguese = “Iniciar”Ext(“Stop”) // Returned value if translating to German = “Anschlag”A-172 InduSoft Web Studio v6.1 SP5
InduSoft Web Studio FunctionsIWS Users GuideSetTranslationFile(strFileName, optStrColumnName)GroupExecutionWindows 2K/XP/VistaWindows CEWeb Thin ClientTranslationSynchronousSupportedSupportedSupportedDescription: Sets the active translation file and translates all enabled text within theapplication.Parameters:strFileNameoptStrColumnNameSting tag containing the name of a translation file.String tag or value containing the name of the column from the translationfile, which must be used to translate the texts on the application. If omitted,then the second column from the translation file will be used by default.Returned Values:0 Success.1 Invalid number of parameters.2 Wrong parameter type.3 Translation file could not be found or opened.Examples:Tag NameTagTagExpressionSetTranslationFile(“Portuguese.tra”)SetTranslationFile(“German.tra”)Tag SetTranslationFile( "Mytranslation.csv" , “Portuguese” )Tag SetTranslationFile( "Mytranslation.csv" , “German” ) Note:You must enable the Translation option from the Project Settings dialog for thisfunction to work. Caution:You must have a translation file in the Translation File utility.InduSoft Web Studio v6.1 SP5 A-173
IWS Users GuideInduSoft Web Studio FunctionsMultimedia FunctionsThis section describes the InduSoft Web Studio Multimedia function,Play(strFileName).Play(strFileName, optNumSynchronous)GroupExecutionWindows 2K/XP/VistaWindows CEWeb Thin ClientMultimediaSynchronous/AsynchronousSupportedSupportedSupportedDescription: Plays a specified .WAV file.Parameters:strFileNameString tag containing the .WAV to translate.optNumSynchronous Numerical tag that controls whether the function executes synchronously orasynchronously.Where:• Specifying 0 (default) or not specifying the parameter enables the functionto execute asynchronously.• Specifying 1 enables the function to execute synchronously.Returned Values: No returned values.Examples:Tag NameExpressionPlay(“C:\Sounds\Wav\alarm.wav”) Note:For this function to work in a Web Thin Client, the target .WAV file must belocated in the same file path on the remote station.A-174 InduSoft Web Studio v6.1 SP5
InduSoft Web Studio FunctionsIWS Users GuideSystem Information FunctionsThis section describes the following InduSoft Web Studio System Informationfunctions: DbVersion()GetAppHorizontalResolution()GetAppPath()GetAppVerticalResolution()GetComputerIP()GetComputerName()GetCursorX()GetCursorY()GetDisplayHorizontalResolution()GetDisplayVerticalResolution()GetFreeMemoryCE(optnumType)GetHardKeyModel()GetHardkeySN()GetIPAll(“tagArrayIP”, optRefresh)GetMemoryCE(optnumType)GetNetMACID()GetProductPath()GetOS()GetPrivateProfileString(strSection, strName, strDefault,strFileName)GetRegValue(numMainKey, strKey, strValueName)GetRegValueType(numMainKey, strKey, strValueName)GetServerHostNameGetTickCount()InfoAppAlrDir()InfoAppHstDir()InfoDiskFree(strDisk)InfoResources(numSelect)IsActiveXReg(numType, strProgIDorFileName)NoInputTime(optUpdateTrigger)ProductVersion()RegSaveCE()SaveAlarmFile(numType, optRemotePath)SetAppAlarmPath(strPath)SetAppHSTPath(strPath)SetDateFormat(strSeparator, strFomat)SetRegValue(numMainKey, strKey, strValueName, numType,strOrNumValue)SetWebConfig(strServerIP, optStrBackupURL, optStrPath,optNumHostPort, optStrSecondaryServerIP, optNumProtocolFlag,InduSoft Web Studio v6.1 SP5 A-175
IWS Users GuideInduSoft Web Studio FunctionsoptNumGtwPort, optStrGtwIP, optStrSecondaryGtwIP,optStrISSymbolURL)SNMPGet(strAddress, strCommunity, strOID, strTagName)WritePrivateProfileString(strSection, strName, strValue,strFileName)DbVersion()GroupExecutionWindows 2K/XP/VistaWindows CEWeb Thin ClientSystem Info.SynchronousSupportedSupportedSupportedDescription: Returns the database version number of the current application.Returned Values: Returns the database version in numerical format.Examples:Tag NameTagExpressionDbVersion()GetAppHorizontalResolution( )GroupExecutionWindows 2K/XP/VistaWindows CEWeb Thin ClientSystem Info.SynchronousSupportedNot SupportedSupported / Executed on ServerDescription: Obtains the horizontal screen resolution from the .APP file, section[Info].Returned Values: Returns the [Info]value, but does not test the Windowsconfiguration.Examples:Tag NameExpressionTag GetAppHorizontalResolution( ) // Returned value = 640Tag GetAppHorizontalResolution( ) // Returned value = 800A-176 InduSoft Web Studio v6.1 SP5
InduSoft Web Studio FunctionsIWS Users GuideGetAppPath()GroupExecutionWindows 2K/XP/VistaWindows CEWeb Thin ClientSystem Info.SynchronousSupportedSupportedSupported / Executed on ServerDescription: Returns the directory of the current application.Returned Values: Returns the directory of the current application as a string.Examples:Tag NameTagTagExpressionGetAppPath() // Returned value = C:\DemoApp\GetAppPath() // Returned value = C:\Studio\Projects\App\ Note:This function must return the current path of the application, including the“\” at the end of the path.GetAppVerticalResolution( )GroupExecutionWindows 2K/XP/VistaWindows CEWeb Thin ClientSystem Info.SynchronousSupportedNot SupportedSupported / Executed on ServerDescription: Gets the vertical screen resolution from the .APP file, section [Info].Returned Values: Returns the [Info]value, but does not test the Windowsconfiguration.Examples:Tag NameExpressionTag GetAppVerticalResolution( ) // Returned value = 480Tag GetAppVerticalResolution( ) // Returned value = 600InduSoft Web Studio v6.1 SP5 A-177
IWS Users GuideInduSoft Web Studio FunctionsGetComputerIP( )GroupExecutionWindows 2K/XP/VistaWindows CEWeb Thin ClientSystem Info.SynchronousSupportedSupportedSupportedDescription: Returns the first IP Address of the local station.Returned Values: Returns the first IP Address of the local station as a string.Examples:Tag NameExpressionTag GetComputerIP() // Returned value = 192.168.0.1Tag GetComputerIP() // Returned value = 248.12.2.78GetComputerName( )GroupExecutionWindows 2K/XP/VistaWindows CEWeb Thin ClientSystem Info.SynchronousSupportedNot SupportedSupportedDescription: Returns the local computer name.Returned Values: Returns the local computer name as a string.Examples:Tag NameTagTagExpressionGetComputerName() // Returned value = Terminal53GetComputerName() // Returned value = BobsComputerA-178 InduSoft Web Studio v6.1 SP5
InduSoft Web Studio FunctionsIWS Users GuideGetCursorX( )GroupExecutionWindows 2K/XP/VistaWindows CEWeb Thin ClientSystem Info.SynchronousSupportedSupportedSupportedDescription: Gets the X-coordinate of the cursor on the screen.Returned Values: This function returns the X-coordinate of the cursor on the screen,or –1 if an error occurs.Examples:Tag NameExpressionGetCursorX( )// Returned value = 1024GetCursorY( )GroupExecutionWindows 2K/XP/VistaWindows CEWeb Thin ClientSystem Info.SynchronousSupportedSupportedSupportedDescription: Gets the Y-coordinate of the cursor on the screen.Returned Values: This function returns the Y-coordinate of the cursor on the screen,or –1 if an error occurs.Examples:Tag NameExpressionGetCursorY( )// Returned value = 768InduSoft Web Studio v6.1 SP5 A-179
IWS Users GuideInduSoft Web Studio FunctionsGetDisplayHorizontalResolution( )GroupExecutionWindows 2K/XP/VistaWindows CEWeb Thin ClientSystem Info.SynchronousSupportedSupportedSupportedDescription: Gets the horizontal resolution, in pixels, of the display connected to thelocal computer.Returned Values: This function returns the horizontal resolution of the display as aninteger.Examples:Tag NameExpressionGetDisplayHorizontalResolution( )// Returned value = 1024GetDisplayVerticalResolution( )GroupExecutionWindows 2K/XP/VistaWindows CEWeb Thin ClientSystem Info.SynchronousSupportedSupportedSupportedDescription: Gets the vertical resolution, in pixels, of the display connected to thelocal computer.Returned Values: This function returns the vertical resolution of the display as aninteger.Examples:Tag NameExpressionGetDisplayVerticalResolution( )// Returned value = 768A-180 InduSoft Web Studio v6.1 SP5
InduSoft Web Studio FunctionsIWS Users GuideGetFreeMemoryCE(optnumType)GroupExecutionWindows 2K/XP/VistaWindows CEWeb Thin ClientSystem Info.SynchronousNot SupportedSupportedSupportedDescription: Returns the free memory available in a Windows CE device.Parameters:optnumTypeOptional numerical tag that specifies which type of free memory IWS shouldretrieve from the Windows CE device, where:0: Total free Program memoryReturned Values:>0 Size of free memory in bytes.-1 Coredll.dll file not found.-2 GetFreeMemoryCE function not found.-3 Invalid optional parameter.-4 Type of memory unavailable.Examples:Tag NameTagExpressionGetFreeMemoryCE(opt2)InduSoft Web Studio v6.1 SP5 A-181
IWS Users GuideInduSoft Web Studio FunctionsGetHardKeyModel()GroupExecutionWindows 2K/XP/VistaWindows CEWeb Thin ClientSystem Info.SynchronousSupportedNot SupportedSupported / Executed on ServerDescription: Returns the name of your hardkey model.Returned Values:– Hardkey located: Returns a string with the hardkey model name.– Hardkey not installed or not found: No values returned.Examples:Tag NameTagTagExpressionGetHardKeyModel() // Returned value = Local InterfaceGetHardKeyModel() // Returned value = Advanced Server Caution:You must install the hardkey before executing this function or the functionwill not execute properly.A-182 InduSoft Web Studio v6.1 SP5
InduSoft Web Studio FunctionsIWS Users GuideGetHardkeySN( )GroupExecutionWindows 2K/XP/VistaWindows CEWeb Thin ClientSystem Info.SynchronousSupportedNot SupportedSupported / Executed on ServerDescription: Returns the serial number of the hardkey.Returned Values:– Hardkey located: Returns a string with the hardkey serial number.– Hardkey not installed or not found: Returns a 0.Examples:Tag NameExpressionTag GetHardkeySN() // Returned value = 120.745Tag GetHardkeySN() // Returned value = 224.941 Caution:You must install the hardkey before executing this function or the functionwill not execute properly.InduSoft Web Studio v6.1 SP5 A-183
IWS Users GuideInduSoft Web Studio FunctionsGetIPAll("tagArrayIP", optRefresh)GroupExecutionWindows 2K/XP/VistaWindows CEWeb Thin ClientSystem Info.SynchronousSupportedSupportedSupportedDescription: Returns the number of IP Addresses assigned to the local station andstores the IP Addresses in a string array tag.Parameters:“tagArrayIP”optRefreshName of the string array tag receiving the IP addresses found.Optional tag that triggers a refresh of this function, if you use it in a text I/Odynamic. Every time this tag changes value, IWS will refresh the function.Returned Values:NNumber of IP addresses found-1 Invalid number of parameters-2 Invalid parameter typeExamples:Tag NameExpressionTag GetIPAll(“TagArrayIP”) // Returned value = 1Tag GetIPAll(“TagArrayIP”, second) // Returned value = 2A-184 InduSoft Web Studio v6.1 SP5
InduSoft Web Studio FunctionsIWS Users GuideGetMemoryCE(optnumType)GroupExecutionWindows 2K/XP/VistaWindows CEWeb Thin ClientSystem Info.SynchronousNot SupportedSupportedSupportedDescription: Returns the total memory available in a Windows CE device.Parameters:optnumTypeOptional numerical tag that specifies which type of memory IWS shouldretrieve from the Windows CE device, as follows.• 0: Total Program memory• 1: Total Storage memory• 2: Total memoryReturned Values:>0 Size of memory in bytes.-1 Coredll.dll file not found.-2 GetMemoryCE function not found.-3 Invalid optional parameter.Examples:Tag NameTagExpressionGetMemoryCE(opt1)InduSoft Web Studio v6.1 SP5 A-185
IWS Users GuideInduSoft Web Studio FunctionsGetNetMACID( "optStrMACID", "optStrAdapterName" )GroupExecutionSystem Info.SynchronousWindows 2K/XP/VistaWindows CEWeb Thin ClientSupportedSupportedSupportedDescription: Gets the MAC ID unique code from the currently installed networkadapter(s).Parameters:optStrMACIDoptStrAdapterNameName of a string tag, which receives the MAD ID of the network adapter. Ifthere is more than one network adapter currently installed in the station, theuser can configure a string array tag in this parameter, so each array positionreceives the MAC ID from one network adapter.Name of a string tag, which receives the name of the network adapter. Ifthere is more than one network adapter currently installed in the station, theuser can configure a string array tag in this parameter, so each array positionreceives the name from one network adapter. This parameter is optional.Returned Values:>0 Number of network adapters found.0 No network adapters found.-1 Invalid number of parameters.-2 One of the parameters is not string type.-3 Tag configured in optStrMACID does not exist.-4 Tag configured in optStrAdapterName does not exist.Examples:Tag NameNumNICNumNICNumNICExpressionGetNetMACID(“MACIDTag”)GetNetMACID(“MACIDTag”, “AdapterName”)GetNetMACID(“MACIDTag[1]”, “AdapterName[1]”)A-186 InduSoft Web Studio v6.1 SP5
InduSoft Web Studio FunctionsIWS Users GuideGetProductPath( )GroupExecutionWindows 2K/XP/VistaWindows CEWeb Thin ClientSystem Info.SynchronousSupportedSupportedSupportedDescription: Returns the path to the IWS directory.Returned Values: Returns the path to the IWS directory as a string.Examples:Tag NameExpressionTag GetProductPath() // Returned value = C:\Program Files\ IWS 51\GetOS( )GroupExecutionWindows 2K/XP/VistaWindows CEWeb Thin ClientSystem Info.SynchronousSupportedSupportedSupportedDescription: Reports the current operating system.Returned Values:0 Windows 3.111 Windows 95/98/ME2 Windows 2K/XP/Vista3 Windows CEExamples:Tag NameExpressionTag GetOS() //Returned value = 2InduSoft Web Studio v6.1 SP5 A-187
IWS Users GuideInduSoft Web Studio FunctionsGetPrivateProfileString(strSection, strName, strDefault,strFileName)GroupExecutionWindows 2K/XP/VistaWindows CEWeb Thin ClientSystem Info.SynchronousSupportedSupportedSupportedDescription: Reads a specified parameter from an .INI file using the standard .INIformat.Parameters:strSectionstrNamestrDefaultSting tag containing the section name to be read.String tag containing the parameter name to be read.String tag containing the default setting for this parameter. If the parameter is not foundin the .ini file, the function will return this default setting.StrFileName String tag containing the path and name of the .ini file to be read.Returned Values: Returns the value of the specified parameter.Examples:Tag NameExpressionTag GetPrivateProfileString( “boot loader”, “timeout”, “50”, “C:\boot.ini”) // Returned value =30A-188 InduSoft Web Studio v6.1 SP5
InduSoft Web Studio FunctionsIWS Users GuideGetRegValue( numMainKey, strKey, strValueName )GroupExecutionWindows 2K/XP/VistaWindows CEWeb Thin ClientSystem Info.SynchronousSupportedSupportedNot SupportedDescription: Retrieves a variable value in the registry.Parameters:numMainKeystrKeystrValueNameNumeric tag with the following possible values:0 : HKEY_LOCAL_MACHINE1 : HKEY_CLASSES_ROOT2 : HKEY_CURRENT_USER3 : HKEY_USERS4 : HKEY_CURRENT_CONFIG5 : HKEY_PERFORMANCE_DATA.Path where the value is located in the Main Key.Name of the variable to get. The maximum length is 255 characters.Returned Values: If the function succeeds, then the function returns the variablevalue. Otherwise one of the following error codes will be returned:-1 Invalid number of parameters or invalid Main Key.-2 Variable type is not supported. You can only read DWord or String values from the registry.-3 Failed to read the variable value; verify that you have the proper security rights.Examples:Tag NameTagExpressionGetRegValue( 0, "HARDWARE\DESCRIPTION\System","SystemBiosDate" )// Returned value = "08/14/03"Tag GetRegValue( 2, "Control Panel\Current", "Color Schemes" )// Returned value = "Windows Standard "InduSoft Web Studio v6.1 SP5 A-189
IWS Users GuideInduSoft Web Studio FunctionsGetRegValueType( numMainKey, strKey, strValueName )GroupExecutionWindows 2K/XP/VistaWindows CEWeb Thin ClientSystem Info.SynchronousSupportedSupportedNot SupportedDescription: Retrieves the type of a variable value in the registry.Parameters:numMainKeystrKeystrValueNameNumeric tag with the following possible values:0 : HKEY_LOCAL_MACHINE1 : HKEY_CLASSES_ROOT2 : HKEY_CURRENT_USER3 : HKEY_USERS4 : HKEY_CURRENT_CONFIG5 : HKEY_PERFORMANCE_DATA.Path where the value is located in the Main Key.Name of the variable to get. The maximum length is 255 characters.Returned Values: If the function succeeds, then it will return 0 for DWord, 1 forString. Otherwise one of the following will be returned:-1 Invalid number of parameters or invalid Main Key.-2 Variable type is not supported. You can only read DWord or String values from the registry.-3 Failed to read the variable value; verify that you have the proper security rights.Examples:Tag NameTagTagExpressionGetRegValueType( 0, "HARDWARE\DESCRIPTION\System","SystemBiosDate" )// Returned value = 1GetRegValueType( 2, "Control Panel\Desktop", "SmoothScroll" )// Returned value = 0A-190 InduSoft Web Studio v6.1 SP5
InduSoft Web Studio FunctionsIWS Users GuideGetServerHostNameGroupExecutionWindows 2K/XP/VistaWindows CEWeb Thin ClientSystem Info.SynchronousNot SupportedNot SupportedSupportedDescription:Parameters: NoneReturned Values: Server host name for ISSymbol and 127.0.0.1 for others.Examples:Tag NameExpressionGetTickCount( )GroupExecutionWindows 2K/XP/VistaWindows CEWeb Thin ClientSystem Info.SynchronousSupportedSupportedSupportedDescription: Returns the current value of the clock ticks counter.Returned Values: Returns an integer with the number of milliseconds counted by theclock for each initialization of the operational system.Examples:Tag NameExpressionTag GetTickCount // Returned value = 9400907InduSoft Web Studio v6.1 SP5 A-191
IWS Users GuideInduSoft Web Studio FunctionsInfoAppAlrDir( )GroupExecutionWindows 2K/XP/VistaWindows CEWeb Thin ClientSystem Info.SynchronousSupportedSupportedSupportedDescription: Returns the Alarm directory for the current application.Returned Values: Returns the Alarm directory of the current application as a string.Examples:Tag NameTagTagExpressionInfoAppAlrDir() // Returned value = C:\DemoApp\alarm\InfoAppAlrDir() // Returned value = C:\ IWS\Projects\App\alarm\InfoAppHstDir( )GroupExecutionWindows 2K/XP/VistaWindows CEWeb Thin ClientSystem Info.SynchronousSupportedSupportedSupportedDescription: Returns the History directory for the current application.Returned Values: Returns the History directory for the current application as a string.Examples:Tag NameTagTagExpressionInfoAppAlrDir() // Returned value = C:\DemoApp\HST\InfoAppAlrDir() // Returned value = C:\ IWS\Projects\App\HST\A-192 InduSoft Web Studio v6.1 SP5
InduSoft Web Studio FunctionsIWS Users GuideInfoDiskFree(strDisk)GroupExecutionWindows 2K/XP/VistaWindows CEWeb Thin ClientSystem Info.SynchronousSupportedNot SupportedSupportedDescription: Returns disposable free space on the disk.Parameters:strDiskString tag containing the name of the disk to be checked.Returned Values: Returns disposable free space in the disk in bytes.Examples:Tag NameExpressionTag InfoDiskFree( “C” ) // Returned value = 2803804605.000000InduSoft Web Studio v6.1 SP5 A-193
IWS Users GuideInduSoft Web Studio FunctionsInfoResources(numSelect)GroupExecutionWindows 2K/XP/VistaWindows CEWeb Thin ClientSystem Info.SynchronousSupportedSupportedSupportedDescription: Returns the Window’s disposable resources.Parameters:numSelectInteger tag containing the resource to examine.• 0: System functions (%)• 1: GDI functions (%)• 2: USER functions (%)• 3: Memory (in bytes)Examples:Tag NameExpressionTag InfoResources( 0 ) // Returned value = 76.000000Tag InfoResources( 1 ) // Returned value = 76.000000Tag InfoResources( 2 ) // Returned value = 80.000000Tag InfoResources( 3 ) // Returned value = 16150528.000000 Note:The only valid selection on a Windows 2K/XP/Vista station is 3. Selecting 0–2returns 0.000000 only.A-194 InduSoft Web Studio v6.1 SP5
InduSoft Web Studio FunctionsIWS Users GuideIsActiveXReg(numType, strProgIDorFileName)GroupExecutionWindows 2K/XP/VistaWindows CEWeb Thin ClientSystem Info.SynchronousSupportedSupportedSupportedDescription: Determines whether an ActiveX control is registered.Parameters:NumTypestrProgIDorFileNameNumerical tag specifying a format for the strProgIDorFileNAmetag.• 0: Verify by Program ID• 1: Verify by File NameString tag containing Program ID or File Name of the ActiveX Control.Returned Values:0 ActiveX is not registered.1 ActiveX is registered.Examples:Tag NameExpressionTag IsActiveXReg(0, “ISSYMBOL.ISSymbolCtrl.1”) // Returned value = 0Tag IsActiveXReg(1, “C:\winNT\system32\MediaPlayer.ocx”) // Returned value = 1InduSoft Web Studio v6.1 SP5 A-195
IWS Users GuideInduSoft Web Studio FunctionsNoInputTime(optUpdateTrigger)GroupExecutionWindows 2K/XP/VistaWindows CEWeb Thin ClientSystem Info.SynchronousSupportedSupportedSupported (for keyboard input only)Description: Returns the time elapsed since the last keyboard action.Parameters:optUpdateTriggerOptional tag that triggers an update when this function is used in a text I/Oproperty. Every time this tag’s value changes, IWS triggers the function.Returned Values: Returns the time (in seconds) since the last keyboard action.Examples:Tag NameTagExpressionNoInputTime() Note:You cannot implement this function directly from a text I/O object.ProductVersion( )GroupExecutionWindows 2K/XP/VistaWindows CEWeb Thin ClientSystem Info.SynchronousSupportedSupportedSupportedDescription: Returns the IWS version number.Returned Values:0 Success1 ErrorA-196 InduSoft Web Studio v6.1 SP5
InduSoft Web Studio FunctionsIWS Users GuideRegSaveCE( )GroupExecutionWindows 2K/XP/VistaWindows CEWeb Thin ClientSystem Info.SynchronousNot SupportedSupportedNot SupportedDescription: Saves the Windows CE Registry. This function will only work if the saveregistry capability is enabled in the Windows CE image.Returned Values: If the function succeeds and the registry is saved, then the returnedvalue is 0. Otherwise one of the following error codes is returned:-1 Failed to save HKEY_CLASSES_ROOT.-2 Failed to save HKEY_CURRENT_USER.-3 Failed to save HKEY_LOCAL_MACHINE.-4 Failed to save HKEY_USERS.-5 Function executed in NT platform. Note:This function calls the RegFlushKey function from the Windows CE API. Theimplementation of this function is OEM dependent therefore it is notguaranteed to work with all the Windows CE devices.InduSoft Web Studio v6.1 SP5 A-197
IWS Users GuideInduSoft Web Studio FunctionsSaveAlarmFile(numType, optRemotePath)GroupExecutionWindows 2K/XP/VistaWindows CEWeb Thin ClientSystem Info.SynchronousSupportedSupportedNot SupportedDescription: Use this function to enable/disable the saving feature for alarm historyand to set the path where the alarm history files must be handled.Parameters:NumTypeTag containing the number and operation, as follows: 0 – Disable save the alarm file to the local disk. 1 – Enable save the alarm file to local disk. 2 – Enable save the alarm file to local disk and to the remote path specified in theOptRemotePath parameter.OptRemotePath Tag containing the name of the remote computer where the alarm file will be savedsimultaneously to the local computer and to the remote path when numType = 2.Returned Values:0 Success1 Second parameter is not a string.2 Second parameter is missing.Examples:Tag NameTagTagTagExpressionSaveAlarmFile(0)SaveAlarmFile(1)SaveAlarmFile(2, “Z:\Apps\AppDemo”)A-198 InduSoft Web Studio v6.1 SP5
InduSoft Web Studio FunctionsIWS Users GuideSetAppAlarmPath(strPath)GroupExecutionWindows 2K/XP/VistaWindows CEWeb Thin ClientSystem Info.SynchronousSupportedSupportedSupported / Executed on ServerDescription: Sets the Alarm path for the current application.Parameters:strPathString tag containing the new Alarm path for the current application.Returned Values: No returned values.Examples:Tag NameExpressionSetAppAlarmPath(“C:\ IWS\Alarm\”)InduSoft Web Studio v6.1 SP5 A-199
IWS Users GuideInduSoft Web Studio FunctionsSetAppHSTPath(strPath)GroupExecutionWindows 2K/XP/VistaWindows CEWeb Thin ClientSystem Info.SynchronousSupportedSupportedSupported / Executed on ServerDescription: Sets the file path (directory) where Trend history files will be saved, inthe proprietary format (.HST). This function is useful when you intend to changethe file path during runtime. You can also set the file path to a network drive bymapping it on the local station, or by using the following syntax:\\\Please note that this function does not copy existing history files from the defaultdirectory to a new one; it only sets the file path for new history files saved after thefunction is called.Parameters:strPathString tag containing the file path (directory) where Trend history files will be saved.Returned Values: No returned values.Examples:Tag NameExpressionSetAppHstPath(“C:\ IWS\History\”)A-200 InduSoft Web Studio v6.1 SP5
InduSoft Web Studio FunctionsIWS Users GuideSetDateFormat(strSeparator, strFomat)GroupExecutionWindows 2K/XP/VistaWindows CEWeb Thin ClientSystem Info.SynchronousSupportedSupportedSupportedDescription: Sets the format and separator for the date string.Parameters:strSeparatorstrFormatString tag containing the separator character for the date string.String tag, which specifies the order of the Month (M), Day (D), and Year (Y) inthe date string.DMY: Day, Month, YearMDY: Month, Day, YearYMD: Year, Month, DayReturned Values:0 No error1 Invalid parameterExamples:Tag NameExpressionTag SetDateFormat( “/”, “MDY”) // Date = 04/18/2002Tag SetDateFormat( “:”, “MYD”) // Date = 04:2002:18InduSoft Web Studio v6.1 SP5 A-201
IWS Users GuideInduSoft Web Studio FunctionsSetRegValue( numMainKey, strKey, strValueName, numType,strOrNumValue )GroupExecutionWindows 2K/XP/VistaWindows CEWeb Thin ClientSystem Info.SynchronousSupportedSupportedNot SupportedDescription: Sets a variable value in the registry.Parameters:numMainKeystrKeystrValueNamenumTypestrOrNumValueNumeric tag with the following possible values:0 : HKEY_LOCAL_MACHINE1 : HKEY_CLASSES_ROOT2 : HKEY_CURRENT_USER3 : HKEY_USERS4 : HKEY_CURRENT_CONFIG5 : HKEY_PERFORMANCE_DATAPath where the variable is located in the Main Key.Name of the variable to be set. The maximum length is 255 characters.Two types are currently supported:0 : DWord1 : StringVariable value.Returned Values: If the function succeeds and the variable is set, then the returnedvalue is 0. Otherwise one of the following error codes is returned:-1 Invalid number of parameters or invalid Main Key-2 Invalid Type-3 Failed to set the variable value, check if you have the proper security rightsExamples:Tag NameTagTagExpressionSetRegValue( 0, "HARDWARE\DEVICEMAP\SERIALCOMM","\Device\Serial1", 1, "COM3" )// Returned value = 0 if successfulSetRegValue( 2, "Control Panel\Desktop", "SmoothA-202 InduSoft Web Studio v6.1 SP5
InduSoft Web Studio FunctionsIWS Users GuideScroll", 0, 1 )// Returned value = 0 if successfulInduSoft Web Studio v6.1 SP5 A-203
IWS Users GuideInduSoft Web Studio FunctionsSetWebConfig( strServerIP, optStrBackupURL, optStrPathFile,optNumHostPort, optStrSecondaryServerIP,optNumProtocolFlag, optNumGtwPort, optStrGtwIP,optStrSecondaryGtwIP, optStrISSymbolURL )GroupExecutionWindows 2K/XP/VistaWindows CEWeb Thin ClientSystem Info.SynchronousSupportedSupportedSupported / Executed on ServerDescription: Configures the Web settings for the current application. Configures thesecondary data server and secondary URL settings for the Web solution. Thesettings configured in the function are updated on the HTML files of theapplication.Parameters:strServerIPoptStrBackupURLoptStrPathFileoptNumHostPortData Server IP Address. IP address (or hostname) of thecomputer where the TCP Server module of IWS is running.Optional alternative URL for the application Web pages. The WebThin Client will look for the Web pages in this URL if it does notfind them in the same URL written in the Address field of the Webbrowser.Optional file path and name of the HTML file to be updated. If youspecify only the file path without a file name, then all of the HTMLfiles in the specified file path will be updated.Optional TCP Port number that the Web Thin Client must use toexchange data with the TCP Server module of IWS.optStrSecondaryServerIP Optional alternative data server IP address. The Web Thin Clientwill attempt to connect to the TCP Server module of IWS in this IPAddress if it is not able to connect to the TCP Server modulerunning in the IP Address specified in the strServerIP parameter.optNumProtocolFlagoptNumGtwPortoptStrGtwIPOptional - When you use the Web Tunneling Gateway option,this parameter specifies whether the Web Thin Client will useeither HTTP to exchange data with the Web Server or HTTPS(SSL – Secure Socket Layer). If this flag has the value 0, the WebThin Client will use HTTP. If this flag has the value 1, the WebThin Client will use HTTPS (SSL).Optional TCP Port number that the Web Thin Client must use toexchange data with the Web Server when using the WebTunneling Gateway.Optional IP Address (or hostname) of the computer where theWeb Tunneling Gateway is running.A-204 InduSoft Web Studio v6.1 SP5
InduSoft Web Studio FunctionsIWS Users GuideoptStrSecondaryGtwIPoptStrISSymbolURLOptional Alternative IP Address (or hostname) of the computerwhere the Web Tunneling Gateway is running. The Web ThinClient will attempt to connect to the Web Tunneling Gateway inthis IP Address if it is not able to connect to the Web TunnelingGateway running in the IP Address specified in the optStrGtwIPparameter.Optional URL from where the updated version of ISSymbol(ActiveX control) must be downloaded if it is not properlyregistered in the Web Thin Client station.Returned Values:0 No error1 Invalid number of parameters2 Invalid Server IP address3 Invalid URL4 Invalid optional path5 No Web pages foundExamples:Tag NameExpressionTag SetWebConfig( "192.168.1.28" )Tag SetWebConfig( "192.168.1.28", "http://192.168.1.28" )Tag SetWebConfig(GetComputerIP(), "http://"+GetComputerIP() )Tag SetWebConfig( "192.168.1.28", "http://192.168.1.28/", "c:\MyWebPages\" )Tag SetWebConfig( "192.168.1.28", "http://192.168.1.28/", "c:\MyWebPages\", 1234 )Tag SetWebConfig ( "192.168.1.28", "http://200.0.0.10/", "c:\MyWebPages\", 1234,“192.168.1.29”, 0, 80, “200.0.0.1”, “200.0.0.10”, “http://200.0.0.10/MyISSymbol/” ) Note: You can use tags or expressions as arguments of this function. Therefore,you can use this function to configure the Web settings automaticallyduring the runtime, according to the network settings of each project (IPaddress, Web Server URL, and so forth). Only the first parameter of this function is mandatory (strServerIP). Theother parameters are optional. The parameters that are not configured inthe function assume the default value configured in the Project → Settings →Web window of the development environment. The following parameters must be omitted, unless you intend to use theWeb Tunneling Gateway: optNumProtocolFlag, optNumGtwPort,optStrGtwIP, optStrSecondaryGtwIP, optStrISSymbolURL.InduSoft Web Studio v6.1 SP5 A-205
IWS Users GuideInduSoft Web Studio FunctionsSNMPGet( strAddress, strCommunity, strOID, strTagName )GroupExecutionWindows 2K/XP/VistaWindows CEWeb Thin ClientSystem Info.SynchronousSupportedNot SupportedSupportedDescription: Retrieve information from computers or network devices through theSNMP protocol.Parameters:strAddressstrCommunityThe address of the machine/computer. Ex: “127.0.0.1” or“localhostSNMP community name used when communicating with thecomputer. Ex: “public”strOID OID to be consulted. Ex: “.1.3.6.1.2.1.1.1.0”strTagNameName of the tag that will receive the requested value.Returned Values:0 No error–1 Invalid number of parameters–2 Invalid parameter–3 Cannot connect to the remote machine–4 Cannot connect to the remote machine–5 GET operation failed–6 Invalid OID–7 Invalid tag name–8 Invalid tag type–9 This function is not supported in the current OSExamples:Tag NameErrorTagExpressionSNMPGet(“127.0.0.1”, “public”, “.1.3.6.1.2.1.1.1.0”, “SysDescrTag”)// ErrorTag will receive the error code. If the function succeeds, the value in the OID“.1.3.6.1.2.1.1.1.0” will be saved in the tag SysDescrTag.A-206 InduSoft Web Studio v6.1 SP5
InduSoft Web Studio FunctionsIWS Users GuideWritePrivateProfileString( strSelection, strName, strValue,strFileName )GroupExecutionWindows 2K/XP/VistaWindows CEWeb Thin ClientSystem Info.SynchronousSupportedSupportedSupportedDescription: Writes a specified parameter to an .ini file using the standard .iniformat. Note:When running on Windows CE this function will rewrite the entire file,therefore its use is not recommended for lengthy files on Windows CE devices.The function will also add the following lines at the end of the file when on aWindows CE device:[FileBackUpControl]Valid=1Parameters:strSelectionstrNamestrValuestrFileNameString tag containing the section name to be written.String tag containing the parameter name to be written.String tag containing the value to be written.String tag containing the path and name of the .ini file to bewritten.Returned Values: The function returns 1 if the file was updated successfully.Examples:Tag NameExpressionTag WritePrivateProfileString( Section, Name, Value, FileName )Tag WritePrivateProfileString( "Options", "ds1", "Value", "C:\viewer.ini" )InduSoft Web Studio v6.1 SP5 A-207
IWS Users GuideInduSoft Web Studio FunctionsTags Database FunctionsThis section describes the InduSoft Web Studio Tags Database functions: ExecuteAlarmAck(strTagName, optStrComment, optStrAlarmType) ForceTagChange(strTagName, numValue) GetTagValue(strTagName, optNumRefresh) SetTagValue( strTagName, tagValue )ExecuteAlarmAck( strTagName, optStrComment, optStrAlarmType)GroupExecutionWindows 2K/XP/VistaWindows CEWeb Thin ClientTags DatabaseSynchronousSupportedSupportedSupportedDescription: Acknowledge an active alarm on the specified tag. The advantage ofusing this function is that if used from the Web Thin Client, the Alarm task willstore the user name and station from which the alarm was acknowledged.Parameters:strTagNameoptStrCommentoptStrAlarmTypeName of the tag on which the alarm will be acknowledged.An optional comment to send to the Alarm task, along with the user name andstation.If more than one alarm is active on the specified tag, you can specify whichalarm (e.g., Hi, Lo, HiHi, LoLo) to acknowledge. Otherwise, the functionacknowledges the most recently activated alarm.Returned Values:0 Successfully executed.-1 Invalid number of parameters.-2 Invalid tag name.A-208 InduSoft Web Studio v6.1 SP5
InduSoft Web Studio FunctionsIWS Users GuideExamples:Tag NameExpressionExecuteAlarmAck ("a", "Hi alarm in tag a", "Hi")// Returned value = 0 if successfully executedForceTagChange( strTagName, numValue )GroupExecutionWindows 2K/XP/VistaWindows CEWeb Thin ClientTags DatabaseSynchronousSupportedSupportedSupportedDescription: Forces the database to write a value to a tag and act as if it were a tagchange even if the new value is equal to the old value.Parameters:strTagNamenumValueString tag containing the name of the target tag being forced to accept the new value.Tag containing the new value to be written to the target tag.Returned Values: No returned values.Examples:Tag NameExpressionForceTagChange( “TagA”, 5 )InduSoft Web Studio v6.1 SP5 A-209
IWS Users GuideInduSoft Web Studio FunctionsGetTagValue( strTagName, optNumRefresh )GroupExecutionWindows 2K/XP/VistaWindows CEWeb Thin ClientTags DatabaseSynchronousSupportedSupportedSupportedDescription: Gets the value of the specified Tag from the application database.Parameters:strTagNameoptNumRefreshString (or Tag of String type) containing the name of the Tag of which you want toget the value.Tag that you want to use as a trigger to refresh the function. When the value of thespecified Tag changes, the function is executed again. (Normally, a functionexecutes only when the object on which it is configured changes in same way, suchas when a Pushbutton object is clicked.) To execute the function at a regularinterval, you can use one of application’s system tags such as Second,Minute or Hour.Returned Values: This function only returns the value of the Tag specified bystrTagName. If the specified Tag does not exist, then the function returns null. Note:The value of the Tag specified by optNumRefresh does not affect the function’sreturned value in any way.Examples:Tag NameExpressionrequiredTag = 15 GetTagName( "requiredTag", Second )// Return = 15pointerTag = "Required Tag"requiredTag = 15optNum = SecondGetTagName( pointerTag, optNum )A-210 InduSoft Web Studio v6.1 SP5
InduSoft Web Studio FunctionsIWS Users GuideSetTagValue( strTagName, tagValue )GroupExecutionWindows 2K/XP/VistaWindows CEWeb Thin ClientTags DatabaseSynchronousSupportedSupportedSupportedDescription: Sets the value of the specified Tag in the application database.Parameters:strTagNametagValueString (or Tag of String type) containing the name of the Tag that you want to set.Parameter containing the new value to be set to the specified Tag.Returned Values:0 No error–1 Invalid tag nameExamples:Tag NameExpressionTagA SetTagValue( "TagA", "Hello" )// Return = HelloTagA SetTagValue( "TagA", 123 )// Return = 123TagATagB = 15SetTagValue( "TagA", TagB )// Return = 15InduSoft Web Studio v6.1 SP5 A-211
IWS Users GuideInduSoft Web Studio FunctionsLoop FunctionThis section describes the InduSoft Web Studio Loop function.For(numInitialValue, numFinalValue, numStep) & NextGroup.ExecutionWindows 2K/XP/VistaWindows CEWeb Thin ClientLoopN/ASupportedSupportedN/ADescription: Implements a For loop within a script. The section of the script affectedby the For loop begins with the For() function and ends with the Next notation.The Next notation directs the script to the previous For() function.Parameters:numInitialValuenumFinalValueNumStepNumerical tag containing the initial step (increment) of the For loop.Numerical tag containing the final step (increment) of the For loop.Numerical tag containing the step (increment) of the For loop.Returned Values: Returns the step on which the loop is currently running.Examples:Tag NameExpressionTag For( 1, 5, 1)Next Note:You must partner very For() function with a Next notation. As shown in theexample, you must place the Next notation in the tag field of the math script.A-212 InduSoft Web Studio v6.1 SP5
InduSoft Web Studio FunctionsIWS Users GuideODBC FunctionsThis section describes the following InduSoft Web Studio ODBC functions: ODBCBeginTrans(numHandler)ODBCBindCol(numHandler, strColName, strColType, strTagName)ODBCCanAppend(numHandler)ODBCCanTransact(numHandler)ODBCCanUpdate(numHandler)ODBCClose(numHandler)ODBCCommitTrans(numHandler)ODBCDelete(numHandler)ODBCExecuteSQL(numHandler, strSqlCommand)ODBCInsert(numHandler)ODBCIsBOF(numHandler)ODBCIsDeleted(numHandler)ODBCIsEOF(numHandler)ODBCIsFieldNULL(numHandler, strColName)ODBCIsFieldNullable(numHandler, strColName)ODBCMove(numHandler, numOffset)ODBCMoveFirst(numHandler)ODBCMoveLast(numHandler)ODBCMoveNext(numHandler)ODBCMovePrev(numHandler)ODBCOpen(strDsn, strUser, strPassw, strTable, strFilter, strSort)ODBCQuery(numHandler)ODBCROllback(numHandler)ODBCSetFieldNull(numHandler, strColName, numValue)ODBCSetFilter(numHandler, strFilter)ODBCSetSort(numHandler, strSort)ODBCUnbindCol(numHandler, strColName)ODBCUpdate(numHandler)InduSoft Web Studio v6.1 SP5 A-213
IWS Users GuideInduSoft Web Studio FunctionsODBCBeginTrans(numHandler)GroupExecutionWindows 2K/XP/VistaWindows CEWeb Thin ClientODBCSynchronousSupportedNot SupportedSupported / Executed on ServerDescription: Begins a transaction with the connected data source.Parameters:numHandlerInteger tag containing the handler returned by the ODBCOpen() function.Returned Values:0 Success1 Invalid handler2 Database not open3 Error beginning transactionExamples:Tag NameExpressionTag ODBCBeginTrans( 5 )A-214 InduSoft Web Studio v6.1 SP5
InduSoft Web Studio FunctionsIWS Users GuideODBCBindCol(numHandler, strColName, strColType, strTagName)GroupExecutionWindows 2K/XP/VistaWindows CEWeb Thin ClientODBCSynchronousSupportedNot SupportedSupported / Executed on ServerDescription: Binds a column to a tag. Every time you finish binding columns, youmust call the ODBCQuery function.Parameters:numHandlerstrColNamestrColTypestrTagNameInteger tag containing the handler returned by the ODBCOpen() function.String tag containing the Database column name.String tag containing the SQL data type (one of the following):• SQL_BIT• SQL_TINYINT• SQL_LONGVARCHAR• SQL_CHAR• SQL_VARCHAR• SQL_DECIMAL• SQL_NUMERIC• SQL_DATE• SQL_TIME• SQL_TIMESTAMP• SQL_DOUBLE• SQL_REAL• SQL_SMALLINT• SQL_INTEGERString tag containing the name of the tag to bind to the column.Returned Values:0 Success1 Invalid Handler2 Invalid parameter type3 One of the parameters has an empty string4 ColType contains an invalid typeExamples:Tag NameExpressionTag ODBCBindCol( 5, “OrderDate”, “SQL_DATE”, “Order_Date” )InduSoft Web Studio v6.1 SP5 A-215
IWS Users GuideInduSoft Web Studio FunctionsODBCCanAppend(numHandler)GroupExecutionWindows 2K/XP/VistaWindows CEWeb Thin ClientODBCSynchronousSupportedNot SupportedSupported / Executed on ServerDescription: Returns whether the database will allow you to add new records.Parameters:numHandlerInteger tag containing the handler returned by the ODBCOpen() function.Returned Values:0 Database does not allow appending new recordsNon-ZeroDatabase does allow appending new recordsExamples:Tag NameExpressionTag ODBCCanAppend( 5 )A-216 InduSoft Web Studio v6.1 SP5
InduSoft Web Studio FunctionsIWS Users GuideODBCCanTransact(numHandler)GroupExecutionWindows 2K/XP/VistaWindows CEWeb Thin ClientODBCSynchronousSupportedNot SupportedSupported / Executed on ServerDescription: Returns whether the database allows transactions.Parameters:numHandlerInteger tag containing the handler returned by the ODBCOpen() function.Returned Values:0 Database does not allow transactions.Non-ZeroDatabase does allow transactions.Examples:Tag NameExpressionTag ODBCCanTransact( 2 )InduSoft Web Studio v6.1 SP5 A-217
IWS Users GuideInduSoft Web Studio FunctionsODBCCanUpdate(numHandler)GroupExecutionWindows 2K/XP/VistaWindows CEWeb Thin ClientODBCSynchronousSupportedNot SupportedSupported / Executed on ServerDescription: Returns whether the database can be updated.Parameters:numHandlerInteger tag containing the handler returned by the ODBCOpen() function.Returned Values:0 Database does not allow updates.Non-ZeroDatabase does allow updates.Examples:Tag NameExpressionTag ODBCCanUpdate( 6 )A-218 InduSoft Web Studio v6.1 SP5
InduSoft Web Studio FunctionsIWS Users GuideODBCClose(numHandler)GroupExecutionWindows 2K/XP/VistaWindows CEWeb Thin ClientODBCSynchronousSupportedNot SupportedSupported / Executed on ServerDescription: Closes a connection to the database.Parameters:numHandlerInteger tag containing the handler returned by the ODBCOpen() function.Returned Values:0 Success1 Invalid HandlerExamples:Tag NameExpressionTag ODBCClose( 5 )InduSoft Web Studio v6.1 SP5 A-219
IWS Users GuideInduSoft Web Studio FunctionsODBCCommitTrans(numHandler)GroupExecutionWindows 2K/XP/VistaWindows CEWeb Thin ClientODBCSynchronousSupportedNot SupportedSupported / Executed on ServerDescription: Commits a transaction. Call this function upon completingtransactions.Parameters:numHandlerInteger tag containing the handler returned by the ODBCOpen() function.Returned Values:0 Success1 Invalid handler2 Database not open3 Error committing transactionExamples:Tag NameExpressionTag ODBCCommitTrans( 1)A-220 InduSoft Web Studio v6.1 SP5
InduSoft Web Studio FunctionsIWS Users GuideODBCDelete(numHandler)GroupExecutionWindows 2K/XP/VistaWindows CEWeb Thin ClientODBCSynchronousSupportedNot SupportedSupported / Executed on ServerDescription: Deletes the current register. After a successful deletion, you mustexplicitly call one of the Move functions to move off the deleted record.Parameters:numHandlerInteger tag containing the handler returned by the ODBCOpen() function.Returned Values:0 Success1 Invalid handler2 Database not open3 Delete errorExamples:Tag NameExpressionTag ODBCDelete( 5 )InduSoft Web Studio v6.1 SP5 A-221
IWS Users GuideInduSoft Web Studio FunctionsODBCExecuteSQL(numHandler, strSqlCommand)GroupExecutionWindows 2K/XP/VistaWindows CEWeb Thin ClientODBCSynchronousSupportedNot SupportedSupported / Executed on ServerDescription: Executes an SQL command directly. The ODBCExecuteSQL functiondoes not return data records.Parameters:numHandlerstrSqlCommandInteger tag containing the handler returned by the ODBCOpen() function.Sting tag specifying a valid SQL command.Returned Values:0 Success1 Invalid handler2 Database not open3 Invalid parameter4 Error executing SQL commandExamples:Tag NameExpressionTag ODBCExecuteSQL( 3, “ )Tag ODBCExecuteSQL( 4, “ )A-222 InduSoft Web Studio v6.1 SP5
InduSoft Web Studio FunctionsIWS Users GuideODBCInsert(numHandler)GroupExecutionWindows 2K/XP/VistaWindows CEWeb Thin ClientODBCSynchronousSupportedNot SupportedSupported / Executed on ServerDescription: Inserts a new register to the database. InduSoft uses the values of thetags bound by the ODBCBindCol function to create the new register.Parameters:numHandlerInteger tag containing the handler returned by the ODBCOpen() function.Returned Values:0 Success1 Invalid handler2 Database not open3 Insert errorExamples:Tag NameExpressionTag ODBCInsert( 7 )InduSoft Web Studio v6.1 SP5 A-223
IWS Users GuideInduSoft Web Studio FunctionsODBCIsBOF(numHandler)GroupExecutionWindows 2K/XP/VistaWindows CEWeb Thin ClientODBCSynchronousSupportedNot SupportedSupported / Executed on ServerDescription: Returns whether you have gone above the first record of the record set.(Call this function before scrolling from record to record.)You also can use the ODBCIsBOF function with ODBCIsEOF to determine whetherthe record set contains any records or is empty. Immediately after callingODBCQuery, and if the record set contains no records, ODBCIsBOF returns nonzero.When you open a record set with at least one record, the first record is the currentrecord and ODBCIsBOF returns a zero (0). If the first record is the current record,and you call ODBCMovePrev, the ODBCIsBOF function will subsequently return anonzero.Parameters:numHandlerInteger tag containing the handler returned by the ODBCOpen() function.Returned Values:0 Record foundNon-ZeroRecord set contains no records or you scrolled backward, above the first recordExamples:Tag NameExpressionTag ODBCIsBOF( 1 )A-224 InduSoft Web Studio v6.1 SP5
InduSoft Web Studio FunctionsIWS Users GuideODBCIsDeleted(numHandler)GroupExecutionWindows 2K/XP/VistaWindows CEWeb Thin ClientODBCSynchronousSupportedNot SupportedSupported / Executed on ServerDescription: Reports whether the current record was deleted. If you scroll to a recordand ODBCIsDeleted returns a nonzero, then you must scroll to another recordbefore you can perform any other operations.Parameters:numHandlerInteger tag containing the handler returned by the ODBCOpen() function.Returned Values:0 Record set is not positioned on a deleted record.Non-ZeroRecord set is positioned on a deleted record.Examples:Tag NameExpressionTag ODBCIsDeleted( 8 )InduSoft Web Studio v6.1 SP5 A-225
IWS Users GuideInduSoft Web Studio FunctionsODBCIsEOF(numHandler)GroupExecutionWindows 2K/XP/VistaWindows CEWeb Thin ClientODBCSynchronousSupportedNot SupportedSupported / Executed on ServerDescription: Reports whether you have gone beyond the last record of the record set.(Call this function as you scroll from record to record.)You also can use the ODBCIsEOF function to determine whether the record setcontains any records or is empty. Immediately after calling ODBCQuery (and if therecord set contains no records) ODBCIsEOF returns non-zero. When you open arecord set with at least one record, the first record is the current record andODBCIsEOF returns a zero (0). If the last record is the current record when you callODBCMoveNext, ODBCIsEOF will subsequently return a nonzero.Parameters:numHandlerInteger tag containing the handler returned by the ODBCOpen() function.Returned Values:0 Record found.Non-ZeroRecord set contains no records or you scrolled backward, before the last record.Examples:Tag NameExpressionTag ODBCIsEOF( 5 )A-226 InduSoft Web Studio v6.1 SP5
InduSoft Web Studio FunctionsIWS Users GuideODBCIsFieldNULL(numHandler, strColName)GroupExecutionWindows 2K/XP/VistaWindows CEWeb Thin ClientODBCSynchronousSupportedNot SupportedSupported / Executed on ServerDescription: Reports whether a specified field in a record set was flagged as Null.Parameters:numHandler Integer tag containing the handler returned by the ODBCOpen() function.strColNameString tag containing the column name.Returned Values:0 The specified field is not flagged as Null.Non-ZeroThe specified field is flagged as Null.Examples:Tag NameTagTagExpressionODBCIsFieldNULL( 7, “CustomerName”)ODBCIsFieldNULL( 3, “CompanyName”)InduSoft Web Studio v6.1 SP5 A-227
IWS Users GuideInduSoft Web Studio FunctionsODBCIsFieldNullable(numHandler, strColName)GroupExecutionWindows 2K/XP/VistaWindows CEWeb Thin ClientODBCSynchronousSupportedNot SupportedSupported / Executed on ServerDescription: Reports whether a specified field is nullable (can be set to a Null value).Parameters:NumHandler Integer tag containing the handler returned by the ODBCOpen() function.strColNameString tag containing the column name.Returned Values:0 The specified field is not flagged as Nullable.Non-ZeroThe specified field is flagged as Nullable.Examples:Tag NameTagTagExpressionODBCIsFieldNullable( 1, “Price”)ODBCIsFieldNullable( 1, “Model”)A-228 InduSoft Web Studio v6.1 SP5
InduSoft Web Studio FunctionsIWS Users GuideODBCMove(numHandler, numOffset)GroupExecutionWindows 2K/XP/VistaWindows CEWeb Thin ClientODBCSynchronousSupportedNot SupportedSupported / Executed on ServerDescription: Moves the current record pointer within a record set, either forward orbackward. If you pass a value of 0 for Offset, ODBCMove refreshes the currentrecord.Parameters:numHandlernumOffsetInteger tag containing the handler returned by the ODBCOpen() function.Integer tag containing the number of rows to move forward or backward.• Positive values move forward, toward the end of the record set.• Negative values move backward, toward the beginning of the record set.Returned Values:0 Success1 Invalid handler2 Database not open3 Move errorExamples:Tag NameExpressionTag ODBCMove(2, 3)Tag ODBCMove(8, 2)InduSoft Web Studio v6.1 SP5 A-229
IWS Users GuideInduSoft Web Studio FunctionsODBCMoveFirst(numHandler)GroupExecutionWindows 2K/XP/VistaWindows CEWeb Thin ClientODBCSynchronousSupportedNot SupportedSupported / Executed on ServerDescription: Moves to the first record within the record set.Parameters:NumHandlerInteger tag containing the handler returned by the ODBCOpen() function.Returned Values:0 Success1 Invalid handler2 Database not open3 Move errorExamples:Tag NameTagExpressionODBCMoveFirst(4)A-230 InduSoft Web Studio v6.1 SP5
InduSoft Web Studio FunctionsIWS Users GuideODBCMoveLast(numHandler)GroupExecutionWindows 2K/XP/VistaWindows CEWeb Thin ClientODBCSynchronousSupportedNot SupportedSupported / Executed on ServerDescription: Moves to the last record within the record set.Parameters:numHandlerInteger tag containing the handler returned by the ODBCOpen() function.Returned Values:0 Success1 Invalid handler2 Database not open3 Move errorExamples:Tag NameTagExpressionODBCMoveLast(7)InduSoft Web Studio v6.1 SP5 A-231
IWS Users GuideInduSoft Web Studio FunctionsODBCMoveNext(numHandler)GroupExecutionWindows 2K/XP/VistaWindows CEWeb Thin ClientODBCSynchronousSupportedNot SupportedSupported / Executed on ServerDescription: Moves to the next record within the record set.Parameters:numHandlerInteger tag containing the handler returned by the ODBCOpen() function.Returned Values:0 Success1 Invalid handler2 Database not open3 End of record set reached4 Move errorExamples:Tag NameTagExpressionODBCMoveNext(9)A-232 InduSoft Web Studio v6.1 SP5
InduSoft Web Studio FunctionsIWS Users GuideODBCMovePrev(numHandler)GroupExecutionWindows 2K/XP/VistaWindows CEWeb Thin ClientODBCSynchronousSupportedNot SupportedSupported / Executed on ServerDescription: Moves to the next record within the record set.Parameters:numHandlerInteger tag containing the handler returned by the ODBCOpen() function.Returned Values:0 Success1 Invalid handler2 Database not open3 Beginning of record set reached4 Move errorExamples:Tag NameTagExpressionODBCMovePrev(2)InduSoft Web Studio v6.1 SP5 A-233
IWS Users GuideInduSoft Web Studio FunctionsODBCOpen(strDsn, strUser, strPassw, strTable, strFilter,strSort)GroupExecutionWindows 2K/XP/VistaWindows CEWeb Thin ClientODBCSynchronousSupportedNot SupportedSupported / Executed on ServerDescription: Opens a connection to the database.This function returns a handler to be used in subsequent calls to the ODBCfunctions.After calling this function, no register has been read from the database yet. Youmust bind the columns and call the ODBCQuery function to retrieve the firstregister.Parameters:strDsnstrUserstrPasswstrTablestrFilterstrSortSting tag containing the Data Source Name.Sting tag containing the User name.Sting tag containing the Password.Sting tag containing the Database table name.Sting tag containing the SQL WHERE clause.Sting tag containing the SQL ORDER BY clause.Returned Values:NOn success, returns the handler to identify the database-1 Invalid parameter-2 DSN or TableName contain an empty stringExamples:Tag NameTagExpressionODBCOpen(“MyDSNFile”, “Alex”, “”, “Table1”, “Name='Mayer'”, “Name ASC”)Tag ODBCOpen(“DSNFileName”, “Robert”, “Robot”, “Table1”, “”, “”) Note:This function does not open the database itself; it simply creates a handle tomanipulate the database. To open the database, you must bind the columnsand call the ODBCQuery function.A-234 InduSoft Web Studio v6.1 SP5
InduSoft Web Studio FunctionsIWS Users GuideODBCQuery(numHandler)GroupExecutionWindows 2K/XP/VistaWindows CEWeb Thin ClientODBCSynchronousSupportedNot SupportedSupported / Executed on ServerDescription: Retrieves the first register after opening and binding the column. If youmodify the column binding, or modify the filter and sort, you must call thisfunction again.Parameters:numHandlerInteger tag containing the handler returned by the ODBCOpen() function.Returned Values:0 Success1 Invalid handler2 No columns bound3 Cannot open database4 Cannot restart database5 Query errorExamples:Tag NameTagExpressionODBCQuery(6)InduSoft Web Studio v6.1 SP5 A-235
IWS Users GuideInduSoft Web Studio FunctionsODBCROllback(numHandler)GroupExecutionWindows 2K/XP/VistaWindows CEWeb Thin ClientODBCSynchronousSupportedNot SupportedSupported / Executed on ServerDescription: Reverses the changes made during a transaction.Parameters:numHandlerInteger tag containing the handler returned by the ODBCOpen() function.Returned Values:0 Success1 Invalid handler2 Database no open3 Error rolling back transactionExamples:Tag NameExpressionTag ODBCROllback( 4)A-236 InduSoft Web Studio v6.1 SP5
InduSoft Web Studio FunctionsIWS Users GuideODBCSetFieldNull(numHandler, strColName, numValue)GroupExecutionWindows 2K/XP/VistaWindows CEWeb Thin ClientODBCSynchronousSupportedNot SupportedSupported / Executed on ServerDescription: Flags a field data member in the record set as Null (specifically havingno value) or as non-Null.Parameters:numHandlerstrColNamenumValueInteger tag containing the handler returned by the ODBCOpen() function.String tag containing the column name.Integer tag, which specifies the field data as Null if 0 and non-Null in non-zero.Returned Values:0 Success1 Invalid handler2 Database not open3 Invalid parameter4 Invalid column nameExamples:Tag NameExpressionTag ODBCSetFieldNull(2, “Price”, 1)Tag ODBCSetFieldNull(4, “CompanyName”, 0)InduSoft Web Studio v6.1 SP5 A-237
IWS Users GuideInduSoft Web Studio FunctionsODBCSetFilter(numHandler, strFilter)GroupExecutionWindows 2K/XP/VistaWindows CEWeb Thin ClientODBCSynchronousSupportedNot SupportedSupported / Executed on ServerDescription: Constrains the records selected by IWS.You may find this function useful for selecting a subset of records, such as "allsalespersons based in California" ("state = ‘CA’"). Remember to call ODBCQueryafter calling this function.Parameters:numHandlerstrFilterInteger tag containing the handler returned by the ODBCOpen() function.String tag containing the SQL WHERE clause.Returned Values:0 Success1 Invalid handler2 Invalid parameterExamples:Tag NameTagExpressionODBCSetFilter(3, “Name='Morgan'”)A-238 InduSoft Web Studio v6.1 SP5
InduSoft Web Studio FunctionsIWS Users GuideODBCSetSort(numHandler, strSort)GroupExecutionWindows 2K/XP/VistaWindows CEWeb Thin ClientODBCSynchronousSupportedNot SupportedSupported / Executed on ServerDescription: Sorts records selected by IWS.You can use this feature to sort the records in one or more columns. Remember tocall ODBCQuery after calling this function.Parameters:numHandlerstrSortInteger tag containing the handler returned by the ODBCOpen() function.String tag containing the SQL ORDER BY clause.Returned Values:0 Success1 Invalid handler2 Invalid parameter typeExamples:Tag NameTagExpressionODBCSetSort(5,"Name DESC")InduSoft Web Studio v6.1 SP5 A-239
IWS Users GuideInduSoft Web Studio FunctionsODBCUnbindCol(numHandler, strColName)GroupExecutionWindows 2K/XP/VistaWindows CEWeb Thin ClientODBCSynchronousSupportedNot SupportedSupported / Executed on ServerDescription: Unbinds a column from a tag.Parameters:numHandlerstrColNameInteger tag containing the handler returned by the ODBCOpen() function.String tag containing the column name.Returned Values:0 Success1 Invalid handler2 Invalid parameter type3 Column not boundExamples:Tag NameTagExpressionODBCUnbindCol(7, “Name”)A-240 InduSoft Web Studio v6.1 SP5
InduSoft Web Studio FunctionsIWS Users GuideODBCUpdate(numHandler)GroupExecutionWindows 2K/XP/VistaWindows CEWeb Thin ClientODBCSynchronousSupportedNot SupportedSupported / Executed on ServerDescription: Updates the current register. IWS uses the values of tags bound by theODBCBindCol function to update the current register.Parameters:numHandlerInteger tag containing the handler returned by the ODBCOpen() function.Returned Values:0 Success1 Invalid handler2 Database not open3 Update errorExamples:Tag NameTagExpressionODBCUpdate(1)InduSoft Web Studio v6.1 SP5 A-241
IWS Users GuideInduSoft Web Studio FunctionsMail FunctionsThis section describes the following InduSoft Web Studio Email functions: CNFEMail(strSMTP, strFrom, strPOP3, strUser, strPassword,optnumTimeOut)GetStatusSendEMailExt(optTagName)SendEMail(strSubject, strMessage, strTO)SendEMailExt(strSubject, strMessage, strTO, strCC, strBCC, strFile1,..., strFileN) CnfEmail( )CnfEmail( strSMTP, strFrom, strPOP3, strUser, strPassword,optnumTimeOut, optnumAuthType, optStrSMTPUser,optStrSMTPPassword )GroupExecutionWindows 2K/XP/VistaWindows CEWeb Thin ClientMailSynchronousSupportedSupportedSupportedDescription: Sets Simple Mail Transfer Protocol (SMTP) parameters. You mustconfigure these parameters and execute this function before sending email withIWS (e.g. by the SendEmail() function, by the SendEmailExt() function, by theAlarm Email interface, etc.).Parameters:strSMTPstrFromstrPOP3strUserstrPasswordoptnumTimeOutString tag containing the SMTP server name or IP address.For CEView applications, you must specify the SMTP IP address insteadof the server name.String tag containing the sender’s address. This address must be a validemail address for the POP3 Server.String tag containing the POP3 server name.String tag containing the sender’s user account name for the POP3Server.String tag containing the password for the user account name for thePOP3 Server.Optional numerical tag containing the timeout limit (in seconds) used whensending messages. If no answer is received from the Server after thisperiod of time, the operation is aborted automatically.A-242 InduSoft Web Studio v6.1 SP5
InduSoft Web Studio FunctionsIWS Users GuideoptAuthTypeOptional numerical tag containing the SMTP Authentication Type:0 (default) = SMTP Server does not require authentication1 = SMTP server requires authenticationoptStrSMTPUserOptional string tag containing the User Name used to log onto on theSMTP Server when it requires authentication. If this parameter is omittedand the optAuthType type is set to 1, the value configured for the strUser isautomatically used as optStrSMTPUser.optStrSMTPPassword Optional string tag containing the Password used to log onto the SMTPServer that requires authentication. If this parameter is omitted and theoptAuthType type is set to 1, the value configured for the strPassword isautomatically used as optStrSMTPPassword too.Returned Values:0 Success1 Invalid format for parameter 1 (strSMTP)2 Invalid format for parameter 2 (strFrom)3 Invalid format for parameter 3 (strPOP3)4 Invalid format for parameter 4 (strUser)5 Invalid format for parameter 5 (strPassword)6 Invalid format for parameter 6 (optnumTimeOut)7 Wrong amount of parameters8 Error getting host IP address (invalid POP3 server)9 Error Connecting POP3 server10 Error sending username11 Error sending password12 SMTP server does not support Login\Password Authentication mode13 Invalid SMTP User Name14 Authentication failed (Invalid User and/or Password)Examples:Tag NameTagTagExpressionCnfEmail ( "smtp.Studio.com", "Robert@Studio.com", "pop.Studio.com", "RobertH","Shades556",100)CnfEmail( "smtp.Studio.com", "Robert@Studio.com", "pop.Studio.com", "RobertH","Shades556", 5 ,1)InduSoft Web Studio v6.1 SP5 A-243
IWS Users GuideInduSoft Web Studio FunctionsTagCnfEmail( "smtp.Studio.com", "Robert@Studio.com", "pop.Studio.com", "RobertH","Shades556", 5 , 1 , “JohnS” , “abcd1234” )GetStatusSendEMailExt(optTagName)GroupExecutionWindows 2K/XP/VistaWindows CEWeb Thin ClientMailSynchronousSupportedSupportedSupportedDescription: Returns status of the last email sent using the SendEmailExt()function.Parameters:OptTagNameOptional tag that causes the function to update its return value. This parameter isoptional but you must use it when configuring this function for any screen dynamic (suchas Text I/O, Position, and so forth).Returned Values:-2 Incorrect version of the INDMail.DLL library.-1 The INDMail.DLL library is corrupted.0 SendEmailExt() function is not being executed.1 Still sending last email. Cannot execute the SendEmailExt() function.2 Last email was sent successfully. You can execute the SendEmailExt() function again.3 There was an error sending the last email. Execute the SendEmailExt() function again.Examples:Tag NameTagTagExpressionGetStatusSendEMailExt(second)GetStatusSendEMailExt()SendEMail(strSubject, strMessage, strTO)GroupExecutionWindows 2K/XP/VistaMailSynchronousSupportedA-244 InduSoft Web Studio v6.1 SP5
InduSoft Web Studio FunctionsIWS Users GuideWindows CEWeb Thin ClientSupportedSupportedDescription: Sends e-mail messages. Before executing this function, you must setsome parameters using the CnfEmail() functionParameters:strSubjectstrMessagestrToString tag containing the e-mail subject.String tag containing the e-mail message (up to 255 characters).String tag containing the recipient’s address (target).InduSoft Web Studio v6.1 SP5 A-245
IWS Users GuideInduSoft Web Studio FunctionsReturned Values:0 Success1 Invalid format for parameter 1 (strSubject)2 Invalid format for parameter 1 (strMessage)3 Invalid format for parameter 3 (strTo)4 Wrong amount of parameters5 Start Socket error6 Error getting host IP Address (invalid SMTP server)7 Error Connecting SMTP server8 Error sending HELO command (initialization)9 Error sending MAIL command (sending FROM address)10 Error sending RCPT command (sending TO address)11 Error sending DATA (sending message)Examples:Tag NameTagExpressionSendEMail( “Subject”, “Message”, “Wrogers@pnd.net”)SendEMailExt(strSubject, strMessage, strTO, strCC, strBCC,strFile1, ..., strFileN)GroupExecutionWindows 2K/XP/VistaWindows CEWeb Thin ClientMailAsynchronousSupportedSupportedSupportedDescription: Sends e-mail messages with attached files. Before executing thisfunction, you must set some parameters using the CnfEmail() function.A-246 InduSoft Web Studio v6.1 SP5
InduSoft Web Studio FunctionsIWS Users GuideParameters:strSubjectstrMessagestrTOstrCCstrBCCstrFile (1-N)String tag containing the e-mail subject (up to 255 characters).String tag containing the e-mail message (up to 255 characters).String tag containing the recipient’s address.String tag containing the recipients’ addresses to be CCed.String tag containing the recipients’ addresses to be BCCed.String tags, each containing file name and path of a file to send with e-mail.Returned Values:-4 Some of the attached files were not found.-3 Wrong number of parameters (at least three parameters are required).-2 The INDMail.DLL library version is incorrect.-1 The INDMail.DLL library is corrupted.0 Success1 Cannot execute the function because the last e-mail has not been sent yet.2 Internal errorExamples:Tag NameExpressionTag SendEMailExt(“Subject”, “Message”, “Sam@universe.com”, “”, “”,“C:\Projects\report.txt”)TagSendEMailExt(“Subject”, “Message”, “David@Ohio.net”, “Ted@Austin.com”,“Bart@Springfield.gov”, “C:\TechRef51.doc”) Notes: You must configure the strSubject, strMessage, and strTO parameters.All of the other parameters are optional. You can use the null string value ("") for the strTO, strCC, or strBCCparameters if you will not be using them. You can assign more than one recipient in the strTO, strCC, or strBCCparameters, using the semicolon (;) char to share the addresses.InduSoft Web Studio v6.1 SP5 A-247
IWS Users GuideInduSoft Web Studio FunctionsDial-Up FunctionsThis section describes the following InduSoft Web Studio Dial-Up functions: DialError(numType, strPhonebookEntryOrModem, optError, optRefresh)DialGetClientIP(numType, strPhoneBookOrDevice, “tagClientIP”,optRefresh)DialGetServerIP(numType, strPhoneBookOrDevice, "tagServerIP",optRefresh)DialStatus(numType, strPhonebookEntryOrModem, optStatus,optRefresh)DialUp(numType, strPhonebookEntryOrModem, strUserName, strPassword,optStrDomain, strPhoneNumber)DialUpToCE(numModem, strDialPhone, strMyNumber, strUser,strPassword, optStrDomain, optAutoDial, optAutoClose)FindAllDevices(“tagArray”)FindModem("tagArray")HangUp(numType, strPhonebookEntryOrModem)PhoneDialUp(strPhoneNumber, OptStrModemName)PhoneDisableListen(optStrModemName)PhoneEnableListen(OptStrModemName)PhoneHangUp(OptStrModemName)PhoneStatus ("strStatus", optStrModemName)A-248 InduSoft Web Studio v6.1 SP5
InduSoft Web Studio FunctionsIWS Users GuideDialError(numType, strPhonebookEntryOrModem, optError,optRefresh)GroupExecutionWindows 2K/XP/VistaWindows CEWeb Thin ClientDial-UpSynchronousSupportedSupportedSupportedDescription: Returns the error codes regarding each connection.Parameters:numTypestrPhonebookEntryOrModemoptErroroptRefreshNumerical tag specifying the content of thestrPhonebookEntryorModem tag.• 0: Phonebook Name• 1: Modem Name• 2: Direct Connection NameString tag containing a Phonebook Name, Modem Name, orDirect Connection Name used to make the connection. ThenumType tag specifies which of these methods is used.Optional string tag containing the name of the string tagreceiving the Error Message.Optional tag, which causes the function to update its returnvalue. This parameter is optional but you must use it whenconfiguring this function for any screen dynamic (such as TextI/O, Position, and so forth).Returned Values:0 OK-1 Error: INDRas.DLL not found.-2 Error: INDRas.DLL damaged.-3 Error: invalid number of parameters (minimum=2).-4 Invalid value for the numType parameter (0 or 1).-5 PhoneBook or Modem does not exist.600 An operation is pending.601 The port handle is invalid.602 The port is already open.603 Caller's buffer is too small.InduSoft Web Studio v6.1 SP5 A-249
IWS Users GuideInduSoft Web Studio Functions604 Wrong information specified.605 Cannot set port information.606 The port is not connected607 The event is invalid.608 The device does not exist.609 The device type does not exist.610 The buffer is invalid.611 The route is not available.612 The route is not allocated.613 Invalid compression specified.614 Out of buffers.615 The port was not found.616 An asynchronous request is pending.617 The port or device is already disconnecting.618 The port is not open.619 The port is disconnected.620 There are no endpoints.621 Cannot open the phone book file.622 Cannot load the phone book file.623 Cannot find the phone book entry.624 Cannot write the phone book file.625 Invalid information found in the phone book file.626 Cannot load a string.627 Cannot find key.628 The port was disconnected.629 The data link was terminated by the remote machine.630 The port was disconnected due to hardware failure.631 The port was disconnected by the user.632 The structure size is incorrect.633 The port is already in use or is not configured for Remote Access dial out.A-250 InduSoft Web Studio v6.1 SP5
InduSoft Web Studio FunctionsIWS Users Guide634 Cannot register your computer on on the remote network.635 Unknown error.636 The wrong device is attached to the port.637 The string could not be converted.638 The request has timed out.639 No asynchronous net available.640 A NetBIOS error occurred.641 The server cannot allocate NetBIOS resources needed to support the client.642 One of your NetBIOS names is already registered on the remote network.643 A network adapter at the server failed.644 You will not receive network message pop-ups.645 Internal authentication error.646 The account is not permitted to log on at this time of day.647 The account is disabled.648 The password has expired.649 The account does not have Remote Access permission.650 The Remote Access server is not responding.651 Your modem (or other connecting device) has reported an error.652 Unrecognized response from the device.653 A macro required by the device was not found in the device .INF file section.654 A command or response in the device .INF file section refers to an undefined acro.655 The
IWS Users GuideInduSoft Web Studio Functions663 The media .INI file refers to an unknown device type.664 Cannot allocate memory.665 The port is not configured for Remote Access.666 Your modem (or other connecting device) is not functioning.667 Cannot read the media .INI file.668 The connection dropped.669 The usage parameter in the media .INI file is invalid.670 Cannot read the section name from the media .INI file.671 Cannot read the device type from the media .INI file.672 Cannot read the device name from the media .INI file.673 Cannot read the usage from the media .INI file.674 Cannot read the maximum connection BPS rate from the media .INI file.675 Cannot read the maximum carrier BPS rate from the media .INI file.676 The line is busy.677 A person answered instead of a modem.678 There is no answer.679 Cannot detect carrier.680 There is no dial tone.681 General error reported by device.682 ERROR_WRITING_SECTIONNAME683 ERROR_WRITING_DEVICETYPE684 ERROR_WRITING_DEVICENAME685 ERROR_WRITING_MAXCONNECTBPS686 ERROR_WRITING_MAXCARRIERBPS687 ERROR_WRITING_USAGE688 ERROR_WRITING_DEFAULTO<strong>FF</strong>689 ERROR_READING_DEFAULTO<strong>FF</strong>690 ERROR_EMPTY_INI_FILE691 Access denied because username and/or password is invalid on the domain.A-252 InduSoft Web Studio v6.1 SP5
InduSoft Web Studio FunctionsIWS Users Guide692 Hardware failure in port or attached device.693 ERROR_NOT_BINARY_MACRO694 ERROR_DCB_NOT_FOUND695 ERROR_STATE_MACHINES_NOT_STARTED696 ERROR_STATE_MACHINES_ALREADY_STARTED697 ERROR_PARTIAL_RESPONSE_LOOPING698 A response keyname in the device .INF file is not in the expected format.699 The device response caused buffer overflow.700 The expanded command in the device .INF file is too long.701 The device moved to a BPS rate not supported by the COM driver.702 Device response received when none expected.703 The Application does not allow user interaction the connection requires interaction withthe user to complete successfully704 ERROR_BAD_CALLBACK_NUMBER705 ERROR_INVALID_AUTH_STATE706 ERROR_WRITING_INITBPS707 X.25 diagnostic indication.708 The account has expired.709 Error changing password on domain The password may be too short or may match apreviously used password.710 Serial overrun errors were detected while communicating with your modem.711 RasMan initialization failure Check the event log.712 Biplex port initializing Wait a few seconds and redial.713 No active ISDN lines are available.714 No ISDN channels are available to make the call.715 Too many errors occurred because of poor phone line quality.716 The Remote Access IP configuration is unusable.717 No IP addresses are available in the static pool of Remote Access IP addresses.718 Timed out waiting for a valid response from the remote PPP peer.719 PPP terminated by remote machine.InduSoft Web Studio v6.1 SP5 A-253
IWS Users GuideInduSoft Web Studio Functions720 No PPP control protocols configured.721 Remote PPP peer is not responding.722 The PPP packet is invalid.723 The phone number including prefix and suffix is too long.724 The IPX protocol cannot dial-out on the port because the machine is an IPX router.725 The IPX protocol cannot dial-in on the port because the IPX router is not installed726 The IPX protocol cannot be used for dial-out on more than one port at a time.727 Cannot access TCPCFG.DLL.728 Cannot find an IP adapter bound to Remote Access.729 SLIP cannot be used unless the IP protocol is installed.730 Computer registration is not complete.731 The protocol is not configured.732 The PPP negotiation is not converging.733 The PPP control protocol for this network protocol is not available on the server.734 The PPP link control protocol terminated.735 The requested address was rejected by the server.736 The remote computer terminated the control protocol.737 Loopback detected.738 The server did not assign an address.739 The authentication protocol required by the remote server cannot use the Windows NTencrypted password Redial, entering the password explicitly.740 Invalid TAPI configuration.741 The local computer does not support the required encryption type.742 The remote computer does not support the required encryption type.743 The remote computer requires encryption.744 Cannot use the IPX network number assigned by remote server Check the event log.745 ERROR_INVALID_SMM746 ERROR_SMM_UNINITIALIZED747 ERROR_NO_MAC_FOR_PORT748 ERROR_SMM_TIMEOUTA-254 InduSoft Web Studio v6.1 SP5
InduSoft Web Studio FunctionsIWS Users Guide749 ERROR_BAD_PHONE_NUMBER750 ERROR_WRONG_MODULE751 Invalid callback number Only the characters 0 to 9, T, P, W, (,), -, @, and space areallowed in the number.752 A syntax error was encountered while processing a script.753 The connection could not be disconnected because it was created by the Multi-ProtocolRouter.Examples:Tag NameTagTagTagExpressionDialError(0, “Office DialUp”)DialError(1, “USRobotics_SportsterFaxModem”, “StatusMessage”, second)DialError(2, “DirectDial”, “DialupError”)DialGetClientIP(numType, strPhoneBookOrDevice,“tagClientIP”, optRefresh)GroupExecutionWindows 2K/XP/VistaWindows CEWeb Thin ClientDial-UpSynchronousSupportedSupportedSupportedDescription: Obtains the IP Address for the RAS Client station of a Dial-Upconnection. You must execute this function on the RAS Client station (not on theRAS Server station) or the function will not work properly.Parameters:numTypestrPhonebookEntryOrModem“tagClientIP”Numerical tag specifying the content of thestrPhonebookEntryorModem tag.• 0: Phonebook Name• 1: Modem Name• 2: Direct Connection NameString tag containing the Phonebook Name, Modem Name, orDirect Connection Name used to make the connection. ThenumType tag specifies which of these methods is used.Name of the string tag that will receive the IP address.InduSoft Web Studio v6.1 SP5 A-255
IWS Users GuideInduSoft Web Studio FunctionsoptRefreshOptional tag that causes the function to update its return value.This parameter is optional, but you must use it when configuringthis function for any screen dynamic (such as Text I/O, Position,and so forth).Returned Values:-5 GetClientIP function was not found in IndRAS.DLL.-4 Invalid type (0: Phonebook, 1: Modem, 2: Direct Connection)-3 Invalid number of parameters-2 DialStatus function was not found in IndRAS.DLL-1 IndRAS.DLL was not loadedNN: Status code returned by the DialStatus() functionExamples:Tag NameTagExpressionDialGetClinetIP(0, “Office DialUp”, “ClientIPTag”)Tag DialError(1, “USRobotics_SportsterFaxModem”, “ClientIPAddress”, second )TagDialError(2, “DirectDial”, “IPAdd”)DialGetServerIP( numType, strPhoneBookOrDevice,"tagServerIP", optRefresh )GroupExecutionWindows 2K/XP/VistaWindows CEWeb Thin ClientDial-UpSynchronousSupportedNot SupportedSupportedDescription: Obtains the IP Address of the RAS Server station for a Dial-Upconnection. You must execute this function on the RAS Client station (not on theRAS Server station) for this function to work properly.Parameters:numTypeNumerical tag specifying the content of thestrPhonebookEntryorModem tag.• 0: Phonebook Name• 1: Modem Name• 2: Direct Connection NameA-256 InduSoft Web Studio v6.1 SP5
InduSoft Web Studio FunctionsIWS Users GuidestrPhonebookEntryOrModem String tag containing the Phonebook Name, Modem Name, orDirect Connection Name used to make the connection. ThenumType tag specifies which of these methods is used.“tagServerIP”optRefreshName of string tag receiving the IP address.Optional tag that causes the function to update its return value.This parameter is optional, but you must use it when configuringthis function for any screen dynamic (such as Text I/O, Position,and so forth).Returned Values:-5 GetServerIP function was not found in IndRAS.DLL.-4 Invalid type (0: Phonebook, 1: Modem, 2: Direct Connection)-3 Invalid number of parameters-2 DialStatus function was not found in IndRAS.DLL-1 IndRAS.DLL was not loadedNN: Status code returned by the DialStatus() functionExamples:Tag NameExpressionTag DialGetClinetIP( 0, “Office DialUp”, “ClientIPTag” )Tag DialError( 1, “USRobotics_SportsterFaxModem”, “ClientIPAddress”, second )TagDialError( 2, “DirectDial”, “IPAdd”)DialStatus(numType, strPhonebookEntryOrModem,optStatus, optRefresh)GroupExecutionWindows 2K/XP/VistaWindows CEWeb Thin ClientDial-UpSynchronousSupportedSupportedSupportedDescription: Returns the status of each connectionParameters:InduSoft Web Studio v6.1 SP5 A-257
IWS Users GuideInduSoft Web Studio FunctionsNumTypeNumerical tag specifying the content of thestrPhonebookEntryorModem tag.• 0: Phonebook Name• 1: Modem Name• 2: Direct Connection NamestrPhonebookEntryOrModem String tag containing the Phonebook Name, Modem Name, orDirect Connection Name used to make the connection. ThenumType tag specifies which of these methods is used.optStatusoptRefreshOptional string tag containing the name of the string tag receivingthe status message.Optional tag that causes the function to update its return value.This parameter is optional, but you must use it when configuringthis function for any screen dynamic (such as Text I/O, Position,and so forth).Returned Values:-5 PhoneBook or modem does not exist-4 Invalid value for the numType parameter (0 or 1)-3 Error: invalid number of parameters (minimum = 2);-2 Error: INDRAS.DLL damaged-1 Error: INDRAS.DLL not found0 Opening the port...1 Port was opened successfully.2 Connecting to the device...3 The device has connected successfully.4 All devices in the device chain have successfully connected.5 Verifying the user name and password...6 An authentication event has occurred.7 Requested another validation attempt with a new user.8 Server has requested a callback number.9 The client has requested to change the password10 Registering your computer on the network...11 The link-speed calculation phase is starting...12 An authentication request is being acknowledged.13 Reauthentication (after callback) is starting.A-258 InduSoft Web Studio v6.1 SP5
InduSoft Web Studio FunctionsIWS Users Guide14 The client has successfully completed authentication.15 The line is about to disconnect for callback.16 Delaying to give the modem time to reset for callback.17 Waiting for an incoming call from server.18 Projection result information is available.19 User authentication is being initiated or retried.20 Client has been called back and is about to resume authentication.21 Logging on to the network...22 Subentry has been connected.23 Subentry has been disconnected24 Terminal state supported by RASPHONE.exe.25 Retry authentication state supported by RASPHONE.exe.26 Callback state supported by RASPHONE.exe.27 Change password state supported by RASPHONE.exe.8192 Connected to remote server successfully!8193 Disconnected.Examples:Tag NameTagTagTagExpressionDialError(0, “Office DialUp”)DialError(1, “USRobotics_SportsterFaxModem”, “StatusMessage”, second)DialError(2, “DirectDial”, “DialupError”)DialUp( numType, strPhonebookEntryOrModem, strUserName,strPassword, optStrDomain, strPhoneNumber )GroupExecutionWindows 2K/XP/VistaWindows CEWeb Thin ClientDial-UpAsynchronousSupportedSupportedSupportedInduSoft Web Studio v6.1 SP5 A-259
IWS Users GuideInduSoft Web Studio FunctionsDescription: Triggers a dial-up connectionParameters:numTypeNumerical tag specifying the content of thestrPhonebookEntryorModem tag.• 0: Phonebook Name• 1: Modem Name• 2: Direct Connection NamestrPhonebookEntryOrModem String tag containing the Phonebook Name, Modem Name, orDirect Connection Name used to make the connection. ThenumType tag specifies which of these methods is used.strUserNamestrPasswordoptStrDomainstrPhoneNumberString tag containing the Username to use for logging on.String tag containing the Password to use for logging on.Optional string tag containing the domain name to specify whenlogging on.String tag containing the phone number to dial (used only whenthe parameter numType=1). Note for Windows NT/2000 Users:Due to limitations in the Microsoft API, the DialUp() function may not beable to create temporary phonebooks on Windows NT/2000.To work around this problem:1. Configure DialUp() using the Modem Name parameter instead of PhonebookName.2. Create a phonebook manually in the Control Panel and save it as IWSTemporary 1.IWS will use the IWS Temporary 1 phonebook with the parameters youconfigured using the DialUp() function (user name, password, domain, andtelephone). You then can change these parameters at runtime.Returned Values:0 OK: dialing started-1 Error: INDRAS.DLL not found-2 Error: INDRAS.DLL damaged-3 Error: invalid number of parameters (minimum=5)-4 Invalid value for the numType parameter (0 or 1)-5 Invalid value for the parameter strPhonebookEntryOrModem (string)-6 PhoneBook or Modem does not exist-7 PhoneBook or Modem is in use;A-260 InduSoft Web Studio v6.1 SP5
InduSoft Web Studio FunctionsIWS Users Guide-8 Depends of the numType parameter:• If numType = 0: Could not read properties from PhoneBook.• If numType = 1: More than 1000 connections are enabled at same time.-9 Unable to create a temporary PhoneBook.Examples:Tag NameTagExpressionDialUp(0, “OfficeDialup”, “Guest”, “Password”)Tag DialUp(1, ‘USRobotics_SportsterFaxModem”, “HR12378”, “HRPass”, “15125554321”)Tag DialUp(2, “DirectDial”, “Rberton”, “MyPassword”, “156.48.25.0”) Note:The operating system’s RAS Server executes the dial-in for Windows2K/XP/Vista computers automatically.DialUpToCE(numModem, strDialPhone, strMyNumber, strUser,strPassword, optStrDomain, optAutoDial, optAutoClose)GroupExecutionWindows 2K/XP/VistaWindows CEWeb Thin ClientDial-UpAsynchronousSupportedNot SupportedSupportedDescription: Executes the DialUpToCE program, which sends the informationnecessary to CERasSvr.exe calls back to the Windows 2K/XP/Vista computer.Parameters:numModemstrDialPhonestrMyNumberstrUserNumerical tag containing the modem number used to dial to the WinCEcomputer.Numerical tag containing the telephone number of the WinCE remote station.Numerical tag containing the telephone number sent to the WinCE remotestation. CERasSvr.exe will call back to this phone number.String tag containing the user name to be sent to WinCE remote station.CERasSvr.exe will use this name to connect to the Windows 2K/XP/Vistacomputer after calling back to it.InduSoft Web Studio v6.1 SP5 A-261
IWS Users GuideInduSoft Web Studio FunctionsstrPasswordoptStrDomainoptAutoDialoptAutoCloseString tag containing the password to be sent to WinCE remote station.CERasSvr.exe will use this password to connect to the Windows2K/XP/Vista computer after calling back to itOptional string tag containing the domain name to specify when logging on.Optional tag, which can be set to one of the following:• 1: Triggers the DialupToCE connection automatically when thefunction is executed• 0: Requests confirmation before triggering the DialupToCE connectionautomatically when the function is executedOptional tag, which can be set to one of the followign:1: Closes the DialUpToCE dialog automatically after dialing the WinCEremote station0: Leaves the DialUpToCE dialog openReturned Values:0 Fail, unable to call DialUpToCE.1 Success, DialUpToCE executed.Examples:Tag NameTagTagExpressionDialUpToCE(0,”12344321”,”98765432”, ”Administrator”,”MyPass”)DialUpToCE(0,”12344321”,”98765432”, ”Administrator”,”MyPass”,””,1,1) Note:The DialUpToCE program was developed to dial a remote WinCE station.Because Windows CE v3.00 does not provide a RAS Server, you must berunning the CERasSvr.exe program on the WinCE device to answer a call,and call back to a Windows 2K/XP/Vista computer using parameters sent bythe DialUpToCE() function. You must configure the RAS Server service onthe Windows 2K/XP/Vista computer to answer the call back from the WinCEdevice and set the TCP/IP connection.FindAllDevices(“tagArray”)GroupExecutionWindows 2K/XP/VistaWindows CEDial-UpSynchronousSupportedSupportedA-262 InduSoft Web Studio v6.1 SP5
InduSoft Web Studio FunctionsIWS Users GuideWeb Thin ClientSupportedDescription: Returns the list of all the available modems and direct connectioninterfaces (COM ports) in the local station.Parameters:“tagArray”Name of a string array tag receiving the list of available modems and directconnection interfaces.Returned Values: Returns the number of modems and/or interfaces found.Examples:Tag NameTagExpressionFindAllDevices(“SerialConnections[1]”)InduSoft Web Studio v6.1 SP5 A-263
IWS Users GuideInduSoft Web Studio FunctionsFindModem("tagArray")GroupExecutionWindows 2K/XP/VistaWindows CEWeb Thin ClientDial-UpSynchronousSupportedSupportedSupportedDescription: Returns the list of all available modems in the local station.Parameters:“tagArray”Name of a string array tag receiving the list of available modems.Returned Values: Returns the number of modems found.Examples:Tag NameTagExpressionFindModem(“Modems[1]”) Tip:You can use the FindModem() function to get the serial interface name for adial-up connection via modem, and use this information to fill thestrPhonebookEntryOrModem parameter for the DialError(),DialStatus(), DialUp(), and HangUp() functions.A-264 InduSoft Web Studio v6.1 SP5
InduSoft Web Studio FunctionsIWS Users GuideHangUp( numType, strPhonebookEntryOrModem )GroupExecutionWindows 2K/XP/VistaWindows CEWeb Thin ClientDial-UpSynchronousSupportedSupportedSupportedDescription: Hangs-up a dial-up connection.Parameters:numTypeNumerical tag specifying the content of thestrPhonebookEntryorModem tag.• 0: Phonebook Name• 1: Modem Name• 2: Direct Connection NamestrPhonebookEntryOrModem String tag containing the Phonebook Name, Modem Name, orDirect Connection Name used to make the connection. ThenumType tag specifies which of these methods is used.Returned Values: This function returns fhe following values:0 OK.-1 Error: INDRAS.DLL not found-2 Error: INDRAS.DLL damaged-3 Invalid value for the numType parameter (0 or 1)-4 PhoneBook or modem does not exist-5 No configured modems existExamples:Tag NameTagTagTagExpressionHangUp(0, “OfficeDialup”)HangUp(1, ‘USRobotics_SportsterFaxModem”)HangUp(2, “DirectDial”, “Rberton”, “MyPassword”)InduSoft Web Studio v6.1 SP5 A-265
IWS Users GuideInduSoft Web Studio FunctionsPhoneDialUp( strPhoneNumber, optStrModemName )GroupExecutionWindows 2K/XP/VistaWindows CEWeb Thin ClientDial-UpAsynchronousSupportedNot SupportedSupportedDescription: Dials to a phone number using TAPI (Telephony Application ProgramInterface).Parameters:strPhoneNumberOptStrModemNameTelephone number the function will call.Name of the modem used to dial. If you do not specify a modem, IWS will usethe first modem found on the operating system.Returned Values: This function returns the following values:0 OK (dial triggered)-1 Invalid number of parameters-3 INDTAPI.DLL library not found-4 PhoneDialUp() function not supported by the current INDTAPI.DLLlibraryExamples:Tag NameExpressionPhoneDialUp (“512-123-4567”)PhoneDialUp (StringPhoneNumberTag)PhoneDialUp (StringPhoneNumberTag, StringModemNameTag)A-266 InduSoft Web Studio v6.1 SP5
InduSoft Web Studio FunctionsIWS Users GuidePhoneDisableListen( optStrModemName )GroupExecutionWindows 2K/XP/VistaWindows CEWeb Thin ClientDial-UpSynchronousSupportedNot SupportedSupportedDescription: Disables IWS from listening to the modem for incoming calls.Parameters:OptStrModemNameName of the modem used to dial. If you do not specify a modem, IWS will usethe first modem found on the operating system.Returned Values: This function returns the following values:1 OK (stop listening for incoming calls)-1 INDTAPI.DLL library not found-2 PhoneDisableListen() function not supported by the currentINDTAPI.DLL libraryExamples:Tag NameExpressionPhoneDisableListen ()PhoneDisableListen (“Hayes Compatible Modem on COM1”)PhoneDisableListen (StringModemNameTag)InduSoft Web Studio v6.1 SP5 A-267
IWS Users GuideInduSoft Web Studio FunctionsPhoneEnableListen( optStrModemName )GroupExecutionWindows 2K/XP/VistaWindows CEWeb Thin ClientDial-UpSynchronousSupportedNot SupportedSupportedDescription: Enables IWS to listen to the modem for incoming calls.Parameters:OptStrModemNameName of the modem used to dial. If you do not specify a modem, IWS will usethe first modem found on the operating system.Returned Values: This function returns the following values:1 OK (listening for incoming calls)0 Error executing the PhoneEnableListen() function-1 INDTAPI.DLL library not found-2 PhoneEnableListen () function not supported by the currentINDTAPI.DLL libraryExamples:Tag NameExpressionPhoneEnableListen ()PhoneEnableListen (“Hayes Compatible Modem on COM1”)PhoneEnableListen (StringModemNameTag)A-268 InduSoft Web Studio v6.1 SP5
InduSoft Web Studio FunctionsIWS Users GuidePhoneHangUp(OptStrModemName)GroupExecutionWindows 2K/XP/VistaWindows CEWeb Thin ClientDial-UpAsynchronousSupportedNot SupportedSupportedDescription: Hangs up a dial-up connection triggered with the PhoneDialUp()function.Parameters:OptStrModemNameName of the modem used to dial. If you do not specify a modem, IWS will usethe first modem found on the operating system.Returned Values: This function returns the following values:1 OK (dial connection was dropped)-1 INDTAPI.DLL library not found-2 PhoneHangUp() function not supported by the current INDTAPI.DLL libraryExamples:Tag NameExpressionPhoneHangUp()PhoneHangUp (“Hayes Compatible Modem on COM1”)PhoneHangUp (StringModemNameTag)InduSoft Web Studio v6.1 SP5 A-269
IWS Users GuideInduSoft Web Studio FunctionsPhoneStatus ("strStatus", optStrModemName)GroupExecutionWindows 2K/XP/VistaWindows CEWeb Thin ClientDial-UpSynchronousSupportedNot SupportedSupportedDescription: Checks the status of the current connections.Parameters:“strStatus”optStrModemNameName of the tag that will receive the status description textName of the modem used to dial. If you do not specify a modem, IWS will usethe first modem found on the operating systemReturned Values: This function returns the following values:0 “Ready to make a call”1 “Call was shut down“2 “Line Ringing“3 “Dial Tone“4 “Dialing Call“5 “Call is Proceeding“6 “Ring Back“7 “Line is Busy“8 “Line is Idle“9 “Disconnected“Examples:Tag NameTag Status CodeTag Status CodeTag Status CodeExpressionPhoneStatus (“String Tag Status”)PhoneStatus (“String Tag Status”, “Hayes Compatible Modem on COM1”)PhoneStatus (“String Tag Status”, “StringModemNameTag”)A-270 InduSoft Web Studio v6.1 SP5
InduSoft Web Studio FunctionsIWS Users GuideActiveX FunctionsThis section describes the following InduSoft Web Studio ActiveX functions: XGet(strName, strProperties)XRun(strName, strMethod, Parameter1, Parameter2, …, ParameterN)XSet(strName, strProperties, Value)XGet(strName, strProperties)GroupExecutionWindows 2K/XP/VistaWindows CEWeb Thin ClientActiveXAsynchronousSupportedSupportedSupported Note:This function cannot be used with Tasks (page 8–1) or in the GlobalProcedures script (page 15–8).Description: Executes a (PropGet) on the specified ActiveX object.Parameters:strNamestrPropertiesString tag containing the unique name given to the target ActiveX object.String tag containing the specific method to be used.Returned Values: Returns the value of the property as reported by the ActiveX object.Examples:Tag NameTagExpressionXGet(“ActXRec”, “Color”)InduSoft Web Studio v6.1 SP5 A-271
IWS Users GuideInduSoft Web Studio FunctionsXRun(strName, strMethod, Parameter1, Parameter2, …,ParameterN)GroupExecutionWindows 2K/XP/VistaWindows CEWeb Thin ClientActiveXAsynchronousSupportedSupportedSupported Note:This function cannot be used with Tasks (page 8–1) or in the GlobalProcedures script (page 15–8).Description: Calls a method on the specified ActiveX control object.Parameters:strNamestrMethodParameter(1-N)String containing the unique name of the ActiveX object, as configured in theName field of the Object Properties dialog.String containing the specific method to be called.Data of various types that are required by the method to run. The number ofparameters can vary from 0 to 255 and depends on the specified method andActiveX object. All original data values, including strings, must be configuredwithout quotes. All referring Tags must be configured with quotes (""), andthe Tag types must match the parameter types (e.g. Boolean, Integer, Real orString) on the method.Returned Values: Returns the method result as reported by the ActiveX object. (Not allmethods return results.)Examples:Tag NameExpressionTag XRun("ActXCir", "XPos", 12, 4.6, 0.2, 1)// Without referring TagsTagTagXRun("ActXCir", "XPos", Parameter1, Parameter2)// Without referring TagsXRun("ActXCir", "XPos", "Parameter1", "Parameter2")// With referring TagsA-272 InduSoft Web Studio v6.1 SP5
InduSoft Web Studio FunctionsIWS Users GuideXSet(strName, strProperties, Value)GroupExecutionWindows 2K/XP/VistaWindows CEWeb Thin ClientActiveXAsynchronousSupportedSupportedSupported Note:This function cannot be used with Tasks (page 8–1) or in the GlobalProcedures script (page 15–8).Description: Executes a (PropPut) on the specified ActiveX object.Parameters:strNamestrPropertiesValueString tag containing the unique name given to the target ActiveX object.String tag containing the specific method to use.Tag of any type containing the value to put in the ActiveX objectReturned Values: No returned values.Examples:Tag NameTagExpressionXSet(“ActXDisplay”, “Display”, “Status Normal”)InduSoft Web Studio v6.1 SP5 A-273
IWS Users GuideInduSoft Web Studio FunctionsEvent Logger FunctionsThis section describes the InduSoft Web Studio Event Logger function:SendEvent(strEvent).SendEvent(strEvent, optBooFlag, optStrComment)GroupExecutionWindows 2K/XP/VistaWindows CEWeb Thin ClientEvent LoggerSynchronousSupportedSupportedSupportedDescription: Use to send an event to the Event Log file.This function has an option that allows you to create a comment. When this optionis enabled, the user is prompted to enter a comment after executing theSendEvent() function. This comment will be saved in the Event Logger file.Parameters:strEventoptBooFlagoptStrCommentString value or tag containing the text to be saved in the Event Log file.If omitted or 0 (zero), the event does not have a comment. Otherwise, there isa comment associated to the event.String value of tag containing the text of the comment for the event saved inthe database. If omitted, the user is prompted with a standard dialog where thecomment can be typed.Returned Values:0 Success1 Event Logger is disabled in the Event Settings dialog.2 Event Logger is enabled, but Custom Messages are disabled in the Event Settingsdialog.A-274 InduSoft Web Studio v6.1 SP5
InduSoft Web Studio FunctionsIWS Users GuideExamples:Tag NameTagTagTagTagExpressionSendEvent(“Valve Open”) // Saves the event message.SendEvent(“Valve Open Oven No.” + OvenID) // Saves the event messageconcatenated with the value of the OvenID tagSendEvent(“Valve Open”, 1) // Displays the dialog where the operator can type hiscomments.SendEvent(“Valve Open”, 1, TagComment) // Saves the event message with thecomment configured in the TagComment tag. Caution:This function is synchronous. Therefore, the execution of the functionfinishes only after the event data (including the comment, if any) is saved inthe database file. It is recommended that you do not configure this function inbackground tasks (e.g. Math and Scheduler), unless you do not plan to usethe comment or configure it directly (type from the dialog) in the function.InduSoft Web Studio v6.1 SP5 A-275
IWS Users GuideInduSoft Web Studio FunctionsFTP FunctionsThis section describes the following IWS FTP functions: CN<strong>FF</strong>tp (strServer , strUser , strPwd , numPassiveMode , numPort) ftpGet (strRemoteFile , strLocalFile , numOverWrite ,numTransferType)ftpPut (strLocalFile , strRemoteFile, numTransferType)ftpStatus (“strStatusTag”)CN<strong>FF</strong>tp (strServer , strUser , strPwn , numPassiveMode ,numPort)GroupExecutionWindows 2K/XP/VistaWindows CEWeb Thin ClientFTPSynchronousSupportedSupportedSupportedDescription: Sets FTP (File Transfer Protocol) parameters. You must configure theseparameters and execute this function before transferring files with the FtpGet orFtpPut functions.Parameters:strServerFTP server namestrUserstrPwnnumPassiveModenumPortUser nameDefault is Anonymous.User passwordDefault is blank.0 – Passive mode disabled1 – Passive mode enabledDefault is 0.TCP/IP port numberDefault is 21.Returned Values:0 Success-1 Invalid number of parameters-2 Invalid server name-3 Invalid user nameA-276 InduSoft Web Studio v6.1 SP5
InduSoft Web Studio FunctionsIWS Users Guide Note:This function does not try to establish a connection with the FTP server, butit must be called before using any other FTP function.Examples:Tag NameExpressionTag CN<strong>FF</strong>tp(“ftp.mycompany.com”, “admin”, “12345”, 1) //Configures the ftp server using passive modeftpGet (strRemoteFile , strLocalFile , numOverWrite ,numTransferType)GroupExecutionWindows 2K/XP/VistaWindows CEWeb Thin ClientFTPAsynchronousSupportedSupportedSupportedDescription: This function retrieves a file from the FTP server and stores it under thespecified file name, creating a new local file. Before executing this function youmust set some parameters using CN<strong>FF</strong>tp. This function is executedasynchronously; therefore you need to call FtpStatus in order to determine if thetransfer has been completed successfully.Parameters:strRemoteFilestrLocalFileFull qualified name of the remote file (e.g. “/Folder/File.extension”)Note that some FTP servers are case sensitive, so you have to enter with thecorrect capitalization.Full qualified name of the local file (e.g. “C:\file.extension”)numOverWritenumTransferType0 – Error if the Local File already exists1 – OverwriteDefault is 0.0 – Unknown1 – ASCII2 – BinaryDefault is 0.Returned Values:1 Failed to create FTP thread0 SuccessInduSoft Web Studio v6.1 SP5 A-277
IWS Users GuideInduSoft Web Studio Functions-1 Invalid number of parameters-2 Unknown system error-3 Invalid remote file-4 Invalid local file-5 Invalid transfer typeExamples:Tag NameTagExpressionFtpGet(“\Reports\040303.txt”, “C:\Report.txt”) // Retrievesthe file 040303 from the folder Reports in the FTP server and stores it in the C:\Report.txtfileftpPut (strLocalFile , strRemoteFile, numTransferType)GroupExecutionWindows 2K/XP/VistaWindows CEWeb Thin ClientFTPAsynchronousSupportedSupportedSupportedDescription: This function stores a file on the FTP server. Before executing thisfunction you must set some parameters using CN<strong>FF</strong>tp. This function is executedasynchronously; therefore you need to call FtpStatus in order to determine if thetransfer has been completed successfully.Parameters:strLocalFileFull qualified name of the local file (e.g. “C:\file.extension”)strRemoteFileoptnumTransferTypeFull qualified name of the remote file (e.g. “/Folder/File.extension”)Note that some FTP servers are case sensitive, so you have to enter withthe correct capitalization.0 – Unknown1 – ASCII2 – BinaryDefault is 0.Returned Values:1 Failed to create FTP thread0 Success-1 Invalid number of parameters-2 Unknown system error-3 Invalid remote fileA-278 InduSoft Web Studio v6.1 SP5
InduSoft Web Studio FunctionsIWS Users Guide-4 Invalid local file-5 Invalid transfer typeExamples:Tag NameTagExpressionFtpPut(“C:\Report.txt”, “\Reports\040303.txt”) // Retrievesthe file “C:\Report.txt” in the with the name 040303.txt in the folder Reports in the FTPServer.ftpStatus ( “strStatusTag” )GroupExecutionWindows 2K/XP/VistaWindows CEWeb Thin ClientFTPSynchronousSupportedSupportedSupportedDescription: This function returns the current status of a transaction started withFtpGet or FtpPut. The return value indicates the status as described below.Parameters:“strStatusTag”String with status description.Returned Values:1 Transaction executed successfully2 Resolving name3 Name resolved4 Connecting to server5 Connected to server6 Closing connection7 Connection closed8 Sending request9 Request sent10 Receiving response11 Intermediate response received12 Response received13 Request completed0 No transaction is being executed.-2 Invalid opttagErrorDescription-6 Error opening connection (see status string for details)-7 Error establishing connection (see status string for details)InduSoft Web Studio v6.1 SP5 A-279
IWS Users GuideInduSoft Web Studio Functions-8 Error receiving the file (see status string for details)-9 Transfer pendingExamples:Tag NameTagExpressionFtpStatus( “StatusDescription” ) // Retrieves the status of a current transfer. The returncode is stored in the StatusCode tag and the description in the StatusDescription tag.A-280 InduSoft Web Studio v6.1 SP5
InduSoft Web Studio FunctionsIWS Users GuideDB/ERP FunctionsThis section describes the InduSoft Web Studio DB/ERP functions: DBCursorClose( numCur, optStrErrorTag ) DBCursorCurrentRow( numCur, optStrErrorTag } DBCursorGetValue( numCur, strColumn, optStrErrorTag ) DBCursorMoveTo( numCur, numRow, optStrErrorTag ) DBCursorNext( numCur, optStrErrorTag ) DBCursorOpen( strConn, strTable, optStrCondition, optStrColumns,optStrTags, optStrOrder, optStrErrorTag ) DBCursorOpenSQL( strConn, strSQL, optStrTags, optStrErrorTag ) DBCursorPrevious( numCur, optStrErrorTag ) DBCursorRowCount( numCur, optStrErrorTag ) DBDelete( strConn, strTable, strCondition, optStrErrorTag ) DBExecute( strConn, strSQL, optStrTags, optNumMaxRows, optStrErrorTag) DBInsert( strConn, strTable, strValues, optStrColumns, optStrErrorTag) DBSelect( strConn, strTable, strTags, optStrColumns, optStrCondition,optStrOrder, optNumMaxRows, optStrErrorTag ) DBUpdate( strConn, strTable, strValues, strColumns, optStrCondition,optStrErrorTag ) SyncAlarm(optStrStartDate, optStrEndDate) SyncEvent(optStrStartDate, optStrEndDate) SyncTrend(numGroup, optStrStartDate, optStrEndDate) SyncAlarmStatus() SyncEventStatus() SyncTrendStatus(numGroup)InduSoft Web Studio v6.1 SP5 A-281
IWS Users GuideInduSoft Web Studio FunctionsDBCursorClose( numCur, optStrErrorTag )GroupExecutionWindows 2K/XP/VistaWindows CEWeb Thin ClientDB/ERPSynchronousSupportedSupportedSupported Note:This feature emulates Structured Query Language (SQL) database operations.You should be familiar with how SQL commands are formed and executedbefore you use this feature.Description: Closes the cursor and releases the dataset. After the cursor is closed, itis destroyed and it cannot be opened again; you must create a new cursor usingDBCursorOpen() or DBCursorOpenSQL().Parameters:numCuroptStrErrorTagA numeric value or tag; the cursor handle created by DBCursorOpen()or DBCursorOpenSQL().A tag of String type that will receive detailed error messages, if errors occurduring runtime. This is an optional parameter.Returned Values: Returns an error code. In case of error, returns a negative number.When no error occurs, it returns zero.Examples:Tag NameExpressionTag DBCursorClose( nCursor )A-282 InduSoft Web Studio v6.1 SP5
InduSoft Web Studio FunctionsIWS Users GuideDBCursorCurrentRow( numCur, optStrErrorTag )GroupExecutionWindows 2K/XP/VistaWindows CEWeb Thin ClientDB/ERPSynchronousSupportedSupportedSupported Note:This feature emulates Structured Query Language (SQL) database operations.You should be familiar with how SQL commands are formed and executedbefore you use this feature.Description: Returns the number of the current row (i.e. the position of the cursor).Parameters:numCuroptStrErrorTagA numeric value or tag; the cursor handle created by DBCursorOpen()or DBCursorOpenSQL().A tag of String type that will receive detailed error messages, if errors occurduring runtime. This is an optional parameter.Returned Values: Returns the number of the current row. In case of error, returns anegative number.Examples:Tag NameExpressionTag DBCursorCurrentRow( nCursor )InduSoft Web Studio v6.1 SP5 A-283
IWS Users GuideInduSoft Web Studio FunctionsDBCursorGetValue( numCur, strColumn, optStrErrorTag )GroupExecutionWindows 2K/XP/VistaWindows CEWeb Thin ClientDB/ERPSynchronousSupportedSupportedSupported Note:This feature emulates Structured Query Language (SQL) database operations.You should be familiar with how SQL commands are formed and executedbefore you use this feature.Description: Gets the value in the specified column of the current row (i.e. the cursorposition).Parameters:numCurstrColumnoptStrErrorTagA numeric value or tag; the cursor handle created by DBCursorOpen()or DBCursorOpenSQL().A string or a tag of String type; the name of the specific column.A tag of String type that will receive detailed error messages, if errors occurduring runtime. This is an optional parameter.Returned Values: Returns the value in the specified column. If the value is NULL orthe cursor is invalid, then it returns an empty string with quality BAD.Examples:Tag NameExpressionTag DBCursorGetValue( nCursor, "Column1" )A-284 InduSoft Web Studio v6.1 SP5
InduSoft Web Studio FunctionsIWS Users GuideDBCursorMoveTo( numCur, numRow, optStrErrorTag )GroupExecutionWindows 2K/XP/VistaWindows CEWeb Thin ClientDB/ERPSynchronousSupportedSupportedSupported Note:This feature emulates Structured Query Language (SQL) database operations.You should be familiar with how SQL commands are formed and executedbefore you use this feature.Description: Moves the cursor to the specified row of the dataset and copies thosevalues to the mapped tags. If the specified row does not exist — that is, if it’soutside the range of the dataset — then the function returns an error code anddoes not change the mapped tags.Parameters:numCurnumRowoptStrErrorTagA numeric value or tag; the cursor handle created by DBCursorOpen()or DBCursorOpenSQL().A numeric value or tag; the row of the dataset to which the cursor will bemoved.A tag of String type that will receive detailed error messages, if errors occurduring runtime. This is an optional parameter.Returned Values: Returns an error code. In case of error, returns a negative number.When no error occurs, it returns zero.Examples:Tag NameExpressionTag DBCursorMoveTo( nCursor, 4 )// Moves to the fourth row of the dataset and copies those values.InduSoft Web Studio v6.1 SP5 A-285
IWS Users GuideInduSoft Web Studio FunctionsDBCursorNext( numCur, optStrErrorTag )GroupExecutionWindows 2K/XP/VistaWindows CEWeb Thin ClientDB/ERPSynchronousSupportedSupportedSupported Note:This feature emulates Structured Query Language (SQL) database operations.You should be familiar with how SQL commands are formed and executedbefore you use this feature.Description: Moves the cursor to the next row of the dataset and copies those valuesto the mapped tags. If there is no next row — that is, If the current row is the lastone — then the function returns an error code and does not change the mappedtags.Parameters:numCuroptStrErrorTagA numeric value or tag; the cursor handle created by DBCursorOpen()or DBCursorOpenSQL().A tag of String type that will receive detailed error messages, if errors occurduring runtime. This is an optional parameter.Returned Values: Returns an error code. In case of error, returns a negative number.When no error occurs, it returns zero.Examples:Tag NameExpressionTag DBCursorNext( nCursor )A-286 InduSoft Web Studio v6.1 SP5
InduSoft Web Studio FunctionsIWS Users GuideDBCursorOpen( strConn, strTable, optStrCondition,optStrColumns, optStrTags, optStrOrder, optStrErrorTag )GroupExecutionWindows 2K/XP/VistaWindows CEWeb Thin ClientDB/ERPSynchronousSupportedSupportedSupported Note:This feature emulates Structured Query Language (SQL) database operations.You should be familiar with how SQL commands are formed and executedbefore you use this feature.Description: Creates a cursor handle for a selected dataset.Parameters:strConnstrTableA string or a tag of String type; the name of the database connection.Connections are configured in the External Databases folder. For moreinformation, see page 8–35.A string or a tag of String type; the name of the table in the database.optStrCondition A string or a tag of String type; the condition statement to filter the rows of thetable. (This is equivalent to the SQL “Where” clause.) This is an optionalparameter; if no condition is given, then all rows of the table will be selected.optStrColumnsoptStrTagsoptStrOrderoptStrErrorTagA string or a tag of String type; a list of the columns, separated by commas, tobe included in the selection. This is an optional parameter; if no columns arespecified, then all columns will be included.A string or a tag of String type; a list of application tags, separated by commas,to map to the columns. As the cursor is moved through the dataset, the valuesin the current row will be written to these tags. This is an optional parameter; ifno tags are specified, then no values will be written.A string or a tag of String type; the order in which the rows will be sorted. (Thisis equivalent to the SQL “Order By” clause.) This is an optional parameter; ifno order is specified, then the rows will be left in the default order of the table.A tag of String type that will receive detailed error messages, if errors occurduring runtime. This is an optional parameter.Returned Values: Returns a numeric value that represents the cursor handle. In caseof error, returns a negative number.Examples:Tag NameExpressionInduSoft Web Studio v6.1 SP5 A-287
IWS Users GuideInduSoft Web Studio FunctionsnCursor DBCursorOpen( "DB1", "Table1", "Column1>3","Column1,Column2", "Tag1,Tag2", "Column1, Column2 DESC","TagError" )// Opens Table1 of DB1 and selects all rows where Column1 has a value greater than 3.Column1 is mapped to Tag1, and Column2 is mapped to Tag2. Rows are ordered first byColumn1, then by Column2, in descending order. Error messages are written to TagError.A-288 InduSoft Web Studio v6.1 SP5
InduSoft Web Studio FunctionsIWS Users GuideDBCursorOpenSQL( strConn, strSQL, optStrTags,optStrErrorTag )GroupExecutionWindows 2K/XP/VistaWindows CEWeb Thin ClientDB/ERPSynchronousSupportedSupportedSupported Note:This feature emulates Structured Query Language (SQL) database operations.You should be familiar with how SQL commands are formed and executedbefore you use this feature.Description: Creates a cursor handle for a selected dataset, as specified by a SQL“Select” statement.Parameters:strConnstrSQLoptStrTagsoptStrErrorTagA string or a tag of String type; the name of the database connection.Connections are configured in the External Databases folder. For moreinformation, see page 8–35.A string or a tag of String type; a custom SQL “Select” statement.A string or a tag of String type; a list of application tags, separated by commas,to map to the columns. As the cursor is moved through the dataset, the valuesin the current row will be written to these tags. This is an optional parameter; ifno tags are specified, then no values will be written.A tag of String type that will receive detailed error messages, if errors occurduring runtime. This is an optional parameter.Returned Values: Returns a numeric value that represents the cursor handle. In caseof error, returns a negative number.Examples:Tag NameExpressionnCursor DBCursorOpenSQL( "DB1", "SELECT Column1, Column2 FROMTable1 WHERE Column1>3 ORDER BY Column1, Column2 DESC","Tag1,Tag2")InduSoft Web Studio v6.1 SP5 A-289
IWS Users GuideInduSoft Web Studio FunctionsDBCursorPrevious( numCur, optStrErrorTag )GroupExecutionWindows 2K/XP/VistaWindows CEWeb Thin ClientDB/ERPSynchronousSupportedSupportedSupported Note:This feature emulates Structured Query Language (SQL) database operations.You should be familiar with how SQL commands are formed and executedbefore you use this feature.Description: Moves the cursor to the previous row of the dataset and copies thosevalues to the mapped tags. If there is no previous row — that is, If the current rowis the first one — then the function returns an error code and does not change themapped tags.Parameters:numCuroptStrErrorTagA numeric value or tag; the cursor handle created by DBCursorOpen()or DBCursorOpenSQL().A tag of String type that will receive detailed error messages, if errors occurduring runtime. This is an optional parameter.Returned Values: Returns an error code. In case of error, returns a negative number.When no error occurs, it returns zero.Examples:Tag NameExpressionTag DBCursorPrevious( nCursor )A-290 InduSoft Web Studio v6.1 SP5
InduSoft Web Studio FunctionsIWS Users GuideDBCursorRowCount( numCur, optStrErrorTag )GroupExecutionWindows 2K/XP/VistaWindows CEWeb Thin ClientDB/ERPSynchronousSupportedSupportedSupported Note:This feature emulates Structured Query Language (SQL) database operations.You should be familiar with how SQL commands are formed and executedbefore you use this feature.Description: Return the total number of rows in the selected dataset.Parameters:numCuroptStrErrorTagA numeric value or tag; the cursor handle created by DBCursorOpen()or DBCursorOpenSQL().A tag of String type that will receive detailed error messages, if errors occurduring runtime. This is an optional parameter.Returned Values: Returns the number of rows. In case of error, returns a negativenumber.Examples:Tag NameExpressionTag DBCursorRowCount( nCursor )InduSoft Web Studio v6.1 SP5 A-291
IWS Users GuideInduSoft Web Studio FunctionsDBDelete( strConn, strTable, strCondition, optStrErrorTag )GroupExecutionWindows 2K/XP/VistaWindows CEWeb Thin ClientDB/ERPSynchronousSupportedSupportedSupported Note:This feature emulates Structured Query Language (SQL) database operations.You should be familiar with how SQL commands are formed and executedbefore you use this feature.Description: Deletes all rows in the selected dataset.Parameters:strConnstrTablestrConditionoptStrErrorTagA string or a tag of String type; the name of the database connection.Connections are configured in the External Databases folder. For moreinformation, see page 8–35.A string or a tag of String type; the name of the table in the database.A string or a tag of String type; the condition statement to filter the rows of thetable. (This is equivalent to the SQL “Where” clause.) This is an optionalparameter; if it is left blank, then all rows of the table will be deleted.A tag of String type that will receive detailed error messages, if errors occurduring runtime. This is an optional parameter.Returned Values: Returns the number of rows deleted from the table. In case of error,returns a negative number.Examples:Tag NameExpressionTag DBDelete( "DB1", "Table1", "Column1>1000", "TagError" )A-292 InduSoft Web Studio v6.1 SP5
InduSoft Web Studio FunctionsIWS Users GuideDBExecute( strConn, strSQL, optStrTags, optNumMaxRows,optStrErrorTag )GroupExecutionWindows 2K/XP/VistaWindows CEWeb Thin ClientDB/ERPSynchronousSupportedSupportedSupported Note:This feature emulates Structured Query Language (SQL) database operations.You should be familiar with how SQL commands are formed and executedbefore you use this feature.Description: Executes a custom SQL command. If the command is a query(SELECT), then the values are copied to specified array tags.Parameters:strConnstrSQLoptStrTagsoptNumMaxRowsoptStrErrorTagA string or a tag of String type; the name of the database connection.Connections are configured in the External Databases folder. For moreinformation, see page 8–35.A string or a tag of String type; a custom SQL command.A string or a tag of String type; a list of array tags, separated by commas, tomap to the columns. The values in the columns will be copied to these tags.This is an optional parameter.A numeric value or tag; the number of rows to be read. This is an optionalparameter; if no number is specified, then only the first row of the selecteddataset will be read.A tag of String type that will receive detailed error messages, if errors occurduring runtime. This is an optional parameter.Returned Values: Returns the number of records affected by the command. In case oferror, returns a negative number.Examples:Tag NameTagTagExpressionDBExecute( "DB1", "INSERT INTO Table1(Column1,Column2)values(1,1)" )DBExecute( "DB1", "SELECT max(Column1),max(Column2) FROMTable1", "Tag1,Tag2", 1, "TagError" )InduSoft Web Studio v6.1 SP5 A-293
IWS Users GuideInduSoft Web Studio FunctionsDBInsert( strConn, strTable, strValues, optStrColumns,optStrErrorTag )GroupExecutionWindows 2K/XP/VistaWindows CEWeb Thin ClientDB/ERPSynchronousSupportedSupportedSupported Note:This feature emulates Structured Query Language (SQL) database operations.You should be familiar with how SQL commands are formed and executedbefore you use this feature.Description: Inserts a new row into the database table.Parameters:strConnstrTablestrValuesoptStrColumnsoptStrErrorTagA string or a tag of String type; the name of the database connection.Connections are configured in the External Databases folder. For moreinformation, see page 8–35.A string or a tag of String type; the name of the table in the database.A string or a tag of String type; a list of values, separated by commas, to bewritten to the specified columns. String values must be enclosed in singlequotes.A string or a tag of String type; a list of column names, separated by commas.A tag of String type that will receive detailed error messages, if errors occurduring runtime. This is an optional parameter.Returned Values: Returns the number of rows inserted in the table (one). In case oferror, returns a negative number.Examples:Tag NameExpressionTag DBInsert( "DB1", "Table1", "1,'one'", "Column1,Column2" )A-294 InduSoft Web Studio v6.1 SP5
InduSoft Web Studio FunctionsIWS Users GuideDBSelect( strConn, strTable, strTags, optStrColumns,optStrCondition, optStrOrder, optNumMaxRows, optStrErrorTag)GroupExecutionWindows 2K/XP/VistaWindows CEWeb Thin ClientDB/ERPSynchronousSupportedSupportedSupported Note:This feature emulates Structured Query Language (SQL) database operations.You should be familiar with how SQL commands are formed and executedbefore you use this feature.Description: Selects a dataset and copies all values to array tags.Parameters:strConnstrTablestrTagsoptStrColumnsA string or a tag of String type; the name of the database connection.Connections are configured in the External Databases folder. For moreinformation, see page 8–35.A string or a tag of String type; the name of the table in the database.A string or a tag of String type; a list of array tags, separated by commas, tomap to the columns. The values in the columns will be written to these tags.A string or a tag of String type; a list of the columns, separated by commas, tobe included in the selection. This is an optional parameter; if no columns arespecified, then all columns will be included.optStrCondition A string or a tag of String type; the condition statement to filter the rows of thetable. (This is equivalent to the SQL “Where” clause.) This is an optionalparameter; if it is left blank, then all rows of the table will be selected.optStrOrderoptNumMaxRowsoptStrErrorTagA string or a tag of String type; the order in which the rows will be sorted. (Thisis equivalent to the SQL “Order By” clause.) This is an optional parameter; ifno order is specified, then the rows will be left in the default order of the table.A numeric value or tag; the number of rows to be read. This is an optionalparameter; if no number is specified, then only the first row of the selecteddataset will be read.A tag of String type that will receive detailed error messages, if errors occurduring runtime. This is an optional parameter.Returned Values: Returns the total number of rows in the query. In case of error,returns a negative number.InduSoft Web Studio v6.1 SP5 A-295
IWS Users GuideInduSoft Web Studio FunctionsExamples:Tag NameTagTagExpressionDBSelect( "DB1", "Table1", "Array1,Array2","Column1,Column2" )DBSelect( "DB1", "Table1", "Array1,Array2","Column1,Column2", "Column2
InduSoft Web Studio FunctionsIWS Users GuideDBUpdate( strConn, strTable, strValues, strColumns,optStrCondition, optStrErrorTag )GroupExecutionWindows 2K/XP/VistaWindows CEWeb Thin ClientDB/ERPSynchronousSupportedSupportedSupported Note:This feature emulates Structured Query Language (SQL) database operations.You should be familiar with how SQL commands are formed and executedbefore you use this feature.Description: Updates all rows in the selected dataset with new values.Parameters:strConnstrTablestrValuesstrColumnsA string or a tag of String type; the name of the database connection.Connections are configured in the External Databases folder. For moreinformation, see page 8–35.A string or a tag of String type; the name of the table in the database.A string or a tag of String type; a list of values, separated by commas, to bewritten to the specified columns. String values must be enclosed in singlequotes.A string or a tag of String type; a list of column names, separated by commas.optStrCondition A string or a tag of String type; the condition statement to filter the rows of thetable. (This is equivalent to the SQL “Where” clause.) This is an optionalparameter; if it is left blank, then all rows of the table will be updated.optStrErrorTagA tag of String type that will receive detailed error messages, if errors occurduring runtime. This is an optional parameter.Returned Values: Returns the number of rows updated. In case of error, returns anegative number.Examples:Tag NameTagExpressionDBUpdate( "DB1", "Table1", "'X'", "Column2", "Column1=1","TagError" )// In Table1 of DB1, for all rows where Column1 equals 1, writes "X" to Column2.InduSoft Web Studio v6.1 SP5 A-297
IWS Users GuideInduSoft Web Studio FunctionsSyncAlarm( optStrStartDate, optStrEndDate)GroupExecutionWindows 2K/XP/VistaWindows CEWeb Thin ClientDB/ERPAsynchronousSupportedSupportedSupported / Executed on ServerDescription: Synchronizes the alarm [Event, Trend] database.Parameters:strStartDateoptStrEndDateString with the start date. If this parameter is not specified, the currentdate is used.String with the end date, if this parameter is not specified the functionsuses the same as the start date.Returned Values:1 Fail to start synchronization; the database is probably being synchronized.0 Success-1 Invalid group number-2 The format is not set to “Database.”-4 Start date specified is invalid.-5 End date specified is invalid.-6 Start date is greater than the end date.Examples:Tag NameTagExpressionSyncAlarm() //Synchronizes the database using the current dateTag SyncAlarm(“10/20/2004”) //Synchronizes the database only for the day 10/20/2004Tag SyncAlarm(“10/20/2004”, “10/28/2004”) //Synchronizes the database from 10/20/2004to 10/28/2004A-298 InduSoft Web Studio v6.1 SP5
InduSoft Web Studio FunctionsIWS Users GuideSyncEvent( optStrStartDate, optStrEndDate)GroupExecutionWindows 2K/XP/VistaWindows CEWeb Thin ClientDB/ERPAsynchronousSupportedSupportedSupported / Executed on ServerDescription: Synchronizes the alarm [Event, Trend] database.Parameters:optStrStartDateoptStrEndDateString with the start date. If this parameter is not specified, the currentdate is used.String with the end date, if this parameter is not specified the functionsuses the same as the start date.Returned Values:1 Fail to start synchronization; the database is probably being synchronized.0 Success-1 Invalid group number-2 The format is not set to “Database.”-4 Start date specified is invalid.-5 End date specified is invalid.-6 Start date is greater than the end date.Examples:Tag NameTagExpressionSyncEvent() //Synchronizes the database using the current dateTag SyncEvent(“10/20/2004”) //Synchronizes the database only for the day 10/20/2004TagSyncEvent(“10/20/2004”, “10/28/2004”) //Synchronizes the database from 10/20/2004 to10/28/2004InduSoft Web Studio v6.1 SP5 A-299
IWS Users GuideInduSoft Web Studio FunctionsSyncTrend(numGroup, optStrStartDate, optStrEndDate)GroupExecutionWindows 2K/XP/VistaWindows CEWeb Thin ClientDB/ERPAsynchronousSupportedSupportedSupported / Executed on ServerDescription: Synchronizes the alarm [Event, Trend] database.Parameters:numGroupoptStrStartDateoptStrEndDateTrend group numberString with the start date. If this parameter is not specified, the currentdate is used.String with the end date, if this parameter is not specified the functionsuses the same as the start date.Returned Values:1 Fail to start synchronization; the database is probably being synchronized.0 Success-1 Invalid group number-2 The format is not set to “Database.”-4 Start date specified is invalid.-5 End date specified is invalid.-6 Start date is greater than the end date.Examples:Tag NameTagTagTagExpressionSyncTrend(1) //Synchronizes the group 1 database using the current dateSyncTrend(1, “10/20/2004”) //Synchronizes the group 1 database only for the day10/20/2004SyncTrend(“10/20/2004”, “10/28/2004”) //Synchronizes the group 1 database from10/20/2004 to 10/28/2004A-300 InduSoft Web Studio v6.1 SP5
InduSoft Web Studio FunctionsIWS Users GuideSyncAlarmStatus( )GroupExecutionWindows 2K/XP/VistaWindows CEWeb Thin ClientDB/ERPSynchronousSupportedSupportedSupported / Executed on ServerDescription: Returns the synchronization status.Returned Values:3 Synchronization has finished..2 Fail synchronizing1 Still synchronizing0 No synchronization is being executed.-1 The format is not set to “Database.”Examples:Tag NameTagExpressionSyncAlarmStatus()InduSoft Web Studio v6.1 SP5 A-301
IWS Users GuideInduSoft Web Studio FunctionsSyncEventStatus( )GroupExecutionWindows 2K/XP/VistaWindows CEWeb Thin ClientDB/ERPSynchronousSupportedSupportedSupported / Executed on ServerDescription: Returns the synchronization status.Returned Values:3 Synchronization has finished..2 Fail synchronizing1 Still synchronizing0 No synchronization is being executed.-1 The format is not set to “Database.”Examples:Tag NameTagExpressionSyncEventStatus()A-302 InduSoft Web Studio v6.1 SP5
InduSoft Web Studio FunctionsIWS Users GuideSyncTrendStatus( numGroup )GroupExecutionWindows 2K/XP/VistaWindows CEWeb Thin ClientDB/ERPSynchronousSupportedSupportedSupported / Executed on ServerDescription: Returns the synchronization status.Parameters:numGroupTrend group numberReturned Values:3 Synchronization has finished.. volume2 Fail synchronizing1 Still synchronizing0 No synchronization is being executed.-1 The format is not set to “Database.”Examples:Tag NameTagExpressionSyncTrendStatus(1)InduSoft Web Studio v6.1 SP5 A-303
Index..NETControl button, 3–21, 7–101AABS function, A-14ABS(numValue), A-191accessinginformation about active screens, 3–26Least Significant Bit (LSB), A-23Most Significant Bit (MSB), A-23tags/tag fields during runtime, 5–20tags/tag fields, indirectly, 5–3Ack tag field, description/purpose, 5–11acknowledging alarmsAck field, 5–11remotely, 5–21ACos function, A-81Active Objects toolbar, 3–20, 7–44active screens/worksheetsenabling/disabling dragging, 3–27using the status bar, 3–26ActiveSync, 2–5, 2–22ActiveXControl button, 3–20, 7–94creating/configuring objects, 3–3functions, A-10, A-271Program IDs/File Names, A-195ActiveX Events interface, 15–17Add/Remove Programs icon, 2–7Address text box, 3–17Web toolbar, 7–18addresses, specifying limits, 10–13Administrator privileges, 2–1ADO.NET, 8–35, 17–1Advanced dialogTrend Control Object, 7–65Advanced dialog, alarms, 7–50Alarm button, 7–111Alarm Worksheetrestrictions, 5–12Alarm/Event Control Object button, 3–20, 7–44alarmsAlrStatus tag field, 5–10configuring message strings, 5–22configuring tag properties, 5–19enabling for tags, 5–11filtering strings, 5–22mnemonics, 5–23properties, 5–21responding remotely (enabling the Server option fortags), 5–7saving/storing history files, 6–13alarms, tag fieldsAck, 5–11AlrDisable, 5–11Devm, 5–11DevmLimit, 5–12Devp, 5–11DevpLimit, 5–12DevSetpoint, 5–12Hi, 5–11HiHi, 5–11HiHiLimit, 5–11HiLimit, 5–11Lo, 5–11LoLimit, 5–11LoLo, 5–11LoLoLimit, 5–12Rate, 5–11RateLimit, 5–12Align and Distribute toolbar, 3–17, 7–10Align bottom button, 3–18, 7–12Align left button, 3–18, 7–11Align right button, 3–18, 7–11Align top button, 3–18, 7–11AlrDisable tag fielddescription/purpose, 5–11AlrStatus tag fielddescription/purpose, 5–10AppActivate function, A-105AppIsRunning function, A-106application database tags, 5–13Application Tagsadding to database, 5–13datasheet, closing, 5–14datasheet, opening, 5–13datasheet, specifying maximum indexes, 5–4deleting, 5–26description/purpose, 5–1folder, 5–14Application Tags folder, 5–1applicationsassociating tags with objects, 5–24description/purpose, 1–1downloading CEView, 2–1downloading to a runtime workstation, 1–1downloading to remote workstations, 14–1exporting screens, 1–2, 7–16icons, A-136interfacing with other systems/applications, 1–1license levels, 6–3managing remotely, 5–7, 14–1merging, 1–3running, 3–52running on CEView, 1–1setting resolution, 2–5tags, 3–8tags, description/purpose, 3–8testing/debugging, 12–1translating, 1–2, 6–11using sample template, 6–4verifying, 3–51, 18–4AppPostMessage function, A-107AppSendKeys function, A-108Arc Cosinecalculating, A-81returned values, A-81Arc Sine, calculating, A-82Arc Tangent, calculating, A-83Arithmetic functions, A-1, A-14arithmetic operationsInduSoft Web Studio v6.1 SP5 I–1
IWS Users GuideIndexusing for array tags, 5–4Arithmetic Operators, 15–2array indexesdescription/purpose, 5–4formatting, 5–4specifying maximums, 5–4array tags, 5–4description/purpose, 5–3, 5–4examples, 5–5formatting, 5–4specifying maximum index, 5–14using arithmetic operations, 5–4using constants, 5–4Asc2Str function, A-45ASCII TABLES, A-43ASin function, A-82ATan function, A-83AutoFormat function, A-162Avg function, A-31Axes dialogTrend Control Object, 7–60BB0 to B31 tag fielddescription/purpose, 5–7Back button, 3–16, 7–18Background Colorbutton, 3–19, 7–9screen, 7–7Background Task, description/purpose, 4–1backing-up files, 2–6Bargraph button, 3–21, 7–36basic tagsdescription/purpose, 5–3formatting, 5–3batch history file, 8–19, 8–22Bitmap Editor button, 3–19, 7–8Bitmap toolbar, 3–22, 7–22bitmaps, Windows CE16-color only, 7–4BlockUser function, A-94Boolean data typeusing in class tags, 5–3Boolean data typedescription/purpose, 5–6selecting, 5–14using in tag fields, 5–7borders, resizing, 6–21Button button, 3–20, 7–28buttons.NET Control, 3–21, 7–101ActiveX Control, 3–20, 7–94Alarm, 7–111Alarm/Event Control Object, 3–20Alarm/Event Control Object button, 7–44Align bottom, 3–18, 7–12Align left, 3–18, 7–11Align right, 3–18, 7–11Align top, 3–18, 7–11Back, 3–16, 7–18Background Color, 3–19, 7–9Bargraph, 3–21, 7–36Bitmap Editor, 3–19, 7–8Button, 3–20, 7–28Center horizontally, 3–18, 7–12Center vertically, 3–18, 7–12Change Colors, 3–22, 7–22Close, 3–2Closed Polygon, 3–20, 7–24Colors, 3–21, 7–38Combo-Box, 3–20, 7–107Command, 3–21common, 3–39Context Sensitive Help, 3–15Contract/Expand, 3–23Contract/Expand, Output window, 3–24Copy, 3–13Cross Reference, 3–15, 3–48Cut, 3–13Database Spy Window, 3–14Delete, 3–13Dynamic, 3–21Dynamic Properties, 3–21Dynamic Rotation, 7–42Ellipse, 3–20, 7–26Erase Area, 3–22, 7–22Evenly space horizontally, 3–18, 7–13Evenly space vertically, 3–18, 7–13Execution Environment, 3–16, 12–8Fill Color, 3–19, 7–8Flip horizontally, 3–18, 7–13Flip vertically, 3–18, 7–14Flood Fill, 3–22, 7–22Fonts, 3–19, 7–8Forward, 3–17, 7–18Global Tags Replace, 3–16Go, 3–17, 7–18Grid, 3–19, 3–20, 7–9Group, 3–19, 7–16Hide Docked Window, 3–23, 3–24Home, 3–17, 7–18Hyperlink, 3–21, 7–35IP Security, 7–20Library, 3–14Line, 3–20, 7–25Line Color, 3–19, 7–9List Box Object, 3–20Main Password, 11–1Maximize, 3–2Minimize, 3–2Move backward, 7–15Move forward, 7–15Move to back, 3–18, 7–15Move to front, 3–18, 7–15New, 3–12, 7–2Object Finder, 3–15, 3–47, 5–26Open Polygon, 3–20, 7–24Open Project, 3–12Output Window, 3–14Paste, 3–13Pixel Editing, 3–22, 7–22Position, 3–21, 7–40Print, 3–14property, 5–24Pushbuttons, 3–21, 7–90Rectangle, 3–20Refresh, 3–17, 7–18Resize, 3–21, 7–41Resize height, 3–17, 7–10Resize width, 3–18, 7–10resizing windows, 3–2Rotate, 3–18, 7–14Rounded Rectangle, 3–20, 7–26, 7–27Run Application, 3–16, 12–8Run Application, 13–14Save, 3–12, 3–52Save All, 3–13, 3–52Select Area, 3–22, 7–22I-2 InduSoft Web Studio v6.1 SP5
IndexIWS Users GuideSelect Transparent Color, 3–22, 7–22Selection, 3–19, 7–8Send project to target, 3–16, 12–8Smart Message, 3–21Smart Message Objects, 7–85Stop, 3–17, 7–18Stop Application, 3–16, 12–8Stop display test, 3–16Stop Test Display, 12–8Tag Properties, 3–16Tags Properties, 5–19Test Display, 3–16, 12–8Text, 3–20, 7–29Text I/O, 3–21, 7–37Toggle Transparent Color, 3–22, 7–23Trend, 7–76Undo, 3–14Ungroup, 3–19Workspace Window, 3–14XRef, 3–48X-Ref, 3–15Zoom, 3–15Zoom combo-box, 3–15CCaution notesapplication development and license levels, 6–3configuring worksheets, 5–12deleting tags, 5–26description/purpose, xiiihard disk performance, 5–20making changes in screens saved as HTML, 7–18modifying default settings, 4–5, 4–9reading saved .bmp file, 7–4resizing a window, 7–4using the Math() function, 4–10Center horizontally button, 3–18, 7–12Center vertically button, 3–18, 7–12CEServer.exedefault directory path, 2–21downloading, 2–21running Remote Agent, 2–22, 14–1CEViewdownloading, 1–1, 2–1, 2–5, 14–4installing, 2–1, 2–5running applications, 1–1runtime files, storing, 2–5, 2–8sending email from, 1–3updating, 1–1Change Colors button, 3–22, 7–22change the screen resolution, 3–42changing object layers buttons, 7–14CharToValue function, A-46CharToValueW function, A-47CheckESign function, A-95class membersnaming guidelines, 5–13class tags, 5–17description/purpose, 3–8, 5–1, 5–3, 5–5Class worksheetsconfiguring, 5–17Classes folder, 5–1, 5–17ClassMembersToStrVector function, A-48CleanReadQueue function, A-109ClockGetDate function, A-73ClockGetDayOfTheWeek function, A-74ClockGetTime function, A-75Close button, 3–2, 6–20Close function, A-89, A-93Closed Polygon button, 3–20, 7–24CloseSplashWindow function, A-110closing files, 3–39closing projects, 3–38closing Translation Editor, 16–12CnfEmail function, A-242CN<strong>FF</strong>tp function, A-276color interface, 3–33color selection, recommendation, 2–5Colors button, 3–21, 7–38Combo-Box button, 3–20, 7–107Comm tab, 10–1Command button, 3–21command windowsaccessing tag fields, 5–12common buttons, 3–39common errors, 18–5communication tabproject settings, 6–23communication, configuring, 10–1communication, specifying for drivers/OPC, 6–13Communications tab, 3–10Configure dialog, 6–5configuringalarm messages, 5–22DDE, 10–27Development Station, 14–3event settings, 9–2OPC, 10–20projects, 6–1security system, 11–1tags, 5–26TCP/IP, 10–25unit properties, 5–19worksheets, Class, 5–17worksheets, using tags, 5–1constantsusing for array tags, 5–4contacting technical support, 18–2Context Sensitive Help button, 3–15Contract/Expand button, 3–23controlling who can delete Alarm messages, 7–51conventionsmouse/selection, xiiitext, xiiWindows, xiiiconverting Trend History filesfrom binary to text, 8–21from text to binary, 8–22Copy button, 3–13copying files to WinCE devices, 2–5Cos function, A-84Cot function, A-85CreateUser function, A-96creatingActiveX objects, 3–3basic tags, 5–3creating class tags, 5–5creating tags, 5–1Cross Reference button, 3–15, 3–48CSV Databasesimporting from, 3–63cursor display properties, 6–21custom parameters, 10–25customer supportcontacting, xvcustomer information form, xviCut button, 3–13Ddata flowruntime module, 4–1InduSoft Web Studio v6.1 SP5 I-3
IWS Users GuideIndexData Sources dialogTrend Control Object, 7–54data typeschoosing, 5–6, 5–14class tags, 5–3using in tag fields, 5–7databasebatch history file, 8–22database interface, 17–1configuring a default database, 6–18, 17–6configuring primary and secondary databases, 17–5database providers, 17–2Database Spy, 3–23accessing tag fields, 5–12description/purpose, 1–2, 4–1Remote, 12–9using for debugging, 12–2Database Spy Window button, 3–14Database tab, 3–8database tagsdeleting, 5–26description/purpose, 4–1, 5–1internal, 3–8, 5–2read-only, 3–8, 5–2sharing with PC-based control softwareprograms, 3–8, 5–1using in applications, 5–24using indirect tags, 5–6database troubleshooting, 17–25database, importing, 3–55databases, 8–35Datasheet View icon, 5–13, 5–14datasheetsApplication Tags, closing, 5–14Application Tags, opening, 5–13Application Tags, specifying maximum indexes, 5–4using Tab key, 5–13Date and Time functions, A-3, A-73DateTime2Clock function, A-76DB tabs, Database Spy window, 3–23DB/ERP function, A-281DB/ERP functions, A-11DBCursorClose function, A-282DBCursorCurrentRow function, A-283DBCursorGetValue function, A-284DBCursorMoveTo function, A-285DBCursorNext function, A-286DBCursorOpen function, A-287DBCursorOpenSQL function, A-289DBCursorPrevious function, A-290DBCursorRowCount function, A-291DBDelete function, A-292DBExecute function, A-293DBInsert function, A-294DBSelect function, A-295DBUpdate function, A-297DbVersion function, A-176DCOM Tutorial, 10–23DDEClient, configuring, 10–28Client, description/purpose, 4–1configuring, 10–27protocol, 1–1server, configuring, 10–29Server, description/purpose, 4–1Dead Band value, specifying, 5–20, 5–21defaultscaution notes, 4–5, 4–9changing how modules start, 6–31development language, 6–11screen resolution, 6–4server name, 6–6title bar text, 6–20translation files, 6–11defining users, 11–7Delete button, 3–13DeleteOlderFiles(strPath, strMask, strDate), A-139Demo ModeIWS, 2–11development environment, description/purpose, 3–1Development Station, configuring, 14–3development system, description/purpose, 1–1deviationsspecifyingfor tag fields, 5–22specifying for tag fields, 5–10Devm tag field, description/purpose, 5–11DevmLimit tag field, description/purpose, 5–12Devp tag field, description/purpose, 5–11DevpLimit tag field, description/purpose, 5–12DevSetLimit tag field, description/purpose, 5–12DialError function, A-249DialGetClientIP function, A-255DialGetServerIP function, A-256dialogsConfigure, 6–5Hardkey Settings, 6–2Insert Class, 5–17New, 6–1New Tag, 5–4Object Properties, adding tags, 5–13, 5–24Project Wizard, 6–3Protection Manager, 6–2Runtime menu options, 6–21Softkey Settings, 6–2Tag Properties, 5–19DialStatus function, A-257DialUp function, A-259Dial-Up functions, A-9, A-248DialUpToCE function, A-261DirCreate(strDirectory, optBooFullPath), A-140DirDelete(strDirectory, optBooEmptyOnly), A-141DirLength(strPath), A-142DirRename(strPath, strDirectoryFrom, strDirectoryTo),A-143displaying a grid, 7–44displays, testing, 3–50Div function, A-15downloadingapplications, 1–1, 14–1applications to target system, 6–29CEView, 2–1, 14–4considerations, losing tag properties, 5–12, 5–24draggingenabling/disabling, 3–27Driver Runtime taskdescription/purpose, 4–1Driver Users Guides, xvDriver Worksheets, 10–10driversavailable for IWS, 1–3communicating with OPC, 6–13starting modules, 6–33stopping modules, 6–33drivers folder, 10–2dubugging tools, 1–2I-4 InduSoft Web Studio v6.1 SP5
IndexIWS Users GuideDynamic button, 3–21Dynamic Data Exchange. See DDEDynamic Propertiesbutton, 3–21toolbar, 7–31Dynamic Rotation button, 7–42Eediting tags, 5–13Ellipse button, 3–20, 7–26emailfunctions, A-9, A-242sending from CEView, 1–3Enable Fire Compression check-box, 7–20enablingalarms, specifying tag properties, 5–11, 5–19, 5–21history logging, 5–19, 5–23tags to display on HTML pages, 5–7translation, alarm messages, 5–21EndTask function, A-111entering constants in tag/numeric fields, 7–36Erase Area button, 3–22, 7–22Evaluation ModeIWS, 2–10Evenly space horizontally button, 3–18, 7–13Evenly space vertically button, 3–18, 7–13Event Logger functions, A-10, A-274Event Settings, 9–1executablesCERasSvr.exe, A-262CEServer.exe, 2–21, 2–23, 14–1hst2txt.exe, 8–21netdde.exe, 18–9RunStartup.exe, xiiSetup.exe, 2–3SKEYUPG.exe, 2–18Studio Manager.exe, 4–4txt2hst.exe, 8–22ExecuteAlarmAck function, A-208executingdriver, 10–19runtime module, 4–1translation functions, 16–9Execution Control toolbar, 3–16, 12–8Execution Environmentbutton, 3–16, 12–8dialog, 14–3execution fields, 5–12accessing tag fields, 5–12Execution Modes for IWS, 2–10Execution Tasks tab, 6–31ExitWindows function, A-112Exp function, A-35experience requirementsworking in a Windows¨ environment, xiiexportingapplication screens, 1–2, 7–16Ext function, A-172Ext(strText), 16–11External Databases task, 8–35<strong>FF</strong>alse function, A-38features, product, 1–2fieldsaccessible during runtime, 5–7execution, 5–12tag, saving changes, 5–20File functions, A-5File menudescription/purpose, 3–3options, 3–3FileCopy(strSourceFile, strTargetFile,optnumTimeOut), A-144FileDelete(strFile), A-145FileLength (strFile), A-146FileRename(strOldName, strNewName), A-146files.app, 6–20backing-up, 2–6CEServer.exe, 2–21, 14–1closing, 3–39configuration, storing, 6–1history (.hst), saving, 5–23, 6–13opening, 3–38SKEYUPG.exe, 2–18specifying default translation, 6–11specifying file lifetime, 6–13storing CEView runtime files, 2–1storing, CEView runtime files, 2–5, 2–8storing, Remote Agent program file, 2–21Studio Manager.exe, 4–4translation, saving, 6–11Fill Color, 7–8button, 3–19filtering alarm messages during runtime, 7–48filtering alarmsDead Band value, 5–21strings, 5–22FindAllDevices function, A-262FindFile(strFile, opttagFilesFound, optnumTimeOut),A-147finding tags, screen objects, 3–45FindModem function, A-264FindPath(strPathName), A-149Flip horizontally button, 3–18, 7–13Flip vertically button, 3–18, 7–14Flood Fill button, 3–22, 7–22focusscreen editor, object properties window, 3–55foldersApplication Tags, 5–1, 5–14Classes, 5–1, 5–17Shared Database, 5–1System Tags, 5–1Tag List, 5–14font dialog, 7–46fonts, 3–31Fonts button, 3–19, 7–8, 7–84For & Next loop, A-212ForceTagChange function, A-209Format function, A-16formattingformatting conventions, xiiformscustomer information, xviForward button, 3–17, 7–18Frequently Asked Questions (FAQ), xvFTP functions, A-10ftpGet function, A-277ftpPut (strLocalFile , strRemoteFile, numTransferType),A-278ftpStatus function, A-279function names syntax, A-12functions, A-1ActiveX, A-10, A-271alarm, enabling, 5–21Arithmetic, A-1, A-14InduSoft Web Studio v6.1 SP5 I-5
IWS Users GuideIndexDate and Time, A-3, A-73DB/ERP, A-11, A-281Dial-Up, A-9, A-248Email, A-9, A-242Event Logger, A-10, A-274File, A-5FTP, A-10Graphic, A-6, A-162IWS supervisory tasks, 3–8, 5–2Log Message, A-1, A-13Logarithmic, A-35Logarithmic, A-1Logical, A-2, A-38Loop, A-8, A-212Module Activity, A-4, A-104Multimedia, A-6, A-174ODBC, A-8, A-213Opening and Closing Windows, A-3Screen, A-89Security, A-4, A-94Statistical, A-1, A-30String, A-2, A-42System Info., A-7, A-175tag name syntax, 15–4Tags Database, A-8, A-208Translation, A-6, A-172Trigonometric, A-3, A-81UNICODE conversion restrictions, A-46functions executed during runtime, 4–9File functions, A-138FTP functions, A-276GGetAppHorizontalResolution function, A-176GetAppPath function, A-177GetAppVerticalResolution function, A-177GetBit function, A-20GetClock function, A-77GetComputerIP function, A-178GetComputerName function, A-178GetCursorX function, A-179GetCursorY function, A-179GetDisplayHorizontalResolution function, A-180GetDisplayVerticalResolution function, A-180GetFileAttributes(strFile), A-150GetFileTime(strFileName, numFormat), A-151GetFreeMemoryCE function, A-181GetHardKeyModel function, A-182GetHardkeySN function, A-183GetHstInfo(strFileName, numInfoType), A-152GetIPAll function, A-184GetLine(strFileName, strSeqChar, tagStore, optnumCase,optOveflowTag), A-152, A-153GetMemoryCE function, A-185GetNetMACID function, A-186GetOS function, A-187GetPrivateProfileString function, A-188GetProductPath function, A-187GetRegValue function, A-189GetRegValueType function, A-190GetScrInfo function, A-163GetStatusSendEMailExt function, A-244GetTagValue function, A-210GetTickCount( ), A-191Getting Started Guide, xvGetUserNames function, A-98GetUserPwdAging function, A-99GetUserState function, A-100Global Tags Replace, 3–48Global Tags Replace button, 3–16Go button, 3–17, 7–18go to option, 3–46Graphic functions, A-6, A-162graphics, 3–75Graphics Script interface, 15–11Grid button, 3–19, 3–20, 7–9grid, displaying, 7–44Group Account dialog, 11–2, 11–4Group button, 3–19, 7–16group numbers, 5–22, 5–23Group, inserting, 11–3grouping tags, 5–5HHangUp function, A-265hard disk cautions, 5–20Hardkey license, upgrading, 2–14Hardkey Settings dialog, 6–2hardkeysinstalling, 2–12, 2–14Help, accessing, xiiHi tag field, 5–22description/purpose, 5–11Hide check-boxScreen Attributes, 7–4Hide Docked Window button, 3–23, 3–24HiHi tag field, 5–21description/purpose, 5–11HiHiLimit tag fielddescription/purpose, 5–11HiLimit tag fielddescription/purpose, 5–11Hint field, 3–26historybatch, 8–22configuring properties, 5–23enabling logging, 5–23history files (.hst)saving, 5–23saving/storing, 6–13HMIdownloading CEView, 1–1, 2–1, 2–5pre-loaded software, 1–1, 2–5Home button, 3–17, 7–18Horizontal Scale button, 7–78Hour2Clock function, A-78HST2TXT function, 8–21HST2TXT(strStartDate, strStartTime, numDuration,numGroupNumber, optStrTargetFile,optStrSeparator, optnumMilliseconds,optStrFormat), A-155HST2TXTIsRunning(), A-157HTML format, saving screens, 7–18HTML pagesdisplaying tag values, 5–7enabling tag display, 5–7Human Machine Interface. See HMIHyperlink button, 3–21, 7–35IiconsAdd/Remove Programs, 2–7applications, A-136Datasheet View, 5–13, 5–14IWS, 3–2IWS desktop, 2–1, 2–3IWS logo, 3–2I-6 InduSoft Web Studio v6.1 SP5
IndexIWS Users GuideIWS, desktop, 2–4launching InstallShield Wizard, 2–4Symbol Library, 1–2Tasks tab, 3–6TCP/IP Client module, 10–26TCP/IP Server module, 10–26Identification tab, description/purpose, 6–8If function, A-39Import Wizard, 3–55indexes, arraydescription/purpose, 5–4specifying maximums, 5–4indirect tagsdescription/purpose, 5–3, 5–6InduSoft Web Studio. See IWSInduSoft Web Studio Getting Started Guide, xvInfoAppAlrDir( ), A-192InfoAppHstDir( ), A-192InfoDiskFree(strDisk), A-193InfoResources function, A-194Insert Class dialog, 5–17insert screen, 7–3Insert Screen Group, 7–16inserting a Group, 11–3installingCEView, 2–1, 2–5IWS, 2–1InstallShield Wizardlaunching, 2–4integer data typedescription/purpose, 5–6selecting, 5–14using in class tags, 5–3using in tag fields, 5–7IntelliSenseVBScript, 15–33internal structuredescription/purpose, 4–1invalid licensewarning message, 2–10IP Security button, 7–20IsActiveXReg function, A-195IsScreenOpen function, A-113IsTaskRunning function, A-114IsViewerInFocus function, A-115IWSavailable drivers, 1–3closing, 3–2description/purpose, 1–1development environment, description/purpose, 3–1development system, description/purpose, 1–1Driver Users Guides, xvExecution Modes, 2–10exiting, 3–2features, 1–2Frequently Asked Questions (FAQ), xvfunctions, A-1Getting Started Guide, xvicons, desktop, 2–1, 2–3, 2–4, 3–2icons, logo, 3–2installing, 2–1overview, 1–2product limitations, 1–3Protection Types, 2–12removing program, 2–6resizing screens, 3–2runtime, description/purpose, 1–1uninstalling, 2–6using the title bar, 3–2viewing status, 3–2IWS Databasesimporting from, 3–59IWS Scripting Language, 15–1Kkeyboard shortcutscutting/pasting objects, 5–24using Tab key, 5–13KeyPad function, A-116Llanguage referenceVBScript, 15–22languagesdefault development, 6–11Legend dialogTrend Control Object, 7–63Librarysymbols, 7–131license levelsimportant notes, 6–3specifying, 6–2verifying, 6–2Licensed for Engineering + Runtime Mode, 2–11Licensed for Engineering Only Mode, 2–11Licensed for Runtime Only Mode, 2–11limitations, product, 1–3Line button, 3–20, 7–25Line Color button, 3–19, 7–9List Box Object button, 3–20, 7–82Lo tag field, 5–22description/purpose, 5–11Log function, A-36Log Message functions, A-1, A-13Log On dialog, 11–17Log10 function, A-37Logarithmic functions, A-1, A-35logginghistory, 5–23on/off, 11–17specifying Dead Band variation, 5–23Logic Operators, 15–3Logical functions, A-2, A-38LogOff function, A-118Logon function, A-118LogWindescription/purpose, 4–1module, 12–7module, description/purpose, 1–2Remote, 12–10LoLimit tag fielddescription/purpose, 5–11LoLo tag field, 5–22description/purpose, 5–11LoLoLimit tag fielddescription/purpose, 5–11Loop function, A-212Loop functions, A-8LSB, accessing, A-25MMain Driver Sheet, 10–17Main Password button, 11–1managing alarms remotely, 5–7, 5–21managing applications remotely, 5–7, 14–1manualsGetting Started Guide, xvmouse/selection, xiiiInduSoft Web Studio v6.1 SP5 I-7
IWS Users GuideIndexWindows conventions, xiiiMath function, A-119Math task, 8–31Math Worksheet, 8–31Math() function, caution note, 4–10Max function, A-31Max tag field, 5–12description/purpose, 5–7exceeding specified value, 5–20specifying values, 5–20Maximize button, 3–2, 6–20maximum characterstag and class member names, 5–13menubar, using, 3–3description/purpose, File, 3–3enabling/disabling, 6–21options, File, 3–3merging applications, 1–3messagesalarm, creating, 5–22button, 7–84warning, enabling, 6–29warning, values exceed Min/Max, 5–12, 5–20written to Output window, 5–12, 5–20Microsoft ActiveSync, 2–24Min function, A-33Min tag field, 5–12description/purpose, 5–7exceeding specified value, 5–20specifying values, 5–20Minimize button, 3–2, 6–20Minimum/Maximumarray tag sizes, 5–4specifying number of characters, A-16specifying tag values, 5–7specifying worksheet values, 10–13mnemonicsconfiguring for alarm states, 5–23Mod function, A-21Mode toolbar, 3–19, 7–8modemnot supported for Pocket PC v3.00, 10–3, 10–8modem connectionsand drivers, 10–7Module Activity functions, A-4, A-104modules, changing default start-up, 6–31modules, runtimedata flow, 4–1starting, 6–31mouse/selection conventions, xiiiMove backward button, 7–15Move forward button, 7–15Move to back button, 3–18, 7–15Move to front button, 3–18, 7–15MSB, accessing, A-25Multimedia functions, A-6, A-174Nnaming projects, 6–1naming tags, 5–13, 5–14NCopy function, A-49NET Framework 1.1, 2–5, 17–13, 17–29NetDDEprotocol, 1–1Network Dynamic Data Exchange. See NetDDENew button, 3–12, 7–2New dialog, 6–1New Tag dialog, 5–4New Value dialog, 12–3Notes, description/purpose, xiiiNum function, A-50Oobject alignment buttons, 7–11Object Finder button, 3–15, 3–47, 5–26object grouping and ungrouping buttons, 7–16Object ID, 3–26object library, description/purpose, 1–2Object Properties dialogsadding tags, 5–13, 5–24object properties windowfocus, 3–55Object Size, 3–26objects, screendragging, 3–27specifying display properties, 6–21ODBCdatabase, and .NET Framework 1.1, 2–5, 17–29database, importing from, 3–64driver interface with IWS, 17–3error codes in IWS, 8–30functions, A-8, A-213protocol, 1–1runtime task, description/purpose, 4–1runtime, description/purpose, 4–1runtime, TimeSlice settings, 4–8task, 8–28worksheet, 8–28ODBC worksheetchanging data during runtime, 8–29ODBCBeginTrans(numHandler), A-214ODBCBindCol(numHandler, strColName, strColType,strTagName), A-215ODBCCanAppend(numHandler), A-216ODBCCanTransact(numHandler), A-217ODBCCanUpdate(numHandler), A-218ODBCClose(numHandler), A-219ODBCCommitTrans(numHandler), A-220ODBCDelete(numHandler), A-221ODBCExecuteSQL(numHandler, strSqlCommand),A-222ODBCInsert(numHandler), A-223ODBCIsBOF(numHandler), A-224ODBCIsDeleted(numHandler), A-225ODBCIsEOF(numHandler), A-226ODBCIsFieldNULL(numHandler, strColName), A-227ODBCIsFieldNullable(numHandler, strColName),A-228ODBCMove(numHandler, numOffset), A-229ODBCMoveFirst(numHandler), A-230ODBCMoveLast(numHandler), A-231ODBCMoveNext(numHandler), A-232ODBCMovePrev(numHandler), A-233ODBCOpen(strDsn, strUser, strPassw, strTable,strFilter, strSort), A-234ODBCQuery(numHandler), A-235ODBCROllback(numHandler), A-236ODBCSetFieldNull(numHandler, strColName,numValue), A-237ODBCSetFilter(numHandler, strFilter), A-238ODBCSetSort(numHandler, strSort), A-239ODBCUnbindCol(numHandler, strColName), A-240ODBCUpdate function, A-241OLE DB provider, 17–3OMRON CX Programmer Databasesimporting from, 3–69I-8 InduSoft Web Studio v6.1 SP5
IndexIWS Users GuideOPCClient, configuring, 10–20Clients, description/purpose, 4–1communicating with target devices, 6–13configuring, 10–20protocol, 1–1Server, configuring, 10–24Servers, description/purpose, 4–1troubleshooting, 10–23OPC Server Databasesimporting from, 3–62Open Connectivity. See OPCOpen Database Connectivity. See ODBCOpen function, A-90Open Polygon button, 3–20, 7–24Open Project button, 3–12openingfiles, 3–38projects, 3–38Opening and Closing Windows functions, A-3operating systemsrunning IWS, 1–1option tabproject settings, 6–9Options dialogTrend Control Object, 7–58Options tabdescription/purpose, 6–9Output Window, 3–24button, 3–14messages, 5–12, 5–20using for debugging, 12–4XRef tab, 3–24PPanelBuilder32 Databasesimporting from, 3–65PanelMateimporting from, 3–70Paste button, 3–13Paste Link, 7–132PC-based control programscustomized interface, 6–6IWS integration, 1–3modifying shared tags, 5–2storing shared tags, 3–8viewing shared tags, 5–1PDFCreate function, A-158Pen Style dialogTrend Control Object, 7–57Pens button, 7–81performance considerations, Caution notes, 5–20PhoneDialUp function, A-266PhoneDisableListen function, A-267PhoneEnableListen function, A-268PhoneHangUp function, A-269PhoneStatus function, A-270Pi function, A-86pin button, 3–55Pixel Editing button, 3–22, 7–22Play(strFileName), A-174Points dialogTrend Control Object, 7–56portsconfiguring, 2–6, 2–24installing hardkeys, 2–14installing, hardkeys, 2–12installing, softkeys, 2–24removing hardkeys, 2–13using TCP, 6–14Position button, 3–21, 7–40PostKey(numKeydownOrKeyup, numwParam,numlParam), A-120Pow function, A-22predefined tags, 3–8, 5–2Preferences tab, Project Settings menudisplay warning message option, 6–29Print, A-160Print button, 3–14print preview, 3–54printing project screens, 3–53PrintSetup function, A-164PrintWindow function, A-165priority, specifying group priority, 5–22processor platformsruntime provided, 2–5supported, 2–1, 2–5supported by CEView runtime, 2–1productfeatures, 1–2limitations, 1–3ProductVersion function, A-196ProductVersion( ), A-196programmable logic controller. See PLC programmablelogic controllerproject settingscommunication tab, 6–23option tab, 6–9Project Status dialog, 10–19projectsclosing, 3–38configuring, 6–1default location, 6–2naming, 6–1opening, 3–38providing identifying information, 6–8specifying screen resolution, 6–4starting drivers, 6–33starting tasks, 6–32storing, 6–1propertiesalarm, 5–21tag, 5–12tag, applying to system tags/downloadingconsiderations, 5–24tag, associating to objects, 5–24tag, editing, 5–24tag, specifying, 5–7property buttons, 5–24Protection Manager dialog, 6–2Protection Types, 2–12protocolsDDE, 1–1NetDDE, 1–1ODBC, 1–1OPC, 1–1TCP/IP, 1–1publicationsrelated, xvPushbuttonsbutton, 3–21, 7–90styles, 7–93Qquality tag, 5–8field, description/purpose, 5–7RRand function, A-34rate of change, 5–20, 5–22Rate tag field, 5–22InduSoft Web Studio v6.1 SP5 I-9
IWS Users GuideIndexdescription/purpose, 5–11RateLimit tag fielddescription/purpose, 5–12RDFileN(tagSelectedFile, strSearchPath, strMask,numChangeDir), A-161read-onlytags, 3–8, 5–2real data typedescription/purpose, 5–6selecting, 5–14using in class tags, 5–3using in tag fields, 5–7Real numbers, storing, 5–6Recipe Worksheet, 8–24Recipe(strFunction), A-121Recipestask, 8–24UNICODE support, 1–3recommendationslinking WinCE devices, 2–6video settings, 2–4, 2–5Rectangle button, 3–20, 7–27referencing tags, 5–6Refresh button, 3–17, 7–18RegSaveCE function, A-197related IWS publications, 18–3related publications, xvrelational databaseinterface with IWS, 17–1relational databasesSQL, 17–2Remote Agentdialog, 14–1storing, program file, 2–21remote alarm managementconfiguring tags, 5–7, 5–21remote application management, 5–7Remote Database Spy, 12–9Remote LogWin, 12–10Remote Security System, 11–14Remote tools, 12–8RemoveUser function, A-101removing IWS, 2–6replacing tags, 3–49global, 3–48Report function, A-122, A-125Reportstask, 8–26UNICODE support, 1–3worksheet, 8–26Reset Tags Database, 5–15ResetBit function, A-23ResetDecimalPointsTable function, A-166Resizebutton, 3–2, 3–21, 7–41height button, 3–17, 7–10width button, 3–18, 7–10resizingapplication screens, 6–21borders, 6–21windows, 3–2resources, xvrestore defaults, 3–52restrictionsnaming tags, 5–13tags, 5–12worksheets, 5–12Retentive Parameters, 5–20Retentive Value, 5–20RGBColor function, A-167RGBComponent function, A-168right-clickingApplication Tags folder, 5–14tag icons, 5–25tag names, 5–26tag properties, 5–24Rotate button, 3–18, 7–14Round function, A-23Rounded Rectangle button, 3–20, 7–26RSLogix 5000 CSV Databasesimporting from, 3–66Run Application button, 3–16, 12–8RunGlobalProcedureOnServer function, A-124running applications, 3–52, 12–1RunStartup.exe, xiiruntimeCEView, processor platforms supported, 2–1data flow, 4–1description/purpose, 1–1Driver Runtime task, description/purpose, 4–1executing, 4–1fields, accessible during, 5–7functions executed during, 4–9initial address limits, 10–13menu options dialog, 6–21modules, starting, 6–31ODBC, description/purpose, 4–1ODBC, TimeSlice settings, 4–8processor platforms, 2–1, 2–5properties, Screen Attributes, 7–4tasks, descriptions/purposes, 4–1Runtime Desktop tab, description/purpose, 6–19Ssample applications, 6–4Save All button, 3–13, 3–52Save button, 3–12, 3–52savinghistory files, 17–1, 17–4screens in HTML format, 7–18translation files, 6–11Translation worksheets, 16–8Scheduler task, 8–33Scheduler Worksheet, 8–33Screen Attributes dialog, 7–3screen background color, 7–7Screen Coordinates field, 3–26screen editorfocus, 3–55Screen functions, A-89screen objectsassociating tags, 5–24screen resolution, changing, 3–42screens, applicationenabling/disabling dragging, 3–27exporting, 1–2, 7–16resizing, 3–2scaling, 6–21specifying startup screen, 6–21status bar, 3–26viewing coordinates, 3–26Scroll barsDatabase Spy window, 3–23Output window, 3–24searching Translation worksheets, 16–8secondary data serversettings, A-204secondary URLI-10 InduSoft Web Studio v6.1 SP5
IndexIWS Users Guidesettings, A-204securityfield, Screen Attributes, 7–4functions, A-4, A-94providing, 1–3system access level, 11–16Security System dialog, 11–1Select Area button, 3–22, 7–22Select Transparent Color button, 3–22, 7–22Selection button, 3–19, 7–8Send project to target button, 3–16, 12–8SendEMail(strSubject, strMessage, strTO), A-244SendEMailExt function, A-246SendEvent function, A-274SendKeyObject function, A-126Serial Advanced Settings dialog, 14–2serial encapsulation testsand drivers, 10–9serial links, downloading software to HMI, 2–1serverschanging default, 6–6SetAppAlarmPath function, A-199SetAppAlarmPath(strPath), A-198SetAppHSTPath function, A-200SetAppPath function, A-128SetBit function, A-25SetDateFormat(strSeparator, strFomat), A-201SetDecimalPoints function, A-169SetDisplayUnit function, A-170SetPassword function, A-102SetRegValue function, A-202SetsystemDate function, A-79SetSystemTime function, A-80SetTagDisplayUnit function, A-171SetTagValue function, A-211setting tag properties, 5–19settings, Event, 9–1SetTranslationFile function, A-173SetTranslationFile() function, 16–9SetViewerInFocus function, A-129, A-130SetViewerPos function, A-131SetWebConfig function, A-176, A-204Shared Databasetags, description/purpose, 3–8, 5–1tags, modifying, 5–2, 6–5Shared Database folder, 5–1Shared Image check-box, 7–3sharing tags, 5–7, 5–14, 6–4ShutDown function, A-132Sin function, A-87Size tag field, description/purpose, 5–7SKEYUPG.exe, 2–18Smart Message button, 3–21Smart Message Objects button, 7–85smoothing, specifying for tags, 5–20SNMPGet function, A-206Softkey Settings dialog, 6–2softkeys, installing, 2–24SPC button, 7–82specifyingdefault translation files, 6–11specifyingdriver/OPC communication, 6–13license levels, 6–2project settings, 6–7properties, screen objects, 6–21screen resolution, 6–4SQLrelational databases, 17–2SQRT function, A-26Standard Driver Worksheet, 10–10Standard toolbar, 3–12starting modules, 6–31StartTask function, A-133startup screens, specifying, 6–21Startup Script interface, 15–19Startup value, 5–20Static Objects toolbar, 3–19, 7–24Statistical functions, A-1, A-30status barcontrolling display, 6–21tips, 3–5using, 3–26stop application, 12–1Stop Application button, 3–16, 12–8Stop button, 3–17, 7–18stop display test, 12–1Stop display test button, 3–16Stop Test Display button, 12–8storingalarm history files, 6–13CEView runtime files, 2–1, 2–5, 2–8configuration files, 6–1data, 1–1projects, 6–1Real numbers, 5–6Remote Agent program file, 2–21shared tags, 3–8symbols, 7–131tag values, 5–1tag values, 4–1trend curves, 3–9Str function, A-51Str2Asc function, A-52StrCompare function, A-53StrCompareNoCase function, A-54StrFromInt function, A-55StrFromReal function, A-56StrFromTime function, A-57string data typedescription/purpose, 5–6selecting, 5–14using in class tags, 5–3using in tag fields, 5–7String functions, A-2, A-42string, creating messages, 5–22StrLeft function, A-59, A-60StrLen function, A-61StrLower function, A-62StrRChr function, A-63StrRight function, A-64StrStr function, A-65, A-66StrStrPos function, A-67StrTrim function, A-68StrTrimAll function, A-69structure, internal, description/purpose, 4–1StrUpper function, A-70Studio Manager.exe, 4–4Supervisory Control And Data Acquisition. See SCADAsupervisory tasks, 3–8, 5–2supportcontacting, xvcustomer information form, xvisupportingUNICODE conversion restrictions, A-46UNICODE tag data types, 5–6InduSoft Web Studio v6.1 SP5 I-11
IWS Users GuideIndexUNICODE, Reports, 1–3Swap16 function, A-27Swap32 function, A-28Symbol Library, 7–131icon, 1–2SyncAlarm function, A-298SyncAlarmStatus function, A-301SyncEvent function, A-299SyncEventStatus function, A-302SyncTrend function, A-300SyncTrendStatus function, A-303syntaxfunction names, A-12function tag names, 15–4samples, tag fields, 5–12System Info. functions, A-7, A-175system information, 3–44system load, specifying Startup Value, 5–20system tagsdescription/purpose, 3–8, 5–2downloading considerations, 5–12, 5–24viewing, 5–2System Tags folder, 5–1TTab key shortcut, 5–13tabsicons, 3–6Identification, description/purpose, 6–8Options, description/purpose, 6–9Runtime Desktop, description/purpose, 6–19tag fieldsRetentive Parameters, 5–20saving changes, 5–20specifying deviations +/-, 5–10using tag data types, 5–7Tag List folder, 5–14tag namesmaximum characters, 5–13syntax, 15–4Tag Propertiesbutton, 3–16dialog, 5–19toolbar, 3–15, 3–46tag types, 5–3Tagname text box, 3–15tagsadding Application Tags datasheet, 5–13adding on-the-fly, 5–14application, description/purpose, 3–8array, specifying maximum index, 5–14class, description/purpose, 3–8data types, Boolean, integer, real, string, 5–6data types, selecting, 5–14deleting, 5–26description/purpose, 5–1, 15–1displaying on HTML pages, 5–7editing, 5–13enabling alarms, 5–21finding, 3–45grouping into classes, 5–5history properties, 5–23internal, description/purpose, 3–8internal, downloading considerations, 5–12, 5–24Local and Server parameters, 5–7naming, 5–13, 5–14properties, description/purpose, 5–7quality, 6–21read-only, 3–8replace, 3–49saving Retentive Value parameter, 5–20sharing with Web Thin Clients, 5–7specifying parameters, 5–20specifying quality, 5–8, 12–2storing values, 4–1, 5–1using, 15–1using Object Properties dialogs, associating tags, 5–24Tags Databaseaccessing, 15–2description/purpose, 4–1, 5–1editing tags, 5–24saving, 5–14tag categories, description/purpose, 5–1tags, adding/creating, 5–1Tags Database function, A-208Tags Database functions, A-8Tags Properties button, 5–19Tan function, A-88target devices, specifying, 2–24Task Worksheets, configuring, 8–1taskbars, display properties, 6–21taskssupervisory, 5–2tasks, 3–76External Databases, 8–35supervisory, 3–8Tasks tab, 3–9icons, 3–6TCP/IPClient module icon, 10–26Client module, description/purpose, 4–1Clients, specifying TCP port, 6–14configuring, 10–25links, downloading software to HMI, 2–1ports, specifying, 6–14protocol, 1–1Server module icon, 10–26Servers, specifying TCP port, 6–14TCP/IP and UDP/IP encapsulationand drivers, 10–5TCP/IP Server moduledescription/purpose, 4–1technical support, 18–2contacting, xvcustomer information form, xvitemplates, projectdescription/purpose, 6–4Test Display button, 3–16, 12–8test displays, 3–50, 12–1testing your application in a Web browser, 13–14testing/debugging your application, 12–1text boxAddress, 3–17Tagname, 3–15Text button, 3–20, 7–29text conventions, xiiformatting, xiiText I/O button, 3–21, 7–37TimeSlice settings, 4–8TimeStamp tag fielddescription/purpose, 5–7Tipsdescription/purpose, xiiiusing Status bar, 3–5video settings, 2–4, 3–8, 3–31, 6–29title barchanging default text, 6–20enabling/disabling, 6–20I-12 InduSoft Web Studio v6.1 SP5
IndexIWS Users Guideusing, 3–2Toggle function, A-40Toggle Transparent Color button, 3–22, 7–23Toolbar dialogTrend Control Object, 7–64toolbarsActive Objects, 3–20, 7–44Align and Distribute, 3–17, 7–10Bitmap, 3–22, 7–22description/purpose, 3–5docking, 3–5Dynamic Properties, 7–31Execution Control, 3–16, 12–8Mode, 3–19, 7–8Standard, 3–12Static Objects, 3–19, 7–24Tag Properties, 3–15, 3–46Web, 3–16, 7–18ToolTips, 6–21Trace function, A-13translatingalarm messages, 5–21applications, 1–2, 6–11translationfiles, specifying default, 6–11functions, A-6functions, A-172functions, executing, 16–9Translation Editor, 16–4Translation Editor utilityenabling translation, 6–11Translation Tool, 16–1Transmission Control Protocol/Internet Protocol. SeeTCP/IPTrendbutton, 7–76worksheet, 8–14worksheet and batch history file, 8–19worksheets, configuring, 5–23worksheets, restrictions, 5–12Trend Control Development Interfaces, 7–53Trend Control object, 7–52Trend Control Runtime Interface, 7–68Trend task, 8–14trends, storing trend curves, 3–9trigger field, 7–77Trigonometric functions, A-3, A-81troubleshooting, 18–1database, 17–25True function, A-41Trunc function, A-29TwinCAT PLC Databasesimporting from, 3–71UUnblockUser function, A-103Undo button, 3–14Ungroup button, 3–19UNICODE supportIWS functions, conversion restrictions, A-46Recipes, 1–3Reports, 1–3tag data types, 5–6uninstalling IWS, 2–6Unit tag fieldconfiguring, 5–20description/purpose, 5–7updatingCEView, 1–1User Account dialog, 11–7User GuidesDriver, xvuser is blocked, 11–14users, defining, 11–7Using the Screen/Worksheet Editor, 3–11Vvaluedisplay previous value, 7–39, 7–47ValueToChar function, A-71ValueWToChar function, A-72VBAcompared to VBScript, 15–35VBScript, 15–5and CEView, 15–39and conditional statements, 15–42and InputBox(), 15–37and MsgBox(), 15–37and NOT, 15–37and True/False, 15–38compared to VBA, 15–35constants, 15–41Editor, 15–33Graphics Script interface, 15–12language reference, 15–22looping statements, 15–44operators, 15–41procedures, 15–47screen events, 15–37support for ActiveX objects, 15–37variables, 15–40verifyingapplication, 3–51, 18–4license levels, 6–2TCP/IP and background tasks are running, 13–15Vertical Scale button, 7–80video settingsrecommendations, 2–4tips, 2–4, 3–8, 3–31, 6–29view screen attributes, 7–3Viewer windowdescription/purpose, 4–1enabling/disabling features, 6–20ViewerPostMessage function, A-134viewingalarm properties, 5–19, 5–21applications remotely, 5–7history properties, 5–23tag lists, 5–2, 5–25tag values, 5–14virtual keyboard, 3–30, 7–20, 7–38, 7–52, 11–1, A-129Visual Script Language (VBScript), 15–5WWait(numMillisec), A-135warning messages, enabling, 6–29Web client, debugging, 12–7Web site, InduSoft, xvWeb solution, 13–1Web Thin Clientsparameters, A-204tags, 5–7, 5–14Web toolbar, 3–16, 7–18web tunnelingparameters, A-204web tunnelling, 13–1WinCEcopying files, 2–5windowsCE applications, downloading CEView, 2–1commandsInduSoft Web Studio v6.1 SP5 I-13
IWS Users GuideIndexCut/Copy/Paste, 5–24conventions, xiiidockable, xivexperience requirements, xiiHelp, xiiresizing, 3–2running IWS, 1–1, 4–1types, xiiiViewer, enabling/disabling features, 6–20Winexec(strCommand, optnumState), A-136, A-137worksheetsClass, configuring, 5–17Driver, 10–10group numbers, 5–22Main Driver, 10–17Math, 8–31ODBC, 8–28Recipe, 8–24Report, 8–26restrictions, 5–12Scheduler, 8–33Standard Driver, 10–10Trend, 8–14Trend, configuring, 5–23using Tab key, 5–13using tags, 5–1, 15–1Workspace Window button, 3–14WritePrivateProfileString function, A-207XXGet function, A-271X-Ref button, 3–15XRef tab, Output window, 3–24XRun function, A-272XSet function, A-273ZZoom button, 3–15Zoom combo-box button, 3–15I-14 InduSoft Web Studio v6.1 SP5