Installing InduSoft Web Studio - FF-Automation
Installing InduSoft Web Studio - FF-Automation
Installing InduSoft Web Studio - FF-Automation

Create successful ePaper yourself
Turn your PDF publications into a flip-book with our unique Google optimized e-Paper software.
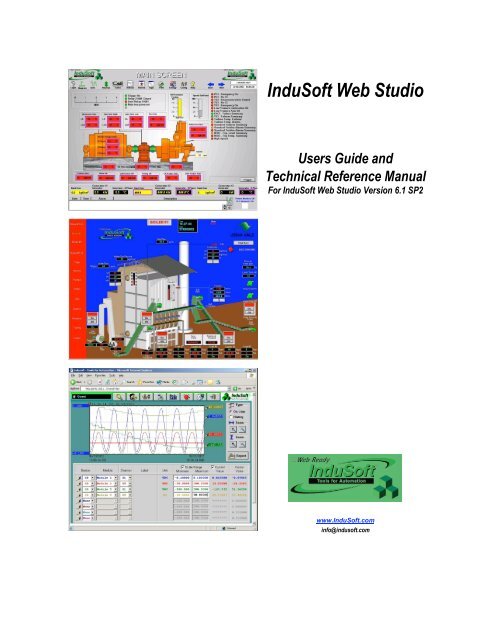
<strong>InduSoft</strong> <strong>Web</strong> <strong>Studio</strong>Users Guide andTechnical Reference ManualFor <strong>InduSoft</strong> <strong>Web</strong> <strong>Studio</strong> Version 6.1 SP2www.<strong>InduSoft</strong>.cominfo@indusoft.com
IWS Users GuideCopyrightCopyright © 2005-2006 by <strong>InduSoft</strong> ® . All rights reserved worldwide.No part of this publication may be reproduced or transmitted in any form or by any means without writtenauthorization from <strong>InduSoft</strong>.<strong>InduSoft</strong> is a registered trademark of <strong>InduSoft</strong>. CEView is a trademark of <strong>InduSoft</strong>.The information contained within this document is subject to change without notice.<strong>InduSoft</strong> does not assume responsibility for any errors or inaccuracies that may occur in this publication.Windows, Windows XP, Windows 2000, and Windows NT are registered trademarks of Microsoft Corp. in the UnitedStates and other countries.Other brand or product names are trademarks or registered trademarks of their respective owners.PN: IND-UG-001ii<strong>InduSoft</strong> <strong>Web</strong> <strong>Studio</strong> v6.1 SP2
ContentsAbout this Publication ........................................................................................................................xiWho Should Read this Publication ............................................................................................... xiiConventions ................................................................................................................................... xiiText Conventions .................................................................................................................... xiiMouse and Selection Conventions ....................................................................................... xiiiWindows Conventions ........................................................................................................... xivAdditional Resources.....................................................................................................................xvWorking with Technical Support ...................................................................................................xvChapter 1: What is <strong>InduSoft</strong> <strong>Web</strong> <strong>Studio</strong>?................................................................................1–1Product Overview.........................................................................................................................1–1Product Features .........................................................................................................................1–2Chapter 2: <strong>Installing</strong> <strong>InduSoft</strong> <strong>Web</strong> <strong>Studio</strong> ...............................................................................2–1Before You Begin.........................................................................................................................2–1<strong>Installing</strong> IWS ...............................................................................................................................2–3<strong>Installing</strong> CEView .........................................................................................................................2–5Uninstalling <strong>InduSoft</strong> <strong>Web</strong> <strong>Studio</strong> and CEView .........................................................................2–6Licensing Your Product ...............................................................................................................2–8Product Versions...................................................................................................................2–9Invalid Licenses.................................................................................................................. 2–10Execution Modes ...................................................................................................................... 2–10Protection Types ....................................................................................................................... 2–12License Settings........................................................................................................................ 2–13<strong>Installing</strong> Hardkey Licenses for <strong>InduSoft</strong> <strong>Web</strong> <strong>Studio</strong> ............................................................ 2–14<strong>Installing</strong> a New License.................................................................................................... 2–14Upgrading the Current Hardkey License .......................................................................... 2–14<strong>Installing</strong> a SoftKey License for <strong>InduSoft</strong> <strong>Web</strong> <strong>Studio</strong>............................................................ 2–16<strong>Installing</strong> a New License.................................................................................................... 2–16Upgrading the Current License ......................................................................................... 2–18<strong>Installing</strong> a SoftKey License for CEView ................................................................................. 2–21<strong>Installing</strong> or Upgrading a License (Locally) ...................................................................... 2–21<strong>Installing</strong> or Upgrading a License (Remotely) .................................................................. 2–24Chapter 3: Working with the IWS Development Environment ..............................................3–1Navigating the Development Environment Window ..................................................................3–1Using the Title Bar ................................................................................................................3–2Using the Menu Bar ..............................................................................................................3–3Using the Toolbars................................................................................................................3–5Using the Workspace............................................................................................................3–6Using the Screen/Worksheet Editor ........................................................................................ 3–12Using the Database Spy........................................................................................................... 3–24Using the Output Window......................................................................................................... 3–25Using the Status Bar .......................................................................................................... 3–26<strong>InduSoft</strong> <strong>Web</strong> <strong>Studio</strong> v6.1 SP2iii
IWS Users GuideContentsCustomizing the Workspace .................................................................................................... 3–27Standard Interfaces .................................................................................................................. 3–27Object Properties Dialog.................................................................................................... 3–27Virtual Keyboard................................................................................................................. 3–29Fonts ................................................................................................................................... 3–30Color Interface.................................................................................................................... 3–32Performing Common Tasks ..................................................................................................... 3–36Accessing Projects and Files ............................................................................................ 3–37Using Common Buttons..................................................................................................... 3–38Managing the Development Environment Windows........................................................ 3–39Using Select All .................................................................................................................. 3–42Cutting, Copying, Pasting Objects .................................................................................... 3–42Finding System Information............................................................................................... 3–43Searching for Tags and Screen Objects .......................................................................... 3–44Using the Tag Properties Toolbar..................................................................................... 3–45Replacing Tags .................................................................................................................. 3–48Testing Displays................................................................................................................. 3–49Verifying the Application .................................................................................................... 3–49Running Applications ......................................................................................................... 3–50Restoring Defaults ............................................................................................................. 3–51Saving Your Work .............................................................................................................. 3–51Printing Project Screens .................................................................................................... 3–51Tips and Tricks.......................................................................................................................... 3–53Configuring the Focus of the Object Properties Window on the Screen Editor............. 3–53Importing a Database ............................................................................................................... 3–54Importing from Other <strong>InduSoft</strong> <strong>Web</strong> <strong>Studio</strong> Databases................................................... 3–57Importing from OPC Server Databases............................................................................ 3–60Importing from CSV Databases ........................................................................................ 3–61Importing from ODBC Databases ..................................................................................... 3–62Importing from PanelBuilder32 Databases................................................................... 3–63Importing from RSLogix 5000 CSV Databases............................................................ 3–64Importing from OMRON CX Programmer Databases ..................................................... 3–66Importing from PanelMate Plus Databases.................................................................. 3–67Importing from TwinCAT PLC Databases ........................................................................ 3–68Development Modules.............................................................................................................. 3–71Graphics ............................................................................................................................. 3–71Tasks................................................................................................................................... 3–72General Communications......................................................................................................... 3–73Chapter 4: Understanding IWS Structure .................................................................................4–1Understanding the Internal Structure and Data Flow ................................................................4–1Executing/Switching IWS Modules .............................................................................................4–3Executing/Switching the Background Task................................................................................4–9Chapter 5: Working with Tags ....................................................................................................5–1What is a Tag? .............................................................................................................................5–1iv<strong>InduSoft</strong> <strong>Web</strong> <strong>Studio</strong> v6.1 SP2
ContentsIWS Users GuideDesigning a Tag ...........................................................................................................................5–2Choosing the Tag Type ........................................................................................................5–2Choosing a Tag Data Type ..................................................................................................5–5Sharing Tags with a <strong>Web</strong> Thin Client ..................................................................................5–5Choosing Tag Properties......................................................................................................5–7Creating Application Database Tags....................................................................................... 5–10Adding Tags to the Application Datasheet....................................................................... 5–11Adding Tags “On-the-Fly” .................................................................................................. 5–12Resetting the Tags Database............................................................................................ 5–13Creating Classes....................................................................................................................... 5–13Setting Tag Properties.............................................................................................................. 5–15Configuring the Parameters Tab Properties .................................................................... 5–17Configuring the Alarms - Type Tab Properties ................................................................ 5–18Configuring the History Tab Properties ............................................................................ 5–20Using Tags in Your Application................................................................................................ 5–21Editing Tags .............................................................................................................................. 5–22From the Application Tags Datasheet .............................................................................. 5–22Deleting Tags ............................................................................................................................ 5–23Chapter 6: Creating and Configuring a Project .......................................................................6–1Creating a New Project Application ............................................................................................6–1Using a Template ..................................................................................................................6–5Specifying a Default Screen Resolution ..............................................................................6–5Sharing PC-Based Control Software Program Database Tags.........................................6–6Specifying Additional Project Settings........................................................................................6–8Providing Project Identification Information...................................................................... 6–10Setting the Options Tab Parameters ................................................................................ 6–10Setting the Runtime Desktop Parameters........................................................................ 6–22Setting the Communication Parameters........................................................................... 6–25Configuring Your Project for Remote <strong>Web</strong> Access ......................................................... 6–26Specify <strong>Web</strong> Thin Client Parameters................................................................................ 6–29Enabling Warning Messages ............................................................................................ 6–32Starting Runtime Modules on the Target System................................................................... 6–33Chapter 7: Configuring Screens and Graphics .......................................................................7–1Working in an Object-Oriented Environment .............................................................................7–1Working with Screen Attributes...................................................................................................7–2Specifying Background Color......................................................................................................7–7Using Objects and Dynamics......................................................................................................7–8Using the Mode Toolbar .......................................................................................................7–8Using the Align and Distribute Toolbar............................................................................. 7–10Using Groups of Screens ......................................................................................................... 7–16Using the <strong>Web</strong> Toolbar ...................................................................................................... 7–18Saving Screens in HTML Format............................................................................................. 7–18Using the Bitmap Toolbar .................................................................................................. 7–21Using the Static Objects Toolbar ...................................................................................... 7–23<strong>InduSoft</strong> <strong>Web</strong> <strong>Studio</strong> v6.1 SP2v
IWS Users GuideContentsUsing the Dynamic Properties Toolbar............................................................................. 7–29Using the Active Objects Toolbar ..................................................................................... 7–39Using the Library..................................................................................................................... 7–120Using Paste Link .............................................................................................................. 7–121Symbols Folder ................................................................................................................ 7–121Chapter 8: Configuring Task Worksheets ................................................................................8–1Configuring an Alarms Task........................................................................................................8–2Configuring a Trend Task......................................................................................................... 8–13Converting Trend History Files from Binary to Text ........................................................ 8–22Converting Trend History Files from Text to Binary ........................................................ 8–23Creating Batch History....................................................................................................... 8–23Configuring a Recipes Task ..................................................................................................... 8–24Configuring a Reports Task ..................................................................................................... 8–26Configuring an ODBC Task...................................................................................................... 8–28Configuring a Math Task .......................................................................................................... 8–31Configuring a Scheduler Task.................................................................................................. 8–32Chapter 9: Event Settings............................................................................................................9–1Configuring the Events Settings...........................................................................................9–2Chapter 10: Communication .................................................................................................... 10–1Configuring a Driver.................................................................................................................. 10–2Configuring the Driver Worksheets................................................................................... 10–9Executing the Driver......................................................................................................... 10–19Configuring OPC..................................................................................................................... 10–19Configuring an OPC Client .............................................................................................. 10–20OPC Troubleshooting ...................................................................................................... 10–22Configuring an OPC Server............................................................................................. 10–24Configuring TCP/IP................................................................................................................. 10–24Configuring the Client ...................................................................................................... 10–24Setting Custom Parameters ............................................................................................ 10–25Configuring the TCP/IP Server ....................................................................................... 10–25Configuring DDE ..................................................................................................................... 10–25Configuring DDE Client ................................................................................................... 10–26Configuring the DDE Server............................................................................................ 10–27Chapter 11: Configuring a Security System.......................................................................... 11–1Entering a Password.......................................................................................................... 11–1Defining Groups ........................................................................................................................ 11–2Defining Users........................................................................................................................... 11–7Remote Security System ................................................................................................. 11–14Setting the Security Access Level .................................................................................. 11–15Defining Users......................................................................................................................... 11–16Specifying Guest Users ................................................................................................... 11–17Logging On/Off........................................................................................................................ 11–17Chapter 12: Testing and Debugging Your Application ....................................................... 12–1Testing Your Application .......................................................................................................... 12–1vi<strong>InduSoft</strong> <strong>Web</strong> <strong>Studio</strong> v6.1 SP2
ContentsIWS Users GuideDebugging Applications from the Database Spy.................................................................... 12–2Debugging Applications from the Output Window.................................................................. 12–4Using the LogWin Module (NT and CE).................................................................................. 12–6Using Remote Tools ................................................................................................................. 12–8Using Remote Database Spy............................................................................................ 12–9Using Remote LogWin..................................................................................................... 12–10Chapter 13: Configuring a <strong>Web</strong> Solution ............................................................................... 13–1Before You Begin...................................................................................................................... 13–3Defining a Home Directory ................................................................................................ 13–3<strong>Installing</strong> and Registering ISSymbol.ocx...................................................................... 13–3Running the <strong>Web</strong> Server ................................................................................................... 13–4Running the TCP/IP Server............................................................................................... 13–6Configuring the Application ...................................................................................................... 13–7Testing the Application ........................................................................................................... 13–10Chapter 14: Managing Applications Remotely ..................................................................... 14–1Downloading the Application.................................................................................................... 14–1Configuring the Target Station .......................................................................................... 14–1Configuring the Development Station............................................................................... 14–3Monitoring/Managing Applications from the Remote Station................................................. 14–6Chapter 15: Scripting Languages: IWS and VBScript ......................................................... 15–1Working with the IWS Scripting Language, Expressions, and Functions ............................. 15–1Using Tags ................................................................................................................................ 15–1Specifying Data Types.............................................................................................................. 15–1Accessing the Tags Database .......................................................................................... 15–2Arithmetic Operators .......................................................................................................... 15–2Logic Operators.................................................................................................................. 15–3Using Functions ........................................................................................................................ 15–3Overview of VBScript................................................................................................................ 15–5VBScript in IWS......................................................................................................................... 15–5Global Procedures ............................................................................................................. 15–7Graphic Module - Graphics Script..................................................................................... 15–8Graphic Module - Screen Script...................................................................................... 15–10Graphic Module - Command Dynamic ........................................................................... 15–12Graphic Module - ActiveX Events ................................................................................... 15–13Background Task - Startup Script................................................................................... 15–15Background Task - Script Groups................................................................................... 15–16Language Reference .............................................................................................................. 15–18Constants.......................................................................................................................... 15–18Errors ................................................................................................................................ 15–21Functions .......................................................................................................................... 15–24Keywords .......................................................................................................................... 15–25Methods ............................................................................................................................ 15–25Objects and Collections................................................................................................... 15–25Operators.......................................................................................................................... 15–26<strong>InduSoft</strong> <strong>Web</strong> <strong>Studio</strong> v6.1 SP2vii
ContentsIWS Users GuideDatabase Appendix E: Using SQL Server CE...................................................................... 17–35Database Appendix F: Using Sybase.................................................................................... 17–36Database Appendix G: Using Microsoft Excel...................................................................... 17–36Database Appendix H: Using MySQL ................................................................................... 17–40Chapter 18: <strong>Web</strong> Solution......................................................................................................... 18–1ISSymbol Control Layer ........................................................................................................... 18–2How it works .............................................................................................................................. 18–3Configuring a web-based application ...................................................................................... 18–4Typical architectures................................................................................................................. 18–5Architecture 1: <strong>Web</strong> server and <strong>Web</strong> Thin Clients in the same network........................ 18–6Architecture 2: <strong>Web</strong> server and <strong>Web</strong> Thin Clients in the same network; web server anddata server in different stations .................................................................................. 18–7Architecture 3: Redundant servers and <strong>Web</strong> Thin Client stations in the same network. 18–10Architecture 4: <strong>Web</strong> server and <strong>Web</strong> Thin Clients in different networks...................... 18–12Chapter 19: Troubleshooting ................................................................................................... 19–1Before Contacting Technical Support...................................................................................... 19–1Verifying Your Application ........................................................................................................ 19–3Common Errors......................................................................................................................... 19–3Database & Security System ............................................................................................ 19–3Graphics ............................................................................................................................. 19–4Tasks................................................................................................................................... 19–5Communication .................................................................................................................. 19–6General Troubleshooting ................................................................................................... 19–8Appendix A. <strong>InduSoft</strong> <strong>Web</strong> <strong>Studio</strong> Functions ..........................................................................A-1Function Prototypes and Descriptions......................................................................................A-12Log Message Functions ............................................................................................................A-13Arithmetic Functions ..................................................................................................................A-14Statistical Functions...................................................................................................................A-27Logarithmic Functions ...............................................................................................................A-31Logical Functions .......................................................................................................................A-33String Functions .........................................................................................................................A-37Date and Time Functions ..........................................................................................................A-55Trigonometric Functions............................................................................................................A-61Opening and Closing Windows Functions ...............................................................................A-66Security Functions .....................................................................................................................A-69Module Activity Functions..........................................................................................................A-77File Functions ...........................................................................................................................A-101Graphic Functions....................................................................................................................A-120Translation Functions ..............................................................................................................A-124Multimedia Functions...............................................................................................................A-126System Information Functions ................................................................................................A-127Loop Function ..........................................................................................................................A-152Database Access Function .....................................................................................................A-153ODBC Functions ......................................................................................................................A-156<strong>InduSoft</strong> <strong>Web</strong> <strong>Studio</strong> v6.1 SP2ix
IWS Users GuideContentsMail Functions ..........................................................................................................................A-177Dial-Up Functions ....................................................................................................................A-183ActiveX Functions ....................................................................................................................A-205Event Logger Functions ..........................................................................................................A-207FTP Functions..........................................................................................................................A-209Database Functions.................................................................................................................A-213Index 1x<strong>InduSoft</strong> <strong>Web</strong> <strong>Studio</strong> v6.1 SP2
About this PublicationThis User Guide and Technical Reference was designed to help you get the bestresults from your <strong>InduSoft</strong> ® <strong>Web</strong> <strong>Studio</strong> software. This publication provides technicalinformation and step-by-step instructions for all the tasks you need to create<strong>Web</strong>-enabled HMI/SCADA applications.The information in this publication is organized into the following chapters:This chapter: Describes the purpose, content, and organization of the <strong>InduSoft</strong> <strong>Web</strong><strong>Studio</strong> User Guide and Technical Reference. In addition, this chapter contains thefollowing information:– Explains the formatting, mouse, and Windows conventions used– Lists other publications providing information about <strong>InduSoft</strong> <strong>Web</strong> <strong>Studio</strong>– Explains how to contact a technical support representativeChapter 1. What is <strong>InduSoft</strong> <strong>Web</strong> <strong>Studio</strong>? Provides a high-level overview of the product’suses, features, and functions.Chapter 2. <strong>Installing</strong> <strong>InduSoft</strong> <strong>Web</strong> <strong>Studio</strong>: Provides step-by-step instructions forinstalling, licensing, starting, and uninstalling <strong>InduSoft</strong> <strong>Web</strong> <strong>Studio</strong> and CEView.Chapter 3. Working with the IWS Development Environment: Describes the <strong>InduSoft</strong> <strong>Web</strong><strong>Studio</strong> interface (or development environment), and explains some basic skillsand techniques you must understand before creating a new application.Chapter 4. Understanding IWS Structure: Describes the internal structure of <strong>InduSoft</strong><strong>Web</strong> <strong>Studio</strong>, including how data flows through the runtime modules and howthese modules are executed.Chapter 5. Working with Tags: Explains basic concepts about the product database,tag types (arrays, classes, and pointers), tag values and parameters. Followingthe concepts discussion, this chapter provides instructions for creating andediting tags for your applications.Chapter 6. Creating and Configuring a Project: Provides step-by-step instructions forcreating and configuring a new project application.Chapter 7. Configuring Screens and Graphics: Explains how to use the different <strong>InduSoft</strong><strong>Web</strong> <strong>Studio</strong> development tools to create your application screens and graphics.Chapter 8. Configuring Task Worksheets: Explains how to create and configure thedifferent <strong>InduSoft</strong> <strong>Web</strong> <strong>Studio</strong> task worksheets for your project applications.Chapter 9. Event Settings. Describes the logging and event-retrieval features.Chapter 10. Communication: Describes how to configure <strong>InduSoft</strong> <strong>Web</strong> <strong>Studio</strong> toread and write your application tag variables to or from a device’s memory. Theinformation includes instructions for configuring drivers and OPC, TCP/IP, andDDE (Dynamic Data Exchange) communication.Chapter 11. Configuring a Security System: Explains how to set-up and manage asecurity system for your applications.Chapter 12. Testing and Debugging Your Application: Discusses how to test and debugapplications using tools such as the Database Spy and Output windows. Thischapter includes a list of possible error messages and methods for correctingthose errors.Chapter 13. Configuring a <strong>Web</strong> Solution: Explains how configure and run yourapplication on the <strong>Web</strong>.<strong>InduSoft</strong> <strong>Web</strong> <strong>Studio</strong> v6.1 SP2xi
IWS Users GuideWhat is <strong>InduSoft</strong> <strong>Web</strong> <strong>Studio</strong>?Chapter 14. Managing Applications Remotely: Explains how to download, monitor, anddebug applications from a remote runtime workstation.Chapter 15. Working with the IWS Scripting Language, Expressions, and Functions: Describes<strong>InduSoft</strong> <strong>Web</strong> <strong>Studio</strong>’s scripting language syntax, which includes more than200 functions.Chapter 16. Using the Translation Editor: Explains how to use the <strong>InduSoft</strong> <strong>Web</strong> <strong>Studio</strong>Translation Editor to translate the text in your applications from one language toanother.Chapter 17. IWS Database Interface: Explains how to connect <strong>InduSoft</strong> <strong>Web</strong> <strong>Studio</strong> tocompatible databases.Chapter 18. <strong>Web</strong> Solution: Explains how to use the <strong>Web</strong> Thin Client for viewing thegraphical interface on a remote station.Chapter 19. Troubleshooting: Provides instructions for verifying applications, describessome common development errors, and explains what to do if you need tocontact a support representative.Appendix A. <strong>Studio</strong> Functions: Contains tables and information describing thedifferent functions available with <strong>InduSoft</strong> <strong>Web</strong> <strong>Studio</strong> and CEView.Who Should Read this PublicationThis User Guide and Technical Reference is a comprehensive document designed toprovide useful information for both novice and advanced <strong>InduSoft</strong> <strong>Web</strong> <strong>Studio</strong> users.New Users: This publication uses a step-by-step, hands-on approach to theapplication development process. Be sure to read the introductory chaptersdescribing the product’s features and development environment.Experienced Users: This publication offers advanced instructions, tips, andtroubleshooting information to help you get the most out of your productapplications. Note:We assume you are familiar with working in a Windows environment, andwe do not attempt to explain Windows navigation, file management, and soforth. If you are unfamiliar with any of these procedures, we recommendusing the Windows Help feature (Start → Help) or consulting your MicrosoftWindows documentation.ConventionsThis section describes the text, mouse, and Windows conventions used throughoutall <strong>InduSoft</strong> publications.Text ConventionsThe following text conventions and formatting techniques are used in thispublication to help you quickly identify certain kinds of information:File names and screen/message text are indicated using bold, monospace text(for example: \DRunStartup.exe).xii<strong>InduSoft</strong> <strong>Web</strong> <strong>Studio</strong> v6.1 SP2
What is <strong>InduSoft</strong> <strong>Web</strong> <strong>Studio</strong>?IWS Users GuideWhen you are required to provide information, such as a file name, the entry isenclosed in angle brackets < > and indicated using bold, italic monospacetext (for example, \Redist\CEView\\).In this example, you must type the project folder name and processor type tocomplete the entry.Buttons, menu options, and keyboard keys are indicated using a narrow boldtypeface (for example, “Press the Enter key.”)Text requiring special emphasis (such as warnings, new terms, or productnames) is indicated using italics to draw your attention to the item (for example,“Do not save the file.”)In addition, this publication segregates some text into Tip, Note, and Caution boxesto help you identify information quickly and easily.– Tips () provide useful information to save development time or to improveapplication performance.– Notes () provide information related to the surrounding text (usually theparagraph just preceding the note) to help you further understand a conceptor to provide supplemental information.– Cautions () provide information necessary to prevent errors that can causeproblems when running the application, and may result in damage.Mouse and Selection ConventionsBecause most PCs used for application development run a version of Windows witha mouse, this publication assumes you are using a mouse. Generally, a PC mouse isconfigured so that the left mouse button is the primary button and the right mousebutton is the secondary button.This publication uses the following mouse and selection conventions:Double-click means to quickly click twice on an object with the left mouse button.Right-click means to click once on an object with the right mouse button.Click and Select means to click once on an object with the left mouse button.In general, you click on buttons and select from lists.Select also means you should use your pointing device to highlight or specify anitem on the computer screen. Selecting an object with a touch screen is usuallythe same as selecting with a mouse, except that you use your finger to touch(select) a screen object or section. To select objects with your keyboard, youtypically use the Tab key to move around options, the Enter key to open menus,and the Alt key with a letter key to select an object that has an underlined letter.Drag means to press down the appropriate mouse button and move the mousebefore releasing the button. Usually an outline of the object will move with themouse cursor.Instructions to select multiple menu bar and/or menu options use arrows toillustrate the selection sequence. For example, if you see the following . . .Select Start → Programs → <strong>InduSoft</strong> <strong>Web</strong> <strong>Studio</strong> → Register to register your product.. . . you should click the Windows Start button, select the Programs option, selectthe <strong>InduSoft</strong> <strong>Web</strong> <strong>Studio</strong> option, and select the Register option.<strong>InduSoft</strong> <strong>Web</strong> <strong>Studio</strong> v6.1 SP2xiii
IWS Users GuideWhat is <strong>InduSoft</strong> <strong>Web</strong> <strong>Studio</strong>?Windows ConventionsThis publication uses the following Windows conventions:Dialog boxes (or dialogs) are windows that allow you to enter information.Text boxes (or fields) are areas in a dialog where you can type in text. Radio buttons are white circles in which a black dot appears or disappearswhen you click on the button. The dot indicates the option or function is enabled(active) and a clear circle indicates the option or function is disabled (inactive). Check-boxes are white squares in which a check ( ) appears or disappearswhen you click on it. A check indicates the option or function is enabled (active)and a clear box indicates the option or function is disabled (inactive).Buttons are boxes containing text or graphics that perform an action within theprogram. Buttons appear “pressed” when you click on them.Button TypeDescriptionClick to perform an action.For example, click Save to save your project or click Cancel to cancel the currentoperation.Click a button containing text with ellipses (...) to open a related dialog.For example, click the Options button to open the Options dialog.Click to perform an action.For example, click the Open Library button to open the Symbol Library dialog.Some buttons are toggles, which means that clicking the button turns a particular feature,mode, or display on or off.For example, click the Output Window button to switch between turning the Outputwindow (LogWin) display on and off in the development environment window.Button Examples TableLists are panes (white boxes) in windows or dialogs containing two or moreselectable options.Combo-Boxes have arrows that, when clicked, show part or all of an otherwiseconcealed list.Interface refers to the entire <strong>InduSoft</strong> <strong>Web</strong> <strong>Studio</strong> window (developmentenvironment).Dockable windows are windows that you can drag to an edge of the interface andmerge with that edge.Toolbars are dockable windows containing only buttons and text boxes.xiv<strong>InduSoft</strong> <strong>Web</strong> <strong>Studio</strong> v6.1 SP2
What is <strong>InduSoft</strong> <strong>Web</strong> <strong>Studio</strong>?IWS Users GuideAdditional ResourcesFor more information about <strong>InduSoft</strong> <strong>Web</strong> <strong>Studio</strong>, the following resources areavailable:ResourceRelated Publications<strong>InduSoft</strong> <strong>Web</strong> SiteDescription• <strong>InduSoft</strong> <strong>Web</strong> <strong>Studio</strong> Getting Started Guide: Designed for first-time users,this publication contains information about the basic functions of <strong>InduSoft</strong><strong>Web</strong> <strong>Studio</strong>. This publication is provided in the Documentation folder on theIWS CD-ROM or from the Help menu located on the main menu bar.• Individual Driver User Guides: Explain how to configure individual <strong>InduSoft</strong>drivers, according to their unique protocol characteristics. One customizeduser guide is included with each <strong>InduSoft</strong> driver. These publications areprovided in the DRV subdirectory of the <strong>InduSoft</strong> <strong>Web</strong> <strong>Studio</strong> folder on theIWS CD-ROM or from the Help menu located on the main menu bar.• <strong>InduSoft</strong> <strong>Web</strong> <strong>Studio</strong> Frequently Asked Questions (FAQ): Lists the mostcommonly asked questions and answers about <strong>InduSoft</strong> <strong>Web</strong> <strong>Studio</strong>.Visit www.<strong>InduSoft</strong>.com for information about <strong>InduSoft</strong> products, availabledownloads and demos, product FAQ, driver information, training opportunities,distributors, and the latest <strong>InduSoft</strong> news.Information Resources TableWorking with Technical Support<strong>InduSoft</strong>’s expert support engineers are committed to resolving your issues andquestions as quickly and accurately as possible. Our technical support centers arelocated in Austin, Texas and Sao Paulo, Brazil.Support OfficeContact InformationAustin, Texas Telephone: 877-INDUSOFT (877-463-8763)Fax: 512-349-0375Email: support@indusoft.comSaõ Paulo, Brazil Telephone: +55 11 5505-5676Fax: +55 11 5505-5676 ext. 13Email: support@indusoft.com.br<strong>InduSoft</strong> Support Offices TableYour technical support options include: Electronic support Telephone support Product version updates Access to the <strong>InduSoft</strong> technical support <strong>Web</strong> page (http://www.<strong>InduSoft</strong>.com) FaxBack system<strong>InduSoft</strong> <strong>Web</strong> <strong>Studio</strong> v6.1 SP2xv
IWS Users GuideWhat is <strong>InduSoft</strong> <strong>Web</strong> <strong>Studio</strong>?When requesting technical support, please have the following information available:Name of Submitter:Contact Information:Preferred contact method: E-mail Telephone Mobile Phone OtherIndustrial Sector (For exampleAutomotive, Pharmaceutical,Manufacturing):Number of supervisor stations: One Two Three OtherField Equipment (For Example, Allen Bradley Data Highway Plus):Manufacturer:Model:Amount:Protocol:<strong>InduSoft</strong> Driver(s):Computer Environment:Topic Sub-Item CharacteristicsHardware32-bit WorkstationHardwareVendorModel numberProcessorClockRAM MemoryOther information you think engineering should know about the hardware:Customer Information Form (continued)xvi<strong>InduSoft</strong> <strong>Web</strong> <strong>Studio</strong> v6.1 SP2
What is <strong>InduSoft</strong> <strong>Web</strong> <strong>Studio</strong>?IWS Users GuideComputer Environment (cont.):Topic Sub-Item CharacteristicsSoftwareOperating SystemHardwareTypeVersionService PackLanguageOther information you think engineering should know about the software:Topic Sub-Item CharacteristicsSoftwareMicrosoft InternetExplorerHardwareSoftwareVersionService PackLanguageOther information you think engineering should know about the Microsoft InternetExplorer installation:Topic Sub-Item CharacteristicsSoftware<strong>InduSoft</strong>HardwareSoftwareVersionService PackOther information you think engineering should know about the Microsoft InternetExplorer installation:<strong>InduSoft</strong> <strong>Web</strong> <strong>Studio</strong> v6.1 SP2xvii
IWS Users GuideWhat is <strong>InduSoft</strong> <strong>Web</strong> <strong>Studio</strong>?Computer Environment (cont.):Topic Sub-Item CharacteristicsSoftwareCEViewHardwareSoftwareVersionService PackOther information you think engineering should know about the CEView installation:Problem Description:Customer Information Formxviii<strong>InduSoft</strong> <strong>Web</strong> <strong>Studio</strong> v6.1 SP2
Chapter 1: What is <strong>InduSoft</strong> <strong>Web</strong> <strong>Studio</strong>?<strong>InduSoft</strong> <strong>Web</strong> <strong>Studio</strong> (or IWS) is a powerful, fully integrated software program thatenables you to design and build feature-rich HMI (Human-Machine Interface) orSCADA (Supervisory Control and Data Acquisition) applications for:Data acquisitionLocal supervisory stationsRemote supervisory stationsData concentrators on distributed processesData communications with corporate systemsProduct OverviewIWS applications run on microcomputers connected in real-time to machines orprocessors through programmable controllers, remote I/O devices, and other dataacquisitionequipment.These applications consist of animated operator-interface screens, configurable PLC(programmable logic controller) drivers and other controllable I/O devices, anapplication tags database, and optional modules such as alarm monitors, logic,trend charts, recipes, schedulers, and a security system. IWS applications interfacewith industrial I/O systems and other Windows applications in the runtimeenvironment using the following protocols:ODBC (Open Database Connectivity)DDE (Dynamic Data Exchange)NetDDE (Network Dynamic Data Exchange)OPC (Open Connectivity)TCP/IP (Transmission Control Protocol/Internet Protocol)After developing an application, you can run it on your development workstation ordownload the application to a runtime workstation (using a serial or TCP/IPconnection) and run it using <strong>InduSoft</strong> <strong>Web</strong> <strong>Studio</strong> or CEView runtime software. Theworkstation processes scan data from connected devices according to parametersdefined in the application and then react to, display, store and upload the data.The <strong>InduSoft</strong> <strong>Web</strong> <strong>Studio</strong> product consists of:Development system software that runs on a desktop, laptop or industrial PCrunning Windows ® NT/2000/XPRuntime system software that runs on an operator interface workstation runningWindows NT/2000/XP or Windows CE Note:The runtime system software (CEView) for the Windows CE operating systemis usually pre-loaded on the HMI. If necessary, you can update the CEViewversion of the development system software by downloading the currentversion to the HMI.<strong>InduSoft</strong> <strong>Web</strong> <strong>Studio</strong> v6.1 SP2 1–1
IWS Users GuideWhat is <strong>InduSoft</strong> <strong>Web</strong> <strong>Studio</strong>?Product FeaturesThe <strong>InduSoft</strong> <strong>Web</strong> <strong>Studio</strong> product provides the following features:Integrated Windows development environment with toolbars, dialogs, andmenus:– Shortcut menus, which can be accessed by right-clicking on any area of thedevelopment environment (Options vary according to context)– Customizable fly-over toolbars– Tasks, objects, and controls organized in a tree-view explorerFull-featured objects and dynamics (the ability to modify object properties,execute commands, or inset values to tags used to build screens on the fly atruntime):– Configurable objects such as buttons, rectangles, ellipse, polygons, lines,and text– Dynamic properties such as bar graphs, color, resizing, position,hide/unhide, rotation, command, hyperlink, and text input/output– Online and historical alarm list displays– Online and historical trending– Alignment and distribution tools– Background bitmap layer creation and editing– Graphics importation– ActiveX object containersOnline remote management and configurationMicrosoft DNA architecture compliance, with full OPC and XML support<strong>Web</strong> interface enabled, which exports application screens to a “thin” clientthrough the Internet/intranet and by exchanging data online through theTCP/IP protocolSymbol library with more than 100 symbols and dynamic objects, such aspushbuttons, meters, sliders, switches, text and numeric displays, LED-styleindicators, pipes, bumps, icons, vehicles, valves, frames, motors, gauges, andcommon controlsDebugging tools:– Database Spy window to monitor/force tag values and execute functions– LogWin module to record OPC, DDE, and TCP/IP transactions, modulesactivation, trace tags, and so forth– Cross-referencing to locate tags throughout the project– Online system and network diagnosticsPowerful and flexible Tags Database (Boolean, Integer, Real, and String tags),array tags, classes, and indirect tag-pointersOpen architecture with API exchanges and tag values with external softwareTranslation editor, which enables you to translate an application into severaldifferent languages, and switch between them while the runtime system is onlineTCP/IP client and server modules to exchange tag values and configureredundancy systems1–2 <strong>InduSoft</strong> <strong>Web</strong> <strong>Studio</strong> v6.1 SP2
What is <strong>InduSoft</strong> <strong>Web</strong> <strong>Studio</strong>?IWS Users GuideMore than 200 drivers for different devices (such as PLC) from severalmanufacturers; such as Allen-Bradley, Siemens, GE-Fanuc, as well as standardprotocols such as MODBUS RTU/ASCII, DeviceNet, Profibus, Interbus, and soforthOPC Server and OPC Client with integrated OPC BrowserScreen and object password-protected runtime security (256 levels)Logical expressions and a scripting language with more than 200 functionsRecipe and Report (ASCII, UNICODE, and RTF formats) builders integrated intothe productEvent scheduler based on date, time, or data condition (100ms resolution)Multi-layer application, which means modular worksheets and screens can bemerged easily to other applicationsFull integration with PC-based control programs (imports tag databases) such asISaGRAF, SteepleChase, Think&Do, and ASAPDial-Up functions to trigger, monitor, and hang-up a dial-up connection with theRAS Server of remote stationsFunctions to send e-mail from IWS (or CEView)Real-time project documentationScreen resolution converter Note:IWS provides different product types for each level of application responsibility.However, IWS does not support some features in certain product types (such asCEView). You can review the TargetVersions.pdf document on the <strong>InduSoft</strong><strong>Web</strong> <strong>Studio</strong> CD-ROM for detailed information about the limitations of eachproduct-type limitations.<strong>InduSoft</strong> <strong>Web</strong> <strong>Studio</strong> v6.1 SP2 1–3
IWS Users GuideWhat is <strong>InduSoft</strong> <strong>Web</strong> <strong>Studio</strong>?1–4 <strong>InduSoft</strong> <strong>Web</strong> <strong>Studio</strong> v6.1 SP2
Chapter 2: <strong>Installing</strong> <strong>InduSoft</strong> <strong>Web</strong> <strong>Studio</strong>This chapter explains how to install, license, run, and uninstall <strong>InduSoft</strong> <strong>Web</strong> <strong>Studio</strong>(IWS) and CEView.You can install IWS from the <strong>InduSoft</strong> <strong>Web</strong> <strong>Studio</strong> CD-ROM or create 3.5-inchinstallation diskettes. For Windows CE applications, you can use IWS to downloadCEView (runtime software) to the Windows CE HMI by serial or TCP/IP link.The IWS installation program automatically creates the necessary directories, copiesfiles to your hard drive, and creates the <strong>InduSoft</strong> <strong>Web</strong> <strong>Studio</strong> icon in your Desktop folder. Notes:If you will be using Windows CE: You use IWS to download CEView (the runtime software) to the Windows CEHMI using a serial or TCP/IP link. When you install <strong>InduSoft</strong> <strong>Web</strong> <strong>Studio</strong> on Windows NT/2000/XP computers,IWS stores the CEView runtime files in the following folder:\Redist\CEView\\Where:– is the installation directory chosen during theinstallation (C:\Program Files\<strong>InduSoft</strong> <strong>Web</strong> <strong>Studio</strong> is the defaultinstallation directory).– is the processor platform. <strong>InduSoft</strong> provides a CEViewruntime for most processor platforms supported by the WinCE operatingsystem.Before You Begin Note:You must have Administrator privileges for the Windows NT/2000/XPworkstation on which you are installing (or uninstalling) <strong>InduSoft</strong> <strong>Web</strong> <strong>Studio</strong>.Before installing the IWS software, you must do the following:Uninstall any older versions of IWS (or install the newer version to a differentdirectory). Also, you cannot install the same version of IWS in two different pathson the same computer.System RequirementsTo develop applications with IWS, you must install the following hardware andsoftware:– PC-compatible computer with a Intel ® Pentium IV-compatible processor,such as Centrino, AMD, Celeron, or higher– Windows 2000/XP or Windows 2003 Server operating system for thedevelopment system– Windows NT/2000/XP or Windows CE v3.00 operating system for runtime<strong>InduSoft</strong> <strong>Web</strong> <strong>Studio</strong> v6.1 SP2 2–1
IWS Users Guide<strong>Installing</strong> <strong>InduSoft</strong> <strong>Web</strong> <strong>Studio</strong> Note:We recommend Windows XP Professional over Windows XP HomeEdition/Media Center, because it includes Internet Information Services(IIS) that can be used as your application’s <strong>Web</strong> server.– Minimum of 256MB random-access memory (RAM) (512MB or higherrecommended)– MS Internet Explorer 6.0 or higher– Minimum of 500MB free hard disk space to install the product and theapplication (the history files/databases will demand additional disk space)– Ethernet adapter– 100% IBM-compatible VGA or SVGA display adapter with 64MB Video RAM(VRAM) or higher– Microsoft-compatible pointing device (such as a mouse, trackball, or touchscreen)– Standard keyboard with function keys F1 through F12– CD-ROM drive (optional – to install the system files)– Parallel printer port (optional – to be used with Parallel Hardkey licensingmethod)– USB port (optional – to be used with USB Hardkey licensing method)– Serial COM ports and adapters (optional) Notes: The requirements described above are based on typical applications.Depending on your specific application, the minimum requirements mayvary. Applications developed with <strong>InduSoft</strong> <strong>Web</strong> <strong>Studio</strong> can run under devicespowered with the Windows CE operating system (Windows CE v3.0 orWindows CE .NET) such as industrial HMIs or PDAs (PocketPC). Consultyour vendor for the hardware requirements when running yourapplication under the Windows CE operating system. In addition to the operating systems described above, the <strong>Web</strong> Thin Clientstation can be running the Windows 98 or Windows ME operatingsystems. When using a Hardkey instead of a Softkey to license the product, eitherthe parallel or the USB port must be available in the local computer. Some of the items listed above as optional may be mandatory dependingon your application. For instance, if you need to exchange data with aPLC via a serial interface, the computer must provide a serial COM port.2–2 <strong>InduSoft</strong> <strong>Web</strong> <strong>Studio</strong> v6.1 SP2
<strong>Installing</strong> <strong>InduSoft</strong> <strong>Web</strong> <strong>Studio</strong>IWS Users Guide<strong>Installing</strong> IWSUse the following procedure to install IWS from the CD-ROM: Turn on the power to your development computer and be sure that no otherprograms are running. Insert the installation CD-ROM into the computer’s CD-ROM drive.A CDBrowser window should display automatically:CDBrowser WindowIf the <strong>InduSoft</strong> CDBrowser window does not display, you can start the programfrom the Windows Explorer. Navigate to the :\Installation directory(where is your CD-ROM drive), and run the Setup.exe file (clicking the<strong>InduSoft</strong> <strong>Web</strong> <strong>Studio</strong> icon launches this file).The CDBrowser window contains the following folders:– Read First: Contains the Readme document (in .pdf format) with importantinformation you should read before using the current product.– Viewer Utilities: Contains Microsoft PowerPoint Viewer (needed to view the<strong>InduSoft</strong> presentations provided in .ppt format), Adobe ® Reader ® (needed toview the <strong>InduSoft</strong> documents provided in .pdf format), and WinZip ® (forunzipping the compressed files).– About <strong>InduSoft</strong>: Contains a short PowerPoint presentation about <strong>InduSoft</strong>.– Installation: Contains an <strong>InduSoft</strong> <strong>Web</strong> <strong>Studio</strong> icon. Double-clicking this iconstarts the installation program.– Documentation: Contains all IWS documentation in .pdf format.– Sample Applications: Contains sample applications to help you develop your ownapplications and provide examples for you while you use <strong>InduSoft</strong> <strong>Web</strong><strong>Studio</strong>.– Add-Ons: Contains a demo version of the Symbol Factory ActiveX program—anextensive symbol library that simplifies application development. Alsocontains the PanelBuilder Import Wizard for importing your existing<strong>InduSoft</strong> <strong>Web</strong> <strong>Studio</strong> v6.1 SP2 2–3
IWS Users Guide<strong>Installing</strong> <strong>InduSoft</strong> <strong>Web</strong> <strong>Studio</strong>PanelBuilder applications into IWS, and the Users Guide for the PanelBuilderImport Wizard. In the Browser window, double-click the Installation folder and then double-clickthe <strong>InduSoft</strong> <strong>Web</strong> <strong>Studio</strong> icon to start the <strong>InduSoft</strong> <strong>Web</strong> <strong>Studio</strong> Installation Wizard. A Setup dialog displays to inform you that the Wizard is loading. Follow the instructions provided by the Wizard to proceed with the installation,which includes:– Reading and accepting the License Agreement– Entering a user name and your company name– Choosing a destination location (accept the default)– Selecting the components to install (accept the default)A Setup Status dialog displays while the program installs, and the SetupComplete dialog displays when the installation is finished:Setup Complete Dialog You must restart your computer to continue, so click the Yes, I want to restart mycomputer now radio button, and then click Finish. After restarting your computer, double-click the <strong>InduSoft</strong> <strong>Web</strong> <strong>Studio</strong> icon on thedesktop or select Start → Programs → <strong>InduSoft</strong> <strong>Web</strong> <strong>Studio</strong> → <strong>InduSoft</strong> <strong>Web</strong> <strong>Studio</strong> to startthe IWS program.From the DesktopFrom the Start MenuStarting <strong>InduSoft</strong> <strong>Web</strong> <strong>Studio</strong> Tip:You can run the development environment under any video setting; however,2–4 <strong>InduSoft</strong> <strong>Web</strong> <strong>Studio</strong> v6.1 SP2
<strong>Installing</strong> <strong>InduSoft</strong> <strong>Web</strong> <strong>Studio</strong>IWS Users Guideto run applications on a CE platform, we recommend configuring yourDisplay video settings to a resolution of 800x600 (or higher) and using 256colors (or higher) for a more pleasing environment. Application resolution(screen size) is independent of the operating system resolution. Note:Microsoft .NET Framework 1.1 is automatically installed, starting with IWSv.6 Service Pack 3. See Using ODBC Databases, in Chapter 17: IWS DatabaseInterface, for more information.<strong>Installing</strong> CEView Note:The runtime system software (CEView) for the Windows CE operating system isusually pre-loaded on the HMI. If necessary, you can update the CEViewversion of the development system software by downloading the current versionto the HMI.When you install <strong>InduSoft</strong> <strong>Web</strong> <strong>Studio</strong> on Windows NT/2000/XP, IWS stores theCEView runtime files in the following folder:\Redist\\\Where: is the installation directory chosen during theinstallation (C:\Program Files\<strong>InduSoft</strong> <strong>Web</strong> <strong>Studio</strong> is the defaultinstallation directory). is the operating system version where CEView will be installed.The CEView subfolder stores the files for WinCE v3.0. The WinCE 4.0 folderstores the files for WinCE v4.0. The WinCE 4.1 folder stores the files for WinCEv4.1 and so on. is the processor platform. <strong>InduSoft</strong> provides a CEViewruntime for most processor platforms supported by the WinCE operating system.To install CEView, use the following steps: Power-on the WinCE device, and the Remote Agent dialog should launchautomatically.If the dialog does not display, copy the CEServer.exe file from the \<strong>InduSoft</strong><strong>Web</strong> <strong>Studio</strong>\Redist\CEView\\BIN directory on theWinNT/2000/XP computer where you installed IWS, paste the file into the\ folder of your WinCE device, and run the file. Note:There are different ways to copy a file into a WinCE device (for example, youcan map a shared folder from the WinNT/2000/XP computer in the WinCEdevice or you can use ActiveSync). If you need assistance copying this fileinto the WinCE device, contact <strong>InduSoft</strong> technical support.<strong>InduSoft</strong> <strong>Web</strong> <strong>Studio</strong> v6.1 SP2 2–5
IWS Users Guide<strong>Installing</strong> <strong>InduSoft</strong> <strong>Web</strong> <strong>Studio</strong> After executing the CEServer.exe file, the Remote Agent dialog launches in theWinCE device. Click the Setup button in the Remote Agent dialog and configure the link (Serial orTCP/IP) to connect the WinCE device to the WinNT/2000/XP computer. Note:<strong>InduSoft</strong> recommends using the TCP/IP link between the WinCE device andyour WinNT/2000/XP computer to download and upload files. Start <strong>InduSoft</strong> <strong>Web</strong> <strong>Studio</strong> on the WinNT/2000/XP computer. Select Project → Execution Environment from the main menu bar. When the Execution Environment dialog displays, select a connection type (NetworkIP, Serial Port or Microsoft ActiveSync) and configure its settings (for example, IPAddress or COM Port).Execution Environment Dialog Click the Connect button to connect <strong>InduSoft</strong> <strong>Web</strong> <strong>Studio</strong> to the WinCE device. Click the Install System Files button from the Execution Environment dialog (Targettab) to download the CEView files to the WinCE device.Uninstalling <strong>InduSoft</strong> <strong>Web</strong> <strong>Studio</strong> and CEViewIf you find it necessary to remove <strong>InduSoft</strong> <strong>Web</strong> <strong>Studio</strong> from your system, followthese instructions: Caution:Before starting the uninstall procedure, be sure to back-up any files you mayfind useful later into the …\<strong>InduSoft</strong> <strong>Web</strong> <strong>Studio</strong>\ folder.Also, be certain that you have a current (or newer) version of the <strong>InduSoft</strong> <strong>Web</strong><strong>Studio</strong> installation CD-ROM or diskettes so you can re-install the software laterif necessary.2–6 <strong>InduSoft</strong> <strong>Web</strong> <strong>Studio</strong> v6.1 SP2
<strong>Installing</strong> <strong>InduSoft</strong> <strong>Web</strong> <strong>Studio</strong>IWS Users Guide From the Windows task bar, select Start > Settings > Control Panel to open theControl Panel.Opening the Control Panel Double-click on the Add/Remove Programs icon in the Control Panel window: When the Add/Remove Programs Properties dialog displays, select <strong>InduSoft</strong> <strong>Web</strong><strong>Studio</strong> from the list and click the Add/Remove button.Removing <strong>InduSoft</strong> <strong>Web</strong> <strong>Studio</strong> When the Confirm File Deletion dialog displays, click the Yes button.<strong>InduSoft</strong> <strong>Web</strong> <strong>Studio</strong> v6.1 SP2 2–7
IWS Users Guide<strong>Installing</strong> <strong>InduSoft</strong> <strong>Web</strong> <strong>Studio</strong>The Uninstall Shield Wizard and the Remove Programs from Your Computerdialogs display.Removing Programs: Progress Screen When the Uninstall successfully completed message displays, and the OKbutton becomes active, click the OK button. Verify that <strong>InduSoft</strong> <strong>Web</strong> <strong>Studio</strong> is no longer listed in the Add/Remove ProgramsProperties dialog. Click the Close button ( ), to close the Add/Remove Programs Properties dialog,and then close the Control Panel window. Open the Windows Explorer and browse to the directory containing the <strong>InduSoft</strong><strong>Web</strong> <strong>Studio</strong> directory. Verify that all of the <strong>InduSoft</strong> <strong>Web</strong> <strong>Studio</strong> files and folders were deleted. (Youmust manually delete any that remain.) Note:The uninstall tool cannot automatically delete files you created or modifiedin the \<strong>InduSoft</strong> <strong>Web</strong> <strong>Studio</strong>\Projects\ or in the C:\Documents andSettings\\My Documents\<strong>InduSoft</strong> <strong>Web</strong> <strong>Studio</strong> v6.1 Projectsfolder.Licensing Your ProductThis section explains how to license your <strong>InduSoft</strong> <strong>Web</strong> <strong>Studio</strong> (IWS) and CEViewproducts. Notes: These instructions are valid for <strong>InduSoft</strong> <strong>Web</strong> <strong>Studio</strong> v5.1 or later. CEView runtime files for each platform are stored in the development stationduring IWS installation. You can use the IWS remote management tools todownload CEView runtime files to the WinCE device.2–8 <strong>InduSoft</strong> <strong>Web</strong> <strong>Studio</strong> v6.1 SP2
<strong>Installing</strong> <strong>InduSoft</strong> <strong>Web</strong> <strong>Studio</strong>IWS Users GuideProduct VersionsIWS and CEView should both have the same version number, which uses thefollowing syntax:X.Y+SPWW (for example, <strong>InduSoft</strong> <strong>Web</strong> <strong>Studio</strong> v6.1+SP2 and CEView v6.1+SP2)Where:X: Represents the Family version. The Family version changes only when majorenhancements are added to the product technologies and concepts.Y: Represents the Sub-version: The Sub-version changes when minorenhancements and/or new features are added to the product.WW: Represents the Service Pack. The Service Pack version changes when youmust install add-on packages to accomplish the following:– Upgrade files for the version previously installed– Fix bugs in the product (showstoppers and no-workarounds)– Provide minor enhancements before releasing the next version of the productEach Service Pack release supersedes the previous Service Pack release. Forexample, SP2 includes all the contents of SP1 and all newly upgraded files,bug fixes, and enhancements. SP3 includes all the contents of SP2 and allnew upgraded files, bug fixes, enhancements and so on. Caution:Both IWS and CEView can execute applications built in previous versions of theproduct. However, older versions of IWS and CEView cannot executeapplications built or modified in newer versions of the product.For example, you cannot execute version 5.1 applications using IWS version 5.0but you can execute version 5.0 applications with IWS version 5.1. IMPORTANT!We issue each license for a specific Family version and Sub-version (X.Y), andthe license is valid for that version (including Service Packs) only. However, alicense is not valid for a newer Family version or Sub-version of the product.Any time you install a new version of IWS or CEView, you must upgrade thecurrent license to the new version being installed. If you are installing a ServicePack only, you are not required to upgrade your license.<strong>InduSoft</strong> <strong>Web</strong> <strong>Studio</strong> v6.1 SP2 2–9
IWS Users Guide<strong>Installing</strong> <strong>InduSoft</strong> <strong>Web</strong> <strong>Studio</strong>Invalid LicensesWhen you try to run IWS with an invalid license, you will receive a very specificwarning message that gives you the information you need to resolve the issue.Examples:Version of software is higher than the license versionSelected Target System is not supported by the licenseExecution Modes<strong>InduSoft</strong> <strong>Web</strong> <strong>Studio</strong> and CEView support the following execution modes:Execution Mode <strong>InduSoft</strong> <strong>Web</strong> <strong>Studio</strong> CEViewEvaluation ModeDemo ModeLicensed for Engineering OnlyLicensed for Runtime OnlyLicensed for Engineering + Runtime = Apply; = Does NOT ApplyEvaluation Mode: Enables all of the product’s engineering and runtime features.The first time you install IWS on a computer, the product runs for 40 (forty)hours in Evaluation Mode. This evaluation period includes any time you run a2–10 <strong>InduSoft</strong> <strong>Web</strong> <strong>Studio</strong> v6.1 SP2
<strong>Installing</strong> <strong>InduSoft</strong> <strong>Web</strong> <strong>Studio</strong>IWS Users Guideproduct module (engineering or runtime). You can use this evaluation periodcontinuously or not (for example: 10 hours a day for 4 days, 5 hours a day for 8days, 10 hours a day for 3 days plus 5 hours a day for 2 days, and so on).After running for 40 hours in the Evaluation Mode the evaluation periodterminates and IWS automatically converts to and runs in Demo Mode (seefollowing description) until you install a valid license (Hardkey or Softkey). Youcannot reactivate Evaluation mode—even if you uninstall and then reinstall theproduct on your computer. Note:Every version of the product has an evaluation period that is independentof every other <strong>InduSoft</strong> <strong>Web</strong> <strong>Studio</strong> version. For example, if your IWSversion 5.1 evaluation period expires and you are running in Demo Modebecause you have not installed a license, when you install IWS version 6.1on the same computer, the newer version will begin its own 40-hourevaluation period and the 5.1 version will continue running in Demo Modeonly.Demo Mode: Enables you to download and upload applications to remote stations,and to run applications for testing and/or demonstration purposes. You canexecute runtime tasks and use the debugging tools (LogWin and Database Spy),but they shut down automatically after running for two hours continuously. Youcan restart the Demo Mode again and run for another two hours, and so on.You cannot create or modify screens, worksheets, or application settings inDemo Mode.The following menu options are available in Demo Mode:File View Project Tools HelpOpen ProjectExitToolbarsStatus BarZoomLibrarySettingsStatusRun ApplicationStop ApplicationSend Project toTargetExecutionEnvironmentLogonRegister ControlsConvert ResolutionVerify ApplicationSystem InformationAll OptionsLicensed for Engineering Only: Enables all workbench options for an unlimited time.This mode also allows you to execute the runtime tasks and debugging tools(Database Spy, Output window, and LogWin module) for 24 hours continuously.After the 24-hour period these tasks shut down, but you can restart them againand run for another 24 hours, and so on. You can use this license fordevelopment and testing only.Licensed for Runtime Only: Enables you to run all runtime and debugging tools(Database Spy, Output window, and LogWin module) for unlimited time, but youcannot create or modify screens and/or worksheets.The menu options available in Runtime Only mode are the same as the optionslisted for Demo Mode (see previous table).Licensed for Engineering + Runtime: Enables all engineering tools, runtime tasks, anddebugging tools (Database Spy, Output window, and LogWin module) for anunlimited period of time.<strong>InduSoft</strong> <strong>Web</strong> <strong>Studio</strong> v6.1 SP2 2–11
IWS Users Guide<strong>Installing</strong> <strong>InduSoft</strong> <strong>Web</strong> <strong>Studio</strong> IMPORTANT!Every license sets restrictions, such as which Product Types are supported forthat license. Consult your software vendor about which product types areavailable and which features are enabled for each type. Notes:The IWS Execution Environment tools are always available so you can upload ordownload files from or to remote stations (such as remote WinCE devices) usingthe Execution Environment dialog (Project > Execution Environment).You can select Help → About from the main menu bar to see which execution modeyou are running. The About <strong>InduSoft</strong> <strong>Web</strong> <strong>Studio</strong> screen contains information aboutthe current execution mode. If you are running Evaluation mode, the amount of timeyou have remaining displays in the Execution Mode field.Verifying Version, Execution Mode, and Remaining Evaluation TimeProtection Types<strong>InduSoft</strong> <strong>Web</strong> <strong>Studio</strong> and CEView support the following protection types:Protection Type <strong>InduSoft</strong> <strong>Web</strong> <strong>Studio</strong> CEViewHardkey Softkey = Apply; = Does NOT ApplyHardkey: An encapsulated chip that must be physically connected to thecomputer’s parallel port (LPT1) or the USB interface.The IWS license resides in the hardkey, and you cannot share this licensesimultaneously with more than one other copy of IWS in the network. If youconnect the hardkey to another computer, you will be transferring the license tothat computer.Using the hardkey does not prevent you from connecting another device (such asa printer) to the computer’s parallel port—the hardkey should be electronicallytransparent to other devices connected to the parallel port. You simply connect2–12 <strong>InduSoft</strong> <strong>Web</strong> <strong>Studio</strong> v6.1 SP2
<strong>Installing</strong> <strong>InduSoft</strong> <strong>Web</strong> <strong>Studio</strong>IWS Users Guidethe hardkey to the computer and then connect the printer cable to the hardkey.However, you may encounter problems if you install more than one hardkey (fordifferent products) on the same parallel port. On the other hand, while using theUSB hardkey, the USB port cannot be shared with any other device. Caution:Be careful when installing or removing a hardkey from the computer’sparallel port. We strongly recommend that you turn off the computer anddisconnect it from the power supply before installing or removing a hardkey.Softkey: When you install IWS or CEView, the program generates a unique codecalled a Site Code. You can send this site code to your software vendor, who willthen generate a license code called a Site Key to match your site code. The sitekey installs the IWS or CEView license on your computer or WinCE device. Note:When you use a softkey, IWS records the license in the computer’s (orWinCE device’s) non-volatile memory. If this device is damaged, you will losethe license.License SettingsBoth hardkey and softkey licenses set the following parameters:Product Type: Specifies which features and restrictions are enabled for theapplication (such as maximum number of tags supported, maximum number ofdrivers running simultaneously, and so on). Consult your software vendor aboutwhich product types are available and which features are enabled for each type.Execution Mode: Specifies the following options– Engineering Only: Configures and runs the application for testing duringdevelopment only. You cannot use this license as a long-term, runtimelicense.– Runtime Only: Runs the application for unlimited time. You cannot use thislicense to develop or modify the application.– Engineering + Runtime: Configures, modifies, and runs the application for anunlimited time.Number of <strong>Web</strong> Thin Clients: Specifies how many <strong>Web</strong> Thin Clients are supportedsimultaneously by the server. You can connect one or more <strong>Web</strong> Thin Clients tothe server simultaneously (for an additional charge), but the license installed onthe server must support these additional <strong>Web</strong> Thin Clients.Options for adding <strong>Web</strong> Thin Clients are as follows:– Server for <strong>InduSoft</strong> <strong>Web</strong> <strong>Studio</strong> (WinNT/2000/XP): Connects 0 (No <strong>Web</strong> ThinClients), 1, 2, 4, 8, 16, 32, 64, 128, or 256 <strong>Web</strong> Thin Clients to the serversimultaneously.– Server for CEView (WinCE): Connects 0 (No <strong>Web</strong> Thin Clients), 1, 2, 4, or 8 <strong>Web</strong>Thin Clients to the server simultaneously.Version Supported: When you generate a license, the license will specify the productversion it supports.<strong>InduSoft</strong> <strong>Web</strong> <strong>Studio</strong> v6.1 SP2 2–13
IWS Users Guide<strong>Installing</strong> <strong>InduSoft</strong> <strong>Web</strong> <strong>Studio</strong><strong>Installing</strong> Hardkey Licenses for <strong>InduSoft</strong> <strong>Web</strong> <strong>Studio</strong>This section explains how to install and upgrade a hardkey license on aWindows NT/2000/XP computer.<strong>Installing</strong> a New LicenseTo install a new IWS license, use the following steps: Install <strong>InduSoft</strong> <strong>Web</strong> <strong>Studio</strong> on your computer using the instructions providedearlier in this chapter. Connect the hardkey to the parallel port (LPT1) or USB interface on thecomputer where you installed IWS. Caution:Be careful when you install or remove a hardkey from your computer. Westrongly recommend that you turn off the computer and disconnect it fromthe power supply before installing or removing the hardkey. Run <strong>InduSoft</strong> <strong>Web</strong> <strong>Studio</strong>.Upgrading the Current Hardkey LicenseTo upgrade your current IWS license, perform the following steps: Close all <strong>InduSoft</strong> <strong>Web</strong> <strong>Studio</strong> development and runtime modules. Ensure the hardkey is connected to the parallel port (LPT1) or USB interface onthe computer where you installed IWS. Select Start > Programs > <strong>InduSoft</strong> <strong>Web</strong> <strong>Studio</strong> >Register to execute the Register module. When the Protection Manager dialog displays, enable the Hardkey button in theProtection Type section and then click the Check button.Protection Manager: Select Hardkey– If you do not have a valid hardkey connected to the computer’s parallel port(LPT1) or USB interface, the following error message displays:No Hardkey2–14 <strong>InduSoft</strong> <strong>Web</strong> <strong>Studio</strong> v6.1 SP2
<strong>Installing</strong> <strong>InduSoft</strong> <strong>Web</strong> <strong>Studio</strong>IWS Users Guide– If you do have a valid hardkey connected to the computer’s parallel port(LPT1) or USB interface, the Hardkey Settings dialog displays, which containsthe current license settings recorded on the hardkey.Checking the Hardkey Settings Click the Change License button to open the Change License – Hardkey dialog:Change License Dialog Copy the code from the Site Code text box and send it to your software vendor. Your software vendor should send back a Site Key to match the site code.Type this site key into the Site Key field of the Change License – Hardkey dialogand then click the Authorize button.You will be prompted to confirm the operation. If the program accepts (validates)your site key, the following message displays:Register: Successful Completion Note:If your new Site Key is not valid, an error message displays. If this happens,double-check that you entered the Site Key correctly. If you entered the keycorrectly and still receive an error message, contact your software vendor forassistance.You can upgrade any license setting (Product Type, Execution Mode, or Number of<strong>Web</strong> Thin Clients) simultaneously supported by the server, or upgrade the softwareversion that is being supported currently. The upgrade cost will depend on yourcurrent license settings and the settings of the upgrade license.<strong>InduSoft</strong> <strong>Web</strong> <strong>Studio</strong> v6.1 SP2 2–15
IWS Users Guide<strong>Installing</strong> <strong>InduSoft</strong> <strong>Web</strong> <strong>Studio</strong><strong>Installing</strong> a SoftKey License for <strong>InduSoft</strong> <strong>Web</strong> <strong>Studio</strong>This section explains how to install and upgrade a SoftKey license for IWS(on Win NT/2000/XP). Note:You must have Administrator privileges for the Windows NT/2000/XPworkstation on which you are installing or modifying a softkey license.<strong>Installing</strong> a New LicenseTo install a new IWS softkey license, use the following steps: Install <strong>InduSoft</strong> <strong>Web</strong> <strong>Studio</strong> on your computer using instructions providedearlier in this chapter. Execute the Register module by selecting Start → Programs → <strong>InduSoft</strong> <strong>Web</strong> <strong>Studio</strong> →Register.Click (enable) the Softkey radio button in the Protection Type group, and then clickthe Check button.Protection Manager: Softkey Note:If you have a hardkey license installed on your computer, the Register dialogdisplays a “Warning: this will change the protection method ofthe software. Continue anyway?” message.To continue with the softkey installation, click Yes.2–16 <strong>InduSoft</strong> <strong>Web</strong> <strong>Studio</strong> v6.1 SP2
<strong>Installing</strong> <strong>InduSoft</strong> <strong>Web</strong> <strong>Studio</strong>IWS Users GuideThe Softkey Settings dialog displays.– If you already have a valid <strong>InduSoft</strong> <strong>Web</strong> <strong>Studio</strong> softkey license installed, thecurrent license settings display.– If you have not previously installed a license on your computer, the Status textbox displays a License not found message.Checking the Softkey Settings Click the Change License button on the Softkey Settings dialog. When the Change License – Softkey dialog displays, copy the code informationfrom the Site Code text box and send it to your software vendor.Change License: SoftkeyYour software vendor will send back a Site Key that matches this Site Code. Typethe Site Key into the Site Key field of the Change License – Softkey dialog and thenclick the Authorize button.You will be prompted to confirm the operation. If the program accepts (validates)your Site Key, the following message displays:Successful Site Key Installation Note:If your new Site Key is not valid, an error message displays. If this happens,double-check that you entered the site key correctly. If you entered the keycorrectly and still receive an error message, contact your software vendor forassistance.Close the Register module and run <strong>InduSoft</strong> <strong>Web</strong> <strong>Studio</strong>.<strong>InduSoft</strong> <strong>Web</strong> <strong>Studio</strong> v6.1 SP2 2–17
IWS Users Guide<strong>Installing</strong> <strong>InduSoft</strong> <strong>Web</strong> <strong>Studio</strong>Upgrading the Current LicenseTo upgrade your current IWS license, use the following steps: Before upgrading a softkey license, you must re-install <strong>InduSoft</strong> <strong>Web</strong> <strong>Studio</strong> onthe same computer where you installed the previous license. Caution:Do not uninstall <strong>InduSoft</strong> <strong>Web</strong> <strong>Studio</strong> before getting an upgraded license fromyour software vendor or you will lose your current license and it will not bepossible to upgrade. (You will have to order a new license.) From the newly installed version of <strong>InduSoft</strong> <strong>Web</strong> <strong>Studio</strong>, open the \BINsubfolder and run the SKEYUPG.exe program.The Upgrade Softkey dialog displays as shown:Upgrade Softkey Dialog In the Upgrade Softkey dialog, click the button and when the Browse dialogdisplays, select the path (location) where the previous (already licensed) versionof IWS was installed. The specified path information automatically displays inthe Path text box in the Old Version section.Finding the Previously Installed Softkey Click the Save SKEYUPG.BIN file button to save the information necessary togenerate the upgraded license. Copy the SKEYUPG.BIN file from the directory where you executed theSKEYUPG.exe program and send it to your software vendor. Your software vendor will send you a Site Key matching the information saved inthe SKEYUPG.BIN file.2–18 <strong>InduSoft</strong> <strong>Web</strong> <strong>Studio</strong> v6.1 SP2
<strong>Installing</strong> <strong>InduSoft</strong> <strong>Web</strong> <strong>Studio</strong>IWS Users Guide Execute the Register module ( Register) for the newly installed version of<strong>InduSoft</strong> <strong>Web</strong> <strong>Studio</strong> (where you executed the SKEYUPG.exe program to generatethe SKEYUPG.BIN file). When the Protection Manager dialog displays, click (enable) the Softkey button inthe Protection Type section and click the Check button.Protection Manger: Select SoftkeyThe Softkey Settings dialog displays.– If you have not previously installed a license on your computer, the Status textbox displays a “License not found” message:Softkey Settings Dialog– If you already have a valid <strong>InduSoft</strong> <strong>Web</strong> <strong>Studio</strong> Softkey license installed, thecurrent license settings display:Softkey Settings: License FoundYou can upgrade any license setting (Product Type, Execution Mode, or Number of<strong>Web</strong> Thin Clients) simultaneously supported by the server, or upgrade whichsoftware version is being supported. The upgrade cost will depend on yourcurrent license settings and the settings of the upgrade license.<strong>InduSoft</strong> <strong>Web</strong> <strong>Studio</strong> v6.1 SP2 2–19
IWS Users Guide<strong>Installing</strong> <strong>InduSoft</strong> <strong>Web</strong> <strong>Studio</strong> In the Softkey Settings dialog, click the Change License button to open the ChangeLicense – Softkey dialog:Change License: Softkey Type the site key sent by your software vendor into the Site Key field of theChange License – Softkey dialog. Click the Authorize button.If the Site Key is accepted (validated), the following message displays:Successful Site Key Installation Note:If the new site key is not valid, an error message displays. If this happens,verify that you entered the site key correctly. If you typed the site keycorrectly and still receive an error message, contact your software vendor forfurther assistance. Close the Register module and run <strong>InduSoft</strong> <strong>Web</strong> <strong>Studio</strong>.2–20 <strong>InduSoft</strong> <strong>Web</strong> <strong>Studio</strong> v6.1 SP2
<strong>Installing</strong> <strong>InduSoft</strong> <strong>Web</strong> <strong>Studio</strong>IWS Users Guide<strong>Installing</strong> a SoftKey License for CEViewThere are two ways to register a CEView license on your WinCE device:Locally: Using the Remote Agent from the WinCE device as the interface.Remotely: Using <strong>InduSoft</strong> <strong>Web</strong> <strong>Studio</strong> to send the license to the WinCE device. Note:You can purchase some WinCE devices with the CEView license alreadyloaded. Consult your software vendor about this possibility.<strong>Installing</strong> or Upgrading a License (Locally)To install a new (or upgrade an existing) CEView softkey license (locally), use thefollowing procedure: Download the Remote Agent program (CEServer.exe) into the \ path of the WinCE device. The \ must retainthis data after you reboot the WinCE device. Note:The \ path can vary with each WinCE devicemanufacturer.After installing IWS on the WinNT/2000/XP computer, the Remote Agent programfile (CEServer.exe) is stored in the following path:\Redist\\\BIN\CEServer.exeWhere:– is the directory where you installed IWS (forexample, C:\Program Files\<strong>InduSoft</strong> <strong>Web</strong> <strong>Studio</strong>\).– indicates the operating system version (for example,CEView for Windows CE v3.0, WinCE 4.0 for Windows CE v4.0, WinCE 4.1for Windows CE v4.1, and so forth).– is the WinCE device processor type (for example, x86). Note:In some WinCE devices, the \ points to aFlashCard memory that is connected to the device. Also, before downloadingthe Remote Agent (CEServer.exe) to your WinCE device, be sure it is notalready loaded in the \.<strong>InduSoft</strong> <strong>Web</strong> <strong>Studio</strong> v6.1 SP2 2–21
IWS Users Guide<strong>Installing</strong> <strong>InduSoft</strong> <strong>Web</strong> <strong>Studio</strong> Tips: There are two ways to download the Remote Agent program (CEServer.exe)to a WinCE device:– You can use the Microsoft ActiveSync ® utility to download/upload filesfrom a WinNT/2000/XP station to a WinCE device. You can downloadActiveSync from the Microsoft <strong>Web</strong> site at no charge.– You can use the following command syntax to map a shared folder froma WinNT/2000/XP computer to most WinCE devices:net use [] [Remote Name] [/user:]After executing this command successfully, open a Command Promptwindow and use a COPY command to copy files to the WinCE device. We strongly recommend that you configure the WinCE device to executethe Remote Agent program automatically when you power on the WinCEdevice. See the WinCE device manufacturer’s documentation forinformation about how to configure the Startup program on the device. If the Remote Agent program (CEServer.exe) does not start automaticallywhen you power on the WinCE device, you can run it manually from the\.Remote Agent Dialog From the Remote Agent dialog, click the Setup button to open the Setup dialog:Setup Dialog2–22 <strong>InduSoft</strong> <strong>Web</strong> <strong>Studio</strong> v6.1 SP2
<strong>Installing</strong> <strong>InduSoft</strong> <strong>Web</strong> <strong>Studio</strong>IWS Users Guide Click the License button to open the License dialog:License Dialog Click the Change License button to open the Change License dialog:Change License Dialog– Copy the site code information (provided in the Site Code text box) and send itto your software vendor.– Your software vendor will send back a Site Key that matches this site code.Type the Site Key into the Site Key field on the Change License dialog, andclick the Authorize button.If the site key is accepted (validated), the following message displays:Successful Site Key Installation Note:If the new site key is not validated, an error message displays. If thishappens, double-check that you entered the site key correctly. If you typedthe key correctly and get an error message, contact your software vendor forfurther assistance.<strong>InduSoft</strong> <strong>Web</strong> <strong>Studio</strong> v6.1 SP2 2–23
IWS Users Guide<strong>Installing</strong> <strong>InduSoft</strong> <strong>Web</strong> <strong>Studio</strong><strong>Installing</strong> or Upgrading a License (Remotely)To install a new (or upgrade an existing) CEView SoftKey license (remotely), use thefollowing procedure: Execute the three first steps described in the previous section. In the Setup dialog, specify the Device Connection type by clicking (enabling) theSerial Port or TCP/IP button. (If you enable Serial Port, you also must select a portfrom the combo-box list). Click OK to close the dialog. Run <strong>InduSoft</strong> <strong>Web</strong> <strong>Studio</strong> on the WinNT/2000/XP station and connect thisstation to the WinCE device using either a serial or TCP/IP link. From the IWS main menu bar, select Project > Execution Environment to open theExecution Environment dialog:Execution Environment Dialog Specify a target station by clicking one of the following radio buttons in theTarget Station:– Local– Network IP and type the IP address into the field provided– Serial Port and select a port from the combo-box list provided– Microsoft ActiveSync When the Connect button becomes active, click the button to connect to theWinCE device on which the Remote Agent is running. (If you select Network IP, youmust also enter the IP address in the text box provided.) Tip:TCP/IP links provide better communication performance than serial links.2–24 <strong>InduSoft</strong> <strong>Web</strong> <strong>Studio</strong> v6.1 SP2
<strong>Installing</strong> <strong>InduSoft</strong> <strong>Web</strong> <strong>Studio</strong>IWS Users GuideThe Status field must display the following message:Connected to CEView Connecting to CEView Select the CE License tab to see which license settings are currently installed onyour WinCE device.CEView License Settings From the License Codes section of the Execution Environment dialog, copy theinformation from the Site Code field and send it to your software vendor.– Your software vendor will send you a Site Key that matches this site code.Type this site key into the Site Key field.– Click the Send button to send the code to the Remote Agent running on theWinCE device.The Remote Agent program will attempt to install the new license using the site keysent from <strong>InduSoft</strong> <strong>Web</strong> <strong>Studio</strong>. If the site key is accepted (validated), thefollowing message displays:Successful Site Key Installation<strong>InduSoft</strong> <strong>Web</strong> <strong>Studio</strong> v6.1 SP2 2–25
IWS Users Guide<strong>Installing</strong> <strong>InduSoft</strong> <strong>Web</strong> <strong>Studio</strong> Note:If the new site key is not valid, an error message will display. If thishappens, double-check that you typed the site key correctly. If you enteredthe site key correctly and still receive an error message, contact yoursoftware vendor for further assistance. Caution:After sending the license to the WinCE device, be sure to save its registrysettings. If you do not save these settings, you will lose the license afterrebooting the device.2–26 <strong>InduSoft</strong> <strong>Web</strong> <strong>Studio</strong> v6.1 SP2
Chapter 3: Working with the IWS DevelopmentEnvironmentThis chapter provides an overview of the <strong>InduSoft</strong> <strong>Web</strong> <strong>Studio</strong> developmentenvironment. This information is organized into the following sections:Navigating the Development Environment WindowUsing the Screen/Worksheet EditorUsing the Database SpyUsing the Output WindowCustomizing the WorkspaceDevelopment ModulesGeneral CommunicationsNavigating the Development Environment Window<strong>InduSoft</strong> <strong>Web</strong> <strong>Studio</strong> uses standard, Windows-like tools and interfaces to provide anintegrated and user-friendly developmentenvironment:IWS Development Environment<strong>InduSoft</strong> <strong>Web</strong> <strong>Studio</strong> v6.1 SP2 3–1
IWS Users GuideWorking with the IWS Development EnvironmentThis development environment consists of the following features:Title barMenu barToolbarsWorkspaceScreen/Worksheet EditorDatabase Spy windowOutput window (LogWin)Status bar Note:Other IWS tools, such as the Symbol Library and the Translation Editor alsocontain some of these features (such as menu bars).Using the Title BarThe title bar is located along the top of the development environment window and itcontains the <strong>InduSoft</strong> icon, the product name, and the name of the active screen orworksheet (if any).Example Title BarThe title bar also contains the following buttons (from left to right): Minimize button ( ): Click to minimize the development environment window. Restore Down/Maximize button ( / ): Click to toggle the development environmentwindow between two sizes:– Restore Down reduces the window to its original (default) size– Maximize enlarges the window to fill your computer screen Close button ( ): Click to save the database and then close the developmentenvironment. If you modified any screens or worksheets, the program promptsyou to save your work. This button’s function is similar to selecting the Exitcommand from the File menu. Note:Closing the development system does not close the runtime system.3–2 <strong>InduSoft</strong> <strong>Web</strong> <strong>Studio</strong> v6.1 SP2
Working with the IWS Development EnvironmentIWS Users GuideUsing the Menu BarThe menu bar is located just below the title bar.Menu BarThe menu bar provides access to the following menus and their menu options:File: Contains options that enable you to manage application files.Edit: Contains options that enable you to manage screens and worksheets.View: Contains options that enable you to manage visible tools and providesshortcuts to dialogs you open most frequently.Insert: Contains options that enable you to configure application tags, tag classes,documents, drivers, users, security settings, screens, and ActiveX objects.Project: Contains options that enable you to execute applications locally andremotely, and provides links used to configure general application settings.Tools: Contains options that provide links to auxiliary development tools.Window: Contains options that enable you to manage open screens andworksheets.Help: Contains options that provide links to information about the <strong>InduSoft</strong> <strong>Web</strong><strong>Studio</strong> product and <strong>InduSoft</strong>.When you click on the menu name, a pulldown menu displays containing a variety ofrelated options.For example, when you click View, the following pulldown menu displays:View Pulldown Menu Notes: Individual menu options are discussed in detail throughout this publicationwhenever their use relates to performing a specific task. In many cases, menu option functionality is duplicated using buttons on thevarious toolbars. For example, you can click thePrint to open the Print dialog.button or select File →<strong>InduSoft</strong> <strong>Web</strong> <strong>Studio</strong> v6.1 SP2 3–3
IWS Users GuideWorking with the IWS Development EnvironmentPULLDOWN MENU FEATURESCertain features on a pulldown menu provide a clue as to what you can expect whenyou select a menu item. Ellipses ( ): Indicates a dialog or window will open when you select this option.For example, when you select the New option, the New dialog displays. Arrows ( ): Indicates a cascade menu (a second pulldown menu) willdisplay when you select this option. For example, when you select the Toolbarsoption, the following cascade menu displays:Toolbars Cascade MenuKeyboard Combinations and Function Keys: Indicates an alternate method (shortcut) forselecting that option from the pulldown menu. For example,– Pressing the Ctrl and p keys simultaneously is the same as selecting the Printoption from the File menu.– Pressing the Alt and 1 keys simultaneously opens/closes the Output window.– Pressing the F4 function key opens the Zoom window. Toggle buttons ( ) or ( ): Click the button to alternate between turning thefeature on or off .For example, if you click once on the Standard button shown in the figure above,you will turn off the Standard toolbar so it will not display in the developmentenvironment. Click the button again, and the toolbar will display. Similarly,clicking the Workspace button), toggles the Workspace display on and off .Option Name only: Indicates that when you click the option name, IWS will performthe task immediately or put you in the right mode to perform the task. Forexample, if you select File → Save, IWS immediately saves the active applicationscreen.3–4 <strong>InduSoft</strong> <strong>Web</strong> <strong>Studio</strong> v6.1 SP2
Working with the IWS Development EnvironmentIWS Users GuideDOCKING THE MENU BARThe menu bar is a dockable feature, which means you can move it to anotherlocation in the development environment window.To move and dock the menu bar: Click on the menu bar and drag it to a new location. Release the mouse button to attach or dock the menu bar to its new position.Using the Toolbars<strong>InduSoft</strong> <strong>Web</strong> <strong>Studio</strong> provides several toolbars that enable you to perform differenttasks within the program. This section describes the function and default location ofeach toolbar.The following toolbars contain general purpose tools, and they are located acrossthe top of the Workspace, just below the menu bar by default:– Standard– Tag Properties– Execution Control– <strong>Web</strong>– Align and DistributeThe following toolbars contain screen editing tools, and they are located along theright side of the development environment window by default:– Mode– Static Objects– Active Objects– Dynamic Properties– Bitmap Notes: The Bitmap toolbar is hidden by default. Select View → Toolbars → Bitmapfrom the main menu bar to display the Bitmap toolbar. Detailed instructions for using these toolbars and toolbar options areprovided throughout this publication when you will use them to perform aspecific task.DOCKING A TOOLBARAll toolbars are dockable, which means you can move them to another location in thedevelopment environment window. To move and dock any of the toolbars: Click on the toolbar and drag it to a new location. Release the mouse button to attach or dock the toolbar to its new position. Tip:Position your cursor on a button and the status bar (located at the bottom of theIWS interface) will provide a brief description of that button.<strong>InduSoft</strong> <strong>Web</strong> <strong>Studio</strong> v6.1 SP2 3–5
IWS Users GuideWorking with the IWS Development EnvironmentUsing the WorkspaceThe Workspace window is a user-friendly interface that enables you to find anyapplication component (such as tags, screens, worksheets, and so forth) quickly andeasily.You can resize, move, or hide the Workspace window to suit your development style.The Workspace contains four tabs:Database: Provides access to all database tags and security-system componentsconfigured for the current application.Graphics: Provides access to all screens and symbols in the application.Tasks: Provides access to all task worksheets in the application.Comm: Provides access to all drivers configured to establish communication withanother device or software program using available protocolsOn each tab, the application components (represented by an icon and uniquedescription) are organized into a tree-view display similar to the following:Workspace TabsClick the button or double-click the folder to view the contents of (expand) thefolder or click the button to close the folder.If you right-click on any component in the Workspace, a menu displays with optionsrelated to that component. For example, the following pop-up menu enables you toOpen the Application Tags database, Insert (create) a new tag, or Refresh the currentview of the Application Tags database:Right-Click to Open a Pop-Up Menu3–6 <strong>InduSoft</strong> <strong>Web</strong> <strong>Studio</strong> v6.1 SP2
Working with the IWS Development EnvironmentIWS Users GuideIf you double-click on the button or name of any component in a folder, a relatedIWS dialog, worksheet, or screen displays so you can edit that component. Forexample:Double-click Developmentto open the Group AccountDialogDouble-click Datasheet Viewto open the Application TagsWorksheetDouble-click Main.scr to openthe Main.scr Display ScreenThe rest of this section describes each of the Workspace tabs.<strong>InduSoft</strong> <strong>Web</strong> <strong>Studio</strong> v6.1 SP2 3–7
IWS Users GuideWorking with the IWS Development EnvironmentDATABASE TABSelect the Database tab to access all of the database tags andsecurity-system components that are available for the currentapplication. This tab contains the following folders:Application Tags contains tags you created duringapplication development (such as screen tags or tags thatread from/write to field equipment). Tip:You can sort the data in the Application Tags sheetand/or insert/remove additional columns to/from thesheet by right-clicking on it and choosing theapplicable option from the pop-up menu.Classes contain compound tags, called class tags, createdto associate a set of values (rather than a single value)with an object.Shared Database contains tags that were created in a PCbasedcontrol software program and then imported intothe IWS Tags database.For example you can import SteepleChase tags into IWSso IWS can read/write data from a SteepleChase PCbasedcontrol product.Internal Tags contains predefined tags with predetermined functions that are usedby IWS for specific, supervisory tasks (for example, Date tags hold the currentdate in string format).All internal tags are read-only, which means you cannot add, edit, or removethese tags from the database.Security: Contains all of the group and individual usersecurity accounts configured for the current application.Event Settings: Contains logging and event-retrieval features.You can view, add, and edit tags in the Application Tags,Classes, Shared Database, or Internal Tags folders as follows:Double-click Datasheet View to open a Tags worksheet, whichyou use to create or modify tags for your application.Open a Tag List or Member List folder and double-click onany of the existing tag names to open a Properties dialog.You can use the parameters on this dialog to modify thetag’s current properties.To modify an existing Security account, open the Groups or Users folder and doubleclickon a group or user name. When a Group Account/User Account dialog displays,use the parameters on the dialog to change the existing account properties. Notes: Chapter 5: Working with Tags provides instructions for creating and editingtags in the IWS Tags database. Chapter 11: Configuring a Security System provides instructions for3–8 <strong>InduSoft</strong> <strong>Web</strong> <strong>Studio</strong> v6.1 SP2
Working with the IWS Development EnvironmentIWS Users Guideconfiguring a security system for your application.<strong>InduSoft</strong> <strong>Web</strong> <strong>Studio</strong> v6.1 SP2 3–9
IWS Users GuideWorking with the IWS Development EnvironmentGRAPHICS TABSelect the Graphics tab to access all of the screens, <strong>Web</strong> pages, Library objects, andsymbols in the application.This tab contains the following folders:Screens: Contains all of the display screens created for thecurrent application.Group Screen: Contains the entire screen groups (individualscreens combined into manageable groups) created for thecurrent application. (Note: Screen groups are not availablefor Windows CE.)<strong>Web</strong> Pages: Contains all the <strong>Web</strong> pages (screens saved inHTML format) created for the application.Library: Contains the library of common symbols andgraphics provided with <strong>InduSoft</strong> <strong>Web</strong> <strong>Studio</strong>. Double-clickthe Library button to open the IWS Symbol Library utility, consisting of a list pane(containing all of the symbol groups) and a display screen.Symbols: Contains all of the user-defined symbols, which can be groups of imagesand/or text. You can create custom symbols for the application and save theminto this folder.To open a screen, <strong>Web</strong> page, or symbol for editing, double-click the appropriatebutton. Note:Specific instructions for editing screens, <strong>Web</strong> pages, or symbols are providedlater in this chapter (“Using the Screen/Worksheet Editor” on page 3–12) and inChapter 7: Configuring Screens and Graphics.TASKS TABSelect the Tasks tab to access all task worksheets in the current application.This tab contains the following task folders:Alarms: Contains the Alarm worksheets used to configurealarm groups and the tags related to each alarm group in theapplication. You also use the Alarm task to define the alarmmessages generated by IWS.Trend: Contains the Trend worksheets used to configurehistory groups that store trend curves for the application. Youcan use the Trend task to declare which tags must have theirvalues stored on disk, and to create history files for trendgraphs. IWS stores the samples in a binary history file(*.hst), and displays both history and on-line samples in atrend graph screen.Recipes: Contains the Recipe worksheets used to configure how data is exchangedbetween the application database and disk files in ASCII or DBF format, and howvalues are transferred between files and real-time memory.Reports: Contains the Report worksheets used to configure reports (text type) thatare sent to a printer or a disk. Reports tasks allow you to configure text reportswith system data, which makes report creation easier and more efficient.3–10 <strong>InduSoft</strong> <strong>Web</strong> <strong>Studio</strong> v6.1 SP2
Working with the IWS Development EnvironmentIWS Users GuideODBC: Contains the ODBC worksheets used to configure how the ODBC interfaceruns in a network environment and uses standard Windows ODBC configuration.You configure ODBC tasks to exchange data between IWS and any databasesupporting the ODBC interface.Math: Contains the Math worksheets used to configure and implement additionalroutines to work with different IWS tasks. IWS executes Math worksheets asBackground Tasks during runtime. You can configure Math worksheets to providefree environments for logical routines and mathematical calculations required bythe application.Scheduler: Contains the Scheduler worksheets used to configure events usingdefined mathematical expressions, which are executed according to time, date, orother monitored event.To open Task worksheets for editing, double-click the task button and the worksheetwill display in the Screen/Display window. Note:Detailed instructions for editing worksheets are provided in Chapter 8:Configuring Task Worksheets.COMMUNICATIONS TABSelect the Communications tab to access all of the drivers configured for yourapplication. Drivers are used to establish communication with other devices orsoftware programs using available protocols.This tab contains the following folders:Drivers: Contains the Driver worksheetsused to configure a communicationinterface (or interfaces) between theproject application and remoteequipment (such as a PLC ortransmitters).A communication driver is a .dll filethat contains specific information aboutthe remote equipment and implementsthe communication protocol.OPC: Contains the OPC worksheets used to configure OPC interfaces between theapplication and an OPC Server. An <strong>InduSoft</strong> <strong>Web</strong> <strong>Studio</strong> OPC Client moduleenables the IWS system to communicate with any device that implements an OPCServer by implementing the OPC standard described in the OLE for ProcessControl Data Access Standard Version 2.0 document published by the OPCFoundation.TCP/IP: Contains the TCP/IP worksheets used to configure TCP/IP Clientinterfaces for other <strong>InduSoft</strong> stations.IWS TCP/IP Client and Server modules enable two or more applications to keeptheir databases synchronized using the TCP/IP protocol to providecommunication between applications.<strong>InduSoft</strong> <strong>Web</strong> <strong>Studio</strong> v6.1 SP2 3–11
IWS Users GuideWorking with the IWS Development EnvironmentDDE: Contains the DDE worksheets used to configure a DDE Client for a DDEServer application (such as Microsoft Excel or any other Windows program thatsupports this interface).DDE (Dynamic Data Exchange) is a protocol that enables dynamic data exchangebetween Windows applications. A DDE conversation is an interaction betweenserver and client applications. IWS provides interfaces that run as clients or asservers. Note:By default, the DDE Client module from IWS supports DDE Servers that handlestring data in the UNICODE format. If the DDE Server handles string data inthe ASCII ANSI format, the following setting must be configured manually in the.APP file (you can use Notepad to edit this file):[Options]DDEANSI=1To open worksheets in the Drivers, OPC, TCP/IP, or DDE folders for editing, doubleclickthe worksheet button and the worksheet will display in the Screen/Worksheetwindow. Note:Detailed instructions for editing communication worksheets are provided inChapter 10: Communication.Using the Screen/Worksheet EditorUse the powerful, object-oriented screen editor to create and edit a variety of screensand worksheets for your applications. You can input information using your mouseand keyboard, output control data to your processes, and automatically updatescreens based on data input from your processes.Other screen editor features include:Simple point-and-click, drag-and-drop interfaceGrouping objects to preserve the construction steps of individual objectsEditing objects without having to ungroup internal object components or groupsHandling bitmap objects and background bitmapsStatus line support in application windows and dialogs3–12 <strong>InduSoft</strong> <strong>Web</strong> <strong>Studio</strong> v6.1 SP2
Working with the IWS Development EnvironmentIWS Users GuideScreen/Workspace EditorThe following toolbars contain general purpose tools that enable you to performdifferent tasks within the program.Standard toolbar: Provides icons (shortcuts) that duplicate functionality found onthe File, Edit, and View menus.Standard Toolbar– New button ( ): Click to open the New dialog and create new applications(projects) or files as part of your open application. Note:Using the New button is the same as selecting File → New from the menubar or typing the Ctrl+N key combination.– Open Project button ( ): Click to locate and open an <strong>InduSoft</strong> <strong>Web</strong> <strong>Studio</strong>application. Note:Using the Open Project icon is the same as selecting File → Open Project fromthe menu bar or opening the <strong>InduSoft</strong> <strong>Web</strong> <strong>Studio</strong> folder from WindowsExplorer and double-clicking on the project name.– Save button ( ): Click to save any active screens or worksheets.<strong>InduSoft</strong> <strong>Web</strong> <strong>Studio</strong> v6.1 SP2 3–13
IWS Users GuideWorking with the IWS Development Environment Notes: Using the Save icon is the same as selecting File → Save from the menubar or typing the Ctrl+S key combination. The Save function becomes available only when you modify the activefile.– Save All button ( ): Click to save all open screens or worksheets. Note: Using the Save All icon is the same as selecting File → Save All from themenu bar. The Save All function becomes available only when you modify a screenor worksheet.– Cut button ( ): Click to remove a selected object from the screen/worksheetand store it on the clipboard, replacing any previously stored selections onthe clipboard. Use in combination with the Paste button. Note:Using the Cut icon is the same as selecting Edit → Cut from the menu bar ortyping the Ctrl + X key combination.– Paste button ( ): Click to place the contents of the clipboard into the upperleft corner of the active screen. You can Paste a cut or copied object multipletimes to a several screens/worksheets. Note:Using the Paste icon is the same as selecting Edit → Paste from the menubar or typing the Ctrl + V combination.– Copy button ( ): Click to duplicate a selected object and store it on theclipboard. You can then use the Paste button to move the copied object toanother location on the same screen or to another screen. NoteUsing the Copy icon is the same as selecting Edit → Copy from the menubar or typing the Ctrl+C key combination.– Delete button ( ): Click to delete the selection. If you accidentally delete anobject, you can restore it using the Undo button. Note:Using the Delete icon is the same as selecting Edit → Delete from the menubar or typing the Ctrl+X key combination.3–14 <strong>InduSoft</strong> <strong>Web</strong> <strong>Studio</strong> v6.1 SP2
Working with the IWS Development EnvironmentIWS Users Guide– Undo button ( ): Click to cancel the last action performed while working ona screen or worksheet. You can cancel up to 20 actions taken before your lastaction. The actions in object properties do not increase Undo steps. Note:Using the Undo icon is the same as selecting Edit → Undo from the menubar or typing the Ctrl+Z key combination.– Print button ( ): Click to print the active screen or worksheet or specifyprint/printer properties. Note:Using the Print icon is the same as selecting File → Print from the menu baror typing the Ctrl+P key combination.– Workspace Window button ( ): Toggle to display (open) or remove (close) theWorkspace window. Note:Using the Workspace Window icon is the same as selecting View → Toolbars →Workspace from the menu bar or typing the Alt+ 0 key combination.– Output Window button ( ): Toggle to display (open) or remove (close) theOutput window. Notes: Using the Output Window icon is the same as selecting View → Toolbars →Output from the menu bar or typing the Altl+1 key combination. See also “Using the Output Window” on page 3–25.– Database Spy Window button ( ): Toggle to display (open) or remove (close) theDatabase Spy window. Notes: Using the Database Spy Window icon is the same as selecting View →Toolbars → Database Spy from the menu bar or typing the Alt+2 keycombination. See also “Using the Database Spy” on page 3–24.– Library button ( ): Click to open a library of previously configured objects. Note: Using the Library icon is the same as selecting View → Library from themenu bar or typing the Ctrl+A key combination. See also Chapter 7: Configuring Screens and Graphics.<strong>InduSoft</strong> <strong>Web</strong> <strong>Studio</strong> v6.1 SP2 3–15
IWS Users GuideWorking with the IWS Development Environment– Layout button ( ):This interface displays all screens currently open in the ScreenEditor and allows you to:* Modify the Screen Attributes: Right-click on the screen displayed on theLayout tab and use the alignment options or the Screen Attributes link tomodify the screen position. You can also click and drag the screen tochange its position (Top and Left) or resize it (Width and Height).* Visualize how the screens fit together during the runtime. This option isespecially useful when creating pop-up/dialog screens or groups ofscreens. Note:The screens open in the Layout tab according to the order that they areopen in the development environment. When you change the position ofthe screen tabs in the development environment (to the left or to theright), you will change the order in which these screens will be displayedin the Layout tab.Tip:Right-click on the title of the Layout tab to display the option toenable/disable the Auto Scale. If you enable this option, the screens willbe auto-scaled automatically to fit in the Layout tab.– Zoom button ( ): Click to change the cursor to the zoom mode. Click anddrag the mouse on the screen to select the area where you want to zoom.Right-click on the screen to change the cursor to selection mode again.– Zoom combo-box ( ): Select the zoom scale from the combo-box.– Context Sensitive Help button ( ): Click on this button and then click on thearea where you want to read the help information.Tag Properties toolbar: Provides a text box and several icons (shortcuts) thatenable you to create, locate, and access different tags, functions, and tagproperties.Tag Properties Toolbar– Tagname text box ( ): Type a name into the text box to create a newtag for your application. The Cross Reference and Tag Properties buttons willreference this tag name for their actions.– Object Finder button ( ): Click to open the Object Finder dialog, which lists allTags and Functions currently configured for the application. See “Using theObject Finder” on page 3–46.– Cross Reference button ( ): Click to search all application screens andworksheets for the tag noted in the Tagname text box. This function writes a3–16 <strong>InduSoft</strong> <strong>Web</strong> <strong>Studio</strong> v6.1 SP2
Working with the IWS Development EnvironmentIWS Users Guidelog, detailing all the occurrences of the tag, to the XRef tab in the Outputwindow. See “Using the X-ref Option” on page 3–47.– Tag Properties button ( ): Click to configure parameters for each tag. The TagProperties dialog displays so you can specify these parameters. (For moreinformation about specifying tag properties, see “Setting Tag Properties” inChapter 5. Working with Tags.)– Global Tags Replace button ( ): Allows you to replace any tag(s) from alldocuments (screens and worksheets) of the whole application. You can editboth the From and the To column.Execution Control toolbar: Allows you to execute and manage an applicationlocally or from a remote location.Execution Control Toolbar– Test Display button ( ): Activates the test display mode, which allows you toconfigure the application while viewing graphical dynamics online in thedevelopment environment. The test display mode does not enable you to usethe Command, input Text I/O dynamics, or execute worksheets.– Stop display test button ( ): Stops the test display mode.– Run Application button ( ): Launches the runtime modules specified asAutomatic on the Project Status dialog (Execution Tasks tab).– Stop Application button ( ): Stops all runtime tasks.– Send project to target button ( ): Allows you to send the application to theremote target station.– Execution Environment button ( ): Allows you to manage remote workstations. Note:For more information, see Chapter 12: Testing and Debugging YourApplication and Chapter 14: Managing Applications Remotely.<strong>Web</strong> toolbar: Allows you to open and navigate HTML files.<strong>Web</strong> Toolbar Note:You must install Internet Explorer v4.1 (or higher) before you can use any ofthe tools on the <strong>Web</strong> toolbar. See Chapter 7: Configuring Screens andGraphics, and Chapter 13: Configuring a <strong>Web</strong> Solution for more information.<strong>InduSoft</strong> <strong>Web</strong> <strong>Studio</strong> v6.1 SP2 3–17
IWS Users GuideWorking with the IWS Development Environment– Back button ( ): Click to return to the last URL address you opened in thedevelopment environment.– Forward button ( ): Click to return to a URL address you opened beforeclicking the Back button in the development environment.– Stop button ( ): Click to cancel the file-downloading process from a specifiedURL address.– Refresh button ( ): Click to reload a URL address specified in the Address textbox.– Home button ( ): Click to open the Home Page configured in your InternetExplorer <strong>Web</strong> browser.– Address text box ( ): Type a <strong>Web</strong> page URL address into thetext box to open (download) that page to your Internet Explorer <strong>Web</strong> browser.– Go button ( ): Click to download the pages specified in the Address text box.Align and Distribute toolbar: Allows you to edit screen objects. You can resize,align, flip, rotate, space, and group objects.Align and Distribute Toolbar Note:See “Using the Align and Distribute Toolbar” on page 7–10 in “Chapter 7:Configuring Screens and Graphics” for a more detailed description andexamples of these buttons.– Resize height button ( ): Click to set the height of all selected objects to theheight of the last object selected (the object with the filled handles). You canuse Resize height to resize one object by setting its height equal to its width.3–18 <strong>InduSoft</strong> <strong>Web</strong> <strong>Studio</strong> v6.1 SP2
Working with the IWS Development EnvironmentIWS Users Guide– Resize width button ( ): Click to set the width of all selected objects to thewidth of the last object selected (the object with the filled handles). You canuse Resize width to resize one selected object by setting its width equal to itsheight.– Align left button ( ): Click to align all selected objects to the left edge of thelast object selected.– Align right button ( ): Click to align all selected objects to the right edge of thelast object selected.– Align top button ( ): Click to align all selected objects to the top edge of thelast objected selected.– Align bottom button ( ): Click to align all selected objects to the bottom edge ofthe last object selected.– Center vertically button ( ): Click to align all selected objects to the verticalcenter of the last object selected.– Center horizontally button ( ): Click to align all selected objects to thehorizontal center of the last object selected.– Evenly space horizontally button ( ): Click to put an equal amount of horizontalspace between a series of objects (two or more).– Evenly space vertically button ( ): Click to put an equal amount of vertical spacebetween a series of objects (two or more).– Flip horizontally button ( ): Click to invert the selected object horizontally. Theobject rotates around an imaginary line through its horizontal center until itis a mirror image of the original object.– Flip vertically button ( ): Click to invert the selected object vertically. Theobject rotates around an imaginary line through its vertical center until it is amirror image of the original object.– Rotate button ( ): Click to rotate the selected object 90 degrees (a quarterturn) clockwise.– Move to back button ( ): Click to move a selected object or objects behind allother objects on the screen. IWS assigns the object the lowest ID# and movesthat object behind all other objects on the screen.– Move to front button ( ): Click to move a selected object or objects in front ofall other objects on the screen. IWS assigns the object the highest ID# andmoves that object behind all other objects on the screen.<strong>InduSoft</strong> <strong>Web</strong> <strong>Studio</strong> v6.1 SP2 3–19
IWS Users GuideWorking with the IWS Development Environment– Group button ( ): Click to combine multiple objects into a single object tofacilitate object selection and manipulation. (You can access each part of thegroup in the Object Properties dialog.)– Ungroup button ( ): Click to separate a grouped object into its individualcomponents.The following toolbars contain screen-editing tools. These toolbars are located alongthe right side of the interface window by default and they are enabled only while youare editing graphic screens:Mode toolbar: Allows you to edit your screens.Mode Toolbar Note:See “Using the Mode Toolbar” on page 7–8 in Chapter 7: Configuring Screensand Graphics for a more detailed description.– Selection button ( ): Click to display a cursor that allows you to select ormove objects on the screen.– Bitmap Editor button ( ): Click to switch between the two, basic editing layers(Objects layer and Background Picture layer).– Fill Color button ( ): Click to specify a default fill color for Closed Polygons,Ellipses, Rounded Rectangles, and Rectangles.– Fonts button ( ): Click to specify the font and color for selected text objects,or to specify a default font and color for new text objects.– Line Color button ( ): Click to specify a line color for selected objects or to seta default color for new objects.– Background Color button ( ): Click to specify a background color for thescreen.– Grid button ( ): Click to specify whether to show or hide the grid on thescreen editor.Static Objects toolbar: Allows you to create polygons, rectangles, lines, and otherobjects for your screen.Static Objects Toolbar Note:See “Using the Static Objects Toolbar” on page 7–23 in Chapter 7:Configuring Screens and Graphics for a more detailed description.3–20 <strong>InduSoft</strong> <strong>Web</strong> <strong>Studio</strong> v6.1 SP2
Working with the IWS Development EnvironmentIWS Users Guide– Open Polygon button ( ): Click to draw an open polygon with a border in thespecified foreground color.– Closed Polygon button ( ): Click to draw a closed polygon, using a border inthe specified foreground color.– Line button ( ): Click to draw an orthogonal line in the drawing area.– Ellipse button ( ): Click to draw ellipses, chords, arcs, and rings.– Rounded Rectangle button ( ): Click to draw rounded rectangles (empty orfilled).– Rectangle button ( ): Click to create rectangles.– Button button ( ): Click to create custom-sized buttons.– Text button ( ): Click to create text objects.Active Objects toolbar: Allows you to create dynamic objects. Active objectstypically require more parameters than static objects and provide embeddeddynamics.Active Objects Toolbar Note:See “Using the Active Objects Toolbar” on page 7–39 in Chapter 7:Configuring Screens and Graphics for a more detailed description andexamples.– Alarm/Event Control Object button ( ): Click to add an Alarm/Event ControlObject to your application screen.– Trend Control button ( ): Click to display data points (values) from differentdata sources in a graphic format.– Trend button ( ): Click to select an area on the screen in which to exhibittrend curves of tag data.– List Box Object button ( ): Click to create a list box object on your screen.Generally, when you execute an application, the active list box object displaysa list of messages.– Smart Message Objects button ( ): Click to create one or more smart messageobjects, which you can use to display messages and graphics when youexecute the application.– Pushbuttons button ( ): Click to create a pushbutton object using theCommand dynamic object property with an object or pre-configuredpushbuttons.<strong>InduSoft</strong> <strong>Web</strong> <strong>Studio</strong> v6.1 SP2 3–21
IWS Users GuideWorking with the IWS Development Environment– ActiveX Control button ( ): Click to open the Insert ActiveX Control dialog,which you can use this dialog place ActiveX components on your screen.– Combo-Box button ( ): Click to select a single label from a combo-box list oflabels.– Alarm button ( ): Click to specify an area of the screen in which to displayalarm messages.– Grid button ( ): Click to specify an area of the screen to create a new Gridobject.– Check Box button ( ): Click to create a check-box object on your screen.– Radio Button ( ): Click to create a radio button object on your screen.Dynamic Properties toolbar: Allows you to apply dynamics to objects or a group ofobjects. Dynamics enable you to modify object properties on the fly (duringruntime) according to tag values. Some dynamics also enable you to executecommands or insert values (set points) to the tags.Dynamic Properties Toolbar Note:See “Using the Dynamic Properties Toolbar” on page 7–29 in Chapter 7:Configuring Screens and Graphics for a more detailed description.– Command button ( ): Click to add the command property to a selected objector group of objects. The command property enables you to click on the objector press a pre-defined key to execute the command at runtime.– Hyperlink button ( ): Click to add the hyperlink property to a selected objector group of objects. Applying this property allows you to click on the object(s)during execution to launch the default browser and load the specified URL.– Bargraph button ( ): Click to add bar graph properties to a selected object,and then double-click on the object to open the Object Properties dialog.– Text I/O button ( ): Click to add the dynamic input or output text property toa selected text object. Applying the Text I/O property allows you to insert anddisplay tag values in real time if you are using the keyboard or on-screenkeypad to run an application.– Colors button ( ): Click to add the color change property to a selected object.The Colors dynamic allows you to specify up to four Change Limit colors.– Position button ( ): Click to specify when and where to display an object,using the specified tag values.– Resize button ( ): Click to increase or decrease the size of a selected objector symbol.3–22 <strong>InduSoft</strong> <strong>Web</strong> <strong>Studio</strong> v6.1 SP2
Working with the IWS Development EnvironmentIWS Users Guide– Dynamic Rotation button ( ): Click to rotate a line.Bitmap toolbar: Allows you to access the bitmap screen editor tools. (This toolbaris available only when the Background Picture layer is active. You enable theBackground Picture layer in the Screen Attributes dialog.)Bitmap Toolbar Note: The Bitmap toolbar is hidden by default. See “Using the Bitmap Toolbar” on page 7–21 in Chapter 7: ConfiguringScreens and Graphics for a more detailed description.– Select Area button ( ): Click to select an area within the Bitmap Screen Editor.– Flood Fill button ( ): Click the Flood Fill button, and then click on the screen topaint the surrounding area with the color you specified with the Fill Colorbutton.– Pixel Editing button ( ): Click to open an Edit Image dialog, where you candraw detailed bitmaps, pixel by pixel.– Erase Area button ( ): Click to remove a selected area from the screen.– Change Colors button ( ): Click to change the transparent fill color for aselected area. Note:Before you can use this button, you should have already specified a fillcolor (Fill Color button), selected a transparent color (Select Transparent Colorbutton), and defined the area to fill (Select Area button).– Select Transparent Color button ( ): Click to specify a transparent color(referenced by the Change Colors button).– Toggle Transparent Color button ( ): Click to cause the color selected using theSelect Transparent Color button to become transparent for bitmaps selected in theBitmap Screen Editor.<strong>InduSoft</strong> <strong>Web</strong> <strong>Studio</strong> v6.1 SP2 3–23
IWS Users GuideWorking with the IWS Development EnvironmentUsing the Database SpyThe Database Spy window (located under the Workspace by default) is an IWSdebugging tool that allows you to:Monitor and force values to database tagsExecute and test functionsExecute and test math expressionsSample Database Spy WindowThe Database Spy window consists of the following elements: Hide Docked Window button ( ): Click to toggle between opening and closing thewindow. (Alternatively, you can use thebutton on the View →Toolbars menu or Alt+2 to open and close this window.) Contract/Expand button ( ): Click to toggle between contracting and expanding theDatabase Spy window.DB tabs: Click each tab to access a spreadsheet with the following components– Name: Displays tag names, function names, and equations– Value: Displays returned values and equation results– Quality: Displays a quality evaluation (Good or Bad) of the tag or function source– Continuous: Displays whether IWS is re-evaluating the tag, function, orequation continuouslyScroll bars: Use to view areas of the Database Spy that are obscured from viewbecause of the window size or the size of the current spreadsheet. Notes: The Database Spy is dockable, which means you can move it to anotherlocation in the development environment. Click on the titlebar and drag it to anew location. Release the mouse button to attach or dock the window to itsnew location. Detailed instructions for using the Database Spy are provided in Chapter 12:Testing and Debugging Your Application.3–24 <strong>InduSoft</strong> <strong>Web</strong> <strong>Studio</strong> v6.1 SP2
Working with the IWS Development EnvironmentIWS Users GuideUsing the Output WindowThe Output window (located next to the Database Spy by default) is another IWSdebugging tool that is similar in function to a LogWin module.Sample Output WindowThough it functions on a smaller scale than the LogWin, the Output window enablesyou to monitor components in your application directly from the developmentenvironment. (For a description of the LogWin module, see Chapter 12: Testing andDebugging Your Application.)The Output window contains the following elements:Log tab: Use this tab to collect data for one or more of the following componentsand monitor the output:– Field Read/Write commands– DDE, OPC, and TCP/IP messages and transactions– Recipes/Reports– Display Open/Close– Logons/Logouts– Trace messages– Serial communication– Insert dates/times– TagsThis feature logs your data on a first-in, first-out (FIFO) basis to save space andmemory, and enables you to pause the data collection to review the results.XRef tab: Use this tab to search for and display the location (path, file name,column, and row) of every instance where a specific tag is being used within yourapplication. (See also “Using the X-ref Option” on page 3–47.) Hide Docked Window button ( ): Click to open or close the window.Alternatively, you can select View → Toolbars from the menu bar and click thebutton or press Alt+1 to open/close the window. Contract/Expand button ( ): Click to contract and expand the Output window.<strong>InduSoft</strong> <strong>Web</strong> <strong>Studio</strong> v6.1 SP2 3–25
IWS Users GuideWorking with the IWS Development EnvironmentScroll Bars: Click and drag to view areas of the Output window that are obscuredfrom view because of the window size or the length of your data. Notes: The Output window is dockable, which means you can move it to anotherlocation in the development environment. Click on the title bar and dragthe window to a new location. Release the mouse button to attach or dockthe window to its new location. Detailed instructions for using the Output window are provided in Chapter12: Testing and Debugging Your Application.Using the Status BarThe status bar (located along the bottom of the IWS window) contains fields used toidentify toolbar buttons and provide information about the active screen (if any).ID fieldScreen Coordinate fieldHint fieldCaps Lock fieldScroll Lock fieldObject Size fieldNum Lock fieldNo Drag fieldExample Status BarThe fields are as follows (from left to right):Hint field: Provides a short description of any toolbar button or display objecttouched by the cursor.Caps Lock field: Indicates whether the keyboard Caps Lock is on (CAP) or off(empty).Num Lock field: Indicates whether the keyboard Num Lock is on (NUM) or off(empty).Scroll Lock field: Indicates whether the keyboard Scroll Lock is on (SCRL) or off(empty).ID field: Displays the ID number of a selected screen object.Screen Coordinate field: Displays the current location of the cursor (or pointer) onthe active screen. Where: X is the number of pixels from the left edge of thescreen and Y is the number of pixels from the top of the screen.Object Size field: Displays the size (in pixels) of a selected object, where W is thewidth and H is the height.No DRAG field: Indicates whether dragging is disabled (No Drag) or enabled (empty)in the active screen. You can toggle the No Drag feature by pressing Ctrl+D. Note:Use the Ctrl+D shortcut to enable/disable the No Drag feature when you editthe screen. You can use the No Drag feature to avoid moving objects on ascreen when you are changing their properties.3–26 <strong>InduSoft</strong> <strong>Web</strong> <strong>Studio</strong> v6.1 SP2
Working with the IWS Development EnvironmentIWS Users GuideCustomizing the Workspace<strong>InduSoft</strong> <strong>Web</strong> <strong>Studio</strong> allows you to customize the development environment: Hide Docked Window button ( ): Click to toggle between opening and closing thewindow. (Alternatively, you can use themenu or Alt+2 to open and close this window.)button on the View → Toolbars Contract/Expand button ( ): Click to toggle between contracting and expanding theDatabase Spy window.Standard InterfacesThe standard interfaces discussed in this section consist of basic interfaces that youuse frequently as you work within the <strong>InduSoft</strong> <strong>Web</strong> <strong>Studio</strong> developmentenvironment. These include:Object Properties dialogVirtual KeyboardFontsColor InterfaceObject Properties DialogThe Object Properties dialog is the interface which allows you to configure the settingsfor the objects and dynamics designed with the Screen Editor of <strong>InduSoft</strong> <strong>Web</strong><strong>Studio</strong>. It can be launched just be double-clicking on the object or by selecting theobject (clicking once on it) and selecting the menu option View > Properties (Shift+F2):Object Properties DialogThe content of this dialog depends on the object (or group of objects) selected by theuser. However, the following interfaces are common for any object (or group ofobjects):Field Remarks SyntaxReplace(Pin button)When the pin button is released, the focus is passed to the objecton the screen as soon as that object is selected. When the pinbutton is pressed the focus is kept on the Object Propertieswindow,\ even when you click the objects on the screen.Launches the Replace Dialog, where you can replace strings,tags or properties for the selected object (or group of objects).ButtonButton<strong>InduSoft</strong> <strong>Web</strong> <strong>Studio</strong> v6.1 SP2 3–27
IWS Users GuideWorking with the IWS Development EnvironmentField Remarks SyntaxHintTooltip displayed during the runtime, when the user keeps themouse cursor on the object for a few seconds. This option isuseful to provide hints to the operator during the runtime (quickhelp).The text on the Hint field is also written to the Internal TagHint during the runtime. Therefore, you can trigger actions basedon the value of this tag when the mouse cursor is moved onspecific object.The combo-box at the right side of the dialog allows the user toselect the specific object, dynamic or group of objects that mustbe edited.Text and/or {Tag}(up to 256 chars)Combo-box Note:The Enable Tooltip option must be enabled (checked) on the Project Settings dialog.Otherwise, the tooltips are NOT displayed during the runtime when the userpoints the mouse cursor on the objects. You can enable/disable this feature forthe local server (Project Settings > Runtime Desktop) and/or for the <strong>Web</strong> Thin Clientstations (Project Settings > <strong>Web</strong>).REPLACE DIALOGWhen pressing the Replace button from the Object Properties window, the Replacedialog is launched:Object Properties: Replace Dialog3–28 <strong>InduSoft</strong> <strong>Web</strong> <strong>Studio</strong> v6.1 SP2
Working with the IWS Development EnvironmentIWS Users GuideThis dialog provides a fast and simple tool to replace strings (String Value tab), tagsand/or properties for an object (or group of objects). This dialog display grids whereyou can edit the To column with the string, tag and/or property that must bereplaced. The main interfaces in this dialog as described in the following table:Field Remarks SyntaxReplace by PartsAllows you to filter the type of information that can be replaced: Tags only: Displays only the tags configured directly (e.g.: Second, Time,Level, and so forth). Tags + Properties: Displays both the tags configured directly and theproperties configured as mnemonics (e.g.: #PumpStatus). Custom Properties: Displays only the mnemonics configured as customproperties (e.g.: #PumpStatus:).When checked allows the user to replace each part of a tag separately: MainTag Name, Array Index, Class Member and Tag Field. It is very useful when youwant to replace a specific settings (e.g.: Array Index) for different tags configuredin the same Group of Objects.ButtonButton Caution:When pressing the Replace button after selecting the Group of Objects option in theObject Properties dialog, the replace feature affects all objects and dynamicswhich are part of the selected Group of Objects. However, when pressing Replacebutton after selecting a specific object or dynamic (e.g.: Button, Color, etc), thereplace feature affects ONLY the selected object or dynamic.Virtual KeyboardThe IWS Virtual Keyboard (VK) allows the user to enter data (text or numbers) duringthe runtime using a touch-screen device, rather than a physical keyboard.You can enable the VK for your application on the Runtime Desktop dialog (Projectpulldown menu item->Settings->Runtime Desktop tab). You can designate a DefaultVirtual Keyboard, as well as apply a Scale (size) to all Virtual Keyboards during theruntime.When configuring objects and dynamics that support data input, you can assign aVK to the object by the VK combo-box (either the default or a specific one). Thefollowing standard VKs are available:Name Picture DescriptionAlphaNumericThis VK is used to enteralphanumeric values (charsand/or numbers).<strong>InduSoft</strong> <strong>Web</strong> <strong>Studio</strong> v6.1 SP2 3–29
IWS Users GuideWorking with the IWS Development EnvironmentEnhKeypadKeypadThis VK is used to enteralphanumeric values(characters and/or numbers)in devices that provide asmall display (e.g. PDAs).The -> button lets usersscroll though different panelsuntil they find the characterthey want.This VK is used to enternumeric values (numbersonly).There are two ways to launch a Virtual Keyboard during the runtime:Click on the object where a new value (data) can be entered (e.g. Text with TextI/O dynamic configured with Input Enabled).Execute the Keypad() built-in function.You can change the language of the Virtual Keyboard by theSetKeyboardLanguage() built-in function. Tips: You can create new languages for any Virtual Keyboard by editing theVK.INI file from the \BIN sub-folder of IWS, where is the label of the language for the VKs (e.g. VKEN.INI =Virtual Keyboards in English; VKGE= Virtual Keyboards in German,and so forth). Consult your software vendor for more informationabout how to edit and configure this file. By default, the VK is launched close to the object on the screenassociated with it. However, you can configure the following settings inthe .APP file, so the VK will be always open in afixed position:[Keypad]PosX=0 //Coordinate (in pixels) of the TOP coordinate where the VKmust be launched.PosY=0 //Coordinate (in pixels) of the LEFT coordinate where the VKmust be launched.FontsIWS supports any UNICODE font available on the operating system where IWS isrunning. Therefore, it is possible to configure interfaces using characters forlanguages that do not use the standard western characters, such as Japases,Chinese, Arabic, Cyrillic, etc.The font used on the development environment of IWS (Worksheets, Dialogs, etc.) isthe default font installed by the operating system and dependent on the language ofthe operating system. Click the Edit Set Font menu option to select a different font fordevelopment.3–30 <strong>InduSoft</strong> <strong>Web</strong> <strong>Studio</strong> v6.1 SP2
Working with the IWS Development EnvironmentIWS Users GuideWhen editing the objects that display text during the runtime, you can set the fontthat will display the text by clicking on the Fonts button in the Object Propertieswindow. The Font button launches the standard Fonts dialog:Font DialogYou can set the font name, style, size, effects and script. Tip:You can change the font style of several objects simultaneously by selectingthem all (press the shift key down while you click each one), and then clickingon the Fonts icon from the Mode toolbar of the screen editor.The icon displayed to the left of the font name indicates the font technology.Icon Technology RemarksN/ATrueTypeOpenTypeVectorOutlineTrueType and OpenType fonts are outline fonts that are rendered from line andcurve commands. OpenType is an extension of TrueType. Both can be scaled androtated. Both look good in all sizes and on all output devices supported byWindows.Windows provides a selection of OpenType fonts, including Arial, Courier New,Lucida Console, Times New Roman, Symbol, and Wingdings.Type 1, by Adobe Systems, Inc., is an outline font that is designed to work withPostScript printers. The outlines can be scaled and rotated. With OpenTypetechnology, Windows fully supports Type 1 fonts.Vector fonts are supported because a number of programs still depend on them.Vector fonts are rendered from a mathematical model. They are used primarily withplotters. Windows supports three vector fonts: Modern, Roman and Script.N/A Raster Raster fonts are supported because a number of programs still depend on them.<strong>InduSoft</strong> <strong>Web</strong> <strong>Studio</strong> v6.1 SP2 3–31
IWS Users GuideWorking with the IWS Development EnvironmentRaster fonts are stored in files as bitmap images and are composed of a series ofdots whether they are displayed on the screen and on paper.It is strongly recommended that you use only TrueType or OpenType fonts. Fontsdesigned with other technologies (e.g. Courier) cannot be scaled properly and couldcause issues during the runtime. Caution:When you design screens, the fonts you use are the ones available in theoperating system of your development station. The fonts on the runtime station,however, may look different (e.g. different size in pixels), even if all settings arethe same on both stations. This situation occurs more frequently whenapplications are run on the Windows CE operating system, where the fonts donot always match the proportions of the equivalent fonts on WindowsNT/2K/XP. Therefore, it is important to test the graphic interfaces (screens) onthe actual runtime platform during the development of the application. Youshould not wait until after the whole application has been developed, or it maybecome necessary to re-design the screens so the text objects display properlyon the runtime platform.Color InterfaceYou can edit the color of a component with the Color interface. Click the icon in the toolbar: Click the desired color from the twenty that display when the pop-up box opens:The selected color will be applied to the component that you are editing. Click More Colors… if you want to apply a different color. The Colors dialog willopen, displaying the 143 standard colors from your operating system.3–32 <strong>InduSoft</strong> <strong>Web</strong> <strong>Studio</strong> v6.1 SP2
Working with the IWS Development EnvironmentIWS Users GuideColors Dialog Click the Custom tab to edit the HSL (Hue, Sat, Lum) or RGB (Red, Green, Blue)codes of any of the 143 standard colors, creating a custom color.Custom Colors Tab Click the OK button to apply the selected color to the component that is beingedited. Depending on the component that you are editing, the Fill Effects option isavailable from the pop-up interface (see step 2 above). Click this option to applygradient colors with different styles and variants. The Fill Effects dialog will open.<strong>InduSoft</strong> <strong>Web</strong> <strong>Studio</strong> v6.1 SP2 3–33
IWS Users GuideWorking with the IWS Development EnvironmentFill Effects Dialog Select two colors in the Start and End fields, select the Style, and click on thechosen Variant. Finally, click the OK button to apply the fill effect to thecomponent which is being edited. Note:For applications for the WinCE operating system, the Fill Effects interface isavailable only for the Rectangle object. Caution:Although Fill Effect is a useful tool for enhancing the look and feel of yourscreens, the operating system takes a longer time to fill an object with fill effectsthan with plain colors. You should develop criteria for using the feature withoutdecreasing the performance of the system, especially under the WinCEoperating system.Using the Color dynamic, , you can modify the color of a static object during theruntime. When configuring this dynamic with Type = By Color, you can set the colorthat will be applied in the object during the runtime, by the color code. The followingtable provides the code values as well as the RGB values for the most commonlyused colors:ColorNameRGB CodeR (Red) G (Green) B (Blue)Code ValueBlack 0 0 0 0Dark Red 128 0 0 128Red 255 0 0 255Pink 255 0 255 167119353–34 <strong>InduSoft</strong> <strong>Web</strong> <strong>Studio</strong> v6.1 SP2
Working with the IWS Development EnvironmentIWS Users GuideRose 255 153 204 13408767Brown 153 51 0 13209Orange 255 102 0 26367Light Orange 255 153 0 39423Gold 255 204 0 52479Tan 255 204 153 10079487Olive Green 51 51 0 13107Dark Yellow 128 128 0 32896Lime 153 204 0 52377Yellow 255 255 0 65535Light Yellow 255 255 153 10092543Dark Green 0 51 0 13056Green 0 128 0 32768Sea Green 51 153 102 6723891Bright Green 0 255 0 65280Light Green 204 255 204 13434828Dark Teal 0 51 102 7877376Teal 0 128 128 8421376Aqua 51 204 204 13421619Turquoise 0 255 255 16776960Light Turquoise 204 255 255 16777164Dark Blue 0 0 128 8388608Blue 0 0 255 16711680Light Blue 51 102 255 16737843Sky Blue 0 204 255 16737843Pale Blue 153 204 255 16764057Indigo 51 51 153 10040115Blue-Gray 102 102 153 10053222Violet 128 0 128 8388736Plum 153 51 102 6697881Lavender 204 153 255 16751052Gray-80% 51 51 51 3355443Gray-50% 128 128 128 8421504Gray-40% 150 150 150 9868950Gray-25% 192 192 192 12632256White 255 255 255 16777215<strong>InduSoft</strong> <strong>Web</strong> <strong>Studio</strong> v6.1 SP2 3–35
IWS Users GuideWorking with the IWS Development Environment Tip:The RGBColor() and RGBComponent() functions can be used to manipulate colorcodes during the runtime. Note:The number of colors available when developing the application depends on thecolor settings configured on the operating system of the development station.The number of colors available when running the application (runtime) dependson the color settings configured on the operating system of the runtime station.Performing Common TasksThe common tasks discussed in this section consist of basic procedures that you usefrequently as you work within the <strong>InduSoft</strong> <strong>Web</strong> <strong>Studio</strong> development environment.These tasks include:Accessing Projects and FilesUsing Common ButtonsManaging the Development Environment WindowsChanging the Screen ResolutionUsing Pop-Up MenusUsing Select AllCutting, Copying, Pasting ObjectsUsing the Symbols LibraryFinding System InformationSearching for Tags and Screen ObjectsReplacing TagsTesting DisplaysVerifying the ApplicationRunning ApplicationsRestoring DefaultsSaving Your WorkPrinting Project Screens3–36 <strong>InduSoft</strong> <strong>Web</strong> <strong>Studio</strong> v6.1 SP2
Working with the IWS Development EnvironmentIWS Users GuideAccessing Projects and FilesTo create a new project, see Chapter 6: Creating and Configuring a Project.OPENING PROJECTSTo open a project, from the Main menu bar, select File > Open Project.Selecting the Open Project option displays the Open dialog, which lists all existingfolders. You can use the Open dialog to locate and open an <strong>InduSoft</strong> <strong>Web</strong> <strong>Studio</strong>project.Open Dialog Note:Alternatively, you can open a new project using one of the following twomethods: Click the Open Project buttondialog.on the Standard toolbar to display the Open Open Windows Explorer, locate the <strong>InduSoft</strong> <strong>Web</strong> <strong>Studio</strong> folder, and thendouble-click on the project name.OPENING FILESFrom the Main menu bar, select File > Open File. Selecting the Open File option displaysthe Open dialog (as shown in the preceding section), which lists all existing folders.To locate and open an <strong>InduSoft</strong> <strong>Web</strong> <strong>Studio</strong> application file from this dialog, click theFiles of type combo-box button, and then click on a file name to select it from the list.CLOSING PROJECTSFrom the Standard toolbar, select File → Save to save any active screens orworksheets. The Save option becomes enabled (active) only after you modify the activefile.<strong>InduSoft</strong> <strong>Web</strong> <strong>Studio</strong> v6.1 SP2 3–37
IWS Users GuideWorking with the IWS Development Environment Note:You can also use the Save button ( ) on the Standard toolbar or type Ctrl+s tosave the open, active screen/worksheet.From the Standard toolbar, select File > Save As to save active screens or worksheets,and to specify a (new) name and location for the file.Select the Save As HTML option to save the active display in HTML format.You can also select File > Save All from the menu bar to save all open screens orworksheets. The Save All option becomes enabled (active) only after you modify theactive file. Note:Using File > Save All is the same as using the Save All button (toolbar.) on the StandardSelect the File > Save All As HTML option to save all displays of the applications in HTMLformat. You have to close all documents before executing this command.Select File > Save Screen Group As HTML to save the Screen Group in HTML format, makingthem available to the remote <strong>Web</strong> Thin Client through a <strong>Web</strong> Browser.CLOSING FILESFrom the menu bar, select File > Close to close the active screen or worksheet. IWSprompts you to save all unsaved changes before it closes the screen/worksheet. Note:Using File > Close is the same as using the Exit button () located on the title bar.You can also select File > Close All. Selecting the Close All option closes all open screensor worksheets. IWS prompts you to save all unsaved changes before it closes thescreens/worksheets.Using Common ButtonsThe following table describes buttons that typically appear on IWS dialog andwindows:ButtonOKApplyCancelOpenPurposeClick this button to execute and save all changes, and close the dialog or window.Click this button to execute and save all changes, but leave the dialog or window open. Thisbutton enables you to see the effects of your changes before closing the dialog/window.Click this button to close the dialog or window immediately (discarding any changes).Click this button to open a file. Generally, this button is associated with a combo-box or list pane.You use the combo-box or list pane to specify a file and then click the Open button to open thefile.3–38 <strong>InduSoft</strong> <strong>Web</strong> <strong>Studio</strong> v6.1 SP2
Working with the IWS Development EnvironmentIWS Users GuideButtonCloseBrowseBackNextReplaceRemovePurposeClick this button to close the open file, screen, dialog, and so forth.Click this button to open a Browse dialog to search for a file or folder to open.Click this button to progress to the previous screen in a sequence of screens.Click this button to progress to the next screen in a sequence of screens.Click to open a Replace dialog, which enables you to change tags or strings associated with aselected screen object.Click to remove a selected (highlighted) object from a list or a display screen.Common Buttons TableManaging the Development Environment WindowsWhen you click the Window menu on the main menu bar, the following options areavailable to help you manage your open screens and worksheets:Cascade arranges the open screens or worksheets in a cascade within theScreen/Worksheet window.Cascading Screens<strong>InduSoft</strong> <strong>Web</strong> <strong>Studio</strong> v6.1 SP2 3–39
IWS Users GuideWorking with the IWS Development EnvironmentTile Horizontally arranges the open screens or worksheets:Horizontally Tiled ScreensTile Vertically arranges the open screens or worksheets:Vertically Tiled ScreensArrange Icons moves and arranges minimized screens or worksheets along thebottom of the Screen/Worksheet window.Close closes only the active (selected) screen or worksheet.Close All closes all open screens or worksheets.Currently Open: Lists all of the open screens or worksheets. You can select a namefrom the list to bring that screen or worksheet to the top of the group.Windows…: Contains options that enable you to manage open displays andworksheets.3–40 <strong>InduSoft</strong> <strong>Web</strong> <strong>Studio</strong> v6.1 SP2
Working with the IWS Development EnvironmentIWS Users GuideSelect a name from the list tobring that screen or worksheet tothe top of the group.List of ScreensChanging the Screen ResolutionClose all open documents and then select Tools > Convert Resolution to open the ConvertResolution dialog, which allows you to change the resolution of your application.Convert Resolution Dialog<strong>InduSoft</strong> <strong>Web</strong> <strong>Studio</strong> v6.1 SP2 3–41
IWS Users GuideWorking with the IWS Development EnvironmentTo change the application resolution: Click (enable) the radio button of the resolution you want to use to convert theapplication. Click the Convert button. Click the Close button to close the dialog when you are finished.Before converting the application to the new resolution, IWS backs up all screens attheir previous size in a Backup folder located in the Screen folder in your\\ directory. The asterisk (*) next to the resolution denotes thecurrent (base) resolution. (Note: When you select a new resolution, all screens will bescaled from this new base resolution.)Using Pop-Up MenusIf you right-click on any component in the Workspace, a menu displays with optionsrelated to that component. For example, the following pop-up menu enables you toOpen the Application Tags database, Insert (create) a new tag, or Refresh the currentview of the Application Tags database:Right-Click to Open a Pop-Up MenuUsing Select AllFrom the menu bar, select Edit > Select All to select all objects on the active screen.Cutting, Copying, Pasting ObjectsFrom the menu bar, select Edit > Cut to remove a selected item from a screen and storeit on the Windows clipboard (replacing any previously selected objects stored on theclipboard). You use Cut in conjunction with the File > Paste option to move an object toanother location on the same screen or onto a different screen. Note:Using the Cut menu option is the same as using Cut buttonStandard toolbar.located on theFrom the menu bar, select Edit > Copy to duplicate a selected item and store it on theWindows clipboard. Use Copy in conjunction with the Paste option to place a copiedobject in another location on the same screen or onto a different screen. You canpaste a copied object multiple times.3–42 <strong>InduSoft</strong> <strong>Web</strong> <strong>Studio</strong> v6.1 SP2
Working with the IWS Development EnvironmentIWS Users Guide Note:Using the Copy menu option is the same as using Copy buttonStandard toolbar.located on theFrom the menu bar, select Edit > Paste to place the contents of the Windows clipboard(cut or copied objects) onto the active screen. If the clipboard contains an object, IWSwill paste that object into the upper left corner of the screen. You can paste a cut orcopied object multiple times. Note: You can easily copy (drag) selected items by holding down the Ctrl key + leftmouse button. Using the Paste menu option is the same as using Paste buttonthe Standard toolbar.located onYou can select Edit > Undo to undo the last action performed (and up to 20 actionstaken prior to the last action) while working on a screen. (Object Properties actions donot increase Undo steps). Note:Using the Undo menu option is the same as using Undo buttonthe Standard toolbar.located onFinding System InformationFrom the menu bar, select Tools >System Information to open the System Informationwindow, which provides information about the following:System Information: Displays details about your operating system.Network Resources: Displays details about your computer's network.Applications: Lists the applications that are running.Processes: Displays all Windows tasks that are running.Services: Lists the Windows NT/2000 services being used by IWS(Windows NT/2000 only).<strong>InduSoft</strong> <strong>Web</strong> <strong>Studio</strong> v6.1 SP2 3–43
IWS Users GuideWorking with the IWS Development EnvironmentSystem Information Window Note:Although you open the System Information window from IWS, this windowprovides general information about the local station and the network only. TheSystem Information window does not provide specific information about theapplication.Searching for Tags and Screen ObjectsUSING THE FIND OPTIONSelect Edit > Find to open the Find dialog, which allows you to search for a word in theactive worksheet.Find DialogType the text string in the Find What text box and then specify search parameters byclicking on one or more of the following:Match whole word only: IWS searches for the specified term, and does not includeinstances where the specified term is part of a larger word. For example, if youspecify back, IWS finds only back, not backward.Match case: IWS searches for term using the specified capitalization. For example,if you specify TankLevel, IWS does not search for tanklevel.Direction: Controls which direction IWS searches the worksheet (Up or Down).3–44 <strong>InduSoft</strong> <strong>Web</strong> <strong>Studio</strong> v6.1 SP2
Working with the IWS Development EnvironmentIWS Users GuideClick on the Find Next button to begin the search. (Click the button again to resumesearching the worksheet.)USING GO TO OPTIONFrom the main menu, select Edit >Go to to jump to a line in an open worksheet or toselect an object using the object’s ID number. IWS applies a sequential identificationnumber (ID) to each object created on the screen. When you select an object, the IDnumber displays in the status bar. Objects are numbered according to how they arelayered, starting with the number zero (the backmost object). These objects arerenumbered when you bring them to front or back. When you group objects, they allbecome one layer.Line DialogTo jump to a line or an object, select Go to. When the Line dialog displays, type theline number or object ID number into the Number text box and click the OK button. Tip:If you have many superimposed objects, and it is not possible to select an objectusing the pointing device, you can use the Go to option to edit the properties ofan object that is under other objects.Using the Tag Properties ToolbarThe Tag Properties toolbar provides a text box and several buttons (shortcuts) thatenable you to create, locate, and access different tags, functions, and tag properties.Tag Properties Toolbar<strong>InduSoft</strong> <strong>Web</strong> <strong>Studio</strong> v6.1 SP2 3–45
IWS Users GuideWorking with the IWS Development EnvironmentUSING THE OBJECT FINDERClick the Object Finder button to open the Object Finder dialog, which lists all Tagsand Functions currently configured for the application.Object Finder DialogTo select an existing tag/function, double-click on the tag/function name, andthen click OK to close the dialog. The selected name displays in the Tagname textbox.To select a specific array index, click the Index button after specifying the arraytag name.To select a specific member name, click the Member button after specifying theclass tag name.To create a new tag, click the New button.When the New Tag dialog displays, enter the following information, then click OKto close the dialog:– Name– Array Size– Type (Boolean, Integer, Real, String, Class:Control, Class:msgonline, orClass:Alr)– Description– <strong>Web</strong> data (local or server)3–46 <strong>InduSoft</strong> <strong>Web</strong> <strong>Studio</strong> v6.1 SP2
Working with the IWS Development EnvironmentIWS Users GuideUSING THE X-REF OPTIONClick the Cross Reference button to search all application screens and worksheetsfor the tag noted in the Tagname text box. This function writes a log, detailing all theoccurrences of the tag, to the XRef tab in the Output window. For example, theresults of searching for a BlinkFast tag are as follows:XRef ResultsSee also “Using the Output Window” on page 3–25.USING THE GLOBAL TAGS REPLACE OPTIONWhen you select the Global Tags Replace button from the Tag Properties toolbar, theGlobal Replace dialog displays:Global Replace DialogFrom the Global Replace dialog, you can replace any tag(s) from all documents(screens and worksheets) of the whole application. You can edit both the From andthe To column.When replacing composed tags (array size > 0 and/or Type = Class), you canconfigure a specific array position (for example, TagA[1]) or class member (forexample, TagB.MemberX) or both (for example, TagC[3].MemberY). If you configureonly the Main Tag Name (for example, TagC) in the From column, all tags from thismain tag will be modified for the tag configured in the To column.<strong>InduSoft</strong> <strong>Web</strong> <strong>Studio</strong> v6.1 SP2 3–47
IWS Users GuideWorking with the IWS Development EnvironmentIf an invalid replacement is configured (for example, replace the Main Tag tag from aclass type tag for a simple tag (not a class tag), the OK button will be disabled. Whenthe OK button is pressed, the tags configured on the Global Replace dialog will bereplaced in the order that they were configured on the dialog interface. Note:You must close all documents (screens and worksheets) before executing thiscommand.When changing the tag name on the Tags Database worksheet, IWS will ask you ifyou intend to replace this tag through the whole application.The Replace option will be created in the Edit menu. By using this option, the GlobalReplace dialog is prompted, however, the changes are applied only to the currentscreen or worksheet in focus.Replacing TagsDouble-click the object to open the Object Properties dialog. To replace tags, select theReplace button located on the Object Properties dialog.Object Properties DialogYou can select one or more replacement tags by selecting the Replace Strings tab.Current tags used are displayed. You can type the New Tag to the right of each CurrentTag.Replace Tags TabYou can also select one or more replacement strings by selecting the Replace Stringstab. Current strings used are displayed. You can type the New String to the right ofeach Current String.3–48 <strong>InduSoft</strong> <strong>Web</strong> <strong>Studio</strong> v6.1 SP2
Working with the IWS Development EnvironmentIWS Users GuideWhen you are finished, click the OK button.Replace Strings TabTesting DisplaysFrom the menu bar, select Project > Test Display to activate the test display mode, whichallows you to configure the application while viewing graphical dynamics online inthe development environment. The test display mode does not enable you to use theCommand or input Text I/O dynamics nor execute worksheets. Note:Using the Test Display menu option is the same as using theExecution Control toolbar.button on theTo stop the test display mode, select Project > Stop display test. Note:Using the Stop display test menu option is the same as using theExecution Control toolbar.button on theVerifying the ApplicationFrom the menu bar, select Tools > Verify Application to recompile math worksheets,recompile screen logic, and update current HTML files using the settings configuredon the <strong>Web</strong> tab (Project Settings dialog). Tags in the database are remapped to allworksheets and screens.Verifying an Application<strong>InduSoft</strong> <strong>Web</strong> <strong>Studio</strong> v6.1 SP2 3–49
IWS Users GuideWorking with the IWS Development Environment Tip:When you save a screen or worksheet, IWS includes a pointer to the currentdatabase version. When you execute the application, IWS compares the screenor worksheet database to the current application database and if there is amismatch, IWS recompiles the expressions.To avoid doing these tasks during application runtime, we recommend runningthe Verify Application function before downloading and/or finishing an application.You also should use this function when converting an application to a newversion of the program. Note:The Verify Application command deletes the *.txt and *.tag files from the\Screen folder to save disk space and clean the application before beingdeployed to the runtime station.Running ApplicationsFrom the menu bar, select Project > Run Application to launch the runtime modulesspecified as Automatic on the Project Status dialog (Execution Tasks tab).When you start the Viewer module, it opens the screen(s) currently being edited.If you do not specify any Automatic tasks, <strong>InduSoft</strong> <strong>Web</strong> <strong>Studio</strong> will launch theViewer and BGTask tasks automatically when you execute Run Application.If you are not currently editing screens in the development environment, theViewer module opens the screen specified in the Startup screen field on the RuntimeDesktop tab (Project Settings dialog). Note:Using the Run Application option is the same as using theExecution Control toolbar.button on the Caution:Run Application affects the application from the target station (configured in theExecution Environment dialog). Be sure you know which target station isconfigured (local or remote) before executing the Run Application command.To stop all runtime tasks, select Project > Stop Application. Caution:Stop Application affects the application from the target station (configured in theExecution Environment dialog). Be sure you know which target station isconfigured (local or remote) before executing the Stop Application command. Note:Using the Stop Application option is the same as using theExecution Control toolbar.button on the3–50 <strong>InduSoft</strong> <strong>Web</strong> <strong>Studio</strong> v6.1 SP2
Working with the IWS Development EnvironmentIWS Users GuideRestoring DefaultsFrom the menu bar, select View > Restore Defaults after adding or modifying the interfaceto return to the IWS default development environment. You will need to close andreopen IWS for the changes to take effect.Saving Your WorkClick the Save buttonto save any active screens or worksheets. Notes: Using the Save button is the same as selecting File → Save from the menu baror typing the Ctrl+S key combination. The Save function becomes available only when you modify the active file.Click the Save All buttonto save all open screens or worksheets. Note: Using the Save All button is the same as selecting File → Save All from the menubar. The Save All function becomes available only when you modify a screen orworksheet.Printing Project ScreensFrom the menu bar, select File > Print Setup to open the Print Setup dialog. From thisdialog you can specify which printer to use and configure different printing options,such as paper size and print orientation (portrait or landscape).Print Setup Dialog Note:To specify a default printer: Go to your Windows Start menu and select Start > Settings > Printers.<strong>InduSoft</strong> <strong>Web</strong> <strong>Studio</strong> v6.1 SP2 3–51
IWS Users GuideWorking with the IWS Development Environment When the Printers dialog displays, right-click on a printer name. When the pop-up menu displays, select Set As Default. A check displays next to Set As Default indicating the selected printer is thedefault.To preview a screen before printing, select File > Print Preview to open the Print Previewwindow.Previewing an Alarm WorksheetUse the buttons located along the top of the Print Preview window as follows:Click Print to open the Print dialog and print the screen or worksheet (same asusing the File > Print command).Click Next Page to view the next page in a series of pages.Click Prev Page to view the previous in a series of pages.Click Two Page to view two pages at a time.Click Zoom In to check details.Click Zoom Out to change back to the default size. Notes: The Next Page, Prev Page, and Two Page buttons become active only when youare printing more than one page. The Zoom Out button becomes active after you Zoom In.Click Close to close the Print Preview window.You can also select File > Print from the menu bar open the Print dialog (identical to thePrint Setup dialog discussed previously). You can use the Print dialog to print theactive screen or worksheet.3–52 <strong>InduSoft</strong> <strong>Web</strong> <strong>Studio</strong> v6.1 SP2
Working with the IWS Development EnvironmentIWS Users Guide Note:Selecting the Print menu option is the same as using the Print buttonStandard toolbar.on theTips and TricksThis section provides useful tips and tricks to help you take full advantage of thetools provided by IWS, enhancing your productivity when developing applicationswith IWS.Configuring the Focus of the Object Properties Window on theScreen EditorWhen you double-click any object (or group of objects) in the Screen Editor, theObject Properties window is launched, allowing you to configure the selected object’ssettings. The content of this dialog window varies according to the specificobject/dynamic that is being edited. However, there is always a pin button in the leftupper corner of this dialog window:Object Properties DialogThe pin button looks like this, , when it is released, and like this, , when it ispressed.When the pin button is released, the focus is passed to the object on the screen assoon as that object is selected. Therefore, we recommend you keep this buttonreleased when you want to manipulate (copy, paste, cut or delete) the objects.Although the Object Properties window is on the top, the keyboard commands(Ctrl+C, Ctrl+V, Ctrl+X or Del) are sent directly to the objects.When the pin button is pressed the focus is kept on the Object Properties window,even when you click the objects on the screen. We recommend you keep this buttonpressed when you want to modify the settings of the objects. You can click an objectand type the new property value directly in the Object Properties window (it is notnecessary to click on the window to bring focus to it). Also, when the pin button ispressed, the Object Properties window does not automatically close when you clickon the screen.<strong>InduSoft</strong> <strong>Web</strong> <strong>Studio</strong> v6.1 SP2 3–53
IWS Users GuideWorking with the IWS Development EnvironmentImporting a DatabaseThe Import Wizard is a powerful tool that reduces engineering time duringapplication development. Using the Import Wizard, you can import tags fromdifferent data sources directly to the IWS Tags Database. Depending on the datasource, you can import not only the tag names, but also the communication interface(the link between the tags and the PLC addresses).When you select File > Import Wizard, an Import Database Wizard dialog displays tostep you through the process of importing tags. There are three steps for importingtags from these data source types:<strong>InduSoft</strong> <strong>Web</strong> <strong>Studio</strong> DatabaseOPC Server DatabaseCSV DatabaseODBC DatabasePanelBuilder32 DatabaseRSLogix 5000 CSV DatabasePanelMate Plus DatabaseOMRON CX Programmer DatabaseTwinCAT PLC DatabaseSTEP1: SELECT THE SOURCE TYPEImport Wizard – Selecting the Data Source TypeClick the data Source Type, which is where the tags are being imported from. Clickthe Next button.3–54 <strong>InduSoft</strong> <strong>Web</strong> <strong>Studio</strong> v6.1 SP2
Working with the IWS Development EnvironmentIWS Users GuideSTEP 2: CONFIGURE THE SOURCE TYPE SETTINGSImport Wizard – Selecting the Source Type SettingsMost of the settings in the second window depend on the data Source Type selectedin the first step. The screenshot above is an example of one data Source Type (OPCServer Database). The settings that are common for any data Source Type aredescribed below:Options box: Select Do not import duplicated tags if you do not want imported tags tooverwrite tags with the same name that already exist in the Tags Database of thecurrent application. Select Replace duplicates with tags imported to overwrite tagsin the Tags Database with imported tags of the same name.Use Prefix: Check to specify a prefix (up to 4 characters) to be concatenated to thename of the imported tags. It is useful to use a prefix to differentiate the importedtags from the tags created manually. Note:To use the Remote option, <strong>InduSoft</strong> <strong>Web</strong> <strong>Studio</strong> must be running on theremote computer.After configuring the settings in this dialog window, click the Next button.<strong>InduSoft</strong> <strong>Web</strong> <strong>Studio</strong> v6.1 SP2 3–55
IWS Users GuideWorking with the IWS Development EnvironmentSTEP 3: FILTER THE TAGSThe screenshot above is an example of one data Source Type (OPC Server Database).The fields and settings that are common for all data Source Types include thefollowing:Grid: Displays the list of tags found on the data source.Field NameCheck-boxTag NameSizeTypeDescriptionDescriptionCheck to import the tag from the data source to the Tags Database of the current application.Name of the tagArray size of the tagData type of the tag (Boolean, Integer, Real, String or Class:)Description of the tagCheck button: Click to select/import all tags in the grid.Uncheck button: Click to uncheck all tags in the grid.Filter button: Click to filter the tags. The Filter dialog window will display, allowingyou to specify a mask for each column in the grid. Wild cards (* and ?) can beused to filter data.Clear filter button: Click to reset the filter.Import Filtered Tags Only check-box: Check this option to import only the tags that arevisible in the grid (filtered).Status box: Displays a message describing the status of the tag currently selectedin the grid. This information is especially useful to indicate why a tag cannot beimported.3–56 <strong>InduSoft</strong> <strong>Web</strong> <strong>Studio</strong> v6.1 SP2
Working with the IWS Development EnvironmentIWS Users GuideLegend box: Describes the meaning of the colors that represent tag status:Color Legend DescriptionRedErrorTag cannot be imported because it is not supported byIWS. See the Status box for a detailed description ofthe error.Blue Tag will be imported Tag will be imported after you click the Finish button.Gray Tag can be imported Tag can be imported but it has not been checked.Database size box: Displays summary information regarding the current ImportWizard:LabelCurrentImportingReplacingDescriptionIndicates the number of tags configured in the Application Tags database of the currentapplicationIndicates the number of tags selected to be importedIndicates the number of tags configured in the Application Tags database of the currentapplication that will be replaced by an imported tag with the same name.After selecting the tags to import, click the Finish button, or click Cancel to abort theoperation.The other settings vary according to the data source selected in step one. They aredescribed in the specific sections for each data source type that follow:– Importing from Other <strong>InduSoft</strong> <strong>Web</strong> <strong>Studio</strong> Databases– Importing from OPC Server Databases– Importing from CSV Databases– Importing from ODBC Databases– Importing from PanelBuilder32 Databases– Importing from RSLogix 5000 CSV Databases– Importing from OMRON CX Programmer Databases– Importing from PanelMate Plus Databases– Importing from TwinCAT PLC DatabasesImporting from Other <strong>InduSoft</strong> <strong>Web</strong> <strong>Studio</strong> DatabasesThis wizard allows you to import the interfaces (tags and worksheets) of other IWSapplications. When you import only the tags, rather than the whole application, froma remote computer, the TCP/IP Client worksheet can be automatically created to linkthe tags between both stations (the local and the remote), and to share the value ofthese tags between both stations during the runtime.<strong>InduSoft</strong> <strong>Web</strong> <strong>Studio</strong> v6.1 SP2 3–57
IWS Users GuideWorking with the IWS Development EnvironmentImport from <strong>InduSoft</strong> <strong>Web</strong> <strong>Studio</strong> Database WizardFieldImport tags onlyImport the wholeapplicationDescriptionWhen this option is selected, the tags from the other application will be imported tothe current application. The other interfaces of the application (worksheets) will notbe imported.When this option is selected, the following interfaces from the other application willbe imported to the current application: Tags Database Global Procedures Tags Database Global Procedures Screens Group Screens <strong>Web</strong> Pages Alarms Trend Recipes Reports ODBC Math Script Scheduler Drivers OPC3–58 <strong>InduSoft</strong> <strong>Web</strong> <strong>Studio</strong> v6.1 SP2
Working with the IWS Development EnvironmentIWS Users GuideDo not importduplicatedReplace duplicatedwith importedLocalRemoteGenerate TCP/IPClient worksheetUse Prefix TCP/IP DDEThis option is useful for merging applications and importing template application(s).Note:When selecting the option to Import the whole application, the following worksheetswill be always imported, regardless of existing worksheets with the same number inthe current application: ODBC, Math, Script, Scheduler, Drivers, OPC, TCP/IP andDDE. If there are worksheets with the same number in the current application, theworksheets imported from the other application will be inserted as additionalworksheets in the current application (the number of each worksheet isautomatically increased to avoid replacing files on the current application.When this option is selected, the following interfaces are not imported in case thereis already an equivalent interface in the current application: Tags Database (tags with the same name will not be imported) Global Procedures (the Global Procedures will not be imported at all) Screens (screens with the same name will not be imported) Group Screens (group screens with the same name will not be imported) <strong>Web</strong> Pages (web pages with the same name will not be imported) Alarms (alarms assigned to tags with the same name will not be imported) Trends (trend logs assigned to tags with the same name will not be imported) Recipes (recipes with the same name will not be imported) Reports (reports with the same name will not be imported) Script (the Startup Script will not be imported at all)When this option is selected, the interfaces from the other application will beimported, and the interfaces from the current application with the same name (ifany) will be overwritten.Select this option to import tags from an application stored in the local computerinto the current application. To do so, click the Browse button and select the *.APPfile of the application that has the tags you want to import.Select this option to import tags from an application running in a remote station.Type the IP Address (or the host name) of the remote computer, in the Remotefield. The tags from the current application from the remote computer will beavailable for import. This option is available for importing tags only, but it is notavailable for importing the whole application.When you select Remote (instead of Local) and check this option, IWS willconfigure the TCP/IP Client worksheet automatically to exchange data with aremote application.Check to specify a prefix (up to 4 characters) to be concatenated to the name ofthe imported tags. It is useful to use a suffix to differentiate the imported tags fromthe tags created manually.<strong>InduSoft</strong> <strong>Web</strong> <strong>Studio</strong> v6.1 SP2 3–59
IWS Users GuideWorking with the IWS Development EnvironmentImporting from OPC Server DatabasesThis wizard allows you to import tags from either a local OPC Server or a remote one.When you import tags from the OPC Server, the OPC Client worksheet isautomatically created to link the tags, eliminating the need to configure thecommunication interface between the OPC Client from IWS and the external OPCServer.Import OPC Server Database WizardLocal/Remote: Provide the following options:ServerLocalRemoteDescriptionSelect this option to import tags from an OPC Server installed in the localcomputer.Select this option to import tags from an OPC Server installed in a remotecomputer. Type the IP Address (or the host name) of the remote computer whereIWS is running in the Remote field.Merge Local and Remote OPC Servers check-box: If you selected a Remote server, checkthis option to display the list of OPC Servers installed in the local computer andalso in the remote computer. Uncheck this check-box to display only the list ofOPC Servers installed in the remote computer.Identifier combo-box: Displays the list of available OPC Servers.Branch: Click on the Browse button to select the branch of the OPC Server fromwhich the tags (items) will be imported. Leave this field blank if you want toimport tags from all branches configured in the OPC Server.Use the item path for the tagname check-box: Check this option to concatenate the pathname to the item name when importing tags from the OPC Server. Uncheck thisoption to use only the item names configured in the OPC Server.3–60 <strong>InduSoft</strong> <strong>Web</strong> <strong>Studio</strong> v6.1 SP2
Working with the IWS Development EnvironmentIWS Users GuideIn the grid displayed in Step 3 () for this Data Source Type, there is an additionalfield with the label OPC, which displays the name of the items from the OPCServer. Note:See Steps 1, 2 and 3 in the section above, for the settings and fields thatare common for all Source Types.Importing from CSV DatabasesThis wizard allows you to import tags from a text file in the CSV (Comma SeparatedValues) format, or any similar format.Import CSV Database WizardFile Name: Press the Browse button to select the text file from which the tags will beimported.Data Column box: Select a number for each tag property that corresponds to itscolumn number in the import file. For example, if the Tag, Array Size and Type arelisted in the second, third and first columns in the import file, respectively, select2 in Tag, 3 in Array Size and 1 in Type. The Tag property (tag name) is mandatory, butthe other properties are optional.For properties that are not included in the text file, select the option Not used. IWSwill insert defaults or leave the field blank, according to the following table:PropertyDefault ValueArray Size 0TypeDescription<strong>Web</strong> DataIntegerLocal<strong>InduSoft</strong> <strong>Web</strong> <strong>Studio</strong> v6.1 SP2 3–61
IWS Users GuideWorking with the IWS Development EnvironmentDelimiters checkbox: Select the delimiter(s) used in the text file to divide one columnfrom another. For a CSV file, the delimiter is Comma (the default). You can selectmore than one delimiter at a time, and you can use the Other option to enter acustom delimiter. Note:See Steps 1, 2 and 3 in the section above, for the settings and fields thatare common for all Source Types.Importing from ODBC DatabasesThis wizard allows you to import tags from an external SQL Relational Databasesuch as Microsoft Access, SQL Server, Oracle, My SQL, Sybase and others, throughthe ODBC (Open DataBase Connectivity) interface.Import ODBC Database WizardSelect Data Source button: Click to select the ODBC Data Source Name (DSN) linked tothe database from which the tags will be imported. The DSN must havepreviously been created with the Data Sources (ODBC) window (Control Panel >Administrative Tools > Data Sources [ODBC] ). After you select a DSN, the otherfields in this window will be populated automatically with information from theselected database.Table combo-box: Select the table that holds the tags in the import database.Tag combo-box: Select the name of the column that holds the tags in the importdatabase.Array Size combo-box: Select the name of the column that holds the array size for thetags in the import database.Type combo-box: Select the name of the column that holds the tag type in the importdatabase.3–62 <strong>InduSoft</strong> <strong>Web</strong> <strong>Studio</strong> v6.1 SP2
Working with the IWS Development EnvironmentIWS Users GuideDescription combo-box: Select the name of the column that holds the tag descriptionin the import database.<strong>Web</strong> Data combo-box: Select the name of the column that holds the <strong>Web</strong> Data for thetags in the import database. Note:See Steps 1, 2 and 3 in the section above, for the settings and fields that arecommon for all Source Types.Importing from PanelBuilder32 Databases Caution:This wizard is sold as an add-on and requires a license to be enabled. Consultyour software for further information.This wizard allows you to import not only the tags, but also the screens, alarmconfiguration and communication interface from a text file (report) exported by thePanelBuilder32 software. Using this wizard, you can convert PanelViewapplication (developed with PanelBuilder32) into the IWS format and run themunder any platform supported by IWS.Import PanelBuilder Database Wizard Note:See Steps 1, 2 and 3 in the section above, for the settings and fields that arecommon for all Source Types.<strong>InduSoft</strong> <strong>Web</strong> <strong>Studio</strong> v6.1 SP2 3–63
IWS Users GuideWorking with the IWS Development EnvironmentImport Screens: Check this option to import the graphical screens (including theirobjects and dynamics) to IWS.Import Comm. Configuration: Check this option to import the communication interface(tags linked to PLC addresses) to IWS.Report File: Press the Browse button to select the name of the text file exported fromPanelBuilder32 (report printed to a text file).ControlLogix Only: When importing an application that was configured to exchangedata with ControlLogix PLCs, IWS can convert the communication interface toEthernet/IP (ABCIP driver). To do so, type the IP Address of the PLC and its slotnumber. This information will be used to create the communication interface forthe imported application. If the original application was already configured to usethe Ethernet/IP interface, these fields can be left blank, because the IP Addressand CPU Slot Number are retrieved from the application file itself.In the grid displayed in Step 3 for this Data Source Type, there is an additionalfield with the label Address, which displays the tag addresses from thePanelBuilder project. Tip:Please consult the documentation for this import wizard for detailed informationabout how to export an application from the *.PBA format to the text (*.TXT)format, using PanelBuilder32, and import it into IWS. Note:IWS does not support some special characters (e.g., [ ] . – ) in tag names.When you import your PaneBuilder database into IWS, these special characterswill be converted into underscores ( _ ).Importing from RSLogix 5000 CSV DatabasesThis wizard allows you to import tags from a program for ControlLogix/FlexiLogixPLC developed with RSLogix 5000 and exported to a CSV file. When you importtags from the RSLogix 5000 CSV file, the ABCIP driver worksheet is automaticallycreated to link the tags imported with the PLC, eliminating the need to configure thecommunication interface between IWS and the PLC manually.3–64 <strong>InduSoft</strong> <strong>Web</strong> <strong>Studio</strong> v6.1 SP2
Working with the IWS Development EnvironmentIWS Users GuideImporting Data from the RSLogix 5000 CSV DatabasePLC Options box: Provides the following options:OptionScope (Folder Name):Use Full ScopeDo Not Use ScopeUse Limited ScopePLC IP AddressDescriptionSelect Use Full Scope to import the tags using the full scope configured inthe PLC program.Select Do Not Use Scope to ignore the scope of the tags configured in thePLC program.Select Use Limited Scope to set the number of characters from the Scopethat must be used when importing the tags from the PLC program.Type the IP Address of the PLC. This information will be used to configure thecommunication driver worksheets automatically.CSV File: Click the Browse button to select the CSV file exported by the RSLogix5000 with the list of tags configured in the PLC program.L5K File: Click the Browse button to select the L5K file saved by the RSLogix5000 with the list of UDT (User Defined Type) tags configured in the PLCprogram. This file is optional for the wizard. However, if this file is not selected,the UDT tags will not be imported.Create class tags when suitable: Check this check-box to create tags and classes forUDT tags imported from the PLC program. Uncheck this check-box to import tagsas single tags (rather than class type) from the PLC program.In the grid displayed in Step 3 (Importing a Database) for this Data Source Type,there is an additional field with the label Address, which displays the name of theitems from the RSLogix program. Note:See Steps 1, 2 and 3 in the section above, for the settings and fields that arecommon for all Source Types.<strong>InduSoft</strong> <strong>Web</strong> <strong>Studio</strong> v6.1 SP2 3–65
IWS Users GuideWorking with the IWS Development EnvironmentImporting from OMRON CX Programmer Databases Caution:This import wizard creates the communication driver for the OMRONcommunication driver, which is enabled only for customers that purchase theproduct directly from OMRON. Consult your software vendor for further details.Moreover, the OMRON communication driver communicates with the OMRONPLCs by the FINS Gateway, which is supported for the Windows 2000/XPoperating systems. Therefore, the FINS Gateway must be installed on thecomputer to enable communication between IWS and the PLCs through theOMRON driver.This wizard allows you to import tags from a program for OMRON PLCs developedwith CX Programmer and exported to a CXT file. When importing tags from the CXProgrammer CXT file, the OMRON driver worksheet is automatically created to linkthe tags imported with the PLC, eliminating the need to configure the communicationinterface between IWS and the PLC manually.Import OMRON CX Programmer Database WizardPrefix: This box allows you to concatenate one of the following types of prefixes tothe tags imported from the CX Programmer program:PrefixCustomPLCProgramDescriptionCheck this option to concatenate a custom prefix with up to 8 characters to the name of theimported tags.Check this option to concatenate either the PLC name or the PLC Number to the name ofthe imported tags.Check this option to concatenate either the Program name or the Program Number to thename of the imported tags.3–66 <strong>InduSoft</strong> <strong>Web</strong> <strong>Studio</strong> v6.1 SP2
Working with the IWS Development EnvironmentIWS Users GuideSerial Auto Address: This box allows you to configure the Network Address and theInitial Node Address for the PLCs configured in the product with Serialcommunication (if any):SettingNetworkAddressNodeAddressDescriptionThis setting will be applied to all PLCs configured in the project with Serial communication.This setting will be applied to the first PLC configured in the project with Serialcommunication. This setting will be incremented and applied to subsequent PLCs configuredin the product with Serial communication.CXT File: Click the Browse button to select the CXT file, exported by CXProgrammer, from which the tags will be imported.In the grid displayed in Step 3 for this Data Source Type, there is an additionalfield with the label Address, which displays the name of the tags from the CXProgrammer program. Note:See Steps 1, 2 and 3 in the section above, for the settings and fields that arecommon for all Source Types.Importing from PanelMate Plus Databases Caution:This wizard is sold as an add-on and requires a license to be enabled. Consultyour software for further information.This wizard allows you to import not only the tags, but also the screens, alarmconfiguration and communication interface from a project created with PanelMatePlus software. Using this wizard, you can convert a PanelMate application(developed with PanelMate Plus) into the IWS format and run it under any platformsupported by IWS.<strong>InduSoft</strong> <strong>Web</strong> <strong>Studio</strong> v6.1 SP2 3–67
IWS Users GuideWorking with the IWS Development EnvironmentImport PanelMate Database WizardImport Screens: Check this option to import the graphical screens (including theirobjects and dynamics) to IWS.PanelMate Model: Press the Browse button to select the directory where the databasefiles of the PanelMate Plus project that you intend to import are stored.Application: After selecting the correct path on the PanelMate Model field, theapplications available in this directory will be available in this combo-box. Selectthe application that you intend to import before pressing the Next button. Tip:Please consult the documentation for this import wizard for detailed informationabout how to export an application from the PanelMate Plus software into IWS. Note:See Steps 1, 2 and 3 in the section above, for the settings and fields that arecommon for all Source Types.Importing from TwinCAT PLC DatabasesThis wizard allows you to import tags from a program developed with the TwinCATPC-Based Control software from Beckhoff and exported to a Symbol file (*.SYM).When importing tags from the TwinCAT PC-Based Control SYM file, the TWCATdriver worksheet is automatically created to link the tags imported with the PC-Based control project, eliminating the need to configure the communication interfacebetween IWS and the PC-Based Control software manually.3–68 <strong>InduSoft</strong> <strong>Web</strong> <strong>Studio</strong> v6.1 SP2
Working with the IWS Development EnvironmentIWS Users GuideTwinCAT PLC: This box allows the user to configure the following settings:SettingAMS Net IDTCP PortSymbol FileDescriptionType the AMS Net ID of the TwinCAT project.Select a TCP port used by the driver to exchange data with the TwinCAT PC-BasedControl software during the runtime. You can select either one of the standard TCP Ports(801, 811, 821 or 831), or type the number of a custom TCP port to be used in thecommunication.Click the Browse button to select the .SYM file from which the tags must be imported.GENERATING THE SYMBOL FILE FROM TWINCATImportant: During the import process, every single variable that is in the .SYM filewill be imported. The problem is that some of those variables may be library orsystem variables, which the TWCAT driver is able to communicate with. So, it isimportant that you correctly configure your TwinCAT application to generate the.SYM file only with the POUs and Global Variables.In order to configure your TwinCAT to do that, please follow the steps below:1. Open your TwinCAT project using the TwinCAT PLC Control software.2. Go to the menu Project > Options.3. Select Symbol Configuration.4. Check the box Dump Symbol Entries.5. Click on Configure Symbol Files.6. Now is the most important part: you will want to unselect everything first,and you will select only what you want later. Make sure that everything isselected and all the check boxes are unchecked, as shown in the figure below:<strong>InduSoft</strong> <strong>Web</strong> <strong>Studio</strong> v6.1 SP2 3–69
IWS Users GuideWorking with the IWS Development EnvironmentUnchecking All Export Options Note:You may need to check the Export Variables in order to enable the othercheck boxes, and then uncheck them.Once you have cleaned everything up, you will select only the POUs andGlobal variables that you are sure you want to communicate with. Do notselect Libraries. You can see an example below:3–70 <strong>InduSoft</strong> <strong>Web</strong> <strong>Studio</strong> v6.1 SP2
Working with the IWS Development EnvironmentIWS Users GuideSelecting POUs and Global Variables7. Once you have configured that, click on OK to close the Set object attributesdialog, and then OK again to close the Project Options window.8. Now, you need to go to the menu Project > Rebuild All. The system will recompileeverything, generating the .SYM file with the POUs and Global Variables only.You are now ready to import the variable names into <strong>InduSoft</strong> <strong>Web</strong> <strong>Studio</strong>.Development ModulesThis section discusses an overview of graphics and tasks development modules.For more information, see Chapter 7: Configuring Screens and Graphics andChapter 8: Configuring Task Worksheets.GraphicsThe most basic function performed by <strong>InduSoft</strong> <strong>Web</strong> <strong>Studio</strong> is to provide a windowinto the process. The ability to display the status of the process by interacting withinstrumentation (or computers), is described as the Human-Machine Interface (HMI).<strong>InduSoft</strong> <strong>Web</strong> <strong>Studio</strong> allows you to create applications that can monitor processesusing high-resolution color screens.The <strong>InduSoft</strong> <strong>Web</strong> <strong>Studio</strong> graphic tools consist of two modules:The Screen/Worksheet Editor on the <strong>InduSoft</strong> <strong>Web</strong> <strong>Studio</strong> desktop (used to createor import graphics)The application runtime ViewerYou can use animation links to create dynamic graphic objects or symbols. Animationlinks cause objects and symbols to change appearance to reflect changes in the valueof a tag or an expression. Each screen is an association of static and dynamicobjects.Screens can have an optional bitmap that acts as a background in the objectwindow. On the following screen for example, the static images can be part of abitmap in the background object and objects with animation in the dynamic object<strong>InduSoft</strong> <strong>Web</strong> <strong>Studio</strong> v6.1 SP2 3–71
IWS Users GuideWorking with the IWS Development Environmentlayer can reflect the changes in the plant, giving the illusion that the screen isthree-dimensional.Sample CEView Emulation ScreenAll <strong>InduSoft</strong> <strong>Web</strong> <strong>Studio</strong> configuration tasks require a Windows-compatible pointingdevice, such as a mouse or touch pad. You can run an application in the Viewerwithout a pointing device if you configure keypad or keyboard keys for all commands.TasksYou use the IWS Tasks tab to configure task-specific worksheets, each composed of aHeader (where you define global information for the worksheet) and a Body (whereyou configure the tags and expressions used in each task).You can configure the following task-specific worksheets: Alarm Groups : Use to define an alarm group, its characteristics, and itsmessages that are reported in alarm conditions. The main purpose of the alarmsis to inform the operators about any problem or change of state during theprocess so that corrective action can be taken.To show alarm messages on the screen, you must create the alarm object on thescreen. Trend Groups : Use to define trend groups, which keep track of process variablesbehavior. You can store samples in a history file and show both history andonline samples in a screen trend graph. Recipes : Use to read and write ASCII files from and to the hard disk, and totransfer values between files and real-time memory. Typically, you use thismodule to store process recipes, but these files can store any type of informationsuch as operation logs, passwords, and so forth. You also can use this module tostore data in XML format. Reports : Use to configure your own reports with system data, in either ASCII orRTF format. The main purpose of this module is to make report creation easierand more efficient. Math Worksheets : Use to implement additional routines to work with the basicfunctions of the <strong>InduSoft</strong> <strong>Web</strong> <strong>Studio</strong> modules. A Math Worksheet is a group of3–72 <strong>InduSoft</strong> <strong>Web</strong> <strong>Studio</strong> v6.1 SP2
Working with the IWS Development EnvironmentIWS Users Guideprogramming lines that are executed as one of the application Background Tasks.You can configure the mathematics in blocks in different worksheets.This worksheet provides a free environment for logical routines and mathematicalcalculations that the project may need. For these purposes, the scriptinglanguage is simple and easy to use. Scheduler : Use to generate the time bases used in an application. TheScheduler is capable of triggering events. ODBC Configuration : Use to enable <strong>InduSoft</strong> <strong>Web</strong> <strong>Studio</strong> applications to accessany database that is compatible with the ODBC protocol (such as Access, Excel,Oracle, SQL Server and so on). Note:The ODBC interface is not available for WinCE applications.General CommunicationsYou can enable <strong>InduSoft</strong> <strong>Web</strong> <strong>Studio</strong> applications to communicate (exchange datavalues) with other applications, remote devices (such as a PLC or transmitters), andany devices that implement OPC or DDE Servers.To enable communication, you configure the task worksheets provided by IWS.Instructions for configuring these worksheets are provided in Chapter 10:Communication in the following sections:Configuring a Driver: Explains how to configure a Driver worksheet to implementa communication protocol (OPC, TCP/IP, or DDE).Configuring OPC: Explains how to configure an OPC worksheet to managecommunication between local or remote OPC Clients and Servers.Configuring TCP/IP: Explains how to configure a TCP/IP worksheet to managecommunication between two IWS applications.Configuring DDE: Explains how to configure a DDE worksheet to managecommunication between local or remote DDE Clients and Servers.Use the Comm tab to access all worksheets configured to establish communicationwith another device or software using available protocols.<strong>InduSoft</strong> <strong>Web</strong> <strong>Studio</strong> v6.1 SP2 3–73
Chapter 4: Understanding IWS StructureThis chapter explains the internal structure of IWS, including how data flowsthrough the IWS runtime environment and how the various runtime modules areexecuted. IMPORTANT!To avoid unexpected behaviors and guarantee the best performance whenexecuting applications, we strongly recommend that you read and understandthe information in this chapter before you start developing complexapplications.Understanding the Internal Structure and Data FlowIWS runtime environment runs on an operator interface workstation (runningWindows NT/2000/XP/CE) and consists of the following modules or threads(program elements that can execute independently of other program elements):Background Task (a supervisory task): Executes other internal tasks (IWSworksheets). For example, the Background task executes scripts configured inthe Math and Scheduler worksheets and manages parameters configured in theAlarm, Recipe, Report, and Trend worksheets.Database Spy (debugging tool):– Executes functions and/or expressions for testing purposes– Reads data (such as tag values) from the Tags database– Writes data (such as tag values) to the Tags databaseDDE Client: Manages DDE communication with a DDE Server (local or remote),according to parameters configured in the DDE Client worksheets.DDE Server: Manages DDE communication with a DDE Client (local or remote).LogWin (debugging tool): Traces messages generated from other modules/tasks.Driver Runtime: Manages the read/write commands configured in the Driverworksheets.OPC Client: Manages OPC communication with an OPC Server (local or remote),according to parameters configured in the OPC Client worksheets.OPC Server: Manages OPC communication with an OPC Client (local or remote).ODBC Runtime: Manages ODBC data communication with any SQL relationaldatabase, according to parameters configured in the ODBC worksheets.TCP/IP Client: Manages TCP/IP communication with a remote TCP/IP Servermodule (from IWS), according to parameters configured in the TCP/IP Clientworksheets.TCP/IP Server: Manages TCP/IP communication messages with a remote TCP/IPClient module (from IWS).Viewer: Executes all scripts (On Open, On While, On Close, Command, Hyperlink, and soforth) configured for application screens and updates the screen objects.None of the preceding runtime modules exchange data directly with another moduleor task. Instead, runtime modules send data to and receive data from the Tagsdatabase, which is the “heart” of IWS.<strong>InduSoft</strong> <strong>Web</strong> <strong>Studio</strong> v6.1 SP2 4–1
IWS Users GuideUnderstanding IWS StructureThe Tags database manages the flow of data between modules. In addition, the Tagsdatabase stores all tag values and the status of all properties associated with eachtag (such as alarm conditioning, timestamp, quality, and so forth). Note:Tags are variables (such as communication points in field equipment,calculation results, alarm points, and so forth) that are used in screens andworksheets.For detailed information about tags, tag values, and tag properties seeChapter 5: Working with Tags.IWS Data FlowEach IWS module contains a virtual table of the tags that are relevant for thatmodule at the current time. The Tags database uses this table to determine whichinformation must be updated in each module. For example, the Viewer contains avirtual table that lists all tags configured for all of the open application screens. If atag value changes, the Tags database sends a message to the Viewer, and then theViewer updates the value in all objects where the tag is configured.4–2 <strong>InduSoft</strong> <strong>Web</strong> <strong>Studio</strong> v6.1 SP2
Understanding IWS StructureIWS Users GuideFor example, if a driver reads a new value from the PLC (programmable logiccontroller), the driver updates the tag associated with this value in the Tagsdatabase. Then, if this new information must display on the application screen, theTags database sends the new tag value to the Viewer task, and the Viewer updatesthe screen.Data Flow ExampleNote that the driver does not send new tag values directly to the Viewer. In addition,there is no pooling between tasks—the Tags database receives the updatedinformation and immediately forwards it to all runtime tasks requiring thatinformation. IMPORTANT!The Viewer module will update an object only when (at least) one of the object’stag values change.If you configure a dynamic object (such as Text I/O) with a function that does notrequire a tag (for example, NoInputTime()), the Viewer will not update theobject because there is are no tags associated with that object.IWS’s architecture significantly improves the internal data flow performance andmakes it easy for you to add new internal tasks. Even though each task worksindependently, it can access information from any other task through the Tagsdatabase.Executing/Switching IWS ModulesIWS is a SCADA system composed of modules that must be executedsimultaneously. Based on the multi-tasking concept, each runtime module (Viewer,Driver, and so forth) is a thread and the operating system switches from one threadto other automatically.<strong>InduSoft</strong> <strong>Web</strong> <strong>Studio</strong> v6.1 SP2 4–3
IWS Users GuideUnderstanding IWS StructureIt is a common misconception that you execute a SCADA system when you executea PLC program. A PLC program contains a simple loop:PLC Program LoopHowever, in a SCADA system, there are several modules running simultaneously,and most of them can read and write data. Because a SCADA system modifies data(tag values) continuously during task execution, the preceding diagram is notapplicable.IWS only has one process—<strong>Studio</strong> Manager.exe. When you execute a runtimeapplication, the <strong>Studio</strong> Manager.exe process starts the Tags database and all ofthe runtime modules configured for the application. You can specify which modules(such as Viewer and Driver) will start during the runtime (see “Starting RuntimeModules on the Target System” on page 6–33).Each process keeps a list of active threads for the operating system. Actually, eachprocess activates and deactivates each thread during the runtime, according to thealgorithm of each process. Also, when you create a thread you specify a priorityvalue. The operating system continuously scans all currently active threads, andexecutes the threads according to their priority value—executing the higher-prioritythreads first. When threads with higher-priority values are active, the threads withlower-priority values are not executed at all. If there is more than one thread withthe same priority value, and there are no other threads with higher-priority values,the operating system keeps switching between the threads with the same priority.4–4 <strong>InduSoft</strong> <strong>Web</strong> <strong>Studio</strong> v6.1 SP2
Understanding IWS StructureIWS Users Guide Note:All IWS threads are set to priority 7, which is THREAD_PRIORITY_NORMAL.(Most programs contain this priority value.)Real-time program (such as SoftPLCs and Device Drivers) threads are assigned ahigher-priority value (THREAD_PRIORITY_HIGHEST); however, these programsmust provide a mechanism to keep them inactive for some period of time or thethreads with normal priority would never be executed.IWS uses the UNICOMM.DLL library for serial drivers. This library creates aTHREAD_PRIORITY_HIGHEST thread that “sleeps” (remains inactive) until dataarrives in the serial channel. When IWS detects new data in the serial channel,the THREAD_PRIORITY_HIGHEST thread “wakes up” (becomes active) andtransfers the data from the operating system buffer to the thread buffer, whereit can be read by the Driver. This thread is the only highest-priority threadcreated by IWS.If you allowed threads to remain active all the time, the CPU usage would be 100%all the time, which must be avoided for performance reasons. Every programprovides a mechanism to prevent threads from staying active all the time.IWS uses the following parameters to prevent threads from staying activecontinuously:TimeSlice (from operating system): Causes the operating system to switchautomatically between active threads with the same priority value.By default, the operating system executes each active thread for approximately20ms and then switches to the next active thread. In other words, if there aremultiple active threads with the same priority value waiting to be executed, theoperating system will not execute any one active thread for more than 20ms.TimeSlice (from IWS): Specifies how long each IWS thread can remaincontinuously active.You use this parameter in addition to the operating system’s TimeSlice parameter.You configure a TimeSlice value for each IWS thread (except the Background Task)and specify how long each thread can remain continuously active. As long as athread is active, the operating system can switch to that thread.Period (from IWS): Specifies the maximum amount of time each IWS thread(except the Background Task) can remain inactive. Caution:We strongly recommend that you do not modify these default values unless it isabsolutely necessary. Configuring these parameters incorrectly can cause theentire system to malfunction (for example: CPU usage will go to 100%) and/orcause some tasks to perform poorly.If you must change the parameter defaults, note the values before making yourchanges so if a malfunction occurs you can return to the original settings.<strong>InduSoft</strong> <strong>Web</strong> <strong>Studio</strong> v6.1 SP2 4–5
IWS Users GuideUnderstanding IWS StructureTo change the IWS TimeSlice and Period parameter default values: From the IWS installation directory (for example, C:\ProgramFiles\\bin), double-click \BIN to open the folder. Double-click the Program Settings.INI file to open the file in Microsoft ®Notepad.The following is a list of all parameters contained in this .ini file and their defaultvalues (in milliseconds).[Period]DBSpy=1000UniDDEClient=200UniDDE=200Driver=20LogWin=100UniODBCRT=100OPCClient=20OPCServer=20TCPClient=100TCPServer=100Viewer=50[TimeSlice]UniDDEClient=100Driver=10OPCClient=10OPCServer=10TCPClient=200TCPServer=200Viewer=200 Note:You may not see all of these parameters listed when you open your ProgramSettings.INI file. However, even if a parameter is not visible in your list,IWS still uses that parameter and its default value.– To change the default value of a displayed parameter: In Notepad, delete the defaultvalue and type the new value in its place.– To change the default value of a parameter that is not displayed in your list: In Notepad, typethe parameter name exactly as shown in the following list, the equal sign,and then the new value. Save the file (File → Save) and close Notepad (File → Exit).4–6 <strong>InduSoft</strong> <strong>Web</strong> <strong>Studio</strong> v6.1 SP2
Understanding IWS StructureIWS Users GuideThe following figure illustrates how IWS executes a generic thread (such as theViewer).Where:Executing a Generic ThreadSignal is the Period time period (set to 50ms for this example).Signal shows when the thread is active for the operating system.Signal is the TimeSlice time period (set to 30ms for this example).Signal shows the execution of the thread itself.In this example, IWS generates a Period message every 50ms (signal ). When IWSgenerates this message, its thread becomes active and remains active until thespecified TimeSlice time period (from IWS) expires. The thread then remains inactiveuntil IWS generates the next Period message (signal ).While the thread is active, the operating system is responsible for executing thatthread. However, just because a thread is active does not mean the operating systemwill execute it immediately – the operating system may be executing other threads,for example.When the operating system executes the thread, the TimeSlice timer starts countingand the thread is executed for 20ms (TimeSlice from the operating system). After the20ms period, the operating system automatically switches to the next active thread(such as the Driver), and so on.In the above example, the TimeSlice time was set to 30ms, which means the operatingsystem is not supposed to execute the thread more than once in each TimeSlice ofIWS. However, if you specify higher values for the IWS TimeSlice time period, it islikely that the operating system will execute the same thread more than once in thesame TimeSlice time period.<strong>InduSoft</strong> <strong>Web</strong> <strong>Studio</strong> v6.1 SP2 4–7
IWS Users GuideUnderstanding IWS StructureIn the next example, the Period and the TimeSlice values were changed as follows, butthe default operating system TimeSlice period (20 ms) was not changed.Signal is the Period time period (set to 100ms).Signal shows when the thread is active for the operating system.Signal is the IWS TimeSlice time period (set to 80ms).Signal shows the execution of the thread itself.Setting a Higher TimeSliceNotice that the thread can be executed more than once in the same TimeSlice timeperiod. When the IWS TimeSlice time period expires, the operating system interruptsthe thread execution; however, even though the IWS Period and TimeSlice parametersare set to 100ms and 80ms respectively, the operating system will not execute thisthread continuously for more than 20ms, because the operating system TimeSlicetime period is set to 20ms.When the operating system is not executing the Viewer thread, the CPU can executeany other thread or remain idle (if there are no other active threads to execute).Remember, the IWS Period and TimeSlice parameters were created to prevent allthreads from being active at the same time to prevent 100% CPU usage.During thread execution, the thread must handle its pending messages. Forexample, the Viewer module must update any related screen objects. If there are nomessages pending, the thread deactivates itself and gives control back to theoperating system. The operating system immediately switches to the next activethread. In other words, a thread can interrupt its own execution — even if theoperating system TimeSlice time period has not yet expired (which occurs frequentlyin real-world applications). Note:The Database Spy, DDE Server, LogWin, and ODBC Runtime modules do nothave an IWS TimeSlice parameter. Consequently, after each thread handles all ofits pending messages, the threads become inactive until the next Period messagefor each one of the threads occurs.The Background Task is the exception to the execution/switching process justdiscussed. The mechanism for executing/switching the Background Task is describedin the next section.4–8 <strong>InduSoft</strong> <strong>Web</strong> <strong>Studio</strong> v6.1 SP2
Understanding IWS StructureIWS Users GuideExecuting/Switching the Background TaskThe Background Task executes scripts from the Math and Scheduler worksheets (forexample, messages from Alarm and Trend worksheets). In addition, the BackgroundTask executes all Recipe and Report commands when the Recipe() or Report()functions are executed during the runtime.Although the Alarm, Math, Scheduler, and Trend tasks are not threads, you canspecify or change their Period time in the Program Settings.INI file located in theC:\Documents and Settings\\Local Settings\ApplicationData\<strong>InduSoft</strong> <strong>Web</strong> <strong>Studio</strong> v6.1 folder (see “Executing/Switching IWS Modules”on page 4–3).The Period default values (in milliseconds) are as follows:[Period]Math=100Sched=50Alarm=100Trend=1000These values mean that every 100ms, IWS generates a Period message to the Mathtask. Every 50ms, IWS generates a Period message to the Scheduler task, and so on. Caution:We strongly recommend that you do not modify the Background Task defaultvalues unless it is absolutely necessary. Configuring any of these parametersincorrectly can cause your entire system to malfunction (for example, CPUusage will go to 100%) and/or cause some tasks to perform poorly.If you must change the parameter defaults, note the values before making yourchanges so if a malfunction occurs you can return to the original settings.Keep in mind that the Background Task thread has the same priority as other threadsin IWS (Drivers, Viewer, and so forth), which means that the operating system willnot execute this task continuously for more than 20ms.The Background Task executes the Recipe and Report commands when the Recipe() orReport() functions are executed. Because the Recipe() and Report() functionsare synchronous, once the Background Task starts executing the functions, it will notswitch to another task (Alarm, Math, Scheduler, or Trend) until it completelyexecutes the functions. Executing a Recipe() or Report() function usually takes afew milliseconds.The Backgound Task must switch between the Alarm, Math, Scheduler, and Trendtasks. When Background Task switches to the Scheduler task, it will not switch toanother task (Alarm, Math, or Trend) until all Scheduler worksheets are executed.After executing all Scheduler worksheets, the Background Task will not execute theScheduler again until it receives the next Period message for the Scheduler task.The Backgound Task applies the same behavior when executing the Alarm and Trendtasks — when the Backgound Task switches to the Alarm or Trend task, it will notswitch to another task until it handles all pending messages. So, the Backgound Taskwill not execute the Alarm or Trend task again, until IWS generates the next Periodmessage for each of these tasks.<strong>InduSoft</strong> <strong>Web</strong> <strong>Studio</strong> v6.1 SP2 4–9
IWS Users GuideUnderstanding IWS StructureThe Backgound Task typically executes the Alarm, Scheduler, and Trend tasks in a fewmilliseconds. However, it can take longer to execute the Math task because it usuallycontains loops and complex scripts. Consequently, the mechanism used to executethe Alarm, Scheduler, and Trend tasks cannot be applied to the Math task.The Background Task executes the Math task for no more than 10ms continuouslybefore switching to other task (such as the Scheduler). The Background Task cannotexecute the Math task again for the next 50ms; however, the Background Task canexecute other tasks (Alarm, Recipe, Report, Scheduler, or Trend) during this 50msperiod. After the Background Task executes all of the Math worksheets, it will not begina new scan of the Math worksheets until IWS generates a new Period message for theMath task.It is important to re-emphasize that this process was created to prevent 100% CPUusage all the time. Caution:We recommend caution when using the Math() function in a Schedulerworksheet or for a screen object (such as the Command dynamic).When the Scheduler task executes a Math() function, no other task can beexecuted by the Background Task until the Scheduler executes the entire Mathworksheet called by the Math() function. This process can take severalmilliseconds or even seconds, depending on how you configured the script inthe Math worksheet (especially for loops).If you configure a Math() function for a screen object, the Viewer stopsupdating the screen until the Viewer executes the entire Math worksheet calledby the Math() function.If you must use the Math() function for the Scheduler task or a screen object,we recommend using the following procedure to prevent process delays: Specify one auxiliary tag with the value 1 and the Scheduler or Viewer taskwill send a message to the Tags database to update this tag value. Configure the tag in the Execution field of the Math worksheet to be executed.When the Background Task scans the Math worksheet, IWS will execute theworksheet. Reset the tag in the last line of the Math worksheet (write the value 0 to theauxiliary tag).As a result, the Background Task will not execute the Math worksheet in the nextscan unless the auxiliary tag is set to the value 1 again.4–10 <strong>InduSoft</strong> <strong>Web</strong> <strong>Studio</strong> v6.1 SP2
Chapter 5: Working with TagsAs stated in Chapter 4, the Tags database is the heart of IWS because it managesthe flow of data between runtime modules and it stores all tags, tag values, and tagproperties. The Tags database is the medium used by all modules to read or writetag values.This chapter explains basic concepts about the tags, tag values, and tag propertiesused in the IWS Tags database—including how to create and edit tags for yourprojects. Note:We recommend that you read and understand the concepts discussed inChapter 4: Understanding the IWS Structure, before you read this chapter.What is a Tag?Tags are variables that are designed to receive results from expressions specified inscreens and worksheets (such as communication points in field equipment,calculation results, alarm points, and so forth).All tags are organized into one of the following categories (which are represented byfolders on the Database tab in the Workspace):Application Tags are tags you create during applicationdevelopment.For example:– Screen tags– Tags that read from/write to field equipment– Control tags– Auxiliary tags used to perform mathematicalcalculationsClasses are compound tags that you create to associate aset of values (rather than a single value) with a class.Class structures permit a high-degree of encapsulationwithin the Tags database.Shared Database tags are created in a PC-based controlsoftware program and then imported into the IWS Tagsdatabase.For example you might create tags in SteepleChase andimport them into IWS so IWS can read/write data from aSteepleChase PC-based control product. Note:Because you must configure a project before you can share tags,instructions for this procedure are provided in Chapter 6: Creating andConfiguring a Project. See “Sharing PC-Based Control Software ProgramDatabase Tags” on page 6–6.<strong>InduSoft</strong> <strong>Web</strong> <strong>Studio</strong> v6.1 SP2 5–1
IWS Users GuideWorking with TagsYou cannot modify shared tags within IWS—you must modify the tags in theoriginal PC-based control program, and then re-import them into the Tagsdatabase.Internal Tags are predefined tags with predetermined functions that are used forIWS supervisory tasks. For example,– Date tags hold the current date in string format– Time tags hold the current time in string formatMost internal tags are read-only, which means you cannot add, edit, or removethese tags from the database.To see a list of the internal tags, select the Database tab in the Workspace, openthe Internal Tags folder, and open the Tag List subfolder. The above figure showsa partial list of internal tags.After creating a tag, you can use it anywhere within the application, and you canuse the same tag for more than one object or attribute.Designing a TagBefore you can create a tag for its intended purpose, you must understand whattypes of tags you can create and the basic elements or characteristics of a tag,including:Tag data typesShared or notTag propertiesAfter reading the information provided in this section, you should be able to createtags to properly suit your application needs.Choosing the Tag TypeIWS allows you to create the following types of tags:Basic tags hold a single value.Array tags are a set of tags that use the same name with unique indexes.Class tags are a set of compound tags that consist of user-defined data types(Boolean, Integer, Real or String) or data-type structures.Indirect tags are pointers that provide indirect access to another tag type, includingclass tags.A discussion of these tag types follows.BASIC TAGSA basic tag receives a single value. Typically, most tags defined for an IWSapplication are basic tags. Some examples of a basic tag include:TankID (to identify different tanks in your application)Temperature (to identify the current temperature of an object)Status (to identify whether an object is open or closed)5–2 <strong>InduSoft</strong> <strong>Web</strong> <strong>Studio</strong> v6.1 SP2
Working with TagsIWS Users GuideARRAY TAGSAn array tag consists of a set of tags that all have the same name, but use uniquearray indexes (a matrix of n lines and one column) to differentiate between each tag.An array index can be a fixed value, another tag or an expression. Maximum arraysizes are determined by product specifications.You can use array tags to:Simplify configurationsEnable multiplexing in screens, recipes, and communication interfacesSave development time during tag declarationYou specify array tags in one of two formats:For a simple array tag, type []For a complex array tag (where the array index is an expression consisting of atag and an arithmetic operation), type [+c]Where:– is the tag name– [] is the unique index (fixed value or another tag)– + is any arithmetic operation– c is a numerical constant Notes: You must specify a maximum index for each array tag by typing a value (n)in the Array Size column of an Application Tags datasheet or in the Array Sizefield on a New Tag dialog. (See “Creating Application Database Tags” onpage 5–10).When you create an n-position array tag, IWS actually creates n+1 positions(from 0 to n). For example, if you specify ArrayTag[15], the array will have16 elements; where 0 is the start position and 15 is the end position. You must not use spaces in an array tag.When IWS reads a tag it begins with the first character and continues until itfinds the first space or null character. Consequently, the system does notrecognize any characters following the space as part of the array tag.For example, if you type a[second + 1] IWS regards a[second as the tagand considers it invalid because IWS does not find (recognize) the closingbracket. However, if you type a[second+1], this is a valid array tag.You can specify an array tag wherever you would use a variable name. Also, becausearray tags greatly simplify configuration tasks and can save development time, wesuggest using them whenever possible.For example, suppose you want to monitor the temperature of four tanks. Theconventional configuration method is:temperature1 high temperature on tank 1temperature2 high temperature on tank 2temperature3 high temperature on tank 3temperature4 high temperature on tank 4<strong>InduSoft</strong> <strong>Web</strong> <strong>Studio</strong> v6.1 SP2 5–3
IWS Users GuideWorking with TagsYou can use array tags to simplify this task as follows (where [n] represents thetank number):temperature[n] high temperature on tank [n]The following table contains some additional examples of an array tag:Array Tag ExampleTank[1], Tank[2], Tank[500]Tank[tk]Tank[tk+1]DescriptionSimple arrays, where the array indexes (1, 2, and 500) arenumerical constants. For example, tank numbers.A simple array, where the array index (tk) is a tag.For example, a tag representing the tank number.A complex array, where the array index (tk+1) is anexpression. For example, the value of tk (tank number) plus1.Array Tag Examples Note:When using another tag to reference the index of an array, if the value of the tagis outside the size of the array, then the following results are given: If is greater than the size of the array, thenMyArray[] will point to the end position of the array; and If is less than 0, then MyArray[]will point to thestart position of the array (i.e., MyArray[0]).CLASS TAGSClass tags are compound tags that permit a high-degree of encapsulation within theTags database. Where basic tags receive a single value, classes are designed toreceive multiple values.You can create a class-type tag by grouping basic or array tags, which then becomethe class members. The maximum number of members for any class depends on theproduct specification.You specify class-type tags in one of two formats:For a simple class tag the syntax is .. (Where theperiod is used as a separator.)For example, if you wanted to monitor several different conditions (such astemperature, level and pressure) in a tank, you might create a class tag asfollows:Tank.TemperatureTank.LevelTank.PressureFor creating a complex class tag (using an array tag) the syntax is[].. (Where again, theperiod is used as a separator.)5–4 <strong>InduSoft</strong> <strong>Web</strong> <strong>Studio</strong> v6.1 SP2
Working with TagsIWS Users GuideIf you wanted to monitor the temperature, level, and pressure conditions inmultiple tanks, you might create a class tag as follows:Tank[tk].TemperatureTank[tk].LevelTank[tk].PressureWhere tk is an array index, representing the tank number.INDIRECT TAGSIndirect tags “point” to other database tags (including class-type tags). Using indirecttags can save development time because they keep you from having to createduplicate tags (and the logic built into them).You create an indirect tag from any string-type tag simply by typing the “@” symbolin front of the tag name @.To reference a simple tag, assume the strX tag (a string tag) holds the value“Tank,” which is the name of another tag, then reading from or writing to @strXprovides access to the value of the Tank tag.To reference a class-type tag and member, you simply create a string tag thatpoints to the class tag and the member. For example, if a tag strX (a string tag)holds the value “Tank.Level,” which is the name of the class tag, then readingfrom or writing to @strX provides access to the value of the Tank.Level tag.You can also point directly to a class-type tag member; by identifying a class-typethat points to a class member. For example: to access the Tank.Level member ofthe class, you must store the Tank value within the strX tag and use the syntax,@strX.Level.Choosing a Tag Data TypeAnother consideration when designing a tag is what type of data the tag will receive.IWS recognizes the following, standard tag data types:Boolean (one bit): Boolean or digital variables (0 or 1). Typically used for turningobjects off and on or for closing and opening objects.Integer (four bytes): Integer number (positive, negative, or zero). Equivalent to theC-type, signed long integer (ranging from –2147483648 to 2147483647).Typically used for counting whole numbers or setting whole number values.Real (floating point, eight bytes): Real number that is stored internally as adouble word. Equivalent to a C-type double. Typically used for measurements orfor decimal or fractional values.String (alphanumeric data, 0–254 chars): Character string up to 255 charactersthat holds letters, numbers, or special characters. Supports both ASCII andUNICODE characters.For example: Recipe product X123, 01/01/90, *** On ***Sharing Tags with a <strong>Web</strong> Thin ClientIWS allows you to decide whether a tag value can be shared with (displayed on) a<strong>Web</strong> Thin Client station.Local: Prevents a tag value on the Server station from being shared with <strong>Web</strong>Thin Client stations.Server: Enables a tag value to display on an HTML page, which makes the valueavailable to a <strong>Web</strong> Thin Client.<strong>InduSoft</strong> <strong>Web</strong> <strong>Studio</strong> v6.1 SP2 5–5
IWS Users GuideWorking with TagsIf you want to view and manage your applications remotely, you must be sure tospecify the Server option for all tags related to the management process. Forexample, if you want the ability to respond to alarms remotely, you must enablethe Server option for all tags related to alarm management.5–6 <strong>InduSoft</strong> <strong>Web</strong> <strong>Studio</strong> v6.1 SP2
Working with TagsIWS Users GuideChoosing Tag PropertiesTag properties are attributes (or parameters) that are inherent to a database tag(such as minimum/maximum values, size, description, and so forth).When you define tags for an IWS application, you can specify tag properties that areused during runtime as tag fields. These runtime tag fields are described in thefollowing table.Tag FieldNameDescription of ValueAssociated with Each FieldTag Type Associated with FieldR=Read OnlyRW=Read+WriteBoolean Integer Real StringNameMemberIndexThe name of the tag, as configured in theApplication Tags database.The name of the class member, in a properlyconfigured Class. NOTE: The syntax must be:.->MemberExample: Tank.Lvl->Member = LvlThe index number of an element in an Array.(An Array is any Tag of size greater than 0.)NOTE: The syntax must be:.[]->IndexExample: Tag[1]->Index = 1 R R RDescription Description of tag (in Tags Database) RWMaxMinQualityMaximum value that can be written to the tagduring runtime.Minimum value that can be written to the tagduring runtimeTag quality (192=GOOD; 0=BAD).Field updates every time tag receivesexpression results or a communication taskvalue (Driver or OPC).Invalid expressions (such as division by zero)or reading communication errors associatedwith tag will set the tag quality to BADautomatically. RW RW RSizeArray Size. If the tag is not an array tag, itreturns the value 0. RTimeStamp Time & date when tag changes value. RUnitBrief description (up to nine characters) of thetag value’s engineering unit (for example: Kg). RW<strong>InduSoft</strong> <strong>Web</strong> <strong>Studio</strong> v6.1 SP2 5–7
IWS Users GuideWorking with TagsTag FieldNameDescription of ValueAssociated with Each FieldTag Type Associated with FieldR=Read OnlyRW=Read+WriteBoolean Integer Real StringB0 … B31 Value (0 or 1) of any of the 32 bits (b0, b1, b2,… b31) of an integer tag. (B0: LSB B31:MSB). RWAlrStatusInteger value containing the status of allcurrently active alarms associated with thetag. Each bit of this integer value indicates aspecific status, as follows:• Bit 0 (LSB): HiHi Alarm active• Bit 1: Hi Alarm active• Bit 2: Lo Alarm active• Bit 3: LoLo Alarm active• Bit 4: Rate Alarm active• Bit 5: Deviation+ Alarm active• Bit 6: DevM Alarm active RFor example:If Tag->AlrStatus returns value 2, “Hi” alarm is active.If Tag->AlrStatus returns value 3, “HiHi” and “Hi” alarms are active simultaneously.If Tag->AlrStatus returns value 0, there are no active alarms associated with this tag.For Boolean tags, only 1 (bit 1), 4 (bit 2) or 16 (bit 4) values are returned.Field NameDescription of ValueAssociated with Each FieldTag Type Associated with FieldBoolean Integer Real StringR=Read OnlyRW=Read+WriteAckAlrDisableThis field can have two values:• 0: No alarms associated with this tagrequire acknowledgment.• 1: At least one alarm associated with thistag requires acknowledgment.NOTE: This works as a global acknowledgefor the tag and goes to 0 only when all alarmsfor the tag have been acknowledged.This field can have two values:• 0: Enables alarm associated with tag.When an alarm condition occurs, the alarmbecomes active.• 1: Disables alarm associated with tag.If alarm condition occurs, alarm will notbecome active. RW RW5–8 <strong>InduSoft</strong> <strong>Web</strong> <strong>Studio</strong> v6.1 SP2
Working with TagsIWS Users GuideField NameDescription of ValueAssociated with Each FieldTag Type Associated with FieldBoolean Integer Real StringR=Read OnlyRW=Read+WriteHiHiHiLoLoLoRateDevPDevM• If 0, HiHi alarm is inactive.• If 1, HiHi alarm is active.• If 0, Hi alarm is inactive.• If 1, Hi alarm is active.• If 0, Lo alarm is inactive.• If 1, the Lo alarm is active.• If 0, LoLo alarm is inactive.• If 1, the LoLo alarm is active.• If 0, Rate alarm is inactive.• If 1, the Rate alarm is active.• If 0, DevP alarm is inactive.• If 1, the DevP alarm is active.• If 0, DevM alarm is inactive.• If 1, DevM alarm is active. R R R R R R RHiHiLimit Limit value for HiHi alarm. RWHiLimit Limit value for Hi alarm. RWLoLimit Limit value for Lo alarm. RWLoLoLimit Limit value for LoLo alarm. RWRateLimit Limit value for Rate alarm. RWDevSetpoint Set point value for DevP and DevM alarms. RWDevPLimit Limit value for DevP alarm. RWDevMLimit Limit value for DevM alarm. RWTag Fields TableTo access a tag field at runtime, type the tag name and field (using the syntax:TagName->Field) into the Database Spy, a command window, or an execution field. Cautions: You cannot use tag fields (such as Bit fields) to configure Alarm or Trendworksheets. Although you can apply tag properties to internal tags, those properties willnot persist if you download your application to a CE device.<strong>InduSoft</strong> <strong>Web</strong> <strong>Studio</strong> v6.1 SP2 5–9
IWS Users GuideWorking with Tags Note:If an application tries to write a value to the Tags database that falls outside therange specified in the Min and Max fields, the database will not accept the newvalue and will write a warning message to the IWS Output window.If you specify a zero (0) for the Min and Max fields, the application can write anytag type value to the Tags database.Creating Application Database TagsThis section explains the process for creating basic, array, and pointer tags for yourproject applications. Notes:When specifying a tag name, you must adhere to the following guidelines: Your tag names must be unique — you cannot specify the same name for twodifferent tags (or functions). If you type an existing tag name, IWS recognizesthat the name exists and will not create the new tag. You must begin each tag name with a letter. Otherwise, you can use letters,numbers, and the underscore character (_) in your tag name. You cannot use the following symbols in a tag name:` ~ ! @ # $ % ^ & * ( ) - = \ + \ [ ] { } < > ? You can use a maximum of 255 characters for a tag name or a class membername. You can use uppercase and lowercase characters. Tag names are not casesensitive. Because IWS does not differentiate between uppercase andlowercase characters, you can use both to make tag names more readable(For example: TankLevel instead of tanklevel). Some other example tag namesinclude: Temperature, pressure1, count.To save development time, IWS allows you to create and edit tags from a variety oflocations within the development environment.You can add tags using the Application Tags datasheetYou can add tags “on-the-fly” from a pop-up menu or from any Tag or Expressiontext box (located on Object Properties dialogs, worksheets, and so forth)Instructions for adding tags with each method are provided in the next two sections.5–10 <strong>InduSoft</strong> <strong>Web</strong> <strong>Studio</strong> v6.1 SP2
Working with TagsIWS Users GuideAdding Tags to the Application DatasheetUse the following steps to create tags from the Application Tags datasheet: Select the Database tab and open the Application Tags folder. Double-click the Datasheet View iconto open the Application Tagsdatasheet:Application Tags Datasheet Locate an empty line in the datasheet and configure the following fields.(Hint: You can use the keyboard Tab key to move to the next column.)– Name field: Type a name using the syntax described for the tag type you arecreating (see “Creating Application Database Tags”) that adheres to theguidelines described on page 5–10.– Array Size field:For an array tag, type a value to specify the maximum index of the array.For any other tag type, type zero (0).– Type combo-box: Click the arrow to select a tag data type (Boolean, Integer, Real,or String) from the list. (If necessary, review “Choosing a Tag Data Type” onpage 5–5.)– Description field (optional): Type a description for documentation purposesonly.– <strong>Web</strong> Data combo-box: Click the arrow to specify whether the tag value will beshared with (displayed on) <strong>Web</strong> Thin Client stations.Local: Prevents a Server tag value from being shared with <strong>Web</strong> Thin Clientstations. For example, you want to view a tag value on your workstation andnot interfere with the value being displayed on other <strong>Web</strong> Thin Clientworkstations.Server: Shares a Server tag value with <strong>Web</strong> Thin Client stations. For example,you want other <strong>Web</strong> Thin Client workstations to share/view control values(such as On or Off). Click in a new line to create another tag or, if you have no other tags to create,save your tag(s) to the Tags database (File → Save) and close the ApplicationTags datasheet.<strong>InduSoft</strong> <strong>Web</strong> <strong>Studio</strong> v6.1 SP2 5–11
IWS Users GuideWorking with TagsThe following example shows a variety of tags configured in an Application Tagsdatasheet.Example Application Tags DatasheetAdding Tags “On-the-Fly”As an alternative to opening the Application Tags datasheet every time you want tocreate a new tag, IWS enables you to create individual tags “on-the-fly” by:Right-clicking on the Applications Tags folder, the Datasheet View icon, orTag List subfolder and selecting Insert Tag from the pop-up menu.Inserting a TagTyping a new tag name into any Tag/Exp text box (available from Object Propertiesdialogs, worksheets, and so forth). When a Question dialog asks if you want tocreate a new tag, click Yes.Creating a New Tag5–12 <strong>InduSoft</strong> <strong>Web</strong> <strong>Studio</strong> v6.1 SP2
Working with TagsIWS Users GuideUsing either of the preceding methods causes a New Tag dialog to display:New Tag DialogThe fields and combo-boxes on this dialog correspond in name and function to thecolumns on the Application Tags datasheet. Consequently, you can configure thisdialog using the instructions provided on page 5–11. When you are finished, click OKto save the tag to the Tags database and close the New Tag dialog.Resetting the Tags DatabaseSelect Tools > Reset Tags Database to “reload” the tags database on the local station. Thiscommand affects all tags stored in the Application Tags folder. This option is usefulfor resetting the application tags and restoring the values they had when theapplication was loaded for the first time. When you stop the application but leavethe development environment open, the tags are not reset by default when theapplication is started again. Therefore, you can execute this command to reset thembefore the application runs again.When this command is executed, the Startup Value configured for each tag (TagsProperties dialog) is written to the respective tag. If you did not configure any StartupValue for a numeric tag (Boolean, Integer or Real), the value 0 (zero) is written to thetag. If you did not configure any Startup Value for a string tag, the empty value (“”)is written to the tag.This command is disabled (in gray) if there is at least one runtime task running onthe local station. You must close all runtime tasks (Project > Stop application) before thiscommand can be executed. Note:The tags stored in the Internal Tags folder and in the Shared Tags folder (if any)are not affected by this command.Tip:If you want to reset the application tags automatically whenever you run theapplication (Project > Run Application), you can check the option Reset Tags Databasewhen starting application on the Preferences tab of the Project Settings dialog.Creating ClassesTo create a new class tag:<strong>InduSoft</strong> <strong>Web</strong> <strong>Studio</strong> v6.1 SP2 5–13
IWS Users GuideWorking with Tags From the Database tab, right-click the Classes folder, and select Insert Class fromthe resulting pop-up menu.Insert Class Popup When the Insert Class dialog displays, type a name into the Name field using thesyntax on page 5–4 and the guidelines described on page 5–10.Insert Class Dialog Click OK to close the Insert Class dialog and the Class: worksheet displaysautomatically. Configure the columns in this worksheet as follows:– Name field: Type a class member name (see page 5–4).– Type combo-box: Click the arrow to select the class member’s data type(Boolean, Integer, Real, or String) from the list.– Description field (optional): Type a description of the class member (fordocumentation purposes only).Sample CTank Worksheet Click in the next blank line and provide the information for the next classmember you want to include in this class. Or, if you are finished addingmembers, you can close the Class worksheet.You can expand the Classes folder and subfolders to see the data structure:5–14 <strong>InduSoft</strong> <strong>Web</strong> <strong>Studio</strong> v6.1 SP2
Working with TagsIWS Users GuideExpanded Classes Folder Next, use the instructions provided in “Creating Application Database Tags” onpage 5–10, to create and associate a tag with the new class.Note that when you click the arrow button to view the Type list, your new classname (CTank) is included (see line 5 in the following figure). Select the classname from this list.Creating the Tank Class Tag When you are done, save your work and close the worksheet.Setting Tag PropertiesThis section explains how to configure tag properties. From the Database tab, open the Application Tags datasheet (or display the tag listin the Workspace) and highlight the tag for which you want to set properties. Click the Tags Properties buttonon the Tags Properties toolbar.<strong>InduSoft</strong> <strong>Web</strong> <strong>Studio</strong> v6.1 SP2 5–15
IWS Users GuideWorking with TagsA Tag Properties dialog displays similiar to the following:Tag Properties DialogA Tag Properties dialog can consist of one, two, or three tabs depending on the typeof tag you selected in the datasheet:Parameters: Use this tab to configure retention, startup, and unit properties.Alarms - Type: Use this tab to enable, configure, and view alarm properties.History - Type: Use this tab to enable, configure, and view historical properties. Note:Not all properties are available for all tag types. Consequently, the features oneach tab will vary, depending on the tag type you selected. For example, Minimumand Maximum values are not necessary for String tags.Review the table on page 5–7 to see which properties are available for thedifferent tag types.Instructions for configuring the parameters on each tab follow.5–16 <strong>InduSoft</strong> <strong>Web</strong> <strong>Studio</strong> v6.1 SP2
Working with TagsIWS Users GuideConfiguring the Parameters Tab PropertiesThis section explains how to configure all of the different parameter properties.Remember, the availability of each parameter depends on the tag type you selected.Tag Properties: Parameters TabRetentive Value check-box: Enable ( ) this box to save the tag value continuously incase the system shuts down unexpectedly. When you restart the system, the tagwill have retained the last-saved value. Caution:Specifying the Retentive Value parameter for tags with changing values cancause frequent hard disk access, which slows performance.Retentive Parameters check-box: Enable ( ) this box to save all changes made to thetag fields during runtime.Startup Value field: Type a tag value for the system load. The tag uses this value ifyou disable the Retentive Value option.Min field (accessible during runtime): Type a minimum value for the tag inengineering units.Max field (accessible during runtime): Type a maximum value for the tag inengineering units. Caution:IWS cannot accept tag values that fall outside the specified Min/Max ranges.However, IWS will generate a message in the Output window to let you knowthat the system tried to write a value that was outside the defined ranges.Unit field (accessible during runtime): Type a string (up to nine (9) characters) tospecify the tag units (such as Ohms, deg., or MHz) for display purposes.<strong>InduSoft</strong> <strong>Web</strong> <strong>Studio</strong> v6.1 SP2 5–17
IWS Users GuideWorking with TagsDead Band check-box: Enable ( ) this box and type a value into the text boxprovided to apply a dead band value to the tag.A dead band value represents a variation allowed above or below the centralvalue of the tag (not recognized for alarms). When the tag value exceeds the deadband allowance, IWS generates an alarm.Smoothing check-box: Enable ( )this box to reduce the rate of change for the tagvalue.For example, if you specify Smoothing for a tag containing the value 50, and thevalue changes to 60 in the next search, IWS stores the average of 50 + 60 in thedatabase and the new value will equal 55.Configuring the Alarms - Type Tab PropertiesThis section explains how to view and configure all of the alarm properties for aselected tag.Tag Properties Dialog: Alarms - Type TabAlarms Enabled check-box: Enable ( ) this box to turn on the alarm function forthis tag.Remote Ack tag field: Type a tag to allow a recipient to acknowledge an alarmremotely, which occurs when the tag values change.Dead Band Value field: Type a value to specify a dead band variation. IWS uses thisvalue to filter alarms.For example, if you configure the TANK tag with an Alarm Limit Value = 90 and a DeadBand Value = 5, then IWS will generate an alarm when TANK is ≥ 95.The alarm returns to normal (normalizes) when the TANK value returns to ≤ 90.Translation Enabled check-box: Enabling ( ) this box allows IWS to translate alarmmessages into another language(s). (For more information about translatingapplications, read Chapter 16: Using the Translation Editor.)5–18 <strong>InduSoft</strong> <strong>Web</strong> <strong>Studio</strong> v6.1 SP2
Working with TagsIWS Users Guide Note:IWS automatically saves Alarm messages with the Translation Enabled attributeenabled by default. These messages are saved to a file called Alarm.txt,which is located in your application’s \DATABASE\ directory.Alarm type check-boxes (available during runtime): Enable ( ) one or more of thefollowing alarm types for this tag– HiHi: Enables Very High alarms– Hi: Enables High alarms– Lo: Enables Low alarms– LoLo: Enables Very Low alarms– Rate: Creates an alarm based on rate of change– DevP: Creates an alarm based on a deviation from a given set point– DevM: Creates an alarm based on a deviation from a given set pointFor example:If SetPoint = 50, DevP = 5, DevM = 5, and Deviation Dead Band = 0.5IWS generates an alarm when the temperature is greater than 55.5 or lessthan 44.5 and returns to normal when the temperature is greater than 45 orless than 55.When you enable any of the preceding alarm types the following fields display onthe Alarms tab:Alarm Tab FieldsConfigure these fields (which correspond to Alarm worksheet columns) asfollows:– Limit: Type a value to specify limits for that alarm type. Note that the Rateparameter also provides a drop-down list that allows you to specify a rate forthis limit 1/s(econd), 1/min(ute), and 1/hour.– Message: Type a message string to display when IWS generates an alarm.<strong>InduSoft</strong> <strong>Web</strong> <strong>Studio</strong> v6.1 SP2 5–19
IWS Users GuideWorking with Tags– Group: Type a value indicating which group number (worksheet number) thistag belongs. IWS uses this value to filter alarms by one or more usergroup(s). You also can use a comma or a dash to specify more than onegroup (for example, 1,3,5-6).– Priority: Type an integer number (from 0 to 255) to indicate priority in a group.Tags with a higher priority must have a higher priority value.– Selection: Type a string which will be used to filter alarm messages. This stringcan have a maximum of seven characters (all others characters will beignored).Deviation SetPoint field (accessible during runtime): Type a value indicating areference point for the deviation.Deviation Dead Band field (accessible during runtime): Type a value indicating areference dead band value for the deviation.Off check-box: Enable ( ) this box to generate an alarm when the tag valueis zero.On check-box: Enable ( ) this box to generate an alarm when the tag valueis one.Changed check-box: Enable ( ) this box to generate an alarm whenever the tagvalue changes.Mnemonic pane: Use the Off, On, and Ack fields to configure mnemonics (forexample, Closed or Open) for the Off, On, and Ack alarm states (Boolean tags only).During runtime, the Alarm/Event Control Object displays these mnemonics in theValue column for Boolean tags associated with the alarm message. Note:If you do not configure a mnemonic, the Alarm/Event Control Object displaysthe tag value (0 or 1) in the Value column.Configuring the History Tab PropertiesThis section explains how to view and configure history properties for a selected tag.These properties correspond to columns on a Trend worksheet (which will bediscussed on page 8–13). IWS disables these tab properties if you have a Trendworksheet open. Before using this dialog, you must have already created Trendgroups.Tag Properties Dialog: History Tab5–20 <strong>InduSoft</strong> <strong>Web</strong> <strong>Studio</strong> v6.1 SP2
Working with TagsIWS Users Guide Notes: History does not support string-type tags. IWS automatically saves history (.hst) files in the Application folder, unlessyou explicitly change this default location.From the Tag Properties dialog, enable history logging as follows:History Enabled check-box: Enable ( ) this box to store tag value samples.Group Number field: Type the group number associated with this tag.Log Dead Band field: Type a value to specify a Dead Band variation for loggingpurposes. When the tag value is equal to or greater than this value, IWS will takea sample for the history file.Setting this value does not affect the Dead Vand value you may have specified onthe Alarm tab. Note:Although you can apply tag properties to Internal tags, if you download Internaltags to a CE device, the tag properties will not persist through the download.You will lose the properties.Using Tags in Your ApplicationOnce you have added a tag to the application database, you can use that tag in yourapplication by associating it to objects on the display screen.The basic process for associating tag to screen objects consists of the followingsteps: In the application screen, select the object to which you want to apply the tag. Click one of the following property buttonsProperties dialog displays.and an Object Locate the Tag text box for that property and type the tag name into the field.Tag text box names and locations will vary, depending on the type of property youare using. For example:Object Properties for Text I/O:Tag/Expression text box.Object Properties for Alarm:Click Selection button to openAlarm Filters dialog with Print tag,Ack tag, and Ack All tag text boxes.Applying Tags to an ObjectComprehensive instructions for applying tags to screen objects will be providedthroughout this manual where appropriate.<strong>InduSoft</strong> <strong>Web</strong> <strong>Studio</strong> v6.1 SP2 5–21
IWS Users GuideWorking with TagsEditing TagsYou can change the properties of a tag at any time during development or runtime.This section describes two methods you can use to edit tags. Note:You can right-click on a tag property and use standard Windows commands tocut (Ctrl+X), copy (Ctrl+C), or paste (Ctrl+V) any tag and its properties. You canalso Undo (Ctrl+Z) the last modification to a field.From the Application Tags DatasheetUse the following steps to edit one or more tags in the Application Tags datasheet: Select the Database tab and double-click on the Datasheet View button . When the Application Tags datasheet opens, locate your tag. Double-click in the column containing the information to be changed, and typethe new information into the datasheet. When you are finished editing, select File → Save to save your changes to the Tagsdatabase.Tip:You can sort the data in the Application Tags sheet and/or insert/removeadditional columns to/from the sheet by right-clicking on it and choosingthe applicable option from the pop-up menu.FROM THE TAG LIST FOLDERUse the following steps to edit one or more tags from the Tag List folder: Select the Database tab and double-click on the the Tag List folder to view a list ofall your tags. Locate your tag and double-click on the tag name to open a Properties dialog. Note:You also can right-click on the tag’s icon and select Properties from thepop-up menu.Properties DialogThe Properties dialog contains fields and combo-boxes that correspond in nameand function to the columns on the Application Tags datasheet.5–22 <strong>InduSoft</strong> <strong>Web</strong> <strong>Studio</strong> v6.1 SP2
Working with TagsIWS Users Guide Make your changes in the Properties dialog as follows:– To change the current Tag Type or <strong>Web</strong> Data properties, click the arrow buttonand select the new information from the list.– To change the Array Size or Description, highlight the existing text and type thenew information into the text box. Click OK to save your changes to the Tags database and close the Propertiesdialog.Tip:You can sort the data in the Application Tags sheet and/orinsert/remove additional columns to/from the sheet by right-clicking onit and choosing the applicable option from the pop-up menu.Deleting Tags Caution:Before deleting a tag, we strongly recommend using the Object Finder buttonon the Tag Properties toolbar (see “Using the Object Finder” on page 3–46) toverify that you are not using the tag in another part of the application (screens,math sheets, so forth). If you delete a tag from the application database that isbeing used in another part of the application, you will cause a compiling errorand your application will function poorly.To delete a tag from the Tags database, use the following steps: Open the project Application Tags datasheet as described on page 5–22. Locate and click on the tag name you want to delete. Cut the tag from the datasheet as follows:Select Edit → Cut from the main menu bar.– Right-click on the tag name and select Cut from the pop-up menu.– Press the Ctrl+x from the keyboard. When the pop-up displays with the “Are You Sure?” prompt, click Yes tocontinue or No to cancel the deletion. Save the datasheet (File → Save).<strong>InduSoft</strong> <strong>Web</strong> <strong>Studio</strong> v6.1 SP2 5–23
Chapter 6: Creating and Configuring a ProjectThis chapter explains how to create and configure projects in <strong>InduSoft</strong> <strong>Web</strong> <strong>Studio</strong>.The information in this chapter is organized as follows:Creating a New Project ApplicationSpecifying Additional Project SettingsStarting Runtime Modules on the Target SystemCreating a New Project ApplicationUse the following steps to create a new project application: From the main menu bar, select File → New. When the New dialog displays, select the Project tab.New Dialog: Project TabYou must provide a name for the project application and indicate where to storethe project and all of its related files (such as the configuration file). Type a name into the Application name text box—keeping the following guidelines inmind:– You must follow the usual Windows naming conventions.– Do not use spaces in the name if you want to access your project from the<strong>Web</strong>. (URLs do not recognize spaces.)Naming the Project<strong>InduSoft</strong> <strong>Web</strong> <strong>Studio</strong> v6.1 SP2 6–1
IWS Users GuideCreating and Configuring a Project Notes: IWS stores all projects in the C:\Documents and Settings\\MyDocuments\<strong>InduSoft</strong> <strong>Web</strong> <strong>Studio</strong> v6.1 Projects\ directory bydefault, so this path will display in the Location text field (a view-only field)automatically. The Configuration file text box also is a view-only field. IWS automaticallystores your project configuration file in the same folder as your project.Storing Project and Configuration Files To save your project to a location other than the default directory, click theBrowse button to locate and select a folder. Select a license level from the Target platform list to indicate the platform on whichyou will be running this project.Target Platform ListTo verify your current license level, exit all open IWS modules and then selectStart → Programs → <strong>InduSoft</strong> <strong>Web</strong> <strong>Studio</strong> → Register. When the Protection Manager dialog displays, click the Check button to open theHardkey Settings or Softkey Settings dialog (depending on your license protectiontype), which contains your license information. Close both dialogs when you are done.6–2 <strong>InduSoft</strong> <strong>Web</strong> <strong>Studio</strong> v6.1 SP2
Creating and Configuring a ProjectIWS Users GuideVerifying Your License Level IMPORTANT!If you try to open or develop an application that was originally developedusing a higher license level than exists on your current computer, IWS willprevent you from opening the application and put you into Demo mode.To correct this situation, select Project → Settings from the main menu bar.When the Project Settings dialog displays, select the Options tab, and click theTarget Station arrow button. IWS displays only those target platforms you areauthorized to use. Select one of these target platforms to accomodate yourcurrent license level.Although you can change your license level later (using the Project Settingsdialog), we recommend that you verify and select the correct license levelnow, so you will not waste time developing applications requiring a licenselevel you are not authorized to use on the runtime device.Also, we recommend developing for the lowest license level if you will berunning your application on multiple computers with different licenses. When you are finished configuring the Project tab, click OK to close theNew dialog.The Project Wizard dialog displays automatically, as follows:<strong>InduSoft</strong> <strong>Web</strong> <strong>Studio</strong> v6.1 SP2 6–3
IWS Users GuideCreating and Configuring a ProjectProject Wizard Dialog Use this dialog to specify a template, set the default screen resolution, and toindicate that you want to share tags with another software product database,such as Steeplechase or ISaGRAF.Instructions for using these features are provided in the following sections.6–4 <strong>InduSoft</strong> <strong>Web</strong> <strong>Studio</strong> v6.1 SP2
Creating and Configuring a ProjectIWS Users GuideUsing a TemplateIWS gives you the option of using a template to create your project application orstarting from scratch with no pre-configured screens or worksheets. To indicate yourpreference, select one of the following options from the Templates pane in the ProjectWizard dialog:Sample Application (recommended if you are using IWS for the first-time): Select thisoption to use the IWS sample application as a template for your application. Thesample application contains pre-configured screens and tags, a header, footer,and some background logic. Using this option provides a good base for yourproject and can save development time.Selecting a TemplateToolbar and menus: Select this option to use just the pre-configured (basic) toolbars,menus, and tags from the sample application. This option also savesdevelopment time, but does not include extraneous screens and tags that youmight not use.Empty Application: Select this option to create a project application with no preconfiguredfeatures or defaults. Experienced users may prefer this option toavoid having to spend time removing extraneous screens, tags, and so forth.Specifying a Default Screen ResolutionUse the buttons in the Resolution pane to specify a default resolution (display size)for your project’s application screens.Selecting a Default Resolution Note:You can adjust the screen resolution “on-the-fly” by selecting Tools → ConvertResolution. The Convert Resolution feature uses the default screen resolution as abase and converts the size of all of your project application screens accordingly.<strong>InduSoft</strong> <strong>Web</strong> <strong>Studio</strong> v6.1 SP2 6–5
IWS Users GuideCreating and Configuring a ProjectSharing PC-Based Control Software Program Database TagsYou can configure your project to share database tags created in a PC-based controlsoftware program, such as SteepleChase or SixNet. When you define a sharingrelationship and select a database, IWS will retrieve the tags and add them to yourIWS application database. IWS also configures your application’s Driver worksheetsand tags for use in the other program. Note:You cannot modify shared tags within IWS—you must modify the tags in theoriginal PC-based control program, and then re-import them into the Tagsdatabase.To define a shared relationship between IWS and a PC-based software controlprogram, use the following steps: From the Shared Tags panel on the Project Wizard dialog, select one of thefollowing software programs from the Name drop-down list.– First ISaGRAF– ISaGRAF– Think & Do– SteepleChase– SixNet When the Configure button becomes active, click the button to open theConfigure: dialog.Sharing Tags In the Application Directory pane, click (enable) one of the following buttons:– Create: Create a directory for a new application.– Select: Provide the location of an existing application directory.Type the directory path and folder name into the Select field, or click theBrowse button to select a location.6–6 <strong>InduSoft</strong> <strong>Web</strong> <strong>Studio</strong> v6.1 SP2
Creating and Configuring a ProjectIWS Users Guide Note:The remaining parameters on the Configure: dialog will varydepending on the program you selected in the first step.Every PC-based control program has its own, customized interface. Beforeyou can share information between a PC-based control application and IWS,you must provide the information about the control program interface. Using the manufacturer’s documentation for your PC-based control program,configure the remaining parameters on the Configure: dialog:ParameterDescriptionServer Name text fieldIWS automatically completes this field. To change the default,type the appropriate information into the text box.Automatic exchange data check-box Enabling ( ) this box allows the two programs to exchange dataautomatically.Communication with Simulation Mode check-box Enabling ( ) this box allows the two programs to communicatein Simulation Mode.IP Address text field (Think and Do only)Type the IP address of the shared PC-based control application.Project Options Pane:Name text field (Steeplechase and SixNet only)Status text field (Steeplechase only)Version text field (Steeplechase only)Last Modification text field (SixNet only)Update button (Steeplechase and SixNet only)Type the name of the shared PC-based control application.Type the current status of the shared PC-based controlapplication. (For example, )Type the current version of the shared PC-based controlapplication.Type the date when the shared PC-based control applicationwas last updated.Click this button to update your IWS application with data fromthe shared PC-based control application.Configure: Parameters Table<strong>InduSoft</strong> <strong>Web</strong> <strong>Studio</strong> v6.1 SP2 6–7
IWS Users GuideCreating and Configuring a ProjectSpecifying Additional Project SettingsAfter creating a new project, you can use the following steps to configure someadditional parameters for that project: From the menu bar, select Project → Settings to open the Project Settings dialog,which controls settings that affect the overall application.Project Settings Dialog – Identification TabThe Project Settings dialog contains five tabs:– Identification– Options– Runtime Desktop– Communication– <strong>Web</strong>– PreferencesDescriptions of each tab, and instructions for configuring parameters on thesetabs, are in the next section. When you finish configuring the parameters on the Project Settings dialog,click OK to close the dialog. Note:Although you can change the Project Settings parameters at any time duringapplication development, we recommend configuring these parameters at thebeginning of your project.For example, the Startup screen field defines which screen will open when youstart the application, so if you try to emulate or run the application without6–8 <strong>InduSoft</strong> <strong>Web</strong> <strong>Studio</strong> v6.1 SP2
Creating and Configuring a ProjectIWS Users Guidea legitimate value in this field, IWS will generate an an error message.<strong>InduSoft</strong> <strong>Web</strong> <strong>Studio</strong> v6.1 SP2 6–9
IWS Users GuideCreating and Configuring a ProjectProviding Project Identification InformationWhen you open the Project Settings dialog, the Identification tab displays by default:Project Settings Dialog: Identification Tab Use the text fields on this tab to provide the information about your project.Configuring these fields is optional, but the information can be very useful if youare sharing your project application with coworkers, customers, and so forth.– Description: Provide a brief description of your project (such as its purpose).– Revision: Type the current revision number/letter to keep track of revisionsmade to your application.– Company: Type a company name to associate your project with a particularcompany (for example, your company name or a client’s company name).– Author: Type the name of the project author.– Field Equipment: Provide the name or type of equipment on which your projectapplication is running.– Notes: Enter any notes you think will be useful. When you are finished, click another tab to continue or close the dialog.Setting the Options Tab ParametersSelect the Options tab to configure the following:Enable language translationSpecify a target systemSpecify how long to save an Alarm History fileIndicate whether to share tags with another software applicationSpecify how to buffer Driver and OPC write commandsSpecify a TCP portConfigure settings for the default database6–10 <strong>InduSoft</strong> <strong>Web</strong> <strong>Studio</strong> v6.1 SP2
Creating and Configuring a ProjectIWS Users GuideProject Settings Dialog – Options TabA description of the Options Tab parameters follows:– Target system: Use the combo box to specify the target system for the currentproject. The target system sets the application restrictions (such as numberof tags supported) and must match your license. The description of the mainlicense restrictions for each target system is displayed below the combo-boxwhere you chose it. Caution:If you specify a Target System level that does not match the actuallicense level on the target station, the application may not run properly.– Resolution: Displays the application resolution.– Automatic Translation: Click (enable) the Enable Translation check box to enablethe translation feature. Type the directory path and a translation file nameinto the Translation File name field. IWS uses this translation file as thedefault language when you start the application.– Alarm History and Events: Type a value into the History Life Time (days) field tospecify how long to keep alarm and event history files. After the specifiednumber of days, IWS automatically deletes existing alarm/event history filesthat are older than the period specified. If you type zero in this field, IWSdoes not delete any history files automatically. In such a case, you shouldcreate an external procedure to clean the old history files; otherwise, the freememory in the computer will eventually be depleted.<strong>InduSoft</strong> <strong>Web</strong> <strong>Studio</strong> v6.1 SP2 6–11
IWS Users GuideCreating and Configuring a Project– History Format: Select the format of the Alarm/Event history, as follows:TypeProprietaryDatabaseEncryptedDescriptionSaves the history data in the \Alarm sub-folder of the application (by default)in text files using the proprietary format of <strong>Studio</strong>.Saves the history data in the SQL Relational Database specified by the user,using the built-in ADO interface.Saves the history data in the \Alarm sub-folder of the application (by default)in binary encrypted files using the proprietary format of <strong>Studio</strong>.– Default Database: Allows you to configure a Default Database, which can beshared by different tasks and objects. See Configuring a Default Database forAll Task History for more information.– Shared Tags: Select a third-party software from the combo-box. Click theConfigure button to configure the settings for importing tags from one of thefollowing data sources into the Shared Database folder:NameFirst ISaGRAFISaGRAFThink & DoSteepleChaseSixNetOpen ControlStratonDescriptionDoes not share tags with any external softwareImport tags from a First ISaGRAF project into the Shared Tags folder of thecurrent application, and, if enabled, configure the communication interface withthe ISAGR driver automatically.Import tags from a ISaGRAF project into the Shared Tags folder of the currentapplication, and, if enabled, configure the communication interface with theISAGR driver automatically.Import tags from a Think & Do project into the Shared Tags folder of the currentapplication, and, if enabled, configure the communication interface with the TNDdriver automatically.Import tags from a SteepleChase project into the Shared Tags folder of thecurrent application, and configure the communication interface with the VLCdriver automatically.Import tags from a SixNet project into the Shared Tags folder of the currentapplication, and configure the communication interface with the SNET driverautomatically.Import tags from an OpenControl project into the Shared Tags folder of thecurrent application, and configure the communication interface with the OC driverautomatically.Import tags from a Straton project into the Shared Tags folder of the currentapplication, and configure the communication interface with the STRAT driverautomatically. Note:Each PC-based control has its own, customized interface that requires you toprovide information about the PC-based control application in order to sharetags with the IWS application.6–12 <strong>InduSoft</strong> <strong>Web</strong> <strong>Studio</strong> v6.1 SP2
Creating and Configuring a ProjectIWS Users GuideENABLING LANGUAGE TRANSLATIONOne of the utilities provided with IWS is a Translation Editor, which enables you totranslate applications from one language into another automatically—and translatethese applications into as many languages as necessary.If you want to translate your project into another language, you must enabletranslation and specify a default translation file from the Automatic Translation panelon the Options tab: Enable ( ) the Enable Translation check-box. Use the Translation Filename text box to specify a default translation file name andlocation.Automatic Translation PanelThe project’s default translation file (.tra) controls thelanguage in which your development environment and project applications willdisplay.For example, if you specify a Spanish default translation file, your developmentenvironment and project applications will display in Spanish by default.– If the default file name and location are acceptable, no action is required.– If you want to specify a different translation file or location, type the filename and location into the text box. Note:You can save translation files to any directory, but we strongly recommendsaving these files in your project’s <strong>Web</strong> folder so they can be used by a <strong>Web</strong>Thin Client.For example, if your default development language is English and you wantto make the file available to <strong>Web</strong> Thin Clients, you might change the defaultworksheet name to English.tra and save the file in the following folder:C:\Program Files\<strong>InduSoft</strong> <strong>Web</strong> <strong>Studio</strong>\Projects\\<strong>Web</strong>\English.traAfter enabling translation for your project application, continue to Chapter 16: Usingthe Translation Editor for a description of the Translation Editor utility and to finishconfiguring your project for translation.SPECIFYING THE TARGET SYSTEM’S LICENSE LEVELThe target system on which you will run your application sets the applicationrestrictions (such as how many tags will be supported). Consequently, the targetsystem’s license level and your development station’s license level must match oryour application may not run properly.<strong>InduSoft</strong> <strong>Web</strong> <strong>Studio</strong> v6.1 SP2 6–13
IWS Users GuideCreating and Configuring a ProjectClick the Target system combo-box arrow button, and select your target system’slicense level from the list.Target System PanelThe default screen resolution displays in the field just below the combo-box.This resolution is the default value you specified when you created the project. Note:To change this resolution “on-the-fly,” close all open screens and selectTools → Convert Resolution from the menu bar. When the Convert Resolution dialogdisplays, enable the size you want to use, and then click the Convert button.6–14 <strong>InduSoft</strong> <strong>Web</strong> <strong>Studio</strong> v6.1 SP2
Creating and Configuring a ProjectIWS Users GuideSAVING ALARM HISTORY FILESThe Alarm History panel allows you to control how long to keep alarm history filesstored on your system.Type a value into the File Life Time (days) field to specify how many days to keep thealarm files. For example, if you specify 7 days, IWS automatically deletes all alarmfiles that are more than a week old.Alarm History PanelSHARING TAGS WITH A PC-BASED CONTROL APPLICATIONThe process for configuring this panel is identical to the process described forcreating a new project. Review “Sharing PC-Based Control Software ProgramDatabase Tags” on page 6–6.COMMUNICATING WITH DRIVERS AND OPC (BU<strong>FF</strong>ER)Because IWS contains multiple modules that can affect values in the Tags database,and given that only one module can run at a time, it is possible that a tag’s valuecan change several times before the driver or OPC Client receives the changed valueto send to the PLC or OPC Server. Consequently, IWS gives you the option ofbuffering the tag values.If you choose to use the buffer, IWS sends every change to a tag value to the PLC orOPC Server—in the order in which the change happened.If you decide not to use the buffer, then IWS sends only the current value to the PLCor OPC Server.Use the Communication panel parameters to specify how changes are written bydrivers and OPC devices to target devices, such as PLCs and OPC Servers.Click the Driver and OPC combo-box button, and select one of the following optionsfrom the list.Send last state: Writes just the current tag value to the device or OPC Server.(Selecting this option conserves memory.)Send every state: Writes all tag value changes to the device or OPC Server.(Selecting this option uses more memory, but ensures a complete and accurateview of the actions that occur.)Communication Panel<strong>InduSoft</strong> <strong>Web</strong> <strong>Studio</strong> v6.1 SP2 6–15
IWS Users GuideCreating and Configuring a ProjectSPECIFYING A TCP PORTUse the Port text field on the TCP panel to specify a port for the IWS TCP/IP Clientand Server modules to use. Type the port number into the text field:TCP PanelCONFIGURING DATABASE SETTINGS TO SAVE ALARM AND/OR EVENT HISTORYConfiguring a database interface with IWS is basically linking tasks from IWS(Alarms, Events or Trends) to tables of external databases via a specific DatabaseProvider that supports the database you have chosen.Each history task (Alarm, Events or Trend) can be configured to save data either tofiles with the proprietary format from <strong>Studio</strong> or to external SQL RelationalDatabases. Use the Options tab to configure the database to save Alarm and Eventhistory. (See Configuring Database Settings for Saving Trend History for instructionsfor saving history for the trend tasks.)Use the History Format combo-box to select Database, then click either the AlarmDatabase or the Event Database button. The Database Configuration dialog window willopen.Note: Both Alarms and Events must be saved in the IWS proprietary format, orboth Alarms and Events must be saved in external Relational Databases;however, they can be saved on different databases. Each Trend worksheet can be configured to save data either in the IWSproprietary format or in an external SQL Relational Database.Database Configuration Dialog WindowThe Database Configuration dialog window allows you to configure the necessarysettings to link IWS to an external SQL Relational Database.6–16 <strong>InduSoft</strong> <strong>Web</strong> <strong>Studio</strong> v6.1 SP2
Creating and Configuring a ProjectIWS Users GuideDatabase Configuration WindowDatabase combo-box: Allows you to select either Primary or Secondary. WithPrimary, all settings displayed in the Database Configuration window apply tothe Primary Database interface. Otherwise, they apply to the SecondaryDatabase interface. You can configure the Secondary database in the followingmodes:– Disabled: In this mode, IWS saves data in the Primary Database only. If thePrimary Database is unavailable for any reason, the data is not savedanywhere else. This option may cause loss of data if the Primary Database isnot available.– Redundant: In this mode, IWS saves data in both Primary and SecondaryDatabases. If one of these databases is unavailable, IWS keeps saving dataonly in the database that is available. When the database that wasunavailable becomes available again, IWS synchronizes both databasesautomatically.– Store and Forward: In this mode, IWS saves data in the Primary Database only. Ifthe Primary Database becomes unavailable, IWS saves the data in theSecondary Database. When the Primary Database becomes available again,IWS moves the data from the Secondary Database into the Primary Database.Using the Secondary Database, you can increase the reliability of the system anduse the Secondary Database as a backup when the Primary Database is notavailable. This architecture is particularly useful when the Primary Database islocated in the remote station. In this case, you can configure a SecondaryDatabase in the local station to save data temporarily if the Primary Database isnot available (during a network failure, for instance).Use application default check-box: When this option is checked, IWS uses thesettings configured in the Default Database for the task that is being configured(Connection string, User name, Password, Retry Interval and Advanced Settings).<strong>InduSoft</strong> <strong>Web</strong> <strong>Studio</strong> v6.1 SP2 6–17
IWS Users GuideCreating and Configuring a ProjectWhen this option is not checked, you can configure these settings individually tothe current task.Connection string field: This field defines the database where IWS will write andread values as well as the main parameters used when connecting to thedatabase. Instead of writing the Connection string manually, you can press thebrowse button (…) and select the database type from the Data Link Propertieswindow.Data Link Properties windowNote:The list of Database Providers shown in the Data Link Propertieswindow depends on the providers actually installed and available in thecomputer where you are running IWS. Consult the operating systemdocumentation (or the database documentation) for further informationregarding the settings of the Provider for the database that you areusing.User name field: User name used to connect to the database. The user nameconfigured in this field must match the user name configured in the database.Password field: Password used to connect to the database. The passwordconfigured in this field must match the password configured in the database.Retry Interval field: If IWS is unable to connect to the database for any reason, itretries automatically to connect to the database after the number of secondsconfigured in this field have passed.6–18 <strong>InduSoft</strong> <strong>Web</strong> <strong>Studio</strong> v6.1 SP2
Creating and Configuring a ProjectIWS Users GuideAdvanced button: After pressing this button, you have access to customize somesettings. For most applications, the default value of these settings do not need tobe modified and should be kept.Database Configuration Advanced window– Milliseconds combo box: You can configure how the milliseconds will be savedwhen saving the date in the database. Each database saves the date indifferent formats; for example, some databases do not support millisecondsin a Date field. The following options are available:• Default: Uses the format pre-defined for the current database. Thedatabases previously tested by <strong>InduSoft</strong> are previously configured withthe most suitable option. When selecting Default, IWS uses the settingpre-configured for the current database type. If you are using a databasethat has not been previously configured by <strong>InduSoft</strong>, the Default optionattempts to save the milliseconds in a separate field.• Disable: Does not save the milliseconds at all when saving the date in thedatabase.• Enable: Saves the milliseconds in the same field where the date is saved.• Separate Column: Saves the milliseconds in a separated column. In thiscase, the date is saved in one field (without the milliseconds precision)and the number of milliseconds is saved in a different column. Thisoption is indicated where you want to save timestamps with the precisionof milliseconds but the database that you are using does not supportmilliseconds for the Date fields.Tip:The default option for each database is configured in the <strong>Studio</strong>ADO.inifile, stored in the \BIN sub-folder of IWS. See “<strong>Studio</strong> DatabaseGateway,” in Chapter 17: IWS Database Interface, for information abouthow to configure the <strong>Studio</strong>ADO.ini file.– Save time difference check-box: When this option is checked (default), IWS savesthe Time Zone configured in the computer where the application is runningin each register of the database. This option must be enabled to avoidproblems with daylight savings time.– Database Gateway: Enter the Host Name/IP Address where the <strong>Studio</strong> databasegateway will be running. The TCP Port number can also be specified, but if<strong>InduSoft</strong> <strong>Web</strong> <strong>Studio</strong> v6.1 SP2 6–19
IWS Users GuideCreating and Configuring a Projectyou are not using the default, you will have to configure the <strong>Studio</strong> databasegateway with the same TCP Port. See “<strong>Studio</strong> Database Gateway,” in Chapter17: IWS Database Interface, for information about how to configure theadvanced settings for the <strong>Studio</strong> ADO Gateway.– Disable Primary Key: For some modules, IWS will try to define a primary key tothe table in order to speed up the queries. If you are using a database thatdoes not support primary keys (e.g. Microsoft Excel), you should check thisfield.Table pane: This area allows you to configure the settings of the Table where thedata will be saved. All tasks can share the same database. However, each task(Alarm, Events, Trend worksheets) must be linked to its own Table. <strong>InduSoft</strong>does not check for invalid configurations on this field, therefore you should makesure that the configuration is suitable for the database that you are using.Use default name check-box: When this option is checked (default), IWS savesand/or retrieves the data in the Table with the default name written in the Namefield.Automatically create check-box: When this option is checked (default), IWS creates atable with the name written in the Name field automatically. If this option is notchecked, IWS does not create the table automatically. Therefore, it will not beable to save data in the database, unless you have configured a table with thename configured in the Name field manually in the database.Name: Specifies the name of the Table from the database where the history datawill be saved.Refresh button: If the database configured is currently available, you can pressthe Refresh button to populate the Name combo-box with the name of the tablescurrently available in the database. In this way, you can select the table wherethe history data should be saved instead of writing the Table name manually inthe Name field.Run-Time pane: Use this area to set run-time values. The following fields areavailable:Status (output) check-box: The tag in this field will receive one of the followingvalues:ValueDescription0 Disconnected from the database. The database is notavailable or your configuration is incorrect.1 The database is connected successfully.2 The database is being synchronized.Reload (output): Specify a reload tag if you are using curly brackets in any of theconfiguration fields. When you want to reconnect to the database using theupdated values on your tags, set the tag on this field to 1. IWS will update theconfiguration when trying to perform an action in the database, setting the tagback to 0 when it is finished.Configuring a Default Database for All Task HistoryAlthough IWS allows you to configure a different database for each task, typicallythe same database type (e.g. SQL Server, MS Access, Oracle, and so forth) is used byall tasks of the same project. Therefore, in order to save time when configuring theapplication, IWS allows you to configure the Default Database. When configuring6–20 <strong>InduSoft</strong> <strong>Web</strong> <strong>Studio</strong> v6.1 SP2
Creating and Configuring a ProjectIWS Users Guideeach task, you can choose to use the settings configured for the Default Database. Ifyou choose this method, it will not be necessary to re-configure the same settings foreach task, since they share the same database.The settings for the Default Database can be configured by pressing the Configurebutton from the Default Database box on the Options tab of the Project Settings dialog.The Default Database Configuration dialog window opens.Default Database Configuration WindowPlease refer to the previous section, Database Configuration Dialog Window, for helpcompleting the fields in this window.<strong>InduSoft</strong> <strong>Web</strong> <strong>Studio</strong> v6.1 SP2 6–21
IWS Users GuideCreating and Configuring a ProjectSetting the Runtime Desktop ParametersWhen you run an application on the runtime (or target) workstation, IWS displaysthe appliation in a Viewer window. You can configure the appearance of this Viewerwindow as follows: Select the Runtime Desktop tab on the Project Settings dialog:Project Settings Dialog – Runtime Desktop Tab Enable ( ) the one or more of the following check-boxes to display those featureson the Viewer window (or disable the boxes to hide the feature): Note:IWS saves all of these display properties in the application’s .APP file.– Titlebar: Displays a title bar along the top of the window. Type a name into thetext field to change the default title bar text.– Minimize Box, Maximize Box, and Close Box: Displays three buttons so you canminimize, maximize, or close the Viewer window.– Start Maximized: Maximizes the window automatically when you run theapplication.– Menu: Displays a menu bar on the Viewer window.– Virtual Keyboard: The IWS Virtual Keyboard (VK) allows the user to enter data(text or numbers) during the runtime using a touch-screen device, ratherthan a physical keyboard.You can enable the VK for your application on the Runtime Desktop dialog(Project pulldown menu item->Settings->Runtime Desktop tab). You candesignate a Default Virtual Keyboard, as well as apply a Scale (size) to allVirtual Keyboards during the runtime.6–22 <strong>InduSoft</strong> <strong>Web</strong> <strong>Studio</strong> v6.1 SP2
Creating and Configuring a ProjectIWS Users GuideWhen configuring objects and dynamics that support data input, you canassign a VK to the object by the VK combo-box (either the default or aspecific one). The following standard VKs are available:Name Picture DescriptionAlphaNumericThis VK is used toenter alphanumericvalues (chars and/ornumbers).EnhKeypadKeypadThis VK is used toenter alphanumericvalues (charactersand/or numbers) indevices that provide asmall display (e.g.PDAs). The -> buttonlets users scroll thoughdifferent panels untilthey find the characterthey want.This VK is used toenter numeric values(numbers only).There are two ways to launch a Virtual Keyboard during the runtime:* Click on the object where a new value (data) can be entered (e.g. Textwith Text I/O dynamic configured with Input Enabled).* Execute the Keypad() built-in function.* You can change the language of the Virtual Keyboard by theSetKeyboardLanguage() built-in function. Tips: You can create new languages for any Virtual Keyboard by editing theVK.INI file from the \BIN sub-folder of IWS, where is the label of the language for the VKs (e.g. VKEN.INI =Virtual Keyboards in English; VKGE= Virtual Keyboards in German,and so forth). Consult your software vendor for more informationabout how to edit and configure this file. By default, the VK is launched close to the object on the screenassociated with it. However, you can configure the following settings inthe .APP file, so the VK will be always open in afixed position:[Keypad]<strong>InduSoft</strong> <strong>Web</strong> <strong>Studio</strong> v6.1 SP2 6–23
IWS Users GuideCreating and Configuring a ProjectPosX=0 //Coordinate (in pixels) of the TOP coordinate where the VKmust be launched.PosY=0 //Coordinate (in pixels) of the LEFT coordinate where the VKmust be launched. To specify which menus and menu options will be available from the menu bar,click the Options button. When the Runtime menu options dialog displays, click the following check-boxesto display or hide the menu/menu options. When you are finished, click OK toclose the dialog.Runtime Menu Options Dialog– Resize Border: Allows you to resize the Viewer window during runtime.– Status Line: Displays a status bar along the bottom of the Viewer window.– Startup screen: Displays a specified application screen or screen group whenyou start the application at runtime. Click on the combo box and select ascreen (.SCR) or screen group (.SG) from the list. Note:Another way to specify a screen or screen group as the startup screen isto right-click on it in the Workspace and then choose Set as startup fromthe pop-up menu.– Show Object Edge: Changes the object edge when you move the cursor over anyobject where the Command dynamic was applied.– Change Mouse Cursor Changes the mouse cursor when you move the cursor overany object where the Command dynamic was applied.– Mouse Cursor: Displays a mouse cursor in the Viewer window. Note:The Mouse Cursor option can be enabled in applications deployed onWindows CE, but only when running on x86 processors. Armv4Iprocessors are not supported.– Touchscreen Keypad: Displays a touch pad in the runtime application (IWSautomatically launches the virtual keypad when you click on “Input Enabled”text).6–24 <strong>InduSoft</strong> <strong>Web</strong> <strong>Studio</strong> v6.1 SP2
Creating and Configuring a ProjectIWS Users Guide– Show ???? when quality is not GOOD: Displays question marks (???) instead of atag’s value when the tag quality is not good.– Hide Taskbar: Hides the Windows taskbar by default.– Enable ToolTips: Displays Windows ToolTips when you run the application.To configure tool tips for an object in your application, double-click theobject to open the Object Properties dialog and type your tip into the Hint field.– Auto Screen Scaling: Scales the application screen automatically when you resizethe Viewer window. This feature is available for local applications running onWindows NT/2000/XP (or <strong>Web</strong> Thin Clients). This parameter is not availablefor local applications running on Windows CE. When you are finished, click another tab to continue or close the dialog.Setting the Communication ParametersUse this tab to specify communication parameters relating to the application ingeneral.Project Settings > Communcation Tab– Driver and OPC: Select the method used by all communication drivers and OPCClient worksheets configured in the current application when writing valuesto the remote PLC/device:* Send every state: When the communication task is configured to writevalues upon a change of tag value, all changes in the tag value arebuffered in a queue and sent to the device when the communication task(Driver or OPC) is executed.* Send last state: When the communication task is configured to write valuesupon a change of tag value, only the current (last) value of the tag is sentto the device when the communication task (Driver or OPC) is executed.When this method is selected, if the tag changed value more than oncewhile the communication task was not being executed, the transient<strong>InduSoft</strong> <strong>Web</strong> <strong>Studio</strong> v6.1 SP2 6–25
IWS Users GuideCreating and Configuring a Projectvalues of the tag are not sent to the device. This is the desired behaviorfor most applications.– TCP: Configure the settings for the TCP/IP Client and TCP/IP Server modules:* Port: TCP Port used by the TCP/IP Client and TCP/IP Server modulesrunning in the current computer. When changing this value in the localapplication, be sure to change the same value in the remote applicationthat is communicating with the local one.* Send Period (ms): Period (in milliseconds) used between two consecutivemessages sent by the TCP/IP Client or TCP/IP Server modules to updatetag values in the remote station. Typically, a lower number equals betterperformance and higher traffic in the network.* Enable Cryptography: Check this option to enable cryptography when theTCP/IP Client or the TCP/IP Server module sends messages to the remotestation. Cryptography increases the security of the system; however, itdecreases the efficiency (performance) of the communication. Whenconnecting two stations via the TCP/IP Client and TCP/IP Server module,make sure this setting is either enabled in both applications or disabledin both.Configuring Your Project for Remote <strong>Web</strong> AccessTo configure a project application so that remote <strong>Web</strong> Thin Clients can access theapplication from most <strong>Web</strong> browsers (such as Internet Explorer or Netscape), use thefollowing procedure: Select the <strong>Web</strong> tab on the Project Settings dialog:Project Settings Dialog – <strong>Web</strong> Tab Configure the parameters on this tab as follows:6–26 <strong>InduSoft</strong> <strong>Web</strong> <strong>Studio</strong> v6.1 SP2
Creating and Configuring a ProjectIWS Users Guide– Data Server IP field: Type the data server’s IP address (IP address where you willrun the application).– Send Period field: Specify a how often (in milliseconds) the Server and <strong>Web</strong> ThinClient stations can exchange (send) data.– Disable Remote Client Commands check-box: Enable ( ) this box to prevent aremote <strong>Web</strong> Thin Client from issuing commands to your application.– Enable ToolTips check-box: Enable ( ) this box to see Windows ToolTips whenviewing the application screens on the <strong>Web</strong> Thin Client (browser).– Auto Screen Scaling check-box: Enable if you are running remotely on a <strong>Web</strong>Thin Client and you want IWS to scale screens automatically when you resizethe Browser window.– Enable File Compression check-box: Enable to compress files stored in theapplication’s \<strong>Web</strong> folder.This option is useful for reducing download time—particularly if you have aslow connection between your Server and the <strong>Web</strong> Thin Client.– You can specify which computers are allowed to access your application as<strong>Web</strong> Thin Clients. Click the IP Security button to open the IP Security dialog:IP Security DialogUse the parameters on this dialog to specify which computers can accessyour application:* Click the Enable check-box ( ) to activate the From and To fields.* Type a beginning and ending IP address into the From and To fields,respectively.* A list of the computers contained in the specified range display in theIP Address Range list.* Click the Add button to add IP addresses to the IP Address Range list or clickthe Remove button to delete IP addresses from the list. Notes: You can specify the same IP address in the From and To fields tolimit the range to a single IP address. You also can specify several ranges.* Click OK to close the IP Security dialog.<strong>InduSoft</strong> <strong>Web</strong> <strong>Studio</strong> v6.1 SP2 6–27
IWS Users GuideCreating and Configuring a Project– To generate log files on the <strong>Web</strong> Thin Client machine for debugging purposes,enable ( ) the Enable check-box (in the Log pane) and indicate where IWSshould save the files by typing the file name and location into the FileNametext field.– To enable the Virtual Keyboard for the <strong>Web</strong> Thin Client stations,independently from the local station, click the Virtual Keyboard check-box.When this box is checked, the Default and Scale fields become active.* Default: Select the default keyboard used in the application. The choicesare AlphaNumeric, EnhKeypad and Keypad.* Scale: With this option, you can enlarge or shrink the keyboards to fitproperly with the display size of the target panel. Scale: 100% representsthe default size of each Virtual Keyboard. The options range from 25% to400%, but you can also enter a custom scale. When you are finished, click another tab to continue or close the dialog.6–28 <strong>InduSoft</strong> <strong>Web</strong> <strong>Studio</strong> v6.1 SP2
Creating and Configuring a ProjectIWS Users GuideSpecify <strong>Web</strong> Thin Client ParametersUse the following procedure to specify the <strong>Web</strong> Thin Client parameters: Select the <strong>Web</strong> tab on the Project Settings dialog: Configure the parameters on this tab as follows:– Data Server IP Address field: Type the IP address (or host name) of your dataserver station. The data server station is the computer or device where theTCP/IP server module of IWS is running. Tip:You can use the IP address 127.0.0.1 (locallost) to access the TCP/IP serveron the local computer (regardless of its IP address on the network). This optionis useful for local tests; however, you are not able to access the data serverfrom remote computers using this configuration.– Send Period (ms) field: Type a value to specify the send period (in milliseconds)used to exchange data between the server and the <strong>Web</strong> Thin Client stations.It means that the <strong>Web</strong> Thin Client will send a package with the new tagvalues to the server every n millisecond(s).The Send Period of the server is configured in Project Settings > Communication. Thedefault value is 1000 (milliseconds). You can set a lower value in this field toincrease the update rate between the server and the <strong>Web</strong> Thin Clients. Doingso may result in higher traffic in the network (the network will be accessedmore frequently) if the tags are changing continuously (faster than 1 second).– Disable Remote Client Commands check box: Click to enable this box, to prevent aremote client from issuing commands from your <strong>Web</strong> Thin Client to yourserver. When this option is enabled, the <strong>Web</strong> Thin Client can read data from<strong>InduSoft</strong> <strong>Web</strong> <strong>Studio</strong> v6.1 SP2 6–29
IWS Users GuideCreating and Configuring a Projectthe server, but cannot send data (tag values, set-points) to the data server. Inthis case, the <strong>Web</strong> Thin Client station becomes a Read Only station.– Enable ToolTips check box: Click to enable this box, to display the ToolTipsconfigured on the objects of the screens when viewing them on the <strong>Web</strong> ThinClient (web browser).– Auto Screen Scaling check box: Click to enable this box, to automatically scalescreens displayed in a web browser window. Using this option, the screen fitsto the size of the web browser window, regardless of its resolution. Note:The Auto Screen Scaling option is not valid for web browsers running underWindows CE operating systems.– Enable File Compression check box: Click to enable this box to compress the filesstored on the \<strong>Web</strong> folder of the application. This option is useful for reducingdownload time, particularly if you have a slow connection between yourserver and the <strong>Web</strong> Thin Client.– Log (Enable check box and FileName text field): Click to enable the check box,and type a file name into the text field to generate a log file on the <strong>Web</strong> ThinClient station. You can use this log file for debugging purposes.– Virtual Keyboard: When this option is checked, the virtual keyboard is enabledfor the <strong>Web</strong> Thin Client stations. The virtual keyboard allows the user toenter data during the runtime in touch screen-based <strong>Web</strong> Thin Client panels.– Default: The user can select the default keyboard used in the application forthe <strong>Web</strong> Thin Client stations.– Scale: Using this option, the user can enlarge or shrink the keyboards to fitproperly with the display size of the target panel. The Scale 100% representsthe default size of each virtual keyboard.– IP Security button: Click this button to open the IP Security dialog.IP Security DialogUse the parameters on this dialog to specify the range of IP addresses for thecomputers that are allowed to access the application as <strong>Web</strong> Thin Clients.This option is useful when you can control the IP Address of the <strong>Web</strong> ThinClient computers allowed to connect to the Server.6–30 <strong>InduSoft</strong> <strong>Web</strong> <strong>Studio</strong> v6.1 SP2
Creating and Configuring a ProjectIWS Users GuideClick the Enable check box, and when the Edit pane parameters become active,type IP addesses in the From and To fields to specify the IP address range. Usethe Add and Remove buttons to move the IP addresses into the IP Address Rangelist. When a <strong>Web</strong> Thin Client attempts to connect to the server, it checks foran IP address for the <strong>Web</strong> Thin Client station that is within any rangeconfigured in the IP Security dialog box. If one is not found, the serverrefuses the connection request from the <strong>Web</strong> Thin Client station.– Advanced button: Click this button to open a dialog where you can edit theAdvanced <strong>Web</strong> settings. For most cases, these settings do not need to bemodified. However, depending on the architecture used in your project, youhave the flexibility to configure advanced settings. Secondary Data Server IP Address field: Type the IP address (or host name) of thesecondary data server station. The data server station is the computer ordevice where the TCP/IP server module of IWS is running. This field mustbe filled when you are using redundant data servers from the <strong>Web</strong> ThinClients. If the primary data server fails, the <strong>Web</strong> Thin Client will attemptto connect to the secondary data server automatically. BackUp URL field: Type the URL where the web files are stored (files from the\<strong>Web</strong> sub-folder of the application). This URL is used to download the filesfrom the secondary web server when the primary web server is notavailable. Note:When using web browsers running under Windows CE v3.0 operatingsystem or Windows CE Pocket PC, the backup URL field must beconfigured with the URL of the primary web server, even if you do nothave a redundant architecture. ISSymbol download path field: When the <strong>Web</strong> Thin Client connects to theserver, it attempts to load the ISSymbol control. If ISSymbol is notregistered in the local computer (<strong>Web</strong> Thin Client), the browser willattempt to download it from the URL specified in this field. The defaultURL is a web site where <strong>InduSoft</strong> keeps the most updated version ofISSymbol available for download. You may need to configure a differentlocation, especially when the <strong>Web</strong> Thin Client computer is not connectedto the internet. The ISSymbol.cab and ISSymbolA.cab (stored in the\BIN sub-folder of IWS) must be available in the URL configured in thisfield. Tip:When the <strong>Web</strong> Thin Client stations do not have access to the internet,it is recommended that the ISSymbol.cab and ISSYmbolA.cab files bemade available at the web server station, and that the URL beconfigured for them in this field. Note:<strong>Web</strong> browsers running under the Windows CE operating system arenot able to download ISSymbol control (ISSymbolCE.ocx)automatically from a remote location. ISSymbolCE.ocx must be<strong>InduSoft</strong> <strong>Web</strong> <strong>Studio</strong> v6.1 SP2 6–31
IWS Users GuideCreating and Configuring a Projectmanually registered in the Windows CE device to be used as a <strong>Web</strong>Thin Client. <strong>Web</strong> Tunneling Gateway check box: Check this option to enable the <strong>Web</strong>Tunneling Gateway. Depending on the architecture of your project, youmay need to use the <strong>Web</strong> Tunneling Gateway to route the <strong>Web</strong> Thin Clientcomputers to the data server. HTTP Port: Select this option when using HTTP with the web server ofMicrosoft IIS. You can specify the TCP port used by your HTTP web server(80 is the default TCP port for HTTP protocol). SSL Port: Select this option when using SSL (Secure Socket Layer) with theMicrosoft IIS web server. You can specify the TCP port used by yourHTTPS web server (443 is the default TCP port for HTTPS protocol). IP Address: IP address of the web server computer where the <strong>Web</strong> TunnelingGateway is running. This must be the IP address of the web serveraccessible from the <strong>Web</strong> Thin Client station(s). Secondary IP Address: IP address of the web server computer where thesecondary <strong>Web</strong> Tunneling Gateway is running. This must be the IPaddress of the secondary web server accessible from the <strong>Web</strong> Thin Clientstation(s). This field must be configured when you are using redundantweb servers. Tip:Most of the <strong>Web</strong> settings can be modified dynamically by theSet<strong>Web</strong>Config() function. It is especially useful when you want tocreate an application just once, and make sure that the web settingsare automatically configured when you run the application in differentstations with different IP Addresses.Enabling Warning MessagesIWS allows you to control whether warning messages will display before theapplication screens are downloaded to the target system. Select the Preferences tab. Click the Display warning messages before downloading screen to the target system check-boxto enable ( ) or disable ( ) the function. When this option is checked and youmodify the name of any tag in the Application Tags worksheet, you are promptedto replace the old tag name with the new tag name in the whole application. Ifthis option is checked, IWS will execute the global replace command to replacethe old tag name with the new tag name in all documents of the application(screens and worksheets). Click any of the other messages:– Display confirmation message when renaming application tags: When this option ischecked and you modify the name of any tag in the Application Tagsworksheet, you are prompted to replace the old tag name with the new tagname in the whole application. If this option is checked, IWS will execute theglobal replace command to replace the old tag name with the new tag namein all documents of the application (screens and worksheets).6–32 <strong>InduSoft</strong> <strong>Web</strong> <strong>Studio</strong> v6.1 SP2
Creating and Configuring a ProjectIWS Users Guide– Display confirmation message when changing the screen position and size: When thisoption is checked, you are prompted to update the screen attributes (Width,Height, Top and Left) after modifying them on the Layout interface.– Reset Tags Database when starting application: If this option is checked, theapplication tags are reset automatically whenever you run the application(Project > Run Application). See Tools > Reset Tags Database for additionaldetails about this feature.Project Settings Dialog – Preferences Tab When you are finished, click another tab to continue or close the dialog.Starting Runtime Modules on the Target SystemAfter specifying a target system for your project application, <strong>InduSoft</strong> <strong>Web</strong> <strong>Studio</strong>allows you to specify which of your project’s runtime modules start automatically onthe target system and which modules must be started manually. Note:IWS configures certain modules to start automatically by default, but enablesyou to change these defaults.With the Project Status dialog, you can:– Configure the tasks that must be automatically executed when theapplication is launched (Execution Tasks tab)– Start/stop each run-time task manually (Execution Tasks tab)– Review information about the development system and your applications(Information tab)<strong>InduSoft</strong> <strong>Web</strong> <strong>Studio</strong> v6.1 SP2 6–33
IWS Users GuideCreating and Configuring a ProjectThe Execution Tasks tab displays the list of available tasks for the currentapplication. Their status and startup modes (Automatic or Manual) are alsodisplayed.To specify how modules will start on the target system, use the following steps: From the main menu bar, select Project → Status to open the Project Status dialog. Select the Execution Tasks tab, which lists all of the runtime modules associatedwith your project application and their current start-up status. Note:The Execution Tasks tab is available only when the Target Station option fromthe Execution Environment dialog (Project → Execution Environment) is set to Local.This list consists of three columns, including the Task Name, runtime Status,and current Startup setting (Automatic or Manual) of each runtime task.For example, see the following figure:Project Status Dialog: Execution Tasks TabThe list of tasks available in this dialog depends on the Target system configured onthe Options tab. The following table lists the tasks that are not available forapplications designed for the Windows CE operating system:TaskBackground TaskDatabase SpyDDE Client RuntimeDDE ServerHAD OPC ServerDriver RuntimeLogWinODBC RuntimeOPC Client RuntimeAvailable for WinCE runtime OSYesNoNoNoNoYesNoNoYes6–34 <strong>InduSoft</strong> <strong>Web</strong> <strong>Studio</strong> v6.1 SP2
Creating and Configuring a ProjectIWS Users Guide<strong>Studio</strong> Scada OPC ServerTCP/IP Client RuntimeTCP/IP ServerViewerYesYesYesYes Notes: Because there are so many drivers and new drivers are being added allthe time, the Driver runtime module starts all of the drivers configured inthe current project application. Started does not display in the Status column when you start the Drivermodule; instead an icon for each driver displays in the lower right-handcorner of the Windows taskbar. To stop an individual driver, right-click the icon and select Exit from thepop-up menu.Driver Runtime - OMETHDriver Runtime - KOYOVerify that Drivers are Running You can configure tasks for automatic execution when the application islaunched by clicking the name on the Execution Tasks tab, pressing the Startupbutton and then choosing Automatic.Startup Dialog– The tasks configured with Startup = Automatic are automatically executedwhen the application is launched; the tasks configured with Startup =Manual are not.– You can also Start/Stop each run-time task by clicking the name and thenpressing the Start or Stop button.<strong>InduSoft</strong> <strong>Web</strong> <strong>Studio</strong> v6.1 SP2 6–35
IWS Users GuideCreating and Configuring a Project Note:If the Execution Tasks tab is not visible, click Project -> ExecutionEnvironment and make sure the Target Station is set to Local. TheExecution Tasks tab is available only when the Target Station is set tolocal. Tip:You can also start/stop each task during the runtime by using theStartTask() and EndTask() built-in functions. You can also use theIsTaskRunning() function to check if each task is running during theruntime. Caution:The commands triggered by this dialog will be executed in the remotestation (not in the local computer) when you are connected to a remotestation. The Information tab from the Project Status dialog displays the list of tasksavailable for the current application, as illustrated in the following picture:Project Status Dialog: Information TabThe most important information displayed in this dialog is the Applicationdatabase (initial), which provides the number of application tags configured inthe current application. This information is useful to evaluate which license ismore suitable for the application. When you are finished, click OK to close the Project Status dialog.6–36 <strong>InduSoft</strong> <strong>Web</strong> <strong>Studio</strong> v6.1 SP2
Creating and Configuring a ProjectIWS Users GuideAfter you create and configure a project, you can design your application screensand create your task worksheets.Instructions for creating screens are provided in Chapter 7: Configuring Screensand Graphics.Instructions for creating worksheets are provided in Chapter 8: Configuring TaskWorksheets.<strong>InduSoft</strong> <strong>Web</strong> <strong>Studio</strong> v6.1 SP2 6–37
IWS Users GuideCreating and Configuring a Project6–38 <strong>InduSoft</strong> <strong>Web</strong> <strong>Studio</strong> v6.1 SP2
Chapter 7: Configuring Screens and GraphicsThis chapter provides information on configuring screens and graphics. Beforecreating an application screen, you should consider the structure of the screen.Windows NT/2000/XP applications permit you to open more than one screen at atime, but for Windows CE applications you create a default screen with a header andfooter (to use as a template), and then you insert objects on the screen. You thensave the template screen under different names to create the different screens.Typically, an <strong>InduSoft</strong> <strong>Web</strong> <strong>Studio</strong> application screen consists of three basic areas(or screen types):Header: Objects located at the top of a screen to provide standard information(date, time, and so forth).Footer: Objects located at the bottom of a screen (typically an alarm objectshowing the last alarm).Regular: Area between the header and the footer to provide information aboutprocesses, alarm screens, trends, and so forth.Using this structure to develop screens provides the following advantages:You can tie screens together according to their utility in the application.You can configure links and dynamics, common to all screens, just once.You can give the application a default format.You can build modular screens and use them in other projects.Working in an Object-Oriented EnvironmentSelect the Graphics tab to access all of the screens, <strong>Web</strong> pages, Library objects, andsymbols in the application.Graphics TabThis tab contains the following folders:Screens: Contains all of the display screens created for the current application.Group Screen: Contains the entire screen groups (individual screens combined intomanageable groups) created for the current application. Note:Screen groups are not available for Windows CE.<strong>InduSoft</strong> <strong>Web</strong> <strong>Studio</strong> v6.1 SP2 7–1
IWS Users GuideConfiguring Screens and Graphics<strong>Web</strong> Pages: Contains all the <strong>Web</strong> pages (screens saved in HTML format) created forthe application.Library: Contains the library of common symbols and graphics provided with<strong>InduSoft</strong> <strong>Web</strong> <strong>Studio</strong>. Double-click the Library button to open the IWS SymbolLibrary utility, consisting of a list pane (containing all of the symbol groups) anda display screen.Symbols: Contains all of the user-defined symbols, which can be groups of imagesand/or text. You can create custom symbols for the application and save theminto this folder.Working with Screen AttributesThe Screens folder contains screens with finished graphic compilations and workingdrafts. To view a screen, expand the Screens folder and screens display to the rightof the Workspace window. Double-click on a screen to open it.To create a new screen, open the Screen Attributes dialog using one of the followingmethods: Click the New button ( ) on the Standard toolbar. When the New Documentdialog opens, click Display, and then click OK. Right-click on the Screens folder, select Insert, and click the prompt pop-up:Creating a New Screen Select File → New from the menu bar. When the New Document dialog opens, clickDisplay, and then click OK.7–2 <strong>InduSoft</strong> <strong>Web</strong> <strong>Studio</strong> v6.1 SP2
Configuring Screens and GraphicsIWS Users Guide Select Insert → Screen from the menu bar. When the New Document dialog opens,click Display, and then click OK.Screen Attributes DialogTo display the Screen Attributes dialog for an existing screen, select View > ScreenAttributes from the menu bar.Use the parameters on the Screen Attributes dialog as follows:Description text box: Type a description of the screen attribute for documentationpurposes. The text you enter in this field displays in the status bar (by default)located at the bottom, left of the screen when you are in Run Application mode.Background Picture area: Specify the following parameters for the background.– Enable background check-box: Click (check) to enable or (uncheck) to disable(default) the use of background bitmaps.– Enable Background combo-box: Click to select one of the following WindowsNT/2000/XP background options:• BMP• TIF• DXF• EPS• WMF• IMG• JPG• WPG• PCD• PNG• FMF• FPX• FAX• TGA Note:Windows CE supports .BMPs only.– Shared Image check-box: Click (check) to save a .BMP file in a compressed form.Activated only when the Enable Background check-box has been selected.<strong>InduSoft</strong> <strong>Web</strong> <strong>Studio</strong> v6.1 SP2 7–3
IWS Users GuideConfiguring Screens and Graphics Caution:You cannot read the saved .BMP file in compressed format if you modifyor install the Windows set-up values in an environment using a differentnumber of colors. We recommend saving the screens in uncompressedformat in case you want to switch among different configurations. InWindows CE, bitmaps must be 16-color.Size area: Type an integer number into the Width and/or Height boxes to specify thesize (in pixels) of the selected window.Location area: Type an integer number into the Top and/or Left fields to specify thelocation of the window (in pixels) in relation to the current screen. Caution:If you use the mouse (pointer) to resize a window (Thin or Resizing style)directly, and then select View > Screen Attributes from the menu bar, IWSprompts you to update the current screen size and location.Security field: Specify the same window security level (default is zero) the user’saccess is defined using Security on the Database tab.Hide check-box: Click (check) to keep the screen loaded in memory after calling itfor the first time, which facilitates faster loading when you open the screen. IWSexecutes Screen Logics normally.Enabling this feature (default is disabled) causes a high use of GDI resources,consequently we recommend that during development, you monitor theseresources using the InfoResources function.Runtime Properties area: Specify the following parameters to define the windowproperties when you are running the application.– Titlebar: Click this box to enable/disable a Titlebar for the new screen. Even ifyou do not check this check-box, you can configure text for the Titlebar;however, the Titlebar displays only if this option is checked. Tips: You can modify the Titlebar text dynamically during the runtime byconfiguring tags between curly brackets. The value of the tag(s) isconcatenated with the text in the Titlebar. Configuring dynamic text in the Titlebar is useful even if it is not visibleon the screens. When the Print command is triggered from the Grid orAlarm/Event Control objects, the text from the Titlebar of the screenwhere the object is configured is printed in the header of the pages.– System Menu check-box: Click (check) to enable the system menu.– Maximize Box check-box: Click (check) to activate the Maximize button.– Minimize Box check-box: Click (check) to activate the Minimize button.– Style: Click to select a window style (default is Replace).* Overlapped opens a window without closing any other window.* Popup opens a window that remains in front of other windows, but leavesother windows enabled.* Dialog opens a window that remains in front of other windows, but disablesthe other windows until you close the opened window.7–4 <strong>InduSoft</strong> <strong>Web</strong> <strong>Studio</strong> v6.1 SP2
Configuring Screens and GraphicsIWS Users Guide* Replace opens a window and closes any other Replace and Popup stylewindows.– Border: Click to select a border style:* None: No border and does not allow a title bar or resizing.* Thin: Thin border window that cannot be resized during runtime.* Resizing (default): Normal border that you can resized during runtime.– Don’t Redraw text box: Type a tag or value to control how screen dynamics arerefreshed. Specifying a value higher than zero disables all screen dynamics.– Screen Logics area: Click (check) the boxes to execute mathematical functionsin one or more of these events: On Open, While Open, On Close.After enabling an event, click on the corresponding button to open a dialogwhere you can enter the following information:* Tag Name: Type a tag name to receive a return value from the Expressioncolumn.* Expression: Type a mathematical expression or function to be performed.The return value is applied to the Tag Name field.* Trigger (While Open dialog only). Type a tag to work as a trigger (any valuechange) to execute this worksheet. If you leave this field blank, IWSexecutes the worksheet in the minimum time slice your system canperform.– Focus area: Use the following options to set the behavior of the focus whenusing a group of screens (more than one screen open simultaneously):* Receive focus on open: Check this option to bring the focus to the first objectsensitive to focus, when it is opened.* Share tab order with other screens: Check this option to switch the focus fromobjects from this screen to objects configured in other screens. This willoccur after you press the Tab key while the last object sensitive to focus isin focus on this screen.* Tab Order: Type a number (0 - 32767) to set the tab order. When there aremore than one screen open, and you keep pressure on the Tab key (duringthe runtime), the focus switches from the screens with the smaller TabOrder number, to the screens with higher Tab Order numbers, and backto the screen with the lowest Tab Order number (and so on). Tip:To set the order that the screens from the group will be opened when thegroup of screens is called, right-click on the screen group name from theGraphics tab of the workspace.<strong>InduSoft</strong> <strong>Web</strong> <strong>Studio</strong> v6.1 SP2 7–5
IWS Users GuideConfiguring Screens and Graphics Click the Save button ( ) on the Standard toolbar or select File → Save (orFile → Save As) from the menu bar to save the new screen. When the Save (orSave As) dialog displays, type .scr (or ) into the File namefield.Specifying the File NameExpand the folders in the Graphics tab to see the saved screen:Checking for the New Screen7–6 <strong>InduSoft</strong> <strong>Web</strong> <strong>Studio</strong> v6.1 SP2
Configuring Screens and GraphicsIWS Users GuideSpecifying Background ColorTo change the background color of the screen, click the Background Color button ( ),located on the Tools toolbar or right-click on the blank screen and choose BackgroundColor from the pop-up menu.When the Color dialog displays, click a color, and then click OK.Color Dialog Tip:Double-click on a color to select that color and automatically close the Colordialog. Note:Depending on the palette configured for your system, the colors of graphicobjects imported into the environment may have color distortion. If thishappens, change the palette configured for your system.<strong>InduSoft</strong> <strong>Web</strong> <strong>Studio</strong> v6.1 SP2 7–7
IWS Users GuideConfiguring Screens and GraphicsUsing Objects and DynamicsThe <strong>InduSoft</strong> <strong>Web</strong> <strong>Studio</strong> product provides full-featured objects and dynamics (theability to modify object properties, execute commands, or inset values to tags usedto build screens on the fly at runtime).Using the Mode ToolbarThe Mode toolbar provides buttons for general screen editing.Mode ToolbarThe Mode toolbar contains the following buttons: Selection button ( ): Click to display a cursor that allows you to select or moveobjects on the screen. Bitmap Editor button ( ): Click to switch between the two, basic editing layers:– Objects layer: The layer on which you create the dynamic objects for yourscreen.– Background Picture layer: The static background layer of the same screen.– When the Background Picture layer is active, the Bitmap toolbar displaysautomatically. Note:You automatically disable the Bitmap Editor button when you uncheck (disable) theEnable Background check-box (.BMP-type only) on the Screen Attributes dialog. Fill Color button ( ): Click to specify a default fill color for the following objects:– Closed Polygons– Ellipses– Rounded Rectangles– Rectangles Tip:To save development time, select several objects (of any type specified in the precedinglist) and use Fill Color to specify a default fill color for all of them at once. Fonts button ( ): Click to specify the font and color for selected text objects, orto specify a default font and color for new text objects. Tip:To save development time, select several text objects and use the Fonts buttonto specify font and color settings for all of the objects at once. (You cannotuse this function for grouped text objects however.)7–8 <strong>InduSoft</strong> <strong>Web</strong> <strong>Studio</strong> v6.1 SP2
Configuring Screens and GraphicsIWS Users Guide Line Color button ( ): Click to specify a line color for selected objects or to set adefault color for new objects, including the following:– Open Polygons– Closed Polygons– Lines– Ellipses– Rounded Rectangles– RectanglesWhen you click the Line Color button, the Line Selection dialog is displayed. Usethis dialog to specify line styles and color for the selected objects:Line Selection Dialog Tip:To save development time, you can select several of the preceding objectsand use the Line Color button to specify a line color for all of the objects atonce. Background Color button ( ): Click to specify a background color for the screen. Note:You automatically disable this button when you check the Enable Backgroundcheck-box on the Screen Attributes dialog. Grid button ( ): Click to specify whether to show or hide the grid on the screeneditor. Tip:You can use the Grid dialog to configure the default settings for a grid. Toopen this dialog, right-click on the screen and select Grid Settings when thepop-up menu displays.<strong>InduSoft</strong> <strong>Web</strong> <strong>Studio</strong> v6.1 SP2 7–9
IWS Users GuideConfiguring Screens and GraphicsUsing the Align and Distribute ToolbarThe Align and Distribute toolbar provides buttons that allow you to edit screenobjects.Align and Distribute ToolbarUse the following toolbar options for resizing: Resize height button ( ): Click to set the height of all selected objects to theheight of the last object selected (the object with the filled handles). You can useResize height to resize one object by setting its height equal to its width. Resize width button ( ): Click to set the width of all selected objects to the widthof the last object selected (the object with the filled handles). You can use Resizewidth to resize one selected object by setting its width equal to its height. Tip:You can use Resize width and Resize height to create circles from an ellipse orsquares from rectangles. Select only one object before using these tools.You also can use your cursor, mouse, and keyboard arrow buttons to resize objectson your screen. When you select an object (or group of objects) with the cursor,selection handles (black squares) display at each corner and at the midpoint of eachside. You can use these handles as follows:To enlarge an object, click on a handle and drag your cursor (or pointer) in thedirection indicated by the arrows that display. Clicking and dragging a cornerresizes the entire object (height and width, while clicking on a side resizes theobject in one direction only (height only or width only).To enlarge an object with finer resizing control, click on a handle and do not release theleft mouse button. Click the arrow keys to resize the object (in the directionindicated by the resizing arrows) one pixel at a time. Release the mouse buttonwhen you are finished resizing the object.To select and resize an open or closed polygon, draw a selection box around the polygonand group it (as described in “Object Grouping and Ungrouping Buttons”, page7–16). You can then click on a handle and drag it to resize the object.To change the shape of an open or closed polygon, click on a handle and a boxed squaredisplays at the base of your cursor. Drag the handle to move its position andchange the shape of the polygon. Notes: All objects with dynamic properties and Group of Symbols objects(including most symbols and library objects) have multiple Object Propertiesdialogs and properties. Use the drop-down list on the Object Propertiesdialog (View → Object Properties) to access these different dialogs andproperties. If you resize a symbol or group of objects, IWS resizes all objects within thesymbol or group accordingly.7–10 <strong>InduSoft</strong> <strong>Web</strong> <strong>Studio</strong> v6.1 SP2
Configuring Screens and GraphicsIWS Users GuideOBJECT ALIGNMENT BUTTONSWhen you select a series of objects (two or more), you can align those objects basedon the location of the last object selected. As you select objects, solid handlesdisplay on the last object selected, and the handles on all previously selected objectsbecome empty (unfilled) boxes. Note:In all of the figures provided, the rectangle represents the last object selected.Use the following alignment buttons to align a series of objects. Align left button ( ): Click to align all selected objects to the left edge of the lastobject selected. For example:Aligning Objects Left Align right button ( ): Click to align all selected objects to the right edge of thelast object selected. For example:Aligning Objects Right Align top button ( ): Click to align all selected objects to the top edge of the lastobjected selected. For example:Aligning Object Tops<strong>InduSoft</strong> <strong>Web</strong> <strong>Studio</strong> v6.1 SP2 7–11
IWS Users GuideConfiguring Screens and Graphics Align bottom button ( ): Click to align all selected objects to the bottom edge ofthe last object selected. For example:Aligning Object Bottoms Center vertically button ( ): Click to align all selected objects to the vertical centerof the last object selected. For example:Centering Objects Vertically Center horizontally button ( ): Click to align all selected objects to the horizontalcenter of the last object selected. For example:Centering Objects Horizontally7–12 <strong>InduSoft</strong> <strong>Web</strong> <strong>Studio</strong> v6.1 SP2
Configuring Screens and GraphicsIWS Users Guide Evenly space horizontally button ( ): Click to put an equal amount of horizontalspace between a series of objects (two or more). For example:Spacing Objects Horizontally Evenly space vertically button ( ): Click to put an equal amount of vertical spacebetween a series of objects (two or more). For example:Spacing Objects Vertically Note:The spacing functions may move the last object selected (with solid handles) byno more than a few pixels to equally space all of the objects.Use the following buttons to change the orientation of a single selected object orgrouped object. (You cannot use these buttons with multiple objects selected.) Flip horizontally button ( ): Click to invert the selected object horizontally. Theobject rotates around an imaginary line through its horizontal center until it is amirror image of the original object. For example:Flipping Objects Horizontally<strong>InduSoft</strong> <strong>Web</strong> <strong>Studio</strong> v6.1 SP2 7–13
IWS Users GuideConfiguring Screens and Graphics Flip Vertically button ( ): Click to invert the selected object vertically. The objectrotates around an imaginary line through its vertical center until it is a mirrorimage of the original object. For example:Flipping Objects Vertically Rotate button ( ): Click to rotate the selected object 90 degrees (a quarter turn)clockwise. For example:Rotating ObjectsCHANGING OBJECT LAYERS BUTTONSUse the following object layer buttons to move selected object(s) behind or in front ofanother screen object(s). Notes: IWS assigns a unique identification number (ID#) to every object on thescreen. These ID#s always start at zero and range up to the total number ofobjects on the screen. You can click on an object to display its ID# in thestatus bar. IWS uses ID#s to determine whether an object displays in front of, or behind,another object on the screen. Objects with lower ID#s display behind objectswith higher ID#s. If you select a group of objects and move them the behind or in front ofanother object, the selected group of objects maintain their original displayorder.7–14 <strong>InduSoft</strong> <strong>Web</strong> <strong>Studio</strong> v6.1 SP2
Configuring Screens and GraphicsIWS Users Guide Move to back button ( ): Click to move a selected object or group behind all otherobjects on the screen. IWS assigns the object the lowest ID# and moves thatobject behind all other objects on the screen. For example:Moving Objects to Back (Selecting the Blue Rectangle) Note:Alternatively, right-click on an object and select Move to back from the object’spop-up menu. Move to front button ( ): Click to move a selected object or group in front of allother objects on the screen. IWS assigns the object the highest ID# and movesthat object behind all other objects on the screen. For example:Moving Objects to Front (Selecting the Red Circle) Note:Alternatively, right-click on an object and select Move to front from the object’spop-up menu. Move backward button ( ): Click to move the selected object or group one layerbelow the next object on the screen. (Alternatively, right-click on the object andselect Move backward from its pop-up menu.) IWS assigns the selected object thenext available ID# less than the object behind which it was moved. Move forward button ( ): Click to move the selected object or group one layerabove the next object on the screen. (Alternatively, right-click on the object andselect Move forward from its pop-up menu.) IWS assigns the selected object thefirst available ID# greater than the object in front of which it was moved.<strong>InduSoft</strong> <strong>Web</strong> <strong>Studio</strong> v6.1 SP2 7–15
IWS Users GuideConfiguring Screens and GraphicsOBJECT GROUPING AND UNGROUPING BUTTONSUse the following buttons to group and ungroup two or more selected objects. Note:All objects with dynamic properties and Group of Symbols objects (whichinclude most symbols and library objects) have multiple Object Propertiesdialogs and properties. You can use the drop-down list on the Object Propertiesdialog (View → Object Properties) to access these different dialogs and properties. Group button ( ): Click to combine multiple objects into a single object tofacilitate object selection and manipulation. (You can access each part of thegroup in the Object Properties dialog.) Note:Alternatively, you can right-click on an object and select Group from theobject’s pop-up menu. Ungroup button ( ): Click to separate a grouped object into its individualcomponents. Notes: Alternatively, you can right-click on an object and select Ungroup from theobject’s pop-up menu. A complex grouped object can consist of several sets of grouped objects(known as subgroups). Consequently, you may find it necessary toungroup all of the subgroups to completely ungroup a complex object.Using Groups of ScreensIWS provides a screen-grouping feature that allows you to open a linked set ofscreens at the same time. Note:This feature is not supported for CEView applications or for screens that will beexported in HTML format.From the menu bar, select Insert > Screen Group to open the Insert Screen Group dialog,where you can create a new group of screens for your application.7–16 <strong>InduSoft</strong> <strong>Web</strong> <strong>Studio</strong> v6.1 SP2
Configuring Screens and GraphicsIWS Users GuideInsert Screen Group DialogTo create a new screen group, type a group name into the Name text box or click on ascreen provided in the List of screens. Click on OK when you are done. Note: You also can create a new screen group from the Graphics tab in theWorkspace. Right-click on the Group Screen folder then select Insert screengroup from thepop-up menu. The Group Screen folder combines individual display screensfrom the Screens folder into more manageable groups. Select File > Save Screen Group As HTML to save the Screen Group in HTMLformat, making them available to the remote <strong>Web</strong> Thin Client through a<strong>Web</strong> Browser.To set the order that the screens from one group should be opened when the groupis called, right-click on the screen group name (from the Graphics tab of theWorkspace). Click on Set Open Order in the pop-up menu.Set Open Order Dialog<strong>InduSoft</strong> <strong>Web</strong> <strong>Studio</strong> v6.1 SP2 7–17
IWS Users GuideConfiguring Screens and GraphicsUsing the <strong>Web</strong> ToolbarThe <strong>Web</strong> toolbar provides buttons that allow you to open and navigate HTML files.<strong>Web</strong> Toolbar Note:You must install Internet Explorer v4.1 (or higher) before you can use any of thetools on the <strong>Web</strong> toolbar. Back button ( ): Click to return to the last URL address you opened in thedevelopment environment. Forward button ( ): Click to return to a URL address you opened before clickingthe Back button in the development environment. Stop button ( ): Click to cancel the file-downloading process from a specifiedURL address. Refresh button ( ): Click to reload a URL address specified in the Address textbox. Home button ( ): Click to open the Home Page configured in your InternetExplorer <strong>Web</strong> browser. Address text box ( ): Type a <strong>Web</strong> page URL address into thetext box to open (download) that page to your Internet Explorer <strong>Web</strong> browser. Go button ( ): Click to download the pages specified in the Address text box.Saving Screens in HTML FormatIWS also enables you to save screens in the HTML format. You cannot create theHTML pages contained in the <strong>Web</strong> Pages folder; instead, they are generated frompre-existing screens. For information on how to configure and run a <strong>Web</strong> ThinClient application, see Chapter 13: Configuring a <strong>Web</strong> Solution.To create an HTML page, you must first create a display screen. Configure a screenas you usually would (create objects, add properties, and so on), but keep in mindthat this screen will become a <strong>Web</strong> page. Save the screen as usual when you finish.Then, with the screen still open, select File > Save As HTML. Caution:The <strong>Web</strong> pages that are generated when you select File > Save As HTML areindependent of the screen file from which they were generated. Consequently, ifyou change that display screen, the changes will not appear on the <strong>Web</strong> pageuntil you select File > Save As HTML again.7–18 <strong>InduSoft</strong> <strong>Web</strong> <strong>Studio</strong> v6.1 SP2
Configuring Screens and GraphicsIWS Users GuideSelect File > Save Screen Group As HTML to save the Screen Group in HTML format,making them available to the remote <strong>Web</strong> Thin Client through a <strong>Web</strong> Browser.To view your <strong>Web</strong> pages, you must first configure the <strong>Web</strong> settings on the ProjectSettings dialog (<strong>Web</strong> tab).Project Settings Dialog: <strong>Web</strong> Tab Open the dialog and type the IP address (from which to run the application) inthe Data Server IP field. Type a value in the Send Period field to specify the send period (in milliseconds)used to exchange data between the Server and the <strong>Web</strong> Thin Client stations. Click (enable) the following check-boxes if applicable:– Disable Remote Client Commands check-box: Click (enable) this box to prevent aremote client from issuing commands from your <strong>Web</strong> Thin Client to yourServer.– Enable ToolTips check-box: Click (enable) this box to see Windows ToolTipswhen viewing the application screens on the <strong>Web</strong> Thin Client (browser).– Auto Screen Scaling check-box: Click (enable) this box to automatically scalescreens displayed in a Browser window.Enable this parameter if you are running remotely on a <strong>Web</strong> Thin Client, andyou want IWS to scale screens automatically when you resize the Browserwindow.– Enable File Compression check-box: Click (enable) this box to compress the filesstored on the \<strong>Web</strong> folder of the application. This option is useful for reducingdownload time, particularly if you have a slow connection between yourServer and the <strong>Web</strong> Thin Client.<strong>InduSoft</strong> <strong>Web</strong> <strong>Studio</strong> v6.1 SP2 7–19
IWS Users GuideConfiguring Screens and Graphics Click the IP Security button to open the IP Security dialog. Use the parameters onthis dialog to specify the range of IP addresses for the computers that areallowed to access the application as <strong>Web</strong> Thin Clients.IP Security DialogWhen the Edit pane parameters become active, type IP addresses in the From andTo fields to specify the IP address range. Use the Add and Remove buttons to movethe IP addresses into the IP Address Range list. IWS permits the computers listed inthis pane to access applications as <strong>Web</strong> Thin Clients. To enable logging for the <strong>Web</strong> Thin Client, move to the Log pane and click(enable) the Enable check-box and type a file name into the Filename field togenerate a log file on the <strong>Web</strong> Thin Client station. You can use this log file fordebugging purposes. To enable the Virtual Keyboard for the <strong>Web</strong> Thin Client stations, independentlyfrom the local station, click the Virtual Keyboard check-box. When this box ischecked, the Default and Scale fields become active.– Default: Select the default keyboard used in the application.– Scale: With this option you can enlarge or shrink the keyboards to fit properlywith the display size of the target panel. Scale: 100% represents the defaultsize of each Virtual Keyboard. The options range from 25% to 400%, but youcan also enter a custom scale. Click OK to close the Project Settings dialog. Notes: If you change any of the <strong>Web</strong> information on the Project Settings dialog, youmust re-verify the application for the new setting to take effect. To verify theapplication, select Tools → Verify from the menu bar. (If you have any windowsopen in the development system, IWS prompts you close them before youverify the application). Because the <strong>Web</strong> pages display information from the application through the<strong>Web</strong> server, you must be running the runtime system, <strong>Web</strong> server, and theTCP/IP server to view your <strong>Web</strong> pages.7–20 <strong>InduSoft</strong> <strong>Web</strong> <strong>Studio</strong> v6.1 SP2
Configuring Screens and GraphicsIWS Users GuideUsing the Bitmap ToolbarUse the Bitmap toolbar to access the Bitmap Screen Editor tools. (This toolbar isavailable only when the Background Picture layer is active. You can enable theBackground Picture layer in the Screen Attributes dialog.)Bitmap ToolbarThe Bitmap toolbar contains the following buttons: Select Area button ( ): Click to select an area within the Bitmap Screen Editor. Flood Fill button ( ): Click the Flood Fill button, and then click on the screen topaint the surrounding area with the color you specified with the Fill Color button. Pixel Editing button ( ): Click to open an Edit Image dialog, where you can drawdetailed bitmaps, pixel by pixel.Edit Image Dialog Erase Area button ( ): Click to remove a selected area from the screen. Change colors button ( ): Click to change the transparent fill color for a selectedarea. Note:Before you can use this button, you should have already specified a fillcolor (Fill Color button), selected a transparent color (Select Transparent Colorbutton), and defined the area to fill (Select Area button). Select Transparent Color button ( ): Click to specify a transparent color(referenced by the Change Colors button).<strong>InduSoft</strong> <strong>Web</strong> <strong>Studio</strong> v6.1 SP2 7–21
IWS Users GuideConfiguring Screens and Graphics Toggle Transparent Color button ( ): Click to cause the color selected using theSelect Transparent Color button to become transparent for bitmaps selected in theBitmap Screen Editor. Tip:You can use the Copy (Ctrl+C) and Paste (Ctrl+V) commands to exchange bitmappictures between IWS’s Bitmap Screen Editor and any other bitmap editor(Paint Brush, for example).7–22 <strong>InduSoft</strong> <strong>Web</strong> <strong>Studio</strong> v6.1 SP2
Configuring Screens and GraphicsIWS Users GuideUsing the Static Objects ToolbarThe Static Objects toolbar provides buttons you can use to create polygons,rectangles, lines, and other objects for your screen.Static Objects ToolbarThe Static Objects toolbar contains the following buttons: Open Polygon button ( ): Click to draw an open polygon with a border in thespecified foreground color.To draw an open polygon in the drawing area:– Click the left mouse button to set the starting point of the polygon.– Move the cursor to a new location and click again to place the second vertex.– Repeat this process until you create the desired polygon shape.– Double-click to stop drawing the polygon.To view the object properties, double-click on the polygon object and the ObjectProperties dialog is displayed:Object Properties Dialog: Open PolygonUse the Object Properties dialog to specify the following parameters for thepolygon:– Line: Specify a border line style by clicking the No Line, Solid Line, or Dashed Linebutton.– Color: Specify a border line color by clicking the Color button. When the Colordialog opens, click on a color to select it and then close the dialog.– Weight: Specify the borderline width (in pixels) by typing a numberrepresenting the line width into the text box. Closed Polygon button ( ): Click to draw a closed polygon, using a border in thespecified foreground color.To draw a closed polygon in the drawing area:– Click the left mouse button to set the starting point of the polygon.– Move the cursor to a new location and click again to place the second point.– Repeat this process until you create the desired polygon shape.– Double-click or right-click to stop drawing the polygon.<strong>InduSoft</strong> <strong>Web</strong> <strong>Studio</strong> v6.1 SP2 7–23
IWS Users GuideConfiguring Screens and GraphicsTo view the object properties, double-click on the polygon object. The ObjectProperties dialog is displayed:Object Properties Dialog: Closed PolygonUse the Object Properties dialog to specify the following parameters for thepolygon:– Line: Specify a border line style by clicking the No Line, Solid Line, or Dashed Linebutton.– Color: Specify a border line color by clicking the Color button. When the Colordialog opens, click a color to select it and then close the dialog.– Weight: Specify the borderline width (in pixels) by typing a numberrepresenting the line width into the text box.– Fill: To specify whether the polygon is filled, click No Fill or Fill.If you enable the Fill option, you can specify a fill color by clicking on the Colorbutton. When the Color dialog displays, click a color to select it and close thedialog. Line button ( ): Click to draw an orthogonal line in the drawing area, asfollows:– Click the left mouse button to set the starting point of the line.– Drag the cursor to adjust the line size.– Click again to place the object.To view the object properties, double-click on the object. The Object Propertiesdialog is displayed:Object Properties: LineUse the Object Properties dialog to specify the following parameters for theorthogonal line:– Line: Specify a line style by clicking the No Line, Solid Line, or Dashed Line button.– Color: Specify a line color by clicking the Color button. When the Color dialogopens, click a color to select it and then close the dialog.– Weight: Specify the line width (in pixels) by typing a number representing theline width into the text box.7–24 <strong>InduSoft</strong> <strong>Web</strong> <strong>Studio</strong> v6.1 SP2
Configuring Screens and GraphicsIWS Users Guide Ellipse button ( ): Click to draw ellipses, chords, arcs, and rings. For example:Oval, Chord, Arc, and Ring Tip:The Ring style is particularly useful when you are creating plumbing drawings.To create an ellipse, use the following steps:– Click in the drawing area and drag the mouse/cursor to create an ovalshape.– Release the mouse button to stop drawing the oval.– Use the Object Properties dialog to change the shape to a chord, arc, or ring.Double-click on the object to view the Object Properties dialog:Object Properties: EllipseUse the Object Properties dialog to specify the following parameters for theellipse:– Style: Specify the object style by selecting Ellipse, Arc, Chord, or Ring from thedrop-down list. Next, select Left-Bottom, Left-Top, Right-Bottom, or Right-Top fromthe Style list to choose the quadrant into which the ellipse is drawn.For example to represent a half-circle pipe, create two Ring objects. Specifyone as Left-Bottom and the other as Right-Bottom then join the two objects tocreate a half-pipe.– Fill: To specify whether the ellipse is filled, click No Fill or Fill.If you select the Fill option, specify a fill color by clicking on the Colorrectangle. When the Color dialog displays, click on a color to select it andclose the dialog.– Line: Specify a line style for the ellipse border by clicking the No Line, Solid Line,or Dashed Line button.– Color: Specify the ellipse borderline color by clicking the Color button to openthe Color dialog. Click the color to select it, and then close the dialog.– Weight: Specify a line width for the ellipse border by typing a numberrepresenting the line width (in pixels) into the text box provided.<strong>InduSoft</strong> <strong>Web</strong> <strong>Studio</strong> v6.1 SP2 7–25
IWS Users GuideConfiguring Screens and Graphics Rounded Rectangle button ( ): Click to draw rounded rectangles (empty or filled),as follows:– Click in the drawing area and drag the mouse/cursor to create the rectangle.– Release the mouse button to stop drawing the object.Double-click on the object to view the Object Properties dialog:Object Properties: Rounded Rectangle Notes: You cannot use the rounded rectangle button to create a bar graph forWindows CE applications. A rounded rectangle has one extra tracker in the lower left corner, whichenables you to modify the arc angle.Use the Object Properties dialog to specify the following parameters for theorthogonal line:– Line: Specify a borderline style by clicking the No Line, Solid Line, or Dashed Linebutton.– Color: Specify a borderline color by clicking the Color button to open the Colordialog. Click the color to select it, and then close the dialog.– Weight: Specify a borderline width by typing a number representing the linewidth (in pixels) into the text box provided.– Fill: Specify whether the rectangle is filled by clicking No Fill or Fill.If you select the Fill option, specify a fill color by clicking on the Color button.When the Color dialog displays, click a color to select it and close the dialog.– Color: Specify a fill color by clicking the Color button to open the Color dialog.Click a color to select it, and then close the dialog.– Caption: This option is not enabled for this object. Rectangle button ( ): Click to create rectangles, as follows:– Click in the drawing area and drag the mouse/cursor to draw the rectangle.– Release the mouse button when the rectangle is the size you want.7–26 <strong>InduSoft</strong> <strong>Web</strong> <strong>Studio</strong> v6.1 SP2
Configuring Screens and GraphicsIWS Users GuideDouble-click on the object to view the Object Properties dialog:Object Properties: RectangleUse the Object Properties dialog to specify the following parameters for theorthogonal line:– Type: Specify a border line style by clicking on None, Solid, Dashed, Etched, Raisedor Sunken.– Color: Specify a border line color by clicking the Color button to open the Colordialog. Click the color to select it, and then close the dialog.– Weight: Specify a border line width by typing a number representing the linewidth (in pixels) into the text box provided.– Fill: Specify whether to fill the rectangle by clicking No Fill or Fill.If you select the Fill option, specify a fill color by clicking on the Colorrectangle. When the Color dialog displays, click a color to select it and closethe dialog.– Color: Specify a fill color by clicking the Color button to open the Color dialog.Click a color to select it, and then close the dialog.– Caption: Press this button to open the Caption dialog where you can edit thetext that can be written inside the rectangle object.Selecting the Caption Button* Caption: Type the text that you want to show inside the rectangle object inthis text box.* Extern translation (optional): Specify an external translation file for therectangle caption by clicking (checking) the box.* Fonts: Specify a font style for the caption by clicking the Fonts button.* Align: Specify the alignment for the caption of the rectangle.* Multiline: Allows the caption of the rectangle to be shown in more than oneline, when checked.<strong>InduSoft</strong> <strong>Web</strong> <strong>Studio</strong> v6.1 SP2 7–27
IWS Users GuideConfiguring Screens and Graphics* Wrap Text: When checked, the object automatically wraps the text whennecessary.* Auto gray out: Turns the caption of the rectangle to gray when the Commanddynamic applied to the rectangle is disabled by the Disable field or due tothe Security System. Button button ( ): Click to create custom-sized buttons, as follows:– Click in the drawing area and drag the mouse/cursor to create the buttonshape.– Release the mouse button when the button is the size you want.Double-click on the object to view the Object Properties dialog:Object Properties: ButtonUse the Object Properties dialog to specify the following parameters for thebutton:– Caption: Specify a caption by typing the text into the text box.– Fonts: Specify a font style for the caption by clicking the Fonts button.When the Fonts dialog displays, specify the following parameters:* Font (typeface)* Font style* Size* Effects* Color* Script style– Weight: Specify a border line width by typing a number representing the linewidth (in pixels) into the text box.– Extern translation (optional): Specify an external translation file for the buttonlabel by clicking (checking) the box.– Multiline: Allows the caption of the button to be shown in more than one line,when checked.– Wrap Text: When checked, the object automatically wraps the text whennecessary.– Auto gray out: Turns the caption of the button to gray when the Commanddynamic applied to the button is disabled by the Disable field or due to theSecurity System. Text button ( ): Click to create text objects, as follows:– Click in the drawing area. When a cursor displays, you can type a line oftext.7–28 <strong>InduSoft</strong> <strong>Web</strong> <strong>Studio</strong> v6.1 SP2
Configuring Screens and GraphicsIWS Users Guide– After entering the text string, double-click on the new text object to view theObject Properties dialog.Object Properties: TextUse the Object Properties dialog to specify the following orthogonal lineparameters:– Caption: Specify a text string by typing a caption in the text box.– Align: Align the text by selecting Left, Center, or Right from the combo-box.– Fonts: Specify a font style for the text by clicking the Fonts button. When theFonts dialog displays, you can specify the following parameters:* Font (typeface)* Font style* Size* Effects* Color* Script– Border: Specify a text border by clicking the Border box.To select a border color, click the Color rectangle. When the Color dialogdisplays, click a color to select it, then close the dialog.– Background: Specify a background color by clicking the Color button. When theColor dialog displays, click a color to select it, then close the dialog.– Transparent check box: Enable (check) this option to not show the backgroundcolor. Disable (uncheck) to show the background color.– Extern translation (optional): Specify an external translation file for the text byclicking (checking) this box.Using the Dynamic Properties ToolbarUse the Dynamic Properties toolbar to apply dynamics to objects or a group ofobjects. Dynamics enable you to modify object properties on the fly (during runtime)according to tag values. Some dynamics also enable you to execute commands orinsert values (set points) to the tags.Dynamic Properties ToolbarThe Dynamic Properties toolbar contains the following buttons:<strong>InduSoft</strong> <strong>Web</strong> <strong>Studio</strong> v6.1 SP2 7–29
IWS Users GuideConfiguring Screens and Graphics Command property ( ): Click to add the command dynamic to a selected objector group of objects. The command dynamic enables you to click on the object orpress a pre-defined key to execute the command at runtime. Double-click the object to view its object properties.Object Properties: CommandThe Command dynamic provides one tag for each one of the events supported byit. Notice that more than one event can be configured simultaneously for thesame Command dynamic:EventOn DownOn WhileDescriptionExecutes the command/script once when the user clicks on the object with the leftmouse button.Keeps executing the command/script continuously while the mouse pointer is pressedon the object. The period (in milliseconds) of execution for the command/script is setin the Rate field from the Configuration dialog screen, except for the VBScriptoption, which is executed as fast as possible.On UpExecutes the command/script once when the user releases the left mouse button onthe object.On Right DownOn Right UpExecutes the command/script once when the user clicks on the object with the rightmouse button.Executes the command/script once when the user releases the right mouse button onthe object.On Double ClickExecutes the command/script once when the user double-clicks on the object with theleft mouse button.7–30 <strong>InduSoft</strong> <strong>Web</strong> <strong>Studio</strong> v6.1 SP2
Configuring Screens and GraphicsIWS Users Guide Notes: IWS treats the touch-screen actions the same way it treats the mousepointer actions. In other words, it is transparent for IWS if an event wastriggered by a touch-screen interface or by a regular mouse pointer. The events On Right Down, On Right Up and On Double Click are notsupported by CEView applications (running on the Windows CEoperating system). When creating an application for a touch-screen device, it is importantto keep in mind that events On Right Down and On Right Up cannot betriggered on such devices.– Key: Shortcut used to trigger the events On Down, While Down and On Upusing a keyboard. This option is especially useful when creating applicationsfor runtime devices that do not provide a mouse or touch-screen interface –the keyboard is the only physical interface available to interact with theapplication during the runtime.– Config: Launches the Configuration dialog screen, where the Commanddynamic can be fully configured.This dialog allows you to configure the Command settings, as follows:TypeConfiguration Dialog* Type: This setting defines the type of action that must be executed by theevent of the Command dynamic. Notice that each event has its own type.Therefore, the same Command dynamic can be configured with differenttypes of action for different events. The following types are supported:DescriptionBuilt-in LanguageAllows you to configure a script using the IWS buil-in language. When this type is selected,the user can configure up to 12 expressions for each event in the Expression column. Theexpressions are executed sequentially from the first row until the last one when the event istriggered. The result of each expression is written to the tag configured in the Tag column<strong>InduSoft</strong> <strong>Web</strong> <strong>Studio</strong> v6.1 SP2 7–31
IWS Users GuideConfiguring Screens and GraphicsTypeVBScriptOpen ScreenClose ScreenSet TagReset TagToggle TagDescription(if any). Consult the IWS Built-in Language chapter for further information about this theIWS Built-in Language.Allows you to configure a script using the standard VBScript language. When this type isselected, the user can configure a script in the VBScript editor for the Command dynamic.Consult the VBScript chapter for further information about the VBScript language.Allows you to configure the Command dynamic to open a specific screen when the eventis triggered during the runtime. This type is equivalent to the IWS built-in function Open().You can either type the screen name in the Open Screen field or browse it. Furthermore,you can type a string tag between curly brackets {TagName} in this field. When the event isexecuted, IWS will attempt to open the named screen.Allows you to configure the Command dynamic to close a specific screen when the eventis triggered during the runtime. This type is equivalent to the IWS built-in function Close().You can either type the screen name in the Close Screen field or browse it. You can alsotype a string tag between curly brackets {TagName} in this field. When the event isexecuted, IWS will attempt to close the named screen.Allows you to configure the Command dynamic to set a tag when the event is triggeredduring the runtime. You can either type the tag name in the Set Tag field or browse it.When the event is executed, IWS will write the value 1 to the tag configured in this field.Allows you to configure the Command dynamic to reset a tag when the event is triggeredduring the runtime. You can either type the tag name in the Reset Tag field or browse it.When the event is executed, IWS will write the value 0 to the tag configured in this field.Allows you to configure the Command dynamic to toggle a tag when the event is triggeredduring the runtime. You can either type the tag name in the Toggle Tag field or browse it.When the event is executed, IWS will toggle the value of the tag configured in this field.The following settings are shared for all events:* Enable Focus: When this option is checked, the object that the Commanddynamic was applied to can receive the focus during the runtime by thenavigation keys.* Force: When this option is checked, any tag that receives a value willgenerate events based on its change, even if the value of the tag inquestion does not change. For instance, if a tag has the value 0 and theCommand dynamic overwrites the same value 0 to this tag, any other taskin IWS will recognize that this tag changed value (even if it did not) afterexecuting the dynamic. This option is useful when you want to make surethat actions driven by tag changes (e.g. Write on Tag Change from acommunication driver) are triggered after the Command dynamic isexecuted.* Beep: When this option is checked, a short beep is played when theCommand is executed. This option is useful to provide an audio feed-backto the user, indicating that the Command was executed. It does notindicate, however, if the action triggered by the Command dynamic wassuccessful or not.* Release: When this option is checked, the On Up event is executed whenyou drag the cursor (or your finger) out of the object area (whether thebutton was released or not). This option is useful to make sure that theOn Up event will always be executed after an On Down event, even if theuser releases the mouse cursor out of the object area before releasing it.7–32 <strong>InduSoft</strong> <strong>Web</strong> <strong>Studio</strong> v6.1 SP2
Configuring Screens and GraphicsIWS Users Guide* Confirm: When this option is checked, user will have to answer aconfirmation question before executing the command. This option isuseful for decreasing the accidental triggering of critical events during theruntime.* E-Sign: When this option is checked, the user will be prompted to enter theElectronic Signature before executing the dynamic.* Disable: Disables action by the user when the result of the expressionconfigured in this field is TRUE (value different from 0).* Security: Security System Access Level required for the object/dynamic Hyperlink button ( ): Click to add the hyperlink property to a selected object orgroup of objects. Applying this property allows you to click on the object(s)during execution to launch the default browser and load the specified URL.Double-click on the object to open the Object Properties dialog:Object Properties: HyperlinkYou can use this dialog to specify the following parameters:– Hyperlink Type combo-box: Click the combo-box button to select a URL protocolfrom the list. IWS uses this protocol when it loads the URL.– E-Sign check-box: When this option is checked, the user is prompted to enterthe Electronic Signature before executing the dynamic.– URL field: Type the URL address you want to load (for example: <strong>InduSoft</strong>.com). Tip:You are not required to enter the protocol type in the URL field. When youselect a protocol type from the Hyperlink Type list, IWS automatically addsthe protocol’s prefix to the URL address.– Disable field: Type a value greater than zero into this field to disable thehyperlink command property for the selected object(s).– Security field: Type a value into this field to specify a security level for theobject(s). If a user logs on, and does not have the required security level,IWS disables the hyperlink command for the object(s). Bargraph button ( ): Click to add bar graph properties to a selected object, andthen double-click on the object to open the Object Properties dialog.<strong>InduSoft</strong> <strong>Web</strong> <strong>Studio</strong> v6.1 SP2 7–33
IWS Users GuideConfiguring Screens and GraphicsObject Properties: BarGraph Note:You cannot use the rounded rectangle button to create a bar graph forWindows CE applications.Use the Object Properties dialog to specify the following parameters:– Tag/Expression field: Type a tag or expression that determines the bar graphlevel. You also can click the button to browse your directories for an existingtag or expression.– Minimum Value field: Type a numeric constant or a tag value into this field todefine the minimum value used to calculate the size of the bars.– Maximum Value field: Type a numeric constant or a tag value into this field todefine the maximum value used to calculate the size of the bars. Tip:IWS also allows you to enter constants in tag/numeric value fields.Constant values (defined by the # character) are equivalent to numericvalues, except that constants display in the Tag Replace dialog. You mayfind constants useful for documentation purposes or for creating genericobjects. For example: #Name:100.Where the value (100) following the semicolon (:) is the constant, andName is a constant mnemonic only and not added to the database.– Foreground Color: To specify a fill color for the bars, click the combo-boxbutton. When the Color dialog displays, click on a color to select it, and thenclose the dialog.– Direction pane: Click the Vertical or Horizontal radio button to specify thedirection of the bar graph.– Orientation pane: Click the Up, Center, or Down button to specify the orientationof the maximum and minimum values when drawing the bars.7–34 <strong>InduSoft</strong> <strong>Web</strong> <strong>Studio</strong> v6.1 SP2
Configuring Screens and GraphicsIWS Users Guide Text I/O button ( ): Click to add the dynamic input or output text property to aselected text object. Applying the Text I/O property allows you to insert and displaytag values in real time if you are using the keyboard or on-screen keypad to runan application. Note:You can apply this dynamic property only to text objects containing the# character (each # represents one character) to be replaced by a valueduring the runtime.Double-click on the object to open the Object Properties dialog. You can use thisdialog to specify the following parameters:Object Properties: Text I/O– Tag/Expression text field: Type one of the following into the field:* A tag on which to perform an input or output operation* An expression on which to perform an output operation only* You can click the button to browse your directories for an existing tag orexpression.– Input Enable check-box: Enable (check) this option to allow data entries.Disable (uncheck) the option and this dynamic only executes the dataoutputs.– Confirm check-box: Enable (check) this option to require users to confirm anynew values set during runtime.– Minimum Value field: Enable (check) this option to define a minimum value forthe tag associated with this text object. A user will not be permitted to inputa number lower than this value.– Maximum Value field: Enable (check) this option to define a maximum value forthe tag associated with this text object. A user will not be permitted to inputa number greater than this value.– Password check-box: Enable (check) this option to hide password text entriesby replacing the text with asterisks (*).– Fmt (format) combo-box: Click on the combo-box button to select a format forthe input/output field. (Decimal is the only format available for CEapplications.)– E-Sign check-box: When this option is checked, the user is prompted to enterthe Electronic Signature before changing the tag value.– VK field: Virtual Keyboard type used for this object. You need to enable theVirtual Keyboard option on the Project > Settings > Runtime Desktop interface beforeconfiguring the Virtual Keyboard for this interface.<strong>InduSoft</strong> <strong>Web</strong> <strong>Studio</strong> v6.1 SP2 7–35
IWS Users GuideConfiguring Screens and Graphics– Disable field: Type a value greater than zero in this field to disable the tag’sdata input property.– Security field: Type a value in this field to specify the security level for aspecific data input object (as defined in the Security section).Colors button ( ): Click to add the color change property to a selected object.The Colors dynamic allows you to modify the color of a static object during theruntime based on the value of a tag or expression.Double-click on the object to open the Object Properties dialog box.Object Properties: ColorsYou can use this dialog to specify the following parameters:– Type field: Determines the mode in which this dynamic works:* By Limit: When selecting this type, you can specify up to four limits(Change Limit) for this dynamic and a color for each limit. When the valueof the tag or expression configured in the Tag/Expr field reaches thelimits, the color associated with the respective limit is applied to theobject.* By Color: When selecting this type, you can specify the code of the colorthat must be applied to the object directly in the Tag/Expr field. Usingthis code, you can apply any color supported by your device to the object. Tip:You can configure the RGBColor() function in the Tag/Expr field whenType = By Color. This allows you to configure the color by its RGB codes.See IWS Development Environment -> Standard Interfaces -> ColorInterface for a table with the codes for the most commonly used colors.– Tag/Expression field: Type the name of a tag or expression you want to monitor.When Type = By Limit, IWS compares the result of the tag/expression withthe specified Change Limits to determine the proper color for the selectedobject. When Type = By Color, the result of this field sets the color that willbe applied to the object.– Change Limit field: Type a limit value (a numeric constant or tag) for the colorchange. The numbers must be configured in ascendant order according tothe following sequence of the fields displayed on the Object Properties dialogwindow: Upper left, lower left, upper right and lower right field. If you clickon the More button, you can configure up to 16 different limits for the colordynamic.7–36 <strong>InduSoft</strong> <strong>Web</strong> <strong>Studio</strong> v6.1 SP2
Configuring Screens and GraphicsIWS Users GuideColor Limits Dialog Box– Color combo-box: Click the combo-box button to associate a color with eachcolor change limit. When the Color dialog opens, click a color to select it, andthen close the dialog.– Blink combo-box: Click the combo-box button to specify whether the colorchange will blink, and how fast it will do so. Note:The following fields are automatically disabled (grayed out) when Type =By Color: Change Limit, Color and Blink. Position button ( ): Click to specify when and where to display an object, usingthe specified tag values.Double-click on the object to open the Object Properties dialog:Object Properties: PositionYou can use this dialog to specify the following parameters:– Show on condition field: Type an expression in this field. If the return value iszero or less, the object will be hidden (the direction the slider moves isdetermined by configuring the Horz: or Vert: lines of the property. (Note: Whenan object is invisible, using the show on condition also disables it.)– Slider check-box: Enable (check) this box to operate the object like a slider(which means you can drag the object to apply corresponding values to thetags).– Sec (security) field: Type a value in this field to specify the security levelrequired to permit operator input using the slider object.<strong>InduSoft</strong> <strong>Web</strong> <strong>Studio</strong> v6.1 SP2 7–37
IWS Users GuideConfiguring Screens and Graphics– Tag field: Type the tag associated with the object, allowing the object to movehorizontally and vertically throughout the screen.– Range field: Type values into these fields to specify upper and lower limits forthe tag values, allowing the object to move throughout the screen accordingto the value of the tag within this range.– Position field: Type values in this field to specify how much change in position(in pixels) you can move an object on the screen according to the establishedcondition. You can enter negative values in the second field (destinationposition).– Reference combo-box: Select one of the following options as a reference point,to be used while moving the object on the screen. Specifying this option isnecessary only if you want to resize the object as you move it.* Left: Left corner of the object* Right: Right corner of the object* Center: Center of the object* Top: Upper corner of the object* Bottom: Lower corner of the object Resize button ( ): Click to increase or decrease the size of a selected object orsymbol. Double-click on the object/symbol to open the Object Properties dialog:Object Properties: ResizeUse the Object Properties dialog to specify the following parameters:– Tag fields: Type values in the Height and Width fields to increase or decrease theobject’s horizontal and vertical size.– Range fields: Type values to specify upper and lower tag limits, which IWSuses to increase and decrease the object size.– Size (%) fields: Type values to specify a percentage range, which IWS uses toincrease and decrease the object size.– Reference combo-boxes: Select one of the following reference points todetermine how the object increases size horizontally and vertically.* Left: From the left side* Right: From the right side* Center: Horizontally and vertically from the center of the object* Top: From the upper side* Bottom: From the lower side Dynamic Rotation button ( ): Click to rotate a line. Double-click on the line toopen the Object Properties dialog:7–38 <strong>InduSoft</strong> <strong>Web</strong> <strong>Studio</strong> v6.1 SP2
Configuring Screens and GraphicsIWS Users GuideObject Properties: Dynamic RotationUse this dialog to specify the following parameters:– Tag/Expression field: Type a tag name or expression to associate with theselected line. IWS reads the value represented on the screen using thisvariable or expression.– Range area: Type Minimum and Maximum tag values used to move the linethroughout the screen according to the established condition.– Rotation (degrees) area: Type starting and ending values to specify how manydegrees you can rotate a line on the screen (rotation dynamic).* Windows NT: You can rotate a line up to 360 degrees* Windows CE: You can rotate a line no more than 90 degrees.– Reference combo-box: Select one of the following as a reference point on whichto rotate the object throughout the screen:* Left Top: Upper-left corner of the object* Right Bottom: Lower-right corner of the object* Center: Center of the object.Using the Active Objects ToolbarThe Active Objects toolbar provides buttons you can use to create dynamic objects.Active objects typically require more parameters than static objects.Active Objects ToolbarThe Active Objects toolbar contains the following buttons: Alarm/Event Control Object button ( ): Click to add an Alarm/Event Control Objectto your application screen.To create and configure an Alarm/Event Control Object:– Click the Alarm/Event Control button.– Click in the display, and drag the mouse to create and adjust the object’sshape.<strong>InduSoft</strong> <strong>Web</strong> <strong>Studio</strong> v6.1 SP2 7–39
IWS Users GuideConfiguring Screens and GraphicsDouble-click on the object to open the following Object Properties dialog:Object Properties: Alarm/Event ControlUse the Alarm/Event Control Object Properties dialog to configure the Alarm/EventControl Object, as follows:– Select an alarm object mode in the Type pane:* On Line: Click (enable) this button to display current alarm messages.* History: Click (enable) this button to display alarm messages from theAlarm history database.– Click (enable) the Show gridlines check-box to display gridlines in the object:Displaying a Grid– Click (enable) the Show Header check-box to display a header on the object:Displaying a Header7–40 <strong>InduSoft</strong> <strong>Web</strong> <strong>Studio</strong> v6.1 SP2
Configuring Screens and GraphicsIWS Users Guide– Click the Font button to open the Font dialog where you can specify displayproperties for the alarm text.Font DialogUse the Font, Font Style, and Size lists to specify a typeface, font style, and size.* Click (enable) the check-boxes in the Effects pane to Strikeout (strikeouttext) or Underline (underlining) the alarm text, or use the combo-box tospecify a color for the alarm text. (Note: The Sample pane shows how thetext will look in the object.)* By default, IWS uses Western-style fonts. If you want to change thedefault, click the Script combo-box button and select from the list. (Note:The contents of this combo-box list will depend on your operating system.)* When you are finished, click OK to close the Font dialog.<strong>InduSoft</strong> <strong>Web</strong> <strong>Studio</strong> v6.1 SP2 7–41
IWS Users GuideConfiguring Screens and Graphics– Click the Columns button to open the Columns dialog where you can specifydisplay properties for columns in the Alarm/Event Control Object.Columns Dialog* Use the Key box to assign a shortcut to each column. This allows you tosort the information on the Alarm Control object by any column, usingkeyboard keys instead of the mouse cursor.* The Available list contains all of the column types available for this object.* The Visible list contains all of the column types currently in use for theobject.* Click the buttons to move selections between the two lists. Tip:Use the Columns dialog to display the most recently replaced value withthe new value. To do so, move both Value and Previous from the Availablelist to the Visible list.* Click the Move Up or Move Down buttons to rearrange the order of columns inthe Visible list.* Use the Label and Width fields in the Properties pane to change the defaultcolumn labels and widths at runtime.* Use the Align combo-box to specify alignment (Left, Center, or Right) for thealarm message text within a specified column.* Click (enable) the Available during runtime check-box to allow the user to addselected columns to the visible list during runtime.* When you are finished, click OK to close the Columns dialog. Note:When acknowledging an alarm, the Alarm Control object sends a messageto the Alarm Task with the following information: Tag, Alarm to beacknowledged (Hi, HiHi, Lo, etc), User Name and Station. This is a7–42 <strong>InduSoft</strong> <strong>Web</strong> <strong>Studio</strong> v6.1 SP2
Configuring Screens and GraphicsIWS Users Guidesolution to control acknowledged alarms from a <strong>Web</strong> Thin Client.– To filter alarm messages during runtime, click the Filters button. The Filtersdialog displays so you can specify filtering parameters for the Alarm/EventControl Object.Filters Dialog* Use the Group field to filter alarm messages by one or more user group(s).Type the Group number into the text field (for example, 1). You also canuse a comma or a dash to specify more than one group (for example,1,3,5-6)* Use the Selection field to filter alarm messages by the Selection textconfigured on the Alarm worksheet.* Use the From and To parameters in the Priority pane to filter alarmmessages based on priority. Type values into the text fields to delimit thepriority range.<strong>InduSoft</strong> <strong>Web</strong> <strong>Studio</strong> v6.1 SP2 7–43
IWS Users GuideConfiguring Screens and Graphics* Use the Tagname, Message, and/or Username text fields in the Search incolumns pane to specify criteria for filtering alarm messages. Type atagname, message, and/or user name into the text field for which youwant IWS to search.* Use the parameters in the Interval pane to filter alarm messages by thelast x number of messages (Latest) or based on a period of time (Period).* Use the parameters in the Initial Sort pane to set the default sorting order.Select a column type from the Column combo-box, click the Asc or Desc radiobutton to sort in ascending or descending order. Click the Allow sort inruntime check-box if you want to enable the sort to occur during runtime. Notes: You can configure tag names (string tags) between curly brackets { } inthe Group, Selection, Tagname, Message, and Username fields to modify thefiltering options during runtime. You can configure integer tag names for the fields in the Priority paneand/or on the latest field from the Interval pane to modify these valuesduring runtime. You can configure string tag names for the Period fields in the Intervalpane to modify those values during runtime. You can use wildcards (* and ?) when specifying values for the Selection,Tagname, Message, and Username fields.– Click the Advanced button to open the Advanced dialog where you can specifyadvanced properties for the Alarm/Event Control Object.Advanced DialogUse the parameters in the Date and Time Format pane to control which dateand time information displays in the alarm message. Click (enable) the7–44 <strong>InduSoft</strong> <strong>Web</strong> <strong>Studio</strong> v6.1 SP2
Configuring Screens and GraphicsIWS Users Guidecheck-box to include that element in the display. (Note: MS stands formilliseconds.)Hint: Watch the Sample text to preview how the information will look in thealarm message.Use the parameters in the Ack pane to control how alarms are acknowledged.* Security field: Type a numeric value to specify which security levels canacknowledge an alarm message. Only those users with the specified levelcan respond.* Ack all tag field: Type a tag to receive a value. When the tag changes value, itindicates that all messages in the alarm object have been acknowledged.* Ack tag field: Type a tag to receive a value. When the tag changes value, itindicates that the message at the top of the alarm object has beenacknowledged.* Confirm check-box: Click (enable) this box to display a confirmation dialogwhen the user tries to acknowledge a single alarm.* Enable comment (individual ack only) check-box: Click (enable) this box to allowthe user to enter comments about the alarm, just after acknowledging it.Use the parameters in the Standard dialogs at runtime pane to control:* View field: Type a tag to receive a value. When the tag changes value, itopens a dialog allowing you to customize the columns visible in the object.* Filters field: Type a tag to receive a value. When the tag changes value, itopens a dialog allowing you to filter the columns visible in the object.Use the parameters in the Delete Message pane to control who can deletealarm messages from the Alarm History:* Security: Use this field to specify which security level can delete alarmmessages. Only those users with the specified security level will be allowedto delete an alarm message.* Confirm: Click (enable) this box to require the user to confirm a messagedeletion before IWS actually deletes the selected alarm message.* Total Alarms field: Type an integer tag to see how many alarms remain afterIWS filters the alarm object using parameters specified on the Filtersdialog.* Selected tag field: Type a string tag to enable the end user to click on analarm message to see the name of the tag associated with that alarmevent.* Print trigger field: Type a tag in this field to print an alarm summary fromyour default printer when this tag changes value.* Click the Navigation Triggers button to open the following dialog:<strong>InduSoft</strong> <strong>Web</strong> <strong>Studio</strong> v6.1 SP2 7–45
IWS Users GuideConfiguring Screens and GraphicsNavigation Triggers DialogYou can make the on-screen Alarm Control object scroll up, scroll down,page up, page down, go to home (beginning) of page, or go to end of pageby configuring tags in the corresponding fields. Whenever the values of theconfigred tags change, the Alarm Control object will navigate that way.This is useful for adding navigation controls to the screen; for example, ifyou configure the same tag to the Up field in this dialog and a Pushbuttonobject, then the Alarm Control object will scroll up whenever thePushbutton object is pressed.When you are finished, click OK to close the Advanced dialog.– Use the Win color box to select a background color for the Alarm/EventControl Object. Click the color box to open the color palette pop-up, and thensimply click a color to select it.– Click (enable) the Ext translation check-box to enable the external translation ofalarm messages using the Translation Tool. (See Chapter 16: Using theTranslation Editor for more information.)– E-Sign check-box: When this option is checked, the user is prompted to enterthe Electronic Signature before executing the dynamic.– VK field: Virtual Keyboard type used for this object. You need to enable theVirtual Keyboard option on the Project > Settings > Runtime Desktop interface beforeconfiguring the Virtual Keyboard for this interface. Trend Control object ( ): Click to display data points (values) from different datasources in a graphic format. The main features provided by the Trend Controlobject are:– Display of multiple pens simultaneously– Support for different Data Sources, such as Tag, Batch, Database and TextFile– Capability to generate X/Y graphs from the configured data sources (pleaserefer to Trend Control Object - Appendix A, which follows this section, for anexample of X/Y chart)– Simultaneous display of an unlimited number of data points. This featuremight be limited by the hardware used since available memory andperformance will vary.– Built-in toolbar, which provides interfaces for the user to interact with theTrend Control object during the runtime– Built-in legend, which displays the main information associated to each penlinked to the object– Zooming and auto-scaling tools7–46 <strong>InduSoft</strong> <strong>Web</strong> <strong>Studio</strong> v6.1 SP2
Configuring Screens and GraphicsIWS Users Guide– Horizontal and vertical orientation Note:For compatibility with applications created in older versions of IWS(legacy), the Trend object is still supported and available from theLegacy toolbar. However, since the Trend Control object provides allfunctionalities of the previous Trend object in addition to otheradvantages, it is recommended that you use the Trend Control objectwith new projects.Trend Control - Development InterfaceThis section describes the development interface and all the settings available toyou as you configure the object on the screen.Although the Trend Control object supports flexible configurations to meet thespecific needs of your application, most of the settings are set by defaults basedon the most common interfaces. Therefore, in many cases, you will onlyconfigure data points (displayed during the runtime), which can be done easilyby clicking the Points button from the Object Property window.Click the Trend Control tool to add it to your application screen. Double-click onthe object to launch its Object Properties dialog window, as follows:<strong>InduSoft</strong> <strong>Web</strong> <strong>Studio</strong> v6.1 SP2 7–47
IWS Users GuideConfiguring Screens and GraphicsTrend Control Object Properties Dialog* Border box: Specify a border line Type (style) by clicking on None, Solid,Dashed, Etched, Raised or Sunken. You can also select the color of theborder line with the color box to the right of the Type field.* Fill box: If you click Fill, you can choose a background color for the TrendControl object by selecting it from the color box to the right of this radiobutton. If you select No Fill, the background of the Trend Control objectwill remain transparent.The rest of the buttons on this dialog launch other dialogs for configuringspecific settings for the Trend Control object:* The Data Sources button on the Trend Control Object Properties dialoglaunches this dialog:Data Sources DialogThe data source defines the location of the values from the data point(s)associated with it. Many points can share the same data source – you donot need to create one data source for each data point.The data source tag is available by default to the Trend Control object.You can add additional Data Sources with the New button. The name youenter will be used as an alias to link the data points to this new datasource.The other fields in this dialog allow you to edit the data source settings:– Source Type: Select the source type of the location of the data pointvalues.7–48 <strong>InduSoft</strong> <strong>Web</strong> <strong>Studio</strong> v6.1 SP2
Configuring Screens and GraphicsIWS Users Guide– X-Axis field: Enter the name of the field (column) from the data sourcethat holds the X axis data.– Max Buffer: The maximum amount of data (in bytes) that will be held inruntime memory.– Sort: This option is useful for plotting data from a Text file. Whenenabled (checked), it sorts the data and shows the Cursor columnvalue until the Max Buffer is filled. When disabled (unchecked), the dataare not sorted and the Cursor column value is not shown.– Data Source Settings: Click to define the settings for the selected SourceType.Data SourceTypeThe following table summarizes the settings for each Data Source Type:Description X-Axis field Data Source SettingsBatchBatch generatedby the Trend taskof IWSDisabled. The X-Axisdata will be retrievedautomatically on thecorrect position fromthe proprietary Batchfile generated by IWS.Enter the data point values’ Batch Name for theirretrieval. You can configure a tag between curlybrackets in this field to change this setting dynamicallyduring the runtime.DatabaseSQL RelationalDatabaseField name thatcontains the X-AxisdataConfigure the settings to link this Data Source to theSQL Relational Database that holds the data pointvalues. See Database Configuration Dialog Window inChapter 17 or further information about this dialoginterface. Please refer to Trend Control Object -Appendix B, which follows this section, for an exampleof configuring databases.Text FileText file (e.g.CSV file) withdata point valuesseparated by aspecific delimiterNumber of the columnthat holds the X-Axisdata. The number 0refers to the firstcolumn, 1 refers to thesecond column, andso forth.Enter the name of the text file that holds the data points.The default path is the current application path. You can<strong>InduSoft</strong> <strong>Web</strong> <strong>Studio</strong> v6.1 SP2 7–49
IWS Users GuideConfiguring Screens and Graphicsconfigure a tag between curly brackets in this field tochange this setting dynamically during the runtime.You can also choose one or more delimiters for the datastored in the text file. The value of each row is written inthe text file between two delimiters. When using acomma as a delimiter, the grid object is able to readdata from CSV files. You can even choose a customdelimiter by checking the Other option. Please refer toTrend Control Object - Appendix A, which follows thissection, for an example of configuring text files.* The Points button on the Trend Control Object Properties dialog launchesthis dialog:Points DialogPropertyPointLabelColorData SourceTag/FieldThe value of each data Point can be represented in the Trend Controlobject as a pen, during the runtime. You can select which data Points willbe visible during the runtime (add/remove pens to the chart), regardlessof how many data Points you associate with the Trend Control object.The following table summarizes the properties of each Data Point:DescriptionData Point ID. Each data Point has a unique ID, which is assigned automatically when the data Point iscreated in this interface.The label associated with the Data Point can be displayed on the Legend, during the runtime, providinga short reference to the user for each data Point.Color of the pen used to draw the values of the Data Point on the Trend Control objectData Source that holds the values for the data Point. The Data Source Tag is available by default. Seethe Data Sources button above for further information about how you can make additional DataSources available for the object.The meaning of this parameter depends on the Data Source Type associated with the data Point: Tag: Type the name of the tag with values to display. If the tag is configured in the Trend task, thehistory data is automatically retrieved; otherwise, only the online values are displayed.7–50 <strong>InduSoft</strong> <strong>Web</strong> <strong>Studio</strong> v6.1 SP2
Configuring Screens and GraphicsIWS Users GuideMinMaxStyleOptionsHide Batch: Type the name of the tag with values to be retrieved from the Batch History file generated bythe Trend Task, and displayed on the object. Database: Type the name of the field (column) in the SQL Relational Database that holds the dataPoint values. Text File: Type the number of the column that holds the data Point values. The number 0 refers tothe first column, 1 refers to the second column, and so on.Minimum value displayed in the Y scale for the data PointMaximum value displayed in the Y scale for the data PointConfigure the style for the pen (color, type, state, etc.). See the Pen Style dialog below for furtherinformation.Configure optional settings for each data Point. You can use the dialog to configure these settings ortype their values directly in the Options field, using the comma character as the delimiter. See Optionsdialog above for further information about these settings.You can configure a tag in this field. When this tag has the value 0, the pen associated with the point isdisplayed on the object; otherwise, it is hidden.* Pen Style dialog: This dialog allows you to configure the style of the penused to draw the data Point values on the object during the runtime. Also,it can be launched during the runtime, allowing the user to customizethese settings on-the-fly.You have the option of defining a Hi Limit and a Lo Limit for each dataPoint, with the Options dialog. The Pen Style Dialog allows you toconfigure different settings for the pen (e.g. color), both when its valuesare within the limits (Normal State) and not within the limits (Out ofLimits state).Pen Style DialogAfter you select a State (Normal or Out of Limits), you can configure itspen style:PropertyUse Normal SettingsDescriptionAvailable only for the Out of Limits state. When checked,the pen will always be displayed with the settings for theNormal state, even if the data point values are not within the<strong>InduSoft</strong> <strong>Web</strong> <strong>Studio</strong> v6.1 SP2 7–51
IWS Users GuideConfiguring Screens and GraphicsTypeWeightExpansionMarkerColorMarker Sizelimits configured for it.Select the type of the line used to draw the pen.Select the weight (thickness) of the line used to draw thepen.Select the algorithm used to link the points, as follows:: The consecutive points are interpolateddirectly to each other using a line. This option is suitablefor analog values. : The consecutive points are linked throughvertical and horizontal lines only (steps). This option issuitable for Boolean values.Select the type of marker (if any) which must be displayedon each specific sample retrieved from the Data Source anddisplayed on the object.Select the color of the Marker (if any) and line used to drawthe pen on the object.Select the size of the Marker (if any). Note:When running the application under the WinCE operating system or onthe <strong>Web</strong> Thin Client (any OS), the Pen Style dialog box – available duringthe runtime – allows the user to change the pen color only.* Options dialog: Use this dialog to configure optional settings for each dataPoint, as follows:Options DialogPropertyDescription7–52 <strong>InduSoft</strong> <strong>Web</strong> <strong>Studio</strong> v6.1 SP2
Configuring Screens and GraphicsIWS Users GuideDescriptionEng. UnitLo LimitHi LimitHide ScaleBreak IntervalX Axes off-setCursor ValueThis text can be displayed in the legend, providing a shortdescription about the data point, during the runtime. Whenusing tags, the default description is the one configured forthe tag.This text can be displayed in the legend, providing theEngineering Unit associated to the data point, during theruntime. When using tags, the default units are the onesconfigured for the tag.When the data point value is below this limit, its pen can bedisplayed with a different style (e.g. color) during theruntime. See Pen Style dialog above for further information.When using tags, the default Low Limit is the Low Alarmvalue configured for the tag.When the data point value is above this limit, its pen can bedisplayed with a different style (e.g. color) during theruntime. See Pen Style dialog above for further information.When using tags, the default High Limit is the High Alarmvalue configured for the tag.You can configure a tag in this field to control the visibility ofthe scale (Y axis) associated with this pen during the runtimeby changing the value of this tag (0=Show ; 1=Hide).Maximum interval between two consecutive points. If thetime between two consecutive samples is higher than thisnumber (in seconds), the Trend Control assumes that therewas no data collection in this period and does not draw aline linking both samples. When the X Axis is configured asnumeric, the value on this field represents a numeric scalarvalue. If the X Axis is configured as date/time, the value forthis field is given in seconds.Off-set for this data point from the X-Axis scale configuredfor the object. This option is useful when you want to displaydata from two or more data points using a different X scale(period of time/value) for each one, so you can comparethem. When the X Axis is configured as numeric, the valueon this field represents a numeric scalar value. If the X Axisis configured as date/time, the value for this field is given inseconds.You can configure a tag in this field. During the runtime, theTrend Cursor object updates the value of this tag with thevalue of the intersection between the data point pen and theVertical cursor (if any).<strong>InduSoft</strong> <strong>Web</strong> <strong>Studio</strong> v6.1 SP2 7–53
IWS Users GuideConfiguring Screens and Graphics* Axes button: The Axes button on the Trend Control Object Propertiesdialog launches this dialog:Axes DialogThis dialog allows you to configure the settings for the X and Y axis.– Data Type: The X axis can display either Date/Time values or numericvalues, according to this setting.Data TypeScale FormatDate/TimeNumeric7–54 <strong>InduSoft</strong> <strong>Web</strong> <strong>Studio</strong> v6.1 SP2
Configuring Screens and GraphicsIWS Users Guide Note:The number of decimal points for the X or Y scale (Decimals) can beconfigured with a tag. Therefore, this setting can be modifieddynamically during the runtime.– Period or Range: The settings available in this interface depend on theData Type configured for the X axis, as follows:Data Type Property DescriptionDate/Time (Period)NumericTypeDurationTimeMinMax Start Date/Time: When this option is selected, the value of the tag configuredin the Time field defines the starting Date/Time for the data displayed on theobject. Time Before Now: When this option is selected, the value of the tag configuredin the Time field defines the amount of time before the current Date/Time,which will be used as the starting Date/Time for the data displayed on theobject.Defines the Period of data displayed on the object. You can configure a string tag inthis field, so you can change the duration dynamically during the runtime bychanging the value of this tag. The format of the value supported by this property isHH:MM:SS. E.g. 36:00:00 (thirty six hours)This field is optional. The value of the tag configured in this field represents a periodof time, rather than a specific date or time. The meaning of this value depends onthe option set for the Type property.When the Type is set as Start Date/Time, the value of the tag configured inthis field must comply with the format Date Time. E.g.: 02/10/2005 18:30:00.When the Type is set as Time Before Now, the value of the tag configured inthis field must comply with one of the following formats:a. Time (string value). E.g. 48:00:00 (forty eight hours)b. Number of hours (real value). E.g. 2.5 (two hours and thirty minutes)Minimum value displayed in the X axisMaximum value displayed in the X axis Note: The tags configured in the Period / Range fields are automaticallyupdated when the user changes the X scale dynamically during theruntime, using the Time bar embedded in the object. If the Time field is left blank (or if the tag configured in this field hasthe value 0), the object displays data up to the current Date/Time.– Grid (X axis or Y axis): You can configure the number of divisions(vertical or horizontal lines) drawn on the object for the X and/or Yaxis respectively, as well as the color of these lines.– Time bar: When checked, the Time bar is displayed below the X axisduring the runtime; otherwise, it is hidden. The time bar is a standardinterface that can be used by the operator to change the X axis scaleduring the runtime.– Scroll bar: When checked, the Scroll bar is displayed below the X axisduring the runtime; otherwise, it is hidden. The time bar is a standard<strong>InduSoft</strong> <strong>Web</strong> <strong>Studio</strong> v6.1 SP2 7–55
IWS Users GuideConfiguring Screens and Graphicsinterface that can be used by the operator to navigate through the Xaxis scale during the runtime. Optionally, you can configure a tag inthe Scroll bar field, which defines the period for the scroll bar. If thisfield is left empty, the period is equal to the current value for Duration ofthe X axis.– Cursor: The cursor is an optional ruler orthogonal to the X axis, whichcan be used during the runtime to obtain the value of any pen at aspecific point (intersection of the pen with the cursor). When you clickthis button, the Cursor dialog launches, where you can configure thesettings for the optional vertical cursor as follows:Cursor DialogPropertyEnableColorPosition (0-100)Value OutputDescriptionWhen checked, the vertical cursor is visible during the runtime.Color of the line drawn for the cursorYou can configure a numeric tag in this field, which is proportional to the position ofthe cursor on the X axis, from 0 to 100%. When this value is changed, the position ofthe cursor is automatically modified.You can configure a string tag in this field that returns the value of the X axis in whichthe cursor is currently positioned.– Position: Defines the position of the X axis, as well as its direction andorientation, as follows:Position DialogPropertyPlacementDirectionOrientationDescriptionPosition where the X axis will be placedDirection of the X axisOrientation of the X axis7–56 <strong>InduSoft</strong> <strong>Web</strong> <strong>Studio</strong> v6.1 SP2
Configuring Screens and GraphicsIWS Users Guide– Scale: Defines the properties of the Y axis, as follows:PropertyMin / MaxMultiple SectionsFormatDescriptionDefault minimum and maximum values displayed in the Y axis. Used when more thanone pen shares the same scale (Multiple Sections disabled), and/or for the pointswhose Min and Max fields are not configured (left blank).When checked, the Y scale is divided automatically into one section for each pen;otherwise, all pens share the same Y scale.Launches a dialog for configuring the format of the labels displayed by the Y axis.* Legend button: The Legend button on the Trend Control Object Propertiesdialog launches this dialog:Legend Dialog– Show: When checked, the embedded legend is displayed during theruntime. This interface provides useful information associated with thepens currently linked to the object.– Available / Visible: The fields in the Visible box are displayed in the legendduring the runtime. You can add fields to and remove them from theVisible box using the >> and
IWS Users GuideConfiguring Screens and Graphics– Properties: Allows you to configure the properties for the fieldhighlighted in the Available or Visible box:PropertyLabelWidthAlignAvailable during runtimeDescriptionLabel for the field displayed during the runtimeWidth for the field (in pixels) during the runtime.Alignment of the data displayed in the fieldWhen this option is checked, the user can show or hide the field during the runtime.– Maximum size: Defines the size of the legend in terms of number of rows.For instance, the user might have 8 points being displayed in thetrend object, if the maximum sizes is set to two, the legend will have ascroll bar to allow the user to scroll to the other points.– Number of items: Number of points (default) displayed on the legend. Youcan allow the user to add/remove points during the runtimeregardless of the value in this field.– Selected Item: You can configure a numeric tag in this field. The objectwrites in this tag the number of the selected row. In addition, you canselect different rows by writing their values in this tag.– Fonts: Sets the font for the text displayed in the legend.* Toolbar button: The Toolbar button on the Trend Control Object Propertiesdialog launches this dialog:Toolbar Dialog– Show toolbar: When this box is checked, the embedded toolbar isdisplayed during the runtime. This interface provides useful buttons totrigger actions associated with the object. You can configure thefollowing settings for each Command (button) available for the toolbar:PropertyShowDescriptionWhen this box is checked, the button is displayed on the toolbar embedded on the Trend during theruntime.7–58 <strong>InduSoft</strong> <strong>Web</strong> <strong>Studio</strong> v6.1 SP2
Configuring Screens and GraphicsIWS Users GuideActivation TagTooltipYou can configure a tag in this field (optional). When the tag changes value, it triggers therespective command. This option is useful when you want to create customized interfaces to triggerthe commands, instead of (or redundant with) the embedded toolbar.The text configured in this field is displayed as a tooltip during the runtime when the mouse cursor ison the icon of the toolbar.* Advanced button: The Advanced button on the Trend Control ObjectProperties dialog launches this dialog:Advanced DialogRun Mode options: The settings on this area define the behavior of thetrend when in run mode:PropertyUpdate triggerUpdate intervalMove to current time on runRetrieve bounding samplesDescriptionWhen the tag configured in this field changes value, the trend object is updated(refreshed).When the update trigger is issued and the X Axis if of type numeric, the value on thisfield will be added to the minimum and maximum values of the X Axis.When this box is checked, X axis shifts to the current time automatically when theobject is triggered to Play mode, during the runtime.When this box is checked, the object retrieve the data outbound the object (firstpoints only). Uncheck this option can improve the performance, since the pointsoutbound the object will not be retrieved from the history. On the other hand, theobject will not draw lines linking the first and last samples to the extremities of theobject.Run-Time Config: The settings of the Trend object modified during theruntime can be saved in temporary files. This option can be used to:−Keep the settings consistent, so when the user closes the screenand opens it again, or re-starts the application, the settingsconfigured during the runtime are not lost.<strong>InduSoft</strong> <strong>Web</strong> <strong>Studio</strong> v6.1 SP2 7–59
IWS Users GuideConfiguring Screens and Graphics−Create standard settings for different scenarios and load theappropriate configuration during the run-time, based on a predefinedcondition or based on the user-selection.7–60 <strong>InduSoft</strong> <strong>Web</strong> <strong>Studio</strong> v6.1 SP2
Configuring Screens and GraphicsIWS Users GuideThe properties of this frame are described in the following table:PropertySave triggerLoad triggerFile NameAuto SaveDescriptionWhen the tag configured in this field changes value (e.g. toggles), the current settings of the Trendobject are saved in the temporary file. This command is not available for the <strong>Web</strong> Thin Client.When the tag configured in this field changes value (e.g. toggles), the settings from the temporaryfile are loaded and applied to the Trend object during the runtime.If this field is left blank, the temporary file is saved in the application \<strong>Web</strong> sub-directory with thesyntax TrendControl.stmp (e.g. MyScreen10TrendControl.stmp). The<strong>Web</strong> Thin Client station saves/loads the temporary file in the standard Temp directory of theoperating system (e.g. \Documents and Settings\\Local Settings\Temp).You can configure a customized file name for the temporary file in this field or even configure astring tag between curly brackets, so the user can change the name of the configuration filedynamically during the runtime by changing the value of this tag. If you do not specify any path, thefile is saved in the application \<strong>Web</strong> sub-directory by default.When this box is checked, the current settings of the Trend are automatically saved in the temporaryfile when the screen where the Trend is configured is closed during the runtime. If the box is notchecked, the settings are saved only when the Save trigger command is executed. Caution:After the screen where the Trend object is configured is saved, thesettings are not automatically loaded from the temporary file whenthe screen is opened again, unless the Load trigger command isexecuted before the screen is closed.Custom point selection: This interface allows you to create your customdialog to modify or insert pens to the object, as follows:PropertyScreenPoint numberAdd IndicatorDescriptionName of the screen which must be launched when the user triggers a command to modify or inserta new pen to the object during the runtime.Point Number (from the Points Dialog), indicating the point associated to the pen that will beinserted or modified during the runtime.Flag that indicates that the user triggered an action to insert a new pen (value 1) instead ofmodifying a pen that is already been visualized (value 0).VK: Virtual Keyboard type used for this object.Ext Translation: Enable the external translation for the text displayed bythis object.<strong>InduSoft</strong> <strong>Web</strong> <strong>Studio</strong> v6.1 SP2 7–61
IWS Users GuideConfiguring Screens and GraphicsTrend Control – Runtime InterfaceWhen enabled, some embedded interfaces can help the user to interact with theTrend Control during the runtime. This section describes these interfaces:* Toolbar: The commands available in the embedded Toolbar are described inthe following table:Command Icon DescriptionActivationTagRunSet the Trend to the Play Mode. In this mode, the X axis iscontinuously updated (Online Mode). This option is disabled (grayedout) when the trend is already in Play Mode.0 = PlayMode on1 = PlayMode offStopSet the Trend to the Stop Mode. In this mode, the X axis is notcontinuously updated (History Mode), so the user can visualize historydata in a frozen period of time. This option is disabled (grayed out)when the trend is already in Stop Mode.0 = StopMode on1 = StopMode offPeriodWindow ZoomHorizontal ZoomVertical ZoomZoom InLaunches an embedded dialog, where the user can modify the mainsettings of the X axis scaleAllows the user to click on the Trend area and drag the cursor toselect the area that must be visible when the cursor is released. Thisoption is disabled (grayed out) when the Multiple Section option (forthe Y scale) is active.Allows the user to click on two points on the Trend area, defining theHorizontal scale that must be availableAllows the user to click on two points on the Trend area, defining theVertical scale that must be available. This option is disabled (grayedout) when the Multiple Section option (for the Y scale) is active.Allows the user to zoom in (display half of the current X and Y scales)each time they click on the Trend area.When theActivationTag changesvalue (e.g.toggles), thiscommand isexecuted.0 = Zoom Inon1 = Zoom InoffZoom OutAllows the user to zoom out each time they click on the Trend area.0 = ZoomOut on1 = ZoomOut offCancel ZoomLegend PropertiesPen StyleCancel the Zoom selectionLaunches an embedded dialog, where the user can modify theLegend main settingsLaunches an embedded dialog, where the user can modify the styleWhen theActivationTag changesvalue (e.g.toggles), thiscommand is7–62 <strong>InduSoft</strong> <strong>Web</strong> <strong>Studio</strong> v6.1 SP2
Configuring Screens and GraphicsIWS Users GuideAdd PenRemove PenMultiple Sectionsof the selected pen.Launches a dialog, where the user can add a new pen to the TrendobjectRemoves the selected pen from the Trend objectSwitches the Y scale to Multiple Sections (a section for each pen) orSingle Section (all pens share the same Y scale section).executed.0 = MultipleSections on1 = MultipleSections offCursorTurns the cursor (ruler) to visible or hidden0 = Cursoron1 = CursoroffAuto ScaleChanges the Y axis scale to fit all values from the pens that arecurrently being monitored.When theActivationTag changesvalue (e.g.toggles), thiscommand isexecuted.Selection* Legend: The commands available in the embedded Legend are described inthe following table:Command Icon DescriptionLaunches a dialog, where the user can replace the data point associated with theselected pen on the legendRemoveHidePen StyleScaleRemoves the selected pen from the Trend objectWhen checked, the selected pen is visible; otherwise, it is hidden.Launches an embedded dialog, where the user can modify the style of the selectedpen.When this box is checked, the Y axis scale is visible; otherwise, it is hidden. The scalecan be hidden only when the Multiple Sections option is off.* Scroll bar: Using the Scroll bar, the user can slide through the X axisvalues, according to the period configured for this scale.* Time bar: Using the Time bar, the user can modify the Duration, as well asthe Start Date/Time and/or the End Date/Time, for the data displayed onthe object. Changing these values will affect the tags associated with the Xaxis scale (if any).Trend Control Object – Appendix A – Using the Data Source Text FileThe Trend Control can generate trend charts from any Text File that has the valuesorganized in columns and rows. The columns should be separated from each otherby special characters (usually the comma). Each sample (pair of values representing<strong>InduSoft</strong> <strong>Web</strong> <strong>Studio</strong> v6.1 SP2 7–63
IWS Users GuideConfiguring Screens and Graphicsa point in the graph) is represented by a row (a line in the file). Suppose that theuser wants to display a chart with the information in the following table:X Value Y1 Value Y2 Value0 0 101 1 202 2 303 3 40We have one variable that represents the X Axis and two variables (Y1 and Y2) thatwill represent different lines in the chart. The first step is to convert the data into atext file. If we adopt the comma as our separator the file will be as shown below:We strongly recommend that you save the file in the same folder where theapplication is. By doing so, you do not have to specify the entire path and yourapplication will still work, even if it is copied to a different computer.Once you have added the Trend Control to your screen, double click on the object toopen then Object Properties and click on Axis. Change the Data Type of the X Axis tonumeric, and set the ranges as shown in the picture below:7–64 <strong>InduSoft</strong> <strong>Web</strong> <strong>Studio</strong> v6.1 SP2
Configuring Screens and GraphicsIWS Users GuideClick Ok on this Window and then, in the Object Properties window, click on theData Sources button. The following window will display:We need to create a data source in order to access to the text file. Click on the newbutton, specify the Data Source Name “MyTextFile” and then click Create. Youshould see the following information now:On the X Axis field we need to indicate which column in our text file represents theX Axis. In our example we are using column zero, so enter with zero for this field,then click on the button Data Source Settings, the following Window will display:If you have copied the text file to the application folder, you only have to specify thefile name, otherwise, enter with the complete path where the file is located (use thebrowse button as needed). Click Ok on this window and Ok again to finish the datasource configuration and close the Data Source configuration Window.Now we need to define our Y1 and our Y2. They will be represented by points on ourTrend Control. Double click on the Trend Control again to access the Object<strong>InduSoft</strong> <strong>Web</strong> <strong>Studio</strong> v6.1 SP2 7–65
IWS Users GuideConfiguring Screens and GraphicsProperties window and then click on Points. Your next step is to define the pointsaccording to the following figure:After following these steps, run your application and you should see somethingsimilar to the figure below:Trend Control Object – Appendix B – Using the Data Source DatabaseThe Trend Control can generate trend charts from any Relational Database that canbe accessed through the ADO.Net technology. This Appendix illustrates how toaccess a Microsoft Access Database; if you are using another type of database,almost all the definitions will apply, however you will need to configure yourconnection on a different way. For information on how to configure other databases,please refer to the Appendixes in the Database Interface section of this manual.7–66 <strong>InduSoft</strong> <strong>Web</strong> <strong>Studio</strong> v6.1 SP2
Configuring Screens and GraphicsIWS Users GuideSuppose that you have an access database at your C drive named “mydata.mdb”and that you want to generate a chart based on the information in the followingtable:The first step is to add the Trend Control to your screen. Now double click on theobject to open then Object Properties and click on Data Sources. The followingwindow will display:We need to create a data source in order to access to the database. Click on the newbutton, specify the Data Source Name “MyDB” and then click Create. You shouldsee the following information now:<strong>InduSoft</strong> <strong>Web</strong> <strong>Studio</strong> v6.1 SP2 7–67
IWS Users GuideConfiguring Screens and GraphicsChange the Source Type to Database and specify Time_Stamp in the X Axis field.Then click on the Data Source Settings button, the following window will display:Uncheck the check box Use application default and click on the browse button inorder to configure the connection string. The following window will display:7–68 <strong>InduSoft</strong> <strong>Web</strong> <strong>Studio</strong> v6.1 SP2
Configuring Screens and GraphicsIWS Users GuideSelect the Microsoft Jet 4.0 OLE DB Provider and click Next. In the followingwindow, you should specify the database path:<strong>InduSoft</strong> <strong>Web</strong> <strong>Studio</strong> v6.1 SP2 7–69
IWS Users GuideConfiguring Screens and GraphicsClick Ok to finish the Connection String configuration. Now uncheck the option Usedefault name and select the table from your database as shown below:Click Ok on this window and Ok again to finish the data source configuration andclose the Data Source configuration window.Now we need to define Temperature and Pressure. They will be represented bypoints on our Trend Control. Double click on the Trend Control again to access theObject Properties window and then click on Points. Your next step is to define thepoints according to the following figure:If you run the trend, it will start with the current date/time. In order to see the datain the chart you will have to properly configure the start date/time as shown below:7–70 <strong>InduSoft</strong> <strong>Web</strong> <strong>Studio</strong> v6.1 SP2
Configuring Screens and GraphicsIWS Users Guide Trend button ( ): Click to select an area on the screen in which to exhibit trendcurves of tag data. You can display up to eight curves simultaneously in theobject, and use configuration fields in the object properties to specify:– Time period to exhibit– Values to exhibit– Format of the graphicTo create a trend object:– Click the Trend button.– Click in the display, and drag the mouse to create and adjust the object’sshape.Double-click on the trend object to open the Object Properties dialog:Object Properties: TrendUse the Trend Object Properties dialog to specify the following parameters:– Trigger field: Type (or click the button to select) a variable to define how trendcurves are redrawn. When the value of this tag changes, IWS redraws thedisplayed trend curves. You must complete this field if you specify (enable) OnLine trends, but it is not required for History trends.– Update field: Type a variable for IWS to use in creating the trend. Use this fieldin conjunction with Crisp trends only.– Curve Type combo-box: Select a curve type from the following options:<strong>InduSoft</strong> <strong>Web</strong> <strong>Studio</strong> v6.1 SP2 7–71
IWS Users GuideConfiguring Screens and Graphics* X/t: Select to plot curve values according to time* X-Y: Select to plot curve values according to Tag X, another tag in theapplication* Crisp: Select to plot curve values in a format appropriate to interface withVAX stations– Orientation combo-box: Select one of the following to specify how the trendpens are oriented in relation to the screen:* Left-Right: Select to plot from left to right, with latest values on the right* Right-Left: Select to plot from right to left, with latest values on the left– History radio button: Click (enable) to display the application’s historical trendcurves. Caution: To use history-type graphics for this trend object, you must: Create a trend group (from the Trend folder on the Tasks tab) Create tags for this group and set the Save on Tag Change or Save onTrigger parameters on the Trend Group worksheet. These tags willhave their samples stored on the hard disk.– On Line radio button: Click (enable) to display on-line trend curves for theapplication. Note:If you enable this button, you must enter a value in the Trigger text boxto indicate when IWS will redraw the trend curves.– Border Color combo-box: Click to select a color for boarder of the trend graphicarea. When the Color dialog displays, click on a color to select it, and thenclose the dialog.– Background Color combo-box: Click to select a background color for the trendgraphic area. When the Color dialog displays, click on a color to select it, andclose the dialog.– Horizontal Scale button: Click to open the Horizontal Scale dialog, which allowsyou to define horizontal scale properties for the trend curves. Note:The content on this dialog changes, depending on the parameters youspecify on the Object Properties Trend dialog.7–72 <strong>InduSoft</strong> <strong>Web</strong> <strong>Studio</strong> v6.1 SP2
Configuring Screens and GraphicsIWS Users GuideSample Horizontal Scale DialogThe following section explains how to set all of the Horizontal Scale parameters.* Scale Visible check-box: Click (check) to display the horizontal scale oruncheck the box to hide the horizontal scale.* Number of Labels field: Type a value to specify how many labels you can usein the horizontal scale.* Grid area: Use the following parameters to configure a grid for the trendgraphic.Divisions field: Specify how many division lines to use for the grid. If youleave this field blank, no grid lines display.Color combo-box: Click to select a color for the grid. When the Color dialogdisplays, click on a color to select it, and then close the dialog.* Scale String Format area: Use the following parameters to specify a format forthe text string on horizontal scale.Fonts button: Click this button to open the Fonts dialog, which allows youto select a style, size, color, and font type for the horizontal axis labels.DD/MM/YY check-boxes (Curve X/Y and Graph X/t only): Click (check) theseboxes to add a date (days/months/year) to the text string in the scale.HH:MM:SS check-boxes (Curve X/Y and Graph X/t only): Click (check) theseboxes to add the time (hours:minutes:seconds) to the text string in thescale.* Vertical Cursor area: Use the following parameters to specify a format for thevertical cursor.Enable check-box: Click (enable) to display a vertical cursor.Color combo-box: Click to select a color for the vertical cursor. When theColor dialog displays, click on a color to select it, and close the dialog.Position (0-100) field (becomes active when you enable the vertical cursor): Youmust enter a real tag value, which IWS updates using the cursor position(0 corresponding to the left edge and 100 the right edge of the trend).Date/Time output field (becomes active when you enable the vertical cursor):Enter a tag name to receive a string. This string is constantly updatedwith the current time of the vertical cursor in the trend.* Horizontal axis Duration field (Curve type X/t only) or Duration (hours) (Historyand Graph X/t only): Type a tag name or numeric value for width of the<strong>InduSoft</strong> <strong>Web</strong> <strong>Studio</strong> v6.1 SP2 7–73
IWS Users GuideConfiguring Screens and Graphicstrend. For example: If you specify Horizontal axis Duration = 0.03333(2 minutes) the trend will display 2 minutes of data from beginning to end.* Hours before now field: Specify a tag to perform scrolling in the trend area.The value of this tag specifies the start time of the trend in relation to thecurrent time.For example: If you specify the following, IWS allows you to display thetrend graphic for up to five hours before the current time.Time = 17:00:00Hours before now = 5Duration = 1Trend will show 11:00.00 > 12:00.00 Caution:The Trend Graphic dialog holds a maximum of 32,000 samples. Note:When you use the Hours Before Now parameter, you are handlinghistorical data. Consequently, you must configure the trend pens intoone trend group (using the Trend folder on the Tasks tab).– Type of History Files area (History and Graph X/t only): Use the followingparameters to specify in which format the history files were created.* Date (default): Click to handle files created in date format by trend group(<strong>InduSoft</strong> format).* Batch: Click to handle files created in batch format by trend group (batchfile format).* Start Date field (History and Graph X/t only): Specify a date (typically astring-type tag) in DD/MM/YYYY format to specify when to start the historycurves.* Start Time field (History and Graph X/t only): Specify a time (typically astring-type tag) in HH:MM:SS format to start the history curves.* Tag X field (Graph X/Y only): Specify a tag for the X-axis. You must specifyan array and declare the index in which the axis starts (for example,MyTagX[1]).* Points field (Graph X/Y only): Specify the number of points (samples) in thegraph dialog.* Max field (Graph X/Y only): Specify a maximum value for the X variable.* Min field (Graph X/Y only): Specify a minimum value for the X variable. Tip:You can use Recipe module (from the Tasks tab) to save and loadhistorical information for the X-Y trend. See Chapter 8: Configuring TaskWorksheets.Vertical Scale button: Click to open the Vertical Scale dialog, which allows you todefine vertical scale properties for the trend curves.7–74 <strong>InduSoft</strong> <strong>Web</strong> <strong>Studio</strong> v6.1 SP2
Configuring Screens and GraphicsIWS Users GuideSample Vertical Scale Dialog– Scale Visible check-box: Click (check) to display the vertical scale or uncheckthe box to hide the vertical scale.– Number of Labels field: Type a value to specify how many labels you can use inthe vertical scale.– Grid area: Use the following parameters to configure a vertical grid for thetrend graphic.* Divisions field: Specify how many division lines to use for the vertical grid. Ifyou leave this field blank, no grid lines display.* Color drop-down list: Click to select a color for the vertical grid. When theColor dialog displays, click on a color to select it, and then close thedialog.– Scale String Format area: Use the following parameters to specify a format for thetext string on vertical scale.* Fonts button: Click this button to open the Fonts dialog, which allows youto select a style, size, color, and font type for the vertical axis labels.* Width field: Specify how many digits are permitted for numbers in thevertical scale string.* Decimals field: Specify how many decimal places are permitted in thevertical scale string.For example: If you enter Width = 3 and Decimals = 2, the horizontal scalestring can use three-digit numbers with two decimal places.– Scale Range area: Use the following parameters to calculate how the curvepositions are defined in the Pens dialog. You can use a numeric value or atag to dynamically change the vertical scale.* Minimum field: Type a minimum value for the trend graphic scale.* Maximum field: Type a maximum value for the trend graphic scale.<strong>InduSoft</strong> <strong>Web</strong> <strong>Studio</strong> v6.1 SP2 7–75
IWS Users GuideConfiguring Screens and GraphicsPens button: Click to open the Pens dialog:Pens DialogUse the following parameters to configure the pens used to draw each tag curve.– Tag fields: Type the tag names to be monitored in the trend (for example,MyTagY[1]). You can create a generic Trend dialog by specifying an indirecttag to define the tag to monitor.– Line buttons: Click to select a color for the lines in each trend curve. Whenthe Color dialog displays, click a color to select it, and close the dialog. Youcan use up to eight different colored lines on the trend graph.– Min and Max fields: Specify a minimum and a maximum value of scale(numeric or tag) with which to draw the curve. Note:The minimum/maximum values of each tag are not required to have thesame minimum/maximum values as the trend graphic scale.– Cursor Value fields: Type tags to receive the value of the Trend line where itintersects with the vertical cursor. Caution:The On-Line trend allocates memory for each point inside the period ofvisualization. CEView will discharge the older values (even if they areinside the period of visualization) when the memory available is lowerthan a critical limit (1MB by default). In addition, a warning message islaunched locally.7–76 <strong>InduSoft</strong> <strong>Web</strong> <strong>Studio</strong> v6.1 SP2
Configuring Screens and GraphicsIWS Users GuideSPC button: Click to open the SPC Parameters dialog, which you can use toreturn Mean, Min, Max, and Standard Deviation (-2s, +2s) values from a selected periodfor each pen. (You can also draw the results on the Trend object.)SPC Parameters DialogUse the parameters on this dialog as follows:– Pen combo-box: Click the arrow button to select a pen from the list.– Disable: Type a tag into the text field. If the tag value is other than 0 (false),IWS disables the SPC feature.– Tag fields: Type a tag name into the text fields to return values for Mean, Min,Max, Median, Sum, and/or Standard Deviation.– Draw check-box: Click (enable) these boxes to draw the results of the Mean,Min, Max, Median, Sum, and/or Standard Deviation -2s/+2s values on the trendgraph.– Line button: After enabling the Draw check-box, click this button to set displayparameters for the different pen line(s).When the Line Selection dialog displays, specify the following:* Line pane: Click a radio button to specify a Solid or Dashed Line and type avalue into the Weight text box to set the line thickness.* Color combo-box: Click the arrow button to display a color palette. Click ona Color button to select a pen line color and then click OK to close the colorpalette box. List Box Object button ( ): Click to create a list box object on your screen.Generally, when you execute an application, the active list box object displays alist of messages.On a screen containing only one list box object and no text input boxes, the listbox object will be active automatically.On a screen containing multiple list box objects and text input boxes, you canuse a cursor (pointing device) or the Tab key to select and activate a list boxobject.<strong>InduSoft</strong> <strong>Web</strong> <strong>Studio</strong> v6.1 SP2 7–77
IWS Users GuideConfiguring Screens and GraphicsYou can select a message from the active list box during runtime and write themessage value to a tag. (If a list is too long to fit within the viewable area of a listbox object, the object provides scroll bars.)Use the Enter Reqd box on the Object Properties dialog to configure selectedmessages as follows:– Check (enable) the Enter Reqd box and use the keyboard/keypad keys, listcontrol objects from the Library, pointing devices, or user-defined keyscontaining the PostKeys() function to scroll through the message list. Then,use the Enter key to select the message and write its value to the write tag.You can use the Esc and Tab keys to return to the previously selectedmessage at any time prior to pressing the Enter key.– Uncheck (disable) the Enter Reqd field to write the value of a selected(highlighted) message the write tag automatically.To add list box objects to a screen:– Click the List Box button on the Active Objects toolbar.– Click in the screen and drag to create/adjust an expanding rectangle.* Height and the font size determine how many messages are visible.* Width determines how much of the message length is visible.– After creating a rectangle, you can adjust the size and font characteristics toallow more messages to display in the given space.– Double-click on the object to open the Object Properties dialog:Object Properties: List Box Tip:You also can open the Object Properties dialog by right-clicking on thelist box object or by highlighting the object, pressing the Alt+Enter keys,and selecting Properties from the resulting pop-up menu.You can use this dialog to specify the following parameters:– Value drop-down list (located below the Replace button): Click to select one ofthe following the tag values used to index the message list.* Boolean* Integer (default)* LSB (least significant bit) Note:For more information, see the discussion about the State field on theMessages Configuration dialog.7–78 <strong>InduSoft</strong> <strong>Web</strong> <strong>Studio</strong> v6.1 SP2
Configuring Screens and GraphicsIWS Users Guide– Messages button: Click to open the Messages Configuration dialog.Message Configuration DialogUse the parameters on this dialog as follows:* State field (read-only): Use this field to view the indexed individualmessages. IWS numbers this field based on the Read/Search Tag type youselected:Boolean: Provides two valid states, labeled 0 and 1Integer: Provides 255 valid states, labeled 1 to 255LSB: Provides 32 valid states (32 bits in an integer value) labeled 0 to 31* Message field: Type the string value message displayed in the list boxobject. You can use tags in messages using the {tag name} syntax.* Value field: Type a message value matching the specified Read/Search Tagvalue (also, the same value written to the write tag).If you specify LSB for the Value field, IWS uses the value specified in theState field for both the Read/Search Tag and the write tag.* Text Foreground color field: Click to specify a color for the message textforeground. When the Color dialog displays, click on a color to select it,and close the dialog.* Text Blink check-box: Click (check) to cause a selected message to blink,once per second, when it displays.– Fonts button: Click to open the Font dialog, which allows you to change thecharacteristics (style, size, and so forth) of the message font.– User Enable text box: Type a tag, expression, or a (nonzero) number to select amessage in the runtime application. The default is 1 (true, enabled).– Control Enable text box: Type a tag, expression, or a (nonzero) number to selecta message in the runtime application — depending on the current value ofthe Read/Search Tag. The default is 1 (true, enabled).– IWS bases this parameter on the Value field (Messages Configuration dialog)you associate with the selected message. Enabling this field allows tagchanges triggered by the process to affect which messages you can select.– Read/Search Tag text box: Type an integer or a Boolean tag to point to a selectedmessage based on the message Value field (Messages Configuration dialog).You can use the Control Enable and User Enable fields to control whether theoperator or a process can alter this tag.<strong>InduSoft</strong> <strong>Web</strong> <strong>Studio</strong> v6.1 SP2 7–79
IWS Users GuideConfiguring Screens and Graphics– Write Tag text box (optional): Type a string tag to receive the Message value ofthe last-selected message. When you close and reopen the screen containinga list box object, IWS uses this tag value to determine the last messageselected in the list box.– E-Sign check-box: Click (check) to prompt the user to enter the ElectronicSignature before executing the dynamic.– Row check-box: Click (check) to include set up and set down arrows in the listbox object scroll bar.– Page check-box: Click (check) to include page up and page down arrows in thelist box object scroll bar.– Start/End check-box: Click (check) to include home and end arrows in the listbox object scroll bar.– List wrap check-box: Click (check) to continue displaying and scrolling themessage list (starting at the opposite end) after you scroll to the beginning orend of the list.– Enter Reqd check-box: Clicking (checking) this box allows you to selectmessages using the Enter key only. It prevents the Tab key from selectingmessages.– Color boxes: Click a color box to open the Color dialog or the 16-color ColorSelection dialog. Either dialog allows you to specify or change colors for thelist box object. Click a color to select it and then click OK to close the dialog.– Highlight Color box: Specify a color for highlighting messages (default is blue).– Text Color box: Specify a color for highlighting message text (default is black).– Win Color box: Specify a color for the list box background (default is white).– Border Color box: Specify a color for the list box border (default is black). Smart Message Objects button ( ): Click to create one or more smart messageobjects, which you can use to display messages and graphics based on tagvalues when you execute the application. IWS provides the following smartmessage object types:– Message Display: Enables you to display any one of multiple messages within asingle screen object.– Multistate Indicator: Enables you to display any one of multiple messages withina single screen object, and also has the ability to display bitmap images withthe messages.– Multistate Pushbutton: Enables you to display messages and bitmap images. Thisobject also resembles a multi-position switch in that it allows you to switch(toggle between) messages by clicking on the object during the runtime.These smart message object types vary in their ability to display messages andgraphics, write to a tag, and control how many messages and graphics displayon the screen. However, all of the object types can receive process input (ReadTag value)to determine which message to display.To add a smart message object to the screen:– Click the Smart Message button and position the mouse on the screen.– Click and drag to create (and adjust the size of) a rectangle.– You use the rectangle’s size and font size to determine how much text andhow large a bitmap image you can display on the screen. Later, you canchange the rectangle’s size and font characteristics to allow longer messagesto display in a given space.7–80 <strong>InduSoft</strong> <strong>Web</strong> <strong>Studio</strong> v6.1 SP2
Configuring Screens and GraphicsIWS Users Guide– Double-click on the object to open the Object Properties dialog.Object Properties: Smart MessageYou can use this dialog to specify the following parameters:– Type combo-box: Click to select the smart message object type. The objecttype sets the behavior of the object during the runtime and the featuressupported by it:* Message Display (default)* Multistate Indicator* Multistate Pushbutton– Value drop-down list: Click to select the tag values used to index the messagelist. Select the type of values used to index the message list :* Boolean - Provides two valid states. Use this selection when you want todisplay either one of two different messages, based on a boolean value (0or 1).* Integer (default) - Provides 500 valid states. Use this selection when youwant to display different messages based on specific values from anInteger tag.* LSB (least significant bit) - Provides 32 valid states (32 bits in an integervalue). Use this selection when you want to display different messagesbased on which bit from an integer tag is set. If more than one bit fromthe Integer tag is set simultaneously, the message associated with theleast significant bit that is set (value 1) will be displayed. Note:If Multistate Pushbutton is the Smart Message type, only 16 differentmessages can be associated with the object, even for Integer or LSB valuetypes.– Read Tag/Expr text box: Enter the name of an integer or a Boolean tag. Thevalue of this tag will determine which message will displayed by the objectduring the runtime.– Write Tag text box (optional and available for Multistate Pushbutton only): Enterthe name of an integer or a Boolean tag. The value associated with themessage currently displayed by the object is written to this tag.– Align: Select the alignment of the text displayed by the Smart Message object.– Key (optional and available for Multistate Pushbutton only): Shortcut used to goto the next message (step) using a keyboard when the Multistate Pushbutton<strong>InduSoft</strong> <strong>Web</strong> <strong>Studio</strong> v6.1 SP2 7–81
IWS Users GuideConfiguring Screens and Graphicstype is selected. This option is especially useful when creating applicationsfor runtime devices that do not provide a mouse or touch-screen interface,when the keyboard is the only physical interface available to interact with theapplication during the runtime.– Event drop-down list (available for Multistate Pushbutton only): Select one ofthe following options to specify when the message is changed:* On Down: Switch to the next message when you click on the object (default).* While Down: Switch to the next message continuously while you hold themouse button down on the object.* On Up: Switch to the next message when you release the mouse button onthe object.– E-Sign (available for Multistate Pushbutton only): When this option is checked,the user will be prompted to enter the Electronic Signature before executingthe dynamic.– Security text box (available for Multistate Pushbutton only): Security SystemAccess Level required for the object/dynamic.– No Line: When this option is checked, the line border of the object is notvisible.– Line Weight: Defines the thickness of the line drawn around the object (theborder).– Fonts: Launches the Fonts dialog, where you can configure the font settingsfor the text displayed in the object.– Config… button: Launches the Configuration dialog, where you can configurethe messages for the object, as follows:Sample Smart Message Configuration Dialog* Data Source: The messages displayed by the object can be either configureddirectly on the object (Data Source = Static) or can be read from anexternal text file (Data Source = Text File). When the Data Source =Static, the Configuration dialog is displayed as pictured above, and youcan configure all the settings on the grid. When the Data Source = TextFile, the Configuration dialog displays a field for entering the path andname of the file from which the messages will be read (the source file).See Source File Format for further details about the format of the text file7–82 <strong>InduSoft</strong> <strong>Web</strong> <strong>Studio</strong> v6.1 SP2
Configuring Screens and GraphicsIWS Users Guidesupported by the Smart Message object when the Data Source = TextFile.* Extern translation: When this option is checked, the text displayed by theobject will be controlled by the Translation Tool, during the runtime.The following table describes the meaning of the properties associated with eachmessage, regardless of the Data Source:PropertyText/MessageValueText (FG)Text (BG)Text BlinkRec (FG)Rec (BG)Rec BlinkGraphic FileTransparentEn. TransparentDescriptionMessage (text) that will be displayed when selected during the runtime. You canconcatenate tag values to the message in this field by configuring the tag betweencurly brackets. For example: The level value is {TagLevel}.You must associate a unique value with each message. During the runtime, theobject will display the message associated with the value that matches the value ofthe tag configured in the Read Tag field. If there is no such message, the messageconfigured in the first row (State = Error) displays during the runtime. When theobject Type is set as Multistate Pushbutton, the value associated with the currentmessage is also written to the tag configured in the Write Tag field (if any).Foreground color for the messages displayed during the runtime.Background color for the messages displayed during the runtime.If checked, the message text will blink during the runtime.Line color (Border) for the rectangle behind the message.Background (Fill) color for the rectangle behind the message.If checked, the rectangle behind the message will blink during the runtime.Path and name of the bitmap file (*.BMP) (if any) that will be displayed when themessage associated with it is selected during the runtime. If you do not specify thepath, the bitmap file must be stored in the application’s directory.Select the color that will be transparent in the graphic file, if the En. Transparentcheck-box is checked.If checked, the color selected in the Transparent field will be set as transparent inthe graphic file. Note:The properties Graphic File, Transparent and En. Transparent are notavailable for the type Message Display. Tip:You can copy data from this dialog and paste it into an Excel worksheet, andvice versa.SOURCE FILE FORMATThis section describes the format of the text file supported by the Smart Messageobject when the Data Source = Text File. The main advantage of using an external TextFile instead of Static Values is that it gives you the flexibility to change the messagesduring the runtime, by pointing to a different Text File, or even by changing thecontent of the Text File dynamically.The Text File must be created in the CSV format (Comma Separated Values), wherethe comma character (“,”) is used to divide the columns (data) in each line (row) ofthe file. Therefore, you can use any CSV Editor such as Microsoft Notepad andMicrosoft Excel to create the CSV file with the messages and their properties for theSmart Message object.<strong>InduSoft</strong> <strong>Web</strong> <strong>Studio</strong> v6.1 SP2 7–83
IWS Users GuideConfiguring Screens and GraphicsThe description of each property associated with the messages is provided in theSmart Message section. The order of the data in the CSV file is described in thefollowing table:Column # Property Default Value1 Text/Message -2 Value -3 Text (FG) 04 Text (BG) 167772155 Text Blink 06 Rec (FG) 84213767 Rec (BG) 167772158 Rec Blink 09 Graphic File -10 Transparent 011 En. Transparent 0When configuring text messages that have the comma character as part of themessage, you must configure the whole message between quotes (e.g. “Warning,Turn the motor Off”); otherwise, the comma will be interpreted as a data separatorinstead of as part of the message.The first line of this file is equivalent to the State = Error. In other words, if there isno message associated with the current value of the tag configured in the Read Tagfield, the message configured in the first row (State = Error) is displayed during theruntime.The data configured in the Value column of the first row from this file is irrelevant.This row must always be configured, regardless of the object type (even forMultistate Pushbutton).Only the Text/Message and Value columns are mandatory. The other columns areoptional, and the default values will be used if you do not specify any value for them(see table).The fields Text(FG),Text(BG),Rec(FG),Rec(BG) and Transparent can be configuredwith the code of the color associated with it. The code can be entered directly indecimal format (e.g. 255) or in hexadecimal format using the syntax #value (e.g.#0000<strong>FF</strong>).The fields Text Blink, Rec Blink and En. Transparent can be configured withBoolean values 0 or 1 (0 = Unchecked; 1 = Checked), or with the keywords FALSE orTRUE (FALSE = Unchecked; TRUE = Checked).Example:Error Message,,0,16777215,1,8421376,16777215,1,error.bmp,0,0Message Zero,0,0,16777215,0,8421376,16777215,0,open.bmp,65280,1Message Ten,10,0,16777215,0,8421376,16777215,0,closed.bmp,65280,1Message Twenty,20,0,16777215,0,8421376,16777215,0,,0,0Message Thirty,30,0,16777215,0,8421376,16777215,0,,0,0 Tip:You can use the Smart Message editor (Data Source = Static) to configure themessages, values and colors. To do so, select the configuration, copy it andpaste it into an Excel worksheet. Then, you can save the Excel worksheet as aCSV file (File > Save As). This procedure provides you with a user friendly7–84 <strong>InduSoft</strong> <strong>Web</strong> <strong>Studio</strong> v6.1 SP2
Configuring Screens and GraphicsIWS Users Guideinterface for configuring the color codes. Pushbuttons button ( ): Click to create a pushbutton object using the Commanddynamic object property with an object or pre-configured pushbuttons.IWS provides the following pre-configured button types, all of which mimic thestandard panel buttons of the same name:– Momentary (default): Changes state (Open or Closed) when you press the buttonand reverts to its initial state when you release the button. This button typealways displays in its normal position when you open the screen.– Maintained: Changes state (Open or Closed) when you press the button, but doesnot revert to its initial state when you release the button. You must press thebutton again to change its present state. This button type maintains its stateacross screen changes.– Latched: Changes state (Open or Closed) when you press the button andremains in this state until you release it by changing the Reset tag.IWS also provides the following button styles:– Rectangular with a faceplate and indicator light– Rectangular without a faceplate or indicator light (default)– Rectangular with a 3-D– Rectangular with a floating appearanceTo add one or more pre-configured buttons to a screen:– Click the Pushbutton button, and position the mouse (pointer) on the screen.– Click and drag to create/adjust the size of the rectangular button.The button size and text font characteristics determine how much text youcan display and how much area you can touch on a touch screen. You canresize the button and change the font characteristics later to permit longermessages to be shown in a given space.– Double-click on the object to open the Object Properties dialog:Object Properties: Pushbuttons Tip:Alternatively, you can right-click on the pushbutton object or highlight theobject, press the Alt+Enter keys, and select Properties from the resulting popupmenu to open the Object Properties dialog.You can use this dialog to specify the following parameters:<strong>InduSoft</strong> <strong>Web</strong> <strong>Studio</strong> v6.1 SP2 7–85
IWS Users GuideConfiguring Screens and Graphics– Type drop-down list: Click to select the pushbutton type (Momentary (default),Maintained, or Latched).– State drop-down list: Click to specify a default state for the pushbutton(Normally Open (default) or Normally Closed).Click the button to toggle between its default and non-default state(according to its specified Type). For example, in the button’s initial state, itmay conform to characteristics specified in the Open area of the Configurationdialog (see below). Click the button again to toggle to the opposite state,which in this example is Closed, and conform to characteristics specified inthe Closed area.– Tag/Exp text box: Type a tag or an expression to accomplish the following:* Type in a tag to receive the Write Value from the appropriate state (Open orClosed) area in the Configuration dialog.* Type an expression to execute On Down, when you press the pushbuttondown. Note:IWS does not write the result of any expression in the Tag/Exp field intoa tag.– Indicator text box: Type a tag to define an indicator that causes the button tochange to a specified color when the tag value matches one of two specifiedvalues. You must define both the colors and tag values in the Configurationdialog. If you leave this field blank, the indicator changes color automaticallywhen you press the button.– E-Sign check-box: Select (check) this option to prompt the user to enter theElectronic Signature before executing the dynamic.– Reset text box (active for Latched pushbutton type only): Type a tag to controlthe button’s latched state, as follows:* Type a zero into the tag’s value and the button will remain in a latchedstate after you press it.* Type a nonzero value into the tag and a latched button will becomeunlatched after you press it. You must reset the tag value to zero beforeyou can press the button again.– Key area: Specify a keyboard key or create a key combination to toggle apushbutton when you have no pointing device (mouse or touch screen) or ifyou want to create shortcut keys in addition to pushbuttons.– Key drop-down list: Type a key in the text box or select a non-alphanumerickey from the drop-down list. Enter a single character or key only. Numbersare not valid entries for this field.– Click (check) the Shift, Ctrl, or Alt box to create a combination key, meaning theShift, Ctrl, or Alt key must be pressed with the key specified in the drop-downlist.– Click (check) the box to open the Key Modifier dialog, which enables you tomodify your combination keys. You can choose Left, Right or Left or Right tospecify the position on the keyboard of the Shift, Ctrl or Alt key in thecombination key. If you choose Left or Right, the command will be executed anytime either of these keys is pressed in combination with the key specified inthe drop-down list.7–86 <strong>InduSoft</strong> <strong>Web</strong> <strong>Studio</strong> v6.1 SP2
Configuring Screens and GraphicsIWS Users GuideKey Modifier Dialog– Disable text box: Type a tag using a nonzero value to disable this pushbuttonso that pressing the button has no effect. This box is empty by default, whichalso enables the command property.– Ext Trans. check-box: Click (check) to translate the text automatically usingpre-configured translation worksheets.– Security text box: Type a value to specify a security level (0 to 255) for thisbutton. If the user does not have the specified security level, the buttonbecomes inactive. If the user has the appropriate security level, or you leavethis field blank, the button remains active.– Config button: Click to open the Configuration dialog, which allows you tospecify style and state parameters for the pushbutton:Configuration DialogThis dialog provides the following parameters:– Style combo-box: Click the combo-box button to select a pushbutton style(Rectangle (default) or Rectangle with Indicator).– Effect combo-box: Click to select a 3-D effect for the pushbutton.* Floating (default): Buttons resemble a flat object with a shadow* 3D: Buttons have beveled edges and appear to “depress” into the screenwhen pressed.<strong>InduSoft</strong> <strong>Web</strong> <strong>Studio</strong> v6.1 SP2 7–87
IWS Users GuideConfiguring Screens and GraphicsYou can use the Style and Effect parameters in combination to create fourdifferent buttons, as shown in the following figures:Pushbutton Styles– Align: Specify the alignment for the caption of the pushbutton.– Button Color box: Click to specify a default color for the button area of apushbutton object that includes an indicator and a faceplate. When the Colordialog displays, click on a color to select it, and close the dialog.– Legend Plate Color box: Click to specify or change a default color for the legendplate area of a pushbutton object that includes an indicator. When the Colordialog displays, click on a color to select it, and close the dialog.A legend plate encloses a button and indicator light. This field becomesinactive if the pushbutton Style does not include an indicator.– Open and Closed areas: The following parameters are used to configure theappearance of a pushbutton object in its open and closed states.– Color box: Click to specify a default color for an indicator in each State. Whenthe Color dialog displays, click on a color to select it, and close the dialog.– If you selected a pushbutton style that does not include an indicator, youcan use this field to specify a button color for each State.– Blink combo-box: Click to specify whether the color you specified in the Colorbox blinks and how fast it blinks for each state (None (no blinking, default),Slow, and Fast).If you set the color to blink, it alternates between the color specified in theColor box and the Legend Plate Color (if an indicator) or the Button Color (if abutton).– Caption text box: Use this text box to enter the caption of the button.Alternatively, if the button style includes an indicator, the legend plate.– Fonts button: Click to open the Font dialog, which you can use to specify orchange the message font characteristics for each state.– Text Blink combo-box: Click to specify whether the text you specified blinksand how fast it blinks for each state (None (no blinking, default), Slow, andFast). Unlike a blinking color, blinking text appears and disappears.– Write Value combo-box: Click to select a value in either field. When thepushbutton is in the appropriate state (Open or Closed), IWS writes this valueto the tag specified in the Tag/Exp field (Object Properties dialog). ActiveX Control button ( ): Click to open the Insert ActiveX Control dialog, whichyou can use to place ActiveX components on your screen.When the dialog opens (as in the following figure), it contains a list of all ActiveXcomponents registered on your computer.7–88 <strong>InduSoft</strong> <strong>Web</strong> <strong>Studio</strong> v6.1 SP2
Configuring Screens and GraphicsIWS Users GuideInsert ActiveX Control DialogClick on one or more components in the list, and then click the OK button toclose the dialog and display all selected components on your screen.ActiveX controls are components designed according to a standard. Because IWSis an ActiveX container, you can configure and run ActiveX controls in thescreens created with IWS. ActiveX controls can provide the following interfaces:– Properties: Variables whose values can be read and/or written for theapplication (e.g. Object Color, FileName, URL, and so forth)– Methods: Functions from the ActiveX object that can be triggered by theapplication (e.g. open a dialog, execute a calculation, and so forth)– Events: Internal messages that can trigger the execution of expressions in theapplication (e.g. Mouse_Click, Download_Completed, and so forth)The name of the properties, methods and events supported by each ActiveXdepends on its own implementation.There are two different ways to interface the application with the ActiveX control:– By using the ActiveX functions XGet(), XSet() and XRun()OR– By using the Object Properties window to configure the object Caution: When using ActiveX controls in your application, make sure that thetarget station (runtime station) has the same ActiveX properlyregistered. The IWS application files include links to the ActiveXcontrols; however, the installation of these controls on the targetstation must be executed manually. Furthermore, when ActiveXcontrols are used on screens open in remote <strong>Web</strong> Thin Clients, theActiveX controls must also be manually installed on the <strong>Web</strong> ThinClient stations. Consult your ActiveX provider for further informationabout how to install. When configuring applications with ActiveX for CEView, make surethat the ActiveX control used in the application is supported on theplatform (Windows CE operating system and process type) where youintend to run the application. Consult your ActiveX provider forfurther information about the supported platforms.Double-click the ActiveX control to open the Object Properties dialog box.<strong>InduSoft</strong> <strong>Web</strong> <strong>Studio</strong> v6.1 SP2 7–89
IWS Users GuideConfiguring Screens and GraphicsObject Properties: ActiveX ControlThe Object Properties window displays the name of the ActiveX control.Generally, each ActiveX control is either a *.dll or a *.ocx file registered in yourlocal computer. You must assign a name (alias) to the ActiveX control, for theapplication on the Name field (e.g. MyControl). This name is used to referencethe object when configuring the ActiveX functions from IWS language. Note:You should not configure two ActiveX controls on the same screen withthe same name. For instance, if you insert two “Windows Media Player”ActiveX controls on the same screen, and assign the name MyMP1 toone object (Name field), you cannot assign the same name to the secondobject on the same screen. You would have to assign the name MyMP2,for example, to the second object.The Property Pages button opens the standard window for configuring the StaticProperties (if any). The layout and the options in this dialog window depend onthe implementeation of each ActiveX control. Use this interface to set propertiesthat should not be changed during the runtime (fixed properties).The Configuration button on the Object Properties window opens dialogs thatallow you to do the following:– Associate tags to properties of the ActiveX object– Trigger methods from the ActiveX object based on tag change– Configure scripts, which are executed when Events from the ActiveX objectoccurThe following sections describe how to configure these interfaces. Notes: Although the Configuration dialog displays the list of all properties,methods and events, you only have to configure the items that youneed for your project. The screen shots used in the following sections depict the WindowsMedia Player ActiveX control. Although the name of the properties,methods and events varies depending on each ActiveX control, theconfiguration interface is the same for any ActiveX control. Theconcepts described here apply to all of them.– Configuring Properties7–90 <strong>InduSoft</strong> <strong>Web</strong> <strong>Studio</strong> v6.1 SP2
Configuring Screens and GraphicsIWS Users GuideThe Properties tab provides a grid with the following fields:Configuration Dialog – Properties Tab* Property: List all properties available from the ActiveX object, and indicatetheir types:Property IconProperty TypeBooleanIntegerRealString* Tag/Expression: The tag configured in this field is associated with therespective property of the ActiveX object. The Action column will definewhether the value of this tag will be written to the ActiveX property, or ifthe value of the ActiveX property will be written to this tag (or both). Note:You can configure an expression in this field if you want to write the resultof an expression to the property of the ActiveX object. However, in thiscase, the value of the property cannot be read back to one tag (unless youuse the XGet() function). Therefore, an expression is configured in this field,and the Scan field is automatically set to Set.* Action: Defines the direction of the interface between the tag or expressionconfigured in the Tag/Expression field and the ActiveX property,according to the following table:ActionGetDescriptionRead the value of the ActiveX property and write it to the tag configured in theTag/Expression field.<strong>InduSoft</strong> <strong>Web</strong> <strong>Studio</strong> v6.1 SP2 7–91
IWS Users GuideConfiguring Screens and GraphicsSetGet+SetSet+GetWrite the value from the tag or expression configured in the Tag/Expression field into theActiveX property.Executes both actions (Get and Set). However, when opening a screen with the ActiveXobject, IWS executes the Get command before executing any Set command. That is, thetag configured in the Tag/Expression field is updated with the value of the ActiveXproperty when IWS opens the screen where the ActiveX is configured.Executes both actions (Get and Set). However, when opening a screen with the ActiveXobject, IWS executes the Set command before executing any Get command. That is, theActiveX property is updated with the value of the tag configured in the Tag/Expressionfield when IWS opens the screen where the ActiveX is configured. Note:When the value of the property is "Read-only" (cannot by overwritten by theapplication), the Action field is automatically set to Get.* Scan: Defines the polling method to get values from the ActiveX propreties,according to the following table:ScanNoAlwaysDescriptionThe value of the ActiveX property is read and written to the tag configured in theTag/Expression field, only when the screen with the ActiveX object is open, and when theActiveX object sends a message to IWS to update this tag.IWS keeps polling the value of the ActiveX property and updating the tag configured in theTag/Expression field with this value. Note:Some ActiveX controls are designed to send messages to their containers(application) indicating that a property changed value and the new valueshould be read (Get) again. However, other ActiveX controls do notimplement this algorithm. In this case, the only way to get the updatedvalues of the ActiveX properties is to keep polling these values from theActiveX control (Scan=Always).– Configuring MethodsThe Methods tab provides a grid with the following fields:7–92 <strong>InduSoft</strong> <strong>Web</strong> <strong>Studio</strong> v6.1 SP2
Configuring Screens and GraphicsIWS Users GuideConfiguration Dialog – Methods Tab* Method: List all methods available from the ActiveX object.* Parameters: The tags configured in this field are associated with theparameters of the method of the corresponding ActiveX object. If themethod does not support any parameter, the fixed text isdisplayed in the Parameters field. Otherwise, you can type the tagsassociated in the parameters of the ActiveX object. When the method hasmore than one parameter,, you can type one tag for each parameter,separating them by a comma (,). For example, TagA , TagB , TagC.When the method is executed, either the value of the tags are written tothe parameters of the method (input parameters), or, after the method isexecuted, the ActiveX writes the value of the parameters to the tags(output parameters). Tip:When you click the Browse button ( ), it will display the list of parameterssupported by the method, allowing you to associate one tag with eachparameter.* Trigger: When the tag configured in this field changes value, the respectivemethod of the ActiveX control is executed.* Return: The tag configured in this field receives the value returned by themethod (if any).– Configuring EventsThe Events tab provides a grid with the following fields:<strong>InduSoft</strong> <strong>Web</strong> <strong>Studio</strong> v6.1 SP2 7–93
IWS Users GuideConfiguring Screens and GraphicsConfiguration Dialog – Events Tab* Event: List all events available from the ActiveX object.* Parameters: The tags configured in this field are associated with theparameters of the event of the corresponding ActiveX object. If the eventdoes not support any parameter, the fixed text is displayed in theParameters field. Otherwise, you can type the tags associated with theparameters of the ActiveX object. When the event has more than oneparameter, you can type one tag for each parameter, separating them by acomma (,). For example, TagA , TagB , TagC. When the event is generated,either the value of the tags are written to the parameters of the event(input parameters), or the parameter values are written to the tags (outputparameters). Tip:When you click the Browse button ( ), it will display the list of parameterssupported by the event, allowing you to associate one tag with eachparameter.* Script: The script configured in this field will be executed when the event istriggered by the ActiveX control. Tip:When you click the Browse button ( ), it will display a dialog with thecomplete script associated with the event. The main dialog window displaysonly the expression configured in the first line of the script. .NET Control button ( ): Click to open the .NET Framework Components dialog,which you can use to place .NET Framework components on your screen.7–94 <strong>InduSoft</strong> <strong>Web</strong> <strong>Studio</strong> v6.1 SP2
Configuring Screens and GraphicsIWS Users GuideWhen the dialog opens (as in the following figure), it contains a list of all .NETFramework components registered on your computer..NET Framework Components DialogClick on one or more components in the list, and then click the OK button toclose the dialog and display all selected components on your screen..NET Components are designed according to the Microsoft .NET Framework,which is a standard for modular programming technologies. Because IWS is an.NET container, you can configure and run .NET Components in the screenscreated with IWS. .NET Components provide the following interfaces:– Properties: Variables whose values can be read and/or written for theapplication (e.g. Object Color, FileName, URL, and so forth)– Methods: Functions from the .NET Framework component that can betriggered by the application (e.g. open a dialog, execute a calculation, and soforth)– Events: Internal messages that can trigger the execution of expressions in theapplication (e.g. Mouse_Click, Download_Completed, and so forth)The name of the properties, methods and events supported by each .NETFramework component depends on its own implementation. Caution:When using .NET Framework components in your application, make surethat the target station (runtime station) can support the same componentsand that they are properly installed and registered. The IWS application filesinclude links to the components; however, the installation of thesecomponents on the target station must be done separately. Furthermore,when components are used on screens open in remote <strong>Web</strong> Thin Clients,the components must also be manually installed on the <strong>Web</strong> Thin Clientstations. The Microsoft Windows operating system installs a large selectionof components by default, but additional components are offered by thirdpartyproviders. Consult your .NET Framework component provider forfurther information about how to install.Double-click the .NET Control object to open the Object Properties dialog box.<strong>InduSoft</strong> <strong>Web</strong> <strong>Studio</strong> v6.1 SP2 7–95
IWS Users GuideConfiguring Screens and GraphicsObject Properties: .NET ControlThe Object Properties window displays the name of the .NET Control. You mustassign a name (alias) to the .NET Control, for the application on the Name field(e.g. CheckBox1). This name is used to reference the component when using thescripting languages. Note:You should not configure two .NET Components on the same screen withthe same name. For instance, if you place two CheckBox components on thesame screen and assign the name CheckBox1 to one object (Name field), youcannot assign the same name to the second object on the same screen. Youwould have to assign the name CheckBox2, for example, to the secondobject.The Property Pages button opens the standard window for configuring the StaticProperties (if any). The layout and the options in this dialog window depend onthe implementeation of each ActiveX control. Use this interface to set propertiesthat should not be changed during the runtime (fixed properties).The Members button on the Object Properties window opens dialogs that allowyou to do the following: Associate tags to properties of the .NET Component Trigger methods from the .NET Component based on tag change Configure scripts, which are executed when Events from the .NETComponent occurThe following sections describe how to configure these interfaces. Notes:Although the Members dialog displays the list of all properties, methodsand events, you only have to configure the items that you need for yourproject.The screen shots used in the following sections depict the CheckBoxcomponent. Although the names of properties, methods and events variesby component, the configuration interface is the same for any .NETComponent. The concepts described here apply to all of them.– Configuring PropertiesThe Properties tab provides a grid with the following fields:7–96 <strong>InduSoft</strong> <strong>Web</strong> <strong>Studio</strong> v6.1 SP2
Configuring Screens and GraphicsIWS Users GuideMembers Dialog – Properties Tab* Property: List all properties available from the .NET component, andindicate their types:Property IconProperty TypeBooleanIntegerRealString* Tag/Expression: The tag configured in this field is associated with therespective property of the .NET Component. The Action column will definewhether the value of this tag will be written to the property, or if the valueof the property will be written to this tag (or both).* Action: Defines the direction of the interface between the tag or expressionconfigured in the Tag/Expression field and the .NET property, accordingto the following table:ActionGetSetGet+SetSet+GetDescriptionRead the value of the property and write it to the tag configured in theTag/Expression field.Write the value from the tag or expression configured in the Tag/Expression fieldinto the property.Executes both actions (Get and Set). However, when opening a screen with the.NET Component, IWS executes the Get command before executing any Setcommand. That is, the tag configured in the Tag/Expression field is updated withthe value of the property when IWS opens the screen where the .NET Componentis configured.Executes both actions (Get and Set). However, when opening a screen with the.NET Component, IWS executes the Set command before executing any Getcommand. That is, the property is updated with the value of the tag configured inthe Tag/Expression field when IWS opens the screen where the .NET Componentis configured.<strong>InduSoft</strong> <strong>Web</strong> <strong>Studio</strong> v6.1 SP2 7–97
IWS Users GuideConfiguring Screens and Graphics Note:When the value of the property is "Read-only" (cannot by overwrittenby the application), the Action field is automatically set to Get.* Scan: Defines the polling method to get values from the propreties. For.NET Components, all properties scan Always by default. That is, IWSkeeps polling the value of the property and updating the tag configured inthe Tag/Expression field with this value.– Configuring MethodsThe Methods tab provides a grid with the following fields:Members Dialog – Methods Tab* Method: Lists all methods available from the .NET Component.* Parameters: The tags configured in this field are associated with thecorresponding method. If the method does not support any parameter,then the fixed text is displayed. Otherwise, you can enter the tagsthat you want to associate with the parameter. When the method hasmore than one parameter, you can enter one tag for each parameter,separating them by a comma (,). For example, TagA , TagB , TagC. Tip:When you click the Browse button ( ), it will display the list ofparameters supported by the method, allowing you to associate onetag with each parameter.When the method is executed, either the value of the tags are written tothe parameters of the method (input parameters), or, after the method isexecuted, the .NET Component writes the value of the parameters to thetags (output parameters).7–98 <strong>InduSoft</strong> <strong>Web</strong> <strong>Studio</strong> v6.1 SP2
Configuring Screens and GraphicsIWS Users Guide* Trigger: When the tag configured in this field changes value, the respectivemethod of the .NET Component is executed.* Return: The tag configured in this field receives the value returned by themethod (if any).– Configuring EventsThe Events tab provides a grid with the following fields:Members Dialog – Events Tab* Event: Lists all events available from the .NET Component.* Parameters: The tags configured in this field are associated with thecorresponding event. If the event does not support any parameter, thenthe fixed text is displayed. Otherwise, you can enter the tags thatyou want to associate with the parameter. When the event has more thanone parameter, you can enter one tag for each parameter, separating themby a comma (,). For example, TagA , TagB , TagC. Tip:When you click the Browse button ( ), it will display the list ofparameters supported by the event, allowing you to associate one tagwith each parameter.When the event occurs, either the value of the tags are written to theparameters of the method (input parameters), or, after the event occurs,the .NET Component writes the value of the parameters to the tags(output parameters).* Script: The script configured in this field will be executed when the event istriggered by the .NET Component.<strong>InduSoft</strong> <strong>Web</strong> <strong>Studio</strong> v6.1 SP2 7–99
IWS Users GuideConfiguring Screens and Graphics Tip:When you click the Browse button ( ), it will display a dialog withthe complete script associated with the event. The main dialogwindow displays only the expression configured in the first line of thescript. Combo-Box button ( ): Click to select a single label from a combo-box list oflabels.If the list is longer that the space allotted, IWS enables a scroll bar for the list.During runtime, if you select a label from the list, the combo-box hides itself andthe selected label displays in the combo-box.Double-click on the combo-box object to open the Object Properties dialog:Object Properties: Combo-BoxYou can use this dialog to set the following parameters:– Align combo-box: Click to specify the label alignment (Left, Center, or Right)which affects the alignment in both the combo-box and its list.– Position/Index text box: Type an integer tag, which corresponds to the labelcurrently displayed in the combo-box. Changing this tag value changes thelabel being displayed.– Label text box: Type a string tag to receive the value of the label currentlydisplayed in the combo-box.– Input Enabled check-box: Click (check) to allow an operator to select a label bytyping the contents of that label into a tag in the Label field.– Confirm check-box: Click (check) to prompt an operator to confirm a commandduring runtime.– E-Sign check-box: Click (check) to prompt the user to enter the ElectronicSignature before executing the dynamic.– VK field: Virtual Keyboard type used for this object. You need to enable theVirtual Keyboard option on the Project > Settings > Runtime Desktop interface beforeconfiguring the Virtual Keyboard for this interface.– Color box: Click to specify a background color for the combo-box. When theColor dialog opens, click a color to select it, then click OK to close the dialog.– Disable text box: Type a tag with a nonzero value to disable this combo-box.Type a zero, or leave the field blank (default) to enable the commandproperty. If you disable the combo-box, it appears grayed out duringruntime.7–100 <strong>InduSoft</strong> <strong>Web</strong> <strong>Studio</strong> v6.1 SP2
Configuring Screens and GraphicsIWS Users Guide– Security text box: Type a security level for the command (0 to 255). If anoperator logs on and does not have the specified security level, the commandbecomes inactive. If an operator logs on and does have the specified securitylevel, or you leave this field blank, the command property remains active.– Fonts button: Click to open the Font dialog. Use this dialog to change thecharacteristics of a message font.– Data... button: Click to open the Combo Data dialog, which allows you todefine labels and their order in the combo-box.Combo Data DialogUse the parameters on the Combo Data dialog as follows:– Type: Specify whether to use an Array of labels or a static list of labels to define thecombo-box.– Sort: Click (check) to display the contents of your array of labels inalphabetical order. This parameter is available only when you select the ArrayTag type.– Array Tag: Type a tag name for a string type array tag containing the values oflabels in the combo-box.– Number of Items: Type in an integer or a tag to specify how many labels candisplay in the combo-box. Keeping in mind that the combo-box counts arrayindex 0 as the first item, if you specify four array labels, the combo-box willdisplay array index 0 through array index 3 – which is a total of four labels.– Drop list size (Items): Type in an integer or a tag to specify how many labels canbe viewed in the combo-box at any one time.– Combo Static Labels List: Specify the Static Labels parameter in the Type area toenable this list to contain labels. Each line of the list signifies oneindependent label. The label on the first line is designated as the label inposition 0. The label on the next line down is in position 1 and so forth.<strong>InduSoft</strong> <strong>Web</strong> <strong>Studio</strong> v6.1 SP2 7–101
IWS Users GuideConfiguring Screens and Graphics Alarm button ( ): Click to specify an area of the screen in which to displayalarm messages.Next, click in the screen and drag the mouse to designate an area for themessages. When you are finished, double-click on the object to open the ObjectProperties dialog:Object Properties: AlarmYou can use this dialog to specify the following parameters:– On Line button: Click (enable) this button to display on-line alarm messagesfor the object.– History button: Click (enable) this button to display alarm messages from thehistory files. Caution:You may have to use the Save to Disk option, located on the Alarmworksheet (Tasks tab), to save alarm messages specified as history files.– Border combo-box: Click to define a color for the alarm message border. Whenthe Color dialog displays, click on a color to select it, and then close thedialog.– Win combo-box: Click to define a background color for the Alarm Messagedialog. When the Color dialog displays, click on a color to select it, and thenclose the dialog.– PgUp field: In the runtime, toggling the tag in this field triggers a page upcommand to the list.– PgDown field: In the runtime, toggling the tag in this field triggers a page downcommand to the list.– Message Format area: Use the following parameters to define a format for alarmmessages. You can format alarms to include dates, times (hours), names,tags, and messages.– Font button: Click to open the Fonts dialog and specify a style, size, color, andfont type for the alarm message text.– DD,MM,YY check-boxes: Click (check) to display the alarm date in the messagetext.– HH,MM,SS,MSS check-boxes: Click (check) to display the alarm time in themessage text. Note:If you check the DD,MM,YY and/or HH,MM,SS,MSS boxes, an asterisk (*)character displays between the alarm’s date/time and the alarmmessage.7–102 <strong>InduSoft</strong> <strong>Web</strong> <strong>Studio</strong> v6.1 SP2
Configuring Screens and GraphicsIWS Users Guide– Tag field: Specify how many characters to allow for a tag name.– Message field: Specify how many characters to allow for a message.– Ack check-box: Click (check) to add the acknowledgement time to an alarmmessage.– End check-box: Click (check) to add the normalization time to an alarmmessage.– Selection button: Click to open the Alarm Filters dialog, which allows you tospecify filters for alarm messages.Alarm Filters DialogUse the following parameters to specify these filters:– Group field: Enter a value to select and display alarm groups in the alarmsummary object.* Enter a zero in the field to select all alarm groups.* Enter any value other than zero to select a specific alarm group.– Selection field: Type the character string you specified in the Selection columnon the Alarm worksheet (Tasks tab). IWS filters display alarms by matchingthis character string against the string specified on the Alarm worksheet. Note:This character string must be the same as the character string on theAlarm worksheet. Tip:If you enter the character string between curly brackets ({ }), you canmodify the tag value during runtime.– Priority Range fields: Specify a range (based on the alarm priority specified inthe priority column of the Alarm worksheet) in which to filter and displayalarm messages.For example, if you assign alarm priorities 1 to 5 on the Alarm worksheet,and then assign 0 to 4 in these Priority Range fields, IWS will display alarmpriorities 1 to 4 and will not display alarm priority 5.<strong>InduSoft</strong> <strong>Web</strong> <strong>Studio</strong> v6.1 SP2 7–103
IWS Users GuideConfiguring Screens and Graphics– Sort area: Use the radio buttons to sort and display alarm messages asfollows:– Time: Click (enable) this button to sort and display alarms according to thetime the alarm was received.– Priority: Click (enable) this button to sort and display alarms according to thepriorities assigned in the Priority Range fields.– Print Tag field: Type a tag name to filter and print all alarms when changes aremade to that tag.– Ack Tag field: Type a tag name to filter and acknowledge the active alarm (topof alarm object list) when you change that tag. Tip:You can use the internal AckAlr tag to acknowledge the last alarm fromthe application.– Ack All Tag field: Type a tag name to acknowledge all filtered, active alarmswhen you change that tag. Tip:You can use the internal AckAll tag to acknowledge all alarms from theapplication.– View % field: Type a tag in this field (specify a percentage from 0% to 100%) tocontrol how many alarm messages are visible in the alarm list duringruntime. You also can use this tag to scroll the alarm list up and downduring runtime.Alarms List with Scroll Bar Grid button ( ): The Grid object allows you to read/write data in a tabularformat from the data source configured in the object. To draw one, do thefollowing: Click the Grid tool. Click on the screen, click the left mouse button, and drag the mouse acrossthe screen to create a box of the desired size (while holding down the mousebutton). Release the mouse button, and the Grid Object will display.7–104 <strong>InduSoft</strong> <strong>Web</strong> <strong>Studio</strong> v6.1 SP2
Configuring Screens and GraphicsIWS Users GuideCreating a Grid Object Right-click on the Grid Object, and select Properties from the menu. TheObject Properties dialog box will open. Use this dialog to configure the GridObject’s parameters:Object Properties: Grid Object– Data Source: Select the data source type. The object supports three datasources:Data SourceText FileClass TagDatabaseDescriptionDisplays data from a text file in the ASCII or Unicode format (e.g. CSV text files).Displays values from a Class Tag, where the members of the tag are fields(columns) of the grid object, and each array position is one row of the grid object.Displays data from an SQL Relational Database, using ADO (ActiveX DatabaseObject) to exchange data with the database.– E-Sign: When you check this option, the user will be prompted to enter anelectronic signature before entering or modifying data on the object.– VK: Select a Virtual Keyboard type used for this object. The option selects the default Virtual Keyboard configured on the ProjectSettings Runtime Desktop interface. You can also specify a different virtualkeyboard for this Grid Object.– Security: Enter the security system access level required for theobject/dynamic.– Disable: You can enter an expression in this field to disable data input oraction by the user.– Highlight Color: Select a background color for the selected row, during theruntime.– Text Color: Select a text color for the selected row, during the runtime.– Win Color 1: Select a background color for the odd rows.– Win Color 2: Select a background color for the even rows.<strong>InduSoft</strong> <strong>Web</strong> <strong>Studio</strong> v6.1 SP2 7–105
IWS Users GuideConfiguring Screens and Graphics– Fonts: Click to launch the Fonts dialog, where you can configure the fontsettings for the text displayed in the Grid object.– Columns: Click to launch the Columns dialog, where you can configure thesettings (such as label, column, width, etc.) for the columns of the Gridobject.You can configure the settings for each column displayed by the Grid objectduring the runtime, as follows:Columns Dialog Box* Column: The ID Number defines the position of the column in the table.* Label: Enter a Title for each column, which will display as the heading(first) row of the Grid object. Tip:You can configure tags between curly brackts in the Label field tomodify it dynamically during the runtime. When the label is blank(i.e.: “”), the width of the column is set to 0 during the runtime. Thisoption is useful to hide columns during the runtime.* Field: Enter the name of the field (column) in the SQL Relational Databasethat the Grid object is linked to. If this field is left in blank, the textconfigured in the Label field will be used as the Field name. (This setting isavailable only when the Data Source type is set to Database.)* Type: Select the Type of interface that will be used in the column. Theoptions are:TypeTextNumericPictureDescriptionDisplays alphanumeric valuesDisplays numeric valuesDisplays the picture (*.bmp or *.ico format) from the data source. Forinstance, if the value from the data source is MyFile.bmp, the gridobject will display the picture from the file MyFile.bmp stored in the7–106 <strong>InduSoft</strong> <strong>Web</strong> <strong>Studio</strong> v6.1 SP2
Configuring Screens and GraphicsIWS Users GuideCheck-boxTimeDateDate/Timeapplication’s folder. The picture will be automatically resized to fit thecell of the grid object. The picture file(s) must be stored in the \<strong>Web</strong>sub-folder of the application to support this feature on the <strong>Web</strong> ThinClient stations. CEView applications support pictures in bitmap format(*.bmp), but not in icon format (*.ico).Displays check-box interfaces. The check-box will be unchecked if thevalue read from the file is 0, or "FALSE"; otherwise, thecheck-box will be checked. By default, IWS will use the value 0 forunchecked and the value 1 for checked.Displays the value in the Time format (e.g. HH:MM:SS). This settingis available only when the Data Source type is set to Database.Displays the value in the Date format (e.g. MM/DD/YYYY). Thissetting is available only when the Data Source type is set toDatabase.Displays the value in the Date/Time format (e.g. MM/DD/YYYYHH:MM:SS). This setting is available only when the Data Source typeis set to Database. Notes: When the Data Source type is set to Database, it is important tomake sure that the Type for each column configured in the objectmatches the Type of the respective field in the database. When the Data Source type is set to Database, you can configurevalid SQL statements, directly in the Field (e.g. List(DISTINCT[Cell_Name]) AS [Cell Name]). You can also configure tag namesbetween curly brackets to modify this setting during the runtime(e.g. {MyFieldName}). Tip:If Picture is the column type, the Grid object displays a default icon ( )if the picture file is not found during the runtime. You can configure adifferent picture to be displayed when the file is not found by copyingthe picture file to the \<strong>Web</strong> sub-folder of the application andconfiguring its name on the .APP file, as follows:[Objects]GridDefaultPicture=* Width: Enter a width of the column, in pixels.* Align: Select an Alignment for the data shown in the column. There arethree options: Left, Right or Center.* Input: Enable (check) to allow the user to enter data in this column duringthe runtime.* Key: Designate a shortcut for sorting the values in this field. A shortcut isa combination of keys pressed on a keyboard at one time (e.g. CTRL + C,CTRL + V, etc.). This option is especially useful when creating applicationsfor runtime devices that do not provide a mouse or touch-screen interfaceand only have a keyboard for interacting with the application during theruntime.<strong>InduSoft</strong> <strong>Web</strong> <strong>Studio</strong> v6.1 SP2 7–107
IWS Users GuideConfiguring Screens and Graphics Note:When the Data Source type is set to Class Tag, and the Columnsdialog is left blank, the object displays the values from all members ofthe Class Tag with the following default column settings:Label = Type = TextWidth = Align = CenterInput = Enabled (checked)Key = * Show ID Column: Check to display the number of each row, automatically.* Allow sorting columns: Check to enable the user to sort the values in thecolumns during the runtime, either by clicking on the label or by usingthe shortcut configured for each column. This option is disabled if theShow header option from the Advanced dialog is not checked. Tip:Use the Move Up and Move Down buttons to reorder the display of thecolumns.– Data: Click to launch the Data dialog, where you can specify a data source forthe Grid object.This dialog allows you to configure the data source settings, as follows:* Data Source – Text FileWhen the Data Source type is set to Text File, you can configure thefollowing settings:– File: Enter the name of the text file source. You can either type thefile name and its path or click the … button to browse for it. (If thefile is stored in the application folder, you can omit the path in thename.)– Delimiters: Set the delimiter(s) used in the data source file. Forinstance, if the data will be read from a CSV (comma separated7–108 <strong>InduSoft</strong> <strong>Web</strong> <strong>Studio</strong> v6.1 SP2
Configuring Screens and GraphicsIWS Users Guidevalues) file, you would select the Comma option. You can evenchoose a custom delimiter by checking the Other option and typingthe custom delimiter in the field beside it. Tip:You can configure tag names between curly brackets {TagName} in theFile field.* Data Source – Class TagWhen the Data Source type is set to Class Tag, you can configure thefollowing interface:– Class Tag: Enter the name of the main class tag source. (Do notspecify a specific member of the class tag.) You can specify theinitial array position in this field (e.g. Mytag[10]); otherwise, 0 (zero)will be used as the initial position by default.– Number of Items: Enter the number of array positions from the ClassTag that should be displayed.– View: When the tag configured in the optional field changes value(e.g. toggles) during the runtime, the grid object launches a dialog,allowing the user to show/hide each column or modify theirpositions.* Data Source – Database<strong>InduSoft</strong> <strong>Web</strong> <strong>Studio</strong> v6.1 SP2 7–109
IWS Users GuideConfiguring Screens and GraphicsWhen the Data Source type is set to Database, you can configure thefollowing settings:Please refer to the Database Configuration Dialog Window for furtherinformation about this dialog.7–110 <strong>InduSoft</strong> <strong>Web</strong> <strong>Studio</strong> v6.1 SP2
Configuring Screens and GraphicsIWS Users Guide– Advanced: Click to launch the Advanced dialog, where you can configureseveral settings for the Grid object.This dialog allows you to configure the advanced settings, as follows:Advanced Dialog* User Enable: If the value of this tag is TRUE (different from 0), the user canselect different rows of the object by clicking on them during the runtime.This field can be configured with a tag or with a numeric value.* Selected Values: The values from each column of the selected row are writtento each position of the array tag configured in this field. Moreover, you canmodify the value of the cells currently selected in the Grid object bychanging the value of array tag configured in this field. The initial arrayposition (offset) can be configured in this field.* Row Number: The Grid object writes the number of the row currentlyselected during the runtime. In addition, you can select different rows bywriting their values in this tag.* Reload: When the tag configured in this field is toggled, the object reloadsthe data from the data source and displays it.* Condition: This field can be configured with the data filter expression. Thisexpression must follow the basic syntax of (e.g. ColumnX > 200). When using Text File or ClassTag for Data Sources, the is the value specified in theLabel. When using Database for the Data Source, the column is the valuespecified in the Field. (In this case, if the Field is left blank, the columnvalue specified is the Label.)<strong>InduSoft</strong> <strong>Web</strong> <strong>Studio</strong> v6.1 SP2 7–111
IWS Users GuideConfiguring Screens and Graphics Tips: You can combine several conditions simultaneously in theCondition filed, using the logic operators AND, OR, and NOT. Forexample, ColumnAge>‘10’ OR ColumnName=‘John’ ANDColumnDate>‘05/20/2003’. You can use wildcards (* and ?) in the Condition field to filter data. You can configure tags between curly brackets {TagName} in theCondition field to change the filtering condition during the runtime.* Print: When the tag configured in this field toggles, the data currentlyfiltered in the object is sent to the printer.* Number of Rows: The grid object writes the number of rows currentlyavailable in the grid object to the tag configured in this field.* Save Trigger: When the tag configured in this field is toggled, the data source(Text File or Database) is updated with the current values of the gridobject. This field is not available when the Data Source type is Class Tag,because the values are automatically updated in the tags as you change acell in the grid.* Insert Trigger: When Auto refresh after insert trigger is enabled (checked), the tagconfigured in this field is used as a trigger to refresh the database table.Whenever the value of the tag changes, a new row is added to the tableand the values of the array configured in the Inserted Values field areautomatically inserted.* Inserted Values: If the Insert Trigger is being used, then the array tag configuredin this field provides the values that will be inserted. This field must onlycontain an array tag, although it can be of any size.* Save on data change: When this option is checked, the values are updated onthe data source (Text File or Database) as soon as the user enters a newvalue on the grid, during the runtime. This option is disabled when theData Source type is Class Tag, because the values are automaticallyupdated in the tags as the user changes the value of the cells in the grid.* Enable Slider/Resize: If this box is not checked, the user is unable to scroll thelist by dragging the slider button, or to change the cell’s size during theruntime.* Conditional Check-box: When this option is checked, the user cannot unchecka check-box on the Grid during the runtime, unless all preceding checkboxesin the same column are already unchecked. This option is especiallyuseful when you want to oblige the user to follow a pre-defined sequence.This field is not available when the Data Source type is Class Tag.* Show Header: When this option is checked, the header of the Grid object isvisible during the runtime, displaying the label of each column.* Show gridlines: When this option is checked, the gridlines of the Grid objectare visible during the runtime.* Ext. translation: When this option is checked, the text displayed by the Gridobject will be susceptible to the Translation Tool during the runtime.* Disable TAB to navigate through cells: When this option is checked, the user canonly navigate through the cells of the Grid Object with the arrow keys,rather than the Tab key. You should disable the Tab key for navigation if7–112 <strong>InduSoft</strong> <strong>Web</strong> <strong>Studio</strong> v6.1 SP2
Configuring Screens and GraphicsIWS Users Guideyou want it to be used for switching to the next object that supports focuson the screen.* Export: This interface allows you to export the data from the grid object to aclass-array tag, regardless of the Data Source selected for the object. Thefollowing fields must be configured to support this feature:FieldClass tagTriggerDescriptionType the main tag name of the class-array tag that will receive theexported values. Each row from the grid object will be exported to onearray position of the array tag, by matching column labels. The initial arrayposition can be configured in this field; 0 is the default.When the tag configured in this field changes value (e.g. toggles), the datais exported from the Grid object to the class-array tag configured in theClass tag field. Tips:The Export feature is an easy and powerful tool to transfer data fromdifferent data sources to tags. After exporting the data to tags, you canuse different tasks to manipulate the data, such as the FileWrite()function, or the Recipe or Report tasks to save the data in text files(e.g. CSV files). Check Box Object button ( ): Click this button to create a check box object onyour screen.The Check Box Object is useful to create interfaces where users can enable/disablean option on the display. To create a Check Box Object:– Click in the drawing area and drag the mouse/cursor to draw the check boxand its label.– Release the mouse button when the object is the size you want.– Double-click on the object to view the Object Properties dialog:Object Properties Dialog: Check BoxUse the Object Properties dialog to specify the following parameters for the CheckBox Object:– Caption: Specify a caption by typing the text into the text box.– Fonts: Specify a font style for the caption by clicking the Fonts button.– E-Sign: When this option is checked, the user will be prompted to enter theElectronic Signature before executing the command.<strong>InduSoft</strong> <strong>Web</strong> <strong>Studio</strong> v6.1 SP2 7–113
IWS Users GuideConfiguring Screens and Graphics– Confirm check-box: Click (check) this box to ensure IWS prompts you toconfirm the action at runtime.– Key drop-down list: Select a key from the list to associate that keyboard keywith the object or group of objects. You can then press this key tocheck/uncheck the check-box.– Click (check) the Shift, Ctrl, or Alt box to create a combination key, meaning theShift, Ctrl, or Alt key must be pressed with the key specified in the drop-downlist.– Click (check) the box to open the Key Modifier dialog, which enables you tomodify your combination keys. You can choose Left, Right or Left or Right tospecify the position on the keyboard of the Shift, Ctrl or Alt key in thecombination key. If you choose Left or Right, the command will be executed anytime either of these keys is pressed in combination with the key specified inthe drop-down list.Key Modifier Dialog– Disable field: Type a tag or expression into this field to enable and disable theobject. You disable the check box object when you enter a value differentfrom 0.– Security field: Type a value in this field to specify a security level for the object,as defined under Security. When a user logs on, and does not have thespecified security level, IWS disables the object.– Tag field: When the user clicks on the check box during the runtime, thevalue of this tag is updated. If no feedback was specified, the value of this tagis also used to indicate the current status of the object.– True Value: Specify a value that will be used to change the control to TRUEstate and to indicate that the control is in TRUE state. For more informationabout states, please refer to the states table.* Tri-State: If enabled the control has a third state. The third state will bedisplayed when the tag configured in the Feedback field assumes the valuespecified in the Tri-State field. If the Feedback field is left blank, the thirdstate will be displayed when the tag configured in the Tag field assumesthe value specified in the Tri-State field.* Feedback: Value that indicates the state of the object (TRUE, FALSE orThird-State). If the Feedback field is left blank, the tag configured in the Tagfield will be used as the Feedback tag.* Ext Trans.: When this option is checked, the caption of the object supportsthe translation.* Force: Click (check) this box to force the Tag Database to recognize a tagchange when the user clicks on the object, even if the value of the tag inquestion does not change.7–114 <strong>InduSoft</strong> <strong>Web</strong> <strong>Studio</strong> v6.1 SP2
Configuring Screens and GraphicsIWS Users Guide* Auto gray out: Turns the caption of the object to gray when it is disabled bythe Disable field or due to the Security System.* Enable Focus: When this option is checked, the object can receive the focusduring the runtime by the navigation keys.* Push Like: When this option is checked the control is displayed as a button,instead of the check box standard shape.* Fill Color: Specify the fill color for the button. This option is enabled onlywhen the Push Like option is checked.There are two main modes of operation for this object: Normal Mode and Tri-StateMode. These modes are described below:NORMAL MODEWhen the Tri-State option is unchecked, the object operates in Normal Mode.Therefore, it can assume two states only:StateShapeShape(Push Like)FALSETRUENormal Mode StatesWhen the value of the tag configured in Feedback is equal to the value of the tagconfigured in True Value, the state is set to TRUE. Otherwise, the state is set toFALSE. If the Feedback field is left blank, the tag configured in the Tag field will beused as the Feedback tag.When the user clicks on the object, the tag configured in the Tag field is updatedaccording to the following table:Current StatusFALSETRUEValue written to the tag configured in the“Tag” field when the user clicks on the objectValue configured in the True Value fieldNOT (Value configured in the True Value field) Note:When the value configured in True Value is a string, the tag configured in theTag field will be toggled between an empty string and the True Value. If TrueValue is left in blank, the tag configured in the Tag field will be toggledbetween “UNSELECTED” and an empty string.<strong>InduSoft</strong> <strong>Web</strong> <strong>Studio</strong> v6.1 SP2 7–115
IWS Users GuideConfiguring Screens and GraphicsTRI-STATE MODEWhen the Tri-State option is checked, the object operates in Tri-State Mode.Therefore, it can assume three states:StateShapeShape(Push Like)FALSETRUETRI-STATEWhen the value of the tag configured in Feedback is equal to the value of the tagconfigured in True Value, the state is set to TRUE. When the value of the tagconfigured in Feedback is equal to the value of the tag configured in Tri-State, thestate is set to TRI-STATE. When none of these conditions are satisfied, the stateis set to FALSE. If the Feedback field is left in blank, the tag configured in the Tagfield will be used as the Feedback tag. Caution:The Tri-State field must not be configured with the same value as the TrueValue field or with an empty string value.Current StatusFALSETRUETRI-STATEValue written to the tag configured in the“Tag” field when the user clicks on the objectValue configured in the True Value fieldNOT (Value configured in the Tri-State field)NOT (Value configured in the True Value field) Note: If “NOT (Value configured in the True Value field)” is equal to Tri-State, thevalue assigned to the tag configured in the Tag field will be the minimumsigned integer value different from True Value. When True Value is a string, “NOT (Value configured in the True Value field)”will result in an empty string. If True Value is an empty string, “NOT (Valueconfigured in the True Value field)” will result in “UNSELECTED”.7–116 <strong>InduSoft</strong> <strong>Web</strong> <strong>Studio</strong> v6.1 SP2
Configuring Screens and GraphicsIWS Users Guide Radio Button Object button ( ): Click this button to create a check box object onyour screen.The Radio Button Object is useful to create interfaces where users can choose oneoption from multiple display options. To create a Radio Button Object:– Click in the drawing area and drag the mouse/cursor to draw the radiobutton and its label.– Release the mouse button when the object is the size you want.– Double-click on the object to view the Object Properties dialog:Object Properties Dialog: Radio ButtonUse the Object Properties dialog to specify the following parameters for the RadioButton Object:– Caption: Specify a caption by typing the text into the text box.– Fonts: Specify a font style for the caption by clicking the Fonts button.– E-Sign: When this option is checked, the user will be prompted to enter theElectronic Signature before executing the command.– Confirm check-box: Click (check) this box to ensure IWS prompts you toconfirm the action at runtime.– Key drop-down list: Select a key from the list to associate that keyboard keywith the object or group of objects. You can then press this key tocheck/uncheck the radio button.– Click (check) the Shift, Ctrl, or Alt box to create a combination key, meaning theShift, Ctrl, or Alt key must be pressed with the key specified in the drop-downlist.– Click (check) the box to open the Key Modifier dialog, which enables you tomodify your combination keys. You can choose Left, Right or Left or Right tospecify the position on the keyboard of the Shift, Ctrl or Alt key in thecombination key. If you choose Left or Right, the command will be executed anytime either of these keys is pressed in combination with the key specified inthe drop-down list.Key Modifier Dialog<strong>InduSoft</strong> <strong>Web</strong> <strong>Studio</strong> v6.1 SP2 7–117
IWS Users GuideConfiguring Screens and Graphics– Disable field: Type a tag or expression into this field to enable and disable theobject. You disable the radio button object when you enter a value differentfrom 0.– Security field: Type a value in this field to specify a security level for the object,as defined under Security. When a user logs on, and does not have thespecified security level, IWS disables the object.– Tag field: When the user clicks on the radio button during the runtime, thevalue of this tag is updated. If no feedback was specified, the value of this tagis also used to indicate the current status of the object.– True Value: Specify a value that will be used to change the control to TRUEstate and to indicate that the control is in TRUE state. For more informationabout states, please refer to the states table.– Advanced: Press this button to open the Advanced dialog:Advanced Dialog* Tri-State: If enabled the control has a third state. The third state will bedisplayed when the tag configured in the Feedback field assumes the valuespecified in the Tri-State field. If the Feedback field is left blank, the thirdstate will be displayed when the tag configured in the Tag field assumesthe value specified in the Tri-State field.* Feedback: Value that indicates the state of the object (TRUE, FALSE orThird-State). If the Feedback field is left blank, the tag configured in the Tagfield will be used as the Feedback tag.* Ext Trans.: When this option is checked, the caption of the object supportsthe translation.* Force: Click (check) this box to force the Tag Database to recognize a tagchange when the user clicks on the object, even if the value of the tag inquestion does not change.* Auto gray out: Turns the caption of the object to gray when it is disabled bythe Disable field or due to the Security System.* Enable Focus: When this option is checked, the object can receive the focusduring the runtime by the navigation keys.* Push Like: When this option is checked the control is displayed as a button,instead of the radio button standard shape.* Fill Color: Specify the fill color for the button. This option is enabled onlywhen the Push Like option is checked.7–118 <strong>InduSoft</strong> <strong>Web</strong> <strong>Studio</strong> v6.1 SP2
Configuring Screens and GraphicsIWS Users GuideThere are two main modes of operation for this object: Normal Mode and Tri-StateMode. These modes are described below:NORMAL MODEWhen the Tri-State option is unchecked, the object operates in Normal Mode.Therefore, it can assume two states only:StateShapeShape(Push Like)FALSETRUENormal Mode StatesWhen the value of the tag configured in Feedback is equal to the value of the tagconfigured in True Value, the state is set to TRUE. Otherwise, the state is set toFALSE. If the Feedback field is left blank, the tag configured in the Tag field will beused as the Feedback tag.When the user clicks on the object, the tag configured in the Tag field is updatedwith the value configured in the True Value field.TRI-STATE MODEWhen the Tri-State option is checked, the object operates in Tri-State Mode.Therefore, it can assume three states:StateShapeShape(Push Like)FALSETRUETRI-STATEWhen the value of the tag configured in Feedback is equal to the value of the tagconfigured in True Value, the state is set to TRUE. When the value of the tagconfigured in Feedback is equal to the value of the tag configured in Tri-State, thestate is set to TRI-STATE. When none of these conditions are satisfied, the stateis set to FALSE. If the Feedback field is left in blank, the tag configured in the Tagfield will be used as the Feedback tag. Caution:The Tri-State field must not be configured with the same value as the TrueValue field or with an empty string value.<strong>InduSoft</strong> <strong>Web</strong> <strong>Studio</strong> v6.1 SP2 7–119
IWS Users GuideConfiguring Screens and GraphicsCurrent StatusFALSETRUETRI-STATEValue written to the tag configured in the“Tag” field when the user clicks on the objectValue configured in the True Value fieldNOT (Value configured in the Tri-State field)NOT (Value configured in the True Value field)Using the LibrarySymbols are reusable objects (or groups of objects) that you can store for reuse. IWSprovides access to an extensive symbol library that enables you to add and reusesymbols quickly and easily. You also can modify existing symbols in just a fewseconds.From the menu bar, select View > Library to open the following library of previouslyconfigured objects and symbols, including several objects with dynamics:LibraryYou can add symbols from this library to your application screen, which saves timeduring development. You also can upgrade this library with new symbols by rightclickingon a screen button (in the Workspace) and choosing the Send to library optionfrom the resulting pop-up menu. The application inserts the screen into the librarywith all its objects. Note:Using the Library menu option is the same as using the Library buttonStandard toolbar.on the7–120 <strong>InduSoft</strong> <strong>Web</strong> <strong>Studio</strong> v6.1 SP2
Configuring Screens and GraphicsIWS Users GuideTo add an image to the display: Click on a category in the left panel to preview available images. Double-click on a category to import a copy of the image to the display screen,which keeps your image and closes the Libraries dialog. Click anywhere in the display screen to place the selected image. Note:Most symbols have predefined properties. To change these properties, use theReplace tab located on the Object Properties dialog. You can add a user screen tothe Symbol library. Develop the screen as .scr and copy it to the \LIB directorywhere you installed IWS.Using Paste LinkFrom the main menu bar, select Edit > Paste Link to paste a linked object (only .BMPfiles) onto the active screen, while maintaining a connection to the source. A linkedobject is information (the object) created in a source file (another project or anotherscreen). Paste Link automatically updates a linked screen object whenever you updatethe source file, but the linked object does not become part of the screen. If you put alinked file in an application folder or a subfolder, you can download the file with theapplication to the runtime workstation.Note: –This option does not work in Windows CE applications.Symbols FolderA Symbol is an Object (or Group of Objects) that is saved to the Symbols folder (inthe Graphics tab of the Workspace), so that you can reuse it again and again in yourapplication projects.Every time you reuse a Symbol, you actually make a copy that is linked to theMaster Symbol file in the Symbols folder. (These linked copies are also called“instances” of the Symbol.) Thereafter, if you make any changes to the MasterSymbol, then those changes automatically propagate to every linked copy in everyproject.You can customize each linked copy of the Master Symbol by defining CustomProperties. For example, when you create a gauge that displays tank levels and thensave that gauge as a Master Symbol, you can define Custom Properties on theSymbol that will allow each linked copy to display the level of a different tank.<strong>InduSoft</strong> <strong>Web</strong> <strong>Studio</strong> v6.1 SP2 7–121
IWS Users GuideConfiguring Screens and GraphicsSymbols Folder in the Graphics TabCREATING A MASTER SYMBOLTo create a Master Symbol and save it to the Symbols folder:1. Design your Symbol just as you would normally draw an application screen,using any combination of Static and Active Objects. For example, threeCheck Boxes in a rectangular pane:Drawing Objects in a Screen2. Select the Object(s) or Group that you want to save as a Symbol.Selecting the Objects Note:It is not necessary to make a Group out of two or more Objects beforesaving them as a Symbol. Saving the Objects together as a Symboleffectively groups them as well.7–122 <strong>InduSoft</strong> <strong>Web</strong> <strong>Studio</strong> v6.1 SP2
Configuring Screens and GraphicsIWS Users Guide3. Right-click on the selected Object(s) and choose Create Linked Symbol from thecontextual menu, or choose Edit > Copy to from the main menu bar.Creating a Linked Symbol4. A standard Save As dialog is displayed, and you are prompted to give thenew Symbol a file name. Symbol files (.sym) are saved in the \Symboldirectory of your application project.Saving the Symbol File5. Click Save to save the file. The Symbol appears in the Symbols folder, in theGraphics tab of the Workspace.<strong>InduSoft</strong> <strong>Web</strong> <strong>Studio</strong> v6.1 SP2 7–123
IWS Users GuideConfiguring Screens and GraphicsSymbol File in the Workspace Note:The Symbol also appears in the Application Symbols folder of the Library.The Symbol is ready to be reused in your project, but the way it is currently saved,every copy will have identical properties. You must now define Custom Properties onthe Symbol — that is, the properties you want to be able to customize each time youreuse the Symbol.EDITING THE MASTER SYMBOLYou can edit a Master Symbol after you've initially saved it, to add or delete Objectsin the Symbol or to define Custom Properties on it. Remember that anymodifications you make to the Master Symbol will automatically propagate to everylinked copy in every application project.To edit a Symbol:1. Right-click on the Symbol file in the Symbols folder, and then choose Editfrom the contextual menu.Editing the Symbol File Tip:You can also right-click on any instance of the Symbol and choose EditLinked Symbol from the contextual menu.7–124 <strong>InduSoft</strong> <strong>Web</strong> <strong>Studio</strong> v6.1 SP2
Configuring Screens and GraphicsIWS Users GuideThe Symbol file is opened for editing in its own window. This Symbol Editorworks in the same way as a regular Screen Editor, except that every Objectin the window is part of the Symbol. If you add, move or delete Objects in theSymbol Editor, then you may change the size or shape of the Symbol anddisrupt the layout of any Screens where it is used.Symbol File Opened for EditingBesides adding, moving or deleting Objects in the Symbol, you can also editthe Object Properties as you normally would. You may want some propertiesto be the same in every instance of the Symbol, but other properties need tobe customized according to where and how the Symbol is used. In thisexample, you probably want to customize the captions of the three CheckBoxes and the Tags which the Check Boxes enable/disable, as well as thecaption of the pane itself.2. Select the first Object in the Symbol and open its Object Properties. Forexample, the first Check Box:Object Properties for the First Check Box3. In any field where you would normally configure a Tag, expression, or value,you can instead define a Custom Property using the following sytax:#:…where is a name to identify the property, when you are completingthe properties on an instance of the Symbol (see below), and is anoptional default value for the property. Note:All standard syntax applies to , including Tag names, indirectTags, Arrays, strings, numerical and boolean values, and scriptingexpressions. Also, even if you do not want to assign a default value to theCustom Property, you must type the colon character (:) after the.<strong>InduSoft</strong> <strong>Web</strong> <strong>Studio</strong> v6.1 SP2 7–125
IWS Users GuideConfiguring Screens and GraphicsIn this example, we want to be able to customize which Tag the Check Boxwill enable/disable when it is clicked; in the Tag field, type #Option1Tag: asshown.Defining a Custom Property for the Tag FieldWhen you go to complete the properties on an instance of the Symbol, theOption1Tag property will appear like this:But more about that later…Custom Properties on a Symbol4. Depending on the context, some Object properties require a specific type ofvalue like a string, boolean or numerical value. For these properties, youmust enclose the Custom Property definition in curly brackets “{ }”. In thisexample, the Caption field requires a string, so type{#Option1Caption:"Option 1"} as shown.Defining a Custom Property for the Caption FieldAgain, when you go to complete the properties on an instance of the Symbol,the Option1Caption property will appear like this:7–126 <strong>InduSoft</strong> <strong>Web</strong> <strong>Studio</strong> v6.1 SP2
Configuring Screens and GraphicsIWS Users GuideCustom Properties on a Symbol5. Repeat steps 2 through 4 as needed, to define the rest of the CustomProperties on the Symbol. In this example, the finished Symbol has all of thefollowing properties:Custom Properties on a Symbol6. Save the Symbol and close the Symbol Editor.7. From the main menu bar, choose Tools > Verify Application. This will update allexisting instances of the Symbol in your application project.INSERTING A SYMBOL IN A SCREENTo insert a Symbol in a Screen and then complete its Custom Properties:1. Open the desired Screen file (.scr) from the Screens folder, or insert a newScreen. The Screen file is opened for editing.2. Insert the desired Symbol in the Screen — there are several ways to do this: Double-click on the Symbol file (.sym) in the Symbols folder; Right-click on the Symbol file and choose Insert from the contextualmenu; Right-click in the Screen Editor where you want to insert the Symbol,choose Insert Linked Symbol from the contextual menu, and select theSymbol file using the standard Open File dialog; or<strong>InduSoft</strong> <strong>Web</strong> <strong>Studio</strong> v6.1 SP2 7–127
IWS Users GuideConfiguring Screens and Graphics Select the Symbol from the Library.Regardless of how it is inserted, the Symbol is placed in the Screen asshown.Symbol Placed in a Screen Note:You can also insert Symbols using the menu option Edit > Paste From.However, when using this menu option, the inserted Symbol does notkeep any link with the Master Symbol — it is just a simple copy of theObject (or Group of Objects) used to create the Master Symbol.Once the Symbol is inserted, you can manipulate it like any other Object inthe Screen. You can align and distribute it with other Objects, and you canapply Dynamic Properties to it. However, the first thing to do is complete theCustom Properties for this instance of the Symbol.3. Open the Object Properties for the Symbol.Object Properties Dialog for the Symbol4. Click Expand to open the Symbol Properties dialog.7–128 <strong>InduSoft</strong> <strong>Web</strong> <strong>Studio</strong> v6.1 SP2
Configuring Screens and GraphicsIWS Users GuideSymbol Properties Dialog for the Symbol5. Enter the property values as needed. In this example, the three Check Boxesare used to determine whether to alert Tom, Dick and/or Harry. The captionsare updated accordingly, and the Check Box tags are configured with thefirst three indices of a boolean array called AlertOptions.Completed Properties for the Symbol6. Click OK to close the Symbol Properties dialog, and then close the ObjectProperties dialog.The Custom Properties are resolved during runtime, as shown below.Symbol During Editing (left) and Runtime (right)<strong>InduSoft</strong> <strong>Web</strong> <strong>Studio</strong> v6.1 SP2 7–129
IWS Users GuideConfiguring Screens and Graphics Note:Remember, the completed Custom Properties on each instance of a Symbol areindependent from every other instance of that Symbol, but if you make anychanges to the Master Symbol file, then those changes automatically propagateto every instance.ADDING TOOLTIPS TO CUSTOM PROPERTIESYou can configure a description for each Custom Property available in the Symbol.After creating a Symbol, open it with the Symbol Editor, right-click in the SymbolEditor (not on the Symbol itself) and choose Edit Symbol Properties from the contextualmenu.When assigning values to the Custom Properties of the Symbol on the screens, theuser can read the description as Tooltips just by moving the mouse cursor on theproperty name, as illustrated on the following picture:Tooltip Showing Description of the PropertyMAKING A USER-MADE SYMBOL AVAILABLE TO OTHER APPLICATION PROJECTSUser-made Symbols are normally available only in the application project where theywere initially created and saved. However, you can send a user-made Symbol to theSystem Symbols directory of the Library, to make it available to all applicationprojects:1. Right-click on the Symbol file (.sym) in the Symbols folder and choose Send toSystem Symbols from the contextual menu. A standard Save As dialog isdisplayed, pointing to the \Symbol directory of IWS (instead of the \Symbolsdirectory of the current application project).7–130 <strong>InduSoft</strong> <strong>Web</strong> <strong>Studio</strong> v6.1 SP2
Configuring Screens and GraphicsIWS Users GuideSaving a Symbol2. Choose a location to save the Symbol file. You can choose one of the existingcategories/directories, or you can create a new one.3. Click Save. The Symbol file is saved chosen location and the Symbol isdisplayed in System Symbols directory of the Library.Symbol in the Library<strong>InduSoft</strong> <strong>Web</strong> <strong>Studio</strong> v6.1 SP2 7–131
Chapter 8: Configuring Task WorksheetsThis chapter provides information on configuring Task worksheets. A task controlshow different tags in the database will be used in relation to your application.Before continuing our application development, we must create a script to simulatecertain variables. Because these variables must be updated constantly, we willcreate this simulation in a Math worksheet. In a real world application, thesevariables would be coming from field equipment such as a PLC or a Soft Control.Use the Tasks tab to access all task worksheets in the current application.Workspace: Tasks TabThis tab contains the following task folders:Alarms: Contains the Alarm worksheets used to configure alarm groups and thetags related to each alarm group in the application. You also use the Alarm taskto define the alarm messages generated by IWS.Trend: Contains the Trend worksheets used to configure history groups that storetrend curves for the application. You can use the Trend task to declare which tagsmust have their values stored on disk, and to create history files for trendgraphs. IWS stores the samples in a binary history file (*.hst), and displaysboth history and on-line samples in a trend graph screen.Recipes: Contains the Recipe worksheets used to configure how data is exchangedbetween the application database and disk files in ASCII or DBF format, and howvalues are transferred between files and real-time memory.Reports: Contains the Report worksheets used to configure reports (text type) thatare sent to a printer or a disk. Report tasks allow you to configure text reportswith system data, which makes report creation easier and more efficient.ODBC: Contains the ODBC worksheets used to configure how the ODBC interfaceruns in a network environment and uses standard Windows ODBCconfiguration. You configure ODBC tasks to exchange data between IWS and anydatabase supporting the ODBC interface.Math: Contains the Math worksheets used to configure and implement additionalroutines to work with different IWS tasks. IWS executes Math worksheets asBackground Tasks during runtime. You can configure Math worksheets to providefree environments for logical routines and mathematical calculations required bythe application.Scheduler: Contains the Scheduler worksheets used to configure events usingdefined mathematical expressions, which are executed according to time, date,or other monitored event.<strong>InduSoft</strong> <strong>Web</strong> <strong>Studio</strong> v6.1 SP2 8–1
IWS Users GuideConfiguring Task WorksheetsTo open Task worksheets for editing, double-click the task button and the worksheetwill display in the Screen/Display window.Configuring an Alarms TaskThe Alarms folder enables you to configure alarm groups and tags related to eachgroup. The Alarm task defines the alarm messages generated by IWS. The primarypurpose of an alarm is to inform the operator of any problems or abnormal conditionduring the process so he can take corrective action(s).To insert an Alarm Worksheet, right-click on the Alarms folder and select the optionInsert from the pop-up menu. You can create multiple Alarm groups (worksheets) andeach group can be configured with independent settings, such as message colors,history log enabled/disabled, and so forth.The Alarm task is executed by the Background Task runtime task (BGTask). The Alarmtask handles the status of all alarms and save the alarm messages to the history, ifconfigured to do so. However, the Alarm task does not display the alarm messages tothe operator. The Alarm/Events control object, available on the Active Objectstoolbar from the screen editor, must be created and configured in a screen in orderto display the alarms to the operator.Each Alarm worksheet is composed of two areas:Header: Settings applied to all tags and alarms configured in the same alarmgroup. These settings allow you to configure the formatting of the message andthe actions that must be triggered based on alarm events (e.g.: print alarms,send alarms by email, and so forth).Body: Configure alarm messages and associate them to conditions linked to tags.Alarm Worksheet8–2 <strong>InduSoft</strong> <strong>Web</strong> <strong>Studio</strong> v6.1 SP2
Configuring Task WorksheetsIWS Users Guide Notes:– You can configure the Alarm Group to sent notifications by emailautomatically, based on alarm events. For further details, see EmailSettings below.– The alarm properties associated to each tag (configured in the body of thealarm group) can also be edited by the Tag Properties dialog, launched bythe Tag Properties toolbar. However, before associating a tag to an alarmgroup, it is necessary to create the alarm group and configure the settingson its header, which will be applied to all tags associated to the group.– As of IWS verion 6.1 SP2, the Alarm task has been modified to avoidautomatically acknowledging alarms by another alarm. For example, the Hi(Lo) alarm should not be automatically acknowledged when the HiHi (LoLo)alarm becomes active. To enable the previous behavior, set the followingkey in your application (.APP) file:[Alarm]UseLegacyPriorityAck=1 Caution:The settings configured in the body of each Alarm worksheet are stored in theTags Database archive(s). Therefore, changes to the tags database may affect thecontent of the Alarm worksheets (body). Notice that each tag/type cannot beavailable in more than one Alarm group simultaneously because the AlarmGroup is a property associated to each Tag/Alarm Type (e.g.: Tag:Level; AlarmType: Hi; Alarm Group: 2).HEADER SETTINGSField Remarks SyntaxDescriptionGroup NameEmail SettingsAdvancedOn Line > Display inAlarm ControlsOn Line > Ack RequiredDescription of the alarm group. It is displayed on the workspace.This field is used for documentation only.Name of the alarm group. During the runtime, the operator canfilter alarms based on the Group Name by the built-in Filters dialogof the Alarm/Event control object.Launches the Email Settings dialog, where you can configure thesettings for emails sent automatically based on alarm conditions.Launches the Advanced Settings dialog, where you can configurethe settings for emails sent automatically based on alarmconditions.When checked, the alarms are available to be displayed on theAlarm/Event Control object.When checked, the alarms require acknowledgment. In this case,the alarms are displayed on the Alarm/Event Control object(Online mode) until they are acknowledged AND normalized.Text(up to 80 chars)Text(up to 32 chars)ButtonButtonCheck-boxCheck-box<strong>InduSoft</strong> <strong>Web</strong> <strong>Studio</strong> v6.1 SP2 8–3
IWS Users GuideConfiguring Task WorksheetsField Remarks SyntaxOn Line > BeepOn Line > Send toPrinterHistory > Save to DiskHistory > Generate AckMessagesHistory > GenerateNorm MessagesColors in Alarm Controls> EnableColors in Alarm Controls> FG and BGWhen checked, the computer keeps beeping while there arealarm(s) to be acknowledged, currently active.When checked, the alarm messages are sent to the printer assoon as the alarm event occurs. When using this option, you mustuse a matrix printer (instead of DeskJet or LaserJet) in order toprint the message(s) and feed just one line – otherwise, eachalarm will be printed in a different sheet of paper. The alarms willbe printed in the default printer. If you want to send alarms to aprinter different from the default printer, you can specify the printerpath/name, editing the following parameter in the.APP file:[AlarmLog]Device=When checked, the alarm messages are stored in the history logwhen they become active.When checked, the alarm messages are stored in the history logwhen they are acknowledged.When checked, the alarm messages are stored in the history logwhen they become normalized.When checked, the alarms configured in this group will bedisplayed with the colors assigned to each alarm state (Start, Ackor Norm), according to the colors configured in the Alarm Group.You can configure the text foreground color (FG) and backgroundcolor (BG) for the alarms displayed on the Alarms/Events Controlobject. Each alarm state can be displayed with a different colorschema:- Start: Alarm active and not acknowledged- Ack: Alarm active and acknowledged- Norm: Alarm no longer active and not acknowledged.Check-boxCheck-boxCheck-boxCheck-boxCheck-boxColor-boxColor-boxBODY SETTINGSField Remarks SyntaxTag Name Name of the tag associated with the alarm. Tag8–4 <strong>InduSoft</strong> <strong>Web</strong> <strong>Studio</strong> v6.1 SP2
Configuring Task WorksheetsIWS Users GuideField Remarks SyntaxTypeLimitMessagePrioritySelectionType of the alarm: HiHi: Activates the alarm if the tag value is equal or higher thanthe limit. Hi: Activates the alarm if the tag value is equal or higher thanthe limit. Lo: Activates the alarm if the tag value is equal or lower thanthe limit. LoLo: Activates the alarm if the tag value is equal or lowerthan the limit. Rate: Activates the alarm if the tag value varies faster than therate specified to the alarm. DevP: Activates the alarm if the tag value is equal or higherthan the Set Point tag plus the limit. DevM: Activates the alarm if the tag value is equal or lowerthan the Set Point tag minus the limit.When using the types Rate, DevP, and DevM it is necessary toconfigure additional settings by the Tag Properties dialog,launched by the Tag Properties toolbar.Limit associated with each alarm. The limits can be modifieddynamically during the runtime, by the tag fields HiHiLimit,HiLimit, LoLimit, LoLoLimit, Rate, DevP and DevM (e.g.:TagLevel->HiLimit).Message associated to the alarm. The message can be displayedon the Alarm/Event Control object and/or stored in the AlarmHistory and/or sent by Email, depending on the settingsconfigured in the Header of the Alarm group.Priority number associated to the alarm. When displaying alarmson the Alarm/Event Control object, the operator can filter and/orsort the alarms by priority.Alias associated to the alarm (e.g.: AreaA, AreaB, etc). Whendisplaying alarms on the Alarm/Event Control object, the operatorcan filter and/or sort the alarms by their selection value.Combo-boxNumberText and/or {Tag}(up to 256 chars)Number(from 0 to 255)Text(up to 7 chars)EMAIL SETTINGS<strong>InduSoft</strong> <strong>Web</strong> <strong>Studio</strong> has the ability to send emails automatically when alarm eventsoccur. The emails are sent using the standard SMTP (Simple Message TransferProtocol). Therefore, you just need a valid email account with a SMTP Server andPOP3 server – it is NOT necessary to install any additional software, such asMicrosoft Outlook. Caution:Before being email to send emails, it is necessary to execute successfully theCNFEmail() function (from the built-in language) at least once. This functionsets the email account parameters used when sending emails from the<strong>InduSoft</strong> <strong>Web</strong> <strong>Studio</strong> v6.1 SP2 8–5
IWS Users GuideConfiguring Task Worksheetsapplication (e.g.: SMTP server, user name, password, and so forth).Alarm Worksheet: Email SettingsField Remarks SyntaxEnable send automatic email Name of the tag associated with the alarm. Check-boxTo, Cc, BccSubjectSend 1 message per email.Target addresses to whom the emails will be sent. You canconfigure multiple email addresses in each box (To, Ccand/or Bcc) by separating the addresses with the semicoloncharacter (“;”).When selecting “Use alarm message”, the alarm messageitself is used as the subject of the email to be sent. Whenselecting “Custom”, you can configure a custom text to beused as Subject when sending the alarm.When checking this option, each alarm is sent in anindividual email and all emails are sent when the SendTrigger is triggered. Otherwise, all alarm messages arebuffered and sent in only one email when the Send Triggeris triggered. You cannot disable (uncheck) this option whenthe Subject option is configured with “Use alarm message”.Text and/or {Tag}(up to 1024 chars)Radio-button andText (up to 1024characters)Check-box8–6 <strong>InduSoft</strong> <strong>Web</strong> <strong>Studio</strong> v6.1 SP2
Configuring Task WorksheetsIWS Users GuideField Remarks SyntaxRemove failed messagesfrom the bufferSend email when alarm isCurrent StatusCurrent ErrorMessage FormatWhen checking this option, the emails are removed fromthe buffer after attempting to send them, even if there wasan error (failure) and the email was not sent. Otherwise, themessages are kept in the buffer until they are sentsuccessfully or when the buffer reaches its maximum size.Allow you to configure which alarm events should generateemails: Active: When the alarm becomes active. Ack: When the alarm is acknowledged. Norm: When the alarm is normalized.Notice that each event can be enabled/disabledindividually.The tag configured in this field, if any, is updated with thecurrent status of the current or last email that theapplication attempted to send: -2: Incorrect version of the INDMail.DLL library. -1: The INDMail.DLL library is corrupted. 0: SendEmailExt() function is not being executed. 1: Sending email(s) 2: Last email was sent successfully. 3: There was an error sending the last email.The tag configured in this field, if any, is updated with theerror message describing the result of the last email thatthe application attempted to send. Therefore, whenconfiguring a tag in this field, this tag must be a String type.This interface allows you to configure the actual format ofthe message sent by email, based on the alarm event(s): Day, Month, Year, Hour, Minute, Second, MS: Theoptions checked will compose the timestamp for thealarm messages. MS stands for milliseconds. Items: The options checked will compose the emailmessage for each alarm. You can configure the order ofthe items, by using the Move Up and Move Downbuttons. Separator: Allow you to choose the separator usedbetween the items checked in this interface.While you configure these settings, the Sample fielddisplays an example of the format of the messageaccording to the settings being configured.Check-boxCheck-boxTagTagCheck-box andRadio-button<strong>InduSoft</strong> <strong>Web</strong> <strong>Studio</strong> v6.1 SP2 8–7
IWS Users GuideConfiguring Task WorksheetsField Remarks SyntaxSend TriggerMax buffer sizeBuffer sizeClear BufferDisable sendWhen the alarm events are generated, they are kept in aninternal buffer (memory). When the tag configured in thisfield changes of value, the email(s) on the internal bufferare sent to the addresses configured in the To, Cc and Bccfields. After being successfully sent, the emails areremoved from the internal buffer.Maximum number of alarm messages (events) that can bestored in the internal buffer simultaneously. When this limitis reached, the buffer follows a FIFO (First-In, First-Out)behavior, discharging the older messages as soon as thenewer messages are generated, guaranteeing that thebuffer does not exceed the limit configured in this field.The tag configured in this field, if any, is updated with thenumber of messages (events) currently stored in theinternal buffer.When the tag configured in this field changes of value, allmessages (events) currently stored in the buffer aredeleted. These messages will never be sent.When the value of the tag configured in this field is TRUE,the email feature is temporarily disabled. Alarm eventsgenerated while the email feature is disabled will not bestored in the internal buffer. Also, emails will NOT be sentin this condition, even if the tag configured in the field SendTrigger changes of value.TagTag or NumberTagTagTagADVANCEDAlarm Worksheet: AdvancedField Remarks Syntax8–8 <strong>InduSoft</strong> <strong>Web</strong> <strong>Studio</strong> v6.1 SP2
Configuring Task WorksheetsIWS Users GuideField Remarks SyntaxDisableTotal AlarmsTotal UnackRemote Ack TriggerDead Band Time > ActivationDead Band Time >NormalizationDead Band Time > TimeStamp/ValueWhen the value of the tag configured in this is TRUE, allalarms configured in this group are temporarily disabled.This option is useful to disable alarms under specialconditions (e.g.: during maintenance).The tag configured in this field, if any, is updated with thenumber of alarms from this group, which are currentlyactive.The tag configured in this field, if any, is updated with thenumber of alarms from this group, which are currentlyactive AND have not been acknowledged yet.When the tag configured in this field change of value, allactive alarms from this group are acknowledged. Thisoption can be used to acknowledge alarms regardless ofany action from the operator.Each alarm must remain continuously in its alarm conditionfor the period of time specified in this field before becomingactive. This option is useful to avoid generating alarms onintermittent conditions (e.g.: noise). If this field is left inblank, the alarm becomes active as soon as its condition istrue.Each alarm must remain continuously out from its alarmcondition for the period of time specified in this field beforebecoming normalized. This option is useful to avoidnormalizing alarms on intermittent conditions (e.g.: noise).If this field is left in blank, the alarm becomes normalizedas soon as its condition is no longer true.Each alarm maintains a time stamp of the last significantactivity, along with the value of the tag at that time. You canselect the type of activity that updates the time stamp: Activation/Norm (default): The time when the deadband ended — that is, when the alarm becomesactivated or normalized. Last Tag Change: The time when the value of the taglast changed during the dead band. Start Condition: The time when the dead band started.TagTagTagTagTag or NumberTag or NumberCombo<strong>InduSoft</strong> <strong>Web</strong> <strong>Studio</strong> v6.1 SP2 8–9
IWS Users GuideConfiguring Task WorksheetsALARM HISTORYThe alarm history can be saved either with the <strong>InduSoft</strong> <strong>Web</strong> <strong>Studio</strong> proprietaryformat or to an external SQL Relational database by ADO. The alarm history settingscan be configured by the Project Settings > Options dialog.Project Settings: Options TabThe Alarm History and Events interface allows you to configure the followingsettings:Field Remarks SyntaxHistory Life Time (days)The history for alarm/event messages older than the number ofdays specified in this field are automatically deleted, following aFIFO (First-In, First-Out) behavior. If this field is left in blank, thehistory of alarms/events is not deleted automatically.Number8–10 <strong>InduSoft</strong> <strong>Web</strong> <strong>Studio</strong> v6.1 SP2
Configuring Task WorksheetsIWS Users GuideField Remarks SyntaxHistory FormatAlarm DatabaseDefines the format of the history of alarms/events: Proprietary: Saves the history in the proprietary format. Thealarm messages are saved in a text file with the nameALxxyyzz.ALH, where:o xx: Last two digits of the current year.o yy: month.o dd: dayThere will be one history file for each day. By default, the alarmhistory files created with the proprietary format are stored in the\Alarm sub-folder of the application. However, it is possible todirect the alarms to a different directory by using theSetAlarmPath() function from the built-in language. Database: Saves the history in a third-party SQL RelationalDatabase (e.g.: SQL Server). <strong>InduSoft</strong> <strong>Web</strong> <strong>Studio</strong> does notprovide the database itself.When selecting Database as the format for the history of alarms,the specific settings to interface with the third-party SQL RelationalDatabase can be configured by the dialog launched when pressingthis button. For further details about support for third-party SQLRelational Databases, see Chapter 17: IWS Database Interface.Combo-box-When saving the alarm history in the proprietary format, each alarm event is savedin a new line, using the pipe character (“|”) to delimiter the different fields, asillustrated below:P1|P2|P3|P4|P5|P6|P7|P8|P9|P10|P11|P12|P13|P14|P15|P16|P17|P18|P19|P20|P21P1|P2|P3|P4|P5|P6|P7|P8|P9|P10|P11|P12|P13|P14|P15|P16|P17|P18|P19|P20|P21..P1|P2|P3|P4|P5|P6|P7|P8|P9|P10|P11|P12|P13|P14|P15|P16|P17|P18|P19|P20|P21The format of the history both in proprietary format and in the SQL RelationalDatabase format is described in the following table:ProprietaryFormatSQL Relational DatabaseField Number Field Name Field TypeRemarksFileVersionP1 - - File version (Current = 003) 001P2Al_Start_Time Date/TimeStart Date (DD/MM/YYYY) 001P3Start Time (HH:MM:SS) 001P4 Al_Tag Text Tag Name 001<strong>InduSoft</strong> <strong>Web</strong> <strong>Studio</strong> v6.1 SP2 8–11
IWS Users GuideConfiguring Task WorksheetsProprietaryFormatSQL Relational DatabaseField Number Field Name Field TypeRemarksFileVersionP5 Al_Message Text Alarm Message 001P6 Al_Ack NumberP7 Al_Active NumberAck, where: 0 Indicates the alarm was acknowledged or does notrequire acknowledgment 1 Indicates the alarm was not acknowledgedActive, where: 0 Indicates the alarm is not active 1 Indicates the alarm is active001001P8 Al_Tag_Value Number Tag Value when the event occurred 001P9 Al_Group Number Alarm Group Number 001P10 Al_Priority Number Priority Number 001P11 Al_Selection Text Selection 001P12 Al_Type NumberP13 Al_Ack_Req NumberType, where: 1 is HiHi 2 is Hi(On) 4 is Lo(Off) 8 is LoLo 16 is Rate(Change) 32 is DevP 64 is DevMAck required, where: 0 Alarm requires acknowledgement (Ack) 1 Alarm does not require acknowledgement001001P14Al_Norm_Time Date/TimeNormalization Date (DD/MM/YYYY) 001P15Normalization Time (HH:MM:SS) 001P16Al_Ack_Time Date/TimeAck Date (DD/MM/YYYY) 001P17Ack Time (HH:MM:SS) 001P18 Al_User User Name 002P19 Al_User_Comment Comment 002P20 Al_User_Full User Full Name 003P21 Al_Station Station 0038–12 <strong>InduSoft</strong> <strong>Web</strong> <strong>Studio</strong> v6.1 SP2
Configuring Task WorksheetsIWS Users GuideProprietaryFormatSQL Relational DatabaseField Number Field Name Field TypeRemarksFileVersionP22 Al_Prev_Tag_Value Number Previous Value 003P23 Bias Number Time Zone Bias 003- Al_Start_Time_ms Number- Al_Norm_Time_ms Number- Al_Ack_Time_ms Number- Al_Deleted NumberNumber of milliseconds for the Start Time timestamp.This field is used when the database does not supportms in a TimeStamp field.Number of milliseconds for the Norm Time timestamp.This field is used when the database does not supportms in a TimeStamp field.Number of milliseconds for the Ack Time timestamp. Thisfield is used when the database does not support ms in aTimeStamp field. 0: Alarm message was not deleted by the user (notvisible). 1: Alarm message was deleted by the user (visible).003003003003- Last_Update Date/Time Timestamp of the last update for this event. 003- Last_Update_ms NumberNumber of milliseconds for the Last Event timestamp.This field is used when the database does not supportms in a TimeStamp field.003For detailed information about saving alarm history files, including instructions forconfiguring database settings, see Chapter 17: IWS Database Interface.Configuring a Trend TaskThe Trend folder enables you to configure history groups that store trend curves.You can use the Trend task to declare which tags must have their values stored ondisk, and to create history files for trend graphs. IWS stores the samples in a binaryhistory file (*.hst), and shows both history and on-line samples in a screen trendgraph.To show a trend graph on the screen, you must click the Trend tool on the ActiveObjects toolbar to create a trend object.Use one of the following methods to insert a new Trend worksheet:Right-click on the Trend folder and select Insert from the pop-up.Select File → New from the menu bar or click on the New tool on the Standardtoolbar to display the New Document dialog. Click Trend Worksheet, and thenclick OK.<strong>InduSoft</strong> <strong>Web</strong> <strong>Studio</strong> v6.1 SP2 8–13
IWS Users GuideConfiguring Task WorksheetsA new worksheet displays, as follows:Trend WorksheetThe Trend worksheet is divided into two areas:Header area (top section), which contains information for the whole groupBody area (bottom section), where you define each tag in the group. This sectioncontains several columns (only two are shown in the preceding figure).Use the Header parameters on this worksheet as follows:Description field: Type a description of the worksheet for documentation purposes.Type combo-box: Click the arrow button to select a trend type from the list. Thefollowing options are available:– Proprietary* File Format: Binary* Default Path: …\\Hst\GGYYDDMM.HST , where:YY = Two last digits of the yearMM = MonthDD = DayNote: IWS provides the HST2TXT.EXE and TXT2HIST.EXE programs, whichenable you to convert trend history files saved on proprietary format (.hst) totext files (.txt) and vice versa. For more information about these programs,see “Converting Trend History Files from Binary to Text” on page 8–22and“Converting Trend History Files from Text to Binary,” on page 8–23.– Database* Database Type: Chosen by the user* Default Table Name: TRENDGGG (GGG = Trend Worksheet Number – e.g.TREND001 for the Trend Worksheet 001)Note: For more information about the structure of the Database table thatIWS uses to save history files, see Data Saved in Trend History File.8–14 <strong>InduSoft</strong> <strong>Web</strong> <strong>Studio</strong> v6.1 SP2
Configuring Task WorksheetsIWS Users GuideDatabase Configuration: Opens the Database Configuration dialog to enter therequisite settings to link IWS to an external SQL Relational Database, for thepurpose of saving the trend history.Database Configuration WindowDatabase combo-box: Allows you to select either Primary or Secondary. WithPrimary, all settings displayed in the Database Configuration window apply tothe Primary Database interface. Otherwise, they apply to the SecondaryDatabase interface. You can configure the Secondary database in the followingmodes:– Disabled: In this mode, IWS saves data in the Primary Database only. If thePrimary Database is unavailable for any reason, the data is not savedanywhere else. This option may cause loss of data if the Primary Database isnot available.– Redundant: In this mode, IWS saves data in both Primary and SecondaryDatabases. If one of these databases is unavailable, IWS keeps saving dataonly in the database that is available. When the database that wasunavailable becomes available again, IWS synchronizes both databasesautomatically.– Store and Forward: In this mode, IWS saves data in the Primary Database only.If the Primary Database becomes unavailable, IWS saves the data in theSecondary Database. When the Primary Database becomes available again,IWS moves the data from the Secondary Database into the PrimaryDatabase.Using the Secondary Database, you can increase the reliability of the system anduse the Secondary Database as a backup when the Primary Database is notavailable. This architecture is particularly useful when the Primary Database islocated in the remote station. In this case, you can configure a SecondaryDatabase in the local station to save data temporarily if the Primary Database isnot available (during a network failure, for instance).<strong>InduSoft</strong> <strong>Web</strong> <strong>Studio</strong> v6.1 SP2 8–15
IWS Users GuideConfiguring Task Worksheets– Use application default check-box: When this option is checked, IWS uses thesettings configured in the Default Database for the task that is beingconfigured (Connection string, User name, Password, Retry Interval andAdvanced Settings). When this option is not checked, you can configurethese settings individually to the current task.– Connection string field: This field defines the database where IWS will write andread values as well as the main parameters used when connecting to thedatabase. Instead of writing the Connection string manually, you can pressthe browse button (…) and select the database type from the Data Link Propertieswindow.Note:The list of Database Providers shown in the Data Link Propertieswindow depends on the providers actually installed and available in thecomputer where you are running IWS. Consult the operating systemdocumentation (or the database documentation) for further informationregarding the settings of the Provider for the database that you areusing.– User name field: User name used to connect to the database. The user nameconfigured in this field must match the user name configured in thedatabase.– Password field: Password used to connect to the database. The passwordconfigured in this field must match the password configured in the database.8–16 <strong>InduSoft</strong> <strong>Web</strong> <strong>Studio</strong> v6.1 SP2
Configuring Task WorksheetsIWS Users Guide– Retry Interval field: If IWS is unable to connect to the database for any reason, itretries automatically to connect to the database after the number of secondsconfigured in this field have passed.– Advanced button: After pressing this button, you have access to customizesome settings. For most applications, the default value of these settings donot need to be modified and should be kept.* Milliseconds combo box: You can configure how the milliseconds will besaved when saving the date in the database. Each database saves the datein different formats; for example, some databases do not supportmilliseconds in a Date field. The following options are available:• Default: Uses the format pre-defined for the current database. Thedatabases previously tested by <strong>InduSoft</strong> are previously configured withthe most suitable option. When selecting Default, IWS uses the settingpre-configured for the current database type. If you are using adatabase that has not been previously configured by <strong>InduSoft</strong>, theDefault option attempts to save the milliseconds in a separate field.Tip:The default option for each database is configured in the<strong>Studio</strong>ADO.ini file, stored in the \BIN sub-folder of IWS. See the<strong>Studio</strong> Database Gateway section for information about how toconfigure the <strong>Studio</strong>ADO.ini file.• Disable: Does not save the milliseconds at all when saving the date inthe database.• Enable: Saves the milliseconds in the same field where the date is saved.• Separate Column: Saves the milliseconds in a separated column. In thiscase, the date is saved in one field (without the milliseconds precision)and the number of milliseconds is saved in a different column. Thisoption is indicated where you want to save timestamps with theprecision of milliseconds but the database that you are using does notsupport milliseconds for the Date fields.* Save time difference check-box: When this option is checked (default), IWSsaves the Time Zone configured in the computer where the application isrunning in each register of the database. This option must be enabled toavoid problems with daylight savings time.* Database Gateway: Enter the Host Name/IP Address where the <strong>Studio</strong>database gateway will be running. The TCP Port number can also bespecified, but if you are not using the default, you will have to configure<strong>InduSoft</strong> <strong>Web</strong> <strong>Studio</strong> v6.1 SP2 8–17
IWS Users GuideConfiguring Task Worksheetsthe <strong>Studio</strong> database gateway with the same TCP Port. See “<strong>Studio</strong>Database Gateway” for information about how to configure the <strong>Studio</strong>ADO Gateway.* Disable Primary Key: For some modules, IWS will try to define a primary keyto the table in order to speed up the queries. If you are using a databasethat does not support primary keys (e.g. Microsoft Excel), you shouldcheck this field.– Table pane: This area allows you to configure the settings of the Table wherethe data will be saved. All tasks can share the same database. However, eachtask (Alarm, Events, Trend worksheets) must be linked to its own Table.<strong>InduSoft</strong> does not check for invalid configurations on this field, therefore youshould make sure that the configuration is suitable for the database that youare using.– Use default name check-box: When this option is checked (default), IWS savesand/or retrieve the data in the Table with the default name written in theName field.– Automatically create check-box: When this option is checked (default), IWScreates a table with the name written in the Name field automatically. If thisoption is not checked, IWS does not create the table automatically. Therefore,it will not be able to save data in the database, unless you have configured atable with the name configured in the Name field manually in the database.– Name: Specifies the name of the Table from the database where the historydata will be saved.– Refresh button: If the database configured is currently available, you canpress the Refresh button to populate the Name combo-box with the name of thetables currently available in the database. In this way, you can select thetable where the history data should be saved instead of writing the Tablename manually in the Name field.Run-Time pane: This area allows you to enter with IWS tags. The following fieldsare available:– Status (output) check-box: The tag in this field will receive one of the followingvalues:ValueDescription0 Disconnected from the database. The database is notavailable or your configuration is incorrect.1 The database is connected successfully2 The database is being synchronized– Reload (output): If you are using in curly brackets in any of the configurationfields, you have to specify the reload tag. When you want to reconnect to thedatabase using the updated values on your tags, set the tag on this field to 1.IWS will update the configuration when trying to perform an action in thedatabase and will set the tag back to 0 when it is finished.For instructions for configuring a default database for all task history (Alarm, Eventand Trend), see Configuring a Default Database for All Task History on page 6–20.For more information about saving Trend history, including an explanation of thefields saved, see Chapter 17: IWS Database Interface.Save Options pane: Use the following parameters to define when and how to savetrend history files:8–18 <strong>InduSoft</strong> <strong>Web</strong> <strong>Studio</strong> v6.1 SP2
Configuring Task WorksheetsIWS Users Guide* Save On Trigger check-box and field: Click (enable) and type a tag name tosave trend samples when someone changes the specified tag. (Tag changecan be an event from the Scheduler.)* Save On Tag Change check-box: Click (enable) to always save the trendsample when a value change occurs in any of the tags from that group.Advanced button: Click to display the following window:Trend Advanced Settings– Batch pane: The Batch pane provides the following fields:* Start/Stop (input): Enter the tag that will start/stop your batches. When thetag in this field is set to TRUE (different from 0), IWS will either startsaving data to your batch file (if you are using proprietary format), or adda new register to the BatchHistory table on your database, indicating thata batch has been started. Note that historical data will be saved accordingto the configuration in the fields Save Trigger and Save On Tag Changeoptions on the Trend Worksheet.* Name (input): This field represents the batch name; its meaning dependson the format selected on the Trend Worksheet:– If you selected Proprietary in the Type field, the Name should comply withthe format [Path], where:Path: An optional field. If the path is not specified, the batch history filewill be stored in the same path as the .app file.FileName: Name of the batch history file.– If you selected Database in the Type field, the value in this field will bestored in the Batch_Name field of the BatchHistory table.Tip:You can enter tag names between curly brackets in this field (e.g.C:\MyBatches\{MyTagWithName}{MyTagWithNumber}.hst).* Delete (input): When the tag specified in this field changes its value, thebatch will be deleted. With the Proprietary format, the batch history file willbe removed. With the Database format, it will set the Delete field in theBatchHistory table to true, but the saved historical data will remain. TheTrend object only sees batches that have the delete field set to 0 (zero).<strong>InduSoft</strong> <strong>Web</strong> <strong>Studio</strong> v6.1 SP2 8–19
IWS Users GuideConfiguring Task Worksheets* Existent (output): The tag entered on this field will receive the value 1 if thebatch specified in the Name field already exists; otherwise the tag willreceive the value 0.* Description (output): This field is available only when using the Databaseformat. When the tag in the Start/Stop field changes to TRUE, the registerthat is added to the BatchHistory table will display the string in this field.Tip:You can enter tag names between curly brackets in this field (e.g.{MyTag}).* Save data even if batch is not running: If this field is unchecked, the historicaldata will be saved only when the tag in the Start/Stop field is TRUE.Tip:The Batch Historical data can be displayed to the user either in Graphicalformat or Table format. The Trend object and Grid object sections explainhow to display information on these formats.– Disk Space Control pane: The following options are available:* History Life Time (days) field: Specify how many days to keep the history file onthe disk. After the specified period, IWS automatically erases the file. Usethis option only for files based on a date.* Compress After (days) field: Specify how many days to keep the trend historyfile (*.hst) on the disk before compressing the file. After the specifiedperiod, IWS automatically compresses the file. Use this option only forfiles based on a date. This option is not available for WinCE applications.* Disable All Data Saving: Enter with a tag in this field. When the value on thistag is TRUE (different from zero), the trend task stops recording data forthis worksheet.Use the Body parameters on the Trend worksheet as follows:Tag Name field: Type the tag name to be saved in the history file. Caution:After adding or removing tags from a Trend worksheet, any history files(*.HST) you previously created will no longer be compatible with the newsetting. Consequently, the data from those history files will no longer bedisplayed by the trend object.Dead Band field: Type a value to filter acceptable changes when Save on Tag Change isused. For example, Dead Band has value = 5. If the tag value is 50 and changes to52, the system will not register this variation in the database, because it is lessthan 5. If the change is equal to or greater than 5, the new value will be saved tothe history file.Field field: Name of the field in the database where the tag will be stored. If thisfield is left blank, the name of the tag will be used as the tag name. Array tagsand classes will have the characters ‘[’ , ‘]’ and ‘.’ Replaced by ‘_’.8–20 <strong>InduSoft</strong> <strong>Web</strong> <strong>Studio</strong> v6.1 SP2
Configuring Task WorksheetsIWS Users GuideExamples:Tag NameMyArray[1]MyClass.Member1MyClass[3].Member2Default FieldMyArray_1MyClass_Member1MyClass_3_Member2 Note:The Trend task can accept only up to 240 tags in a single worksheet. If you manuallyconfigure more than 240 tags in the same worksheet, then the Trend task willgenerate an error when you start the finished application.<strong>InduSoft</strong> <strong>Web</strong> <strong>Studio</strong> v6.1 SP2 8–21
IWS Users GuideConfiguring Task WorksheetsConverting Trend History Files from Binary to TextBy default, IWS saves trend history files in a binary format (.hst). Because you maywant to have these files in .txt format, IWS provides the hst2txt.exe program toconvert trend history files from binary into text format.To convert a file, use the following procedure: From a DOS window, change directory (cd) to the IWS Bin directory.c:\>cd \Program Files\<strong>InduSoft</strong> <strong>Web</strong> <strong>Studio</strong>\Bin At the command prompt, copy the Hst2txt.exe into the same directory wherethe .hst file is located.At the command prompt, type Hst2txt.exe and specify the followingparameters:: Name of the trend history file to convert[]: Data separator character (default is )[]: Extended functionality (convert data with more than 10 characters)[]: Start time in hours (HH), minutes (MM), and seconds (SS)[]: Finish time in hours (HH), minutes (MM), and seconds (SS)[]: Include milliseconds in the Time column (Type 1 to print the millisecondsvalue in the text file created from the .hst file.)For example:Hst2txt.exe 01952010.hstThe program creates a plain text .hdr (header) file and .txt file that can beviewed using any text editor (for example, Notepad).The .hdr file contains the name of the tags configured in the Trend worksheet.The .txt file contains the tag values saved in the history file.After the program converts the file, type Exit to close the DOS window. Note:Alternatively, you can use the HST2TXT function in a Math worksheet toconvert binary files into text format automatically without having to use aDOS window.8–22 <strong>InduSoft</strong> <strong>Web</strong> <strong>Studio</strong> v6.1 SP2
Configuring Task WorksheetsIWS Users GuideConverting Trend History Files from Text to BinaryIWS provides the txt2hst.exe program to convert text files back into binaryformat.To convert a file, use the following procedure: From a DOS window, change directory (cd) to the IWS Bin directory.c:\>cd \Program Files\<strong>InduSoft</strong> <strong>Web</strong> <strong>Studio</strong>\Bin At the command prompt, copy the txt2hst.exe into the same directory wherefthe .txt file is located.At the command prompt, type txt2hst.exe and specify the followingparameters:: Name of the ASCII file with history data to convert[]: Data separator character (default is )[]: Extended functionality (data value with more than 10 characters)[]: Start time of data value in hours (HH), minutes (MM), andseconds (SS)[]: Finish time of data value in hours (HH), minutes (MM), andseconds (SS)For example:Txtt2hst.exe 02950201.txtThe program creates a .hdr (header) file and converts the .txt file into a .hstbinary file.After the program converts the file, type Exit to close the DOS window. Note:You cannot create a math script for the txt2hst.exe program and use it ina Math worksheet to convert text files into binary format as you can forhst2txt.exe. The math script shortcut is available for binary files only.Creating Batch HistoryIWS provides powerful tools that enable the user to create and manage batchhistorical information. The user is able to create batches by using the followingformats: Proprietary: When using the proprietary format, each batch will be stored on adifferent historical file. The user can save historical data in both the normalhistorical file and batch files at the same time (see the “Configuring a TrendTask” in Chapter 8: Configuring Task Worksheets, for more information aboutthese files). Database: The historical data used for the batch is saved in the same table as thenormal historical data; an additional table called BatchHistory keeps registerswith the information about the batches. The list below describes the fields on theBatchHistory table:<strong>InduSoft</strong> <strong>Web</strong> <strong>Studio</strong> v6.1 SP2 8–23
IWS Users GuideConfiguring Task WorksheetsField Name Data Type DescriptionGroup_Number Integer Trend group number. This is the number of the worksheetthat you are creating to specify the tags that will be storedon your batch history.Batch_Name String Name of the batchStart_Time TimeStamp Date and Time that the batch was started.End_Time TimeStamp Date and Time that the batch was finishedPri_Table String ReservedSec_Table String ReservedDescription String Batch descriptionDeleted Boolean 0: Batch has not been deleted1: Batch has been deletedTip:You can customize the name of the table and the name of the columnscreated in the database by editing the .APP file, asfollows:[Trend]=[Trend]BatchHistory=For example:[TREND001PRI]BatchHistory=MyTableForPrimaryDB[TREND001SEC]BatchHistory=MyTableForSecondaryDB[Trend]Group_Number=Trend_WorksheetBatch_Name=Load_NumberConfiguring a Recipes TaskThe Recipe folder enables you to configure Recipe worksheets for data interchangebetween the application database and disk files in ASCII, XML, or DBF format;transferring values between files and real-time memory.You typically use a Recipe worksheet used to store process recipes, but you canstore any type of information (such as operation logs, passwords, and so forth) inthese files. The Recipes task reads and writes tag values into files, and it transferstag values from the application to a file or from a file to the application. Note:IWS sequentially increments the number that identifies the Recipe worksheet foreach newly created worksheet.8–24 <strong>InduSoft</strong> <strong>Web</strong> <strong>Studio</strong> v6.1 SP2
Configuring Task WorksheetsIWS Users GuideUse one of the following methods to create a new Recipe worksheet:Right-click on the Recipes folder, and then click the prompt screen.Select File > New from the menu bar or click on the New button on the Standardtoolbar to open the New Document dialog. Select Recipe Worksheet and click OK.A new Recipe worksheet displays:Recipe WorksheetThe Recipe worksheet is divided into two areas:Header area (top section), which contains information for the whole groupBody area (bottom section), where you define each tag in the group.Use the Header parameters on this worksheet as follows:Description field: Type a description of the worksheet for documentation purposes.Save As XML: Click (check) to save information in XML format, or (uncheck) to savein the .DAT format. Caution:You can load information in a .DAT file into different tags using a secondRecipe worksheet, but you must load information in an .XML file into tagswith the same name as the tag from which the data originated. Note:As with HTML pages, you must be running the <strong>Web</strong> server to view XML datafrom the <strong>Web</strong>. Unlike the HTML pages in the runtime system, XML pages donot need to have the application running to view the XML data. (You must berunning Internet Explorer version 5.0 or higher to view XML data.)File Name field: Type a file name related to the recipe group, using static text(File1) or a dynamic tag value ({FileNameTag}).Register Number field: Type a tag to define the register number to be read or writteninto a DBF file. IWS enables this field for older applications created to use DBFfiles, but disables this field for newer projects.<strong>InduSoft</strong> <strong>Web</strong> <strong>Studio</strong> v6.1 SP2 8–25
IWS Users GuideConfiguring Task WorksheetsUnicode check-box: Click (enable) to save the recipe in UNICODE format (twobytes per character) or (disable) to save the recipe in ANSI format (one byte percharacter). Note:When saving a worksheet, you can save it using any name you choose (you arenot required to use a predefined file name). A configuration file using the defaultextension .RCP (or .XSL if you specify Save As XML) contains the recipeconfiguration and the File Name field contains the data file name to be read orwritten.Use the Body parameters on this worksheet as follows:Tag Name field: Type tag names to update with file contents or with values to writeto a file. If the tag is an array, you must specify the first position to use.If the tag is an Array or a Class (or both), then IWS automatically enables everyarray position and class member by default. To configure a specific arrayposition and/or class member, type it in the Tag Name field as normal. Forexample, level[3].member.Number of Elements field: Specify how many positions of the array tag are in use.Tip:You can configure a tag name between curly brackets {TagName} in thisfield, allowing the user to change the Number of Elements configured inthe Recipe for each array tag dynamically, during the runtime. Caution:When you define an array tag, its initial position is zero, although IWS usesthe tag in case of invalid position configuration.To read or write a recipe group, use the <strong>InduSoft</strong> Scripting Language Recipefunction.Configuring a Reports TaskThe Reports folder contains a definition of reports (text type) to be sent to a printeror disk. The Reports task allows you to configure your own report (text type) with datafrom the system. The main purpose of this task is to make report creation easier andmore efficient. Note:IWS sequentially increments the number that identifies the Report worksheet foreach newly created worksheet.To print a report, use an <strong>InduSoft</strong> Scripting Language function anywhere anexpression is allowed.Use one of the following methods to insert a new Report worksheet:Right-click on the Reports folder and click on the prompt screen.Select File → New from the menu bar or click the New icon on the Standard toolbarto open the New Document dialog. Select Report Worksheet and click OK.8–26 <strong>InduSoft</strong> <strong>Web</strong> <strong>Studio</strong> v6.1 SP2
Configuring Task WorksheetsIWS Users GuideA new worksheet displays:Report WorksheetThe Report worksheet is divided into two areas:Header area (top section), which contains information for the whole group.Body area (bottom section), where you define the tag and text to be used ingenerating the report.Use the Header parameters on this worksheet as follows:Description field: Type a description of the worksheet for documentation purposes.Disk Append check-box: When printing to a file,– Check the box to add (append) the new report to the end of an existing file– Uncheck the box to replace the existing report in that file with the new reportUnicode check-box: Click (enable) to save the report in UNICODE format (twobytes per character) or (disable) to save the report in ANSI format (one byte percharacter).Lock Value into the (Tag/Expression) length check-box: Click (enable) to automaticallytruncate the values of Tags/Expressions in the report to fit between the curlybrackets, as they are positioned in the Body of the report (see below). This helpsto preserve the layout of the report. If this option is left unchecked, then the fullvalues of Tags/Expressions in the report will be displayed.Output File field: Type a tag name for the output file (using the {tag} syntax)where data is stored when you are printing to a file. Where the tag value is partof the file name.For example: report{day}.outWhere the generated file might be report1.out, report2.out ..., according tothe tag day value. Note:A report configuration file uses .RCP as the default extension. The Output Filefield is the file where data is stored.Edit RTF file button: Click to access the report as an RTF file, which you can editfor layout modification and so forth.<strong>InduSoft</strong> <strong>Web</strong> <strong>Studio</strong> v6.1 SP2 8–27
IWS Users GuideConfiguring Task WorksheetsUse the Body portion of this worksheet for report formatting. You can configure areport using data in the system and indicating where to print the tag values. Eachtag name will replace the {tag_name} tag name. For real type tags, use the followingsyntax: {tag_name n}, where n is the number of decimal characters you wantprinted. Note:If you are using the standard report editor (text only: ASCII or UNICODE), thenthe number of characters reserved for the tag value will be equal to the numberof characters used to type the tag name (including the two “curly” brackets). Forexample, if you configure {TagA} in the report body, reserve six characters forthe tag value in the report file. This behavior is not valid for reports in RTFformat.Configuring an ODBC TaskThe ODBC interface runs in a network environment and uses the standard WindowsODBC configuration. The ODBC task is capable of data interchange between IWSand any database supporting this interface.In addition to configuring the ODBC worksheet, you must configure the WindowsODBC standard driver. IWS refers to the User DNS (Data Source Name), which youconfigure through the Control Panel. For more information, refer to your Windowsdocumentation. Note:IWS sequentially increments the number that identifies the ODBC worksheet foreach newly created worksheet.Use one of the following methods to insert a new ODBC worksheet:Right-click on the ODBC folder and click on the prompt screen.Select File → New from the menu bar or click the New icon on the Standard toolbarto open the New Document dialog. Select ODBC Worksheet and click OK.8–28 <strong>InduSoft</strong> <strong>Web</strong> <strong>Studio</strong> v6.1 SP2
Configuring Task WorksheetsIWS Users GuideA new worksheet displays:ODBC WorksheetThe ODBC worksheet is divided into two areas:Header area (top section), which contains information for the whole group,defines tags to start read and write events, sets return values, handles databaseaccess parameters, and so forth.Body area (bottom section), where you define each tag in the group and relatetags to fields in the current register from the database table.Use the Header parameters on this worksheet as follows:Description field: Type a description of the worksheet for documentation purposes.Data Source field: Type the same Data Source Name (DSN) specified in theWindows Control Panel containing information about specific database access.You can change the Data Source name during runtime by configuring a tagbetween curly brackets in this field. For example:{DSNNameTag}User field: Type a user name to access to the database. You can change the Username during runtime by configuring a tag between curly brackets in this field.Password field: Type the user’s password. You can change the Password duringruntime by configuring a tag between curly brackets in this field.Table field: Type a table name in the database. You can change the Table nameduring runtime by configuring a tag between curly brackets in this field.Condition field: Type a search condition or filter. Status field: Type a return value (fill in with a tag name). The tag should report 0for success and use another value for an error code.Transaction field: Type a tag that changes value when the transaction is executed.<strong>InduSoft</strong> <strong>Web</strong> <strong>Studio</strong> v6.1 SP2 8–29
IWS Users GuideConfiguring Task WorksheetsSelect, Next, Insert, Delete, or Update Trigger fields: Type a tag to work as a trigger,where each value change causes the system to execute the correspondingcommand. At least one trigger field is required.Use the Body parameters on this worksheet as follows:Tag Name field: Type the names of tags to update with file contents or tags whosevalues should be written to a file.Column: Type the location in which to find data in the file (for example, in anExcel file, if you type in Column 1, Row 1, the entire column gets defined ascolumn 1).You must use the Windows Control Panel to set up the ODBC interface for Excelfiles. The procedure is as follows: Click the Start > Settings > Control Panel. When the Control Panel window displays, double-click on the ODBC button toopen the ODBC Data Source Administrator dialog. In the ODBC Data Source Administrator dialog, click Excel Files in the User DataSources list, and then click the Configure button. When the ODBC Microsoft Excel Setup dialog displays, type the Windowsconfiguration name to be used in the DSN field on ODBC worksheet into the DataSource Name field. Click the Select Workbook button to configure the Excel file you want to use. Return to the ODBC Data Source Administrator dialog and verify that your UserDSN displays in the list. Click OK to close the dialog. After configuring the ODBC Windows interface, you must configure the IWSODBC worksheets. From the Tasks tab, insert a new ODBC worksheet. Be sure you set the ODBC Runtime to start automatically from the Execution Tasks tab(Project → Project Status).To start this configuration, you simply need to run the project. Your application willhandle the Select, Next, Insert, Delete, and Update triggers to allow data to exchangethroughout rows in Excel and tags configured in the worksheet.Consult your Windows documentation for the meaning of specific error codes.The following is a list of IWS error codes:Select command1 - Error in the ODBCPREPARE function.2 - Error in the ODBCBINDCOL function.3 - Error in the ODBCEXECUTE function.4 - Error in the ODBCSETCH function.Next command5 - Error in the ODBCSETCH function.Insert command6 - Error in the ODBCPREPARE function.7 - Error in the ODBCEXECUTE function.8 - Error in the ODBCCOMMITE function.Update command9 - Error in the ODBCPREPARE function.10 - Error in the ODBCEXECUTE function.8–30 <strong>InduSoft</strong> <strong>Web</strong> <strong>Studio</strong> v6.1 SP2
Configuring Task WorksheetsIWS Users Guide11 - Error in the ODBCCOMMITE function.Delete command12 - Error in the ODBCPREPARE function.13 - Error in the ODBCEXECUTE function.14 - Error in the ODBCCOMMITE function.Configuring a Math TaskThe Math folder allows you to implement additional routines to work with the basicfunctions of different IWS tasks. A Math worksheet contains a group of programminglines that IWS executes as a Background Task during runtime. You can configurethe Math worksheet to provide free environments for logical routines andmathematical calculations needed by the project. For these purposes, the <strong>InduSoft</strong>Scripting Language is very simple and easy to use. Note:IWS sequentially increments the number that identifies the Math worksheet foreach newly created worksheet.Use one of the following methods to insert a new Math worksheet:Right-click on the Math folder and then click on the prompt screen.Select File → New from the menu bar or click the New button on the Standardtoolbar to open the New Document dialog. Select Math Worksheet and click OK.A new worksheet displays:Math WorksheetThe Math worksheet is divided into two areas: Header area (top section), which contains information for the whole group<strong>InduSoft</strong> <strong>Web</strong> <strong>Studio</strong> v6.1 SP2 8–31
IWS Users GuideConfiguring Task WorksheetsBody area (bottom section), where you define each tag, expression, andProgramming Lines (logical routines and mathematical calculations throughfunctions and logical operations) in the group.Use the Header parameters on this worksheet as follows:Description field: Type a description of the worksheet for documentation purposes.Execution field: Type an expression, a single tag, or a constant value to determinewhen the worksheet should execute. Caution:IWS executes the worksheet only when the Execution field result is not zero. Ifyou always want the worksheet to execute, type a 1 (constant value) in theExecution field.Use the Body parameters on this worksheet as follows:Tag Name field: Type a tag to receive a return value from the specified calculationin the Expression column.Expression field: Type an expression to send the return value to the specified tagin the Tag Name column.Configuring a Scheduler TaskThe Scheduler folder generates events with defined mathematical expressions to beexecuted according to the time, date, or any monitored event. Note:IWS sequentially increments the number that identifies the Scheduler worksheetfor each newly created worksheet. Different scheduler groups have onlyorganizational purposes.Use one of the following methods to insert a new Scheduler worksheet:Right-click on the Scheduler folder and click on the prompt screen.Select File → New from the menu bar or click the New icon on the Standard toolbarto open the New Document dialog. Select Scheduler Worksheet and click OK.A new worksheet displays:8–32 <strong>InduSoft</strong> <strong>Web</strong> <strong>Studio</strong> v6.1 SP2
Configuring Task WorksheetsIWS Users GuideScheduler WorksheetThe Scheduler worksheet is divided into two areas:Header area (top section), which contains information for the whole group.Body area (bottom section), where you define each tag, expression, and conditionfor the group.Use the Header parameters on this worksheet as follows:Description field: Type a description of the worksheet for documentation purposes.Event drop-down list: Click to select an event type from the following– Calendar: Generates time bases greater than 24 hours. For example, you candefine an event that prints a report every day at a specific time. Note:Be sure to complete the Date field if you want a specific date for eventexecution.– Clock: Generates time bases smaller than 24 hours (intervals in minutes orseconds). This function is frequently used with trend graphics. For example,you can define a tag that will be incremented each hour.– Change: Event related to the change of a tag in the Trigger field.Trigger field: Type a tag that triggers a change event when the value of this tagchanges. When the Trigger tag changes, IWS returns the value specified in theValue field to the tag. This field is used only by the change event.Time field: Specify a time interval in which an event must occur when used byclock – hours (0 to 23), minutes (0 to 59), and seconds (0 to 59). You also canuse this field to specify a specific time to be used by calendar events. Date field: Specify a specific date on which a calendar event must occur –day (1 to 31), month (1 to 12), and year (1900 to 2099). If you leave the fieldblank, the event occurs daily. This field is used only by the calendar event.Tag field: Type a tag to receive the value returned by the Expression field.<strong>InduSoft</strong> <strong>Web</strong> <strong>Studio</strong> v6.1 SP2 8–33
IWS Users GuideConfiguring Task WorksheetsExpression field: Type an expression who’s return value will be sent to the tag.This field is used by all events.Disable field: Contains a disable condition for the specified function. Leave thisfield blank or use an expression value equal to zero (logically true) to execute thefunction. Use an expression value equal to one and the function will not execute(Disable ≥ 1).8–34 <strong>InduSoft</strong> <strong>Web</strong> <strong>Studio</strong> v6.1 SP2
Chapter 9: Event SettingsThis chapter describes <strong>InduSoft</strong> <strong>Web</strong> <strong>Studio</strong>’s new logging and event-retrievalfeatures. An event can be any tag change, generating reports or recipes, opening andclosing screens, logging onto and logging off the security system, and so forth.<strong>InduSoft</strong> <strong>Web</strong> <strong>Studio</strong> saves all of these events in a log file, which can be retrieved bythe Alarm/Event Control object.Event log files are stored in the application’s \Alarm folder (the same folder where<strong>InduSoft</strong> <strong>Web</strong> <strong>Studio</strong> saves alarm history files). The event log file names mustconform to the evYYMMDD.evt format, where:YY represents the last two digits of the year in which the event log file wasgeneratedMM represents the month in which the event log file was generatedDD represents the day on which the event log file was generatedFor example, a log file for May 7, 2003 would be ev030507.evt.The event files (*.evt) are ASCII text files created according to the following format:P1|P2|P3|P4|P5|P6|P7|P8|P9|P10|P11|P12|P13P1|P2|P3|P4|P5|P6|P7|P8|P9|P10|P11|P12|P13...P1|P2|P3|P4|P5|P6|P7|P8|P9|P10|P11|P12|P13P1 = File version (Current > 1)P2 = Event Type. 1 > SECURITY SYSTEM. 2 > DISPLAY. 3 > RECIPE. 4 > REPORT. 5 > CUSTOM MESSAGES. 6 > SYSTEM WARNING. 7 > LOG TAGSP3 = Event Time (DD/MM/YYYY HH:MM:SS.SSS)P4 = Tag NameP5 = Tag ValueP6 = Source (Not used)P7 = User NameP8 = User Full NameP9 = Event MessageP10 = StationP11 = CommentP12 = Previous Value<strong>InduSoft</strong> <strong>Web</strong> <strong>Studio</strong> v6.1 SP2 9–1
IWS Users GuideEvent SettingsP13 = Time Difference (Bias)Configuring the Events SettingsUse the steps to configure the event-retrieval feature: Select the Database tab. This tab contains a new icon called Event Settings:Database Tab: Event Settings Right-click the Event Settings icon and select Open from the pop-up to open theEvent Settings dialog:Selecting Event Settings9–2 <strong>InduSoft</strong> <strong>Web</strong> <strong>Studio</strong> v6.1 SP2
Event SettingsIWS Users GuideEvent Settings Dialog Configure the parameters on the Event Settings dialog as follows:– Enable event logger check-box: Enable (check) this box to enable event-logging.– Disable text box: Type a tag into this field. If the tag value is other than 0(false), <strong>InduSoft</strong> <strong>Web</strong> <strong>Studio</strong> automatically disables the Event Logger.– Security System check-box: Enable (check) this box to include security systemevents in the historic event file. IWS logs the following security systemevents:* Log On / Log Off users* User created/removed using the CreateUser() or RemoveUser()functions* User blocked/unblocked using the BlockUser() or UnblockUser()functions* User blocked by the security system after several attempts to enter aninvalid password* Password expired* Password modified* Invalid Log On attempt– Display check-box: Enable (check) this box to include screen Open and Closeevents in the historical event file.– Recipe check-box: Enable (check) this box to include recipe load, save, init,and delete events in the historical event file.– Report check-box: Enable (check) this box to include reports saved to disk orsend to printer events in the historical event file.– Custom Messages check-box: Enable (check) this box to include eventsgenerated by the SendEvent(strEvent) function in the historical event file.– System Warning check-box: Enable (check) this box to include general systemwarnings (such as Division by zero, Attempted to access invalidarray index, and so forth) in the historical event file. IWS logs the followingsystem warning events:* Errors that occur when sending alarms by email<strong>InduSoft</strong> <strong>Web</strong> <strong>Studio</strong> v6.1 SP2 9–3
IWS Users GuideEvent Settings* Tag was blocked/unblocked* Division by zero* Connection/Disconnection of the remote security system– Tags check-box: Enable (check) this box to enable and log tag changes in thehistorical event file. Configure the tags you want to log in the Tags table asfollows:* Tag Name column: Type the name of the tag you want to log in the eventfile.* Dead Band column: Type a value for comparing and filtering acceptablechanges.For example, if you specify a Dead Band value = 5 for a tag value = 50 andthe tag value changes to 52, the system will not register this variation inthe event log file, because the variation is less than 5. However, if the tagvalue change is equal to or greater than 5, the system will save the newvalue to the history file.* Message column: Type a string (message) related to this tag change. Youcan specify tags in messages using the {tag name} syntax.The Tags parameter can be useful if you want to generate a log file of events that arenot necessarily alarm conditions (for example, Motor On, Motor Off, and so forth).Use the History Format combo-box to save events data in either the Proprietaryhistory file format from IWS or to an external SQL Relational database. The optionsfor both are as follows:Proprietary– File Format: Text (UNICODE). IWS uses the vertical bar character (|) toseparate the fields.– Default Path: …\\Alarm\EVYYDDMM.EVT , where:YY = Two last digits of the yearMM = MonthDD = Day Database– Database Type: Chosen by the User– Default Table Name: EventHistoryThe information saved in the history file is described in the following table.Field Name Data Type RemarksVersionEvent_TypeIntegerIntegerThis field is created only when the File Format is Proprietary. Currentversion: 0021: SECURITY SYSTEM2: DISPLAY3: RECIPE4: REPORT5: CUSTOM MESSAGES6: SYSTEM WARNING7: LOG TAGS9–4 <strong>InduSoft</strong> <strong>Web</strong> <strong>Studio</strong> v6.1 SP2
Event SettingsIWS Users GuideEvent_TimeTimeStampEvent_Info String Tag NameTimestamp indicating when the event occurred.When the File Format is Proprietary, IWS saves the Event Time in thefollowing format: MM/DD/YYYY HH:MM:SS.MSS.Value Real Tag value when the event occurredSource String Name of the task that generated the eventUser String User logged when the event occurred.User_Full String Full name of the user logged when the event occurred.Message String Event messageStation String Name of the station (computer) where the event occurred.CommentPrevious_ValueDeletedBiasLast_UpdateStringRealBooleanIntegerTimeStampComment (optional) typed by the operator when the event occurred. Thisfield only exists for Version >=2Tag value that occurred before the event. This field only exists for Version>=20: Event message was not deleted1: Event message was deletedThis field is created only when the File Format is Database.Difference (in minutes) from the Time Stamp columns and the GMT time.This field only exists for Version >=2Time Stamp when the register was created/modified. This field is used tosynchronize the databases when using the Secondary Database inaddition to the Primary Database. This field is created only when the FileFormat is Database.Tip:When saving the Events in a SQL Relational Database (File Format =Database)you can customize the name of the columns created in thedatabase by editing the .APP file as follows:[EventLogger]=For example:[EventLogger]Event_Info=InformationMessage=Event_MessageFor detailed information about saving events history files, including instructions forconfiguring database settings, see Chapter 17: IWS Database Interface.<strong>InduSoft</strong> <strong>Web</strong> <strong>Studio</strong> v6.1 SP2 9–5
IWS Users GuideEvent Settings9–6 <strong>InduSoft</strong> <strong>Web</strong> <strong>Studio</strong> v6.1 SP2
Chapter 10: CommunicationThis chapter explains how you enable <strong>InduSoft</strong> <strong>Web</strong> <strong>Studio</strong> applications tocommunicate (exchange data values) with other applications, remote devices (suchas a PLC or transmitters), and any devices that implement OPC or DDE Servers.To enable communication, you configure the task worksheets provided by IWS.Instructions for configuring these worksheets are provided the following sections:Configuring a Driver: Explains how to configure a Driver worksheet to implementa communication protocol (OPC, TCP/IP, or DDE).Configuring OPC: Explains how to configure an OPC worksheet to managecommunication between local or remote OPC Clients and Servers.Configuring TCP/IP: Explains how to configure a TCP/IP worksheet to managecommunication between two IWS applications.Configuring DDE: Explains how to configure a DDE worksheet to managecommunication between local or remote DDE Clients and Servers.Use the Comm tab to access all worksheets configured to establish communicationwith another device or software using available protocols.Workspace: Comm TabThe folders on the Comm tab are described on the following pages.<strong>InduSoft</strong> <strong>Web</strong> <strong>Studio</strong> v6.1 SP2 10–1
IWS Users GuideCommunicationConfiguring a DriverA communication driver is a DLL containing specific information about the remoteequipment and implements the communication protocol. To develop a newcommunication driver, <strong>InduSoft</strong> provides a driver toolkit. Consult <strong>InduSoft</strong> forfurther information.The Drivers folder allows you to define the communication interface (or interfaces)between the project and remote equipment; such as a PLC, a single-loop, andtransmitters. Note:Consult the Help menu for a description of the functions and characteristicsthat are standard for all drivers. When developing an application, you can alsorefer to the specific documentation provided with each communication driver.This documentation is usually located in the DRV directory.To configure a communication driver, you must specify the interface parameters (forexample, the station address and the baud rate), specify the equipment addresses,and then link them to <strong>InduSoft</strong> tags.Use one of the following methods to add or remove a configured driver:Right-click on the Drivers folderSelect Insert → Drivers from the menu barBoth methods open a Communication Drivers dialog, which displays a list of availabledrivers.Communication Drivers Dialog BoxUse the parameters on this dialog, as follows:Available Drivers field: Lists all available drivers and a brief description of each.Help button: Click to open the Help menu, which contains detailed configurationinstructions for the driver currently highlighted in the Available Drivers field.Select>> button: Click to select the driver currently highlighted in the AvailableDrivers field.Selected Drivers field: Lists all selected drivers and their descriptions (if available).10–2 <strong>InduSoft</strong> <strong>Web</strong> <strong>Studio</strong> v6.1 SP2
CommunicationIWS Users GuideRemove button: Click to remove a driver currently highlighted in the Selected Driversfield.When you click OK in the Communications Driver dialog, you create a subfolder forthe selected driver(s) in the Drivers folder located on the Comm tab.You can right-click on a driver subfolder to access the Settings option, which opensthe Communications Parameters dialog.Sample Communications Parameters Dialog BoxConnection Type field: Enables serial drivers to communicate with modem, TCP/IPor UDP connections. This setting is supported only for serial drivers developedwith the UNICOMM library, which includes most of the serial drivers available inthe product. Caution:The option Modem is not supported for Pocket PC v3.00 or older. Note:This section covers only the Direct option, which enables the driver to connectusing a normal serial channel. Please refer to Using TCP/IP and UDPEncapsulation and Using Modem Connections below for more information onother connection types. “Connection Type Tests” lists the drivers that havebeen tested with modem, TCP/IP and UDP connections.COM field: Click to select a serial communication port.Baud Rate, Data Bits, Stop Bits, and Parity fields: Click to select parameters for a serialport configuration.Long1, Long2, String1, and String2 fields: These fields are driver custom settings. Inthe example above, the the driver uses Long1 to set up the error detection methodand String1 to define the PLC family type.<strong>InduSoft</strong> <strong>Web</strong> <strong>Studio</strong> v6.1 SP2 10–3
IWS Users GuideCommunicationAdvanced button: Click to open the Advanced settings dialog. Use this dialog tochange the default driver parameters.Advanced Settings Dialog BoxSpecify or change the default driver parameters as follows:Timeout (ms) area– Start Message field: Specify the timeout for the message start.– End Message field: Specify the timeout for the message end.– Interval between char field: Specify the timeout between each character.– Wait CTS field: Specify the timeout for the Clear to Send wait.Handshake area– Control RTS drop-down list: Specify whether to use the “Request to Send”control.– Verify CTS drop-down list: Specify whether to use the “Clear to Send” type ofverification.Disable DTR check box: Click (enable) this box to disable the DTR function (thedriver will not set the DTR signal before starting the communication).Enable IR check box (available on the Windows CE platform only): Click (enable)this box to enable the serial driver to use an Infrared interface (COM2 port)instead of a standard serial port to communicate with the device (such as thePLC, I/O, hand-held computers, and so forth).Protocol area– Retries field: Type a numeric value to specify how many times the driver willattempt to execute the same communication command before considering acommunication error for this command.– Station field: Some slave drivers such as the Modbus Slave (MODSL) require aslave network address. Use this field to specify the slave address.Buffers length (bytes) area– Tx Buffer field: Specify the transmission buffer length (in bytes).– Rx Buffer field: Specify the reception buffer length (in bytes).10–4 <strong>InduSoft</strong> <strong>Web</strong> <strong>Studio</strong> v6.1 SP2
CommunicationIWS Users GuideIWS provides two interfaces, which you can use to configure the driver (associatingtags from the <strong>InduSoft</strong> application to device addresses):MAIN DRIVER SHEET: Provides the easiest method for configuring communicationbetween <strong>InduSoft</strong> application tags and device addresses. This interface allowsyou to automatically group tags to provide the best performance during runtime.You cannot use this interface to control the time needed to scan a group of tagsindividually.STANDARD DRIVER SHEETS: Allows you to control the time needed to scan a group oftags individually.You can use both sheets at the same time.USING TCP/IP AND UDP ENCAPSULATIONMost of the serial drivers available in IWS allow the use of TCP/IP or UDP/IPencapsulation. The encapsulation mode has been designed to providecommunication with serial devices connected to terminal servers on your ethernet orwireless networks. A terminal server can be seen as a virtual serial port. It convertsTCP/IP or UDP/IP messages on your Ethernet or Wireless network to serial data.Once the message has been converted to a serial form, you can connect standarddevices that support serial communications to the terminal server. The followingdiagram provides one example of applying this solution:TCP/IP EncapsulationYou can enable the encapsulation by following the steps below: Right-click on the driver’s folder, and select Settings form the menu thatdisplays. This will give you access to the communication parameters:<strong>InduSoft</strong> <strong>Web</strong> <strong>Studio</strong> v6.1 SP2 10–5
IWS Users GuideCommunication In the Connection Type field, select TCP/IP or UDP/IP:Selecting a Connection Type The following fields are available:IP Address field: Specify the IP Address for the Terminal Server. This field acceptstags between curly brackets.Port Number field: Enter the TCP/IP or UDP/IP port number.Status Tag field: This field is available only when using TCP/IP. The tag on thisfield receives the value 1 when the TCP/IP connection is established; otherwise,it receives 0.Server Mode field: The TCP/IP encapsulation allows the Server Mode, making theterminal server responsible for establishing the connection to enable thecommunication.USING MODEM CONNECTIONSMost of the serial drivers available in IWS allow the use of modem connections. Themodem connection has been designed to enable communications with remote serialdevices connected through a phone line. The following diagram provides oneexample of applying this solution:Modem Connection10–6 <strong>InduSoft</strong> <strong>Web</strong> <strong>Studio</strong> v6.1 SP2
CommunicationIWS Users GuideYou can enable the modem connection by following the steps below: Right click on the driver’s folder, and select Settings from the menu thatdisplays. This will give you access to the communication parameters: In the Connection Type field, select Modem:Selecting a Modem Caution:The option Modem is not supported for Pocket PC v3.00 or older. The following fields are available:Name drop-down list: Select the modem that the driver will use to establish theconnection. If you do not know the modem name, use the Auto Detect option.The Auto Detect 1 will use the first modem available, Auto Detect 2 will use thesecond, Auto Detect 3 will use the third, and Auto Detect 4 will use the fourth.Phone field: Enter a phone number that the driver will use to connect to theremote device. This field accepts tags between curly brackets.Settings button: Click on this button to configure the modem settings. Thewindow that displays when you click on this button depends on the operatingsystem that you are using and on the modem type.<strong>InduSoft</strong> <strong>Web</strong> <strong>Studio</strong> v6.1 SP2 10–7
IWS Users GuideCommunicationCaution:The settings configured by clicking on this button are not saved with yourapplication. The information is saved on the operating system registry,and they are valid only in the computer that you are interacting with. Ifyou install your application on another computer, you will have toreconfigure these settings.Connection button: Click to open the Connection Control window. The defaultconnection settings should suffice for most of the applications. However, you cantake full control over the connection, and also enable incoming calls, by clickingon this button.Connection Control Dialog– Dial out trigger field: When the value of the tag configured in this field changes,the driver will try to connect to the remote device. If the connection hasalready been established, the command is ignored. You do not have to usethis field if you are using Auto Connect.– Hang up trigger field: When the value of the tag configured in this field changes,the driver will disconnect from the remote device. If the device isdisconnected the command is ignored. You do not have to use this field ifyou are using Disconnect call if idle for more than.– Auto Connect field: When this option is enabled, the driver will try to connect tothe remote device before sending any information. If the connection fails, thenext attempt will be made after the Retry Interval has expired.– Disconnect call if idle for more than field: When this option is checked, the driverwill automatically disconnect from the remote device if no communication isperformed after the time you specified.– Enable incoming calls field: Check this option if you want to enable the driver toreceive calls from the remote device. You can use the Hang up trigger to dropthe call once it has been established. Notice that one driver can use bothincoming calls and outgoing calls.Status area– Code field: Enter with a tag that will receive one of the following codes whenthe driver is running:CodeDescription0 Disconnected1 Connected10–8 <strong>InduSoft</strong> <strong>Web</strong> <strong>Studio</strong> v6.1 SP2
CommunicationIWS Users Guide2 Dialing3 Dropping4 Closing line– Description field: Enter with a tag that will receive a complete description of thecurrent status. The description is associated with the Code field; however, itbrings some additional information about the current status.CONNECTION TYPE TESTSMost of the serial drivers should work with every single connection type. However,most of the drivers were developed before the connection type had been created. Thefollowing table lists the drivers fully tested with certain connection types; if thedriver that you intend to use is not listed and you are unsure if it will work, pleasecontact your distributor.Driver Modem TCP/IP UDP/IPMODSL ABKE MODBU OMETH = Item has been tested = Item has not been testedConfiguring the Driver WorksheetsThis section explains how to configure the MAIN and STANDARD DRIVER SHEETs (orCommunication tables) to associate application tags with the device addresses. Youcan configure multiple Driver worksheets—each of which is divided into a Headersection and Body section. The MODBU driver will be used for demonstrationpurposes. Note:Not all drivers require a MAIN DRIVER SHEET. Some drivers only require oneStandard Worksheet. Consult the driver documentation for specificinstructions.<strong>InduSoft</strong> <strong>Web</strong> <strong>Studio</strong> v6.1 SP2 10–9
IWS Users GuideCommunicationCONFIGURING THE STANDARD DRIVER WORKSHEETUse the following steps to create a new Standard Driver Worksheet: From the IWS development environment, select the Comm tab, located below theWorkspace pane. In the Workspace pane, expand the Drivers folder and right-click the MODBUsubfolder.When the pop-up menu displays, select the Insert option:Inserting a Driver WorksheetThe Driver worksheet (.drv) contains two sections: Header: Contains all the information about the reads and writes commands Body: Contains the operator’s addressesConfiguring the HeaderThe Driver worksheet header contains configuration information required for thedriver’s functions. Initially, you must create a new Driver Configuration worksheet foreach area with which you want to communicate.Header Section of Driver WorksheetThe header contains the following fields:Description: Type a description of the worksheet, such as area types, their ranges,and if the worksheet is Read, Write, or Both. This description displays in theWorkspace, in the Drivers folder.Increase read priority: For read worksheets (and there can be more read worksheetswith the same read trigger or enabled when idle) and a write event happens, theworksheet with the highest priority will be the first worksheet on the nextreading called by the read trigger or the “read when idle” event.10–10 <strong>InduSoft</strong> <strong>Web</strong> <strong>Studio</strong> v6.1 SP2
CommunicationIWS Users GuideRead Trigger: Contains a tag that always generates a read event when value of thetag in the field changes.Enable Read when Idle: Contains a tag or value that always enables a continuousread when it the value is greater than zero.Read Completed: Contains a tag value that toggles when a read event is finished.Read Status: Contains a tag that always has its value filled with an integer value,when a read event finishes. If this value equals zero, the event is completedsuccessfully. If any other value displays, the event completed with an error. Youcan view the error message in the Logwin module (for NT/2000) or check theMODBU.MSG file in the <strong>InduSoft</strong> <strong>Web</strong> <strong>Studio</strong>'s DRV directory.Write Trigger: Contains a tag that generates a write event for the entire worksheet,whenever the value of the tag changes. IMPORTANT!When using this feature, the driver writes the tag value to the PLCsmemory. This operation writes using blocks, from the first worksheetoperator up to the last. If there is an operator that has not been declared inthe worksheet, and its address is between the first and the last block, thetag will receive the value zero. Therefore, be sure about what you want towrite when using this trigger, and verify whether there is any kind of hole inthe worksheet that can cause problems for the system or the PLC'sprogram.Enable Write on Tag Change: When the value of one of the tags in the body is differentfrom the write trigger, IWS writes the changed tag in the worksheet (its value isgreater than zero).Write Completed: Contains a tag value that toggles when a writing event finishes.Write Status: Contains a tag that always fills with an integer value, when a readingevent finishes. If this value is equal to zero, the event is successful. Any othervalue indicates an error. You can view the error message in the Logwin module(for NT/2000) or check the OMPLC.MSG file in the <strong>InduSoft</strong> <strong>Web</strong> <strong>Studio</strong>'s \DRVdirectory.Station: Must (if indicated in the driver’s help file) contain the CPU's ID, UnitNumber, or PLC Address it relates to this specific worksheet. Each driver has adifferent syntax for this field.For example, the GE Fanuc SNP driver allows you to identify the PLC using allASCII characters, but the OMRON Host Link Protocol allows from only 1 to 31addresses called Unit Numbers.Typically, you use the address of the PLC in a device network.You can also enter a tag between curly brackets (for example: {tag}) Notes: You cannot test the existence of tags entered inside curly brackets (orentered in a different form from tags in other fields), because they havenot been created in the Tags database yet. In other words, if you type anuncreated tag, the system cannot work properly. Station is a string field and must be filled in correctly or the driver will notwork properly.<strong>InduSoft</strong> <strong>Web</strong> <strong>Studio</strong> v6.1 SP2 10–11
IWS Users GuideCommunicationHeader: Must contain the worksheet header. This field is extremely important.Each driver has a different syntax for this field; however, you must typesomething like the operator’s type, followed by the initial address.The following table contains some examples:Driver Header MeaningMODBUS 4X:100 4X indicates that this worksheet will communicate with the HoldingRegisters, from the address 100 on. In the AEG 984 case, from theaddress 400100 on.OMPLC (HostLink)IR:0IR indicates that this worksheet will communicate with the I/O andInternal Relays, from the address 0 on. In the C200H case, from theaddress IR00000 on.FANUC (SNP) %M %M indicates that this worksheet will communicate with the %M discreteinternal operator. There’s no initial address to this driver.ABKE (DF1) N7:0 N7 indicates that this worksheet will communicate with the N7 file, fromthe address 0 on. In the PLC-5/40 case, from the address N7:0.AS511 (SiemensPG Port)DB5:10DB5 indicates that this worksheet will communicate with the Data Blocknumber 5, from the Data word 10 on.So, for each driver this syntax can vary. Most of the time, this is the address ofthe PLC in a device network.For example, let’s use the MODBUS syntax:Where:: is the reference with which you want to communicateFor example, if the header is 4X:1, IWS will read the worksheet from 4000001until the highest offset configured in the Address column.You can use the following references:0X: Coil Status1X: Input Status (read only)3X: Input Register (read only)4X: Holding RegisterID: Report Slave (read only)There are no limits for the initial address, but be careful when specifying addresslimits. For example, on the PLC there is no 30500. The Header field accepts thesyntax 3X:500, but the runtime will not find this register.Where Read Only is indicated, the write functions will not work. It is not safe tospecify write for the Input Status, Input Registers, and the Report Slave functions.This field can also be filled with a tag between curly brackets (for example:{tag}).10–12 <strong>InduSoft</strong> <strong>Web</strong> <strong>Studio</strong> v6.1 SP2
CommunicationIWS Users Guide Note:As with the Station field, you cannot test the existence of tags entered insidecurly brackets (or entered in a different form from tags in other fields),because they have not been created in the Tags database yet. In other words,if you type an uncreated tag, the system cannot work properly.When you first create a new Driver worksheet, the field is blank. After you placethe cursor on this field (even you try to make it blank again) IWS automaticallyinserts the default 0X:1 string. From this point on, you cannot make the fieldblank again. You can however, change the value to another valid header. Min / Max: Becomes enabled after you enable ( ) the check-box. When selected,this parameter enables a range of values that can be converted into anengineering format. These fields determine the minimum and maximum range ofvalues. For example, memory holds values from 0 to 4095 meaning 0% to 100%in the user interface. This setting takes effect for all tags in the worksheet. Inthis example, the tag parameters Min and Max must be set 0 to 100 respectively.Configuring the BodyThe Driver worksheet’s body section assigns the PLC's memory address to declaredtags and handles the engineering units.Body Section of Driver WorksheetThe Body section contains four columns:Tag Name: Contains tags used by the communication driver.Address: Contains addresses to read and write tag values to in the equipment.As with the Header field, this column is different for every driver. Typically, youtype the offset from the initial address you configured for the Header field. In somecases, you can indicate the specific Address bit.For our driver example case, type the offset from the initial address youconfigured for the Header field. You cannot enter a negative offset—the value 0will overwrite a negative value.<strong>InduSoft</strong> <strong>Web</strong> <strong>Studio</strong> v6.1 SP2 10–13
IWS Users GuideCommunicationDiv / Add / Max / Min: Configure as follows:Column Range of Values MeanDivAddMinMaxAny Integer orRealAny Integer orRealAny Integer orRealAny Integer orRealIn read commands: Tag = (Host value) / DIVIn write commands: Host value = Tag * DIVIn read commands: Tag = (Host value) + ADDIn write commands: Host value = Tag – ADDDefines the minimum value assigned for the tag, when thecorresponding host’s value is equal to the value defined in the field Minof the Driver worksheet’s Header.Defines the maximum value assigned for the tag, when thecorresponding host’s value is equal to the value defined in the fieldMax of the Driver worksheet’s Header. Notes:For read operations: =(() / Div)+ AddFor write operations: = ( - Add) * DivIf you do not configure the columns as specified in the preceding table, thecolumns will not be configured and the Driver worksheet tags will receivethe same value as the address configured.Use the following steps to specify header tags: Specify the following tags in the Driver worksheet Header fields. All of the tags willbe arrays, and you must type each element on each worksheet.For example, RdTr[1] in the Read Trigger field of the ABKE001.DRV worksheet,and RdTr[5] in the ABKE005.DRV worksheet, and so forth.TagNameSize Type DescriptionRdTr 0 Boolean Boolean tag that will be on the "Read Trigger" fieldsRdEn 0 Boolean Boolean tag that will be on the "Enable Read when Idle" fieldsRdCpl 0 Boolean Boolean tag that will be on the "Read Complete" fieldsRdSt 0 Integer Integer tag that will be on the "Read Status" fieldsWrTr 0 Boolean Boolean tag that will be on the "Write Trigger" fieldsWrEn 0 Boolean Boolean tag that will be on the "Enable Write when Idle" fields10–14 <strong>InduSoft</strong> <strong>Web</strong> <strong>Studio</strong> v6.1 SP2
CommunicationIWS Users GuideTagNameSize Type DescriptionWrCpl 0 Boolean Boolean tag that will be on the "Write Complete" fieldsWrSt 0 Integer Integer tag that will be on the "Write Status" fieldsStation 0 String String tag that will be on the "Header" fieldHeader 0 String String tag that will be on the "Station" field Specify TAG_DRV as an Array tag, size 10, for the communication tags. Configure a Driver worksheet and a PLC Driver screen to look like the followingfigure:Configuring the MODBU Driver Worksheet<strong>InduSoft</strong> <strong>Web</strong> <strong>Studio</strong> v6.1 SP2 10–15
IWS Users GuideCommunicationPLC Driver ScreenCONFIGURING THE MAIN DRIVER SHEET (MDS)When you add the MODBU driver to your application, the program automaticallyadds the MAIN Driver Worksheet (MDS) to the MODBU driver folder as shown:Selecting the Main Driver Sheet10–16 <strong>InduSoft</strong> <strong>Web</strong> <strong>Studio</strong> v6.1 SP2
CommunicationIWS Users GuideYou can use the MDS to associate IWS tags to addresses in the PLC. Most MDSparameters are standard for any driver. Use the following instructions to configurethe parameters that are specific to the MODBU driver: Double-click on the Main Driver Sheet icon to open the following worksheet:Main Driver Worksheet Configure the following fields on this worksheet:– Station field: Type the number of the equipment station within the network.The syntax in this field varies with each communication driver. Refer to theappropriate driver’s documentation for further information. You canconfigure a tag name (string) between curly brackets in this field. In thiscase, the tag value will be the Station used by the driver. Therefore, you canchange the station dynamically during the runtime.Tip:Configuring a string tag between curly brackets in the Station field ofthe Main Driver Sheet (MDS) is especially useful when configuringapplications for redundant PLCs. Changing the value of the tagconfigured in the Station field, you can switch automatically from onePLC to the other in case of a failure of the primary PLC (hot/Standby).– I/O Address field: Type the address of each PLC register, using the followingsyntax:: (for example, 4X:20) or:. (for example, 4X:20.6)Where:Type is the register type. Type one of the following: 0X, 1X, 3X, 4X, FP, FPS,FP3, FP3S, DW, or ID.Address is the register address of the device.Bit is the bit number (from 0 – 15) of the word address. This parameter isoptional and can be combined with 3X- or 4X-type addresses only.<strong>InduSoft</strong> <strong>Web</strong> <strong>Studio</strong> v6.1 SP2 10–17
IWS Users GuideCommunicationCaution:You must use a non-zero value in the Station field and you cannot leavethe field blank.10–18 <strong>InduSoft</strong> <strong>Web</strong> <strong>Studio</strong> v6.1 SP2
CommunicationIWS Users GuideExecuting the DriverAfter adding the driver to a project, <strong>Studio</strong> sets the project to execute the driverautomatically when you start the runtime environment.To verify that the driver runtime task is enabled and will start correctly, perform thefollowing steps: Select Project > Status from the main menu bar.The Project Status dialog displays:Project Status Dialog Verify that the Driver Runtime task is set to Automatic.– If the setting is correct, click OK to close the dialog.– If the Driver Runtime task is set to Manual, select the Driver Runtime line. Whenthe Startup button becomes active, click the button to toggle the Startup modeto Automatic. Click OK to close the Project Status dialog. Start the application to run the driver.Configuring OPCThe OPC folder allows you to configure OPC interfaces between the application andan OPC server. The <strong>InduSoft</strong> OPC Client module enables the IWS system tocommunicate with any device that implements an OPC server. Before using the<strong>InduSoft</strong> OPC Client module, you must install and configure the OPC server on themachines running your application.On the client machine, use the OPC Client Configuration program to configure theserver identifier, communication parameters, and the items you want to connect. Toaccess the client configuration, add a new OPC Client document to the "COMM"table.<strong>InduSoft</strong> <strong>Web</strong> <strong>Studio</strong> v6.1 SP2 10–19
IWS Users GuideCommunicationConfiguring an OPC ClientUse the following steps to configure an OPC Client: Select the Comm tab, right-click the OPC folder and insert a new OPC Clientworksheet. Select a registered OPC Server (CimQuestInc.IGOPCAB) from the Server Identifiercombo-box to register InGear OPC AB. Create a new set of tags to communicate with the OPC Server, as shown: In the OPC Client worksheet, type OPC_Status in the OPC Status field. In the first Tag Name column row, type OPC_N7_0. To associate this tag to the OPC Server item, right click on the Item column andclick OPC Browser and browse all the configured OPC Server items. Select the N7_0item.Select N7_010–20 <strong>InduSoft</strong> <strong>Web</strong> <strong>Studio</strong> v6.1 SP2
CommunicationIWS Users GuideYour OPC Client worksheet should look like the following:OPC Client WorksheetThe OPC Client worksheet contains the following fields:Description: Type a description of the OPC module for documentation purposesonly. (The OPC Client module ignores this information.)Server Identifier: Type the name of the server you want to connect. If the server isalready installed on the computer, you can select the server name from the list.Disable: Type a tag or a constant with a value other than zero, to disablecommunication with the OPC server. Specify zero, or leave the field blank toenable communication.Read Update Rate (ms): Specify how often the server should update this group (inmilliseconds). Specify zero to indicate the server should use the fastest practicalrate.Percent Deadband: (valid for analog items only): Specify how much percent changein an item value should cause a notification by the server. Status: Current status. Good status is 1.Remote Server Name: Node name or IP address of server on node network.Read after writing check-box: Check this check-box force the OPC Client worksheetto execute a synchronous read command. This will read the value from an itemfrom the OPC Server just after writing a value to this item. This option must beused to guarantee synchronization between the value of the tags on IWS and theitems from the OPC Server, when the PLC program overwrites the values writtenby IWS through the OPC Server.Accept Tag Name in the Item column check-box: When this option is checked, the textconfigured between curly brackets in the Item field is resolved as a Tag Name(string tag). In this case, the value of this tag is used as the name of the itemfrom the OPC Server, allowing the user to point to different item names duringthe runtime, by changing the value of the tag(s) configured in the OPC Clientworksheet (Item column). When this option is unchecked, all charactersconfigured in the Item column are considered part of the Item name (includingthe curly brackets).Tag Name: Type the names of tags linked to the server items.<strong>InduSoft</strong> <strong>Web</strong> <strong>Studio</strong> v6.1 SP2 10–21
IWS Users GuideCommunicationItem: Type the name of the server's items. After selecting an OPC Server, you canselect items from the Server using the OPC Browser. Right-click in the Item fieldand select the OPC Browser option.Tip:You can configure a tag name between curly brackets {TagName} in thisfield, allowing the user to change the item names dynamically, during theruntime.Scan: Specify one of the following:– Screen: IWS performs an update when you open a screen containing thespecified tag.– Always: IWS performs an update in the Read Update Rate specified in theworksheet header.Div field: Specify the division constant when scale adjustment is required. Thisvalue is a division factor in a read operation and a multiplication factor in a writeoperation.Add field: Specify the addition constant when scale adjustment is required. Thisvalue is a addition factor in a read operation and a subtraction factor in a writeoperation.To run the OPC client run-time module, you can choose to run it automatically onstart up, or run the module manually by selecting Project > Status from the menu bar.After running this program, a small icon displays in your system tray.To close the OPC client run-time module, right-click the icon in the system tray, andclick Exit. Note:IWS and CEView also provide an OPC Server communication modulenamed <strong>Studio</strong>.Scada.OPC. This module starts automatically when any OPCClient (local or remote) attempts to connect to the <strong>Studio</strong>.Scada.OPC server.An OPC Client can exchange data with IWS tags (Application Tags, InternalTags, and Shared tags) using the OPC interface.In addition, you can start the OPC Server module automatically when youstart the application. Select the OPC Server module in the Project > Statusdialog, click the Startup button, and specify Automatic.Tip:You can also use the OPC interface to exchange data between remote stationsrunning IWS or CEView. You must configure the OPC Client in one station andyou must execute the OPC Server in the other station.OPC TroubleshootingWhen you are using OPC and have problems establishing communication, youshould first verify the messages in the LogWin.If you are using Windows CE, there are two ways to check the log:1. Remote LogWin2. Local Log10–22 <strong>InduSoft</strong> <strong>Web</strong> <strong>Studio</strong> v6.1 SP2
CommunicationIWS Users GuideFor information about using these logs, please refer to "Using the LogWin Module(NT and CE)" in the Users Guide and Technical Reference Manual.If you find error messages in the log, look them up in this manual/help system, andfollow the documented steps for solving the problems. (Use + F to find themin the manual; use the Index to find them in the context sensitive help system.)If you feel that you need to contact your distributor for technical support, make surethat you provide them with the following information:1. Log file2. Software vendor and product name of the OPC Server/Client that you are using3. If possible, a copy or an evaluation version of the OPC Server for testing purposes4. The contact information for your OPC Server/Client technical supportThree possible errors and their resolutions are listed below:SecurityError Code: 0x80070005 or -2147024891Reason for error: When the OPC Client tries to connect to the OPC Server, theDCOM layer usually requires authentication. The computer that is running theOPC Server needs to recognize the user logged on to the OPC Client computer,and such a user needs to have privileges to access the OPC Server.Solution: The first step is to create a single user in both computers that hasAdministrator privileges and the same password. Log on with this user to bothends, and then try to establish the connection.If you cannot use the same user in both computers because of some specificrequirement of your application, or if the problem persists even after you havelogged on as the same user, please read the documents below. They will help yousolve the security issues:1. DCOM Security Configuration – The DCOM Tutorial athttp://www.opcactivex.com/Support/DCOM_Config/DCOMConfigUtility/dcomconfigutility.html2. Using DCOM with Windows XP + SP2 athttp://www.indusoft.com/Using_DCOM_w_WINXPSP2.pdfName ResolutionError: Couldn't create connection with advise sink, error: -2147022986 (0x80070776)Reason for error: There is a problem resolving the computer name.Solution: This problem can be solved by specifying the IP address of the serverinstead of specifying the computer name.Proxy for Windows CEError: OPCServer: IIndCP::Advise - Could not query callbackinterface: 0x80040155Reason for error: Your Windows CE device is missing the OPCCOMN_PS.dll.Solution: You should download the .dll to the device and register it. The .dll shouldbe available with your <strong>Studio</strong> distribution, most probably in \ Redist\Wince \\If you do not find the .dll in the folder for your processor, contact your <strong>Studio</strong>distributor.<strong>InduSoft</strong> <strong>Web</strong> <strong>Studio</strong> v6.1 SP2 10–23
IWS Users GuideCommunicationConfiguring an OPC ServerThe <strong>InduSoft</strong> <strong>Web</strong> <strong>Studio</strong> OPC Client module enables the <strong>InduSoft</strong> <strong>Web</strong> <strong>Studio</strong>system to communicate with any device that implements an OPC Server. See themanufacturer’s documentation for configuration instructions.To communicate with a third-party OPC Client and have IWS as the OPC Server, youneed to be sure that the Project > Status > <strong>Studio</strong> Scada OPC Server is set to Automatic. All ofthe tags in our database will be automatically available. You can have multipleapplications. Only the current application’s tags are available.Configuring TCP/IPThe IWS TCP/IP Client/Server modules enable two or more <strong>InduSoft</strong> applications tokeep their databases synchronized. These modules use <strong>InduSoft</strong>’s TCP/IP protocolto make the communication between the applications.Before using the IWS TCP/IP Client/Server modules, you must install and configurethe TCP/IP protocol on the machines that will run these modules.Configuring the ClientOn the client machine, you must use the TCP/IP Client Configuration worksheet toconfigure the Server IP address and the tags you want to share with the server. In the Workspace, select the COMM tab and right-click the TCP folder to insert anew TCP worksheet. Configure the following fields:– Description: Type a description of the worksheet for documentation purposesonly. The TCP/IP Client module ignores this field.– Connection Status: Type a tag name. The TCP/IP Client module updates this tagaccording to connection status. If the tag value is 0 (zero), then theconnection is OK. Otherwise, the Windows Socket library returns an errorcode.– Disable: Type a tag name in this field. When this tag has any value other than0, this TCP/IP worksheet will be disabled. Using this field, you canenable/disable the TCP/IP Client worksheet during the runtime.– Server IP Address: Type the server IP Address. The entry can be a string or youcan use a tag enclosed by brackets. For example, if you fill this field with{tag_name}, the TCP/IP Client module will try to connect to the serverindicated by the tag_name tag.– Tag Name: Type the tags you want to share with the server. If the tag is anarray or a class (or both), every element and member is shared. You shouldtype the tag name only in this field — without specifying the index or classmember. If you specify an index or a class, the TCP/IP Client module ignoresit.– Remote Tag: Type the name of the tag to be linked with the tag specified in theTag Name field. This field is optional. If you leave it in blank, the same tagname will be used for both the client and the server. Warning:If you need to share an array, then the tag in the server should contain thesame number of elements as the tag in the client. If the tag is a class, then theclass definition should be the same in both server and client applications. If you10–24 <strong>InduSoft</strong> <strong>Web</strong> <strong>Studio</strong> v6.1 SP2
CommunicationIWS Users Guidedo not follow these rules, unpredictable results will occur.Setting Custom ParametersYou can configure the following parameters for your Application Configuration (.APP)file (select Project > Settings on the main menu bar):[TCP] Port: TCP/IP port number. Default is 1234. This parameter should be thesame in both the client and server machines.SendPeriod: Time in milliseconds before the client/server module will update thetag values of the other machine. Default is 250.ConnectRetryTimeout: Time in seconds before the client should retry to connect tothe server. Default is 30.Only the client module uses the ConnectionRetryTimeout.You can run the TCP/IP Client Module automatically or manually. From the mainmenu bar, select Project → Status. On the Execution Tasks tab, set the TCP/IP Client Runtimeto Manual or Automatic.After running this program, a small icon will display in your system tray.Configuring the TCP/IP ServerOn the server machine, you do not have to configure anything. You just have to runthe IWS TCP/IP Server module. In the development environment window, go to theProject Settings dialog and set the TCP/IP Server to run automatically. From themain menu bar, select Project → Status. On the Execution Tasks tab, set the TCP/IP Server toAutomatic. When running this program, a small icon will display in your system tray.To close the IWS TCP/IP Server module, right-click on the icon in the system tray,and select Exit.Configuring DDEThe DDE folder allows you to configure a DDE Client configuration to a DDE Serverapplication such as Excel (or any other Windows program supporting this interface).Dynamic Data Exchange (DDE) is a protocol for dynamic data exchange betweenWindows applications, such as Excel. A DDE conversation is an interaction betweenserver and client applications. IWS provides interfaces that run as clients or asservers. See DDE Client Runtime and DDE Server in the Execution Tasks (Project → Status).To run as a server, start the DDE or NetDDE server task as described inExecution Tasks.To run as a client, configure the DDE interface worksheet on the Comm tab.Network Dynamic Data Exchange (NetDDE) is an extension of DDE that worksacross computers on a network.To run IWS as a server to a NetDDE connection, you must start the DDE Serverapplication.To run IWS as a client to a NetDDE connection, use the same DDE interfaceworksheets with the proper configuration to address a IWS application.<strong>InduSoft</strong> <strong>Web</strong> <strong>Studio</strong> v6.1 SP2 10–25
IWS Users GuideCommunication Notes: When running NetDDE, IWS accepts the WRITE triggers only. To read data,you must configure a write command on the server computer. By default, the DDE Client module from IWS supports DDE Servers thathandle string data in the UNICODE format. If the DDE Server handles stringdata in the ASCII ANSI format, the following setting must be configuredmanually in the .APP file (you can use Notepad to edit thisfile):[Options]DDEANSI=1Configuring DDE ClientTo open a new DDE worksheet, right-click on the DDE folder and click the promptscreen.A new DDE worksheet displays:DDE WorksheetThe DDE worksheet dialog is divided into two areas:Header area (top section), contains information for the whole group and definesthe tags to start the reading and writing and to receive connection statusBody area (bottom section), where you define tags in the application and itemsrelated to the DDE server applicationEvery DDE interface is based on addressing an application using the following threestructures:Application NameTopicItem10–26 <strong>InduSoft</strong> <strong>Web</strong> <strong>Studio</strong> v6.1 SP2
CommunicationIWS Users GuideConfiguring the DDE ServerThe first task is to find these identifiers in the DDE Server application.Use the parameters in the DDE client worksheet Header area as follows:Description field: Type a description of the DDE worksheet for documentationpurposes.Application Name field: Type the DDE server application name.Topic field: Specify a topic in the server application.Connect field: Type a tag to control the connection of the IWS DDE client and DDEserver application. When this tag is set to 1, it requests a connection to theserver. If the connection is not possible or if it fails, IWS sets the tag to zeroagain. If the connection is OK, this value remains set to 1.Read Trigger field: Type a tag to command a reading of the table. When this tagchanges value, IWS generates polling to the DDE server. You can use thisparameter with local DDE only; you cannot use it with NetDDE servers.Enable Read when Idle field: Type a tag value higher than zero to enable a reading ofthe equipment.Read Status field: Contains the status of the reading command.Write Trigger field: Type a tag enabling IWS to generate poke commands to theserver.Enable Write on Tag Change field: Type a tag value higher than zero to enable thecommunication driver to check continuously for changes in a tag value in theworksheet. When the driver detects a change occurs, it writes the changed tagon the equipment, along with the tag’s address.Write Status field: Contains the status of the writing command.Use the DDE client Body area parameters as follows:Tag Name field: Type a tag to read or write the IWS database from the DDE serverapplication.Item field: Type the ITEM part of the DDE address on the server. Refer to yourserver software documentation for information about the proper syntax for APP,TOPIC, and ITEM.You can configure the Topic and Item fields with tags on the address using thesyntax: text {tag}. IWS evaluates the value of {tag} to a string and uses it onthe address. For example:– Topic: topic_{tag_topic_name}_example– Item: {tag_item_name} or A{tag_number}Configuring a NetDDE connection is similar to configuring a DDE connection, exceptfor the Header Application name and topic. Before starting your tests, verify that youenable the DDE Server on the station with which you want to exchange data. Note:When connecting to servers other than IWS, please refer to the serverdocumentation for information about the proper syntax of APP, TOPIC, and ITEM.<strong>InduSoft</strong> <strong>Web</strong> <strong>Studio</strong> v6.1 SP2 10–27
IWS Users GuideCommunicationUse the NetDDE Client worksheet Header parameters to define the tags that startreading and writing, and tags that receive the connection status, as follows:Application Name field: Type \NDDE$, where must be a valid network computer name.Topic field: Type the UNISOFT$ topic name to connect to another IWS station.Use the DDE client worksheet Body parameters to relate each tag to each ITEM partof the DDE server address, as follows:Tag Name field: Specify the IWS local database tag name that is related to someremote tag name.Item field: Specify the remote tag name that is related to the local tag name.10–28 <strong>InduSoft</strong> <strong>Web</strong> <strong>Studio</strong> v6.1 SP2
CommunicationIWS Users Guide<strong>InduSoft</strong> <strong>Web</strong> <strong>Studio</strong> v6.1 SP2 10–29
Chapter 11: Configuring a Security SystemYou use the Security System dialog to create groups and users, and to configuretheir access privileges to <strong>InduSoft</strong> <strong>Web</strong> <strong>Studio</strong> tools and applications.To access this dialog, simply right-click the Security folder on the Database tab andselect Settings from the pop-up menu.Security System DialogThis dialog contains the following features: Enable Security System check-box: Check ( ) this box to enable the IWS SecuritySystem.Main Password button: Opens the Security System Main Password dialog so you candefine passwords granting access to the security system.Groups button: Opens a Groups dialog, where you create and maintain usergroups.Users button: Opens a Users dialog, where you create and maintain users.VK pane: Virtual Keyboard type used for the Security System dialogs (LogOn,Change Password, and so on). You need to enable the Virtual Keyboard option onthe Project > Settings > Runtime Desktop interface before configuring the VirtualKeyboard for this interface.Entering a PasswordWhen you click the Main Password button, the Security System Main Password dialogopens so you can enter a password for accessing the <strong>InduSoft</strong> <strong>Web</strong> <strong>Studio</strong> SecuritySystem.Security System Main Password Dialog<strong>InduSoft</strong> <strong>Web</strong> <strong>Studio</strong> v6.1 SP2 11–1
IWS Users GuideConfiguring a Security SystemThis dialog contains two fields:New Password field: Type a password.Confirm Password field: Retype the same password to confirm it.If the passwords are different, IWS will prompt you to type it again. IMPORTANT!After defining your password, you must use that password each time you accessthe Security System, therefore it is mandatory that you remember it. Note:Applications developed in <strong>InduSoft</strong> <strong>Web</strong> <strong>Studio</strong> version 6.1 SP2 or later use casesensitivepasswords — that is, passwords created with both upper and lowercasecharacters must be entered the same way by the user.Applications developed in earlier versions of IWS use case-insensitive passwords.Defining GroupsThe Group Account dialog enables you to create and maintain user groups,enable/disable operations, and set security level ranges for development andruntime systems.You access this dialog by clicking on the Groups Account button on the Security Systemdialog. Alternatively, you can open the Groups folder located in the Security folder onthe Database tab, or select Insert → Security Group from the main menu bar.Group Account DialogThe features on this dialog include:Group Account combo-box: Identifies the group to which a user belongs. Note:You cannot delete the Guest group (it is the default group).11–2 <strong>InduSoft</strong> <strong>Web</strong> <strong>Studio</strong> v6.1 SP2
Configuring a Security SystemIWS Users GuideSecurity Level – Development fields and Security Level – Runtime fields: Defines the securitylevel for a group (0 to 255).Every object used for data input on a screen (such as input commands, sliders,or screens) has a Security Level field. If the object’s security level is not in thegroup security range of the user logged in at the moment, then that object will bedisabled. A level 0 (zero) means that the object is always enabled.Engineering Access check-boxes: Controls which engineering (development) tasksusers in this group can access when they log on. IMPORTANT!You also can set the security level for documents (such as worksheets andscreens) to protect them in the development environment.Runtime Access check-boxes: Controls which runtime modules users in this groupcan access when they log on.New button: Opens the New Group Account dialog used to create new groups.Delete button: Deletes the currently selected user group.Before setting up your security system, you must decide which groups and usersyou want to configure. You must define the rights of each group in yourenvironment.Use the following procedure to create these groups: In the Workspace, select the Database tab and double-click on the Security folderto view the subfolders. Right-click the Group folder and select Insert Group from the pop-up menu:Inserting a Group<strong>InduSoft</strong> <strong>Web</strong> <strong>Studio</strong> v6.1 SP2 11–3
IWS Users GuideConfiguring a Security SystemThe Group Account dialog displays:Group Account DialogRemember, you cannot delete the default group called Guest, so you must createa new group, as follows. Click the New button, and when the New Group Account dialog displays, type agroup name into the field provided. (For this example, type Operation.) Click OKto close the dialog.Entering the Group Name Return to the Group Account dialog and if the new account name is not alreadydisplayed, select Operation from the Group Account combo-box.11–4 <strong>InduSoft</strong> <strong>Web</strong> <strong>Studio</strong> v6.1 SP2
Configuring a Security SystemIWS Users Guide Configure the access rights for this group as shown:Operation Access Rights Click the New button again and create the Maintenance group. Click OK to closethe New Group Account dialog. Select Maintenance from the Group Account combo-box and configure the accessrights for the group as follows:Maintenance Access Rights Finally, repeat the procedure once more to create the Development groupaccount.<strong>InduSoft</strong> <strong>Web</strong> <strong>Studio</strong> v6.1 SP2 11–5
IWS Users GuideConfiguring a Security System Select Development from the Group Account combo-box and configure the followingaccess rights:Development Access Rights Click OK to save this configuration. Notes: Each group has a range for the level in development and runtime. In some worksheets(for example, in the Math worksheet), you can set an access level to provide thegroup with access to configure that worksheet. When users log into the system they must be associated with a group in thespecified access level range (development) for that worksheet. You also can configure access levels for buttons so that only authorized userscan execute commands (scripts) configured for those buttons in the runtimeenvironment.11–6 <strong>InduSoft</strong> <strong>Web</strong> <strong>Studio</strong> v6.1 SP2
Configuring a Security SystemIWS Users GuideDefining UsersNext, you must create new users and associate these users to the group accountsyou just created. Use the following steps: In the Workspace, select the Database tab and double-click on the Security folderto view the subfolders. Right-click the Users folder and select Insert User from the pop-up menu.Inserting New UsersThe User Account dialog displays:User Account DialogRemember, you cannot delete the default user called Guest, so you must createnew users, as follows. Click the New button, and when the New User Account dialog displays, type auser name into the field provided. (For this example, type Operator_1.) Click OKto close the dialog.Creating Operator_1 User<strong>InduSoft</strong> <strong>Web</strong> <strong>Studio</strong> v6.1 SP2 11–7
IWS Users GuideConfiguring a Security System To associate this user with a group account, return to the User Account dialogand verify that Operator_1 is displayed in the User combo-box. Select Operation from the Security Group combo-box.Operator User Account To specify a password for this user, click the Password button, and when the UserPassword dialog displays, type oper_1. Click OK to close the dialog. Reopen the User Account dialog and add the next user as follows:– Click the New button and when the New User Account dialog displays, typeMaintEng_1 into the User Name field. Click OK to close the dialog.– Associate this user to the Maintenance group account and then click thePassword button to define the main_1 as their password.Creating the MaintEng_1 User Reopen the User Account dialog once more and add the last user as follows:– Click New and create the Developer_1 user.– Associate this new user to the Development group account and specify deve_1as their password.Creating the Developer_1 User11–8 <strong>InduSoft</strong> <strong>Web</strong> <strong>Studio</strong> v6.1 SP2
Configuring a Security SystemIWS Users Guide Click OK to save the configuration.Now, if you expand the Security folder, you should be able to open all of thesubfolders and verify all the groups and users that you created.Expanded View ofSecurity Groups and Users Note:You also can use the CreateUser function to create new users. Within theapplication, users created in this manner will appear in the Users folder.SETTINGS BUTTONYou can use the User is blocked check-box and the Settings button (which replaces thePassword button used previously) to control a user’s access to the application. Youcan access these features from the User Account dialog.Use the following steps to open this dialog and configure user access: In the Workspace, expand the Security folder and right-click on a user name. When the pop-up menu displays, select Properties to open the User Account dialog:Security – User Properties: User Account Dialog If necessary, click the User is blocked check-box to block the selected user. Click the new Settings button to open the Settings dialog:<strong>InduSoft</strong> <strong>Web</strong> <strong>Studio</strong> v6.1 SP2 11–9
IWS Users GuideConfiguring a Security SystemUser Account: Settings Dialog Configure the parameters on this dialog as follows:– User Full Name text box (optional): Type the user’s full name.– New Password text box: Type the user’s password.– Confirm Password text box: Re-type the user’s password. When you are finished, click OK to apply the changes and close the Settingsdialog. Note:Applications developed in <strong>InduSoft</strong> <strong>Web</strong> <strong>Studio</strong> version 6.1 SP2 or later use casesensitivepasswords — that is, passwords created with both upper and lowercasecharacters must be entered the same way by the user.Applications developed in earlier versions of IWS use case-insensitive passwords.ADVANCED BUTTONYou can use the Advanced button to control a user’s access to the application. Youcan access these features from the User Account dialog.Use the following steps to open this dialog and configure user access: In the Workspace, expand the Security and Groups folders, and then right-clickon a group name. When the pop-up menu displays, select Properties to open the Group Accountdialog.Right-Click Properties11–10 <strong>InduSoft</strong> <strong>Web</strong> <strong>Studio</strong> v6.1 SP2
Configuring a Security SystemIWS Users Guide Click the Advanced button to open the Advanced dialog:Group Account: Selecting the Advance ButtonGroup Account: Advanced Dialog<strong>InduSoft</strong> <strong>Web</strong> <strong>Studio</strong> v6.1 SP2 11–11
IWS Users GuideConfiguring a Security System Configure the parameters on the Advanced dialog as follows:– Options: Allow the user to configure the Advanced Options for the Group.Field Remarks SyntaxMinimum Password SizePassword agingE-signature time-outDisable E-signatureAll users assigned to this group must provide apassword containing at least the minimum numberof characters. If a user tries to create a passwordwith less than the required number of characters,<strong>InduSoft</strong> <strong>Web</strong> <strong>Studio</strong> will reject the password anddisplay a warning message. Configuring the value 0in this field allows the users to enter passwords withany number of characters during the runtime.Longevity (in days) of the password for all usersassigned to this group. After the specified number ofdays, <strong>InduSoft</strong> <strong>Web</strong> <strong>Studio</strong> will force users assignedto this group to change their passwords. When theuser tries to log in, the Change Password dialogdisplays automatically and the user cannot completethe log-in process until they provide a newpassword. The password never expires whenconfiguring the value 0 in this field.Time-out period (in minutes) for the E-signature.Users assigned to this group must enter their UserIDand password before the specified timeout periodexpires to execute commands requiring anelectronic signature. Before the time-out timeexpires, the user is asked for a password only – thesystem automatically assumes the username loggedin the last electronic signature. The system resetsthe time-out counter just after an electronic signatureis executed.When the value in this field is TRUE (different fromzero), the E-signature is disabled for the wholeapplication. When configuring a tag in this field, youcan enable/disable the E-signature dynamicallyduring the runtime.Tag or NumberTag or NumberTag or NumberTag or Number Note:You can check the number of hours left to expire the password (based onthe Password aging setting) by using the built-in functionGetUserPWDAging().Also, by default, the user must type a password different from theprevious password, unless the following setting is configured in the.APP file:[Security]ChangePasswordMode=111–12 <strong>InduSoft</strong> <strong>Web</strong> <strong>Studio</strong> v6.1 SP2
Configuring a Security SystemIWS Users Guide– Auto Log Off: Allows you to log-off the current user automatically.Field Remarks SyntaxLog Off afterCount time after logonCount time after last actionNumber of minutes after which the current user mustbe logged off automatically. If this field is left in blank(or with the value 0), the current user is neverlogged off automatically.When this option is selected, the current user isautomatically logged off after the period of timeconfigured in the Log Off after field elapsed sincewhen the current user was logged on the system.When this option is selected, the current user isautomatically logged off after the period of timeconfigured in the Log Off after field elapsed sincethe last action (mouse or keyboard action) wasperformed by the current user.Tag or NumberRadio-buttonRadio-button Note:When logging off the current user, the Guest user (default user name) isautomatically logged on the system. Therefore, it is recommended torestrict the rights for the Guest user.– Account Auto Lock-up: Allows you to block a user after attempting to log-on this userwith a wrong password for a number of times.Field Remarks SyntaxEnableLock-up account afterReset counter afterWhen checked, the users assigned to this group canbe blocked automatically during the runtime.Maximum number of times a user can try to log on toan account. If the user exceeds the specifiedmaximum number of attempts (provides an invalidpassword) within the period of time specified in theReset counter after field, <strong>InduSoft</strong> <strong>Web</strong> <strong>Studio</strong> willlock the user account automatically.Defines how long after an invalid log-on attempt,<strong>InduSoft</strong> <strong>Web</strong> <strong>Studio</strong> will wait (in minutes) until itresets the log-on attempts counter. When typing avalid password, the log-on attempts counter is resetautomatically.Check-boxTag or NumberTag or Number<strong>InduSoft</strong> <strong>Web</strong> <strong>Studio</strong> v6.1 SP2 11–13
IWS Users GuideConfiguring a Security System Note:When a user exceeds the specified number of log-on attempts, <strong>InduSoft</strong> <strong>Web</strong><strong>Studio</strong> automatically blocks the account and will not reset the counter —even after the Reset counter after time expires. The System Administrator mustreset the user account by disabling (unchecking) the User is blocked check-boxon the User Account dialog or by executing the UnblockUser() function.A red circle surrounding a user name in the Workspace indicates that theuser is blocked. In addition, the User is blocked box is enabled (checked). Thefollowing figures are examples that indicate that the Eng user is blocked:Example: User is Blocked When you are finished, click OK to apply your changes and close the Advanceddialog.Remote Security SystemIf your system applications connect through a TCP/IP link, it is now possible todesignate one of your computer stations as the Central security system, from whichother stations can use the Users and Groups definitions. The following figureillustrates this configuration:Remote Security System11–14 <strong>InduSoft</strong> <strong>Web</strong> <strong>Studio</strong> v6.1 SP2
Configuring a Security SystemIWS Users GuideUse the following procedure to configure a central security system: Right-click the Security folder on the Database tab and select Settings from the popupmenu to open the Security System dialog:Right-Click Security Settings Enable (check) the new Use preferentially the Remote Security System check-box todesignate a remote security system.If the remote applications successfully connect to the security system from theServer station, they will use the security system configured on the Server station.In this case, any change implemented in the security system of the Serverstation will be assumed automatically by the remote applications. Also, thesecurity system functions (such as CreateUser(), RemoveUser(),ChangePassword(), and so forth) will update the Server station’s securitysystem — even if the functions are executed from the remote applications. As aresult, all applications on a distributed system can share the same securitysystem settings.If the applications cannot connect because the remote system is not running orcannot be reached, a message (similar to the following) will be logged in theOutput window and saved in the event file:Error connecting to Remote Security Server ‘192.168.1.255’In addition, the application(s) will revert to using the local computer’s securitysettings. The remote applications attempt to connect to the Server station’s securitysystem only when there is an event associated with the security system (such as auser logging on). In other words, there is no polling between the remote applicationsand the Server station during runtime.Setting the Security Access LevelYou can use the Security Level-Development check-boxes to set a unique range of accessvalues for each user group. You also can set a unique access range for any <strong>InduSoft</strong><strong>Web</strong> <strong>Studio</strong> worksheet (Alarm, Math, Recipe, Report, Scheduler, TCP Client, Trend,and those not available on CE: DDE Client, OPC Client, and ODBC).<strong>InduSoft</strong> <strong>Web</strong> <strong>Studio</strong> v6.1 SP2 11–15
IWS Users GuideConfiguring a Security SystemIf you click on any part of the worksheet body, you can activate the Edit → AccessLevel option from the main menu bar, which opens the Security dialog so you canassign an Access Level to that worksheet.Security DialogAssigning an access level to a worksheet means that a user would have to have anaccess level that falls within the specified Security Level- Development range to editthat worksheet.For example, UserA of GroupA has a security access level range of 0-10 and UserB ofGroupB has a security access level range of 5-15. To continue the example: Math Worksheet 001 has Access Level = 1 Math Worksheet 002 has Access Level = 7 Math Worksheet 003 has Access Level = 12 Math Worksheet 004 has Access Level = 20Consequently, Only UserA can access Math Worksheet 001 Both users can access Math Worksheet 002 Only UserB can access Math Worksheet 003 Neither user can access Math Worksheet 004Defining UsersClick on the User Account button to open the User Account dialog. You can use thisdialog to create and maintain user accounts for your application. (You defined yourapplication users for each group using the Group Account dialog.) Note:Alternatively, you can access the User Account dialog from the Users folderlocated in the Security folder on the Database tab, or by selecting Insert → User fromthe main menu bar.User Account Dialog11–16 <strong>InduSoft</strong> <strong>Web</strong> <strong>Studio</strong> v6.1 SP2
Configuring a Security SystemIWS Users GuideUse the features on this dialog as follows:User combo-box: Select from a list of application users.Security Group combo-box: Select from a list of application groups.New button: Open the New User Account dialog to create a new user.Delete button: Delete the selected user.Password button: Open a User Password dialog to define user passwords.User Password DialogSpecifying Guest UsersAfter initializing <strong>InduSoft</strong> <strong>Web</strong> <strong>Studio</strong>, a user is logged on as a Guest user (bydefault). If no other user logs on or the current user logs off, <strong>InduSoft</strong> <strong>Web</strong> <strong>Studio</strong>automatically logs on the Guest user.The Guest group has default privileges. Because the installation parameters of aGuest group leave all tasks enabled by default, you should change this parameterand set as few privileges as required for a start-up procedure.Logging On/OffAfter defining the user names and passwords, you use the Logon utility (Project →Logon) to log users on and off.Alternatively, you can use the to the <strong>InduSoft</strong> <strong>Web</strong> <strong>Studio</strong> Scripting Languageactivation functions LOGON( ) and LOGO<strong>FF</strong>( ) to log users on or off.Log On DialogUse the features of this dialog as follows:User Name field: Enter the user name to log in.Password field: Enter the user password.Log Off button: Click to log off the current user. Note:When a Logoff is executed, the Guest user is automatically logged on.<strong>InduSoft</strong> <strong>Web</strong> <strong>Studio</strong> v6.1 SP2 11–17
IWS Users GuideConfiguring a Security System11–18 <strong>InduSoft</strong> <strong>Web</strong> <strong>Studio</strong> v6.1 SP2
Chapter 12: Testing and Debugging Your ApplicationThis chapter explains how to use different IWS tools to test and debug your projectapplications.Testing Your ApplicationUse the following procedures to test your application:Project > Test Display: Activates the test display mode, which allows you to configurethe application while viewing graphical dynamics online in the developmentenvironment. The test display mode does not enable you to use the Command,input Text I/O dynamics, or execute worksheets. Note:Using the Test Display menu option is the same as using thethe Execution Control toolbar.button onProject > Stop display test: Stops the test display mode. Note:Using the Stop display test menu option is the same as using thethe Execution Control toolbar.button onProject > Run Application: Launches the runtime modules specified as Automatic on theProject Status dialog (Execution Tasks tab).– When you start the Viewer module, it opens the screen(s) currently beingedited.– If you do not specify any Automatic tasks, <strong>InduSoft</strong> <strong>Web</strong> <strong>Studio</strong> will launch theViewer and BGTask tasks automatically when you execute Run Application.– If you are not currently editing screens in the development environment, theViewer module opens the screen specified in the Startup screen field on theRuntime Desktop tab (Project Settings dialog). Note:Using the Run Application menu option is the same as using thethe Execution Control toolbar.button on Caution:Run Application affects the application from the target station (configured inthe Execution Environment dialog). Be sure you know which target station isconfigured (local or remote) before executing the Run Application command.Project > Stop Application: Stops all runtime tasks.<strong>InduSoft</strong> <strong>Web</strong> <strong>Studio</strong> v6.1 SP2 12–1
IWS Users GuideTesting and Debugging Your Application Caution:Stop Application affects the application from the target station (configured in theExecution Environment dialog). Be sure you know which target station isconfigured (local or remote) before executing the Stop Application command. Note:Using the Stop Application menu option is the same as using thethe Execution Control toolbar.button onDebugging Applications from the Database Spy Notes: The Output Window is dockable, which means you can move it to anotherlocation in the development environment. Simply click once on the titlebarand drag it to a new location. Release the mouse button to attach or dock thewindow to its new location. For a description of the Database Spy window and its components, review“Using the Database Spy” in Chapter 3: Working with the IWS DevelopmentEnvironment.The Database Spy is a very useful debugging tool because it enables you to:Force values to database tags and monitor the resultsExecute different functions or equationsSample Database Spy WindowThe Database Spy contains four DB tabs where you can enter groups of tags,functions, and/or expressions you want to test and debug.Each DB tab contains a spreadsheet with the following componentsName: Displays the tagname and/or function being evaluated on this line.Value: Displays returned values and equation resultsQuality: Displays a quality evaluation (Good or Bad) of the tag or function sourceContinuous: Displays whether IWS is continuously re-evaluating the tag, function,or equation.Creating different groups enables you to manage multiple testing/debugging tasks.For example, you can create one set of tags on DB1 to test a recipe function, andcreate another group of tags on DB2 to test a trending function.12–2 <strong>InduSoft</strong> <strong>Web</strong> <strong>Studio</strong> v6.1 SP2
Testing and Debugging Your ApplicationIWS Users GuideTo use test your application using the Database Spy, use the following process toconfigure the spreadsheet: Double-click on an empty line in the spreadsheet to open the Object Finderdialog.You use the Object Finder dialog to add tags, expressions, or functions to thedata collection process. You can use the New Tag dialog to force values to test atag or collect data for a tag. When you right-click on a line in the Database Spy window, a pop-up menudisplays:Right-click to Display Options– New Value: Use this option to change the current value of the selected tag.Selecting this option opens the New value dialog. Type a value into the NewValue text box and then click OK.New Value Dialog– Continuous: Use this option to enable or disable whether IWS continuously reevaluatesthe selected expression or tag.– Toggle: Use this option to toggle the tag value between 0 and 1, or to reinitiate(renew) a function or expression– Insert Tag or Expression: Use this option to insert a new tag or expression.– Remove Selection: Use this option to delete the selected expression.– Hide Window: Select to close (hide) the Database Spy window.To reopen the window, you can:* Click the Toggle Database Spy Window icon on the Standard toolbar* Press Alt+2 from the keyboard* Select View → Toolbars → Database Spy to re-open the window.If you are having trouble with any function, copy the function and use the DatabaseSpy trigger to test and debug the function instead of running, tweaking, and thenrunning the function again and again in the development environment.<strong>InduSoft</strong> <strong>Web</strong> <strong>Studio</strong> v6.1 SP2 12–3
IWS Users GuideTesting and Debugging Your Application Note:Some functions, such as report(), recipe(), and math(), must be executedas Background Tasks during runtime to work properly.Debugging Applications from the Output WindowUse the Output (LogWin) window (located next to the Database Spy) to viewdebugging messages provided by IWS. (Note: You can double-click on a line item toopen that worksheet or screen.)Sample Output WindowFor example, you can check the serial communication with a PLC. Notes: The Output window is dockable, which means you can move it to anotherlocation in the development environment. Simply click once on the titlebarand drag it to a new location. Release the mouse button to attach or dock thewindow to its new location. See Chapter 3: Working with the IWS Development Environment for a detaileddescription of the Output window.12–4 <strong>InduSoft</strong> <strong>Web</strong> <strong>Studio</strong> v6.1 SP2
Testing and Debugging Your ApplicationIWS Users GuideThe Output window contains the following tabs:Log tab: Similar in function to the LogWin module, but provides limitedfunctionality to reduce time and memory usage within the dev environment. Ituses the first-in, first-out (FIFO) principle to manage space.Right-click in the Output window and a pop-up menu displays:Right-click to Display Options– Settings: Opens the Log Settings dialog where you specify options and tags youwant IWS to look for and log for debugging purposes.Log Settings DialogUse the two tabs on this dialog to specify the kind of information you wantIWS to log and display in Output window.* Log Options tab: Enable ( ) the check-boxes to log the following events:Field Read and Field Write CommandsDDE, OPC, TCP/IP, and Trace MessagesRecipes/ReportsOpening and closing the displayLog-ons and Log-outsSerial communicationInserting date/time<strong>InduSoft</strong> <strong>Web</strong> <strong>Studio</strong> v6.1 SP2 12–5
IWS Users GuideTesting and Debugging Your Application* Log Tags tab: Use the Add button to open the Object Finder dialog, whichyou can use to create a list of tags for IWS to monitor. (Steps for using theObject Finder dialog are provided in “Debugging Applications from theDatabase Spy” on page 12–2.) Use the Remove or Remove All buttons todelete tag names from this list.Whenever a specified action occurs or a specified tag changes value, IWS will logthe results in the Output window—along with the driver, modules, and so forththat initiated the change.– Pause: Select (enable) to stop the data collection process temporarily, andre-select (disable) to resume data collection.– Hide Window: Select to close (hide) the Output window.To reopen the window, you can:* Click the Toggle Output Window icon on the Standard toolbar.* Press Alt+1 from the keyboard.* Select View → Toolbars → Output to re-open the window.– Cut, Copy, Delete, Select All: Become active when you select an entry in theOutput window.To print the results from the Output window, select the text you want toprint. Right-click and select Copy from the pop-up menu. You can then pastethe results into Notepad (or another application) and print the report fromthere.If you established settings (using the Log Settings dialog) in the developmentenvironment, those settings will transfer to your CE station, along with theapplication, so you can create a log from the CE station. You can change thesettings from your CE station, or change the settings from Development andresend them to your CE station.X-Ref tab: Use the Object Finder field to get a tag, and to find every place in theapplication where the tag is being used. Results appear on this tab, providingpath and filename, column, row in the spreadsheet. So, if something changes inthe tag, and produces unexpected or unsuccessful results, you can locate allinstances of the tag for debugging purposes. Notes: The X-Ref tab does not work for functions, only tags, but does allow you tolook for indexes. See also “Using the Object Finder,” in Chapter 3: Working with the IWSDevelopment Environment.Using the LogWin Module (NT and CE)This module provides a continuous record of activities and tags for debugging overlong periods of time. It creates a file into which you can dump the data collectionresults, and this file continues to grow in size until you stop the logging (datacollection) process. Use the LogWin module (local and remote) to record DDE, OPC,and TCP/IP transactions, activate modules, trace tags, and so forth.12–6 <strong>InduSoft</strong> <strong>Web</strong> <strong>Studio</strong> v6.1 SP2
Testing and Debugging Your ApplicationIWS Users GuideTo initiate LogWin, go to Project → Status locally, or select LogWin from the Tools menuon the CE box.Initiating LogWinTo debug the <strong>Web</strong> client, check (enable) Log by selecting Project → Settings from themenu bar, and then selecting the <strong>Web</strong> tab. Check the Enable check-box and type inthe path+filename in the FileName option box. When finished, select OK.Debugging the <strong>Web</strong> Client<strong>InduSoft</strong> <strong>Web</strong> <strong>Studio</strong> v6.1 SP2 12–7
IWS Users GuideTesting and Debugging Your ApplicationUsing Remote Tools<strong>InduSoft</strong> <strong>Web</strong> <strong>Studio</strong> offers on-line, remote application management andconfiguration (download/upload, commands, system and network diagnostics, anddebugging). You can configure and debug applications remotely using a TCP/IP link.You can use the Execution Control toolbar to execute and manage an applicationlocally or from a remote location.Execution Control Toolbar Test Display button ( ): Allows you to run in test display mode, which allows youto configure an application while viewing graphical dynamics on-line in thedevelopment environment. Stop Test Display button ( ): Allows you to stop running in test display mode. Run Application button ( ): Allows you to launch any runtime modules specifiedas Automatic. Stop Application button ( ): Allows you to stop all runtime tasks. Caution:Stop Application affects the application from the target station (configured fromthe Execution Environment dialog). Be sure you know which target station isconfigured (local or remote) before executing Stop Application. Send project to target button ( ): Allows you to send the application to the remotetarget station. Execution Environment button ( ): Allows you to manage remote workstations.With this button, you can:– Connect in a remote station– Send/update system files (CE only)– Send/update application files– Send files– Import application files– Import CE logs– License remotely (CE only) Notes: For a description of the Execution Control toolbar, see Chapter 7: ConfiguringScreens and Graphics. For a description of configuring the Execution Environment, see Chapter 14:Managing Applications Remotely.12–8 <strong>InduSoft</strong> <strong>Web</strong> <strong>Studio</strong> v6.1 SP2
Testing and Debugging Your ApplicationIWS Users GuideUsing Remote Database SpyYou can use the Remote Database Spy tool (located in the Tools menu) to monitorthe Database Spy of an IWS application project running on a remote computer. Theproject must have the Database Spy execution task enabled, and the remotecomputer must be in runtime.To use the Remote Database Spy tool:1. From the main menu bar, select Tools > Remote Database Spy. The RemoteComputer dialog is displayed.2. Enter the IP address of the remote computer, as shown below.Entering a Remote IP Note:The IP address 192.168.1.52 is only an example. Please verify the IPaddress of the computer to which you want to connect.3. Click OK to connect to the specified address. If the connection is good, thenthe Remote Database Spy window is displayed.Remote Database Spy Note:You cannot add or remove tags remotely; the Database Spy tag list mustbe configured on the remote computer itself.When you are done, click Close to disconnect from the remote computer.<strong>InduSoft</strong> <strong>Web</strong> <strong>Studio</strong> v6.1 SP2 12–9
IWS Users GuideTesting and Debugging Your ApplicationUsing Remote LogWinYou can use the Remote LogWin tool (located in the Tools menu) to monitor theOutput log (LogWin) of an IWS application project running on a remote computer.The project must have the LogWin execution task enabled, and the remote computermust be in runtime.To use the Remote Database Spy tool:1. From the main menu bar, select Tools > Remote LogWin. The Remote Computerdialog is displayed.2. Enter the IP address of the remote computer, as shown below.Entering a Remote IP Note:The IP address 192.168.1.52 is only an example. Please verify the IPaddress of the computer to which you want to connect.3. Click OK to connect to the specified address. If the connection is good, thenthe Remote LogWin window is displayed.Remote LogWinWhen you are done, just close the window to disconnect. Note:For a detailed description of managing applications remotely, see Chapter 14:Managing Applications Remotely.12–10 <strong>InduSoft</strong> <strong>Web</strong> <strong>Studio</strong> v6.1 SP2
Testing and Debugging Your ApplicationIWS Users Guide<strong>InduSoft</strong> <strong>Web</strong> <strong>Studio</strong> v6.1 SP2 12–11
Chapter 13: Configuring a <strong>Web</strong> SolutionThis chapter explains how to configure and run a <strong>Web</strong> Thin Client application. Afterdeveloping and testing an application on your local computer, <strong>InduSoft</strong> <strong>Web</strong> <strong>Studio</strong>enables you to view and run the application in a standard <strong>Web</strong> Browser (such as theInternet Explorer or Netscape) from any standard PC, laptop, or handheld device.You can:Read and write data directly from a PLC or an intelligent field device.Update screens dynamically, based on current register values read from the PLC.Provide HMI interfaces (such as button and text input) to send commands orsetpoints to the PLC or device.The following figure illustrates the process of taking an application from the IWSdevelopment environment to the <strong>Web</strong> Thin Client (Browser).Viewing Applications on a <strong>Web</strong> Thin Client (Browser)The Data Server computer (running IWS or CEView) collects data (such as plant floordevices) and sends that data to the <strong>Web</strong> Thin Client. A TCP/IP Server module(provided by IWS and/or CEView) is required to enable this communication. Note:The TCP/IP module uses the TCP port #1234 by default. If you must changethis port location (for example, to prevent a conflict or for security issues suchas a fire wall), see “Setting the Options Tab Parameters” in Chapter 6: Creating<strong>InduSoft</strong> <strong>Web</strong> <strong>Studio</strong> v6.1 SP2 13–1
IWS Users GuideConfiguring a <strong>Web</strong> Solutionand Configuring a Project for instructions.The <strong>Web</strong> Server computer contains your application’s .html pages (stored in a \<strong>Web</strong>folder). You must have an HTTP Server running on this computer to enable the <strong>Web</strong>Thin Client to download the .html pages using the HTTP protocol. The HTTP Servercan be the IIS <strong>Web</strong> Server that is typically provided by Microsoft or the IWS <strong>Web</strong>Server (NT<strong>Web</strong>Server.exe) that is provided by <strong>InduSoft</strong> for your convenience. TheHTTP Server always uses TCP/IP Port #80 (which is reserved for the HTTP protocol). Notes: Microsoft provides <strong>Web</strong> servers for all Microsoft operating systems. Consultyour Microsoft documentation for information about installing andconfiguring an IIS <strong>Web</strong> Server. The Data Server and the <strong>Web</strong> Server can be the same computer (notrequired). You must ensure that there are no firewalls between the <strong>Web</strong> Thin Client andthe Server station(s) to block the TCP/IP ports used by the TCP/IP and HTTPServers.The <strong>Web</strong> Thin Client downloads .html pages from the <strong>Web</strong> Server computer, andrequires an ActiveX component called ISSymbol.ocx to process the .html pageswithin the Browser. Note:If your computer does not have an ISSymbol.ocx component installed already,the <strong>Web</strong> Thin Client will download and initialize an ISSymbol.ocx componentfrom the <strong>InduSoft</strong> <strong>Web</strong> site automatically.The ISSymbol.ocx component downloads screen and database files (.SCC,.TAGL, , ) from the <strong>Web</strong> Server using the HTTPprotocol over TCP/IP.The ISSymbol.ocx component also validates users attempting to log onto the <strong>Web</strong>Thin Client. After authorizing the user, ISSymbol.ocx displays the applicationscreen and initializes a virtual TCP/IP Client module to exchange data with theData Server’s TCP/IP Server module. This virtual TCP/IP Client module reads allvalues from the TCP/IP Server.When you display your application screen in the Browser, the <strong>Web</strong> Thin Client andthe Data Server can exchange data values. Consequently, if any screen tag(configured as a Server tag) changes value on any of the runtime devices, the new tagvalue will be sent immediately and automatically to all other devices. There is nodata pooling between devices, which results in better performance.If you specified any indirect tags (@) for your application screen, the tagsto which the indirect tags are pointing must be configured on the same screen or the<strong>Web</strong> Thin Client cannot receive the tag values from the Data Server.The <strong>Web</strong> Thin Client executes functions and expressions configured on the screen(such as the Command dynamic). Consequently, if you have functions that must beexecuted in the Server only, you must configure those functions in an IWS Math orScheduler worksheet.The rest of this chapter explains how to configure your applications for a <strong>Web</strong> ThinClient.13–2 <strong>InduSoft</strong> <strong>Web</strong> <strong>Studio</strong> v6.1 SP2
Configuring a <strong>Web</strong> SolutionIWS Users GuideBefore You BeginBefore you can run your IWS application in a <strong>Web</strong> Thin Client (Browser), you mustaccomplish the following tasks:Define a Home directory folder for your <strong>Web</strong> pages.Install and register the ISSymbol.ocx ActiveX component.Ensure the IIS <strong>Web</strong> Server is pointing to the Home directory folder and runningora copy of the IWS NT<strong>Web</strong>Server.exe is running in the Home directory folder. Note:Microsoft provides <strong>Web</strong> servers for all Microsoft operating systems.Consult your Microsoft documentation for information about installingand configuring a <strong>Web</strong> Server.Verify that the TCP/IP Server is running.Set your application tags to Server if you want to view the results of those tags inthe Browser. (Review “Sharing Tags with a <strong>Web</strong> Thin Client” in Chapter 5:Working with Tags.)Instructions for performing these tasks follows.Defining a Home DirectoryYou must define a Home directory folder (only one per computer), in which to storeyour <strong>Web</strong> pages. <strong>InduSoft</strong> recommends using the \<strong>Web</strong> subfolder located in theproject application folder. For exampleC:\Program Files\<strong>InduSoft</strong> <strong>Web</strong> <strong>Studio</strong>\Projects\\<strong>Web</strong> Note:To enable translation for <strong>Web</strong> Thin Clients, you must manually copy translationfiles (*.TRA) into the \<strong>Web</strong> folder.<strong>Installing</strong> and Registering ISSymbol.ocxTo view applications screens in a Browser, the <strong>Web</strong> Thin Client requires an ActiveXcomponent called ISSymbol.ocx. This component can be installed in one of threeways:When you install IWS, the program automatically installs and registers thiscomponent.When you connect a <strong>Web</strong> Thin Client to the Internet and this component is notalready installed, IWS automatically connects to the <strong>InduSoft</strong> <strong>Web</strong> site anddownloads and registers this component.You can copy the ISSymbol.cab from IWS’s \BIN subfolder and paste it into the\\System32 directory on the <strong>Web</strong> Thin Client station. Use the WinZip ®utility to unzip (extract) the files from ISSymbol.cab into the\\System32 directory and register the ISSymbol.ocx using theregsvr32 ISSymbol.ocx command.<strong>InduSoft</strong> <strong>Web</strong> <strong>Studio</strong> v6.1 SP2 13–3
IWS Users GuideConfiguring a <strong>Web</strong> SolutionThe recommended way to register the ISSymbol manually in a computer whichdo not have Internet access is by following the procedure below:– Copy ISSymbolA.cab, ISSymbol.cab and ISSymbolReg.exe from the \BINsub-folder of <strong>InduSoft</strong> <strong>Web</strong> <strong>Studio</strong> installation directory and paste these filesinto any directory of the <strong>Web</strong> Thin Client station.– Execute the ISSymbolReg.exe program. It will register the ISSymbol controlautomatically. Note: When using the /s parameter (Silent), ISSymbolReg.exe does not displayany message box (for example, ISSymbolReg.exe /s). When using the /u parameter (Unregister), ISSymbol is unregistered (forexample, ISSymbolReg.exe /u).Running the <strong>Web</strong> ServerYou must have a <strong>Web</strong> Server running and pointing to your Home directory folder(a folder on your computer where you store <strong>Web</strong> pages). You can use the WindowsIIS <strong>Web</strong> Server or a copy of the IWS <strong>Web</strong> Server (called NT<strong>Web</strong>Server.exe), which isprovided with <strong>InduSoft</strong> <strong>Web</strong> <strong>Studio</strong> for your convenience. Note:Most Windows CE computers have a default <strong>Web</strong> server similar to IIS and IWSprovides a <strong>Web</strong> server similar to NT<strong>Web</strong>Server.exe. The steps for configuringthese two <strong>Web</strong> Servers on CE are the same as the configuration for WindowsNT/2000/XP (described in the following sections).CONFIGURING AN IIS WEB SERVERTo configure the IIS <strong>Web</strong> Server: Select Start → Settings → Control Panel → Administrative Tools → Internet Services Manager. When the IIS window displays, expand the folders in the left pane until you seethe Default <strong>Web</strong> Site folder. Right-click the Default <strong>Web</strong> Site folder, select Properties from the pop-up menu,and the Default <strong>Web</strong> Site Properties dialog displays.13–4 <strong>InduSoft</strong> <strong>Web</strong> <strong>Studio</strong> v6.1 SP2
Configuring a <strong>Web</strong> SolutionIWS Users Guide Select the Home Directory tab and specify the Home directory path in the Local Pathtext field (similar to the following figure): Click OK to close the dialog.Configuring the IIS <strong>Web</strong> ServerCONFIGURING THE IWS WEB SERVERTo put a copy of the IWS NT<strong>Web</strong>Server.exe in your Home directory: Open C:\Program Files\<strong>InduSoft</strong> <strong>Web</strong> <strong>Studio</strong>\Bin and locate theNT<strong>Web</strong>Server.exe executable file. Copy the file and paste it into the folder designated as the Home directory foryour <strong>Web</strong> pages. For example,C:\Program Files\<strong>InduSoft</strong> <strong>Web</strong> <strong>Studio</strong>\Projects\\<strong>Web</strong>\NT<strong>Web</strong>Server.exe<strong>InduSoft</strong> <strong>Web</strong> <strong>Studio</strong> v6.1 SP2 13–5
IWS Users GuideConfiguring a <strong>Web</strong> SolutionRunning the TCP/IP ServerTo verify that the TCP/IP Server is running on your computer (or the runtimecomputer): Select Project → Status from the main menu bar to open the Project Status dialog. On the Execution tab, verify that the TCP/IP Server is Started or set to Automatic.Verifying TCP/IP Server StatusIf TCP/IP Server is set to Manual or Stopped:– To start the server immediately, click the Start button.– To configure the server to start automatically, click the Startup button. Whenthe Startup dialog displays, select the Automatic radio button and then clickOK.Starting the TCP/IP Server Automatically Click OK to close the Project Status dialog.13–6 <strong>InduSoft</strong> <strong>Web</strong> <strong>Studio</strong> v6.1 SP2
Configuring a <strong>Web</strong> SolutionIWS Users GuideConfiguring the ApplicationSave your application screen in HTML format using the following steps: Expand the Screens folder in the Workspace and double-click on the applicationbutton to open the screen.Opening the Application Screen Select File → Save as HTML to save the screen (or Save All as HTML to save multipleopen screens) in HTML format.IWS automatically saves the screen (as an .html file) into the <strong>Web</strong> Pages folder,which represents the /<strong>Web</strong> folder in your application directory.New HTML Screen<strong>InduSoft</strong> <strong>Web</strong> <strong>Studio</strong> v6.1 SP2 13–7
IWS Users GuideConfiguring a <strong>Web</strong> Solution Next, select Project → Settings from the main menu bar and when the ProjectSettings dialog displays, select the <strong>Web</strong> tab.Project → Settings → <strong>Web</strong> Tab Configure the following parameters on this tab:– Data Server IP text box: Type the IP address of the Server station running IWSor CEView. The <strong>Web</strong> Thin Client station will exchange on-line data (tagvalues) with this Server station during runtime.– Send Period field: Type a value to specify how often (in milliseconds) the Serverand the <strong>Web</strong> Thin Client stations will exchange data.– Disable Remote Client Commands check-box: Enable this box to prevent a remoteclient from issuing commands to your Server through the <strong>Web</strong> Thin Client.– Enable ToolTips check-box: Enable this box to see Windows ToolTips whenviewing the application screens on the <strong>Web</strong> Thin Client (browser).– Auto Screen Scaling check-box: Enable this box if you want the screensdisplayed in the Browser to scale automatically when you resize the Browserwindow.– Enable File Compression check-box: Enable this box to compress the files storedon the project application’s \<strong>Web</strong> folder.Compressing files can reduce your download time significantly — particularlyif you have a slow connection between your Server and the <strong>Web</strong> Thin Client.13–8 <strong>InduSoft</strong> <strong>Web</strong> <strong>Studio</strong> v6.1 SP2
Configuring a <strong>Web</strong> SolutionIWS Users Guide– IP Security button: Clicking this button opens the IP Security dialog.IP Security DialogUse the parameters on this dialog to control which computers will be allowedto access this application as <strong>Web</strong> Thin Clients.Check the Enable check-box, and when the Edit pane parameters becomeactive, type IP addresses in the From and To fields to specify the IP addressrange. Use the Add and Remove buttons to move the IP addresses into the IPAddress Range list. IWS permits the computers listed in this pane to accessapplications as <strong>Web</strong> Thin Clients.– Log (Enable check-box and FileName text field): Enable the check-box and type afile name into the text field to generate a log file on the <strong>Web</strong> Thin Clientstation. You can use this log file for debugging purposes.– To enable the Virtual Keyboard for the <strong>Web</strong> Thin Client stations,independently from the local station, click the Virtual Keyboard check-box.When this box is checked, the Default and Scale fields become active.* Default: Select the default keyboard used in the application.* Scale: With this option you can enlarge or shrink the keyboards to fitproperly with the display size of the target panel. Scale: 100% representsthe default size of each Virtual Keyboard. The options range from 25% to400%, but you can also enter a custom scale. After configuring the <strong>Web</strong> tab parameters, click OK to close the Project Settingsdialog. Close all screens in the screen editor (Window → Close All). Select Tools → Verify Application from the main menu bar to update the <strong>Web</strong> Settingsfor the <strong>Web</strong> pages. IMPORTANT!You must verify an application any time you change a screen’s <strong>Web</strong>parameters on the Project Settings dialog <strong>Web</strong> tab.Verifying applies (or reapplies) all of your changes to the .html page.<strong>InduSoft</strong> <strong>Web</strong> <strong>Studio</strong> v6.1 SP2 13–9
IWS Users GuideConfiguring a <strong>Web</strong> SolutionIWS displays two prompt dialogs to report status as it verifies your application,when the success prompt displays, click OK to close the dialog.Verifying the ApplicationTesting the ApplicationBefore you begin, use this short checklist to verify that you are ready to test yourapplication in a <strong>Web</strong> Browser: Verify that the ActiveX component ISSymbol.ocx is installed and registered. Verify that the IIS <strong>Web</strong> Server is pointing to the Home directory folder andrunning or that a copy of the IWS NT<strong>Web</strong>Server.exe is running in the Homedirectory folder. Verify that the TCP/IP Server is running. Verify that application tags are set to Server if you want to view the results ofthose tags in the Browser. (Review “Sharing Tags with a <strong>Web</strong> Thin Client” inChapter 5: Working with Tags.)To test your <strong>Web</strong>-based application, use the following steps: Click on Run application button (on the IWS main menu bar) to execute theapplication locally on your Server station.Check your Windows Task Bar and verify that the TCP/IP Server and BackgroundTasks are running. You may also note that one or more drivers are running.Background TasksDriversVerify that TCP/IP and Background Tasks are Running After the application screen opens, open your Internet Browser (such as InternetExplorer or Netscape) and type the URL address (being sure to include thecorrect Home directory) to open the .html screen from the Serverstation (for example, http://192.168.1.100/main.html). When the Log On dialog displays in the Browser, type your log-on name into theUser Name text box, your password into the Password text box, and then click OK toopen the .html screen.13–10 <strong>InduSoft</strong> <strong>Web</strong> <strong>Studio</strong> v6.1 SP2
Configuring a <strong>Web</strong> SolutionIWS Users GuideLogging On Notes: If you have not defined users in the application’s Security folder, the IWSdefault User Name is Guest with no password. If you disabled any security requirements for your application, the Log Ondialog will not display. When the Log On dialog displays, it is an indication that your TCP/IPServer is running successfully. If a problem exists with the TCP/IP Server,an error message will display instead.After you close the Log On dialog, the following screen displays in the Browserwindow to indicate the download status.Reporting Download Status<strong>InduSoft</strong> <strong>Web</strong> <strong>Studio</strong> v6.1 SP2 13–11
IWS Users GuideConfiguring a <strong>Web</strong> SolutionWhen the download is complete, your application screen will display. At this point,the <strong>Web</strong> Thin Client should be reading information from the screen tags (forexample, the clock should indicate the passage of seconds).main.html in Browser13–12 <strong>InduSoft</strong> <strong>Web</strong> <strong>Studio</strong> v6.1 SP2
Chapter 14: Managing Applications RemotelyThis chapter explains how to download an <strong>InduSoft</strong> <strong>Web</strong> <strong>Studio</strong> application to yourruntime workstation and then monitor/manage that application remotely from avariety of devices.Downloading the ApplicationAfter configuring an application and testing it locally (on your developmentworkstation), you can download the application to a remote runtime workstationthat is running IWS on Windows NT/2000/XP or running CEView on a Windows CEdevice.Configuring the Target Station Before you begin, verify that the Remote Agent (CEServer.exe) is running on thetarget (remote) workstation.– On a Windows platform, the CEServer.exe file is located in the \<strong>InduSoft</strong><strong>Web</strong> <strong>Studio</strong>\Redist\\\BIN folder (for NT,the location is the \BIN folder).– On a Windows CE device, the file is located in the \ folder. Run the CEServer.exe on the target workstation, and when the Remote Agentdialog displays, click the Setup button.Remote Agent Dialog<strong>InduSoft</strong> <strong>Web</strong> <strong>Studio</strong> v6.1 SP2 14–1
IWS Users GuideManaging Applications RemotelyThe Setup dialog opens:Setup Dialog Use the parameters on this dialog to configure communication between thedevelopment and target stations:– Serial Port: Enable this button to establish a connection to the developmentstation through a serial port. Click the arrow button and select acommunication port from the combo-box list.If you click the Advanced button, the Serial Advanced Settings dialog opens.Serial Advanced Settings DialogYou can use the parameters on this dialog to control the flow of data betweenyour target and development stations:* Baud Rate: Click the arrow button to select a predefined baud rate fromthe combo-box list* Control RTS: Enable ( ) this box to use a “Request to Send” control, whereIWS sends an RS-232 signal from the transmitting station to the receivingstation requesting permission to transmit.* Control CTS: Enable ( ) this box to use a “Clear to Send” control, where IWSsends an RS-232 signal from the receiving station to the transmittingstation to indicate the receiving station is ready to accept data.When you finish setting these parameters, click OK to close the SerialAdvanced Settings dialog.14–2 <strong>InduSoft</strong> <strong>Web</strong> <strong>Studio</strong> v6.1 SP2
Managing Applications RemotelyManaging Applications Remotely– TCP/IP: Enable this button to establish a TCP/IP connection to thedevelopment station. Note:For performance reasons, we recommend using a TCP/IP connectioninstead of a Serial Link connection. When you are finished, click OK to close the Setup dialog, but leave the RemoteAgent program running in the remote workstation.Configuring the Development StationAfter configuring the target station to receive data, use the following steps toconfigure the development station to send the application data: Select Project → Execution Environment from the main menu bar (on the developmentworkstation).Execution Environment DialogThis dialog contains the following tabs:– Target: Use this tab to specify the target station, including:* Local, Network IP address, Serial Port, or Microsoft ActiveSyncNOTE: Microsoft ActiveSync currently works only with Windows CE 3.0,4.x and 5.0.* Connect/Disconnect the target station* Review station Status* Returns the platform (operating system + processor type) of the targetstation after connecting to it.* Install system files (or Only newer files)– Application: Use this tab to specify the application, including:* Local and Target directory paths* Specify whether to Send (the application) to target station (or Only newer files)* Send file* Run/Stop the application* Review application Status– Import: Use this tab to import an application, including<strong>InduSoft</strong> <strong>Web</strong> <strong>Studio</strong> v6.1 SP2 14–3
IWS Users GuideManaging Applications Remotely* Specify the To and From application path* Get From Target* Get Log File* Review application Status– CE License: Use this tab to specify License Settings and License Codes for aWindows CE license, including* Product Type* Version* Number of <strong>Web</strong> Thin Clients* Site Code* Site Key Select the Target tab and use the following options to specify the target station towhich you are going to connect.– Local: Select this button if you are going to run the application on the samestation on which you developed the application.– Network IP: Select this button and type the IP address of the target station intothe text box if you specified a TCP/IP connection when you configured thetarget station.– Serial Port: Select this button and select a port from the combo-box list if youspecified a Serial Port connection when you configured the target station.– Microsoft ActiveSync: Select this button to connect to devices on which MSActiveSync is enabled.Specifying Link Type and IP Address Click the Connect button to connect to the remote workstation. Note:If the remote workstation is a WinCE device, you can click on the InstallSystem Files button to download the CEView runtime files to the remoteworkstation.14–4 <strong>InduSoft</strong> <strong>Web</strong> <strong>Studio</strong> v6.1 SP2
Managing Applications RemotelyManaging Applications Remotely In the Workspace window, select the Application tab and click the Send to Targetbutton to download the application to the remote workstation.Specifying Link Type and IP Address Caution:When you send an application to the remote target station, the changes takeeffect online. In other words, after downloading application files to the targetstation, the new application(s) replace the old ones automatically – even if theapplication is running.In addition, if you uncheck (disable) the Only newer files check-box on theApplication tab (Execution Environment dialog), IWS will remove all of the files inthe target application directory before downloading the new files. Note: If the application download is interrupted, IWS requests confirmation andadvises you that the application may not run properly. Using the Send app to target menu option is the same as using the Send app totarget button on the Execution Control toolbar.– Send file: Click to browse to the directory and select an individual file to send.– Stop button: Click to stop the application. After downloading all application files, click the Run button to execute theapplication in the remote target workstation.<strong>InduSoft</strong> <strong>Web</strong> <strong>Studio</strong> v6.1 SP2 14–5
IWS Users GuideManaging Applications RemotelyMonitoring/Managing Applications from the RemoteStationAfter configuring an application and testing it locally (on your developmentworkstation), you can download the application to a remote runtime workstationthat is running under Windows NT/2000/XP or CEView under Windows CE. Before you begin, verify that the Remote Agent (CEServer.exe) is running on theremote target workstation. Note:The CEServer.exe file is located in the following directory on Windows2000/XP computers (for NT, the location is the \BIN folder):\<strong>InduSoft</strong> <strong>Web</strong> <strong>Studio</strong>\Redist\CEView\\BINThe file should be located in the \ folder on the WinCEdevice. After downloading all application files, click the Run button to execute theapplication in the remote target workstation.14–6 <strong>InduSoft</strong> <strong>Web</strong> <strong>Studio</strong> v6.1 SP2
Chapter 15: Scripting Languages: IWS and VBScriptWorking with the IWS Scripting Language, Expressions,and FunctionsThis section explains how to work with the <strong>InduSoft</strong> <strong>Web</strong> <strong>Studio</strong> (IWS) scriptinglanguage, expressions, and functions.Using TagsTags are variables that can receive the results of expressions specified in screensand worksheets (such as communication points in field equipment, calculationresults, alarm points, and so forth). Note:We recommend that you read and understand the concepts discussed inChapter 5: Working with Tags before you read this chapter.Specifying Data TypesYou can use the IWS Scripting Language in many places, for example:Dynamic object properties in the Application BuilderScreen logic in the Application BuilderScheduler worksheetsMath worksheetsA Math worksheet has two columns:– Tag Name: Names of tags to receive results from expressions specified in theExpression column on the same line.– Expression: Mathematical expressions defined by <strong>InduSoft</strong> <strong>Web</strong> <strong>Studio</strong>.For example, Tag Name a, will receive the result of Expression (10c)-5.Example Math Worksheet IMPORTANT! No attributions are done on the Expression column. If you write A=2 in thiscolumn, IWS will compare A with the number 2. The integer result of thisexpression (Boolean value 0 if false or 1 if true) will be written to the tag in theTag Name column. The system is not case-sensitive. To add comments to an expression line, use the // characters.<strong>InduSoft</strong> <strong>Web</strong> <strong>Studio</strong> v6.1 SP2 15–1
IWS Users GuideScripting Languages: IWS and VBScriptThe following data types are acceptable: Integer numbers (32 bits): 1 23 45 -123 Floating point (8 bytes): 1.234 -775.344 Hexadecimal integer numbers (32 bits): 0x5 0xA0 0xBC4 Strings (255 characters): “demo” “new demo”Accessing the Tags DatabaseTo write a value in the database, use the tag name directly, for example:In the following script line, the X tag will receive the sum of two tags, level andtemp:Example 1IWS allows you to read and write tags using references or pointers. You candeclare a tag being used as pointer to another tag in two ways:– As a string (a pointer to an undefined type)– As a pointer of a specific kind (recommended)Example 2In the preceding figure Valve_Fill_State is a variable of a string type that is apointer. The @pointer_to_integer variable is a pointer to integer values. Notes:The syntax @tag allows a tag to access another tag by reference.You can use any tag declared as a string as an indirect tag (pointer).Arithmetic Operators<strong>InduSoft</strong> <strong>Web</strong> <strong>Studio</strong> supports all the following Arithmetic operators:+ addition- subtraction* multiplication/ division> greater than< less than= equal>= greater than or equal to
Scripting Languages: IWS and VBScriptIWS Users Guide different from (unequal to) Notes:Math functions are calculated from left to right, according to a specific order foreach operator in the formula. To change the order of evaluation, enclose inparentheses the part of the formula to be calculated first. For example, thefollowing formula produces 11 because multiplication is calculated beforeaddition. The formula multiplies 2 by 3 and then adds 5 to the result:5+2*3In contrast, if you use parentheses to change the syntax, 5 and 2 are addedtogether and then multiplied by 3 to produce 21:(5+2)*3Logic Operators<strong>InduSoft</strong> <strong>Web</strong> <strong>Studio</strong> supports all the following Logic operators: AND AND, logic NOT NOT, logic OR OR, logic XOR exclusive or, logic & AND, bit | OR, bit ~ NOT, bit ^ XOR, bit >>n rotate right – Rotate n bits to right.
IWS Users GuideScripting Languages: IWS and VBScriptExample of functions:Functions Execution NT/2K/XP Win CE <strong>Web</strong> ClientFalse() Synchronous If() Synchronous True() Synchronous Format() Synchronous GetBit() Synchronous Max() Synchronous Min() Synchronous SendEmail() Synchronous Log() Synchronous Play() Synchronous/Asynchronous IMPORTANT:You can use the Database Spy window to execute any math expression bywriting the expression in the Tag Name field and clicking the Toggle button.The return value of the expression will display in the Value field.15–4 <strong>InduSoft</strong> <strong>Web</strong> <strong>Studio</strong> v6.1 SP2
Scripting Languages: IWS and VBScriptIWS Users GuideOverview of VBScriptThe Microsoft Visual Script Language (VBScript), is a simple, standard and flexiblescripting language that allows you to implement logics and algorithms within theIWS application.IWS implements the Microsoft Visual Basic Scripting Edition 5.5 or higher. BecauseIWS hosts VBScript, the user can take advantage of all features provided by thislanguage, such as:Use syntax, operators and functions available in the languageCreate new variables and Procedures (Functions and/or Sub-routines)Access properties, methods and/or events from COM objects, including ActiveXcontrolsExecute the logics in any platform that supports VBScript, including MicrosoftWindows NT/2K/XP (IWS Server station), Microsoft Windows CE (CEView) andMicrosoft Internet Explorer (<strong>Web</strong> Thin Client). Caution:When creating the image for the Microsoft Windows CE device, the hardwaremanufacturer must enable the support for VBScript on it, so CEView will beable to execute the scripts configured in VBScript language on the device. If youare not sure if the image loaded on your device supports VBScript, pleaseconsult the hardware manufacturer.The aim of this documentation is to provide an overview about the integration ofVBScript with IWS. Furthermore, it can be used as a quick reference for the mostused features of the language. For a full description of the language as well as itsinterfaces and functions, please consult the Microsoft documentation. At the timethat this documentation was written, you could read the VBScript languagedocumentation at http://msdn.microsoft.com/library/default.asp?url=/library/enus/script56/html/vtorivbscript.asp.VBScript in IWSThe following table provides a summary of the VBScript interfaces supported byIWS:InterfaceScope for Procedures andVariablesExecutionFunctionalityGlobal Procedures Graphics and Tasks - Declaration ofProceduresGraphics Script Graphics Script interface only Server (Viewer) + <strong>Web</strong> ThinClientsScreen ScriptScreen where the script isconfiguredServer (Viewer) + <strong>Web</strong> ThinClients Declaration ofVariables Declaration ofProcedures Execution Declaration ofVariables Declaration ofProcedures Execution<strong>InduSoft</strong> <strong>Web</strong> <strong>Studio</strong> v6.1 SP2 15–5
IWS Users GuideScripting Languages: IWS and VBScriptCommand DynamicActiveX EventsObject where the script isconfiguredObject where the script isconfiguredServer (Viewer) + <strong>Web</strong> ThinClientsServer (Viewer) + <strong>Web</strong> ThinClients Declaration ofVariables Execution Declaration ofVariables ExecutionStartup Script All Script Sheets from Tasks Server (BGTask) Declaration ofVariables Declaration ofProcedures ExecutionScript Groups Script Group only Server (BGTask) Declaration ofVariables ExecutionThe following picture illustrates the scope of each VBScript interface and the orderthat they are scanned by IWS:The illustration shows that the Global Procedures are shared by the Graphic Moduleand the Background Task. However, the other VBScript interfaces are either fromthe Graphic Module or from the Background Task, and they do not share variablesor procedures between them. They are independent of each other. Note:Although the Graphics Script is scanned by IWS before the Screen Scripts,the procedures and variables declared in the Graphics Script interface areNOT available for any script interface configured on the screens. You must15–6 <strong>InduSoft</strong> <strong>Web</strong> <strong>Studio</strong> v6.1 SP2
Scripting Languages: IWS and VBScriptIWS Users Guideuse the Global Procedures interface to implement procedures that must beavailable for all screens.When writing your code in a VBScript interface, you can access any tag from theIWS tags database or any function from the IWS built-in language by applying the“$” prefix to the tag/function name, as in the examples below:$Time 'Returns the value of the tag Time from the tags database$MyTag 'Returns the value of the tag MyTag from the tags database$Open("main") 'Executes the Open() built-in function to open the"main" screenTherefore, you can create scripts using built-in functions from IWS, tags from theIWS tags database, VBScript functions, VBScript variables, ActiveX properties,methods or events, and any other interface available. The IWS tags are shared by allmodules from IWS, including the Graphic Module and the Background Task.The following VBScript interfaces are available in IWS:Global ProceduresThe Global Procedures interface can be edited by its icon from the Database tab ofthe Workspace:This interface is used to declare and implement procedures that can be called byany other VBScript interface available in the product. You can declare local variableswithin each procedure declared in this interface (the local scope within eachprocedure); however, you cannot declare global variables in this interface.The procedures implemented in this interface are not executed by IWS, unless theyare called from any other VBScript interface available in the product. Therefore, thisinterface can be used ONLY to declare and implement procedures to be called byother interfaces.Example:Option Explicit'Procedures with global scope can be implemented here'Global variables are NOT supported in this interface<strong>InduSoft</strong> <strong>Web</strong> <strong>Studio</strong> v6.1 SP2 15–7
IWS Users GuideScripting Languages: IWS and VBScriptFunction MyAdd (number1, number2)MyAdd = number1+number2End FunctionSub MyMessage (message)MsgBox (message)End SubGraphic Module - Graphics ScriptThe Graphics Script interface can be edited by its icon from the Graphics tab of theWorkspace:This interface can be used to execute logics on the following events, based on preconfiguredsub-routines:Graphics_OnStart(): The code configured within this sub-routine isautomatically executed just once when the graphic module is started. Thisinterface is useful for initializing variables or executing logics that must beimplemented when starting the application.Graphics_WhileRunning(): The code configured within this sub-routine isautomatically executed continuously while the graphic module is running. Therate in which this sub-routine is called depends on the performance of theplatform where the application is running.Graphics_OnEnd():The code configured within this sub-routine is automaticallyexecuted just once when the graphic module is closed. Caution:Do NOT change the name of the pre-configured sub-routines. If you do, thesystem will be unable to call them automatically.On the Server (where IWS or CEView is running):The graphic module is the Viewer task. The Graphics_OnStart() sub-routine is executed once on the Server when theViewer task is launched. 15–8 <strong>InduSoft</strong> <strong>Web</strong> <strong>Studio</strong> v6.1 SP2
Scripting Languages: IWS and VBScriptIWS Users GuideThe Graphics_WhileRunning() sub-routine keeps being executed on the Serverwhile the Viewer task is running. The Graphics_OnEnd() sub-routine is executedonce on the Server when the Viewer task is shut down.On the <strong>Web</strong> Thin Client (<strong>Web</strong> Browser):The graphic module is the ISSymbol control.The Graphics_OnStart() sub-routine is executed once on the <strong>Web</strong> Thin Clientstation after logging in successfully. The Graphics_WhileRunning() sub-routine keeps being executed on the <strong>Web</strong>Thin Client station while the ISSymbol control is hosted by the <strong>Web</strong> Browser.The Graphics_OnEnd() sub-routine is executed once on the <strong>Web</strong> Thin Clientstation when the <strong>Web</strong> Browser is shut down (or when the ISSymbol control is nolonger hosted by the <strong>Web</strong> Browser).The variables and procedures declared in this interface are NOT available for anyother VBScript interface – they have local scope only. Note: The execution of the Graphic Script sub-routines on the server is totallyindependent of the execution on the <strong>Web</strong> Thin Client stations. The procedures and/or variables created in this interface have localscope: they can be accessed only from the Graphic Script interface of thelocal station where they are being executed.Example:'Variables with local scope can be declared and initialized hereDim MyDateMyDate = Date()Dim MyValueMyValue = 100'Procedures with local scope can be implemented hereFunction AreaRec ( side1, side2)AreaRec = side1 * side2End FunctionSub CheckHiLimit (myValue, myHiLimit)If myValue > myHiLimit ThenMsgBox ("Value out of range")End IfEnd Sub' This procedure is executed just once when the graphic module isstartedSub Graphics_OnStart()End SubMsgBox("Welcome to the system!")<strong>InduSoft</strong> <strong>Web</strong> <strong>Studio</strong> v6.1 SP2 15–9
IWS Users GuideScripting Languages: IWS and VBScript' This procedure is executed continuously while the graphic module isrunningSub Graphics_WhileRunning()End SubIf $UserName="Guest" ThenEnd If$MyFlag=0' This procedure is executed just once when the graphic module isclosedSub Graphics_OnEnd()End Sub$LogOff()Graphic Module - Screen ScriptTo edit the Graphics Script interface, right-click on the screen, and select the ScreenScript option. You can also select View -> Screen Script from the drop-down menu.This interface can be used to execute logics on the following events, based on preconfiguredsub-routines:Screen_OnOpen(): The code configured within this sub-routine is automaticallyexecuted just once when its screen is open.Screen_WhileOpen(): The code configured within this sub-routine isautomatically executed continuously while its screen is open. The rate in whichthis sub-routine is called depends on the performance of the platform where theapplication is running.Screen_OnClose():The code configured within this sub-routine is automaticallyexecuted just once when the screen is closed.The variables and procedures declared in this interface are available for theVBScript interfaces of the screen where the Screen Script is configured.15–10 <strong>InduSoft</strong> <strong>Web</strong> <strong>Studio</strong> v6.1 SP2
Scripting Languages: IWS and VBScriptIWS Users Guide Caution:Do NOT change the name of the pre-configured sub-routines. If you do, thesystem will be unable to call them automatically. Notes: The execution of the Screen Script sub-routines on the server is totallyindependent of the execution on the <strong>Web</strong> Thin Client stations. The procedures and/or variables created in this interface have localscope: they can be accessed only from the specific screen where they areimplemented.Example:'Variables available on this screen can be declared and initializedhereDim Counter'Procedures available on this screen can be implemented hereFunction AreaCircle (radius)AreaCircle = Sqr(radius)*$Pi()End FunctionSub CheckLoLimit (myValue, myLoLimit)If myValue < myLoLimit ThenMsgBox ("Value out of range")End IfEnd Sub' This procedure is executed just once when this screen is openSub Screen_OnOpen()MsgBox("The screen was open!")End Sub' This procedure is executed continuously while this screen is openSub Screen_WhileOpen()If Counter
IWS Users GuideScripting Languages: IWS and VBScriptMsgBox("The screen will be closed!")End SubGraphic Module - Command DynamicTo edit the Command dynamic interface, do the following: Select the object. Click the Command dynamic icon on the Mode toolbar. Right-click on the object.The Object Properties dialog box for the Command dynamic will open. Click the Config… button. Select VBScript as the Type.Use this interface to execute logics when the user clicks on the object where theCommand dynamic is applied (during the runtime) or presses the shortcut (Key)associated with the Command dynamic.15–12 <strong>InduSoft</strong> <strong>Web</strong> <strong>Studio</strong> v6.1 SP2
Scripting Languages: IWS and VBScriptIWS Users GuideVariables declared in this interface are available for this interface only (localscope). In other words, they are not available for any other object in theapplication. You cannot implement procedures in this interface. You can,however, call procedures implemented in the Global Procedures or in the ScreenScript interface for the same screen where the Command dynamic is configured. Note:Further information about the Command dynamic is available in chapter 3,which describes the dynamics from the screen editor.Example:'The script below will be executed when the user clicks on theobject'where this dynamic is configured$MyValue = InputBox("Please enter the new set-point", "Set-point")Graphic Module - ActiveX EventsTo edit the ActiveX Events interface, select the Script option from the Events tab ofthe ActiveX object inserted on the screen. Click the ActiveX Control icon in the Mode toolbar.The Insert ActiveX Control dialog box opens. Select the ActiveX Control that you wish to use, and then click OK. The object that symbolizes the selected ActiveX Control will display. Right-clickon this object to open the Object Properties dialog.<strong>InduSoft</strong> <strong>Web</strong> <strong>Studio</strong> v6.1 SP2 15–13
IWS Users GuideScripting Languages: IWS and VBScript Click the Configuration button. The Configuration dialog will open. Click theEvents tab. Click the … button in the Script column.15–14 <strong>InduSoft</strong> <strong>Web</strong> <strong>Studio</strong> v6.1 SP2
Scripting Languages: IWS and VBScriptIWS Users GuideUse this interface to execute logics when an ActiveX object triggers an event.Variables declared in this interface are available for this interface only (localscope). In other words, they are not available for any other object in theapplication.You cannot implement procedures in this interface. You can, however, callprocedures implemented in the Global Procedures or in the Screen Scriptinterface for the same screen where the ActiveX object is configured. Note:Further information about the ActiveX Events is available in the Using theActive Objects Toolbar section of Chapter 7.Example:'The script below will be executed when the Calendar ControlActiveX'triggers its"AfterUpdate" event$MyYear = CalendarControl1.Year$MyMonth = CalendarControl1.Month$MyDay = CalendarControl1.DayBackground Task - Startup ScriptTo edit the Startup Script interface, click its icon from the Script folder, on the Taskstab of the Workspace:The code configured in this interface is executed just once when the Backgroundtask module (BGTask) is started. This interface is useful for initializing variables orexecuting logics that must be implemented when the application is starting.You can declare and initialize variables and implement procedures. However,variables or procedures declared in this interface will be available ONLY to the scriptgroups from the Script task – they are not available to any VBScript interface fromthe Graphic Module.<strong>InduSoft</strong> <strong>Web</strong> <strong>Studio</strong> v6.1 SP2 15–15
IWS Users GuideScripting Languages: IWS and VBScriptExample:'Variables available for all Script groups from the Script task canbe declared and initialized hereDim MyVar, CounterMyVar = 100'Procedures available for all Script groups from the Script task canbe implemented hereFunction AreaEquTriangle ( base, high)End FunctionAreaEquTriangle = (base * high) / 2Sub CheckLimits (myValue, myHiLimit, myLoLimit)If (myValue > myHiLimit Or myValue < myLoLimit) ThenMsgBox ("Value out of range")End IfEnd Sub' The code configured here is executed just once when the Backgroundtask is startedIf $GetOS()=3 ThenMsgBox ("Welcome! This application is running under MicrosoftWindows CE operating system.")ElseMsgBox ("Welcome! This application Is running under MicrosoftWindows NT/2K/XP operating system.")End IfBackground Task - Script GroupsTo create a new Script Group, right-click the Script folder in the Tasks tab of theWorkspace. Select the Insert option from the pop-up menu:15–16 <strong>InduSoft</strong> <strong>Web</strong> <strong>Studio</strong> v6.1 SP2
Scripting Languages: IWS and VBScriptIWS Users GuideTo edit an existing Script Group interface, click its icon in the Script folder on theTasks tab of the Workspace:The code configured in each Script Group is executed by the Background Task. IWSscans the Script Groups sequentially (based on the number of the group) andexecutes only the groups in which the condition configured in the Execution field ofthe Script Group is TRUE (different from 0). Note:You must use the syntax supported by the IWS built-in language in theExecution field of each Script group. Only the body of the Script groupsupports VBScript language. Caution:When any Script Group is saved during the runtime (on-line configuration), theStartup Script interface will be executed again, and the current value of thelocal variables of any Script Group will be reset.Variables declared in the group have local scope for that specific group only. Theyare not available for any other VBScript interface. From the Script Group, you can<strong>InduSoft</strong> <strong>Web</strong> <strong>Studio</strong> v6.1 SP2 15–17
IWS Users GuideScripting Languages: IWS and VBScriptcall procedures implemented in the Global Procedures interface or in the StartupScript interface; however, you cannot implement (declare) procedures in the ScriptGroups.Example:'Variables available only for this group can be declared hereDim myVar, myTestmyTest=1'The code configured here is executed while the condition configuredin the'Execution field is TRUEmyVar = $FindFile("c:\*.txt")If MyVar>0 Then$TagNumOfFiles = myVarEnd IfLanguage ReferenceConstantsColor ConstantsConstant Value DescriptionvbBlack &h00 BlackvbRed &h<strong>FF</strong> RedvbGreen &h<strong>FF</strong>00 GreenvbYellow &h<strong>FF</strong><strong>FF</strong> YellowvbBlue &h<strong>FF</strong>0000 BluevbMagenta &h<strong>FF</strong>00<strong>FF</strong> MagentavbCyan &h<strong>FF</strong><strong>FF</strong>00 CyanvbWhite &h<strong>FF</strong><strong>FF</strong><strong>FF</strong> WhiteComparison ConstantsConstant Value DescriptionvbBinaryCompare 0 Perform a binary comparisonvbTextCompare 1 Perform a textual comparisonDate and Time ConstantsConstant Value DescriptionvbSunday 1 SundayvbMonday 2 MondayvbTuesday 3 TuesdayvbWednesday 4 Wednesday15–18 <strong>InduSoft</strong> <strong>Web</strong> <strong>Studio</strong> v6.1 SP2
Scripting Languages: IWS and VBScriptIWS Users GuidevbThursday 5 ThursdayvbFriday 6 FridayvbSaturday 7 SaturdayvbUseSystemDayOfWeek 0 Use the day of the week specifiedin your system settings for the firstday of the week.vbFirstJan1 1 Use the week in which January 1occurs (default).vbFirstFourDays 2 Use the first week that has at leastfour days in the new year.vbFirstFullWeek 3 Use the first full week of the year.Date Format ConstantsConstant Value DescriptionvbGeneralDate 0 Display a date and/or time. For realnumbers, display a date and time. Ifthere is no fractional part, displayonly a date. If there is no integerpart, display time only. Date andtime display is determined by yoursystem settings.vbLongDate 1 Display a date using the long dateformat specified in your computer'sregional settings.vbShortDate 2 Display a date using the short dateformat specified in your computer'sregional settings.vbLongTime 3 Display a time using the long timeformat specified in your computer'sregional settings.vbShortTime 4 Display a time using the short timeformat specified in your computer'sregional settings.Miscellaneous ConstantsConstant Value DescriptionvbObjectError -2147221504 User-defined error numbers shouldbe greater than this value.Box Constants - Buttons and IconsConstant Value DescriptionvbOKOnly 0 Display OK button only.vbOKCancel 1 Display OK and Cancel buttons.vbAbortRetryIgnore 2 Display Abort, Retry, and Ignorebuttons.vbYesNoCancel 3 Display Yes, No, and Cancelbuttons.vbYesNo 4 Display Yes and No buttons.<strong>InduSoft</strong> <strong>Web</strong> <strong>Studio</strong> v6.1 SP2 15–19
IWS Users GuideScripting Languages: IWS and VBScriptvbRetryCancel 5 Display Retry and Cancel buttons.vbCritical 16 Display Critical Message icon.vbQuestion 32 Display Warning Query icon.vbExclamation 48 Display Warning Message icon.vbInformation 64 Display Information Message icon.vbDefaultButton1 0 First button is the default.vbDefaultButton2 256 Second button is the default.vbDefaultButton3 512 Third button is the default.vbDefaultButton4 768 Fourth button is the default.vbApplicationModal 0 Application modal. The user mustrespond to the message box beforecontinuing work in the currentapplication.vbSystemModal 4096 System modal. On Win16 systems,all applications are suspended untilthe user responds to the messagebox. On Win32 systems, thisconstant provides an applicationmodal message box that alwaysremains on top of any otherprograms you may have running.Box Constants – SelectedButtonConstant Value DescriptionvbOK 1 OK button was clicked.vbCancel 2 Cancel button was clicked.vbAbort 3 Abort button was clicked.vbRetry 4 Retry button was clicked.vbIgnore 5 Ignore button was clicked.vbYes 6 Yes button was clicked.vbNo 7 No button was clicked.String ConstantsConstant Value DescriptionvbCr Chr(13) Carriage returnVbCrLf Chr(13) & Chr(10) Carriage return–linefeedcombinationvbFormFeed Chr(12) Form feed; not useful in MicrosoftWindowsvbLf Chr(10) Line feedvbNewLine Chr(13) & Chr(10) or Chr(10) Platform-specific newline character;whatever is appropriate for theplatformvbNullChar Chr(0) Character having the value 0vbNullString String having value 0 Not the same as a zero-lengthstring (""); used for calling external15–20 <strong>InduSoft</strong> <strong>Web</strong> <strong>Studio</strong> v6.1 SP2
Scripting Languages: IWS and VBScriptIWS Users GuideproceduresvbTab Chr(9) Horizontal tabvbVerticalTab Chr(11) Vertical tab; not useful in MicrosoftWindowsTristate ConstantsConstant Value DescriptionvbUseDefault -2 Use default from computer'sregional settings.vbTrue -1 TRUEvbFalse 0 FALSEVarType ConstantsConstant Value DescriptionvbEmpty 0 Uninitialized (default)vbNull 1 Contains no valid datavbInteger 2 Integer subtypevbLong 3 Long subtypevbSingle 4 Single subtypevbDouble 5 Double subtypevbCurrency 6 Currency subtypevbDate 7 Date subtypevbString 8 String subtypevbObject 9 ObjectvbError 10 Error subtypevbBoolean 11 Boolean subtypevbVariant 12 Variant (used only for arrays ofvariants)vbDataObject 13 Data access objectvbDecimal 14 Decimal subtypevbByte 17 Byte subtypevbArray 8192 ArrayErrorsError NumberVBScript Run-time ErrorsDescription429 ActiveX component can't create object507 An exception occurred449 Argument not optional17 Can't perform requested operation430 Class doesn't support <strong>Automation</strong>506 Class not defined11 Division by zero<strong>InduSoft</strong> <strong>Web</strong> <strong>Studio</strong> v6.1 SP2 15–21
IWS Users GuideScripting Languages: IWS and VBScript48 Error in loading DLL5020 Expected ')' in regular expression5019 Expected ']' in regular expression432 File name or class name not found during <strong>Automation</strong>operation92 For loop not initialized5008 Illegal assignment51 Internal error505 Invalid or unqualified reference481 Invalid picture5 Invalid procedure call or argument5021 Invalid range in character set94 Invalid use of Null448 Named argument not found447 Object doesn't support current locale setting445 Object doesn't support this action438 Object doesn't support this property or method451 Object not a collection504 Object not safe for creating503 Object not safe for initializing502 Object not safe for scripting424 Object required91 Object variable not set7 Out of memory28 Out of stack space14 Out of string space6 Overflow35 Sub or function not defined9 Subscript out of range5017 Syntax error in regular expression462 The remote server machine does not exist or isunavailable10 This array is fixed or temporarily locked13 Type mismatch5018 Unexpected quantifier500 Variable is undefined458 Variable uses an <strong>Automation</strong> type not supported inVBScript450 Wrong number of arguments or invalid propertyassignment15–22 <strong>InduSoft</strong> <strong>Web</strong> <strong>Studio</strong> v6.1 SP2
Scripting Languages: IWS and VBScriptIWS Users GuideVBScript Syntax ErrorsError NumberDescription1052 Cannot have multiple default property/method in a Class1044 Cannot use parentheses when calling a Sub1053 Class initialize or terminate do not have arguments1058 'Default' specification can only be on Property Get1057 'Default' specification must also specify 'Public'1005 Expected '('1006 Expected ')'1011 Expected '='1021 Expected 'Case'1047 Expected 'Class'1025 Expected end of statement1014 Expected 'End'1023 Expected expression1015 Expected 'Function'1010 Expected identifier1012 Expected 'If'1046 Expected 'In'1026 Expected integer constant1049 Expected Let or Set or Get in property declaration1045 Expected literal constant1019 Expected 'Loop'1020 Expected 'Next'1050 Expected 'Property'1022 Expected 'Select'1024 Expected statement1016 Expected 'Sub'1017 Expected 'Then'1013 Expected 'To'1018 Expected 'Wend'1027 Expected 'While' or 'Until'1028 Expected 'While,' 'Until,' or end of statement1029 Expected 'With'1030 Identifier too long1014 Invalid character1039 Invalid 'exit' statement1040 Invalid 'for' loop control variable1013 Invalid number1037 Invalid use of 'Me' keyword1038 'loop' without 'do'<strong>InduSoft</strong> <strong>Web</strong> <strong>Studio</strong> v6.1 SP2 15–23
IWS Users GuideScripting Languages: IWS and VBScript1048 Must be defined inside a Class1042 Must be first statement on the line1041 Name redefined1051 Number of arguments must be consistent acrossproperties specification1001 Out of memory1054 Property Set or Let must have at least one argument1002 Syntax error1055 Unexpected 'Next'1015 Unterminated string constantFunctionsFunction NamesAbs Array Asc AtnCBool CByte CCur CDateCDbl Chr CInt CLngConversions Cos CreateObject CSngCStr Date DateAdd DateDiffDatePart DateSerial DateValue DayDerived Math Escape Eval ExpFilter FormatCurrency FormatDateTime FormatNumberFormatPercent GetLocale GetObject GetRefHex Hour InputBox InStrInStrRev Int, Fix IsArray IsDateIsEmpty IsNull IsNumeric IsObjectJoin LBound LCase LeftLen LoadPicture Log LTrim; RTrim; and TrimMaths Mid Minute MonthMonthName MsgBox Now OctReplace RGB Right RndRound ScriptEngine ScriptEngineBuildVersion ScriptEngineMajorVersionScriptEngineMinorVersion Second SetLocale SgnSin Space Split SqrStrComp String StrReverse TanTime Timer TimeSerial TimeValueTypeName UBound UCase UnescapeVarType Weekday WeekdayName Year15–24 <strong>InduSoft</strong> <strong>Web</strong> <strong>Studio</strong> v6.1 SP2
Scripting Languages: IWS and VBScriptIWS Users GuideKeywordEmptyKeywordsKeywordsDescriptionThe Empty keyword is used to indicate an uninitialized variablevalue. This is not the same thing as Null.False The False keyword has a value equal to 0.NothingNullThe Nothing keyword in VBScript is used to disassociate anobject variable from any actual object.The Null keyword is used to indicate that a variable contains novalid data. This is not the same thing as Empty.True The True keyword has a value equal to -1.MethodClearExecuteRaiseReplaceTestWriteWriteLineMethodsMethodsDescriptionClears all property settings of the Err object.Executes a regular expression search against a specifiedstring.Generates a run-time error.Replaces text found in a regular expression search.Executes a regular expression search against a specified stringand returns a Boolean value that indicates if a pattern matchwas found.Sends strings to the script debugger.Sends strings to the script debugger, followed by a newlinecharacter.NameClass ObjectDebug ObjectErr ObjectMatch ObjectObjects and CollectionsMatches CollectionRegular Expression (RegExp) ObjectSubMatches CollectionObjects and CollectionsDescriptionThe object created using the Class statement. Provides accessto the events of the class.An intrinsic global object that can send output to a scriptdebugger, such as the Microsoft Script Debugger.Contains information about run-time errors. Accepts the Raiseand Clear methods for generating and clearing run-time errors.Provides access to the read-only properties of a regularexpression match.Collection of regular expression Match objects.Provides simple regular expression support.Collection of regular expression submatch strings.<strong>InduSoft</strong> <strong>Web</strong> <strong>Studio</strong> v6.1 SP2 15–25
IWS Users GuideScripting Languages: IWS and VBScriptOperatorsArithmeticSymbol Name Description^Exponentiation- Unary negationRaises a number to the power of anexponent.Finds the difference between twonumbers or indicates the negativevalue of a numeric expression.* Multiplication Multiplies two numbers./ Division\ Integer divisionModModulus arithmeticDivides two numbers and returns afloating-point result.Divides two numbers and returns aninteger result.Divides two numbers and returnsonly the remainder.+ Addition Finds the sum of two numbers.- Subtraction&String concatenationComparisonSymbol Name DescriptionFinds the difference between twonumbers or indicates the negativevalue of a numeric expression.Forces string concatenation of twoexpressions.= Equality Comparison is True if the firstexpression is equal to the secondexpression. Inequality Comparison is True if the firstexpression is different from thesecond expression.< Less than Comparison is True if the firstexpression is less than the secondexpression.> Greater than Comparison is True if the firstexpression is greater than thesecond expression.= Greater than or equal to Comparison is True if the firstexpression is greater than or equalto the second expression.Is Object equivalence Compares two object referencevariables. Comparison is True ifboth object names refer to the sameobject.15–26 <strong>InduSoft</strong> <strong>Web</strong> <strong>Studio</strong> v6.1 SP2
Scripting Languages: IWS and VBScriptIWS Users GuideLogicalSymbol Name DescriptionNot Logical negation Performs logical negation on anexpression.And Logical conjunction Performs a logical conjunction ontwo expressions.Or Logical disjunction Performs a logical disjunction ontwo expressions.Xor Logical exclusion Performs a logical exclusion on twoexpressions.Eqv Logical equivalence Performs a logical equivalence ontwo expressions.Imp Logical implication Performs a logical implication ontwo expressions.AssignmentSymbol Name Description= Assignment Assigns a value to a variable orproperty.PropertiesProperty NameDescriptionFirstIndexGlobalHelpContextHelpFileIgnoreCaseLengthNumberPatternSourceValuePropertiesDescriptionReturns or sets a descriptive string associated with anerror.Returns the position in a search string where a matchoccurs.Sets or returns a Boolean value that indicates if apattern should match all occurrences in an entiresearch string or just the first one.Sets or returns a context ID for a topic in a Help File.Sets or returns a fully qualified path to a Help File.Sets or returns a Boolean value that indicates if apattern search is case-sensitive or not.Sets or returns a Boolean value that indicates if apattern search is case-sensitive or not.Returns or sets a numeric value specifying an error.Number is the Err object's default property.Sets or returns the regular expression pattern beingsearched for.Returns or sets the name of the object or applicationthat originally generated the error.Returns the value or text of a match found in a searchstring.<strong>InduSoft</strong> <strong>Web</strong> <strong>Studio</strong> v6.1 SP2 15–27
IWS Users GuideScripting Languages: IWS and VBScriptStatementsStatement NameCallClassConstDimDo…LoopEraseExecuteExecuteGlobalExitFor Each…NextFor…NextFunctionIf…Then…ElseOption ExplicitPrivateProperty GetProperty LetProperty SetPublicRamdomizeReDimRemSelectStatementsDescriptionTransfers control to a Sub or Function procedure.Declares the name of a class, as well as a definition ofthe variables, properties, and methods that comprisethe class.Declares constants for use in place of literal values.Declares variables and allocates storage space.Repeats a block of statements while a condition is Trueor until a condition becomes True.Reinitializes the elements of fixed-size arrays anddeallocates dynamic-array storage space.Executes one or more specified statements.Executes one or more specified statements in theglobal namespace of a script.Exits a block of Do...Loop, For...Next, Function, or Subcode.Repeats a group of statements for each element in anarray or collection.Repeats a group of statements a specified number oftimes.Declares the name, arguments, and code that form thebody of a Function procedure.Conditionally executes a group of statements,depending on the value of an expression.Forces explicit declaration of all variables in a script.Declares private variables and allocates storage space.Declares, in a Class block, a private variable.Declares, in a Class block, the name, arguments, andcode that form the body of a Property procedure thatgets (returns) the value of a property.Declares, in a Class block, the name, arguments, andcode that form the body of a Property procedure thatassigns (sets) the value of a property.Declares, in a Class block, the name, arguments, andcode that form the body of a Property procedure thatsets a reference to an object.Declares public variables and allocates storage space.Declares, in a Class block, a private variable.Initializes the random-number generator.Declares dynamic-array variables, and allocates orreallocates storage space at procedure level.Includes explanatory remarks in a program.Executes one of several groups of statements,depending on the value of an expression.15–28 <strong>InduSoft</strong> <strong>Web</strong> <strong>Studio</strong> v6.1 SP2
Scripting Languages: IWS and VBScriptIWS Users GuideSetStopSubWhileWithAssigns an object reference to a variable or property, orassociates a procedure reference with an event.Suspends execution.Declares the name, arguments, and code that form thebody of a Sub procedure.Executes a series of statements as long as a givencondition is True.Executes a series of statements on a single object.Tips and TricksVBScript Editor - IntelliSenseIntelliSense provides an array of options that make language references easilyaccessible. When coding, you do not need to leave the Code Editor or the ImmediateMode command window to perform searches on language elements. You can keepyour context, find the information you need, insert language elements directly intoyour code, and even have IntelliSense complete your typing for you.IntelliSense comprises the following options:List Members: You can display a list of valid members from class tags, fieldsfrom any tag, properties/methods from an ActiveX object, or functions from theIWS built-in language. Selecting from the list inserts the member into your code.When you type the $ character on any VBScript interface, a list box willautomatically open with the list of all tags available for the current applicationas well as all functions from the IWS built-in language.When you type the name of a class tag followed by the dot character (.) on anyVBScript interface, a list box will automatically open with the list of all membersfrom the class tag:<strong>InduSoft</strong> <strong>Web</strong> <strong>Studio</strong> v6.1 SP2 15–29
IWS Users GuideScripting Languages: IWS and VBScriptWhen you type the name of a tag followed by the hyphen and greater thancharacters ( -> ) on any VBScript interface, a list box will automatically openwith the list of all fields available for this tag:The items are displayed in alphabetic order, and each item has an icon toidentify its main type, as follows:IconTypeBoolean TagInteger TagReal TagString TagClass TagFunction from the IWS built-in languageWhen you type the name of an ActiveX control that is inserted on the screenfollowed by the dot character (.) on any VBScript interface from the screen wherethe ActiveX object is inserted, a list box will automatically open with the list of allproperties and methods from the object:The items are displayed in alphabetic order, and each item has an icon toidentify its main type, as follows:IconTypeProperty from the ActiveX objectMethod from the ActiveX object15–30 <strong>InduSoft</strong> <strong>Web</strong> <strong>Studio</strong> v6.1 SP2
Scripting Languages: IWS and VBScriptIWS Users GuideParameter Quick Info: The Quick Info option displays pop-up boxes with theinformation about the functions from the IWS built-in language. The informationincludes all the parameters supported by this function, with the currentlyconfigured one in bold text.Complete Word: Complete word finishes a tag, member, field, function, orActiveX property/method name once you have entered enough characters todisambiguate the term. After you type the first few letters of the name, you canpress CTRL+SPACEBAR to complete the name automatically.VBScript compared to VBAWhile VBScript and Visual Basic for Applications (VBA) are similar and are bothbased on the Visual Basic standard language, there are advantages to usingVBScript for IWS users:VBScript is supported for the Microsoft Windows CE operating system, and VBAis not.VBScript brings active scripting to a wide variety of environments, including <strong>Web</strong>client scripting in Microsoft Internet Explorer. This prevents operations that maypresent risks for the <strong>Web</strong> Thin Client user, such as direct access to local files.VBScript was designed to be simple and easy to learn, with some standards fromVBA modified in VBScript to make it more straightforward. For example, inVBScript the user does not have to worry about the type of each variable whendeclaring them because VBScript assumes the proper type for each variableautomatically.The following table lists VBScript features that VBA does not have.CategoryDeclarationsMiscellaneousObjectsScript Engine IdentificationFeature/KeywordClassEvalExecuteRegExpScriptEngineScriptEngineBuildVersionScriptEngineMajorVersionThe following table lists VBA features that VBScript does not have.CategoryArray HandlingCollectionConditional CompilationOmitted Feature/KeywordOption BaseDeclaring arrays with lower bound 0Add, Count, Item, RemoveAccess to collections using ! character#Const#If...Then...#Else<strong>InduSoft</strong> <strong>Web</strong> <strong>Studio</strong> v6.1 SP2 15–31
IWS Users GuideScripting Languages: IWS and VBScriptControl FlowConversionData TypesDate/TimeDDEDebuggingDeclarationError HandlingFile Input/OutputFinancialObject ManipulationObjectsOperatorsOptionsSelect CaseStringsDoEventsGoSub...Return, GoToOn Error GoToOn...GoSub, On...GoToLine numbers, Line labelsCVar, CVDateStr, ValAll intrinsic data types except VariantType...End TypeDate statement, Time statementLinkExecute, LinkPoke, LinkRequest, LinkSendDebug.PrintEnd, StopDeclare (for declaring DLLs)OptionalParamArrayStaticErlErrorResume, Resume NextAll traditional Basic file I/OAll financial functionsTypeOfClipboardCollectionLikeDeftypeOption BaseOption CompareOption Private ModuleExpressions containing the Is keyword or anycomparison operatorsExpressions containing a range of values using the TokeywordFixed-length stringsLSet, RSetMid StatementStrConvUsing Objects Collection access using !15–32 <strong>InduSoft</strong> <strong>Web</strong> <strong>Studio</strong> v6.1 SP2
Scripting Languages: IWS and VBScriptIWS Users GuideScreen EventsIn addition to the Screen Script, you can configure logics using the IWS built-inlanguage for the On Open, While Open and On Close events for the screen (see theScreen Logic interface from the Screen Attributes dialog). If you configure the ScreenScript (VBScript language) and the Screen Logic (IWS Built-in language), IWS willrespect the following execution order:EventWhen opening the screenWhen closing the screenOrder of execution Screen_OnOpen() sub-routine from the ScreenScript interface (VBScript language) On Open from the Screen Logic interface (IWS Builtinlanguage) On Close from the Screen Logic interface (IWSBuilt-in language) Screen_OnClose() sub-routine from the ScreenScript interface (VBScript language)MsgBox() and InputBox() functionsThe MsgBox() and InputBox() functions from the VBScript language allow you todisplay pop-up messages during the runtime. These functions are synchronous.When either one is executed, the remaining instructions from the code will not beexecuted before the pop-up messages launched by the functions are closed. Note:The text displayed in these pop-up messages are not affected by theTranslation Tool of IWS, unless you configure the text explicitly using the$Ext() function from the IWS built-in language.Support for ActiveX objectsUsing the VBScript interfaces for the Graphic module (Graphics Script, ScreenScript, Command dynamic and ActiveX events), you can use this syntax to accessproperties and methods directly from any ActiveX object inserted in the screenwhere the object is configured.IWS will assign a unique name to the object on the screen. You can use the Nameproperty (Object Properties dialog window) to modify this name.After inserting an ActiveX object on the screen, you can access properties andmethods from this object from any VBScript interface associated with this screen.Use the syntax ..Examples://Access the value of the property Day from the CalendarControl1ActiveX objectCalendarControl1.Day//Triggers the method AboutBox from the CalendarControl1 ActiveXobjectCalendarControl1.AboutBox<strong>InduSoft</strong> <strong>Web</strong> <strong>Studio</strong> v6.1 SP2 15–33
IWS Users GuideScripting Languages: IWS and VBScriptLogical Operator NOTThe behavior of the Logical Operator NOT is different in VBScript from the built-inlanguage of IWS. In VBScript, the NOT operator inverts the bit values of anyvariable. When used for Integer or Real tags, the NOT operator will result in thecomplement of the tag value. The table below illustrates the behavior of the NOToperator for the syntax: result = NOT expression, where result is the value receivedby a numeric tag (Integer or Real) from IWS:If expression is-3 2-2 1-1 00 -11 -22 -33 -4Then result is Note:When attempting to write any value different from 0 in a Boolean tag fromIWS, it assumes the value 1 (TRUE). Therefore, when using the NOT logicaloperator in VBScript to a Boolean tag with the value 1, the operator willattempt to write the value -2 to the Boolean tag (see previous table); theBoolean tag will keep the value 1.We recommend using either of the following syntaxes when using VBScript to toggletags from IWS:- Syntax 1: $Tag = Abs($Tag=0)- Syntax 2: $Tag = $If($Tag=0,1,0)- Syntax 3: $Tag = $Toggle($Tag)By contrast, the NOT operator toggles the value of any tag in IWS Built-in language.If the tag has the value 0, the NOT operator will return the value 1 to the tag. If thetag has any value different from 0, the NOT operator will return the value 0 to thetag. The table below illustrates the behavior of the NOT operator for the syntaxresult NOT expression, where result is the value received by a numeric tag (Integer, Real orBoolean) from IWS:If expression is0 1 0 0True and FalseThen result isIn VBScript, True and False are keywords, which return the following valuesKeywordFalse 0True -1ValueNotice that True returns the value -1 instead of 1.15–34 <strong>InduSoft</strong> <strong>Web</strong> <strong>Studio</strong> v6.1 SP2
Scripting Languages: IWS and VBScriptIWS Users Guide Note:The value assumed by Boolean tags in IWS depends on the value of theBooleanTrueAboveZero parameter from the [Options] section on the.APP file.Using the following configuration, the Boolean tags assume the value 1(TRUE) when they receive any value different from 0:[Options]BooleanTrueAboveZero=0Using the following configuration, the Boolean tags assume the value 1(TRUE) ONLY when they receive a value greater than 0:[Options]BooleanTrueAboveZero=1Windows CE SupportCEView also support VBScript. The hardware manufacturer of the MicrosoftWindows CE device must enable the support for VBScript on it, so CEView will beable to execute the scripts configured in VBScript language on the device.The MsgBox() and InputBox() functions can be specifically enabled/disabled by thehardware manufacturer when the image for the Microsoft WindowsCE device iscreated.If you are not sure if the image loaded on your device supports VBScript, pleaseconsult the hardware manufacturer.Scope and Lifetime of VariablesA variable's scope is determined by where you declare it. When you declare avariable within a procedure, only code within that procedure can access or changethe value of that variable. It has local scope and is a procedure-level variable. If youdeclare a variable outside a procedure, you make it recognizable to all theprocedures in your script. This is a script-level variable, and it has script-levelscope.The lifetime of a variable depends on how long it exists. The lifetime of a script-levelvariable extends from the time it is declared until the time the script is finishedrunning. At procedure level, a variable exists only as the procedure runs. When theprocedure exits, the variable is destroyed. Local variables are ideal as temporarystorage space when a procedure is executing. You can have local variables of thesame name in several different procedures because each is recognized only by theprocedure in which it is declared.Declaring VariablesA variable is a convenient placeholder that refers to a computer memory locationwhere you can store program information that may change during the time yourscript is running. In VBScript, variables are always of one fundamental data type,Variant.<strong>InduSoft</strong> <strong>Web</strong> <strong>Studio</strong> v6.1 SP2 15–35
IWS Users GuideScripting Languages: IWS and VBScriptYou declare variables explicitly in your script using the Dim statement, the Publicstatement, and the Private statement.For example:Dim DegreesFahrenheitYou declare multiple variables by separating each variable name with a comma.For example:Dim Top, Bottom, Left, RightYou can also declare a variable implicitly by simply using its name in your script.That is not generally a good practice because you could misspell the variable namein one or more places, causing unexpected results when your script is run. For thatreason, the Option Explicit statement is configured by default in the GlobalProcedures interface to require explicit declaration of all variables. Unless you deletethis statement, you need to declare all variables explicitly; otherwise, VBScript willgenerate errors during the runtime indicating that the variable does not exist.An expression should have the variable on the left side and the value you want toassign to the variable on the right.For example:MyVar = 100Creating ConstantsA constant is a meaningful name that takes the place of a number or string andnever changes. VBScript defines a number of intrinsic constants.You create user-defined constants in VBScript using the Const statement. Using theConst statement, you can create string or numeric constants with meaningfulnames and assign them literal values.For example:Const MyString = "This is my string."Const MyAge = 49Note that the string literal is enclosed in quotation marks (" "). Quotation marks arethe most obvious way to differentiate string values from numeric values. Yourepresent Date literals and time literals by enclosing them in number signs (#).For example:Const CutoffDate = #6-1-97#You may want to adopt a naming scheme to differentiate constants from variables.This will prevent you from trying to reassign constant values while your script isrunning. For example, you might want to use a "vb" or "con" prefix on your constantnames, or you might name your constants in all capital letters. Differentiatingconstants from variables eliminates confusion as you develop more complex scripts.Precedence of VBScript OperatorsVBScript has a full range of operators, including arithmetic operators, comparisonoperators, concatenation operators, and logical operators.When several operations occur in an expression, each part is evaluated and resolvedin a predetermined order called “operator precedence.” You can use parentheses tooverride the order of precedence and force some parts of an expression to beevaluated before others. Operations within parentheses are always performed before15–36 <strong>InduSoft</strong> <strong>Web</strong> <strong>Studio</strong> v6.1 SP2
Scripting Languages: IWS and VBScriptIWS Users Guidethose outside. Within parentheses, however, standard operator precedence ismaintained.When expressions contain operators from more than one category, arithmeticoperators are evaluated first, comparison operators are evaluated next, and logicaloperators are evaluated last. Comparison operators all have equal precedence; thatis, they are evaluated in the left-to-right order in which they appear. Arithmetic andlogical operators are evaluated in the following order of precedence.Arithmetic Comparison LogicalNegation (-) Equality (=) NotExponentiation (^) Inequality () AndMultiplication and division (*, /) Less than () XorModulus arithmetic (Mod) Less than or equal to (=) ImpString concatenation (&) Is &When multiplication and division occur together in an expression, each operation isevaluated as it occurs from left to right. Likewise, when addition and subtractionoccur together in an expression, each operation is evaluated in order of appearancefrom left to right.The string concatenation (&) operator is not an arithmetic operator, but inprecedence it falls after all arithmetic operators and before all comparison operators.The Is operator is an object reference comparison operator. It does not compareobjects or their values; it checks only to determine if two object references refer tothe same object.Using Conditional StatementsYou can control the flow of your script with conditional statements and loopingstatements. Using conditional statements, you can write VBScript code that makesdecisions and repeats actions. The following conditional statements are available inVBScript:If...Then...Else statementSelect Case statementMAKING DECISIONS USING IF...THEN...ELSEThe If...Then...Else statement is used to evaluate whether a condition is True orFalse and, depending on the result, to specify one or more statements to run.Usually the condition is an expression that uses a comparison operator to compareone value or variable with another. For information about comparison operators, seeComparison Operators.If...Then...Else statements can be nested to as many levels as you need.Running Statements if a Condition is TrueTo run only one statement when a condition is True, use the single-line syntax forthe If...Then...Else statement. The following example shows the single-line syntax.Notice that this example omits the Else keyword.Sub FixDate()<strong>InduSoft</strong> <strong>Web</strong> <strong>Studio</strong> v6.1 SP2 15–37
IWS Users GuideScripting Languages: IWS and VBScriptEnd SubDim myDatemyDate = #2/13/95#If myDate < Now Then myDate = NowTo run more than one line of code, you must use the multiple-line (or block) syntax.This syntax includes the End If statement, as shown in the following example:Sub AlertUser(value)If value = 0 ThenEnd IfEnd SubAlertLabel.ForeColor = vbRedAlertLabel.Font.Bold = TrueAlertLabel.Font.Italic = TrueRunning Certain Statements if a Condition is True and Running Others if a Condition isFalseYou can use an If...Then...Else statement to define two blocks of executablestatements: one block to run if the condition is True, and the other block to run ifthe condition is False.Sub AlertUser(value)If value = 0 ThenElseEnd IfEnd SubAlertLabel.ForeColor = vbRedAlertLabel.Font.Bold = TrueAlertLabel.Font.Italic = TrueAlertLabel.Forecolor = vbBlackAlertLabel.Font.Bold = FalseAlertLabel.Font.Italic = FalseDeciding Between Several AlternativesA variation on the If...Then...Else statement allows you to choose from severalalternatives. Adding ElseIf clauses expands the functionality of the If...Then...Elsestatement, so you can control program flow based on different possibilities. Forexample:Sub ReportValue(value)If value = 0 ThenMsgBox valueElseIf value = 1 ThenMsgBox valueElseIf value = 2 thenElseMsgbox valueMsgbox "Value out of range!"15–38 <strong>InduSoft</strong> <strong>Web</strong> <strong>Studio</strong> v6.1 SP2
Scripting Languages: IWS and VBScriptIWS Users GuideEnd IfYou can add as many ElseIf clauses as you need to provide alternative choices, butextensive use of the ElseIf clauses often becomes cumbersome. A better way tochoose between several alternatives is the Select Case statement.MAKING DECISIONS WITH SELECT CASEThe Select Case structure provides an alternative to If...Then...ElseIf for selectivelyexecuting one block of statements from among multiple blocks of statements. ASelect Case statement provides capability similar to the If...Then...Else statement,but it makes code more efficient and readable.A Select Case structure works with a single test expression that is evaluated once, atthe top of the structure. The result of the expression is then compared to the valuesfor each Case in the structure. If there is a match, the block of statementsassociated with that Case is executed, as in the following example.Select Case Document.Form1.CardType.Options(SelectedIndex).TextCase "MasterCard"DisplayMCLogoValidateMCAccountCase "Visa"DisplayVisaLogoValidateVisaAccountCase "American Express"DisplayAMEXCOLogoValidateAMEXCOAccountCase ElseEnd SelectDisplayUnknownImagePromptAgainNotice that the Select Case structure evaluates an expression once at the top of thestructure. In contrast, the If...Then...ElseIf structure can evaluate a differentexpression for each ElseIf statement. You can replace an If...Then...ElseIf structurewith a Select Case structure only if each ElseIf statement evaluates the sameexpression.Looping Through CodeLooping allows you to run a group of statements repeatedly. Some loops repeatstatements until a condition is False; others repeat statements until a condition isTrue. There are also loops that repeat statements a specific number of times.The following looping statements are available in VBScript:Do...Loop: Loops while or until a condition is TrueWhile...Wend: Loops while a condition is TrueFor...Next: Uses a counter to run statements a specified number of times<strong>InduSoft</strong> <strong>Web</strong> <strong>Studio</strong> v6.1 SP2 15–39
IWS Users GuideScripting Languages: IWS and VBScriptUSING DO LOOPSYou can use Do...Loop statements to run a block of statements an indefinite numberof times. The statements are repeated either while a condition is True or until acondition becomes True.Repeating Statements While a Condition is TrueUse the While keyword to check a condition in a Do...Loop statement. You can checkthe condition before you enter the loop (as shown in the following ChkFirstWhileexample), or you can check it after the loop has run at least once (as shown in theChkLastWhile example). In the ChkFirstWhile procedure, if myNum is set to 9instead of 20, the statements inside the loop will never run. In the ChkLastWhileprocedure, the statements inside the loop run only once because the condition isalready False.Sub ChkFirstWhile()Dim counter, myNumcounter = 0myNum = 20Do While myNum > 10LoopmyNum = myNum - 1counter = counter + 1MsgBox "The loop made " & counter & " repetitions."End SubSub ChkLastWhile()Dim counter, myNumcounter = 0myNum = 9DomyNum = myNum - 1counter = counter + 1Loop While myNum > 10MsgBox "The loop made " & counter & " repetitions."End SubRepeating a Statement Until a Condition Becomes TrueThere are two ways to use the Until keyword to check a condition in a Do...Loopstatement. You can check the condition before you enter the loop (as shown in thefollowing ChkFirstUntil example), or you can check it after the loop has run at leastonce (as shown in the ChkLastUntil example). As long as the condition is False, thelooping occurs.Sub ChkFirstUntil()Dim counter, myNumcounter = 0myNum = 20Do Until myNum = 1015–40 <strong>InduSoft</strong> <strong>Web</strong> <strong>Studio</strong> v6.1 SP2
Scripting Languages: IWS and VBScriptIWS Users GuidemyNum = myNum - 1counter = counter + 1LoopMsgBox "The loop made " & counter & " repetitions."End SubSub ChkLastUntil()Dim counter, myNumcounter = 0myNum = 1DomyNum = myNum + 1counter = counter + 1Loop Until myNum = 10MsgBox "The loop made " & counter & " repetitions."End SubExiting a Do...Loop Statement from Inside the LoopYou can exit a Do...Loop by using the Exit Do statement. Because you usually wantto exit only in certain situations, such as to avoid an endless loop, you should usethe Exit Do statement in the True statement block of an If...Then...Else statement. Ifthe condition is False, the loop runs as usual.In the following example, myNum is assigned a value that creates an endless loop.The If...Then...Else statement checks for this condition, preventing the endlessrepetition.Sub ExitExample()Dim counter, myNumEnd Subcounter = 0myNum = 9Do Until myNum = 10LoopmyNum = myNum - 1counter = counter + 1If myNum < 10 Then Exit DoMsgBox "The loop made " & counter & " repetitions."USING WHILE...WENDThe While...Wend statement is provided in VBScript for those who are familiar withits usage. However, because of the lack of flexibility in While...Wend, it isrecommended that you use Do...Loop instead.<strong>InduSoft</strong> <strong>Web</strong> <strong>Studio</strong> v6.1 SP2 15–41
IWS Users GuideScripting Languages: IWS and VBScriptUSING FOR...NEXTYou can use For...Next statements to run a block of statements a specific number oftimes. For loops, use a counter variable whose value increases or decreases witheach repetition of the loop.The following example causes a procedure called MyProc to execute 50 times. TheFor statement specifies the counter variable x and its start and end values. The Nextstatement increments the counter variable by 1.Sub DoMyProc50Times()Dim xFor x = 1 To 50NextEnd SubMyProcUsing the Step keyword, you can increase or decrease the counter variable by thevalue you specify. In the following example, the counter variable j is incremented by2 each time the loop repeats. When the loop is finished, the total is the sum of 2, 4,6, 8, and 10.Sub TwosTotal()Dim j, totalFor j = 2 To 10 Step 2Nexttotal = total + jMsgBox "The total is " & totalEnd SubTo decrease the counter variable, use a negative Step value. You must specify anend value that is less than the start value. In the following example, the countervariable myNum is decreased by 2 each time the loop repeats. When the loop isfinished, the total is the sum of 16, 14, 12, 10, 8, 6, 4, and 2.Sub NewTotal()Dim myNum, totalFor myNum = 16 To 2 Step -2Nexttotal = total + myNumMsgBox "The total is " & totalEnd SubYou can exit any For...Next statement before the counter reaches its end value byusing the Exit For statement. Because you usually want to exit only in certainsituations, such as when an error occurs, you should use the Exit For statement inthe True statement block of an If...Then...Else statement. If the condition is False,the loop runs as usual.VBScript ProceduresIn VBScript, there are two kinds of procedures; the Sub procedure and the Functionprocedure.15–42 <strong>InduSoft</strong> <strong>Web</strong> <strong>Studio</strong> v6.1 SP2
Scripting Languages: IWS and VBScriptIWS Users GuideSUB PROCEDURESA Sub procedure is a series of VBScript statements (enclosed by Sub and End Substatements) that perform actions but don't return a value. A Sub procedure can takearguments (constants, variables, or expressions that are passed by a callingprocedure). If a Sub procedure has no arguments, its Sub statement must includean empty set of parentheses ().The following Sub procedure uses two intrinsic (built-in) VBScript functions,MsgBox and InputBox, to prompt a user for information. It then displays the resultsof a calculation based on that information. The calculation is performed in aFunction procedure created with VBScript. The Function procedure is shown afterthe following discussion.Sub ConvertTemp()temp = InputBox("Please enter the temperature in degrees F.", 1)MsgBox "The temperature is " & Celsius(temp) & " degrees C."End SubFUNCTION PROCEDURESA Function procedure is a series of VBScript statements enclosed by the Functionand End Function statements. A Function procedure is similar to a Sub procedure,but can also return a value. A Function procedure can take arguments (constants,variables or expressions that are passed to it by a calling procedure). If a Functionprocedure has no arguments, its Function statement must include an empty set ofparentheses. A Function returns a value by assigning a value to its name in one ormore statements of the procedure. The return type of a Function is always a Variant.In the following example, the Celsius function calculates degrees Celsius fromdegrees Fahrenheit. When the function is called from the ConvertTemp Subprocedure, a variable containing the argument value is passed to the function. Theresult of the calculation is returned to the calling procedure and displayed in amessage box.Sub ConvertTemp()temp = InputBox("Please enter the temperature in degrees F.", 1)MsgBox "The temperature is " & Celsius(temp) & " degrees C."End SubFunction Celsius(fDegrees)Celsius = (fDegrees - 32) * 5 / 9End FunctionGETTING DATA INTO AND OUT OF PROCEDURESEach piece of data is passed into your procedures using an argument . Argumentsserve as placeholders for the data you want to pass into your procedure. You canname your arguments any valid variable name. When you create a procedure usingeither the Sub statement or the Function statement, parentheses must be includedafter the name of the procedure. Any arguments are placed inside theseparentheses, separated by commas. For example, in the following example, fDegreesis a placeholder for the value being passed into the Celsius function for conversion.Function Celsius(fDegrees)Celsius = (fDegrees - 32) * 5 / 9<strong>InduSoft</strong> <strong>Web</strong> <strong>Studio</strong> v6.1 SP2 15–43
IWS Users GuideScripting Languages: IWS and VBScriptEnd FunctionTo get data out of a procedure, you must use a Function. Remember, a Functionprocedure can return a value; a Sub procedure can't.USING SUB AND FUNCTION PROCEDURES IN CODEA Function in your code must always be used on the right side of a variableassignment or in an expression. For example:Temp = Celsius(fDegrees)orMsgBox "The Celsius temperature is " & Celsius(fDegrees) & "degrees."To call a Sub procedure from another procedure, type the name of the procedurealong with values for any required arguments, each separated by a comma. The Callstatement is not required, but if you do use it, you must enclose any arguments inparentheses.The following example shows two calls to the MyProc procedure. One uses the Callstatement in the code; the other doesn't. Both do exactly the same thing.Call MyProc(firstarg, secondarg)MyProc firstarg, secondargNotice that the parentheses are omitted in the call when the Call statement isn'tused.15–44 <strong>InduSoft</strong> <strong>Web</strong> <strong>Studio</strong> v6.1 SP2
Chapter 16: Using the Translation Tool/EditorUsing the Translation Tool, you can translate any text from the application that isvisible during the runtime into different languages (idioms). The main advantages ofthis feature are:– You do not need to re-create the screens, alarms or any other interface ofyour application to translate it into another language. All application filesremain in the original language (e.g. English), and the translation to differentlanguages is centralized in one (or more) CSV file(s), in text format.– <strong>InduSoft</strong> <strong>Web</strong> <strong>Studio</strong> is UNICODE-compliant (2 bytes for each character).Therefore, you can translate your application into any language that requiresUNICODE characters (Japanese, Chinese, Koren, etc.) as long as you select aUNICODE font for your project.– The translation for other languages can be configured in a standard CSV file.Therefore, you can either use the Translation Editor from IWS (Tools >Translation Editor) to write the translated text, or you can use any editor for CSVfiles, such as Microsoft Notepad or Microsoft Excel, to create the file with thetranslated text.– The Translation Tool translates entire phrases or paragraphs instead oftranslating word-by-word, allowing you to adjust the translated textaccording to the grammar rules of each language.– You can configure the default translation language when running theapplication by using the Automatic Translation interface. This is availablefrom the Options tab of the Project Settings dialog (Project > Settings). In additionto that, you can change the language during the runtime (on-the-fly) byusing the SetTranslationFile() built-in function of IWS.– When you execute the SetTranslationFile() on a <strong>Web</strong> Thin Client station,you apply it to that particular <strong>Web</strong> Thin Client instance only. Therefore, youcan have several <strong>Web</strong> Thin Clients running simultaneously, and each onecan display the screens in a different language.<strong>InduSoft</strong> <strong>Web</strong> <strong>Studio</strong> v6.1 SP2 16–1
IWS Users GuideUsing the Translation Tool/EditorProject Settings for Automatic TranslationWhen configuring an application to support more than one language, you canconfigure the following parameters in the Options tab of the Project Settings dialog(menu Project > Settings):Project Settings Dialog – Options Tab– Translation File Name: The translation file configured in this field will be loadedby default when launching the application. This option is useful to configurethe default translation file name when launching the application. The usercan set a different language during the runtime by executing theSetTranslationFile() function.– Enable Translation: When this option is unchecked (clear), the Translation Toolis disabled and the text are displayed only as configured in the originalapplication files.– When pressing the Advanced button you can configure the following settingsfor the Translation Tool:Advanced Dialog16–2 <strong>InduSoft</strong> <strong>Web</strong> <strong>Studio</strong> v6.1 SP2
Using the Translation Tool/EditorIWS Users Guide* Startup Column Name: You can create a CSV file with translation for morethan one language. The text in the original language used when theapplication was created are in the first column of the CSV file. Eachdifferent language is added in additional columns. The first row of the CSVfile indicates the name of each column. You can specify in this field thename of the column that must be used to translate the application bydefault, when launching the application. If this field is left in blank, theapplication is launched with its original language. The user can set adifferent language during the runtime by executing theSetTranslationFile() function.* Ignore space chars at the end and beginning of the text: When this option is checked,the space character at the end or at the beginning of each text is ignoredfor translation purposes. This option is useful to avoid duplicated entriesin the translation table due to space chars configured by mistake whencreating the objects or just for alignment.* Keep original text when translation is blank: When this option is checked, theoriginal text is kept when there is not any text configured as a translationfor it in the column currently set for translation of the application. If thisoption is unchecked, the original text is omitted from the applicationduring the runtime, when there is not any translated text for it in thecurrently set for translation of the application.Configuring Object Properties for Screen ObjectsTo enable translation for individual screen objects, use the following procedure: Create the text and screen objects for your application using the toolbarsdescribed in “Using Objects and Dynamics” beginning on page 7–8. When you open the Object Properties dialogs to specify the parameters for eachobject, verify that the Extern translation check-box is enabled ( ).For example, in this figure Extern translation is enabled for the OPC button object:Translation Enabled for the OPC Button<strong>InduSoft</strong> <strong>Web</strong> <strong>Studio</strong> v6.1 SP2 16–3
IWS Users GuideUsing the Translation Tool/EditorTranslation EditorThe Translation Editor can be launched by the Tools > Translation Editor menu option:Translation ToolThe file specified in the Translation File Name field from the Options tab of the ProjectSettings dialog (Project > Settings) is open by default. You can open a differenttranslation file by the File > Open option from the menu of the Translation Editor.Moreover, you can create a new translation file with the File > New option from themenu of the Translation Editor.The first column is reserved for the text in the original language used when creatingthe application. Although you can add text in this column manually, you can alsoimport the text from your application automatically into this column by executingthe command Import String Application available in the File menu of the TranslationEditor.Tip:You can execute the command File > Import String Application to update the currentworksheet on the Translation Editor as many times as necessary. Wheneverthis command is executed, the text available in the application which are notalready included in the worksheet are inserted on it. However, this commanddoes not remove any text from the worksheet, regardless of how it had beeninserted on it (manually or automatically).You can write the translation for each different language in additional columns (notin the first column). You can use the following options from the Edit menu of theTranslation Editor to configure the columns of the translation file:– Insert Column (shortcut F9): Insert a new column on the translation file.– Rename Column (shortcut F10): Allows you to rename the column currentlyselected.– Insert Column (shortcut F11): Delete the column currently selected.16–4 <strong>InduSoft</strong> <strong>Web</strong> <strong>Studio</strong> v6.1 SP2
Using the Translation Tool/EditorIWS Users GuideAfter editing the translation file, you can use the File > Save or File > Save As optionsfrom the menu of the Translation Editor to save the settings into the translation file(CSV format).Since <strong>InduSoft</strong> <strong>Web</strong> <strong>Studio</strong> supports translation files in the standard CSV format,you can either use the Translation Editor or any other editor for CSV files, such asMicrosoft Notepad or Microsoft Excel to create the translation file. The first row ofthe CSV file indicates the name of each column. The columns are separated usingthe comma character (“,”).Although you can create more than one translation file, it is recommended keepingthe translation for all languages in only one file because it will be easier to keep itupdated when modifying the application – using the File > Import String Application justonce, you can update the translation file. Notes:For legacy reasons, the Translation Tool supports translation files with theextension TRA. The translation files saved with this extension use the pipecharacter (“|”) instead of the comma character (“,”) to separate the text betweencolumns.Editing WorksheetsTo open a worksheet for editing: Select File → Open. When the Open dialog displays, locate and select the worksheet you want to edit. Click OK to close the dialog. Save Typing Time:After typing terms into a worksheet, you can select File → Save As to save a copy ofthe worksheet under a new name, or select Window → New Window to open a newwindow containing a duplicate worksheet, which you can then save under a newname. Then, in the new worksheet, you can keep the terms in one column andreplace the terms in the other column.There are several ways to edit a Translation worksheet: You can change or delete individual terms You can insert lines You can copy from one worksheet to anotherCHANGING OR DELETING TERMSThe procedure for changing or deleting terms in a worksheet is as follows: When the selected worksheet displays in the Translation Editor, double-click onthe term you want to change and type a new term in its place. Press Enter. Save your changes to the worksheet by selecting File → Save or File → Save As. Note:Although you can save translation worksheet files to any directory, we stronglyrecommend saving your files in your project’s <strong>Web</strong> folder to make them availablefor use on a <strong>Web</strong> Thin Client.<strong>InduSoft</strong> <strong>Web</strong> <strong>Studio</strong> v6.1 SP2 16–5
IWS Users GuideUsing the Translation Tool/EditorINSERTING LINESIf you wish to insert one or more terms between existing terms in a worksheet, placeyour cursor in a cell, select Edit → Insert Line, and IWS will insert a blank line abovethe existing cell.For example,Before: Clicked on TemperatureAfter: New line inserted above TemperatureInserting a LineCOPYING TERMS BETWEEN WORKSHEETSThe Translation Editor allows you to cut or copy terms from one Translationworksheet and paste them into another. You also can copy terms from an Excel fileand paste them into a Translation worksheet.To copy terms from one worksheet (or file) to another, use the following steps: Open both worksheets. Locate the term(s) you want to copy and select them with your cursor. You can select multiple entries within a column and copy those entries intoanother column. Copy the term(s) by selecting Edit → Copy, pressing Ctrl+C, or clicking ). In the second worksheet, select the cell(s) where you want to put the new terms,and paste the term(s) by selecting Edit → Paste, pressing Ctrl+V, or clicking ). Repeat the previous steps until you have pasted all the terms you want to share. Save your changes.16–6 <strong>InduSoft</strong> <strong>Web</strong> <strong>Studio</strong> v6.1 SP2
Using the Translation Tool/EditorIWS Users GuideSEARCHING THE WORKSHEETIf your worksheet contains a lot of terms (you can enter up to 8,193 terms), you canuse the Edit → Find or View → View Line options to search for terms.Selecting Edit → Find opens the Find dialog:Find Dialog– Type a term into the Find What text box, and specify one or more of thefollowing optional search parameters:* Match whole word only: Enable ( ) this box to prevent IWS from finding a termembedded within another term. For example, if you did not enable thisoption and tried to search for “and,” IWS might find operand, expand, orstandard.* Match case: Enable ( ) this box to search for a term using the samecapitalization you typed into the Find What text box. For example, if you didnot enable this option and tried to search for “TankLevel,” IWS might findTANKLEVEL or tanklevel.* Up and Down: Enable this button to control the direction in which theprogram searches for your term. The search commences from the activeline. For example, if there are 345 lines in the entire worksheet and yourcurrently on line 325, IWS will search lines 325 through 345 only.– Click Find Next to start (and continue) searching for a term.Use the View → View Line option to jump to a particular line in the worksheet.When the Line dialog displays, type the line number into the Number field andclick OK.Line DialogRESTORING DEFAULTSAfter resizing a Translation worksheet or columns in a worksheet, you can selectWindow → Restore Defaults from the Translation Editor menu bar and the window (orcolumn) will revert to its original display size.<strong>InduSoft</strong> <strong>Web</strong> <strong>Studio</strong> v6.1 SP2 16–7
IWS Users GuideUsing the Translation Tool/EditorSaving Your WorksheetsTo save your work after creating or editing a Translation worksheet, select File → Saveor File → Save As from the Translation Editor menu bar.Executing the Translation FunctionsAfter enabling translation for the application and the screen objects, andcreating/editing Translation worksheets, you can execute the following IWSfunctions:SetTranslationFile(strFileName, optStrColumnName): Specifies theTranslation worksheet file and translates all enabled text within the applicationduring runtime.Ext(strText): Specifies a text string (not related to a screen object) to betranslated. For example, the result of an expression to be viewed by an end user.You can execute both functions synchronously, and they will search the applicationand change the specified text/objects into the new language. Both functions aresupported on Windows NT/2000/XP/CE and <strong>Web</strong> Thin Clients platforms. Note:You can save translation files to any directory; however, we strongly recommendsaving these files in your project’s <strong>Web</strong> folder so they can be used by a <strong>Web</strong> ThinClient.For example, if your default development language is English and you want tomake the file available to <strong>Web</strong> Thin Clients, you might change the defaultworksheet name to English.tra and save the file in the following folder:C:\Program Files\<strong>InduSoft</strong> <strong>Web</strong> <strong>Studio</strong>\Projects\\<strong>Web</strong>Using SetTranslationFile(strFileName,optStrColumnName)You must execute the SetTranslationFile() function to translate all enabledscreen objects within an application.To execute this function, Create two buttons (or some other screen object). Double-click on each button to open the Object Properties dialog and specify ameaningful name for each (for example, English and Spanish).Create Two Buttons Click the first button and apply the Command () property. Double-click on the button to open the Object Properties dialog. Type SetTranslationFile(“strFileName”)into the Expression field —substituting the name of the translation file between the double quotes.16–8 <strong>InduSoft</strong> <strong>Web</strong> <strong>Studio</strong> v6.1 SP2
Using the Translation Tool/EditorIWS Users GuideFor example, SetTranslationFile(“English.tra”)Setting the Translation File Note:If you saved these Translation worksheets in your project’s <strong>Web</strong> folder to makethe files available for <strong>Web</strong> Thin Clients), you also must type the directory path tothat file. For example,C:\Program Files\<strong>InduSoft</strong> <strong>Web</strong> <strong>Studio</strong>\\<strong>Web</strong>\or type (“\web\.tra”). Apply the Command property to the second button, and then double-click on thebutton to open the Object Properties dialog. Type SetTranslationFile(“strFileName”)into the Expression field —substituting the name of the second translation file between the double quotes.For example, SetTranslationFile(“Spanish.tra”)Now, if you run the application ( ) you can click the buttons to toggle between thetwo languages, as shown in the following screens:Click the English Buttonand the Screen ObjectsDisplay in EnglishClick the Spanish Buttonand the Screen ObjectsDisplay in SpanishTranslating between English and Spanish<strong>InduSoft</strong> <strong>Web</strong> <strong>Studio</strong> v6.1 SP2 16–9
IWS Users GuideUsing the Translation Tool/EditorIf you want to verify that the translation was successful, you can create a tag (forexample, STATUS) and add it to your application screen. When you run theapplication, the tag will return one of the values listed in the following table.Returned ValueDescription0 Success1 Invalid number of parameters2 Wrong parameter type3 Translation file could not be found or openedUsing Ext(strText)You can use the Ext() function to translate text strings within an application, suchas the results of an operation that you want displayed to an end-user.To execute this function, Open an IWS worksheet (for example a Math worksheet), and type a string-typetag in the Tag Name column. Double-click on each button in the display to open the Object Properties dialogand specify a meaningful name for each (for example, English and Spanish).The Ext(“strText”) function returns the text translation using the activeTranslation worksheet.For example,Ext(“Start”) // Returned value in Spanish = “Comience”Ext(“Stop”) // Returned value in Spanish = “Pare”Ext(“StrTag”)Closing the Translation EditorTo close the Translation Editor, select File → Exit from the Translation Editormenu bar.If you have already saved the open Translation worksheet(s), the TranslationEditor will close immediately.If you have unsaved changes in an open Translation worksheet(s), IWS willprompt you to save your changes.– Click Yes to save the changes and close the window.– Click No to close the window without saving your changes.– Click Cancel to keep the window open and continue working on the openworksheet.16–10 <strong>InduSoft</strong> <strong>Web</strong> <strong>Studio</strong> v6.1 SP2
Chapter 17: IWS Database InterfaceConfiguring a database interface with IWS is basically linking tasks from IWS(Alarms, Events or Trends) to tables of external databases via a specific DatabaseProvider that supports the database you have chosen.Each history task (Alarm, Events or Trend) can be configured to save data either tofiles with the proprietary format from <strong>Studio</strong> or to external SQL RelationalDatabases.IWS supports ADO.NET to provide an intuitive, simple, flexible and powerfulinterface with standard technologies from MDAc (Microsoft Data AccessComponents) such as OLE-DB (Object Linking Embedded – Database) and ODBC(Open Database Connectivity). By using this capability, you can connect to anydatabase that is MDAC compatible (please see the Conformance Test Table for the list ofdatabases already tested).The following tasks support the database interface:Alarms: The application can save and/or retrieve the alarm history messages in arelational database.Events: The application can save and/or retrieve the event messages in arelational database.Trends: The application can save and/or retrieve the Trend history values in arelational database.Viewer: Database information can be displayed both in table format (Alarm andGrid objects) or in a graphical format (Trend object).<strong>Web</strong>: Because the items listed below are already available in IWS <strong>Web</strong> interface,you can deploy an application that stores/saves data in a relational databaseand have it working over the <strong>Web</strong>.Using its embedded database interface, IWS can easily provide data from the plantfloor to third-party systems (e.g. ERP) or get data from them.IWS can interface with any relational database supported by a valid ADO.NETProvider, OLE DB Provider or ODBC Driver. However, the conformance tests wereexecuted with the following databases:Database Database Version ADO.NET Provider Assembly VersionMicrosoft SQLServer 2000MicrosoftAccess 2000MicrosoftExcel 2000Oracle8.0 System.Data.SqlClient 1.0.5000.09.0.3821 SR-1 System.Data.OleDbClient 1.0.5000.09.0.3821 SR-1 System.Data.OleDbClient 1.0.5000.010g Release 1 forWindowsSystem.Data.OracleClient 1.0.5000.0Sybase Anywhere 9.0.1.1751 iAnywhere.Data.AsaClient 9.0.1.1751MySQL 4.0.20a ByteFX.MySqlClient 0.7.6.15073Conformance Test Table<strong>InduSoft</strong> <strong>Web</strong> <strong>Studio</strong> v6.1 SP2 17–1
IWS Users GuideIWS Database InterfaceNote:For information about how to configure a specific database, please refer tothe Appendixes.17–2 <strong>InduSoft</strong> <strong>Web</strong> <strong>Studio</strong> v6.1 SP2
IWS Database InterfaceIWS Users GuideGeneral ConceptsThis section describes databases, database providers and the way IWS interfaceswith different databases.SQL Relational DatabasesA SQL Relational Database is a set of information stored in tables with fields andregisters, which support SQL commands.Each database can have one or more tables. Each table is composed of fields(columns) and registers (rows). Typically, the fields are pre-defined and theapplication adds or reads one or more registers, according to the query condition.IWS uses Database Providers (ADO.NET) to interface with SQL RelationalDatabases. Database Providers are libraries developed to access data from differentdatabases through SQL commands. The ADO.NET Provider for a specific databasecan be supplied by the operating system or by the database manufacturer.The following picture illustrates how IWS can interface with different databasesusing a different Database Provider for each database.<strong>InduSoft</strong> <strong>Web</strong> <strong>Studio</strong> v6.1 SP2 17–3
IWS Users GuideIWS Database InterfaceThe previous picture shows some of the most popular ADO.NET Providers fordatabases. Notice that the Microsoft ADO.NET Provider for ODBC Drivers allows youto access the database through an ODBC driver. See Database Appendix A: UsingODBC Databases for information about how to use this provider. It is also possiblethat you do not have an ADO.NET provider, but an OLE DB provider is available. Byusing the Microsoft ADO.NET Provider for OLE DB you can get access to thedatabase; the Microsoft Jet OLE DB provider gives access to applications in theMicrosoft Office package by using this approach.Note:It is important to note that IWS provides the interface for ADO.NET Providers.However, the ADO.NET Providers and/or the ODBC Driver/OLE DB Providermust be supplied either by the operating system or by the databasemanufacturer. If your connection string does not refer to a valid ADO.NETProvider, the OLE DB Provider will be used.Although most applications typically link to only one type of database, IWS givesyou the flexibility to link each task to a specific database supported by a DatabaseProvider. Furthermore, by using this architecture, you do not need to worry aboutthe specific characteristics of each database (it is mostly handled by the DatabaseProvider for each database or by the IWS Database Gateway interface). Therefore,the application settings are mostly uniform, regardless of the specific databasechosen by you.17–4 <strong>InduSoft</strong> <strong>Web</strong> <strong>Studio</strong> v6.1 SP2
IWS Database InterfaceIWS Users GuideHistory FormatThe IWS tasks that can generate history data (Alarms, Events and Trend) can beconfigured to save data either in the Proprietary history file format from IWS or toan external SQL Relational database. You can choose the history file format by theHistory Format combo-box available for each task. The following table shows theoptions available for each task:Task History Format SettingsAlarmsEventsTrendProprietaryDatabaseProprietaryDatabaseProprietaryDatabaseFile Format: Text (UNICODE). IWS uses the vertical bar character (|)to separate the fields.Default Path: …\\Alarm\ALYYMMDD.ALH , where:YY = Two last digits of the yearMM = MonthDD = Day.Database Type: Chosen by the userDefault Table Name: AlarmHistoryFile Format: Text (UNICODE). IWS uses the vertical bar character (|)to separate the fields.Default Path: …\\Alarm\EVYYDDMM.EVT , where:YY = Two last digits of the yearMM = MonthDD = Day.Database Type: Chosen by the userDefault Table Name: EventHistoryFile Format: BinaryDefault Path: …\\Hst\GGYYDDMM.HST , where:GG = Trend group number (in hexadecimal format)YY = Two last digits of the yearMM = MonthDD = Day.Database Type: Chosen by the userDefault Table Name: TRENDGGG (GGG = Trend Worksheet Number– e.g. TREND001 for the Trend Worksheet 001)<strong>InduSoft</strong> <strong>Web</strong> <strong>Studio</strong> v6.1 SP2 17–5
IWS Users GuideIWS Database InterfacePrimary and Secondary DatabasesIWS supports redundant systems. Therefore, when configuring the databaseinterface, you can configure the Primary Database and, optionally, the SecondaryDatabase. These can be configured in the following modes:Disabled: In this mode, IWS saves data in the Primary Database only. If thePrimary Database is unavailable for any reason, the data is not saved anywhereelse. This option may cause loss of data if the Primary Database is not available.Redundant: In this mode, IWS saves data in both Primary and SecondaryDatabases. If one of these databases is unavailable, IWS keeps saving data onlyin the database that is available. When the database that was unavailablebecomes available again, IWS synchronizes both databases automatically.Store and Forward: In this mode, IWS saves data in the Primary Database only.If the Primary Database becomes unavailable, IWS saves the data in theSecondary Database. When the Primary Database becomes available again, IWSmoves the data from the Secondary Database into the Primary Database.Note:The Primary and Secondary can be different types of databases. However,they must have the same fields.Using the Secondary Database, you can increase the reliability of the systemand use the Secondary Database as a backup when the Primary Database is notavailable. This architecture is particularly useful when the Primary Database islocated in the remote station. In this case, you can configure a SecondaryDatabase in the local station to save data temporarily if the Primary Database isnot available (during a network failure, for instance).17–6 <strong>InduSoft</strong> <strong>Web</strong> <strong>Studio</strong> v6.1 SP2
IWS Database InterfaceIWS Users GuideDefault DatabaseAlthough IWS allows you to configure a different database for each task, typicallythe same database type (e.g. SQL Server, MS Access, Oracle, and so forth) is usedby all tasks of the same project. Therefore, in order to save time when configuringthe application, IWS allows you to configure the Default Database. When configuringeach task, you can choose to use the settings configured for the Default Database. Ifyou choose this method, it will not be necessary to re-configure the same settingsfor each task, since they share the same database.The settings for the Default Database can be configured by pressing the Configurebutton from the Default Database box on the Options tab of the Project Settings dialog.By clicking on this button the following Window will display:0<strong>InduSoft</strong> <strong>Web</strong> <strong>Studio</strong> v6.1 SP2 17–7
IWS Users GuideIWS Database InterfacePlease refer to the section Configuring Database Settings for information about thefields on this Window.Linking the Database Through a Remote DB ProviderDepending on the architecture of your project, the ADO.NET Provider for the SQLRelational Database may not be available in the same stations where IWS isrunning. This scenario is especially common when the application is run on theWindows CE operating system (currently, most of the Providers are not supportedfor the Windows CE operating system). In order to solve this problem, <strong>InduSoft</strong>designed a flexible solution that allows you to configure distributed systems, asillustrated in the picture below:The application is running in the <strong>Studio</strong> Application station (where IWS and/orCEView are/is installed). The application can communicate with the IWS DatabaseGateway (running in a remote computer) via TCP/IP. The Gateway implements theinterface with the Database through the Database Provider available in thecomputer where it is running.The IWS Database Gateway does not require complex configuration. Just copy thefiles STADOSvr.exe and StADOSrv.ini from the \BIN sub-folder of IWS and pastethem under any directory of the computer that will be used as the Gateway stationand execute the STADOSvr.exe program. There are advanced settings associatedwith the <strong>Studio</strong> Database Gateway, but they should be changed only under specialcircumstances. See the “<strong>Studio</strong> Database Gateway” for information on how toconfigure the <strong>Studio</strong> Database Gateway advanced settings.Tip:The IWS Database Gateway is a TCP/IP Server for the IWS applicationand it uses the TCP Port 3997 by default. You can specify a different portnumber when executing the STADOSvr.exe program according to thefollowing syntax: STADOSvr.exe . Example: STADOSvr399817–8 <strong>InduSoft</strong> <strong>Web</strong> <strong>Studio</strong> v6.1 SP2
IWS Database InterfaceIWS Users GuideConfiguring Database SettingsConfiguring a database interface with IWS is basically linking tasks from IWS(Alarms, Events or Trends) to tables of external databases via a specific DatabaseProvider that supports the database you have chosen.Each history task (Alarm, Events or Trend) can be configured to save data either tofiles with the proprietary format from <strong>Studio</strong> or to external SQL RelationalDatabases. When selecting Database as the History Format, the database interfacesettings can be configured through the following interfaces:TaskAlarmsEventsTrendInterface Select the Project > Settings menu. Select the Options tab on the Project Settings dialog window. Choose Database in the History Format combo-box. Click on the Alarm Database button. Configure the database settings on the Database Configuration dialog. Select the Project > Settings menu. Select the Options tab on the Project Settings dialog window. Choose Database in the History Format combo-box. Click on the Event Database button. Configure the database settings on the Database Configuration dialog. Create or open a Trend worksheet. Choose Database in the History Format combo-box. Click on the Database Configuration button. Configure the database settings on the Database Configuration dialog.Note: Both Alarms and Events are saved in the IWS proprietary format, or bothAlarms and Events are saved in external Relational Databases; however,they can be saved on different databases. Each Trend worksheet can be configured to save data either in the IWSproprietary format or in an external SQL Relational Database.<strong>InduSoft</strong> <strong>Web</strong> <strong>Studio</strong> v6.1 SP2 17–9
IWS Users GuideIWS Database InterfaceDatabase Configuration DialogThe Database Configuration dialog allows you to configure the necessary settings tolink IWS to an external SQL Relational Database.The following picture illustrates the Database Configuration dialog:Database Configuration DialogDatabase combo-box: Allows you to select either Primary or Secondary. WithPrimary, all settings displayed in the Database Configuration window apply tothe Primary Database interface. Otherwise, they apply to the SecondaryDatabase interface. You can configure the Secondary database in the followingmodes:– Disabled: In this mode, IWS saves data in the Primary Database only. If thePrimary Database is unavailable for any reason, the data is not savedanywhere else. This option may cause loss of data if the Primary Database isnot available.– Redundant: In this mode, IWS saves data in both Primary and SecondaryDatabases. If one of these databases is unavailable, IWS keeps saving dataonly in the database that is available. When the database that wasunavailable becomes available again, IWS synchronizes both databasesautomatically.– Store and Forward: In this mode, IWS saves data in the Primary Database only.If the Primary Database becomes unavailable, IWS saves the data in theSecondary Database. When the Primary Database becomes available again,IWS moves the data from the Secondary Database into the PrimaryDatabase.17–10 <strong>InduSoft</strong> <strong>Web</strong> <strong>Studio</strong> v6.1 SP2
IWS Database InterfaceIWS Users GuideUsing the Secondary Database, you can increase the reliability of the systemand use the Secondary Database as a backup when the Primary Database is notavailable. This architecture is particularly useful when the Primary Database islocated in the remote station. In this case, you can configure a SecondaryDatabase in the local station to save data temporarily if the Primary Database isnot available (during a network failure, for instance).Use application default check-box: When this option is checked, IWS uses thesettings configured in the Default Database for the task that is being configured(Connection string, User name, Password, Retry Interval and AdvancedSettings). When this option is not checked, you can configure these settingsindividually to the current task.Connection string field: This field defines the database where IWS will write andread values as well as the main parameters used when connecting to thedatabase. Instead of writing the Connection string manually, you can press thebrowse button (…) and select the database type from the Data Link Propertieswindow.Note:The list of Database Providers shown in the Data Link Propertieswindow depends on the providers actually installed and available in thecomputer where you are running IWS. Consult the operating systemdocumentation (or the database documentation) for further informationregarding the settings of the Provider for the database that you areusing.User name field: User name used to connect to the database. The user nameconfigured in this field must match the user name configured in the database.<strong>InduSoft</strong> <strong>Web</strong> <strong>Studio</strong> v6.1 SP2 17–11
IWS Users GuideIWS Database InterfacePassword field: Password used to connect to the database. The passwordconfigured in this field must match the password configured in the database.Retry Interval field: If IWS is unable to connect to the database for any reason, itretries automatically to connect to the database after the number of secondsconfigured in this field have passed.Advanced button: After pressing this button, you have access to customize somesettings. For most applications, the default value of these settings do not need tobe modified and should be kept.– Milliseconds combo box: You can configure how the milliseconds will be savedwhen saving the date in the database. Each database saves the date indifferent formats; for example, some databases do not support millisecondsin a Date field. The following options are available:• Default: Uses the format pre-defined for the current database. Thedatabases previously tested by <strong>InduSoft</strong> are previously configured withthe most suitable option. When selecting Default, IWS uses the settingpre-configured for the current database type. If you are using a databasethat has not been previously configured by <strong>InduSoft</strong>, the Default optionattempts to save the milliseconds in a separate field.Tip:The default option for each database is configured in the <strong>Studio</strong>ADO.inifile, stored in the \BIN sub-folder of IWS. See “<strong>Studio</strong> Database Gateway”for information about how to configure the <strong>Studio</strong>ADO.ini file.• Disable: Does not save the milliseconds at all when saving the date in thedatabase.• Enable: Saves the milliseconds in the same field where the date is saved.• Separate Column: Saves the milliseconds in a separated column. In thiscase, the date is saved in one field (without the milliseconds precision)and the number of milliseconds is saved in a different column. Thisoption is indicated where you want to save timestamps with the precisionof milliseconds but the database that you are using does not supportmilliseconds for the Date fields.– Save time difference check-box: When this option is checked (default), IWS savesthe Time Zone configured in the computer where the application is runningin each register of the database. This option must be enabled to avoidproblems with daylight savings time.– Database Gateway: Enter the Host Name/IP Address where the <strong>Studio</strong> databasegateway will be running. The TCP Port number can also be specified, but if17–12 <strong>InduSoft</strong> <strong>Web</strong> <strong>Studio</strong> v6.1 SP2
IWS Database InterfaceIWS Users Guideyou are not using the default, you will have to configure the <strong>Studio</strong> databasegateway with the same TCP Port. See “<strong>Studio</strong> Database Gateway” forinformation about how to configure the advanced settings for the <strong>Studio</strong>ADO Gateway.– Disable Primary Key: For some modules, IWS will try to define a primary key tothe table in order to speed up the queries. If you are using a database thatdoes not support primary keys (e.g. Microsoft Excel), you should check thisfield.Table pane: This area allows you to configure the settings of the Table where thedata will be saved. All tasks can share the same database. However, each task(Alarm, Events, Trend worksheets) must be linked to its own Table. <strong>InduSoft</strong>does not check for invalid configurations on this field, therefore you shouldmake sure that the configuration is suitable for the database that you are using.Use default name check-box: When this option is checked (default), IWS savesand/or retrieves the data in the Table with the default name written in theName field.Automatically create check-box: When this option is checked (default), IWS creates atable with the name written in the Name field automatically. If this option is notchecked, IWS does not create the table automatically. Therefore, it will not beable to save data in the database, unless you have configured a table with thename configured in the Name field manually in the database.Name: Specifies the name of the Table from the database where the history dataswill be saved.Refresh button: If the database configured is currently available, you can pressthe Refresh button to populate the Name combo-box with the name of the tablescurrently available in the database. In this way, you can select the table wherethe history data should be saved instead of writing the Table name manually inthe Name field.Run-Time pane: This area allows you to enter with IWS tags. The following fieldsare available:– Status (output) check-box: The tag in this field will receive one of the followingvalues:ValueDescription0 Disconnected from the database. The database is notavailable or your configuration is incorrect.1 The database is connected successfully2 The database is being synchronized– Reload (output): If you are using in curly brackets in any of the configurationfields, you have to specify the reload tag. When you want to reconnect to thedatabase using the updated values on your tags, set the tag on this field to1. IWS will update the configuration when trying to perform an action in thedatabase and will set the tag back to 0 when it is finished.<strong>InduSoft</strong> <strong>Web</strong> <strong>Studio</strong> v6.1 SP2 17–13
IWS Users GuideIWS Database Interface<strong>Studio</strong> Database GatewayThe <strong>Studio</strong> Database Gateway is a TCP/IP server that interacts with databasesusing the Microsoft .NET Framework 1.1. It can run on the same computer that isrunning the IWS application, or on a different computer. The Database GatewayHost in the Advanced Settings (see “Database Configuration Dialog” dialog) specifieswhether the gateway will be running on the local computer or not. If you are usingthe local computer you should enter either localhost or 127.0.0.1 in the Hostname. You do not need to worry about starting or stopping the gateway because itwill be done automatically by IWS tasks. On the other hand, when running thegateway remotely, you need to start the gateway manually. To do so, copy the filesStADOSvr.exe and <strong>Studio</strong>ADO.ini from the IWS BIN folder to the remotecomputer, then execute the StADOSvr.exe.The gateway can be started multiple times for different TCP/IP port numbers. Thedefault port number is 3997, and it is changed by specifying the desired portnumber in the command prompt (e.g. StADOSvr 1111). When running theStADOSvr, it will add the following icon to the tray bar:When you right-click on the tray bar icon, the following options will display:The hide option defines whether the debug window will be displayed or not. If youde-select it, the following window will display:17–14 <strong>InduSoft</strong> <strong>Web</strong> <strong>Studio</strong> v6.1 SP2
IWS Database InterfaceIWS Users GuideAny failure that occurs during operations with databases will be displayed both inthis window and also in the IWS LogWin window. The messages are reported byexceptions generated by the ADO.NET Provider. (Please refer to “DatabaseTroubleshooting” for more information about error messages in the Gatewaymodule.)The <strong>Studio</strong> Database Gateway has Advanced Settings that are configured in theStADOSvr.ini file. If you are having problems interfacing with a specific database,you will probably need to change some of these settings or add new providers to thefile. The following parameters are available:Parameter Range of Values DescriptionSaveMSecAssemblyConnectionClassDataAdapterClassCommandBuilderClass1 - Disable2 - Enable3 - Separate ColumnAny string that contains a .NetFramework assemblyAny connection class inside theassemblyAny data adapter class insidethe assemblyAny command builder classinside the assemblyThis setting specifies the default behavior for theprovider when saving milliseconds. The default canbe changed on the Advanced Settings in theDatabase Configuration Dialogs.Assembly option for all providers. The assembly hasall the classes required to interface with thedatabase. Most of the providers are inside theSystem.Data assembly.The Connection Class is the one that implements theSystem.Data.IDbConnection interface.The Data Adapter class is used on operations whereupdates to the database are necessary. It must becompatible with the connection class specified and itshould implement IDbDataAdapter.The Command Builder class is also responsible forupdates on databases. It must be compatible with theconnection class.<strong>InduSoft</strong> <strong>Web</strong> <strong>Studio</strong> v6.1 SP2 17–15
IWS Users GuideIWS Database InterfaceProviderColumnDelimiterPrefixColumnDelimiterSuffixTableDelimiterPrefixName of the providerAny character or group ofcharactersAny character or group ofcharactersAny character or group ofcharactersOne of the parameters in the connection string is the"Provider". The <strong>Studio</strong> ADO Gateway compares thevalue on the connection string with the value for thisparameter in each provider and defines the properone to be used.Specify a character that will be placed before columnnames on SQL statementsSpecify a character that will be placed after columnnames on SQL statementsSpecify a character that will be placed before tablenames on SQL statementsTableDelimiterSuffixValueStringValueStringPrefixAny character or group ofcharactersAny stringAny stringValueAddNumber 0 or 1BoolTypeIntegerTypeRealTypeStringTypeTimeStampTypeAny string representing a validdata type for the databaseAny string representing a validdata type for the databaseAny string representing a validdata type for the databaseAny string representing a validdata type for the databaseAny string representing a validdatatype for the databaseSpecify a character that will be placed after tablenames on SQL statementsThis value indicates how constant values areidentified on SQL statements. For Microsoft SQLdatabases for instance, the value should be @Value,for ODBC question mark (?)This value indicates a prefix to be used before thevalues. Oracle values for instance require the prefix.The SQL statements use value identifiers by usingtheir prefixes, but the parameters in the Connectionclass do not use the prefix.Indicates whether a sequential number should beadded to the ValueString to identify the parameter ornot. For Microsoft SQL database, this parametershould have the value 1, because parameters areidentified by using @Value1, @Value2 …, @ValueN.For ODBC, this parameter should be 0.When trying to create columns to store booleanvalues, the data type specified on this parameter willbe used. You need to make sure that the data typespecified is able to save boolean values.When trying to create columns to store integervalues, the data type specified on this parameter willbe used. You need to make sure that the data typespecified here is able to store 32 bit values.When trying to create columns to store real values,the data type specified on this parameter will beused. You need to make sure that the data typespecified here is able to store 64 real values.When trying to create columns to store string values,the data type specified on this parameter will beused. You need to make sure that the data typespecified is able to save the number of charactersthat you are willing to save on your application.When trying to create columns to store TimeStampvalues, the datatype specified on this parameter willbe used.17–16 <strong>InduSoft</strong> <strong>Web</strong> <strong>Studio</strong> v6.1 SP2
IWS Database InterfaceIWS Users GuideEnableTop 0 or 1SingleConnection 0 or 1When this field is set to 1, the ADO will place theTOP in the SQL statement to limit the amount ofregisters requested.When this field is set to 1, the ADO will open only oneconnection with the database, regardless of howmany tasks or computers are requesting servicesfrom it. The synchronization between the tasks will beperformed by the gateway and they will not be able tobe executed simultaneously if this option is enabled.A single section called [Providers] has all the parameters inside it. The default valuesare specified in the beginning of the file, using the prefix “Default” in eachparameter as shown below:[Providers]DefaultSaveMSec=3DefaultAssembly=System.DataDefaultConnectionClass=System.Data.OleDb.OleDbConnectionDefaultDataAdapterClass=System.Data.OleDb.OleDbDataAdapterDefaultCommandBuilderClass=System.Data.OleDb.OleDbCommandBuilderDefaultValueString=@ValueDefaultValueAddNumber=1DefaultBoolType=INTEGERDefaultIntegerType=INTEGERDefaultRealType=REALDefaultStringType=VARCHAR(255)DefaultTimeStampType=DATETIMEDefaultSingleConnection=0The next item on the file lists the amount of providers:Count=5The providers are identified by the “Provider” parameter followed by a number.When connecting to a database, the Provider parameter in the connection string iscompared to the provider’s identification, in order to determine which provider willbe used. If there is no provider with the value on the connection string, all thedefault values are assumed. Besides its identification, each provider can have itsown value per each parameter. Again, if no value is specified, the default is used.Below is an example with seven providers:Count=7Provider1=MICROSOFT.JET.OLEDBSaveMSec1=3ColumnDelimiterPrefix1=[ColumnDelimiterSuffix1=]SingleConnection1=1Provider2=SQLOLEDBConnectionClass2=System.Data.SqlClient.SqlConnectionDataAdapterClass2=System.Data.SqlClient.SqlDataAdapterCommandBuilderClass2=System.Data.SqlClient.SqlCommandBuilderColumnDelimiterPrefix2=[ColumnDelimiterSuffix2=]TableDelimiterPrefix2=[TableDelimiterSuffix2=]<strong>InduSoft</strong> <strong>Web</strong> <strong>Studio</strong> v6.1 SP2 17–17
IWS Users GuideIWS Database InterfaceRealType2=FLOATProvider3=MSDASQLConnectionClass3=System.Data.Odbc.OdbcConnectionDataAdapterClass3=System.Data.Odbc.OdbcDataAdapterCommandBuilderClass3=System.Data.Odbc.OdbcCommandBuilderValueString3=?ValueAddNumber3=0StringType3=VARCHAR(128)EnableTop3=0Provider4=ORAOLEDBAssembly4=System.Data.OracleClientConnectionClass4=System.Data.OracleClient.OracleConnectionDataAdapterClass4=System.Data.OracleClient.OracleDataAdapterCommandBuilderClass4=System.Data.OracleClient.OracleCommandBuilderValueString4=ValueValueAddNumber4=1ValueStringPrefix4=:BoolType4=Number(1)IntegerType4=Number(10)RealType4=NumberStringType4=VARCHAR(255)TimeStampType4=TIMESTAMP(0)EnableTop4=0Provider5=ASAPROVAssembly5=iAnywhere.Data.AsaClientConnectionClass5=iAnywhere.Data.AsaClient.AsaConnectionDataAdapterClass5=iAnywhere.Data.AsaClient.AsaDataAdapterCommandBuilderClass5=iAnywhere.Data.AsaClient.AsaCommandBuilderValueString5=?ValueAddNumber5=0ColumnDelimiterPrefix5=[ColumnDelimiterSuffix5=]TableDelimiterPrefix5=[TableDelimiterSuffix5=]Provider6=MYSQLPROVAssembly6=ByteFX.MySqlClientConnectionClass6=ByteFX.Data.MySqlClient.MySqlConnectionDataAdapterClass6=ByteFX.Data.MySqlClient.MySqlDataAdapterCommandBuilderClass6=ByteFX.Data.MySqlClient.MySqlCommandBuilderValueString6=@ValueValueAddNumber6=1StringType6=VARCHAR(128)EnableTop6=0Provider7=MSDAORAAssembly7=System.Data.OracleClientConnectionClass7=System.Data.OracleClient.OracleConnectionDataAdapterClass7=System.Data.OracleClient.OracleDataAdapterCommandBuilderClass7=System.Data.OracleClient.OracleCommandBuilderValueString7=ValueValueAddNumber7=117–18 <strong>InduSoft</strong> <strong>Web</strong> <strong>Studio</strong> v6.1 SP2
IWS Database InterfaceIWS Users GuideValueStringPrefix7=:BoolType7=Number(1)IntegerType7=Number(10)RealType7=NumberStringType7=VARCHAR(255)TimeStampType7=TIMESTAMP(0)EnableTop7=0<strong>InduSoft</strong> <strong>Web</strong> <strong>Studio</strong> v6.1 SP2 17–19
IWS Users GuideIWS Database InterfaceIWS DEVELOPMENT ENVIRONMENT > THE WORKSPACE > TASKS TAB > ALARMSFOLDERAlarm summary: When you enable the alarm history file for a group, IWS saves thealarm events to the history database, according to the File Format configured for theAlarm History and Events. The information saved in the history file is described inthe following table.Field Name Data Type RemarksVersionAl_Start_TimeIntegerTimeStampAl_Tag String Tag NameAl_Message String Alarm messageAl_AckAl_ActiveBooleanBooleanThis field is created only when the File Format is Proprietary.Current version: 003Timestamp indicating when the alarm started.When the File Format is Proprietary, IWS saves the Date(MM/DD/YYYY) in one field and the Time (HH:MM:SS.MSS) inthe next field.0: Indicates the alarm was acknowledged or does not requireacknowledgment1: Indicates the alarm was not acknowledged0: Indicates the alarm is not active1: Indicates the alarm is activeAl_Value Real Tag value when the alarm event occurredAl_Group Integer Alarm Group NumberAl_Priority Integer Alarm Priority NumberAl_Selection String Alarm Selection valueAl_TypeAl_Ack_ReqAl_Norm_TimeAl_Ack_TimeAl_UserIntegerBooleanTimeStampTimeStampString1: HiHi2: Hi(On)4: Lo(Off)8: LoLo16: Rate(Change)32: DevP64: DevM0: Requires acknowledgement (Ack)1: Does not require acknowledgementTimestamp indicating when the alarm was normalized.When the File Format is Proprietary, IWS saves the Date(MM/DD/YYYY) in one field and the Time (HH:MM:SS.MSS) inthe next field.Timestamp indicating when the alarm was acknowledged.When the File Format is Proprietary, IWS saves the Date(MM/DD/YYYY) in one field and the Time (HH:MM:SS.MSS) inthe next field.User logged when the alarm event occurred. This field onlyexists for Version >=117–20 <strong>InduSoft</strong> <strong>Web</strong> <strong>Studio</strong> v6.1 SP2
IWS Database InterfaceIWS Users GuideAl_CommentAl_User_FullAl_StationAl_Previous_Tag_ValueAl_DeletedAl_BiasAl_Last_UpdateStringStringStringRealBooleanIntegerTimeStampComment (optional) typed by the operator when the alarm wasacknowledged. This field only exists for Version >=1Full name of the user logged when the alarm event occurred.This field only exists for Version >=2Name of the station (computer) where the alarm event occurred.This field only exists for Version >=2Tag value that occurred before the alarm event. This field onlyexists for Version >=30: Alarm message was not deleted1: Alarm message was deletedThis field is created only when the File Format is Database.Difference (in minutes) from the Time Stamp columns and theGMT time. This field only exists for Version >=3Time Stamp when the register was created/modified. This field isused to synchronize the databases when using the SecondaryDatabase in addition to the Primary Database. This field iscreated only when the File Format is Database.Tip:When saving the History Alarms in a SQL Relational Database (File Format =Database), you can customize the name of the columns created in thedatabase by editing the .APP file, as follows:[Alarm]=For example:[Alarm]Message=Alarm_MessageAck=Acknowledgment<strong>InduSoft</strong> <strong>Web</strong> <strong>Studio</strong> v6.1 SP2 17–21
IWS Users GuideIWS Database InterfaceIWS DEVELOPMENT ENVIRONMENT > THE WORKSPACE > DATABASE TAB > EVENTSETTINGSEvent log files are saved to the history database, according to the File Formatconfigured for the Alarm History and Events. The information saved in the historyfile is described in the following table.Field Name Data Type RemarksVersionEvent_TypeEvent_TimeIntegerIntegerTimeStampThis field is created only when the File Format is Proprietary. Currentversion: 0021: SECURITY SYSTEM2: DISPLAY3: RECIPE4: REPORT5: CUSTOM MESSAGES6: SYSTEM WARNING7: LOG TAGSEvent_Info String Tag NameTimestamp indicating when the event occurred.When the File Format is Proprietary, IWS saves the Event Time in thefollowing format: MM/DD/YYYY HH:MM:SS.MSS.Value Real Tag value when the event occurredSource String Name of the task that generated the eventUser String User logged when the event occurred.User_Full String Full name of the user logged when the event occurred.Message String Event messageStation String Name of the station (computer) where the event occurred.CommentPrevious_ValueDeletedBiasLast_UpdateStringRealBooleanIntegerTimeStampComment (optional) typed by the operator when the event occurred. Thisfield only exists for Version >=2Tag value that occurred before the event. This field only exists for Version>=20: Event message was not deleted1: Event message was deletedThis field is created only when the File Format is Database.Difference (in minutes) from the Time Stamp columns and the GMT time.This field only exists for Version >=2Time Stamp when the register was created/modified. This field is used tosynchronize the databases when using the Secondary Database inaddition to the Primary Database. This field is created only when the FileFormat is Database.17–22 <strong>InduSoft</strong> <strong>Web</strong> <strong>Studio</strong> v6.1 SP2
IWS Database InterfaceIWS Users GuideTip:When saving the Events in a SQL Relational Database (File Format =Database)you can customize the name of the columns created in thedatabase by editing the .APP file as follows:[EventLogger]=For example:[EventLogger]Event_Info=InformationMessage=Event_Message<strong>InduSoft</strong> <strong>Web</strong> <strong>Studio</strong> v6.1 SP2 17–23
IWS Users GuideIWS Database InterfaceIWS DEVELOPMENT ENVIRONMENT > THE WORKSPACE > TASKS TAB > TRENDFOLDERName of history files pane: Specify the following parameters to define the history filename. You can generate trend historical files in two forms: by date or batch (byevents).– Date (default) check box: Click (check) to generate history files based on thedate. Use this option if you have a continuous process. Depending on theoptions selected in the History Format combo-box, IWS saves the Trendhistory data either to proprietary binary files or to a SQL RelationalDatabase. The fields saved in the History Trend are described in thefollowing table:Field Name Data Type RemarksTime_StampTimeStampInteger or Real(depending on the tagtype)TimeStamp (Date and Time) when the data wassaved.IWS will create one field (column) in thedatabase for each tag configured in the Trendworksheet.17–24 <strong>InduSoft</strong> <strong>Web</strong> <strong>Studio</strong> v6.1 SP2
IWS Database InterfaceIWS Users GuideDatabase TroubleshootingIWS Database interface provides powerful tools that will help you to identifyconfiguration problems with databases. If you are having problems interfacing witha database, you should first enable the Database Messages in the Log Window. Youcan do so by following the steps below:1. In the IWS Development environment, make sure to enable the Output Window(View-> Toolbars-> Output).2. Right click on the Output Window (usually located in the right corner in thedevelopment environment), and select Settings;3. In the Settings Log Settings window check the Database Messages option;After enabling Database Messages, the Output window will display error messagesrelated to the database. The Database FAQ section that follows lists some commonerrors that you can see in the Output window.Database FAQGENERIC QUESTIONSQ: I configured my database, but the Run-Time modules (Alarm, Trend and Events)are not being saved to the database. I only see the following error message in theOutput window:Database: Error: Error to add new register[CMD_ADD].What should I do?A: Most of the database errors in the Output window will be followed by additionalinformation such as the SQL command being executed, the Connection Stringand the Table name. Error messages such as the one described above, will<strong>InduSoft</strong> <strong>Web</strong> <strong>Studio</strong> v6.1 SP2 17–25
IWS Users GuideIWS Database Interfaceusually happen after a more detailed message. For example, if your Trend taskfails to add a register in the database because the cable is disconnected, youshould first receive a network error; if the task tries to add more registers beforethe time specified in the Retry field (see “Database Configuration DialogWindow”), it will only display Database: Error: Error to add newregister[CMD_ADD]. If you think that your configuration is correct and youwant to debug this type of problem, reduce the Retry. Then you should see moredetailed information.Q: I configured my Connection String using the browser and the Data LinkProperties Window. When I click on the Test button, it says “Test succeeded”.However, when I run my application, the Database Interface displays errormessages, and I am not able to save data.A: The Data Link Properties Window uses OLE DB to interface with the Database.IWS Database Interface uses ADO.NET; therefore, you can have the OLE DBprovider on your machine and be missing the ADO.NET provider. It is alsopossible that you are using an ADO.NET provider that is not listed in theStADOSvr.ini file. Please refer to “<strong>Studio</strong> Database Gateway” for moreinformation about adding ADO.NET providers to the StADOSvr.ini file.Q: Why, when I update information in one line in the Grid object, is it updatingmore than one line in my database?A: The grid object issues an update command in the database using the values inall the columns for the specific row that you are trying to update. If you haverows with duplicate values, you might see this problem. If your table has aprimary key or any other unique field that you do not want to display in the Gridobject, you can add it to the Columns but specify the Width 0. This will fix theproblem.Q: Why do I have to use a separate Column to store the milliseconds on mydatabase?A: Some databases do not support milliseconds in the Time Stamp field. IWSDatabase interface, by default, requires another column for the milliseconds. Ifyour database can handle milliseconds, or if you do not want to record themilliseconds, you can change the default behavior in the Advanced settings.Note that some databases are able to store milliseconds, but they have lowerprecision. If you mix different databases with different precisions in redundantmode, you can get synchronization problems.Q: My application works fine when I run in emulation mode. But when I send to theWindows CE device, it cannot communicate with my database.A: It might be the case that your Windows CE device does not have the .NetFramework or that it does not have the provider that you are using. Try to usethe gateway remotely by following the instructions in “Linking the DatabaseThrough a Remote DB Provider.”Q: Why am I receiving the message Error to create connection class when Itry to connect to the database?A: The .Net Provider that you are trying to use is not installed on your machine.This error message is usually followed by the provider name; if you are using theSybase database, for instance, the message is followed by[iAnywhere.Data.AsaClient.AsaConnection]. The Provider is theiAnywhere.Data.AsaClient. You can check if the provider is installed on your17–26 <strong>InduSoft</strong> <strong>Web</strong> <strong>Studio</strong> v6.1 SP2
IWS Database InterfaceIWS Users Guidemachine by going to the Control Panel->Administrative Tools->Microsoft .Net Framework x.xConfiguration. The provider should be listed in the Assembly Cache.Q: What if I have the provider assembly (usually a .dll file), but it is not listed in theAssembly Cache?A: If your assembly has a strong name, you can register it in the Assembly Cacheusing the gcautil program. It should work if you copy your assembly to thesame folder as the StADOSvr.exe (usually the IWS\Bin folder).ORACLEQ: When I lose the connection with an ORACLE database, it does not recover. Ireceive the following message in the logwin: Database: Error: ORA-03114:not connected to ORACLE. Is that a problem with the IWS Database Interface?A: The Oracle .Net Provider has a problem managing the connection pool. You needto install a QFE 830173. At the time that this document was written, moreinformation about this problem could be found athttp://support.microsoft.com/default.aspx?scid=kb;en-us;830173.Q: When I try to access the database I get the following error message: ORA-00162:external dbid length 19 is greater than maximum (16). What should Ido?A: At the time that this document was written, there was a problem on the Oracle.NET Provider; the Server Name (SERVER/TNS) could not exceed 16 characters. Inorder to fix this problem, you should try to reduce your Server Name field. One wayof doing it is to edit the file \WINDOWS\system32\drivers\etc\hosts to add anentry with a smaller server name. For instance, the server name specified by192.168.89.98, has 13 characters, it could be reduced to 3 by adding thefollowing line in the file:192.168.89.98 oraNow you can configure the Server Name configuration using ORA/TNS instead of192.168.89.98/TNS.MYSQLQ: When I try to access the database from my local machine, it works fine. Butwhen I move my application to a remote machine, it says, Access Denied.A: Each user on a MySQL database has a property associated with it that indicatesthe computer from which you can get access to the database. By default, thisproperty is set to localhost, so you will only be able to access the databasefrom the local computer. You should read the MySQL manual for informationabout changing this setting.SYBASEQ: I configured my Sybase database using the Browse button. When I click the testbutton, the test succeeds, but when I try to run my application, I get thefollowing error: Database: Error: Parse error: DSN 'MyDatabase' doesnot exist. What am I doing wrong?A: Please refer to Appendix F – Using Sybase for more information about thisproblem.<strong>InduSoft</strong> <strong>Web</strong> <strong>Studio</strong> v6.1 SP2 17–27
IWS Users GuideIWS Database InterfaceQ: Why, when I try to connect to the Sybase database, am I receiving the errorError to create connection class[iAnywhere.Data.AsaClient.AsaConnection]?A: You do not have the ADO.NET Provider installed on your computer. Thedatabase setup program has an option to install the Provider. Rerun the setupprogram and make sure to check that option.SQL SERVER CEQ: Why does the gateway shows TypeLoad failure when I try to access my SQLServer CE database?A: This problem usually happens when you do not have the SQL Server CE .NETProvider installed on your CE Device.Q: Why am I getting the error message, There is a file sharing violation.A different process might be using the file?A: You have another program with the SQL Server CE database open. For instance,this will happen if you are using the SQL Server CE configuration software.17–28 <strong>InduSoft</strong> <strong>Web</strong> <strong>Studio</strong> v6.1 SP2
IWS Database InterfaceIWS Users GuideDatabase Appendix A: Using ODBC DatabasesAlmost every database provides an ODBC interface that can be used to interfacewith it. The database features provided by IWS can be used with ODBC driversthrough the ADO.NET interface for ODBC. In order to use this capability, you mustuse Microsoft .NET Framework 1.1 or higher. Note:Microsoft .NET Framework 1.1 is automatically installed, starting with IWSv.6 Service Pack 3.The Database Configuration Dialog allows you to provide connection strings thatwill connect to an ODBC DSN. The connection string can be built automatically byclicking on the Browse button (…). When the Data Link Window displays, you shouldselect the option Microsoft OLE DB Provider for ODBC Drivers as shown below:By clicking the Next button the following window will display:<strong>InduSoft</strong> <strong>Web</strong> <strong>Studio</strong> v6.1 SP2 17–29
IWS Users GuideIWS Database InterfaceSelect the DSN that you want to connect to and click OK. If you want to specify theuser name and password on this window instead of specifying on the DatabaseConfiguration dialog, remember to check the Allow saving password checkbox.Database Appendix B: Using Microsoft SQL ServerIWS Database Interface allows you to retrieve and store information on MicrosoftSQL Server relational databases. You should follow the steps below in order toconfigure the SQL Server database:1. Click on the Browse button in the Database Configuration Dialog window. Thefollowing window will display:17–30 <strong>InduSoft</strong> <strong>Web</strong> <strong>Studio</strong> v6.1 SP2
IWS Database InterfaceIWS Users Guide2. Select the Microsoft OLE Provider for SQL Server, and click Next. Thefollowing window will display:<strong>InduSoft</strong> <strong>Web</strong> <strong>Studio</strong> v6.1 SP2 17–31
IWS Users GuideIWS Database Interface3. Fill out the fields on this window with your database information. If you arenot using Windows NT Integrated security, remember to check the Allow savingpassword checkbox to save the password when the Data Link Properties window isclosed.4. Click OK to finish the Connection String configuration.Your connection string should be very similar to this one:Provider=SQLOLEDB.1; Integrated Security=SSPI; InitialCatalog=MyDatabase; Data Source=192.168.23.200 Note:These procedures were tested using Microsoft SQL Server 2000.Database Appendix C: Using ORACLE databasesIWS Database Interface allows you to retrieve and store information on ORACLErelational databases. You should follow the steps below in order to configure theORACLE database:1. Click on the Browse button in the Database Configuration Dialog window. Thefollowing window will display:2. Select the Microsoft OLE Provider for Oracle and click Next. The followingwindow will display:17–32 <strong>InduSoft</strong> <strong>Web</strong> <strong>Studio</strong> v6.1 SP2
IWS Database InterfaceIWS Users Guide3. Fill out the fields on this window with your database information. Rememberto check the Allow saving password checkbox to save the password when theData Link Properties window is closed. The server name information has thefollowing format:/Where:• Server: Computer where the Oracle database is running• TNS: Oracle TNS name Caution:At the time that this document was written, the Server Name field could not beconfigured with more than 16 letters. If more than 16 letters were specified,you would receive the following error: ORA-00162: external dbid length19 is greater than maximum (16). where 19 is the number of letters inthe Server Name. Please see “Database Troubleshooting” for more hints toworkaround this problem.4. Click OK to finish the Connection String configuration. Note:These procedures were tested using ORACLE 10g Release 1.<strong>InduSoft</strong> <strong>Web</strong> <strong>Studio</strong> v6.1 SP2 17–33
IWS Users GuideIWS Database InterfaceDatabase Appendix D: Using Microsoft Access DatabasesIWS Database interface allows you to retrieve and store information on MicrosoftAccess Database files. You should follow the steps below in order to set up anaccess database:1. Click on the Browse button in the Database Configuration Dialog window. Thefollowing window will display:2. Select the Microsoft Jet 4.0 OLE DB Provider, and click Next. The followingwindow will display:17–34 <strong>InduSoft</strong> <strong>Web</strong> <strong>Studio</strong> v6.1 SP2
IWS Database InterfaceIWS Users Guide3. Type the name of or select the database that you want to access. Caution:Databases such as Microsoft Access are not capable of handling largeamounts of data efficiently. Therefore, if you try to store all your historicaldata in this type of database, the queries might be very slow, and you mightnot get the expected results. If you need to store large amounts of data, werecommend that you either use the proprietary format or a powerfulrelational database such as Microsoft SQL Server or ORACLE. MicrosoftAccess is recommended as a secondary database, using the option Store andForward, or to exchange information with third party software. Note:These procedures were tested using Microsoft Access 2000 (9.0.3821).Database Appendix E: Using SQL Server CEIWS can interface with SQL Server CE databases by using the SQL Server CEprovider. This provider is available only for Windows CE, and it must be installed onyour Windows CE device. Because this provider is only available for Windows CE,you have to enter the Connection String manually. The Connection String should have thefollowing format:Provider=SQLCE; Data Source = Examples:<strong>InduSoft</strong> <strong>Web</strong> <strong>Studio</strong> v6.1 SP2 17–35
IWS Users GuideIWS Database Interface1. Access a fixed database file located in \Harddisk\MyDatabase.sdf:Provider=SQLCE; Data Source = \Harddisk\MyDatabase.sdf2. Access a database file in the location indicated by the string tagDatabaseFile:Provider=SQLCE; Data Source = {DatabaseFile} Caution:Databases such as SQL Server CE are not capable to handle large amountsof data efficiently. Therefore if you try to store all your historical data onthis type of database, the queries might be very slow and you might not getthe expected results. If you need to store large amounts of data, werecommend that you either use the proprietary format or a powerfulrelational database such as Microsoft SQL Server or ORACLE. SQL ServerCE is recommended as a Secondary database using the option Store andForward or to exchange information with third part software.Database Appendix F: Using SybaseYou need to install the AsaClient provider on your computer; the tests with IWSwere performed using the architecture explained in the topic Linking the DatabaseThrough a Remote DB Provider.If you are using the browse button to automatically generate the connection string,the string returned will have the following format:Provider=ASAProv.90; Data Source=TestThis format requires that you create an ODBC DSN with the same name as the DataSource (in this case, Test) in order to communicate with the database. If the DSN isnot created, the following error will display in the LogWin when connecting to thedatabase:Database: Error: Parse error: DSN 'Test' does not existTo void an ODBC DSN, you can enter with the connection string manually as shownin the example below:Provider=ASAProv.90; DBF=C:\ Test.db Note:These procedures were tested using Sybase Server Anywhere 9.0.1.1751.Database Appendix G: Using Microsoft ExcelIWS Database interface allows you to retrieve and store information in Excel files.The main use of an Excel database is with the Grid object. The steps below showhow to configure the Grid object to retrieve data from an Excel file:1. Insert a Grid object on your screen;2. Select Database in the Data Source field.3. Click the Data button. The following window will display:17–36 <strong>InduSoft</strong> <strong>Web</strong> <strong>Studio</strong> v6.1 SP2
IWS Database InterfaceIWS Users Guide4. Uncheck the Use application default check box.5. Click the Browse button to build the Connection String. The following windowwill display:6. Select the Microsoft Jet 5.0 OLE DB Provider, and click Next. The followingwindow will display:<strong>InduSoft</strong> <strong>Web</strong> <strong>Studio</strong> v6.1 SP2 17–37
IWS Users GuideIWS Database Interface7. Click the Browse button. The following window will display:8. Select your Excel file, and click Open.9. Select the tab All in the Data Link Properties Window.10. In the extended properties, enter the value Excel 8.0.17–38 <strong>InduSoft</strong> <strong>Web</strong> <strong>Studio</strong> v6.1 SP2
IWS Database InterfaceIWS Users Guide Note:The value in this field might change if you are using a different Excel version.11. Click OK, and you will have a connection string very similar to this one:Provider=Microsoft.Jet.OLEDB.4.0; Data Source=C:\Book1.xls;Extended Properties="Excel 8.0" Tip:You can enter a tag between curly brackets to specify the Excel file that youwant to access. In the example below, the tag TagExcelFile is used to indicatethe Excel file:Provider=Microsoft.Jet.OLEDB.4.0; DataSource=C:\{TagExcelFile}.xls; Extended Properties="Excel 8.0"12. Specify the worksheet that you want to access in the Table field. Theworksheet name should have the dollar sign ($) at the end, and it must bebetween square brackets ([]). The picture below shows the configuration toaccess a worksheet called Sheet1:<strong>InduSoft</strong> <strong>Web</strong> <strong>Studio</strong> v6.1 SP2 17–39
IWS Users GuideIWS Database Interface Tip:You can enter a tag between curly brackets to specify the worksheet name (e.g.[{TagExcelWorksheet}$]) Note:These procedures were developed based on information provided on theMicrosoft Knowledge Base Article 278973. They were tested using MicrosoftExcel 2000 (9.0.3821).Database Appendix H: Using MySQLIWS Database interface can interface with MySQL databases; however, you mustinstall the .Net provider for it in order have access. The provider required by IWS isthe ByteFX.MySqlClient. At the time that this document was written, it could bedownloaded from www.sourceforge.net.The connection string should have the following format:Provider=MySqlProv; Data Source=MyDatabaseName;Location=192.168.23.200 Note:If you have the OLE DB Provider for MySQL installed on your computer, youcan use the browse button on the Database Configuration Dialog window tobuild your connection string.17–40 <strong>InduSoft</strong> <strong>Web</strong> <strong>Studio</strong> v6.1 SP2
IWS Database InterfaceIWS Users GuideThe ByteFX.MySqlClient connection uses different keywords for the Data Sourceand for the Location parameters in the connection string. The example above ispassed to the connection class in the following format:Database=MyDatabaseName; Data Source=192.168.23.200 Note:These procedures were tested using MySQL v4.0.20a and theByteFX.MySqlClient v0.76.<strong>InduSoft</strong> <strong>Web</strong> <strong>Studio</strong> v6.1 SP2 17–41
IWS Users GuideIWS Database Interface17–42 <strong>InduSoft</strong> <strong>Web</strong> <strong>Studio</strong> v6.1 SP2
Chapter 18: <strong>Web</strong> SolutionIWS allows you to create screens that can be visualized in a remote station using aregular web browser (e.g. Internet Explorer). The station where the user canvisualize the graphical interface (screens) on the web browser is herein called the<strong>Web</strong> Thin Client.IWS is installed on the server station only. Also, the application (screen files, tagsdatabase, configuration worksheets, and so forth) is stored on the server only. Inother words, you do not need to install IWS or the application on the <strong>Web</strong> ThinClient station(s). This solution provides a high level of flexibility because anycomputer physically linked to the server station (TCP/IP link) can access thegraphical screen and online/history data from the server, without installing IWS orthe application on the <strong>Web</strong> Thin Client station(s). Any computer or device (e.g. PDAspowered with Windows CE) running Internet Explorer web browser v6.0 (or higher)can be a <strong>Web</strong> Thin Client for an IWS application. Moreover, IWS provides asophisticated Security System to prohibit unauthorized access to the application. Note:The maximum number of <strong>Web</strong> Thin Client stations connected simultaneouslyto the server depends on the settings of the license installed on the server. Theuser does not have to install any license on the <strong>Web</strong> Thin Client stations.From the <strong>Web</strong> Thin Client station, you are able not only to visualize data from theserver but also to change set points and/or send commands to the server. Whenconfiguring the application, you can (optionally) disable all commands from the <strong>Web</strong>Thin Client to the server station. In this case, the <strong>Web</strong> Thin Client stations can readdata from but cannot send any data to the server.All background tasks (Math, Scheduler and so forth) and communication tasks(Driver, OPC, DDE and so forth) are executed on the server station only. The<strong>Web</strong> Thin Client is able to load the graphical interface configured on the server(screens with objects and dynamics) and display the online values from the tagsconfigured in the server, as well as history data (Alarm, Events and Trendhistory data).<strong>InduSoft</strong> <strong>Web</strong> <strong>Studio</strong> v6.1 SP2 18–1
IWS Users Guide<strong>Web</strong> SolutionISSymbol Control LayerISSymbol is a component designed by <strong>InduSoft</strong> that is able to display the screenscreated with IWS on the web browser and exchange data (tag values and historydata) with the TCP/IP server module of IWS. On the <strong>Web</strong> Thin Client station, theweb browser (e.g. Internet Explorer) is the container that hosts the ISSymbolcontrol.ISSymbol works as a control layer between the IWS application and the web browser– equivalent to the Java Virtual Machine for Java-based applications. This approachprovides a high level of security because ISSymbol does not allow the application toaccess the operating system directly.When the web browser downloads the HTML page specified by the user, it checks forISSymbol control registration on the current computer. If it does not find it, thebrowser attempts to download registration from the URL specified in the ProjectSettings > <strong>Web</strong> > Advanced dialog. The web browser is not able to display the screensfrom the IWS application if the ISSymbol control is not properly registered in the<strong>Web</strong> Thin Client station. Caution:Make sure your web browser is enabled to download signed ActiveXcontrols, in order to download ISSymbol automatically. Otherwise, you willneed to register ISSymbol manually in the <strong>Web</strong> Thin Client station. Checkyour web browser’s documentation about security settings if you havequestions about how to configure these settings.INSTALLING THE ISSYMBOL CONTROL MANUALLYYou can also install the ISSymbol control manually in the <strong>Web</strong> Thin Client station.The procedure to install ISSymbol in each operating system is described below:Windows NT/2K/XP:– Copy the files ISSymbolReg.exe and ISSymbol.cab from the \BIN subfolderof Indusoft <strong>Web</strong> <strong>Studio</strong> v6.1 and paste them in any directory of the<strong>Web</strong> Thin Client station. Make sure that both files are stored in the samedirectory.– Run ISSymbolReg.exe to register ISSymbol control in the <strong>Web</strong> Thin Clientstation.Windows 9x/ME:– Copy the files ISSymbolReg.exe and ISSymbolA.cab from the \BIN subfolderof Indusoft <strong>Web</strong> <strong>Studio</strong> v6.1 and paste them in any directory of the<strong>Web</strong> Thin Client station. Make sure that both files are stored in the samedirectory.– Run ISSymbolReg.exe to register ISSymbol control in the <strong>Web</strong> Thin Clientstation. Caution:Windows 9x/ME do not support UNICODE characters. Therefore, UNICODEfonts will not be properly displayed on <strong>Web</strong> Thin Clients running underWindows 9x/ME.Windows CE:18–2 <strong>InduSoft</strong> <strong>Web</strong> <strong>Studio</strong> v6.1 SP2
<strong>Web</strong> SolutionIWS Users Guide– Copy the file ISSymbolCE.ocx and IndHTTP.dll from the \Redist\\\ sub-folder of Indusoft <strong>Web</strong> <strong>Studio</strong> v6.1,and paste them in any directory of the <strong>Web</strong> Thin Client station.– Execute the following command from the Prompt window: regsvrce.exe“\\ISSymbolCE.ocx” (e.g. regsvrce.exe “\StorageCard\ISSymbolCE.ocx”)– Save the registry settings to keep ISSymbolCE.ocx registered when youreboot the Windows CE device.Windows CE PocketPC:– Copy the files RegSvrCE.exe, ISSymbolCE.ocx and ndHTTP.dll from the\Redist\\\ sub-folder of Indusoft <strong>Web</strong><strong>Studio</strong> v6.1 and paste them in any directory of the <strong>Web</strong> Thin Clientstation. Make sure that both files are stored in the same directory.– Execute the RegSvrCE.exe program on the <strong>Web</strong> Thin Client device. Toregister ISSymbolCE.ocx, do the following:• Select the \\ISSymbolCE.ocx file• Select the option Register• Click the OK button Note:Internet Explorer is not able to download ActiveX controlsautomatically from Windows CE and Windows CE PocketPC. Therefore,before using Windows CE devices as <strong>Web</strong> Thin Clients, you mustregister the ISSymbolCE.ocx control manually.How it worksAfter you open the web browser, you must type the URL for one web page availablein the <strong>Web</strong> Server station (e.g. http://127.0.0.1/main.html) into the Addressfield. At this point, the <strong>Web</strong> Thin Client executes the following process:1. The web browser downloads the HTML page of the screen you specified.2. The web browser checks for ISSymbol control registration in the local computer.If it does not find it, the web browser attempts to download the ISSymbolcomponent from the URL configured in the application (settings saved in theHTML page). Since the ISSymbol control is properly registered in the <strong>Web</strong> ThinClient station, the web browser loads it.From this point on, ISSymbol takes over the communication with the serverstation, and the web browser is used only as a host for ISSymbol.3. ISSymbol connects to the data server. You configure the data server IP Addresswith the Project Settings > <strong>Web</strong> dialog window. This setting is saved in the HTMLpage.4. ISSymbol prompts a window on the <strong>Web</strong> Thin Client, asking for the User Nameand Password. The data you enter is encrypted and sent to the server. Theserver station checks the validity of the data and whether you have the rights toopen the startup screen. If so, the process continues. If not, you are promptedwith an error message indicating that the User Name and/or Password areinvalid. In this case, the process will not continue.<strong>InduSoft</strong> <strong>Web</strong> <strong>Studio</strong> v6.1 SP2 18–3
IWS Users Guide<strong>Web</strong> Solution Note:Step 4 is skipped if the Security System is disabled during theconfiguration of the application.5. ISSYmbol downloads the necessary files to display the screen specified by theuser (screen files, tags database, translation files and so forth).6. ISSymbol connects to the data server and reads the value of the tags that aredisplayed in the screen you specified.7. ISSymbol displays the screen on the web browser and keeps updating theobjects according to the values read from the server. Whenever the value of anytag displayed on the open screen(s) changes on the server, the new value is sentto the <strong>Web</strong> Thin Client (and vice-versa). Therefore, there is no pooling betweenthe <strong>Web</strong> Thin Client and the server station. This method increases thecommunication performance and optimizes the traffic in the network.Notice that there are two servers in this process:<strong>Web</strong> server (HTTP Server): Provides the files from the server to the <strong>Web</strong> Thin Clientvia HTTP protocol over TCP/IP.Data server (TCP/IP Server module from IWS): Provides tag values and/or historydata from the application running on the server to the <strong>Web</strong> Thin Clientcomputer(s).Although both servers are usually running in the same computer, IWS provides theflexibility to run each server in a different station, if necessary. See <strong>Web</strong>-basedapplication typical architectures for further information.Configuring a web-based applicationThe main steps to configure a web-based application with IWS are described below:1. Configure the web server: The web server is a HTTP server driver that is able toprovide files to remote stations via the HTTP protocol over TCP/IP. IWS supportsany web server; however, if your architecture demands the <strong>Web</strong> Gatewaydesigned by Indusoft, the web server must be IIS (Internet Information Services)from Microsoft.Configuring a web server for an IWS application is basically making sure thatthe web server is running and assigning a home directory (web root) to it.Usually, the home directory should be configured with the path for the \<strong>Web</strong>sub-folder of the application. Consult your web server’s documentation forfurther information about its configuration. Notes: <strong>InduSoft</strong> provides a web server for Windows NT/2K/XP(NT<strong>Web</strong>Server.exe) that is stored in the \BIN sub-folder of IWS afterinstallation. Furthermore, <strong>InduSoft</strong> provides a web server forWindows CE (CE<strong>Web</strong>Server.exe) that is stored in the\Redist\\ sub-folder of IWSafter installation. The home directory (web root) for the web serversprovided by <strong>InduSoft</strong> is the directory from where they are executed.Therefore, <strong>InduSoft</strong> recommends copying these web servers to the\<strong>Web</strong> sub-folder of your application before running them. NT<strong>Web</strong>Server and CE<strong>Web</strong>Server were designed primarily for simpletests and/or for demos. <strong>InduSoft</strong> recommends using third-party18–4 <strong>InduSoft</strong> <strong>Web</strong> <strong>Studio</strong> v6.1 SP2
<strong>Web</strong> SolutionIWS Users Guidecommercial <strong>Web</strong> Servers such as IIS (Internet Information Services)from Microsoft or Apache (for Linux) in real-world applications.2. Configure the web settings in the IWS application: The web settings for the IWSapplication are configured in the Project Settings > <strong>Web</strong> dialog window.3. Save the screens as HTML: The screens that should be available for the <strong>Web</strong> ThinClient stations must be saved as HTML. To do so, open the screen on thedevelopment environment and execute the File>Save as HTML command from themenu. Use the File>Save Screen Group as HTML menu option to save screen groups(*.sg) as HTML and make them available for the <strong>Web</strong> Thin Clients. After yousave any screen as HTML once, the web files for this screen are automaticallyupdated whenever it is saved again (File>Save). Tip:If you want to make all screens from your application available for the <strong>Web</strong>Thin Client stations, execute the File>Save All as HTML menu option. Caution:After changing any setting in the Project Settings dialog window and/or in theTags Database, you must execute the Tools>Verify Application command to updatethe web files with the new settings.4. Run the application on the server: Make sure the TCP/IP Server module is running onthe data server. The TCP/IP Server module is embedded in IWS, and it isautomatically executed whenever you run any application for the Windows CEoperating system. For Windows NT/2K/XP, you can configure the TCP/IP Servermodule to be executed automatically when the application is started, using theProject Status>Execution Tasks dialog. The TCP/IP Server module is the data serverfor the remote <strong>Web</strong> Thin Client station(s).5. Depending on your architecture, you may need to run the <strong>Web</strong> Gatewaydesigned by Indusoft in the web server station.Typical architecturesThis section describes the typical architectures applied for web-based solutions andprovides examples of how to configure the IWS application for each architecture.The definitions of some of the terms used in this section are described below:<strong>Web</strong> server: Software that implements the HTTP protocol (server) over TCP/IP; e.g.web server from the IIS from Microsoft.Server station: Computer or device running IWS and a web server. The IWSapplication must be stored in this computer.<strong>Web</strong> server station: Computer or device running a web server. The files from the\<strong>Web</strong> sub-folder of the application must be stored in this computer.Data server station: Computer or device running IWS. The IWS application must bestored in this computer.This section does not describe all possible architectures, but it provides theconcepts necessary to design and configure different scenarios based on the basicarchitectures illustrated below.<strong>InduSoft</strong> <strong>Web</strong> <strong>Studio</strong> v6.1 SP2 18–5
IWS Users Guide<strong>Web</strong> SolutionArchitecture 1: <strong>Web</strong> server and <strong>Web</strong> Thin Clients in the samenetworkThis is the most common architecture as well as the simplest to configure. In thisarchitecture, both the web server (e.g. IIS) and the data server (TCP/IP servermodule from IWS) are running in the same computer (server station). The <strong>Web</strong> ThinClient connects to the web server on the server station to download the HTMLscreen file. Then it connects to the data server to exchange data with IWS.Since both the <strong>Web</strong> Thin Client and the server station are connected to the samenetwork, the <strong>Web</strong> Thin Client can access the server station directly through its IPaddress (or host name).Configuration example:This example is based on the following premises: IP address of the server station on the network: 192.168.1.1Home directory of the web server (HTTP server) on the server station: \<strong>Web</strong> subfolderof the applicationYou must type the following address on the remote web browser to access a screen(e.g. myscreen) from the server: http://192.168.1.1/myscreen.htmlThe Project Settings > <strong>Web</strong> interface must be configured as follows:Project Settings > <strong>Web</strong> Interface18–6 <strong>InduSoft</strong> <strong>Web</strong> <strong>Studio</strong> v6.1 SP2
<strong>Web</strong> SolutionIWS Users Guide Note:This architecture is adopted when the server station and the <strong>Web</strong> ThinClient(s) are directly connected to the same intranet network or via adial-up connection. If the server is connected to the internet, you mustassign a Fix IP address to the server on the internet, and theapplication must be running in this computer. Consult your ISPprovider for further information about how to get a Fix IP address foryour server computer on the internet.Architecture 2: <strong>Web</strong> server and <strong>Web</strong> Thin Clients in the samenetwork; web server and data server in different stationsThis architecture is especially useful when you want to isolate the web server (HTTPserver) from the data server (TCP/IP server module from IWS). The common reasonsto adopt this architecture are:Allows you to use a standard web server station shared by several applications in the company.Some companies use one computer as the standard web server for all web-basedapplications. For physical or safety reasons, you may not want to run the actualapplication in this computer (e.g. It is far in distance from the control room).Therefore, you can run IWS and the application in another computer (dataserver station) and copy just the web files of the application (files from the \<strong>Web</strong>sub-folder of the application) to the web server station.Hosts the web pages on a web site. If you want to store the web pages on a web site(e.g. www.mycompany.com), you can upload just the web files of the application(files from the \<strong>Web</strong> sub-folder of the application) to the web site and use it asthe web server station. The application (and IWS) keeps running in anothercomputer, physically connected to the internet.Enables you to use a Linux-based web server (e.g. Apache). You do not have to install IWSon the web server station; therefore, if you want to use a web server for Linux,you can run it on the web server station and run IWS on the data server station.Hides the IP address (or host name) of the data server station from the users on the <strong>Web</strong> Thin Clientstation. In this architecture, the user has to type the URL of the web serverstation on the web browser (not the IP address of the data server station). Thismay be desirable for safety reasons.<strong>InduSoft</strong> <strong>Web</strong> <strong>Studio</strong> v6.1 SP2 18–7
IWS Users Guide<strong>Web</strong> Solution Note:It is not necessary for IWS to be installed on the web server station. Thefollowing components must be available on the web server station:– <strong>Web</strong> server (e.g. IIS from Microsoft)– Files from the \<strong>Web</strong> sub-folder of the application Tip:When you have many data server applications in your project, you canuse this architecture to share the same web server for all applications.For example, you can link the web server to the data servers via aswitch. This will keep the traffice in the data servers network fromincreasing while the <strong>Web</strong> Thin Clients are downloading files from theweb server station.In this architecture, both the web server (e.g. IIS) and the data server (TCP/IP servermodule from IWS) are running on different computers. The <strong>Web</strong> Thin Clientconnects to the web server station to download the HTML screen file. Then itconnects to the data server station to exchange data with IWS.Since all <strong>Web</strong> Thin Client, web server and data server stations are connected to thesame network, the <strong>Web</strong> Thin Client can access the server stations directly throughtheir IP addresses (or host names).Configuration Example:This example is based on the following premises: IP address of the web server station on the network: 192.168.1.1 IP address of the data server station on the network: 192.168.1.2Home directory of the web server (HTTP server) on the server station: \<strong>Web</strong> subfolderof the applicationYou must type the following address on the remote web browser to access a screen(e.g. myscreen) from the server: http://192.168.1.1/myscreen.htmlYou must configure the Project Settings > <strong>Web</strong> interface as follows:18–8 <strong>InduSoft</strong> <strong>Web</strong> <strong>Studio</strong> v6.1 SP2
<strong>Web</strong> SolutionIWS Users GuideProject Settings > <strong>Web</strong> Interface<strong>InduSoft</strong> <strong>Web</strong> <strong>Studio</strong> v6.1 SP2 18–9
IWS Users Guide<strong>Web</strong> SolutionArchitecture 3: Redundant servers and <strong>Web</strong> Thin Clientstations in the same networkThis architecture is similar to Architecture 1. But in this architecture, two serverstations with the same files run the same application in redundancy. The <strong>Web</strong> ThinClient connects to the server specified by the user in the address field of the webbrowser. If this server goes down for any reason (e.g. power failure), the <strong>Web</strong> ThinClient switches to the other server station automatically.This architecture is recommended when it is necessary a high level of availability forthe <strong>Web</strong> Thin Client stations. In other words, even if one Server Station goes down,the <strong>Web</strong> Thin Client stations are able to get data from the other Server Station.Configuration Example: This example is based on the following premises: IP address of server station #1 on the network: 192.168.1.1 IP address of server station #2 on the network: 192.168.1.2Home directory of the web server (HTTP server) on server station #1: \<strong>Web</strong> subfolderof the application stored on server station #1.Home directory of the web server (HTTP server) on server station #2: \<strong>Web</strong> subfolderof the application stored on server station #2.The user must type the following address on the remote web browser to access ascreen (e.g. myscreen) from server station #1:http://192.168.1.1/myscreen.htmlThe user must type the following address on the remote web browser to access ascreen (e.g. myscreen) from server station #2:http://192.168.1.2/myscreen.htmlThe Project Settings > <strong>Web</strong> interface must be configured as follows: Tip:It is possible to configure two data servers that share the same webserver. Just apply the concepts described in both Architectures 2 and 3.18–10 <strong>InduSoft</strong> <strong>Web</strong> <strong>Studio</strong> v6.1 SP2
<strong>Web</strong> SolutionIWS Users GuideProject Settings > <strong>Web</strong> InterfaceAdvanced Dialog Window<strong>InduSoft</strong> <strong>Web</strong> <strong>Studio</strong> v6.1 SP2 18–11
IWS Users Guide<strong>Web</strong> SolutionArchitecture 4: <strong>Web</strong> server and <strong>Web</strong> Thin Clients in differentnetworksThis architecture is common when the <strong>Web</strong> Thin Clients are connected to the servervia the internet. Usually, the data server computer (computer where the IWS isrunning) is not directly connected to the internet. In this case, the data servercomputer does not have an IP address on the internet. Therefore, it cannot beconnected directly through the internet. The <strong>Web</strong> Tunneling Gateway (WTG),developed by <strong>InduSoft</strong>, provides the routing capabilities to solve this problem.The WTG must be installed in the computer with the Fix IP Address on the internet(consult your ISP provider for further information about how to get a Fix IP Addressfor your computer on the internet). This computer must have the Microsoft IIS webserver installed and running. The WTG is an ISAPI extension for IIS.Follow the procedure below to install the WTG on the web server computer:Copy the <strong>Web</strong>Gtw.exe file from the \BIN sub-folder of IWS into any directory ofthe web server computer.Execute the <strong>Web</strong>Gtw.exe file on the web server computer.The WTG works as a router between the <strong>Web</strong> Thin Clients (connected to theinternet) and the data server computer (connected to the intranet). The same WTGcan route information for more than one data server simultaneously. Note:The computer directly connected to the internet (where the WTG isrunning) is the web server for the application; therefore, the files fromthe \<strong>Web</strong> sub-folder of the application must be stored in this computer.Configuration example:This example is based on the following premises: IP address of the web server station (internet): 200.0.0.1 IP address of the web server station (intranet): 192.168.1.118–12 <strong>InduSoft</strong> <strong>Web</strong> <strong>Studio</strong> v6.1 SP2
<strong>Web</strong> SolutionIWS Users Guide IP address of the data server station on the intranet: 192.168.1.2Home directory of the web server (HTTP server) on the web server station: \<strong>Web</strong>sub-folder of the application stored on the web server station.The user must type the following address on the remote web browser to access ascreen (e.g. myscreen) from the <strong>Web</strong> Server Station:http://200.0.0.1/myscreen.htmlThe Project Settings > <strong>Web</strong> interface must be configured as follows:Project Settings > <strong>Web</strong> InterfaceAdvanced Dialog Window<strong>InduSoft</strong> <strong>Web</strong> <strong>Studio</strong> v6.1 SP2 18–13
IWS Users Guide<strong>Web</strong> Solution Note:If your web server is able to provide files via HTTPS (SSL – SecureSocket Layer), you can select this option on the Advanced dialogwindow from the Project Settings > <strong>Web</strong> interface. Tip:The WTG encapsulates the protocol implemented by the TCP/IP servermodule of IWS into HTTP (or HTTPS when the SSL option is selected).By this way, it is not necessary to open an additional TCP Port on thefirewall between the web server and the <strong>Web</strong> Thin Clients. The sameport used by the web server (HTTP or HTTPS) is used by IWS dataprotocol.18–14 <strong>InduSoft</strong> <strong>Web</strong> <strong>Studio</strong> v6.1 SP2
Chapter 19: TroubleshootingIf you do find yourself in need of technical assistance, there are certain things thatyou will need to know before you contact technical support. Regardless of theproblem, you will need to know the sequence of events that led to you discoveringthe problem. It must be explained in as much detail as possible and you should becareful not to ad-lib, as it may drastically affect troubleshooting time andprocedures. It's also best to be in front of the computer you are having problemswith, and to keep a pen and paper handy.Before Contacting Technical SupportSome things you should try before you contact technical support are:Check out the documentationCheck the Help files of your product for more information on your issue. Helpcan be found on the menu bar within the application. For online documentationincluding Release Notes and downloads, see the IWS web site (www.<strong>InduSoft</strong>.com).You may find that your particular issue has already been documented.Consider recent changes on your systemIf something used to work, think about what may have changed. New softwareinstallation or general system changes can affect performance and generalfunctionality of other software on your system.Try reproducing the problem in a new fileIf the problem can not be reproduced in a new test file, compare the new file withyour original file to find and eliminate the differences. This will help narrowdown the cause of the issue.Try reproducing the problem on another machineIf the problem goes away on another machine, compare what is different betweenthe two systems. If this is the case, there is most likely a system conflict.If you cannot find an answer to your technical question in the productdocumentation or help system, our Technical Support Specialists are available toassist any customer with current product maintenance.Please try to define the problem before you contact Technical Support so that youcan repeat the steps that led to the problem and specifically identify when and howthe problem occurred. The support representative will need to know exactly what theproblem is in order to provide help. These steps will help us pinpoint and solve yourproblem more quickly.Please have the following information available:Hardware environment—available memory, processor type, output deviceSoftware environment—operating system, version of Windows®, networkplatformProduct name, version number, and product registration numberAmount of memory installed on your systemAmount of free hard disk space on your system Screen resolution (screen size in pixels, for example, 1024 by 768)<strong>InduSoft</strong> <strong>Web</strong> <strong>Studio</strong> v6.1 SP2 19–1
IWS Users GuideTroubleshootingScreen color depth (number of colors or bits, for example, 256 colors or 8-bitcolor)Graphics card manufacturer, model name, and driver version numberSound card manufacturer and model nameA list of external devices connected to the computerBrief description of the problem or error, and the specific text of any errormessagesDescription of the steps you have taken to troubleshoot the issue, for example,how many machine have you tested on, and is the issue reproducible in a newfileSteps to reproduce the issue, if it is reproducible. If the issue is not reproducible,it may be an development issue rather than an issue with the product.If your application crashes completely during runtime, it will generate adebugger report and save it to:\<strong>Web</strong>\Dump\WindDump.dmpPlease have this file ready to send to Technical Support for analysis.If your problem or question is not urgent, you may choose to email technicalsupport. Email sent to support is answered daily (support@<strong>InduSoft</strong>.com).If you require additional assistance while using <strong>InduSoft</strong> <strong>Web</strong> <strong>Studio</strong> or this servicepack, the following resources are available by telephone at 877-INDUSOFT(877-463-8763)Related IWS Publications:<strong>InduSoft</strong> <strong>Web</strong> <strong>Studio</strong> Getting Started Guide: Designed for first-time users, thispublication contains information about the basic functions of <strong>InduSoft</strong> <strong>Web</strong><strong>Studio</strong>. This publication is provided in the Documentation folder on the IWSCD-ROM or from the Help menu located on the main menu bar.Using the Help Menu– Technical Reference: Opens the Context Sensitive Help.– User Guide: Opens the User Guide Manual.<strong>InduSoft</strong> <strong>Web</strong> <strong>Studio</strong> Technical Reference Manual: Describes all the features andtools that comprise the IWS development environment and provides detailedinstructions for using the product. This publication is provided in theDocumentation folder on the IWS CD-ROM or from the Help menu on the mainmenu bar.Drivers User Guides: Explain how to configure individual <strong>InduSoft</strong> drivers,according to their unique protocol characteristics. One customized user guide isincluded with each <strong>InduSoft</strong> driver. These publications are provided in the DRV19–2 <strong>InduSoft</strong> <strong>Web</strong> <strong>Studio</strong> v6.1 SP2
TroubleshootingIWS Users Guidesubdirectory of the <strong>InduSoft</strong> <strong>Web</strong> <strong>Studio</strong> folder on the IWS CD-ROM or from theHelp menu located on the main menu bar.Visit the <strong>InduSoft</strong> <strong>Web</strong> Site at www.<strong>InduSoft</strong>.com.Verifying Your ApplicationFrom the menu bar, select Tools > Verify Application to recompile Math worksheets,recompile screen logic, and update current HTML files using the settings configuredon the <strong>Web</strong> tab (Project Settings dialog). Tags in the database are remapped to allworksheets and screens.You need to verify your application if you delete/change/reorder any tags in theTags database or fields in the Project Settings <strong>Web</strong> tab. Verifying your applicationrealigns all the driver worksheets and screens to the current state of your tagdatabase.Verifying an Application Tip:When you save a screen or worksheet, IWS includes a pointer to the currentdatabase version. When you execute the application, IWS compares the screenor worksheet database to the current application database and if there is amismatch, IWS recompiles the expressions.To avoid doing these tasks during application runtime, we recommend runningthe Verify Application function before downloading and/or finishing an application.You also should use this function when converting an application to a newversion of the program.Common ErrorsListed below are answers to frequently asked questions about <strong>InduSoft</strong> <strong>Web</strong> <strong>Studio</strong>.Database & Security SystemWhat does the Shared Tags folder store?The Shared Tags folder stores the tags imported from the PC Based Controllinked to the IWS application. The PC Based Control is linked to the IWSapplication by the New Project wizard.How do I count how many tags are configured in the application database?From the menu bar, select Project Status, and then the Information tab to calculatethe amount of tags configured in the application. Each array position and eachclass member of the tags configured in the IWS tag database are counted.<strong>InduSoft</strong> <strong>Web</strong> <strong>Studio</strong> v6.1 SP2 19–3
IWS Users GuideTroubleshootingHow do I see the list of “Users” I’ve added during runtime in my application that Ihave created with the CreateUser() function?Execute the following command: “\BIN\<strong>Studio</strong> Manager.exe”“\BIN\ExtUser.dll” (for example: “E:\ProgramFiles\<strong>Studio</strong>\BIN\<strong>Studio</strong> Manager.exe” “E:\ProgramFiles\<strong>Studio</strong>\BIN\ExtUser.dll”). This command will launch a dialog window.You can see the users created by the CreateUser() function, and you can thencreate or delete users.GraphicsHow do I insert and configure an ActiveX object in a <strong>Studio</strong> application?To insert an ActiveX object in an IWS application:– Select the menu option Insert ActiveX object… or press the ActiveX Controlbutton from the Active Objects toolbar.– Select the ActiveX object to be inserted in the application from the list box,and press the OK button. The ActiveX object will then appear on the screen.(Unregistered ActiveX objects will not be available in this list box.)– Double-click on the ActiveX object and assign a name to it (enter a value inthe Name field). The dynamic properties and methods list can be viewed byselecting the Methods button. The static properties can be set by the Propertiesbutton (A detailed description about the objects properties can be found inthe component documentation, provided by the component developer).There are three functions to access the ActiveX component during runtime:– XGet(strName,strProperties): Returns the value of the properties from the object . The list of properties whichcan be read from the object are listed in the Methods dialog from the object,with the syntax (PropGet) (for example,Color(PropGet)).– XSet(strName,strProperties,Value): Writes the value to theproperties of the object . The list of propertieswhich can be set to the object are listed in the Methods dialog from theobject, with the syntax (PropPut) (for example,Color(PropPut)).– XRun(strName, strMethod, Parameter1, Parameter2, …, ParameterN): Executes the method from the object , according to the parameters, , …, . The list of methodsavailable in the object is listed in the Methods dialog from the object, with thesyntax (Method) (for example, OpenFile(Method)). Tip:Before inserting an ActiveX component (usually an OCX file) into the IWSapplication, make sure it has been properly registered in the computer. It’spossible to register an ActiveX object by IWS. Select the menu optionTools > Register Controls, press the Register… button and select the ActiveX file(usually an OCX file) that must be registered.19–4 <strong>InduSoft</strong> <strong>Web</strong> <strong>Studio</strong> v6.1 SP2
TroubleshootingIWS Users Guide Note:The amount of parameters set in the XRun() function can vary from 0 upto 255 and it depends each the ActiveX component. It’s possible to usetags to set the parameters; however, the tag type must match thecomponent parameter type (Boolean, integer, string or real).How do I designate one screen that will open each time I start the application?Open the Project Settings dialog window by the Project Settings menu, select theRuntime Desktop tab, and type the startup screen name in the Startup screen field.How do I insert a background picture on the screen?Right click on the screen and select the option Screen Attributes from the popupmenu. Enable the check-box Enable Background and choose the picture format inthe combo-box besides this label. Copy the picture file to the \Screen folder ofthe application and rename it with the same name of the screen(.scr file). Using the Shared image option, it’s possible to copy abitmap file to the \Screen folder and share this picture with more than onescreen. In this case, it’s necessary to type the bitmap name in the Share imagefield.TasksHow do I convert the History Trend to an ASCII file?To convert a History Trend file to an ASCII format, copy the file"\bin\hst2txt.exe" to the path "\\hst\".Alternatively, you can use the HST2TXT function in a Math worksheet to convertbinary files into text format automatically without having to use a DOS window.How do I exchange data with FOX Pro by an ODBC protocol?When exchanging data with FOX Pro database, it’s necessary to set theparameter UseQuote=0 from the [ODBC] section in the .appfile.How do I set a DATE field for an ODBC interface with an Oracle package?Configure the “Column” cells in the IWS ODBC worksheet with the syntax.ts (for example: MyDate.ts).How do I execute a Math worksheet during the startup and another Math worksheetduring the application shutdown?Startup: Execute a Math worksheet during the startup by creating a Mathworksheet and filling in its Execution field with the expression =0 (forexample, StartTag=0). In the last line of the Math worksheet, set the value 1 tothe tag. The tag type should be Boolean.Shutdown: Instead of executing the ShutDown() function directly, execute oneMath worksheet and configure the ShutDown() function in the last line of thisMath worksheet.<strong>InduSoft</strong> <strong>Web</strong> <strong>Studio</strong> v6.1 SP2 19–5
IWS Users GuideTroubleshootingCommunicationHow do I address timeout errors?A timeout error (error 1234) typically indicates that runtime instructions are notarriving at the connected PLC. To address the error, you can do the following:– Verify that the selected driver’s communication parameters match the PLCspecifications. (See Configuring a Driver on page 10–2.)– Verify the PLC’s station number and make sure it is properly configured inthe Station field of the driver worksheet. (See Configuring the Driver Worksheetson page 10–9.)– Ensure that all wiring is securely connected and the PLC is set to run.How do I set a “communication error” alarm?Configure a tag in the fields “Write Status” or “Read Status” of the driver worksheetsand configure an alarm whenever this tag is different of 0 (zero).How do I communicate with a Siemens S7-200 PLC without using Prodavesoftware?Siemens S7-200 PLC has a Freeport that can implement any protocol via PLCprogramming. There is PLC free software distributed by Siemens thatimplements Modbus protocol in the PLC Freeport (for further details contactSiemens support). Using this software in the PLC and <strong>Studio</strong> Modbus driver(MODBU) you can exchange information between them.How do I start and stop communication drivers during the runtime?There are three functions available to handle the execution of thecommunication drivers during the runtime:– Start all drivers configured in the application:Syntax: StartTask(“Driver”)For example, StartTask(“Driver”)– Start a specific driver configured in the application:Syntax: WinExec(“\bin\<strong>Studio</strong>Manager.exe”+ “+“\bin\Driver.dll”+ “+ “”)For example, WinExec(Asc2Str(34)+“C:\Program Files\<strong>InduSoft</strong> <strong>Web</strong><strong>Studio</strong>\BIN\<strong>Studio</strong> Manager.exe+Asc2Str(34)+” “+Asc2Str(34)+“C:\Program Files\<strong>InduSoft</strong> <strong>Web</strong> <strong>Studio</strong>\BIN\Driver.dll”+Asc2Str(34)+” “+Asc2Str(34)+ “MODBU”+Asc2Str(34)) Note:The Asc2Str(34) function is used to concatenate quotation marks forpaths where there are space chars.– Stop a specific driver configured in the application:Syntax: EndTask(“Driver”)For example, EndTask(“DriverMODBU”) Tip:You can start or stop other tasks using the StartTask()and EndTask() functions.19–6 <strong>InduSoft</strong> <strong>Web</strong> <strong>Studio</strong> v6.1 SP2
TroubleshootingIWS Users GuideFor example, StartTaks(“Viewer”), Endtask(“Viewer”). Caution:The drivers and tasks cannot be started or stopped during the runtimewhen running CEView (under the WinCE operating system).<strong>InduSoft</strong> <strong>Web</strong> <strong>Studio</strong> v6.1 SP2 19–7
IWS Users GuideTroubleshootingWhat are the parameters of <strong>Studio</strong> DDE Server?The <strong>Studio</strong> DDE Server and NetDDE Server parameters are shown in the tablebelow:Comm. Type Application Topic ItemNetwork DDE //\NDDE$ UNISOFT$ Local DDE UNIDDE DB How to exchange data with Excel by using NetDDE?NetDDE can be used to exchange data, via the DDE protocol, between networkedstations.– Start the DDEServer module from <strong>Studio</strong> (Project > Status > DDE Server)– Run Excel in the remote station– Open a Excel worksheet and fill the cells which must exchange data with<strong>Studio</strong> using the following syntax: ='\\\NDDE$'|'UNISOFT$'!For example, ='\\PC\NDDE$'|'UNISOFT$'!second Notes: When running under Windows NT or Windows2000, it is necessary tomake sure that the services Network DDE and Network DDE DSDM arestarted. (Use the Services shortcut from Control Panel to start theseservices). When running under Windows 98, it is necessary to run the program\netdde.exe in both computers (for example,c:\Windows\netdde.exe).Is the <strong>Studio</strong> OPC interface compliant with OPC specification v1.0a or v2.0?<strong>Studio</strong> OPC Client and OPC Server modules are compliant with both OPCspecification v1.0a and v2.0.General TroubleshootingWhat operating systems are compatible with <strong>Studio</strong> and CEView?See table below. The symbol “” means that the operating system is NOTsupported and the symbol “” means that the operating system is supported.Operating System <strong>Studio</strong> CEViewName Version v2.xv3.x andv4.1v4.2 orhigherv3.x V4.x V5.xWindows XP Any Windows 2000 Any Windows NTV4.0+SP4 orhigher Windows ME Any Windows 98 Any Windows 95 Any 19–8 <strong>InduSoft</strong> <strong>Web</strong> <strong>Studio</strong> v6.1 SP2
TroubleshootingIWS Users GuideOperating System <strong>Studio</strong> CEViewName Version v2.xWindows CEWindows CE.netv3.x andv4.1v4.2 orhigherv3.x V4.x V5.xV2.12 V3.x V4.0 V4.1 V4.2 How do I start IWS automatically when the computer is powered on?Create a shortcut to the …\\bin\RunStartUp.exe in the Startupfolder from the Programs group (…\WINNT\Profiles\All Users\StartMenu\Programs\Startup\).How to disable Dr. Watson?The procedure step-by-step to disable Dr. Watson under Windows NT isdescribed below:– Execute the program \RegEdit.exe (for example,C:\WinNT\Regedit.exe)– Select the path HKEY_LOCAL_MACHINE\SOFTWARE\Microsoft\WindowsNT\CurrentVersion\AeDebug– Set the value 0 (zero) to the parameter “Auto” from the path selected.– Close the Registry Editor window. Caution:Special cautions must be taken when editing parameters in the Registry Editorprogram because some of them can modify the overall behavior of theoperating system.There are two ways to modify the data format in IWS:– Off-Line: Set the parameters Order= (for example, DMY) andSeparator= (for example, / or .) from the [International]section from the \\Local Settings\ApplicationData\<strong>InduSoft</strong> <strong>Web</strong> <strong>Studio</strong> v6.1\Program Settings.ini file. Note:You will need to verify your application to apply date settings topreviously saved <strong>Web</strong> pages.– On-Line: Use the function SetDateFormat(,). For example, SetDateFormat(“/”,”MDY”).What features are not supported by CEView?The main features not supported by CEView are: DDE, NetDDE, ODBC,PasteLink, and a number of functions.How do I show a splashwindow when starting an application in CEView?To enable your CE application to show a splash window during startup, add thefollowing key to the device’s CEView.ini file:<strong>InduSoft</strong> <strong>Web</strong> <strong>Studio</strong> v6.1 SP2 19–9
IWS Users GuideTroubleshooting[OEM]SpashWnd = // default is Splash.bmpSplashWndTime = // default is 100019–10 <strong>InduSoft</strong> <strong>Web</strong> <strong>Studio</strong> v6.1 SP2
TroubleshootingIWS Users GuideWhat are the main steps to create a web based application?Follow the procedure below:– Develop the application locally. Don’t use features which are not supportedby <strong>Web</strong> Thin Clients for the screens which will be saved as HTML format.– After saving the screens in the standard format (File > Save), save the screenswhich must be available for the <strong>Web</strong> Thin Client in HTML format by themenu File > Save as HTML.– Open the Project Settings dialog window (menu Project > Settings) and select the<strong>Web</strong> tab.– Configure the field Data Server IP with the IP address of the Server station(station where <strong>Studio</strong> is running).– Open the Project Status dialog window (menu Project > Status), select theExecution Tasks tab and set the TCP/IP Server module as Startup=Automatic.– Open the application tags database and set the option Server instead of Localin the <strong>Web</strong> Data column for all tags which must exchange value between theServer and the <strong>Web</strong> Thin Client station.– Execute the command Tools > Verify Application to update the Project Settings in theHTML files.– If there is not any <strong>Web</strong> Server running in the computer, copy the programNT<strong>Web</strong>Server.exe from the \BIN folder of <strong>Studio</strong> into the web root (forexample, \\<strong>Web</strong>) and execute it. The path where this<strong>Web</strong> Server program is executed will be the web root of the station. The <strong>Web</strong>Server is necessary to export data (web files) in HTTP protocol to the <strong>Web</strong>Thin Clients.– Execute the application in the Server station.– Using a browser (for example, Internet Explorer v4.1+SP1 or newer version)in the <strong>Web</strong> Thin Client station, type the URL address to download the screenwhich had been saved in HTML format (for example,http:/// .html). Note:The <strong>Web</strong> Thin Client requires an ActiveX component (ISSymbol.ocx) tohandle the screens on the browser. If the <strong>Web</strong> Thin Client is connected tothe Internet, this component is downloaded and registered automatically.Otherwise, it’s necessary to copy it to the \\System32 directoryof the <strong>Web</strong> Thin Client and register it by the command regsvr32ISSymbol.ocx. This file can be found in the \BIN folder from the IWSinstallation directory.<strong>InduSoft</strong> <strong>Web</strong> <strong>Studio</strong> v6.1 SP2 19–11
IWS Users GuideTroubleshootingHow do I send an email from the IWS application?Follow the procedure below:– Execute the function CNFEMail(strSMTP,strFrom,strPOP3,strUser,strPassword,numTimeOut) to configure the overall parameters used to sendemails. After executing this function once, the parameters set by it are keptin the system until the application is shut down. So, most of applicationexecute this function just once, after starting the application;– Execute the function SendEMail(strSubject,strMessage,strTO) and/orSendEMailExt(strSubject,strMessage,strTO,strCC,strBCC,strFile1,...,strFileN) each time that an email message must be sent.The main difference between both functions are listed in the next table:Characteristic SendEmail() function SendEmailExt() functionExecution Synchronous AsynchronousSupports Subject text Supports Message text Supports TO addresses Supports CC addresses Supports BCC addresses Supports attached files The runtime task (TCP/IP, OPC, DDE, ODBC, etc) does not work.Make sure the runtime task is set to as Automatic in the Execution Tasks tab fromthe Project Status dialog window (Project > Status menu). Select the runtime taskswhich must be executed (for example, TCP/IP Server), hit the Startup… button andset it as Automatic.The Browser from the <strong>Web</strong> Thin Client does not display the screen and launches awarning message regarding ISSymbol.ocx.Make sure the runtime task is set to Automatic in the Execution Tasks tab from theProject Status dialog window (Project > Status menu). Select the runtime tasks whichmust be executed (for example, TCP/IP Server), hit the Startup… button and set itas Automatic.The Browse of the <strong>Web</strong> Thin Client launches an error message missing theISSymbol.ocx and does not display the screens from the Server.Issymbol.ocx is the IWS ActiveX object used by the browser from the <strong>Web</strong> ThinClient to view the web pages. If the <strong>Web</strong> Thin Client is connected to the Internet,the ISSymbol.ocx control is automatically downloaded and registered in the<strong>Web</strong> Thin Client station. Otherwise, it’s necessary to copy it to the\WinNT\System32 folder of the <strong>Web</strong> Thin Client station and register it manually.Once it is registered your browser will be able to see the pages. Note:Use the command regsvr32 ISSymbol32.ocx to register the ActiveXcomponent in the <strong>Web</strong> Thin Client.The screens are shown on the <strong>Web</strong> Thin Client (Browser); however, the data (tagsvalues) are not read from the Server.19–12 <strong>InduSoft</strong> <strong>Web</strong> <strong>Studio</strong> v6.1 SP2
TroubleshootingIWS Users GuideMake sure the parameter in the column <strong>Web</strong> Data from the application tagsdatabase is set as Server instead of Local. The tags set as Server keep the samevalue in the Server and in the <strong>Web</strong> Thin Client (Browser). The tags set as Localhave independent values in the Server and in the <strong>Web</strong> Thin Client (Browser). Caution:It’s necessary to execute the command Tools > Verify application after modifyingthe tags settings. Otherwise, the changes will not be updated in the webfiles.The “On Up” expressions configured in the Command dynamic are not executed.The “On Up” expressions from the Command dynamic are not executed if the mousepointer is dragged out the object area before releasing it. If the check-box Releasefrom the Command Object Properties window is enabled, the On Up expression isexecuted even if the mouse pointer is dragged out the object area beforereleasing it.The Trend History does not work after adding or removing tags in the Trendworksheet.When a tag is inserted or removed FROM a Trend worksheet, the format of thehistory files (*.hst) is modified. The same .hst file cannot have two differentformats; otherwise, the data will not be retrieved from it properly by the Trendobject. If you need to add or remove tags for history files, there are two validprocedures: Create a new Trend worksheet or delete the old *.hst files.The value of indirect tags (@ ) is not shown in the web thin clientapplication.When a screen is saved as HTML, <strong>Studio</strong> saves a .tagl file in the\WEB subfolder. This file has the list of all tags configured in the screen (objectsand dynamics). When a screen is opened in the <strong>Web</strong> Thin Client browser, thetags listed in the .tagl are “enabled” for TCP/IP communicationwith the server station. It provides an optimized communication between theserver station and the <strong>Web</strong> Thin Client stations.When using indirect tags in this way (@), the tags pointed will notexchange data with the Server, unless they had been configured in the screen. Inother words, the tags that will be pointed in the screen MUST be configured inany object of the screen to enable the TCP/IP communication for these tags withthe server station. Tip:Add a transparent rectangle (no fill and no line) in the screen corner. Applythe Command dynamic to this rectangle and configure the tags (which can bepointed by indirect tags during the runtime in the <strong>Web</strong> Thin Client station) inthe Expression fields (keep the Tag Name fields blank). These tags will be added tothe .TAGL file and they will be available for TCP/IPcommunication with the Server station.<strong>InduSoft</strong> <strong>Web</strong> <strong>Studio</strong> v6.1 SP2 19–13
IWS Users GuideTroubleshootingWhich functionalities are not supported by Pocket PC platforms (for example, IPaq,Cassiopeia, Jornada)?WinCE devices powered Pocket PC do not support some functionality which aresupported by WinCE devices powered by the “standard” Windows CE version:Functionality not supported by Pocket PC devicesDCOM (Distributed Component Object Model): It means that all features based on DCOM (for example,remote OPC communication) are not supported by PocketPC devices.DialGetClientIP() function does not work for Pocket PC devicesHow do I enable the “Hibernate” options from the operating system after installingIWS on a notebook?Follow the procedure below:– Run the Registry Editor (\Run\regedit).– Select the following path from the Registry Editor:HKEY_LOCAL_MACHINE\System\CurrentControlSet\Services\Proteq\Parameters– The IoPortAddress parameter from the path mentioned above is set with thehexadecimal value: 0x00000111. Set this parameter with the hexadecimaladdress of the LPT1 parallel port of your notebook (for example,0x00000378).– Close the Registry Editor and reboot the computer. Tip:The Hexadecimal address of the LPT1 parallel port of the notebook can begotten from the Control Panel (System\Hardware\Device Manager\Ports(COM & LPT)\Printer Port (LPT1)\Properties\Resources). Pick theinitial address of the I/O Range. Usually it is the hexadecimal address0x00000378.19–14 <strong>InduSoft</strong> <strong>Web</strong> <strong>Studio</strong> v6.1 SP2
Appendix A. <strong>InduSoft</strong> <strong>Web</strong> <strong>Studio</strong> FunctionsThis chapter contains tables and information describing the different functionsavailable with <strong>InduSoft</strong> <strong>Web</strong> <strong>Studio</strong> and CEView.Log Message Functions Execution NT/2K/XP Win CE <strong>Web</strong> ClientTrace Synchronous Arithmetic Functions Execution NT/2K/XP Win CE <strong>Web</strong> ClientAbs() Synchronous Div() Synchronous Format() Synchronous GetBit() Synchronous Mod() Synchronous Pow() Synchronous ResetBit() Synchronous Round() Synchronous SetBit() Synchronous SQRT() Synchronous Swap16() Synchronous Swap32() Synchronous Trunc() Synchronous Statistical Functions Execution NT/2K/XP Win CE <strong>Web</strong> ClientAve() Synchronous Max() Synchronous Min() Synchronous Rand() Synchronous <strong>InduSoft</strong> <strong>Web</strong> <strong>Studio</strong> v6.1 SP2 A-1
IWS Users Guide<strong>Studio</strong> FunctionsLogarithmic Functions Execution NT/2K/XP Win CE <strong>Web</strong> ClientExp() Synchronous Log() Synchronous Log10() Synchronous Logical Functions Execution NT/2K/XP Win CE <strong>Web</strong> ClientFalse() Synchronous If() Synchronous Toggle() Synchronous True() Synchronous String Functions Execution NT/2K/XP Win CE <strong>Web</strong> ClientAsc2Str() Synchronous CharToValue() Synchronous CharToValueW() Synchronous ClassMembersToStrVector() Synchronous Ncopy Synchronous Num() Synchronous Str() Synchronous Str2Asc() Synchronous StrGetElement() Synchronous StrLeft() Synchronous StrLen() Synchronous StrLower() Synchronous StrRChr() Synchronous StrRight() Synchronous StrSetElement() Synchronous StrStr() Synchronous StrStrPos() Synchronous StrTrim() Synchronous A-2 <strong>InduSoft</strong> <strong>Web</strong> <strong>Studio</strong> v6.1 SP2
<strong>Studio</strong> FunctionsIWS Users GuideString Functions Execution NT/2K/XP Win CE <strong>Web</strong> ClientStrTrimAll() Synchronous StrUpper() Synchronous ValueToChar() Synchronous ValueWToChar() Synchronous Date & Time Functions Execution NT/2K/XP Win CE <strong>Web</strong> ClientClockGetDate() Synchronous ClockGetDayOfWeek() Synchronous ClockGetTime() Synchronous DateTime2Clock() Synchronous GetClock() Synchronous Hour2Clock() Synchronous SetSystemDate() Synchronous SetSystemTime() Synchronous Trigonometric Functions Execution NT/2K/XP Win CE <strong>Web</strong> ClientAcos() Synchronous Asin() Synchronous Atan() Synchronous Cos() Synchronous Cot() Synchronous Pi() Synchronous Sin() Synchronous Tan() Synchronous Opening and ClosingWindows FunctionsExecution NT/2K/XP Win CE <strong>Web</strong> ClientClose() Asynchronous Open() Asynchronous OpenPrevious() Asynchronous <strong>InduSoft</strong> <strong>Web</strong> <strong>Studio</strong> v6.1 SP2 A-3
IWS Users Guide<strong>Studio</strong> FunctionsA-4 <strong>InduSoft</strong> <strong>Web</strong> <strong>Studio</strong> v6.1 SP2
<strong>Studio</strong> FunctionsIWS Users GuideSecurity Functions Execution NT/2K/XP Win CE <strong>Web</strong> ClientBlockUser() Synchronous CreateUser() Synchronous GetUserNames() Synchronous GetUserPwdAging() Synchronous GetUserState() Synchronous RemoveUser() Synchronous SetPassword() Synchronous UnblockUser() Synchronous Module Activity Functions Execution NT/2K/XP Win CE <strong>Web</strong> ClientAppActivate() Asynchronous AppIsRunning() Synchronous AppPostMessage() Synchronous AppSendKeys() Synchronous CleanReadQueue() Synchronous CloseSplashWindow() Synchronous EndTask() Asynchronous ExitWindows() Asynchronous IsScreenOpen() Synchronous IsTaskRunning() Synchronous IsViewerInFocus() Synchronous KeyPad() Asynchronous LogOff() Asynchronous LogOn() Asynchronous Math() Synchronous PostKey() Synchronous Recipe() Synchronous Report() Synchronous <strong>InduSoft</strong> <strong>Web</strong> <strong>Studio</strong> v6.1 SP2 A-5
IWS Users Guide<strong>Studio</strong> FunctionsModule Activity Functions Execution NT/2K/XP Win CE <strong>Web</strong> ClientRunVBScript() Synchronous SendKeyObject() Synchronous SetAppPath() Synchronous SetKeyboardLanguage() Synchronous SetViewerInFocus() Synchronous SetViewerPos() Synchronous ShutDown() Synchronous StartTask() Asynchronous ViewerPostMessage() Asynchronous Wait() Synchronous WinExec() Asynchronous WinExecIsRunning() Synchronous File Functions Execution NT/2K/XP Win CE <strong>Web</strong> ClientDeleteOlderFiles() Synchronous DirCreate() Synchronous DirDelete() Synchronous DirLength() Synchronous DirRename() Synchronous FileCopy() Synchronous FileDelete() Synchronous FileLength() Synchronous FileRename() Synchronous FileWrite() Synchronous FindFile() Synchronous FindPath() Synchronous GetFileAttributes() Synchronous GetFileTime() Synchronous GetHstInfo() Synchronous A-6 <strong>InduSoft</strong> <strong>Web</strong> <strong>Studio</strong> v6.1 SP2
<strong>Studio</strong> FunctionsIWS Users GuideGetLine() Synchronous Hst2Txt() Asynchronous Hst2TxtIsRunning() Synchronous Print() Asynchronous RDFileN() Synchronous Graphic Functions Execution NT/2K/XP Win CE <strong>Web</strong> ClientPrintSetup() Asynchronous PrintWindow() Asynchronous RGBColor() Synchronous RGBComponent() Synchronous Translation Functions Execution NT/2K/XP Win CE <strong>Web</strong> ClientExt() Synchronous SetTranslationFile() Synchronous Multimedia Functions Execution NT/2K/XP Win CE <strong>Web</strong> ClientPlay() Synchronous/Asynchronous System Info. Functions Execution NT/2K/XP Win CE <strong>Web</strong> ClientDbVersion() Synchronous GetAppHorizontalResolution() Synchronous GetAppPath() Synchronous GetAppVerticalResolution() Synchronous GetComputerIP() Synchronous GetComputerName() Synchronous GetFreeMemoryCE(optnumType) Synchronous GetHardKeyModel() Synchronous GetHardKeySN() Synchronous GetIPAll() Synchronous GetMemoryCE(optnumType) Synchronous <strong>InduSoft</strong> <strong>Web</strong> <strong>Studio</strong> v6.1 SP2 A-7
IWS Users Guide<strong>Studio</strong> FunctionsSystem Info. Functions Execution NT/2K/XP Win CE <strong>Web</strong> ClientGetNetMACID() Synchronous GetOS() Synchronous GetPrivateProfileString() Synchronous GetProductPath() Synchronous GetRegValue() Synchronous GetRegValueType() Synchronous GetScrInfo() Synchronous GetServerHostName Synchronous GetTickCount() Synchronous InfoAppAlrDir() Synchronous InfoAppHSTDir() Synchronous InfoDiskFree() Synchronous InfoResources() Synchronous IsActiveXReg() Synchronous KeyPad() Asynchronous NoInputTime() Synchronous ProductVersion() Synchronous RegSaveCE() Synchronous SaveAlarmFile() Synchronous SetAppAlarmPath() Synchronous SetAppHSTPath() Synchronous SetDataFormat() Synchronous SetRegValue() Synchronous Set<strong>Web</strong>Config() Synchronous WritePrivateProfileSharing() Synchronous Loop Functions Execution NT/2K/XP Win CE <strong>Web</strong> ClientFor() & Next NA A-8 <strong>InduSoft</strong> <strong>Web</strong> <strong>Studio</strong> v6.1 SP2
<strong>Studio</strong> FunctionsIWS Users GuideDatabase Access Function Execution NT/2K/XP Win CE <strong>Web</strong> ClientExecuteAlarmAck() NA ForceTagChange NA ODBC Functions Execution NT/2K/XP Win CE <strong>Web</strong> ClientODBCBeginTrans() Synchronous ODBCBindCol() Synchronous ODBCCanAppend() Synchronous ODBCCanTransact() Synchronous ODBCCanUpdate() Synchronous ODBCClose() Synchronous ODBCCommitTrans() Synchronous ODBCDelete() Synchronous ODBCExecuteSQL() Synchronous ODBCInsert() Synchronous ODBCIsBOF() Synchronous ODBCIsDeleted() Synchronous ODBCIsEOF() Synchronous ODBCIsFieldNull() Synchronous ODBCIsFieldNullable() Synchronous ODBCMove() Synchronous ODBCMoveFirst() Synchronous ODBCMoveLast() Synchronous ODBCMoveNext() Synchronous ODBCMovePrev() Synchronous ODBCOpen() Synchronous ODBCQuery() Synchronous ODBCRollback() Synchronous ODBCSetFieldNull() Synchronous ODBCSetFilter() Synchronous <strong>InduSoft</strong> <strong>Web</strong> <strong>Studio</strong> v6.1 SP2 A-9
IWS Users Guide<strong>Studio</strong> FunctionsODBC Functions Execution NT/2K/XP Win CE <strong>Web</strong> ClientODBCSetSort() Synchronous ODBCUnbindCol() Synchronous ODBCUpdate() Synchronous Email Functions Execution NT/2K/XP Win CE <strong>Web</strong> ClientCNFEmail() Synchronous GetStatussendEmailExt() Synchronous SendEmail() Synchronous SendEmailExt() Asynchronous Dial-Up Functions Execution NT/2K/XP WinCE<strong>Web</strong>ClientDialError() Synchronous DialGetClientIP() Synchronous DialGetServerIP() Synchronous DialStatus() Synchronous DialUp() Asynchronous DialUpToCE() Asynchronous FindAllDevices() Synchronous FindModem() Synchronous HangUp() Synchronous PhoneDialUp(strPhoneNumber, OptStrModemName) Asynchronous PhoneDisableListen(optStrModemName) Synchronous PhoneEnableListen(OptStrModemName) Synchronous PhoneHangUp(OptStrModemName) Asynchronous PhoneStatus ("strStatus", optStrModemName) Synchronous ActiveX Functions Execution NT/2K/XP Win CE <strong>Web</strong> ClientXGet() Asynchronous XRun() Asynchronous A-10 <strong>InduSoft</strong> <strong>Web</strong> <strong>Studio</strong> v6.1 SP2
<strong>Studio</strong> FunctionsIWS Users GuideXSet() Asynchronous Event Logger Functions Execution NT/2K/XP Win CE <strong>Web</strong> ClientSendEvent() Synchronous FTP Functions Execution NT/2K/XP Win CE <strong>Web</strong> ClientCN<strong>FF</strong>tp() Synchronous ftpGet() Asynchronous ftpPut() Asynchronous ftpStatus() Synchronous Database Functions Execution NT/2K/XP Win CE <strong>Web</strong> ClientForceTagChange() Synchronous SyncAlarm() Asynchronous SyncEvent() Asynchronous SyncTrend() Asynchronous SyncAlarmStatus() Synchronous SyncEventStatus() Synchronous SyncTrendStatus() Synchronous <strong>InduSoft</strong> <strong>Web</strong> <strong>Studio</strong> v6.1 SP2 A-11
IWS Users Guide<strong>Studio</strong> FunctionsFunction Prototypes and DescriptionsThe function tag names used in IWS must conform to the following syntax: num[Name]: Numerical tag or value str[Name]: String tag or value tag[Name]: Tag NameoptNum[Name]: Optional Numerical tag or valueoptStr[Name]: Optional String tag or valueoptTag[Name]: Optional Tag NameThis syntax identifies the argument types required for each parameter of the IWSfunction. Note:These prototypes depict dynamic tags used to pass values to functions;however, you can also enter static values into these functions. To replace stringtags with static character strings, enter the string between double-quotationmarks (for example, enter “ABCDEFG” instead of strTag). You also can replacestatic numbers with numeric tags (for example, enter 45.6543 instead ofnumTag).A-12 <strong>InduSoft</strong> <strong>Web</strong> <strong>Studio</strong> v6.1 SP2
<strong>Studio</strong> FunctionsIWS Users GuideLog Message FunctionsThis section describes the <strong>InduSoft</strong> <strong>Web</strong> <strong>Studio</strong> Log Message function,Trace(strOutputMessage).Trace(strOutputMessage)GroupExecutionWindows NT/2K/XPWindows CE<strong>Web</strong> Thin ClientLog MessageSynchronousSupportedSupportedNOT supportedDescription: Displays the contents of strOutputMessage in the LogWin window.Parameter: This function accepts the following parameter:StrOuputMessageString tag containing a message to display in the LogWinExamples:Tag NameExpressionTrace( “Starting Step 5” ) // Starting Step 5 displays in the LogWin window.Trace(Date) // The contents of the tag Date displays in the LogWin window. Note:You will find this function useful for debugging purposes. For example, ifyou want to know when IWS is executing a specific math script. Tip:You can concatenate text, expressions, and tag values to compose thestrOutputMessage parameter. For example,Trace(“The tag second has the value”+second+” and the InternalClock = “+GetTickCount( ))<strong>InduSoft</strong> <strong>Web</strong> <strong>Studio</strong> v6.1 SP2 A-13
IWS Users Guide<strong>Studio</strong> FunctionsArithmetic FunctionsThis section describes the following <strong>InduSoft</strong> <strong>Web</strong> <strong>Studio</strong> Arithmetic functions: ABS(numValue) Div(numNumerator, numDenominator) Format(strFlag, numValue) GetBit(tagName, numBitNumber) Mod(numNumerator, numDenominator) Pow(numBase, numExponent) ResetBit(“tagName”, numBitNumber) Round(numValue) SetBit(“tagName”, numBitNumber) SQRT(numValue) Swap32(numValue) Swap16(numValue) Trunc(numValue)ABS(numValue)GroupExecutionWindows NT/2K/XPWindows CE<strong>Web</strong> Thin ClientArithmeticSynchronousSupportedSupportedSupportedDescription: Performs the Absolute value function on the contents of the numValuetag.Parameters:numValueInteger or Real tag containing the number from which the function takes the absolutevalue.Returned Values: Numerical result of the Absolute value function.Examples:Tag NameExpressionTag ABS(“-54.9788”) // Returned value = 54.9788TagABS(numValue) // Returned value = absolute value of the number in the numValue tag.A-14 <strong>InduSoft</strong> <strong>Web</strong> <strong>Studio</strong> v6.1 SP2
<strong>Studio</strong> FunctionsIWS Users GuideDiv(numNumerator, numDenominator)GroupExecutionWindows NT/2K/XPWindows CE<strong>Web</strong> Thin ClientArithmeticSynchronousSupportedSupportedSupportedDescription: Divides the value in numNumerator by the value of numDenominatorand returns only the whole integer number, omitting the remainder.Parameters:numNumeratornumDenominatorInteger or Real tag containing the Numerator of the function.Integer or Real tag containing the Denominator of the function.Returned Values: Numerical result of the function as an integer.Examples:Tag NameExpressionnumValue Div(100, 8) // Returns the value 12.5numValue Div(16, 4) // Returns the value 4numValue Div(100,12.5) //Returns the value 8 Tip:Use the MOD( ) function to get the remainder of the division.Format (strFlag, numValue)GroupExecutionWindows NT/2K/XPWindows CE<strong>Web</strong> Thin ClientArithmeticSynchronousSupportedSupportedSupportedDescription: Modifies the format of a numerical value, according to the flag.<strong>InduSoft</strong> <strong>Web</strong> <strong>Studio</strong> v6.1 SP2 A-15
IWS Users Guide<strong>Studio</strong> FunctionsParameters:strFlagnumValueSets the format in accordance with the %m.nF syntax.Where:• F: Determines how the value is formatted• d: Decimal• x: Hexadecimal (chars in lower case)• X: Hexadecimal (chars in uppercase)• o: Octal• b: Binary• f: Float• e: Scientific notation (e in lowercase)• E: Scientific notation (E in uppercase)• g: Round the value (e in lowercase, when applicable)• G: Round the value (E in lowercase, when applicable)• s: String• c: ASCII char• h: Hour (hh:mm:ss)• m (Applicable for flags d, x, X, o, b, f, e, E, g, G, s, c, and h): Sets the minimumnumber of characters returned by the function, adding blank space chars on the leftof the returned value or 0 (zero) chars (see examples).• n (Applicable for flags f, e, E, g, and G): Sets the minimum number of decimalcharacters for the floating values returned by the function.Numerical value to be formatted.Returned Values: String value that is formatted according to the parametersconfigured in the function.Examples:Tag NameExpressionTag Format("%d",12.34) // returned value = “12”Tag Format("%04d",12.34) // returned value = “0012”Tag Format("%4d",12.34) // returned value = “12”TagTagTagTagTagTagFormat("%x",26) // returned value = “1a”Format("%04x",26) // returned value = “001a”Format("%4x",26) // returned value = “1a”Format("%X",26) // returned value = “1A”Format("%04X",26) // returned value = “001A”Format("%4X",26) // returned value = “1A”A-16 <strong>InduSoft</strong> <strong>Web</strong> <strong>Studio</strong> v6.1 SP2
<strong>Studio</strong> FunctionsIWS Users GuideTag NameExpressionTag Format("%o",16) // returned value = “20”Tag Format("%04o",16) // returned value = “0020”Tag Format("%4o",16) // returned value = “20”Tag Format("%b",2) // returned value = “10”Tag Format("%4b",2) // returned value = “0010”Tag Format("%04b",2) // returned value = “0010”Tag Format("%0.1f",12.34) // returned value = “12.3”Tag Format("%06.1f",12.34) // returned value = “0012.3”Tag Format("%6.1f",12.34) // returned value = “12.3”TagTagTagTagTagTagTagTagTagFormat("%e",12.34) // returned value = “1.234000e+001”Format("%0.1e",12.34) // returned value = “1.2e+001”Format("%09.1e",12.34) // returned value = “01.2e+001”Format("%9.1e",12.34) // returned value = “ 1.2e+001”Format("%E",12.34) // returned value = “1.234000E+001”Format("%0.1E",12.34) // returned value = “1.2E+001”Format("%09.1E",12.34) // returned value = “01.2E+001”Format("%9.1E",12.34) // returned value = “ 1.2E+001”Format("%0.1g",12.34) // returned value = “1e+001”Tag Format("%0.2g",12.34) // returned value = “12”Tag Format("%0.3g",12.34) // returned value = “12.3”Tag Format("%05.3g",12.34) // returned value = “012.3”Tag Format("%5.3g",12.34) // returned value = “ 12.3”<strong>InduSoft</strong> <strong>Web</strong> <strong>Studio</strong> v6.1 SP2 A-17
IWS Users Guide<strong>Studio</strong> FunctionsTag NameTagExpressionFormat("%0.1G",12.34) // returned value = “1E+001”Tag Format("%0.2G",12.34) // returned value = “12”Tag Format("%0.3G",12.34) // returned value = “12.3”Tag Format("%05.3G",12.34) // returned value = “012.3”Tag Format("%5.3G",12.34) // returned value = “ 12.3”Tag Format("%s",12.34) // returned value = “12”Tag Format("%04s",12.34) // returned value = “0012”Tag Format("%4s",12.34) // returned value = “12”TagTagTagFormat("%c",97) // returned value = “a”Format("%4c",97) // returned value = “a”Format("%04c",97) // returned value = “000a”Tag Format("%h",30) // returned value = “00:00:30”Tag Format("%h",60) // returned value = “00:01:00”Tag Format("%h",90) // returned value = “00:01:30”Tag Format("%h",3600) // returned value = “01:00:00” Note:The Format(strFlag, numValue) function allows the same flags to followthe % symbol that are used for the standard C function printf( );however, you can format only one value in each cell. Tip:You will find the Format( ) function especially useful when you areformatting the number of characters for values to be printed in reports.Also, you must use this function to convert the number of seconds in thefollowing format:hh:mm:ss(strFlag =%h)The h and m parameters are optional.A-18 <strong>InduSoft</strong> <strong>Web</strong> <strong>Studio</strong> v6.1 SP2
<strong>Studio</strong> FunctionsIWS Users GuideGetBit(tagName, numBitNumber)GroupExecutionWindows NT/2K/XPWindows CE<strong>Web</strong> Thin ClientArithmeticSynchronousSupportedSupportedSupportedDescription: Isolates a single bit in a numerical tagParameters:tagNamenumBitNumberThe name of an Integer tag where the bit value will be taken from.A numerical tag, which holds the number of the bit to be isolated. (0…31)Returned Values: Returns the numerical value (0 or 1) that corresponds to the valueof the isolated bit.Examples:Tag NameTagTagExpressionGetBit(numSource, 4) // If the tag numSource held the value 15, this function wouldreturn the value 0.GetBit(numSource,1) // If the tag numSource held the value 19, this function wouldreturn the value 1. Tip:You also can use the Bit field to read/write values from specific bits in aninteger tag.For example, enter Second->b0 to access the LSB (Least Significant Bit ofthe Second tag), and Second->b31 to access the MSB (Most Significant Bitof the Second tag).<strong>InduSoft</strong> <strong>Web</strong> <strong>Studio</strong> v6.1 SP2 A-19
IWS Users Guide<strong>Studio</strong> FunctionsMod(numNumerator, numDenominator)GroupExecutionWindows NT/2K/XPWindows CE<strong>Web</strong> Thin ClientArithmeticSynchronousSupportedSupportedSupportedDescription: Divides the value of numNumerator by the value of numDenominiatoronly and returns the remainder as a real number.Parameters:numNumeratornumDenominatorInteger or Real tag containing the Numerator of the function.Integer or Real tag containing the Denominator of the function.Returned Values: Returns the remainder after dividing numNumerator bynumDenominator.Examples:Tag NameExpressionTag Mod(50, 4) // Returned value = 2Tag Mod(16,4) // Returned value = 0Tag Mod(100, 8.2) //Returned value = 1.600 Note:Use the DIV( ) function to get the integer result of the division.Pow(numBase, numExponent)GroupExecutionWindows NT/2K/XPWindows CE<strong>Web</strong> Thin ClientArithmeticSynchronousSupportedSupportedSupportedDescription: Returns the result of raising numBase to the power of numExponent.A-20 <strong>InduSoft</strong> <strong>Web</strong> <strong>Studio</strong> v6.1 SP2
<strong>Studio</strong> FunctionsIWS Users GuideParameters:numBasenumExponentInteger or Real tag containing the Base of the function.Integer or real tag containing the Exponent of the function.Returned Values: Returns the result of raising the base to the exponent.Examples:Tag NameExpressionTag Pow(2, 3) // Returned value = 8Tag Pow(10,4) // Returned value = 10000ResetBit(“tagName”, numBitNumber)GroupExecutionWindows NT/2K/XPWindows CE<strong>Web</strong> Thin ClientArithmeticSynchronousSupportedSupportedSupported Description: Sets a single bit in a numerical tag to 0.Parameters:“tagName”numBitNumberName of an Integer tag where the bit value will be reset.Numerical tag holding the number of the bit to be reset. (0…31)Returned Values:0 No error1 Invalid parameter2 Tag does not existExamples:Tag NameTagTagExpressionResetBit(“numSource”, 4) // If the tag numSource held the value 16, this functionwould return the value 0 and numSource would hold the value 0.ResetBit(“numSource”,1) // If the tag numSource held the value 19, this functionwould return the value 0 and numSource would hold the value 17.<strong>InduSoft</strong> <strong>Web</strong> <strong>Studio</strong> v6.1 SP2 A-21
IWS Users Guide<strong>Studio</strong> Functions Note:To enter the name of the integer tag directly (instead of using the tagNameparameter) you must enter the name between double-quotes. For example,SetBit(“Second”,1). Tip:You can use the Bit field to read/write values from specific bits in an integertag. For example, enter Second->b0 to access the LSB (Least Significant Bitof the Second tag), and Second->b31 to access the MSB (Most SignificantBit of the Second tag).Round(numValue)GroupExecutionWindows NT/2K/XPWindows CE<strong>Web</strong> Thin ClientArithmeticSynchronousSupportedSupportedSupportedDescription: Rounds numValue to the nearest integer.Parameters:numValueA Real tag that holds the value to be rounded.Returned Values: Returns the integer result of the round function.Examples:Tag NameExpressionTag Round(“345.87”) // Returned value = 346Tag Round(“65.323”) // Returned value = 65SetBit(“tagName”, numBitNumber)GroupExecutionWindows NT/2K/XPWindows CE<strong>Web</strong> Thin ClientArithmeticSynchronousSupportedSupportedSupportedA-22 <strong>InduSoft</strong> <strong>Web</strong> <strong>Studio</strong> v6.1 SP2
<strong>Studio</strong> FunctionsIWS Users Guide Description: Sets a single bit in a numerical tag to 1.Parameters:“tagName”numBitNumberName of an Integer tag where the bit value will be set.Numerical tag holding the number of the bit to be set. (0…31)Returned Values:0 No error1 Invalid parameter2 Tag does not existExamples:Tag NameTagTagExpressionGetBit(“numSource”, 4) // If the tag numSource held the value 0, this function wouldreturn the value 0 and numSource would hold the value 16.GetBit(“numSource”,1) // If the tag numSource held the value 17, this functionwould return the value 0 and numSource would hold the value 19. Note:To enter the name of the integer tag directly (instead of using the tagNameparameter) you must enter the name between double-quotes. For example,SetBit(“Second”,1). Tip:You can also use the Bit field to read/write values from specific bits of aninteger tag. For example, enter Second->b0 to access the LSB (LeastSignificant Bit of the Second tag), and Second->b31 to access the MSB(Most Significant Bit of the Second tag).SQRT(numValue)GroupExecutionWindows NT/2K/XPWindows CE<strong>Web</strong> Thin ClientArithmeticSynchronousSupportedSupportedSupportedDescription: Takes the square root of numValue.<strong>InduSoft</strong> <strong>Web</strong> <strong>Studio</strong> v6.1 SP2 A-23
IWS Users Guide<strong>Studio</strong> FunctionsParameters:NumValueInteger or Real tag to be square rooted.Returned Values: Returns the square root of the value in the numValue tag.Examples:Tag NameExpressionTag SQRT(25) // Returns the value 5Tag SQRT(67) // Returns the value 8.185353 Note:If numValue has a negative value, then this function returns the value 0and sets the quality of the returned tag to BAD.Swap16(numValue)GroupExecutionWindows NT/2K/XPWindows CE<strong>Web</strong> Thin ClientArithmeticSynchronousSupportedNot SupportedSupportedDescription: Swaps the two lower bytes of a tag.Parameters:numValueInteger tag that holds the numeric value of the bytes to be swapped.Returned Values: Returns the numeric value after swapping the bytes.Examples:Tag NameTagTagExpressionSwap16(16) // 16 = 0000000000010000 in binary.Returned value = 4096 = 0001000000000000 in binary.Swap16(43760) // 43760 = 1010010111110000 in binary.Returned value = 61610 = 1111000010100101 in binary.A-24 <strong>InduSoft</strong> <strong>Web</strong> <strong>Studio</strong> v6.1 SP2
<strong>Studio</strong> FunctionsIWS Users GuideSwap32(numValue)GroupExecutionWindows NT/2K/XPWindows CE<strong>Web</strong> Thin ClientArithmeticSynchronousSupportedNot SupportedSupportedDescription: Swaps two words in a tag.Parameters:numValueInteger tag that holds the numeric value of the words to be swapped.Returned Values: Returns the numeric value after swapping the words.Examples:Tag NameTagTagExpressionSwap32(16) // 16 = 00000000000000000000000000010000 in binary.Returned value = 1048576 = 00000000000100000000000000000000 in binary.Swap32(246333120) // 286333120 = 1010101010101010101111111100000000 inbinary. Returned value = -1094709586= 11111111000000001010101010101010 inbinary.Trunc(numValue)GroupExecutionWindows NT/2K/XPWindows CE<strong>Web</strong> Thin ClientArithmeticSynchronousSupportedSupportedSupportedDescription: Truncates the value of numValue.Parameters:numValueReal tag to be truncated.<strong>InduSoft</strong> <strong>Web</strong> <strong>Studio</strong> v6.1 SP2 A-25
IWS Users Guide<strong>Studio</strong> FunctionsReturned Values: Returns the integer portion of the real number value of numValue.Examples:Tag NameExpressionTag Trunc(234.987) // Returned value = 234Tag Trunc(-3465.9) // Returned value = -3465.9A-26 <strong>InduSoft</strong> <strong>Web</strong> <strong>Studio</strong> v6.1 SP2
<strong>Studio</strong> FunctionsIWS Users GuideStatistical FunctionsThis section describes the following <strong>InduSoft</strong> <strong>Web</strong> <strong>Studio</strong> Statistical functions:Avg(numValue1, numValue2, …, numValueN)Avg(“tagArray”, numSample, optnumIgnore)Max(numValue1, numValue2, …, numValueN)Max(“tagArray”, numSample, optnumIgnore)Min(numValue1, numValue2, …, numValueN)Min(“tagArray”, numSample, optnumIgnore)Rand()Avg(numValue1, numValue2, …, numValueN)Avg(“tagArray”, numSample, optnumIgnore)GroupExecutionWindows NT/2K/XPWindows CE<strong>Web</strong> Thin ClientStatisticalSynchronousSupportedSupportedSupportedDescription: Calculates the average value of a set of numbers.Parameters:numValue (1…N)“tagArray”numSampleoptnumIgnoreInteger or Real tags containing the numbers to be averaged together.Name of array tag (Real or Integer) containing the values to be averaged.Integer tag containing the number of array elements to be averaged.Optional Integer or Real tag containing the value to be ignored in calculatingthe average.Returned Values: Returns the average of the values.Examples:Tag NameExpressionTag Avg(1,2.34,5,7,4,8,9.4) // Returned value = 5.248571Tag Avg(1, 5, -9, 0, 5, 3) // Returned value = 0.833333TagTagAvg(“tagArray[1]”,3) // If tagArray[1]=10, tagArray[2]=20 and tagArray[3]=60, then theReturned Value = 30Avg(“tagArray[1]”,3,10) // If tagArray[1]=10, tagArray[2]=20 and tagArray[3]=60, thenthe Returned Value = 40<strong>InduSoft</strong> <strong>Web</strong> <strong>Studio</strong> v6.1 SP2 A-27
IWS Users Guide<strong>Studio</strong> Functions Note:This function has two formats: If the first parameter is a numerical tag or value, you must use theAvg(numValue1, numValue2, …, numValueN) format. If the first parameter is an array tag in double-quotes or a string tag, youmust use the Avg(“tagArray”, numSample, optnumIgnore) format.Max(numValue1, numValue2, …, numValueN)Max(“tagArray”, numSample, optnumIgnore)GroupExecutionWindows NT/2K/XPWindows CE<strong>Web</strong> Thin ClientStatisticalSynchronousSupportedSupportedSupportedDescription: Returns the maximum value of a set of numbers.Parameters:numValue (1…N)“tagArray”numSampleoptnumIgnoreInteger or Real tags containing the numbers to be analyzed.Name of array tag (Real or Integer) containing the values to be analyzed.Integer tag containing the number of array elements to be analyzed.Integer or Real tags containing the value to be ignored in the analysis.Returned Values: Returns the maximum value of the set.Examples:Tag NameExpressionTag Max(1,2.34,5,7,4,8,9.4) // Returned value = 9.4Tag Max(1, 5, -9, 0, 5, 3) // Returned value = 5TagTagMax(“tagArray[1]”,3) // If tagArray[1]=10, tagArray[2]=20 and tagArray[3]=60, then theReturned Value = 60Max(“tagArray[1]”,3,10) // If tagArray[1]=10, tagArray[2]=20 and tagArray[3]=60, thenthe Returned Value = 60A-28 <strong>InduSoft</strong> <strong>Web</strong> <strong>Studio</strong> v6.1 SP2
<strong>Studio</strong> FunctionsIWS Users Guide Note:This function has two formats:• If the first parameter is a numerical tag or value, you must use theMax(numValue1, numValue2, …, numValueN) format.• If the first parameter is an array tag in double-quotes or a string tag, youmust use the Max(“tagArray”, numSample, optnumIgnore) format.Min(numValue1, numValue2, …, numValueN)Min(“tagArray”, numSample, optnumIgnore)GroupExecutionWindows NT/2K/XPWindows CE<strong>Web</strong> Thin ClientStatisticalSynchronousSupportedSupportedSupportedDescription: Returns the minimum value of a set of numbers.Parameters:numValue (1…N)“tagArray”numSampleoptnumIgnoreInteger or Real tags containing the numbers to be analyzed.Name of an array tag (Real or Integer) containing the values to be analyzed.Integer tag containing the number of array elements to be analyzed.Integer or Real tags containing a value to be ignored in the analysis.Returned Values: Returns the minimum value of the set.Examples:Tag NameExpressionTag Min(1,2.34,5,7,4,8,9.4) // Returned value = 1Tag Min(1, 5, -9, 0, 5, 3) // Returned value = -9TagTagMin(“tagArray[1]”,3) // If tagArray[1]=10, tagArray[2]=20 and tagArray[3]=60, then theReturned Value = 10Min(“tagArray[1]”,3,10) // If tagArray[1]=10, tagArray[2]=20 and tagArray[3]=60, then theReturned Value = 20<strong>InduSoft</strong> <strong>Web</strong> <strong>Studio</strong> v6.1 SP2 A-29
IWS Users Guide<strong>Studio</strong> Functions Note:This function has two formats:If the first parameter is a numerical tag or value, you must use theMin(numValue1, numValue2, …, numValueN) format.If the first parameter is an array tag in double-quotes or a string tag, youmust use the Min(“tagArray”, numSample, optnumIgnore) format.Rand()GroupExecutionWindows NT/2K/XPWindows CE<strong>Web</strong> Thin ClientStatisticalSynchronousSupportedNot SupportedSupported Description: Generates a random number between 0 and 1. Returned Values: Returns a real number between 0 and 1. Examples:Tag NameExpressionTag Rand() // Returned value = ?, Where: 0
<strong>Studio</strong> FunctionsIWS Users GuideLogarithmic FunctionsThis section describes the following <strong>InduSoft</strong> <strong>Web</strong> <strong>Studio</strong> Logarithmic functions: Exp(numValue) Log(numValue) Log10(numValue)Exp(numValue)GroupExecutionWindows NT/2K/XPWindows CE<strong>Web</strong> Thin ClientLogarithmicSynchronousSupportedSupportedSupportedDescription: Calculates the value of e (e = 2.718282) raised to the power ofnumValueParameters:NumValue Integer or Real tag containing the exponent of e.Returned Values: Returns the value of e^(numValue).Examples:Tag NameExpressionTag Exp(1)// Returned value = 2.718282Tag Exp(5.25896) // Returned value = 192.281415Log(numValue)GroupExecutionWindows NT/2K/XPWindows CE<strong>Web</strong> Thin ClientLogarithmicSynchronousSupportedSupportedSupportedDescription: Calculates the natural log of numValueParameters:NumValueInteger or Real tag from which the natural log is taken.<strong>InduSoft</strong> <strong>Web</strong> <strong>Studio</strong> v6.1 SP2 A-31
IWS Users Guide<strong>Studio</strong> FunctionsReturned Values: Returns the value of ln(numValue).Examples:Tag NameExpressionTag Log(2.718282)// Returned value = 1Tag Log(100) // Returned value = 4.605170 Note:If numValue has a negative value, this function returns the value 0 and setsthe quality of the returned tag to BAD.Log10(numValue)GroupExecutionWindows NT/2K/XPWindows CE<strong>Web</strong> Thin ClientLogarithmicSynchronousSupportedSupportedSupportedDescription: Calculates the log base 10 of numValue.Parameters:NumValueInteger or Real tag, from which the log base 10 is take.Returned Values: Returns the value of log10(numValue).Examples:Tag NameExpressionTag Log10(1000)// Returned value = 3Tag Log10(43.05) // Returned value = 1.633973 Note:If the numValue has a negative value, then this function will return thevalue 0 and it will set the quality of the returned tag to BAD.A-32 <strong>InduSoft</strong> <strong>Web</strong> <strong>Studio</strong> v6.1 SP2
<strong>Studio</strong> FunctionsIWS Users GuideLogical FunctionsThis section describes the following <strong>InduSoft</strong> <strong>Web</strong> <strong>Studio</strong> Logical functions: False(numExpression) If(numExpression, numThen, optnumElse) Toggle(numValue) True(numExpression)False(numExpression)GroupExecutionWindows NT/2K/XPWindows CE<strong>Web</strong> Thin ClientLogicalSynchronousSupportedSupportedSupportedDescription: Determines whether the content of numExpression is logically false.Parameters:numExpressionTag or expression to be used in the function.Returned Values:0 If the tag or expression is not logically false.1 If the tag or expression is logically false.Examples:Tag NameExpressionTag False(1)// Returned value = 0Tag False(5 < 2) // Returned value = 1 Tip:You will find this function especially useful if you need to return the value 0when the expression returns any value other than 0.<strong>InduSoft</strong> <strong>Web</strong> <strong>Studio</strong> v6.1 SP2 A-33
IWS Users Guide<strong>Studio</strong> FunctionsIf(numExpression, numThen, optnumElse)GroupExecutionWindows NT/2K/XPWindows CE<strong>Web</strong> Thin ClientLogicalSynchronousSupportedSupportedSupportedDescription: Determines whether the contents of numExpression are logically true,and then returns the value of numThen or optnumElse accordingly.Parameters:numExpressionnumThenoptnumElseTag or expression used as the condition in the function.Tag or expression used if the condition is logically true.Optional tag or expression used if the condition is logically false.Returned Values:numThenoptnumElseNo value returnedIf the numExpression is logically true.If the numExpression is logically false.If the numExpression is logically false and there is no optnumElse in thefunction.Examples:Tag NameExpressionTag If(5>4,10, 6)// Returned value = 10Tag If(5TagB,If(TagATagB AND TagA=10,1,0).A-34 <strong>InduSoft</strong> <strong>Web</strong> <strong>Studio</strong> v6.1 SP2
<strong>Studio</strong> FunctionsIWS Users GuideToggle(numValue)GroupExecutionWindows NT/2K/XPWindows CE<strong>Web</strong> Thin ClientLogicalSynchronousSupportedSupportedSupportedDescription: Returns the toggled value from the contents of numValue tag.Parameters:numValueBoolean tag containing the value to be toggled.Returned Values: Numerical result (0 or 1) of the value to be toggled.Examples:Tag NameTagTagExpressionToggle(myBoolTag)// Returned value = 1 if myBoolTag equals 0, or 0 if myBoolTag equals 1Toggle(numValue)// Returned value = toggled value of the number in the numValue tag Tip:This function does not actually change the value of the tag, but it can beused in a command or operation that does.True(numExpression)GroupExecutionWindows NT/2K/XPWindows CE<strong>Web</strong> Thin ClientLogicalSynchronousSupportedSupportedSupportedDescription: Determines whether the contents of numExpression are logically true.Parameters:numExpressionTag or expression to be used in the function.Returned Values:<strong>InduSoft</strong> <strong>Web</strong> <strong>Studio</strong> v6.1 SP2 A-35
IWS Users Guide<strong>Studio</strong> Functions0 If the tag or expression is not logically true.1 If the tag or expression is logically true.Examples:Tag NameExpressionTag True(1)// Returned value = 1Tag True(5 < 2) // Returned value = 0 Tip:You may find this function especially useful if you need to return the value 1when the expression returns a value other than 0.A-36 <strong>InduSoft</strong> <strong>Web</strong> <strong>Studio</strong> v6.1 SP2
<strong>Studio</strong> FunctionsIWS Users GuideString FunctionsThis section describes the following <strong>InduSoft</strong> <strong>Web</strong> <strong>Studio</strong> String functions:Asc2Str(numChar1, numChar2, …, numCharN)CharToValue(“tagName”, “tagArray”)CharToValueW(“tagName”, “tagArray”)ClassMembersToStrVector (“strClassTag”, numStartPos, numNumPos,“strArrayTag”, optBooStartPosTarget)NCopy(strSource, numStartChar, numQtdChar)Num(strValue)Str(numValue)Str2Asc(strChar)StrGetElement(strSource, strDelimiter, numElementNumber)StrLeft(strSource, numQtdChar)StrLen(strSource)StrLower(strSource)StrRChr(strSource, strCharSequence)StrRight(strSource, numQtdChar)StrSetElement(strSource, strDelimiter, numElementNumber, strValue)StrStr(strSource, strCharSequence)StrStrPos(strSource, strCharSequence)StrTrim(strReference, numOptFlag)StrTrimAll(strReference, strOptTrimChar)StrUpper(strSource)ValueToChar(“tagArray”, numChars)ValueWToChar(“tagArray”, numChars)<strong>InduSoft</strong> <strong>Web</strong> <strong>Studio</strong> v6.1 SP2 A-37
IWS Users Guide<strong>Studio</strong> FunctionsASCII TablesCharacter Set (0 - 127)Code Char Code Char Code Char Code Char0 32 [space] 64 @ 96 `1 33 ! 65 A 97 a2 34 " 66 B 98 b3 35 # 67 C 99 c4 36 $ 68 D 100 d5 37 % 69 E 101 e6 38 & 70 F 102 f7 39 ' 71 G 103 g8 ** 40 ( 72 H 104 h9 ** 41 ) 73 I 105 i10 ** 42 * 74 J 106 j11 43 + 75 K 107 k12 44 , 76 L 108 l13 ** 45 - 77 M 109 m14 46 . 78 N 110 n15 47 / 79 O 111 o16 48 0 80 P 112 p17 49 1 81 Q 113 q18 50 2 82 R 114 r19 51 3 83 S 115 s20 52 4 84 T 116 t21 53 5 85 U 117 u22 54 6 86 V 118 v23 55 7 87 W 119 w24 56 8 88 X 120 x25 57 9 89 Y 121 y26 58 : 90 Z 122 z27 59 ; 91 [ 123 {28 60 < 92 \ 124 |29 61 = 93 ] 125 }30 - 62 > 94 ^ 126 ~31 63 ? 95 _ 127Character Set (128 – 255)Code Char Code Char Code Char Code Char128 € 160 [space] 192 À 224 à129 161 ¡ 193 Á 225 á130 ‚ 162 ¢ 194 Â 226 âA-38 <strong>InduSoft</strong> <strong>Web</strong> <strong>Studio</strong> v6.1 SP2
<strong>Studio</strong> FunctionsIWS Users Guide131 ƒ 163 £ 195 à 227 ã132 ‚‚ 164 ¤ 196 Ä 228 ä133 … 165 ¥ 197 Å 229 å134 † 166 ¦ 198 Æ 230 æ135 ‡ 167 § 199 Ç 231 ç136 ˆ 168 ¨ 200 È 232 è137 ‰ 169 © 201 É 233 é138 Š 170 ª 202 Ê 234 ê139 ‹ 171 ‹‹ 203 Ë 235 ë140 Œ 172 ¬ 204 Ì 236 ì141 173 205 Í 237 í142 174 ® 206 Î 238 î143 175 ¯ 207 Ï 239 ï144 176 ° 208 Ð 240 ð145 ' 177 ± 209 Ñ 241 ñ146 ' 178 ² 210 Ò 242 ò147 " 179 ³ 211 Ó 243 ó148 " 180 ´ 212 Ô 244 ô149 · 181 µ 213 Õ 245 õ150 – 182 214 Ö 246 ö151 — 183 · 215 × 247 ÷152 ˜ 184 ¸ 216 Ø 248 ø153 185 ¹ 217 Ù 249 ù154 š 186 º 218 Ú 250 ú155 › 187 ›› 219 Û 251 û156 œ 188 ¼ 220 Ü 252 ü157 189 ½ 221 Ý 253 ý158 190 ¾ 222 Þ 254 þ159 Ÿ 191 ¿ 223 ß 255 Note:** Values 8, 9, 10, and 13 convert to backspace, tab, linefeed, and carriagereturn characters, respectively. They have no graphical representation, butdepending on the application, they may affect the visual display of text.indicates that it is not supported on the current platform.Asc2Str(numChar1, numChar2, …, numCharN)GroupExecutionWindows NT/2K/XPWindows CEStringSynchronousSupportedSupported<strong>InduSoft</strong> <strong>Web</strong> <strong>Studio</strong> v6.1 SP2 A-39
IWS Users Guide<strong>Studio</strong> Functions<strong>Web</strong> Thin ClientSupportedDescription: Converts decimal values into their corresponding ASCII characters.Parameters:numChar (1-N)Tag or expression containing a decimal value to be converted into an ASCIIcharacter.Returned Values: Returns a string of ASCII characters corresponding to the decimalvalues entered.Examples:Tag NameTagTagExpressionAsc2Str(67) // Returned value = CAsc2Str(83, 116, 117, 100, 105, 111) // Returned value = IWSCharToValue(“tagName”, “tagArray”)GroupExecutionWindows NT/2K/XPWindows CE<strong>Web</strong> Thin ClientStringSynchronousSupportedSupportedSupportedDescription: Converts a string into an array of integer values (using bytes).Parameters:“tagName”“tagArray”The name of the string tag, whose value will be converted.The name of the array tag receiving the integer values.Returned Values: No values are returned from this function.Examples:Tag NameExpressionCharToValue( “StrTag”, “Array[1]”) // If StrTag = “ IWS” then Array[1] will be set to83 (“S” in ASCII), Array[2] to 116 (“t” in ASCII) and so on. Note:You cannot use this function for UNICODE characters because it convertsthe lower byte of UNICODE characters only.A-40 <strong>InduSoft</strong> <strong>Web</strong> <strong>Studio</strong> v6.1 SP2
<strong>Studio</strong> FunctionsIWS Users GuideCharToValueW(“tagName”, “tagArray”)GroupExecutionWindows NT/2K/XPWindows CE<strong>Web</strong> Thin ClientStringSynchronousSupportedSupportedSupportedDescription: Converts a string into an array of integer values (using words insteadof bytes).Parameters:“tagName”“tagArray”The name of the string tag, whose value will be converted.The name of the array tag receiving the integer values.Returned Values: No values are returned from this function.Examples:Tag NameExpressionCharToValue(“StrTag”, “Array[1]”) // If StrTag = “ IWS” then Array[1] would be set to 29779(“St” in ASCII), Array[2] to 25717 (“ud” in ASCII) and so on. Note:This function can be useful when converting UNICODE characters intocodes.ClassMembersToStrVector (“strClassTag”, numStartPos,numNumPos, “strArrayTag”, optBooStartPosTarget)GroupExecutionWindows NT/2K/XPWindows CE<strong>Web</strong> Thin ClientStringSynchronousSupportedSupportedSupportedDescription: Transfers values from class tags to array tags.Parameters:strClassTagnumStartPosThe string value containing the class tag name.Start position (array index) of the strClassTag<strong>InduSoft</strong> <strong>Web</strong> <strong>Studio</strong> v6.1 SP2 A-41
IWS Users Guide<strong>Studio</strong> FunctionsnumNumPosstrArrayTagoptBooStartPosTargetNumber of positions (array indexes) to be transferred from the strClassTag.String value containing the array tag that will receive the values from thestrClassTag.Start position (array index) of the strArrayTag. If omitted, the default valeu 1is used.Returned Values:-6 Array size of strClassTag is not big enough for numStartPos-5 strClassTag tag is not a Class Tag-4 strClassTag tag not found-3 strArrayTag tag not found-2 Invalid data type of the parameters-1 Invalid number of parametersExamples:0 Transferred successfullyTag NameExpressionTag ClassMembersToStrVector ( "Classtag", 5, 3, “Arraytag” )Tag ClassMembersToStrVector ( "Classtag", 5, 3, “Arraytag” , 0)TagClassMembersToStrVector ( TagName, 0, 1, ArrayName) Note:If the strClassTag tag has more than one member, the value of eachmember will be transferred to the strArrayTag. Therefore, it is importatnt tomake sure that the array size of the strArrayTag tag is big enough to receiveall values from the strClassTag tag.NCopy(strSource, numStartChar, numQtdChar)GroupExecutionWindows NT/2K/XPStringSynchronousSupportedA-42 <strong>InduSoft</strong> <strong>Web</strong> <strong>Studio</strong> v6.1 SP2
<strong>Studio</strong> FunctionsIWS Users GuideWindows CE<strong>Web</strong> Thin ClientSupportedSupportedDescription: Copies a defined section of a larger string.Parameters:strSourcenumStartCharnumQtdCharString tag containing the source string.Integer tag containing a number corresponding to the first character being copied.Integer tag containing the number of characters to be copied.Returned Values: Returns a string that is part of the source string (as defined by thefunction).Examples:Tag NameTagTagExpressionNcopy(“IWS version 6.1”, 7, 7) // Returned value = versionNcopy(“Technical Reference Manual”, 0, 9) // Returned value = Technical Note:The first character in the string will be assigned the value 0.Num(strValue)GroupExecutionWindows NT/2K/XPWindows CE<strong>Web</strong> Thin ClientStringSynchronousSupportedSupportedSupportedDescription: Converts a string into a float.Parameters:StrValueString tag containing the number of characters to be converted into floatformat.Returned Values: Returns the number (formerly in a string format) in float format.Examples:Tag NameExpressionTag Num(“321654.987”) // Returned value = 321654.987<strong>InduSoft</strong> <strong>Web</strong> <strong>Studio</strong> v6.1 SP2 A-43
IWS Users Guide<strong>Studio</strong> FunctionsTag Num(“5.6589626246”) // Returned value = 5.6589626246 Note:The float string cannot use characters other than the numbers (0…9) and adecimal point (.) or the program returns the value 0.0.Str(numValue)GroupExecutionWindows NT/2K/XPWindows CE<strong>Web</strong> Thin ClientStringSynchronousSupportedSupportedSupportedDescription: Converts a number into a string.Parameters:numValueInteger or float tag containing a number to be converted to a string.Returned Values: Returns the string, in a float format.Examples:Tag NameExpressionTag Str(321654.987) // Returned value = “321654.987”Tag Str(5.65896246) // Returned value = “5.658962”Str2Asc(strChar)GroupExecutionWindows NT/2K/XPWindows CE<strong>Web</strong> Thin ClientStringSynchronousSupportedSupportedSupportedDescription: Converts an ASCII character into its corresponding ASCII code.Parameters:strCharString Tag containing an ASCII character to be converted into ASCII code.A-44 <strong>InduSoft</strong> <strong>Web</strong> <strong>Studio</strong> v6.1 SP2
<strong>Studio</strong> FunctionsIWS Users GuideReturned Values: Returns a decimal value corresponding to the ASCII characterentered.Examples:Tag NameExpressionTag Str2Asc(“C”) // Returned value = 67Tag Str2Asc(“o”) // Returned value = 111StrGetElement(strSource, strDelimiter, numElementNumber)GroupExecutionWindows NT/2K/XPWindows CE<strong>Web</strong> Thin ClientStringSynchronousSupportedSupportedSupportedDescription: Gets a specific element from a string source.Parameters:strSourcestrDelimiternumElementNumberString tag containing the source string.Char used as delimiter between the elements.Number of the element which will be returned by the function. The firstelement has the number 1. The second element has the number 2, and soon.Returned Values: Returns the element (string value) retrieved from the strSource.Examples:Tag NameTagTagExpressionStrGetElement(“a|b|c”, “|”, 2) // Returned value = “b”StrGetElement(“a,b,c”, “,”, 3) // Returned value = “c”StrLeft(strSource, numQtdChar)GroupExecutionWindows NT/2K/XPWindows CEStringSynchronousSupportedSupported<strong>InduSoft</strong> <strong>Web</strong> <strong>Studio</strong> v6.1 SP2 A-45
IWS Users Guide<strong>Studio</strong> Functions<strong>Web</strong> Thin ClientSupportedDescription: Copies the first characters of a larger string.Parameters:strSourcenumQtdCharString tag containing the source string.Integer tag containing the number of characters to be copied.Returned Values: Returns a string containing the left-most characters in the sourcestring.Examples:Tag NameTagTagExpressionStrLeft(“IWS version 6.1”, 8) // Returned value = IWS vStrLeft (“Technical Reference Manual”, 9) // Returned value = TechnicalStrLen(strSource)GroupExecutionWindows NT/2K/XPWindows CE<strong>Web</strong> Thin ClientStringSynchronousSupportedSupportedSupportedDescription: Determines the length of a string.Parameters:strSourceString tag containing the string.Returned Values: Returns an integer that is the number of characters in the string.Examples:Tag NameExpressionTag StrLen(“IWS version 6.1”) // Returned value = 18Tag StrLen(“Technical Reference Manual”) // Returned value = 26A-46 <strong>InduSoft</strong> <strong>Web</strong> <strong>Studio</strong> v6.1 SP2
<strong>Studio</strong> FunctionsIWS Users GuideStrLower(strSource)GroupExecutionWindows NT/2K/XPWindows CE<strong>Web</strong> Thin ClientStringSynchronousSupportedSupportedSupportedDescription: Converts a string to all lower case characters.Parameters:strSourceString tag containing the string to be converted.Returned Values: Returns the string, where all the characters are in lowercase.Examples:Tag NameExpressionTag StrLower(“IWS version 6.1”) // Returned value = “IWS version 6.1”TagStrLower(“Technical Reference Manual”) // Returned value = “technical referencemanual”StrRChr(strSource, strChrSequence)GroupExecutionWindows NT/2K/XPWindows CE<strong>Web</strong> Thin ClientStringSynchronousSupportedSupportedSupportedDescription: Isolates the final occurrence of a character sequence within a string.Parameters:StrSourceStrCharSequenceString tag containing the source string.String tag containing the reference string.Returned Values: Returns a string of characters following the last occurrence of acharacter within the source string.<strong>InduSoft</strong> <strong>Web</strong> <strong>Studio</strong> v6.1 SP2 A-47
IWS Users Guide<strong>Studio</strong> FunctionsExamples:Tag NameExpressionTag StrRChr(“IWS version 6.1”, “i”) // Returned value = “ion 5.1”TagStrRChr(“Technical Reference Manual”, “a”) // Returned value =”al”StrRight(strSource, numQtdChar)GroupExecutionWindows NT/2K/XPWindows CE<strong>Web</strong> Thin ClientStringSynchronousSupportedSupportedSupportedDescription: Copies the last characters in a larger string.Parameters:StrSourceNumQtdCharString tag containing the source string.Integer tag containing the number of characters to be copied.Returned Values: Returns a string containing the right-most characters in a sourcestring.Examples:Tag NameExpressionTag StrRight(“IWS version 6.1”, 8) // Returned value = “sion 5.1”TagStrRight(“Technical Reference Manual”, 9) // Returned value = “ce Manual”StrSetElement(strSource, strDelimiter, numElementNumber,strValue)GroupExecutionWindows NT/2K/XPWindows CE<strong>Web</strong> Thin ClientStringSynchronousSupportedSupportedSupportedDescription: Gets a specific element from a string source.A-48 <strong>InduSoft</strong> <strong>Web</strong> <strong>Studio</strong> v6.1 SP2
<strong>Studio</strong> FunctionsIWS Users GuideParameters:strSourcestrDelimiternumElementNumberstrValueString tag containing the source string.Char used as delimiter between the elements.Number of the element where the string value will be written by the function.The first element has the number 1. The second element has the number 2,and so on.String value that will be written to the numElementNumber of the strSourcestring tag.Returned Values: Returns the string value updated from the strValue.Examples:Tag NameTagTagExpressionStrSetElement(StringTag,“|”, 2, “abcd”)StrSetElement(StringTag,“,”, 3, “defg”)StrStr(strSource, strCharSequence)GroupExecutionWindows NT/2K/XPWindows CE<strong>Web</strong> Thin ClientStringSynchronousSupportedSupportedSupportedDescription: Isolates the first occurrence of a character sequence within a string.Parameters:strSourcestrCharSequenceString tag containing the source string.String tag containing the reference string.Returned Values: Returns the string of characters following the first occurrence of acharacter within the source string.Examples:Tag NameExpressionTag StrStr(“IWS version 6.1”, “i”) // Returned value = “io version 5.1”Tag StrStr(“Technical Reference Manual”, “a”) //Returned value =”al Reference Manual”<strong>InduSoft</strong> <strong>Web</strong> <strong>Studio</strong> v6.1 SP2 A-49
IWS Users Guide<strong>Studio</strong> FunctionsStrStrPos(strSource, strCharSequence)GroupExecutionWindows NT/2K/XPWindows CE<strong>Web</strong> Thin ClientStringSynchronousSupportedSupportedSupportedDescription: Finds the first occurrence of a character within a string.Parameters:strSourcestrCharSequenceString tag containing the source string.String tag containing the reference string.Returned Values: Returns an integer corresponding to the first occurrence of acharacter within the source string.Examples:Tag NameExpressionTag StrStrPos(“IWS version 6.1”, “i”) // Returned value = 4Tag StrStrPos(“Technical Reference Manual”, “a”) // Returned value = 7 Note:The first character in the string assigned the value 0.StrTrim(strReference, numOptFlag)GroupExecutionWindows NT/2K/XPWindows CE<strong>Web</strong> Thin ClientStringSynchronousSupportedSupportedSupportedDescription: Eliminates spaces from the beginning and the end of a stringA-50 <strong>InduSoft</strong> <strong>Web</strong> <strong>Studio</strong> v6.1 SP2
<strong>Studio</strong> FunctionsIWS Users GuideParameters:strReferencenumOptFlagA string tag containing the source string.An optional integer tag.• If numOptFlag = 0, then IWS removes spaces from both thebeginning and end of the string.• If numOptFlag = 1, then IWS removes spaces from the beginningof the string.• If numOptFlag = 2, then IWS removes spaces from the end of thestring only.Returned Values: Returns a string equal to strReferance minus the specifiedspace characters.Examples:Tag NameExpressionTag StrTrim(“IWS version 6.1 “) // Returned value = “IWS version 6.1“Tag StrTrim(“IWS version 6.1 “, 0) // Returned value = “IWS version 6.1“Tag StrTrim(“IWS version 6.1 “, 1) // Returned value = “IWS version 6.1 “Tag StrTrim(“IWS version 6.1 “, 2) // Returned value = “IWS version 6.1“StrTrimAll(strReference, strOptTrimChar)GroupExecutionWindows NT/2K/XPWindows CE<strong>Web</strong> Thin ClientStringSynchronousSupportedSupportedSupportedDescription: Eliminates a specific char from the whole string.Parameters:strReferencestrOptTrimCharA string tag containing the source string.Char that will be removed from the string. If this parameter is omitted, thespace char will be removed from the string by default.Returned Values: Returns a string equal to strReferance minus the charactersremoved by the function.<strong>InduSoft</strong> <strong>Web</strong> <strong>Studio</strong> v6.1 SP2 A-51
IWS Users Guide<strong>Studio</strong> FunctionsExamples:Tag NameExpressionTag StrTrimAll(“IWS version 6.1 “,””) // Returned value = “IWS version 6.1“Tag StrTrimAll(“IWS version 6.1 “,” “.””) // Returned value = “IWS version 6.1“StrUpper(strSource)GroupExecutionWindows NT/2K/XPWindows CE<strong>Web</strong> Thin ClientStringSynchronousSupportedSupportedSupportedDescription: Converts a string to all uppercase characters.Parameters:strSourceString tag containing the string.Returned Values: Returns the string with all characters in uppercase.Examples:Tag NameExpressionTag StrUpper(“IWS version 6.1”) // Returned value = “IWS version 6.1”TagStrUpper(“Technical Reference Manual”) // Returned value = “TECHNICALREFERENCE MANUAL”A-52 <strong>InduSoft</strong> <strong>Web</strong> <strong>Studio</strong> v6.1 SP2
<strong>Studio</strong> FunctionsIWS Users GuideValueToChar(“tagArray”, numChars)GroupExecutionWindows NT/2K/XPWindows CE<strong>Web</strong> Thin ClientStringSynchronousSupportedSupportedSupportedDescription: Converts a string into an array of integer values (using bytes).Parameters:“tagArray”NumCharsName of array tag containing the integer values of the characters to be converted.Integer tag containing the number of characters to be converted.Returned Values: Returns a string with characters defined by values in the Arraytags.Examples:Tag NameTagExpressionValueToChar(“Array”, 3) // If Array[0] = 65, Array[1] = 66, and Array[2] = 67 then thereturned value will be “ABC”Tag ValueToChar(“Array[10]”, 3) // If Array[10] = 65, Array[11] = 66, and Array[12] = 67then the returned value will be “ABC” Note:You cannot use this function for UNICODE characters, because it convertsthe lower bytes of UNICODE characters only.ValueWToChar(“tagArray”, numChars)GroupExecutionWindows NT/2K/XPWindows CE<strong>Web</strong> Thin ClientStringSynchronousSupportedSupportedSupportedDescription: Converts a string into an array of integer values (using words).<strong>InduSoft</strong> <strong>Web</strong> <strong>Studio</strong> v6.1 SP2 A-53
IWS Users Guide<strong>Studio</strong> FunctionsParameters:“tagArray”numCharsName of array tag containing integer values of the characters to be converted.Integer tag containing the number of characters to be converted.Returned Values: Returns a string with characters defined by values in the Arraytags.Examples:Tag NameExpressionTag ValueWToChar(“Array”, 3) // If Array[0] = 29779, Array[1] = 25717, and Array[2] =28521 then the returned value will be “ IWS” Note:You may find this function especially useful when converting UNICODEcharacters into codes.A-54 <strong>InduSoft</strong> <strong>Web</strong> <strong>Studio</strong> v6.1 SP2
<strong>Studio</strong> FunctionsIWS Users GuideDate and Time FunctionsThis section describes the following <strong>InduSoft</strong> <strong>Web</strong> <strong>Studio</strong> Date and Time functions: ClockGetDate(numSeconds) ClockGetDayOfTheWeek(numSeconds) ClockGetTime(numSeconds) DateTime2Clock(strDate, strTime) GetClock() Hour2Clock(strTime) SetsystemDate(strDate) SetSystemTime(strTime)ClockGetDate(numSeconds)GroupExecutionWindows NT/2K/XPWindows CE<strong>Web</strong> Thin ClientDate and TimeSynchronousSupportedSupportedSupportedDescription: Calculates the date, based on how many seconds have elapsed since19:00:00 EST 12/31/1969 (taking into account the current time zone of thecomputer).Parameters:numSeconds Integer tag containing the number of seconds elapsed since 19:00:00 ETS 12/31/1969.Returned Values: Returns the date calculated in string format.Examples:Tag NameTagTagExpressionClockGetDate(0)// If the computer is in the Central time zone.Returned value = 12/31/1969ClockGetDate(1018886359) // If the computer is in the Central time zone.Returned value = 04/15/2002 Note:This function takes into account the current Time Zone as specified in theControl Panel of the local computer.<strong>InduSoft</strong> <strong>Web</strong> <strong>Studio</strong> v6.1 SP2 A-55
IWS Users Guide<strong>Studio</strong> FunctionsClockGetDayOfTheWeek(numSeconds)GroupExecutionWindows NT/2K/XPWindows CE<strong>Web</strong> Thin ClientDate and TimeSynchronousSupportedSupportedSupportedDescription: Calculates the day of the week, based on how many seconds haveelapsed since 19:00:00 EST 12/31/1969 (taking into account the current timezone of the local computer).Parameters:numSeconds Integer tag containing the number of seconds elapsed since 19:00:00 ETS 12/31/1969Returned Values: Returns the day of the week (calculated in integer format) asfollows:– 0 = Sunday– 1 = Monday– 2 = Tuesday– 3 = Wednesday– 4 = Thursday– 5 = Friday– 6 = SaturdayExamples:Tag NameTagTagExpressionClockGetDayOftheWeek(0)// If the computer is in the Central time zone.Returned value = 3ClockGetDate(1018886359) // If the computer is in the Central time zone.Returned value = 1 Note:This function takes into account the current Time Zone, as specified in theControl Panel of the local computer.A-56 <strong>InduSoft</strong> <strong>Web</strong> <strong>Studio</strong> v6.1 SP2
<strong>Studio</strong> FunctionsIWS Users GuideClockGetTime(numSeconds)GroupExecutionWindows NT/2K/XPWindows CE<strong>Web</strong> Thin ClientDate and TimeSynchronousSupportedSupportedSupportedDescription: Calculates the time based on how many seconds have elapsed since19:00:00 EST 12/31/1969 (taking into account the current time zone asspecified on the local computer.Parameters:NumSeconds Integer tag containing the number of seconds elapsed since 19:00:00 ETS 12/31/1969.Returned Values: Returns the time calculated in string format.Examples:Tag NameTagTagExpressionClockGetTime(0) // If the computer is in the Central time zone.Returned value = 18:00:00ClockGetTime(1018886359) // If the computer is in the Central time zone.Returned value = 10:59:19 Note:This function takes into account the current Time Zone, as specified in theControl Panel of the local computer. Tip:To convert the number of seconds strictly into the HH:MM:SS format, youmust use the Format() function instead of the ClockGetTime() function.DateTime2Clock(strDate, strTime)GroupExecutionWindows NT/2K/XPWindows CE<strong>Web</strong> Thin ClientDate and TimeSynchronousSupportedSupportedSupported<strong>InduSoft</strong> <strong>Web</strong> <strong>Studio</strong> v6.1 SP2 A-57
IWS Users Guide<strong>Studio</strong> FunctionsDescription: Calculates how many seconds have elapsed since 19:00:00 EST12/31/1969 (taking into account the current time zone specified on the localcomputer.)Parameters:StrDateStrTimeString tag containing the date to be used in the calculation.String tag containing the time to be used in the calculation. Returned Values: Returns the number of seconds that have elapsed since 19:00:00EST 12/31/1969.Examples:Tag NameTagTagExpressionDateTime2Clock (“12/31/1969”, “18:00:00”) // If the computer is in the Central timezone. Returned value = 0DateTime2Clock (“04/15/2002”, “10:59:19”) // If the computer is in the Central timezone. Returned value = 01018886359 Note:This function takes into account the current Time Zone, as specified in theControl Panel of the local computer.GetClock()GroupExecutionWindows NT/2K/XPWindows CE<strong>Web</strong> Thin ClientDate and TimeSynchronousSupportedSupportedSupportedDescription: Calculates how many seconds have elapsed since 19:00:00 EST12/31/1969 at the moment the function was run (taking into account thecurrent time zone, as specified on the local computer). Returned Values: Returns the number of seconds that have elapsed since 19:00:00EST 12/31/1969 at the moment the function was run.Examples:Tag NameExpressionTag GetClock() // If executed at 10:59:19 AM April 15 th 2002 CST. Returned value = 101886359Tag GetClock() // If executed at 00:00:00 January 1st 1970 GMT. Returned value = 0A-58 <strong>InduSoft</strong> <strong>Web</strong> <strong>Studio</strong> v6.1 SP2
<strong>Studio</strong> FunctionsIWS Users Guide Note:This function takes the current Time Zone into account, as specified in theControl Panel of the local computer.Hour2Clock(strTime)GroupExecutionWindows NT/2K/XPWindows CE<strong>Web</strong> Thin ClientDate and TimeSynchronousSupportedSupportedSupportedDescription: Converts time in the HH:MM:SS format into seconds.Parameters:strTimeString tag containing the number of hours, minutes, and seconds in HH:MM:SS format.Returned Values: Returns the number of seconds equivalent to the total number ofhours, minutes, and seconds specified.Examples:Tag NameExpressionTag Hour2Clock(“01:00:00”) // Returned value = 3600Tag Hour2Clock(“10:01:01”) // Returned value = 36061SetsystemDate(strDate)GroupExecutionWindows NT/2K/XPWindows CE<strong>Web</strong> Thin ClientDate and TimeSynchronousSupportedSupportedSupportedDescription: Sets the date in the operating system’s clock.Parameters:strDateString tag containing the date in MM/DD/YYYY format in which to set the clock.Returned Values: Returns no values.<strong>InduSoft</strong> <strong>Web</strong> <strong>Studio</strong> v6.1 SP2 A-59
IWS Users Guide<strong>Studio</strong> FunctionsExamples:Tag NameExpressionSetSystemDate(“04/15/2002”) // Sets the system clock to April 15 th 2002.SetSystemTime(strTime)GroupExecutionWindows NT/2K/XPWindows CE<strong>Web</strong> Thin ClientDate and TimeSynchronousSupportedSupportedSupportedDescription: Sets the time in the operating system’s clock.Parameters:strTimeString tag containing the time in HH:MM:SS format in which to set the clock.Returned Values: No Returned Value.Examples:Tag NameExpressionSetSystemTime(“15:45:18”) // Sets the system clock to 3:45:18 PM.A-60 <strong>InduSoft</strong> <strong>Web</strong> <strong>Studio</strong> v6.1 SP2
<strong>Studio</strong> FunctionsIWS Users GuideTrigonometric FunctionsThis section describes the following <strong>InduSoft</strong> <strong>Web</strong> <strong>Studio</strong> Trigonometric functions: ACos(numValue) ASin(numValue) ATan(numValue) Cos(numAngle) Cot(numAngle) Pi() Sin(numAngle) Tan(numAngle)ACos(numValue)GroupExecutionWindows NT/2K/XPWindows CE<strong>Web</strong> Thin ClientTrigonometricSynchronousSupportedSupportedSupportedDescription: Calculates the Arc Cosine of a value.Parameters:NumValueNumerical tag from which the Arc Cosine will be taken.Returned Values: Returns the Arc Cosine of numValue in radians.Examples:Tag NameExpressionTag ACos(1) // Returned value = 0.000000Tag ACos(0) // Returned value = 1.570796ASin(numValue)GroupExecutionWindows NT/2K/XPWindows CE<strong>Web</strong> Thin ClientTrigonometricSynchronousSupportedSupportedSupported<strong>InduSoft</strong> <strong>Web</strong> <strong>Studio</strong> v6.1 SP2 A-61
IWS Users Guide<strong>Studio</strong> FunctionsDescription: Calculates the Arc Sine of a value.Parameters:NumValueNumerical tag, from which to take the Arc Sine.Returned Values: Returns the Arc Sine of numValue in radians.Examples:Tag NameExpressionTag ASin(1) // Returned value = 1.570796Tag ASin(0) // Returned value = 0.000000ATan(numValue)GroupExecutionWindows NT/2K/XPWindows CE<strong>Web</strong> Thin ClientTrigonometricSynchronousSupportedSupportedSupportedDescription: Calculates the Arc Tangent of a value.Parameters:NumValueNumerical tag, from which to take the Arc Tangent.Returned Values: Returns the Arc Tangent of numValue in radians.Examples:Tag NameExpressionTag ATan(1) // Returned value = 0.785398Tag ATan(0) // Returned value = 1.570796Cos(numAngle)GroupExecutionWindows NT/2K/XPWindows CE<strong>Web</strong> Thin ClientTrigonometricSynchronousSupportedSupportedSupportedA-62 <strong>InduSoft</strong> <strong>Web</strong> <strong>Studio</strong> v6.1 SP2
<strong>Studio</strong> FunctionsIWS Users GuideDescription: Calculates the Cosine of a value.Parameters:NumAngleNumerical tag containing the Angle (in radians) from which to calculate the Cosine.Returned Values: Returns the Cosine of numAngle.Examples:Tag NameExpressionTag Cos(1.570796) // Returned value = 0.000000Tag Cos(0) // Returned value = 1.000000Cot(numAngle)GroupExecutionWindows NT/2K/XPWindows CE<strong>Web</strong> Thin ClientTrigonometricSynchronousSupportedSupportedSupportedDescription: Calculates the Cotangent of a value.Parameters:NumAngleNumerical tag containing the Angle (in radians) from which to calculate the Cotangent.Returned Values: Returns the Cotangent of numAngle.Examples:Tag NameExpressionTag Cot(0.785398) // Returned value = 1.000000Tag Cot(0) // Returned value = 0.00000 Note:Although mathematically the tangent of Pi is infinite, IWS only returns thelargest number possible.<strong>InduSoft</strong> <strong>Web</strong> <strong>Studio</strong> v6.1 SP2 A-63
IWS Users Guide<strong>Studio</strong> FunctionsPi()GroupExecutionWindows NT/2K/XPWindows CE<strong>Web</strong> Thin ClientTrigonometricSynchronousSupportedSupportedSupportedDescription: Calculates Pi.Returned Values: Returns Pi.Examples:Tag NameExpressionTag Pi() // Returned value = 3.141593 Note:Even though the Pi() function does not have any arguments, you mustinclude the parentheses or IWS will look for a tag named Pi.Sin(numAngle)GroupExecutionWindows NT/2K/XPWindows CE<strong>Web</strong> Thin ClientTrigonometricSynchronousSupportedSupportedSupportedDescription: Calculates the Sine of a value.Parameters:NumAngleNumerical tag containing the Angle (in radians) from which to calculate the Sine.Returned Values: Returns the Sine of numAngle.Examples:Tag NameExpressionTag Sin(0) // Returned value = 0.000000Tag Sin(1.570796) // Returned value = 1.000000A-64 <strong>InduSoft</strong> <strong>Web</strong> <strong>Studio</strong> v6.1 SP2
<strong>Studio</strong> FunctionsIWS Users GuideTan(numAngle)GroupExecutionWindows NT/2K/XPWindows CE<strong>Web</strong> Thin ClientTrigonometricSynchronousSupportedSupportedSupportedDescription: Calculates the Tangent of a value.Parameters:NumAngleNumerical tag containing the Angle (in radians) from which to calculate the Tangent.Returned Values: Returns the Tangent of numAngle.Examples:Tag NameExpressionTag Tan(0) // Returned value = 0.00000Tag Tan(0.785398) // Returned value = 1.00000 Note:Although mathematically the tangent of ½ Pi is infinite, IWS only returnsthe largest number possible.<strong>InduSoft</strong> <strong>Web</strong> <strong>Studio</strong> v6.1 SP2 A-65
IWS Users Guide<strong>Studio</strong> FunctionsOpening and Closing Windows FunctionsThis section describes the following <strong>InduSoft</strong> <strong>Web</strong> <strong>Studio</strong> Screen functions:Close(strScreen)Open(strScreen, optnumX1 , optnumY1 , optnumX2 , optnumY2) OpenPrevious(numOptionalX1 , numOptionalY1 , numOptionalX2 ,numOptionalY2)Close(strScreen)GroupExecutionWindows NT/2K/XPWindows CE<strong>Web</strong> Thin ClientOpening and Closing WindowsAsynchronousSupportedNot SupportedNot SupportedDescription: Closes an open screen.Parameters:strScreenString tag containing the name of the screen to be closed.Returned Values: No returned values.Examples:Tag NameExpressionClose(“main”)Close(“alarms”) Caution:When you open a screen using the Replace style, it automatically closes thescreens with Replace and/or Popup attributes that are overlapped by newscreen. In this case, it is not necessary to call the CLOSE(strScreen)function.Open(strScreen, optnumX1, optnumY1, optnumX2, optnumY2)GroupExecutionWindows NT/2K/XPWindows CEOpening and Closing WindowsAsynchronousSupportedSupportedA-66 <strong>InduSoft</strong> <strong>Web</strong> <strong>Studio</strong> v6.1 SP2
<strong>Studio</strong> FunctionsIWS Users Guide<strong>Web</strong> Thin ClientSupportedDescription: Opens the specified screen.Parameters:strScreenoptnumX1optnumY1optnumX2optnumY2String tag containing the name of the screen to be opened.Optional Integer tag contains the X coordinate for upper-left corner of screen in pixels.Optional Integer tag contains the Y coordinate for upper-left corner of screen in pixels.Optional Integer tag contains the X coordinate for lower-right corner of screen in pixels.Optional Integer tag contains the X coordinate for lower-right corner of screen in pixels.Returned Values:0 Function executed successfully.1 Function did not execute successfully.Examples:Tag NameTagExpressionOpen(“main”)Tag Open(“alarm”, 50, 50, 690, 530) Caution:Some <strong>Web</strong> servers are case-sensitive. If you plan to convert your screensinto HTML format you should use only lowercase letters for the screenname.OpenPrevious(numOptionalX1 , numOptionalY1 ,numOptionalX2 , numOptionalY2 )GroupExecutionWindows NT/2K/XPWindows CE<strong>Web</strong> Thin ClientOpening and Closing WindowsAsynchronousSupportedSupportedSupportedDescription: Re-opens the last screen that was closed.Parameters:optnumX1Optional integer tag contains the X coordinate for upper-left corner of screen in pixels.<strong>InduSoft</strong> <strong>Web</strong> <strong>Studio</strong> v6.1 SP2 A-67
IWS Users Guide<strong>Studio</strong> FunctionsoptnumY1optnumX2optnumY2Optional integer tag contains the Y coordinate for upper-left corner of screen in pixels.Optional integer tag contains the X coordinate for lower-right corner of screen in pixels.Optional integer tag contains the Y coordinate for lower-right corner of screen in pixels.Returned Values:0 Function did not execute successfully1 Function executed successfullyExamples:Tag NameExpressionOpenPrevious()OpenPrevious0,0,800,600()A-68 <strong>InduSoft</strong> <strong>Web</strong> <strong>Studio</strong> v6.1 SP2
<strong>Studio</strong> FunctionsIWS Users GuideSecurity FunctionsThis section describes the following <strong>InduSoft</strong> <strong>Web</strong> <strong>Studio</strong> Security functions: BlockUser(strUserName) CreateUser(strUserName, strGroupName, strPassword) GetUserNames(strUsers , nUserType , strGroups) GetUserPwdAging(strUserName) GetUserState(strUserName) RemoveUser(strUserName) SetPassword(strUserName, strOptionalNewPassword) UnblockUser(strUserName)BlockUser(strUserName)GroupExecutionWindows NT/2K/XPWindows CE<strong>Web</strong> Thin ClientSecuritySynchronousSupportedSupportedSupportedDescription: Used to block an existing user from the security system.Parameters:StrUserNameString tag containing the name of the user to block.Returned Values:0 User blocked successfully1 Invalid number of parameters2 Wrong parameter type3 User does not exist4 It is not possible to write the data successfullyExamples:Tag NameTagTagExpressionBlockUser(“Bob”)BlockUser(“Albert”)<strong>InduSoft</strong> <strong>Web</strong> <strong>Studio</strong> v6.1 SP2 A-69
IWS Users Guide<strong>Studio</strong> Functions Note:You cannot use this function to create a user name that is already beingused in the application. Users created with this function do not display inthe development environment Security folder because they are stored in asecondary database. Tip:You can use the ExtUser.exe program (located in the Bin folder) to managethe users in this secondary database.CreateUser(strUserName, strGroupName, strPassword,strOptUserFullName)GroupExecutionWindows NT/2K/XPWindows CE<strong>Web</strong> Thin ClientSecuritySynchronousSupportedSupportedSupportedDescription: Creates a new user.Parameters:StrUserNameStrGroupNameStrPasswordStrOptUserFullNameString tag containing the name of the user to be created.String tag containing the name of the group to which the user will belong.String tag containing a password for the user.String tag containing the full name of the user. This parameter is optional.Returned Values:0 New user created successfully1 Invalid number of parameters2 Wrong parameter type3 User already exists4 Group does not exist5 It is not possible to safely write the data6 It is not possible to use the CreateUser() functionExamples:A-70 <strong>InduSoft</strong> <strong>Web</strong> <strong>Studio</strong> v6.1 SP2
<strong>Studio</strong> FunctionsIWS Users GuideTag NameTagTagExpressionCreateUser(“Bob”, “Admin”, “Chocolate”)CreateUser(“Albert”, “Engineering”, “EMC2”) Note:You cannot use this function to create a user name that is already beingused in the application. Users created with this function do not display inthe development environment Security folder because they are stored in asecondary database. Tip:You can use the ExtUser.exe program (located in the Bin folder) to managethe users in this secondary database.GetUserNames ( “tagUsers” , optnumUserType ,“opttagGroups” )GroupExecutionWindows NT/2K/XPWindows CE<strong>Web</strong> Thin ClientSecuritySynchronousSupportedSupportedNot SupportedDescription:Parameters:“tagUsers”Name of the array tag that will receive usersoptnumUserType“opttagGroups”0- Return all users1- Only users created during run-time2- Only users created using the development environmentName of the array tag that will receive the group for each specific userReturned Values: Number of users or a negative number that can be one of thefollowing:-1 Invalid number of parameters-2 “tagUsers” is invalid-3 optnumUserType is invalid<strong>InduSoft</strong> <strong>Web</strong> <strong>Studio</strong> v6.1 SP2 A-71
IWS Users Guide<strong>Studio</strong> Functions-4 opttagGroups is invalid-5 Error, function cannot be called in the web thin clientNatural number set: Number of usersExamples:Tag NameNumberOfUsersNumberOfUsersNumberOfUsersNumberOfUsersExpressionGetUserNames("UsersArray") //Retrieves all users, store their names in theUsersArray tag and the number of users in the NumberOfUsers tag.GetUserNames("UsersArray", 1) //Retrieves all users created during run-time, storetheir names in the UsersArray tag and the number of users in the NumberOfUserstag.GetUserNames("UsersArray", 2) //Retrieves all users created in the developmentenvironment, store their names in the UsersArray tag and the number of users inthe NumberOfUsers tag.GetUserNames("UsersArray", 2, “Groups”) //Retrieves all users created in thedevelopment environment, store their names in the UsersArray tag and thenumber of users in the NumberOfUsers tag. The group name per each user isstored in the Groups tag.GetUserPWSAging( strUser )GroupExecutionWindows NT/2K/XPWindows CE<strong>Web</strong> Thin ClientSecuritySynchronousSupportedSupportedSupportedDescription: Returns the time remaining before the password a specific userexpires.Parameters:StrUserNameString tag containing the name of the user.Returned Values:o >0: Number of hours remaining before the password expires.o
<strong>Studio</strong> FunctionsIWS Users GuideExamples:Tag NameTagHoursToExpireTagHoursToExpireExpressionGetUserPwdAging(“John”)// returns the number of hours before the password for the User “John” expires.GetUserPwdAging(UserName)// returns the number of hours before the password for current User logged on thesystem expires.GetUserState(strUserName)GroupExecutionWindows NT/2K/XPWindows CE<strong>Web</strong> Thin ClientSecuritySynchronousSupportedSupportedSupportedDescription: Use to see the current status of a selected user.Parameters:StrUserNameString tag containing the name of the user.Returned Values:0 User is unblocked1 User is blocked3 User does not exist4 It is not possible to safely write the dataExamples:Tag NameTagTagExpressionGetUserState(“Bob”)GetUserState(“Albert”)RemoveUser(strUserName)GroupExecutionWindows NT/2K/XPSecuritySynchronousSupported<strong>InduSoft</strong> <strong>Web</strong> <strong>Studio</strong> v6.1 SP2 A-73
IWS Users Guide<strong>Studio</strong> FunctionsWindows CE<strong>Web</strong> Thin ClientSupportedSupportedDescription: Removes a user from the system.Parameters:StrUserNameString tag containing the name of the user to be removed.Returned Values:0 User removed successfully1 Invalid number of parameters2 Wrong parameter type3 User does not exist4 It is not possible to safely write the dataExamples:Tag NameTagTagExpressionRemoveUser(“Bob”)RemoveUser(“Albert”) Note:You can use this function to remove only those users you created using theCreateUser() function.SetPassword(strUserName, strOptionalNewPassword)GroupExecutionWindows NT/2K/XPWindows CE<strong>Web</strong> Thin ClientSecuritySynchronousSupportedSupportedSupportedDescription: Use to specify a new user password.Parameters:StrUserNameStrOptionalNewPasswordString tag containing the name of the user.Optional string tag containing the new password.A-74 <strong>InduSoft</strong> <strong>Web</strong> <strong>Studio</strong> v6.1 SP2
<strong>Studio</strong> FunctionsIWS Users GuideReturned Values:0 The new password has been set1 User is blocked3 User does not exist4 It is not possible to safely write the data5 Operation was cancelledExamples:Tag NameTagTagExpressionSetPassword(“Bob”)SetPassword(“Albert,” “anemarie”) Note:If you omit the strOptionalNewPassword parameter, the SetPassword()function will launch an Enter a new password dialog, so the user canconfigure a new password.UnblockUser(strUserName)GroupExecutionWindows NT/2K/XPWindows CE<strong>Web</strong> Thin ClientSecuritySynchronousSupportedSupportedSupportedDescription: Use to unblock a blocked user in the system.Parameters:StrUserNameString tag containing the name of the user to unblock.Returned Values:0 User unblocked successfully1 Invalid number of parameters2 Wrong parameter type3 User does not exist4 It is not possible to safely write the data<strong>InduSoft</strong> <strong>Web</strong> <strong>Studio</strong> v6.1 SP2 A-75
IWS Users Guide<strong>Studio</strong> FunctionsExamples:Tag NameTagTagExpressionUnblockUser(“Bob”)UnblockUser(“Albert”)A-76 <strong>InduSoft</strong> <strong>Web</strong> <strong>Studio</strong> v6.1 SP2
<strong>Studio</strong> FunctionsIWS Users GuideModule Activity FunctionsThis section describes the following <strong>InduSoft</strong> <strong>Web</strong> <strong>Studio</strong> Module Activity functions:AppActivate(strAppTitle, optnumActiv)AppIsRunning(strAppTitle)AppPostMessage(strAppTitle, numwParam, numlParam)AppSendKeys(strKeys1, strKeys2, ..., strKeysN)CleanReadQueue()CloseSplashWindow()EndTask(strTask)ExitWindows(numExitCode)IsScreenOpen(strScreen)IsTaskRunning(strTask)IsViewerInFocus()KeyPad(“TagName”) LogOff( )Logon(optstrUser, optstrPassword)Math(numWorksheet)PostKey(numKeydownOrKeyup, numwParam, numlParam)Recipe(strFunction)Report( “strFunction” , optnumOrientation)RunVBScript( strScript , "opttagReturnError")SendKeyObject(numEvent, strMainKey, optnumShift, optnumCtrl,optnumAlt, optstrTargetScreen)SetAppPath(strPath)SetKeyboardLanguage(strLanguage)SetViewerInFocus()SetViewerPos(numLeft, numTop, optnumWidth, optnumHeight)ShutDown()StartTask(strTask)ViewerPostMessage(strScrTitle, numwParam, numlParam)Wait(numMillisec)WinExec(strCommand, optnumState)WinExecIsRunning(numHandle, “stroptReturn”)AppActivate(strAppTitle, optnumActiv)GroupExecutionWindows NT/2K/XPWindows CEModule ActivityAsynchronousSupportedSupported<strong>InduSoft</strong> <strong>Web</strong> <strong>Studio</strong> v6.1 SP2 A-77
IWS Users Guide<strong>Studio</strong> Functions<strong>Web</strong> Thin ClientSupportedDescription: Activates an application that is already open.Parameters:StrAppTitleOptnumActiveString tag containing the name of the application to be activated.Optional integer tag containing the integer that corresponds to an activationoption. See Windows documentation for more details on these options.• 0 = SW_HIDE• 1 = SW_SHOWNORMAL• 2 = SW_SHOWMINIMIZED• 3 = SW_SHOWMAXIMIZED• 4 = SW_SHOWNOACTIVATE• 5 = SW_SHOW• 6 = SW_MINIMIZE• 7 = SW_SHOWMINNOACTIVATE• 8 = SW_SHOWNA• 9 = SW_RESTORE (Default)Returned Values: No returned values.Examples:Tag NameExpressionAppActivate(“Microsoft Word – test.doc”, 5)AppIsRunning(strAppTitle)GroupExecutionWindows NT/2K/XPWindows CE<strong>Web</strong> Thin ClientModule ActivitySynchronousSupportedSupportedSupportedDescription: Verifies whether an application is open and running.Parameters:strAppTitleString tag containing the name of the application.Returned Values:1 Application is running.0 Application is not running.A-78 <strong>InduSoft</strong> <strong>Web</strong> <strong>Studio</strong> v6.1 SP2
<strong>Studio</strong> FunctionsIWS Users GuideExamples:Tag NameTagExpressionAppIsRunning(“Microsoft Word – test.doc”)AppPostMessage(strAppTitle, numwParam, numlParam)GroupExecutionWindows NT/2K/XPWindows CE<strong>Web</strong> Thin ClientModule ActivitySynchronousSupportedSupportedSupportedDescription: Sends a message to the active application.Parameters:strAppTitlenumwParamnumlParamString tag containing the name of the application.Integer tag containing an integer corresponding to the Windows message wParamInteger tag containing an integer corresponding to the Windows message lParamReturned Values: No returned values.Examples:Tag NameExpressionTag AppPostMessage(“Microsoft Word – test.doc”, 3, 1)AppSendKeys(strKeys1, strKeys2, ..., strKeysN)GroupExecutionWindows NT/2K/XPWindows CE<strong>Web</strong> Thin ClientModule ActivitySynchronousSupportedNot SupportedNot SupportedDescription: Sends keyboard commands to the active application.Parameters:StrKeys (1-N)String tags containing the keyboard commands to be used.Returned Values: No returned values.<strong>InduSoft</strong> <strong>Web</strong> <strong>Studio</strong> v6.1 SP2 A-79
IWS Users Guide<strong>Studio</strong> FunctionsExamples:Tag NameExpressionAppSendKeys(“S”, ”t”, ”u”, ”d”, ”i”, “o”, “”)AppSendKeys(“F”) Note:You can specify , , or in the text to send a code equalto the Alt, Ctrl, or Shift keyboard commands. To send the < character, specify
<strong>Studio</strong> FunctionsIWS Users GuideCloseSplashWindow()GroupExecutionWindows NT/2K/XPWindows CE<strong>Web</strong> Thin ClientModule ActivitySynchronousSupportedNot SupportedNot SupportedDescription: Closes the IWS splash screen.Returned Values: No returned values.Examples:Tag NameExpressionCloseSplashWindow()EndTask(strTask)GroupExecutionWindows NT/2K/XPWindows CE<strong>Web</strong> Thin ClientModule ActivityAsynchronousSupportedNot SupportedNot SupportedDescription: Stops the IWS module that is currently running.Parameters:strTaskString tag containing the name of the task to stop (must be one of the following):• BGTASK: Background Tasks• VIEWER: Viewer• DBSPY: Database Spy• LOGWIN: LogWin• DRIVER : Driver• UNIDDECL: DDE client• UNINDDE: DDE server• UNIODBC: ODBC• TCPSERVER: TCP/IP Server• TCPCLIENT: TCP/IP Client• OPCCLIENT: OPCReturned Values: No returned values.<strong>InduSoft</strong> <strong>Web</strong> <strong>Studio</strong> v6.1 SP2 A-81
IWS Users Guide<strong>Studio</strong> FunctionsExamples:Tag NameExpressionEndTask(“Viewer”) Note:To close a driver, you must use the following syntax:EndTask(“Driver”)Where is the name of the driver’s .dll file. For example,EndTask(“DriverMODBU”)ExitWindows(numExitCode)GroupExecutionWindows NT/2K/XPWindows CE<strong>Web</strong> Thin ClientModule ActivityAsynchronousSupportedNot SupportedNot SupportedDescription: Closes windows in a specified manner.Parameters:numExitCodeInteger tag containing a number (0–2) specifying how Windows will beexited.• 0 = Reboot Windows• 1 = Log Off Windows• 2 = Shutdown WindowsReturned Values: No returned values.Examples:Tag NameExpressionExitWindows(1)A-82 <strong>InduSoft</strong> <strong>Web</strong> <strong>Studio</strong> v6.1 SP2
<strong>Studio</strong> FunctionsIWS Users GuideIsScreenOpen(strScreen)GroupExecutionWindows NT/2K/XPWindows CE<strong>Web</strong> Thin ClientModule ActivitySynchronousSupportedSupportedNot SupportedDescription: Verifies that a screen is open.Parameters:strScreenString tag containing the name of the screen to be verified.Returned Values:0 Screen is not open.1 Screen is open.Examples:Tag NameTagExpressionIsScreenOpen(“main”)IsTaskRunning(strTask)GroupExecutionWindows NT/2K/XPWindows CE<strong>Web</strong> Thin ClientModule ActivitySynchronousSupportedNot SupportedNot SupportedDescription: Verifies that a task is running.Parameters:strTaskString tag containing the name of the task to be verified.Returned Values:0 Task is not running.1 Task is running.<strong>InduSoft</strong> <strong>Web</strong> <strong>Studio</strong> v6.1 SP2 A-83
IWS Users Guide<strong>Studio</strong> FunctionsExamples:Tag NameTagExpressionIsTaskRunning(“viewer”)IsViewerInFocus()GroupExecutionWindows NT/2K/XPWindows CE<strong>Web</strong> Thin ClientModule ActivitySynchronousSupportedNot SupportedNot SupportedDescription: Verifies that the Viewer module is in focus on the screen.Returned Values:0 Viewer is not in focus.1 Viewer is in focus.Examples:Tag NameTagExpressionIsViewerInFocus()KeyPad(“TagName”)GroupExecutionWindows NT/2K/XPWindows CE<strong>Web</strong> Thin ClientModule ActivityAsynchronousSupportedSupportedSupportedDescription: Opens the Keypad dialog to write to the specified tag.Parameters:“TagName”The name of the tag to which the Keypad will write.A-84 <strong>InduSoft</strong> <strong>Web</strong> <strong>Studio</strong> v6.1 SP2
<strong>Studio</strong> FunctionsIWS Users GuideReturned Values:0 Success1 User pressed ESC to close keypad2 Invalid parameterExamples:Tag NameTagExpressionKeyPad(“tagA”)LogOff( )GroupExecutionWindows NT/2K/XPWindows CE<strong>Web</strong> Thin ClientModule ActivityAsynchronousSupportedSupportedSupportedDescription: Logs off the current user and logs on the guest user.Returned Values: No returned values.Examples:Tag NameExpressionLogOff()Logon(optstrUser, optstrPassword)GroupExecutionWindows NT/2K/XPWindows CE<strong>Web</strong> Thin ClientModule ActivityAsynchronousSupportedSupportedSupportedDescription: Logs on the specified user using the specified password. If no user isprovided, opens a logon dialog.<strong>InduSoft</strong> <strong>Web</strong> <strong>Studio</strong> v6.1 SP2 A-85
IWS Users Guide<strong>Studio</strong> FunctionsParameters:optstrUseroptstrPasswordOptional string tag containing the name of the User to log on.Optional string tag containing the user’s log-on password.Returned Values: No returned values.Examples:Tag NameExpressionLogon()Logon(“Albert”, “EMC2”)Math(numWorksheet)GroupExecutionWindows NT/2K/XPWindows CE<strong>Web</strong> Thin ClientModule ActivitySynchronousSupportedSupportedNot SupportedDescription: Executes the specified math worksheet.Parameters:numWorksheetNumerical tag containing the number of the math worksheet to be executed.Returned Values: No returned values.Examples:Tag NameExpressionMath(6) Caution:Running a math worksheet from inside another module will pause thatmodule until the math worksheet finishes. Consequently, use this functiononly when absolutely necessary to avoid decreasing the performance of theother modules.A-86 <strong>InduSoft</strong> <strong>Web</strong> <strong>Studio</strong> v6.1 SP2
<strong>Studio</strong> FunctionsIWS Users GuidePostKey(numKeydownOrKeyup, numwParam, numlParam)GroupExecutionWindows NT/2K/XPWindows CE<strong>Web</strong> Thin ClientModule ActivitySynchronousSupportedSupportedSupportedDescription: Posts keys to the screen in the viewer.Parameters:numKeydownOrKeyup Numerical tag containing a 0 (to indicate a Key down event) or a 1(to indicate a Key up event).numwParamnumlParamNumerical tag containing key code to be sent.Numerical tag containing message lParam.Returned Values: No returned values.Examples:Tag NameExpressionPostKey(0, 0x24, 0)Recipe(strFunction)GroupExecutionWindows NT/2K/XPWindows CE<strong>Web</strong> Thin ClientModule ActivitySynchronousSupportedSupportedSupportedDescription: Activates a specified recipe function.Parameters:strFunctionString tag specifing the operation to be preformed and the recipe sheet to beused in the [Operation]:[Recipe sheet]format.Operations:• Save: Saves data to a data file.• Load: Loads data from a data file.• Delete: Deletes a data file.• Init: Initializes a data file with a value of 0 in all the tags.<strong>InduSoft</strong> <strong>Web</strong> <strong>Studio</strong> v6.1 SP2 A-87
IWS Users Guide<strong>Studio</strong> FunctionsReturned Values:0 No error1 If the tag is numeric2 Expression does not contain “:”3 Previous command to the invalid “:”4 Task not found by the system5 Disk errorExamples:Tag NameTagTagExpressionRecipe(“Save:Recipe1”)Recipe(“Load:Recipe5”) Cautions: You must be running the Background Task (Execution Tasks tab on theProject Status window) to execute the recipe functions. When this function is called on a <strong>Web</strong> Thin Client, the command is sent tothe Server (via TCP/IP) and the Recipe task on the Server executes thecommand. Therefore, be aware that tags configured with a Scope of Localrather Server will still be updated on the Server.Report( “strFunction” , optnumOrientation)GroupExecutionWindows NT/2K/XPWindows CE<strong>Web</strong> Thin ClientModule ActivitySynchronousSupportedSupportedNot SupportedDescription: Either saves a report to the disk or sends it to the printer.Parameters:“strFunction”String specifying the operation to perform and the report sheet to use in thesyntax “[Operation]:[Report worksheet] format, where:[Operation]:• Disk: Saves data to a data file.• Prn: Prints data directly to printer.[Report worksheet]:Name of the report that must be either saved to the disk or sent to theA-88 <strong>InduSoft</strong> <strong>Web</strong> <strong>Studio</strong> v6.1 SP2
<strong>Studio</strong> FunctionsIWS Users Guideprinter (the report file name must include the .REP extension).optnumOrientationSet the paper orientation as follows:0 (default) = Portrait1 = LandscapeThis setting is ignored when the Operation configured in the “strFunction”parameter is different from Prn. Note:The optnumOrientation parameter is not supported when running theapplication under the Windows CE operating system.Returned Values:0 Success1 “strFunction” is configured with a numeric value (invalid)2 Expression does not contain “:” (invalid)3 Previous command to the invalid “:”4 Task not found by the system (BGTask is not running)5 Disk error (disk full, read-only file cannot be overwritten or invalid path)Examples:Tag NameExpressionReport(“Disk:Report1.rep”)Report(“Prn:Report2.rep”)Report(“Prn:Report3.rep”, 1) Caution:Reports in RTF format are not supported under Windows CE operatingsystem. Tip:The BGTask (Background Task) must be running in order to execute thisfunction. Otherwise, the operation will not be executed and the function willreturn the value 4 indicating error.RunVBScript( strScript , "opttagReturnError" )<strong>InduSoft</strong> <strong>Web</strong> <strong>Studio</strong> v6.1 SP2 A-89
IWS Users Guide<strong>Studio</strong> FunctionsGroupExecutionWindows NT/2K/XPWindows CE<strong>Web</strong> Thin ClientModule ActivitySynchronousSupportedSupportedNot SupportedDescription: Executes an statement in VBScript language.Parameters:strScriptScript statement that must be executed by the function.optTagReturnError Name of the tag that will receive the error (if any) generated by thestatement – e.g.: “Division by zero”. The tag name must be configuredbetween double-quotes and it must be a String tag.Returned Values:o 0: Error.o 1: Success.Examples:Tag NameTagResultExpressionRunVBScript(“MsgBox(Time)”)// Executes the MsgBox function from VBScript and displays the currenttime.RunVBScript(TagStatement)// Executes the statement configured in the value of the string tagTagStatement.RunVBScript(“$TagC=$TagA/$TagB”,”TagError”)// Writes in TagC the result of TagA divided by TagB. The error generatedby the operation (if any) is written to the string tag TagError (e.g.: “Divisionby zero”). Tip:This function is useful to execute VBScript statements from interfaces thatsupport the built-in language only – e.g.: Scheduler groups. You can alsocall VBSCript functions created in the Global Procedures. Note:The runtime station must support the VBScript statements configured inthis function in order to execute them.A-90 <strong>InduSoft</strong> <strong>Web</strong> <strong>Studio</strong> v6.1 SP2
<strong>Studio</strong> FunctionsIWS Users GuideSendKeyObject(numEvent, strMainKey, optnumShift,optnumCtrl, optnumAlt, optstrTargetScreen)GroupExecutionWindows NT/2K/XPWindows CE<strong>Web</strong> Thin ClientModule ActivitySynchronousSupportedNot SupportedNot SupportedDescription: Sends key codes to objects on the open screens. You can trigger"Command" dynamics from these objects using this function.<strong>InduSoft</strong> <strong>Web</strong> <strong>Studio</strong> v6.1 SP2 A-91
IWS Users Guide<strong>Studio</strong> FunctionsParameters:numEventstrMainKeyNumerical tag specifying the key event code, as follows:• 0: On Down• 1: While Down• 2: On UpString tag containing the key to be sent to the object. The following tagsare acceptable:• "F1" ... "F20"• "+ "• "-"• "/"• "*"• "HOME"• "END"• "INSERT"• "DELETE"• "DOWN"• "UP"• "LEFT"• "RIGHT"• "PAGEUP"• "PAGEDOWN"• "SPACE"• "RETURN"• "BACKSPACE"• "ESCAPE"• "A" ... "Z"optnumShiftoptnumCtrloptnumAltoptstrTargetScreenOptional numerical tag, which indicates whether to send Shift.Optional numerical tag, which indicates whether to send Ctrl.Optional numerical tag, which indicates whether to send Alt.Optional string tag containing the screen to receive the key code.Returned Values: No returned values.Examples:Tag NameExpressionSendKeyObject(0, “R”, 1, 0, 0, “main”) Notes: numEvent defines how the function executes expressions specified for OnDown, On While, or On Up of the object’s Command dynamic. The On While event requires special attention. Each time theSendKeyObject() function is executed, IWS executes the expressionsconfigured for the On While sheet (from the object’s Command dynamic) justonce. The numShift, numCtrl, numAlt, and strTargetScreen parameters are optional;however, if you configure one of them, you must configure the others too.A-92 <strong>InduSoft</strong> <strong>Web</strong> <strong>Studio</strong> v6.1 SP2
<strong>Studio</strong> FunctionsIWS Users GuideSetAppPath(strPath)GroupExecutionWindows NT/2K/XPWindows CE<strong>Web</strong> Thin ClientModule ActivitySynchronousSupportedNot SupportedNot SupportedDescription: Sets the new path for the application. After this function is executed,IWS will look for all the configuration files (screens, alarms, trends, database,events) in this new path.Parameters:StrPathString tag containing the file path.Returned Values:0 Failed to set path.1 Succeeded in setting pathExamples:Tag NameExpressionSetAppPath(“C:\ <strong>InduSoft</strong> <strong>Web</strong> <strong>Studio</strong>\”) Note:If the computer is on a network, you can use the /// syntax to define a location on another node of the network.SetKeyboardLanguage(strLanguage)GroupExecutionWindows NT/2K/XPWindows CE<strong>Web</strong> Thin ClientModule ActivitySynchronousSupportedSupportedSupportedDescription: Use this function to set the language of the Virtual Keyboards.Parameters:StrLanguageString tag with the language used for the virtual keyboards. The currently available<strong>InduSoft</strong> <strong>Web</strong> <strong>Studio</strong> v6.1 SP2 A-93
IWS Users Guide<strong>Studio</strong> Functionsoptions are: “EN” (English, default), and “GE” (German).Returned Values:0 Success1 ErrorExamples:Tag NameTagTagExpressionSetKeyboardLanguage(“EN”)SetKeyboardLanguage(TagLanguage)SetViewerInFocus()GroupExecutionWindows NT/2K/XPWindows CE<strong>Web</strong> Thin ClientModule ActivitySynchronousSupportedNot SupportedNot SupportedDescription: Sets the focus to the Viewer task.Returned Values: No returned values.Examples:Tag NameExpressionSetViewerInFocus()SetViewerPos(numLeft, numTop, optnumWidth, optnumHeight)GroupExecutionWindows NT/2K/XPWindows CE<strong>Web</strong> Thin ClientModule ActivitySynchronousSupportedNot SupportedNot SupportedDescription: Sets the height, width, and position of the Viewer.A-94 <strong>InduSoft</strong> <strong>Web</strong> <strong>Studio</strong> v6.1 SP2
<strong>Studio</strong> FunctionsIWS Users GuideParameters:NumLeftNumTopOptnumWidthOptnumHeightNumerical tag specifying the left-side position of the Viewer in pixels.Numerical tag specifying the top-side position of the Viewer in pixels.Optional numerical tag specifying the Viewer width in pixels.Optional numerical tag containing the Viewer height in pixels.Returned Values:0 Error1 SuccessExamples:Tag NameExpressionTag SetViewerPos(50, 50, 640, 480) Note:When you omit the optional parameters (numWidth and numHeight), IWSgets size of the Viewer window from the application resolution.ShutDown()GroupExecutionWindows NT/2K/XPWindows CE<strong>Web</strong> Thin ClientModule ActivitySynchronousSupportedSupportedNot SupportedDescription: Shuts down all of the active application modules.Returned Values: No returned values.Examples:Tag NameExpressionShutDown() Caution:This function does not close the development environment, Database Spy, orLogWin.<strong>InduSoft</strong> <strong>Web</strong> <strong>Studio</strong> v6.1 SP2 A-95
IWS Users Guide<strong>Studio</strong> FunctionsStartTask(strTask)GroupExecutionWindows NT/2K/XPWindows CE<strong>Web</strong> Thin ClientModule ActivityAsynchronousSupportedNot SupportedNot SupportedDescription: Starts an IWS module not currently running.Parameters:StrTaskString tag containing the name of the task to start (must be one of the following tasks):• BGTASK: Background Tasks• VIEWER: Viewer• DBSPY: Database Spy• LOGWIN: LogWin• DRIVER: Driver• UNIDDECL: DDE Client• UNINDDE: DDE Server• UNIODBC: ODBC• TCPSERVER : TCP/IP Server• TCPCLIENT: TCP/IP Client• OPCCLIENT: OPCReturned Values: No returned values.Examples:Tag NameExpressionEndTask(“Viewer”) Note:The StartTask(“Driver”) function starts all drivers configured in theapplication.To start a specific driver, you must use the Winexec() function. Forexample,Winexec(“\BIN\<strong>Studio</strong> Manager.exe”+” “+”\Bin\Driver.dll”+” “+””)A-96 <strong>InduSoft</strong> <strong>Web</strong> <strong>Studio</strong> v6.1 SP2
<strong>Studio</strong> FunctionsIWS Users GuideViewerPostMessage(strScrTitle, numwParam, numlParam)GroupExecutionWindows NT/2K/XPWindows CE<strong>Web</strong> Thin ClientModule ActivityAsynchronousSupportedSupportedSupportedDescription: Sends an internal message to the Viewer.Parameters:strScrTitlenumwParamnumlParamString tag containing the name of the screen to which the message will be posted.Numerical tag containing the wParam of the Windows message.Numerical tag containing the lParam of the Windows message.Returned Values: No returned values.Examples:Tag NameExpressionViewerPostMessage(“main”, 3, 1)Wait(numMillisec)GroupExecutionWindows NT/2K/XPWindows CE<strong>Web</strong> Thin ClientModule ActivitySynchronousSupportedSupportedSupportedDescription: Interrupts the Math worksheet’s execution for a specified number ofmilliseconds.Parameters:NumMillisec Integer tag containing the number of milliseconds to wait.Returned Values: No returned values.Examples:Tag NameExpressionWait(1000)<strong>InduSoft</strong> <strong>Web</strong> <strong>Studio</strong> v6.1 SP2 A-97
IWS Users Guide<strong>Studio</strong> Functions Caution:You can use the Wait(numMillisec) function in Math worksheets only.However, it is dangerous to use this function anywhere in yourapplication. Wait(numMillisec) pauses the application, and anyinformation coming into the application during a wait will be ignored.WinExec(strCommand, optnumState, optnumSync,“opttagReturnOrHandle”)GroupExecutionWindows NT/2K/XPWindows CE<strong>Web</strong> Thin ClientModule ActivityAsynchronous / AsynchronousSupportedSupportedSupportedDescription: Executes a Windows command line.Parameters:strCommandoptnumStateoptnumSyncString tag containing the command line to execute.Optional numeric tag or constant containing an integer thatdefines the initial state of a new application:• 0: Hides the application and gives control to another one.• 1: Activates and displays the application (default).• 2: Activates the application and displays it as an icon.• 3: Activates the application and maximizes it.• 4: Shows the application with its recent size. The application isstill active.• 7: Shows the application as an icon. The application is stillactive.Optional numeric tag or constant that specifies if the function willexecute synchronously or asynchronously. When executingsynchronously, the function will return when the executable finishits execution; when executing asynchronously the function willreturn immediately. To verify if an program startedasynchronously has been finished, one should use the fourthparameter and the WinExecIsRunning function.• 0: Asynchronous mode.• 1: Synchronous mode.Default is 0.A-98 <strong>InduSoft</strong> <strong>Web</strong> <strong>Studio</strong> v6.1 SP2
<strong>Studio</strong> FunctionsIWS Users Guide“opttagReturnOrHandle”You should specify a string with the tag name that will receiveeither the Return code (when executing Synchronously) of theexecutable file or the program handle that can be used in theWinExecIsRunning function to determine whether the executableis still running.Returned Values:0 Command was not executed successfully.1 Command was executed successfully.Examples:Tag NameTagTagTagTagExpressionWinExec( "C:\WinNT\System32\notepad.exe", 4 ) // Starts the Notepad and continuesexecuting the next lines in the scriptWinExec( "C:\WinNT\System32\mspaint.exe" ) // Starts MS Paint and continuesexecuting the next lines in the scriptWinExec( "C:\MyTasks.bat", 0, 1, “result” ) // Starts a batch file, executes it in hiddenmode, and continues executing the next lines in the script only when the batch finishesits execution. The result is stored in the result integer tag.WinExec( "C:\MyTasks.bat", 0, 0, “handle” ) // Starts a batch file, executes it in hiddenmode and goes to the next line in the script. The tag handle receives a number thatcan be passed to the WinExecIsRunning function to determine whether the batch isstill executing or not [WinExecIsRunning(handle)].<strong>InduSoft</strong> <strong>Web</strong> <strong>Studio</strong> v6.1 SP2 A-99
IWS Users Guide<strong>Studio</strong> FunctionsWinExecIsRunning(numHandle, “opttagReturn”)GroupExecutionWindows NT/2K/XPWindows CE<strong>Web</strong> Thin ClientModule ActivitySynchronousSupportedSupportedSupportedDescription: Indicates whether a program started by the WinExec() function is stillrunning.Parameters:numHandle“opttagReturn”Handle number stored in the tag in the WinExec stroptReturnorHandleparameter.Tag that receives the code returned by the program executed by theWinExec() function.Returned Values:0 Successful execution-1 Invalid parameter(s)-2 Failed to open file. Disk is write-protected or file name is invalid.Examples:Tag NameTagTagExpressionWinExecIsRunning(numHandle)WinExecIsRunning(numHandle, “return”)A-100 <strong>InduSoft</strong> <strong>Web</strong> <strong>Studio</strong> v6.1 SP2
<strong>Studio</strong> FunctionsIWS Users GuideFile FunctionsThis section describes the following <strong>InduSoft</strong> <strong>Web</strong> <strong>Studio</strong> File functions:DeleteOlderFiles (strPath, strMask, strDate)DirCreate (strDirectory , optBooFullPath)DirDelete (strDirectory , optBooEmptyOnly)DirLength (strPath)DirRename (strPath , strDirectoryFrom , strDirectoryTo)FileCopy (strSourceFile, strTargetFile, optnumTimeOut)FileDelete(strFile)FileLength(strFile)FileRename(strOldName, strNewName)FileWrite(strFileName, strWriteText, numoptAppend)FindFile(strFile, "opttagFilesFound", optnumTimeOut)FindPath(strPathName)GetFileAttributes(strFile)GetFileTime(strFileName, numFormat)GetHstInfo(strFileName, numInfoType)GetLine(strFileName, strSeqChar, "tagStore", optnumCase,"optOveflowTag")HST2TXT(strStartDate, strStartTime, numDuration, numGroupNumber,strTargetFile, optstrSeparator, optnumMilliseconds, optstrFormat)HST2TXTIsRunning()Print()RDFileN("tagSelectedFile", strSearchPath, strMask, numChangeDir)DeleteOlderFiles(strPath, strMask, strDate)GroupExecutionWindows NT/2K/XPWindows CE<strong>Web</strong> Thin ClientFileSynchronousSupportedSupportedSupportedDescription: Deletes files that are older than a date matching the configured maskfrom the configured path.Parameters:StrPathStrMaskStrDateString tag containing the path to the files that will be deleted.String tag containing the mask of the files to be deleted.String tag containing the cut-off date. Any files older than this date will be deleted.<strong>InduSoft</strong> <strong>Web</strong> <strong>Studio</strong> v6.1 SP2 A-101
IWS Users Guide<strong>Studio</strong> FunctionsReturned Values: Returns the number of files deleted.Examples:Tag NameExpressionTag DeleteOlderFiles(“C:\ IWS\Application\HST\”, “*.hst”, “04/12/2002”) Note:You must configure the third parameter (StrDate) using the date formatspecified for the application (such as MDY or DMY) with the appropriateseparator ( /, :, ., and so forth.)DirCreate(strDirectory, optBooFullPath)GroupExecutionWindows NT/2K/XPWindows CE<strong>Web</strong> Thin ClientFileSynchronousSupportedSupportedNot SupportedDescription: Creates the specified directory.Parameters:strDirectoryoptBooEmptyOnlyString tag or value containing the name and file path of the directory tocreate.Optional flag. If omitted or if this parameter has the value 0, the directory iscreated only if all previous directories exist. If this parameter has the valuedifferent from 0, the full path specified in the strDirectory parameter iscreated.Returned Values:-1 Invalid parameters0 Failed to create the directory (e.g. Drive does not exist.)1 Directory created successfully.Examples:Tag NameTagTagExpressionDirCreate(“C:\<strong>Studio</strong>\Temp”) // The Temp folder is created in the C:\<strong>Studio</strong> path (only ifthe C:\<strong>Studio</strong> path already exists).DirCreate(“C:\<strong>Studio</strong>\Temp”,1) // The C:\<strong>Studio</strong>\Temp full path is created.A-102 <strong>InduSoft</strong> <strong>Web</strong> <strong>Studio</strong> v6.1 SP2
<strong>Studio</strong> FunctionsIWS Users Guide Note:When this function is executed from a <strong>Web</strong> Thin Client station, the directoryis checked on the server station (but not on the <strong>Web</strong> Thin Client).DirDelete(strDirectory, optBooEmptyOnly)GroupExecutionWindows NT/2K/XPWindows CE<strong>Web</strong> Thin ClientFileSynchronousSupportedSupportedNot SupportedDescription: Deletes the specified directory.Parameters:strDirectoryoptBooEmptyOnlyString tag or value containing the name and file path of the directory todelete.Optional flag. If omitted or if this parameter has the value 0, the directory isdeleted only if it is empty.Returned Values:-2 Attempted to delete a non-empty directory when this action is not allowed(optBooEmptyOnly 0)-1 Invalid parameters0 Failed to delete the directory (e.g. Directory does not exist.)1 Directory deleted successfully.Examples:Tag NameTagTagExpressionDirDelete(“C:\<strong>Studio</strong>\Temp”) // The Temp folder from C:\<strong>Studio</strong> is deleted.DirDelete (“C:\<strong>Studio</strong>\Temp”,1) // The Temp folder from C:\<strong>Studio</strong> is deleted only if it isempty. Note:When this function is executed from a <strong>Web</strong> Thin Client station, the directoryis checked on the server station (but not on the <strong>Web</strong> Thin Client).<strong>InduSoft</strong> <strong>Web</strong> <strong>Studio</strong> v6.1 SP2 A-103
IWS Users Guide<strong>Studio</strong> Functions Tip:This function supports wildcard (* and ?).DirLength(strPath)GroupExecutionWindows NT/2K/XPWindows CE<strong>Web</strong> Thin ClientFileSynchronousSupportedSupportedNot SupportedDescription: Returns the size of a specific directory.Parameters:strPathString tag or value containing the path of the directory that will be checked.Returned Values:-2 Directory does not exist.-1 Invalid parameters>=0 Size (in bytes) of the files and sub-folders in the directoryExamples:Tag NameTagExpressionDirLength(“C:\<strong>Studio</strong>”) // Returns the size (in bytes) of all files and sub-folders fromC:\<strong>Studio</strong>. Caution:This function is synchronous, and it may take some seconds to return thecorrect value; therefore, it must be used with caution. Note:When this function is executed from a <strong>Web</strong> Thin Client station, the directoryis checked on the server station (but not on the <strong>Web</strong> Thin Client).DirRename(strPath, strDirectoryFrom, strDirectoryTo)GroupFileA-104 <strong>InduSoft</strong> <strong>Web</strong> <strong>Studio</strong> v6.1 SP2
<strong>Studio</strong> FunctionsIWS Users GuideExecutionWindows NT/2K/XPWindows CE<strong>Web</strong> Thin ClientSynchronousSupportedSupportedNot SupportedDescription: Renames directories.Parameters:strPathstrDirectoryFromstrDirectoryToString tag or value containing the path of the directory that will be renamed.String tag or value containing the original name of the directory that will berenamed.String tag or value containing the target name used to rename the originaldirectory.Returned Values:-1 Invalid parameters0 Failed to rename the directory (e.g. strDirectoryFrom does not exist.)1 Directory renamed successfully.Examples:Tag NameTagTagExpressionDirRename(“C:\<strong>Studio</strong>\”,”Temp”, “New”) // The Temp folder from the C:\<strong>Studio</strong>\ folderis renamed to New.DirDelete (“C:\<strong>Studio</strong>\Temp”,1) // The Temp folder from C:\<strong>Studio</strong> is deleted only if it isempty. Note:When this function is executed from a <strong>Web</strong> Thin Client station, the directoryis renamed on the server station (but not on the <strong>Web</strong> Thin Client). Tip:This function supports wildcard (* and ?).FileCopy (strSourceFile, strTargetFile, optnumTimeOut)GroupExecutionFileSynchronous<strong>InduSoft</strong> <strong>Web</strong> <strong>Studio</strong> v6.1 SP2 A-105
IWS Users Guide<strong>Studio</strong> FunctionsWindows NT/2K/XPWindows CE<strong>Web</strong> Thin ClientSupportedSupportedSupportedDescription: Copies the file(s) configured in the strSourceFile parameter to thepath/file configured in the strTargetFile parameter.Parameters:strSourceFilestrTargetFileoptnumTimeOutString tag containing the path and mask of the file(s) to be copied.String tag containing the path where the file(s) are to be copied.Numerical tag containing an integer to set the timeout time for the operation.Returned Values:-1 Timeout time expired.0 Failed to copy file(s).1 File(s) copied successfully.Examples:Tag NameExpressionTag FileCopy(“C:\ IWS\Application\HST\*.hst”, “C:\Temp\Hst\”, 1000)Tag FileCopy(“C:\ IWS\Application\ropert.txt”, “C:\Temp\Tuesday_Report.txt”, 500) Caution:This function is originally synchronous (for example, the scan does not goon until the function finishes the copying procedure). Consequently, usingthis function for slow network connections may cause problems.If you use the optnumTimeOut parameter, the function returns the value –1after the specified timeout time and the scan continues. Though thefunction returns a –1, it does not cancel the copying procedure. Instead, itcreates an internal process to finish the copying procedure.FileDelete(strFile)GroupExecutionWindows NT/2K/XPWindows CEFileSynchronousSupportedSupportedA-106 <strong>InduSoft</strong> <strong>Web</strong> <strong>Studio</strong> v6.1 SP2
<strong>Studio</strong> FunctionsIWS Users Guide<strong>Web</strong> Thin ClientSupportedDescription: Deletes the specified file.Parameters:strFileSting tag containing the name and file path of the file to delete.Returned Values:0 Failed to delete fileRealReturns the size of the file deletedExamples:Tag NameTagExpressionFileDelete(“C:\ IWS\readme.txt”)FileLength (strFile)GroupExecutionWindows NT/2K/XPWindows CE<strong>Web</strong> Thin ClientFileSynchronousSupportedSupportedSupportedDescription: Returns the size of a file.Parameters:strFileString tag containing the name and file path of the file.Returned Values: Returns the size of the specified file in bytes.Examples:Tag NameExpressionTag FileLength( "C:\readme.txt" )FileRename(strOldName, strNewName)GroupExecutionWindows NT/2K/XPWindows CEFileSynchronousSupportedSupported<strong>InduSoft</strong> <strong>Web</strong> <strong>Studio</strong> v6.1 SP2 A-107
IWS Users Guide<strong>Studio</strong> Functions<strong>Web</strong> Thin ClientSupportedDescription: Renames the specified file.Parameters:strOldNamestrNewNameString tag containing the path and old name of the file.String tag containing the path and new name of the file.Returned Values: No returned values.Examples:Tag NameExpressionFileRename(“C:\readme.txt”, “C:\pleasereadme.txt”)FileWrite(strFileName, strWriteText, numoptAppend)GroupExecutionWindows NT/2K/XPWindows CE<strong>Web</strong> Thin ClientFileSynchronousSupportedSupportedSupportedDescription: Writes an ASCII string into a specified file. If the file does not exist, thefunction will create the file.Parameters:strFileNamestrWriteTextnumoptAppendString tag containing the file name.String tag containing text to be written to the specified file.Number tag: If you omit this parameter or specify zero (0), the function replaces thecontents of the existing file with the text specified for strWriteText. If you specify a value other than zero (1, 2, 3, …), the function adds the newtext specified using strWriteText as a new line to the file.Returned Values:0 Successful execution-1 Invalid parameter(s)-2 Failed to open file. Disk is write-protected or file name is invalid.Examples:Tag NameTagExpressionFileWrite(“c:\test.txt”, “This is a test”)A-108 <strong>InduSoft</strong> <strong>Web</strong> <strong>Studio</strong> v6.1 SP2
<strong>Studio</strong> FunctionsIWS Users GuideTagFileWrite(TagFileName, TagText)Tag FileWrite(TagFileName, TagText, 1)FindFile(strFile, "opttagFilesFound", optnumTimeOut)GroupExecutionWindows NT/2K/XPWindows CE<strong>Web</strong> Thin ClientFileSynchronousSupportedSupportedSupportedDescription: Searches a fileParameters:strFile“opttagFilesFound”optnumTimeOutString tag contains the file mask for which to search.Optional string tag array receives path and name of each file found.Optional numerical tag contains an integer to set the timeout inmilliseconds for this function.Returned Values:-1 Timeout0 No files foundNNumber of files foundExamples:Tag NameTagExpressionFindFile(“*.txt”)Tag FindFile(“*.doc”, “StringArray”, 1000) Caution:This function is synchronous originally (for example, the scan does not goon until the function returns a value). If you have a slow networkconnection, this function may cause application problems.If you use the optnumTimeOut parameter, the function returns the value –1after the specified timeout time and the scan continues.FindPath(strPathName)<strong>InduSoft</strong> <strong>Web</strong> <strong>Studio</strong> v6.1 SP2 A-109
IWS Users Guide<strong>Studio</strong> FunctionsGroupExecutionWindows NT/2K/XPWindows CE<strong>Web</strong> Thin ClientFileSynchronousSupportedSupportedSupportedDescription: Verifies whether a directory exists.Parameters:strPathNameString tag containing the file path for which to search.Returned Values:0 Path not found1 Path foundExamples:Tag NameTagExpressionFindPath(“C:\WINNT\”)GetFileAttributes(strFile)GroupExecutionWindows NT/2K/XPWindows CE<strong>Web</strong> Thin ClientFileSynchronousSupportedSupportedSupportedDescription: Reads the attributes of a specified file.Parameters:strFileString tag, containing the file from which to read the attributes.Returned Values:-1 Error1 Read only2 Hidden4 System16 DirectoryA-110 <strong>InduSoft</strong> <strong>Web</strong> <strong>Studio</strong> v6.1 SP2
<strong>Studio</strong> FunctionsIWS Users Guide32 Archive128 Normal256 TemporaryExamples:Tag NameTagExpressionGetFileAttributes(“C:\readme.txt”)GetFileTime(strFileName, numFormat)GroupExecutionWindows NT/2K/XPWindows CE<strong>Web</strong> Thin ClientFileSynchronousSupportedSupportedSupportedDescription: Reads the time and date the file was last modified.Parameters:strFileNamenumFormatString tag containing the file name to be read.Numerical tag, which specifies the format of the returned data.• 0: Returns the date and time from the file.• 1: Returns only the file date.• 2: Returns only the file time.Returned Values: Returns the date and or time the file was last modified.Examples:Tag NameTagExpressionGetFileTime(“C:\readme.txt”)GetHstInfo(strFileName, numInfoType)GroupExecutionWindows NT/2K/XPWindows CEFileSynchronousSupportedSupported<strong>InduSoft</strong> <strong>Web</strong> <strong>Studio</strong> v6.1 SP2 A-111
IWS Users Guide<strong>Studio</strong> Functions<strong>Web</strong> Thin ClientSupportedDescription: Returns the Start Time, End Time, and Duration of the specifiedhistory (*.HST) file.Parameters:strFileNamenumInfoTypeString tag containing the name of the history file to be read.Numerical tag, which specifies the type of information to be returned.• 0: Returns the Start Time of the file.• 1: Returns the End Time of the file.• 2: Returns the Duration (in hours) of the file.Returned Values: If the file cannot be read or the specified information cannot bereturned, then an error is generated:-1 Failed to retrieve the Start Time; verify the history file exists and is valid.-2 Failed to retrieve the End Time; verify the history file exists and is valid.-3 Internal application error; please contact Technical Support.-4 The <strong>Studio</strong> TCP/IP server returned a Time that is incompatible with the formatspecified in the application screen or <strong>Web</strong> page. Please use the Verify Applicationcommand to update the application and try again.Examples:Tag NameExpressionTag GetHstInfo( "batch", 0 )Tag GetHstInfo( "hst/02060801.hst", 1 )Tag GetHstInfo( "C:\batch.bat", 2 )GetLine(strFileName, Search, "tagStore", optnumCase,optOveflowTag, optRunFromServer)GroupExecutionWindows NT/2K/XPWindows CE<strong>Web</strong> Thin ClientFileSynchronousSupportedSupportedSupportedDescription: Searches a sequence of characters (string) or for a specific line in anASCII file and stores (in a string tag) the contents of the whole line in a stringtag.Parameters:A-112 <strong>InduSoft</strong> <strong>Web</strong> <strong>Studio</strong> v6.1 SP2
<strong>Studio</strong> FunctionsIWS Users GuidestrFileNameSearch“tagStore”optnumCaseoptOverflowTagOptOverflowTagString tag containing the path and name of the file to be searched. The namecan be a fully qualified name (e.g.: C:\File.txt) or simply a file name(e.g.: File.txt). In the second case the application will search for the filein the following paths:Local Station: The application will search for the file in the ApplicationFolder, and if it is not found, in the Application\<strong>Web</strong> folder.<strong>Web</strong> Thin Client: If the parameter optRunFromServer is set to 0, thepath where the file will be searched is undetermined. If is set to 1, it willsearch for the file in the URL typed in the Browser, and if the file is not found,in the Backup URL.Note: For <strong>Web</strong> Enabled applications, we recommend setting theoptRunFromServer parameter to 1 and placing your files in theApplicatoin\<strong>Web</strong> folder.There are two options for this parameter, based on its data type:Numeric Tag/Constant: Number of the line pointed by the function. Thefunction will try to find the line specified in this parameter and copy itscontents to the “tagStore” parameter. The first line in the file is line 0.String Tag/Constant: Sequence of characters for which to search. Thefunction will try to find a line in the file that contains this sequence ofcharacters and copy the contents of the first occurrence to the“tagStore” parameter.Name of the string tag receiving the contents of the line pointed by thefunction.Optional numerical tag specifying whether the search is case-sensitive.• 0: Not case-sensitive• 1: Case-sensitiveOptional name of a numerical tag receiving the result of overflow verification.• 0: OK• 1: OverflowOptional numerical tag ignored when the function is called on local stations.On <strong>Web</strong> Thin Clients this parameter indicates the following:• 0: Retrieves the file from the <strong>Web</strong> Thin Client machine (do not use thisvalue with non-fully qualified names)• 1: Retrieves the file from the <strong>Web</strong> Server. If the file name is not a URL thefunction will ignore the application path and search for the file in theapplication URL where the screen files are located.<strong>InduSoft</strong> <strong>Web</strong> <strong>Studio</strong> v6.1 SP2 A-113
IWS Users Guide<strong>Studio</strong> FunctionsReturned Values:NAmount of lines in which the sequence was found in the target ASCII file.0 String was not found in the target ASCII file-1 ASCII File was not found-2 Invalid strFileName parameter-3 Invalid strSeqChar parameter-4 Invalid strStoreTag parameter-5 Invalid numOptCase parameter-6 Invalid optnumOverflowTag parameter-7 Invalid number of parameters-8 Invalid line numberExamples:Tag NameExpressionTag GetLine( "C:\TechRef v51.doc", "<strong>Studio</strong> version", "ReturnLine" )Tag GetLine( "C:\readme.txt", 1, "ReturnedLine", 0, "Overflow" )// returns the second line of the file Note:This function only searches for text in ASCII files.HST2TXT(strStartDate, strStartTime, numDuration,numGroupNumber, strTargetFile, optStrSeparator,optNumMilliseconds, optStrFormat)GroupExecutionWindows NT/2K/XPWindows CE<strong>Web</strong> Thin ClientFileAsynchronousSupportedSupportedNot SupportedDescription: Export information from the proprietary binary trend history file(s)(*.hst) into a text (*.txt) file.A-114 <strong>InduSoft</strong> <strong>Web</strong> <strong>Studio</strong> v6.1 SP2
<strong>Studio</strong> FunctionsIWS Users GuideParameters:strStartDatestrStartTimenumDurationnumGroupNumberstrTargetFileoptStrSeparatoroptNumMillisecondsoptStrFormatString tag containing the start date of the data.String tag containing the start time of the data.Numerical tag containing duration of the data in hours.Numerical tag containing trend group number.String tag containing path and name of the file to be written. If omitted,the function creates a file with the same name of the proprietary binaryfile, but using the extension TXT.Optional string tag containing the data separator character for file. Ifomitted, the function uses the TAB character (\t) to separate the values inthe text file.Optional numeric tag. If this parameter is false (0), the text file createdwill not show milisecond-precision on the timestamp of each historysample.String tag, which specifies the order of the Month (M), Day (D), and Year(Y) for the time-stamp format exported to the text file:“DMY”: Day, Month, Year“MDY”: Month, Day, Year“YMD”: Year, Month, DayIf omitted, the function uses the format DMY for the timestamp in the textfile.Returned Values:-3 Invalid number of parameters-2 Dll functions not found-1 IndHst.dll not found0 Function was executed successfully1 Error. Previous execution of the HST2TXT has not yet been completedExamples:Tag NameExpressionTag HST2TXT( "04/14/2002", "06:30:00", 0.1, 3,"C:\<strong>Studio</strong>\data.txt", "\" )Tag HST2TXT( "04/14/2002", "06:30:00", 0.1, 3,"C:\<strong>Studio</strong>\data.csv", "," , “MDY” ) Tip:When using the comma (,) as optstrSeparator, the function creates a filein the CSV format (Comma Separated Values). It is useful for exporting theTrend history data into a file that can be opened with Microsoft Excel.<strong>InduSoft</strong> <strong>Web</strong> <strong>Studio</strong> v6.1 SP2 A-115
IWS Users Guide<strong>Studio</strong> FunctionsHST2TXTIsRunning()GroupExecutionWindows NT/2K/XPWindows CE<strong>Web</strong> Thin ClientFileSynchronousSupportedNot SupportedNot SupportedDescription: Returns the status of the HST2TXT() function.A-116 <strong>InduSoft</strong> <strong>Web</strong> <strong>Studio</strong> v6.1 SP2
<strong>Studio</strong> FunctionsIWS Users GuideReturned Values:0 HST2TXT is still running.-1 Last conversion process was executed properly.-2 Reserved.-3 File not fond. There are no history files in the configured time interval for the groupspecified.-4 Cannot open HST file.-5 Cannot create/open ASCII file.-6 Cannot read file information from HST file-7 Invalid file type.-8 Cannot read header information from HST file.-9 Invalid number of tag in the header information (0 > nTags > 250)-10 Cannot create Header file (.hdr)-20 IndHst.dll was not found.-30 Cannot access dll function.Examples:Tag NameTagExpressionHST2TXT()Print( strFilePath , optnumOrientation)GroupExecutionWindows NT/2K/XPWindows CE<strong>Web</strong> Thin ClientFileAsynchronousSupportedSupportedNot SupportedDescription: Prints a text file.Parameters:strFilePathPath and name of the text file that will be printed.optnumOrientation Set the paper orientation as follows:0 (default) = Portrait1 = Landscape<strong>InduSoft</strong> <strong>Web</strong> <strong>Studio</strong> v6.1 SP2 A-117
IWS Users Guide<strong>Studio</strong> Functions Note:The optnumOrientation parameter is not supported when running theapplication under the Windows CE operating system.Returned Values: No returned values.Examples:Tag NameExpressionPrint(“C:\ReadMe.txt”)Print(“C:\ReadMe.txt”, 1)Print(TagFileName, 0) Note:This function can be used to print the contents of text files only.Information in any other format (e.g. pictures, binary files, etc.) cannot beprinted with this function.RDFileN("tagSelectedFile", strSearchPath, strMask,optNumChangeDir)GroupExecutionWindows NT/2K/XPWindows CE<strong>Web</strong> Thin ClientFileSynchronousSupportedSupportedSupportedDescription: Launches a File Browser window allowing you to select a file.Parameters:“tagSelectedFile”strSearchPathstrMaskoptNumChangeDirName of the string tag receiving the name and path of a selected file.The tag name must be configured between quotes. Moreover, it must bea valid tag name — it cannot be a VBScript variable name, for example.String tag containing the file path (directory) to search.String tag containing the mask used to filter the files.Optional numerical tag that indicates whether the operator will be able tochange the browsing directory. If this parameter is omitted or set TRUE(1), then the window opened by this function will allow the operator tonavigate to different directories. If it is set FALSE (0), then the windowwill be restricted to the directory specified by strSearchPath.A-118 <strong>InduSoft</strong> <strong>Web</strong> <strong>Studio</strong> v6.1 SP2
<strong>Studio</strong> FunctionsIWS Users GuideReturned Values:0 Success1 One of the parameters is not a string2 Parameter 1 contains an invalid tag name3 The user canceled the operationExamples:Tag NameExpressionTag RDFileN("FileName", “C:\ IWS\”, “*.doc”, 1)<strong>InduSoft</strong> <strong>Web</strong> <strong>Studio</strong> v6.1 SP2 A-119
IWS Users Guide<strong>Studio</strong> FunctionsGraphic FunctionsThis section describes the following <strong>InduSoft</strong> <strong>Web</strong> <strong>Studio</strong> Graphic functions: PrintSetup() PrintWindow(strScreenName , optnumOrientation) RGBColor ( numRed, numGreen, numBlue ) RGBComponent ( numColor , numComponent )PrintSetup()GroupExecutionWindows NT/2K/XPWindows CE<strong>Web</strong> Thin ClientGraphic Screens PrintintAsynchronousSupportedSupportedSupportedDescription: Opens the standard setup dialog from the operating system, where theprinter can be selected and configured.Returned Values: No returned values.Examples:Tag NameTagExpressionPrintSetup()PrintWindow(strScreenName , optnumOrientation)GroupExecutionWindows NT/2K/XPWindows CE<strong>Web</strong> Thin ClientGraphicAsynchronousSupportedSupportedSupportedDescription: Prints a screenshot from an application screen.Parameters:strScreenNameString tag containing the name of the screen you wish to print. If this parameteris omitted, the screen currently open will be printed. This parameter must beomitted when executing this function under the WinCE operating system.optnumOrientation Set the paper orientation as follows:0 (default) = PortraitA-120 <strong>InduSoft</strong> <strong>Web</strong> <strong>Studio</strong> v6.1 SP2
<strong>Studio</strong> FunctionsIWS Users Guide1 = Landscape Note:The optnumOrientation parameter is not supported when running theapplication under the Windows CE operating system.Returned Values: No returned values.Examples:Tag NameExpressionPrintWindow()PrintWindow(“Main”, 1)Print(TagScreenName, 0) Note:You can use the PrintWindow() function to print reports in graphicalformat, including any object, like Trends, bitmaps, etc.RGBColor ( numRed, numGreen, numBlue )GroupExecutionWindows NT/2K/XPWindows CE<strong>Web</strong> Thin ClientGraphicSynchronousSupportedSupportedSupportedDescription: Returns the number of the color defined by the RGB (Red, Green andBlue) codes.Parameters:numRednumGreennumBlueRed code from the RGB codeGreen code from the RGB codeBlue code from the RGB codeReturned Values: This function returns the number of the color defined by the RGB(Red, Green and Blue) codes.<strong>InduSoft</strong> <strong>Web</strong> <strong>Studio</strong> v6.1 SP2 A-121
IWS Users Guide<strong>Studio</strong> FunctionsExamples:Tag NameTagColorTagColorExpressionRGBColor(51,153,102) // This function returns thevalue 13434828, which is the color code for SeaGreen.RGBColor(TagRed,TagGreen,TagBlue) // This functionreturns the color code of the RGB values set in thetags TagRed, TagGreen and TagBlue, respectively. Tip:See the list of RGB Codes and Color values for the most used colors in theIWS Development Environment -> Standard Interfaces -> Color Interfacesection.RGBComponent ( numColor , numComponent )GroupExecutionWindows NT/2K/XPWindows CE<strong>Web</strong> Thin ClientGraphicSynchronousSupportedSupportedSupportedDescription: Returns the code of one of the RGB components from the given colorcode.Parameters:numColorColor code from which one component value will be extracted.numComponent Specify which RGB component will be extracted from the color (0=Red ;1=Green; 2=Blue)Returned Values: This function returns the code of one of the RGB componentsfrom the given color code.A-122 <strong>InduSoft</strong> <strong>Web</strong> <strong>Studio</strong> v6.1 SP2
<strong>Studio</strong> FunctionsIWS Users GuideExamples:Tag NameTagRedTagGreenTagBlueTagComponentExpressionRGBColor(13434828,0) // This function returns the value 51, which is the Redcomponent of the color code 13434828 (Sea Green).RGBColor(13434828,1) // This function returns the value 153, which is the Greencomponent of the color code 13434828 (Sea Green).RGBColor(13434828,2) // This function returns the value 102, which is the Bluecomponent of the color code 13434828 (Sea Green).RGBColor(TagCode, TagComponent) // This function returns the value of the colorcode and component specified by the tags TagCode and TagComponent, respectively. Tip:See the list of RGB Codes and Color values for the most used colors in theColor Interface chapter.<strong>InduSoft</strong> <strong>Web</strong> <strong>Studio</strong> v6.1 SP2 A-123
IWS Users Guide<strong>Studio</strong> FunctionsTranslation FunctionsThis section describes the following <strong>InduSoft</strong> <strong>Web</strong> <strong>Studio</strong> Translation functions: Ext(strText) SetTranslationFile(strFileName, optStrColumnName)Ext(strText)GroupExecutionWindows NT/2K/XPWindows CE<strong>Web</strong> Thin ClientTranslationSynchronousSupportedSupportedSupportedDescription: Translates specified text.Parameters:srtTextString tag containing the text to be translated.Returned Values: Returns the text translation using the active translation file.Examples:Tag NameTagTagExpressionExt(“Start”) // Returned value if translating to Portuguese = “Iniciar”Ext(“Stop”) // Returned value if translating to German = “Anschlag”SetTranslationFile(strFileName, optStrColumnName)GroupExecutionWindows NT/2K/XPWindows CE<strong>Web</strong> Thin ClientTranslationSynchronousSupportedSupportedSupportedDescription: Sets the active translation file and translates all enabled text withinthe application.Parameters:strFileNameoptStrColumnNameSting tag containing the name of a translation file.String tag or value containing the name of the column from thetranslation file, which must be used to translate the texts on theA-124 <strong>InduSoft</strong> <strong>Web</strong> <strong>Studio</strong> v6.1 SP2
<strong>Studio</strong> FunctionsIWS Users Guideapplication. When omitted, the second column from the translation filewill be used by default.Returned Values:0 Success.1 Invalid number of parameters.2 Wrong parameter type.3 Translation file could not be found or opened.Examples:Tag NameTagTagTagExpressionSetTranslationFile(“Portuguese.tra”)SetTranslationFile(“German.tra”)SetTranslationFile( "Mytranslation.csv" , “Portuguese” )Tag SetTranslationFile( "Mytranslation.csv" , “German” ) Note:You must enable the Translation option from the Project Settings dialog for thisfunction to work. Caution:You must have a translation file in the Translation File utility.<strong>InduSoft</strong> <strong>Web</strong> <strong>Studio</strong> v6.1 SP2 A-125
IWS Users Guide<strong>Studio</strong> FunctionsMultimedia FunctionsThis section describes the <strong>InduSoft</strong> <strong>Web</strong> <strong>Studio</strong> Multimedia function,Play(strFileName).Play(strFileName, numOptSynchronous)GroupExecutionWindows NT/2K/XPWindows CE<strong>Web</strong> Thin ClientMultimediaSynchronous/AsynchronousSupportedSupportedSupportedDescription: Plays a specified .WAV file.Parameters:strFileNameString tag containing the .WAV to translate.numOptSynchronous Numerical tag that controls whether the function executes synchronously orasynchronously.Where:• Specifying 0 (default) or not specifying the parameter enables thefunction to execute asynchronously.• Specifying 1 enables the function to execute synchronously.Returned Values: No returned values.Examples:Tag NameExpressionPlay(“C:\Sounds\Wav\alarm.wav”) Note:For this function to work in a <strong>Web</strong> Thin Client, the target .WAV file must belocated in the same file path on the remote station.A-126 <strong>InduSoft</strong> <strong>Web</strong> <strong>Studio</strong> v6.1 SP2
<strong>Studio</strong> FunctionsIWS Users GuideSystem Information FunctionsThis section describes the following <strong>InduSoft</strong> <strong>Web</strong> <strong>Studio</strong> System Informationfunctions:DbVersion()GetAppHorizontalResolution()GetAppPath()GetAppVerticalResolution()GetComputerIP()GetComputerName()GetFreeMemoryCE(optnumType)GetHardKeyModel()GetHardkeySN()GetIPAll(“tagArrayIP”, optRefresh)GetMemoryCE(optnumType)GetNetMACID()GetProductPath()GetOS()GetPrivateProfileString(strSection, strName, strDefault,strFileName)GetRegValue(numMainKey, strKey, strValueName)GetRegValueType(numMainKey, strKey, strValueName)GetScrInfo()GetServerHostNameGetTickCount()InfoAppAlrDir()InfoAppHstDir()InfoDiskFree(strDisk)InfoResources(numSelect)IsActiveXReg(numType, strProgIDorFileName)KeyPad(“TagName”, strOptKeyboardType, booOptIsPassword)NoInputTime(optUpdateTrigger)ProductVersion()RegSaveCE()SaveAlarmFile(numType, optRemotePath)SetAppAlarmPath(strPath)SetAppHSTPath(strPath)SetDateFormat(strSeparator, strFomat)SetRegValue(numMainKey, strKey, strValueName, numType,strOrNumValue)Set<strong>Web</strong>Config(strServerIP, strOptURL, strOptPath, numOptPort)WritePrivateProfileString(strSection, strName, strValue,strFileName)<strong>InduSoft</strong> <strong>Web</strong> <strong>Studio</strong> v6.1 SP2 A-127
IWS Users Guide<strong>Studio</strong> FunctionsDbVersion()GroupExecutionWindows NT/2K/XPWindows CE<strong>Web</strong> Thin ClientSystem Info.SynchronousSupportedSupportedSupportedDescription: Returns the database version number of the current application.Returned Values: Returns the database version in numerical format.Examples:Tag NameTagExpressionDbVersion()GetAppHorizontalResolution( )GroupExecutionWindows NT/2K/XPWindows CE<strong>Web</strong> Thin ClientSystem Info.SynchronousSupportedNot SupportedNot SupportedDescription: Obtains the horizontal screen resolution from the .APP file, section[Info].Returned Values: Returns the [Info]value, but does not test the Windowsconfiguration.Examples:Tag NameExpressionTag GetAppHorizontalResolution( ) // Returned value = 640Tag GetAppHorizontalResolution( ) // Returned value = 800GetAppPath()GroupExecutionWindows NT/2K/XPSystem Info.SynchronousSupportedA-128 <strong>InduSoft</strong> <strong>Web</strong> <strong>Studio</strong> v6.1 SP2
<strong>Studio</strong> FunctionsIWS Users GuideWindows CE<strong>Web</strong> Thin ClientSupportedNot SupportedDescription: Returns the directory of the current application.Returned Values: Returns the directory of the current application as a string.Examples:Tag NameTagTagExpressionGetAppPath() // Returned value = C:\DemoApp\GetAppPath() // Returned value = C:\<strong>Studio</strong>\Projects\App\ Note:This function must return the current path of the application, including the“\” at the end of the path.GetAppVerticalResolution( )GroupExecutionWindows NT/2K/XPWindows CE<strong>Web</strong> Thin ClientSystem Info.SynchronousSupportedNot SupportedNot SupportedDescription: Gets the vertical screen resolution from the .APP file, section [Info].Returned Values: Returns the [Info]value, but does not test the Windowsconfiguration.<strong>InduSoft</strong> <strong>Web</strong> <strong>Studio</strong> v6.1 SP2 A-129
IWS Users Guide<strong>Studio</strong> FunctionsExamples:Tag NameExpressionTag GetAppVerticalResolution( ) // Returned value = 480Tag GetAppVerticalResolution( ) // Returned value = 600GetComputerIP( )GroupExecutionWindows NT/2K/XPWindows CE<strong>Web</strong> Thin ClientSystem Info.SynchronousSupportedSupportedSupportedDescription: Returns the first IP Address of the local station.Returned Values: Returns the first IP Address of the local station as a string.Examples:Tag NameExpressionTag GetComputerIP() // Returned value = 192.168.0.1Tag GetComputerIP() // Returned value = 248.12.2.78GetComputerName( )GroupExecutionWindows NT/2K/XPWindows CE<strong>Web</strong> Thin ClientSystem Info.SynchronousSupportedNot SupportedSupportedDescription: Returns the local computer name.Returned Values: Returns the local computer name as a string.A-130 <strong>InduSoft</strong> <strong>Web</strong> <strong>Studio</strong> v6.1 SP2
<strong>Studio</strong> FunctionsIWS Users GuideExamples:Tag NameTagTagExpressionGetComputerName() // Returned value = Terminal53GetComputerName() // Returned value = BobsComputerGetFreeMemoryCE(optnumType)GroupExecutionWindows NT/2K/XPWindows CE<strong>Web</strong> Thin ClientSystem Info.SynchronousNot SupportedSupportedNot SupportedDescription: Returns the free memory available in a Windows CE device.Parameters:optnumTypeOptional numerical tag that specifies which type of free memory IWSshould retrieve from the Windows CE device, where:0: Total free Program memoryReturned Values:>0 Size of free memory in bytes.-1 Coredll.dll file not found.-2 GetFreeMemoryCE function not found.-3 Invalid optional parameter.-4 Type of memory unavailable.Examples:Tag NameTagExpressionGetFreeMemoryCE(opt2)GetHardKeyModel()GroupExecutionWindows NT/2K/XPSystem Info.SynchronousSupported<strong>InduSoft</strong> <strong>Web</strong> <strong>Studio</strong> v6.1 SP2 A-131
IWS Users Guide<strong>Studio</strong> FunctionsWindows CE<strong>Web</strong> Thin ClientNot SupportedNot SupportedDescription: Returns the name of your hardkey model.Returned Values:– Hardkey located: Returns a string with the hardkey model name.– Hardkey not installed or not found: No values returned.Examples:Tag NameTagTagExpressionGetHardKeyModel() // Returned value = Local InterfaceGetHardKeyModel() // Returned value = Advanced Server Caution:You must install the hardkey before executing this function or the functionwill not execute properly.GetHardkeySN( )GroupExecutionWindows NT/2K/XPWindows CE<strong>Web</strong> Thin ClientSystem Info.SynchronousSupportedNot SupportedNot SupportedDescription: Returns the serial number of the hardkey.Returned Values:– Hardkey located: Returns a string with the hardkey serial number.– Hardkey not installed or not found: Returns a 0.Examples:Tag NameExpressionTag GetHardkeySN() // Returned value = 120.745Tag GetHardkeySN() // Returned value = 224.941 Caution:You must install the hardkey before executing this function or the functionA-132 <strong>InduSoft</strong> <strong>Web</strong> <strong>Studio</strong> v6.1 SP2
<strong>Studio</strong> FunctionsIWS Users Guidewill not execute properly.GetIPAll(“tagArrayIP”, optRefresh)GroupExecutionWindows NT/2K/XPWindows CE<strong>Web</strong> Thin ClientSystem Info.SynchronousSupportedSupportedSupportedDescription: Returns the number of IP Addresses assigned to the local station andstores the IP Addresses in a string array tag.Parameters:“tagArrayIP”optRefreshName of the string array tag receiving the IP addresses found.Optional tag that triggers a refresh of this function, if you use it in a text I/Odynamic. Every time this tag changes value, IWS will refresh the function.Returned Values:NNumber of IP addresses found-1 Invalid number of parameters-2 Invalid parameter typeExamples:Tag NameExpressionTag GetIPAll(“TagArrayIP”) // Returned value = 1Tag GetIPAll(“TagArrayIP”, second) // Returned value = 2GetMemoryCE(optnumType)GroupExecutionWindows NT/2K/XPWindows CE<strong>Web</strong> Thin ClientSystem Info.SynchronousNot SupportedSupportedNot Supported<strong>InduSoft</strong> <strong>Web</strong> <strong>Studio</strong> v6.1 SP2 A-133
IWS Users Guide<strong>Studio</strong> FunctionsDescription: Returns the total memory available in a Windows CE device.Parameters:optnumTypeOptional numerical tag that specifies which type of memory IWS shouldretrieve from the Windows CE device, as follows.• 0: Total Program memory• 1: Total Storage memory• 2: Total memoryReturned Values:>0 Size of memory in bytes.-1 Coredll.dll file not found.-2 GetMemoryCE function not found.-3 Invalid optional parameter.Examples:Tag NameTagExpressionGetMemoryCE(opt1)GetNetMACID(“strOptMACID”, “strOptAdapterName” )GroupExecutionSystem Info.SynchronousWindows NT/2K/XPWindows CE<strong>Web</strong> Thin ClientSupportedSupportedNot SupportedDescription: Gets the MAC ID unique code from the currently installed networkadapter(s).Parameters:strOptMACIDstrOptAdapterNameName of a string tag, which receives the MAD ID of the network adapter. Ifthere is more than one network adapter currently installed in the station, theuser can configure a string array tag in this parameter, so each array positionreceives the MAC ID from one network adapter.Name of a string tag, which receives the name of the network adapter. Ifthere is more than one network adapter currently installed in the station, theuser can configure a string array tag in this parameter, so each array positionreceives the name from one network adapter. This parameter is optional.Returned Values:A-134 <strong>InduSoft</strong> <strong>Web</strong> <strong>Studio</strong> v6.1 SP2
<strong>Studio</strong> FunctionsIWS Users Guide>0 Number of network adapters found.0 No network adapters found.-1 Invalid number of parameters.-2 One of the parameters is not string type.-3 Tag configured in strOptMACID does not exist.-4 Tag configured in strOptAdapterName does not exist.Examples:Tag NameNumNICNumNICNumNICExpressionGetNetMACID(“MACIDTag”)GetNetMACID(“MACIDTag”, “AdapterName”)GetNetMACID(“MACIDTag[1]”, “AdapterName[1]”)GetProductPath( )GroupExecutionWindows NT/2K/XPWindows CE<strong>Web</strong> Thin ClientSystem Info.SynchronousSupportedSupportedSupportedDescription: Returns the path to the IWS directory.Returned Values: Returns the path to the IWS directory as a string.Examples:Tag NameExpressionTag GetProductPath() // Returned value = C:\Program Files\ IWS 51\<strong>InduSoft</strong> <strong>Web</strong> <strong>Studio</strong> v6.1 SP2 A-135
IWS Users Guide<strong>Studio</strong> FunctionsGetOS( )GroupExecutionWindows NT/2K/XPWindows CE<strong>Web</strong> Thin ClientSystem Info.SynchronousSupportedSupportedSupportedDescription: Reports the current operating system.Returned Values:0 Windows 3.111 Windows 95/98/ME2 Windows NT/2000/XP3 Windows CEExamples:Tag NameExpressionTag GetOS() //Returned value = 2GetPrivateProfileString(strSection, strName, strDefault,strFileName)GroupExecutionWindows NT/2K/XPWindows CE<strong>Web</strong> Thin ClientSystem Info.SynchronousSupportedSupportedSupportedDescription: Reads a specified parameter from an .INI file using the standard.INI format.A-136 <strong>InduSoft</strong> <strong>Web</strong> <strong>Studio</strong> v6.1 SP2
<strong>Studio</strong> FunctionsIWS Users GuideParameters:strSectionstrNamestrDefaultStrFileNameSting tag containing the section name to be read.String tag containing the parameter name to be read.String tag containing the default setting for this parameter. If the parameter is notfound in the .ini file, the function will return this default setting.String tag containing the path and name of the .ini file to be read.Returned Values: Returns the value of the specified parameter.Examples:Tag NameExpressionTag GetPrivateProfileString( “boot loader”, “timeout”, “50”, “C:\boot.ini”) // Returned value =30GetRegValue( numMainKey, strKey, strValueName )GroupExecutionWindows NT/2K/XPWindows CE<strong>Web</strong> Thin ClientSystem Info.SynchronousSupportedSupportedNot SupportedDescription: Retrieves a variable value in the registry.Parameters:numMainKeystrKeystrValueNameNumeric tag with the following possible values:0 : HKEY_LOCAL_MACHINE1 : HKEY_CLASSES_ROOT2 : HKEY_CURRENT_USER3 : HKEY_USERS4 : HKEY_CURRENT_CONFIG5 : HKEY_PERFORMANCE_DATA.Path where the value is located in the Main Key.Name of the variable to get. The maximum length is 255 characters.Returned Values: If the function succeeds, then the function returns the variablevalue. Otherwise one of the following error codes will be returned:-1 Invalid number of parameters or invalid Main Key.-2 Variable type is not supported. You can only read DWord or String values from the registry.<strong>InduSoft</strong> <strong>Web</strong> <strong>Studio</strong> v6.1 SP2 A-137
IWS Users Guide<strong>Studio</strong> Functions-3 Failed to read the variable value; verify that you have the proper security rights.Examples:Tag NameTagTagExpressionGetRegValue( 0, "HARDWARE\DESCRIPTION\System","SystemBiosDate" )// Returned value = "08/14/03"GetRegValue( 2, "Control Panel\Current", "Color Schemes")// Returned value = "Windows Standard "GetRegValueType( numMainKey, strKey, strValueName )GroupExecutionWindows NT/2K/XPWindows CE<strong>Web</strong> Thin ClientSystem Info.SynchronousSupportedSupportedNot SupportedDescription: Retrieves the type of a variable value in the registry.Parameters:numMainKeystrKeystrValueNameNumeric tag with the following possible values:0 : HKEY_LOCAL_MACHINE1 : HKEY_CLASSES_ROOT2 : HKEY_CURRENT_USER3 : HKEY_USERS4 : HKEY_CURRENT_CONFIG5 : HKEY_PERFORMANCE_DATA.Path where the value is located in the Main Key.Name of the variable to get. The maximum length is 255 characters.Returned Values: If the function succeeds, then it will return 0 for DWord, 1 forString. Otherwise one of the following will be returned:-1 Invalid number of parameters or invalid Main Key.-2 Variable type is not supported. You can only read DWord or String values from the registry.-3 Failed to read the variable value; verify that you have the proper security rights.Examples:A-138 <strong>InduSoft</strong> <strong>Web</strong> <strong>Studio</strong> v6.1 SP2
<strong>Studio</strong> FunctionsIWS Users GuideTag NameTagTagExpressionGetRegValueType( 0, "HARDWARE\DESCRIPTION\System","SystemBiosDate" )// Returned value = 1GetRegValueType( 2, "Control Panel\Desktop", "SmoothScroll" )// Returned value = 0GetScrInfo()GroupExecutionWindows NT/2K/XPWindows CE<strong>Web</strong> Thin ClientSystem Info.SynchronousSupportedSupportedSupportedDescription: Provides information about a screen (*.scr) from the application.Parameters:strScreenName: Name of the screen for which information is required.“strInfoData”: Name of the tag that will receive the information retrieved by thefunction. The value of this data is specified by the optstrInfoType parameter.optstrInfoType: Type of the screen information provided by the function:optstrInfoTypevalueDescription0 (Default) Writes the following coordinates to each consecutive position of the array tagconfigured in the “strInfoData” parameter: TOP, LEFT, BOTTOM and RIGHT.1 Writes the TOP coordinate to the tag configured in the “strInfoData” parameter.2 Writes the LEFT coordinate to the tag configured in the “strInfoData” parameter.3 Writes the BOTTOM coordinate to the tag configured in the “strInfoData”parameter.4 Writes the RIGHT coordinate to the tag configured in the “strInfoData” parameter.Returned Values:Value Description0 Success-1 The first and second parameters are different from STRING type.-2 Memory allocation error-3 optstrInfoType is zero, but the “strInfoData” tag is not an array tag.-4 Invalid tag configured in the “strInfoData” parameter.Examples:<strong>InduSoft</strong> <strong>Web</strong> <strong>Studio</strong> v6.1 SP2 A-139
IWS Users Guide<strong>Studio</strong> FunctionsTag NameTagErrorCodeTagErrorCodeExpressionTag GetScrInfo( "main" , “TagXY[0]” ) // Returns the TOP, LEFT, BOTTOM andRIGHT coordinates of the MAINS.SCR screen into the four initial array positions ofthe array tag TagXY.Tag GetScrInfo( "main" , “TagXY” , 3 ) // Returns the BOTTOM coordinate of theMAINS.SCR screen into the tag TagXY.GetServerHostNameGroupExecutionWindows NT/2K/XPWindows CE<strong>Web</strong> Thin ClientSystem Info.SynchronousNot SupportedNot SupportedSupportedDescription:Parameters: NoneReturned Values: Server host name for ISSymbol and 127.0.0.1 for others.Examples:Tag NameExpressionGetTickCount( )GroupExecutionWindows NT/2K/XPWindows CE<strong>Web</strong> Thin ClientSystem Info.SynchronousSupportedSupportedSupportedDescription: Returns the current value of the clock ticks counter.Returned Values: Returns an integer with the number of milliseconds counted bythe clock for each initialization of the operational system.Examples:Tag NameExpressionA-140 <strong>InduSoft</strong> <strong>Web</strong> <strong>Studio</strong> v6.1 SP2
<strong>Studio</strong> FunctionsIWS Users GuideTag GetTickCount // Returned value = 9400907InfoAppAlrDir( )GroupExecutionWindows NT/2K/XPWindows CE<strong>Web</strong> Thin ClientSystem Info.SynchronousSupportedSupportedSupportedDescription: Returns the Alarm directory for the current application.Returned Values: Returns the Alarm directory of the current application as a string.Examples:Tag NameTagTagExpressionInfoAppAlrDir() // Returned value = C:\DemoApp\alarm\InfoAppAlrDir() // Returned value = C:\ IWS\Projects\App\alarm\InfoAppHstDir( )GroupExecutionWindows NT/2K/XPWindows CE<strong>Web</strong> Thin ClientSystem Info.SynchronousSupportedSupportedSupportedDescription: Returns the History directory for the current application.Returned Values: Returns the History directory for the current application as astring.Examples:Tag NameTagTagExpressionInfoAppAlrDir() // Returned value = C:\DemoApp\HST\InfoAppAlrDir() // Returned value = C:\ IWS\Projects\App\HST\InfoDiskFree(strDisk)<strong>InduSoft</strong> <strong>Web</strong> <strong>Studio</strong> v6.1 SP2 A-141
IWS Users Guide<strong>Studio</strong> FunctionsGroupExecutionWindows NT/2K/XPWindows CE<strong>Web</strong> Thin ClientSystem Info.SynchronousSupportedNot SupportedSupportedDescription: Returns disposable free space on the disk.Parameters:strDiskString tag containing the name of the disk to be checked.Returned Values: Returns disposable free space in the disk in bytes.Examples:Tag NameExpressionTag InfoDiskFree( “C” ) // Returned value = 2803804605.000000InfoResources(numSelect)GroupExecutionWindows NT/2K/XPWindows CE<strong>Web</strong> Thin ClientSystem Info.SynchronousSupportedSupportedSupportedDescription: Returns the Window’s disposable resources.Parameters:numSelectInteger tag containing the resource to examine.• 0: System functions (%)• 1: GDI functions (%)• 2: USER functions (%)• 3: Memory (in bytes)Examples:Tag NameExpressionTag InfoResources( 0 ) // Returned value = 76.000000Tag InfoResources( 1 ) // Returned value = 76.000000Tag InfoResources( 2 ) // Returned value = 80.000000A-142 <strong>InduSoft</strong> <strong>Web</strong> <strong>Studio</strong> v6.1 SP2
<strong>Studio</strong> FunctionsIWS Users GuideTag InfoResources( 3 ) // Returned value = 16150528.000000 Note:The only valid selection on a Windows NT/2000/XP station is 3. Selecting0–2 returns 0.000000 only.IsActiveXReg(numType, strProgIDorFileName)GroupExecutionWindows NT/2K/XPWindows CE<strong>Web</strong> Thin ClientSystem Info.SynchronousSupportedNot SupportedNot SupportedDescription: Determines whether an ActiveX control is registered.Parameters:NumTypestrProgIDorFileNameNumerical tag specifying a format for thestrProgIDorFileNAme tag.• 0: Verify by Program ID• 1: Verify by File NameString tag containing Program ID or File Name of the ActiveX Control.Returned Values:0 ActiveX is not registered.1 ActiveX is registered.Examples:Tag NameExpressionTag IsActiveXReg(0, “ISSYMBOL.ISSymbolCtrl.1”) // Returned value = 0Tag IsActiveXReg(1, “C:\winNT\system32\MediaPlayer.ocx”) // Returned value = 1KeyPad(“TagName”, strOptKeyboardType, booOptIsPassword)GroupExecutionWindows NT/2K/XPSystem Info.AsynchronousSupported<strong>InduSoft</strong> <strong>Web</strong> <strong>Studio</strong> v6.1 SP2 A-143
IWS Users Guide<strong>Studio</strong> FunctionsWindows CE<strong>Web</strong> Thin ClientSupportedSupportedDescription: Opens the Virtual Keyboard dialog to write to the specified tag.Parameters:“TagName”strOptKeyboardTypebooOptIsPasswordThe name of the tag to which the Virtual Keyboard will write.Name of the Virtual Keyboard that will be launched. If this parameter isomitted, the default Virtual Keyboard will be launched.If this parameter is set with any value different from 0 (zero), the charstyped in the Virtual Keyboard will appear as “*”. This option is usefulwhen the user is typing a password.Returned Values: Returns the time (in seconds) since the last keyboard action.Examples:Tag NameTagExpressionNoInputTime() Note:You cannot implement this function directly from a text I/O object.NoInputTime(optUpdateTrigger)GroupExecutionWindows NT/2K/XPWindows CE<strong>Web</strong> Thin ClientSystem Info.SynchronousSupportedNot SupportedNot SupportedDescription: Returns the time elapsed since the last keyboard action.Parameters:optUpdateTriggerOptional tag that triggers an update when this function is used in a text I/Oproperty. Every time this tag’s value changes, IWS triggers the function.Returned Values: Returns the time (in seconds) since the last keyboard action.Examples:Tag NameTagExpressionNoInputTime()A-144 <strong>InduSoft</strong> <strong>Web</strong> <strong>Studio</strong> v6.1 SP2
<strong>Studio</strong> FunctionsIWS Users Guide Note:You cannot implement this function directly from a text I/O object.ProductVersion( )GroupExecutionWindows NT/2K/XPWindows CE<strong>Web</strong> Thin ClientSystem Info.SynchronousSupportedSupportedSupportedDescription: Returns the IWS version number.Returned Values:0 Success1 ErrorExamples:Tag NameTagTagExpressionKeyPad(“tagA”)KeyPad(“tagA”, “EnhKeypad”)Tag KeyPad(“tagA”, “EnhKeypad”, 1)RegSaveCE( )GroupExecutionWindows NT/2K/XPWindows CE<strong>Web</strong> Thin ClientSystem Info.SynchronousNot SupportedSupportedNot SupportedDescription: Saves the Windows CE Registry. This function will only work if thesave registry capability is enabled in the Windows CE image.Returned Values: If the function succeeds and the registry is saved, then thereturned value is 0. Otherwise one of the following error codes is returned:-1 Failed to save HKEY_CLASSES_ROOT.<strong>InduSoft</strong> <strong>Web</strong> <strong>Studio</strong> v6.1 SP2 A-145
IWS Users Guide<strong>Studio</strong> Functions-2 Failed to save HKEY_CURRENT_USER.-3 Failed to save HKEY_LOCAL_MACHINE.-4 Failed to save HKEY_USERS.-5 Function executed in NT platform. Note:This function calls the RegFlushKey function from the Windows CE API. Theimplementation of this function is OEM dependent therefore it is notguaranteed to work with all the Windows CE devices.SaveAlarmFile(numType, optRemotePath)GroupExecutionWindows NT/2K/XPWindows CE<strong>Web</strong> Thin ClientSystem Info.SynchronousSupportedSupportedNot SupportedDescription: Use this function to enable/disable the saving feature for alarmhistory and to set the path where the alarm history files must be handled.Parameters:NumTypeTag containing the number and operation, as follows: 0 – Disable save the alarm file to the local disk. 1 – Enable save the alarm file to local disk. 2 – Enable save the alarm file to local disk and to the remote path specified inthe OptRemotePath parameter.OptRemotePath Tag containing the name of the remote computer where the alarm file will besaved simultaneously to the local computer and to the remote path whennumType = 2.Returned Values:0 Success1 Second parameter is not a string.2 Second parameter is missing.Examples:Tag NameExpressionA-146 <strong>InduSoft</strong> <strong>Web</strong> <strong>Studio</strong> v6.1 SP2
<strong>Studio</strong> FunctionsIWS Users GuideTagTagTagSaveAlarmFile(0)SaveAlarmFile(1)SaveAlarmFile(2, “Z:\Apps\AppDemo”)SetAppAlarmPath(strPath)GroupExecutionWindows NT/2K/XPWindows CE<strong>Web</strong> Thin ClientSystem Info.SynchronousSupportedSupportedNot SupportedDescription: Sets the Alarm path for the current application.Parameters:strPathString tag containing the new Alarm path for the current application.Returned Values: No returned values.Examples:Tag NameExpressionSetAppAlarmPath(“C:\ IWS\Alarm\”)SetAppHSTPath(strPath)GroupExecutionWindows NT/2K/XPWindows CE<strong>Web</strong> Thin ClientSystem Info.SynchronousSupportedSupportedNot SupportedDescription: Sets the file path (directory) where Trend history files will be saved, inthe proprietary format (.HST). This function is useful when you intend to changethe file path during runtime. You can also set the file path to a network drive bymapping it on the local station, or by using the following syntax:\\\Please note that this function does not copy existing history files from thedefault directory to a new one; it only sets the file path for new history filessaved after the function is called.<strong>InduSoft</strong> <strong>Web</strong> <strong>Studio</strong> v6.1 SP2 A-147
IWS Users Guide<strong>Studio</strong> FunctionsParameters:strPathString tag containing the file path (directory) where Trend history files will be saved.Returned Values: No returned values.Examples:Tag NameExpressionSetAppHstPath(“C:\ IWS\History\”)SetDateFormat(strSeparator, strFomat)GroupExecutionWindows NT/2K/XPWindows CE<strong>Web</strong> Thin ClientSystem Info.SynchronousSupportedSupportedSupportedDescription: Sets the format and separator for the date string.Parameters:strSeparatorstrFormatString tag containing the separator character for the date string.String tag, which specifies the order of the Month (M), Day (D), and Year (Y)in the date string.DMY: Day, Month, YearMDY: Month, Day, YearYMD: Year, Month, DayReturned Values:0 No error1 Invalid parameterExamples:Tag NameExpressionTag SetDateFormat( “/”, “MDY”) // Date = 04/18/2002Tag SetDateFormat( “:”, “MYD”) // Date = 04:2002:18SetRegValue( numMainKey, strKey, strValueName, numType,strOrNumValue )A-148 <strong>InduSoft</strong> <strong>Web</strong> <strong>Studio</strong> v6.1 SP2
<strong>Studio</strong> FunctionsIWS Users GuideGroupExecutionWindows NT/2K/XPWindows CE<strong>Web</strong> Thin ClientSystem Info.SynchronousSupportedSupportedNot SupportedDescription: Sets a variable value in the registry.Parameters:numMainKeystrKeystrValueNamenumTypestrOrNumValueNumeric tag with the following possible values:0 : HKEY_LOCAL_MACHINE1 : HKEY_CLASSES_ROOT2 : HKEY_CURRENT_USER3 : HKEY_USERS4 : HKEY_CURRENT_CONFIG5 : HKEY_PERFORMANCE_DATAPath where the variable is located in the Main Key.Name of the variable to be set. The maximum length is 255 characters.Two types are currently supported:0 : DWord1 : StringVariable value.Returned Values: If the function succeeds and the variable is set, then the returnedvalue is 0. Otherwise one of the following error codes is returned:-1 Invalid number of parameters or invalid Main Key-2 Invalid Type-3 Failed to set the variable value, check if you have the proper security rightsExamples:Tag NameTagTagExpressionSetRegValue( 0, "HARDWARE\DEVICEMAP\SERIALCOMM","\Device\Serial1", 1, "COM3" )// Returned value = 0 if successfulSetRegValue( 2, "Control Panel\Desktop", "SmoothScroll", 0, 1 )// Returned value = 0 if successful<strong>InduSoft</strong> <strong>Web</strong> <strong>Studio</strong> v6.1 SP2 A-149
IWS Users Guide<strong>Studio</strong> FunctionsSet<strong>Web</strong>Config( strServerIP, strOptBackupURL, strOptPath,numOptHostPort, strOptSecondaryServerIP,numOptProtocolFlag, numOptGtwPort, strOptGtwIP,strOptSecondaryGtwIP, strOptISSymbolURL )GroupExecutionWindows NT/2K/XPWindows CE<strong>Web</strong> Thin ClientSystem Info.SynchronousSupportedSupportedNot SupportedDescription: Configures the web settings for the current application. Configures thesecondary data server and secondary URL settings for the web solution. Thesettings configured in the function are updated on the HTML files of theapplication.Parameters:strServerIPstrOptBackupURLstrOptPathnumOptHostPortstrOptSecondaryServerIPnumOptProtocolFlagnumOpt<strong>Web</strong>PortstrOptGtwIPstrOptSecondaryGtwIPData Server IP Address. IP address (or hostname) of thecomputer where the TCP Server module of IWS is running.Optional alternative URL for the application web pages. The<strong>Web</strong> Thin Client will look for the web pages in this URL if it doesnot find them in the same URL written in the Address field of theweb browser.Optional path where the web pages that must be updated arestored.Optional TCP Port number that the <strong>Web</strong> Thin Client must use toexchange data with the TCP Server module of IWS.Optional alternative data server IP address. The <strong>Web</strong> Thin Clientwill attempt to connect to the TCP Server module of IWS in thisIP Address if it is not able to connect to the TCP Server modulerunning in the IP Address specified in the strServerIP parameter.Optional - When you use the <strong>Web</strong> Tunneling Gateway option,this parameter specifies whether the <strong>Web</strong> Thin Client will useeither HTTP to exchange data with the <strong>Web</strong> Server or HTTPS(SSL – Secure Socket Layer). If this flag has the value 0, the<strong>Web</strong> Thin Client will use HTTP. If this flag has the value 1, the<strong>Web</strong> Thin Client will use HTTPS (SSL).Optional TCP Port number that the <strong>Web</strong> Thin Client must use toexchange data with the <strong>Web</strong> Server when using the <strong>Web</strong>Tunneling Gateway.Optional IP Address (or hostname) of the computer where the<strong>Web</strong> Tunneling Gateway is running.Optional Alternative IP Address (or hostname) of the computerA-150 <strong>InduSoft</strong> <strong>Web</strong> <strong>Studio</strong> v6.1 SP2
<strong>Studio</strong> FunctionsIWS Users Guidewhere the <strong>Web</strong> Tunneling Gateway is running. The <strong>Web</strong> ThinClient will attempt to connect to the <strong>Web</strong> Tunneling Gateway inthis IP Address if it is not able to connect to the <strong>Web</strong> TunnelingGateway running in the IP Address specified in the strOptGtwIPparameter.strOptISSymbolURLOptional URL from where the updated version of ISSymbol(ActiveX control) must be downloaded if it is not properlyregistered in the <strong>Web</strong> Thin Client station.Returned Values:0 No error1 Invalid number of parameters2 Invalid Server IP address3 Invalid URL4 Invalid optional path5 No web pages foundExamples:Tag NameExpressionTag Set<strong>Web</strong>Config( "192.168.1.28" )Tag Set<strong>Web</strong>Config( "192.168.1.28", "http://192.168.1.28" )Tag Set<strong>Web</strong>Config(GetComputerIP(), "http://"+GetComputerIP() )Tag Set<strong>Web</strong>Config( "192.168.1.28", "http://192.168.1.28/", "c:\My<strong>Web</strong>Pages\" )Tag Set<strong>Web</strong>Config( "192.168.1.28", "http://192.168.1.28/", "c:\My<strong>Web</strong>Pages\", 1234 )Tag Set<strong>Web</strong>Config ( "192.168.1.28", "http://200.0.0.10/", "c:\My<strong>Web</strong>Pages\", 1234,“192.168.1.29”, 0, 80, “200.0.0.1”, “200.0.0.10”, “http://200.0.0.10/MyISSymbol/” )Note: You can use tags or expressions as arguments of this function.Therefore, you can use this function to configure the web settingsautomatically during the runtime, according to the network settings ofeach project (IP address, <strong>Web</strong> Server URL, and so forth). Only the first parameter of this function is mandatory (strServerIP). Theother parameters are optional. The parameters that are not configuredin the function assume the default value configured in the Project →Settings → <strong>Web</strong> window of the development environment. The following parameters must be omitted, unless you intend to use the<strong>Web</strong> Tunneling Gateway: numOptProtocolFlag, numOptGtwPort,strOptGtwIP, strOptSecondaryGtwIP, strOptISSymbolURL.<strong>InduSoft</strong> <strong>Web</strong> <strong>Studio</strong> v6.1 SP2 A-151
IWS Users Guide<strong>Studio</strong> FunctionsWritePrivateProfileString( strSelection, strName,strValue, strFileName )GroupExecutionWindows NT/2K/XPWindows CE<strong>Web</strong> Thin ClientSystem Info.SynchronousSupportedSupportedSupportedDescription: Writes a specified parameter to an .ini file using the standard .iniformat. Note:When running on Windows CE this function will rewrite the entire file,therefore its use is not recommended for lengthy files on Windows CEdevices. The function will also add the following lines at the end of the filewhen on a Windows CE device:[FileBackUpControl]Valid=1Parameters:strSelectionstrNamestrValuestrFileNameString tag containing the section name to be written.String tag containing the parameter name to be written.String tag containing the value to be written.String tag containing the path and name of the .ini file to bewritten.Returned Values: The function returns 1 if the file was updated successfully.Examples:Tag NameExpressionTag WritePrivateProfileString( Section, Name, Value, FileName )Tag WritePrivateProfileString( "Options", "ds1", "Value", "C:\viewer.ini" )Loop FunctionThis section describes the <strong>InduSoft</strong> <strong>Web</strong> <strong>Studio</strong> Loop function,For(numInitialValue, numFinalValue, numStep) & NextFor(numInitialValue, numFinalValue, numStep) & NextA-152 <strong>InduSoft</strong> <strong>Web</strong> <strong>Studio</strong> v6.1 SP2
<strong>Studio</strong> FunctionsIWS Users GuideGroup.ExecutionWindows NT/2K/XPWindows CE<strong>Web</strong> Thin ClientLoopN/ASupportedSupportedN/ADescription: Implements a For loop within a script. The section of the scriptaffected by the For loop begins with the For() function and ends with the Nextnotation. The Next notation directs the script to the previous For() function.Parameters:numInitialValuenumFinalValueNumStepNumerical tag containing the initial step (increment) of the For loop.Numerical tag containing the final step (increment) of the For loop.Numerical tag containing the step (increment) of the For loop.Returned Values: Returns the step on which the loop is currently running.Examples:Tag NameExpressionTag For( 1, 5, 1)Next Note:You must partner very For() function with a Next notation. As shown inthe example, you must place the Next notation in the tag field of the mathscript.Database Access FunctionThis section describes the <strong>InduSoft</strong> <strong>Web</strong> <strong>Studio</strong> Database Access function: ExecuteAlarmAck(strTagName, optStrComment, optStrAlarmType). ForceTagChange(strTagName, numValue)ExecuteAlarmAck( strTagName, optStrComment,optStrAlarmType )GroupExecutionWindows NT/2K/XPDatabaseSynchronousSupported<strong>InduSoft</strong> <strong>Web</strong> <strong>Studio</strong> v6.1 SP2 A-153
IWS Users Guide<strong>Studio</strong> FunctionsWindows CE<strong>Web</strong> Thin ClientSupportedSupportedDescription: Acknowledge an active alarm on the specified tag. The advantage ofusing this function is that if used from the <strong>Web</strong> Thin Client, the Alarm task willstore the user name and station from which the alarm was acknowledged.Parameters:strTagNameoptStrCommentoptStrAlarmTypeName of the tag on which the alarm will be acknowledged.An optional comment to send to the Alarm task, along with the user nameand station.If more than one alarm is active on the specified tag, you can specify whichalarm (e.g., Hi, Lo, HiHi, LoLo) to acknowledge. Otherwise, the functionacknowledges the most recently activated alarm.Returned Values:0 Successfully executed.-1 Invalid number of parameters.-2 Invalid tag name.Examples:Tag NameExpressionExecuteAlarmAck ("a", "Hi alarm in tag a", "Hi")// Returned value = 0 if successfully executedForceTagChange( strTagName, numValue )GroupExecutionWindows NT/2K/XPWindows CE<strong>Web</strong> Thin ClientDatabaseSynchronousSupportedSupportedSupportedDescription: Forces the database to write a value to a tag and act as if it were a tagchange even if the new value is equal to the old value.Parameters:strTagNamenumValueString tag containing the name of the target tag being forced to accept the new value.Tag containing the new value to be written to the target tag.Returned Values: No returned values.A-154 <strong>InduSoft</strong> <strong>Web</strong> <strong>Studio</strong> v6.1 SP2
<strong>Studio</strong> FunctionsIWS Users GuideExamples:Tag NameExpressionForceTagChange( “TagA”, 5 )<strong>InduSoft</strong> <strong>Web</strong> <strong>Studio</strong> v6.1 SP2 A-155
IWS Users Guide<strong>Studio</strong> FunctionsODBC FunctionsThis section describes the following <strong>InduSoft</strong> <strong>Web</strong> <strong>Studio</strong> ODBC functions: ODBCBeginTrans(numHandler) ODBCBindCol(numHandler, strColName, strColType, strTagName) ODBCCanAppend(numHandler) ODBCCanTransact(numHandler) ODBCCanUpdate(numHandler) ODBCClose(numHandler) ODBCCommitTrans(numHandler) ODBCDelete(numHandler) ODBCExecuteSQL(numHandler, strSqlCommand) ODBCInsert(numHandler) ODBCIsBOF(numHandler) ODBCIsDeleted(numHandler) ODBCIsEOF(numHandler) ODBCIsFieldNULL(numHandler, strColName) ODBCIsFieldNullable(numHandler, strColName) ODBCMove(numHandler, numOffset) ODBCMoveFirst(numHandler) ODBCMoveLast(numHandler) ODBCMoveNext(numHandler) ODBCMovePrev(numHandler) ODBCOpen(strDsn, strUser, strPassw, strTable, strFilter, strSort) ODBCQuery(numHandler) ODBCROllback(numHandler) ODBCSetFieldNull(numHandler, strColName, numValue) ODBCSetFilter(numHandler, strFilter) ODBCSetSort(numHandler, strSort) ODBCUnbindCol(numHandler, strColName) ODBCUpdate(numHandler)ODBCBeginTrans(numHandler)GroupExecutionWindows NT/2K/XPWindows CE<strong>Web</strong> Thin ClientODBCSynchronousSupportedNot SupportedNot SupportedDescription: Begins a transaction with the connected data source.A-156 <strong>InduSoft</strong> <strong>Web</strong> <strong>Studio</strong> v6.1 SP2
<strong>Studio</strong> FunctionsIWS Users GuideParameters:numHandlerInteger tag containing the handler returned by the ODBCOpen() function.Returned Values:0 Success1 Invalid handler2 Database not open3 Error beginning transactionExamples:Tag NameExpressionTag ODBCBeginTrans( 5 )ODBCBindCol(numHandler, strColName, strColType,strTagName)GroupExecutionWindows NT/2K/XPWindows CE<strong>Web</strong> Thin ClientODBCSynchronousSupportedNot SupportedNot SupportedDescription: Binds a column to a tag. Every time you finish binding columns, youmust call the ODBCQuery function.Parameters:numHandlerstrColNamestrColTypeInteger tag containing the handler returned by the ODBCOpen() function.String tag containing the Database column name.String tag containing the SQL data type (one of the following):• SQL_BIT• SQL_TINYINT• SQL_LONGVARCHAR• SQL_CHAR• SQL_VARCHAR• SQL_DECIMAL• SQL_NUMERIC• SQL_DATE• SQL_TIME• SQL_TIMESTAMP• SQL_DOUBLE• SQL_REAL• SQL_SMALLINT• SQL_INTEGERstrTagNameString tag containing the name of the tag to bind to the column.<strong>InduSoft</strong> <strong>Web</strong> <strong>Studio</strong> v6.1 SP2 A-157
IWS Users Guide<strong>Studio</strong> FunctionsReturned Values:0 Success1 Invalid Handler2 Invalid parameter type3 One of the parameters has an empty string4 ColType contains an invalid typeExamples:Tag NameExpressionTag ODBCBindCol( 5, “OrderDate”, “SQL_DATE”, “Order_Date” )ODBCCanAppend(numHandler)GroupExecutionWindows NT/2K/XPWindows CE<strong>Web</strong> Thin ClientODBCSynchronousSupportedNot SupportedNot SupportedDescription: Returns whether the database will allow you to add new records.Parameters:numHandlerInteger tag containing the handler returned by the ODBCOpen() function.Returned Values:0 Database does not allow appending new recordsNon-ZeroDatabase does allow appending new recordsExamples:Tag NameExpressionTag ODBCCanAppend( 5 )A-158 <strong>InduSoft</strong> <strong>Web</strong> <strong>Studio</strong> v6.1 SP2
<strong>Studio</strong> FunctionsIWS Users GuideODBCCanTransact(numHandler)GroupExecutionWindows NT/2K/XPWindows CE<strong>Web</strong> Thin ClientODBCSynchronousSupportedNot SupportedNot SupportedDescription: Returns whether the database allows transactions.Parameters:numHandlerInteger tag containing the handler returned by the ODBCOpen() function.Returned Values:0 Database does not allow transactions.Non-ZeroDatabase does allow transactions.Examples:Tag NameExpressionTag ODBCCanTransact( 2 )ODBCCanUpdate(numHandler)GroupExecutionWindows NT/2K/XPWindows CE<strong>Web</strong> Thin ClientODBCSynchronousSupportedNot SupportedNot SupportedDescription: Returns whether the database can be updated.Parameters:numHandlerInteger tag containing the handler returned by the ODBCOpen() function.Returned Values:0 Database does not allow updates.Non-ZeroDatabase does allow updates.<strong>InduSoft</strong> <strong>Web</strong> <strong>Studio</strong> v6.1 SP2 A-159
IWS Users Guide<strong>Studio</strong> FunctionsExamples:Tag NameExpressionTag ODBCCanUpdate( 6 )ODBCClose(numHandler)GroupExecutionWindows NT/2K/XPWindows CE<strong>Web</strong> Thin ClientODBCSynchronousSupportedNot SupportedNot SupportedDescription: Closes a connection to the database.Parameters:numHandlerInteger tag containing the handler returned by the ODBCOpen() function.Returned Values:0 Success1 Invalid HandlerExamples:Tag NameExpressionTag ODBCClose( 5 )ODBCCommitTrans(numHandler)GroupExecutionWindows NT/2K/XPWindows CE<strong>Web</strong> Thin ClientODBCSynchronousSupportedNot SupportedNot SupportedDescription: Commits a transaction. Call this function upon completingtransactions.Parameters:numHandlerInteger tag containing the handler returned by the ODBCOpen() function.A-160 <strong>InduSoft</strong> <strong>Web</strong> <strong>Studio</strong> v6.1 SP2
<strong>Studio</strong> FunctionsIWS Users GuideReturned Values:0 Success1 Invalid handler2 Database not open3 Error committing transactionExamples:Tag NameExpressionTag ODBCCommitTrans( 1)ODBCDelete(numHandler)GroupExecutionWindows NT/2K/XPWindows CE<strong>Web</strong> Thin ClientODBCSynchronousSupportedNot SupportedNot SupportedDescription: Deletes the current register. After a successful deletion, you mustexplicitly call one of the Move functions to move off the deleted record.Parameters:numHandlerReturned Values:Integer tag containing the handler returned by the ODBCOpen() function.0 Success1 Invalid handler2 Database not open3 Delete errorExamples:Tag NameExpressionTag ODBCDelete( 5 )<strong>InduSoft</strong> <strong>Web</strong> <strong>Studio</strong> v6.1 SP2 A-161
IWS Users Guide<strong>Studio</strong> FunctionsODBCExecuteSQL(numHandler, strSqlCommand)GroupExecutionWindows NT/2K/XPWindows CE<strong>Web</strong> Thin ClientODBCSynchronousSupportedNot SupportedNot SupportedDescription: Executes an SQL command directly. The ODBCExecuteSQL functiondoes not return data records.Parameters:numHandlerstrSqlCommandInteger tag containing the handler returned by the ODBCOpen() function.Sting tag specifying a valid SQL command.Returned Values:0 Success1 Invalid handler2 Database not open3 Invalid parameter4 Error executing SQL commandExamples:Tag NameExpressionTag ODBCExecuteSQL( 3, “ )Tag ODBCExecuteSQL( 4, “ )ODBCInsert(numHandler)GroupExecutionWindows NT/2K/XPWindows CE<strong>Web</strong> Thin ClientODBCSynchronousSupportedNot SupportedNot SupportedDescription: Inserts a new register to the database. <strong>InduSoft</strong> uses the values of thetags bound by the ODBCBindCol function to create the new register.A-162 <strong>InduSoft</strong> <strong>Web</strong> <strong>Studio</strong> v6.1 SP2
<strong>Studio</strong> FunctionsIWS Users GuideParameters:numHandlerInteger tag containing the handler returned by the ODBCOpen() function.Returned Values:0 Success1 Invalid handler2 Database not open3 Insert errorExamples:Tag NameExpressionTag ODBCInsert( 7 )ODBCIsBOF(numHandler)GroupExecutionWindows NT/2K/XPWindows CE<strong>Web</strong> Thin ClientODBCSynchronousSupportedNot SupportedNot SupportedDescription: Returns whether you have gone above the first record of the recordset. (Call this function before scrolling from record to record.)You also can use the ODBCIsBOF function with ODBCIsEOF to determine whetherthe record set contains any records or is empty. Immediately after callingODBCQuery, and if the record set contains no records, ODBCIsBOF returnsnonzero. When you open a record set with at least one record, the first record isthe current record and ODBCIsBOF returns a zero (0). If the first record is thecurrent record, and you call ODBCMovePrev, the ODBCIsBOF function willsubsequently return a nonzero.Parameters:numHandlerInteger tag containing the handler returned by the ODBCOpen() function.Returned Values:0 Record foundNon-ZeroRecord set contains no records or you scrolled backward, above the first record<strong>InduSoft</strong> <strong>Web</strong> <strong>Studio</strong> v6.1 SP2 A-163
IWS Users Guide<strong>Studio</strong> FunctionsExamples:Tag NameExpressionTag ODBCIsBOF( 1 )ODBCIsDeleted(numHandler)GroupExecutionWindows NT/2K/XPWindows CE<strong>Web</strong> Thin ClientODBCSynchronousSupportedNot SupportedNot SupportedDescription: Reports whether the current record was deleted. If you scroll to arecord and ODBCIsDeleted returns a nonzero, then you must scroll to anotherrecord before you can perform any other operations.Parameters:numHandlerInteger tag containing the handler returned by the ODBCOpen() function.Returned Values:0 Record set is not positioned on a deleted record.Non-ZeroRecord set is positioned on a deleted record.Examples:Tag NameExpressionTag ODBCIsDeleted( 8 )ODBCIsEOF(numHandler)GroupExecutionWindows NT/2K/XPWindows CE<strong>Web</strong> Thin ClientODBCSynchronousSupportedNot SupportedNot SupportedA-164 <strong>InduSoft</strong> <strong>Web</strong> <strong>Studio</strong> v6.1 SP2
<strong>Studio</strong> FunctionsIWS Users GuideDescription: Reports whether you have gone beyond the last record of the recordset. (Call this function as you scroll from record to record.)You also can use the ODBCIsEOF function to determine whether the record setcontains any records or is empty. Immediately after calling ODBCQuery (and if therecord set contains no records) ODBCIsEOF returns non-zero. When you open arecord set with at least one record, the first record is the current record andODBCIsEOF returns a zero (0). If the last record is the current record when youcall ODBCMoveNext, ODBCIsEOF will subsequently return a nonzero.Parameters:numHandlerInteger tag containing the handler returned by the ODBCOpen() function.Returned Values:0 Record found.Non-ZeroRecord set contains no records or you scrolled backward, before the last record.Examples:Tag NameExpressionTag ODBCIsEOF( 5 )ODBCIsFieldNULL(numHandler, strColName)GroupExecutionWindows NT/2K/XPWindows CE<strong>Web</strong> Thin ClientODBCSynchronousSupportedNot SupportedNot SupportedDescription: Reports whether a specified field in a record set was flagged as Null.Parameters:numHandler Integer tag containing the handler returned by the ODBCOpen() function.strColNameString tag containing the column name.Returned Values:0 The specified field is not flagged as Null.Non-ZeroThe specified field is flagged as Null.<strong>InduSoft</strong> <strong>Web</strong> <strong>Studio</strong> v6.1 SP2 A-165
IWS Users Guide<strong>Studio</strong> FunctionsExamples:Tag NameTagTagExpressionODBCIsFieldNULL( 7, “CustomerName”)ODBCIsFieldNULL( 3, “CompanyName”)ODBCIsFieldNullable(numHandler, strColName)GroupExecutionWindows NT/2K/XPWindows CE<strong>Web</strong> Thin ClientODBCSynchronousSupportedNot SupportedNot SupportedDescription: Reports whether a specified field is nullable (can be set to a Nullvalue).Parameters:NumHandlerstrColNameInteger tag containing the handler returned by the ODBCOpen() function.String tag containing the column name.Returned Values:0 The specified field is not flagged as Nullable.Non-ZeroThe specified field is flagged as Nullable.Examples:Tag NameTagTagExpressionODBCIsFieldNullable( 1, “Price”)ODBCIsFieldNullable( 1, “Model”)A-166 <strong>InduSoft</strong> <strong>Web</strong> <strong>Studio</strong> v6.1 SP2
<strong>Studio</strong> FunctionsIWS Users GuideODBCMove(numHandler, numOffset)GroupExecutionWindows NT/2K/XPWindows CE<strong>Web</strong> Thin ClientODBCSynchronousSupportedNot SupportedNot SupportedDescription: Moves the current record pointer within a record set, either forward orbackward. If you pass a value of 0 for Offset, ODBCMove refreshes the currentrecord.Parameters:numHandlernumOffsetInteger tag containing the handler returned by the ODBCOpen() function.Integer tag containing the number of rows to move forward or backward.• Positive values move forward, toward the end of the record set.• Negative values move backward, toward the beginning of the record set.Returned Values:0 Success1 Invalid handler2 Database not open3 Move errorExamples:Tag NameExpressionTag ODBCMove(2, 3)Tag ODBCMove(8, 2)ODBCMoveFirst(numHandler)GroupExecutionWindows NT/2K/XPWindows CE<strong>Web</strong> Thin ClientODBCSynchronousSupportedNot SupportedNot Supported<strong>InduSoft</strong> <strong>Web</strong> <strong>Studio</strong> v6.1 SP2 A-167
IWS Users Guide<strong>Studio</strong> FunctionsDescription: Moves to the first record within the record set.Parameters:NumHandlerInteger tag containing the handler returned by the ODBCOpen() function.Returned Values:0 Success1 Invalid handler2 Database not open3 Move errorExamples:Tag NameTagExpressionODBCMoveFirst(4)ODBCMoveLast(numHandler)GroupExecutionWindows NT/2K/XPWindows CE<strong>Web</strong> Thin ClientODBCSynchronousSupportedNot SupportedNot SupportedDescription: Moves to the last record within the record set.Parameters:numHandlerInteger tag containing the handler returned by the ODBCOpen() function.Returned Values:0 Success1 Invalid handler2 Database not open3 Move errorExamples:Tag NameTagExpressionODBCMoveLast(7)A-168 <strong>InduSoft</strong> <strong>Web</strong> <strong>Studio</strong> v6.1 SP2
<strong>Studio</strong> FunctionsIWS Users GuideODBCMoveNext(numHandler)GroupExecutionWindows NT/2K/XPWindows CE<strong>Web</strong> Thin ClientODBCSynchronousSupportedNot SupportedNot SupportedDescription: Moves to the next record within the record set.Parameters:numHandlerInteger tag containing the handler returned by the ODBCOpen() function.Returned Values:0 Success1 Invalid handler2 Database not open3 End of record set reached4 Move errorExamples:Tag NameTagExpressionODBCMoveNext(9)ODBCMovePrev(numHandler)GroupExecutionWindows NT/2K/XPWindows CE<strong>Web</strong> Thin ClientODBCSynchronousSupportedNot SupportedNot SupportedDescription: Moves to the next record within the record set.Parameters:numHandlerInteger tag containing the handler returned by the ODBCOpen() function.<strong>InduSoft</strong> <strong>Web</strong> <strong>Studio</strong> v6.1 SP2 A-169
IWS Users Guide<strong>Studio</strong> FunctionsReturned Values:0 Success1 Invalid handler2 Database not open3 Beginning of record set reached4 Move errorExamples:Tag NameTagExpressionODBCMovePrev(2)ODBCOpen(strDsn, strUser, strPassw, strTable, strFilter,strSort)GroupExecutionWindows NT/2K/XPWindows CE<strong>Web</strong> Thin ClientODBCSynchronousSupportedNot SupportedNot SupportedDescription: Opens a connection to the database.This function returns a handler to be used in subsequent calls to the ODBCfunctions.After calling this function, no register has been read from the database yet. Youmust bind the columns and call the ODBCQuery function to retrieve the firstregister.Parameters:strDsnstrUserstrPasswstrTablestrFilterstrSortSting tag containing the Data Source Name.Sting tag containing the User name.Sting tag containing the Password.Sting tag containing the Database table name.Sting tag containing the SQL WHERE clause.Sting tag containing the SQL ORDER BY clause.A-170 <strong>InduSoft</strong> <strong>Web</strong> <strong>Studio</strong> v6.1 SP2
<strong>Studio</strong> FunctionsIWS Users GuideReturned Values:NOn success, returns the handler to identify the database-1 Invalid parameter-2 DSN or TableName contain an empty stringExamples:Tag NameTagExpressionODBCOpen(“MyDSNFile”, “Alex”, “”, “Table1”, “Name='Mayer'”, “Name ASC”)Tag ODBCOpen(“DSNFileName”, “Robert”, “Robot”, “Table1”, “”, “”) Note:This function does not open the database itself; it simply creates a handle tomanipulate the database. To open the database, you must bind thecolumns and call the ODBCQuery function.ODBCQuery(numHandler)GroupExecutionWindows NT/2K/XPWindows CE<strong>Web</strong> Thin ClientODBCSynchronousSupportedNot SupportedNot SupportedDescription: Retrieves the first register after opening and binding the column. Ifyou modify the column binding, or modify the filter and sort, you must call thisfunction again.Parameters:numHandlerInteger tag containing the handler returned by the ODBCOpen() function.Returned Values:0 Success1 Invalid handler2 No columns bound3 Cannot open database4 Cannot restart database5 Query error<strong>InduSoft</strong> <strong>Web</strong> <strong>Studio</strong> v6.1 SP2 A-171
IWS Users Guide<strong>Studio</strong> FunctionsExamples:Tag NameTagExpressionODBCQuery(6)ODBCROllback(numHandler)GroupExecutionWindows NT/2K/XPWindows CE<strong>Web</strong> Thin ClientODBCSynchronousSupportedNot SupportedNot SupportedDescription: Reverses the changes made during a transaction.Parameters:numHandlerInteger tag containing the handler returned by the ODBCOpen() function.Returned Values:0 Success1 Invalid handler2 Database no open3 Error rolling back transactionExamples:Tag NameExpressionTag ODBCROllback( 4)ODBCSetFieldNull(numHandler, strColName, numValue)GroupExecutionWindows NT/2K/XPWindows CE<strong>Web</strong> Thin ClientODBCSynchronousSupportedNot SupportedNot SupportedDescription: Flags a field data member in the record set as Null (specifically havingno value) or as non-Null.A-172 <strong>InduSoft</strong> <strong>Web</strong> <strong>Studio</strong> v6.1 SP2
<strong>Studio</strong> FunctionsIWS Users GuideParameters:numHandlerstrColNamenumValueInteger tag containing the handler returned by the ODBCOpen() function.String tag containing the column name.Integer tag, which specifies the field data as Null if 0 and non-Null in non-zero.Returned Values:0 Success1 Invalid handler2 Database not open3 Invalid parameter4 Invalid column nameExamples:Tag NameExpressionTag ODBCSetFieldNull(2, “Price”, 1)Tag ODBCSetFieldNull(4, “CompanyName”, 0)ODBCSetFilter(numHandler, strFilter)GroupExecutionWindows NT/2K/XPWindows CE<strong>Web</strong> Thin ClientODBCSynchronousSupportedNot SupportedNot SupportedDescription: Constrains the records selected by IWS.You may find this function useful for selecting a subset of records, such as "allsalespersons based in California" ("state = ‘CA’"). Remember to callODBCQuery after calling this function.Parameters:numHandlerstrFilterInteger tag containing the handler returned by the ODBCOpen() function.String tag containing the SQL WHERE clause.<strong>InduSoft</strong> <strong>Web</strong> <strong>Studio</strong> v6.1 SP2 A-173
IWS Users Guide<strong>Studio</strong> FunctionsReturned Values:0 Success1 Invalid handler2 Invalid parameterExamples:Tag NameTagExpressionODBCSetFilter(3, “Name='Morgan'”)ODBCSetSort(numHandler, strSort)GroupExecutionWindows NT/2K/XPWindows CE<strong>Web</strong> Thin ClientODBCSynchronousSupportedNot SupportedNot SupportedDescription: Sorts records selected by IWS.You can use this feature to sort the records in one or more columns. Rememberto call ODBCQuery after calling this function.Parameters:numHandlerstrSortInteger tag containing the handler returned by the ODBCOpen() function.String tag containing the SQL ORDER BY clause.Returned Values:0 Success1 Invalid handler2 Invalid parameter typeExamples:Tag NameTagExpressionODBCSetSort(5,"Name DESC")A-174 <strong>InduSoft</strong> <strong>Web</strong> <strong>Studio</strong> v6.1 SP2
<strong>Studio</strong> FunctionsIWS Users GuideODBCUnbindCol(numHandler, strColName)GroupExecutionWindows NT/2K/XPWindows CE<strong>Web</strong> Thin ClientODBCSynchronousSupportedNot SupportedNot SupportedDescription: Unbinds a column from a tag.Parameters:numHandlerstrColNameInteger tag containing the handler returned by the ODBCOpen() function.String tag containing the column name.Returned Values:0 Success1 Invalid handler2 Invalid parameter type3 Column not boundExamples:Tag NameTagExpressionODBCUnbindCol(7, “Name”)ODBCUpdate(numHandler)GroupExecutionWindows NT/2K/XPWindows CE<strong>Web</strong> Thin ClientODBCSynchronousSupportedNot SupportedNot SupportedDescription: Updates the current register. IWS uses the values of tags bound bythe ODBCBindCol function to update the current register.Parameters:numHandlerInteger tag containing the handler returned by the ODBCOpen() function.<strong>InduSoft</strong> <strong>Web</strong> <strong>Studio</strong> v6.1 SP2 A-175
IWS Users Guide<strong>Studio</strong> FunctionsReturned Values:0 Success1 Invalid handler2 Database not open3 Update errorExamples:Tag NameTagExpressionODBCUpdate(1)A-176 <strong>InduSoft</strong> <strong>Web</strong> <strong>Studio</strong> v6.1 SP2
<strong>Studio</strong> FunctionsIWS Users GuideMail FunctionsThis section describes the following <strong>InduSoft</strong> <strong>Web</strong> <strong>Studio</strong> Email functions:CNFEMail(strSMTP, strFrom, strPOP3, strUser, strPassword,optnumTimeOut)GetStatusSendEMailExt(optTagName)SendEMail(strSubject, strMessage, strTO)SendEMailExt(strSubject, strMessage, strTO, strCC, strBCC,strFile1, ..., strFileN) CnfEmail( )CnfEmail( strSMTP, strFrom, strPOP3, strUser,strPassword, optnumTimeOut, optnumAuthType,optstrSMTPUser, optstrSMTPPassword )GroupExecutionWindows NT/2K/XPWindows CE<strong>Web</strong> Thin ClientMailSynchronousSupportedSupportedSupportedDescription: Sets Simple Mail Transfer Protocol (SMTP) parameters. You mustconfigure these parameters and execute this function before sending email withIWS (e.g. by the SendEmail() function, by the SendEmailExt() function, by theAlarm Email interface, etc.).Parameters:strSMTPstrFromstrPOP3strUserstrPasswordoptnumTimeOutString tag containing the SMTP server name or IP address.For CEView applications, you must specify the SMTP IP address insteadof the server name.String tag containing the sender’s address. This address must be a validemail address for the POP3 Server.String tag containing the POP3 server name.String tag containing the sender’s user account name for the POP3Server.String tag containing the password for the user account name for thePOP3 Server.Optional numerical tag containing the timeout limit (in seconds) usedwhen sending messages. If no answer is received from the Server afterthis period of time, the operation is aborted automatically.<strong>InduSoft</strong> <strong>Web</strong> <strong>Studio</strong> v6.1 SP2 A-177
IWS Users Guide<strong>Studio</strong> FunctionsoptAuthTypeOptional numerical tag containing the SMTP Authentication Type:0 (default) = SMTP Server does not require authentication1 = SMTP server requires authenticationoptstrSMTPUseroptstrSMTPPasswordOptional string tag containing the User Name used to log onto on theSMTP Server when it requires authentication. If this parameter is omittedand the optAuthType type is set to 1, the value configured for the strUseris automatically used as optstrSMTPUser.Optional string tag containing the Password used to log onto the SMTPServer that requires authentication. If this parameter is omitted and theoptAuthType type is set to 1, the value configured for the strPassword isautomatically used as optstrSMTPPassword too.Returned Values:0 Success1 Invalid format for parameter 1 (strSMTP)2 Invalid format for parameter 2 (strFrom)3 Invalid format for parameter 3 (strPOP3)4 Invalid format for parameter 4 (strUser)5 Invalid format for parameter 5 (strPassword)6 Invalid format for parameter 6 (optnumTimeOut)7 Wrong amount of parameters8 Error getting host IP address (invalid POP3 server)9 Error Connecting POP3 server10 Error sending username11 Error sending password12 SMTP server does not support Login\Password Authentication mode13 Invalid SMTP User Name14 Authentication failed (Invalid User and/or Password)Examples:Tag NameTagTagExpressionCnfEmail ( "smtp.<strong>Studio</strong>.com", "Robert@<strong>Studio</strong>.com", "pop.<strong>Studio</strong>.com", "RobertH","Shades556",100)CnfEmail( "smtp.<strong>Studio</strong>.com", "Robert@<strong>Studio</strong>.com", "pop.<strong>Studio</strong>.com", "RobertH","Shades556", 5 ,1)A-178 <strong>InduSoft</strong> <strong>Web</strong> <strong>Studio</strong> v6.1 SP2
<strong>Studio</strong> FunctionsIWS Users GuideTagCnfEmail( "smtp.<strong>Studio</strong>.com", "Robert@<strong>Studio</strong>.com", "pop.<strong>Studio</strong>.com", "RobertH","Shades556", 5 , 1 , “JohnS” , “abcd1234” )GetStatusSendEMailExt(optTagName)GroupExecutionWindows NT/2K/XPWindows CE<strong>Web</strong> Thin ClientMailSynchronousSupportedSupportedSupportedDescription: Returns status of the last email sent using the SendEmailExt()function.Parameters:OptTagNameOptional tag that causes the function to update its return value. This parameter isoptional but you must use it when configuring this function for any screen dynamic(such as Text I/O, Position, and so forth).Returned Values:-2 Incorrect version of the INDMail.DLL library.-1 The INDMail.DLL library is corrupted.0 SendEmailExt() function is not being executed.1 Still sending last email. Cannot execute the SendEmailExt() function.2 Last email was sent successfully. You can execute the SendEmailExt() function again.3 There was an error sending the last email. Execute the SendEmailExt() function again.Examples:Tag NameTagTagExpressionGetStatusSendEMailExt(second)GetStatusSendEMailExt()SendEMail(strSubject, strMessage, strTO)GroupExecutionWindows NT/2K/XPMailSynchronousSupported<strong>InduSoft</strong> <strong>Web</strong> <strong>Studio</strong> v6.1 SP2 A-179
IWS Users Guide<strong>Studio</strong> FunctionsWindows CE<strong>Web</strong> Thin ClientSupportedSupportedDescription: Sends e-mail messages. Before executing this function, you must setsome parameters using the CnfEmail() functionParameters:strSubjectString tag containing the e-mail subject.strMessagestrToString tag containing the e-mail message (up to 255 characters).String tag containing the recipient’s address (target).A-180 <strong>InduSoft</strong> <strong>Web</strong> <strong>Studio</strong> v6.1 SP2
<strong>Studio</strong> FunctionsIWS Users GuideReturned Values:0 Success1 Invalid format for parameter 1 (strSubject)2 Invalid format for parameter 1 (strMessage)3 Invalid format for parameter 3 (strTo)4 Wrong amount of parameters5 Start Socket error6 Error getting host IP Address (invalid SMTP server)7 Error Connecting SMTP server8 Error sending HELO command (initialization)9 Error sending MAIL command (sending FROM address)10 Error sending RCPT command (sending TO address)11 Error sending DATA (sending message)Examples:Tag NameTagExpressionSendEMail( “Subject”, “Message”, “Wrogers@pnd.net”)SendEMailExt(strSubject, strMessage, strTO, strCC,strBCC, strFile1, ..., strFileN)GroupExecutionWindows NT/2K/XPWindows CE<strong>Web</strong> Thin ClientMailAsynchronousSupportedSupportedSupportedDescription: Sends e-mail messages with attached files. Before executing thisfunction, you must set some parameters using the CnfEmail() function.<strong>InduSoft</strong> <strong>Web</strong> <strong>Studio</strong> v6.1 SP2 A-181
IWS Users Guide<strong>Studio</strong> FunctionsParameters:strSubjectstrMessagestrTOstrCCstrBCCstrFile (1-N)String tag containing the e-mail subject (up to 255 characters).String tag containing the e-mail message (up to 255 characters).String tag containing the recipient’s address.String tag containing the recipients’ addresses to be CCed.String tag containing the recipients’ addresses to be BCCed.String tags, each containing file name and path of a file to send with e-mail.Returned Values:-4 Some of the attached files were not found.-3 Wrong number of parameters (at least three parameters are required).-2 The INDMail.DLL library version is incorrect.-1 The INDMail.DLL library is corrupted.0 Success1 Cannot execute the function because the last e-mail has not been sent yet.2 Internal errorExamples:Tag NameExpressionTag SendEMailExt(“Subject”, “Message”, “Sam@universe.com”, “”, “”,“C:\Projects\report.txt”)TagSendEMailExt(“Subject”, “Message”, “David@Ohio.net”, “Ted@Austin.com”,“Bart@Springfield.gov”, “C:\TechRef51.doc”) Notes: You must configure the strSubject, strMessage, and strTOparameters. All of the other parameters are optional. You can use the null string value ("") for the strTO, strCC, or strBCCparameters if you will not be using them. You can assign more than one recipient in the strTO, strCC, or strBCCparameters, using the semicolon (;) char to share the addresses.A-182 <strong>InduSoft</strong> <strong>Web</strong> <strong>Studio</strong> v6.1 SP2
<strong>Studio</strong> FunctionsIWS Users GuideDial-Up FunctionsThis section describes the following <strong>InduSoft</strong> <strong>Web</strong> <strong>Studio</strong> Dial-Up functions:DialError(numType, strPhonebookEntryOrModem, optError, optRefresh)DialGetClientIP(numType, strPhoneBookOrDevice, “tagClientIP”,optRefresh)DialGetServerIP(numType, strPhoneBookOrDevice, "tagServerIP",optRefresh)DialStatus(numType, strPhonebookEntryOrModem, optStatus,optRefresh)DialUp(numType, strPhonebookEntryOrModem, strUserName,strPassword, optstrDomain, strPhoneNumber)DialUpToCE(numModem, strDialPhone, strMyNumber, strUser,strPassword, optstrDomain, optAutoDial, optAutoClose)FindAllDevices(“tagArray”)FindModem("tagArray")HangUp(numType, strPhonebookEntryOrModem)PhoneDialUp(strPhoneNumber, OptStrModemName)PhoneDisableListen(optStrModemName)PhoneEnableListen(OptStrModemName)PhoneHangUp(OptStrModemName)PhoneStatus ("strStatus", optStrModemName)DialError(numType, strPhonebookEntryOrModem, optError,optRefresh)GroupExecutionWindows NT/2K/XPWindows CE<strong>Web</strong> Thin ClientDial-UpSynchronousSupportedSupportedNot SupportedDescription: Returns the error codes regarding each connection.<strong>InduSoft</strong> <strong>Web</strong> <strong>Studio</strong> v6.1 SP2 A-183
IWS Users Guide<strong>Studio</strong> FunctionsParameters:numTypestrPhonebookEntryOrModemoptErroroptRefreshNumerical tag specifying the content of thestrPhonebookEntryorModem tag.• 0: Phonebook Name• 1: Modem Name• 2: Direct Connection NameString tag containing a Phonebook Name, Modem Name, orDirect Connection Name used to make the connection. ThenumType tag specifies which of these methods is used.Optional string tag containing the name of the string tagreceiving the Error Message.Optional tag, which causes the function to update its returnvalue. This parameter is optional but you must use it whenconfiguring this function for any screen dynamic (such as TextI/O, Position, and so forth).Returned Values:0 OK-1 Error: INDRas.DLL not found.-2 Error: INDRas.DLL damaged.-3 Error: invalid number of parameters (minimum=2).-4 Invalid value for the numType parameter (0 or 1).-5 PhoneBook or Modem does not exist.600 An operation is pending.601 The port handle is invalid.602 The port is already open.603 Caller's buffer is too small.604 Wrong information specified.605 Cannot set port information.606 The port is not connected607 The event is invalid.608 The device does not exist.609 The device type does not exist.610 The buffer is invalid.611 The route is not available.A-184 <strong>InduSoft</strong> <strong>Web</strong> <strong>Studio</strong> v6.1 SP2
<strong>Studio</strong> FunctionsIWS Users Guide612 The route is not allocated.613 Invalid compression specified.614 Out of buffers.615 The port was not found.616 An asynchronous request is pending.617 The port or device is already disconnecting.618 The port is not open.619 The port is disconnected.620 There are no endpoints.621 Cannot open the phone book file.622 Cannot load the phone book file.623 Cannot find the phone book entry.624 Cannot write the phone book file.625 Invalid information found in the phone book file.626 Cannot load a string.627 Cannot find key.628 The port was disconnected.629 The data link was terminated by the remote machine.630 The port was disconnected due to hardware failure.631 The port was disconnected by the user.632 The structure size is incorrect.633 The port is already in use or is not configured for Remote Access dial out.634 Cannot register your computer on on the remote network.635 Unknown error.636 The wrong device is attached to the port.637 The string could not be converted.638 The request has timed out.639 No asynchronous net available.640 A NetBIOS error occurred.641 The server cannot allocate NetBIOS resources needed to support the client.<strong>InduSoft</strong> <strong>Web</strong> <strong>Studio</strong> v6.1 SP2 A-185
IWS Users Guide<strong>Studio</strong> Functions642 One of your NetBIOS names is already registered on the remote network.643 A network adapter at the server failed.644 You will not receive network message pop-ups.645 Internal authentication error.646 The account is not permitted to log on at this time of day.647 The account is disabled.648 The password has expired.649 The account does not have Remote Access permission.650 The Remote Access server is not responding.651 Your modem (or other connecting device) has reported an error.652 Unrecognized response from the device.653 A macro required by the device was not found in the device .INF file section.654 A command or response in the device .INF file section refers to an undefined acro.655 The
<strong>Studio</strong> FunctionsIWS Users Guide671 Cannot read the device type from the media .INI file.672 Cannot read the device name from the media .INI file.673 Cannot read the usage from the media .INI file.674 Cannot read the maximum connection BPS rate from the media .INI file.675 Cannot read the maximum carrier BPS rate from the media .INI file.676 The line is busy.677 A person answered instead of a modem.678 There is no answer.679 Cannot detect carrier.680 There is no dial tone.681 General error reported by device.682 ERROR_WRITING_SECTIONNAME683 ERROR_WRITING_DEVICETYPE684 ERROR_WRITING_DEVICENAME685 ERROR_WRITING_MAXCONNECTBPS686 ERROR_WRITING_MAXCARRIERBPS687 ERROR_WRITING_USAGE688 ERROR_WRITING_DEFAULTO<strong>FF</strong>689 ERROR_READING_DEFAULTO<strong>FF</strong>690 ERROR_EMPTY_INI_FILE691 Access denied because username and/or password is invalid on the domain.692 Hardware failure in port or attached device.693 ERROR_NOT_BINARY_MACRO694 ERROR_DCB_NOT_FOUND695 ERROR_STATE_MACHINES_NOT_STARTED696 ERROR_STATE_MACHINES_ALREADY_STARTED697 ERROR_PARTIAL_RESPONSE_LOOPING698 A response keyname in the device .INF file is not in the expected format.699 The device response caused buffer overflow.<strong>InduSoft</strong> <strong>Web</strong> <strong>Studio</strong> v6.1 SP2 A-187
IWS Users Guide<strong>Studio</strong> Functions700 The expanded command in the device .INF file is too long.701 The device moved to a BPS rate not supported by the COM driver.702 Device response received when none expected.703 The Application does not allow user interaction the connection requires interaction withthe user to complete successfully704 ERROR_BAD_CALLBACK_NUMBER705 ERROR_INVALID_AUTH_STATE706 ERROR_WRITING_INITBPS707 X.25 diagnostic indication.708 The account has expired.709 Error changing password on domain The password may be too short or may match apreviously used password.710 Serial overrun errors were detected while communicating with your modem.711 RasMan initialization failure Check the event log.712 Biplex port initializing Wait a few seconds and redial.713 No active ISDN lines are available.714 No ISDN channels are available to make the call.715 Too many errors occurred because of poor phone line quality.716 The Remote Access IP configuration is unusable.717 No IP addresses are available in the static pool of Remote Access IP addresses.718 Timed out waiting for a valid response from the remote PPP peer.719 PPP terminated by remote machine.720 No PPP control protocols configured.721 Remote PPP peer is not responding.722 The PPP packet is invalid.723 The phone number including prefix and suffix is too long.724 The IPX protocol cannot dial-out on the port because the machine is an IPX router.725 The IPX protocol cannot dial-in on the port because the IPX router is not installed726 The IPX protocol cannot be used for dial-out on more than one port at a time.727 Cannot access TCPCFG.DLL.A-188 <strong>InduSoft</strong> <strong>Web</strong> <strong>Studio</strong> v6.1 SP2
<strong>Studio</strong> FunctionsIWS Users Guide728 Cannot find an IP adapter bound to Remote Access.729 SLIP cannot be used unless the IP protocol is installed.730 Computer registration is not complete.731 The protocol is not configured.732 The PPP negotiation is not converging.733 The PPP control protocol for this network protocol is not available on the server.734 The PPP link control protocol terminated.735 The requested address was rejected by the server.736 The remote computer terminated the control protocol.737 Loopback detected.738 The server did not assign an address.739 The authentication protocol required by the remote server cannot use the Windows NTencrypted password Redial, entering the password explicitly.740 Invalid TAPI configuration.741 The local computer does not support the required encryption type.742 The remote computer does not support the required encryption type.743 The remote computer requires encryption.744 Cannot use the IPX network number assigned by remote server Check the event log.745 ERROR_INVALID_SMM746 ERROR_SMM_UNINITIALIZED747 ERROR_NO_MAC_FOR_PORT748 ERROR_SMM_TIMEOUT749 ERROR_BAD_PHONE_NUMBER750 ERROR_WRONG_MODULE751 Invalid callback number Only the characters 0 to 9, T, P, W, (,), -, @, and space areallowed in the number.752 A syntax error was encountered while processing a script.753 The connection could not be disconnected because it was created by the Multi-Protocol Router.<strong>InduSoft</strong> <strong>Web</strong> <strong>Studio</strong> v6.1 SP2 A-189
IWS Users Guide<strong>Studio</strong> FunctionsExamples:Tag NameTagTagTagExpressionDialError(0, “Office DialUp”)DialError(1, “USRobotics_SportsterFaxModem”, “StatusMessage”, second)DialError(2, “DirectDial”, “DialupError”)DialGetClientIP(numType, strPhoneBookOrDevice,“tagClientIP”, optRefresh)GroupExecutionWindows NT/2K/XPWindows CE<strong>Web</strong> Thin ClientDial-UpSynchronousSupportedSupportedNot SupportedDescription: Obtains the IP Address for the RAS Client station of a Dial-Upconnection. You must execute this function on the RAS Client station (not on theRAS Server station) or the function will not work properly.Parameters:numTypestrPhonebookEntryOrModem“tagClientIP”optRefreshNumerical tag specifying the content of thestrPhonebookEntryorModem tag.• 0: Phonebook Name• 1: Modem Name• 2: Direct Connection NameString tag containing the Phonebook Name, Modem Name, orDirect Connection Name used to make the connection. ThenumType tag specifies which of these methods is used.Name of the string tag that will receive the IP address.Optional tag that causes the function to update its return value.This parameter is optional, but you must use it whenconfiguring this function for any screen dynamic (such as TextI/O, Position, and so forth).A-190 <strong>InduSoft</strong> <strong>Web</strong> <strong>Studio</strong> v6.1 SP2
<strong>Studio</strong> FunctionsIWS Users GuideReturned Values:-5 GetClientIP function was not found in IndRAS.DLL.-4 Invalid type (0: Phonebook, 1: Modem, 2: Direct Connection)-3 Invalid number of parameters-2 DialStatus function was not found in IndRAS.DLL-1 IndRAS.DLL was not loadedNN: Status code returned by the DialStatus() functionExamples:Tag NameTagExpressionDialGetClinetIP(0, “Office DialUp”, “ClientIPTag”)Tag DialError(1, “USRobotics_SportsterFaxModem”, “ClientIPAddress”, second )TagDialError(2, “DirectDial”, “IPAdd”)DialGetServerIP(numType, strPhoneBookOrDevice,"tagServerIP", optRefresh)GroupExecutionWindows NT/2K/XPWindows CE<strong>Web</strong> Thin ClientDial-UpSynchronousSupportedNot SupportedNot SupportedDescription: Obtains the IP Address of the RAS Server station for a Dial-Upconnection. You must execute this function on the RAS Client station (not on theRAS Server station) for this function to work properly.<strong>InduSoft</strong> <strong>Web</strong> <strong>Studio</strong> v6.1 SP2 A-191
IWS Users Guide<strong>Studio</strong> FunctionsParameters:numTypeNumerical tag specifying the content of thestrPhonebookEntryorModem tag.• 0: Phonebook Name• 1: Modem Name• 2: Direct Connection NamestrPhonebookEntryOrModem String tag containing the Phonebook Name, Modem Name, orDirect Connection Name used to make the connection. ThenumType tag specifies which of these methods is used.“tagServerIP”optRefreshName of string tag receiving the IP address.Optional tag that causes the function to update its return value.This parameter is optional, but you must use it when configuringthis function for any screen dynamic (such as Text I/O, Position,and so forth).Returned Values:-5 GetServerIP function was not found in IndRAS.DLL.-4 Invalid type (0: Phonebook, 1: Modem, 2: Direct Connection)-3 Invalid number of parameters-2 DialStatus function was not found in IndRAS.DLL-1 IndRAS.DLL was not loadedNN: Status code returned by the DialStatus() functionExamples:Tag NameExpressionTag DialGetClinetIP( 0, “Office DialUp”, “ClientIPTag” )Tag DialError( 1, “USRobotics_SportsterFaxModem”, “ClientIPAddress”, second )TagDialError( 2, “DirectDial”, “IPAdd”)A-192 <strong>InduSoft</strong> <strong>Web</strong> <strong>Studio</strong> v6.1 SP2
<strong>Studio</strong> FunctionsIWS Users GuideDialStatus(numType, strPhonebookEntryOrModem,optStatus, optRefresh)GroupExecutionWindows NT/2K/XPWindows CE<strong>Web</strong> Thin ClientDial-UpSynchronousSupportedSupportedNot SupportedDescription: Returns the status of each connectionParameters:NumTypeNumerical tag specifying the content of thestrPhonebookEntryorModem tag.• 0: Phonebook Name• 1: Modem Name• 2: Direct Connection NamestrPhonebookEntryOrModem String tag containing the Phonebook Name, Modem Name, orDirect Connection Name used to make the connection. ThenumType tag specifies which of these methods is used.optStatusoptRefreshOptional string tag containing the name of the string tagreceiving the status message.Optional tag that causes the function to update its return value.This parameter is optional, but you must use it when configuringthis function for any screen dynamic (such as Text I/O, Position,and so forth).Returned Values:-5 PhoneBook or modem does not exist-4 Invalid value for the numType parameter (0 or 1)-3 Error: invalid number of parameters (minimum = 2);-2 Error: INDRAS.DLL damaged-1 Error: INDRAS.DLL not found0 Opening the port...1 Port was opened successfully.2 Connecting to the device...3 The device has connected successfully.4 All devices in the device chain have successfully connected.<strong>InduSoft</strong> <strong>Web</strong> <strong>Studio</strong> v6.1 SP2 A-193
IWS Users Guide<strong>Studio</strong> Functions5 Verifying the user name and password...6 An authentication event has occurred.7 Requested another validation attempt with a new user.8 Server has requested a callback number.9 The client has requested to change the password10 Registering your computer on the network...11 The link-speed calculation phase is starting...12 An authentication request is being acknowledged.13 Reauthentication (after callback) is starting.14 The client has successfully completed authentication.15 The line is about to disconnect for callback.16 Delaying to give the modem time to reset for callback.17 Waiting for an incoming call from server.18 Projection result information is available.19 User authentication is being initiated or retried.20 Client has been called back and is about to resume authentication.21 Logging on to the network...22 Subentry has been connected.23 Subentry has been disconnected24 Terminal state supported by RASPHONE.exe.25 Retry authentication state supported by RASPHONE.exe.26 Callback state supported by RASPHONE.exe.27 Change password state supported by RASPHONE.exe.8192 Connected to remote server successfully!8193 Disconnected.A-194 <strong>InduSoft</strong> <strong>Web</strong> <strong>Studio</strong> v6.1 SP2
<strong>Studio</strong> FunctionsIWS Users GuideExamples:Tag NameTagTagTagExpressionDialError(0, “Office DialUp”)DialError(1, “USRobotics_SportsterFaxModem”, “StatusMessage”, second)DialError(2, “DirectDial”, “DialupError”)DialUp(numType, strPhonebookEntryOrModem, strUserName,strPassword, optstrDomain, strPhoneNumber)GroupExecutionWindows NT/2K/XPWindows CE<strong>Web</strong> Thin ClientDial-UpAsynchronousSupportedSupportedNot SupportedDescription: Triggers a dial-up connectionParameters:numTypeNumerical tag specifying the content of thestrPhonebookEntryorModem tag.• 0: Phonebook Name• 1: Modem Name• 2: Direct Connection NamestrPhonebookEntryOrModem String tag containing the Phonebook Name, Modem Name, orDirect Connection Name used to make the connection. ThenumType tag specifies which of these methods is used.strUserNamestrPasswordoptstrDomainstrPhoneNumberString tag containing the Username to use for logging on.String tag containing the Password to use for logging on.Optional string tag containing the domain name to specify whenlogging on.String tag containing the phone number to dial (used only whenthe parameter numType=1).<strong>InduSoft</strong> <strong>Web</strong> <strong>Studio</strong> v6.1 SP2 A-195
IWS Users Guide<strong>Studio</strong> Functions Note for Windows NT/2000 Users:Due to limitations in the Microsoft API, the DialUp() function may not beable to create temporary phonebooks on Windows NT/2000.To work around this problem:1. Configure DialUp() using the Modem Name parameter instead ofPhonebook Name.2. Create a phonebook manually in the Control Panel and save it as IWSTemporary 1.IWS will use the IWS Temporary 1 phonebook with the parameters youconfigured using the DialUp() function (user name, password, domain, andtelephone). You then can change these parameters at runtime.Returned Values:0 OK: dialing started-1 Error: INDRAS.DLL not found-2 Error: INDRAS.DLL damaged-3 Error: invalid number of parameters (minimum=5)-4 Invalid value for the numType parameter (0 or 1)-5 Invalid value for the parameter strPhonebookEntryOrModem (string)-6 PhoneBook or Modem does not exist-7 PhoneBook or Modem is in use;-8 Depends of the numType parameter:• If numType = 0: Could not read properties from PhoneBook.• If numType = 1: More than 1000 connections are enabled at same time.-9 Unable to create a temporary PhoneBook.Examples:Tag NameTagExpressionDialUp(0, “OfficeDialup”, “Guest”, “Password”)Tag DialUp(1, ‘USRobotics_SportsterFaxModem”, “HR12378”, “HRPass”, “15125554321”)Tag DialUp(2, “DirectDial”, “Rberton”, “MyPassword”, “156.48.25.0”) Note:The operating system’s RAS Server executes the dial-in for WindowsNT/2000/XP computers automatically.A-196 <strong>InduSoft</strong> <strong>Web</strong> <strong>Studio</strong> v6.1 SP2
<strong>Studio</strong> FunctionsIWS Users GuideDialUpToCE(numModem, strDialPhone, strMyNumber, strUser,strPassword, optstrDomain, optAutoDial, optAutoClose)GroupExecutionWindows NT/2K/XPWindows CE<strong>Web</strong> Thin ClientDial-UpAsynchronousSupportedNot SupportedNot SupportedDescription: Executes the DialUpToCE program, which sends the informationnecessary to CERasSvr.exe calls back to the Windows NT/2000/XP computer.Parameters:numModemstrDialPhonestrMyNumberstrUserstrPasswordoptstrDomainoptAutoDialoptAutoCloseNumerical tag containing the modem number used to dial to the WinCEcomputer.Numerical tag containing the telephone number of the WinCE remote station.Numerical tag containing the telephone number sent to the WinCE remotestation. CERasSvr.exe will call back to this phone number.String tag containing the user name to be sent to WinCE remote station.CERasSvr.exe will use this name to connect to the WindowsNT/2000/XP computer after calling back to it.String tag containing the password to be sent to WinCE remote station.CERasSvr.exe will use this password to connect to the WindowsNT/2000/XP computer after calling back to itOptional string tag containing the domain name to specify when logging on.Optional tag, which can be set to one of the following:• 1: Triggers the DialupToCE connection automatically when thefunction is executed• 0: Requests confirmation before triggering the DialupToCE connectionautomatically when the function is executedOptional tag, which can be set to one of the followign:1: Closes the DialUpToCE dialog automatically after dialing the WinCEremote station0: Leaves the DialUpToCE dialog openReturned Values:0 Fail, unable to call DialUpToCE.1 Success, DialUpToCE executed.<strong>InduSoft</strong> <strong>Web</strong> <strong>Studio</strong> v6.1 SP2 A-197
IWS Users Guide<strong>Studio</strong> FunctionsExamples:Tag NameTagTagExpressionDialUpToCE(0,”12344321”,”98765432”, ”Administrator”,”MyPass”)DialUpToCE(0,”12344321”,”98765432”, ”Administrator”,”MyPass”,””,1,1) Note:The DialUpToCE program was developed to dial a remote WinCE station.Because Windows CE v3.00 does not provide a RAS Server, you must berunning the CERasSvr.exe program on the WinCE device to answer a call,and call back to a Windows NT/2000/XP computer using parameters sentby the DialUpToCE() function. You must configure the RAS Server serviceon the Windows NT/2000/XP computer to answer the call back from theWinCE device and set the TCP/IP connection.FindAllDevices(“tagArray”)GroupExecutionWindows NT/2K/XPWindows CE<strong>Web</strong> Thin ClientDial-UpSynchronousSupportedSupportedNot SupportedDescription: Returns the list of all the available modems and direct connectioninterfaces (COM ports) in the local station.Parameters:“tagArray”Name of a string array tag receiving the list of available modems and directconnection interfaces.Returned Values: Returns the number of modems and/or interfaces found.Examples:Tag NameTagExpressionFindAllDevices(“SerialConnections[1]”)A-198 <strong>InduSoft</strong> <strong>Web</strong> <strong>Studio</strong> v6.1 SP2
<strong>Studio</strong> FunctionsIWS Users GuideFindModem("tagArray")GroupExecutionWindows NT/2K/XPWindows CE<strong>Web</strong> Thin ClientDial-UpSynchronousSupportedSupportedNot SupportedDescription: Returns the list of all available modems in the local station.Parameters:“tagArray”Name of a string array tag receiving the list of available modems.Returned Values: Returns the number of modems found.Examples:Tag NameTagExpressionFindModem(“Modems[1]”) Tip:You can use the FindModem() function to get the serial interface name for adial-up connection via modem, and use this information to fill thestrPhonebookEntryOrModem parameter for the DialError(),DialStatus(), DialUp(), and HangUp() functions.HangUp(numType, strPhonebookEntryOrModem)GroupExecutionWindows NT/2K/XPWindows CE<strong>Web</strong> Thin ClientDial-UpSynchronousSupportedSupportedNot SupportedDescription: Hangs-up a dial-up connection.<strong>InduSoft</strong> <strong>Web</strong> <strong>Studio</strong> v6.1 SP2 A-199
IWS Users Guide<strong>Studio</strong> FunctionsParameters:numTypeNumerical tag specifying the content of thestrPhonebookEntryorModem tag.• 0: Phonebook Name• 1: Modem Name• 2: Direct Connection NamestrPhonebookEntryOrModem String tag containing the Phonebook Name, Modem Name, orDirect Connection Name used to make the connection. ThenumType tag specifies which of these methods is used.Returned Values: This function returns fhe following values:0 OK.-1 Error: INDRAS.DLL not found-2 Error: INDRAS.DLL damaged-3 Invalid value for the numType parameter (0 or 1)-4 PhoneBook or modem does not exist-5 No configured modems existExamples:Tag NameTagTagTagExpressionHangUp(0, “OfficeDialup”)HangUp(1, ‘USRobotics_SportsterFaxModem”)HangUp(2, “DirectDial”, “Rberton”, “MyPassword”)PhoneDialUp(strPhoneNumber, OptStrModemName)GroupExecutionWindows NT/2K/XPWindows CE<strong>Web</strong> Thin ClientDial-UpAsynchronousSupportedNot SupportedNot SupportedDescription: Dials to a phone number using TAPI (Telephony Application ProgramInterface).A-200 <strong>InduSoft</strong> <strong>Web</strong> <strong>Studio</strong> v6.1 SP2
<strong>Studio</strong> FunctionsIWS Users GuideParameters:strPhoneNumberOptStrModemNameTelephone number the function will call.Name of the modem used to dial. If you do not specify a modem, IWS willuse the first modem found on the operating system.Returned Values: This function returns the following values:0 OK (dial triggered)-1 Invalid number of parameters-3 INDTAPI.DLL library not found-4 PhoneDialUp() function not supported by the currentINDTAPI.DLL libraryExamples:Tag NameExpressionPhoneDialUp (“512-123-4567”)PhoneDialUp (StringPhoneNumberTag)PhoneDialUp (StringPhoneNumberTag, StringModemNameTag)PhoneDisableListen(optStrModemName)GroupExecutionWindows NT/2K/XPWindows CE<strong>Web</strong> Thin ClientDial-UpSynchronousSupportedNot SupportedNot SupportedDescription: Disables IWS from listening to the modem for incoming calls.Parameters:OptStrModemNameName of the modem used to dial. If you do not specify a modem, IWS willuse the first modem found on the operating system.Returned Values: This function returns the following values:1 OK (stop listening for incoming calls)-1 INDTAPI.DLL library not found-2 PhoneDisableListen() function not supported by the currentINDTAPI.DLL library<strong>InduSoft</strong> <strong>Web</strong> <strong>Studio</strong> v6.1 SP2 A-201
IWS Users Guide<strong>Studio</strong> FunctionsExamples:Tag NameExpressionPhoneDisableListen ()PhoneDisableListen (“Hayes Compatible Modem on COM1”)PhoneDisableListen (StringModemNameTag)PhoneEnableListen(OptStrModemName)GroupExecutionWindows NT/2K/XPWindows CE<strong>Web</strong> Thin ClientDial-UpSynchronousSupportedNot SupportedNot SupportedDescription: Enables IWS to listen to the modem for incoming calls.Parameters:OptStrModemNameName of the modem used to dial. If you do not specify a modem, IWS willuse the first modem found on the operating system.Returned Values: This function returns the following values:1 OK (listening for incoming calls)0 Error executing the PhoneEnableListen() function-1 INDTAPI.DLL library not found-2 PhoneEnableListen () function not supported by the currentINDTAPI.DLL libraryExamples:Tag NameExpressionPhoneEnableListen ()PhoneEnableListen (“Hayes Compatible Modem on COM1”)PhoneEnableListen (StringModemNameTag)A-202 <strong>InduSoft</strong> <strong>Web</strong> <strong>Studio</strong> v6.1 SP2
<strong>Studio</strong> FunctionsIWS Users GuidePhoneHangUp(OptStrModemName)GroupExecutionWindows NT/2K/XPWindows CE<strong>Web</strong> Thin ClientDial-UpAsynchronousSupportedNot SupportedNot SupportedDescription: Hangs up a dial-up connection triggered with the PhoneDialUp()function.Parameters:OptStrModemNameName of the modem used to dial. If you do not specify a modem, IWS willuse the first modem found on the operating system.Returned Values: This function returns the following values:1 OK (dial connection was dropped)-1 INDTAPI.DLL library not found-2 PhoneHangUp() function not supported by the current INDTAPI.DLL libraryExamples:Tag NameExpressionPhoneHangUp()PhoneHangUp (“Hayes Compatible Modem on COM1”)PhoneHangUp (StringModemNameTag)PhoneStatus ("strStatus", optStrModemName)GroupExecutionWindows NT/2K/XPWindows CE<strong>Web</strong> Thin ClientDial-UpSynchronousSupportedNot SupportedNot SupportedDescription: Checks the status of the current connections.<strong>InduSoft</strong> <strong>Web</strong> <strong>Studio</strong> v6.1 SP2 A-203
IWS Users Guide<strong>Studio</strong> FunctionsParameters:“strStatus”optStrModemNameName of the tag that will receive the status description textName of the modem used to dial. If you do not specify a modem, IWS willuse the first modem found on the operating systemReturned Values: This function returns the following values:0 “Ready to make a call”1 “Call was shut down“2 “Line Ringing“3 “Dial Tone“4 “Dialing Call“5 “Call is Proceeding“6 “Ring Back“7 “Line is Busy“8 “Line is Idle“9 “Disconnected“Examples:Tag NameTag Status CodeTag Status CodeTag Status CodeExpressionPhoneStatus (“String Tag Status”)PhoneStatus (“String Tag Status”, “Hayes Compatible Modem on COM1”)PhoneStatus (“String Tag Status”, “StringModemNameTag”)A-204 <strong>InduSoft</strong> <strong>Web</strong> <strong>Studio</strong> v6.1 SP2
<strong>Studio</strong> FunctionsIWS Users GuideActiveX FunctionsThis section describes the following <strong>InduSoft</strong> <strong>Web</strong> <strong>Studio</strong> ActiveX functions: XGet(strName, strProperties) 123XRun(strName, strMethod, Parameter1, Parameter2, …,ParameterN) 123 XSet(strName, strProperties, Value) 124XGet(strName, strProperties)XRun(strName, strMethod, Parameter1, Parameter2, …, ParameterN)XSet(strName, strProperties, Value)XGet(strName, strProperties)GroupExecutionWindows NT/2K/XPWindows CE<strong>Web</strong> Thin ClientActiveXAsynchronousSupportedSupportedSupportedDescription: Executes a (PropGet) on the specified ActiveX object.Parameters:strNamestrPropertiesString tag containing the unique name given to the target ActiveX object.String tag containing the specific method to be used.Returned Values: Returns the value of the property as reported by the ActiveXobject.Examples:Tag NameTagExpressionXGet(“ActXRec”, “Color”)XRun(strName, strMethod, Parameter1, Parameter2, …,ParameterN)GroupExecutionWindows NT/2K/XPWindows CE<strong>Web</strong> Thin ClientActiveXAsynchronousSupportedSupportedSupported<strong>InduSoft</strong> <strong>Web</strong> <strong>Studio</strong> v6.1 SP2 A-205
IWS Users Guide<strong>Studio</strong> FunctionsDescription: Executes a (Method) on the specified ActiveX object.Parameters:strNamestrMethodParameter (1-N)String tag containing the unique name given to the target ActiveX object.String tag containing the specific method to be used.Tag of various types containing data required by the (Method) to run.Returned Values: Returns the (Method) result as reported by the ActiveX object(not all methods return results).Examples:Tag NameExpressionTag XRun(“ActXCir”, “XPos”, 12, 4.6, 0.2, 1) Note:The number of parameters you can set in the XRun() function can varyfrom 0 to 255 and depends on each ActiveX component. You can use tags toset the parameters, but the tag types must match the componentparameters type (Boolean, Integer, String, or Real).XSet(strName, strProperties, Value)GroupExecutionWindows NT/2K/XPWindows CE<strong>Web</strong> Thin ClientActiveXAsynchronousSupportedSupportedSupportedDescription: Executes a (PropPut) on the specified ActiveX object.Parameters:strNamestrPropertiesValueString tag containing the unique name given to the target ActiveX object.String tag containing the specific method to use.Tag of any type containing the value to put in the ActiveX objectReturned Values: No returned values.Examples:Tag NameTagExpressionXSet(“ActXDisplay”, “Display”, “Status Normal”)A-206 <strong>InduSoft</strong> <strong>Web</strong> <strong>Studio</strong> v6.1 SP2
<strong>Studio</strong> FunctionsIWS Users GuideEvent Logger FunctionsThis section describes the <strong>InduSoft</strong> <strong>Web</strong> <strong>Studio</strong> Event Logger function:SendEvent(strEvent).SendEvent(strEvent, optBooFlag, optStrComment)GroupExecutionWindows NT/2K/XPWindows CE<strong>Web</strong> Thin ClientEvent LoggerSynchronousSupportedSupportedSupportedDescription: Use to send an event to the Event Log file.This function has an option that allows you to create a comment. When thisoption is enabled, the user is prompted to enter a comment after executing theSendEvent() function. This comment will be saved in the Event Logger file.Parameters:strEventoptBooFlagoptStrCommentString value or tag containing the text to be saved in the Event Log file.If omitted or 0 (zero), the event does not have a comment. Otherwise, thereis a comment associated to the event.String value of tag containing the text of the comment for the event saved inthe database. If omitted, the user is prompted with a standard dialog wherethe comment can be typed.Returned Values:0 Success1 Event Logger is disabled in the Event Settings dialog.2 Event Logger is enabled, but Custom Messages are disabled in the Event Settingsdialog.Examples:Tag NameTagTagTagTagExpressionSendEvent(“Valve Open”) // Saves the event message.SendEvent(“Valve Open Oven No.” + OvenID) // Saves the event messageconcatenated with the value of the OvenID tagSendEvent(“Valve Open”, 1) // Displays the dialog where the operator can type hiscomments.SendEvent(“Valve Open”, 1, TagComment) // Saves the event message with thecomment configured in the TagComment tag.<strong>InduSoft</strong> <strong>Web</strong> <strong>Studio</strong> v6.1 SP2 A-207
IWS Users Guide<strong>Studio</strong> Functions Caution:This function is synchronous. Therefore, the execution of the functionfinishes only after the event data (including the comment, if any) is saved inthe database file. It is recommended that you do not configure this functionin background tasks (e.g. Math and Scheduler), unless you do not plan touse the comment or configure it directly (type from the dialog) in thefunction.A-208 <strong>InduSoft</strong> <strong>Web</strong> <strong>Studio</strong> v6.1 SP2
<strong>Studio</strong> FunctionsIWS Users GuideFTP FunctionsThis section describes the following IWS FTP functions:CN<strong>FF</strong>tp (strServer , strUser , strPwd , numPassiveMode , numPort) ftpGet (strRemoteFile , strLocalFile , numOverWrite ,numTransferType)ftpPut (strLocalFile , strRemoteFile, numTransferType)ftpStatus (“strStatusTag”)CN<strong>FF</strong>tp (strServer , strUser , strPwn , numPassiveMode ,numPort)GroupExecutionWindows NT/2K/XPWindows CE<strong>Web</strong> Thin ClientFTPSynchronousSupportedSupportedSupportedDescription: Sets FTP (File Transfer Protocol) parameters. You must configurethese parameters and execute this function before transferring files with theFtpGet or FtpPut functions.Parameters:strServerFTP server namestrUserstrPwnnumPassiveModenumPortUser nameDefault is Anonymous.User passwordDefault is blank.0 – Passive mode disabled1 – Passive mode enabledDefault is 0.TCP/IP port numberDefault is 21.Returned Values:0 Success-1 Invalid number of parameters-2 Invalid server name-3 Invalid user name<strong>InduSoft</strong> <strong>Web</strong> <strong>Studio</strong> v6.1 SP2 A-209
IWS Users Guide<strong>Studio</strong> Functions Note:This function does not try to establish a connection with the FTP server,but it must be called before using any other FTP function.Examples:Tag NameExpressionTag CN<strong>FF</strong>tp(“ftp.mycompany.com”, “admin”, “12345”, 1) //Configures the ftp server using passive modeftpGet (strRemoteFile , strLocalFile , numOverWrite ,numTransferType)GroupExecutionWindows NT/2K/XPWindows CE<strong>Web</strong> Thin ClientFTPAsynchronousSupportedSupportedSupportedDescription: This function retrieves a file from the FTP server and stores it underthe specified file name, creating a new local file. Before executing this functionyou must set some parameters using CN<strong>FF</strong>tp. This function is executedasynchronously; therefore you need to call FtpStatus in order to determine if thetransfer has been completed successfully.Parameters:strRemoteFileFull qualified name of the remote file (e.g. “/Folder/File.extension”)Note that some FTP servers are case sensitive, so you have to enter with thecorrect capitalization.strLocalFileFull qualified name of the local file (e.g. “C:\file.extension”)numOverWritenumTransferType0 – Error if the Local File already exists1 – OverwriteDefault is 0.0 – Unknown1 – ASCII2 – BinaryDefault is 0.Returned Values:1 Failed to create FTP thread0 SuccessA-210 <strong>InduSoft</strong> <strong>Web</strong> <strong>Studio</strong> v6.1 SP2
<strong>Studio</strong> FunctionsIWS Users Guide-1 Invalid number of parameters-2 Unknown system error-3 Invalid remote file-4 Invalid local file-5 Invalid transfer typeExamples:Tag NameExpressionTag FtpGet(“\Reports\040303.txt”, “C:\Report.txt”) //Retrieves the file 040303 from the folder Reports in the FTP server and stores it in theC:\Report.txt fileftpPut (strLocalFile , strRemoteFile, numTransferType)GroupExecutionWindows NT/2K/XPWindows CE<strong>Web</strong> Thin ClientFTPAsynchronousSupportedSupportedSupportedDescription: This function stores a file on the FTP server. Before executing thisfunction you must set some parameters using CN<strong>FF</strong>tp. This function is executedasynchronously; therefore you need to call FtpStatus in order to determine if thetransfer has been completed successfully.Parameters:strLocalFileFull qualified name of the local file (e.g. “C:\file.extension”)strRemoteFileoptnumTransferTypeFull qualified name of the remote file (e.g. “/Folder/File.extension”)Note that some FTP servers are case sensitive, so you have to enter withthe correct capitalization.0 – Unknown1 – ASCII2 – BinaryDefault is 0.Returned Values:1 Failed to create FTP thread0 Success-1 Invalid number of parameters-2 Unknown system error-3 Invalid remote file<strong>InduSoft</strong> <strong>Web</strong> <strong>Studio</strong> v6.1 SP2 A-211
IWS Users Guide<strong>Studio</strong> Functions-4 Invalid local file-5 Invalid transfer typeExamples:Tag NameExpressionTag FtpPut(“C:\Report.txt”, “\Reports\040303.txt”) //Retrieves the file “C:\Report.txt” in the with the name 040303.txt in the folder Reports inthe FTP Server.ftpStatus ( “strStatusTag” )GroupExecutionWindows NT/2K/XPWindows CE<strong>Web</strong> Thin ClientFTPSynchronousSupportedSupportedSupportedDescription: This function returns the current status of a transaction started withFtpGet or FtpPut. The return value indicates the status as described below.Parameters:“strStatusTag”String with status description.Returned Values:1 Transaction executed successfully2 Resolving name3 Name resolved4 Connecting to server5 Connected to server6 Closing connection7 Connection closed8 Sending request9 Request sent10 Receiving response11 Intermediate response received12 Response received13 Request completed0 No transaction is being executed.-2 Invalid opttagErrorDescription-6 Error opening connection (see status string for details)-7 Error establishing connection (see status string for details)A-212 <strong>InduSoft</strong> <strong>Web</strong> <strong>Studio</strong> v6.1 SP2
<strong>Studio</strong> FunctionsIWS Users Guide-8 Error receiving the file (see status string for details)-9 Transfer pendingExamples:Tag NameTagExpressionFtpStatus( “StatusDescription” ) // Retrieves the status of a current transfer. The returncode is stored in the StatusCode tag and the description in the StatusDescription tag.Database FunctionsThis section describes the <strong>InduSoft</strong> <strong>Web</strong> <strong>Studio</strong> Database functions: SyncAlarm(strOptionalStartDate, strOptionalEndDate) SyncEvent(strOptionalStartDate, strOptionalEndDate) SyncTrend(numGroup, strOptionalStartDate, strOptionalEndDate) SyncAlarmStatus SyncEventStatus SyncTrendStatus(numGroup)<strong>InduSoft</strong> <strong>Web</strong> <strong>Studio</strong> v6.1 SP2 A-213
IWS Users Guide<strong>Studio</strong> FunctionsSyncAlarm( strOptionalStartDate, strOptionalEndDate)GroupExecutionWindows NT/2K/XPWindows CE<strong>Web</strong> Thin ClientDatabaseAsynchronousSupportedSupportedNot supportedDescription: Synchronizes the alarm [Event, Trend] database.Parameters:strStartDatestrOptionalEndDateString with the start date. If this parameter is not specified, the currentdate is used.String with the end date, if this parameter is not specified thefunctions uses the same as the start date.Returned Values:1 Fail to start synchronization; the database is probably being synchronized.0 Success-1 Invalid group number-2 The format is not set to “Database.”-4 Start date specified is invalid.-5 End date specified is invalid.-6 Start date is greater than the end date.Examples:Tag NameTagExpressionSyncAlarm() //Synchronizes the database using the current dateTag SyncAlarm(“10/20/2004”) //Synchronizes the database only for the day 10/20/2004Tag SyncAlarm(“10/20/2004”, “10/28/2004”) //Synchronizes the database from 10/20/2004to 10/28/2004A-214 <strong>InduSoft</strong> <strong>Web</strong> <strong>Studio</strong> v6.1 SP2
<strong>Studio</strong> FunctionsIWS Users GuideSyncEvent( strOptionalStartDate, strOptionalEndDate)GroupExecutionWindows NT/2K/XPWindows CE<strong>Web</strong> Thin ClientDatabaseAsynchronousSupportedSupportedNot supportedDescription: Synchronizes the alarm [Event, Trend] database.Parameters:strOptionalStartDatestrOptionalEndDateString with the start date. If this parameter is not specified, the currentdate is used.String with the end date, if this parameter is not specified thefunctions uses the same as the start date.Returned Values:1 Fail to start synchronization; the database is probably being synchronized.0 Success-1 Invalid group number-2 The format is not set to “Database.”-4 Start date specified is invalid.-5 End date specified is invalid.-6 Start date is greater than the end date.Examples:Tag NameTagExpressionSyncEvent() //Synchronizes the database using the current dateTag SyncEvent(“10/20/2004”) //Synchronizes the database only for the day 10/20/2004Tag SyncEvent(“10/20/2004”, “10/28/2004”) //Synchronizes the database from 10/20/2004to 10/28/2004<strong>InduSoft</strong> <strong>Web</strong> <strong>Studio</strong> v6.1 SP2 A-215
IWS Users Guide<strong>Studio</strong> FunctionsSyncTrend(numGroup, strOptionalStartDate,strOptionalEndDate)GroupExecutionWindows NT/2K/XPWindows CE<strong>Web</strong> Thin ClientDatabaseAsynchronousSupportedSupportedNot supportedDescription: Synchronizes the alarm [Event, Trend] database.Parameters:numGroupstrOptionalStartDatestrOptionalEndDateTrend group numberString with the start date. If this parameter is not specified, the currentdate is used.String with the end date, if this parameter is not specified thefunctions uses the same as the start date.Returned Values:1 Fail to start synchronization; the database is probably being synchronized.0 Success-1 Invalid group number-2 The format is not set to “Database.”-4 Start date specified is invalid.-5 End date specified is invalid.-6 Start date is greater than the end date.Examples:Tag NameTagTagTagExpressionSyncTrend(1) //Synchronizes the group 1 database using the current dateSyncTrend(1, “10/20/2004”) //Synchronizes the group 1 database only for the day10/20/2004SyncTrend(“10/20/2004”, “10/28/2004”) //Synchronizes the group 1 database from10/20/2004 to 10/28/2004A-216 <strong>InduSoft</strong> <strong>Web</strong> <strong>Studio</strong> v6.1 SP2
<strong>Studio</strong> FunctionsIWS Users GuideSyncAlarmStatus( )GroupExecutionWindows NT/2K/XPWindows CE<strong>Web</strong> Thin ClientDatabaseSynchronousSupportedSupportedNot supportedDescription: Returns the synchronization status.Returned Values:3 Synchronization has finished..2 Fail synchronizing1 Still synchronizing0 No synchronization is being executed.-1 The format is not set to “Database.”Examples:Tag NameTagExpressionSyncAlarmStatus()<strong>InduSoft</strong> <strong>Web</strong> <strong>Studio</strong> v6.1 SP2 A-217
IWS Users Guide<strong>Studio</strong> FunctionsSyncEventStatus( )GroupExecutionWindows NT/2K/XPWindows CE<strong>Web</strong> Thin ClientDatabaseSynchronousSupportedSupportedNot supportedDescription: Returns the synchronization status.Returned Values:3 Synchronization has finished..2 Fail synchronizing1 Still synchronizing0 No synchronization is being executed.-1 The format is not set to “Database.”Examples:Tag NameTagExpressionSyncEventStatus()A-218 <strong>InduSoft</strong> <strong>Web</strong> <strong>Studio</strong> v6.1 SP2
<strong>Studio</strong> FunctionsIWS Users GuideSyncTrendStatus(numGroup)GroupExecutionWindows NT/2K/XPWindows CE<strong>Web</strong> Thin ClientDatabaseSynchronousSupportedSupportedNot supportedDescription: Returns the synchronization status.Parameters:numGroupTrend group numberReturned Values:3 Synchronization has finished.. volume2 Fail synchronizing1 Still synchronizing0 No synchronization is being executed.-1 The format is not set to “Database.”Examples:Tag NameTagExpressionSyncTrendStatus(1)<strong>InduSoft</strong> <strong>Web</strong> <strong>Studio</strong> v6.1 SP2 A-219
Index..NETControl button, 7–94AABS(numValue), A-14, A-140accessinginformation about active screens, 3–26Least Significant Bit (LSB), A-22Most Significant Bit (MSB), A-22tags/tag fields during runtime, 5–17tags/tag fields, indirectly, 5–2Ack tag field, description/purpose, 5–8acknowledging alarmsAck field, 5–8remotely, 5–18ACos(numValue), A-61Active Objects toolbar, 3–21, 7–39active screens/worksheetsenabling/disabling dragging, 3–26using the status bar, 3–26ActiveSync, 2–5, 2–22ActiveXControl button, 3–22, 7–88creating/configuring objects, 3–3downloading ActiveX components, 13–3functions, A-10, A-205Program IDs/File Names, A-143ActiveX Events interface, 15–13Add/Remove Programs icon, 2–7Address text box, 3–18<strong>Web</strong> toolbar, 7–18addresses, specifying limits, 10–12Administrator privileges, 2–1ADO.NET, 17–1Advanced dialogTrend Control Object, 7–59Advanced dialog, alarms, 7–44Alarm button, 3–22, 7–102Alarm Worksheetrestrictions, 5–9Alarm/Event Control Object button, 3–21, 7–39alarmsAlrStatus tag field, 5–8configuring message strings, 5–19configuring tag properties, 5–16enabling for tags, 5–8filtering strings, 5–20mnemonics, 5–20properties, 5–18responding remotely (enabling the Server option fortags), 5–6saving/storing history files, 6–15alarms, tag fieldsAck, 5–8AlrDisable, 5–8Devm, 5–9DevmLimit, 5–9Devp, 5–9DevpLimit, 5–9DevSetpoint, 5–9Hi, 5–9HiHi, 5–9HiHiLimit, 5–9HiLimit, 5–9Lo, 5–9LoLimit, 5–9LoLo, 5–9LoLoLimit, 5–9Rate, 5–9RateLimit, 5–9Align and Distribute toolbar, 3–18, 7–10Align bottom button, 3–19, 7–12Align left button, 3–19, 7–11Align right button, 3–19, 7–11Align top button, 3–19, 7–11AlrDisable tag fielddescription/purpose, 5–8AlrStatus tag fielddescription/purpose, 5–8AppActivate(strAppTitle, optnumActiv), A-77AppIsRunning(strAppTitle), A-78application database tags, 5–10Application Tagsadding to database, 5–11datasheet, closing, 5–11datasheet, opening, 5–11datasheet, specifying maximum indexes, 5–3deleting, 5–23description/purpose, 5–1folder, 5–12Application Tags folder, 5–1applicationsassociating tags with objects, 5–21configuring remote access, 6–26description/purpose, 1–1downloading CEView, 2–1downloading to a runtime workstation, 1–1downloading to remote workstations, 14–1exporting screens, 1–2, 7–16icons, A-98interfacing with other systems/applications, 1–1license levels, 6–3managing remotely, 5–6, 14–1merging, 1–3running, 3–50running on CEView, 1–1setting resolution, 2–5tags, 3–8tags, description/purpose, 3–8testing/debugging, 12–1translating, 1–2, 6–13using sample template, 6–5verifying, 3–49AppPostMessage(strAppTitle, numwParam,numlParam), A-79AppSendKeys(strKeys1, strKeys2, ..., strKeysN), A-79Arc Cosinecalculating, A-61returned values, A-61Arc Sine, calculating, A-62Arc Tangent, calculating, A-62<strong>InduSoft</strong> <strong>Web</strong> <strong>Studio</strong> v6.1 SP2 I–1
IWS Users Guide<strong>Studio</strong> FunctionsArithmetic functions, A-1, A-14arithmetic operationsusing for array tags, 5–3Arithmetic Operators, 15–2array indexesdescription/purpose, 5–3formatting, 5–3specifying maximums, 5–3array tags, 5–3description/purpose, 5–2, 5–3examples, 5–4formatting, 5–3specifying maximum index, 5–11using arithmetic operations, 5–3using constants, 5–3Asc2Str(numChar1, numChar2, …, numCharN), A-39ASCII TABLES, A-38ASin(numValue), A-61ATan(numValue), A-62Auto Screen Scaling check-box, 6–27Avg(numValue1, numValue2, …, numValueN)Avg(tagArray, numSample, optnumIgnore, A-27Axes dialogTrend Control Object, 7–54BB0 to B31 tag fielddescription/purpose, 5–7Back button, 3–18, 7–18Background Colorbutton, 3–20, 7–9screen, 7–7Background Task, description/purpose, 4–1backing-up files, 2–6Bargraph button, 3–22, 7–33basic tagsdescription/purpose, 5–2formatting, 5–2batch history file, 8–19, 8–23Bitmap Editor button, 3–20, 7–8Bitmap toolbar, 3–23, 7–21bitmaps, Windows CE16-color only, 7–4Boolean data typeusing in class tags, 5–2Boolean data typedescription/purpose, 5–5selecting, 5–11using in tag fields, 5–7borders, resizing, 6–24Button button, 3–21, 7–28buttons.NET Control, 7–94ActiveX Control, 3–22, 7–88Alarm, 3–22, 7–102Alarm/Event Control Object, 3–21Alarm/Event Control Object button, 7–39Align bottom, 3–19, 7–12Align left, 3–19, 7–11Align right, 3–19, 7–11Align top, 3–19, 7–11Back, 3–18, 7–18Background Color, 3–20, 7–9Bargraph, 3–22, 7–33Bitmap Editor, 3–20, 7–8Button, 3–21, 7–28Center horizontally, 3–19, 7–12Center vertically, 3–19, 7–12Change Colors, 3–23, 7–21Close, 3–2Closed Polygon, 3–21, 7–23Colors, 3–22, 7–36Combo-Box, 3–22, 7–100Command, 3–22common, 3–38Context Sensitive Help, 3–16Contract/Expand, 3–24Contract/Expand, Output window, 3–25Copy, 3–14Cross Reference, 3–16, 3–47Cut, 3–14Database Spy Window, 3–15Delete, 3–14Dynamic, 3–23Dynamic Properties, 3–22Dynamic Rotation, 7–38Ellipse, 3–21, 7–25Erase Area, 3–23, 7–21Evenly space horizontally, 3–19, 7–13Evenly space vertically, 3–19, 7–13Execution Environment, 3–17, 12–8Fill Color, 3–20, 7–8Flip horizontally, 3–19, 7–13Flip vertically, 3–19, 7–14Flood Fill, 3–23, 7–21Fonts, 3–20, 7–8Forward, 3–18, 7–18Global Tags Replace, 3–17Go, 3–18, 7–18Grid, 3–20, 3–22, 7–9Group, 3–20, 7–16Hide Docked Window, 3–24, 3–25Home, 3–18, 7–18Hyperlink, 3–22, 7–33IP Security, 7–20Library, 3–15Line, 3–21, 7–24Line Color, 3–20, 7–9List Box Object, 3–21Main Password, 11–1Maximize, 3–2Minimize, 3–2Move backward, 7–15Move forward, 7–15Move to back, 3–19, 7–15Move to front, 3–19, 7–15New, 3–13, 7–2Object Finder, 3–16, 3–46, 5–23Open Polygon, 3–21, 7–23Open Project, 3–13Output Window, 3–15Paste, 3–14Pixel Editing, 3–23, 7–21Position, 3–22, 7–37Print, 3–15property, 5–21Pushbuttons, 3–21, 7–85Rectangle, 3–21Refresh, 3–18, 7–18Resize, 3–22, 7–38Resize height, 3–18, 7–10Resize width, 3–19, 7–10resizing windows, 3–2Rotate, 3–19, 7–14Rounded Rectangle, 3–21, 7–26Run Application, 3–17, 12–8Run Application, 13–102 <strong>InduSoft</strong> <strong>Web</strong> <strong>Studio</strong> v6.1 SP2
<strong>Studio</strong> FunctionsIWS Users GuideSave, 3–13, 3–51Save All, 3–14, 3–51Select Area, 3–23, 7–21Select Transparent Color, 3–23, 7–21Selection, 3–20, 7–8Send project to target, 3–17, 12–8Smart Message, 3–21Smart Message Objects, 7–80Stop, 3–18, 7–18Stop Application, 3–17, 12–8Stop display test, 3–17Stop Test Display, 12–8Tag Properties, 3–17Tags Properties, 5–15Test Display, 3–17, 12–8Text, 3–21, 7–28Text I/O, 3–22, 7–35Toggle Transparent Color, 3–23, 7–22Trend, 3–21, 7–71Undo, 3–15Ungroup, 3–20Workspace Window, 3–15XRef, 3–47X-Ref, 3–16Zoom, 3–16Zoom combo-box, 3–16CCaution notesapplication development and license levels, 6–3configuring worksheets, 5–9deleting tags, 5–23description/purpose, xiiihard disk performance, 5–17making changes in screens saved as HTML, 7–18modifying default settings, 4–5, 4–9reading saved .bmp file, 7–4resizing a window, 7–4using the Math() function, 4–10Center horizontally button, 3–19, 7–12Center vertically button, 3–19, 7–12CEServer.exedefault directory path, 2–21downloading, 2–21running Remote Agent, 2–22, 14–1CEViewdownloading, 1–1, 2–1, 2–5, 14–4installing, 2–1, 2–5running applications, 1–1runtime files, storing, 2–5, 2–8sending email from, 1–3updating, 1–1Change Colors button, 3–23, 7–21change the screen resolution, 3–41changing object layers buttons, 7–14CharToValue(tagName, tagArray), A-40CharToValueW(tagName, tagArray), A-41class membersnaming guidelines, 5–10class tags, 5–13description/purpose, 3–8, 5–1, 5–2, 5–4Class worksheetsconfiguring, 5–14Classes folder, 5–1, 5–14ClassMembersToStrVector (“strClassTag”, numStartPos,numNumPos, “strArrayTag”, optBooStartPosTarget),A-41CleanReadQueue(), A-80ClockGetDate(numSeconds), A-55ClockGetDayOfTheWeek(numSeconds), A-56ClockGetTime(numSeconds), A-57Close button, 3–2, 6–22Close(strScreen), A-66, A-67Closed Polygon button, 3–21, 7–23CloseSplashWindow(), A-81closing files, 3–38closing projects, 3–37closing Translation Editor, 16–10CnfEmail, A-177CN<strong>FF</strong>tp (strServer , strUser , strPwd , numPassiveMode ,numPort), A-209color interface, 3–32color selection, recommendation, 2–5Colors button, 3–22, 7–36Combo-Box button, 3–22, 7–100Comm tab, 10–1Command button, 3–22command windowsaccessing tag fields, 5–9common buttons, 3–38common errors, 19–3communication tabproject settings, 6–25communication, configuring, 10–1communication, specifying for drivers/OPC, 6–15Communications tab, 3–11compression, file, 6–27Configure dialog, 6–6configuringalarm messages, 5–19DDE, 10–25Development Station, 14–3event settings, 9–2OPC, 10–19projects, 6–1security system, 11–1tags, 5–23TCP/IP, 10–24unit properties, 5–16<strong>Web</strong> solution, 13–1worksheets, Class, 5–14worksheets, using tags, 5–1connection type testsand drivers, 10–9constantsusing for array tags, 5–3contacting technical support, 19–1Context Sensitive Help button, 3–16Contract/Expand button, 3–24controlling who can delete Alarm messages, 7–45conventionsmouse/selection, xiiitext, xiiWindows, xivconverting Trend History filesfrom binary to text, 8–22from text to binary, 8–23Copy button, 3–14copying files to WinCE devices, 2–5Cos(numAngle), A-62Cot(numAngle), A-63CreateUser(strUserName, strGroupName,strPassword), A-69CreateUser(strUserName, strGroupName,strPassword, strOptUserFullName), A-70creatingActiveX objects, 3–3basic tags, 5–2<strong>InduSoft</strong> <strong>Web</strong> <strong>Studio</strong> v6.1 SP2 3
IWS Users Guide<strong>Studio</strong> Functionscreating class tags, 5–4creating tags, 5–1Cross Reference button, 3–16, 3–47CSV Databasesimporting from, 3–61cursor display properties, 6–24custom parameters, 10–25customer supportcontacting, xvcustomer information form, xviCut button, 3–14Ddata flowruntime module, 4–1Data Sources dialogTrend Control Object, 7–48data typeschoosing, 5–5, 5–11class tags, 5–2using in tag fields, 5–7databasebatch history file, 8–23Database Access function, A-9, A-153Database functions, A-11, A-213database interface, 17–1configuring a default database, 6–21, 17–7configuring primary and secondary databases, 17–6database providers, 17–3Database Spy, 3–24accessing tag fields, 5–9description/purpose, 1–2, 4–1Remote, 12–9using for debugging, 12–2Database Spy Window button, 3–15Database tab, 3–8database tagsdeleting, 5–23description/purpose, 4–1, 5–1internal, 3–8, 5–2read-only, 3–8, 5–2sharing with PC-based control softwareprograms, 3–8, 5–1using in applications, 5–21using indirect tags, 5–5database troubleshooting, 17–25database, importing, 3–54Datasheet View icon, 5–11, 5–12datasheetsApplication Tags, closing, 5–11Application Tags, opening, 5–11Application Tags, specifying maximum indexes, 5–3using Tab key, 5–11Date and Time functions, A-3, A-55DateTime2Clock(strDate, strTime), A-57DB tabs, Database Spy window, 3–24DbVersion(), A-128DCOM Tutorial, 10–23DDEClient, configuring, 10–26Client, description/purpose, 4–1configuring, 10–25protocol, 1–1server, configuring, 10–27Server, description/purpose, 4–1Dead Band value, specifying, 5–18defaultscaution notes, 4–5, 4–9changing how modules start, 6–33development language, 6–13screen resolution, 6–5server name, 6–7title bar text, 6–22translation files, 6–13defining users, 11–7Delete button, 3–14DeleteOlderFiles(strPath, strMask, strDate), A-101Demo ModeIWS, 2–11development environment, description/purpose, 3–1Development Station, configuring, 14–3development system, description/purpose, 1–1deviationsspecifyingfor tag fields, 5–19specifying for tag fields, 5–8Devm tag field, description/purpose, 5–9DevmLimit tag field, description/purpose, 5–9Devp tag field, description/purpose, 5–9DevpLimit tag field, description/purpose, 5–9DevSetLimit tag field, description/purpose, 5–9DialError(numType, strPhonebookEntryOrModem,optError, optRefresh), A-183DialGetClientIP(numType, strPhoneBookOrDevice,tagClientIP, optRefresh), A-190DialGetServerIP(numType, strPhoneBookOrDevice,tagServerIP, optRefresh), A-191dialogsConfigure, 6–6Hardkey Settings, 6–2Insert Class, 5–14New, 6–1New Tag, 5–3Object Properties, adding tags, 5–10, 5–21Project Wizard, 6–3Protection Manager, 6–2Runtime menu options, 6–24Softkey Settings, 6–2Tag Properties, 5–16DialStatus(numType, strPhonebookEntryOrModem,optStatus, optRefresh), A-193Dial-Up functions, A-10, A-183DialUp(numType, strPhonebookEntryOrModem,strUserName, strPassword, optstrDomain,strPhoneNumber), A-195DialUpToCE(numModem, strDialPhone,strMyNumber, strUser, strPassword,optstrDomain, optAutoDial, optAutoClose), A-197DirCreate(strDirectory, optBooFullPath), A-102DirDelete(strDirectory, optBooEmptyOnly), A-103DirLength(strPath), A-104DirRename(strPath, strDirectoryFrom, strDirectoryTo), A-104Disable Remote Client Commands check-box, 6–27displaying a grid, 7–40displays, testing, 3–49Div(numNumerator, numDenominator), A-15downloadingapplications, 1–1, 14–1applications to target system, 6–32CEView, 2–1, 14–4considerations, losing tag properties, 5–9, 5–21draggingenabling/disabling, 3–26Driver Runtime taskdescription/purpose, 4–1Driver Users Guides, xv4 <strong>InduSoft</strong> <strong>Web</strong> <strong>Studio</strong> v6.1 SP2
<strong>Studio</strong> FunctionsIWS Users GuideDriver Worksheets, 10–9driversavailable for IWS, 1–3communicating with OPC, 6–15starting modules, 6–35stopping modules, 6–35drivers folder, 10–2dubugging tools, 1–2Dynamic button, 3–23Dynamic Data Exchange. See DDEDynamic Propertiesbutton, 3–22toolbar, 7–29Dynamic Rotation button, 7–38Eediting tags, 5–10Ellipse button, 3–21, 7–25emailfunctions, A-10, A-177sending from CEView, 1–3Enable Fire Compression check-box, 7–19Enable ToolTips check-box, 6–27enablingalarms, specifying tag properties, 5–8, 5–16, 5–18history logging, 5–16, 5–21tags to display on HTML pages, 5–5translation, alarm messages, 5–18EndTask(strTask), A-81entering constants in tag/numeric fields, 7–33Erase Area button, 3–23, 7–21Evaluation ModeIWS, 2–10Evenly space horizontally button, 3–19, 7–13Evenly space vertically button, 3–19, 7–13Event Logger functions, A-11, A-207Event Settings, 9–1executablesCERasSvr.exe, A-198CEServer.exe, 2–21, 2–23, 14–1hst2txt.exe, 8–22netdde.exe, 19–8NT<strong>Web</strong>Server.exe, 13–2RunStartup.exe, xiiSetup.exe, 2–3SKEYUPG.exe, 2–18<strong>Studio</strong> Manager.exe, 4–4txt2hst.exe, 8–23ExecuteAlarmAck function, A-153executingdriver, 10–19runtime module, 4–1translation functions, 16–8Execution Control toolbar, 3–17, 12–8Execution Environmentbutton, 3–17, 12–8dialog, 14–3execution fields, 5–9accessing tag fields, 5–9Execution Modes for IWS, 2–10Execution Tasks tab, 6–33ExitWindows(numExitCode), A-82Exp(numValue), A-31experience requirementsworking in a Windows¨ environment, xiiexportingapplication screens, 1–2, 7–16Ext(strText), 16–10, A-124<strong>FF</strong>alse(numExpression), A-33features, product, 1–2fieldsaccessible during runtime, 5–7execution, 5–9tag, saving changes, 5–17File functions, A-6File menudescription/purpose, 3–3options, 3–3FileCopy(strSourceFile, strTargetFile,optnumTimeOut), A-105FileDelete(strFile), A-106FileLength (strFile), A-107FileRename(strOldName, strNewName), A-107files.app, 6–22backing-up, 2–6CEServer.exe, 2–21, 14–1closing, 3–38configuration, storing, 6–1enabling compression, 6–27history (.hst), saving, 5–21, 6–15log, generating, 6–28log, saving, 6–28opening, 3–37SKEYUPG.exe, 2–18specifying default translation, 6–13specifying file lifetime, 6–15storing CEView runtime files, 2–1storing, CEView runtime files, 2–5, 2–8storing, Remote Agent program file, 2–21<strong>Studio</strong> Manager.exe, 4–4translation, saving, 6–13Fill Color, 7–8button, 3–20filtering alarm messages during runtime, 7–43filtering alarmsDead Band value, 5–18strings, 5–20FindAllDevices(tagArray), A-198FindFile(strFile, opttagFilesFound, optnumTimeOut),A-108finding tags, screen objects, 3–44FindModem(tagArray), A-199FindPath(strPathName), A-110Flip horizontally button, 3–19, 7–13Flip vertically button, 3–19, 7–14Flood Fill button, 3–23, 7–21focusscreen editor, object properties window, 3–53foldersApplication Tags, 5–1, 5–12Classes, 5–1, 5–14Internal Tags, 5–1Shared Database, 5–1Tag List, 5–12font dialog, 7–41fonts, 3–30Fonts button, 3–20, 7–8, 7–79For(numInitialValue, numFinalValue, numStep) &Next, A-153ForceTagChange(strTagName, numValue), A-154Format(strFlag, numValue), A-15formattingformatting conventions, xiiformscustomer information, xviForward button, 3–18, 7–18<strong>InduSoft</strong> <strong>Web</strong> <strong>Studio</strong> v6.1 SP2 5
IWS Users Guide<strong>Studio</strong> FunctionsFrequently Asked Questions (FAQ), xvftpGet (strRemoteFile , strLocalFile , numOverWrite ,numTransferType), A-210ftpPut (strLocalFile , strRemoteFile, numTransferType), A-211ftpStatus ( “strStatusTag” ), A-212function names syntax, A-12functions, A-1ActiveX, A-10, A-205alarm, enabling, 5–18Arithmetic, A-1, A-14Database, A-11, A-213Database Access, A-9, A-153Date and Time, A-3, A-55Dial-Up, A-10, A-183Email, A-10, A-177Event Logger, A-11, A-207File, A-6Graphic, A-7, A-120IWS supervisory tasks, 3–8, 5–2Log Message, A-1, A-13Logarithmic, A-31Logarithmic, A-2Logical, A-2, A-33Loop, A-8, A-152Module Activity, A-5, A-77Multimedia, A-7, A-126ODBC, A-9, A-156Opening and Closing Windows, A-3Screen, A-66Security, A-5, A-69Statistical, A-1, A-27String, A-2, A-37System Info., A-7, A-127tag name syntax, 15–3Translation, A-7, A-124Trigonometric, A-3, A-61UNICODE conversion restrictions, A-40functions executed during runtime, 4–9File functions, A-101FTP functions, A-209GGetAppHorizontalResolution( ), A-128GetAppPath(), A-128GetAppVerticalResolution( ), A-129GetBit(tagName, numBitNumber), A-19GetClock(), A-58GetComputerIP( ), A-130GetComputerName( ), A-130GetFileAttributes(strFile), A-110GetFileTime(strFileName, numFormat), A-111GetFreeMemoryCE(optnumType), A-131GetHardKeyModel(), A-131GetHardkeySN( ), A-132GetHstInfo(strFileName, numInfoType), A-111GetIPAll(tagArrayIP, optRefresh), A-133GetLine(strFileName, strSeqChar, tagStore, optnumCase,optOveflowTag), A-112GetNetMACID(“strOptMACID”, “strOptAdapterName” ), A-134GetOS( ), A-136GetPrivateProfileString(strSection, strName,strDefault, strFileName), A-136GetProductPath( ), A-135GetRegValue function, A-137GetRegValueType function, A-138GetScrInfo(), A-139GetStatusSendEMailExt(optTagName), A-179GetTickCount( ), A-140Getting Started Guide, xvGetUserNames ( “tagUsers” , optnumUserType ,“opttagGroups” ), A-71, A-72Global Tags Replace, 3–47Global Tags Replace button, 3–17Go button, 3–18, 7–18go to option, 3–45Graphic functions, A-7, A-120graphics, 3–71Graphics Script interface, 15–8Grid button, 3–20, 3–22, 7–9grid, displaying, 7–40Group Account dialog, 11–2, 11–4Group button, 3–20, 7–16group numbers, 5–20, 5–21Group, inserting, 11–3grouping tags, 5–4Guest user, 11–17HHangUp(numType, strPhonebookEntryOrModem), A-199hard disk cautions, 5–17Hardkey license, upgrading, 2–14Hardkey Settings dialog, 6–2hardkeysinstalling, 2–12, 2–14Help, accessing, xiiHi tag field, 5–19description/purpose, 5–9Hide check-boxScreen Attributes, 7–4Hide Docked Window button, 3–24, 3–25HiHi tag field, 5–19description/purpose, 5–8HiHiLimit tag fielddescription/purpose, 5–9HiLimit tag fielddescription/purpose, 5–9Hint field, 3–26historybatch, 8–23configuring properties, 5–20enabling logging, 5–21history files (.hst)saving, 5–21saving/storing, 6–15HMIdownloading CEView, 1–1, 2–1, 2–5pre-loaded software, 1–1, 2–5Home button, 3–18, 7–18Horizontal Scale button, 7–72Hour2Clock(strTime), A-59HST2TXT function, 8–22HST2TXT(strStartDate, strStartTime, numDuration,numGroupNumber, optstrTargetFile,optstrSeparator, optnumMilliseconds,optstrFormat), A-114HST2TXTIsRunning(), A-116HTML format, saving screens, 7–18HTML pagesdisplaying tag values, 5–5enabling tag display, 5–5storing, 13–2Human Machine Interface. See HMIHyperlink button, 3–22, 7–336 <strong>InduSoft</strong> <strong>Web</strong> <strong>Studio</strong> v6.1 SP2
<strong>Studio</strong> FunctionsIWS Users GuideIiconsAdd/Remove Programs, 2–7applications, A-98Datasheet View, 5–11, 5–12IWS, 3–2IWS desktop, 2–1, 2–3IWS logo, 3–2IWS, desktop, 2–4launching InstallShield Wizard, 2–4Symbol Library, 1–2Tasks tab, 3–6TCP/IP Client module, 10–25TCP/IP Server module, 10–25Identification tab, description/purpose, 6–10If(numExpression, numThen, optnumElse), A-34IIS <strong>Web</strong> Server, configuring, 13–4Import Wizard, 3–54indexes, arraydescription/purpose, 5–3specifying maximums, 5–3indirect tagsdescription/purpose, 5–2, 5–5<strong>InduSoft</strong> <strong>Web</strong> <strong>Studio</strong>. See IWS<strong>InduSoft</strong> <strong>Web</strong> <strong>Studio</strong> Getting Started Guide, xvInfoAppAlrDir( ), A-141InfoAppHstDir( ), A-141InfoDiskFree(strDisk), A-142InfoResources(numSelect), A-142Insert Class dialog, 5–14insert screen, 7–3Insert Screen Group, 7–16inserting a Group, 11–3installingCEView, 2–1, 2–5IWS, 2–1InstallShield Wizardlaunching, 2–4integer data typedescription/purpose, 5–5selecting, 5–11using in class tags, 5–2using in tag fields, 5–7IntelliSenseVBScript, 15–29internal structuredescription/purpose, 4–1internal tagsdescription/purpose, 3–8, 5–2downloading considerations, 5–9, 5–21viewing, 5–2Internal Tags folder, 5–1invalid licensewarning message, 2–10IP Security button, 7–20IsActiveXReg(numType, strProgIDorFileName), A-143IsScreenOpen(strScreen), A-83ISSymbol.ocx, 13–3IsTaskRunning(strTask), A-83IsViewerInFocus(), A-84IWSavailable drivers, 1–3closing, 3–2description/purpose, 1–1development environment, description/purpose, 3–1development system, description/purpose, 1–1Driver Users Guides, xvExecution Modes, 2–10exiting, 3–2features, 1–2Frequently Asked Questions (FAQ), xvfunctions, A-1Getting Started Guide, xvicons, desktop, 2–1, 2–3, 2–4, 3–2icons, logo, 3–2installing, 2–1overview, 1–2product limitations, 1–3Protection Types, 2–12removing program, 2–6resizing screens, 3–2runtime, description/purpose, 1–1uninstalling, 2–6using the title bar, 3–2viewing status, 3–2IWS Databasesimporting from, 3–57IWS Scripting Language, 15–1Kkeyboard shortcutscutting/pasting objects, 5–22using Tab key, 5–11KeyPad(TagName), A-84Llanguage referenceVBScript, 15–18languagesdefault development, 6–13Legend dialogTrend Control Object, 7–57Librarybutton, 3–15symbols, 7–120license levelsimportant notes, 6–3specifying, 6–2verifying, 6–2Licensed for Engineering + Runtime Mode, 2–11Licensed for Engineering Only Mode, 2–11Licensed for Runtime Only Mode, 2–11limitations, product, 1–3Line button, 3–21, 7–24Line Color button, 3–20, 7–9List Box Object button, 3–21, 7–77Lo tag field, 5–19description/purpose, 5–9log files, generating, 6–28Log Message functions, A-1, A-13Log On dialog, 11–17Log tab, Output window, 3–25Log(numValue), A-31Log10(numValue), A-32Logarithmic functions, A-2, A-31logginghistory, 5–21on/off, 11–17specifying Dead Band variation, 5–21Logic Operators, 15–3Logical functions, A-2, A-33LogOff(), A-85Logon(optstrUser, optstrPassword), A-85LogWindescription/purpose, 4–1module, 12–6module, description/purpose, 1–2<strong>InduSoft</strong> <strong>Web</strong> <strong>Studio</strong> v6.1 SP2 7
IWS Users Guide<strong>Studio</strong> FunctionsRemote, 12–10LoLimit tag fielddescription/purpose, 5–9LoLo tag field, 5–19description/purpose, 5–9LoLoLimit tag fielddescription/purpose, 5–9Loop function, A-152Loop functions, A-8LSB, accessing, A-23MMain Driver Sheet, 10–16Main Password button, 11–1managing alarms remotely, 5–6, 5–18managing applications remotely, 5–6, 14–1manualsGetting Started Guide, xvmouse/selection, xiiiWindows conventions, xivMath task, 8–31Math Worksheet, 8–31Math() function, caution note, 4–10Math(numWorksheet), A-86Max tag field, 5–10description/purpose, 5–7exceeding specified value, 5–17specifying values, 5–17Max(numValue1, numValue2, …, numValueN)Max(tagArray, numSample, optnumIgnore), A-28Maximize button, 3–2, 6–22maximum characterstag and class member names, 5–10menubar, using, 3–3description/purpose, File, 3–3enabling/disabling, 6–22options, File, 3–3merging applications, 1–3messagesalarm, creating, 5–19button, 7–79warning, enabling, 6–32warning, values exceed Min/Max, 5–10, 5–17written to Output window, 5–10, 5–17Microsoft ActiveSync, 2–24Min tag field, 5–10description/purpose, 5–7exceeding specified value, 5–17specifying values, 5–17Min(numValue1, numValue2, …, numValueN)Min(tagArray, numSample, optnumIgnore), A-29Minimize button, 3–2, 6–22Minimum/Maximumarray tag sizes, 5–3specifying number of characters, A-16specifying tag values, 5–7specifying worksheet values, 10–13mnemonicsconfiguring for alarm states, 5–20Mod(numNumerator, numDenominator), A-20Mode toolbar, 3–20, 7–8modemnot supported for Pocket PC v3.00, 10–3, 10–7modem connectionsand drivers, 10–6Module Activity functions, A-5, A-77modules, changing default start-up, 6–33modules, runtimedata flow, 4–1starting, 6–33mouse/selection conventions, xiiiMove backward button, 7–15Move forward button, 7–15Move to back button, 3–19, 7–15Move to front button, 3–19, 7–15MSB, accessing, A-23Multimedia functions, A-7, A-126Nnaming projects, 6–1naming tags, 5–10, 5–11NCopy(strSource, numStartChar, numQtdChar), A-42NET Framework 1.1, 2–5, 17–14, 17–29NetDDEprotocol, 1–1Network Dynamic Data Exchange. See NetDDENew button, 3–13, 7–2New dialog, 6–1New Tag dialog, 5–3New Value dialog, 12–3NoInputTime(optUpdateTrigger), A-143Notes, description/purpose, xiiiNum(strValue), A-43NY<strong>Web</strong>Server.exe, 13–5Oobject alignment buttons, 7–11Object Finder button, 3–16, 3–46, 5–23object grouping and ungrouping buttons, 7–16Object ID, 3–26object library, description/purpose, 1–2Object Properties dialogsadding tags, 5–10, 5–21object properties windowfocus, 3–53Object Size, 3–26objects, screendragging, 3–26specifying display properties, 6–24ODBCdatabase, and .NET Framework 1.1, 2–5, 17–29database, importing from, 3–62driver interface with IWS, 17–4error codes in IWS, 8–30functions, A-9, A-156protocol, 1–1runtime task, description/purpose, 4–1runtime, description/purpose, 4–1runtime, TimeSlice settings, 4–8task, 8–28worksheet, 8–28ODBC worksheetchanging data during runtime, 8–29ODBCBeginTrans(numHandler), A-156ODBCBindCol(numHandler, strColName,strColType, strTagName), A-157ODBCCanAppend(numHandler), A-158ODBCCanTransact(numHandler), A-159ODBCCanUpdate(numHandler), A-159ODBCClose(numHandler), A-160ODBCCommitTrans(numHandler), A-160ODBCDelete(numHandler), A-161ODBCExecuteSQL(numHandler, strSqlCommand),A-162ODBCInsert(numHandler), A-162ODBCIsBOF(numHandler), A-1638 <strong>InduSoft</strong> <strong>Web</strong> <strong>Studio</strong> v6.1 SP2
<strong>Studio</strong> FunctionsIWS Users GuideODBCIsDeleted(numHandler), A-164ODBCIsEOF(numHandler), A-164ODBCIsFieldNULL(numHandler, strColName), A-165ODBCIsFieldNullable(numHandler, strColName), A-166ODBCMove(numHandler, numOffset), A-167ODBCMoveFirst(numHandler), A-167ODBCMoveLast(numHandler), A-168ODBCMoveNext(numHandler), A-169ODBCMovePrev(numHandler), A-169ODBCOpen(strDsn, strUser, strPassw, strTable,strFilter, strSort), A-170ODBCQuery(numHandler), A-171ODBCROllback(numHandler), A-172ODBCSetFieldNull(numHandler, strColName,numValue), A-172ODBCSetFilter(numHandler, strFilter), A-173ODBCSetSort(numHandler, strSort), A-174ODBCUnbindCol(numHandler, strColName), A-175ODBCUpdate(numHandler), A-175OLE DB provider, 17–4OMRON CX Programmer Databasesimporting from, 3–67OPCClient, configuring, 10–20Clients, description/purpose, 4–1communicating with target devices, 6–15configuring, 10–19protocol, 1–1Server, configuring, 10–24Servers, description/purpose, 4–1troubleshooting, 10–22OPC Server Databasesimporting from, 3–60Open Connectivity. See OPCOpen Database Connectivity. See ODBCOpen Polygon button, 3–21, 7–23Open Project button, 3–13Open(strScreen, optnumX1, optnumY1, optnumX2,optnumY2), A-66openingfiles, 3–37projects, 3–37Opening and Closing Windows functions, A-3operating systemsrunning IWS, 1–1option tabproject settings, 6–11Options dialogTrend Control Object, 7–52Options tabdescription/purpose, 6–10Output Window, 3–25button, 3–15Log tab, 3–25messages, 5–10, 5–17using for debugging, 12–4XRef tab, 3–25PPanelBuilder32 Databasesimporting from, 3–63PanelMateimporting from, 3–67Paste button, 3–14Paste Link, 7–121PC-based control programscustomized interface, 6–7IWS integration, 1–3modifying shared tags, 5–2storing shared tags, 3–8viewing shared tags, 5–1Pen Style dialogTrend Control Object, 7–51Pens button, 7–76performance considerations, Caution notes, 5–17PhoneDialUp(strPhoneNumber, OptStrModemName),A-200PhoneDisableListen(optStrModemName), A-201PhoneEnableListen(OptStrModemName), A-202PhoneHangUp(OptStrModemName), A-203PhoneStatus (strStatus, optStrModemName), A-203Pi(), A-64pin button, 3–53Pixel Editing button, 3–23, 7–21Play(strFileName), A-126Points dialogTrend Control Object, 7–50portsconfiguring, 2–6, 2–24installing hardkeys, 2–14installing, hardkeys, 2–12installing, softkeys, 2–24removing hardkeys, 2–13using TCP, 6–16Position button, 3–22, 7–37PostKey(numKeydownOrKeyup, numwParam,numlParam), A-87Pow(numBase, numExponent), A-20predefined tags, 3–8, 5–2Preferences tab, Project Settings menudisplay warning message option, 6–32Print, A-117Print button, 3–15print preview, 3–52printing project screens, 3–51PrintSetup(), A-120PrintWindow(strScreenName , optnumOrientation),A-120priority, specifying group priority, 5–20processor platformsruntime provided, 2–5supported, 2–1, 2–5supported by CEView runtime, 2–1productfeatures, 1–2limitations, 1–3ProductVersion( ), A-144, A-145programmable logic controller. See PLC programmablelogic controllerproject settingscommunication tab, 6–25option tab, 6–11Project Status dialog, 10–19projectsclosing, 3–37configuring, 6–1default location, 6–2naming, 6–1opening, 3–37providing identifying information, 6–10specifying screen resolution, 6–5starting drivers, 6–35starting tasks, 6–34storing, 6–1propertiesalarm, 5–18tag, 5–9<strong>InduSoft</strong> <strong>Web</strong> <strong>Studio</strong> v6.1 SP2 9
IWS Users Guide<strong>Studio</strong> Functionstag, applying to internal tags/downloadingconsiderations, 5–21tag, associating to objects, 5–21tag, editing, 5–22tag, specifying, 5–7property buttons, 5–21Protection Manager dialog, 6–2Protection Types, 2–12protocolsDDE, 1–1NetDDE, 1–1ODBC, 1–1OPC, 1–1TCP/IP, 1–1publicationsrelated, xvPushbuttonsbutton, 3–21, 7–85styles, 7–88Qquality tag, 5–7field, description/purpose, 5–7RRand(), A-30rate of change, 5–18, 5–19Rate tag field, 5–19description/purpose, 5–9RateLimit tag fielddescription/purpose, 5–9RDFileN(tagSelectedFile, strSearchPath, strMask,numChangeDir), A-118read-onlytags, 3–8, 5–2real data typedescription/purpose, 5–5selecting, 5–11using in class tags, 5–2using in tag fields, 5–7Real numbers, storing, 5–5Recipe Worksheet, 8–25Recipe(strFunction), A-87Recipestask, 8–24UNICODE support, 1–3recommendationslinking WinCE devices, 2–6video settings, 2–4, 2–5Rectangle button, 3–21, 7–26referencing tags, 5–5Refresh button, 3–18, 7–18RegSaveCE function, A-145related IWS publications, 19–2related publications, xvrelational databaseinterface with IWS, 17–1relational databasesSQL, 17–3Remote Agentdialog, 14–1storing, program file, 2–21remote alarm managementconfiguring tags, 5–6, 5–18remote application management, 5–6, 6–26Remote Database Spy, 12–9Remote LogWin, 12–10Remote Security System, 11–14Remote tools, 12–8RemoveUser(strUserName), A-73removing IWS, 2–6replacing tags, 3–48global, 3–47Report(, A-88, A-90Reportstask, 8–26UNICODE support, 1–3worksheet, 8–26Reset Tags Database, 5–13ResetBit(, A-21Resizebutton, 3–2, 3–22, 7–38height button, 3–18, 7–10width button, 3–19, 7–10resizingapplication screens, 6–25borders, 6–24windows, 3–2resources, xvrestore defaults, 3–51restrictionsnaming tags, 5–10tags, 5–9worksheets, 5–9Retentive Parameters, 5–17Retentive Value, 5–17RGBColor ( numRed, numGreen, numBlue ), A-121RGBComponent ( numColor , numComponent ), A-122right-clickingApplication Tags folder, 5–12tag icons, 5–22tag names, 5–23tag properties, 5–22Rotate button, 3–19, 7–14Round(numValue), A-22Rounded Rectangle button, 3–21, 7–26RSLogix 5000 CSV Databasesimporting from, 3–64Run Application button, 3–17, 12–8running applications, 3–50, 12–1RunStartup.exe, xiiruntimeCEView, processor platforms supported, 2–1data flow, 4–1description/purpose, 1–1Driver Runtime task, description/purpose, 4–1executing, 4–1fields, accessible during, 5–7functions executed during, 4–9initial address limits, 10–12menu options dialog, 6–24modules, starting, 6–33ODBC, description/purpose, 4–1ODBC, TimeSlice settings, 4–8processor platforms, 2–1, 2–5properties, Screen Attributes, 7–4tasks, descriptions/purposes, 4–1Runtime Desktop tab, description/purpose, 6–22Ssample applications, 6–5Save All button, 3–14, 3–51Save button, 3–13, 3–51savinghistory files, 17–1, 17–5log files, 6–28screens in HTML format, 7–18translation files, 6–13Translation worksheets, 16–810 <strong>InduSoft</strong> <strong>Web</strong> <strong>Studio</strong> v6.1 SP2
<strong>Studio</strong> FunctionsIWS Users GuideScheduler task, 8–32Scheduler Worksheet, 8–32Screen Attributes dialog, 7–3screen background color, 7–7Screen Coordinates field, 3–26screen editorfocus, 3–53Screen functions, A-66screen objectsassociating tags, 5–21screen resolution, changing, 3–41screens, applicationenabling/disabling dragging, 3–26exporting, 1–2, 7–16resizing, 3–2scaling, 6–25specifying startup screen, 6–24status bar, 3–26viewing coordinates, 3–26Scroll barsDatabase Spy window, 3–24Output window, 3–26searching Translation worksheets, 16–7secondary data serversettings, A-150secondary URLsettings, A-150securityfield, Screen Attributes, 7–4functions, A-5, A-69providing, 1–3system access level, 11–15Security System dialog, 11–1Select Area button, 3–23, 7–21Select Transparent Color button, 3–23, 7–21Selection button, 3–20, 7–8Send project to target button, 3–17, 12–8SendEMail(strSubject, strMessage, strTO), A-179SendEMailExt(strSubject, strMessage, strTO, strCC,strBCC, strFile1, ..., strFileN), A-181SendEvent(strEvent), A-207SendKeyObject(numEvent, strMainKey,optnumShift, optnumCtrl, optnumAlt,optstrTargetScreen), A-91Serial Advanced Settings dialog, 14–2serial links, downloading software to HMI, 2–1serverschanging default, 6–7SetAppAlarmPath(strPath), A-146, A-147SetAppHSTPath(strPath), A-147SetAppPath(strPath), A-93SetBit(, A-22SetDateFormat(strSeparator, strFomat), A-148SetPassword(strUserName,strOptionalNewPassword), A-74SetRegValue function, A-148SetsystemDate(strDate), A-59SetSystemTime(strtime), A-60setting tag properties, 5–15settings, Event, 9–1SetTranslationFile() function, 16–8SetTranslationFile(strFileName), A-124SetViewerInFocus(), A-93, A-94SetViewerPos(numLeft, numTop, optnumWidth,optnumHeight), A-94Set<strong>Web</strong>Config(strServerIP, strOptURL, strOptPath,numOptPort), A-150Shared Databasetags, description/purpose, 3–8, 5–1tags, modifying, 5–2, 6–6Shared Database folder, 5–1Shared Image check-box, 7–3sharing tags, 5–5, 5–11, 6–6ShutDown(), A-95Sin(numAngle), A-64Size tag field, description/purpose, 5–7SKEYUPG.exe, 2–18Smart Message button, 3–21Smart Message Objects button, 7–80smoothing, specifying for tags, 5–18Softkey Settings dialog, 6–2softkeys, installing, 2–24SPC button, 7–77specifyingdefault translation files, 6–13specifyingdriver/OPC communication, 6–15license levels, 6–2project settings, 6–8properties, screen objects, 6–24screen resolution, 6–5SQLrelational databases, 17–3SQRT(numValue), A-23Standard Driver Worksheet, 10–10Standard toolbar, 3–13starting modules, 6–33StartTask(strTask), A-96startup screens, specifying, 6–24Startup Script interface, 15–15Startup value, 5–17Static Objects toolbar, 3–20, 7–23Statistical functions, A-1, A-27status barcontrolling display, 6–24tips, 3–5using, 3–26stop application, 12–1Stop Application button, 3–17, 12–8Stop button, 3–18, 7–18stop display test, 12–1Stop display test button, 3–17Stop Test Display button, 12–8storingalarm history files, 6–15CEView runtime files, 2–1, 2–5, 2–8configuration files, 6–1data, 1–1HTML pages, 13–2projects, 6–1Real numbers, 5–5Remote Agent program file, 2–21shared tags, 3–8symbols, 7–120tag values, 5–1tag values, 4–2trend curves, 3–10<strong>Web</strong> pages, 13–3Str(numValu), A-44Str2Asc(strChar), A-44string data typedescription/purpose, 5–5selecting, 5–11using in class tags, 5–2using in tag fields, 5–7String functions, A-2, A-37<strong>InduSoft</strong> <strong>Web</strong> <strong>Studio</strong> v6.1 SP2 11
IWS Users Guide<strong>Studio</strong> Functionsstring, creating messages, 5–19StrLeft(strSource, numQtdChar), A-45StrLen(strSource), A-46StrLower(strSource), A-47StrRChr(strSource, strChrSequence), A-47StrRight(strSource, numQtdChar), A-48StrStr(strSource, strCharSequence), A-48StrStrPos(strSource, strCharSequence), A-50StrTrim(strReference, numOptFlag), A-50structure, internal, description/purpose, 4–1StrUpper(strSource), A-52<strong>Studio</strong> Manager.exe, 4–4Supervisory Control And Data Acquisition. See SCADAsupervisory tasks, 3–8, 5–2supportcontacting, xvcustomer information form, xvisupportingUNICODE conversion restrictions, A-40UNICODE tag data types, 5–5UNICODE, Reports, 1–3Swap16(numValue), A-24Swap32(numValue), A-25Symbol Library, 7–120icon, 1–2SyncAlarm( strOptionalStartDate, strOptionalEndDate), A-214SyncAlarmStatus( ), A-217SyncEvent( strOptionalStartDate, strOptionalEndDate), A-215SyncEventStatus( ), A-218SyncTrend(numGroup, strOptionalStartDate,strOptionalEndDate), A-216SyncTrendStatus(numGroup), A-219syntaxfunction names, A-12function tag names, 15–3samples, tag fields, 5–9System Info. functions, A-7, A-127system information, 3–43system load, specifying Startup Value, 5–17TTab key shortcut, 5–11tabsicons, 3–6Identification, description/purpose, 6–10Options, description/purpose, 6–10Runtime Desktop, description/purpose, 6–22tag fieldsRetentive Parameters, 5–17saving changes, 5–17specifying deviations +/-, 5–8using tag data types, 5–7Tag List folder, 5–12tag namesmaximum characters, 5–10syntax, 15–3Tag Propertiesbutton, 3–17dialog, 5–16toolbar, 3–16, 3–45tag types, 5–2Tagname text box, 3–16tagsadding Application Tags datasheet, 5–11adding on-the-fly, 5–12application, description/purpose, 3–8array, specifying maximum index, 5–11class, description/purpose, 3–8data types, Boolean, integer, real, string, 5–5data types, selecting, 5–11deleting, 5–23description/purpose, 5–1, 15–1displaying on HTML pages, 5–5editing, 5–10enabling alarms, 5–18finding, 3–44grouping into classes, 5–4history properties, 5–20internal, description/purpose, 3–8internal, downloading considerations, 5–9, 5–21Local and Server parameters, 5–5naming, 5–10, 5–11properties, description/purpose, 5–7quality, 6–25read-only, 3–8replace, 3–48saving Retentive Value parameter, 5–17sharing with <strong>Web</strong> Thin Clients, 5–5specifying parameters, 5–17specifying quality, 5–7, 12–2storing values, 4–2, 5–1using, 15–1using Object Properties dialogs, associating tags, 5–21Tags Databaseaccessing, 15–2description/purpose, 4–1, 5–1editing tags, 5–22saving, 5–11tag categories, description/purpose, 5–1tags, adding/creating, 5–1Tags Properties button, 5–15Tan(numAngle), A-65target devices, specifying, 2–24Task Worksheets, configuring, 8–1taskbars, display properties, 6–25taskssupervisory, 5–2tasks, 3–72supervisory, 3–8Tasks tab, 3–10icons, 3–6TCP/IPClient module icon, 10–25Client module, description/purpose, 4–1Clients, specifying TCP port, 6–16configuring, 10–24links, downloading software to HMI, 2–1ports, specifying, 6–16protocol, 1–1Server module icon, 10–25Servers, specifying TCP port, 6–16TCP/IP and UDP/IP encapsulationand drivers, 10–5TCP/IP Server moduledescription/purpose, 4–1technical support, 19–1contacting, xvcustomer information form, xvitemplates, projectdescription/purpose, 6–5Test Display button, 3–17, 12–8test displays, 3–49, 12–1testing your application in a <strong>Web</strong> browser, 13–10testing/debugging your application, 12–1text boxAddress, 3–18Tagname, 3–1612 <strong>InduSoft</strong> <strong>Web</strong> <strong>Studio</strong> v6.1 SP2
<strong>Studio</strong> FunctionsIWS Users GuideText button, 3–21, 7–28text conventions, xiiformatting, xiiText I/O button, 3–22, 7–35TimeSlice settings, 4–8TimeStamp tag fielddescription/purpose, 5–7Tipsdescription/purpose, xiiiusing Status bar, 3–5video settings, 2–4, 3–8, 3–30, 6–23, 6–29, 6–31, 6–32title barchanging default text, 6–22enabling/disabling, 6–22using, 3–2Toggle Transparent Color button, 3–23, 7–22Toggle(numExpression), A-35Toolbar dialogTrend Control Object, 7–58toolbarsActive Objects, 3–21, 7–39Align and Distribute, 3–18, 7–10Bitmap, 3–23, 7–21description/purpose, 3–5docking, 3–5Dynamic Properties, 7–29Execution Control, 3–17, 12–8Mode, 3–20, 7–8Standard, 3–13Static Objects, 3–20, 7–23Tag Properties, 3–16, 3–45<strong>Web</strong>, 3–17, 7–18ToolTips, 6–25touch pads, displaying, 6–24TRA files, 13–3Trace(strOutputMessage), A-13translatingalarm messages, 5–18applications, 1–2, 6–13translationfiles, specifying default, 6–13functions, A-7functions, A-124functions, executing, 16–8Translation Editor, 16–4Translation Editor utilityenabling translation, 6–13Translation Tool, 16–1Transmission Control Protocol/Internet Protocol. SeeTCP/IPTrendbutton, 3–21, 7–71worksheet, 8–13worksheet and batch history file, 8–19worksheets, configuring, 5–20worksheets, restrictions, 5–9Trend Control Development Interfaces, 7–47Trend Control object, 7–46Trend Control Runtime Interface, 7–62Trend task, 8–13trends, storing trend curves, 3–10trigger field, 7–71Trigonometric functions, A-3, A-61troubleshooting, 19–1database, 17–25True(numExpression), A-35Trunc(numValue), A-25TwinCAT PLC Databasesimporting from, 3–68UUnblockUser(strUserName), A-75Undo button, 3–15Ungroup button, 3–20UNICODE supportIWS functions, conversion restrictions, A-40Recipes, 1–3Reports, 1–3tag data types, 5–5uninstalling IWS, 2–6Unit tag fieldconfiguring, 5–17description/purpose, 5–7updatingCEView, 1–1User Account dialog, 11–7User GuidesDriver, xvuser is blocked, 11–14users, defining, 11–7Using the Screen/Worksheet Editor, 3–12Vvaluedisplay previous value, 7–36, 7–42ValueToChar(, A-53ValueWToChar(, A-53VBAcompared to VBScript, 15–31VBScript, 15–5and CEView, 15–35and conditional statements, 15–37and InputBox(), 15–33and MsgBox(), 15–33and NOT, 15–34and True/False, 15–34compared to VBA, 15–31constants, 15–36Editor, 15–29global procedures, 15–7Graphics Script interface, 15–8language reference, 15–18looping statements, 15–39operators, 15–36procedures, 15–42screen events, 15–33support for ActiveX objects, 15–33variables, 15–35verifyingapplication, 3–49, 13–9, 19–3license levels, 6–2TCP/IP and background tasks are running, 13–10TCP/IP Server is running, 13–6Vertical Scale button, 7–74video settingsrecommendations, 2–4tips, 2–4, 3–8, 3–30, 6–23, 6–29, 6–31, 6–32view screen attributes, 7–3Viewer windowdescription/purpose, 4–1enabling/disabling features, 6–22ViewerPostMessage(strScrTitle, numwParam,numlParam), A-97viewingalarm properties, 5–16, 5–18applications remotely, 5–6history properties, 5–20tag lists, 5–2, 5–22<strong>InduSoft</strong> <strong>Web</strong> <strong>Studio</strong> v6.1 SP2 13
IWS Users Guide<strong>Studio</strong> Functionstag values, 5–11virtual keyboard, 3–29, 6–28, 6–30, 7–20, 7–35, 7–46, 7–100, 11–1, 13–9, A-93, A-144Visual Script Language (VBScript), 15–5WWait(numMillisec), A-97warning messages, enabling, 6–32<strong>Web</strong> client, debugging, 12–7<strong>Web</strong> pages, storing, 13–3<strong>Web</strong> site, <strong>InduSoft</strong>, xvweb solution, 18–1<strong>Web</strong> tab, 13–8<strong>Web</strong> Thin Clientsconfiguring remote access, 6–26parameters, A-150tags, 5–5, 5–11<strong>Web</strong> toolbar, 3–17, 7–18web tunnelingparameters, A-150web tunnelling, 18–1WinCEcopying files, 2–5windowsCE applications, downloading CEView, 2–1commandsCut/Copy/Paste, 5–22conventions, xivdockable, xivexperience requirements, xiiHelp, xiiresizing, 3–2running IWS, 1–1, 4–1types, xivViewer, enabling/disabling features, 6–22Winexec(strCommand, optnumState), A-98, A-100worksheetsClass, configuring, 5–14Driver, 10–9group numbers, 5–20Main Driver, 10–17Math, 8–31ODBC, 8–28Recipe, 8–25Report, 8–26restrictions, 5–9Scheduler, 8–32Standard Driver, 10–10Trend, 8–13Trend, configuring, 5–20using Tab key, 5–11using tags, 5–1, 15–1Workspace Window button, 3–15WritePrivateProfileString function, A-152XXGet(strName, strProperties), A-205X-Ref button, 3–16XRef tab, Output window, 3–25XRun(strName, strMethod, Parameter1, Parameter2,…, ParameterN), A-205XSet(strName, strProperties, Value), A-206ZZoom button, 3–16Zoom combo-box button, 3–1614 <strong>InduSoft</strong> <strong>Web</strong> <strong>Studio</strong> v6.1 SP2