PDF file of the software manual (English) - Fujifilm
PDF file of the software manual (English) - Fujifilm
PDF file of the software manual (English) - Fujifilm

You also want an ePaper? Increase the reach of your titles
YUMPU automatically turns print PDFs into web optimized ePapers that Google loves.
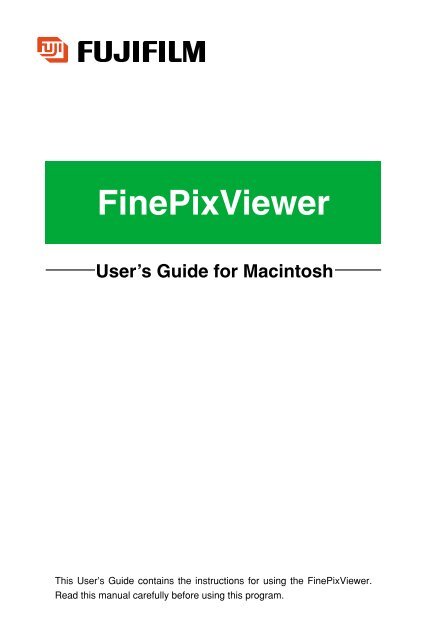
FinePixViewerUser’s Guide for MacintoshThis User’s Guide contains <strong>the</strong> instructions for using <strong>the</strong> FinePixViewer.Read this <strong>manual</strong> carefully before using this program.
IMPORTANTBe sure to read this page before using <strong>the</strong> S<strong>of</strong>tware Set.Notes on <strong>the</strong> S<strong>of</strong>tware and User’s Guide(1) Unauthorized transfer or duplication <strong>of</strong> all or any part <strong>of</strong> <strong>the</strong> encloseds<strong>of</strong>tware or User’s Guide is forbidden.(2) The enclosed s<strong>of</strong>tware and User’s Guide can be used with only one device.(3) We accept no liability whatsoever for any loss or injury incurred by <strong>the</strong>owner or any third party while using a device with <strong>the</strong> enclosed s<strong>of</strong>tware orUser’s Guide.(4) Every effort has been made to ensure that <strong>the</strong> product is flawless. If anydefect is found that is due to a fault on <strong>the</strong> part <strong>of</strong> <strong>the</strong> manufacturer, <strong>the</strong>product will be replaced free <strong>of</strong> charge, at our discretion. No responsibility isaccepted for defects not caused by <strong>the</strong> manufacturer.(5) The contents <strong>of</strong> <strong>the</strong> enclosed s<strong>of</strong>tware and User’s Guide are subject tochange without notice.(6) Fuji Photo Film Co. Ltd accepts no liability whatsoever for any loss incurredas a result <strong>of</strong> errors contained in this <strong>manual</strong>.Do not attempt to play <strong>the</strong> CD-ROM enclosed with thisproduct on an audio CD player.Doing so could damage your hearing or could damageyour speakers or headphones.• xD-Picture Card is a trademark <strong>of</strong> Fuji Photo Film Co., Ltd.• Macintosh, Power Macintosh, iMac, PowerBook, iBook and Mac OS are trademarks <strong>of</strong>Apple Computer, Inc. registered in <strong>the</strong> U.S. and o<strong>the</strong>r countries.• Adobe Acrobat ® Reader ® is a trademark <strong>of</strong> Adobe Systems Incorporated <strong>of</strong> <strong>the</strong> U.S.• SmartMedia is a trademark <strong>of</strong> Toshiba Corporation.• O<strong>the</strong>r company or product names are trademarks or registered trademarks <strong>of</strong> <strong>the</strong>respective companies.2
IntroductionThis User’s Guide describes how to use <strong>the</strong> FinePixViewer.In this Guide, it is assumed that <strong>the</strong> reader has a basic grasp <strong>of</strong> how to use a personalcomputer (PC). For information on how to use your PC, refer to <strong>the</strong> <strong>manual</strong>s suppliedwith <strong>the</strong> PC.3
ContentsIMPORTANT ......................................................................2Introduction ......................................................................3Contents ............................................................................4About <strong>the</strong> S<strong>of</strong>tware ..........................................................7FinePixViewer Supports <strong>the</strong> Following File Formats: ..................7FinePixViewer File Format Compatibility Table...........................7Window Components – Display Areas ........................................9Window Components – Buttons ...............................................10Switching Thumbnails .............................................................12Changing Area Sizes...............................................................12Using FinePixViewer.......................................................13Saving Images on Your Computer............................................13Deleting Images......................................................................16Using <strong>the</strong> Folder Tree ....................................................17Selecting Folders ...................................................................18Sample Procedure – Checking <strong>the</strong> Images on <strong>the</strong> Camera .......19Moving and Copying Folders and Images ................................20Using <strong>the</strong> Thumbnail Display Area ................................21Thumbnail Types ....................................................................21Switching Thumbnail Display Modes .......................................21Select a Thumbnail ................................................................22Viewing Slide Shows .....................................................24Starting a Slide Show .............................................................24Operations During a Slide Show ..............................................24Slide Show Settings ...............................................................25Printing ..........................................................................26Print ......................................................................................26Index Print .............................................................................27Ordering Prints ..............................................................29Opening and Working with Windows ........................................29Sample Print Order Procedure ................................................304
Using <strong>the</strong> Image Window ...............................................41Opening <strong>the</strong> Image Window ....................................................42Working With Still Images .......................................................43Playing Back Movies and Sound .............................................50Saving a Movie Under Ano<strong>the</strong>r Name ......................................51Editing Movies ........................................................................53Using <strong>the</strong> Picture Playback Application Registration Area .....54Registering an Application ......................................................55Switching between Applications ..............................................55Using <strong>the</strong> Playback Pane ...............................................56Displaying and Hiding <strong>the</strong> Playback Pane ................................56Viewing Image Information .....................................................57Batch Operations and Settings ......................................58Overview <strong>of</strong> Batch Operations .................................................58Settings for Format Conversion and Saving .............................60Automatic Rename .................................................................62Batch Resize .........................................................................62Batch Rotation .......................................................................63Batch Format Conversion .......................................................63Information Batch Edit ............................................................64Automatic Save Settings .........................................................65Customizing Windows ............................................................66Making a FinePix CD Album ..........................................67Making Video CDs ..................................................................68Using RAW FILE CONVERTER LE...................................74Using FinePixViewer to Attach Images to E-Mail............75Supported E-Mail S<strong>of</strong>tware .....................................................75Check <strong>the</strong> Following : .............................................................75Attaching Images ...................................................................76Setting <strong>the</strong> File Size for Attached Images ................................77Using <strong>the</strong> FinePix Internet Service ................................78User Registration ...................................................................79Using <strong>the</strong> Service ...................................................................81To Delete <strong>the</strong> S<strong>of</strong>tware ..................................................825
Troubleshooting ............................................................83Menus ............................................................................92Using <strong>the</strong> [File] Menu ..............................................................92Using <strong>the</strong> [Edit] Menu..............................................................93Using <strong>the</strong> [View] Menu.............................................................93Using <strong>the</strong> [Go] Menu ...............................................................93Using <strong>the</strong> [Bookmarks] Menu ..................................................94Using <strong>the</strong> [Settings] Menu........................................................94Using <strong>the</strong> [Tools] Menu............................................................94Using <strong>the</strong> [Help] Menu.............................................................94Using <strong>the</strong> [Contextual] Menus .................................................95Grossary ........................................................................96Symbols Used in This GuideThe symbols listed below are used throughout this guide.q Indicates a camera operation must be performed. Refer to <strong>the</strong> Owner’sManual for your camera.NOTE Indicates important precautions to follow when using <strong>the</strong> s<strong>of</strong>tware.✽ Indicates important information.☞ Indicates notes or additional information.TIP Indicates useful tips.6
About <strong>the</strong> S<strong>of</strong>twareFinePixViewer Supports <strong>the</strong> Following File Formats:Display/PlaybackStillimagesMoviesExif-JPEG, Exif-TIFF(RGB), Exif-TIFF(YC), JPEG (JFIFbaseline only), BMP, PICT, TIFF(RGB), TIFF(16bit) orCCD-RAW (FUJIFILM proprietary format)AVI (Motion JPEG), MOV (QuickTime movie), MPEG1Save ✽SoundStillimagesMoviesWAV, MP3, AIFFExif-JPEG, Exif-TIFF(RGB) or PICTQuickTime movies✽The conversion source <strong>file</strong> must meet <strong>the</strong> following conditions:• AVI (movies shot on FUJIFILM cameras)FinePixViewer File Format Compatibility TableThe table below provides details <strong>of</strong> <strong>the</strong> CCD-RAW and 16-bit TIFF imagecompatibility in FinePixViewer.u: Supported ✕: Not supportedFunctionImageMixer VCD2UploadsOrdering printsPrintIndex printFormatCCD-RAW✕✕✕✕u16-bit Tiff✕✕✕uuBatch resizeBatch rotationBatch format conversionAutomatic rename✕✕✕uuuuuPlayback (open)Thumbnail list display✕uuuImage information displayuuPlayback paneuuSlide showsuu7
Notes on playing back AVI-format movie <strong>file</strong>s on a computer• Before playing back a video <strong>file</strong> on your computer, copy and save <strong>the</strong> video <strong>file</strong> from <strong>the</strong>media (xD-Picture Card, SmartMedia or Microdrive) to your computer’s hard disk. Then playback <strong>the</strong> saved <strong>file</strong>.• Video <strong>file</strong>s contain large amounts <strong>of</strong> data. Depending on <strong>the</strong> performance <strong>of</strong> your computer,<strong>the</strong> video may not play back smoothly because your computer cannot process <strong>the</strong> imagesquickly enough. (The video can still be played back normally on <strong>the</strong> camera’s LCD monitoror on a TV screen connected to <strong>the</strong> camera.)• If video <strong>file</strong>s do not play back smoothly, you may be able to get better results by using <strong>the</strong>batch format conversion feature in FinePixViewer to convert <strong>the</strong> video <strong>file</strong>s.● Guide to computer performanceImage sizeFrame rateMacintosh640 × 480 pixels 320 × 240 pixels 160 × 120 pixels30 fps 15 fps 30 fps 15 fps 10 fps 10 fps867 MHzG4or better366 MHzG3or better233 MHz G3 or better8
Window Components – Display AreasA B C DEABCNameFolder tree display areaThumbnail display areaPlayback PaneFunctionThe folders on <strong>the</strong> recording media loaded in <strong>the</strong> computeror camera are displayed in <strong>the</strong> folder tree display area.Shows reduced versions <strong>of</strong> <strong>the</strong> images in <strong>the</strong> selectedfolder. The reduced images are referred to as thumbnails.Shows a larger version <strong>of</strong> <strong>the</strong> image along with arange <strong>of</strong> information about <strong>the</strong> image.DEInternet Service displayareaPlayback applicationdisplay areaShows <strong>the</strong> FinePix Internet Service menu.Allows you to register and switch between <strong>the</strong>application programs used to play back images.CLICKThe images in <strong>the</strong> folder selected in <strong>the</strong> folder tree display areain <strong>the</strong> thumbnail display area B .9Aare displayed
Window Components – ButtonsShow/Hide Folder Tree buttonSwitches between showing and hiding <strong>the</strong> folder treedisplay.Show/Hide Playback Pane buttonSwitches between showing and hiding <strong>the</strong> playback pane.NameBack buttonForward buttonStop buttonFunctionSelects folders by moving backthrough <strong>the</strong> folder selection log.Selects folders by moving forwardthrough <strong>the</strong> folder selection log.Cancels thumbnail display.Related TopicsUsing <strong>the</strong> Folder TreeUsing <strong>the</strong> ThumbnailDisplay Area10
NameRefresh buttonFunctionUpdates <strong>the</strong> display.Related TopicsPrint buttonPrint OrderbuttonBatch RotationbuttonPrints <strong>the</strong> selected thumbnail.Launches <strong>the</strong> DPOF application.Rotates <strong>the</strong> selected thumbnail.ThumbnailsOrdering PrintsBatch Operationsand SettingsNameBatch CopySlide ShowbuttonFunctionCopies multiple imagesat once.Starts a slide show.Related TopicsBatch Operations andSettingsViewing Slide ShowsImageMixer VCD2for FinePixRAW FILECONVERTER LECR buttonCreate a video CD or CDalbum.Converts CCD-RAW <strong>file</strong>sto Exif-TIFF format.For printing on a printerthat supports Exif 2.2("Exif Print"), this optionspecifies whe<strong>the</strong>r tocancel automaticcompensation.Making a FinePix CDAlbumUsing RAW FILECONVERTER LE11
Switching Thumbnails / Changing Area SizesSwitching ThumbnailsRelated Item: Using <strong>the</strong> Thumbnail Display AreaDetailsSelecting “Details” displays information such as <strong>the</strong> image sizeand <strong>the</strong> photography date and time.Large Thumbnail Medium Thumbnail Small ThumbnailChanging Area Sizes Related Item: Window Components – Display AreasYou can change <strong>the</strong> size <strong>of</strong> an area by dragging <strong>the</strong> area frame.12
Using FinePixViewerSaving Images on Your Computer / Deleting ImagesSaving Images on Your ComputerThis section gives a brief overview <strong>of</strong> how to use FinePixViewer. Refer to <strong>the</strong>seinstructions while you are using FinePixViewer.q1Connect <strong>the</strong> camera to your computer inDSC mode.See “Viewing Images” in<strong>the</strong> camera Owner’sManual.2 FinePixViewer starts up. When <strong>the</strong> Automatic Save dialog boxappears, click <strong>the</strong> [OK] button.Mac OS 9.2.2Mac OS X 10.2 – 10.33 After <strong>the</strong> Automatic Save has been checked, <strong>the</strong> AutomaticDisconnect dialog box appears. Click <strong>the</strong> [OK] button anddisconnect <strong>the</strong> camera.13
4 Check that <strong>the</strong> <strong>file</strong>s are downloaded from <strong>the</strong> camera to yourcomputer and that a folder with <strong>the</strong> photography date iscreated.Open <strong>the</strong> folder as shown below. For information on <strong>the</strong>folder to which <strong>the</strong> images were saved, see "Automatic SaveSettings".TIPTo open a folder, click on <strong>the</strong> arrow “” to <strong>the</strong> left <strong>of</strong> <strong>the</strong> folder.1232 indicates <strong>the</strong> folder in whichFinePixViewer is installed.5 Double-click a still-image thumbnail to open an image window.See “Using <strong>the</strong> Image Window” for details.Marquee tool:Allows you to specify an area to be cropped on <strong>the</strong> screen.PrintCropImage size:Allows you to change <strong>the</strong> image size.Rotate right (CW)Rotate left (CCW)Hand tool:Use this to scroll <strong>the</strong>screen display.Zoom Out tool:Use this to shrink <strong>the</strong>screen display.Zoom In tool:Use this to enlarge<strong>the</strong> screen display.Type tool:Allows you to type in text on <strong>the</strong> screen.14
6 You can use functions such as “Rotate” and “Type Tool” tomodify your image.7 Click <strong>the</strong> [Save As...] button.8 Enter a <strong>file</strong> name and click <strong>the</strong> [Save] button.NOTEIf you repeatedly save an image in <strong>the</strong> Exif-JPEG format <strong>the</strong> image quality deteriorates.We recommend that you save <strong>the</strong> original <strong>file</strong> using <strong>the</strong> following procedure:• First make a copy <strong>of</strong> <strong>the</strong> original <strong>file</strong>.• Save <strong>the</strong> <strong>file</strong> under a different name or in a different location.• Save <strong>the</strong> <strong>file</strong> in a format that does not lower <strong>the</strong> image quality (Exif-TIFF or PICT).9 Close <strong>the</strong> image window.15
Deleting Images1 Select <strong>the</strong> images to be deleted.2 Click “Delete” in <strong>the</strong> File menu.3 Click <strong>the</strong> [OK] button in <strong>the</strong> confirmation window to delete <strong>the</strong>selected images.16
Using <strong>the</strong> Folder TreeSelecting Folders / Sample Procedure – Checking <strong>the</strong>Images on <strong>the</strong> Camera / Moving and Copying Foldersand Images●Selecting a folder from <strong>the</strong> folder tree display area and checking <strong>the</strong> thumbnaildisplay is a convenient way to search for an image.●The thumbnail display also provides a way to check <strong>the</strong> results when you moveor copy images.The folders on <strong>the</strong> recording media loaded in <strong>the</strong> computer or camera aredisplayed in <strong>the</strong> folder tree display area.The images in a folder selected in <strong>the</strong> folder tree display area are displayed in <strong>the</strong>thumbnail display area.CLICK17
Selecting FoldersWhen you select a folder, <strong>the</strong> folder name is highlighted and <strong>the</strong> images in thatfolder are displayed in <strong>the</strong> thumbnail display area.UnselectedCLICKDisplayed at <strong>the</strong> top<strong>of</strong> <strong>the</strong> windowSelect ➔ The images inthis folder aredisplayed.✽ The folder structure may vary depending on <strong>the</strong> type <strong>of</strong> computer you are using.Mac OS 9.2.2To open or close a folder, click <strong>the</strong> arrow “” to <strong>the</strong> left <strong>of</strong> <strong>the</strong> folder.Open/Close a folderMac OS X 10.2 – 10.3To open or close a folder, click <strong>the</strong> arrow “” to <strong>the</strong> left <strong>of</strong> <strong>the</strong> folder.18
Sample Procedure – Checking <strong>the</strong> Images on <strong>the</strong> CameraWhen you open folders in <strong>the</strong> sequence shown below, <strong>the</strong> images on <strong>the</strong> cameraappear in <strong>the</strong> thumbnail display area.Mac OS 9.2.2123Mac OS X 10.2 – 10.312319
Moving and Copying Folders and ImagesYou can use drag and drop to move and copy folders and images.AimOperationMoveDrag and drop <strong>the</strong> folder or image in <strong>the</strong> folder tree display area.CopyStop a move orcopyDrag and drop <strong>the</strong> folder or image in <strong>the</strong> folder tree display areawhile holding down <strong>the</strong> [option] key.Drop <strong>the</strong> folder or image in <strong>the</strong> thumbnail display area.When you drop <strong>the</strong> folder or image (release <strong>the</strong> mouse button) , <strong>the</strong> operation ends.Folder tree display areaThumbnail display area20
Using <strong>the</strong> Thumbnail Display AreaThumbnail Types / Switching Thumbnail DisplayModes / Select a ThumbnailThe thumbnail display area shows a list <strong>of</strong> reduced versions <strong>of</strong> <strong>the</strong> images in afolder. The reduced images are referred to as thumbnails.Related Topics• Using <strong>the</strong> Folder Tree• Using <strong>the</strong> Image WindowThumbnail TypesThe type <strong>of</strong> thumbnail shown differs depending on <strong>the</strong> <strong>file</strong> format.Still Image Sound Still Image with Sound MovieA damaged <strong>file</strong> or a format not supportedby FinePixViewer.Switching Thumbnail Display ModesSelecting “Details” displays information such as <strong>the</strong> imagesize and <strong>the</strong> photography date and time.21
Select a ThumbnailThis section describes how FinePixViewer operates when you select a thumbnail.Refer to <strong>the</strong> operation examples provided here.• When you click a thumbnail, only that thumbnail is selected.UnselectedSelectedCLICK• To select multiple images, drag <strong>the</strong> mouse so that <strong>the</strong> images are enclosed.• To select additional thumbnails, hold down <strong>the</strong> [shift] key as you click <strong>the</strong> images.• Click in <strong>the</strong> background to deselect all <strong>the</strong> selected images.Operation examplesBeforeAfter1 Click (to select 1 image only).CLICK2 Click while holding down <strong>the</strong> [shift] key (to select ano<strong>the</strong>r image).CLICK22
BeforeAfter3 Click while holding down <strong>the</strong> [shift] key (to select ano<strong>the</strong>r image).CLICK4 Click while holding down <strong>the</strong> [shift] key (to deselect just one image).CLICK5 Click in <strong>the</strong> background (to deselect all <strong>the</strong> selected images).CLICK6 Drag <strong>the</strong> mouse over <strong>the</strong> images (to select multiple images).23
Viewing Slide ShowsStarting a Slide Show / Operations During a Slide Show /Slide Show SettingsYou can use a slide show to check successive images in full-screen display mode.Starting a Slide ShowClick <strong>the</strong> [Slide Show] button to start <strong>the</strong> slide show.CLICKPlayback MethodPlay back all <strong>the</strong> frames in a folder.Begin playback from a specified frame.Play back only <strong>the</strong> selected frames.OperationStart without selecting any thumbnails.Select just 1 thumbnail and <strong>the</strong>n begin.Select 2 or more thumbnails and <strong>the</strong>n begin.Operations During a Slide ShowFrame advancePlayback Method[➔] key or space key.OperationFrame rewind [ ] key➔EndShow dialog box[command] + [.] (period) keyMouse click or [return] keyExit slide showContinue slide showDelete this <strong>file</strong>Ends <strong>the</strong> slide show.Restarts <strong>the</strong> slide show from <strong>the</strong>current frame.Deletes <strong>the</strong> <strong>file</strong> being playedback.24
Slide Show SettingsClick “Slide Show” in <strong>the</strong> “File” menu.PlaybackAutomaticallyPlaybackintervalPlaybackrepeatedlyPlaybackChanges frames at <strong>the</strong> specified interval.Frames are not changed automatically.Sets <strong>the</strong> interval at which frames are changed. This setting is validwhen <strong>the</strong> “Playback Automatically” checkbox is ticked.Restarts playback from <strong>the</strong> first frame once <strong>the</strong> last frame is reached.All <strong>the</strong> frames are played back just once.Ends <strong>the</strong> slide show settings.CancelReturns <strong>the</strong> setting to <strong>the</strong>ir original values.25
PrintingPrint / Index PrintPrint1 Double-click a still-image thumbnail to open an image window.2 Click <strong>the</strong> [Print] button.3 Tick <strong>the</strong> checkboxes for <strong>the</strong> required print option settings.4 Click <strong>the</strong> [Preview] button to check how <strong>the</strong> image will be printed.When you are happy with <strong>the</strong> image, click <strong>the</strong> Close button.5 Click <strong>the</strong> [Print] button to print <strong>the</strong> image.Tick this checkbox toprint <strong>the</strong> image in <strong>the</strong>center <strong>of</strong> <strong>the</strong> page.Ensures that <strong>the</strong>image is not croppedduring printing.✽rtSelect“FinePixViewer”.Tick this checkbox toprint <strong>the</strong> photographydate.✽Prints with <strong>the</strong> minimum margins.To set details such as <strong>the</strong> paper size and printing orientation, select “Page Setup” in <strong>the</strong> “File” menu.For more information, refer to your printer’s operation <strong>manual</strong>.26
Index PrintIndex prints allow you to print multiple frames on a single print.Related Topics• Using <strong>the</strong> Thumbnail Display Area• Information Batch Edit1 In <strong>the</strong> thumbnail display area, select <strong>the</strong> images to beincluded in <strong>the</strong> index.2 Select “Index Print” in <strong>the</strong> “File” menu.CLICK27
3 When you have finished <strong>the</strong> settings, click <strong>the</strong> [OK] button.See “Information Batch Edit” for information on <strong>the</strong> commentin <strong>the</strong> Detailed Settings.Specifies <strong>the</strong> number<strong>of</strong> frames on eachprint. In this example,4 × 4 (=16 frames) isspecified.You can imprint informationbelow <strong>the</strong> images.See “Information Batch Edit” forinformation on comments.You can check <strong>the</strong> information beforeprinting.28
Ordering PrintsOpening and Working with Windows / Sample PrintOrder ProcedureOpening and Working with WindowsClick <strong>the</strong> [Print Order] button.Opening WindowsWorking With WindowsSelect a media.Print Order WindowSelect a media and click <strong>the</strong> [OK] button.Set Print OrderCancel Print OrderSpecify <strong>the</strong> Number <strong>of</strong> PrintsSave and CloseClick “New Index” in <strong>the</strong>“Order” menu to open anew index window.Index WindowImage windowDouble-click a thumbnail toopen an image window.Specify Index PrintingCancel Index Print SettingsSpecify <strong>the</strong>Trimming SettingsSpecify <strong>the</strong> Rotation SettingsSpecify <strong>the</strong> Description29
Sample Print Order ProcedureLoad <strong>the</strong> media you intend to give to <strong>the</strong> store into your computer. Once you haveloaded <strong>the</strong> media, try <strong>the</strong> actual procedure below.1 Click <strong>the</strong> [Print Order] button.2 Select <strong>the</strong> media to be given to <strong>the</strong> store.30
Set Print Order3 You can drag <strong>the</strong> thumbnails for <strong>the</strong> still images you want toprint from FinePixViewer and drop <strong>the</strong>m in <strong>the</strong> print orderwindow.Print Order WindowFinePixViewerFiles You Can RegisterFile formatImage sizeExif-JPEG, Exif-TIFF, JPEG640 pixels (width) or more by 480 pixels (height) or moreCancel Print Order4 Select <strong>the</strong> thumbnail and click “Cancel Print Order” in <strong>the</strong>“Order” menu.31
Specify <strong>the</strong> Number <strong>of</strong> Prints5 Select a thumbnail and change <strong>the</strong> “Number <strong>of</strong> prints” setting.Maximum number <strong>of</strong> prints: 999+1You can enter a number directly-1Specify <strong>the</strong> Trimming Settings6 Double-click <strong>the</strong> thumbnail to open <strong>the</strong> image window.Print Order WindowImage Window7 Click <strong>the</strong> [Marquee Tool] button.32
8 Begin by dragging <strong>the</strong> mouse slightly. This creates a frame at<strong>the</strong> minimum size (640 × 480 pixels). The image cannot betrimmed any smaller than this frame.4809 Adjust <strong>the</strong> size and position <strong>of</strong> <strong>the</strong> frame. When you havecompleted <strong>the</strong> settings, close <strong>the</strong> image window.640AimChange <strong>the</strong> size.Change <strong>the</strong> position.Remove <strong>the</strong> frame.OperationClick and drag <strong>the</strong> handles.Click inside <strong>the</strong> frame and drag <strong>the</strong> image.Click outside <strong>the</strong> frame.Image Window33
0 Click <strong>the</strong> [OK] button in <strong>the</strong> Warning dialog box. A frameappears around <strong>the</strong> thumbnail and are able to be checked <strong>the</strong>trimming settings.Specify <strong>the</strong> Rotation Settings!1 Double-click <strong>the</strong> thumbnail to open <strong>the</strong> image window.Print Order WindowImage Window34
!2 Click <strong>the</strong> [Rotation Setting] button and select <strong>the</strong> “RotationAngle”. When you have completed <strong>the</strong> settings, click <strong>the</strong> [OK]button to close <strong>the</strong> image window.✽ The image is rotated during printing. You cannot check <strong>the</strong> rotation on screen.If <strong>the</strong> proportions (height and width) <strong>of</strong> <strong>the</strong> print paper differ from those <strong>of</strong> <strong>the</strong>image data, part <strong>of</strong> <strong>the</strong> image may be cropped or white margins may appear on<strong>the</strong> print.!3 Click <strong>the</strong> [OK] button in <strong>the</strong> Warning dialog box. An iconappears on <strong>the</strong> thumbnail to confirm that rotation has beenspecified for <strong>the</strong> image.35
Specify <strong>the</strong> Description!4 Double-click a thumbnail to open an image window.Print Order WindowImage Window!5 Click <strong>the</strong> [Description Setting] button and specify <strong>the</strong>description settings. Put a tick in <strong>the</strong> “Date” checkbox andselect “MM/DD/YYYY” in “Format”.The date is not printed.The date is printed in <strong>the</strong> specified format.DateFormatExample with a photography date <strong>of</strong>February 14, 2003YYYY.MM.DD 2003.02.14MM/DD/YYYY 02/14/2003DD.MM.YYYY 14.02.200336
!6 Put a tick in <strong>the</strong> “Frame Number/Filename” and“Comment/Title” checkboxes and enter a title (e.g. RedFlower). When you have completed <strong>the</strong> settings, click <strong>the</strong>[OK] button to close <strong>the</strong> image window.Frame Number /FilenameComment / TitleNot printed.The frame number or <strong>file</strong>name is printed. You canenter up to 12 characters.Not printedThe comment or title is printed. You can enter up to12 characters.!7 Click <strong>the</strong> [OK] button in <strong>the</strong> Warning dialog box. An iconappears on <strong>the</strong> thumbnail to confirm that description settingshave been specified for <strong>the</strong> image.37
Specify Index Printing!8 In <strong>the</strong> Print Order window, select “New Index” in <strong>the</strong> “Order” menu.Print Order WindowIndex Window!9 Register <strong>the</strong> still images to be included in <strong>the</strong> index print.Drag <strong>the</strong> still image thumbnails from FinePixViewer and drop<strong>the</strong>m in <strong>the</strong> index window. When you have finishedregistering images, close <strong>the</strong> Index window.Index WindowFinePIx ViewerFiles You Can RegisterFile formatImage sizeExif-JPEG, Exif-TIFF, JPEG640 pixels (width) or more by 480 pixels (height) or more38
@0 The thumbnail images are displayed so that you can check<strong>the</strong> index settings.Print Order WindowIndex WindowThe index can be revised.DOUBLE CLICKCancel Index Print Settings@1 Use this procedure to cancel a print specification. Select <strong>the</strong>thumbnail and click “Cancel Print Order” in <strong>the</strong> “Order” menu.Index Window39
Save and Close@2 Click <strong>the</strong> [Save] button.@3 Check <strong>the</strong> order details and <strong>the</strong>n click <strong>the</strong> [OK] button.@4 Eject <strong>the</strong> media using <strong>the</strong> correct procedure.40
Using <strong>the</strong> Image WindowOpening <strong>the</strong> Image Window / Working With Still Images(Save As, Print, Marquee Tool, Crop, Type Tool, ImageSize, Rotate Left / Rotate Right) / Playing Back Moviesand Sound / Saving a Movie Under Ano<strong>the</strong>r Name /Editing MoviesDouble-clicking a still image thumbnail opens an image window. The default imageviewer is FinePixViewer, but you can use a different application to display images.This description assumes that you are using <strong>the</strong> default application FinePixViewer.Related Topics• Using <strong>the</strong> Thumbnail Display Area• Using <strong>the</strong> Picture Playback Application Registration Area41
Opening <strong>the</strong> Image WindowWhen you double-click a still image thumbnail, an image window similar to <strong>the</strong> oneshown below appears.FilenameDisplay scaleInformation about <strong>the</strong> displayed still image is shown along <strong>the</strong> bottom <strong>of</strong><strong>the</strong> window. The information shown varies depending on <strong>the</strong> <strong>file</strong> format.Increases <strong>the</strong> display scale.Decreases <strong>the</strong> display scale.Scrolls <strong>the</strong> window.Click and hold a point in <strong>the</strong> image and drag it around42
Working With Still ImagesSave AsOpen an image window first, <strong>the</strong>n start necessary operation.Specify <strong>the</strong> save location 1, <strong>the</strong> <strong>file</strong>name (Save as) 2 and <strong>the</strong><strong>file</strong> type (Format) 3. Then click <strong>the</strong> [Save] button.123Still Image File TypeExif-JPEGFeatures/Typical UsesSmaller <strong>file</strong> sizes / On <strong>the</strong> InternetQualityDeteriorates when<strong>the</strong> image is saved.Exif-TIFFPICTSaved with its Exif data /To retain image quality and informationStandard Macintosh image <strong>file</strong> format /For viewing on o<strong>the</strong>r MacintoshesDoes notdeteriorate when<strong>the</strong> image is saved.If you repeatedly save an image in <strong>the</strong> Exif-JPEG format <strong>the</strong> image qualitydeteriorates. We recommend that you save <strong>the</strong> original <strong>file</strong> using <strong>the</strong> followingprocedure:• First make a copy <strong>of</strong> <strong>the</strong> original <strong>file</strong>.• Save <strong>the</strong> <strong>file</strong> under a different name or in a different location.• Save <strong>the</strong> <strong>file</strong> in a format that does not lower <strong>the</strong> image quality (Exif-TIFF orPICT).43
PrintPrints <strong>the</strong> displayed image.Open an image window first, <strong>the</strong>n start necessary operation.1 Specify <strong>the</strong> print options.2 Use <strong>the</strong> [Preview] to check how <strong>the</strong> image will look when printed.3 Click <strong>the</strong> [Print] button.12344
Sample Settings“Center Image” / “Date Imprinting” settingCenter Image SettingDate Imprinting Setting“Adjust to paper size” settingSettingPrint Preview45
Marquee Tool:Specifies an area to be cropped.This tool can also be used to specify an area tobe copied. (This allows you to paste part <strong>of</strong> animage into ano<strong>the</strong>r document.)Crop: Cuts out <strong>the</strong> specified area.Open an image window first, <strong>the</strong>n start necessary operation.1 Use <strong>the</strong> Marquee Tool to specify desired area.2 Click <strong>the</strong> [Crop] button to crop or select “Copy” from “Edit”menu for paste.Click <strong>the</strong> [Crop] button.Click “Copy” in <strong>the</strong> “Edit” menu and paste <strong>the</strong> croppedimage in ano<strong>the</strong>r document.• Move <strong>the</strong> selected area around by clicking and dragging a point inside <strong>the</strong>selected area.• Cancel <strong>the</strong> last operation performed by clicking “Undo” in <strong>the</strong> “Edit” menu. This isuseful when you crop an image incorrectly.Once an edited image is saved, <strong>the</strong> original image cannot be recovered.To avoid this, use <strong>the</strong> “Save As” command to ensure that <strong>the</strong> original <strong>file</strong> remains untouched.46
Type ToolAllows you to superimpose text onto your images.Open an image window first, <strong>the</strong>n start necessary operation.Double-click inside<strong>the</strong> selected area toedit <strong>the</strong> text again.• Move <strong>the</strong> superimposed text around by clicking a point inside <strong>the</strong> selected areaand dragging it around.• Cancel <strong>the</strong> last operation performed by clicking “Undo” in <strong>the</strong> “Edit” menu. This isuseful when <strong>the</strong> selected area is accidentally deleted.Once an edited image is saved, <strong>the</strong> original image cannot be recovered.To avoid this, use <strong>the</strong> “Save As” command to ensure that <strong>the</strong> original <strong>file</strong> remains untouched.47
Image SizeAllows you to change <strong>the</strong> size <strong>of</strong> your image.Open an image window first, <strong>the</strong>n start necessary operation.Linked so as to maintain <strong>the</strong>aspect ratio.Image SizeUnitWidthHeightArbitrary%Pixels% specification160 ~ 6144% specification120 ~ 6144640 × 480 (VGA)320 × 240 (QVGA)Pixels640320480240• You can cancel <strong>the</strong> last operation performed by clicking “Undo” in <strong>the</strong> “Edit”menu. This is useful when you change <strong>the</strong> size <strong>of</strong> <strong>the</strong> image incorrectly.Once an edited image is saved, <strong>the</strong> original image cannot be recovered.To avoid this, use <strong>the</strong> “Save As” command to ensure that <strong>the</strong> original <strong>file</strong> remains untouched.48
Rotate Left / Rotate RightRotate <strong>the</strong> image.Open an image window first, <strong>the</strong>n start necessary operation.• Cancel <strong>the</strong> last operation performed by clicking “Undo” in <strong>the</strong> “Edit” menu. This isuseful when <strong>the</strong> image is mistakenly rotated.Once an edited image is saved, <strong>the</strong> original image cannot be recovered.To avoid this, use <strong>the</strong> “Save As” command to ensure that <strong>the</strong> original <strong>file</strong> remains untouched.49
Playing Back Movies and Sound1 Double-click <strong>the</strong> thumbnail to open <strong>the</strong> <strong>file</strong>.Movie Sound Still image with sound2 Use <strong>the</strong> playback bar below <strong>the</strong> window to play back <strong>the</strong>movie or sound.Volume controlAdjusts <strong>the</strong> volume.Playback / Pause buttonPlayback progress buttonFrame advance buttonStarts or pauses playback.Shows <strong>the</strong> playback progress. Playback any part <strong>of</strong> <strong>the</strong> <strong>file</strong> by draggingthis button to <strong>the</strong> desired position.Plays back one frame at a time.50
Saving a Movie Under Ano<strong>the</strong>r NameClick “Save As” in <strong>the</strong> “File” menu.CLICKSpecify <strong>the</strong> save location 1, <strong>the</strong> <strong>file</strong>name (Save as) 2 and <strong>the</strong> <strong>file</strong>type (Format) 3, and <strong>the</strong>n click <strong>the</strong> [Save] button.You can only save movies in <strong>the</strong> AVI format (movies shot on a FUJIFILM camera).123See “File Types”.51
File TypesStillImageMovieFile TypesExif-JPEGExif-TIFFPICTQuickTime Movie (Normal)QuickTime Movie (for E-mail)FeaturesSaves <strong>the</strong> currently displayedframe as a still image.Saves <strong>the</strong> <strong>file</strong> in a standardMacintosh <strong>file</strong> format.Image quality is lower, but <strong>file</strong>sizes are smaller.52
Editing MoviesFinePixViewer comes with basic editing functions that allow you to edit outunwanted sections <strong>of</strong> a movie and save only <strong>the</strong> parts you want to keep.1 Change <strong>the</strong> “Movie playback application” in <strong>the</strong> “Playbackapplication registration area” to “ImageMixer MovieEditor”.Hold down <strong>the</strong> “control” key as you click.2 Double-click a movie thumbnail.3 “Movie Editor” starts up.When you position <strong>the</strong> mouse pointer over features such asbuttons, a brief explanation <strong>of</strong> <strong>the</strong> feature appears at <strong>the</strong>bottom <strong>of</strong> <strong>the</strong> window.SliderClick and move left or right.Use <strong>the</strong> slider bar to selecta position on <strong>the</strong> slider barthat sets <strong>the</strong> starting pointfor <strong>the</strong> required section.Brief explanation displayedhere.Use <strong>the</strong> slider bar toselect a position on <strong>the</strong>slider bar that sets <strong>the</strong>ending point for <strong>the</strong>required section.When you have finishedediting, click here to returnto <strong>the</strong> Save window.NOTEMovies can only be trimmed in 1-second increments.53
Using <strong>the</strong> Picture Playback Application Registration AreaRegistering an Application / Switching betweenApplicationsDouble-clicking a thumbnail plays back <strong>the</strong> image <strong>file</strong>.By default, <strong>the</strong> image is opened in FinePixViewer, but o<strong>the</strong>r applications can beused too.Related Topics• Using <strong>the</strong> Thumbnail Display Area54
Registering an ApplicationA B CABCStill image (picture) playbackapplicationMovie playback applicationSound playback applicationDrag and drop <strong>the</strong> application you want to use (or <strong>the</strong> “alias”).• You can register multiple applications.Switching between Applications• Hold down <strong>the</strong> [control] key as you click <strong>the</strong> mouse to view a list.• Hold down <strong>the</strong> mouse button to view a list. Click <strong>the</strong> application you want to use.55
Using <strong>the</strong> Playback PaneDisplaying and Hiding <strong>the</strong> Playback Pane / ViewingImage InformationThe playback pane shows a range <strong>of</strong> information about an image and a view <strong>of</strong> <strong>the</strong>image that is larger than <strong>the</strong> thumbnail. This pane is useful for checking andcomparing information such as <strong>the</strong> photography conditions.Displaying and Hiding <strong>the</strong> Playback PaneDisplayedClick to hide <strong>the</strong> pane.HiddenClick to display <strong>the</strong> pane.56
Viewing Image InformationSwitches <strong>the</strong>image displaymode.Advances <strong>the</strong> frame.These tabs show different information.The number <strong>of</strong> tabs differs depending on <strong>the</strong> <strong>file</strong> format.Some <strong>of</strong> <strong>the</strong> information displayed here can be edited.See “Information Batch Edit” for information on editing <strong>the</strong> information.57
Batch Operations and SettingsOverview <strong>of</strong> Batch Operations / Settings for FormatConversion and Saving / Automatic Rename / Batch Resize /Batch Rotation / Batch Format Conversion / InformationBatch Edit / Automatic Save Settings / Customizing WindowsSelect thumbnail or folder first, <strong>the</strong>n starts necessary operation.Overview <strong>of</strong> Batch OperationsThe s<strong>of</strong>tware operates as described below according to <strong>the</strong> settings. Batchoperations are extremely convenient as <strong>the</strong>y allow you to automatically processlarge numbers <strong>of</strong> <strong>file</strong>s by setting up <strong>the</strong> s<strong>of</strong>tware beforehand.NameOperationAutomatic RenameBatch ResizeAutomatic SaveBatch RotationBatch Format ConversionRenames <strong>file</strong>s.Resizes images (image dimensions).Copies data to a specified folder. The data can berenamed and resized at <strong>the</strong> same time.Rotates images.Changes <strong>file</strong> formats.58
The illustrations below give a general overview <strong>of</strong> batch operations.Original dataSettingsRename Resize Rotation Format ConversionDSCF00001DSCF00002DSCF000032002_0506_07072002_0506_07082002_0506_0709Common processingProcessed dataRelated Topics• Menus59
Settings for Format Conversion and Saving● “Format Conversion” settingsPut a tick in <strong>the</strong> checkbox to convert <strong>the</strong> <strong>file</strong>s to ano<strong>the</strong>r format and <strong>the</strong>n select<strong>the</strong> <strong>file</strong> type.NOTEOnly AVI (Motion JPEG) format movies shot on a FUJIFILM camera can be convertedor saved.Still Image File TypeExif-JPEGExif-TIFFPICTFeatures / Typical UsesSmaller <strong>file</strong> sizes / On <strong>the</strong> InternetSaved with its Exif data / To retain<strong>the</strong> original image quality andinformationStandard Macintosh image <strong>file</strong> format/ For viewing on o<strong>the</strong>r MacintoshesQualityDeteriorates when <strong>the</strong>image is saved.Does not deterioratewhen <strong>the</strong> image issaved.Movie File TypesQuickTime Movie (Normal)QuickTime Movie (for E-mail)FeaturesSaves <strong>the</strong> <strong>file</strong> in a standardMacintosh <strong>file</strong> format.Image quality is lower, but <strong>file</strong> sizesare smaller.60
● “Way <strong>of</strong> Saving” SettingsSpecify <strong>the</strong> save destination for <strong>the</strong> converted <strong>file</strong>s.Once you specify <strong>the</strong> destination and click <strong>the</strong> [OK] button, <strong>the</strong> <strong>file</strong> format is converted.The same settings are used for subsequent <strong>file</strong> format conversions.Click <strong>the</strong> [Browse] button to change <strong>the</strong>save destination.If you tick this checkbox, a folder is created in which all <strong>the</strong> images are saved. If <strong>the</strong>re isalready a folder with that name, <strong>the</strong> images are saved in that folder.Naming foldersDateThe <strong>file</strong>’s date is used as <strong>the</strong> folder name.The Same NameArbitraryThe name <strong>of</strong> <strong>the</strong> folder containing <strong>the</strong> original <strong>file</strong> is used as<strong>the</strong> folder name.Enter <strong>the</strong> name yourself.If you tick this checkbox and <strong>the</strong>re is already a <strong>file</strong> with <strong>the</strong> same name, that <strong>file</strong> isoverwritten without any warning being displayed.You are advised to leave this checkbox blank unless you have a particular reason.Available options in <strong>the</strong> overwrite warning dialog boxOverwriteCancelSkipRenameDeletes <strong>the</strong> <strong>file</strong> in <strong>the</strong> save destination and saves <strong>the</strong> data as a new <strong>file</strong>.Cancels batch processing.Leaves <strong>the</strong> <strong>file</strong> in <strong>the</strong> save destination and proceeds to <strong>the</strong> next step.Allows renaming <strong>the</strong> <strong>file</strong>.Example where “Overwrite” applies only to <strong>file</strong> A and <strong>the</strong> o<strong>the</strong>r <strong>file</strong>s are skipped.Save toFile AFile BFile CFile AFile BFile CSave toFile AFile BFile CIf you tick this checkbox, all <strong>the</strong> original <strong>file</strong>s are deleted. You are advised to leave thischeckbox blank unless you have a reason.61
Automatic RenameRelated Topics• Settings for Format Conversion and Saving1 Click “Automatic Rename” in <strong>the</strong> “File” menu.2 Set <strong>the</strong> “User Settings” and <strong>the</strong> “Pattern” (refer to <strong>the</strong>modification example).Up to 7 characters can be entered in <strong>the</strong> “User definition”field.3 Specify <strong>the</strong> “Format Conversion” and “Way <strong>of</strong> Saving”settings and <strong>the</strong>n click <strong>the</strong> [OK] button.Batch ResizeRelated Topics• Image Size• Settings for Format Conversion and Saving1 Click “Batch Resize” in <strong>the</strong> “File” menu.2 Set <strong>the</strong> image size.3 Specify <strong>the</strong> “Format Conversion” and “Way <strong>of</strong> Saving”settings and <strong>the</strong>n click <strong>the</strong> [OK] button.62
Batch RotationRelated Topics• Settings for Format Conversion and Saving1 Click “Batch Rotation” in <strong>the</strong> “File” menu.2 Set <strong>the</strong> rotation angle.3 Specify <strong>the</strong> “Format Conversion” and “Way <strong>of</strong> Saving”settings and <strong>the</strong>n click <strong>the</strong> [OK] button.Batch Format ConversionRelated Topics• Settings for Format Conversion and Saving1 Click “Batch Format Conversion” in <strong>the</strong> “File” menu.2 Specify <strong>the</strong> “Format Conversion” and “Way <strong>of</strong> Saving”settings and <strong>the</strong>n click <strong>the</strong> [OK] button.63
Information Batch EditRelated Topics• Using <strong>the</strong> Thumbnail Display Area• Using <strong>the</strong> Playback PaneUse this procedure to edit some <strong>of</strong> <strong>the</strong> Exif information included with Exif-JPEGand Exif-TIFF.1 Click “Information Batch Edit” in <strong>the</strong> “File” menu.2 Put a tick in <strong>the</strong> checkboxes for <strong>the</strong> items you want to editand <strong>the</strong>n edit those items.3 Click <strong>the</strong> [OK] button.64
Automatic Save SettingsUse this procedure to change <strong>the</strong> settings used when images from <strong>the</strong> camera areautomatically saved to your computer.Related Topics• Automatic Rename• Batch Resize• Settings for Format Conversion and Saving1 Click “Automatic Save Settings” in <strong>the</strong> “Settings” menu.2 Specify <strong>the</strong> “Rename” and “Resize” settings.3 Specify <strong>the</strong> “Format conversion” and “Way <strong>of</strong> Saving”settings and <strong>the</strong>n click <strong>the</strong> [OK] button.65
Customizing Windows1 Click “View Options” in <strong>the</strong> “View” menu.2 Select your preferred “Thumbnail Frame” and “Background”and <strong>the</strong>n click <strong>the</strong> [OK] button.66
Making a FinePix CD AlbumUsing FinePixViewer and “ImageMixer VCD2 for FinePix” (IMxVCD2), you cancreate albums made up <strong>of</strong> important photos and movies and <strong>the</strong>n record <strong>the</strong>albums on a CD-R disk. This is a very convenient way <strong>of</strong> showing your photos andmovies to people who don’t have FinePixViewer or who don’t even have acomputer.Video CDWeb albumVideo CDCD AlbumExplanationLets you view Video CDsand Web albums on <strong>the</strong>same disk.Creates Web albumsBest for storing photos andmovies you have shot.Consumer DVDplayersPlayPCsFUJICOLORDigital CameraPrintK K K× K KNOTEK: Can be used. ×: Cannot be used.• You will need a separate CD-R drive or CD-RW drive to create FinePix CD Albums.• You cannot write data directly to a CD on a Macintosh. Toast 5 Titanium or Toast 6Titanium from Roxio, Inc. is required.• Video CDs cannot be viewed on <strong>the</strong> consumer games machines currently being sold.In addition, some DVD players do not have a Video CD playback function or may notbe able to recognize CD-R disks.67
Making Video CDsNOTEThis section briefly describes <strong>the</strong> procedure generally used for creating video CDs.For more detailed information, refer to <strong>the</strong> Help provided in <strong>the</strong> ImageMixer VCD2 forFinePix application.1 Launch FinePixViewer.2 Click <strong>the</strong> folder containing<strong>the</strong> images you want torecord onto <strong>the</strong> CD and <strong>the</strong>nclick <strong>the</strong> [Launch IMxVCD2]button.3 The “ImageMixer VCD2”startup screen appears.4 To create a video CD, click <strong>the</strong> [Video CD] button.5 To add ano<strong>the</strong>r folder, select <strong>the</strong> folder to be added from <strong>the</strong>"Select folder" area and <strong>the</strong>n click <strong>the</strong> "Add" button.Navigation barHelp buttonHelp windowFolder selection areaAdd buttonOption buttonOnce this bar is full, no more <strong>file</strong>s can be added.68
Navigation barAdd buttonHelp windowHelp buttonShows which task is currently being performed.Click this button to add a folder from <strong>the</strong> folder list. Theadded folder is displayed as a Slideshow button.When you move <strong>the</strong> mouse pointer over a feature suchas a button, a description <strong>of</strong> <strong>the</strong> feature appears in thisHelp window.Click this button to display <strong>the</strong> ImageMixer VCD2 forFinePix Help.6 Once registration ends, click <strong>the</strong> "Next" button and set <strong>the</strong>Video CD design.TIPYou can switch between settings panels by clicking in <strong>the</strong> Menu/Layout window.1 Click <strong>the</strong> "Menu" tab to display <strong>the</strong> "Menu" panel and set <strong>the</strong> style for <strong>the</strong> menuscreens displayed during playback.Menu tabShows <strong>the</strong> registeredfolders.Use this to select<strong>the</strong> backgrounddesign.Allows you toselect a still image<strong>file</strong> as <strong>the</strong>background.Allows you to set <strong>the</strong> background music (BGM)for <strong>the</strong> menu window. Only WAVE or MP3 <strong>file</strong>scan be set.69
2 Click "Buttons" to display <strong>the</strong> "Buttons" tab and set <strong>the</strong> buttons.Buttons tubSets <strong>the</strong> button style.Button3 Click <strong>the</strong> menu title to display <strong>the</strong> "Text" tab and set <strong>the</strong> title. Then click <strong>the</strong> foldertitle to display <strong>the</strong> "Text" tab and set <strong>the</strong> folder title.Text tabMenu nameFolder nameApply buttonSets <strong>the</strong> menu titles,folder titles, styles,sizes and font colors.4 When <strong>the</strong> settings are completed, click <strong>the</strong> "Apply" button.70
7 Set <strong>the</strong> details <strong>of</strong> <strong>the</strong> registered folders.1 Double-click <strong>the</strong> desired folder to display <strong>the</strong> folder content.2 Set <strong>the</strong> BGM and <strong>the</strong> sequence in which <strong>the</strong> Menu window thumbnails or <strong>the</strong>slideshow images are played back.If you select a frameand <strong>the</strong>n select <strong>the</strong>“Set as thumbnail”checkbox, thatimage is used as <strong>the</strong>folder thumbnail.Sets <strong>the</strong> slideshow sequence. You canarrange <strong>the</strong> slideshow images in anyorder by dragging and dropping <strong>the</strong> image<strong>file</strong>s to <strong>the</strong> desired position.You can set 1 tuneas <strong>the</strong> backgroundmusic for each folder.To repeat <strong>the</strong> tune,select <strong>the</strong> “Loop”checkbox.Only WAVE or MP3<strong>file</strong>s can be set.If you select a frame and <strong>the</strong>n select <strong>the</strong>“Do not use” checkbox, that image will notbe used on <strong>the</strong> Video CD. This provides aneasy way to exclude unwanted photos.8 Click <strong>the</strong> "Check Playback" button in <strong>the</strong> navigation bar.Selected numberThese correspond to <strong>the</strong> selection numbers on<strong>the</strong> remote control for <strong>the</strong> player used to playback <strong>the</strong> Video CD. Clicking button “1” in <strong>the</strong>“Controller” panel initiates a slideshow <strong>of</strong> <strong>the</strong>folder currently shown with selection number 1in <strong>the</strong> Menu window.71
9 Click <strong>the</strong> [Write to Disc] button in <strong>the</strong> navigation bar and <strong>the</strong>nspecify <strong>the</strong> CD album settings.Enter <strong>the</strong> CD album title. Thetitle can contain up to 15 halfpitchcharacters.Enter a comment for <strong>the</strong> CDalbum. The comment cancontain up to 138 half-pitchcharacters.Select <strong>the</strong> CD album design.When you click to select atemplate thumbnail, thatdesign is applied to <strong>the</strong> indexscreen page.0 When you have finished checking <strong>the</strong> settings, you are readyto actually burn <strong>the</strong> CD.Enter <strong>the</strong> disk name for <strong>the</strong> created Video CDimage. The disk name can consist <strong>of</strong> up to 30half-pitch uppercase characters made up <strong>of</strong>numbers (0 to 9), letters (A to Z) andunderscores (_).If you tick this checkbox,instructions will bedisplayed during playback.Click here to specify <strong>the</strong> folder in which <strong>the</strong>Video CD image will be stored.72
!1 When you have completed <strong>the</strong> CD album settings, click <strong>the</strong>[Write] button.NOTETo burn <strong>the</strong> CD, you will need Toast 5 Titanium or Toast 6 Titanium from Roxio, Inc.Refer to <strong>the</strong> instructions provided with Roxio Toast 5 Titanium or Toast 6 Titanium formore information on writing data to <strong>the</strong> CD.73
Using RAW FILE CONVERTER LECCD-RAW <strong>file</strong>s shot on <strong>the</strong> Digital Camera are <strong>file</strong>s that contain image data shoton <strong>the</strong> digital camera and saved without first undergoing signal processing.Consequently, <strong>the</strong> content <strong>of</strong> CCD-RAW <strong>file</strong>s cannot be viewed by ordinaryapplication programs.1 Copy <strong>the</strong> CCD-RAW <strong>file</strong>s to your hard disk.2 Select <strong>the</strong> CCD-RAW <strong>file</strong>s to be converted in FinePixViewer.CCD-RAW <strong>file</strong>s are indicated by <strong>the</strong> “ ” or “ ” icon.233 Click <strong>the</strong> [RAW FILE CONVERTER LE] button with <strong>the</strong> mouse.4 RAW FILE CONVERTER LE starts up.5 When you press <strong>the</strong> “Convert All” button, an Exif-TIFF (RGB)image data <strong>file</strong> is created in <strong>the</strong> same folder as <strong>the</strong> CCD-RAWdata.TIPThe Exif-TIFF (RGB) image <strong>file</strong> is created using <strong>the</strong> name <strong>of</strong> <strong>the</strong> original CCD-RAW <strong>file</strong>with “_1” added and <strong>the</strong> <strong>file</strong> extension changed to “.TIF”. However, if a <strong>file</strong> with thatname already exists, <strong>the</strong> number following <strong>the</strong> underscore is automatically incremented.Eg) DSCF0003.RAF / DSCF0003_1.TIF74
Using FinePixViewer to Attach Images to E-MailSupported E-mail S<strong>of</strong>tware / Check <strong>the</strong> following: /Attaching Images / Setting <strong>the</strong> File Size for Attached ImagesFinePixViewer provides a simple procedure for attaching images to an e-mailmessage.Supported E-Mail S<strong>of</strong>twareThe e-mail s<strong>of</strong>tware programs listed below can only be used if <strong>the</strong>y are selected asyour default e-mail s<strong>of</strong>tware.Mac OS 9.2.2Outlook ExpressMac OS X 10.2 – 10.3MailNOTEContact your ISP (Internet Service Provider) for information on setting up your e-mails<strong>of</strong>tware.Check <strong>the</strong> Following :Check that your e-mail s<strong>of</strong>tware is registered correctly.Mac OS 9.2.21 Click “Control Panels” /“Internet” and <strong>the</strong>n click <strong>the</strong>“E-mail” tab.2 Check that “OutlookExpress” is shown in“Default E-mail Application”.Mac OS X 10.2 – 10.31 Click “System Preferences...” in <strong>the</strong> Apple menu.2 Click “Internet” and <strong>the</strong>n click “Mail”.3 Check that “Mail” is selected as <strong>the</strong> “Default e-mail s<strong>of</strong>tware”.75
Attaching Images1 Open <strong>the</strong> folder in which FinePixViewer was installed anddouble-click <strong>the</strong> “FinePixViewer” icon to launch <strong>the</strong> program.2 Click <strong>the</strong> folder containing <strong>the</strong> images you want to attach.3 Click <strong>the</strong> thumbnails for <strong>the</strong> images to select <strong>the</strong>m.✽ Up to 10 images can be sent with one e-mail message.CLICK4 With <strong>the</strong> images selected, click “Mail Sending” in <strong>the</strong> “File”menu.✽ You can send a total <strong>of</strong> up to 1 MB <strong>of</strong> image data at one time.If <strong>the</strong> total exceeds 1 MB, a warning message appears when you click “MailSending”. If this occurs, reduce <strong>the</strong> number or size <strong>of</strong> <strong>the</strong> images until <strong>the</strong>message no longer appears.TIPUse <strong>the</strong> Batch Format Conversion function to convert <strong>the</strong> <strong>file</strong> format for movies.76
5 The Outlook mail transmission window opens and <strong>the</strong> imagesare automatically attached to your e-mail message. Type in<strong>the</strong> address, title and your message and <strong>the</strong>n send <strong>the</strong>message in <strong>the</strong> usual way.NOTEDo not exit FinePixViewer until mail transmission is complete, as this will prevent <strong>the</strong> e-mail with <strong>the</strong> images attached from being sent.Setting <strong>the</strong> File Size for Attached ImagesWhen FinePixViewer attaches an image <strong>file</strong> to an e-mail message, it adjusts <strong>the</strong>size <strong>of</strong> <strong>the</strong> image <strong>file</strong> in accordance with <strong>the</strong> “Mail Transmission Settings”.✽ When an image is resized, <strong>the</strong> original image is not affected.1 Click “Mail Transmission Settings” in <strong>the</strong> “Settings” menu.2 Place a tick in <strong>the</strong> “Resize” checkbox and specify <strong>the</strong> number<strong>of</strong> pixels (height and width) for resized images.TIPIf you do not want to resize <strong>the</strong> image, deselect <strong>the</strong> “Resize” checkbox.77
Using <strong>the</strong> FinePix Internet ServiceUsing FinePixViewer also allows you to access <strong>the</strong> FinePix Internet Service via <strong>the</strong>Internet.✽ A working Internet connection is required.✽ A FinePix Internet Service fees do not include your Internet service provider (ISP) connection feesor any phone charges incurred in dialing your ISP’s access point.The figure below gives a general overview <strong>of</strong> <strong>the</strong> procedure.NOTE1 User RegistrationYour user ID and password are very important. Make sure you do not forget <strong>the</strong>m.First-time usersRegistered usersTo <strong>the</strong> user registration window2 Using <strong>the</strong> ServiceThe Internet menu is updated.Access <strong>the</strong> services via <strong>the</strong> Internet menu. You can also use <strong>the</strong> “Obtaining <strong>the</strong> LatestVersion <strong>of</strong> FinePixViewer”.Obtain <strong>the</strong> latest service information.78
User RegistrationTo use <strong>the</strong> FinePix Internet services, users must first register.✽ Users can be registered for free.1 Launch FinePixViewer.2 Click <strong>the</strong> [Register Now] button.3 The “User’s Registration for Internet Services” dialog boxopens. As shown below, select “Register Here”, <strong>the</strong>n select<strong>the</strong> country or region where you are living and click <strong>the</strong> [OK]button.☞If you are not already connected to <strong>the</strong> Internet, connect now.(A dial-up dialog box may be displayed.)✽ If you have completed <strong>the</strong> user registration, select “Already Registered” (E.g.When you want to re-install FinePixViewer after completing user registration).✽ If <strong>the</strong> country or area where you are living does not appear in <strong>the</strong> pull-down list,select “OTHERS”.79
4 When <strong>the</strong> browser starts up, proceed as directed by <strong>the</strong>on-screen instructions.5 Enter <strong>the</strong> required information in <strong>the</strong> user registration page.abcda Enter a familiar name (such as your nickname) between 3 and 25 characterslong as your user ID.b Enter a password <strong>of</strong> your choice using letters and/or numbers.Then enter <strong>the</strong> password again for confirmation.c Enter your name.d Enter your e-mail address.Enter <strong>the</strong> remaining required information.✽ After you register, a confirmation e-mail message is sent to you. Be sure to entera valid e-mail address at which you can receive <strong>the</strong> message.✽ The actual user registration page may differ slightly in appearance from <strong>the</strong>sample shown here.6 When you have entered all <strong>the</strong> required information, click <strong>the</strong>[Registration] button at <strong>the</strong> bottom <strong>of</strong> <strong>the</strong> page.Once you complete <strong>the</strong> registration, a confirmation e-mail is sent. Wait a fewmoments until <strong>the</strong> message is sent.80
Using <strong>the</strong> Service1 Click <strong>the</strong> [Update menu] button in FinePixViewer.2 The “Input <strong>of</strong> User ID” dialog boxappears. Enter <strong>the</strong> user ID andpassword set during userregistration and <strong>the</strong>n click <strong>the</strong> [OK]button to update <strong>the</strong> Internet menu.TIP☞ If you are not already connected to <strong>the</strong> Internet,<strong>the</strong> s<strong>of</strong>tware automatically attempts to connect(for dial-up connections).• If you tick <strong>the</strong> “Click here to save your password” checkbox, you will not need to enter yourpassword next time.You may need your user ID and password. Make sure you do notforget <strong>the</strong>m.• As well as <strong>the</strong> Internet menu being updated, related information pages may also beopened. Because <strong>the</strong>se pages may contain good news or useful information, you shouldupdate <strong>the</strong> Internet menu frequently.3 Click <strong>the</strong> menu button for <strong>the</strong> service you want to use.TIP☞ If you are not already connected to <strong>the</strong> Internet, <strong>the</strong> s<strong>of</strong>tware automatically attempts toconnect (for dial-up connections).☞ Operation after you click <strong>the</strong> menu button differs depending on <strong>the</strong> button you click.For instance, you may jump to your service provider’s web site or an upload dialogbox may open.✽ The actual Internet menu may differ slightly in appearance from <strong>the</strong> sample shownhere.Move <strong>the</strong> mouse cursor over an Internet menu button to view information about <strong>the</strong> service.4 When you have finished using <strong>the</strong> Internet services,disconnect from <strong>the</strong> Internet (for dial-up connections).NOTEThe connection speed will vary significantly depending on <strong>the</strong> quality <strong>of</strong> your phone line and<strong>the</strong> amount <strong>of</strong> traffic on <strong>the</strong> server to which you are connected.81
To Delete <strong>the</strong> S<strong>of</strong>twareOnly perform this operation when you no longer require <strong>the</strong> installed s<strong>of</strong>tware or when<strong>the</strong> s<strong>of</strong>tware was not installed correctly.Mac OS 9.2.2Uninstalling Exif Launcher, FinePixViewer and DP Editor1 After you have quit Exif Launcher in “Exif Launcher Settings”in <strong>the</strong> FinePixViewer “Settings” menu, move <strong>the</strong> ExifLauncher <strong>file</strong> from <strong>the</strong> “Startup Items” folder in <strong>the</strong> Systemfolder to <strong>the</strong> Trash. Then click “Empty Trash” in <strong>the</strong> “Special”menu.2 After you have exited FinePixViewer and DP Editor and <strong>the</strong>ndrag <strong>the</strong> installed FinePixViewer folder to <strong>the</strong> Trash. Thenclick “Empty Trash” in <strong>the</strong> “Special” menu.Mac OS X 10.2 – 10.3Uninstalling FinePixViewerQuit FinePixViewer and DP Editor. Then drag <strong>the</strong> installed FinePixViewer folder to<strong>the</strong> Trash and click “Empty Trash” from <strong>the</strong> “Special” menu.82
TroubleshootingIf <strong>the</strong> s<strong>of</strong>tware does not operate correctly check that you are using <strong>the</strong> correcthardware and s<strong>of</strong>tware.If <strong>the</strong> problem persists even though you are using <strong>the</strong> correct hardware ands<strong>of</strong>tware, refer to <strong>the</strong> table below and <strong>the</strong>n see <strong>the</strong> reference page listed for yourproblem.ProblemwithConnection •Image ViewingInternetO<strong>the</strong>rProblemWhen I connected <strong>the</strong> camera to my Macintosh, <strong>the</strong> “Required s<strong>of</strong>tware not found”message or “Required driver cannot be used” message appears.When I connected <strong>the</strong> USB cable, Mac OS displayed <strong>the</strong> “Initialize disk?” message.The camera and Macintosh are connected but no removable disk icon is displayed.A warning message appears when I disconnect <strong>the</strong> USB cable from <strong>the</strong> camera.I can’t log in to <strong>the</strong> “FinePix Internet Service”.I can’t sign on as a “FinePix Internet Service” user.I can’t update <strong>the</strong> Internet menu properly. (The buttons do not line up correctly.)The “The tool could not be executed” message appears.My camera will no longer play back image <strong>file</strong>s.I want to stop <strong>the</strong> FinePixViewer from launching automatically.Troubleshooting Connection and Image Viewing Problems● When I connected <strong>the</strong> camera to my Macintosh, <strong>the</strong> “Requireds<strong>of</strong>tware not found” message or “Required driver cannot be used”message appears.Possible causeIs <strong>the</strong> s<strong>of</strong>tware installed?SolutionInstall <strong>the</strong> s<strong>of</strong>tware on your Macintosh.83
● When I connected <strong>the</strong> USB cable, Mac OS displayed <strong>the</strong> “Initializedisk?” message.Possible causeSolutionIs <strong>the</strong> media formatted?Disconnect <strong>the</strong> USB cable from <strong>the</strong> camera, insert<strong>the</strong> media into <strong>the</strong> camera and format <strong>the</strong> media.For more information , refer to <strong>the</strong> Owner’s Manualfor your camera.Mac OS 9.2.2 onlyEnable File Exchange.Is File Exchange enabled?● The camera and Macintosh are connected but no removable disk iconis displayed.Possible causeIs <strong>the</strong> camera switched on?Is <strong>the</strong> media loaded in <strong>the</strong> camera?Is “DSC” selected as <strong>the</strong> USB settingon <strong>the</strong> camera?Is <strong>the</strong> special USB cable connected to<strong>the</strong> camera and to <strong>the</strong> computer?Are you using a compatible operatingsystem?SolutionSwitch <strong>the</strong> camera on. For more information on“Viewing Images”, refer to <strong>the</strong> camera’s Owner’sManual.Load a media into <strong>the</strong> camera. For moreinformation, refer to <strong>the</strong> Owner’s Manual foryour camera.Disconnect <strong>the</strong> camera briefly and change <strong>the</strong>USB setting to “DSC”. For more information on“Viewing Images”, refer to <strong>the</strong> camera’s Owner’sManual.Check that one end <strong>of</strong> <strong>the</strong> special USB cable isconnected to <strong>the</strong> camera and <strong>the</strong> o<strong>the</strong>r end isconnected to <strong>the</strong> Macintosh.Use Mac OS 9.2.2 or Mac OS X (version10.2–10.3). Note that <strong>the</strong> driver s<strong>of</strong>tware doesnot run correctly in <strong>the</strong> Mac OS X Classicenvironment.● A warning message appears when I disconnect <strong>the</strong> USB cable from<strong>the</strong> camera.Possible causeSolutionDid you remove <strong>the</strong> camera while <strong>the</strong>camera was still mounted as a diskdrive?Disconnecting <strong>the</strong> camera while it is stillmounted can corrupt <strong>the</strong> data on <strong>the</strong> media ordamage <strong>the</strong> media itself. Drag <strong>the</strong> drive icon to<strong>the</strong> Trash before you disconnected <strong>the</strong> camera.84
Troubleshooting Internet Problems● I can’t log in to <strong>the</strong> “FinePix Internet Service”.Possible causeAre you able to connect to <strong>the</strong>Internet?Is <strong>the</strong> FinePix Internet Serviceundergoing maintenance?Have you completed <strong>the</strong> userregistration process?SolutionCheck your Macintosh hardware and s<strong>of</strong>twaresetup.Log in after <strong>the</strong> maintenance is completed.Click <strong>the</strong> FinePixViewer [Register Now] (MacOS 9.2.2) / [user’s registration] (Mac OS X10.2–10.3) button and sign on as a “Using <strong>the</strong>FinePix Internet Service” user.● I can’t sign on as a “FinePix Internet Service” user.Possible causeHave you already signed on under <strong>the</strong>same e-mail address?SolutionYou cannot sign on twice with <strong>the</strong> same user IDor e-mail address.● I can’t update <strong>the</strong> Internet menu properly. (The buttons do not line upcorrectly.)SolutionThe menu data is corrupted. Use <strong>the</strong> procedure below to update <strong>the</strong> menu:1 Quit FinePixViewer.2 Delete <strong>the</strong> menu data in <strong>the</strong> following locations:Mac OS 9.2.2The “FinePixInternetFiles” folder inside “Preferences” in <strong>the</strong>System Folder.Mac OS X 10.2 – 10.3 “FinePixInternetFile” folder in “Users” / “(user name)” /“Library” / “Preferences”.3 Launch FinePixViewer and click “Menu Update” in <strong>the</strong> “View” menu.85
Troubleshooting O<strong>the</strong>r Problems● The “The tool could not be executed” message appears.Mac OS 9.2.2Possible causeDo you have enough system memoryinstalled?Solution1 Quit any o<strong>the</strong>r applications that are running.2 Open <strong>the</strong> “Control Panels” / “Memory” andincrease <strong>the</strong> amount <strong>of</strong> virtual memoryallocated. Then restart your Macintosh.● My camera will no longer play back image <strong>file</strong>s.Possible causeSolutionDid you rename any <strong>file</strong>s or foldersinside <strong>the</strong> “DCIM” folder?Did you replace an image <strong>file</strong> inside <strong>the</strong>“DCIM” folder?Change <strong>the</strong> <strong>file</strong> or folder names in <strong>the</strong> “DCIM”folder back to <strong>the</strong> original names.Do not replace image <strong>file</strong>s in <strong>the</strong> “DCIM” folder.● I want to stop <strong>the</strong> FinePixViewer from launching automatically.SolutionYou can use ei<strong>the</strong>r <strong>of</strong> <strong>the</strong> three methods below to prevent FinePixViewer from launchingautomatically.• Change <strong>the</strong> Exif Launcher settings1 Select “Exif Launcher Settings” in <strong>the</strong> FinePixViewer “Settings” menu and click “Do not run ExifLauncher at restart.”2 Restart your computer.✽ To restore <strong>the</strong> original settings, use <strong>the</strong> same procedure and tick <strong>the</strong> “Launch Exif Launcher atrestart”. Then restart your Macintosh.• Remove Exif Launcher1 Select “Exif Launcher Settings” in <strong>the</strong> FinePixViewer “Settings” menu and tick “Quit ExifLauncher immediately”.2 Move “Exif Launcher” from <strong>the</strong> “Startup Items” folder in <strong>the</strong> System folder to <strong>the</strong> Trash.3 Select “Empty Trash” in <strong>the</strong> “Special” menu.✽ To restore Exif Launcher, re-install <strong>the</strong> s<strong>of</strong>tware.• Change <strong>the</strong> ImageCapture settings.(OS X 10.2 or later)1 Double-click <strong>the</strong> ImageCapture icon.2 Select “Preferences...” from <strong>the</strong> “Image Capture” menu.3 Change <strong>the</strong> “When a camera is connected, open:” to “No application” and <strong>the</strong>n click <strong>the</strong> Closebutton.✽ To restore <strong>the</strong> original settings, set “When a camera is connected, open:” to “FPVBridge”.86
for FinePixViewerFinePixViewer TroubleshootingError message Cause SolutionFolder not found.“Filename” not found.This <strong>file</strong> format cannotbe used.The <strong>file</strong> with <strong>the</strong> samename as “<strong>file</strong>name”already exists.Overwrite?The folder with <strong>the</strong>same name as“<strong>file</strong>name (foldername)” already exists.Disk or folder is writeprotected.Insufficient diskcapacity. Processaborted.You were working with afolder on a removable diskand <strong>the</strong> disk has beenremoved.The folder you were workingwith has been deleted ormoved.You were working with a <strong>file</strong>on a removable disk and <strong>the</strong>disk has been removed.A <strong>file</strong> with a format notsupported by FinePixViewerwas accessed.The folder on which youdropped <strong>the</strong> <strong>file</strong> alreadycontains ano<strong>the</strong>r <strong>file</strong> with <strong>the</strong>same name.The folder on which youdropped <strong>the</strong> <strong>file</strong> (folder)already contains a folder with<strong>the</strong> same name.The folder or disk to whichyou attempted to write <strong>the</strong> <strong>file</strong>is write-protected.Some digital camera modelsdo not have a Write function.There is not enoughavailable disk space.Re-insert <strong>the</strong> disk.Use <strong>the</strong> [Refresh] menu.Re-insert <strong>the</strong> disk.Use a <strong>file</strong> format supportedby FinePixViewer.To avoid overwriting <strong>the</strong>existing <strong>file</strong>, rename <strong>the</strong> <strong>file</strong>being dropped or rename <strong>the</strong><strong>file</strong> in <strong>the</strong> target folder.Rename <strong>the</strong> <strong>file</strong> (folder) beingdropped or rename <strong>the</strong> folderin <strong>the</strong> target folder.Remove <strong>the</strong> write-protectionfrom <strong>the</strong> disk or folder.Specify ano<strong>the</strong>r writable diskas <strong>the</strong> save destination for<strong>the</strong> image data. Alternatively,copy <strong>the</strong> image data in <strong>the</strong>camera to ano<strong>the</strong>r writabledisk and <strong>the</strong>n process <strong>the</strong>copied data.Switch to a new disk, orcreate space by deletingsome unneeded <strong>file</strong>s on <strong>the</strong>disk.87
Error message Cause SolutionCannot move “<strong>file</strong>(folder) name”. Copy?“Filename” is in use.Files won’t be playedback on a camera.OK?It is recommended thatyou process <strong>the</strong> <strong>file</strong>safter saving <strong>the</strong>m to ahard disk.File is locked.“Filename” is broken ornot in <strong>the</strong> usableformat.Window cannot beopened any more.The <strong>file</strong> or <strong>the</strong> folderwith <strong>the</strong> same namealready exists.Image size is smallerthan <strong>the</strong> specified size.Image size will be out<strong>of</strong> range.The <strong>file</strong> (folder) youattempted to move is on awrite-protected disk.The <strong>file</strong> you attempted tomove is being used byano<strong>the</strong>r application.The selected <strong>file</strong> is beingused by ano<strong>the</strong>r application.A <strong>file</strong> with <strong>the</strong> same <strong>file</strong> nameor <strong>file</strong> number already existsin <strong>the</strong> write destination.An attempt was made tomodify a write-protected <strong>file</strong>.The attempt to read <strong>the</strong> <strong>file</strong>failed.No more than 20 windowscan be opened.A <strong>file</strong> (folder) exists with <strong>the</strong><strong>file</strong>name you entered.This image size cannot besaved in <strong>the</strong> Exif format.The image cannot be resizedas specified.Remove <strong>the</strong> write-protectionfrom <strong>the</strong> disk.Quit <strong>the</strong> application that isusing <strong>the</strong> <strong>file</strong>.Quit <strong>the</strong> application that isusing <strong>the</strong> <strong>file</strong>.Change <strong>the</strong> name or number<strong>of</strong> <strong>the</strong> <strong>file</strong> being written.Use <strong>the</strong> [Get Info] commandto uncheck <strong>the</strong> [Locked]check box.This <strong>file</strong> is not supported byFinePixViewer and cannot beused.To open <strong>the</strong> images in awindow, select no more than20 images.To avoid duplicating anexisting <strong>file</strong> (folder) name,use a different <strong>file</strong> name.Save <strong>the</strong> image as a PICT<strong>file</strong>.Specify a target size for <strong>the</strong>resized image that is between160 × 120 and 6144 × 6144.88
Error message Cause SolutionAutomatic renamefailed. Processaborted.Part <strong>of</strong> “<strong>file</strong>name” willbe cropped because<strong>the</strong> image is larger than<strong>the</strong> printer output size.Registered applicationnot found.Could not execute <strong>the</strong>registered application.Could not create atemporary <strong>file</strong>. Processaborted.Could not execute <strong>the</strong>order application.Printer not found.Mail Transmissionfailed.Too many <strong>file</strong>s were selectedand <strong>file</strong> name duplicationcould not be prevented.The image in <strong>the</strong> <strong>file</strong> beingprinted is bigger than <strong>the</strong>paper size.The registered applicationhas been deleted or moved.The application is damaged.Insufficient memory.A temporary <strong>file</strong> could not becreated when an Exif-TIFF-YC <strong>file</strong> was opened as <strong>the</strong>rewas insufficient disk space.The print order applicationprogram cannot be found oris damaged.No printer is selected.No e-mailer applicationfound.No registered e-mailerapplication.Reduce <strong>the</strong> number <strong>of</strong> <strong>file</strong>sprocessed by <strong>the</strong> AutomaticRename function.Print using <strong>the</strong> [Adjust topaper size] option.Re-register <strong>the</strong> application.Re-install <strong>the</strong> application orregister ano<strong>the</strong>r application.Quit any o<strong>the</strong>r applicationsthat are running.Increase <strong>the</strong> amount <strong>of</strong> spaceavailable on <strong>the</strong> disk on whichFinePixViewer is installed.Reinstall FinePixViewer.Select <strong>the</strong> printer in <strong>the</strong>Chooser.Install Outlook Express.Open <strong>the</strong> [Internet] controlpanel and register Outlookas <strong>the</strong> [DefaultE-mail Application].89
Troubleshooting with Print OrderError message Cause SolutionInsert an order media.Existing DPOF <strong>file</strong>cannot be used.Existing DPOF <strong>file</strong>contains an error.These orders will beignored.“Filename” not found.“Filename” is broken ornot in <strong>the</strong> usableformat.The order media is notinserted in <strong>the</strong> drive.The media is not formatted.The existing DPOF <strong>file</strong>contains an error.The settings in <strong>the</strong> existingDPOF <strong>file</strong> contain an error.You were working with a <strong>file</strong>on a removable disk and <strong>the</strong>disk has been removed.The <strong>file</strong> being used has beendeleted or moved.The <strong>file</strong> is corrupted or is in aformat that is not supported.Alternatively, <strong>the</strong> image sizeis smaller than 640 × 480.Load <strong>the</strong> media into <strong>the</strong> drive.Format <strong>the</strong> media in <strong>the</strong>camera.Create a new DPOF <strong>file</strong>.The erroneous settings areignored.Re-insert <strong>the</strong> disk.Cancel <strong>the</strong> print order for <strong>the</strong><strong>file</strong>.Use a <strong>file</strong> format (Exif-JPEG,Exif-TIFF or JPEG) and animage size no smaller than640 × 480.Window cannot beopened any more.Order media is writeprotected.Insufficient order mediacapacity.Cannot create an orderfolder.The number <strong>of</strong> ordersis full. Cannot orderany more.You attempted to open morethan 20 windows.The media is write protected.Some digital camera modelsdo not have a Write function.There is not enough spaceavailable on <strong>the</strong> media.The DCIM folder on <strong>the</strong> ordermedia already contains afolder numbered 999.There are too manyregistered standard printsand index prints.To open <strong>the</strong> Image windowsand <strong>the</strong> Index windows,select no more than 20thumbnails and index.Remove <strong>the</strong> write protectionfrom <strong>the</strong> media.When creating a print order<strong>file</strong> on <strong>the</strong> media, use <strong>the</strong>Image Memory Card ReaderSM-R2 or DPC-R1 and <strong>the</strong>PC Card Adapter PC-AD3 orDPC-AD.Use a media with sufficientfree space as <strong>the</strong> ordermedia.Use a new media.Register using a new media.90
O<strong>the</strong>r ProblemsError message Cause SolutionNot enough memory.Process aborted.I/O error occurred.Process aborted.There was not enoughmemory.Fault in <strong>the</strong> drive unit or disk.Select <strong>the</strong> FinePixViewerprogram <strong>file</strong> and use <strong>the</strong> [GetInfo] command to increase<strong>the</strong> “Preferred Size” setting in<strong>the</strong> memory requirements.Check for problems in <strong>the</strong>drive unit, or use an error-freedisk.91
MenusFile / Edit / View / Go / Bookmarks / Settings / Tools /Help / Contextual MenusUsing <strong>the</strong> [File] MenuNamePreceding operationFunctionOpenSave AsCloseDeleteNew FolderDelete FolderSlide ShowMail SendingAutomatic SaveAutomatic RenameBatch ResizeBatch RotationBatch FormatConversionInformation BatchEditPage SetupPrintIndex PrintSelect a thumbnail.Opens a <strong>file</strong>.Opens a <strong>file</strong>.Select a thumbnail.Select a folder.Select a folder.Select a thumbnailor folder.Select a thumbnail.Select a folder.Select a thumbnail.Select a thumbnail.Select a thumbnail.Select a thumbnail.Select a thumbnail.––––––––––––––––Select a thumbnail.Select a thumbnail.Opens a <strong>file</strong>.Saves <strong>the</strong> open <strong>file</strong>.Closes <strong>the</strong> open window.Deletes <strong>the</strong> selected <strong>file</strong>.Creates a folder inside <strong>the</strong> selectedfolder.Deletes <strong>the</strong> selected folder.Successive images are shown infull-screen display mode.Creates a new e-mail message with<strong>the</strong> image attached.Copies images to your computer.Renames <strong>the</strong> <strong>file</strong>s using <strong>the</strong> specified format.Batch converts image sizes using<strong>the</strong> specified format.Batch rotates images using <strong>the</strong>specified format.Converts <strong>the</strong> image format (<strong>file</strong>format) using <strong>the</strong> specified format.Batch edits information such as <strong>the</strong>copyright and photography date andtime.Sets <strong>the</strong> page.Prints <strong>the</strong> image.Prints multiple frames on <strong>the</strong> sameprint.92
NamePrint OrderExitPreceding operation––––––––––––––––––––––––––––––––FunctionCreates an order form to be given toa print service.Exits FinePixViewer.Using <strong>the</strong> [Edit] MenuNameUndoCutCopyPasteSelect AllPreceding operation––––––––––––––––––––––––––––Select part <strong>of</strong> an image (use<strong>the</strong> marquee tool in <strong>the</strong>playback window).––––––––––––––Select a folder.Open <strong>the</strong> playback window.FunctionCancels <strong>the</strong> last operation performed.––––––––––––––Copies an image (can be pastedinto ano<strong>the</strong>r document).––––––––––––––Selects all <strong>the</strong> thumbnails.Selects <strong>the</strong> entire image.Using <strong>the</strong> [View] MenuNameFunctionStopRefreshDisplay ModeArrangeView OptionsMenu UpdateCancels thumbnail display.Updates <strong>the</strong> folder display area or thumbnail display area.Changes <strong>the</strong> thumbnail display mode.Rearranges <strong>the</strong> thumbnails.Changes <strong>the</strong> thumbnail frame and thumbnail display area background.Updates <strong>the</strong> Internet menu.Using <strong>the</strong> [Go] MenuNameEffectBackForwardFolder selection historyReturns to <strong>the</strong> previous folder.Proceeds to <strong>the</strong> next folder.Moves to <strong>the</strong> indicated folder.93
Using <strong>the</strong> [Bookmarks] MenuThis is similar to <strong>the</strong> [Favorites] function in a browser.NameAdd to BookmarksOrganize BookmarksList bookmarksFunctionRegisters <strong>the</strong> currently selected folder as a bookmark.Arranges your bookmarks.Displays your bookmarks.Using <strong>the</strong> [Settings] MenuNameMail Transmission SettingsAutomatic Save SettingsExif Launcher SettingFunctionOpens <strong>the</strong> Mail Transmission Settings dialog box.Opens <strong>the</strong> Automatic Save Settings dialog box.Opens <strong>the</strong> Exif Launcher Setting dialog box.Using <strong>the</strong> [Tools] MenuNameTransfer folder toImageMixer VCD2FunctionCreate a video CD or CD album.Using <strong>the</strong> [Help] MenuNameFunctionHow to Use FinePixViewerQuick Start Guide /Online FAQS<strong>of</strong>tware UpdateDisplays <strong>PDF</strong> <strong>file</strong>s.Displays an introduction to <strong>the</strong> basic functions <strong>of</strong> <strong>the</strong>s<strong>of</strong>tware and links to <strong>the</strong> online Q&A page.Connects to <strong>the</strong> Internet and updates <strong>the</strong> s<strong>of</strong>tware.94
Using <strong>the</strong> [Contextual] MenusClick while holding down <strong>the</strong> [control] key to display <strong>the</strong> menu.NameFunctionOpenDeleteMail SendingAutomatic RenameBatch ResizeBatch RotationBatch Format ConversionInformation Batch EditPrintIndex PrintOpens <strong>the</strong> playback window.Deletes an item.Creates a new e-mail message with an image in <strong>the</strong>specified format attached.Renames <strong>file</strong>s using <strong>the</strong> specified format.Batch converts image sizes using <strong>the</strong> specified format.Batch rotates images using <strong>the</strong> specified format.Converts images in <strong>the</strong> specified format.Batch edits information such as <strong>the</strong> copyright andphotography date and time.Prints an image.Prints multiple frames on <strong>the</strong> same print.95
GrossaryAVIAcronym for Audio Video Interleaved. An movie format.DPOFA format used for recording information specifying <strong>the</strong> images to be printed on a media.ExifA full-color image format for digital still cameras. This format is compatible with TIFFand JPEG and is supported by most image processing s<strong>of</strong>tware. This format stipulates<strong>the</strong> recording method for thumbnail images and camera information.JPEGThe standardization <strong>of</strong> still image compression technology, or <strong>the</strong> standard itself. JPEGallows effective image compression. However, because some <strong>of</strong> <strong>the</strong> original image datais lost during compression, <strong>the</strong> image generated from <strong>the</strong> expanded data is notprecisely <strong>the</strong> same as <strong>the</strong> original image, though <strong>the</strong> degree <strong>of</strong> variance differsdepending on <strong>the</strong> compression ratio. Compression ratios vary from 10:1 to 100:1.Mac OSThe basic system s<strong>of</strong>tware (operating system) used on Apple Macintosh computers.PICTStandard format for image data on Macintosh computers.Application s<strong>of</strong>twareS<strong>of</strong>tware used for a specific purpose, such as word processing, spreadsheets orgraphics.InstallThe process <strong>of</strong> setting up s<strong>of</strong>tware on a PC. In most cases, s<strong>of</strong>tware installationcomprises <strong>the</strong> copying <strong>of</strong> <strong>the</strong> s<strong>of</strong>tware from floppy disks or CD-ROM to <strong>the</strong> hard disk ina PC.ThumbnailA small copy <strong>of</strong> an image.Automatic RenameRenames <strong>file</strong>s automatically. In FinePixViewer, you can rename multiple images at <strong>the</strong>same time using <strong>file</strong>names based on <strong>the</strong> photography date and time.Dialog boxA window used for specifying settings.DriveA peripheral device used by PCs to store <strong>file</strong>s.DragThe action <strong>of</strong> moving <strong>the</strong> mouse with <strong>the</strong> mouse button held down.96
Drag and dropThe process <strong>of</strong> clicking <strong>the</strong> mouse on an icon or thumbnail, holding <strong>the</strong> mouse buttondown as <strong>the</strong> mouse is moved to ano<strong>the</strong>r location, and <strong>the</strong>n releasing <strong>the</strong> mouse buttonto "drop" <strong>the</strong> icon or thumbnail. This procedure can be used to move or copy <strong>file</strong>s.Cropping (Trimming)The action <strong>of</strong> cutting <strong>of</strong>f unwanted portions <strong>of</strong> an image.PixelEquivalent to picture element or dot. The minimum unit used in computer graphics.File numberThe final 4 digits used in <strong>the</strong> <strong>file</strong>names for images shot on DCF-compliant digitalcameras. DCF is a standard image format for digital cameras. This format allows image<strong>file</strong>s to be exchanged easily among DCF-compliant cameras and printers.Folder treeAn hierarchical structure for folders containing <strong>file</strong>s.PreviewAn image displayed as it will be printed.Removable diskMedia that can be removed, including floppy disks, MO disks and Zip cartridges.Important Information and Helpful Hints for Internet Users■ ChargesThe charges for using <strong>the</strong> Internet include <strong>the</strong> following:Call chargesConnectionchargesThe fees paid for using <strong>the</strong> phone line; paid to your telephone company.The fees paid for server connection and data storage (e-mail andweb pages); paid to your Internet service provider (ISP).✽ If <strong>the</strong> charges vary depending on <strong>the</strong> call or connection time, you should use yourPC’s automatic disconnect function to avoid wasted connection time.✽ The FUJIFILM FinePix Internet Service includes both free and fee-based services.✽ If you use online shopping or o<strong>the</strong>r services, you will be invoiced for <strong>the</strong> product orservice in addition to <strong>the</strong> call and connection charges.■ VirusesA virus infecting your PC can result in <strong>the</strong> loss <strong>of</strong> important data or <strong>the</strong> sending <strong>of</strong>unwanted e-mail messages to <strong>the</strong> people stored in your address book. Do not opendownloaded <strong>file</strong>s or <strong>file</strong>s received as e-mail attachments unless you are certain <strong>of</strong> <strong>the</strong>ircontent.97
http://home.fujifilm.com/products/digital/index.htmlFGS-406101