VX-7R Technical Supplement - The Repeater Builder's Technical ...
VX-7R Technical Supplement - The Repeater Builder's Technical ...
VX-7R Technical Supplement - The Repeater Builder's Technical ...

Create successful ePaper yourself
Turn your PDF publications into a flip-book with our unique Google optimized e-Paper software.
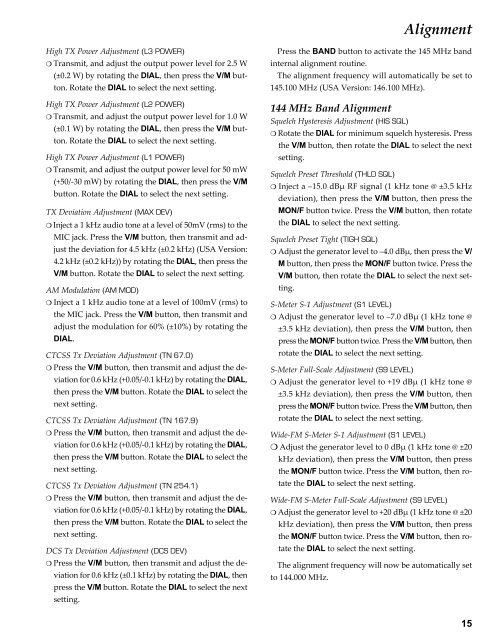
AlignmentHigh TX Power Adjustment (L3 POWER)❍ Transmit, and adjust the output power level for 2.5 W(±0.2 W) by rotating the DIAL, then press the V/M button.Rotate the DIAL to select the next setting.High TX Power Adjustment (L2 POWER)❍ Transmit, and adjust the output power level for 1.0 W(±0.1 W) by rotating the DIAL, then press the V/M button.Rotate the DIAL to select the next setting.High TX Power Adjustment (L1 POWER)❍ Transmit, and adjust the output power level for 50 mW(+50/-30 mW) by rotating the DIAL, then press the V/Mbutton. Rotate the DIAL to select the next setting.TX Deviation Adjustment (MAX DEV)❍ Inject a 1 kHz audio tone at a level of 50mV (rms) to theMIC jack. Press the V/M button, then transmit and adjustthe deviation for 4.5 kHz (±0.2 kHz) (USA Version:4.2 kHz (±0.2 kHz)) by rotating the DIAL, then press theV/M button. Rotate the DIAL to select the next setting.AM Modulation (AM MOD)❍ Inject a 1 kHz audio tone at a level of 100mV (rms) tothe MIC jack. Press the V/M button, then transmit andadjust the modulation for 60% (±10%) by rotating theDIAL.CTCSS Tx Deviation Adjustment (TN 67.0)❍ Press the V/M button, then transmit and adjust the deviationfor 0.6 kHz (+0.05/-0.1 kHz) by rotating the DIAL,then press the V/M button. Rotate the DIAL to select thenext setting.CTCSS Tx Deviation Adjustment (TN 167.9)❍ Press the V/M button, then transmit and adjust the deviationfor 0.6 kHz (+0.05/-0.1 kHz) by rotating the DIAL,then press the V/M button. Rotate the DIAL to select thenext setting.CTCSS Tx Deviation Adjustment (TN 254.1)❍ Press the V/M button, then transmit and adjust the deviationfor 0.6 kHz (+0.05/-0.1 kHz) by rotating the DIAL,then press the V/M button. Rotate the DIAL to select thenext setting.DCS Tx Deviation Adjustment (DCS DEV)❍ Press the V/M button, then transmit and adjust the deviationfor 0.6 kHz (±0.1 kHz) by rotating the DIAL, thenpress the V/M button. Rotate the DIAL to select the nextsetting.Press the BAND button to activate the 145 MHz bandinternal alignment routine.<strong>The</strong> alignment frequency will automatically be set to145.100 MHz (USA Version: 146.100 MHz).144 MHz Band AlignmentSquelch Hysteresis Adjustment (HIS SQL)❍ Rotate the DIAL for minimum squelch hysteresis. Pressthe V/M button, then rotate the DIAL to select the nextsetting.Squelch Preset Threshold (THLD SQL)❍ Inject a –15.0 dBµ RF signal (1 kHz tone @ ±3.5 kHzdeviation), then press the V/M button, then press theMON/F button twice. Press the V/M button, then rotatethe DIAL to select the next setting.Squelch Preset Tight (TIGH SQL)❍ Adjust the generator level to –4.0 dBµ, then press the V/M button, then press the MON/F button twice. Press theV/M button, then rotate the DIAL to select the next setting.S-Meter S-1 Adjustment (S1 LEVEL)❍ Adjust the generator level to –7.0 dBµ (1 kHz tone @±3.5 kHz deviation), then press the V/M button, thenpress the MON/F button twice. Press the V/M button, thenrotate the DIAL to select the next setting.S-Meter Full-Scale Adjustment (S9 LEVEL)❍ Adjust the generator level to +19 dBµ (1 kHz tone @±3.5 kHz deviation), then press the V/M button, thenpress the MON/F button twice. Press the V/M button, thenrotate the DIAL to select the next setting.Wide-FM S-Meter S-1 Adjustment (S1 LEVEL)❍ Adjust the generator level to 0 dBµ (1 kHz tone @ ±20kHz deviation), then press the V/M button, then pressthe MON/F button twice. Press the V/M button, then rotatethe DIAL to select the next setting.Wide-FM S-Meter Full-Scale Adjustment (S9 LEVEL)❍ Adjust the generator level to +20 dBµ (1 kHz tone @ ±20kHz deviation), then press the V/M button, then pressthe MON/F button twice. Press the V/M button, then rotatethe DIAL to select the next setting.<strong>The</strong> alignment frequency will now be automatically setto 144.000 MHz.15