Servicedatasheet - PMCCatalogue
Servicedatasheet - PMCCatalogue
Servicedatasheet - PMCCatalogue
You also want an ePaper? Increase the reach of your titles
YUMPU automatically turns print PDFs into web optimized ePapers that Google loves.
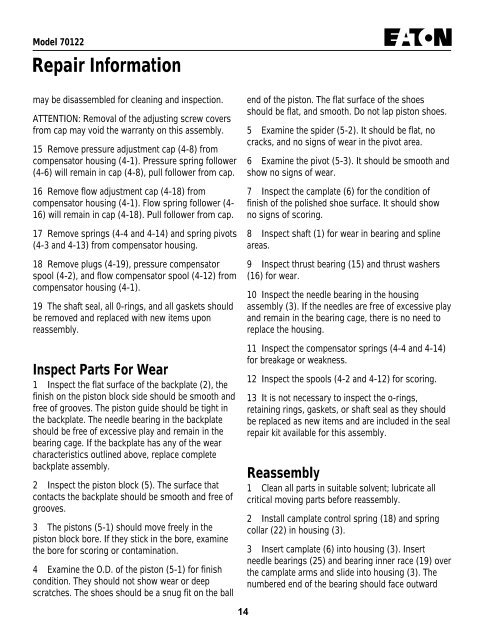
Model 70122Repair Informationmay be disassembled for cleaning and inspection.ATTENTION: Removal of the adjusting screw coversfrom cap may void the warranty on this assembly.15 Remove pressure adjustment cap (4-8) fromcompensator housing (4-1). Pressure spring follower(4-6) will remain in cap (4-8), pull follower from cap.16 Remove flow adjustment cap (4-18) fromcompensator housing (4-1). Flow spring follower (4-16) will remain in cap (4-18). Pull follower from cap.17 Remove springs (4-4 and 4-14) and spring pivots(4-3 and 4-13) from compensator housing.18 Remove plugs (4-19), pressure compensatorspool (4-2), and flow compensator spool (4-12) fromcompensator housing (4-1).19 The shaft seal, all 0-rings, and all gaskets shouldbe removed and replaced with new items uponreassembly.Inspect Parts For Wear1 Inspect the flat surface of the backplate (2), thefinish on the piston block side should be smooth andfree of grooves. The piston guide should be tight inthe backplate. The needle bearing in the backplateshould be free of excessive play and remain in thebearing cage. If the backplate has any of the wearcharacteristics outlined above, replace completebackplate assembly.2 Inspect the piston block (5). The surface thatcontacts the backplate should be smooth and free ofgrooves.3 The pistons (5-1) should move freely in thepiston block bore. If they stick in the bore, examinethe bore for scoring or contamination.4 Examine the O.D. of the piston (5-1) for finishcondition. They should not show wear or deepscratches. The shoes should be a snug fit on the ballend of the piston. The flat surface of the shoesshould be flat, and smooth. Do not lap piston shoes.5 Examine the spider (5-2). It should be flat, nocracks, and no signs of wear in the pivot area.6 Examine the pivot (5-3). It should be smooth andshow no signs of wear.7 Inspect the camplate (6) for the condition offinish of the polished shoe surface. It should showno signs of scoring.8 Inspect shaft (1) for wear in bearing and splineareas.9 Inspect thrust bearing (15) and thrust washers(16) for wear.10 Inspect the needle bearing in the housingassembly (3). If the needles are free of excessive playand remain in the bearing cage, there is no need toreplace the housing.11 Inspect the compensator springs (4-4 and 4-14)for breakage or weakness.12 Inspect the spools (4-2 and 4-12) for scoring.13 It is not necessary to inspect the o-rings,retaining rings, gaskets, or shaft seal as they shouldbe replaced as new items and are included in the sealrepair kit available for this assembly.Reassembly1 Clean all parts in suitable solvent; lubricate allcritical moving parts before reassembly.2 Install camplate control spring (18) and springcollar (22) in housing (3).3 Insert camplate (6) into housing (3). Insertneedle bearings (25) and bearing inner race (19) overthe camplate arms and slide into housing (3). Thenumbered end of the bearing should face outward14


