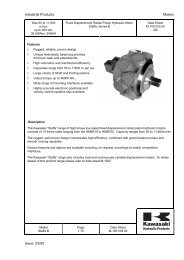
Servicedatasheet - PMCCatalogue
Servicedatasheet - PMCCatalogue
Servicedatasheet - PMCCatalogue

Create successful ePaper yourself
Turn your PDF publications into a flip-book with our unique Google optimized e-Paper software.
Model 70422 or 70423Repair InformationCleanliness is extremely important when repairingthese pumps. Work in a clean area. Beforedisconnecting the lines clean port area of pump.Disconnect hydraulic lines and remove pumpassembly from vehicle and plug ports. Thoroughlyclean the outside of pump. After cleaning, removeport plugs and drain oil.DisassemblyATTENTION: Removal of the adjusting screw coversfrom cap may void the warranty on this assembly.1 Clamp the end of the drive shaft in a protectedjaw vise with the body of the pump up and removethe four allen head screws (14) holding compensator(4).2 Remove the compensator assembly (4), 0-ring(28), and gasket (24).3 Remove the four cap screws (27) from thebackplate of the pump.4 Place a screw driver in slots provided betweenhousing and loosen backplate. Remove backplate (2)and gasket (21) from housing.5 Remove the control piston (7) remaining on thebackplate or in housing. Also remove plug (2-2) frombackplate (2).6 To remove rotating assembly (5) from housing,remove pump from vise and slide rotating assemblyoff shaft. Caution: pistons may not come out withpiston block.7 Remove pistons (5-1), spider (5-2), and spiderpivot (5-3) from piston block (5-5).8 The piston block assembly (5-5) need not bedisassembled unless the internal pins (5-6) or spring(5-8) are damaged.CAUTION: Use the following procedure if the springis to be removed from the piston block. The spring(5-8) is highly compressed and the snap ring (5-9)should not be removed without compressing thespring.The following parts will be needed to disassemble thepiston block:2 ea. 3/8 l.D. x 1-1/8 O.D. flat washer,1 ea. 3/8 x 3-1/4 N.C. cap screw, and1 ea. 3/8 N.C. nut.Place one of the flat washers over the 5/16 capscrew and place this through the center of the pistonblock. Place the other washer over the cap screw andlet it rest on the three pins. Screw the nut on andcompress the spring inside the piston block. Use apair of snap ring pliers and remove the internal snapring (5-9). Remove the nut and bolt along with thetwo washers (5-7), three pins (5-6), and the internalpin keeper (5-4).9 To free shaft seal and shaft, remove retainingring (12).10 Remove shaft (1) from housing (3) by tappingbackplate end of shaft with a wooden or plasticmallet.11 Remove shaft seal (17), washer (13), the tworetaining rings (10), the two thrust washers (16), andbearing (15) from shaft.12 To remove the camplate (6) from the housing,remove the two internal retaining rings (11) from thesides of the housing. Remove the two covers (20),the two o-rings (26), the two inner races (19), andthe bearings (25). The camplate can now be movedover to one side and removed. The two camplatepivot bearings are a loose slip fit into the housing. Donot be concerned if they are not tight.13 Remove the spring collar (22) and spring (18).Do not remove the button (23) and roll pin (9) unlessthey are worn or loose.14 The pressure-flow compensator assembly (4)may be disassembled for cleaning and inspection.16