Latent Print Development - National Criminal Justice Reference ...
Latent Print Development - National Criminal Justice Reference ...
Latent Print Development - National Criminal Justice Reference ...

You also want an ePaper? Increase the reach of your titles
YUMPU automatically turns print PDFs into web optimized ePapers that Google loves.
When latent prints appear, they can be lightly brushed by<br />
adding powder and subsequently brushing excess powder<br />
away. This is done in the direction of the ridge flow to<br />
prevent damage to the impression.<br />
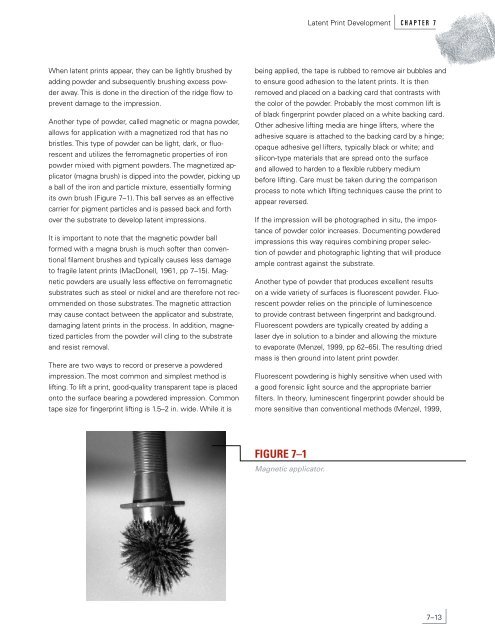
Another type of powder, called magnetic or magna powder,<br />
allows for application with a magnetized rod that has no<br />
bristles. This type of powder can be light, dark, or fluorescent<br />
and utilizes the ferromagnetic properties of iron<br />
powder mixed with pigment powders. The magnetized applicator<br />
(magna brush) is dipped into the powder, picking up<br />
a ball of the iron and particle mixture, essentially forming<br />
its own brush (Figure 7–1). This ball serves as an effective<br />
carrier for pigment particles and is passed back and forth<br />
over the substrate to develop latent impressions.<br />
It is important to note that the magnetic powder ball<br />
formed with a magna brush is much softer than conventional<br />
filament brushes and typically causes less damage<br />
to fragile latent prints (MacDonell, 1961, pp 7–15). Magnetic<br />
powders are usually less effective on ferromagnetic<br />
substrates such as steel or nickel and are therefore not recommended<br />
on those substrates. The magnetic attraction<br />
may cause contact between the applicator and substrate,<br />
damaging latent prints in the process. In addition, magnetized<br />
particles from the powder will cling to the substrate<br />
and resist removal.<br />
There are two ways to record or preserve a powdered<br />
impression. The most common and simplest method is<br />
lifting. To lift a print, good-quality transparent tape is placed<br />
onto the surface bearing a powdered impression. Common<br />
tape size for fingerprint lifting is 1.5–2 in. wide. While it is<br />
being applied, the tape is rubbed to remove air bubbles and<br />
to ensure good adhesion to the latent prints. It is then<br />
removed and placed on a backing card that contrasts with<br />
the color of the powder. Probably the most common lift is<br />
of black fingerprint powder placed on a white backing card.<br />
Other adhesive lifting media are hinge lifters, where the<br />
adhesive square is attached to the backing card by a hinge;<br />
opaque adhesive gel lifters, typically black or white; and<br />
silicon-type materials that are spread onto the surface<br />
and allowed to harden to a flexible rubbery medium<br />
before lifting. Care must be taken during the comparison<br />
process to note which lifting techniques cause the print to<br />
appear reversed.<br />
If the impression will be photographed in situ, the importance<br />
of powder color increases. Documenting powdered<br />
impressions this way requires combining proper selection<br />
of powder and photographic lighting that will produce<br />
ample contrast against the substrate.<br />
Another type of powder that produces excellent results<br />
on a wide variety of surfaces is fluorescent powder. Fluorescent<br />
powder relies on the principle of luminescence<br />
to provide contrast between fingerprint and background.<br />
Fluorescent powders are typically created by adding a<br />
laser dye in solution to a binder and allowing the mixture<br />
to evaporate (Menzel, 1999, pp 62–65). The resulting dried<br />
mass is then ground into latent print powder.<br />
Fluorescent powdering is highly sensitive when used with<br />
a good forensic light source and the appropriate barrier<br />
filters. In theory, luminescent fingerprint powder should be<br />
more sensitive than conventional methods (Menzel, 1999,<br />
FIGURE 7–1<br />
Magnetic applicator.<br />
<strong>Latent</strong> <strong>Print</strong> <strong>Development</strong> C H A P T E R 7<br />
7–13