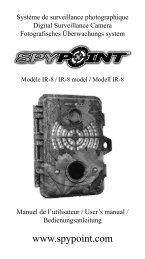
Digital Surveillance Camera User's manual www.spy-point.com
Digital Surveillance Camera User's manual www.spy-point.com
Digital Surveillance Camera User's manual www.spy-point.com
You also want an ePaper? Increase the reach of your titles
YUMPU automatically turns print PDFs into web optimized ePapers that Google loves.
<strong>Digital</strong> <strong>Surveillance</strong><br />
<strong>Camera</strong><br />
FL-A model<br />
User’s <strong>manual</strong><br />
<strong>www</strong>.<strong>spy</strong>-<strong>point</strong>.<strong>com</strong>
English<br />
2<br />
Thank you for purchasing SPYPOINT FL-A<br />
product. You can now enjoy the many benefits of a full feature<br />
and easy to use digital surveillance camera. This 4 MP digital<br />
camera features the latest scouting camera technology and<br />
captures crisp and clean digital photo or video either day or<br />
night. This camera has the option to use a 35 infrared LED<br />
module (sold separately) to take infrared pictures or videos<br />
without the use of a flash.<br />
FEATURES<br />
• Still photos 4 MP<br />
• Video resolution 640 x 480<br />
• File formats JPG/AVI<br />
• External memory SD card up to 8 GB<br />
• Internal memory 32 MB built-in memory<br />
• Exposure Auto<br />
• Play modes Computer / TV<br />
• TV-out PAL / NTSC<br />
• PIR distance Adjustable from 5 to 50 ft.<br />
• Motion detection angle 95°<br />
• Power source 6 AA-cell batteries or<br />
external 12V DC power jack<br />
or lithium rechargeable<br />
battery pack<br />
• Operating temperature (-20 °C to +50 °C)<br />
(-4 F to +122 F)<br />
• Storage temperature (-30 °C to +75 °C)<br />
(-22 F to + 167 F)<br />
• Computer operating system WIN 2000 / XP / VISTA /<br />
Mac OS X
KIT INCLUDES<br />
• SPYPOINT FL-A camera<br />
• Mounting Kit<br />
• USB cable<br />
• Video cable<br />
• User’s Manual<br />
MAIN FEATURES<br />
• LCD display mode: date, time and number of pictures.<br />
• Adjustable PIR sensitivity.<br />
• Color day and night time images.<br />
• Multi-shot of 1, 2, 3 or 4 pictures per detection.<br />
• Video length adjustable from 10 to 90 sec.<br />
• Ajustable delay between motions from 15 sec to 5 min.<br />
• Removable internal camera for easier handling<br />
• Water-resistant housing case.<br />
• Date and time stamp on each picture.<br />
• Auxiliary power jack for external 12 V DC input.<br />
• Replace the Flash by optional infrared LED module<br />
POWER<br />
Alkaline batteries<br />
This camera requires 6 type “AA” batteries. We re<strong>com</strong>mend<br />
the use of good quality alkaline batteries. Install the batteries<br />
according to the instructions inside camera case. Exact polarity<br />
MUST be followed. Battery power is displayed on the LCD<br />
panel. The camera will take pictures even if the batteries are<br />
half full, but we strongly re<strong>com</strong>mended that you replace them<br />
before they are empty. (See figure below)<br />
English<br />
3
English<br />
4<br />
Lithium battery pack LIT-C-8<br />
SPYPOINT camera model FL-A can be operated with a<br />
rechargeable lithium battery pack (sold separately). This type<br />
of battery is much less affected by cold temperatures and lasts<br />
up to 3 times alkaline batteries.<br />
12V Power<br />
SPYPOINT camera model IR-A can be used with an external<br />
12V DC input. When using 12V DC power, we re<strong>com</strong>mend<br />
removing alkaline batteries to prevent surcharges. A 12V cable<br />
CB-12ft (sold separately) allows connecting the camera to a<br />
12V battery.<br />
MEMORY CARD<br />
The SD slot in the SPYPOINT camera model IR-A can accept<br />
optional SD memory cards up to 8GB. Before inserting or<br />
removing the memory card, the camera MUST be turned off.<br />
Failing to do so may cause loss of photos or damage to the<br />
memory card. When the internal memory or the SD card is full,<br />
the LCD panel will show “FULL”. The following data shows<br />
an approximate quantity of photos that can be recorded by the<br />
camera depending on the memory card capacity.
SETTINGS<br />
Picture Quality, Date and Time<br />
Turn off your camera, set the mode switch to “Set/Test” and set<br />
the power switch to “ON”. Press “MENU” once. The default<br />
setting “H” (4MP) icon will flash. Use “DOWN” if you want to<br />
change to «L» resolution (3MP). Press “MENU” button to set<br />
date and time. Use “UP” and “DOWN” to change the blinking<br />
number. Press “MENU” to set next option. Press “OK” and<br />
turn off the system to record the changes. The camera’s internal<br />
memory (32MB) can store approximately 65 pictures in 3MP<br />
mode (low resolution) and 39 pictures in 4MP mode (high<br />
resolution). The SD slot accepts optional SD card to record<br />
more pictures.<br />
MODE<br />
When you select “Photo” or “Video”, the test<br />
light on the front of the unit will light up for 60<br />
seconds while the motion detector charges up.<br />
When you select “Set/Test” you can set your<br />
system or test the distance setting. The test light on the front of<br />
the unit will light when the camera detects motion. When you<br />
notice how the camera reacts to your motion, you may want to<br />
adjust the distance setting, change the direction or height of the<br />
camera. The camera doesn’t take pictures while in “Set/Test”<br />
mode. When “MODE” switch is set to “View”, you can review<br />
the recorded pictures or videos.<br />
DELAY<br />
Selects the time the camera will wait before<br />
recording another photo or video. This option<br />
prevents taking too many photos or videos of<br />
the same object should it remain in front of the<br />
camera for a lengthy period of time.<br />
MULTI-SHOT<br />
Allows for a 15 second interval between 4<br />
consecutive photos. This option shows a different<br />
view of all 4 photos.<br />
English<br />
5
English<br />
6<br />
VIDEO-LENGTH<br />
Selects the video length when the camera is set in video mode.<br />
DISTANCE<br />
The distance dial sets the motion detector sensitivity. Use this<br />
feature to set the detection range required. Turn dial to the<br />
right to increase distance. Range of detector is between 5 and<br />
50ft. The best method to determine a proper distance is to turn<br />
“MODE” switch to “Set/Test” and to walk perpendicularly to<br />
the front of the camera where action is anticipated. When the<br />
detector is activated, the test light on the front of the camera<br />
will blink once. At this moment, the camera operator may want<br />
to adjust the distance setting, and/or change the direction or<br />
height of the camera.<br />
ChANGE OF ThE LIGhTING MODULE<br />
It is necessary to turn the camera OFF, to remove the batteries<br />
and to wait 2 minutes before replacing the visible lighting flash<br />
module by the IR-35 infrared module. Simply raise the module<br />
with the fingers by the spaces designed for this purpose in order<br />
to remove it. Then, slowly reintegrate the replacement module<br />
by taking care not to damage the metal connectors at the back<br />
of the module.<br />
Visible flash module<br />
IR-35 IR infrared module
DOWNLOAD TO A COMPUTER<br />
To transfer or view photos and videos on a PC, you must first<br />
turn the camera off and use the USB cable (supplied) to connect<br />
the camera to your <strong>com</strong>puter. The <strong>com</strong>puter will then recognize<br />
the camera as a removable disk drive. <strong>Camera</strong> operator must<br />
wait until the termination of <strong>com</strong>puter software installation<br />
(few seconds) before clicking on Desktop. Then, click on<br />
removable disk and look to find folder with DCIM. Click on<br />
the DCIM folder and all the photos and videos will be found in<br />
100DSCIM folder. Photos and videos can be viewed, edited or<br />
deleted with your <strong>com</strong>puter’s software.<br />
Taking the SD card out of the camera and inserting it in the<br />
<strong>com</strong>puter port will achieve same results. If no SD slot is built<br />
into the <strong>com</strong>puter, a multi-card reader RD25-1 (sold separately)<br />
must be used.<br />
TELEVISION<br />
To project photos and videos on a TV screen, turn OFF your<br />
camera and select “View”. Use the video cable (supplied) and<br />
plug in TV/OUT port of the camera to “Video IN” of TV set.<br />
Turn ON the camera. Viewing screen menu will also appear on<br />
TV screen. You will see the latest picture taken by your system.<br />
To change pictures use “UP” or “DOWN” keys. When you<br />
push “MENU”, you will see these option:<br />
View Date/Time: Increases size of date and time<br />
imprinted on the picture<br />
Erase one: Erases the photo or the video on the screen<br />
Erase All: Erases all stored photos and videos,<br />
exclusive of protected photos and videos.<br />
Format: Formats memory card and erases all<br />
protected photos and videos.<br />
English<br />
7
English<br />
8<br />
Protect: Protects the photo or video on the screen.<br />
Language: Selects language.<br />
Exit: Returns to viewing screen.<br />
TROUBLEShOOTING<br />
No person / animal on photos<br />
1. Rising sun can trigger sensor. <strong>Camera</strong> must be reoriented.<br />
2. At night, motion detector may detect beyond range of the<br />
Flash. Reduce distance setting.<br />
3. Small animal may be triggering unit. Reduce distance<br />
setting and/or raise height of camera.<br />
4. Motion detector may sense animals through foliage.<br />
5. If person/animal moves quickly, it may move out of<br />
camera field of view before photo is taken. Move camera<br />
further back or redirect camera. <strong>Camera</strong> must be set on a<br />
stable and immovable object. i.e. large tree.<br />
6. Make sure the mounting post or tree is stable and doesn’t<br />
move.<br />
Red light in front of camera blinks<br />
1. Main mode switch is in test mode.<br />
2. Main mode switch is in Photo or Video mode. Red light<br />
blinks during 60 sec. allowing the operator to walk away<br />
from camera.
OPTIONS<br />
See your local dealer or visit <strong>www</strong>.<strong>spy</strong>-<strong>point</strong>.<strong>com</strong> to find<br />
available products. The following items are popular options<br />
that can be added to a SPYPOINT camera model FL-A.<br />
Infrared LED module, IR-35<br />
35 LED infrared module to replace the flash.<br />
SD Memory card, SD-2GB<br />
Increases capacity of photos and videos<br />
recorded by the camera. Most users work with<br />
2 SD cards to avoid bringing the camera home.<br />
If so, an optional multi-card reader RD25-1<br />
may be needed.<br />
Multi-card reader RD25-1<br />
Allows downloading photos and videos directly<br />
into a personal <strong>com</strong>puter without the use of the<br />
SPYPOINT camera. This reader works with 25<br />
different types of memory cards and is <strong>com</strong>patible<br />
with SD card.<br />
12v power cable, CB-12ft<br />
Connects a 12 ft. long cable to an external 12V<br />
DC power.<br />
Lithium battery pack kit including charger,<br />
LIT-C-8<br />
Used to recharge SPYPOINT lithium battery<br />
pack only. Charger operates under 110v/240v.<br />
Additional lithium battery pack, LIT-09<br />
An additional lithium battery pack is a handy<br />
spare.<br />
Cable lock, CL-6ft<br />
6 ft. long locking cable with key used for<br />
maximum theft protection.<br />
English<br />
9
English<br />
10<br />
12-volt rechargeable battery and charger<br />
BATT-12V<br />
Allows using external rechargeable battery<br />
to power the camera.<br />
Water-Resistant battery box, KIT-12V<br />
Water-resistant battery box including 12volt<br />
rechargeable battery and charger to<br />
power the camera.<br />
Picture viewer, PV-2.4<br />
Picture viewer, SD card slot, 2.0” viewing<br />
screen, radio, 1GB internal memory, MP3,<br />
MP4, rechargeable battery, charger, and<br />
headphone included.<br />
Photo and video viewer, PV-9<br />
Photo and video viewer, 2,5” viewing<br />
screen.
LIMITED WARRANTY<br />
SPYPOINT FL-A, designed by GG Tele<strong>com</strong>, is covered by a<br />
one (1) year warranty on material and workmanship starting on<br />
the date of original purchase. The sales receipt is your proof of<br />
purchase and should be presented if warranty service is needed.<br />
This warranty does not cover any GG Tele<strong>com</strong> product which<br />
has been subjected to misuse, neglect, accident or has been<br />
improperly used or maintained. Any modification or tampering<br />
of the product will affect its operation, performance, durability<br />
and void this warranty.<br />
REPAIR SERVICE<br />
Should assistance be required, please contact your retailer first.<br />
To find the address of a repair centre, please go to <strong>www</strong>.<strong>spy</strong><strong>point</strong>.<strong>com</strong>.<br />
Repairs for damages not covered by the warranty will be<br />
subject to a reasonable charge. For technical assistance, write<br />
to tech@ggtele<strong>com</strong>.ca. Give a description of the problem with<br />
a phone number where you can be reached.<br />
IMPORTANT: Under no circumstances will GGTele<strong>com</strong><br />
accept returned goods without a Return Material Authorization<br />
number (RMA).<br />
WWW.SPY-POINT.COM<br />
English<br />
11


