
You also want an ePaper? Increase the reach of your titles
YUMPU automatically turns print PDFs into web optimized ePapers that Google loves.
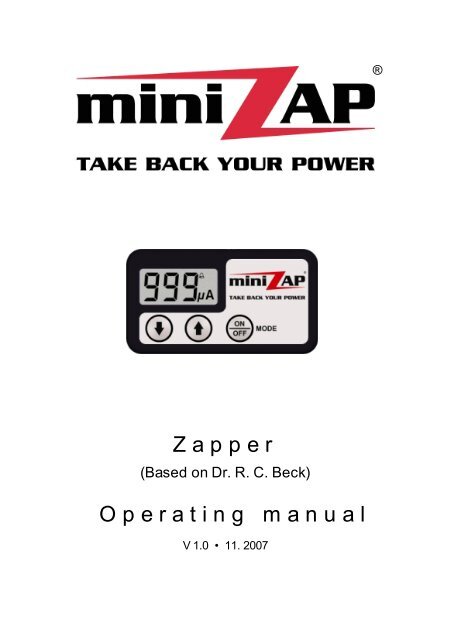
Zapper<br />
(Based on Dr. R. C. Beck)<br />
Operating <strong>manual</strong><br />
V 1.0 • 11. 2007<br />
®
Operating <strong>manual</strong> V1.0<br />
TABLE OF CONTENTS<br />
1. Foreword................................................................................................2<br />
2. Scope of delivery....................................................................................2<br />
3. General notes.........................................................................................3<br />
4. Application.............................................................................................3<br />
5. Device overview......................................................................................5<br />
6. Button functions.....................................................................................6<br />
6.1 5 Min. break timer............................................................................6<br />
6.2 Two hour signal...............................................................................7<br />
6.3 Current adjustment...........................................................................8<br />
6.4 Cable-test-mode..............................................................................8<br />
6.5 Software version..............................................................................9<br />
7. LCD-display..........................................................................................10<br />
8. Acoustic signals...................................................................................11<br />
9. Quickstart.............................................................................................12<br />
10. Error messages and -fixing....................................................................14<br />
10.1 Low battery...................................................................................14<br />
10.2 Short circuit / Overload...................................................................15<br />
10.3 No load........................................................................................15<br />
10.4 Maximum voltage reached..............................................................16<br />
10.5 No quartzclock..............................................................................16<br />
11. Technical highlights..............................................................................16<br />
11.1 True AC voltage with 3,920 Hz.........................................................16<br />
11.2 Constant current control (CCC)........................................................17<br />
11.3 Display of output voltage.................................................................17<br />
11.4 Operating hours counter.................................................................17<br />
11.5 Intelligent error management (IEM)...................................................17<br />
11.6 Gold electrodes.............................................................................18<br />
11.7 10 hours auto-off-timer....................................................................18<br />
11.8 Future-proof through software update...............................................18<br />
12. Battery change......................................................................................18<br />
13. Maintenance / Storage...........................................................................19<br />
14. Guarantee / Repair / Disposal.................................................................20<br />
15. Order list..............................................................................................21<br />
16. Technical data......................................................................................22<br />
16.1 Measurement of output voltage........................................................23<br />
17. Notes...................................................................................................23<br />
© 2007 Mikas Elektronik Entwicklungen<br />
www.zapper.com 1
2<br />
1. Foreword<br />
Operating <strong>manual</strong> V1.0<br />
Congratulations for having purchased the <strong>miniZAP</strong> ® , the smallest and state-of-the-art<br />
zapper on the world market, which is carried like a wristwatch. Due to its display and easy<br />
to handle carrying and operating philosophy, the <strong>miniZAP</strong> ® sets a new standard. We wish<br />
you all success and pleasure while using your <strong>miniZAP</strong> ® daily!<br />
Please study the <strong>manual</strong> completely and carefully before using the <strong>miniZAP</strong> ® , in order to<br />
achieve the maximum advantage with the device.<br />
2. Scope of delivery<br />
The following parts are included in delivery with the <strong>miniZAP</strong> ® :<br />
Z a p p e r<br />
(Based on Dr. R. C. Beck)<br />
O p e r a t i n g m a n u a l<br />
V 1.0 • 11. 2007<br />
Operating <strong>manual</strong><br />
Replacement velcro<br />
(for gold electrodes)<br />
®<br />
<strong>miniZAP</strong> ®<br />
(with battery)<br />
Gold electrodes<br />
Wristband with velcro<br />
www.zapper.com<br />
Electrode cable<br />
<strong>miniZAP</strong> ® electrode gel<br />
(50ml-tube)
3. General notes<br />
Operating <strong>manual</strong> V1.0<br />
In 1995 Dr. Kaali and Dr. Lyman from Albert Einstein university, New York, developed a<br />
method for blood electrification, which was applied for a patent (US-Patent Nr. 5139684).<br />
Dr. R. C. Beck developed this method further, so that it was usable without surgical interference<br />
and is nowadays in form of the <strong>miniZAP</strong> ® for everybody very simple, convenient,<br />
and effective avaliable.<br />
Blood electrification with the <strong>miniZAP</strong> ® is suitable for:<br />
• Improvement of physical and mental capacity,<br />
• Increase of overall well being and health status.<br />
The <strong>miniZAP</strong> ® can be used in combination with other therapeutic measures, as well as for<br />
prevention purposes. The <strong>miniZAP</strong> ® is no medical device and therefore no replacement for<br />
a visit at your doctor or alternative practitioner.<br />
4. Application<br />
The <strong>miniZAP</strong> ® should be used two hours daily over a period of six weeks to three months<br />
(see chapter „11.4 Operating hours counter“). This period can be extended according to<br />
your needs. In order to start immediately with the use of the <strong>miniZAP</strong> ® , skip to chapter „8.<br />
Quickstart“. Please consider the following notes:<br />
• Start the usage of the <strong>miniZAP</strong> ® with low current (60µA - 150µA). Increase the current<br />
slowely from session to session, until you have reached the recommended<br />
range of 200µA - 400µA. Should one of the effects occur as stated below, please follow<br />
the hints mentioned there.<br />
• Dependent on the exact position of the Gold electrodes (e.g. directly over a nerve),<br />
the current pulses are more, less or not sensible. However, the effectivity of blood<br />
electrification is independent from feeling the current or not. Though, at less than<br />
200µA the effectiveness can be reduced.<br />
• To meet individual requirements, the <strong>miniZAP</strong> ® can deliver up to 999µA. Please<br />
consider, that currents over 400µA can quicker lead to blister from burns and batterylife<br />
decreases disproportionately.<br />
• Use the electrode gel during every session, because his not only saves battery, but<br />
helps to prevent skin irritations due to the fact, that the current pulses are less sensible,<br />
although the current intensity remains equal.<br />
• Change the wrist from session to session to preserve your skin.<br />
• Drink several glasses of water in the period you use the <strong>miniZAP</strong> ® , preferably ionised<br />
(basic). Product infos see www.aquaphaser.de.<br />
www.zapper.com 3
4<br />
Operating <strong>manual</strong> V1.0<br />
• Should you have the feeling that the current is too strong, even at the lowest adjustment,<br />
apply electrode gel repeatedly, comminute it and let it act upon the skin for a<br />
while.<br />
• Pull the gold-plated plug of the electrode cable only at the black holding tubes out of<br />
the gold electrodes, and not at the cable. Otherwises the copper wires inside the cable<br />
could break.<br />
cable gold-plated plug<br />
pull only at black holding tube<br />
• The <strong>miniZAP</strong> ® electrode gel has an extra high conductivity and is completely skin<br />
neutral. 50 ml last for more than 250 applications.<br />
• During the use of the <strong>miniZAP</strong> ® the following effects can occur at the contact area<br />
between skin and gold electrodes:<br />
– local redness,<br />
– itching,<br />
– blistering or blister from burns with subsequent crustification.<br />
Reduce this secondary effects through following actions:<br />
a) Apply more often electrode gel,<br />
b) Decrease the current,<br />
c) Change more often between your wrists,<br />
d) Use skin cream which is suitable as burn ointment.<br />
www.zapper.com
5. Device overview<br />
1. Piezo-buzzer<br />
Depending on the mode of operation<br />
the <strong>miniZAP</strong> ® makes<br />
different sounds, see „8. Acoustic<br />
signals“.<br />
2. LCD-display<br />
With the LCD-display different<br />
operating parameters as current,<br />
output voltage, acutal running<br />
time and error messages<br />
are displayed. See „7. LCDdisplay“<br />
and „10. Error messages<br />
and -fixing“.<br />
3. Output socket Ausgangsbuchse<br />
The electrode cable is connected<br />
to this socket.<br />
Operating <strong>manual</strong> V1.0<br />
1. Piezo-<br />
buzzer<br />
(internal)<br />
2. LCD-display<br />
7. Current adjustment<br />
buttons<br />
3. Output socket<br />
6. ON / OFF-<br />
button<br />
4. Velcro fastening<br />
(back side)<br />
5. Notch for battery<br />
change<br />
4. Velcro fastening TEXTfsdfdsgfdsgfdsgfdsgfdsgfdsgfdsgd FÜR. . . . . . . . ABSTANDS-E<br />
On its back side the <strong>miniZAP</strong> ® has a velcro field with which it can be easily attached to<br />
the wristband.<br />
5. Notch for opening battery case tesdateest, test ,test, test test test test test test ttes<br />
This notch makes opening the enclosure for battery change very easy (see „12. Battery<br />
change“).<br />
6. ON / OFF-button<br />
With this button the <strong>miniZAP</strong> ® is switched on and off, the 5 min break-timer is started /<br />
stopped, and the two hour signal is switched on / off. These and more functions are<br />
described at „6. Button functions“.<br />
7. Current adjustment buttons test test test test test test test test test test test test test tes<br />
With this buttons the current, which flows through the gold electrodes in your body, can<br />
be adjusted. Higher current with the arrow-up-button „�“, lower current with the arrowdown-button<br />
„�“. Further hints at „6.3 Current adjustment“.<br />
www.zapper.com 5
6<br />
6. Button functions<br />
The ON / OFF-button has the following functions:<br />
Operating <strong>manual</strong> V1.0<br />
• Switching-on:<br />
push the ON / OFF-button shortly to switch the <strong>miniZAP</strong> ® on. The sound sequence „A“<br />
(see „8. Acoustic signals“) is audible and the display shows one after another:<br />
1. Total operating time in [hrs:min] Example:<br />
2. Last adjusted current in [µA] Example:<br />
Provided all is connected correctly, the sound sequence „B“ is audible and the mini-<br />
ZAP ® starts automatically it´s normal operation:<br />
Normal operation:<br />
During normal operation the current is switched on and the display changes every four seconds<br />
between output voltage and acutal running time.<br />
• Switch-off:<br />
Keep ON / OFF-button pushed (approx. 2 sec.), until the message „OFF“ appears on<br />
the display. At the same time the sound sequence „C“ is audible. Now the <strong>miniZAP</strong> ® is<br />
switched off.<br />
• Interruption of an error signal:<br />
If the ON / OFF-button is pushed shortly during an error message, it is interrupted and<br />
„cLr“ is notified in the display. Afterwards the <strong>miniZAP</strong> ® checks, if the error has been<br />
fixed. If “yes”, normal operation starts, else the error message is reported again.<br />
6.1 5 Min. break timer<br />
General:<br />
Outputvoltage<br />
4s 4s<br />
With the 5 Min. break timer the session can be interrupted without switching the <strong>miniZAP</strong> ®<br />
off. This has the advantage that displaying the running time and time counting for the two<br />
hour signal doesn´t get lost. Activate the break timer in case of: applying fresh electrode<br />
gel, switch the current off for a period of time or change the wrist. During the break timer is<br />
running, the current is switched off and no error message will occur.<br />
www.zapper.com<br />
120s<br />
.....<br />
Running time Output- Running time<br />
voltage<br />
etc.<br />
.....
Operating <strong>manual</strong> V1.0<br />
START of the 5 Min. break timer:<br />
.....<br />
Push ON / OFF-button shortly, the notify „0µA“ is displayed (current is switched off). Subsequently<br />
the display changes to „5:00“ (five minutes), which is then counted down secondwise.<br />
STOP of the 5 Min. break timer:<br />
Push ON / OFF-button shortly, the display changes from the remaining time, e.g. „1:59“ to<br />
the last adjusted current (e.g. „430µA“). Afterwards the <strong>miniZAP</strong> ® ....<br />
switches again to normal<br />
operation.<br />
After the five minutes are up, the <strong>miniZAP</strong> ® automatically switches to normal operation,<br />
provided no error has occured.<br />
Hints: – During the break timer is running, he can be restarted by pressing the<br />
ON / OFF-button two times in quick succession.<br />
6.2 Two hour signal<br />
General:<br />
– 10 seconds before the 5 minutes expire, beep-tones are audible, which<br />
signalise the soon end of the break time.<br />
For better verifying of the application time, the <strong>miniZAP</strong> ® every two hours makes an<br />
acoustic signal (sound sequence „E“), which can be switched off if needed. After switching<br />
on the <strong>miniZAP</strong> ® the two hour signal is always activated automatically.<br />
ON- or OFF-switching of the 2 hour signal:<br />
Push ON / OFF-button three times within one second.<br />
The following table shows, how the change-over of the two hour signal is displayed:<br />
2 hour<br />
signal is<br />
switched<br />
OFF<br />
switched<br />
ON<br />
LCD-display<br />
1s<br />
Sound<br />
sequence<br />
Bell-<br />
symbol<br />
„D“ OFF<br />
„E“ ON<br />
etc.<br />
www.zapper.com 7<br />
1s
8<br />
6.3 Current adjustment<br />
Operating <strong>manual</strong> V1.0<br />
With the current adjustment buttons, the current intensity can be adjusted very sensitively<br />
in the range of 60 - 999µA (Mikroampere) in steps of 10µA. When pushed shortly, the last<br />
adjusted value is displayed for about two seconds.<br />
Example for displayed current:<br />
Button Function<br />
� upper current<br />
� lower current<br />
Hints: – The last adjusted current remains stored until the next restart of the<br />
<strong>miniZAP</strong> ® .<br />
6.4 Cable-test-mode<br />
– After each switching on of the current, it is increased softly until the adjusted<br />
value is reached (soft-start).<br />
– During an error message it is not possible to adjust the current.<br />
General:<br />
With the cable-test-mode you can test, if the electrode cable has a defective contact or a<br />
cable break, and is therefore the reason for an error message.<br />
Activating the cable-test-mode:<br />
a) Switch off the <strong>miniZAP</strong> ® .<br />
Quicker adjustment:<br />
keep button pressed to start<br />
automatic adjustment.<br />
b) Fix the <strong>miniZAP</strong> ® as usual on your wrist (see „9. Quickstart“). Applying electrode gel<br />
is not necessary.<br />
c) Push the ON / OFF-button and keep it pressed (about 4 seconds), until the switch-<br />
over in the cable-test-mode was sucessfully, which is confirmed by three peep-tones<br />
(sound sequence „D“) and a display content of:<br />
If the switch-over failed, the <strong>miniZAP</strong> ® continues with normal operation. In this case<br />
start again at point a).<br />
www.zapper.com<br />
(Cable-test-mode is activated)
Operating <strong>manual</strong> V1.0<br />
d) The cable-test is now activated and the test result is either A or B:<br />
A<br />
B<br />
Test result<br />
Cable is okay<br />
(electric circuit closed)<br />
Cable is defective<br />
(electric circuit open)<br />
LCDdisplay<br />
Acoustic signal<br />
fast pulsing<br />
beep tone (sequence „H“)<br />
e) Test cable for loose contact:<br />
Even if the <strong>miniZAP</strong> ® indicates an error free cable, it can be, that the cable still has a<br />
loose contact. To check this, hold the cable near the plug and move it very slowely<br />
rotating, benting and also pulling here and there. If the pulsing sound stops suddenly<br />
and the display changes as stated at B, the cable is in all probability defective. Repeat<br />
the test to get sureness and then please contact the manufacturer (see 14.2 Repair).<br />
f) Finish the cable-test-mode by switching the <strong>miniZAP</strong> ® off.<br />
Hint: Three minutes after the last display change, the <strong>miniZAP</strong> ® automatically<br />
switches off to save battery.<br />
6.5 Software version<br />
The acutal software version of the <strong>miniZAP</strong> ® is displayed, if all three buttons are pushed<br />
simultaneously when switching the <strong>miniZAP</strong> ® on.<br />
Example for displaying the Software programm version „1.0“:<br />
OFF<br />
www.zapper.com 9
10<br />
7. LCD-display<br />
Operating <strong>manual</strong> V1.0<br />
Every information that can be displayed during normal operation, is listed in the following<br />
table:<br />
Display content Example Symbol Appears when<br />
adjusted current intensity<br />
in mikroampere<br />
actual output voltage<br />
in Volt<br />
acutal running time<br />
in hrs. : min.<br />
total running time<br />
in hours<br />
2 hour signal is activated<br />
5 Min. break timer<br />
is starting<br />
www.zapper.com<br />
no<br />
symbol<br />
current adjustment button<br />
„�“ or „�“ pushed<br />
normal operation<br />
normal operation<br />
<strong>miniZAP</strong> ® is<br />
switched on<br />
normal operation<br />
ON / OFF-button pushed<br />
during normal operation
8. Acoustic signals<br />
Operating <strong>manual</strong> V1.0<br />
Every acoustic signal the <strong>miniZAP</strong> ® can generate, always occurs in combination with a<br />
corresponding display content. In the following table, all acoustic signals are listed, which<br />
the <strong>miniZAP</strong> ® can generate during failure-free operation. Those signals which the mini-<br />
ZAP ® generate in case of a failure, are explained in chapter „10. Error messages and -<br />
fixing“.<br />
For better understanding, the acoustic signals are written in acoustical language. To this<br />
an...<br />
...Example with the sound sequence „A“:<br />
If the <strong>miniZAP</strong> ® is switched on, it produces a quick tone sequence, which sounds like<br />
a fast spoken „Blip…Blip“.<br />
Soundsequence<br />
A<br />
B<br />
C<br />
D<br />
E<br />
F<br />
G<br />
H<br />
Tone-signal<br />
(duration)<br />
Blip-Blip<br />
(0,3 sek.)<br />
Dulip<br />
(0,3 sek.)<br />
Beeeeep<br />
(1 sek.)<br />
Diii.....Diii.....Diii<br />
(1 sek.)<br />
Diii..Duu..Diii..Duu<br />
(1 sek.)<br />
Piep<br />
(0,2 sek.)<br />
Beeeep…Beeeep…Beeeep<br />
(3 sek.)<br />
Du..Du..Du..Du.. etc.<br />
LCDdisplay<br />
(Example)<br />
(Example)<br />
see 7.2<br />
see 7.2<br />
depends on<br />
operation<br />
Meaning<br />
switching on of the <strong>miniZAP</strong> ® ,<br />
display of total operating time<br />
Electric circuit okay,<br />
<strong>miniZAP</strong> ® starts normal operation<br />
<strong>miniZAP</strong> ® is switched off<br />
2 hrs. signal is deactivated /<br />
Cable-test-mode is activated<br />
2 hrs. signal /<br />
2 hrs. signal is activated<br />
ON / OFF-button pushed<br />
<strong>miniZAP</strong> ® switches off automatically<br />
because of continuing errors<br />
Cable-test-mode is activated,<br />
cable is okay<br />
www.zapper.com 11
12<br />
9. Quickstart<br />
In five steps to applicate the <strong>miniZAP</strong> ® :<br />
Operating <strong>manual</strong> V1.0<br />
1st. step: Place both gold electrodes approximately in the middle of the inner side<br />
of the wristband (Fig. 1), namely in the distance of the arteries (Fig. 2).<br />
Velcro-hook<br />
Inner side of the wrist band (without velcro-hook)<br />
Fig. 1: Place gold electrodes at the inner side of the wrist band.<br />
2nd. step: Apply an about pea-sized amount of electrode gel on each of the two<br />
white marked areas and levigate it. (Fig. 2). Keep the hatched area free of<br />
electrode gel to avoid the current flow only through the skin.<br />
Keep this<br />
area free of<br />
electrode gel<br />
www.zapper.com<br />
Gold electrode<br />
Apply gel at the white coloured areas<br />
Fig. 2: The white areas show the position of the arteries.<br />
Holding ring
Operating <strong>manual</strong> V1.0<br />
3rd. step: Put the wristband on and take care, that the electrodes lay on the gel<br />
treated areas. Then connect the cable with the gold electrodes. The wristband<br />
shouldn´t sit too tight but comfortable (Fig. 3).<br />
Gold electrodes<br />
Holding ring<br />
Electrode cable<br />
Fig. 3: Fasten wristband and connect electrode cable with<br />
both gold electrodes.<br />
4th. step: Fix the <strong>miniZAP</strong> ® on the wristband and plug the electrode cable into the<br />
output socket of the <strong>miniZAP</strong> ® (Fig. 4).<br />
Holding ring<br />
Fig. 4: Fix <strong>miniZAP</strong> ® on the wristband and plug the cable<br />
into the output socket.<br />
5th. step: Push ON / OFF-button to switch the <strong>miniZAP</strong> ® on. Adjust the current<br />
through the current adjustment buttons „�“ and „�“ to 200µA - 400µA (=<br />
recommended range) or above. After the session switch off the <strong>miniZAP</strong> ®<br />
by pressing the ON / OFF-button for about two seconds. Please pay attention<br />
to content of „4. Application“!<br />
www.zapper.com 13
14<br />
10. Error messages and -fixing<br />
Operating <strong>manual</strong> V1.0<br />
The <strong>miniZAP</strong> ® immediately indicates, if its successful application is interrupted by an error.<br />
Therefore a reliable application is ensured, because every error is noticed quickly and<br />
can be fixed.<br />
If one of the following error messages occur, jump to the specified chapter for further information<br />
regarding the possible reason of the error and how to fix it.<br />
Errormessage<br />
I<br />
K<br />
L<br />
M<br />
N<br />
LCDdisplay<br />
10.1 Low battery<br />
Symbol Acoustic signal<br />
no<br />
symbol<br />
www.zapper.com<br />
no signal<br />
Meaning /<br />
see chapter<br />
Low battery<br />
10.1<br />
Short circuit<br />
10.2<br />
No load<br />
10.3<br />
Maximum voltage<br />
10.4<br />
No quartzclock<br />
10.5<br />
With the error message „I“ (Low batt) the <strong>miniZAP</strong> ® indicates, that the end of battery life<br />
has come, or if a too high current was drawn from the battery.<br />
If the battery symbol appears, the battery is soon empty.<br />
Meaning Reason Troubleshooting<br />
battery is low<br />
very high<br />
battery<br />
consumption<br />
(Example)<br />
<strong>miniZAP</strong> ® is many<br />
weeks in use<br />
high adjusted current AND<br />
very high skin resistance<br />
TaaaTuuu...TaaaTuuu...<br />
(2 sek.)<br />
Piep...Piep...Piep<br />
(1 sek.)<br />
Piep.............Piep.............Piep<br />
(3 sek.)<br />
DuuDaaDiii…DuuDaaDiii<br />
(2 sek.)<br />
increasing interval signal<br />
(2 sek.)<br />
decrease current 1) /<br />
replace battery<br />
decrease current 1) /<br />
apply electrode gel<br />
1) Hint: If current adjustment has to be put below 200µA to avoid a low batt message, a new<br />
battery should be inserted.
10.2 Short circuit / Overload<br />
Operating <strong>manual</strong> V1.0<br />
If the electrodes are shorted or overload (too high current) appears, the <strong>miniZAP</strong> ® generates<br />
the error message „K“.<br />
Meaning Reason Troubleshooting<br />
short circuit<br />
overload<br />
cable is not inserted correctly<br />
in the output socket 1)<br />
electrodes touch each other<br />
push jack completely into<br />
output socket or pull it out<br />
separate electrodes<br />
from each other<br />
skin surface too wet dry skin / wristband<br />
too much electrode gel on skin,<br />
wristband or between electrodes<br />
wipe electrode gel from skin and<br />
wristband, dry good, reapply gel<br />
1) Hint: Because of the inner assembly of the output socket, the contacts of the electrode<br />
cable are shorted during plugging in or out, or if the jack isn´t inserted in the socket<br />
completely. Is the <strong>miniZAP</strong> ® switched on during plugging, he generates an error<br />
message, but this can be ignored.<br />
10.3 No load<br />
The <strong>miniZAP</strong> ® generates the error message „L“, if the current is interrupted because of an<br />
unplugged connector, cable break or a loose contact 2) .<br />
Meaning Reason Troubleshooting<br />
no load<br />
cable break/<br />
loose contact<br />
2) Loose contact:<br />
electrode cable is not<br />
connected properly<br />
gold electrodes have insufficient<br />
contact with skin surface<br />
to often strongly pulled at the cable,<br />
cable was bend too much<br />
connect cable correctly<br />
apply electrode gel,<br />
tighten wristband<br />
test cable 2) /<br />
order new cable<br />
If the electrode cable has gotten a loose contact because of excessive tensile load or<br />
bending load, this becomes noticeable as the <strong>miniZAP</strong> ® generates quick one after another<br />
the error message for No load („L“), Circuit okay („B“), and possibly Maximum<br />
voltage reached („M“). This sounds like a quick spoken „Piep...Dulip“, which might be<br />
followed a short time later by a „DuuDaaDiii...DuuDaaDiii“. If this messages occur occa<br />
sionally or more often, please test whether the cable is defective (see „6.4 Cable-testmode“,<br />
or contact the manufacturer (see chapter „14.2 Repair“).<br />
www.zapper.com 15
16<br />
10.4 Maximum voltage reached<br />
Operating <strong>manual</strong> V1.0<br />
When the output voltage exceeds 35 Volts because of a hoo high skin resistance, the<br />
<strong>miniZAP</strong> ® generates the error message „M“.<br />
Meaning Reason Troubleshooting<br />
skin resistance<br />
too high<br />
cable break /<br />
loose contact<br />
skin too dry / contact resistance between<br />
skin and electrodes too high<br />
cable was pulled to strong /<br />
cable was bend too often or to much<br />
1) see „Loose contact“ at point „10.3 No load“.<br />
10.5 No quartzclock<br />
www.zapper.com<br />
apply electrode gel<br />
test cable 1) /<br />
order new cable<br />
The error message „N“ appears shortly after switching on the <strong>miniZAP</strong> ® , if the quartz crystal<br />
for the microprocessor is defective and the accuracy of current frequency and time<br />
measurement has decreased by 10 percent. This error only can occur if the electronic circuit<br />
is mechanically damaged. In this case a repair by the manufacturer would be neccessary<br />
(see chapter „14.2 Repair“).<br />
11. Technical highlights<br />
11.1 True AC voltage with 3,920 Hz<br />
The output voltage of the <strong>miniZAP</strong> ® is a true squarewave AC voltage, whose frequency by<br />
Dr. R. C. Beck, has quartzprecise 3,920 Hz. The addition “true” means, that it is free from<br />
any DC voltage fraction, whereby no electrolysis can take place, which can cause skin irritation.<br />
What does electrolysis mean?<br />
Elektrolysis is the decomposition of chemical compounds under exposure to an electric<br />
DC current. Related to the current treatment of the body, electrolysis is unwanted because<br />
of increased skin irritations like local redness, itching, stinging and swelling.<br />
How can electrolysis be avoided?<br />
Electrolysis only can be avoided through the combination of true AC voltage and constant<br />
current regulation, because only when the back and forth flowing of the current<br />
between the electrodes remains constant, it is also the amount of the transported ions.
11.2 Constant current control (CCC)<br />
Operating <strong>manual</strong> V1.0<br />
The CCC-funktion (Constant Current Control) of the <strong>miniZAP</strong> ® guarantees, that the adjusted<br />
current intensity remains constant through the complete session, independent from<br />
any change of the skin resistance. To let the current remain constant, the <strong>miniZAP</strong> ® automatically<br />
regulates its output voltage in the range of 2,3 – 35 Volts.<br />
Why does the skin resistance changes?<br />
Skin resistance changes permanently because it depends on many factors like sweating,<br />
thickness of horny skin, temperature, humidity, general skin constitution, state of<br />
mind (keyword: lie detector) etc.<br />
11.3 Display of output voltage<br />
The display of the acutal output voltage provides additional informations:<br />
• Tracking the change of skin resistance:<br />
The output voltage is a direct measurement for the heigth of the skin resistance, as it<br />
changes – because of the constant current control of the <strong>miniZAP</strong> ® – linear with the<br />
skin resistance. In other words: if the skin resistance increases, the output voltage increases<br />
too and vice versa: the lower the skin resistance, the lower the voltage.<br />
• Estimate the moment to apply new electrode gel:<br />
While the electrode gel dryes out slowely during the session, skin resistance and output<br />
voltage increase and consequently, feeling of the current becomes more intensive.<br />
Thus, an increasing sensation of the current in combination with an increased voltage<br />
signals, that it is time to apply new electrode gel instad of reducing the current.<br />
11.4 Operating hours counter<br />
Directly after switching on the <strong>miniZAP</strong> ® , the total number of normal operation hours are<br />
displayed. With this one can check, how intensive the <strong>miniZAP</strong> ® was used. Dr. Beck recommends<br />
at first application of blood electrification an amount of at least 84 hours application<br />
within 6 weeks.<br />
Hint: From 9 hrs. and 59 minutes operating time on, only hours will be displayed.<br />
11.5 Intelligent error management (IEM)<br />
Through the IEM-funktion (Intelligent Error Management) a high fault tolerance and therefore<br />
a highest degree of operational reliability is achieved. The <strong>miniZAP</strong> ® can differentiate<br />
between temporary and permanent errors. He tolerates temporary but switches off at permanent<br />
errors to save battery.<br />
If an error occurs (e. g. short circuit) repeatedly or in short distance in the space of 10 – 30<br />
seconds, the <strong>miniZAP</strong> ® automatically switches off.<br />
www.zapper.com 17
18<br />
11.6 Gold electrodes<br />
Operating <strong>manual</strong> V1.0<br />
The electrodes are made from ergonomic formed brass, which is – for reasons of skin<br />
kindness and as protection against oxidation – coated with a high gloss polished gold plating.<br />
As so called diffusion barrier layer, pure silver instead of allergenic nickel was used.<br />
11.7 10 hours auto-off-timer<br />
After 10 hours operating time, the <strong>miniZAP</strong> ® automatically switches off, that at the latest a<br />
break is made after that time.<br />
11.8 Future-proof through software update<br />
Should in future new cognitions emerge from the zapper research, which seem reasonable<br />
enough to change the existing function of your <strong>miniZAP</strong> ® , the microprocessor can be<br />
reprogrammed (for fee) to the new function. Thus your <strong>miniZAP</strong> ® always is keeping up to<br />
date. Informations whether a software update is avaliable, you can get on the homepage<br />
www.zapper.com at „support“. Check the actual software version of your <strong>miniZAP</strong> ® by<br />
keypress (see 6.5).<br />
12. Battery change<br />
The battery of the <strong>miniZAP</strong> ® can be replaced very easy. When the battery is inserted in<br />
reverse polarity, the electronic cannot be damaged.<br />
How to replace the battery:<br />
(a) Switch the <strong>miniZAP</strong> ® off and disconnect the electrode cable from the output socket.<br />
(b) Attach the blade of a screwdriver to the notch for battery change and open the<br />
cover by turning the screwdriver. Alternatively the cover can be opened without tool,<br />
by pressing both thumbnails into the groove at a long side of the enclosure, and afterwards<br />
take the enclosure in two pieces.<br />
(c) Careful remove the battery with your fingers or the screwdriver from the battery<br />
holder.<br />
(d) Insert the new battery (type CR2032) with the marking upwards in the battery holder,<br />
so that the „+“ symbol on the battery is visible.<br />
(e) Should the <strong>miniZAP</strong> ® not automatically switch on, shortly push the ON / OFFbutton.<br />
If no reaction takes place, check the battery polarity.<br />
(f) Put both enclosure parts on top of each other and press them until they snap in<br />
place with a “click” sound. The <strong>miniZAP</strong> ® is now ready again for use.<br />
www.zapper.com
13. Maintenance / Storage<br />
13.1 Maintenance<br />
Operating <strong>manual</strong> V1.0<br />
• Clean the <strong>miniZAP</strong> ® only with a soft and lightly moistened cloth. Ideal for cleaning<br />
the display panel are microfibre cloths, as they are used for eyeglass lenses, thus no<br />
scratch can result.<br />
• Remove dried leftovers of electrode gel from wristband and gold electrodes from<br />
time to time with a wet sponge under lukewarm water. Don´t use soap or other<br />
cleaning agents. Let the wristband dry completely before starting the next session!<br />
• Should in the course of time dark spots have build up on the surface of the gold<br />
electrodes, this doesn´t mean a decline in quality. Remove that spots if required with<br />
a Q-tip and toothpaste as abrasive. The gold plating will not nameable be cleared<br />
away, but gets its original gloss back. In no case use ordinary abrasive or the rough<br />
side of a kitchen sponge.<br />
• If the velcro labels peel away from the gold electrodes, snip an equivalent piece off<br />
the provided replacement velcro and stick it on the bottom side of the gold electrode.<br />
The stick surface has to be free of dirt and grease. Press on hard the just now<br />
stucked velcro strip for some seconds.<br />
13.2 Storage<br />
• Protect the <strong>miniZAP</strong> ® against humidity, dust, direct sunlight and keep it away from<br />
heating sources.<br />
• In the off state the <strong>miniZAP</strong> ® doesn´t consumpt battery. Therefore he is ready for<br />
operation even after years of non-use.<br />
• If water has poured into the <strong>miniZAP</strong> ® , quickly remove the battery (see chapter „12.<br />
Battery change“) to prevent it against discharge and that the electronic doesn´t take<br />
any damage. Open the enclosure and let the electronic dry several hours bevor inserting<br />
the battery again.<br />
www.zapper.com 19
20<br />
14. Guarantee / Repair / Disposal<br />
14.1 Guarantee<br />
Operating <strong>manual</strong> V1.0<br />
The <strong>miniZAP</strong> ® is a masterpiece of german engineering and is manufactured in Germany<br />
by the latest manufacturing process. The manufacturer guarantee period is 2 years from<br />
the date of purchase (invoice). The warranty includes no accessories and quailty defects<br />
which negligible affect the fittness for purpose of the device. The warranty claim expires, if<br />
the <strong>miniZAP</strong> ® was damaged due to non-observance the <strong>manual</strong>, improper use or handling,<br />
leaked battery or repair attempt without authority. In case of warranty claim, please<br />
read on „14.2 Repair“.<br />
14.2 Repair<br />
In case of a warranty claim like incomplete shipment, damage or malfunction and any<br />
other reclamation, please immediately and exclusively contact the manufacturer, and<br />
consultate him, if a send in for a professional repair is needed.<br />
If you think that your <strong>miniZAP</strong> ® doesn´t work correctly any longer, please check this – to<br />
prevent unnecessary requests – again with the help of the informations on the error messages,<br />
the possible reasons and their fixing given in chapter 10.<br />
Phone and address of the manufacturer you find at „16. Technical data“. Please add a<br />
short description of failure in case of returning the <strong>miniZAP</strong> ® for repair. Please note, that<br />
in case of loss on the dispatch, no liability is assumed.<br />
14.3 Disposal<br />
According to the german law called „Elektro- und Elektronikgerätegesetz<br />
(ElektroG) by the 16th. Mar. 2005, the manufacturer is responsible for taking<br />
back and environment friendly disposal of his electric devices. Therefore we<br />
please you, to send your <strong>miniZAP</strong> ® at the end of his lifetime including all<br />
accessory back to the manufacturer. With this you preserve our environment<br />
and contribute an essential amount of dealing rational with the raw materials<br />
and resources.<br />
According to the battery decree (BattV § 12), we are further committed to point out the following<br />
issues:<br />
• Used batteries you can give back for free to your salesman / shopman or at a public<br />
collecting point.<br />
• As end user you are committed to give used batteries back, or to dispose them correctly.<br />
Batteries must not be disposed through the household waste.<br />
• The symbol of the slashed litter bin means: no disposal through household waste because<br />
these contain Hg = mercury, Cd = cadmium or Pb = lead.<br />
www.zapper.com
15. Order list<br />
Operating <strong>manual</strong> V1.0<br />
The following spare parts can be ordered at your <strong>miniZAP</strong> ® salesman. There you also can<br />
get the actual prices and time of derlivery.<br />
Order-no.: Spare parts<br />
0101-001 wristband with velcro<br />
0102-001 electrode cable<br />
0104-002 <strong>miniZAP</strong> ® electrode gel (extra high conductivity, 50ml tube)<br />
0104-003 2 pieces of gold electrodes<br />
0104-005 3V lithium battery<br />
0104-006 100mm replacement velcro for gold electrodes<br />
www.zapper.com 21
22<br />
16. Technical data<br />
Operating <strong>manual</strong> V1.0<br />
Model Dr. Beck LCD<br />
Output current (electronically regulated) 60 – 999 µA AC<br />
Output voltage 2,3 – 35 Volt AC<br />
Voltage and current frequency 3,920 Hz (± 0,01%)<br />
Shape of output voltage Squarewave AC voltage<br />
Display of output voltage Amplitude in volts<br />
Display tolerance of output voltage ± 0,2 Volt<br />
Precision of time measurement ± 1 sec. / hour<br />
Classification BF (body floating)<br />
Protection category IP30<br />
Operating mode Continuous duty<br />
Operating range 0°C to +45°C<br />
Storage -20°C to +70°C<br />
Battery type 3V Lithium CR 2032<br />
Expectancy of battery life<br />
Dimensions in mm (L x W x H) 63 x 35 x 12<br />
Weight (only <strong>miniZAP</strong> ® ) 23 g<br />
Manufacturer:<br />
Mikas Elektronik Entwicklungen<br />
Bgm.-Grenzebach-Str. 17<br />
D-82343 Poecking<br />
Tel: +49 (0)8157 / 92 42 92<br />
Fax: +49 (0)721 / 509 663 017<br />
E-Mail: info@mikas-elektronik.de<br />
General distribution:<br />
Nu Life Enterprise Ltd. & Co. Vertriebs KG<br />
Arnikastr. 2<br />
D-85635 Hoehenkirchen-Siegertsbrunn<br />
Tel: +49 (0)8102 / 99 47 05<br />
Fax: +49 (0)12120 / 233 153<br />
E-Mail: mail@nulife.de<br />
www.zapper.com<br />
approx. 4 months at 2 hrs. daily<br />
and 250µA current adjustment<br />
!
16.1 Measurement of output voltage<br />
Operating <strong>manual</strong> V1.0<br />
Characteristic for the current regulation of the <strong>miniZAP</strong> ® is, that the height of the output<br />
voltage depends on the adjusted current AND the skin resistance. To measure an output<br />
voltage of 35 Volts, it is necessary that the skin resistance (or the load resistor which is<br />
connected between the cable connectors) has at least 87,5 kOhm (max. 500kOhm) and<br />
that the current is adjusted to 400µA. The current intensity should be increased slowely,<br />
because when 35 volts are exceeded, the error message „M“ (maximum output voltage<br />
reached) occurs, and the output voltage is switched off until the <strong>miniZAP</strong> ® restarts. Furthermore<br />
it has to take into consideration, that commercial digital multimeter will display a<br />
wrong value, because they are calibrated to sine wave signals with 50 Hz frequency when<br />
using the AC measurement range. However, the shape of the <strong>miniZAP</strong> ® output voltage is<br />
a squarewave and has a frequency of 3,920Hz. Therefore, to correctly measure the voltage,<br />
a TRMS-voltage meter (True Root Mean Square) with an adequate lower cut off frequency<br />
is required. For that reasons, the ideal instrument to measure the output voltage of<br />
the <strong>miniZAP</strong> ® is an oscilloscope, because the amplitude is directly displayed on the<br />
screen.<br />
17. Notes<br />
www.zapper.com 23
24<br />
Operating <strong>manual</strong> V1.0<br />
www.zapper.com