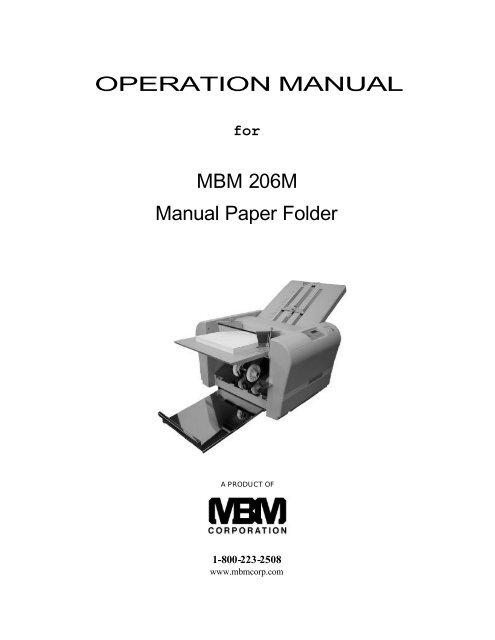
OPERATION MANUAL MBM 206M Manual Paper Folder - Ideal-MBM
OPERATION MANUAL MBM 206M Manual Paper Folder - Ideal-MBM
OPERATION MANUAL MBM 206M Manual Paper Folder - Ideal-MBM
You also want an ePaper? Increase the reach of your titles
YUMPU automatically turns print PDFs into web optimized ePapers that Google loves.
(2) AccessoriesMake sure that the following accessories are included in the package after opening it. Please contact yourlocal dealer immediately if there are missing accessories.Accessories Qty IllustrationTable 1 1Table 2 1Power source cord 1<strong>Paper</strong> support guides(right and left)2Machine cover 1Operation <strong>Manual</strong> 15
(3) Description of PartsNumber Name Number Name1 Roller cover 10 Table 12 Left side cover 11 Control panel3 <strong>Paper</strong> feed roller 12 <strong>Paper</strong> feed table4 <strong>Paper</strong> guide 13 Table 25 Auxiliary feed table 14 Right side cover6 <strong>Paper</strong> discharge roller 15 <strong>Paper</strong> feed table lever7 <strong>Paper</strong> stacking table 16 Power source switch8 Stopper plate 17 Inlet9 Fold position adjustment knob 18 Circuit breaker6
(4) Designation and Functions of Operation PanelNo. Designation/Indication Function1 TEST key Test folding of two sheets is performed.2 START/STOP key Operation starts and if pushed again, the machine stops.3 CLEAR/RESET key Clearing the indication of the counter / resetting an error.4 Numerical key Used for batch counting.5 Counter The number of sheets folded.6 Check lampComes on when paper stock is depleted, or indicates a placewhere paper mis-feed occurs.7
(5) PreparationInstall Table 1 and 2:Insert Table 1 on the studs indicated by (a) and (b) as shown inthe picture to the right.Insert Table 2 on the studs indicated by (c) and (d) as shown inthe picture to the right.Note:When setting Table 1, be sure to put its stopper plate at the center position.Caution:Be sure that both Table 1 and 2 property fit in the positions of thestuds (a), (b), (c) and (d). If they are improperly set, it maycause an incorrect collation, or the tables may fall out of the machine.Setting <strong>Paper</strong>:Lift the auxiliary table and place the paper.Raise the paper feed table lever.Set the paper guide for the appropriate paper size.Neatly stack the paper on the feed table with its printed sidefacing up. (its printed side down in case of fold-out)Lower the paper feed table lever to set the paper.Note:If the paper does not come in contact with the paper feed roller, remove and reinsert.Curled or wrinkled paper may not feed correctly – be sure to use flat paper stock.In case of printed paper, use it only after the ink is dry, otherwise the paper feed rubber roller,paper separator, fold roller, and other parts of the unit may absorb the ink, causing marking.8
Setting the paper exit roller:The exit roller should be moved to the proper position accordingto the paper size.<strong>Paper</strong> Exit RollerNote:Refer to “Roller position indication” label. If ejection is notperformed proper ly, set it to a different position.Example:Set the roller to position ONE when using 8 1 /2” × 11” paper.(6) Operation ProcedureSwitching the Power ON:Insert the power plug into the outlet.Set the POWER to ON position.Note:Remove the power plug from the outlet after use.Setting Fold Plate Table PositionPull the half -nut lever to move the stopper plate to the desiredposition on Table 1 and 2. Align the arrow on the stopper platewith the corresponding fold marks on the tables and release thehalf-nut. This locks the stopper plate into position.Test Folding:Press the TEST key to feed two sheets of paper.Check if the paper has been folded correctly by inspecting thesecond of the two folded sheets.If the fold position is not correct, refer to “Fine Adjustments”pages 14 & 15TEST Key9
Fold Feed Angle / Skew Adjustment:Turn the feed angle adjustment knob to the right if the lower sideof the folded paper slants to the right.Turn the knob to the left of the lower side slants to the left.Note:In cases other than single fold, put the folded paper face down onTable 1 to make a feed angle adjustment.Continuous folding:Press the START/STOP key. The machine will fold the sheetscontinuously.Press the START/STOP key again while the machine is inoperation in order to stop feeding.START/STOP KeyBatch Counting:As each sheet is folded, the number indicated on the displaydecreases by one.Press the appropriate numerical key to select the number ofsheets to be folded.Example:Press the number “10” key twice to select 20.Note:The batch counting number is cancelled when the POWER is setto OFF.10
Under the following conditions the machine will automatically stop feeding:(Press the CLEAR/RESET key to reset after the error has been corrected)ConditionsIndication on Control panelWhen the START/STOP key is pressed while there is no stock.When the START/STOP key is pressed while the paper feedlever is in the upper position.When the stock runs short while folding in the Batch Counting Mode.When a paper mis-feed occurs.When paper jam occurs at Table 1 and Table 2.When paper stack (exit) table is full.When paper jam occurs at the paper exit.Clearing a <strong>Paper</strong> Jam:Should a paper jam occur, set the POWER to the OFF position and remove the jammed sheet(s). When thejammed paper is wrapped around the fold roller or other parts, it can be easily removed by detaching Tables1 and 2 from the unit.Note:When the roller cover is opened, the machine will automatically stop operation.11
Cross Folding:Cross folding refers to performing the double parallel, letter, or othertypes of folds on single-folded sheets of paper.Example:11 ” × 17” sheet is folded in half, and then cross-folded to letter size tofit into a standard # 10 envelope.Note:The maximum weight of paper that can be used for cross folding is 28#.However, the following variables may affect performance of the paperstock being folded: paper type, paper size, grain direction, printingquality, as well as the relative humidity and temperature of the operatingenvironment.On occasion, fold displacement may occur, causing a corner of thefolded paper to be folded inside as indicated in the figure at the right. Inthese cases, additional fine adjustment may need to be made to the foldtables to eliminate the problem.Tip:To aid in the cross-folding procedure, press the crease of thesingle-folded stock flat before attempting to cross fold.12
Fine Adjustments for Table 1Fold typePlane (A)Direction to turn the Table 1fine adjustment knobSingle foldTable 1 is not usedLongGate foldShortLongLetter foldShortLongZigza g foldShortDoubleparallel foldLongShortFold-outFoldLongShort13
Fine Adjustments for Table 2Fold typePlane (B)Direction to turn the Table 2fine adjustment knobSingle foldLongShortGate foldLongShortLetter foldLongShortZigzag foldLongShortDoubleparallel foldLongShortFold-out foldLongShort14
(7) Maintenance1 Before cleaning the machine, be sure to set POWER to the OFF position and unplug the power cord fromthe outlet.2 When the unit is not in use, put the machine cover in place to prevent dust, paper particles , etc. fromaccumulating on the fold rollers.3 If paper particles, dust, ink, etc. accumulate on the fold rollers; it may cause the paper to fold improperly.Clean the rollers periodically to prevent this occurrence.4 If paper particles, dust, ink, etc. accumulate on either the paper feed rubber roller or the paper separator,paper feed performance deteriorates, causing pap er to slip and possibly jam. Clean the rubber roller andseparator periodically to prevent this occurrence.5 Periodically clean the paper feed tires to prevent marking.6 Consumable products include: <strong>Paper</strong> feed rubber roller, rubber brake, and paper feed separator.15
(8) TroubleshootingTrouble Possible Cause MeasuresThe paper doesnot feed properly<strong>Paper</strong> sticks just after it is printedStains on the paper separatorStains on the paper feed rubberrollerThe paper separator is worn outJog the paper sufficiently. Make sure thatthe ink is dry.Clean the paper feed separator usingapproved cleaner.Clean the dust or ink on the paper feedroller with approved cleaner.Install a new paper separator.The volume of the paper stacked onthe paper feed table is not enoughAdd more paper to the feed table – at least20 sheet or more.The machine does notoperate even after theSTART/STOP key ispressedWrinkles appear onthe paperImproper foldpositionPrinted paper(13# or lighter)cannot be folded<strong>Paper</strong> jam inside the unit<strong>Paper</strong> sticks just after it is printedStains on the paper separatorStains on the paper feed rollerStains on paper fold rollersTable 1 and 2 are not properly set<strong>Paper</strong> jam in Table 1 and 2The total length of the paper is notstandard sizeThe surfaces of the fold rollers arecovered with dust or ink, causingthem to be slipperyLow room temperatureDetach Table 1 and 2 and remove thepaper from the unit.Jog the paper sufficiently. Make sure thatthe ink is dry.Clean the paper separator using theapproved cleaner.Clean the dust or ink on the paper feedroller with the approved cleaner.Clean all four fold rollers using approvedcleaner.Reset properly.Detach Table 1 and 2 and remove thejammed paper.Measure the total length of the paper andadjust using the fine adjustment knob.Clean all four fold rollers using theapproved cleaner.Operate the machine in aclimate-controlled environment. <strong>Paper</strong>should be a room temperature beforefolding. <strong>Paper</strong> stored below 53F is notrecommended.16


