Users instructions PHONE-DEX (English) - Widex for professionals
Users instructions PHONE-DEX (English) - Widex for professionals
Users instructions PHONE-DEX (English) - Widex for professionals
- No tags were found...
You also want an ePaper? Increase the reach of your titles
YUMPU automatically turns print PDFs into web optimized ePapers that Google loves.
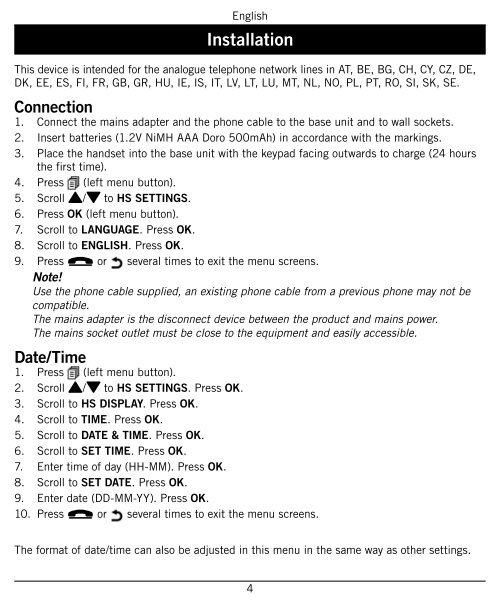
<strong>English</strong>InstallationThis device is intended <strong>for</strong> the analogue telephone network lines in AT, BE, BG, CH, CY, CZ, DE,DK, EE, ES, FI, FR, GB, GR, HU, IE, IS, IT, LV, LT, LU, MT, NL, NO, PL, PT, RO, SI, SK, SE.Connection1. Connect the mains adapter and the phone cable to the base unit and to wall sockets.2. Insert batteries (1.2V NiMH AAA Doro 500mAh) in accordance with the markings.3. Place the handset into the base unit with the keypad facing outwards to charge (24 hoursthe first time).4. Press (left menu button).5. Scroll {/} to HS SETTINGS.6. Press OK (left menu button).7. Scroll to LANGUAGE. Press OK.8. Scroll to ENGLISH. Press OK.9. Press L or several times to exit the menu screens.Note!Use the phone cable supplied, an existing phone cable from a previous phone may not becompatible.The mains adapter is the disconnect device between the product and mains power.The mains socket outlet must be close to the equipment and easily accessible.Date/Time1. Press (left menu button).2. Scroll {/} to HS SETTINGS. Press OK.3. Scroll to HS DISPLAY. Press OK.4. Scroll to TIME. Press OK.5. Scroll to DATE & TIME. Press OK.6. Scroll to SET TIME. Press OK.7. Enter time of day (HH-MM). Press OK.8. Scroll to SET DATE. Press OK.9. Enter date (DD-MM-YY). Press OK.10. Press L or several times to exit the menu screens.The <strong>for</strong>mat of date/time can also be adjusted in this menu in the same way as other settings.4


