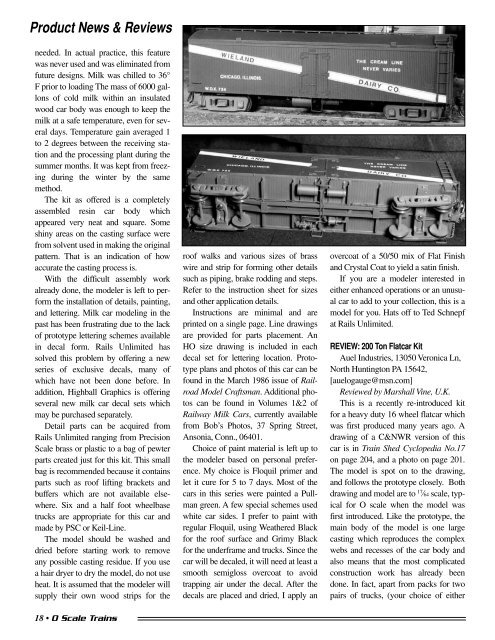
Product News & Reviewsneeded. In actual practice, this featurewas never used and was eliminated fromfuture designs. Milk was chilled to 36°F prior to loading The mass of 6000 gallonsof cold milk within an insulatedwood car body was enough to keep themilk at a safe temperature, even for severaldays. Temperature gain averaged 1to 2 degrees between the receiving stationand the processing plant during thesummer months. It was kept from freezingduring the winter by the samemethod.The kit as offered is a completelyassembled resin car body whichappeared very neat and square. Someshiny areas on the casting surface werefrom solvent used in making the originalpattern. That is an indication of howaccurate the casting process is.With the difficult assembly workalready done, the modeler is left to performthe installation of details, painting,and lettering. Milk car modeling in thepast has been frustrating due to the lackof prototype lettering schemes availablein decal form. Rails Unlimited hassolved this problem by offering a newseries of exclusive decals, many ofwhich have not been done before. Inaddition, Highball Graphics is offeringseveral new milk car decal sets whichmay be purchased separately.Detail parts can be acquired fromRails Unlimited ranging from PrecisionScale brass or plastic to a bag of pewterparts created just for this kit. This smallbag is recommended because it containsparts such as roof lifting brackets andbuffers which are not available elsewhere.Six and a half foot wheelbasetrucks are appropriate for this car andmade by PSC or Keil-Line.The model should be washed anddried before starting work to removeany possible casting residue. If you usea hair dryer to dry the model, do not useheat. It is assumed that the modeler willsupply their own wood strips for the18 • O Scale Trainsroof walks and various sizes of brasswire and strip for forming other detailssuch as piping, brake rodding and steps.Refer to the instruction sheet for sizesand other application details.Instructions are minimal and areprinted on a single page. Line drawingsare provided for parts placement. AnHO size drawing is included in eachdecal set for lettering location. Prototypeplans and photos of this car can befound in the March 1986 issue of RailroadModel Craftsman. Additional photoscan be found in Volumes 1&2 ofRailway Milk Cars, currently availablefrom Bob’s Photos, 37 Spring Street,Ansonia, Conn., 06401.Choice of paint material is left up tothe modeler based on personal preference.My choice is Floquil primer andlet it cure for 5 to 7 days. Most of thecars in this series were painted a Pullmangreen. A few special schemes usedwhite car sides. I prefer to paint withregular Floquil, using Weathered Blackfor the roof surface and Grimy Blackfor the underframe and trucks. Since thecar will be decaled, it will need at least asmooth semigloss overcoat to avoidtrapping air under the decal. After thedecals are placed and dried, I apply anovercoat of a 50/50 mix of Flat Finishand Crystal Coat to yield a satin finish.If you are a modeler interested ineither enhanced operations or an unusualcar to add to your collection, this is amodel for you. Hats off to Ted Schnepfat Rails Unlimited.REVIEW: 200 Ton Flatcar KitAuel Industries, 13050 Veronica Ln,North Huntington PA 15642,[auelogauge@msn.com]Reviewed by Marshall Vine, U.K.This is a recently re-introduced kitfor a heavy duty 16 wheel flatcar whichwas first produced many years ago. Adrawing of a C&NWR version of thiscar is in Train Shed Cyclopedia No.17on page 204, and a photo on page 201.The model is spot on to the drawing,and follows the prototype closely. Bothdrawing and model are to 17 ⁄64 <strong>scale</strong>, typicalfor O <strong>scale</strong> when the model wasfirst introduced. Like the prototype, themain body of the model is one largecasting which reproduces the complexwebs and recesses of the car body andalso means that the most complicatedconstruction work has already beendone. In fact, apart from packs for twopairs of trucks, (your choice of either
Dalman or Andrews), there are onlyfour other parts in the kit, the mainbody, the deck, and two span bolsters.With so few parts in such a simplekit, construction is really quite obvious,so no instructions are included. The onlypotential problem which may arise isthat the use of drills, taps and the appropriatescrews will be required to affixthe trucks to the bolsters and then theseassemblies to the body casting. Thesescrews are not supplied in the kit so thebuilder must use whatever they have onhand of a suitable size. Since I am in the“Old Country” I used our 6BA sizescrews, which, I am told are about thesame as American 4-40 screws. Otherthan this, assembly is straight forward.No detail parts are provided. Handgrabs, steps, and a brake wheel at eachend will be needed as a minimum. Thekit is perhaps not really suitable for abeginner though there are probably veryfew O <strong>scale</strong> modelers in that category!The first job needed, as in any metalkit, is to clean up the parts. There is afair bit of flash on the main casting, butthe metal, a soft zinc alloy, is easilycleaned up, and the usual selection ofsmall files will make short work of it.There was also one small blowhole inmy casting which needed filling. A couplerpocket for an old style dummy coupleris cast into each end of the frameand deck, but most builders will probablywant to do as I did and cut these offand replace them with modern Kadeecoupler. Take care to use the plastic draftgear boxes to avoid possible short circuitsthrough this all metal car.The deck has a multitude of smallslots cast in it, and while most are perfectlycast, some might need cleaningup, and I found this the most tiresomejob of all. A few needed drilling out witha #65 drill, then cleaned up with somevery fine wire-like files I acquired yearsago. It was the need to mark out anddrill these multitude of slots, (used fortying down the load on the prototype),that had for some time deterred me fromscratchbuilding the car. In this kit thework is done for you.The two bolsters were already veryclean so needed only a quick rub overwith a fine file before assembly. Thetruck side frames also needed the usualclean up, but after that went togetherquite easily, apart from the normal problem...that horrible job of fitting thesprings! The kits come with NWSLmetal wheel sets so care must be takento ensure that the insulated wheels areall on the same side. Guess who didn’tand had to turn one truck round!At this stage, I painted the inside ofthe main body casting because of thecomplex ribs and recesses and parts of itwould have been difficult to get at later.The body and deck castings were thenglued together. With all the framing,there is quite an area to glue, so a relativelyslow drying epoxy is the mostsuitable, but make sure that the matingsurfaces are clean and shiny beforeapplying the glue.Drilling and tapping the two holes ineach bolster for the trucks and the twomain pivots on the body, are straightforwardoperations.With the model now complete otherthan the small details, and on the track, Ifound that, having previously removedthe cast on draft gear boxes back to a flatsurface, the Kadee couplers needed a1.5mm spacer to bring them down to thecorrect height. Everyone will have theirown ideas on how these couplers shouldbe fitted, but I cut a piece of wood to atight fit in the hole left by the originaldraft gear box, epoxied it in, andscrewed the Kadee boxes into it with acouple of small wood screws. Oncecomplete it is quite invisible.The usual details were then added.Positions for two hand grabs are alreadymarked on each end, but there should beanother in each corner above the usualstirrup step. Then, in common with mostheavy duty cars like well or depressedcenter flats, there should be a hand brakewheel at each end, and according to thedrawing these fitted in brackets outsidethe end beam and could be loweredflush with the deck.There are two sets of Champ decalswhich are suitable for these cars, either#CN-95, Chicago North Western, and#CN-290, as the Pennsy 200 ton flatseems very similar. Both cars wereapparently painted Red Oxide, althoughI wouldn’t think that the steel decksheets kept much of this paint very long!This is a good basic kit for an interesting,eye catching piece of equipmentwhich is easily assembled, as anyonelikely to attempt it will probably befamiliar with both the use of taps and thedetailing of rolling stock. The fact that itis very slightly over <strong>scale</strong> for our present1⁄4" <strong>scale</strong> is not readily apparent. It justlooks that much more impressive! Thecompleted model can be pushed quitehappily through the reverse curves oftwo 3' radius turnouts, (about #6), itsweight of 1 lb. 7 oz. helping it to trackvery well. I thoroughly enjoyed buildingit. The kit is available for $56.REVIEW: 57' Mechanical ReeferWeaver Models, RR1 Rt11,Northumberland PA 17857, 570-473-9434, www.weavermodels.comReviewed by Richard MadonnaHistory:Reefers have been around for over150 years on railroads. Early versionsO Scale Trains • 19