SERVICE MANUAL - BVT Partners OÃ
SERVICE MANUAL - BVT Partners OÃ
SERVICE MANUAL - BVT Partners OÃ

Create successful ePaper yourself
Turn your PDF publications into a flip-book with our unique Google optimized e-Paper software.
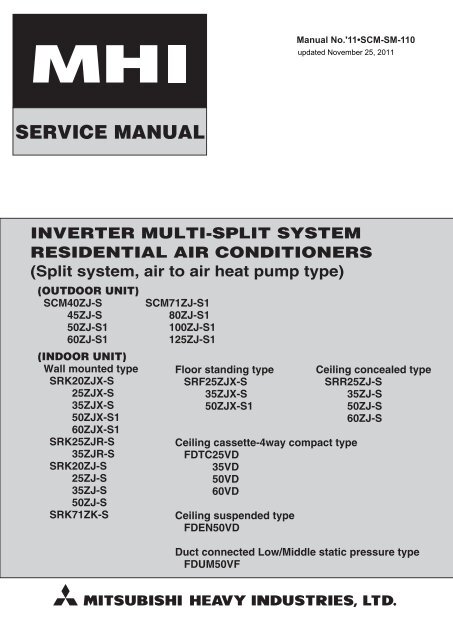
Manual No.'11•SCM-SM-110updated November 25, 2011<strong>SERVICE</strong> <strong>MANUAL</strong>INVERTER MULTI-SPLIT SYSTEMRESIDENTIAL AIR CONDITIONERS(Split system, air to air heat pump type)(OUTDOOR UNIT)SCM40ZJ-S45ZJ-S50ZJ-S160ZJ-S1(INDOOR UNIT)Wall mounted typeSRK20ZJX-S25ZJX-S35ZJX-S50ZJX-S160ZJX-S1SRK25ZJR-S35ZJR-SSRK20ZJ-S25ZJ-S35ZJ-S50ZJ-SSRK71ZK-SSCM71ZJ-S180ZJ-S1100ZJ-S1125ZJ-S1Floor standing typeSRF25ZJX-S35ZJX-S50ZJX-S1Ceiling cassette-4way compact typeFDTC25VD35VD50VD60VDCeiling suspended typeFDEN50VDCeiling concealed typeSRR25ZJ-S35ZJ-S50ZJ-S60ZJ-SDuct connected Low/Middle static pressure typeFDUM50VF
CONTENTS1. OUTLINE OF OPERATION CONTROL BY MICROCOMPUTER ............... 51.1 SRK,SRF and SRR series ..................................................................... 5(1) Operation control function by remote controller(2) Unit ON/OFF button .............................................................................. 9(3) Auto restart function .............................................................................. 9(4) Custom cord switching procedure(5) Selection of the annual cooling function(6) High power operation ............................................................................ 11(7) Econo operation .................................................................................... 12(8) Flap and louver control (SRK and SRF series only) .............................. 12(9) Air outlet selection (SRF series only) .................................................... 15(10) 3D auto operation (SRK series only) .................................................... 15(11) Timer operation ..................................................................................... 16(12) Installation location setting (SRK series only) ....................................... 17(13) Determining the operating mode(14) Drain motor (DM) control (SRR series only) ......................................... 181.2 FDTC, FDEN and FDUM series ............................................................. 19(1) Remote controller (Optional parts)(2) Operation control function by the wired remote controller .................... 22(3) Operation control function by the indoor controller1.3 Outline of heating operation ................................................................ 34(1) Summary ............................................................................................... 34(2) Operation of major functional components in heating mode ................. 34(3) Hot keep operation ................................................................................ 34(4) Defrosting operation .............................................................................. 351.4 Outline of cooling operation ................................................................ 36(1) Summary ............................................................................................... 36(2) Operation of major functional components in cooling mode ................. 361.5 Outline of automatic operation ............................................................ 37(1) Determination of operation mode1.6 Operation permission/prohibition control .......................................... 38(1) The operation mode is switched over between Permission and Prohibitionby releasing the jumper wire (J3) on the indoor PCB(3) In the case of CnT input OFF (Operation prohibition)'11 • SCM-SM-110.................................... 5......................................................... 10................................................ 11.......................................................... 17........................................................ 19............................... 23.......................................................... 37............................... 38........................... 38(2) In the case of CnT input ON (Operation permission) ............................ 38
1.7 External control (remote display) /control of input signal ................ 39(1) External control (remote display) output ............................................... 39(2) Control of input signal ........................................................................... 391.8 Protective control function .................................................................. 40(1) Frost prevention control ........................................................................ 40(2) Cooling overload protective control ...................................................... 40(3) Cooling high pressure control(4) Cooling low outdoor temperature protective control(5) Heating high pressure control ............................................................... 42(6) Heating overload protective control ...................................................... 43(7) Heating low outdoor temperature protective control(8) Freezing cycle system protective control .............................................. 44(9) Crankcase heater ................................................................................. 44(10) Inching prevention ................................................................................ 44(11) Compressor overheat protection .......................................................... 44(12) Current safe .......................................................................................... 45(13) Current cut ............................................................................................ 46(14) Outdoor unit failure ............................................................................... 46(15) Indoor fan motor protection ................................................................... 46(16) Discharge pipe sensor disconnection protection control ....................... 46(17) Regulation of outdoor air flow ............................................................... 46(18) Serial signal transmission error protection ............................................ 47(19) Rotor lock .............................................................................................. 47(20) Outdoor fan motor protection ................................................................ 47(21) Outdoor fan control at low outdoor temperature(22) Outdoor unit fan control at overload ...................................................... 48(23) Anomalous power transistor ................................................................. 49(24) Power transistor overheat protection .................................................... 49'11 • SCM-SM-110............................................................... 40............................. 41............................. 43................................... 47.......... 50........................ 51(25) Control of the flowing noise of refrigerant during cooling operation ...... 492. MAINTENANCE DATA ................................................................................ 502.1 SRK,SRF and SRR series ..................................................................... 50(1) Cautions ................................................................................................ 50(2) Items to check before troubleshooting .................................................. 50(3) Troubleshooting procedure (If the air conditioner does not run at all)(4) Troubleshooting procedure (If the air conditioner runs)(5) Self-diagnosis table .............................................................................. 52(6) Service mode (Trouble mode access function) ..................................... 54(7) Inspection procedures corresponding to detail of trouble ..................... 64
(8) Phenomenon observed after shortcircuit, wire breakage on sensor ............ 68(9) Checking the indoor electrical equipment ............................................. 69(10) How to make sure of wireless remote controller(11) Outdoor unit inspection points .............................................................. 712.2 FDTC, FDEN and FDUM series ............................................................. 772.2.1 Diagnosing of microcomputer circuit ............................................. 77(1) Selfdiagnosis function ........................................................................... 77(2) Troubleshooting procedure ................................................................... 81(3) Troubleshooting at the indoor unit(4) Check of anomalous operation deta with the remote controller(5) Inverter checker for diagnosis of inverter output ................................... 89(6) Outdoor unit inspection points .............................................................. 892.2.2 Troubleshooting flow ....................................................................... 90(1) List of troubles ...................................................................................... 90(2) Troubleshooting .................................................................................... 913. ELECTRICAL WIRINGS ..............................................................................1373.1 Outdoor units ........................................................................................1373.2 Indoor units ...........................................................................................142(1) Wall mounted type (SRK) ......................................................................142(2) Floor standing type (SRF) .....................................................................146(3) Ceiling concealed type (SRR)(4) Ceiling cassette-4way compact type (FDTC)(5) Ceiling suspended type (FDEN)(6) Duct connected Low/Middle static pressure type (FDUM)4. PIPING SYSTEMS .......................................................................................1525. INSTALLATION <strong>MANUAL</strong>. ...........................................................................1575.1 Outdoor units ..........................................................................................157(1) Models SCM40ZJ-S, 45ZJ-S ................................................................157(2) Models SCM50ZJ-S1, 60ZJ-S1 .............................................................161(3) Models SCM71ZJ-S1, 80ZJ-S1 .............................................................165(4) Models SCM100ZJ-S1, 125ZJ-S1 .........................................................1695.2 Indoor units ............................................................................................173(1) Wall mounted type (SRK) .....................................................................173(2) Floor standing type (SRF) .....................................................................185(3) Ceiling concealed type (SRR)(4) Ceiling cassette-4way compact type (FDTC)(5) Ceiling suspended type (FDEN)(6) Duct connected Low/Middle static pressure type (FDUM)(7) Replacement procedure of the fan unit (For FDUM model)6. TABLE OF FUNCTIONS CONNECTED WIRED REMOTE CONTROLLERS (RC-E4, E5) .............209'11 • SCM-SM-110................................... 70........................................................ 81............ 88...............................................................148.......................................149...........................................................150....................151...............................................................189........................................193............................................................199....................203...................208- -
7. COMPONENT REPLACEMENT ..................................................................2117.1 Models SCM71ZJ-S1, 80ZJ-S17.2 Models SCM100ZJ-S1, 125ZJ-S18. CHECKING PROCEDURE ...........................................................................2358.1 Models SCM71ZJ-S1, 80ZJ-S1 ..............................................................2358.2 Models SCM100ZJ-S1, 125ZJ-S1 ..........................................................240'11 • SCM-SM-110..............................................................211..........................................................223ModelCapacity 20 25 35 50 60 71Wall mounted type (SRK**ZJX-S)Wall mounted type (SRK**ZJR-S)Wall mounted type (SRK**ZJ-S)Wall mounted type (SRK**ZK-S)Floor standing type (SRF)Ceiling concealed type (SRR)Ceiling cassette-4way compact type(FDTC)Ceiling suspended type (FDEN)Duct connected Low/Middle staticpressure type (FDUM)Outdoor unit to be combined (SCM) SCM40ZJ-S, 45ZJ-S, 50ZJ-S1, 60ZJ-S1, 71ZJ-S1, 80ZJ-S1, 100ZJ-S1, 125ZJ-S1Indoor unitExample: SRK 20 Z JX-SSeries codeInverter typeProduct capacityModel name SRK : Wall mounted typeSRF : Floor standing typeSRR : Ceiling concealed typeFDTC : Ceiling cassette-4 waycompact typeFDEN : Ceiling suspended typeFDUM : Duct connected Low/Middlestatic pressure typeOutdoor unitExample: SCM 60 Z J-S1Series codeInverter typeProduct capacityModel name(Outdoor unit)■ Table of models■How to read the model name
1 OUTLINE OF OPERATION CONTROL BY MICROCOMPUTER1.1 SRK, SRF and SRR series(1) Operation control function by remote controller(a) SRK seriesModels SRK20, 25, 35ZJX-S, 50, 60ZJX-S1, 25, 35ZJR-S, 20, 25, 35, 50ZJ-SRemote controllerOperation sectionFAN SPEED buttonEach time the button is pressed, thedisplay is switched over in turn.HI POWER/ECONO buttonThis button changes the HIGH POWER/ECONOMY mode.TEMPERATURE buttonThese buttons sets the indoor temperature.(These buttons are used for setting thecurrent time and timer function as well.)ON TIMER buttonThis button selects ON TIMER operation.SLEEP buttonThis button selects SLEEP operation.CLEAN switchThis switch changes the CLEAN mode.CANCEL buttonThis button cancels the ON timer, OFFtimer, and SLEEP operation.Unit display sectionRemote control signal receiverUnit ON/OFF buttonThis button can be used for turning on/off the unit when remotecontrol is not available.RUN (HOT KEEP) light (green)Illuminates during operation.Blinks when airflow stops due to the HOTKEEP and CLEAN operation .HOT KEEPCLEAN operationONOFFONOFF1.5 sec.3 sec.0.5 sec.1 sec.'11 • SCM-SM-110OPERATION MODE select buttonEach time the button pressed, thedisplay is switched over in turn.ON/OFF (luminous) buttonPress to start operation, press again tostop.AIR FLOW (UP/DOWN) buttonThis button changes the air flow (up/down)direction.AIR FLOW (LEFT/RIGHT) buttonThis button changes the air flow (left/right)direction.3D AUTO buttonThis button sets 3D AUTO operation.OFF TIMER buttonThis button selects OFF TIMER operationACL switchThis switch is for resetting microcomputerand setting time.(1) (2)ALLERGEN CLEAR button3D AUTO light (green)Illuminates during 3D AUTO operation.HI POWER light (green)Illuminates during HIGH POWER operation.TIMER light (yellow)Illuminates during TIMER operation.- -The above illustration shows all controls, but in practiceonly the relevant parts are shown.Notes (1) In case of SCM multi system, Allergen Clear Control function is invalid.(2) In case of SCM multi system, if [ALLERGEN CLEAR] button is pressed by mistake, the outdoor unit stops to be [All stop indoor units] mode.
Model SRK71ZK-SRemote controllerOperation sectionFAN SPEED buttonEach time the button is pressed, thedisplay is switched over in turn.HI POWER/ECONO buttonThis button changes the HIGH POWER/ECONOMY mode.ALLERGEN CLEAR buttonThis button selects ALLERGEN CLEARoperation.TEMPERATURE buttonThese button set the room temperature.(These buttons are used for setting thecurrent time and timer function aswell.)SLEEP buttonThis button selects SLEEP operation.CLEAN switchThis switch selects the CLEAN mode.ON TIMER buttonThis button selects ON TIMER operation.Unit display sectionRemote control signal receiverUnit ON/OFF buttonThis button can be used for turning on/off the unit whenremote control is not available.RUN (HOT KEEP) light (green)• Illuminates during operation.• Blinks when airflow stops due to the ‘HOTKEEP’ and ‘CLEAN operation’.HOT KEEPCLEAN operationONOFFONOFF1.5 sec.0.5 sec.3 sec.1 sec.'11 • SCM-SM-110OPERATION MODE select buttonEach time the button pressed, thedisplay is switched over in turn.ON/OFF (luminous) buttonPress to start operation, press again tostop.AIR FLOW (UP/DOWN) buttonThis button changes the air flow (up/down) direction.AIR FLOW (LEFT/RIGHT) buttonThis button changes the air flow (left/right) direction.CANCEL buttonThis button cancels the ON timer, OFFtimer, and SLEEP operation.OFF TIMER buttonThis button selects OFF TIMERoperation.ACL switchSwitch for resetting microcomputer.TIME SET UP switchThis switch is for setting the time.HI POWER ECONOON/OFFECONO light (orange)Illuminates during ECONOMY operation.HI POWER light (green)Illuminates during HIGH POWER operation.TIMER light (yellow)Illuminates during TIMER operation.- -• The above illustration shows all controls, but inpractice only the relevant parts are shown.RUNTIMER
(b) SRF seriesRemote controllerOperation sectionFAN SPEED buttonEach time the button is pressed, thedisplay is switched over in turn.HI POWER/ECONO buttonThis button changes the HIGH POWER/ECONOMY mode.TEMPERATURE buttonThese buttons set the indoor temperature.(These buttons are used for setting thecurrent time and timer function as well.)ON TIMER buttonThis button selects ON TIMER operation.SLEEP buttonThis button selects SLEEP operation.CLEAN switchThis switch selects the CLEAN mode.CANCEL buttonThis button cancels the ON timer, OFFtimer, and SLEEP operation.Unit display sectionUnit ON/OFF buttonThis button can be used for turning on/off the unit when remotecontroller is not available.HI POWER Light (green)Illuminates during HIGH POWER operation.AIR SELECTION buttonUse this button to switch between the combination of upper andlower air outlets and upper air outlet.AIR OUTLET SELECTION light (green)Illuminates during upper air outlet operation.Remote controller signal receiver• The above illustration shows all controls, but in practiceonly the relevant parts are shown.'11 • SCM-SM-110OPERATION MODE select buttonEach time the button pressed, thedisplay is switched over in turn.ON/OFF (luminous) buttonPress to start operation, press again tostop.AIR FLOW (UP/DOWN) buttonThis button changes the air flow (up/down)direction.OFF TIMER buttonThis button selects OFF TIMER operation.ACL switchThis switch is for resetting microcomputerand setting time.RUN (HOT KEEP) light (green)• Illuminates during operation.• Blinks when airflow stops due to the ‘HOTKEEP’ and ‘CLEAN operation’.1.5 sec.ONHOT KEEPOFF0.5 sec.3 sec.ONCLEAN operationOFF1 sec.TIMER light (yellow)Illuminates during TIMER operation.ECONO light (green)Illuminates during ECONOMY operation.- -
(c) SRR seriesRemote controllerOperation sectionEach time the button is pressed, thedisplay is switched over in turn.These buttons set the room temperature.(These buttons are used for setting thecurrent time and timer function as well.)Unit display sectionRUN (HOT KEEP) light (green)・Illuminates during operation.・Blinks when airflow stops due to the‘HOTKEEP’and‘CLEAN operation’.HOT KEEPCLEAN operationONOFFONOFFTIMER light (yellow)Illuminates during TIMER operation.1.5 sec.0.5 sec.3 sec.1 sec.'11 • SCM-SM-110Each time the button pressed, thedisplay is switched over in turn.Press to start operation, press again tostop.This button changes the air flow (up/down)direction.This button is not used.(Air flow direction adjustment can not beperformed.)ACL switchThis switch is for resetting microcomputerand setting time.Remote control signal receiverUnit ON/OFF buttonThis button can be used for turning on/off theunit when remote control is not available.HI POWER light (green)Illuminates during HIGH POWER operation.ECONO light (orange)Illuminates during ECONOMY operation.- -
'11 • SCM-SM-110(2) Unit ON/OFF buttonWhen the remote controller batteries become weak, or if the remote controller is lost or malfunctioning, this button may beused to turn the unit on and off.(a) OperationPush the button once to place the unit in the automatic mode. Push it once more to turn the unit off.(b) Details of operationThe unit will go into the automatic mode in which it automatically determines, from indoor temperature (as detected bysensor), whether to go into the cooling, thermal dry or heating modes.Function Indoor temperatureFan speed Flap/Louver Timer Switchoperation modesettingCooling About 24ºCThermal dry About 25ºC Auto Auto ContinuousHeating About 26ºC・Model SRK20, 25, 35ZJX-S, 50, 60ZJX-S1 ・Model SRK25, 35ZJR-S, 20, 25, 35, 50ZJ-SUnit ON/OFF buttonUnit ON/OFF button・Model SRK71ZK-SUnit ON/OFF button・Model SRF25, 35ZJX-S, 50ZJX-S1・Model SRR25, 35, 50, 60ZJ-SUnit ON/OFF buttonUnit ON/OFF button(3) Auto restart function(a) Auto restart function records the operational status of the air-conditioner immediately prior to be switched off by a power cut,and then automatically resumes operations after the power has been restored.(b) The following settings will be cancelled:1) Timer settings2) HIGH POWER operationsNotes (1) Auto restart function is set at on when the air-conditioner is shipped from the factory. Consult with your dealer if this function needs to be switched off.(2) When power failure ocurrs, the timer setting is cancelled. Once power is resumed, reset the timer.(3) If the jumper wire (J170 or JA1) “AUTO RESTART” is cut, auto restart is disabled. (See next page)
'11 • SCM-SM-110• Model SRK20, 25, 35ZJX-S, 50, 60ZJX-S1, 71ZK-S • Model SRK25, 35ZJR-S, 20, 25, 35, 50ZJ-SSRF25, 35ZJX-S, 50ZJX-S1SRR25, 35, 50, 60ZJ-SJumper wire (J170)Jumper wire (JA1)(4) Custom cord switching procedureIf two wireless remote controller are installed in one room, in order to prevent wrong operation due to mixed signals, pleasemodify the printed circuit board in the indoor unit’s controlbox and the remote controller using the following procedure.Be sure to modify both boards. If only one board is modified, receiving (and operation) cannot be done.(a) Modifying the indoor printed circuit boardTake out the printed circuit board from the control box and cut off jumper wire (J171 or JA2) using wire cutters.After cutting of the jumper wire, take measures to prevent contact with the other the lead wires, etc.• Model SRK20, 25, 35ZJX-S, 50, 60ZJX-S1, 71ZK-S • Model SRK25, 35ZJR-S, 20, 25, 35, 50ZJ-SSRF25, 35ZJX-S, 50ZJX-S1SRR25, 35, 50, 60ZJ-SJumper wire (J171)Jumper wire (JA2)(b) Modifying the wireless remote controller1) Remove the battery.Cut2) Cut the jumper wire shown in the figure at right.- 10 -
'11 • SCM-SM-110(5) Selection of the annual cooling function(a) The annual cooling function can be enabled or disabled by means of the jumper wire (J172 or JA3) on theindoor unit PCB and the dip switch (SW2-4) on the interface kit (optional) PCB.Interface kitJumper wire(SC-BIKN-E)(J172 or JA3)SW2-4FunctionShorted ON EnabledShorted OFF DisabledOpen ON DisabledOpen OFF DisabledNote: (1) Default states of the jumper wire (J172 or JA3) and the interface kit at the shipping from factory – On the PCB, the dip switch (SW2-4) is set to enable the annualcooling function.(2) To cancel the annual cooling setting, consult your dealer.• Model SRK20, 25, 35ZJX-S, 50, 60ZJX-S1, 71ZK-S • Model SRK25, 35ZJR-S, 20, 25, 35, 50ZJ-SSRF25, 35ZJX-S, 50ZJX-S1SRR25, 35, 50, 60ZJ-SJumper wire (JA3)Jumper wire (J172)(b) Content of control1) If the outdoor air temperature sensor (Th2) detects below 5°C, the indoor unitspeed is switched to 9th step. (It is not possible to change.)ModelASRK20, 25, 35ZJX-S, 50, 60ZJX-S12) If the outdoor air temperature sensor (Th2) detects higher than A°C, the indoorSRR25, 35, 50, 60ZJ-S17unit speed is changed to the normal control speed.SRK71ZK-S 7ONSRK25, 35ZJR-SOFFSRK20, 25, 35, 50ZJ-S105 AOutdoor air temperature ( C)(6) High power operationPressing the HIGH POWER/ECONO button intensifies the operating power and initiates powerful cooling and heating operationfor 15 minutes continuously. The remote control displays and the FAN SPEED display disappears.(a) During the HIGH POWER operation, the room temperature is not controlled. When it causes an excessive cooling and heating,press the HI POWER/ECONO button again to cancel the HIGH POWER operation.(b) HIGH POWER operation is not available during the DRY and the program timer operations.(c) When HIGH POWER operation is set after ON TIMER operation, HIGH POWER operation will start from the set time.(d) When the following operation are set, HIGH POWER operation will be canceled.1 When the HI POWER/ECONO button is pressed again.2 When the operation mode is changed.3 When it has been 15 minutes since HIGH POWER operation has started.(e) Not operable while the air conditioner is OFF.(f) After HI POWER operation, the sound of refrigerant flowing may be heard.
(7) Econo operation(a)(b)(c)(d)Pressing the HI POWER/ECONO button initiate a soft operation with the power suppressed in order to avoid an excessive coolingor heating. The unit operate 1.5℃ higher than the setting temperature during cooling or 2.5℃ lower than that during heating. Theremote control displays ECONO mark and the FAN SPEED display disappears.It will go into ECONOMY operation at the next time the air conditioner runs in the following cases.1 When the air-conditioner is stopped by ON/OFF button during ECONOMY operation.2 When the air-conditioner is stopped in SLEEP or OFF TIMER operation during ECONOMY operation.3 When the operation is retrieved from CLEAN or ALLERGEN CLEAR operation.When the following operation are set, ECONOMY operation will be canceled.1 When the HI POWER/ECONO button is pressed again.2 When the operation mode is changed DRY to FAN.Not operable while the air-conditioner is OFF.The setting temperature is adjusted according to the following table.Item(8) Flap and louver control (SRK and SRF series only)S SRK seriesControl the flap and louver by AIRFLOW (UP/DOWN) and (LEFT/RIGHT) button on the wireless remote controller.(a) FlapEach time when you press the AIRFLOW (UP/DOWN) button the mode changes as follows.(Flap stopped)Angle of Flap from HorizontalModel SRK20, 25, 35ZJX-S, 50, 60ZJX-S1Remote controllerdisplayCOOL , DRY, FANHEATRemote controllerdisplayCOOL , DRY, FANHEATApprox. 5°Approx. 20°Approx. 10°Approx. 25°Approx. 20°Approx. 35°Model SRK25, 35ZJR-S, 20, 25, 35, 50ZJ-SModel SRK71ZK-SRemote controllerdisplayCOOL , DRY, FANHEATModeTemperatureadjustmentCooling1+0.52+1.03+1.51 at the start of operation.2 one hour after the start of operation.3 two hours after the start of operation.Approx. 5°Heating1-1.02-2.03-2.5Approx. 25°Approx. 25°Approx. 40°Approx. 25°Approx. 40°'11 • SCM-SM-110(Swing)Approx. 35° Approx. 45° Approx. 60°Approx. 45° Approx. 60° Approx. 75°Approx. 40° Approx. 50° Approx. 60°Approx. 50° Approx. 60° Approx. 70°Approx. 35° Approx. 55° Approx. 80°Approx. 50° Approx. 60° Approx. 80°
(b)(c)(d)(e)'11 • SCM-SM-110LouverModel SRK20, 25, 35ZJX-S, 50, 60ZJX-S1, 25, 35ZJR-S, 20, 25, 35, 50ZJ-SEach time when you press the AIRFLOW (LEFT/RIGHT) button the mode changes as follows.(Louver stopped)(Swing) (Spot) (Wide)Angle of LouverRemote controllerdisplayCenter installation Left Approx. 50° Left Approx. 20° Center Right Approx. 20° Right Approx. 50°Right end installation Left Approx. 50° Left Approx. 45° Left Approx. 30° Center Right Approx. 20°Left end installation Left Approx. 20° Center Right Approx. 30° Right Approx. 45° Right Approx. 50°Model SRK71ZK-S(Louver stopped)(Swing)Angle of LouverRemote controllerdisplayCenter installation Left Approx. 50° Left Approx. 20° Center Right Approx. 20° Right Approx. 50°Swing1) Swing flap2) Swing louverFlap moves in upward and downwardLouver moves in left and right directions continuously.directions continuously.In HEAT operationIn COOL, DRY, FAN operationApprox.5°(10°)Approx. 60°Approx. 75°(70°) 80°Notes (1) Values in ( ) are for the model SRK25, 35ZJR-S, 20, 25, 35, 50ZJ-S.(2) Values in 〔 〕are for the model SRK71ZK-S.Memory flap (Flap or Louver stopped)When you press the AIRFLOW (UP/DOWN or LEFT/RIGHT) button once while the flap or louver is operating, it stops swingingat the position. Since this angle is memorized in the microcomputer, the flap or louver will automatically be set at this angle whenthe next operation is started.When not operatingThe flap returns to the position of air flow directly below, when operation has stopped.Approx. 20°(25°)35°
'11 • SCM-SM-110(e) Multi-directional Air Flow (up/down air scroll and left/right air scroll)〔SRK71ZK-S only〕Activating both up/down air swing and left/right air swing at the same time results in a multi-directional air flow.Up/down air scrollLeft/right air scrollIn COOL, DRY and FAN operation In HEAT operation In COOL, DRY and FAN operation In HEAT operationStops at this positionfor 5 seconds.Stops at this positionfor 5 seconds.Left louver Right louverThick line : moves quicklyThin line : moves slowlyS SRF seriesControl the flap by AIRFLOW (UP/DOWN) button on the wireless remote controller.(a) FlapEach time when you press the AIRFLOW (UP/DOWN) button the mode changes as follows.(Flap stopped)(Swing)Angle of Flap from HorizontalRemote controllerdisplayCOOL , DRY, FANHEATApprox. 60°Approx. 44°Approx. 50°Approx. 32°Approx. 38°Approx. 21.5°Approx. 21.5°Approx. 12°Approx. 12°Approx. 5°(b) Swing1) Swing flapFlap moves in upward and downward directions continuously.In HEAT operationIn COOL, DRY, FAN operationApprox.44°Approx.60°Approx.12°Approx.5°Approx.(c) Memory flap (Flap stopped)5°Approx. When 45° you press the AIRFLOW button once while the flap is operating, it stops swinging at the position. Since this angle is memorizedin the microcomputer, the flap will automatically be set at this angle when the next operation is started.(d)Approx. 60°When not operatingApprox. 75°The flap returns to the position of air flow directly below, when operation has stopped.
'11 • SCM-SM-110(14) Drain motor (DM) control (SRR series only)(a) Drain motor (DM) is operated during the cooling or dehumidifying mode operations and simultaneously wity the compressorON. The DM continues to operate for 5 minutes after the operation stop, anomalous stop, thermostat stop or when it wasswitched from the cooling and dehumidifying operations to the fan or heating operation.Indoor unit operation modeStop (1) Cooling Dehumidifying Fan (2) Heating Note (1) Inciuding the stop from the cooling, dehumiditying, fanand heating, and the anomalous stopCompressor ONControl A(2) Inciuding the “Fan” operation according to themismatch of operation modesCompressor OFFControl B1) Control Aa) If the float switch detects any anomalous draining condition, the unit stops with the anomalous stop and thedrain pump starts. After detecting the anomalous condition, the drain motor comtinues to be ON.b) It keeps operating while the float switch is detecting the anomalous condition.2) Control BIf the float switch detects any anomalous drain condition, the drain motor is turned ON for 5 minutes, and at 10 secondsafter the drain motor OFF it checks the float switch. If it is normal, the unit is stopped under the normal modeor, if there is any anomalous condition, displayed by the flashing of display lights and the drain motor is turned ON.(The ON condition is maintained during the drain detection.)
1.2 FDTC, FDEN and FDUM series(1) Remote controller (Optional parts)(a)Wired remote controller(i) Remote controller (RC-E4)The figure below shows the remote controller with the cover opened. Note that all the items that may be displayed in the liquidcrystal display area are shown in the figure for the sake of explanationCharacters displayed with dots in the liquid crystal display area are abbreviated.Ventilaion displayDisplayed during ventilation operationCenteal control displayDisplayed when the air conditioning system iscontrolled by centralized remote control.Timer operation displayDisplays the timer operation setting.Temperature setting buttonsThese buttons are used to set thetemperature of the room.Timer buttonThis button is used to setthe timer mode.Timer setting buttonsThese buttons are used to setthe timer mode and the time.GRILL buttonThis button has no function.When this button is pressed,(Invalid Operation)is displayed, but it does not mean a failure.CoverAIR CON No. buttonDisplay the indoor unit number connected to thisremote controller.CHECK buttonThis button is used at servicing.TEST buttonThis button is used during test operation.The figure below shows the remote control with the cover opened.'11 • SCM-SM-110Weekly timer displayDisplays the settings of theweekly timer.Operation setting display areaDisplays setting temperature, airflowvolume, operation mode and oparationmessage.Operation/check indicator lightDuring oparation: Lit in greenIn case of error: Flashing in redOperation/stop buttonThis button is used to operate and stopthe air conditioning system.Press the button once to operate thesystem and press it once again to stopthe system.MODE buttonThis button is used to change theoperation mode.FAN SPEED buttonThis button is used to set the airflowvolume.VENT buttonThis button is used to operate externalventilator.LOUVER buttonThis button is used to operate/stop theswing louver.SET button●This button is used to fix the setting.●This button is used to set the silent mode.RESET button●Press this button while making settings to go back to the- 19 -* All displays are described in the liguid crystal display for explanation.previous operation.●This button is also used to reset the "FILTER CLEANING" display.(Press it after cleaning the air filter)
(ii) Remote controller (RC-E5)The figure below shows the remote controller with the cover opened. Note that all the items that may be displayed in the liquidcrystal display area are shown in the figure for the sake of explanationCharacters displayed with dots in the liquid crystal display area are abbreviated.Ventilaion displayDisplayed during ventilation operationCenteal control displayDisplayed when the air conditioning system iscontrolled by centralized remote control.Timer operation displayDisplays the timer operation setting.Temperature setting buttonsThese buttons are used to set thetemperature of the room.Timer buttonThis button is used to setthe timer mode.Timer setting buttonsThese buttons are used to setthe timer mode and the time.ESP buttonThis button is used toselect the auto staticpressure adjustment mode.CoverAIR CON No. buttonDisplay the indoor unit number connected to thisremote controller.CHECK buttonThis button is used at servicing.TEST buttonThis button is used during test operation.The figure below shows the remote control with the cover opened.'11 • SCM-SM-110Weekly timer displayDisplays the settings of theweekly timer.Operation setting display areaDisplays setting temperature, airflowvolume, operation mode and oparationmessage.Operation/check indicator lightDuring oparation: Lit in greenIn case of error: Flashing in redOperation/stop buttonThis button is used to operate and stopthe air conditioning system.Press the button once to operate thesystem and press it once again to stopthe system.MODE buttonThis button is used to change theoperation mode.FAN SPEED buttonThis button is used to set the airflowvolume.VENT buttonThis button is used to operate externalventilator.LOUVER buttonThis button is used to operate/stop theswing louver.SET button●This button is used to fix the setting.●This button is used to set the silent mode.RESET button●Press this button while making settings to go back to the- 20 -* All displays are described in the liguid crystal display for explanation.previous operation.●This button is also used to reset the "FILTER CLEANING" display.(Press it after cleaning the air filter)
(b)Wireless remote controllerIndication sectionIndicates set temperature.Indicates the selected airflow volumeIndicates when ON-TIMER is set.Indicates the ON-TIMER setting time.Nothing displayed when ON-TIMER isnot set.Operation sectionSends signal to the air conditioner.Every time this button is pressed, the mode isswitched as below.Used to reset (turn off) the filter sign.Press the button only after completingthe filter cleaning.Sets ON TIMER operation.Sets OFF TIMER operation.Sets current time.'11 • SCM-SM-110Indicates the status of swing louver.Indicates selected operation with .Indicates for two seconds when FILTERbutton is pressed.Indicates when OFF-TIMER is set.Indicates OFF-TIMER setting time. Indicates thecurrent time when the OFF-TIMER is not set.When this is pressed once, the unit starts tooperate and when this is pressed once again,it stops operating.Used to swing the louver.Every time this button is pressed, displays switchas below.Sets room temperature by pressing or button.Sets time when setting the time.Used to cancel the TIMER SETTINGS.Used to reset the microcomputer.* All displays are described in the liquid crystal display for explanation
(3) Operation control function by the indoor controller(a) Auto operation(b)(c)'11 • SCM-SM-110If “Auto” mode is selected by the remote controller, the heating and the cooling are automatically switched according to thedifference between outdoor air temperature and setting temperature and the difference between setting temperature and returnair temperature. (When the switching of cooling mode ↔ heating mode takes place within 3 minutes, the compressor doesnot operate for 3 minutes by the control of 3-minute timer.) This will facilitate the cooling/heating switching operation inintermediate seasons and the adaptation to unmanned operation at stores, etc (ATM corner of bank).Cooling operationHeating operation-3+3Room temperature setting temperatureRoom temperature (detected with ThI-A) [deg]Note (1) Room temperature control during auto cooling/auto heating is performed according to the room temperature setting temperature. (DIFF: ±1 deg)(2) If the indoor heat exchanger temperature rises to 59°C or higher duringHeating operation stopped (cooling)heating operation, it is switched automatically to cooling operation. InHeating OKaddition, for 1 hour after this switching, the heating operation is notperformed, regardless of the temperature shown at right.5659Indoor heat exchanger temperature (°C)Operations of functional items during cooling/heatingOperation CoolingHeatingThermostat Thermostat Fan Thermostat Thermostat Hot start DehumidifyFunctional item ON OFFON OFF (Defrost)Compressor /4-way valve () Outdoor unit fan () /Indoor unit fan / / / /Louver motor// /× / /Drain pump (3) (2) (2)/ (2)Thermostat ON: Thermostat OFF: (2)Note (1) : Operation : Stop /: Turned ON/OFF by the control other than the room temperature control.(2) ON during the drain motor delay control.(3) Drain pump ON setting may be selected with the indoor unit function setting of the wired remote controller.Dehumidifying operationReturn air temperature thermistor [ThI-A (by the remote controller when the remote controller thermistor is enabled)]controls the indoor temperature environment simultaneously.1) Operation is started in the cooling mode. When the difference between the return air temperature and the settingtemperature is 2°C or less, the indoor unit fan tap is brought down by one tap. That tap is retained for 3 minutesafter changing the indoor unit fan tap.2) If the return air temperature exceeds the setting temperature by 3°C during defrosting operation, the indoor unit fantap is raised. That tap is retained for 3 minutes after changing the indoor unit fan tap.3) If the thermostat OFF is established during the above control, the indoor unit fan tap at the thermostat ON is retainedso far as the thermostat is turned OFF.4) After stopping the cooling operation, the indoor unit continues to run at Lo for 15 seconds.
(d)(e)(f)'11 • SCM-SM-110Timer operation1) Sleep timerSet the duration of time from the present to the time to turn off the air-conditioner.It can be selected from 10 steps in the range from “OFF 1 hour later” to “OFF 10 hours later”. After the sleep timersetting, the remaining time is displayed with progress of time in the unit of hour.2) OFF timerTime to turn OFF the air-conditioner can be set in the unit of 10 minutes.3) ON timerTime to turn ON the air-conditioner can be set. Indoor temperature can be set simultaneously.4) Weekly timerTimer operation (ON timer, OFF timer) can be set up to 4 times a day for each weekday.5) Timer operations which can be set in combinationItemItemSleep timer OFF timer ON timer Weekly timerSleep timerOFF timerON timerWeekly timerNote (1) : Allowed : Not(2) Since the ON timer, sleep timer and OFF timer are set in parallel, when the times to turn ON and OFF the airconditioner are duplicated, the settingof the OFF timer has priority.Remote controller display during the operation stop1) When the operation is stopped (the power supply is turned ON), it displays preferentially the “Room temperature”, “Center/Remote”, “Filter sign”, “Inspection” and “Timer operation”.Hot start (Cold draft prevention at heating)(i) Operating conditionsWhen either one of following conditions is met, the hot start control is performed.1) From stop to heating operation2) From cooling to heating operation3) Form heating thermostat OFF to ON4) After completing the defrost control (only on units with thermostat ON)(ii) Contents of operation1) Indoor fan motor control at hot starta) Within 7 minutes after starting heating operation, the fan mode is determined depending on the condition ofthermostat (fan control with heating thermostat OFF).i) Thermostat OFF1 Operates according to the fan control setting at heating thermostat OFF.2 Even if it changes from thermostat OFF to ON, the fan continues to operate with the fan control at thermostatOFF till the heat exchanger thermistor (ThI-R1 or R2, whichever higher) detects 35°C or higher.3 When the heat exchanger thermistor (ThI-R1 or R2, whichever higher) detects 35°C or higher, the fanoperates with the set airflow volume.ii) Thermostat ON1 When the heat exchanger thermistor (ThI-R1 or R2, whichever higher) detects 25°C or lower, the fan isturned OFF and does not operate.2 When the heat exchanger thermistor (ThI-R1 or R2, whichever higher) detects 25°C or higher, the fanoperates with the fan control at heating thermostat OFF.3 When the heat exchanger thermistor (ThI-R1 or R2, whichever higher) detects 35°C or higher, the fanoperates with the set airflow volume.iii) If the fan control at heating thermostat OFF is set at the “Set airflow volume” (from the remote controller), thefan operates with the set airflow volume regardless of the thermostat ON/OFF.
(g)(h)'11 • SCM-SM-110b) Once the fan motor is changed from OFF to ON during the thermostat ON, the indoor fan motor is not turnedOFF even if the heat exchanger thermistor detects lower than 25°C.Note (1) When the defrost control signal is received, it complies with the fan control during defrosting.c) Once the hot start is completed, it will not restart even if the temperature on the heat exchanger thermistor drops.2) During the hot start, the louver horizontal control signal is transmitted.3) When the fan motor is turned OFF for 7 minutes continuously after defrosting, the fan motor is turned ON regardlessof the temperatures detected with the indoor heat exchanger thermistors (ThI-R1, R2).(iii) Ending condition1) If one of following conditions is met during the hot start control, this control is terminated, and the fan is operated withthe set airflow volume.a) Heat exchanger thermistor (ThI-R1 or R2, whichever higher) detects 35°C or higher.b) It has elapsed 7 minutes after starting the hot start control.Hot keepHot keep control is performed at the start of the defrost control.1) Controla) When the indoor heat exchanger temperature (detected with ThI-R1 or R2) drops to 35°C or lower, the speed ofindoor fan is changed to the lower tap at each setting.b) During the hot keep, the louver horizontal control signal is transmitted.2) Ending conditionWhen the indoor fan is at the lower tap at each setting, it returns to the set airflow volume as the indoor heat exchangertemperature rises to 45°C or higher.Thermostat operation(i) Cooling1) Thermostat is operated with the room temperature control.2) Thermostat is turned ON or OFF relative to the set room temperature as shown below.Thermostat ONThermostat OFFTemperature drop-1 +1Temperature riseSet room temperature3) Thermostat is turned ON when the room temperature is in the range of -1 < Set point < +1 at the start of cooling operation(including from heating to cooling).(ii) Heating1) Thermostat is operated with the room temperature control.2) Thermostat is turned ON or OFF relative to the set room temperature as shown below.Thermostat ONThermostat OFFHeater ON-1 +1Temperature riseHeater OFFTemperature drop-1 +13C ◦Set room temperature3) Thermostat is turned ON when the room temperature is in the range of -1 < Set point < +1 at the start of cooling operation(including from cooling to heating).(iii) Fan control during heating thermostat OFF1) Following fan controls during the heating thermostat OFF can be selected with the indoor function setting of the wiredremote controller.1 Low fan speed (Factory default), 2 Set fan speed, 3 Intermittence, 4 Fan OFF
(i)(j)'11 • SCM-SM-1102) When the “Low fan speed (Factory default)” is selected, the following taps are used for the indoor fans.・ For AC motor : Lo tap・ For DC motor : ULo tap3) When the “Set fan speed” is selected, it is operated with the set fan speed also in the thermostat OFF condition.4) If the “Intermittence” is selected, following controls are performed:a) If the thermostat is turned OFF during the heating operation, the indoor unit moves to the hot control and turnsOFF the indoor fan if the heat exchanger thermistors (both ThI-R1 and R2) detect 25°C or lower.b) Indoor fan OFF is fixed for 5 minutes. After the 5 minutes, the indoor fan is operated at Lo (AC motor) or ULo (DCmotor) for 2 minutes. In the meantime the louver is controlled at level.c) After operating at Lo (AC motor) or ULo (DC motor) for 2 minutes, the indoor fan moves to the state of a) above.d) If the thermostat is turned ON, it moves to the hot start control.e) When the heating thermostat is turned OFF, the remote controller displays the temperature detected at the fan stopand revises the temperature later when the indoor fan changes from Lo (AC motor) or ULo (DC motor) to stop.The remote controller uses the operation data display function to display temperatures and updates values oftemperature even when the indoor fan is turned OFF.f) When the defrosting starts while the heating thermostat is turned OFF or the thermostat is turned OFF duringdefrosting, the indoor fan is turned OFF. (Hot keep or hot start control takes priority.) However, the suctiontemperature is updated at every 7-minute.g) When the heating thermostat is turned ON or the operation is changed to another mode (including stop), thiscontrol is stopped immediately, and the operating condition is restored.5) When the “Fan OFF” is selected, the fan on the indoor unit of which the thermostat has been turned OFF, is turnedOFF. The same occurs also when the remote control sensor is effective.Filter signAs the operation time (Total ON time of ON/OFF switch) accumulates to 180 hours (1), “FILTER CLEANING” is displayedon the remote controller. (This is displayed when the unit is in trouble and under the centralized control, regardless of ON/OFF)Note (1) Time setting for the filter sign can be made as shown below using the indoor function of wired remote controller “FILTER SIGN SET”. (It is set at 1 at theshipping from factory.)Filter sign settingFunctionTYPE 1Setting time: 180 hrs (Factory default)TYPE 2Setting time: 600 hrsTYPE 3Setting time: 1,000 hrsTYPE 4Setting time: 1,000 hrs (Unit stop) (2)(2) After the setting time has elapsed, the “FILTER CLEANING” is displayed and, after operating for 24 hours further (counted also during the stop), theunit stops.Auto swing control [Applicable model: FDTC and FDEN]1) Louver controla) Press the “LOUVER” button to operate the swing louver when the air conditioner is operating.“SWING ” is displayed for 3 seconds and then the swing louver moves up and down continuously.b) To fix the swing louver at a position, press one time the “LOUVER” button while the swing louver is moving so thatfour stop positions are displayed one after another per second.When a desired stop position is displayed, press the “LOUVER” button again. The display stops, changes to showthe “STOP 1 ” for 5 seconds and then the swing louver stops.c) Louver operation at the power on with a unit having the louver 4-position control functionThe louver swings one time automatically (without operating the remote controller) at the power on.This allows inputting the louver motor (LM) position, which is necessary for the microcomputer to recognize thelouver position.Note (1) If you press the “LOUVER” button, the swing motion is displayed on the louver position LCD for 10 second. The display changes to the“SWING ” display 3 seconds later.- 26 -
(k)(l)'11 • SCM-SM-1102) Automatic louver level setting during heatingAt the hot start with the heating thermostat OFF, regardless whether the auto swing switch is operated or not (auto swingor louver stop), the louver takes the level position (In order to prevent the cold start). The louver position display LCDcontinues to show the display which has been shown before entering this control.3) Louver-free stop controlWhen the louver-free stop has been selected with the indoor function of wired remote controller “ POSITION”, thelouver motor stops when it receives the stop signal from the remote controller. If the auto swing signal is received fromthe remote controller, the auto swing will start from the position where it was before the stop.Note (1) When the indoor function of wired remote controller “ POSITION” has been switched, switch also the remote control function “POSITION” in the same way.Compressor inching prevention control1) 3-minute timerWhen the compressor has been stopped by the thermostat, remote controller operation switch or anomalous condition,its restart will be inhibited for 3 minutes. However, the 3-minute timer is invalidated at the power on the electric powersource for the unit.2) 3-minute forced operation timer• Compressor will not stop for 3 minutes after the compressor ON. However, it stops immediately when the unit isstopped by means of the ON/OFF switch or by when the thermister turned OFF the change of operation mode.• If the thermostat is turned OFF during the forced operation control of heating compressor, the louver position (with theauto swing) is returned to the level position.Note (1) The compressor stops when it has entered the protective control.Drain pump control [Applicable models:FDTC and FDUM]1) This control is operated when the inverter frequency is other than 0 Hz during the cooling operation and automaticcooling and dehumidifying operations.2) Drain pump ON condition continues for 5 minutes even when it enters the OFF range according to 1) above after turningthe drain pump ON, and then stops. The 5-minute delay continues also in the event of anomalous stop.3) The drain pump is operated with the 5-minute delay operation when the compressor is changed from ON to OFF.4) Even in conditions other than the above (such as heating, fan, stop, cooling thermostat OFF), the drain pump control isperformed by the drain detection.5) Following settings can be made using the indoor function setting of the wired remote controller.( i ) : Drain pump is run during cooling and dry.(ii): Drain pump is run during cooling, dry and heating.(iii): Drain pump is run during cooling, dry, heating and fan.(iv): Drain pump is run during cooling, dry and fan.- 27 -
(m) Drain motor (DM) control [Applicable model: FDTC and FDUM](n)(o)'11 • SCM-SM-110(i) Drain detection switch is turned ON or OFF with the float switch (FS) and the timer.Drain detection switch ONNormal stateNormal state[*1] [*2][*1] Drain detection switch is turned “ON” when the float switch “Open” is detected for 3 seconds continuously in thedrain detectable space.[*2] Drain detection switch is turned “OFF” when the float switch “Close” is detected for 10 seconds continuously.1) It detects always from 30 seconds after turning the power ON.a) There is no detection of anomalous draining for 10 seconds after turning the drain pump OFF.b) Turning the drain detection switch “ON” causes to turn ON the drain pump forcibly.c) Turning the drain detection switch “OFF” releases the forced drain pump ON condition.(ii) Indoor unit performs the control A or B depending on each operating condition.Indoor unit operation modeStop (1) Cooling Dehumidifying Fan (2) Heating Note (1) Including the stop from the cooling, dehumidifying, fanand heating, and the anomalous stopCompressor ONControl A(2) Including the “Fan” operation according to themismatch of operation modesCompressor OFFControl B1) Control Aa) If the float switch detects any anomalous draining condition, the unit stops with the anomalous stop (displays E9)and the drain pump starts. After detecting the anomalous condition, the drain motor continues to be ON.b) It keeps operating while the float switch is detecting the anomalous condition.2) Control BIf the float switch detects any anomalous drain condition, the drain motor is turned ON for 5 minutes, and at 10seconds after the drain motor OFF it checks the float switch. If it is normal, the unit is stopped under the normalmode or, if there is any anomalous condition, E9 is displayed and the drain motor is turned ON. (The ON condition ismaintained during the drain detection.)Operation check/drain pump test run operation mode1) If the power is turned on by the dip switch (SW7-1) on the indoor PCB when electric power source is supplied, it enters themode of operation check/drain pump test run. It is ineffective (prohibited) to change the switch after turning power on.2) When the communication with the remote controller has been established within 60 seconds after turning power on by thedip switch (SW7-1) ON, it enters the operation check mode. Unless the remote controller communication is established, itenters the drain pump test run mode.Note (1) To select the drain pump test run mode, disconnect the remote controller connector (CNB) on the indoor PCB to shut down the remote controllercommunication.3) Operation check modeThere is no communication with the outdoor unit but it allows performing operation in respective modes by operating theremote controller.4) Drain pump test run modeAs the drain pump test run is established, the drain pump only operates and during the operation protective functions bythe microcomputer of indoor unit become ineffective.Cooling, dehumidifying frost protection1) To prevent frosting during cooling mode or dehumidifying mode operation, the of compressor speed is reduced ifthe indoor heat exchanger temperature (detected with ThI-R) drops to 1.0 °C or lower at 4 minutes after the start ofcompressor operation. If the indoor unit heat exchanger temperature is 1.0 °C or lower after 1 minutes, the compressorspeed is reduced further. If it becomes 2.5 °C or higher, the control terminates. When the indoor heat exchangertemperature has become as show below after reducing the compressor speed, it is switched to the fan operation. For theselection of indoor fan speed, refer to item 2).Cooling operationModelSymbol A BFan operationSRC40~60 4 11.010FDC100~140 4 1Indoor heat exchanger temperature (°C)C1.01.0
(p)(q)(r)'11 • SCM-SM-1102) Selection of indoor fan speedIf it enters the frost prevention control during cooling operation (excluding dehumidifying), the indoor unit fan speed isswitched.(a) In cases of FDENi) When the indoor unit return air temperature (detected with ThI-A) is 23°C or lower, this control is invalidatedand, as 2 hours elapse after starting the frost prevention control, it is terminated.ii) If it is detected again within 15 minutes from the start of frost prevention control, the indoor fan speed is raisedby 1 tap to increase the indoor unit fan speed. If it is detected within further 15 minutes, the indoor unit fanspeed is raised by 1 tap more.Note (1) Indoor unit fan speed can be increased by up to 2 taps.iii) “ FAN SPEED SW VALID/INVALID” of this control is selectable with the function setting of remotecontroller.b) In the case of FDTC and FDUMi) When the indoor return air detection temperature (detected with ThI-A) is 23°C or higher and the indoor heatexchanger temperature (detected with ThI-R) detects the compressor frequency drop start temperature A°C+1°C,of indoor unit fan speed is increased by 20rpm.ii) If the phenomenon of i) above is detected again after the acceleration of indoor unit fan, indoor unit fan speedis increased further by 20rpm.Note (1) Indoor unit fan speed can be increased by up to 2 taps.• Compressor frequency drop start temperatureSymbolAItemTemperature - Low (Factory default) 1.0Temperature - High 2.5Note (1) Frost prevention temperature setting can be selected with the indoor unit function setting of the wired remote controller.Heating overload protection1) If the indoor heat exchanger temperature (detected with ThI-R) at 63°C or higher is detected for 2 seconds continuously,the compressor stops. When the compressor is restarted after a 3-minute delay, if a temperature at 63°C or higher isdetected for 2 seconds continuously within 60 minutes after initial detection and if this is detected 5 times consecutively,the compressor stops with the anomalous stop (E8). Anomalous stop occurs also when the indoor heat exchangertemperature at 63°C or higher is detected for 6 minutes continuously.Compressor OFFCompressor ON56 63Indoor heat exchanger temperature (°C)2) Indoor unit fan speed selectionIf, after second detection of heating overload protection up to fourth, the indoor fan is set at Me and Lo taps when thecompressor is turned ON, the indoor fan speed is increased by 1 tap.Anomalous fan motor [In case of FDTC and FDUM]1) After starting the fan motor, if the fan motor speed is 200rpm or less is detected for 30 seconds continuously and 4 timeswithin 60 minutes, then fan motor stops with the anomalous stop (E16).2) If the fan motor fails to reach at -50 rpm less than the required speed, it stops with the anomalous stop (E20).Plural unit control – Control of 16 units group by one remote controller1) FunctionOne remote controller switch can control a group of multiple number of unit (Max. 16 indoor units). “Operation mode”which is set by the remote controller switch can operate or stop all units in the group one after another in the order of unitNo. (1) . Thermostat and protective function of each unit function independently.Note (1) Unit No. is set by SW2 on the indoor unit control PCB. Unit No. setting by SW2 is necessary for the indoor unit only.- 29 -
(s)(t)'11 • SCM-SM-110SW2 : For setting of 0 – 9, A – FOutdoor unit SCM**ZJ typeOutdoor unit SCM**ZJ typeWirings betweenoutdoor unit andindoor unitsIndoor unit 0 1 2 3 4 5C D E FRRemote controller(2) Unit No. may be set at random unless duplicated, it should be better to set orderly like 0, 1, 2…, F to avoid mistake.2) Display to the remote controllera) Center or each remote controller basis, heating preparation: the youngest unit No. among the operating units in theremote mode (or the center mode unless the remote mode is available) is displayed.b) Inspection display, filter sign: Any of unit that starts initially is displayed.c) Confirmation of connected unitsPressing “AIR CON No.” button on the remote controller displays the indoor unit address. If “▲” “▼” button ispressed at the next, it is displayed orderly starting from the unit of youngest No.d) In case of anomalyi) If any anomaly occurs on a unit in a group (a protective function operates), that unit stops with the anomalousstop but any other normal units continue to run as they are.ii) Signal wiring procedureSignal wiring between indoor and outdoor units should be made on each unit same as the normal wiring.For the group control, lay connect with sires wiring between rooms using terminal blocks (X, Y) of remotecontroller.Connect the remote controller communication wire separately from the power supply wire or wires of otherelectric devices (AC220V or higher).High ceiling controlIn the case of indoor unit installed in a higher ceiling room, the airflow volume mode control can be changed with the wiredremote controller indoor unit function “FAN SPEED SET”.Fan tapIndoor unit airflow setting- - -- ---FAN SPEED SETSTANDARD PHi - Hi - Me - Lo Hi - Me - Lo Hi - Lo Hi - MeHIGH SPEED1, 2 PHi - PHi - Hi - Me PHi - Hi - Me PHi - Me PHi - HiNote (1) Factory default is Standard.(2) At the hot-start and heating thermostat OFF, or other, the indoor unit fan is operated at the low speed tap of each setting.(3) This function is not able to be set with wireless remote controls or simple remote control (RCH-E3)Abnormal temperature thermistor (return air/indoor heat exchanger) wire/short-circuit detection1) Broken wire detectionWhen the return air temperature thermistor detects -20°C or lower or the heat exchanger temperature thermistor detect-40°C or lower for 5 seconds continuously, the compressor stops. After a 3-minute delay, the compressor restarts but,if it is detected again within 60 minutes after the initial detection for 6 minutes continuously, stops again (the return airtemperature thermistor: E7, the heat exchanger temperature thermistor: E6).2) Short-circuit detectionIf the heat exchanger temperature thermistor detects 70°C or higher for 5 seconds continuously at 2 minutes and 20seconds after the compressor ON during cooling operation, the compressor stops (E6).
(u)(v)'11 • SCM-SM-110Operation permission/prohibition(In case of adopting card key switches or commercially available timers)When the indoor function setting of wired remote controller for “Operation permission/prohibition” is changed from “Invalid(Factory default)” to “ Valid”, following control becomes effective.1 Optional2XR1CnT 3XR2BlueCard key412V XR3XR5 switch5XR46XR5Normal operationOperation permission/prohibition mode(Factory default)“Valid” (Local setting)ON OFF ON OFFCnT-6Operation Operation prohibitionOperationStoppermission*1 (Unit stops)*1 Only the “LEVEL INPUT” is acceptable for external input, however when the indoor function setting of“Level input (Factory default)” or “Pulse input” is selected by the function for “External input” of the wired remotecontroller, operation status will be changed as follows.In case of “Level input” setting In case of “Pulse input” settingUnit operation from the wiredUnit starts operationremote controller becomes*(2)available*(1)*(1) In case that “Operation permission/prohibition mode” setting is “Valid” and “External input” setting is “Levelinput (Factory default)”;1 When card key switch is ON (CnT-6 ON: Operation permission), start/stop operation of the unit from thewired remote controller becomes available.2 When card key switch is OFF (CnT-6 OFF: Operation prohibition), the unit stops operation in conjunctionwith OFF signal, and start/stop operation of the unit from the wired remote controller becomes not available.*(2) In case that “Operation permission/prohibition mode” setting is “Valid” and “External input” setting is “Pulseinput (Local setting)”;1 When card key switch is ON (Operation permission), the unit starts operation in conjunction with ON signal.and also start/stop operation of the unit from the wired remote controller becomes available.2 When card key switch is OFF (Operation prohibition), the unit stops operation in conjunction with OFF signal, andstart/stop operation of the unit from the wired remote controller becomes not available.(3) This function is invalid only at “Center mode” setting done by central controller.External input/output control (CnT)Be sure to connect the wired remote controller to the indoor unit. Without wired remote controller remote operation by CnT isnot possible to perform.1 Optional1Operation output(CnT-2: XR1)2XR12Heating output(CnT-3: XR2)CnT 3XR2Blue3Thermostat ON output (CnT-4: XR3)412V XR34Error output(CnT-5: XR4)5XR45Remote operation input (CnT-6: No-voltage contactor)6XR51) Output for external control (remote display)Following output connectors (CnT) are provided on the indoor control PCB for monitoring operation status.1 Operation output: Outputs DC12V signal for driving relay during operation2 Heating output: Outputs DC12V signal for driving relay during heating operation3 Thermostat ON output: Outputs DC12V signal for driving relay when compressor is operating.4 Error output: Outputs DC12V signal for driving relay when anomalous condition occurs.
'11 • SCM-SM-1102) Remote operation inputRemote operation input connector (CnT-6) is provided on the indoor control PCB.However remote operation by CnT-6 is not effective, when “Center mode” is selected by center controller.In case of plural unit (twin, triple, double twin), remote operation input to CnT-6 on the slave indoor unit is invalid.Only the “LEVEL INPUT” is acceptable for external input, however when the indoor function setting of “Levelinput (Factory default)” or “Pulse input” is selected by the function for “External input” of the wired remote controller,operation status will be changed as follows.a) In case of “Level input” setting (Factory default)Input signal to CnT-6 is OFF→ON …… unit ONInput signal to CnT-6 is ON→OFF …… unit OFFOperation is not inverted.• Model FDTC and FDEN• Model FDUMONONONONCnT-6 input OFFOFFOFF CnT-6 input OFFOFFONONONONUnit A OFFOFFOFF Unit A OFFOFFONONONONUnit B OFFOFFUnit BOFFOFFRemotecontroller OFFRemotecontroller ONNote: The latest operation has priorityIt is available to operate/stop by remote controller or center controllerb) In case of “Pulse input” setting (Local setting)It is effective only when the input signal to CnT-6 is changed OFF→ON, and at that time unit operation [ON/OFF] isinverted.• Model FDTC and FDEN• Model FDUMONONONONCnT-6 input OFFOFFOFF CnT-6 input OFFOFFONONUnit A OFFOFFUnit A OFFOFFONONONONUnit B OFFOFFOFFUnit BOFFRemotecontroller OFFRemotecontroller ON3) Remote operationa) In case of multiple units (Max. 16 indoor units group) are connected to one wired remote controllerWhen the indoor function setting of wired remote controller for “External control set” is changed from “Individual(Factory default)” to “ For all units”, all units connected in one wired remote controller system can be controlled byexternal operation input.Outdoor unit SCM**ZJ typeOutdoor unit SCM**ZJ typeWirings betweenoutdoor unit andindoor unitsIndoor unit 0 1 2 3 4 5C D E FRRemote controllerEx. Indoor units = 0 +1+2+3+4+5・・・・ C + D + E + F ≦16 units
(w)(x)(y)'11 • SCM-SM-110Individual operation (Factory default) All units operation (Local setting)ON OFF ON OFFCnT-6Only the unit Only the unitAll units in one All units in onedirectly connected directly connectedremote controller remote controllerto the remote to the remotesystem can be system can becontroller can be controller can beoperated.stopped operation.operated.stopped opeartion.Unit 0 only Unit 0 only Units 0-F Units 0-FWhen more than one indoor unit (Max. 16 indoor units) are connected in one wired remote controller system:(1) With the factory default, external input to CnT-6 is effective for only the unit 0.(2) When setting “For all unit” (Local setting), all units in one remote controller system can be controlled by externalinput to CnT-6 on the indoor unit 0.(3) External input to CnT-6 on the other indoor unit than the unit 0 is not effective.Fan control at heating startup (Applicable model: FDTC and FDUM)1) Start conditionsAt the start of heating operation, if the difference of setting temperature and return air temperature is 5°C or higher afterthe end of hot start control, this control is performed.2) Contents of controla) Sampling is made at each minute and, when the indoor unit heat exchanger temperature (detected with ThI-R) is37°C or higher, present number of revolutions of indoor unit fan speed is increased by 10min -1 .b) If the indoor unit heat exchanger temperature drops below 37°C at next sampling, present number of revolutions ofindoor unit fan speed is reduced by 10min -1 .3) End conditionsIndoor fan speed is reduced to the setting airflow volume when the compressor OFF is established and at 30 minutes afterthe start of heating operation.Room temperature detection temperature compensation during heatingWith the standard specification, the compressor is turned ON/OFF with the thermostat setting temperature. When the thermostatis likely to turn OFF earlier because the unit is installed at the ceiling where warm air tends to accumulate, the setting can bechanged with the wired remote controller indoor unit function “ ”. The compressor and the heater are turned ON/OFFat one of the setting temperature +3, +2 or +1°C in order to improve the feeling of heating. The setting temperature, however,has the upper limit of 30°C.Standard CompressorOperationWhen it is set at +3°C CompressorOperationStopStop-1 +1+2 +4Setting temperatureSetting temperatureRoom temperature (deg)Room temperature (deg)Return air temperature compensationThis is the function to compensate the deviation between the detection temperature by the return air temperature thermistor andthe measured temperature after installing the unit.1) It is adjustable in the unit of 0.5°C with the wired remote controller indoor unit function “RETURN AIR TEMP”.• +1.0°C, +1.5°C, +2.0°C• -1.0°C, -1.5°C, -2.0°C2) Compensated temperature is transmitted to the remote controller and the compressor to control them.Note (1) The detection temperature compensation is effective on the indoor unit thermistor only.
'11 • SCM-SM-1101.3 Outline of heating operation(1) Summary(a) Capacity control1) Indoor unit SRK ** ZJX models onlyModelCapacitySCM40ZJ-S1.4 6.9 kWSCM45ZJ-S1.4 7.4 kWSCM50ZJ-S11.4 7.5 kWSCM60ZJ-S11.5 7.8 kWSCM71ZJ-S11.5 9.4 kWSCM80ZJ-S11.5 9.8 kWModelCapacitySCM100ZJ-S11.5 13.5 kWSCM125ZJ-S11.5 14.0 kW2) Indoor unit except SRK ** ZJX modelsModelCapacitySCM40ZJ-S1.4 6.7 kWSCM45ZJ-S1.4 7.2 kWSCM50ZJ-S11.4 7.3 kWSCM60ZJ-S11.5 7.6 kWSCM71ZJ-S11.5 9.1 kWSCM80ZJ-S11.5 9.5 kWModelCapacitySCM100ZJ-S11.5 13.3 kWSCM125ZJ-S11.5 13.8 kWCapacity control is within the range shown above. If demand capacity of the indoor units exceeds the maximum capacity ofthe outdoor unit, the demand capacity will be proportionally distributed.(b) Outdoor compressor speed controlIndoor compressor command total speed value0 rpsA rps or lessMore than A rps, but B rps or lessMore than B rpsDecision speed0 rpsA rpsA rps to B rpsB rpsValues of A, BItemModel SCM40ZJ-S SCM45ZJ-S SCM50ZJ-S1AB30 rps100 rps30 rps120 rps30 rps120 rpsItemModel SCM60ZJ-S1 SCM71ZJ-S1 SCM80ZJ-S1ABTwo connectionOne connection40 rps90 rpsMore than three connectionMore than two connection30 rps120 rpsItemModel SCM100ZJ-S1 SCM125ZJ-S1ABOne connection80 rpsMore than two connection 105 rps 110 rpsThree connection31 rpsMore than fore connection31 rps(2) Operation of major functional components in heating modeOperationThermostat OFF Thermostat OFF Fan, stop, abnormal stop FailureFunctionalHeatingcomponents(All indoor units) (Some of indoor units) (Some of indoor units) (Outdoor unit)Command speedMulti-operation rpm calculated based0000on the rpm required for each indoor unit (All indoor units) (Thermostat off units) (Fan, stop, abnormal stop units) (All units)Indoor Fixed According to mode switching Hot KeepAccording to mode switchingHot Keepunit fanAutomatic According to command speed Hot KeepAccording to command speedHot KeepOutdoor unit fan According to outdoor unit speed OFFAccording to outdoor unit speedOFFElectronicAccording to decisionexpansion valve speedAccording to stop modeAccording to heating stop unit control According to heating stop unit control(Thermostat off units) (Fan, stop, abnormal stop units)According to stop modeCompressorONOFFONONOFF(3) Hot keep operationIf the hot keep operation is selected during the heating operation, the indoor fan is controlled based on the temperature of theindoor unit heat exchanger (Th2) to prevent blowing of cool wind.Note (1) Refer to the FDTC, FDEN and FDUM series by 25 page.
(4) Defrosting operation(a)Outdoor heat exchanger temperature (℃)(b)'11 • SCM-SM-1104040Tho-R2Tho-ATho-R(Tho-A)(Tho-R) > = 0.44 × (Tho-A) + ATho-AA2 °C < = Tho-A 4(6.5)15 °C < = Tho-A < 2 °C 6(10.0)Tho-A < 15 °C 6(10.0)Note (1) Values in ( ) are for the model SCM100, 125.00-5-5-10-10Defrost operation-15startDefrost operationstart-15-20-20 -15 -10 -20 -5 0 5 10Outdoor air -20temperature -15(℃) -10 -5 0 5 10Outdoor air temperature (℃)Tho-R 22Tho-R20Tho-Rº SCM71, 80, 100, 1253Heating operationHeating operationMax. 12 minutes and 50 seconds2~7 minutes※Max. 12 minutes and 50 secondsHot keep operation2~7 minutes※Hot keep operation※ Depends on an operation condition, the time can be longer than 7 minutes.※ Depends on an operation condition, the time can be longer than 7 minutes.Outdoor heat exchanger temperature (℃)Defrost operation start temperatureDefrost operation start temperature
'11 • SCM-SM-1101.4 Outline of cooling operation(1) Summary(a) Capacity control1) Indoor unit SRK ** ZJX models onlyModelCapacitySCM40ZJ-S1.8 5.9 kWSCM45ZJ-S1.8 6.4 kWSCM50ZJ-S11.8 7.1 kWSCM60ZJ-S11.8 7.5 kWSCM71ZJ-S11.8 8.8 kWSCM80ZJ-S11.8 9.2 kWModelCapacitySCM100ZJ-S11.8 12.0 kWSCM125ZJ-S11.8 14.0 kW2) Indoor unit except SRK ** ZJX modelsModelCapacitySCM40ZJ-S1.8 5.8 kWSCM45ZJ-S1.8 6.3 kWSCM50ZJ-S11.8 6.9 kWSCM60ZJ-S11.8 7.3 kWSCM71ZJ-S11.8 8.3 kWSCM80ZJ-S11.8 8.7 kWModelCapacitySCM100ZJ-S11.8 11.8 kWSCM125ZJ-S11.8 13.8 kWCapacity control is within the range shown above. If demand capacity of the indoor units exceeds the maximum capacity ofthe outdoor unit, the demand capacity will be proportionally distributed.(b) Outdoor compressor speed controlIndoor compressor command total speed value0 rpsA rps or lessMore than A rps, but B rps or lessMore than B rpsDecision speed0 rpsA rpsA rps to B rpsB rpsValues of A, BModel SCM40ZJ-S SCM45ZJ-S SCM50ZJ-S1 SCM60ZJ-S1 SCM71ZJ-S1 SCM80ZJ-S1AB30 rps100 rps30 rps120 rps30 rps120 rps20 rps120 rps20 rps120 rps20 rps120 rpsModelABSCM100ZJ-S12040 rps110 rpsSCM125ZJ-S12045 rps110 rps(2) Operation of major functional components in cooling modeOperationThermostat OFF Thermostat OFF Fan, stop, abnormal stop FailureFunctionalCoolingcomponents(All indoor units) (Some of indoor units) (Some of indoor units) (Outdoor unit)Command speedMulti-operation rpm calculated basedon the rpm required for each indoor unit0(All indoor units)0(Thermostat off units)0(Fan, stop, abnormal stop units)0(All units)Indoor FixedAccording to mode switchingunit fanAutomatic According to command speed According to mode switchingAccording to command speedOutdoor unit fan According to outdoor unit speed OFFAccording to outdoor unit speedOFFElectronicAccording to decisionexpansion valve speedAccording to stop modeAll closedAll closed(Thermostat off units) (Fan, stop, abnormal stop units)According to stop modeCompressorONOFFONONOFF
'11 • SCM-SM-1101.5 Outline of automatic operation(1) Determination of operation mode(a) SRK20, 25, 35, 50, 60ZJX, SRF and SRR seriesThe unit checks the indoor air temperature and the outdoor air temperature after operating the indoor and outdoor blowersfor 20 seconds, determines the operation mode and the indoor air temperature setting correction value, and then enters inthe automatic operation.Cooling27.525.5Indoor air temperature (°C)Dehumidifying19.5Heating18 30Outdoor air temperature (°C)1) The unit checks the temperature every hour after the start of operation and, if the result of check is not same as the previousoperation mode, changes the operation mode.2) When the unit is started again within one hour after the stop of automatic operation or when the automatic operation is selectedduring heating, cooling or dehumidifying operation, the unit is operated in the previous operation mode.3) Setting temperature can be adjusted within the following range. There is the relationship as shown below between the signalsof the wireless remote controller and the setting temperature.◆ SRF seriesUnit : °CSignals of wireless remote control (Display)–6 –5 –4 –3 –2 –1 ±0 +1 +2 +3 +4 +5 +6Setting Cooling 0 21 22 23 24 25 26 27 28 29 30temperature Dehumidifying 18 19 20 21 22 23 24 25 26 27 28 29 30Heating 0 21 22 23 24 25 26 27 28 29 30 31 32◆ SRK, SRR seriesUnit : °CSignals of wireless remote control (Display)–6 –5 –4 –3 –2 –1 ±0 +1 +2 +3 +4 +5 +6Setting Cooling 0 21 22 23 24 25 26 27 28 29 30temperature Dehumidifying 19 20 21 22 23 24 25 26 27 28 28 30 31Heating 0 21 22 23 24 25 26 27 28 29 30 31 324) When the unit is operated automatically with the wired remote controller connected, the cooling operation is controlled accordingto the display temperatures while the setting temperature is compensated by +1°C during dehumidifying or by +2°C duringheating.(b)SRK25, 35ZJR-S, 20, 25, 35, 50ZJ-S, 71ZK-S seriesCooling27.525.5Indoor air temperature (˚C)18.0AHeatingDehumidifying18 30Outdoor air temperature (˚C)
'11 • SCM-SM-110 Signals of wireless remote controller (Display)–6 –5 –4 –3 –2 –1 0 +1 +2 +3 +4 +5 +6CoolingSettingDehumidifyingtemperatureHeating4) When the unit is operated automatically with the wired remote controller connected, the cooling operation is controlled accordingto the display temperatures while the setting temperature is compensated by +1°C during dehumidifying or by +2°Cduring heating.(c) FDTC, FDEN and FDUM seriesRefer to page 23.1.6 Operation permission/prohibition control(Refer to the FDTC, FDEN and FDUM series by 31 page)The air conditioner operation is controlled by releasing the jumper wire (J3) on the indoor PCB and inputting the externalsignal into the CnT.Note (1) Please install the separately-sold Interface kit (SC-BIK-E). Remove the jumper wire (J1 or J3) from the Interface kit circuit board.(1) The operation mode is switched over between Permission and Prohibition by releasing the jumper wire (J3)on the indoor PCB.When the jumper wire (J3) is short circuited When the jumper wire (J3) is releasedNormal operation is enable (when shipping)Permission / Prohibition modeWhen CnT input is set to ON, the operation starts When Cnt input is set to ON, the operation mode isand if the input is set to OFF, the operation stops. changed to permission and if input is set to OFF theFor the CnT and remote control inputs, the input operation is prohibited.which is activated later has priority and can start andstop the operation.(2) In the case of CnT input ON (Operation permission)(a) The air conditioner can be operated or stopped by the remote control signal.(When the "CENTER" mode is set, the operation can be controlled only by the center input.)(b) When the CnT input is changed from OFF to ON, the air conditioner operation mode is changed depending on the statusof the jumper wire (J1) on the indoor control board.When the jumper wire (J1) is short circuited When the jumper wire (J1) is releasedThe signal (1) above starts the air conditioner.When the CnT input is set to ON, the air conditioner(Shipping status)starts operation. After that, the operation of the airconditioner depends on (a) above. (Local status)(3) In the case of CnT input OFF (Operation prohibition)(a) Air-conditioner is unable to control the operation/stop, ect. in accordance with signals from the remote controller signalwire.(b) Air-conditioner stops as it changes CnT input ON → OFF.- 38 -
'11 • SCM-SM-1101.7 External control (remote display) /control of input signal(Refer to the FDTC, FDEN and FDUM series by 31 page)(1) External control (remote display) outputFollowing output connectors (CNT) are provided on the printed circuit board of indoor unit.Note (1) Please install the separately-sold Interface kit (SC-BIK-E). The output connector (CNT) is located on the circuit board of the Interface kit.• Operation output: Power to engage DC 12V relay (provided by the customer) is outputted during operation.• Heating output: Power to engage DC 12V relay (provided by the customer) is outputted during the heating operation.• Compressor OPERATION output: Power to engage DC 12V relay (provided by the customer) is outputted while thecompressor is operating.• MALFUNCTION output: When any error occurs, the power to engage DC 12V relay (provided by the customer) is outputted.(2) Control of input signalControl of input signal (switch input, timer input) connectors (CNT) are provided on the printed circuit board of indoor unit.However, when the operation of air conditioner is under the Center Mode, the remote control by CnT is invalid.(a) Level inputIf the factory settings (Jumper wire J1 EXTERNAL INPUT on the PCB of indoor unit) are set, or “LEVEL INPUT” is selectedin the wired remote control’s indoor unit settings.1) Input signal to CnT OFF → ON Air conditioner ON2) Input signal to CnT ON → OFF Air conditioner OFFONONCnT InputOFFOFFOFF Note (1) The ON with the * mark indicates anON operation using the remote controlONON *ONunit switch, etc.Unit(CASE A)OFFOFFOFFUnit *ONONON(CASE B)OFFOFF(b) Pulse inputWhen Jumper wire J1 on the PCB of indoor unit is cut at the field or “PULSE INPUT” is selected in the wired remote control’sindoor unit settings.Input signal to CnT becomes valid at OFF → ON only and the motion of air conditioner [ON/OFF] is inverted.ONONCnT Input OFFOFFOFFONUnit(CASE A) OFFOFFONONUnit(CASE B)OFF
1.8Protective control function'11 • SCM-SM-110(1) Frost prevention control(a) Operating conditions2.58(b) Detail of anti-frost operationResetOperation modeProtective controlResetProtectiveItemcontrolCompressor operationForced outage Operation instructionIndoor fanDepends on operation mode2.5 8(c) Reset conditions:Indoor heat exchangertemperature (ºC)(2) Cooling overload protective control(a) Operating conditions:Tho-AON2ModelON1ItemSCM40, 45ZJ-S, 50, 60, 71, 80ZJ-S1OFFOutdoor air temperatureLower limit speed40 41 46 47ModelOutdoor air temperature ( ºC )SCM100, 125ZJ-S1ItemOutdoor air temperatureLower limit speed25 31(b) Detail of operation30 (25) 40 (31)30 (25) 40 (31) thermo becomes OFF, the speedis reduced to 0 rps.Note (1) Values in ( ) are for the model SCM100, 125ZJ-S1.(c) Reset conditions:(3) Cooling high pressure controlModel SCM40, 45, 50, 60, 71, 80(a) Purpose:(b) Detector:Tho-R(c) Detail of operation:(Example) FuzzyAfter lapse of 30 sec. or over (3)After lapse of 30 sec. or over (3)lower limitAfter lapse of 30 sec. or over (3)speed 30 rps0rps53 58 60Outdoor heat exchanger temperature (°C)60 8 2060
'11 • SCM-SM-110◆Model SCM100, 1251) Start condition: When the high pressure sensor (HPS) has risen to a specified pressure while the compressor isturned on.2) Compressor command speed is controlled according to the zones of high pressure sensor asshown by the following table.HPS < P2 P2 < = HPS < P3 P3 < = HPS P4 < = HPSProtection control speed (NP) Normal Retention NP-8rps 0rpsSampling time (s) Normal 30 20 NormalUnit: MPaNPHPS P2 P3 P420 < = NP < 30 2.94 – 3.45 3.07 – 3.85 3.15 – 4.0530 < = NP < 90 3.45 3.85 4.0590 < = NP < 100 3.45 – 3.25 3.85 – 3.60 4.05 – 3.81100 < = NP < 110 3.25 – 3.07 3.60 – 3.33 3.81 – 3.53110 < = NP 3.07 3.33 3.53(4) Cooling low outdoor temperature protective control(a) Operating conditions: When the outdoor air temperature (Tho-A) is 22°C or lower continues for 20 seconds whilecompressor command speed is other than 0 rps.(b) Detail of operation:1 The lower limit of compressor command speed is set to B or D rps and even if the speed becomes lower than B or Drps, the speed is kept to B or D rps. However, when the thermo becomes OFF, the speed is reduced to 0 rps.2 The upper limit of compressor command speed is set to A or C rps, the speed is kept to A or C rps.ON Upper limit C rpsLower limit D rpsON Upper limit A rpsLower limit B rpsOFF0 3 22 25Outdoor air temperature.(°C)Values of A ~ DModel SCM40ZJ-S SCM45ZJ-S SCM50ZJ-S1 SCM60ZJ-S1 SCM71ZJ-S1 SCM80ZJ-S1ABCD75 rps35 rps60 rps45 rps75 rps35 rps60 rps45 rps75 rps35 rps60 rps45 rps75 rps30 rps60 rps40 rps75 rps30 rps60 rps40 rps75 rps30 rps60 rps40 rpsModelABCDSCM100ZJ-S175 rps20 rps60 rps31 rpsSCM125ZJ-S175 rps20 rps60 rps31 rps(c) Reset conditions: When the either of the following condition is satisfied1 When the outdoor air temperature (Tho-R) becomes 25°C or higher.2 When the compressor command speed is 0rps.
'11 • SCM-SM-110(5) Heating high pressure control(a) Indoor unit side1) Start condition: When the indoor heat exchanger temperature (Th2) has become higher than the start temperaturefor 1 minute continuously.2) Contents of control: Compressor stopItemIndoorair temp.(Th1)Release temperature Start temperatureTh1 < = 24°C 48.5°C 62°C24°C < Th1 < =27°C 47.5°C (–) 61°C27°C < Th1 46.5°C (–) 60°CNote (1) Values in ( ) are for the model SRK71ZK-S.3) Release condition: When the indoor heat exchanger temperature (Th2) has become lower than the release temperature.(b) Outdoor unit side◆Model SCM40, 45, 50, 60, 71, 801) Start condition: When the indoor heat exchanger temperature (Th2) has risen to a specified temperature while thecompressor is turned on.2) Compressor command speed is controlled according to the zones of indoor heat exchanger temperatureas shown by the following table.Th2 < P1 P1 < = Th2 < P2 P2 < = Th2 < P3 P3 < = Th2Protection control speed (NP) Normal Retention NP-4rps NP-8rpsSampling time (s) Normal 20 20 20• Model SCM40, 45, 50Unit: °C • Model SCM60, 71, 80 Unit: °CNPTh2 P1 P2 P3NPTh2 P1 P2 P310 < = NP < 115 45 52 57.510 < = NP < 90 45 52 57115 < = NP < 120 45 – 43 52 – 50 57.5 – 5590 < = NP < 100 45 – 44.5 52 – 49.5 57 – 54120 < = NP 43 50 55100 < = NP < 110 44.5 – 44 49.5 – 47.5 54 – 51110 < = NP < 120 44 – 43 47.5 – 45 51 – 48120 < = NP 43 45 48◆Model SCM100, 1251) Start condition: When the high pressure sensor (HPS) has risen to a specified pressure while the compressor isturned on.2) Compressor command speed is controlled according to the zones of high pressure sensor asshown by the following table.HPS < P1 P1 < = HPS < P2 P2 < = HPS < P3 P3 < = HPS < P4 P4 < = HPSProtection control speed (NP) Normal Retention NP-3rps NP-6rps 0rpsSampling time (s) Normal 20 20 20 NormalUnit: MPaNPHPS P1 P2 P3 P420 < = NP < 30 2.81 – 2.94 2.94 – 3.45 3.07 – 3.85 3.15 – 4.0530 < = NP < 90 2.94 3.45 3.85 4.0590 < = NP < 100 2.94 – 2.88 3.45 – 3.25 3.85 – 3.60 4.05 – 3.81100 < = NP < 110 2.88 – 2.81 3.25 – 3.07 3.60 – 3.33 3.81 – 3.53110 < = NP 2.81 3.07 3.33 3.53
'11 • SCM-SM-110(6) Heating overload protective control(a) Indoor unit side1) Operating conditions :2) Detail of operation :Tho-A(SRK71ZK-S:10th, SRF, SRR:9th)3) Reset conditions :Tho-ANote (1) FDTC, FDEN and FDUM serise:Refer to page 29.(b) Outdoor unit side1) Operating conditions :Tho-A 10 or 17 (model 60, 71, 80:13 or 17 )2) Detail of operationA or CB or DB or D when the thermo becomes OFF, the speed isB or D.3) Reset conditions:Tho-A8 (model 60, 71, 80, 100, 125:11 ).Upper CUnit: rpsLower DUpper AItemModelA B C DLower BSCM40, 4590 35 75 40OFFSCM5090 35 75 4011(8) 13(10) 16 17SCM60, 71, 80 90 30 75 40Outdoor air temperature(°C)SCM100, 125 90 25 75 31Note(1) Values in ( ) are for the model SCM40, 45.(7) Heating low outdoor temperature protective control(a)Operating conditions:Tho-A4(b)Detail of operation:Lower limit 40 rps (model 50:45 rps)Lower limit 35 rpsNormal operation-8 -6 4 6Outdoor air temperature(°C)(c) Reset conditions:Tho-A 6
'11 • SCM-SM-110(8) Freezing cycle system protective control(a) Starting condition: This control starts when the following conditions are met.1) When it has elapsed 30 minutes after the compressor was changed from OFF to ON in the cooling operation mode formore than 5 minutes.2) When the compressor command speed has met the following conditions.3) When the indoor air temperature of running indoor unit (Th1) and the indoor heat exchanger temperature (Th2) havemet the following condition even on one unit.Compressor Indoor air temperature Indoor air temperature (Th1) and indoorUnitDurationcommand speed (Th1, ℃ )heat exchanger temperature (Th2)1 40 (60) rpsTh1 - 4 < Th22 50 (70) rps3 60 (80) rps10 < = Th1 < Th1 - 3 < Th2= 405 minute4 70 rps5 80 rpsTh1 - 2 < Th26 90 rpsNote (1) Values in ( ) are for the model SCM40, 45, 50.(b) Contents of control1) Stop the compressor and delay the start, and then restarts.2) Compressor stops by the abnormal stop when the compressor stop has occurred 3 times in one hour.(9) Crankcase heater(a) Operating conditions (When all the conditions below are satisfied)1 After the operation mode is changed to stop and the compressor command speed becomes 0 rps continuously for 30 minutes.2 When the temperature detected by the outdoor air temperature (Tho-A) is 10°C or lower after the compressor stops.(b) Detail of operationThe crankcase heater operates, warming up the compressor, then refrigerant begins circulating smoothly when the coolerstarts its heating operation, and heating begins.(c) Restoration conditionsWhen the temperature detected by the outdoor air temperature (Tho-A) reaches 12°C or higher, or the operation modechanges from stop to cooling or heating.(10) Inching preventionWhen the compressor becomes to the thermo operation within 5 minutes since operation start or becomes dehumidifying operation,the operation is continued with the compressor command speed of minimum rps forcibly.(11) Compressor overheat protection(a) Purpose:(b) Detail of operation1)Tho-D(Example) Fuzzy3 minutes3 minutes3 minutes95 105 115Discharge pipe temperature (˚C)105115951053 minutes951053 minutes- 44 -
'11 • SCM-SM-110ModelItem Cooling HeatingLower limit speedSCM40, 45, 50 32 rps 32 rpsSCM60, 71, 80, 100, 125 25 rps 32 rps2)115(12) Current safeModel SCM40, 45, 50, 60, 71, 80(a) Purpose:(b) Detail of operation:(c) Current safe control value: Set this using the jumper wire (J1 or J2) on the outdoor PCB. Control startswhen it exceeds the control value.1) Switching with jumper wireJumper wire (J2)Short-circuit(At shipping from factory)Short-circuitShort-circuit (At shipping from factory) Current safe 1 Current safe 2Jumper wire (J1)Open Current safe 3 Current safe 32) Control valueUnit: ACurrent safe 1 Current safe 2 Current safe 3ModelCooling Heating Cooling Heating Cooling HeatingSCM40, 45ZJ-S, 50ZJ - S1 10.0 12.0 10.0 10.0 7.5 7.5SCM60ZJ - S1 11.0 14.0 10.0 10.0 7.5 7.5SCM71, 80ZJ - S1 13.0 16.0 10.0 10.0 7.5 7.5◆Model SCM100, 125Detecting the outdoor unit inverter input (primary) current and the output (secondary) current, if the current values exceed settingvalues, the compressor speed (frequency) is controlled to protect the inverter.Reduces frequencyat each minute.CoolingHeatingRetentionControl Reset value Control Reset valuevalue A B value A BResetBAPrimarycurrent21 20 23 20Current (A)side(Fig. C) The control value “A” and the reset value vary dependingon the compressor speed.Secandary24currentsideFig.C Fig.C Fig.C Fig.C2220Control valve A1816 Reset valve B141240 50 60 70 80 90 100 110 120 130Compressor speed (frequency) (rps)Control or reset valve (A)
'11 • SCM-SM-110(13) Current cut(a) Purpose:(b) Detail of operation:(14) Outdoor unit failure(Model SCM40, 45, 50, 60, 71, 80 only)compressor command(15) Indoor fan motor protection (Refer to the FDTC and FDUM series by 29 page)300 (SRF:150)(16) Discharge pipe sensor disconnection protection control(a) When the compressor command speed is other than 0 rps.1) Tho-D(10)-Tho-D(0) < 8 °C, and Tho-D(10)-Tho-A(10) < 5 °CThe compressor command speed is set on A rps for 5 minutes. After 5 minutes, the compressor command speed is seton B rps for 5 minutes.2) Tho-D(20)-Tho-D(15) < 5 °C :The compressor command speed is set on 0 rps.(b) Once the unit is stopped by this function, it is not restarted.Notes (1) Tho-D(X): After compressor operation, the discharge pipe sensor temperature after X minutes.(2) Tho-A(X): After compressor operation, the outdoor air sensor temperature after X minutes.• Values of A, BModel SCM40ZJ-S SCM45ZJ-S SCM50ZJ-S1 SCM60ZJ-S1 SCM71ZJ-S1 SCM80ZJ-S1 SCM100ZJ-S1 SCM125ZJ-S1AB30 rps60 rps30 rps60 rps30 rps60 rps20 rps60 rps20 rps60 rps20 rps60 rps20 rps60 rps20 rps60 rps(17) Regulation of outdoor air flow(a) The fan operates as follows according to the compressor command speed. (Except during defrost.)Model SCM40, 45, 50, 60CoolingHeatingModel SCM40: Less than 40 Model SCM40: 40 or more Model SCM40: Less than 56 Model SCM40: 56 or moreCompressor speed (rps)Model SCM45: Less than 40 Model SCM45: 40 or more Model SCM45: Less than 56 Model SCM45: 56 or moreModel SCM50: Less than 48 Model SCM50: 48 or more Model SCM50: Less than 61 Model SCM50: 61 or moreOutdoor fan speedModel SCM60: Less than 485th speedModel SCM60: 48or more6th speedModel SCM60: Less than 615th speedModel SCM60: 61 or more6th speedModel SCM71, 80CoolingHeatingCompressor speed (rps) Less than 31More than 31 More than 46More than 31 More than 6666 or more Less than 31but 46 or less but 66 or lessbut 66 or less but 85 or less85 or moreOutdoor fan speed 3rd speed 4th speed 5th speed 6th speed 3rd speed 4th speed 5th speed 6th speedModel SCM100, 125CoolingHeatingCompressor speed (rps) Less than 31More than 31 More than 46More than 31 More than 66 More than 8564 or more Less than 31but 46 or less but 64 or lessbut 66 or less but 85 or less but 96 or less96 or moreOutdoor fan speed 4th speed 5th speed 6th speed 7th speed 4th speed 5th speed 6th speed 7th speed 8th speed(b) If the outdoor unit’s fan speed drops, the outdoor fan is run for 1 minute at that speed.
'11 • SCM-SM-110(18) Serial signal transmission error protection(a) Purpose:(b) Detail of operation:(19) Rotor lock (Model SCM40, 45, 50, 60, 71, 80 only)(20) Outdoor fan motor protection(21) Outdoor fan control at low outdoor temperatureCoolingModel SCM40, 45, 50, 60, 71, 80(a) Operating conditions:Tho-A(b) Detail of operation:Outdoor fanOutdoor air temperature > 10˚COutdoor air temperature < = 10˚CTho-RLower limit speedOutdoor air temperature > 16˚COutdoor air temperature < = 16˚CTho-RTho-R(c) Reset conditions:Tho-AModel SCM100, 125(a) Operating conditions:Tho-A(b) Detail of operation:Outdoor fanOutdoor air temperature > 10˚C3rdOutdoor air temperature < = 10˚C- 47 -
'11 • SCM-SM-110High pressure sensor (HPS) 1.50MPahigh pressure sensor is lower than 1.50MPa, gradually reduce the outdoor fan speed by 1 speed.Lower limit speedOutdoor air temperature > 16˚C3rdOutdoor air temperature < = 16˚C1.50MPa High pressure sensor (HPS) 2.72MPahigh pressure sensor 1.50MPa ~ 2.72MPa,High pressure sensor (HPS) 2.72MPahigh pressure sensor is higher than 2.72MPa,(c) Reset conditions:high pressure sensor (HPS) is 2.72MPaHeating(a) Operating conditions:Tho-A(b) Detail of operation:(c) Reset conditions:(SCM100, 125:8th) Tho-A(22) Outdoor unit fan control at overloadCooling(a) Start condition: When the outdoor air temperature (Tho-A) has risen higher than 41°C for 30 seconds continuously whilethe compressor is operating.Under controlONOFF Normal operation 40 41Outdoor air Under temperature(ºC)controlON(b) Contents of control: The OFFoutdoor Normal unit fan tap is brought up by 3 steps (Higher limit is 6th tap.)(c) Release condition: When the compressor is turned off or the outdoor heat exchanger temperature (Tho-R) has dropped40 41lower than 40°C.Outdoor air Under temperature(ºC)controlHeatingONNormal operation(a) Start condition: When OFF the outdoor air temperature (Tho-A) has risen higher than 13°C for 30 seconds continuously whilethe compressor is operating. 10 13Outdoor heat exchanger Under temperature(ºC)controlONNormal operationOFF10 13Outdoor heat exchanger temperature(ºC)(b) Contents of control: The outdoor unit fan tap is brought down by 3 steps (Lower limit is 2nd tap.)(c) Release condition: When the compressor is turned off or the outdoor heat exchanger temperature (Tho-R) has droppedlower than 10°C.
'11 • SCM-SM-110(23) Anomalous power transistor (SCM100, 125 only)When anomalous rise of the power transistor temperture is detected for 15 minutes continuosly.(24) Power transistor overheat protection (SCM100, 125 only)(a) Purpose: Prevention of malfunction, deterioration, breakage, etc. of the control(b) Contents of restrictionRestricts the speed of compressor when the temperature of power transistor (Tho-AF) rises higher than 90°C.Tho-AF < 80°C 80°C < = Tho-AF < 90°C 90°C < = Tho-AF < 110°C 90°C < = Tho-AF < 110°C Tho-AF < = 110°CProtection control speed (NP) Normal Retention NP-2rps NP-4rps 0rpsSampling time (s) Normal 20 20 20 −(c) Resetting conditionWhen the power transistor temperature is lower than 90°C or when the compressor has stopped.(d) Anomalous stopIt stops anomalously if it occurs 2 times within 60 minutes or it has elapsed 60 minutes after the first establishment of the condition.(25) Control of the flowing noise of refrigerant during cooling operation (SCM100, 125 only)In order to suppress the flowing noise of refrigerant when operating 1 unit of indoor unit, the compressor is operated at theMax speed of 40 rps if the dip switch (J31) on the outdoor sub-PCB is set to open.- 49 -
'11 • SCM-SM-1102 MAINTENANCE DATA2.1 SRK, SRF and SRR series(1) Cautions(2) Items to check before troubleshooting(3) Troubleshooting procedure (If the air conditioner does not run at all)ImportantNOYESNOYESNOYESNOYES- 50 -
'11 • SCM-SM-110(4) Troubleshooting procedure (If the air conditioner runs)NOYES52.NO54 ~ 62.YESYESNO54 ~ 62.YESNO- 51 -
(5) Self-diagnosis table(i) SCM40, 45, 50, 60, 71, 80Indoor unit display panel Outdoormain PCBRed LEDRUNlight1 timeflash2 timesflash3 timesflash4 timesflash6 timesflashKeepsflashingKeepsflashingKeepsflashingKeepsflashingONONONONONONONON2 timesflash5 timesflash7 timesflash——StaysOFFTIMERlightONONONONON1 timeflash2 timesflash4 timesflash5 timesflash1 timeflash2 timesflash3 timesflash4 timesflash5 timesflash6 timesflash7 timesflashKeepsflashing2 timesflashONON——KeepsflashingStaysOFFStaysOFFStaysOFFStaysOFFStaysOFF8 timesflash8 timesflash8 timesflash8 timesflash1 timeflash2 timesflash3 timesflash1 timeflash5 timesflash6 timesflashKeepsflashing2 timesflash7 timesflash2 timesflash2 timesflash4 timesflashStaysOFF—(3)SRR series only.Wired (2)remotecontrollerdisplay———E 9E 16E 38E 37E 39E 53E 42E 59E 58E 51E 36E 5E 48E 35E 60E 47E 57E 45E 1—Descriptionof troubleHeat exchangersensor 1 errorRoomtemperaturesensor errorHeat exchangersensor 2 errorDrain (3)troubleIndoor fanmotor errorOutdoor airtemperaturesensor errorOutdoor heatexchangersensor errorDischarge pipesensor errorCurrent cut• Broken heat exchanger sensor1 wire, poor connectorconnection• Indoor PCB is faulty• Broken room temperaturesensor wire, poor connectorconnection• Indoor PCB is faulty• Defective fan motor, poorconnector connection• Broken heat exchanger sensorwire, poor connectorconnection• Outdoor main PCB is faulty• Broken discharge pipe sensorwire, poor connectorconnection• Outdoor main PCB is faulty• Broken suction pipe sensor wire,Outdoor suctionpoor connector connectionpipe sensor error• Outdoor sub PCB is faultyTrouble ofoutdoor unitCurrent safestopPowertransistorerrorOver heat ofcompressorError of signaltransmissionOutdoor fanmotor errorCooling highpressureprotectionRotor lockActive filtervoltage errorRefrigerationcycle systemprotectivecontrolOutdoor sub PCBcommunicationerrorError of wiredremote controllerwiringLimit switcherrorCause• Broken heat exchanger sensor2 wire, poor connectorconnection• Indoor PCB is faulty'11 • SCM-SM-110Display (flashing) conditionWhen a heat exchanger sensor 1 wire disconnection is detected whileoperation is stopped. (If a temperature of –28ºC or lower is detected for15 seconds, it is judged that the wire is disconnected.)(Not displayed during operation.)When a room temperature sensor wire disconnection is detected whileoperation is stopped. (If a temperature of –45ºC or lower is detected for15 seconds, it is judged that the wire is disconnected.)(Not displayed during operation.)When a heat exchanger sensor 2 wire disconnection is detected whileoperation is stopped. (If a temperature of –28ºC or lower is detected for15 seconds, it is judged that the wire is disconnected.)(Not displayed during operation.)If the float switch OPEN is defected for 3 seconds continuously or iffloat switch connector or wire is disconnected.When conditions for turning the indoor unit’s fan motor on exist during airconditioner operation, an indoor unit fan motor speed of 300 (SRF : 150) rpmor lower is measured for 30 seconds or longer. (The air conditioner stops.)–55ºC or lower is detected for 5 seconds continuously 3 times within40 minutes after initial detection of this anomalous temperature.Or –55ºC or higher is detected for within 20 seconds after power ON.(The compressor is stopped.)–55ºC or lower is detected for 5 seconds continuously 3 times within40 minutes after initial detection of this anomalous temperature.Or –55ºC or higher is detected for within 20 seconds after power ON.(The compressor is stopped.)–25ºC or lower is detected for 5 seconds continuously 3 times within 40minutes after initial detection of this anomalous temperature.(The compressor is stopped.)–55ºC or lower is detected for 5 seconds continuously 3 times within 40minutes after initial detection of this anomalous temperature.Or –55ºC or higher is detected for within 20 seconds after power ON.(The compressor is stopped)The compressor output current exceeds the set value during compressorstart.,(The air conditioner stops.)When there is an emergency stop caused by trouble in the outdoor unit,or the input current value is found to be lower than the set value.(The air conditioner stops.)When the compressor command speed is lower than the set value andthe current safe has operated. (the compressor stops)When the power transistor is judged breakdown while compressorstarts.(The compressor is stopped.)When the value of the discharge pipe sensor exceeds the set value.(The air conditioner stops.)When there is no signal between the indoor PCB and outdoor PCB for10 seconds or longer (when the power is turned on), or when there is nosignal for 7 minute 35 seconds or longer (during operation)(thecompressor is stopped).When the outdoor unit’s fan motor speed continues for 30 seconds orlonger at 75 rpm or lower. (3 times) (The air conditioner stops.)When the value of the outdoor heat exchanger sensor exceeds the setvalue.If the compressor motor’s magnetic pole positions cannot be correctlydetected when the compressor starts.(The air conditioner stops.)When the wrong voltage connected for the power supply.When the outdoor main PCB is faulty .ficient When refrigeration cycle system protective control operates.Communication error for 15 minutes: Detected more than 15 seconds4 timesThe wired remote controller wire Y is open. The wired remotecontroller wires X and Y are reversely connected. Noise is penetratingthe wired remote controller lines. The wired remote controller or indoorPCB is faulty. (The communications circuit is faulty.)Actuation of limit switch- 52 -• Defective drain pump (DM),broken drain pump wire• Anomalous float switch operation• Defective indoor PCB faulty• Broken outdoor air temp.sensor wire, poor connectorconnection• Outdoor main PCB is faulty• Compressor locking, open phaseon compressor output, shortcircuit on power transistorservice valve is closed• Broken compressor wire• Compressor blockage• Overload operation• Overcharge• Compressor locking• Broken power transistor• Gas shortage, defectivedischarge pipe sensor, servicevalve is closed• Defective power supply,Broken signal wire, defectiveindoor/outdoor sub PCB• Defective fan motor, poorconnector connection• Overload operation, overcharge• Broken outdoor heat exchangesensor wire• Service valve is closed• Defective compressor• Open phase on compressor• Defective outdoor PCB• Defective active filter• Service valve is closed.• Refrigerant is insuf• Outdoor sub PCB fauly• Poor connection of wire betweenoutdoor sub PCB – main PCB• Broken wired remote controllerwire, defective indoor PCB• Defective limit switch• Defective suction pancl set• Defective indoor control PCB
(ii) SCM100,125Indoor unit display panelRUNlight1 timeflash2 timesflash3 timesflash4 timesflash6 timesflashKeepsflashingKeepsflashingKeepsflashingKeepsflashingONONONONONONON7 timesflash——TIMERlightONONONONON2 timesflash4 timesflash5 timesflash1 timeflash2 timesflash4 timesflash5 timesflash6 timesflash7 timesflashKeepsflashingON——KeepsflashingStaysOFFStaysOFFStaysOFFStaysOFFStaysOFF8 timesflash8 timesflash8 timesflash8 timesflash1 timeflash2 timesflash1 timeflash5 timesflash6 timesflashKeepsflashing2 timesflash2 timesflash—Wired (2)remotecontrollerdisplay———E 9E 16E 38E 37E 39E 53E 42E 59E 51E 36E 5E 48E 35E 571 time— —E 41flash2 times— —flashE 404 timesflashE 45— —8 timesE 54flashStaysOFF1 timeflashOutdoormain PCBRed LEDStaysOFFE 1—Descriptionof troubleHeat exchangersensor 1 errorRoomtemperaturesensor errorHeat exchangersensor 2 error(3)DraintroubleIndoor fanmotor errorOutdoor airtemperaturesensor errorOutdoor heatexchangersensor errorDischarge pipesensor errorCurrent cut• Broken heat exchanger sensor1 wire, poor connectorconnection• Indoor PCB is faulty• Broken room temperaturesensor wire, poor connectorconnection• Indoor PCB is faulty• Defective fan motor, poorconnector connection• Broken heat exchanger sensorwire, poor connectorconnection• Outdoor main PCB is faulty• Broken discharge pipe sensorwire, poor connectorconnection• Outdoor main PCB is faulty• Broken suction pipe sensor wire,Outdoor suctionpoor connector connectionpipe sensor error • Outdoor sub PCB is faultyTrouble ofoutdoor unitInverter andfan motoranomalyOver heat ofcompressorError of signaltransmissionOutdoor fanmotor errorCooling highpressureprotectionRefrigerationcycle systemprotectivecontrolPower transistorerrorHeating highpressureprotectionOutdoor sub PCBcommunicationerrorHigh pressuresensor errorError of wiredremote controllerwiringLimit switcherrorCause• Broken heat exchanger sensor2 wire, poor connectorconnection• Indoor PCB is faulty• Defective drain pump (DM),broken drain pump wire•Anomalousfloat s witchoperation• Defective indoor PCB faulty• Broken outdoor air temp.sensor wire, poor connectorconnection• Outdoor main PCB is faulty• Compressor locking, open phaseon compressor output, shortcircuit on power transistor,service valve is closed• Broken compressor wire• Compressor blockage• Outdoor inverter PCB is faulty• Outdoor controol PCB is faulty• Outdoor fan motor is faulty• Gas shortage, defectivedischarge pipe sensor, servicevalve is closed• Defective power supply,Broken signal wire, defectiveindoor/outdoor sub PCB• Defective fan motor, poorconnector connection• Overload operation, overcharge• Broken high pressure sensorwire• Service valve is closed• Service valve is closed.• Refrigerant is insufficient• Power transistor overheat• Overload operation, overcharge• Broken high pressure sensorwire• Service valve is closed• Outdoor sub PCB fauly• Poor connection of wire betweenoutdoor sub PCB – main PCB• Broken high pressure sensorwire• Broken wired remote controllerwire, defective indoor PCB• Defective limit switch• Defective suction panel set• Defective indoor control PCBNotes (1) The air conditioner cannot be restarted using the remote controller for 3 minutes after operation stops.(2) The wired remote controller is optional parts.(3) SRR series only.'11 • SCM-SM-110Display (flashing) conditionWhen a heat exchanger sensor 1 wire disconnection is detected whileoperation is stopped. (If a temperature of –28ºC or lower is detected for15 seconds, it is judged that the wire is disconnected.)(Not displayed during operation.)When a room temperature sensor wire disconnection is detected whileoperation is stopped. (If a temperature of –45ºC or lower is detected for15 seconds, it is judged that the wire is disconnected.)(Not displayed during operation.)When a heat exchanger sensor 2 wire disconnection is detected whileoperation is stopped. (If a temperature of –28ºC or lower is detected for15 seconds, it is judged that the wire is disconnected.)(Not displayed during operation.)If the float switch OPEN is defected for 3 seconds continuously or iffloat switch connector or wire is disconnected.When conditions for turning the indoor unit’s fan motor on exist during airconditioner operation, an indoor unit fan motor speed of 300 (SRF : 150) rpmor lower is measured for30 seconds or longer. (The air conditioner stops.)–55ºC or lower is detected for 5 seconds continuously 3 times within40 minutes after initial detection of this anomalous temperature.Or –55ºC or higher is detected for within 20 seconds after power ON.(The compressor is stopped.)–55ºC or lower is detected for 5 seconds continuously 3 times within40 minutes after initial detection of this anomalous temperature.Or –55ºC or higher is detected for within 20 seconds after power ON.(The compressor is stopped.)–25ºC or lower is detected for 5 seconds continuously 3 times within 40minutes after initial detection of this anomalous temperature.(The compressor is stopped.)–55ºC or lower is detected for 5 seconds continuously 3 times within 40minutes after initial detection of this anomalous temperature.Or –55ºC or higher is detected for within 20 seconds after power ON.(The compressor is stopped)The compressor output current exceeds the set value during compressorstart.(The air conditioner stops.)When there is an emergency stop caused by trouble in the outdoor unit,or the input current value is found to be lower than the set value.(The air conditioner stops.)When power transistor anomaly is detected for 15 minutes continuosly(The compressor is stopped.)When the value of the discharge pipe sensor exceeds the set value.(The air conditioner stops.)When there is no signal between the indoor PCB and outdoor PCB for10 seconds or longer (when the power is turned on), or when there is nosignal for 7 minute 35 seconds or longer (during operation)(thecompressor is stopped).When the outdoor unit’s fan motor speed continues for 30 seconds orlonger at 75 rpm or lower. (3 times) (The air conditioner stops.)When anomalous rise of the high pressure sensor is detected 5 timeswithin 1 hour.When high pressure sensor anomaly is detected for 10 minutescontinuously.When refrigeration cycle system protective control operates.When anomalous rise of the power transistor temperature is detected2 times within 1 hour.When anomalous rise of the high pressure sensor is detected 5 timeswithin 1 hour.When high pressure sensor anomaly is detected for 10 minutescontinuously.Communication error for 15 minutes: Detected more than 15 seconds4 times.If the detected for 5 second continuously within 2 minutes to 2 minutesand 20 seconds after the compressor ON, the compressor stops.The wired remote controller wire Y is open. The wired remotecontroller wires X and Y are reversely connected. Noise is penetratingthe wired remote controller lines. The wired remote controller or indoorPCB is faulty. (The communications circuit is faulty.)Actuation limit switch- 53 -
'11 • SCM-SM-110(6) Service mode (Trouble mode access function)(a) Explanation of termsTermExplanationThe service mode is the mode where service data are displayed by flashing of the display lightsService modewhen the operations in item (b) below are performed with the indoor controller.These are the contents of error displays and protective stops which occurred in the past in the airconditioner system. Error display contents and protective stop data from past anomalousService data operations of the air conditioner system are saved in the indoor unit controller’s non-volatilememory (memory which is not erased when the power goes off). There are two types of data,self-diagnosis data and stop data, described below.These are the data which display the reason why a stop occurred when an error display(selfdiagnosisdisplay) occurred in an indoor unit. Data are recorded for up to 5 previous occurrences.Data which are older than the 5th previous occurrence are erased.Self-diagnosis data In addition, data on the temperature of each sensor (room temperature, indoor heat exchanger,outdoor heat exchanger, outdoor air temperature, discharge pipe), remote controller information(operation switching, fan speed switching) are recorded when trouble occurs, so more detailedinformation can be checked.These are the data which display the reason by a stop occurred when the air conditioning systemperformed protective stops, etc. in the past. Even if stop data alone are generated, the systemrestarts automatically. (After executing the stop mode while the display is normal, the systemrestarts automatically.) Data for up to 10 previous occasions are stored. Data older than the 10thStop dataprevious occasion are erased.( Important) In cases where transient stop data only are generated, the air conditioner systemmay still be normal. However, if the same protective stop occurs frequently (3 ormore times), it could lead to customer complaints.(b) Service mode display procedure57.).)- 54 -
1) Self-diagnosis data'11 • SCM-SM-110Remote controller settingContents of output dataRemote controller setting Indicates the number ofoccasions previous to the presentTemperature setting the error display data are from.21ºC1 time previous (previous time)22ºC2 times previous23ºC3 times previous24ºC4 times previous25ºC5 times previousOnly for indoor heat exchanger sensor 2Remote controller setting Indicates the number ofoccasions previous to the presentTemperature setting the error display data are from.26ºC1 time previous (previous time)27ºC2 times previous28ºC3 times previous29ºC4 times previous30ºC5 times previous
(Example)OperationswitchingCooling2) Stop dataOperationswitchingCoolingRemote controller settingFan speedswitchingMEDRemote controller settingFan speedswitchingLOTemperaturesetting21ºC22ºC23ºC24ºC25ºCTemperaturesetting21ºC22ºC23ºC24ºC25ºC26ºC27ºC28ºC29ºC30ºC'11 • SCM-SM-110Displayed dataDisplays the reason for the stop (error code) the previous time an error was displayed.Displays the reason for the stop (error code) 2 times previous when an error was displayed.Displays the reason for the stop (error code) 3 times previous when an error was displayed.Displays the reason for the stop (error code) 4 times previous when an error was displayed.Displays the reason for the stop (error code) 5 times previous when an error was displayed.Displayed dataDisplays the reason for the stop (stop code) the previous time when the air conditioner was stopped by protective stop control.Displays the reason for the stop (stop code) 2 times previous when the air conditioner was stopped by protective stop control.Displays the reason for the stop (stop code) 3 times previous when the air conditioner was stopped by protective stop control.Displays the reason for the stop (stop code) 4 times previous when the air conditioner was stopped by protective stop control.Displays the reason for the stop (stop code) 5 times previous when the air conditioner was stopped by protective stop control.Displays the reason for the stop (stop code) 6 times previous when the air conditioner was stopped by protective stop control.Displays the reason for the stop (stop code) 7 times previous when the air conditioner was stopped by protective stop control.Displays the reason for the stop (stop code) 8 times previous when the air conditioner was stopped by protective stop control.Displays the reason for the stop (stop code) 9 times previous when the air conditioner was stopped by protective stop control.Displays the reason for the stop (stop code) 10 times previous when the air conditioner was stopped by protective stop control.- 56 -
(c) Error code, stop code table(i) Model SCM40, 45, 50, 60, 71, 80Number of flashes when inservice mode Stop coadRUNlightTIMERlightorError coad(10's digit) (1's digit)OFF3 timesflash4 timesflash5 timesflash6 timesflash8 timesflashOFF5 timesflash5 timesflash6 timesflash7 timesflash8 timesflash9 timesflash2 timesflash5 timesflash7 timesflash8 timesflash1 timeflash3 timesflash7 timesflash8 timesflash9 timesflashOFF1 timeflash2 timesflashOFF2 timesflash4 timesflash5 timesflash6 timesflash0 Normal0535363738394245474851535758596061628082848586Can not receive signals for 35seconds(if communications have recovered)Cooling high pressure controlCompressor overheat 115°COutdoor heat exchanger sensoris abnormalOutdoor air temperature sensoris abnormalDischarge pipe sensor isabnormal (anomalous stop)Current cutAnomalous outdoor subPCB commuicationActive filter voltage errorOutdoor unit's fan motor isabnormalShort circuit in the powertransistor (high side)Current cut circuit breakdownSuction pipe sensoris abnormalRefrigeration cycle systemprotective controlCurrent safeCompressor wiring is unconnectionVoltage dropRotor lockConnection lines between theindoor and outdoor units arefaultyAnti-condensation controlHeating high pressure control'11 • SCM-SM-110Error Autodisplay recoveryWhen 35 seconds passes withoutcommunications signals from either the outdoor unit orthe indoor unit being detected correctly.When the outdoor heat exchanger sensor's value exceedsthe set value.(5 times)When the discharge pipe sensor's value exceeds the setvalue.(2 times)–55°C or lower is detected for 5 seconds continuously 3 timeswithin 40 minutes after intial detection of this anomaloustemperature.Or–55°C higher is detected for 5 seconds continuously(3 times)within 20 seconds after power ON.–55°C or lower is detected for 5 seconds continuously 3 timeswithin 40 minutes after intial detection of this anomaloustemperature.Or–55°C higher is detected for 5 seconds continuously(3 times)within 20 seconds after power ON.–25°C or lower is detected for 5 seconds continuously 3 timeswithin 40 minutes after intial detection of this anomalous.temperature.(3 times).Compressor start fails 42 times in succession and thereason for the final failure is current cut.(2 times)Communication error for 15 minutes: Detected more than15 seconds 4 times.When the wrong voltage connected for the power supply.When the outdoor main PCB is faulty.When a fan speed of 75 rpm or lower continues for 30seconds or longer.(3 times)When it is judged that the power transistor wasdamaged at the time the compressor started.–55°C or lower is detected for 5 seconds continuously 3 timeswithin 40 minutes after intial detection of this anomaloustemperature.Or–55°C higher is detected for 5 seconds continuously(3 times)within 20 seconds after compressor ON.When refrigeration cycle system protective controloperates.(3 times)When there is a current safe stop during operation..When the current is 1A or less at the time the.compressor started..When the power supply voltage drops during operation..After the compressor starts, when the compressor stopsdue to rotor lock.(2 times). .When 10 seconds passes after the power is turned onwithout communications signals from the indoor oroutdoor unit being detected correctly..When 7 minute 35 seconds passes withoutcommunications signals from either the outdoor unit orthe indoor unit being detected correctly..When the indoor unit's fan motor is detected to be running. at 300 (SRF : 150) rpm or lower speed with the fan motor.in the ON condition while the air conditioner is running.When a temperature of –28°C or lower is sensedcontinuously for 40 minutes during heating operation..(the compressor stops).Anti-condensation prevention control is operating.When the anti-frost control operates and the compressor. stops during cooling operation.When high pressure control operates during heatingoperation and the compressor stops.Error content Cause Occurrence conditionsSerial transmission errorIndoor unit's fan motor isabnormalIndoor heat exchanger sensoris abnormal (anomalous stop)Anti-frost controlPower supply is faulty.Power supply cables and signal lines are improperly wired.Indoor or outdoor sub PCB are faulty .Cooling overload operation.Outdoor unit fan speed drops.Outdoor heat exchanger sensor is short circuit.Refrigerant is insufficient.Discharge pipe sensor is faulty.Service valve is closed.Outdoor heat exchanger sensor wire isdisconnected.Connector connections are poor.Outdoor main PCB is faulty .Outdoor air temperature sensor wire isdisconnected.Connector connections are poor.Outdoor main PCB is faulty .Discharge pipe sensor wire isdisconnected.Connector connections are poor.Outdoor main PCB is faultyCompressor lock.Compressor wiring short circuit.Compressor output is open phase.Outdoor main PCB is faultyService valve is closed.Electronic expansion valve is faulty.Compressor is faulty.Outdoor sub PCB fauly.Poor connection of wire betweenoutdoor sub PCB-main PCB.Defective active filter.Outdoor fan motor is faulty.Connector connections are poor.Outdoor main PCB is faulty.Outdoor main PCB is faulty .Power transistor is damaged.Suction pipe sensor wire isdisconnected.Connector connections are poor.Outdoor sub PCB is faulty.Service valve is closed.Refrigerant is insufficient.Refrigerant is overcharge.Compressor lock.Overload operation.Compressor wiring is disconnected.Power transistor is damaged.Power supply construction is defective.Outdoor main PCB is faultyCompressor is faultyCompressor is faulty.Compressor output is open phase.Electronic expansion valve is faulty.Overload operation.Outdoor main PCB is faultyConnection lines are faulty.Indoor or outdoor sub PCB are faulty.Indoor or outdoor sub PCB are faultyNoise is causing faulty operation.Indoor fan motor is faultyConnector connections are poorIndoor PCB is faultyIndoor heat exchanger sensor wire isdisconnected.Connector connections are poorHigh humidity condition.Humidity sensor is faulty.Indoor unit fan speed drops.Indoor heat exchanger sensor is broken wireHeating overload operation.Indoor unit fan speed drops.Indoor heat exchanger sensor is short circuit.
(ii) SCM100,125Number of flashes when inservice mode Stop coadRUNlightTIMERlightorError coad(10's digit) (1's digit)OFF3 timesflash4 timesflash5 timesflash6 timesflashOFF5 timesflash5 timesflash6 timesflash7 timesflash8 timesflash9 timesflashOFF1 timeflash2 timesflash5 timesflash8 timesflash1 timeflash3 timesflash4 timesflash7 timesflash9 timesflash1 timeflash2 timesflash0 Normal053536373839404142454851535457596162Can not receive signals for 35seconds(if communications have recovered)Cooling high pressure controlCompressor overheat 115°COutdoor eatexchanger sensoris abnormalOutdoor air temperature sensoris abnormalDischarge pipe sensor isabnormal (anomalous stop)Current cutAnomalous outdoor subPCB commuicationOutdoor unit's fan motor isabnormalInverter and fan motor anomalySuction pipe sensoris abnormalRefrigeration cycle systemprotective controlCompressor wiring is unconnectionVoltage dropConnection lines between theindoor and outdoor units arefaulty'11 • SCM-SM-110Error Autodisplay recoveryWhen 35 seconds passes withoutcommunications signals from either the outdoor unit orthe indoor unit being detected correctly.When the outdoor high pressure sensor's value exceedsthe set value.(5 times)When the discharge pipe sensor's value exceeds the setvalue.(2 times)–55°C or lower is detected for 5 seconds continuously 3 timeswithin 40 minutes after intial detection of this anomaloustemperature.(3 times)Or–55°C higher is detected for 5 seconds continuouslywithin 20 seconds after power ON.–55°C or lower is detected for 5 seconds continuously 3 timeswithin 40 minutes after intial detection of this anomaloustemperature.(3 times)Or–55°C higher is detected for 5 seconds continuouslywithin 20 seconds after power ON.–25°C or lower is detected for 5 seconds continuously 3 timeswithin 40 minutes after intial detection of this anomaloustemperature.(3 times)When the outdoor high pressure sensor's value exceedsthe set value.(5 times)When anomalous rise of the power transistor temperatureis detected 2 times within 1 hour.(2 times)Compressor start fails 42 times in succession and thereason for the final failure is current cut.(2 times)Communication error for 15 minutes: Detected more than15 seconds 4 times.When a fan speed of 75 rpm or lower continues for 30seconds or longer.(3 times)When power transistor anomaly is detected for 15 minutescontinuosly.–55°C or lower is detected for 5 seconds continuously 3 timeswithin 40 minutes after intial detection of this anomaloustemperature.(3 times)Or–55°C higher is detected for 5 seconds continuouslywithin 20 seconds after compressor ON.If the detected for 5 second continuously within 2 minutesto 2 minutes and 20 seconds after the compressor ON, thecompressor stops.(3 times)When refrigeration cycle system protective controloperates.(3 times)When the current is 1A or less at the time the.compressor started.When the power supply voltage drops during operation.When 10 seconds passes after the power is turned onwithout communications signals from the indoor oroutdoor unit being detected correctly.When 7 minute 35 seconds passes withoutcommunications signals from either the outdoor unit orthe indoor unit being detected correctly.- 58 -Error content Cause Occurrence conditionsHeating high pressure controlPower transistor errorHigh pressure sensoris abnormalSerial transmission errorPower supply is faulty.Power supply cables and signal lines are improperly wired.Indoor or outdoor PCB are faulty.Cooling overload operation.Outdoor unit fan speed drops.Outdoor high pressure sensor is short circuit.Refrigerant is insufficient.Discharge pipe sensor is faulty.Service valve is closed.Outdoor heat exchanger sensor wire isdisconnected.Connector connections are poor.Outdoor control PCB is faulty.Outdoor air temperature sensor wire isdisconnected.Connector connections are poor.Outdoor control PCB is faulty.Discharge pipe sensor wire isdisconnected.Connector connections are poor.Outdoor control PCB is faulty.Heating overload operation.Outdoor unit fan speed drops.Outdoor high pressure sensor is short circuit.Power transistor overheat.Power transistor sensor is short circuit.Compressor lock.Compressor wiring short circuit.Compressor output is open phase.Outdoor inverter PCB is faulty.Service valve is closed.Electronic expansion valve is faulty.Compressor is faulty.Outdoor sub PCB fauly.Poor connection of wire betweenoutdoor sub PCB-control PCB.Outdoor fan motor is faulty.Connector connections are poor.Outdoor control PCB is faulty.Outdoor inverter PCB is faulty.Outdoor control PCB is faulty.Outdoor fan motor is faulty.Suction pipe sensor wire isdisconnected.Connector connections are poor.Outdoor control PCB is faulty.High pressure sensor wire isdisconnected.Connector connections are poor.Outdoor control PCB is faulty.Service valve is closed.Refrigerant is insufficient.Compressor wiring is disconnected.Power transistor is damaged.Power supply construction is defective.Outdoor inverter PCB is faulty.Compressor is faulty.Connection lines are faulty.Indoor or outdoor sub PCB are faulty.Indoor or outdoor sub PCB are faulty.Noise is causing faulty operation.
Number of flashes when inservice mode Stop coadRUNlightTIMERlightorError coad(10's digit) (1's digit)8 timesflashOFF2 timesflash4 timesflash5 timesflash6 timesflash8082848586Anti-condensation controlHeating high pressure control'11 • SCM-SM-110Error Autodisplay recoveryWhen the indoor unit's fan motor is detected to be runningat 300 (SRF : 150) rpm or lower speed with the fan motorin the ON condition while the air conditioner is running.When a temperature of –28°C or lower is sensedcontinuously for 40 minutes during heating operation.(the compressor stops).Anti-condensation prevention control is operating.When the anti-frost control operates and the compressorstops during cooling operation.When high pressure control operates during heatingoperation and the compressor stops.- 59 -Error content Cause Occurrence conditionsIndoor unit's fan motor isabnormalIndoor heat exchanger sensoris abnormal (anomalous stop)Anti-frost controlIndoor fan motor is faulty.Connector connections are poor.Indoor PCB is faulty.Indoor heat exchanger sensor wire isdisconnected.Connector connections are poor.High humidity condition.Humidity sensor is faulty.Indoor unit fan speed drops.Indoor heat exchanger sensor is broken wire.Heating overload operation.Indoor unit fan speed drops.Indoor heat exchanger sensor is short circuit.
- - '09•SRK-DB-087D'11 • SCM-SM-110 (d) Remote controller information tables Display pattern whenDisplay pattern whenin service mode Operation switchingin service modeFan speedswitching whenwhen there is anRUN lightthere is anabnormal stopTIMER lightabnormal stop(Operation switching)(Fan speed switching)0AUTO0AUTO1DRY2HI2COOL3MED3FAN4LO4HEAT6HI POWER7ECONORemote controller setting Operation switchingFan speed switching1.5 sec.RUN lightON(10’s digit)OFF0.5 sec.0.5 sec.ONTIMER light(1’s digit)OFF11-second interval60
- 61 - '09•SRK-DB-087D'11 • SCM-SM-110(e) Room temperature sensor, indoor heat exchanger sensor, outdoor air temperature sensor, outdoor heatexchanger sensor , suction pipe sensor tableUnits: °CTIMER light(1’s digit)RUN light(10’s digit)0 1 2 3 4 5 6 7 8 9Buzzer soundYes(sounds for 0.1 second)No(does not sound)65432100123456789-60-50-40-30-20-100102030405060708090-61-51-41-31-21-11-11112131415161718191-62-52-42-32-22-12-22122232425262728292-63-53-43-33-23-13-33132333435363738393-64-54-44-34-24-14-44142434445464748494-55-45-35-25-15-55152535455565758595-56-46-36-26-16-66162636465666768696-57-47-37-27-17-77172737475767778797-58-48-38-28-18-88182838485868788898-59-49-39-29-19-99192939495969798999Sensor nameRoom temperature sensorIndoor heat exchanger sensorOutdoor air temperature sensorOutdoor heat exchanger sensorOutdoor suction pipe sensorSensor value displayed when the error code is normal-64ºC-64ºC-64ºC-64ºC-64ºC, outdoorsuction pipe0.1 sec.ONIf the temperature is < 0, the buzzer sounds.Buzzer soundIf the temperature is0, the buzzer does not sound.OFF1.5 sec.RUN lightON(10’s digit)OFF0.5 sec.0.5 sec.ONTIMER light(1’s digit)OFF11-second interval
- 62 - '09•SRK-DB-087D'11 • SCM-SM-110(f) Discharge pipe sensor tableUnits: °CTIMER light(1’s digit)RUN light(10’s digit)0 1 2 3 4 5 6 7 8 9Buzzer sound3-60 -62 -64Yes2-40 -42 -44 -46 -48 -50 -52 -54 -56 -58(sounds for 0.1 second)1-20 -22 -24 -26 -28 -30 -32 -34 -36 -380-2 -4 -6 -8 -10 -12 -14 -16 -1800 2 4 6 8 10 12 14 16 18120 22 24 26 28 30 32 34 36 38240 42 44 46 48 50 52 54 56 58No360 62 64 66 68 70 72 74 76 78(does not sound)480 82 84 86 88 90 92 94 96 985100 102 104 106 108 110 112 114 116 1186120 122 124 126 128 130 132 134 136 1387140 142 144 146 148 150Sensor value displayed when the error code is normal-64ºC0.1 sec.ONIf the temperature is < 0, the buzzer sounds.Buzzer soundIf the temperature is0, the buzzer does not sound.OFF1.5 sec.ONRUN light(10’s digit)OFF0.5 sec.0.5 sec.ONTIMER light(1’s digit)OFF11-second interval
Service data record form'11 • SCM-SM-11055)- 63 -
(7) Inspection procedures corresponding to detail of troubleSensor errorResistance (k )'11 • SCM-SM-110Broken sensor wire,connector poor connectionDischarge pipe sensor temperature characteristicsSensor temperature characteristics (Roomtemp., indoor heat exchanger temp., outdoorheat exchanger temp., outdoor airtemp,outdoor suction pipe temp.)180301602514012020100158060104052000 20 40 60 80 100 120 135-10 0 10 20 30 40 50 60 70Temperature (˚C)Temperature (˚C)Defective fan motor, connector poorconnection, defective indoor PCB69 for the fan motor and indoor PCB check pro-Power supply resetReplace fan motor. (If theIs it normalized?error persists after replacingthe fan motor, replace theindoor PCB.)Indoor fan motor errorMalfunction by temporary noiseResistance (k )
Limit switch anomaly (SRK20, 25, 35, 50, 60ZJX only)Is the air inlet panel set correctly?Current cutAre limit switch OK ?Defective indoor control PCBCurrent safe stop'11 • SCM-SM-110Defective limit switch, defective indoorcontrol PCB, Defective air inlet panel setCorrection, re-setDefective limit switch76sub 70Overload operation, compressorlock, overcharge- 65 -Compressor lock, Compressor wiring short circuit, Compressor output is open phase,Outdoor PCB is faulty, Service valve is closed, EEV is faulty, Compressor faulty.mainmainSCM40, 45, 50 : 1.619Ω or more at 20ºCSCM60, 71, 80 : 1.154Ω or more at 20ºCSCM100, 125 : 0.293Ω or more at 20ºCmainNote(1) Check if the limit switch functions properly or not by seeing whetherthe lamp continues to blink or can be reset by pressing the limit swit--ch by hand while the air inlet panel is removed.
Over heat of compressor64)mainError of signal transmissionoutdoor sub'11 • SCM-SM-110Gas shortage, defective dischargepipe sensorWiring error including power cable, defective indoor/outdoor PCBindoorindoor- 66 -
Trouble of outdoor unit(1)(2)(3)Outdoor fan motor errorPower supply resetIs it normalized?Malfunction by temporary noisethe fan motor and outdoormainoutdoor main PCBoutdoor mainInsufficient refregerant amount, Faulty power transistor, Broken compressor wireService valve close, Defective EEV, Defective outdoor PCBmainmainsubReplace fan motor. (If theerror persists after replacingthe fan motor, replace theoutdoor main PCB.)'11 • SCM-SM-110Notes (1)76(2)70(3) Check coil resistance, See pages 65.Defective fan motor, connector poorconnection, defective outdoor PCBReplace outdoor fan motorSee pages 76 for the fan motor and outdoor main PCB checkproAfter making sure the fan motor and outdoor main PCB arenor- 67 -
'11 • SCM-SM-110Defective compressor, defectiveRotor lock (SCM40, 45, 50, 60, 71, 80 only)outdoor PCBmainSee pages 65.[Drain piping defective,pump defect,Drain abnormality (SRR only)float switch, indoor PCB]Has an overflow developed?NONO Indoor PCB isIs the float switch operating?defective.YESIs the drain piping clogged or atthe wrong gradient?YESIs there output for drain motor driver?YESNONOInspect float switch.Repair and clean.Drain motor is defective.Inspect wiring.Indoor PCB is defective.(8) Phenomenon observed after shortcircuit, wire breakage on sensor(a) Indoor unitSensorOperationPhenomenonmodeShortcircuitDisconnected wireRoom temperaturesensorCoolingHeatingHeat exchanger CoolingsensorHeatingCoolingHumidity sensor (1)HeatingNote (1) SRK35ZJR-S, 35, 50ZJ-S, 50, 60ZJX-S1, 71ZK-S,SRF25, 35, 50 only Humidity sensor operationFailure mode Control input circuit resding Air conditioning system operation
'11 • SCM-SM-110(b) Outdoor unitSensorOperationPhenomenonmodeShortcircuitDisconnected wireHeat exchanger CoolingsensorHeatingDefrosting is performed for 10 minutes at approx. 40 minutes.Ourdoor airCoolingtemperature sensor HeatingDefrosting is performed for 10 minutes at approx. 40 minutes.Discharge pipesensorAll modes(9) Checking the indoor electrical equipment(a) Indoor PCB check procedureIs there voltage between terminal NOInspect power sourceblocks and ? (AC 220/230/240for outdoor unit.V)YESNOIs the fuse burnt out? (3.15 A)Replace fuse.YESIs the voltage between terminalblocks and oscillating betweenNOReplace indoor PCB.DC 0 and 20V?YESIndoor electrical componentsare normal.(b) Indoor unit fan motor check procedure1) Indoor PCB output check DC several V(–)(4 – 6 V)GNDDC 280VMeasuring Resistance whenDC15Vpoint normalCNUIndoor PCB FMI2) Fan motor resistance checkMeasuring point Resistance when normal kBlueYellowWhiteBlackRed
'11 • SCM-SM-110(C) Power transistor inspection procedure[Use a tester with a needle indicator for the inspection. (Do not use a digital tester. Check in the AC 300 volt range.)](1) If there is a self-diagnosis display, inspect the compressor system (burns, wiring mistakes, etc.) If no problems are found, check theoutput of the power transistor.(2) Output inspection procedureDisconnect the terminals for the compresseor.If an output such as the one shown in the figure on the below can be measured, the power transistor and the circuit board for theoutdoor unit are normal.(Example)RUN light : ONOutput voltageTIMER light: 2 time flash(ACV)08~10 sec. 1 sec. 3 min. 1 sec. 3 min. 1 sec.Operation SW ONMeasure in this section(10) How to make sure of wireless remote controllerThe figare below shows the SRK-ZJX, ZJR, ZJ series.- 70 -
CAUTION- HIGH VOLTAGEHigh voltage is produced in the control box. Don't touchelectrical parts in the control box for 5 minutes after theunit is stopped.Color MarksMark ColorBKRDWHBlackRedWhiteOR OrangeBR BrownYE YellowY/G Yellow/GreenPower supply1 Phase220-240V 50HzUNIT AFUSETB1 250V 15ABK BKLRINWH WHNSINY/GY/GG1Y/GGTB21 BKWH2RD3CNAPWB 2(SUB)ROSOS-1C-1CNMAINCN20VBKWHWHRD52RSS-2C-2CNSUBCN20V◆Inspection power transistorRemove the fasten terminal and testoutput voltageT1T2UVWPWB 1(MAIN)YEORRDWHBKRM3~CMModels SCM40ZJ-S,45ZJ-S(11) Outdoor unit inspection pointsUNIT BTB31 BKWH2BR3CNBCNFANMFM0- 71 - '11 • SCM-SM-110◆Power source and serialsignal inspection1 to 2: AC 220/230/240V2 to 3 : Normal if the voltageoscillates between DC 0and approx. 20VWHCNHEATHEATERCN20S20SRDG2Y/GWHMEEVACNEEV1RDMEEVBCNTH2t゜Tho-SCNTH2 2 2t゜t゜t゜Tho-R Tho-A Tho-D◆Inspection of outdoorfan motorSee page 76.◆Inspection of electronicexpansion valveSee page 76.◆Inspection of resistance value of sensorRemove the connector and check the resistance value.See the section of sensor characteristics on page 64.
CAUTION- HIGH VOLTAGEHigh voltage is produced in the control box. Don't touchelectrical parts in the control box for 5 minutes after theunit is stopped.Color MarksMark ColorBK BlackBL BlueRDWHRedWhiteOR OrangeBR BrownYE YellowYG YellowGreenPower supply1 Phase220-240V 50HzFUSE250V 15ATB1 250V 20ABK BKLRINWH WHNSINYGYGG1YGGTB21 BKWH2CNAUNIT ARD3BKUNIT B123WHBRCNBPWB 2SUBROSOS-1C-1CNMAINCN20VBKWHWHRD52Inspection power transistorRemove the fasten terminal and testoutput voltageRSS-2C-2CNSUBCN20VT1T2UVPWB 1MAINWCNFANYEORRDWHBKRM3CMMModels SCM50ZJ-S1,60ZJ-S1UNIT C123BKWHBLCNCFMoCNHEATCN20SG2CNEEV1 CNEEV3 CNTHCNTHYGWHRDWH RD BL22 2 2- 72 - '11 • SCM-SM-110Power source and serialsignal inspection to : AC 220/230/240V to : Normal if the voltageoscillates between DC 0and approx. 20VHEATER20SM M MEEVAEEVBEEVCtTho-StttTho-R Tho-A Tho-DInspection of outdoorfan motorSee page 76.Inspection of electronicexpansion valveSee page 76.Inspection of resistance value of sensorRemove the connector and check the resistance value.See the section of sensor characteristics on page 64.
CAUTION- HIGH VOLTAGEHigh voltage is produced in the control box. Don't touchelectrical parts in the control box for 5 minutes after theunit is stopped.Color MarksMark ColorBK BlackBL BlueBR BrownRDWHRedWhiteOR OrangeBR BrownYE YellowY/G Yellow/GreenPower supply1 Phase220-240V 50HzUNIT AUNIT BFUSETB1 250V 20ABK BKLWH WHNY/GY/GTB2BK1WH23RDY/GTB3 BK1WH2BR3Y/GY/GRINSING1GCNACNBPWB 2(SUB)ROSOS-1C-1CNMAINCN20VBKWHWHRD52RSS-2C-2CNSUBCN20V◆Inspection power transistorRemove the fasten terminal and testoutput voltageT1T2UVWPWB 1(MAIN)YEORRDWHBKRM3~CMModels SCM71ZJ-S1,80ZJ-S1UNIT CUNIT DTB4123TB5123BKWHBLY/GBKWHYEY/GCNCCNDCNHEAT CN20SG2- 73 - '11 • SCM-SM-110CNEEV1 CNEEV2 CNTHCNTHCNFANMFMoY/GY/G◆Power source and serialsignal inspection1 to 2: AC 220/230/240V2 to 3 : Normal if the voltageoscillates between DC 0and approx. 20VWHHEATER20SRDWH RD BL GNM M M MEEVAEEVBEEVCEEVD2t゜Tho-S2 2 2t゜t゜t゜Tho-R Tho-A Tho-D◆Inspection of outdoorfan motorSee page 76.◆Inspection of electronicexpansion valveSee page 76.◆Inspection of resistance value of sensorRemove the connector and check the resistance value.See the section of sensor characteristics on page 64.
CAUTION- HIGH VOLTAGEHigh voltage is produced in the control box. Don't touchelectrical parts in the control box for 5 minutes after theunit is stopped.Color MarksMark ColorBK BlackBL BlueBR BrownGNORGreenOrangePK PinkRD RedWH WhiteYE YellowY/G Yellow/GreenPOWER SOURCE~ 220/230/240V50HzCircuit breakerEarth leakage breaker3 TB1LNRDWHY/GF130A 250VRDTB3PWB5NOISETB4FILTERTB7 TB8Y/GY/GTB5TB6RDWHTB3TB4PWB3NOISEFILTERY/GTB7TB5TB6RDWHCT12~AC3~+1DS-4RDBLP1N11 24 3P2N2RDBLLL1 L2+CNACT(BK)-PA/FMODULEN2RD+BLC14CNACT1(WH)RDP3BLN3Model SCM100ZJ-S1PWB2INV PWBUNIT AUNIT BUNIT CUNIT DTB2123123123TB3123BKWHRDBKWHBRBKWHBLBKWHYECNA(WH)CNB(WH)CNC(WH)CND(WH)RDL-INPWB4SUB PWBWHN-INCNTRI(WH)CNTRO(WH)CNS2(BK)CNX2(YE)2WH2RDBKWHBKWHTRWHRDCNS1(BK)CNW(BK)CNX1(YE)PWB1CONTROL PWBLED2CHECKERLED1LED3PCCNA1(WH)CNA2(GN)CNI1(WH)CNI3(WH)BLRD43F24A250VBLBLCNI2CNI4UNIT E123BKWHORCNE(WH)CNEEV1 CNEEV2 CNEEV3(WH) (WH) (WH)GY/GCNTHCNP1CNEEV1(RD)CNL1(BL)CNECNFAN1(WH)CNVCNR1(WH)CNN1(RD)WIPM30A 600VVU5 5 5 5 5WH RD BL GN BKBKBKBKYEBK2 2 2 2 2535BR2BL2BLWHRD◆Power source and serialsignal inspection1 to 2: AC 220/230/240V2 to 3 : Normal if the voltageoscillates between DC 0and approx. 20VM5EEVAMEEVB5 5 5 5MMEEV EEVC DMEEVETho-Rt°Tho-Dt°Tho-St°Tho-At°Tho-AFt°MEEV-HHPS CH 20SMFMWCMVMS3~U◆Inspection of electronicexpansion valveSee page 76.- 74 - '11 • SCM-SM-110◆Inspection of resistance value of sensorRemove the connector and check theresistance value.See the section of sensor characteristicson page 64.◆Inspection of outdoorfan motorSee page 76.◆Inspection power transistorRemove the fasten terminal and testoutput voltage
CAUTION- HIGH VOLTAGEHigh voltage is produced in the control box. Don't touchelectrical parts in the control box for 5 minutes after theunit is stopped.Color MarksMark ColorBK BlackBL BlueBR BrownGNORGreenOrangePK PinkRD RedWH WhiteYE YellowY/G Yellow/GreenPOWER SOURCE~ 220/230/240V50HzCircuit breakerEarth leakage breaker3 TB1RDLWHNY/GF130A 250VRDTB3TB5PWB5TB4NOISEFILTERTB6TB7 TB8Y/GY/GRDWHTB3TB4PWB3NOISEFILTERY/GTB7TB5TB6RDWHCT12~AC3~+1DS-4RDBLP1N11 24 3P2N2RDBLLL1 L2+CNACT(BK)-PA/FMODULEN2RD+BLC14CNACT1(WH)RDP3BLN3Model SCM125ZJ-S1PWB2INV PWBUNIT AUNIT BUNIT CUNIT DTB2123123123TB3123BKWHRDBKWHBRBKWHBLBKWHYECNA(WH)CNB(WH)CNC(WH)CND(WH)RDL-INPWB4SUB PWBWHN-INCNTRI(WH)CNTRO(WH)CNS2(BK)CNX2(YE)2WH2RDBKWHBKWHTRWHRDCNW(BK)CNS1(BK)CNX1(YE)PWB1CONTROL PWBLED2CHECKERLED1LED3PCCNA1(WH)CNA2(GN)CNI1(WH)CNI3(WH)BLRD43F24A250VBLBLCNI2CNI4UNIT EUNIT F123123BKWHORBKWHPKCNE(WH)CNF(WH) CNCN CN CNEEV1EEV2 EEV3 EEV4(WH) (WH) (WH) (WH)GY/GCNTHCNP1CNEEV1(RD)CNL1(BL)CNECNFAN1(WH)CNVCNR1(WH)CNN1(RD)WIPM30A 600VVU5 5 5 5 5 5BKBKBKYEBK2 2 2 2 2535BR2BL2BLWHRDWH RD BL GN BK YE◆Power source and serialsignal inspection1 to 2: AC 220/230/240V2 to 3 : Normal if the voltageoscillates between DC 0and approx. 20VM5M5 5 5 5 5MEEV A EEV B EEV C EEV D EEV EMMMEEV FTho-Rt°Tho-Dt°Tho-St°Tho-At°Tho-AFt°MEEV-HHPS CH 20SMFMWCMVMS3~U◆Inspection of electronicexpansion valveSee page 76.- 75 - '11 • SCM-SM-110◆Inspection of resistance value of sensorRemove the connector and check theresistance value.See the section of sensor characteristicson page 64.◆Inspection of outdoorfan motorSee page 76.◆Inspection power transistorRemove the fasten terminal and testoutput voltage
'11 • SCM-SM-110(a)Inspection of electronic expansion valve6 5 4 3 2 1sub• Inspection of electronic expansion valve as a separate unitMeasuring point Resistance when normal(b)Outdoor unit fan motor check proceduremain mainoutdoor (SCM100,125: )mainmainModels SCM40, 45, 50, 60, 71, 80Models SCM100,125FM0FM06 5 4 3 2 19 8 7 6 5 4 3 2 1CNFAN6 5 4 3 2 1Outdoor main PCB CNFAN9 8 7 6 5 4 3 2 1Outdoor main PCBGNDDC several (0‐6V)DC several (0‐6V)GNDDC280VDC280VDC15VDC15VMeasuring point Resistance when normalMeasuring point Resistance when normal6 - 4DC280V1 - 4DC280V3 - 42 - 41 - 4DC15VDC several V(0‐6V)DC several V(0‐5V)5 - 46 - 47 - 4DC15VDC several V(0‐6V)DC several V(0‐5V)Fan motor resistance checkModels SCM40, 45, 50, 60, 71, 80Models SCM100,125Measuring point Resistance when normalMeasuring point Resistance when normal6-4(Red - Blue) 20 MΩ or higher1-4(Red - Blue) 20 MΩ or higher3-4(Brown - Blue) 20 kΩ or higher5-4(Brown - Blue) 20 kΩ or higherNotes(1) Remove the fan motor and measure it without power cnnected to it.(2) If the measured value is below the value when the motor is normal, it means that the fan motor is fauly.RedBlueWhiteBrownYellowOrangeOrangeWhiteBlueRedWhiteOrangeBrownBlueRed
2.2 FDTC, FDEN and FDUM series2.2.1 Diagnosing of microcomputer circuit(1) Selfdiagnosis function(a) Check indicator tableWhether a failure exists or not on the indoor unit and outdoor unit can be know by the contents of remote controller error code,indoor/outdoor unit green LED (power pilot lamp and microcomputer normality pilot lamp) or red LED (check pilot lamp).(i) Indoor unitRemote controllerError code Red LED Red LEDIndoor control PCBStays OFFGreenLED (1)KeepsflashingOutdoormain PCBRed LEDLocation of trouble Description of trouble Repair method ReferencepageStays OFF — • Normal operation — —No-indication Stays OFF Stays OFF Stays OFF Stays OFF Indoor unit power supply • Power OFF, broken wire/blown fuse, broken transformer wire Repair 98*Remote controller wires • Poor connection, breakage of remote controller wire * For wire breaking at power ON, the LED is OFF. RepairKeeps3 timesStays OFFflashingflashRemote controller • Defective remote controller PCBIndoor-outdoor units connectionWAIT orKeeps• Poor connection, breakage of indoor-outdoor units connection wireStays OFFStays OFFwireINSPECT I/UflashingRemote controller • Improper setting of master and slave by remote controller• Poor connection of remote controller signal wire (White)*Remote controller wires (Noise)Keeps• Intrusion of noise in remote controller wireStays OFFStays OFFflashingRemote controller indoor controlPCB*• Defective remote controller or indoor control PCB (defective communication circuit)?Keepsflashing2 timesflash2 timesflash2 timesflash1 timeflash1 timeflash1 timeflash1 timeflashStays OFF1 timeflash1 timeflash1 timeflashStays OFFKeepsflashingKeepsflashingKeepsflashingKeepsflashingKeepsflashingKeepsflashingKeepsflashingKeepsflashingKeepsflashingKeepsflashingKeepsflashingKeepsflashing6 timesflash6 timesflash6 timesflashStays OFFStays OFFStays OFFStays OFFStays OFFStays OFFIndoor-outdoor units connectionwire(Noise)Outdoor control PCBOutdoor control PCBFuseIndoor heat exchanger temperaturethermistorIndoor control PCBIndoor return air temperaturethermistorIndoor control PCBInstallation or operating conditionIndoor heat exchanger temperaturethermistorIndoor control PCBDrain trouble'11 • SCM-SM-110Replacement of 99remote controllerRepair 100~104* For wire breaking at power ON, the LED is OFF RepairReplacement of105remote controlleror PCBRepairPower reset orRepairReplacement of 106PCBReplacementReplacement,repair of temperaturethermistor 107Replacement ofPCBReplacement,repair of temperaturethermistor 108Replacement ofPCBRepairReplacementof temperature 109thermistorReplacement ofPCBReplacement,repair of DM(In case of FDTC, FDUM)Replacement of110PCBReplacement,(In case of FDTC, FDUM)repair 112(In case of FDTC, FDUM)114• Poor connection of wire between indoor-outdoor units during operation(disconnection, loose connection)• Anomalous communication between indoor-outdoor units by noise, etc.• CPU-runaway on outdoor control PCB*• Occurrence of defective outdoor control PCB on the way of power supply (defective communicationcircuit)?• Defective outdoor control PCB on the way of power supply• Blown fuse• Defective indoor heat exchanger temperature thermistor (defective element, broken wire,short-circuit)• Poor contact of temperature thermistor connector*• Defective indoor control PCB (Defective temperature thermistor input circuit)?• Defective indoor return air temperature thermistor (defective element, broken wire, shortcircuit)• Poor contact of temperature thermistor connector*• Defective indoor control PCB (Defective temperature thermistor input circuit)?• Heating over-load (Anomalously high indoor heat exchanger temperature)• Defective indoor heat exchanger temperature thermistor (short-circuit)*• Defective indoor control PCB (Defective temperature thermistor input circuit)?• Defective drain pump (DM), broken drain pump wire, disconnected connectorFloat switch • Anomalous float switch operation (malfunction) RepairIndoor control PCB*• Defective indoor control PCB (Defective float switch input circuit)*• Defective indoor control PCB (Defective DM drive output circuit)?Option • Defective optional parts (At optional anomalous input setting) RepairNumber of connected indoorunitsFan motor• When multi-unit control by remote controller is performed, the number of units is over Repair 111• Defective fan motorIndoor control PCB • Defective indoor control PCB ReplacementStays OFF Indoor control PCB • Improper operation mode setting Repair 113Stays OFFStays OFFFan motor • Indoor fan motor rotation speed anomaly Replacement, repairIndoor power PCB • Defective indoor power PCB ReplacementRemote controller temperaturethermistor• Broken wire of remote controller temperature thermistor Repair 115Note (1) Normal indicator lamp (Indoor unit: Green) extinguishes (or lights continuously) only when CPU is anomalous. It keeps flashingin any trouble other than anomalous CPU.(2) * mark in the Description of trouble means that, in ordinary diagnosis, it cannot identify the cause definitely, and, if the trouble is repaired by replacingthe part, it is judged consequently that the replaced part was defective.(3) Value in ( ) is for the FDUM series only.
(ii) Outdoor unit(a) Model SCM40, 45, 50, 60, 71, 80Remote controllerError code Red LED Red LEDKeepsflashingIndoor control PCBGreenLEDOutdoormain PCBRed LEDKeeps 2 timesStays OFFflashing flashKeeps 5 timesStays OFFflashing flashKeeps 8 timesStays OFFflashing flashKeeps 8 timesStays OFFflashing flashKeeps 8 timesStays OFFflashing flashKeepsStays OFFflashingStay OFFKeepsflashing1 timeflash4 timesflashKeeps 2 timesStays OFFflashing flashKeeps KeepsStays OFFflashing flashingKeepsStays OFFflashing1 timeflashKeeps 8 timesStays OFFflashing flashKeeps 2 timesStays OFFflashing flash'11 • SCM-SM-110ReferencepageReplacement, repairof temperature116sensorReplacement ofPCBReplacement, repairof temperature118sensorReplacement ofPCBReplacement, repairof temperaturesensor 119Replacement ofPCBReplacement, repairof temperaturesensor 120Replacement ofPCBReplacement, repairof temperaturesensor 121Replacement ofPCBReplacement ofPCB 124 • 125126PCBRepair127PCB replacementReplacement 128Replacement of129PCBReplacement, repairof temperaturesensor 131Replacement ofPCBService valve 133opening check- 78 -Location of trouble Description of trouble Repair methodInstallation, operation status • Higher outdoor heat exchanger temperature RepairOutdoor heat exchangertemperature sensorOutdoor main PCB• Defective outdoor heat exchanger temperature sensor*• Defective outdoor main PCB (Defective temperature sensor input circuit)?Installation, operation status • Higher discharge temperature RepairDischarge pipe temperaturesensorOutdoor main PCBOutdoor heat exchangertemperature sensorOutdoor main PCBOutdoor air temperaturesensorOutdoor main PCBDischarge pipe temperaturesensorOutdoor main PCBOutdoor main PCB,compressor• Defective discharge pipe temperature sensor*• Defective outdoor main PCB (Defective temperature sensor input circuit)?• Defective outdoor heat exchanger temperature sensor, broken wire or poorconnector connection*• Defective outdoor main PCB (Defective temperature sensor input circuit)?• Defective outdoor air temperature sensor, broken wire or poor connectorconnection*• Defective outdoor main PCB (Defective temperature sensor input circuit)?• Defective discharge pipe temperature sensor, broken wire or poor connectorconnection*• Defective outdoor main PCB (Defective temperature sensor input circuit)?• Current cut (Anomalous compressor over-current)Installation, operation status • Service valve closing operation RepairOutdoor main PCB • Anomalous outdoor main PCB commuication Replacement ofOutdoor sub PCBOutdoor sub PCBFan motorOutdoor main PCBPower transistor error(outdoor main PCB)Outdoor suction pipe sensorOutdoor sub PCB• Anomalous outdoor sub PCB commuication• Defective active filter• Defective fan motor• Defective outdoor main PCB• Power transistor error• Defective suction pipe temperature sensor, broken wire or poor connectorconnection• Defective outdoor sub PCB (Defective temperature sensor input circuit)?Operation status • Shortage in refrigerant quantity RepairInstallation status• Service valve closing operationStays OFF• Overload operationKeeps 3 times• Overchargeflashing flash• Compressor locking• Current safe stop Replacement 134Stays OFFKeeps 2 times Compressor, outdoor mainflashing flashPCB• Anomalous compressor startup Replacement 135Stays OFFKeeps 7 timesflashing flashCompressor • Anomalous compressor rotor lock Replacement 136Note (1) * mark in the Description of trouble means that, in ordinary diagnosis, it cannot identify the cause definitely, and, if the trouble is repaired by replacing thepart, it is judged consequently that the replaced part was defective.
(b) Model SCM100, 125Remote controllerError code Red LED Red LEDIndoor control PCBGreenLEDOutdoorcontrol PCBRed LEDKeeps 2 timesStays OFFflashing flashKeeps 5 timesStays OFFflashing flashKeeps 8 timesStays OFFflashing flashKeeps 8 timesStays OFFflashing flashKeeps 8 timesStays OFFflashing flashKeepsflashing Stays OFFKeeps 2 timesflashing flashKeepsStays OFFflashingKeepsStays OFFflashingStay OFFKeepsflashing1 timeflash1 timeflash4 timesflashKeeps KeepsStays OFFflashing flashingKeepsStays OFFflashing1 timeflashKeeps 8 timesStays OFFflashing flashKeeps 8 timesStays OFFflashing flashKeeps 2 timesStays OFFflashing flashKeeps 2 timesStays OFFflashing flash'11 • SCM-SM-110ReferencepageRepairReplacement, repairof temperature117sensorReplacement ofPCBReplacement, repairof temperature118sensorReplacement ofPCBReplacement, repairof temperaturesensor 119Replacement ofPCBReplacement, repairof temperaturesensor 120Replacement ofPCBReplacement, repairof temperaturesensor 121Replacement ofPCBRepairReplacement, repairof temperature 122sensorReplacement ofPCBReplacement of123PCB or RepairReplacement ofPCB 124•125126PCBReplacement 128Replacement of130PCBReplacement, repairof temperaturesensor 131Replacement ofPCBReplacement ofsensor132Replacement ofPCBService valve 133opening check- 79 -Location of trouble Description of trouble Repair methodInstallation, cooling operation status • Higher outdoor high pressureHigh pressure sensorOutdoor control PCB• Defective high pressure sensor*• Defective outdoor control PCB (Defective high pressure sensor input circuit)?Installation, operation status • Higher discharge temperature RepairDischarge pipe temperaturesensorOutdoor control PCBOutdoor heat exchangertemperature sensorOutdoor control PCBOutdoor air temperaturesensorOutdoor control PCBDischarge pipe temperaturesensorOutdoor control PCB• Defective discharge pipe temperature sensor*• Defective outdoor control PCB (Defective temperature sensor input circuit)?• Defective outdoor heat exchanger temperature sensor, broken wire or poorconnector connection*• Defective outdoor control PCB (Defective temperature sensor input circuit)?• Defective outdoor air temperature sensor, broken wire or poor connectorconnection*• Defective outdoor control PCB (Defective temperature sensor input circuit)?• Defective discharge pipe temperature sensor, broken wire or poor connectorconnection*• Defective outdoor control PCB (Defective temperature sensor input circuit)?Installation, Heating operation• Higher outdoor high pressurestatusHigh pressure sensorOutdoor control PCB• Defective high pressure sensor• Defective outdoor control PCB (Defective high pressure sensor input circuit)? Power transistor • Power transistor overheatOutdoor main PCB,compressor• Current cut (Anomalous compressor over-current)Installation, operation status • Service valve closing operation RepairOutdoor control PCB • Anomalous outdoor control PCB commuication Replacement ofOutdoor sub PCBFan motorOutdoor control PCBPower transistor error(Inverter PCB)Outdoor suction pipe sensorOutdoor sub PCBHigh pressure sensorOutdoor control PCB• Anomalous outdoor sub PCB commuication• Defective fan motor• Defective outdoor control PCB• Inverter and fan motor anomaly• Defective suction pipe temperature sensor, broken wire or poor connectorconnection• Defective outdoor sub PCB (Defective temperature sensor input circuit)?• Defective high pressure sensor• Defective outdoor control PCB (Defective temperature sensor input circuit)?Operation status • Shortage in refrigerant quantity RepairInstallation statusCompressor, outdoor mainPCB• Service valve closing operation• Anomalous compressor startup Replacement 135Note (1) * mark in the Description of trouble means that, in ordinary diagnosis, it cannot identify the cause definitely, and, if the trouble is repaired by replacing thepart, it is judged consequently that the replaced part was defective.
'11 • SCM-SM-110(iv) Display sequence of error codes or inspection indicator lamps■ Occurrence of one kind of errorDisplays are shown respectively according to errors.■ Occurrence of plural kinds of errorSectionCategory of displayError code on remotecontroller• Displays the error of higher priority (When plural errors are persisting)Red LED on indoorcontrol PCB• Displays the present errors. (When a new error has occurred after the former error was reset.)Red LED on outdoormain (control) PCB■ Error detecting timingSection Error description Error code Error detecting timingDrain trouble (Float switchactivated)Whenever float switch is activated after 30 second had past sincepower ON.Communication error atinitial operation“ WAIT ”No communication between indoor and outdoor units isestablished at initial operation.Remote controllerCommunication between indoor unit and remote controller iscommunication circuit errorinterrupted for mote than 2 minutes continuously after initialcommunication was established.Communication error duringCommunication between indoor and outdoor units is interruptedIndooroperationfor mote than 2 minutes continuously after initial communicationwas established.Excessive number ofconnected indoor units bycontrolling with one remoteWhenever excessively connected indoor units is detected afterpower ON.controllerReturn air temperaturethermistor anomaly-50°C or lower is detected for 5 seconds continuously within 60minutes after initial detection of this anomalous temperature.Indoor heat exchangertemperature thermistoranomaly-50°C or lower is detected for 5 seconds continuously within 60minutes after initial detection of this anomalous temperature.Or 70°C or higher is detected for 5 seconds continuously.-55°C or lower is detected for 5 seconds continuously 3 timesOutdoor air temperaturesensor anomalywithin 40 minutes after initial detection of this anomalous sensor.Or -55°C or higher is detected for 5 seconds continuously within20 seconds after power ON.-55°C or lower is detected for 5 seconds continuously 3 timesOutdoor heat exchangertemperature sensor anomalyOutdoorwithin 40 minutes after initial detection of this anomalous sensor.Or -55°C or lower is detected for 5 seconds continuously within20 seconds after power ON.Discharge pipe temperaturesensor anomaly-25°C or lower is detected for 5 seconds continuously 3 timeswithin 40 minutes after initial detection of this anomalous sensor.-55°C or lower is detected for 5 seconds continuously 3 timesSuction pipe temperaturesensor anomalywithin 40 minutes after initial detection of this anomalous sensor.Or -55°C or higher is detected for 5 seconds continuously within20 seconds after power ON.
'11 • SCM-SM-110■ Error log and resetError indicator Memorized error log ResetRemote controller display • Higher priority error is memorized. • Stop the unit by pressing the ON/OFFRed LED on indoor control PCB • Not memorized.switch of remote controller.• If the unit has recovered from anomaly, itRed LED on outdoor main (control) PCB • Memorizes a mode of higher priority.can be operated.■ Resetting the error log• Resetting the memorized error log in the remote controllerHolding down “CHECK” button, press “TIMER” button to reset the error log memorized in the remote controller.• Resetting the memorized error logThe remote controller transmits error log erase command to the indoor unit when “VENTI” button is pressed whileholding down “CHECK” button.Receiving the command, the indoor unit erase the log and answer the status of no error.(2) Troubleshooting procedureWhen any trouble has occurred, inspect as follows. Details of respective inspection method will be described on later pages.Confirmation ofTroubleConfirmationof powersupply(Indoor/outdoor unit)remote controller andLEDs on the PCBof indoor unit andoutdoor unit (Indoor/outdoor unit, remoteCheck of the anomalousoperation data on theremote controllerInspectionof the unit/controllerReplacement/repair offaulty part,test run,adjustmentcontroller)(3) Troubleshooting at the indoor unitWith the troubleshooting, find out any defective part by checking the voltage (AC, DC), resistance, etc. at respective connectorsat around the indoor PCB, according to the inspection display or operation status of unit (the compressor does not run, fan doesnot run, the 4-way valve does not switch, etc.), and replace or repair in the unit of following part.(a) Replacement part related to indoor PCB’sControl PCB, power supply PCB, temperature thermistor (return air, indoor heat exchanger), remote controller switch andfuseNote (1) With regard to parts of high voltage circuits and refrigeration cycle, judge it according to ordinary inspection methods.(b) Instruction of how to replace indoor control PCBSAFETY PRECAUTIONS● Read the "SAFETY PRECAUTIONS" carefully first of all and then strictly follow it during the replacement in order to protect yourself.● The precautionary items mentioned below are distinguished into two levels, WARNING and CAUTION.Both mentions the important items to protect your health and safety so strictly follow them by any means.WARNING Wrong installation would cause serious consequences such as injuries or death.CAUTION Wrong installation might cause serious consequences depending on circumstances.● After completing the replacement, do commissioning to confirm there are no anomaly.WARNING● Replacement should be performed by the specialist.If you replace the PCB by yourself, it may lead to serious trouble such as electric shock or fire.● Replace the PCB correctly according to these instructions.Improper replacement may cause electric shock or fire.● Shut off the power before electrical wiring work.Replacement during the applying the current would cause the electric shock, unit failure or improper running.It would cause the damage of connected equipment such as fan motor,etc.● Fasten the wiring to the terminal securely, and hold the cable securely so as not to apply unexpected stress on the terminal.Loose connections or hold could result in abnormal heat generation or fire.● Check the connection of wiring to PCB correctly before turning on the power, after replacement.Defectiveness of replacement may cause electric shock or fire.CAUTION● In connecting connector onto the PCB, connect not to deform the PCB. It may cause breakage or malfunction.● Insert connecter securely, and hook stopper. It may cause fire or improper running.● Bundle the cables together so as not to be pinched or be tensioned. It may cause malfunction or electric shock for disconnection or deformation.
(i) FDTC series• Control PCBReplace and set up the PCB according to this instruction.1 Set to an appropriate address and function using switch on PCB.Select the same setting with the removed PCB.2 Set to an appropriate capacity using the model selector switch(SW6).Select the same capacity with the PCB removed from the unit.SW6 -1 -2 -3 -4SW625VD 〇 - - -ON3 Replace the PCB1. Fix the PCB so as not to pitch the cords.2. Connect connectors to the PCB. Connect a cable connector with the PCB connector of the same color.3. Do not pass CPU surrounding about wirings.4 Control PCBParts mounting are different by the kind of PCB.SW2 (Blue)Address settingCNE(White)RAM checkerSW6Capacity settingCNN(Yellow)Thermistor(Heat exchanger)itemAddressTest run35VD - 〇 - -50VD 〇 - 〇 -60VD 〇 〇 〇 -switchSW2SW7-1CNH(Black)Thermistor(Return air)CNC(Red)Humiditysensor-〇〇 :ON -:OFFCNJ(White)Louver motorCNI(Blue)Float SWContent of controlPlural indoor units control by 1 remote controller1 2 3 4Example setting fro 25VDSW7Function setting'11 • SCM-SM-110PSB012D931F DCNT(Blue) CNV(Red)External switch Auto liftCNW4(Blue)Power PCBCNW3(Red)Power PCBCNG(Blue)Part number- 82 -NormalOperation check/drain motor test runCNZ(White)HACNV2(Black)Auto liftCNB(White)Remotecontroller
• Power PCBThis PCB is a general PCB. Replace the PCB according to this instruction.'11 • SCM-SM-110PSB012D953Ano longer needed.CNW0(White)Terminal blockT1(Yellow/Green)EarthCNR(White)Part numberDrain motor- 83 -1 Replace the PCB (refer to right dwg.)1. Unscrew terminal of the wiring(yellow/green) soldered to PCB from the box.2. Cut the band that binds the wiring (red and blue) from connector CNW1 and CNW2, and the wiring (yellow/green) from PCB (T2/T3) . (Note 1)(However, do not cut the band that binds only the red and blue wirings.)3. Replace the PCB only after all the wirings connected to the connector are removed.4. Fix the board such that it will not pinch any of the wires.5. Reconnect the wirings to the PCB. Wiring connector color should match with the color of connector of the PCB. (Note 2)6. Let the wiring (red and blue) pass beneath the (yellow/green) wiring and bind together with band.7. Screw back the terminal of wiring (yellow/green) from PCB(T1,T2/T3), that was removed in 1.In that case, do not place the crimping part of the wiring under the PCB.(Note 1): It might not be applicable on some models.(Note 2): After replacing PCB, connection between capacitor assy and connector CNP is2 Power PCBParts mounting are different by the kind of PCB.CNW1(Blue)Control PCBCNW2(Red)Control PCBT2(Yellow/Green)EarthT3(Yellow/Green)Earth(Note 2) CNP(White)Capacitor assyCNM(White)Fan motor
(ii) FDEN seriesSet to an appropriate address and function using switch on PCB.There is a unit having plural applicable PCB depending on a model.Set the function setting corresponding the spare PCB and the applicable model.itemAddressTest runSet to an appropriate capacity using the model selector switch(SW6).Select the same capacity with the PCB removed from the unit.Replace the PCB1. Fix the PCB so as not to pitch the cords.2. Connect connectors to the PCB. Connect a cable connector with the PCB connector of the same color.3.Do not pass CPU surrounding about wirings.Control PCBParts mounting are different by the kind of PCB.switchSW2SW7-1SW6 -1 -2 -3 -450V Operation check/drain motor test runSW6ON1 2 3 4Content of controlPlural indoor units control by 1 remote controllerNormal'11 • SCM-SM-110PSB012D974 B- 84 -
(iii) FDUM series• Control PCBReplace and set up the PCB according to this instruction.1 Set to an appropriate address and function using switch on PCB.Select the same setting with the removed PCB.2 Set to an appropriate capacity using the model selector switch(SW6).Select the same capacity with the PCB removed from the unit.SW6SW6 -1 -2 -3 -4ON50V 〇 - 〇 -3 Replace the PCB1. Exchange PCB after detaching all connectors connected with the PCB.2. Fix the PCB so as not to pitch the wiring.3. Connect connectors to the PCB. Match the wiring connector to the connector color on the PCB and connect it.4 Control PCBitemAddressTest runswitchSW2SW7-1Parts mounting are different by the kind of PCB.SW5Master/SlavesettingSW2(Blue)Address settingCNE(White)RAM checkerSW6Capacity settingSW7Function settingSW8Function settingCNN(Yellow)Thermistor(Heat exchanger)CNH(Black)Thermistor(Return air)CNTA(Blue)Externalinput-Content of controlPlural indoor units control by 1 remote controller1 2 3 4'11 • SCM-SM-110PSB012D990NormalCNT(Blue) CNV(Red)External switch Auto liftCNR(White)Drain motorCNW2(White)Power PWBPart numberCNO(Red)CNV2(Black) CNB(White)HeaterAuto clean Remoteoutputpanel controller〇 Operation check/drain motor test run〇 :ON -:OFFCNJ(White)Louver motorCNC(Red)HumiditysensorCNI(Blue)Float SWCNZ(White)HA
'11 • SCM-SM-110• Power PCBPSB012D992This PCB is a general PCB. Replace the PCB according to this instruction.1 Replace the PCB1. Unscrew terminal of the wiring(yellow/green) connected to Terminal block (CNWO) from the box.2. Replace the PCB only after all the wirings connected to the connector are removed.3. Fix the board such that it will not pinch any of the wires.4. Reconnect the wirings to the PCB. Wiring connector color should match with the color of connector of the PCB.5. Screw back the terminal of wiring, that was removed in 1.2 Power PCBParts mounting are different by the kind of PCB.CNW3(White)Terminal blockPart numberCNM1(White)Fan motorCNW0(White)Terminal blockCNW1(White)Control pwb
'11 • SCM-SM-110●DIP switch setting listSwitches Description Default setting RemarksSW2 Address No. setting at plural indoor units control by 1 R/C 00-FSW6-1SW6-2SW6-3SW6-4Model selection As per model See table 1SW7-1 Test run, Drain motorNormal*/Test runOFF NormalSW7-2 ReservedOFFkeep OFFSW7-3 Powerful modeValid*/InvalidON ValidSW7-4 ReservedOFFkeep OFFJSL1 Superlink terminal spareNormal*/switch to spare With* Default settingTable 1: Indoor unit model selection with SW6-1-SW6-40: OFF 1:ON25VD 35VD 50VD 60VDSW6-11 0 1 1SW6-20 1 0 1SW6-30 0 1 1SW6-40 0 0 0
'11 • SCM-SM-110(4) Check of anomalous operation data with the remotecontrollerOperation data can be checked with remote control unit operation.Number0102Data Item(Operation Mode)(Set Temperature)➀ Press the button.03(Return Air Temperature)The display change “ ”04(Remote Controller Thermistor Tempeature)➁ Press the (SET) button while “ ” is displayed. 05(Indoor Heat Exchanger Thermistor / U Bend)➂ When only one indoor unit is connected to remote controller,06(Indoor Heat Exchanger Thermistor /Capillary)“ ” is displayed (blinking indication during data07(Indoor Heat Exchanger Thermistor /Gas Header)08(Indoor Unit Fan Speed)loading).Next, operation data of the indoor unit will be displayed. Skip to step ➆.➃ When plural indoor units is connected, the smallest address number091011(Frequency Requirements)(Response Frequency)(Pulse of Indoor Unit Expansion Value)of indoor unit among all connected indoor unit is displayed.12(Total Running Hours of The Indoor Unit)21(Outdoor Air Temperature)[Example]:“ ” (blinking 1 seconds) ➝ “ ”2223(Outdoor Heat Exchanger Thermistor)(Outdoor Heat Exchanger Thermistor)blinking.24(Compressor Frequency)➄ Select the indoor unit number you would like to have data displayed25(High Pressure)26(Low Pressure)with the button.27(Discharge Pipe Temperature)➅ Determine the indoor unit number with the (SET) button.28(Comp Bottom Temperature)(The indoor unit number changes from blinking indication to29(Current)continuous indication)30(Target Super Heat)31(Super Heat)“ ” (The address of selected indoor unit is blinking for 2 32(Discharge Pipe Super Heat)seconds.)3334(Protection State No. of The Compressor)(Outdoor Unit Fan Speed)“ ” (A blinking indication appears while data loaded.)35(63H1 On/Off)36(Defrost Control On/Off)Next, the operation data of the indoor unit is indicated.37(Total Running Hours of The Compressor)➆ Upon operation of the button, the current operation data is 38(Pulse of The Outdoor Unit Expansion Valve EEVC)displayed in order from data number 01.The items displayed are in the above table.39(Pulse of The Outdoor Unit Expansion Valve EEVH)*Depending on models, the items that do not have corresponding data are not displayed.➇ To display the data of a different indoor unit, press thebutton, which allows you to go back to the indoor unitselection screen.➈ Pressing thebutton will stop displaying data.Pressing the (RESET) button during remote control unit operation will undo your last operation and allow you to go back tothe previous screen.If two (2) remote controllers are connected to one (1) inside unit, only the master controller is available for trial operation andconfirmation of operation data. (The slave remote controller is not available.)
'11 • SCM-SM-110(5) Inverter checker for diagnosis of inverter output●Checking method(a) Setup procedure of checker.1) Power OFF (Turn off the breaker).2) Remove the terminal cover of compressor and disconnect the wires (U, V, W) from compressor.3) Connect the wires U (Red) , V (White) and W (Black) of the checker to the terminal of disconnected wires (U, V, W)from compressor respectively.(b) Operation for judgment.1) Power ON and start check operation on cooling or heating mode.2) Check ON/OFF status of 6 LED's on the checker.3) Judge the PCB by ON/OFF status of 6 LED's on the checker.ON/OFFstatus of LEDIf all of LED are ON/OFFaccording to following patternIf all of LED stay OFF orsome of LED are ON/OFFOutdoor mainPCBNormalAnomalousPower ON3 min.Start check operationDuring this period, ON/OFF status of LED isrepeated cyclically according to following patternStop check operation4) Stop check operation within about 2minutes after starting check operation.〈Inverter Checker〉LEDLED ON/OFF patternLED1LED1LED1LED1LED1LED1LED2LED2LED2LED2LED2LED2LED3LED3LED3LED3LED3LED3LED4LED4LED4LED4LED4LED4LED5LED5LED5LED5LED5LED5LED6LED6LED6LED6LED6LED6Cyclically● ONRed White○ OFFUBlackVFaston terminalWConnect to the terminal of the wires which are disconnected from compressor.(6) Outdoor unit inspection points●See page 71 to 75
2.2.2 Troubleshooting flow(1) List of troubles'11 • SCM-SM-110Remote controller display Description of trouble Reference pageNone Operates but does not cool. 91None Operates but does not heat. 92None Earth leakage breaker activated 93None Excessive noise/vibration (1/3) 94None Excessive noise/vibration (2/3) 95None Excessive noise/vibration (3/3) 96None Louver motor failure (FDTC and FDEM only) 97None Power supply system error (Power supply to indoor control PCB) 98None Power supply system error (Power supply to remote controller) 99INSPECT I/U INSPECT I/U (When 1 or 2 remote controllers are connected) 100INSPECT I/U INSPECT I/U (Connection of 3 units or more remote controllers) 101WAIT Communication error at initial operation 102~104E1 Remote controller communication circuit error 105E5 Communication error during operation 106E6 Indoor heat exchanger temperature thermistor anomaly 107E7 Return air temperature thermistor anomaly 108E8 Heating overload operation 109E9 Drain trouble (FDTC and FDUM only) 110E10 Excessive number of connected indoor units (more than 17 units) by controlling with one remote controller 111E16 Indoor fan motor anomaly (FDTC and FDUM only) 112E19 Indoor unit operation check, drain motor check setting error 113E20 Indoor fan motor rotation speed anomaly (FDTC and FDUM only) 114E28 Remote controller temperature thermistor anomaly 115E35 Cooling high pressure operation 116, 117E36 Discharge pipe temperature error 118E37 Outdoor heat exchanger temperature sensor anomaly 119E38 Outdoor air temperature sensor anomaly 120E39 Discharge pipe temperature sensor anomaly 121E40 Heating high pressure operation (SCM100, 125 only) 122E41 Power transistor overheat (SCM100, 125 only) 123E42 Current cut 124, 125E45 Outdoor sub PCB communication error 126E47 Active filter voltage error (SCM40, 45, 50, 60, 71, 80 only) 127E48 Outdoor fan motor anomaly 128E51 Power transistor anomaly (SCM40, 45, 50, 60, 71, 80 only) 129E51 Inverter and fan motor anomaly (SCM100, 125 only) 130E53 Suction pipe temperature error 131E54 High pressure sensor anomly (SCM100, 125 only) 132E57 Insufficient refrigerant amount or detection of service valve closure 133E58 Current safe stop (SCM40, 45, 50, 60, 71, 80 only) 134E59 Compressor startup failure 135E60 Anomalous compressor rotor lock (SCM40, 45, 50, 60, 71, 80 only) 136
(2) Troubleshooting'11 • SCM-SM-110Error codeLED Green Red ContentRemote controller: None Indoor Keeps flashing Stays OFFOutdoor – Stays OFFOperates but does not cool1. Applicable model 5. TroubleshootingAll models Diagnosis CountermeasureCheck the indoor unit fan operation.Check the temperature differncebetween return and supply air.It is normal.(This unit is designed toIs thestart in the soft start modetemperature differnceDoes theby detecting the under domebetween return and supply air YES heat load increase after NOtemperature of compressor10-20degC atinstalltion?when it restart after powercooling?2. Error detection methodreset.YESNOMistake in model selection.It is necessary to replace toCalculate heat load once more.higher capacity one or toinstall additional unit.Is the compressorNOoperating?“ WAIT ”Compressor refrigerant oilmessage is displayed (for 3 seconds) whenperforming cooling, defrosting and heating YES protection control at startingoperations from the remoteis activated.controller.Compressor may be stoppedYESNOby the error detectioncontrol. For the contents ofcontrol, refer to anomalous3. Condition of Error displayedstop control by controllingcompressor rotation speedof microcomputor controlfunctions.Is theInspect the followings.compressor rotationspeed low?NO• Minor clogging of filter• Minor clogging of heatexchangerYES• Minor short-circuit• Minor shortage ofCheck which control “Determinationrefrigerant amountcontrol of conpressor rotation speed” or• Poor compression of“Protective control by controllingcompressorcompressor rotation speed” is appropriate4. Presumable causeto this phenomenon.Considering appropriateoperation control, checksuspicious points.• Poor compression ofAre the (1)Inspect the followings forcompressortemperature conditionsreference.of room and outdoor air closeYES• Faulty expansion valveto the rated• Major clogging of filteroperationconditions?• Major clogging of heatNote (1) Outdoor: 35°C, Indoor: 27°CexchangerNO• Major short-circuit• Major shortage ofThe unit is operating normally but isrefrigerant amountoperating under the contol for protecting• Compressor protection ONcompressor or other respective parts.• Indoor fan tapNote:
'11 • SCM-SM-110Error codeLED Green Red ContentRemote controller: None Indoor Keeps flashing Stays OFFOutdoor – Stays OFFOperates but does not heat1. Applicable model 5. TroubleshootingAll models Diagnosis CountermeasureCheck the indoor unit fan operation.Check the temperature differncebetween return and supply air.It is normal.(This unit is designed toIs thestart in the soft start modetemperature differnceDoes theby detecting the underbetween return and supply air YES heat load increase after NO dome temperature of10-30degC atinstalltion?compressor when it restartheating?2. Error detection methodafter power reset.YESNOIt is necessary to replace toMistake in model selection.Calculate heat load once again.higher capacity one or toinstall additional unit.Is the compressoroperating?NO“ WAIT ”Compressor refrigerant oilmessage is displayed (for 3 seconds) whenprotection control at startingperforming cooling, defrosting and heating YESis activated.operations from the remotecontroller.Compressor may bestopped by the errorYESNOdetection control.For the contents of control,3. Condition of Error displayedrefer to anomalous stopcontrol by controllingcompressor rotation speedof microcomputor controlfunctions.Is theInspect the followings.compressor rotationNO• Minor clogging of filterspeed low?• Minor clogging of heatexchangerYES• Minor short-circuit• Minor shortage ofCheck which control “Determination control ofrefrigerant amountconpressor rotation speed” or “Protective control• Poor compression ofby controlling compressor rotation speed” iscompressor4. Presumable causeappropriate to this phenomenon.Considering appropriateoperation control, check• Faulty 4-way valve operationsuspicious points.Are the (1)• Poor compression oftemperature conditionsInspect the followings forcompressorof room and outdoor air closeYESreference.to the rated• Faulty expansion valve• Major clogging of filterconditions?operation• Major clogging of heatNote (1) Outdoor: 7°C, Indoor: 20°CNOexchanger• Major short-circuit• Major shortage ofThe unit is operating normally but isrefrigerant amountoperating under the contol for protecting• Compressor protection ONcompressor or other respective parts.• Indoor fan tapNote:
'11 • SCM-SM-110Error codeLED Green Red ContentRemote controller: None Indoor Stays OFF Stays OFFEarth leakage breaker activatedOutdoor – Stays OFF1. Applicable model 5. TroubleshootingAll models Diagnosis CountermeasureAre OK theinsulation resistance andNOReplace compressor.*coil resistance ofcompressor?YES2. Error detection methodIs insulationof respective harnesses OK?NOSecure insulationIs any harness bitten betweenresistance.pannel and casingor etc?YESCheck the outdoor unit groundingwire/earth leakage breaker.Check of the outdoor unit grounding wire/earth leakage breaker3. Condition of Error displayed Run an independent grounding wire from the grounding screwof outdoor unit to the grounding terminal on the distributionpanel. (Do not connect to another grounding wire.) In order to prevent malfunction of the earth leakage breakeritself, confirm that it is conformed to higher harmonicregulation.* Insulation resistance of compressor• Immediately after installation or when the unit has been leftfor long time without power supply, the insulation resistancemay drop to a few MΩ because of refrigerant migrated inthe compressor.When the earth breaker is activated at lower insulationresistance, check the following points. Check if the earth leakage breaker is conformed to higher4. Presumable causeharmonic regulation or not.Since the unit is equipped with inverter, it is necessary to usecomponents conformed to higher harmonic regulation in order• Defective compressorto prevent malfunction of earth leakage breaker.• NoiseNote:- 93 -
'11 • SCM-SM-110Error codeLED Green Red ContentRemote controller: None Indoor – –Outdoor – –Excessive noise/vibration (1/3)1. Applicable model 5. TroubleshootingAll models Diagnosis CountermeasureIf excessive noise/vibrationDoesnoise/vibrationoccur during or soonafter stopping operationNOpersists when sufficienttime has elapsed afterstopping the unit, it isconsidered that the airconditionerof air-conditioner?is not thesource.Check the installed2. Error detection methodYEScondition carefully, andDoes thecorrect the position orinstallation ofinsert rubber cushionsYESindoor/outdooror others into the gap, ifunit loose?necessary.YES[Installation work]Does noise/vibrationoccur not only from theNOPrevent the vibration fromtransmitting to wall and etcby fixing pipes on the wallair-conditioneror wrapping rubber cushionbut also from entireAre pipesaround the pipe whichbuilding?YEStouching the wall, etc? goes through the hole inthe wall or applying otherappropriate means.NONOStrength of ceilingwall, floor, etc. may beinsufficient. Review theinstalling position orreinforce it.3. Condition of Error displayed[Product]Check for leaning ofDoes noise/vibrationIs there a fanoccur from operating YES or louver touching other YES installed unit or anomalousfan (fan only)?components?mounting of fan, louveror motor and specify thecontacting point and correctit.NO When the heat exchangerNOor filter is clogged, cleanthem. In case that theunit is installed at the siteTo next pagewhere background noiseis very low, small noisefrom indoor unit can be4. Presumable causeheard, but it is normal.Before installation, checkfor background noise. If➀ Improper installation workbackgound nois is very• Improper anti-vibrationlow, convince client priorwork at instllationto installation.• Insufficient strength ofmounting face➁ Defective product• Before/after shipping fromfactory➂ Improper adjustment duringcommissioning• Excess/shortage ofrefrigerant, etc.Note:
'11 • SCM-SM-110Error codeLED Green Red ContentRemote controller: None Indoor – –Excessive noise/vibration (2/3)Outdoor – –1. Applicable model 5. TroubleshootingAll models Diagnosis CountermeasureFrom previous pageRearrange the piping toAre the pipescontacting theYES avoid contact with thecasing?casing.[Unit side]YESDoes noise/vibrationNOIt is noise/vibration that2. Error detection methodoccur when the cooling/is generated when theheating operation isrefrigerant gas or liquidperformedflow through inside ofnormally?Is it heardpiping of air-conditioner.continuous hissing or YESroaring sound?It is likely to occurparticularly during coolingor defrosting in the heatingNONOmode. It is normal.To next pageThe noise/vibration occursAre hissing sounds when the refrigerant startsheard at the startup or YESor stops flowing. It isstopping?normal.When the defrosting startsNOor stops during heating,the refrigerant flow isreversed due to switchingIs blowing sound4-way valve. This causes3. Condition of Error displayedheard at the start/stop a large change in pressureYESof defrosting during which produces a blowingheating?sound. It may accompanyalso the hissing sounds asmentioned above. They areNOnormal.After the start or stop ofheating operation or duringIs cracking noisedefrosting, abrupt changesheard during heating YESin temperature cause resinoperation?parts to shrink or expand.This is normal.NOIt is the sound produced4. Presumable causeby the drain pump thatdischarges drain from theHissing noise isindoor unit. The pumpheard during cooling continues to run for 5YESoperation or afterminutes after stopping thestopping.cooling operation. This isnormal.Apply the damper sealantat places considered toNObe the sources such asthe pressure reducingmechanism (expansionvalve), capillary, etc.Note:- 95 -
'11 • SCM-SM-110Error codeLED Green Red ContentRemote controller: None Indoor – –Excessive noise/vibration (3/3)Outdoor – –1. Applicable model 5. TroubleshootingAll models Diagnosis CountermeasureFrom previous pageIf insufficient cooling/Adjustmentheating problem happensduring commissioningdue to anomalous operatingDoes noise/vibration occur when thecooling/heating operation is inconditions at cooling/2. Error detection methodanomalous condition?heating, followings aresuspicious.• Overcharge of refrigerantYES• Insufficient charge ofrefrigerant• Intrusion of air, nitrogen,etc.In such occasion, it isnecessary to recoverrefrigerant, vacuum-dryand recharge refrigerant.* Since there could bemany causes of noise/vibration, the above do notcover all.In such case, check theconditions when, where,3. Condition of Error displayedhow the noise/vibrationoccurs according tofollowing check point.• Indoor/outdoor unit• Cooling/heating/fanmode• Startup/stop/duringoperation• Operating condition(Indoor/outdoortemperatures, pressure)• Time it occurred• Operation data retainedby the remote controller4. Presumable causesuch as compressorrotation speed, heatexchanger temperature,EEV opening degree, etc.• Tone (If available, recordthe noise)• Any other anomaliesNote:- 96 -
'11 • SCM-SM-110Error codeLED Green Red ContentRemote controller: None Indoor Keeps flashing Stays OFF Louver motor failureOutdoor – Stays OFF (FDTC and FDEN series)1. Applicable model 5. TroubleshootingFDTC and FDEN series only Diagnosis Countermeasure Check at the indoor unit side.2. Error detection methodOperate afterwaiting for morethan 1 minute.Does the louveroperate at the power NOon?Is LM wiringbroken?NOYES Repair wiring.YESDefective indoor controlIs LM locked?NOPCB ➞ Replace.YESReplace LM.Is the louveroperable with the remoteYESNormalcontroller?3. Condition of Error displayedNOAdjust LM lever and thencheck again.LM: louver motor4. Presumable cause• Defective LM• LM wire breakage• Faulty indoor control PCBNote:
'11 • SCM-SM-110Error codeLED Green Red ContentPower supply system errorRemote controller: None Indoor Stays OFF Stays OFF(Power supply to indoor control PCB)Outdoor – Stays OFF1. Applicable model 5. TroubleshootingAll models Diagnosis CountermeasureIsAC220/240Vdetected between and on the terminal blockNOof indoorunit?IsAC220/240VYESfor 1-phase unit detected between NO Defective outdoor control and on the terminalPCB (Noise filter)block of outdoorunit?2. Error detection methodYESMisconnection or breakageof connecting wiresAre fusesOK (F200, F201)?NOYESIs thecheck of resistance between NO Defective indoor control or- of CNW0power PCB ➞ Replace.OK?YESIs thechecked resultof resistance of FM,LM, etcOK?NO Replace FM, LM, etc.FDEN, SeriesFDTC, FDUMSeriesYESReplace fuse.3. Condition of Error displayedIs DC5V detected(3)between - of CNW2 NO Defective indoor power(FDUM:CNW1)?PCB ➞ Replace.YESNote (3) for GNDIs JX1 open? NOYESOpen JX1.Defective indoor controlPCB ➞ Replace.Is AC19V orhigher detected between Red-Red (CNW2) at transformerNOReplace transformer.4. Presumable cause• Misconnection or breakage ofsecondary side?YESconnecting wires• Blown fuse• Faulty indoor control orpower PCB• Broken harness• Faulty outdoor control PCB(Noise filter)Is JX1 open?YESNOOpen JX1.Defective indoor controlPCB ➞ Replace.Note:
'11 • SCM-SM-110Error codeLED Green Red ContentPower supply system errorRemote controller: None Indoor Keeps flashing Stays OFF(Power supply to remote controller)Outdoor – Stays OFF1. Applicable model 5. TroubleshootingAll models Diagnosis CountermeasureIsn't there anyloose connection of remotecontroller wires?NOYES Correct.2. Error detection methodIsn't remotecontroller wire broken or YES Replace wires.short-circuited?NODisconnect remotecontroller wires.Is DC15V orhigher detected between X-Y YES Replace remote controller.of indoor unit terminal3. Condition of Error displayedblock?NOFDTC, FDUMFDEN, Series SeriesIs DC180Vbetween - of CNW2 NO Defective indoor power(FDUM:CNW1)?PCB➞Replace.YESDefective indoor controlPCB➞Replace.4. Presumable causeIs 24V or higher• Remote controller wirebetween (Brown-Brown) ofbreakage/short-circuittransformer secondaryNOReplace transformer.• Defective remote controllerside?• Malfunction by noise• Faulty indoor power PCB• Broken harnessYESDefective indoor control• Faulty indoor control PCBPCB➞Replace.Note:
'11 • SCM-SM-110Error codeLED Green Red ContentRemote controller: INSPECT I/U Indoor Keeps flashing Stays OFFINSPECT I/UOutdoor – Stays OFF (When 1 or 2 remote controllers are connected)1. Applicable model 5. TroubleshootingAll models Diagnosis CountermeasureAre 2 unitsof remote controllerconnected?YESNOSet one remote controllerIs it setfor “Master” and the otherat the slave remote YES Set SW1 on remotefor “Slave”controller?2. Error detection methodcontroller PCB at “Master”.Note (1) Use SW1 to set atmaster or slave. Note (2)“Slave” is displayedCommunication between indooron the remoteunit and remote controllercontroller LCD.is disabled for more than 30Does itminutes after the power on.become normal?NONODo more thanone indoor units have theYES Set address again. (SW2 onsame address?indoor control PCB)3. Condition of Error displayedNOSame as aboveAre remotecontroller wires laidYES Separate remote controlleralong high voltagewires?wires from high voltagewires.NODisconnect the connectingwire between the indoorand outdoor unit.4. Presumable causePower supply reset• Improper setting• Surrounding environment• Defective remote controllerDoes DMcommunication circuitstart 60 seconds laterYES Defective indoor control• Faulty indoor control PCBautomatically.PCB➞Replace.NO Defective remote controller➞Change.Note: If any error is detected 30 minutes after displaying “ WAIT ” on the remote controller, the display changes to“INSPECT I/U”.
'11 • SCM-SM-110Error codeLED Green Red ContentRemote controller: INSPECT I/U Indoor Keeps flashing Stays OFFINSPECT I/UOutdoor – Stays OFF (Connection of 3 units or more remote controller)1. Applicable model 5. TroubleshootingAll models Diagnosis CountermeasureAre more than3 units of remote controllerconnected?YESReduce to 2 units or less.NODoes remote2. Error detection methodcontroller display“Slave”?YES Change remote controllersetting to “Master”. (SW1on remote controller PCB)Indoor unit cannot communicateNOfor more than 30 minutes afterthe power on with remoteDo more thancontroller.one indoor units have theYES Change address. (SW2 onsame address?indoor control PCB)NOIs it set toa slave indoor unit.YES Change to master. (SW5-1,SW5-1, 2?2 on indoor control PCB)NOIs there looseor wrong connection at the termanalof wiring between indoor andYES Correctoutdoor units?3. Condition of Error displayedNOSame as aboveIs thegrounding wire connectedproperly?NO CorrectYESIs approx.DC20V detected between -NOon the outdoor unit terminalDefective outdoor sub PCBblock?➞Replace.YES4. Presumable causeIs approx.DC20V detected between -NO Broken connecting wire➞on the indoor unit terminal• Improper settingCorrect.block?• Surrounding environment• Defective remote controllerYEScommunication circuitDefective indoor control or• Faulty indoor control orpower PCB➞Replace.power PCB• Faulty outdoor sub PCBNote: If any error is detected 30 minutes after displaying “ WAIT ” on the remote controller, the display changes to“INSPECT I/U”.
'11 • SCM-SM-110Error codeLED Green Red ContentRemote controller:Indoor Keeps flashing Stays OFFCommunication error atWAITOutdoor – Stays OFF initial operation (1/3)1. Applicable model 5. TroubleshootingAll modelsDiagnosisCountermeasureWhen the remote controllerLCD displays “ WAIT ” 2minutes after the power on.The remote controller LCD Turn the breaker off once and thendisplays “ WAIT ”back on again 3 minutes later.2 minutes after the power on.Is normal condition restored?NO2. Error detection methodIsn’t blownthe power supply fuse (15A, 20A or 30A) on theReplace theNOoutdoor unit controller?power supply fuse. To next page.YESIs AC220/240Vdetected at the secondary side ofDefective outdoor subNOoutdoor sub PCB?PCB→Replace.YESIs thegreen LED of indoor unitNO Defective indoor controlflashing?PCB→Replace.YESReplace indoor controlAre wiresPCB.3. Condition of Error displayedconnected properly betweenNO Correct connection wiresthe indoor and the outdoorbetween indoor andunits?outdoor units.YESIs approx.DC20V detected between -NO Defective outdoor subon the outdoor unit terminalPCB→Replace.block?YESIs approx.Defective connection wireDC20V detected between -NOon the indoor unit terminal(broken wire)block?NoiseYES Defective indoor control4. Presumable causePCB→Replace.• Blown fuse• Faulty outdoor sub PCB• Connection between PCB’s• Faulty indoor control PCB• Defective remote controller• Broken remote controller wireNote: If any anomaly is detected during communication, the error code E5 is displayed. Inspection procedure is same as above. (Excludingmatters related to connection) When the power supply is reset after the occurrence of E5, the LED will display “ WAIT ” if the anomalycontinues. If the breaker ON/OFF is repeated in a short period of time (within 1 minute), “ WAIT ” may be displayed. In such occasion,turn the breaker off and wait for 3 minutes.- 102 -
'11 • SCM-SM-110Error codeLED Green Red ContentRemote controller: WAIT Indoor Keeps flashing Stays OFFCommunication error atOutdoor – Stays OFF initial operation (2/3)1. Applicable model 5. TroubleshootingAll modelsDiagnosisCountermeasureWhen the fuse is blown, themethod to inspect outdoor subPCB before replacing the powerIsn’t theresupply fusea short-circuit between phases ofoutdoor sub PCB?NOReplace the outdoorYESsub PCB2. Error detection methodAren’t therecracks or burning on the powerransistor module or diodestack?YESNOReplace the outdoormain PCBIsn’t reactor the anomalous?NOReplace thereactor.YESReplace fuse.3. Condition of Error displayed4. Presumable cause• Blown fuse• Faulty outdoor sub PCB• Faulty outdoor main PCB• Faulty reactorNote:
'11 • SCM-SM-110Error codeLED Green Red ContentRemote controller: WAIT Indoor Keeps flashing Stays OFFCommunication error atOutdoor – Stays OFF initial operation (3/3)1. Applicable model 5. TroubleshootingAll modelsDiagnosisCountermeasureWhen the remote controllerdisplay is extinguished after thepower on.Remote controller display isextinguished after the power on.Is thegreen LED on the indoor unitflashing?NO2. Error detection methodIs thefuse on the indoor control NO Replace fuse.PCB OK?YESYES(1)Is AC19V or higher detectedbetween Red-Red at the secondary side of NO Defective transformerindoor unit transformer?YES Note (1) FDEN only.Isapprox. 10-11V detectedbetween wires at the remote controller NOside after disconnecting theShort-circuit on remoteremote controller?controller wire3. Condition of Error displayedYESDefective remote controllerAre wiresconnected properly between the indoor andNOCorrect wires.the outdoor units?YESIs approx.DC20V detected between -on the outdoor unit terminalNODefective outdoor subblock?PCB➞Replace.YESIs approxDC20V detected between -on the indoor unit terminalNODefective connection wireblock?(Broken wire)4. Presumable causeNoise• Blown fuseYESDefective indoor control• Connection between PCB’sPCB➞Replace.• Blown fuse• Faulty indoor control PCB• Defective remote controller• Wire breakage on remotecontroller• Faulty outdoor sub PCBNote:
'11 • SCM-SM-110Error codeLED Green Red ContentRemote controller: E1Indoor Keeps flashing Stays OFF Remote controllerOutdoor – Stays OFF communication circuit error1. Applicable model 5. TroubleshootingAll models Diagnosis CountermeasureIs it possible toMalfunction by noisereset normally by theYESCheck peripheralpower reset?environment.NO2. Error detection methodWhen normal communicationbetween the remote controllerTurn SW7-1 to OFF. ONRemove the wire connectingbetween indoor/outdoor units.Power resetand the indoor unit isinterrupted for more than 2minutes. (Detectable only withDoes the drainpump restart automaticallyYESthe remote controller)Defective indoor control1 minute later?PCB ➞ Replace.Note (2) Does the remote controller still display “NOWAIT ” evenDefective remote controller➞ Replace.after 3 minutes?3. Condition of Error displayedSame as above4. Presumable cause• Defective communicationcircuit between remotecontroller-indoor unit• Noise• Defective remote controller• Faulty indoor control PCBNote:If the indoor unit cannot communicate normally with the remote controller for 180 seconds, the indoor contnrol PCB startsto reset automatically.
'11 • SCM-SM-110Error codeLED Green Red ContentRemote controller: E5Indoor Keeps flashing 2 times flashOutdoor – 6 times flashCommunication error during operation1. Applicable model 5. TroubleshootingAll models Diagnosis CountermeasureNote (1) Inspect faulty connections (disconnection,Is thelooseness) on the outdoor unit terminal block.connection of signalwires at the outdoor unitNORepair signal wires.side OK?YES2. Error detection methodNote (2) Check for faulty connection or breakage ofIs the signal wires between indoor-outdoor units.When normal communicationconnection of signalwires between indoor-outdoorNORepair signal wires.between indoor and outdoorunits OK?unit is interrupted for more than2 minutes.YESPower resetDefective outdoor subHas the remotePCB (Defective networkcontroller LCD returned toNOnormal state?communication circuit) ➞Replace.YESUnit is normal.(Malfunction by temporary3. Condition of Error displayednoise, etc.)Same as above is detectedduring operation.4. Presumable cause• Unit No. setting error• Broken remote controller wire• Faulty remote controller wireconnection• Faulty outdoor sub PCBNote:
'11 • SCM-SM-110Error codeLED Green Red ContentRemote controller: E6Indoor Keeps flashing 1 time flashIndoor heat exchangerOutdoor – Stays OFF temperature thermistor anomaly1. Applicable model 5. TroubleshootingAll models Diagnosis CountermeasureIs theconnection of indoor heatexchanger temperature thermistorNOCorrect. ➞ Insert connectorconnector OK?securely.YES2. Error detection methodArecharacteristics of indoorheat exchanger temperatureNODefective indoor heatAnomalously low temperaturethermistor OK?exchanger temperatureor high temperature (resistance)thermistor ➞ Replace.is detected on the indoor heatexchanger thermistor (ThI-R1,R2 or R3).YESDefective indoor controlPCB ➞ Replace.(Defective indoor unit heatexchanger temperaturethermistor input circuit)3. Condition of Error displayed• When the temperaturethermistor detects -40°CTemperature-resistance characteristic(Broken wire)or lower for 5 secondscontinuously, the compressor15stops. After 3-minutes delay,the compressor starts againautomatically, but if thiserror occurs again within60 minutes after the initial10detection.• Or if 70°C or higher isdetected for 5 secondscontinuously.5kΩ at 25°C5(Shot circuit)0 10 20 30 40 504. Presumable causeTemperature (°C)• Defective indoor heatexchanger thermistorconnector• Indoor heat exchangertemperature thermistoranomaly• Faulty indoor control PCBNote:- 107 -Temperature thermistor resistance (kΩ)
'11 • SCM-SM-110Error codeLED Green Red ContentRemote controller: E7Indoor Keeps flashing 1 time flashReturn air temperatureOutdoor – Stays OFF thermistor anomaly1. Applicable model 5. TroubleshootingAll models Diagnosis CountermeasureIs theconnection of returnair temperature thermistorNOCorrect. ➞ Connectconnector OK?connector.YES2. Error detection methodAre thecharacteristics of return airtemperature thermistorNODefective return airAnomalously low temperatureOK?temperature thermistor ➞or high temperature (resistance)Replace.is detected by indoor return airtemperature thermistor (ThI-A)YESDefective indoor controlPCB ➞ Replace.(Defective return airtemperature thermistorinput circuit)3. Condition of Error displayedTemperature-resistance characteristic(Broken wire)• When the temperature thermistordetects -20°C or lower for5 seconds continuously, thecompressor stops. After 3-minutedelay, the compressor starts againautomatically, but if this erroroccurs again within 60 minutesafter the initial detection.5kΩ at 25°C4. Presumable cause(Shot circuit) • Defective return airtemperature thermistorTemperature (°C)connector• Defective return airtemperature thermistor• Faulty indoor control PCBNote:- 108 -Temperature thermistor resistance (kΩ)
'11 • SCM-SM-110Error codeLED Green Red ContentRemote controller: E8Indoor Keeps flashing 1 time flashOutdoor – Stays OFFHeating overload operation1. Applicable model 5. TroubleshootingAll models Diagnosis CountermeasureNO Is the air filter clogged?YESWash.2. Error detection methodIs theDefective indoor heatindoor heat exchangertemperature thermistorNOexchanger temperatureconnection OK?thermistorIndoor heat exchangerconnector➞Correct.temperature thermistor (ThI-R1,R2, R3)YESAre the(2)Defective indoor heatcharacteristics of indoorheat exchanger temperatureNOexchanger temperaturethermistor OK?thermistor.* For the characteristics of indoorheat exchanger temperature, referYESto E6.Check the error data with theremote controller.Is the unit3. Condition of Error displayedoperating in the state ofNOCheck refrigerant system.heating overload?When it is detected 5 timeswithin 60 minutes from initialdetection or when the overloadcondition is detected for 6minutes continuously.YESNote (1) Judge if it is in the state of overload or not as follows. Is there any short-circuit of air? Isn’t there any fouling or clogging on the indoor heat exchanger? Is the outdoor fan control normal? Isn't the indoor and outdoor air temperature too high?Note (2) For characteristics of indoor heat exchanger temperature thermistor,see the error display E6.Adjust4. Presumable cause• Clogged air filter• Defective indoor heatexchanger temperaturethermistor connector• Defective indoor heatexchanger temperaturethermistor• Anomalous refrigerant systemError stopReset56 63Indoor heat exchanger temperature (°C)Note: During heating operation; After starting compressor, compressor rotation speed is decreased by detecting indoor heatexchanger temperature (ThI-R) in order to control high pressure.
'11 • SCM-SM-110Error codeLED Green Red ContentRemote controller: E9Indoor Keeps flashing 1 time flashDrain troubleOutdoor – Stays OFF (FDTC and FDUM series)1. Applicable model 5. TroubleshootingFDTC and FDUM series only Diagnosis CountermeasureCheck the error data in the remote controller.Is there any overflow? NOIs DC 12Vat CNI connector.NO2. Error detection methodYES Check float switchFloat switch is activatedIs theCNI connected NO Defective indoor controlYESfirmly?PCB ➞ Replace.YESIsthere anyanomaly on the optional NO Defective indoor controlIs the humidifier connected?equipment?PCB ➞ Replace.YES Check optional equipmentYESIs thehumidifier Drain Motor3. Condition of Error displayedinterlocked by the indoor unit functionNOCorrect setting tosetting of remotecontroller?NO“Humidifier DM interlock”.If the float switch OPENYESis detected for 3 secondscontinuously or if floatDrain motor ON from the remote controllerswitch connector or wire isdisconnected.IsAC220/240VDoes DM operate? NO FDUM: DC12V NO Defective indoor powerdetected at CNRconnector?PCB ➞ Replace.(FDUM: Indoor control PCB)YESYES Check wiring of drainmotorIs the drain4. Presumable causepiping unclogged? Is thedrain pipe slopNOCorrect.• Defective indoor control orOK?power PCB• Float switch setting error• Humidifier DM interlocksetting error• Optional equipment settingerror• Drain piping error• Defective drain motor• Disconnection of drain motorwiringYESCheck drain motor.Note: When this error occurred at power ON, disconnection of wire or connector of the float switch is suspected. Check andcorrect it (or replace it, if necessary).
'11 • SCM-SM-110Error codeLED Green Red Content Excessive number of connectedRemote controller: E10Indoor Keeps flashing Stays OFF indoor units (more than 17 units)Outdoor – Stays OFF by controlling with one remoto controller1. Applicable model 5. TroubleshootingAll models Diagnosis CountermeasureAren't more than 17indoor units connected to oneNODefective remote controllerremote controller?➞ Replace.2. Error detection methodWhen it detects more than 17 ofindoor units connected to oneremote contorller3. Condition of Error displayedSame as above4. Presumable cause• Excessive number of indoorunits connected• Defective remote controllerYESReduce to 16 or less units.Note:
'11 • SCM-SM-110Error codeLED Green Red ContentRemote controller: E16 Indoor Keeps flashing 1 time flashIndoor fan motor anomalyOutdoor – Stays OFF (FDTC and FDUM series)1. Applicable model 5. TroubleshootingFDTC and FDUM series only Diagnosis CountermeasureDoes anyforeign materialintervene in rotational areaof fan propeller?NODoes the fan2. Error detection methodrotate smoothly when turnedby hand?Detected by rotation speed ofindoor fan motorYESYESNONote (1) for GNDRemove foreign material.Replace the fan motor.Is DC280V 1detected between - offan motor connectorNOCNM?YESIs the fuse F202FDUM: F3blown?NO Check power voltage.Power supply resetYESReplace faulty fan motorand power PCB.3. Condition of Error displayedReplace fan motor. (If theerror persists after replacingIs it normalized?NOWhen actual rotation speed ofthe fan motor, replace theindoor fan motor drops to lowerindoor control PCB.)than 200rpm for 30 secondscontinuously, the compressorand the indoor fan motorYESMalfunction by temporarystop. After 2-seconds, it startsnoiseagain automatically, but if thiserror occurs 4 times within60 minutes after the initialdetection.4. Presumable cause• Defective indoor power PCB• Foreign material at rotationalarea of fan propeller• Defective fan motor• Dust on control PCB• Blown fuse• External noise, surgeNote:
'11 • SCM-SM-110Error codeLED Green Red ContentIndoor unit operation check,Remote controller: E19Indoor Keeps flashing 1 time flashOutdoor – Stays OFF drain motor check setting error1. Applicable model 5. TroubleshootingAll models Diagnosis CountermeasureE19 occurswhen the power ONIs SW7-1on the indoor controlNODefective indoor controlPCB (Defective SW7)2. Error detection methodAfter indoor operation check,when the communicationbetween indoor and outdoorunit is established and SW7-1 isstill kept ON.3. Condition of Error displayedSame as above4. Presumable causeMistake in SW7-1 setting(Due to forgetting to turn OFFSW7-1 after indoor operationcheck)PCB ON ?YES➞ReplaceTurn SW7-1 on the indoorcontrol PCB OFF and resetthe powerNote:
'11 • SCM-SM-110Error codeLED Green Red Content Indoor fan motor rotationRemote controller: E20Indoor Keeps flashing 1 time flashspeed anomalyOutdoor Keeps flashing Stays OFF (FDTC and FDUM series)1. Applicable model 5. TroubleshootingFDTC and FDUM series only Diagnosis CountermeasureDoes anyforeign materialintervene in rotational areaof fan propeller?NODoes the fan2. Error detection methodrotate smoothly when turnedby hand?Detected by rotation speed ofindoor fan motorYESYESNONote (1) for GNDRemove foreign material.Replace the fan motor.Is DC280V 1detected between - offan motor connectorNOCNM?YESIs the fuse F202(FDUM:F3) blown?NO Check power voltage.Power supply resetYESReplace faulty fan motorand power PCB.3. Condition of Error displayedReplace fan motor. (If theIs it normalized?NOerror persists after replacingWhen the actual fan rotationthe fan motor, replace thespeed does not reach to theindoor control PCB.)speed of [required speed-50rpm]after 2 minutes have beenelapsed since the fan motorYESMalfunction by temporaryrotation speed commandnoisewas output, the unit stops bydetecting indoor fan motoranomaly.4. Presumable cause• Defective indoor power (control)PCB• Foreign material at rotationalarea of fan propeller• Defective fan motor• Dust on control PCB• Blown fuse• External noise, surgeNote:
'11 • SCM-SM-110Error codeLED Green Red ContentRemote controller: E28Indoor Keeps flashing Stays OFF Remote controllerOutdoor – Stays OFF temperature thermistor anomaly1. Applicable model 5. TroubleshootingAll models Diagnosis Countermeasure2. Error detection methodIs the remotecontroller temperature Is the remote thermistorNOCorrect.connected properly?controller temperature thermistorNODetection of anomalously lowconnected properly?temperature (resistance) ofremote controller temperatureYESthermistor (Thc)Are the YEScharacteristics ofremote controller temperaturethermistor OK?NODefective remote controllerIs the thermistor Are wire thetemperature thermistor ➞characteristics OK? ofReplace.remote controller temperaturethermistor OK?NOIs the thermistor wireOK?YESDefective remote controllerPCB ➞ Replace.(Defective remotecontroller temperature3. Condition of Error displayedResistance-temperature characteristics of remote controller temperature thermistor (ThC) thermistor input circuit)Temperature (°C) Resistance value (kΩ) Temperature (°C) YES Resistance value (kΩ)06530161623215When the temperature2593414thermistor detects -50°C4533613or lower for 5 secondsResistance-temperature 6characteristics 48of remote 38 controller temperature 12 thermistor (ThC)continuously, the compressor8444011stops. After 3-minutes delay,Temperature 10 (°C) Resistance 40 value (kΩ) 42 Temperature 9.9 (°C) Resistance value (kΩ)the compressor starts again12 036 65 44 30 9.216automatically, but if this error14 133 62 46 32 8.515occurs again within 60 minutes1630487.818 227 59 50 34 7.314after the initial detection.20 425 53 52 36 6.71322 623 48 54 38 6.31224 821 44 56 40 5.8112619585.428 1018 40 60 42 5.09.94. Presumable cause1236449.2• Faulty connection of remotecontroller temperaturethermistor1416182033302725464850528.57.87.36.7• Defective remote controller2223546.3temperature thermistor2421565.8• Defective remote controller2619585.4PCB2818605.0Note: After 10 seconds has passed since remote controller thermistor was switched from valid to invalid, E28 will not be displayed even if thethermistor harness is disconnected. At same time the thermistor, which is effective, is switched from remote controller thermistor to indoor returnair temperature thermistor. Even though the remote controller thermistor is set to be Effective, the return air temperature displayed on remotecontroller for checking still shows the value detected by indoor return air temperature thermistor, not by remote controller temperature thermistor.
'11 • SCM-SM-110Error codeLED Green Red ContentRemote controller: E35Indoor Keeps flashing Stays OFF Cooling high pressure operationOutdoor – 2 times flash (Model SCM40, 45, 50, 60, 71, 80)1. Applicable model 5. TroubleshootingModel SCM40, 45, 50, 60, 71, 80onlyDiagnosisCountermeasure* For the characteristics of outdoorheat exchanger temperatureAre normal sensor, refer to E37.the characteristics ofoutdoor heat exchangerNOReplace outdoor heattemperature sensorexchanger temperaturenormal?sensor.YES2. Error detection methodIs theunit operating inCheck unit side.the state of coolingYES• Isn’t the air circulationAnomalous stopoverload?of outdoor unit shortcircuited?ResetNO• Are installation spacesadequate?• Isn’t there any fouling53 60or clogging on heaterOutdoor heat exchanger temperature (°C)exchanger?Is the highpressure controlNOControl operation check*normalYES3. Condition of Error displayedIsthe temperature(measured actually) atNODefective outdoor maindirection of errorcorrect?PCB➞Replace.When anomalous outdoor heatexchanger temperature occurs5 times within 60 minutesYESExcessive refrigerantor 60°C or higher continuesamount: Rechargefor 10 minutes, including therefrigerant by weighingcompressor stop.proper amount on a scale.4. Presumable cause• Defective outdoor heatexchanger temperature sensor• Defective outdoor main PCB• Indoor, outdoor unitinstallation spaces• Short-circuit of air on indoor,outdoor units• Fouling, clogging of heatexchanger• Excessive refrigerant quantityNote:
'11 • SCM-SM-110Error codeLED Green Red ContentRemote controller: E35Indoor Keeps flashing Stays OFF Cooling high pressure operationOutdoor – 2 times flash(Model SCM100, 125)1. Applicable model 5. TroubleshootingModel SCM100, 125 only Diagnosis Countermeasure* For the characteristics ofAre normal high pressure sensor, refer to E54.the characteristics ofNOReplace high pressurehigh pressure sensornormal?sensor.YES2. Error detection methodIs theCheck unit side.unit operating inthe state of coolingYES• Isn’t the air circulationFor the error detection method,overload?of outdoor unit shortcircuited?refer to the protective control bycontrolling compressor rotation• Are installation spacesspeed and cooling high pressureNOadequate?protective control of micro• Isn’t there any foulingcomputer control function foror clogging on heatercorresponding models.exchanger?(Refer to 41 page)Is the highpressure controlNOControl operation check*normalYES3. Condition of Error displayedIsthe pressure(measured actually) atNODefective outdoor controldirection of errorcorrect?PCB➞Replace.• When anomalous rise ofthe high pressure sensor isdetected 5 times within 1 hour.YESExcessive refrigerant• When high pressure sensoramount: Rechargeanomaly is detected for 10refrigerant by weighingminutes continuously.proper amount on a scale.4. Presumable cause• Defective high pressure sensor• Defective outdoor control PCB• Indoor, outdoor unitinstallation spaces• Short-circuit of air on indoor,outdoor units• Fouling, clogging of heatexchanger• Excessive refrigerant quantityNote:
'11 • SCM-SM-110Error codeLED Green Red ContentRemote controller: E36Indoor Keeps flashing Stays OFFOutdoor – 5 times flashDischarge pipe temperature error1. Applicable model 5. TroubleshootingAll models Diagnosis Countermeasure* For the characteristics of dischargeAre the pipe temperature, refer to E39.characteristics ofdischarge pipe temperatureNO Replace discharge pipesensornormal?temperature sensor.YESIs thedischarge pipe2. Error detection methodtemperature error persistedYES Insufficient refrigerantduring coolingamount : Rechargeoperation?refrigerant by weighingFor the error detection method,proper amount on a scale.refer to the protective control bycontrolling compressor rotationNOspeed and cooling high pressureprotective control of microcomputer control function forcorresponding models.Is thedischarge pipe temperatureNO Control operation check *control normal?YESIs the3. Condition of Error displayedtemperature (measuredactually) at detection ofNO Defective outdoor mainerror correct?(control) PCB➞Replace.When discharge pipetemperature anomaly is detected2 times within 60 minutes isYES Check unit side:compressor stop.• Isn’t filter clogged?* For the contents of control, refer to the protective control by controllingcompressor rotation speed and cooling high pressure protective control ofmicro computer control function for corresponding models.• Are adequate indoor,outdoor unit installationspaces?• Isn’t there any shortcircuitof air?• Isn’t there any fouling,clogging on indoor heatexchanger?4. Presumable cause• Defective outdoor main(control) PCB• Defective discharge pipetemperature sensor• Clogged filter• Indoor, outdoor unitinstallation spaces• Short-circuit of air on indoor,outdoor units• Fouling, clogging of heatexchangerNote:
'11 • SCM-SM-110Error codeLED Green Red ContentRemote controller: E37Indoor Keeps flashing Stays OFFOutdoor heat exchangerOutdoor – 8 times flash temperature sensor anomaly1. Applicable model 5. TroubleshootingAll modelsDiagnosisCountermeasureIs theoutdoor heatexchanger temperaturesensor connectorNOCorrect connector.connectedproperly?2. Error detection methodYESFor the characteristics of outdoor heat exchangerDetection of anomalously lowtemperature sensor, see the following graph.temperature (resistance) onAre thecharacteristics ofthe outdoor heat exchangeroutdoor heat exchangerNOtemperature sensorDefective outdoor heattemperaturesensorexchanger temperatureOK?sensor➞Replace.YESDefective outdoor main(control) PCB➞Replace.(Defective outdoor heatexchanger temperature3. Condition of Error displayedsensor input circuit)Temperature-resistance characteristics(Broken wire)• When the temperature sensor15detects -55 °C or lower for 20seconds continuously within2 minutes to 2 minutes 20seconds after the compressorON, the compressor stops.After 3-minutes delay, the10compressor starts againautomatically, but if thisanomalous temperature isdetected 3 times within 40minutes.5kΩ at 25°C5• When -55 °C or lower isdetected for within 20 secondafter power ON.4. Presumable cause(Shot circuit)0 10 20 30 40Temperature (°C)50• Defective outdoor main(control) PCB• Broken sensor harness ortemperature sensing section• Disconnected wire connection(connector)Note:Temperature sensor resistance (kΩ)
'11 • SCM-SM-110Error codeLED Green Red ContentRemote controller: E38Indoor Keeps flashing Stays OFFOutdoor air temperatureOutdoor – 8 times flash sensor anomaly1. Applicable model 5. TroubleshootingAll modelsDiagnosisCountermeasureIsthe suction pipetemperature sensor connectorconnected properly?NOCorrect connector.YESFor the characteristics of suction pipeIs the temperature sensor, see the following graph.characteristics of theDefective outdoor air2. Error detection methodsuction pipe temperatureNOtemperature sensor➞sensorReplace.Detection of anomalously lowOK?temperature (resistance) onoutdoor air temperature sensorYESDefective outdoor main(control) PCB➞Replace.(Defective outdoor airtemperature sensor inputcircuit)3. Condition of Error displayedTemperature-resistance characteristics(Broken wire)• When the temperature sensor15detects -55 °C or lower for 5seconds continuously within2 minutes to 2 minutes 20seconds after the compressorON, the compressor stops.10After 3-minutes delay, thecompressor starts againautomatically, but if thisanomalous temperature isdetected 3 times within 405kΩ at 25°C5minutes.• When -55 °C or lower isdetected for within 20 secondafter power ON.(Shot circuit)0 10 20 30 40 504. Presumable causeTemperature (°C)• Defective outdoor main(control) PCB• Broken sensor harness ortemperature sensing section(Check molding.)• Disconnected wire connection(connector)Note:Temperature sensor resistance (kΩ)
'11 • SCM-SM-110Error codeLED Green Red ContentRemote controller: E39Indoor Keeps flashing Stays OFFDischarge pipeOutdoor – 8 times flash temperature sensor anomaly1. Applicable model 5. TroubleshootingAll models Diagnosis CountermeasureIs thedischarge pipetemperature sensorconnector connectedNOCorrect connector.properly?YES2. Error detection methodFor the characteristics of discharge pipeAre the temperature sensor, see the following graph.characteristicsDetection of anomalously lowof discharge pipeNODefective discharge pipetemperature (resistance) ontemperaturesensortemperature sensor➞the discharge pipe temperatureOK?Replace.sensorYESDefective outdoor main(control) PCB➞Replace.(Defective temperaturesensor input circuit)3. Condition of Error displayed(Broken wire) Temperature-resistance characteristicsWhen the temperature sensor100detects -25 °C or lower for 5seconds continuously within10 minutes to 10 minutes 20seconds after the compressorON, the compressor stops. After3-minutes delay, the compressor50starts again automatically, butif this anomalous temperatureis detected 3 times within 40minutes.[T 90°C]00 20 40 60 80 100 120 140(Shot circuit)Temperature (°C)4. Presumable cause• Defective outdoor main(control) PCB• Broken sensor harness ortemperature sensing section(Check molding.)• Disconnected wire connection(connector)Note:Temperature sensor resistance (kΩ)
'11 • SCM-SM-110Error codeLED Green Red ContentRemote controller: E40Indoor Keeps flashing Stays OFF Heating high pressure operationOutdoor – 2 times flash(Model SCM100, 125)1. Applicable model 5. TroubleshootingModel SCM100,125 only Diagnosis Countermeasure* For the characteristics ofAre normalhigh pressure sensor, refer to E54.the characteristics ofNOReplace high pressurehigh pressure sensornormal?sensor.YES2. Error detection methodIs theunit operating inCheck unit side.the state of heatingYES• Isn’t the air circulationFor the error detection method,overload?of outdoor unit shortcircuited?refer to the protective control bycontrolling compressor rotation• Are installation spacesspeed and heating high pressureNOadequate?protective control of micro• Isn’t there any foulingcomputer control function foror clogging on heatercorresponding models.exchanger?(Refer to 42 page)Is the highpressure controlNOControl operation checknormalYES3. Condition of Error displayedIsthe pressure(measured actually) atNODefective outdoor controldirection of errorcorrect?PCB➞Replace.• When anomalous rise ofthe high pressure sensor isdetected 5 times within 1 hour.YESExcessive refrigerant• When high pressure sensoramount: Rechargeanomaly is detected for 10refrigerant by weighingminutes continuously.proper amount on a scale.4. Presumable cause• Defective high pressure sensor• Defective outdoor control PCB• Indoor, outdoor unitinstallation spaces• Short-circuit of air on indoor,outdoor units• Fouling, clogging of heatexchanger• Excessive refrigerant quantityNote:
'11 • SCM-SM-110Error codeLED Green Red ContentRemote controller: E41Indoor Keeps flashing Stays OFF Power transistor overheatOutdoor – 1 time flash(Model SCM100, 125)1. Applicable model 5. TroubleshootingModel SCM100, 125 only Diagnosis CountermeasureIs theinstallation space of outdoorunit enough?NOYES Correct.2. Error detection methodIs the outdoor fan running? NOAnomalous rise of the internalYES Replace the fan motor or outdoor controlPCB.power transistor temperatureAre thecharacteristics of power transistor temperaturethermistor OK?NOReplace the power transistorYEStemperature thermistor.Is the powertransistor temperature thermistor connectorconnection OK?YESNOConnect.3. Condition of Error displayedIs it OK the fixingto power transistor radiator fin?Fixed screwApplication of radiationsiliconeNOFix properly.When anomalous rise of thepower transistor temperature isYESdetected 2 times within 1 hour.Does it recur?NOOK* Characteristics of power transistor temperature thermistorTemperature-resistance characteristics2001801604. Presumable cause140120100• Defective inverter PCB80• Defective outdoor fan motor60• Delective power transistor40temperature thermistor20• Inadequate installation space00 20 40 60 80 100 120 140Temperature (°C)Note:Temperature thermistor resistance (kΩ)
'11 • SCM-SM-110Error codeLED Green Red ContentRemote controller: E42 Indoor Keeps flashing Stays OFFOutdoor – 1 time flashCurrent cut (1/2)1. Applicable model 5. TroubleshootingAll models Diagnosis CountermeasureIs thePower supplyvoltage OK?NOCheck power supply.YESAre the2. Error detection methodservice valvesNOOpen the valves.opened?In order to prevent fromovercurrent of inverter,if the current exceeds theYESCheck refrigerant amountspecifications, it makes theand refregerant circuitcompressor stopping.*In case of transitionalIs theincrease of high pressurehigh pressureNOand/or test run, severalduring operationOK?times restarting mayrecover it, because liquidYESrefrigerant (migrated)in the compresser isdischarged from theIs thecompressor.checked result ofinsulation resistance andcoil resistance (1) ofcompressor motorNOReplace compressor.3. Condition of Error displayedOK? (1) SCM40, 45, 50 : 1.619Ω or more at 20°CSCM60, 71, 80 : 1.154Ω or more at 20°CYES SCM100, 125 : 0.293Ω or more at 20°C• If the output current of inveterexceeds the specifications,it makes the compressorstopping.To next page.4. Presumable cause• The valves closed• Faulty power supply• Insufficient refrigerant amount• Faulty compressor• Faulty power transistormoduleNote:
'11 • SCM-SM-110Error codeLED Green Red ContentRemote controller: E42 Indoor Keeps flashing Stays OFFCurrent cut (2/2)Outdoor – 1 time flash1. Applicable model 5. TroubleshootingAll models Diagnosis CountermeasureFrom previous pageIs thechecked result of powerNO• Defective outdoor maintransistor moduleOK?PCB➞Replace.2. Error detection methodYESIn order to prevent from• Is the space for installation of indoor and/or outdoor unit enough?• Is there any short circuit of air on indoor and/or outdoor unit?overcurrent of inverter,• At cooling, does the outdoor fan motor run?if the current exceeds theAre the service valves fully opened?specifications, it makes theIs the filter clogged?compressor stopping.• At heating, does the indoor fan motor run?Are the service valves fully opened?Is the filter clogged?• Is there any liquid flooding?Is the superheat within normal range?Is the suction pipe temperature thermistor normal?• Is there any anoumalous sound on the compressor?YESAfterresetting power forseveral times does itNO• Defective outdoor main3. Condition of Error displayedbecome normal?PCB➞Replace.• If the output current of inveterYESexceeds the specifications,it makes the compressorstopping.Temporary noise may cause of anomaly.If noise source can be found, take countermeasure.4. Presumable cause• Defective outdoor main PCB• Faulty power supply• Insufficient refrigerant amount• Faulty compressor• Faulty power transistormoduleNote:- 125 -
'11 • SCM-SM-110Error codeLED Green Red ContentRemote controller:Indoor Keeps flashing Stays OFFOutdoor sub PCBE45Outdoor – 4 times flash communication error1. Applicable model 5. TroubleshootingAll models Diagnosis CountermeasureIs the connectorconnection between the outdoormain PCB and the outdoor subPCB OK?YESNO Correct connector.2. Error detection methodDetected communication errorIs the power supply voltage OK?NO Check why power is notsupplied to outdoor subPCB.of more than 15 seconds 4 timesin 15 minutes.YESIs thecommunication wirebetween the main PCB and the outdoor subNO Connect communicationPCB connected properly?wire securely.YES3. Condition of Error displayedReplace the outdoor main PCB.When communication is notestablished between the outdoorsub PCB and the outdoor mainPCB.Is normal state restored?NOYESDefective outdoor sub PCB➞Replace.Malfunction by temporarynoise4. Presumable cause• Defective sub PCB• Defective connector betweenthe outdoor main PCB andoutdoor sub PCB• Defective outdoor main(control) PCBNote:
'11 • SCM-SM-110Error codeLED Green Red ContentRemote controller: E47Indoor Keeps flashing Stays OFF Active filter voltage errorOutdoor – 2 times flash (Model SCM40, 45, 50, 60, 71, 80)1. Applicable model 5. TroubleshootingModel SCM40, 45, 50, 60, 71, 80onlyDiagnosisCountermeasureIs the power supply normal?YESNORestore normal condition.2. Error detection methodIs voltagewithin the specified range?Error is displayed if theNORestore normal condition.converter voltage exceedsDC340V (3 times within 20minutes). Remote controllermay be set after 3 minutesYESdelay.Checksoldered surfaces on theoutdoor sub PCB for foreign matterlike dust, fouling,etc.NORemove foreign matter likedust, fouling, etc.YESDefective outdoor sub PCB3. Condition of Error displayed➞Replace.Same as above4. Presumable cause• Defective outdoor sub PCB• Dust on outdoor sub PCB• Anomalous power supplyNote:
'11 • SCM-SM-110Error codeLED Green Red ContentRemote controller: E48Indoor Keeps flashing Stays OFFOutdoor – Keeps flashingOutdoor fan motor anomaly1. Applicable model 5. TroubleshootingAll models Diagnosis CountermeasureDoes anyforeign material intervenein rotational area of fanYES Remove foreign matter.propeller?NODoes the2. Error detection methodfan rotate smoothly when turnedNOReplace fan motor.by hand?If resistance between ➀Detected by rotation speed of(Vm):white -➃(GND)outdoor fan motor〔SCM100, 125: ➆(Vm):white-➃(GND)〕:blue isYESdetected 1kΩ or lower, it isfaulty.Is DC308~336Vdetected between (CNFAN (blue)- (red))SCM100,125: CNFAN (blue)– (red) NOof fan motor connector?Is F3 (250V1A)SCM100, 125: F4 (250V4A) NO Check power supplyYESPower supply resetYES3. Condition of Error displayedvoltage.Replace faulty fan motorand outdoor main PCB.When actual rotation speedof outdoor fan motor drops to75min -1 or lower for 30 minutescontinuously, the compressorIs normal state restored?NO Replace fan motor (Ifand the outdoor fan motor stop.anomaly persists afterAfter 3-minutes delay, it startsreplacing fan motor, replaceagain automatically, but if thisoutdoor main PCB.)anomaly occurs 3 times within60 minutes after the initialdetection.YESMalfunction by temporarynoise4. Presumable cause• Defective outdoor main(control) PCB• Foreign material at rotationalarea of fan propeller• Defective fan motor• Dust on outdoor main(control) PCB• Blown F3 fuseNote: When E48 error occurs, in almost cases F3 (SCM100, 125: F4) fuse on the outdoor main (control) PCB is blown. There are a lot of cases that fuseis blown and E48 occurs due to defective fan motor. And even though only the outdoor main (control) PCB ( or fuse) is replaced,, another troublecould occur. Therefore when fuse is blown, check whether the fan motor is OK or not.After confirming the fan motor normal, check by power ON. (Don't power ON without confirming the fan motor normal.)
'11 • SCM-SM-110Error codeLED Green RedContentRemote controller: E51Indoor Keeps flashing Stays OFF Power transistor anomalyIndoor Keeps flashing Stays OffOutdoor – 1 time flash (Model Power SCM40, transistor 45, 50, 60, error 71, 80)1. Applicable model 5. TroubleshootingModel SCM40, 45, 50, 60, 71, 80onlyDiagnosisCountermeasureCheck solderedsurfaces on the outdoor main PCB forNO Remove foreign matterforeign matter like dust,fouling,etc.like dust, fouling, etc.2. Error detection methodYESPower transistor primary currentIsn’t F2 fuseYES(250V, 20A)blown?NOReplace fuse.Defective outdoor mainPCBReplace.3.Condition of Error displayedIf the power transistor primarycurrent exceeds the setting valuefor 3 seconds, the compressorstops.4. Presumable cause• Faulty outdoor main PCB• Dust on outdoor main PCB• Blown F2 fuseNote:
'11 • SCM-SM-110Error codeLED Green Red ContentRemote controller: E51Indoor Keeps flashing Stays OFF Inverter and fan motor anomalyOutdoor – 1 time flash (Model SCM100, 125)1. Applicable model 5. TroubleshootingModel SCM100, 125 only Diagnosis CountermeasureIs DC15Vdetected between the connectorCNI4 - on theYES Defective inverter PCB➞inverter PCB?Replace.NOIs DC15V2. Error detection methoddetected between thehanesses at the control PCB side afterdisconnecting the connectorWhen power transistor anomaly(CNI4)?is detected for 15 minutesYES Broken harness wirecontinuouslyNOIs DC15Vdetected on the fan motorconnector?YES Replace fan motor.NODefective outdoor controlPCB➞Replace.3. Condition of Error displayedSame as above4. Presumable cause• Defective outdoor fan motor• Defective inverter PCB• Defective outdoor controlPCBNote:
'11 • SCM-SM-110Error codeLED Green Red ContentRemote controller: E53Indoor Keeps flashing Stays OFFSuction pipe temperatureOutdoor – 8 times flash sensor anomaly1. Applicable model 5. TroubleshootingAll modelsDiagnosisCountermeasureIsthe suction pipetemperature sensor connectorconnected properly?NOCorrect connector.YESFor the characteristics of suction pipeIs the temperature sensor, see the following graph.characteristics of theDefective suction pipe2. Error detection methodsuction pipe temperatureNOtemperature sensor➞sensorReplace.Detection of anomalously lowOK?temperature (resistance) onsuction pipe temperature sensorYESDefective outdoor subPCB➞Replace.(Defective suction pipetemperature sensor inputcircuit)3. Condition of Error displayedTemperature-resistance characteristics(Broken wire)• When the temperature sensor15detects -55 °C or lower for 5seconds continuously within2 minutes to 2 minutes 20seconds after the compressorON, the compressor stops.10After 3-minutes delay, thecompressor starts againautomatically, but if thisanomalous temperature isdetected 3 times within 405kΩ at 25°C5minutes.• When -55 °C or lower isdetected for within 20 secondafter power ON.(Shot circuit)0 10 20 30 40 504. Presumable causeTemperature (°C)• Defective outdoor sub PCB• Broken sensor harness ortemperature sensing section(Check molding.)• Disconnected wire connection(connector)Note:Temperature sensor resistance (kΩ)
'11 • SCM-SM-110Error codeLED Green Red ContentRemote controller: E54Indoor Keeps flashing Stays OFF High pressure sensor anomalyOutdoor – 8 times flash(Model SCM100, 125)1. Applicable model 5. TroubleshootingModel SCM100, 125 only Diagnosis CountermeasureAre theconnection of high pressuresensor connectors (at sensor sideNO Correct high pressure sensorand PCB side) OK?connector connection.YESAre the2. Error detection methodpressure (actualmeasurement) matched with the valueYES Is refrigerant amountindicated on the remotecharged properly?controller?When anomalous voltageIs there any anomaly on the(pressure) is detectedrefrigeration circuit?NOReplace the high pressure sensor.Isnormal conditionNO Defective outdoor controlrestored?PCB➞Replace.(Defective high pressuresensor input circuit)3. Condition of Error displayedIf the pressure sensor detects 0Vor lower and 3.49V or higher for5 seconds continuously within2 minutes to 2 minutes 20YES OKseconds after compressor ON,the compressor stops. WhenHigh pressure sensor output characteristicsthe compressor is restartedautomatically after 3-minuts3.5delay, if this anomaly occurs 3times within 40 minutes2.04. Presumable cause0.50 2.08 4.15• Defective high pressure sensorPressure (MPa)Note(1) Sensor output:Black (GND) –WhiteconnectionOutput voltage:Black – Red(DC5V)• Defective high pressure sensor• Defective outdoor controlPCB• Improper amount ofrefrigerant• Anomalous refrigerationcircuitNote:Output voltage (V)
'11 • SCM-SM-110Error codeLED Green Red ContentRemote controller: E57Indoor Keeps flashing Stays OFF Insufficient refrigerant amountOutdoor – 2 times flash or detection of service valve closure1. Applicable model 5. TroubleshootingAll models Diagnosis CountermeasureIs theservice valve fullyNOOpen fully.opened?YESAre theconnections of indoorheat exchanger and/or return airNO2. Error detection methodCorrect indoor heattemperature thermistorconnectors OK?exchanger, return airtemperature thermistor• Judge insufficient refrigerantconnector connections.amount by detecting theYEStemperature differnce betweenindoor heat exchanger (ThI-R)Are theand indoor return air (ThI-A).characteristics of indoor heatexchanger and/or return airNODefective indoor heattemperature thermistorexchanger, return airOK?temperature thermistor ➞Replace.YESIs the lowpressure during operationnormal?NOCharge refrigerant.3. Condition of Error displayedYESDefective indoor controlPCB➞Replace. (Defectiveindoor heat exchanger,When the insufficient refrigerantreturn air temperatureamount is detected 3 timesIndoor heat exchanger, return air temperature thermistorthermistor input circuits)within 60 minutes.Temperature-resistance characteristics(Broken wire)15104. Presumable cause55kΩ at 25°C• Defective indoor heatexchanger temperaturethermistor• Defective indoor return air(Shot circuit) 0 10 20 30 40 50temperature thermistorTemperature (°C)• Defective indoor control PCB• Insufficient refregerantamountNote:Temperature thermistor resistance (kΩ)
'11 • SCM-SM-110Error codeLED Green RedContentRemote controller: E58Indoor Keeps flashing Stays OFF OffCurrent safe stopOutdoor ―– 3 times flash(Model (Model SCM40, SRC40 45, 50, - 60, 60) 71, 80)1. Applicable model 5. TroubleshootingModel SCM40, 45, 50, 60, 71, 80onlyDiagnosisCountermeasureIs the refrigerantNO Adjust the refrigerantamount nomal ?amount properly.2. Error detection methodYESWhen the current safe controlhas operated at the compressorspeed of 30 rps or under:Is outdoorventilation conditiongood ?YESInspectcompressorNONOSecure space for inlet andoutlet.Replace compressor.3.Condition of Error displayedYESSame as aboveInspectoutdor air temp.NOsensorNOReplace sensor.Defective outdoor main4. Presumable causePCBReplace.(Defective outdor air temp.sensor input circuit)• Excessive refrigerant amount• Indoor,outdoor unit installationspaces• Faulty compressor• Defective outdor air temp.sensor• Defective outdoor main PCBNote:
'11 • SCM-SM-110Error codeLED Green Red ContentRemote controller: E59Indoor Keeps flashing Stays OFFOutdoor – 2 times flashCompressor startup failure1. Applicable model 5. TroubleshootingAll models Diagnosis CountermeasureCompressor does not start at all.Neither noise nor vibration cannot be heardDisconnect the outdoor fan motorconnector and try to startupDoescompressorstartup?YESReplace outdoor fan motorNO2. Error detection methodIf it fails to change over to therotor detection operation ofIs powersupply voltageOK?NOCheck power supplyvoltagecompressor motorYESIsthe pressure balanceNOCheck refrigerant amountat starting OK?and refrigerant circuitYESIs theinsulation resistanceand coil resistance ofNORepalce compressorcompressor OK ?3. Condition of Error displayedIf compressor fails to startup forYES42 timesIs power transistorNODefective outdoor mainmodule OK?PCB➞ReplaceYES4. Presumable causeIsthe output of inverterNODefective outdoor mainchecker OK ?PCB➞Replace• Faulty outdoor fan motorYES• Faulty outdoor main PCB• Anomalous power supplyNote: Several times restartingmay resolve it, because migratedvoltageTry to startupliquid refrigerant in the• Improper refrigerant amountseveral times compresser is discharged fromand refrigerant circuitthe compressor.• Faulty compressor (Motorbearing)Does it start?NORepalce compressorNote: Insulation resistance• The unit is left for long period without power supply or soon after installation, migrated liquid refrigerant may dissolve in the refrigerant oil in the compressor.In such case insulation resistance decreases upto several MΩ or lower. If the electric leakage breaker is activated due to low insulation resistance,check followings.➀ Check whether the electric leakage breake conforms to high-hermonic specifications(As units has inverter, in order to prevent from improper operation, be sure to use high-hermonic one.)
'11 • SCM-SM-110Error codeLED Green Red ContentRemote controller: E60Indoor Keeps flashing Stays OFF Compressor rotor lock errorOutdoor – 7 times flash (Model SCM40, 45, 50, 60, 71, 80)1. Applicable model 5. TroubleshootingModel SCM40, 45, 50, 60, 71, 80onlyDiagnosisCountermeasureIs thepower supply voltageOK?YESReset the power supply and restart operation.NOCheck and correct thepower supply voltage2. Error detection methodCompressor rotor positionDoes the compressor start? NODoes E59 occur? YES Correct it based on theYEStroubleshooting of E59NODoes thecompressor run withoutNO Correct it based on theoccurrence oftroubleshooting of E42E42?3. Condition of Error displayedIs theoutput from inverter NOIf it fails again to detect theDefective outdoor mainchecker OK?rotor position after shifting toPCB➞Replace.the compressor rotor positiondetection operation, thecompressor stops.YESIs the noiseor vibration of compressor NOReplace compressor.normal?4. Presumable causeYES• Defective outdoor main PCB• Anomalous power supplyDoes itstart up normally withoutvoltageNOCheck compressor forrecurrence of• Improper refrigerant amountE60.insulation, resistance.and refrigerant circuitReplace compressor if• Defective compressor (motor,necessary.bearing)YESDefective outdoor mainPCB➞Replace.Note: Insulation resistance• The unit is left for long period without power supply or soon after installation, migrated liquid refrigerant may dissolve in the refrigerant oil in the compressor.In such case insulation resistance decreases upto several MΩ or lower. If the electric leakage breaker is activated due to low insulation resistance, check followings.➀ Check whether the electric leakage breake conforms to high-hermonic specifications(As units has inverter, in order to prevent from improper operation, be sure to use high-hermonic one.)
POWERSUPPLYTB1BKLWHNY/GTB21 BKWHUNIT A 2RD3TB31 BKWHUNIT B 2BR3FUSE250V 15ABKR INWHS INY/GG1Y/GGCNACNBPWB 2(SUB)WIRING DIAGRAMROS OS-1C-1CNMAINCN20VBKWHWHRD52RST1S-2T2C-2CNSUBCN20VUVWPWB 1(MAIN)CNFANYEORRDWHBKRM3~CMMFM0Indication lampColorFunctionLed e (1)Red Warning lampSelf diagnosis function by led e1 Time flash Current cut2 Time flash Trouble of outdoor unit3 Time flash Over current4 Time flash Transmission error5 Time flash Over heat of compressor6 Time flash Error of signal transmission7 Time flash Lock of compressor8 Time flash Sensor error(Except discharge pipe sensor)Light onOutdoor fan motor errorFour sec lightand Discharge pipe sensor errorfour sec offCaution ・When the compressor does not run Immediately afterhitting on the button,wait for 5 to 10 minutes.(There ispossibility of delayed start.)3 ELECTRICAL WIRINGS3.1 Outdoor unitsModels SCM40ZJ-S, 45ZJ-SWHCNHEATCN20SRDG2Y/GWHCNEEV1RDCNTH2CNTH2 2 2・High voltage is produced in the control box. don't touchelectrical parts in the control box for 5 minutes aftercutting power supply.HEATER20SMEEVAMEEVB- 137 - '11 • SCM-SM-110t゜t゜t゜t゜Tho-S Tho-R Tho-A Tho-DRWC000Z232 aColor MarksMark Color Mark Color ItemBKBlackYE Yellow CNA-CN20SRDRedY/G Yellow/Green20SWH WhiteCMOR OrangeEEV A,EEV BBR BrownFMoHEATERMeaning of MarksDescription Item DescriptionConnectorR Reactor4 Way valve(coil)TB1-TB3 Terminal blockCompressor motorTho-R Heat exchanger sensorElectric expansion valve(outdoor unit)(coil)Tho-A Outdoor air temp. sensorFan motorTho-D Discharge pipe temp. sensorCrank case heaterTho-S Suction pipe temp. sensor
FUSE250V 15ATB1 250V 20ABK BKLR INPOWER WH WHNS INSUPPLYYGYGG1YGGTB21 BKWHUNIT A 2RD3BK1WHUNIT B 2BR3BK1WHUNIT C 2BL3CNACNBCNCPWB 2SUBWIRING DIAGRAMR OS OS-1C-1CNMAINCN20VBKWHWHRD52RST1S-2T2C-2CNSUBCN20VUVWPWB 1MAINCNFANYEORRDWHBKRM3CMMFMoIndication lampColorFunctionLed e 1Red Warning lampSelf diagnosis function by led e1 Time flash Current cut2 Time flash Trouble of outdoor unit3 Time flash Over current4 Time flash Transmission error5 Time flash Over heat of compressor6 Time flash Error of signal transmission7 Time flash Lock of compressor8 Time flash Sensor errorExcept discharge pipe sensorLight onOutdoor fan motor errorFour sec lightand Discharge pipe sensor errorfour sec offCaution When the compressor does not run Immediately afterhitting on the button,wait for 5 to 10 minutes.There ispossibility of delayed start.Models SCM50ZJ-S1, 60ZJ-S1WHCNHEATCN20SRDG2YGCNEEV1 CNEEV3 CNTHWH RD BL2CNTH2 2 2High voltage is produced in the control box. don't touchelectrical parts in the control box for 5 minutes aftercutting power supply.HEATER20SM M MEEVAEEVBEEVC- 138 - '11 • SCM-SM-110ttttTho-S Tho-R Tho-A Tho-DRWC000Z252Color MarksMark Color Mark Color ItemBKBlackBR Brown CNA-CN20SBLBlueYE Yellow20SRDRedYG YellowGreenCMWH WhiteEEV A,EEV BOR OrangeEEV CFMoHEATERMeaning of MarksDescription Item DescriptionConnectorR Reactor4 Way valvecoilTB1,TB2 Terminal blockCompressor motorTho-R Heat exchanger sensorElectric expansion valveoutdoor unitcoilTho-A Outdoor air temp. sensorFan motorTho-D Discharge pipe temp. sensorCrank case heaterTho-S Suction pipe temp. sensora
TB1BKLPOWER WHSUPPLY NYGTB2BK1WH2UNIT A3RDYGTB3 BK1WHUNIT B2BR3YGTB4BK1WHUNIT C 2BL3YGTB5BK1WHUNIT D2YE3YGFUSE250V 20AYGBKR INWHS INYGG1YGGCNACNBCNCCNDWHCNHEATCN20SRDPWB 2SUBG2YGCNEEV1CNEEV2WH RD BL GNR OS OS-1C-1CNMAINCN20VCNTH2BKWHWHRD52RSS-2T1C-2T2CNSUBCN20VUVWPWB 1MAINCNFANCNTH2 2 2YEORRDWHBKRM3CMMFMoIndication lampColorFunctionLed e 1Red Warning lampSelf diagnosis function by led e1 Time flash Current cut2 Time flash Trouble of outdoor unit3 Time flash Over current4 Time flash Transmission error5 Time flash Over heat of compressor6 Time flash Error of signal transmission7 Time flash Lock of compressor8 Time flash Sensor errorExcept discharge pipe sensorLight onOutdoor fan motor errorFour sec lightand Discharge pipe sensor errorfour sec offCaution When the compressor does not run Immediately afterhitting on the button,wait for 5 to 10 minutes. There ispossibility of delayed start.High voltage is produced in the control box. don't touchelectrical parts in the control box for 5 minutes aftercutting power supply.Models SCM71ZJ-S1, 80ZJ-S1HEATER20S- 139 - '11 • SCM-SM-110M M M MEEVAEEVBEEVCEEVDtTho-StttTho-R Tho-A Tho-DRWC000Z250Color MarksMark Color Mark Color ItemBKBlackRDRedCNA-CN20SBLBlueWH White20SBR Brown YE YellowCMGN Green YG YellowGreen EEV A,EEV BOR OrangeEEV C,EEV DFMoHEATERMeaning of MarksDescription Item DescriptionConnectorR Reactor4 Way valvecoilTB15 Terminal blockCompressor motorTho-R Heat exchanger sensorElectric expansion valveoutdoor unitcoilTho-A Outdoor air temp. sensorFan motorTho-D Discharge pipe temp. sensorCrank case heaterTho-S Suction pipe temp. sensora
t°t°t°t°t°- 140 -RWC000Z247POWER SOURCE 220/230/240V50Hz3UNIT AUNIT BUNIT CUNIT DUNIT ETB1 F 1L RD 30A 250V RD TB3 TB5PWB5NWHNOISETB4 TB6Y/GFILTERTB7 TB8TB2123123123TB3123123BKWHRDBKWHBRBKWHBLBKWHYBKWHORCNAWHCNBWHCNCWHCNDWHCNEWHCNEEV1WHY/GY/GRDWHCN CNEEV2 EEV3WH WH5 5 5 5 5WH RD BL GN BK5 5 5 5 5M M M M MEEVAEEVBEEVCEEVDEEVE1.Instructions for correct operationBefore you turn on power,please carefully read the installation manual and the operation manual supplied with the unit.Please check the following points before operation. This unit is designed exclusively for use with R410A. Do not use any refrigerant other than R410A. To protect the compressor,turn on power for the air conditioner 6 hours before operation so as warm up sufficiently the dome temperature of compressor. Open the service valves of liquid pipe at first. Secondarily open the one of gas pipe. Before you operate the unit,make sure again that the service valves are in open position. Please note that the pressure valves detected at the charge port in the unit and the gas service valves are different during the cooling operation and the heating operation. High pressure is replaced with the low pressure depending on whether it is in the cooling or heating operation.RDWHTB3TB4TB5PWB3NOISEFILTER TB6TB7Y/GWHRDL-IN N-INCNTRI 2WHWH2CNTRO RDTRWHCNWBKPWB4CNS2 BKWHCNS1BKBKSUB PWBCNX2 BK CNX1Y WHYGY/GCNTHRDWH2 +1ACDS3-4CT1CNP12 2 2 2 22.Error indicationBKBKBKYBKTho-RTho-DTho-STho-ATho-AFPWB1CONTROL PWBRDBLCNEEV1RD5MEEV-HP1 1 2 P2N1 4 3 N2CNL1BLINDICATION LAMP COLOR FUNCTIONLED E 1 RED WARNING LAMPSELF DIAGNOSIS FUNCTION BY LED E1 TIME FLASH2 TIME FLASHCURRENT CUTTROUBLE OF OUTDOOR UNIT3 TIME FLASH4 TIME FLASHOVER CURRENTTRANSMISSION ERROR5 TIME FLASH6 TIME FLASH8 TIME FLASHOVER HEAT OF COMPRESSORERROR OF SIGNAL TRANSMISSIONSENSOR ERROREXCEPT DISCHARGE PIPE SENSORLIGHT ON OUTDOOR FAN MOTOR ERRORFOUR SEC LIGHTANDDISCHARGE PIPE SENSOR ERRORFOUR SEC OFF3LED2RDBLLED1LED3CHECKER PCCNE CNV CNFAN1 CNR1WH WH5 2BRHPSMCH 20SFML+ L1 L24CNACT1CNACTWHBK-RD RDPP3AF+MODULEN2 BLC1BLN3CNA1WHCNA2GNCNI1WHCNI3WHCNN1RD2BLBLRD43F24A250VBLBLCNI2CNI4IPM30A 600VWBLPWB2INV PWBVWHVW MSCM 3used only at our factoryURDUMarkA/F MODULECHCMCNAZCTDSEEVEEV-HFFMHPSIPMLLED1LED2LED3TBTho-ATho-DTho-RTho-STho-AFTR20SMarkBKBLBRGNORPKRDWHYYGNameActive filter moduleCrankcase heaterCompressor motorConnectorCurrent sensorDiode stackElectronic expansion coilElectronic expansion coilFor heatingFuseFan motorHigh pressure sensorIntelligent power moduleReactorIndicator lampRed-Inspection indicatorIndicator lampGreen-Microcomputer normality indicatorIndicator lampGreen-For serviceTerminal blockThermistoroutdoor air temperatureThermistordischarge pipeThermistorheat exchangerThermistorsuction pipeThermistorpower transistorTrance former4-way valve coilColorBlackBlueBrownGreenOrangePinkRedWhiteYellowYellowGreenModel SCM100ZJ-S1'11 • SCM-SM-110
t°t°t°t°t°- 141 -RWC000Z244POWER SOURCE 220/230/240V50Hz3UNIT AUNIT BUNIT CUNIT DUNIT EUNIT FTB1 F 1LRD 30A 250V RD TB3 TB5PWB5WHNNOISEY/GTB4 FILTER TB6TB7 TB8TB2Y/GY/GRDWHRDWHTB3TB4TB5PWB3NOISEFILTER TB6TB7Y/GWHRDRDWH2 +1ACDS3 -4CT1BK1L-IN N-INCNWWH CNA2RDBK3 WHCNTRI 2WH1BKWH CNBWH22CNTRO RDTRBR3 WHWH1BKWH CNC2CNS2BKBL3 WHWHCNS1PWB4BKBKPWB1TB3SUB PWBCONTROL PWB1BKCNDCNX2 BKWH2 YWH CNX13 WHYYBKY/G1CNEGWH2OR3 WH1BK CNF CN CN CNWHEEV1 EEV2 EEV3 EEV4CNCN2PK WHEEV13WH WH WHWHCNTH CNP1 RD5 5 5 5 5 52 2 2 2 25WH RD BL GN BK Y5 5 5 5 5 51.Instructions for correct operationBefore you turn on power,please carefully read the installation manual and the operation manual supplied with the unit.Please check the following points before operation. This unit is designed exclusively for use with R410A. Do not use any refrigerant other than R410A. To protect the compressor,turn on power for the air conditioner 6 hours before operation so as warm up sufficiently the dome temperature of compressor. Open the service valves of liquid pipe at first. Secondarily open the one of gas pipe. Before you operate the unit,make sure again that the service valves are in open position. Please note that the pressure valves detected at the charge port in the unit and the gas service valves are different during the cooling operation and the heating operation. High pressure is replaced with the low pressure depending on whether it is in the cooling or heating operation.MEEVAMEEVBMEEVCMEEVDMEEVEMEEVF2.Error indicationBKBKBKYBKTho-RTho-DTho-STho-ATho-AFRDBLMEEV-HP1 1 2 P2N1 4 3 N2CNL1BLINDICATION LAMP COLOR FUNCTIONLED E 1 RED WARNING LAMPSELF DIAGNOSIS FUNCTION BY LED E1 TIME FLASH2 TIME FLASHCURRENT CUTTROUBLE OF OUTDOOR UNIT3 TIME FLASH4 TIME FLASHOVER CURRENTTRANSMISSION ERROR5 TIME FLASH6 TIME FLASH8 TIME FLASHOVER HEAT OF COMPRESSORERROR OF SIGNAL TRANSMISSIONSENSOR ERROREXCEPT DISCHARGE PIPE SENSORLIGHT ON OUTDOOR FAN MOTOR ERRORFOUR SEC LIGHTANDDISCHARGE PIPE SENSOR ERRORFOUR SEC OFF3LED2CHECKERRDBLLED1LED3PCCNE CNV CNFAN1 CNR1WH WH5 2BRHPSMCH 20SFML4+ L1 L2CNACT1CNACTWHBK-RD RDPP3AF+MODULEN2BLC1BLN3CNA1WHCNA2GNCNI1WHCNI3WHCNN1RD2BLBLRD43F24A250VBLBLCNI2CNI4IPM30A 600VW V UBLPWB2INV PWBWHRDVWCMMS3Uused only at our factoryMarkNameA/F MODULE Active filter moduleCH Crankcase heaterCMCNAZCTCompressor motorConnectorCurrent sensorDSEEVDiode stackElectronic expansion coilEEV-H Electronic expansion coilFor heatingF FuseFM Fan motorHPS High pressure sensorIPM Intelligent power moduleL ReactorLED1 Indicator lampRed-Inspection indicatorLED2 Indicator lampGreen-Microcomputer normality indicatorLED3 Indicator lampGreen-For serviceTB Terminal blockTho-A Thermistoroutdoor air temperatureTho-D Thermistordischarge pipeTho-R Thermistorheat exchangerTho-S Thermistorsuction pipeTho-AF Thermistorpower transistorTR Trance former20S 4-way valve coilMarkBKBLBRGNORPKRDWHYYGColorBlackBlueBrownGreenOrangePinkRedWhiteYellowYellowGreenModel SCM125ZJ-S1'11 • SCM-SM-110
DISPLAYWIRELESS RECEIVERBACK-UP SWTh1Th2 1Th2 2INTERFACE KITSC-BIKN-Ettt125CNECNGCNSPRINTEDCIRCUITBOARDDSCNX1CNX2CNY5 55 55 55 55 5MMMMMLM1LM2SM1SM2IMLSItemCNE-CNYFMISM1,2LM1,2IMTh1Th2LSDSFTVa1,2DescriptionConnectorFan motorFlap motorLouver motorInlet motorRoom temp. sensorHeat exch. sensorLimit switchDiode stackFuseTerminal blockVaristorModels SRK20ZJX-S, 25ZJX-S, 35ZJX-S3.2 Indoor units(1) Wall mounted type (SRK)HEATEXCHANGERYGWHRDBKGSNJLUVaF250V3.15ACNU13456RDBKWHYBL1TMFMIPower source1 phase 220 - 240 V 50HzTO OUTDOOR UNITColor MarksMark ColorBKBLRDWHYYGBlackBlueRedWhiteYellowYellowGreenRWA000Z227- 142 - '11 • SCM-SM-110HEATEXCHANGER2N3POWER WIRESSIGNAL WIRE1 2/N3
DISPLAY12WIRELESS RECEIVERBACK-UP SWTh1Th2 1Th2 2Th3INTERFACE KITSC-BIKN-Ettt25CNECNGCNFCNS5 5FMIM LM1PRINTED CNX1SM1,2CIRCUITLM1,2BOARD5 5M LM2IMTh15 5DS M SM1Th2 1,2CNX2Th35 5M SM2LSDSFT5 5M IMVaCNYLSItemCNE-CNYDescriptionConnectorFan motorFlap motorLouver motorInlet motorRoom temp. sensorHeat exch. sensorHumidity sensorLimit switchDiode stackFuseTerminal blockVaristorModels SRK50ZJX-S1, 60ZJX-S1YGGHEATEXCHANGERWHRDBKSNJLUVaF250V3.15A13CNU 456RDBKWHYBL1T- 143 - '11 • SCM-SM-110MFMIPower source~220/230/240V 50HzTO OUTDOOR UNITColor MarksMark ColorBK BlackBL BlueRD RedWH WhiteY YellowYG YellowGreenRWA000Z236HEATEXCHANGER2N3POWER WIRESSIGNAL WIRE1 2/N3
LM2M M MMCNYDSCNSLM15 5CNXCNFUSMI5CNMPRINTEDCIRCUITBOARD250V 3.15AVaCNEFRDBKFMIWHYBL1 3 4 5 6CNUCNGS/NGLJY/GHEATEXCHANGERHEATEXCHANGERItemDescriptionCNE-CNY ConnectorFMI Fan motorSMI Flap motorLM1,2 Louver motorHD Humidity sensorThI Room temp. sensorTh2,3 Heat exch. sensorDS Diode stackF FuseT Terminal blockVa VaristorMark ColorBK BlackBL BlueRD RedWH WhiteY YellowYG YellowGreenModels SRK25ZJR-S, 35ZJR-S, 20ZJ-S, 25ZJ-S, 35ZJ-S, 50ZJ-SRWA000Z226AINTERFACE KIT5- 144 - '11 • SCM-SM-110HD35,50ONLY2 8 2DISPLAYWIRELESSR-AMPBACK-UP SWt oTh3t o 2Th2t oThI2BK1WHRD2/N 3Y/GTO OUTDOORUNITTPower Source1 Phase220230240V 50Hz
DISPLAYWIRELESS RECEIVERBACK-UP SWTh1Th21Th22ttt8CNECNGPRINTEDCIRCUITBOARDDSCNX1CNX2555MMMLM1LM2SM1ItemCNE-CNX2FMISM1LM1,2Th1Th21,2Th3DSFTVaDescriptionConnectorFan motorFlap motorLouver motorRoom temp. sensorHeat exch. sensorHumidity sensorDiode stackFuseTerminal blockVaristorModel SRK71ZK-STh32CNFINTERFACE KITSC-BIKN-E5CNSHEATEXCHANGERY/GWHRDBKGS/NJLUVaF250V3.15A13CNU 456RDBKWHYBLMFMI- 145 - '11 • SCM-SM-110Color MarksMark ColorBKBLRDWHYY/GBlackBlueRedWhiteYellowYellow/GreenPower source1T~220/230/240V 50HzTO OUTDOOR UNITRWA000Z400HEATEXCHANGER2/N3POWER WIRESSIGNAL WIRE1 2/N3
DISPLAYWIRELESS RECEIVERBACK-UP SWAIR SELECTION SWTh1Th21Th22ttt10CNECNGPRINTEDCIRCUITBOARDDSCNX1CNX255555555MMMMDM1DM2SM1SM2ItemCNE-CNX2FMISM1,2DM1DM2Th1Th2Th3DSFTVa1,2DescriptionConnectorFan motorFlap motorDamper motorDamper arm motorRoom temp. sensorHeat exch. sensorHumidity sensorDiode stackFuseTerminal blockVaristorModels SRF25ZJX-S, 35ZJX-S(2) Floor standing type (SRF)Th32CNFINTERFACE KITSC-BIKN-E5CNSHEATEXCHANGERYGWHRDBKGSNJLUVaF250V3.15ACNU13456RDBKWHYEBL1TMFMIPower source1 phase 220 - 240 V 50HzTO OUTDOOR UNITColor MarksMark ColorBKBLRDWHYEYGBlackBlueRedWhiteYellowYellowGreenRWB000Z052- 146 - '11 • SCM-SM-110HEATEXCHANGER2N3POWER WIRESSIGNAL WIRE1 2/N3
DISPLAYWIRELESS RECEIVER 10BACK-UP SWAIR SELECTION SWTh1Th2 1Th2 2ttt2Th3CNECNGCNFItemCNE-CNX25 5FMIM DM1CNX1SM1,2PRINTEDDM1CIRCUIT5 5M DM2BOARDDM2Th15 5DS M SM1Th2 1,2CNX2Th35 5M SM2DSFTVaDescriptionConnectorFan motorFlap motorDamper motorDamper arm motorRoom temp. sensorHeat exch. sensorHumidity sensorDiode stackFuseTerminal blockVaristorModel SRF50ZJX-S1INTERFACE KITSC-BIKN-E5CNSHEATEXCHANGERYGWHRDBKGSNJLUVaF250V3.15A13CNU 456RDBKWHYBL1T- 147 - '11 • SCM-SM-110MFMIPower source220230240V 50HzTO OUTDOOR UNITColor MarksMark ColorBK BlackBL BlueRD RedWH WhiteY YellowYG YellowGreenRWB000Z054HEATEXCHANGER2N3POWER WIRESSIGNAL WIRE1 2/N3
DMM1RDRDWHWH5F250V0.16ACNSCNWCNYRDUPRINTED CIRCUITBOARDBKVaFMWHYEBL1 3 4 5 6CNUF250V 3.15ACONTROLBOXSNLJWHBKRDModels SRR25ZJ-S, 35ZJ-S, 50ZJ-S, 60ZJ-S(3) Ceiling concealed type (SRR)BKWHG YG 1 2/N 3RDYG2CNECNG8BKBKOR2 2 2TDISPLAYWIRELESSRECEIVERTO OUTDOOR UNITColor MarksMark Color Mark Color- 148 - '11 • SCM-SM-110BKtttINTERFACE KITSC-BIKN-EFSMBKBK10Th1 Th2 Th3Power source1 phase 220 - 240 V 50HzTO OUTDOOR UNITRWA000Z230BKBLORRDWHBlackBlueOrangeRedWhiteYEYGYellowYellowGreenMeaning of MarksItemCNE-CNYFFM IDMFSConnectorFuseFan motorDrain motorFloat SwitchDescription Item DescriptionTh1Th2Th3TVaRoom temp. sensorHeat exch. sensor 1Heat exch. sensor 2Terminal blockVaristorPOWER WIRESSIGNAL WIRE1 2/N3
PJA003Z340 BCNBZDMF200203FM IFSLED2Connecting line betweenindoor unit and outdoor unitPower source line 1 2Signal line3EarthConnectorDrain motorFuseFan motorFloat switchIndication lampGreen-Normal operation123YGNYGNYGNRDRemote controllert°Power PCBXYTB2XY- 149 - '11 • SCM-SM-110WHLED3LM14SW2SW5SW6SW7-17F2003.15A5BL 1 F2013.15ACNW0TB1YGNWH F2030.16A3CNRWHCNR2BLNotes 1. indicates wiring on site. 2. TB1 is the terminal block for heavy current connecting line betweenindoor unit and outdoor unit,and TB2 is the terminal block for weak current remote controller. 3. See the wiring diagram of outside unit about the line betweeninside unit and outside unit.2 4. Use twin core cable0.3mm X2at remote controller line. See spec sheet of remote controller in case that the total length is more than 100m. 5. Do not put remote controller line alongside power source line.YGN1 3WH BR2 1YMDM1ThCYGNX4F2021.0AYIndication lampRed-InspectionLouver motorRemote controller communicationaddressPlural units MasterSlave settingModel capacity settingOperation check,Drain motor test runPower circuit1 4 5 6 7RD BL BR OR WHFMI5 6 4 3 2RD BL BR OR WH5 6 4 3 2RD BL BR OR WHMCNMWHCNM3RDCNM4WHWHBKCNW2RDCNW1BL1234512345LM1MLM2MLM3MLM4M12345123451234512345CNJ2WHRDRDRDRDRDBLBLBLBLBLBKBKBKBKBK12345BKBKBKBKBKBK 6 BKBK 7 BKBK 8 BKBK 9 BKBK 10 BKBK 11 BKBK 12 BKBK 13 BKBK 14 BKBK 15 BKBK 16 BKBK 17 BKBK 18 BKBK 19 BKBK 20 BKTB1TB2ThcThI-AThI-R1,2,3X4 mark1312345213451234567891011121314151617181920CNBWHCNW3RDCNW4BLCNJWHLED2Terminal blockPower source markTerminal blockSignal linemarkThermistorRemote controllerThermistorReturn airThermistorHeat exchangerRelay for DMClosed-end connectorControl PCBSW2SW5SW6SW7LED3CNIBLCNHBKCNNY+12 123BL 456CNT1212123456WHWHBLBLRDRDYYBKBKOptionXR1XR312345678910XR2XR4WHWHBLBLRDRDYYBKBKCNCWHXR5Remote operation input:volt-free contact1212123456RDRDCNI2WHBKBKCNH2WHBKBKBKBKBKt°t°t°t°BKCNN2BKColor MarksMark ColorBK BlackBL BlueBR BrownOR OrangeRD RedWH WhiteY YellowYGN YellowGreenFSThI-AThI-R1ThI-R2ThI-R3Models FDTC25VD, 35VD, 50VD, 60VD(4) Ceiling cassette-4way compact type (FDTC)
PConnecting line betweenindoor unit and outdoor unitPower source lineSignal lineEarth1 23TB1123RDWHYGNRDF3.15AWHF3.15ABL531CNW0RD1CNM3 CWHCNF1WHFMI 1WHM1X65X13UHBR5 7HBKX2MBLX39LRDLMBLMBRORRD1 2 3 4 5CNJ WH220240VCNRWH 1X43BKCNW1WHBKTrl19VCNIBLRDRDBRBRCNW2BK24VLED2CNB WH1 3WHtTh I-R1 Th I-R2Th I-R3Th I-ABK1 2 3 4CNN YBKBKLED3X Y TB2CNBCNB2WHtBKSW2AMPLED2SW4LED3tLED4'11 • SCM-SM-110PFA003Z819- 150 -CNFI 1WHCF I 1Notes 1. indicates wiring on site. 2. See the wiring diagram of outside unit about the line betweenindoor unit and outdoor unit.2 3. Use twin core cable0.3mm at remote controller line. Refer to page 30 of remote controller in case that the total length is more than 100m. 4. Do not put remote controller line alongside power source line.ORORYGNCReceiver PCBLED2LED3LED4SW1SW4WH7-segment displaySwitches for settingBKBKWireless specificationSW1Receiver PCBRemotecontrollerIndication lamp Green-Normal operationIndication lamp Yellow-TimerInspectionBack-up switchOperationStopBK5 6 1 2CNHBKSW5SW6SW7tBKBK+1212CNT 3BL 456Control PCBXR1XR3OptionXR2XR4XR5Remote operation input :volt-free contactWired specificationTB2XYXYRemotecontrollerThctOperationHeatingCompressor ONInspectionWhen wired remote controller are usedonlywireless typeIt is necessary to remove the line that isconnected to the receiver.Remove signal line connected to the receiverfrom primary side of terminal blockX,Y.ATTENTION Insulate with tape the removed line. The LED of that removed connector willnot be able to make any indication.CFI 1CNB ZFFMI 1LED2LED3LMSW2SW5SW6SW7-1TB1TB2ThcThl -AThl -R1,2,3TrlX1 3,6X4Color MarksMarkBKBLBRORPBlackBlueColorBrownPinkCapacitor for FMIConnectorFuseFan motorwith thermostatIndication lampGreen-Normal operationIndication lampRed-InspectionLouver motorRemote controller communication addressPlural units MasterSlave settingModel capacity settingOperation check, Drain motor test runTerminal blockPower sourcemarkTerminal blockSignal linemarkThermistorRemote controllerThermistorReturn airThermistorHeat exchangerTransformerRelay for FMRelay for DMOrangeMarkRDWHYYGNRedWhiteYellowColorYellowGreenModel FDEN50VD(5) Ceiling suspended type (FDEN)A
Connecting line betweenindoor unit and outdoor unitPower source lineSignal lineEarth1 23CNWR2WH123RDTB1Y/GNLY/GNRDWHCNW01 WH35WH 1 CNW3BL 3 WHF3(2A)F1 (3.15A)F2 (3.15A)1 4 5 6 7RD BK WH Y BLFM I1MCNM1WHRemote controllerThCt°Power circuitXYPower PCBCNW1WH123456789101112XYTB2WHBKWHWHWHWHWHWHWHWHWHWHWHWH13123456789101112Control PCBCNBWHCNW2WHLED • E2 LED • E3SW2SW5SW6SW7For HACNZ WHCNTABL1 2CNNYCNHBKCNIBLCNRWH+12CNTBL123456121212123456RDRDYYBKBKBKBKRDRDRDWHFSM DMOptionXR1XR3t° ThI-R1t° ThI-R2t° Th I-R3t° ThI-AXR2XR4(Operation)(Heating)(Compressor ON)(Inspection)XR5 (Remote operationinput:volt-free contact)CNB~Z ConnectorDMF1~3Drain motorFuseFM11FSFan motor (with thermostat)Float switchLReactorLED · E2 Indication lamp (Green-Normal operation)LED · E3 Indication lamp (Red-Inspection)SW2Remote controller communication addressSW5Plural units Master/Slave settingSW6Model capacity settingSW7-1 Operation check, Drain motor test runTB1Terminal block (Powerce) ( mark)TB2Terminal block (Signal line) ( mark)ThcThermistor (Remote controller)- 151 - '11 • SCM-SM-110ThI-ATh I-R1,2,3markColor MarksMarkBKBLBRORBlackBlueBrownThermistor (Return air)Thermistor Heat exchanger)Closed-end connectorColorOrangeMarkRDWHYY/GNRedWhiteYellowColorYellow/GreenModel FDUM50VF(6) Duct connected Low/Middle static pressure type (FDUM)PJG000Z005Notes 1. indicates wiring on site.2. See the wiring diagram of outside unit about the line betweeninside unit and outside unit.3. Use twin core cable (0.3mm 2 x2) at remote controller line. See specsheet of remote controller in case that the total length is more than 100m.4. Do not put remote controller line alongside power source line.A
Gas lineIndoor unit(φ9.52)(φ9.52)Outdoor unitService valve(Gas)Check joint4 way valveSensor(Tho-A)Cooling cycleHeating cycle4. PIPING SYSTEMSModels SCM40ZJ-S, 45ZJ-S*1Humiditysensor(Th3)Sensor(Th22)Sensor(Tho-D)DischargeMufflerSensor(Tho-S)Heat exchangerSensor(Th1)Heat exchangerLiquid line(φ6.35)(φ6.35)Sensor(Th21)Service valve(Liquid)- 152 - '11 • SCM-SM-110StrainerSuctionCompressorCapillary tubeAccumlatorElectricexpansion valveEEVAEEVBReceiverAccumlatorCapillarytubeSensor(Tho-R)*1 Humidity sensorSRK35ZJR-S, 35ZJ-S and SRF series only.
Gas line2Humiditysensor(Th3)1(9.52 or 12.7)1(9.52 or 12.7)1(9.52 or 12.7)Indoor UnitSensor(Th22)Outdoor UnitService valve (Gas)4way valveHeat exchangerSensor(Tho-A)Cooling cycleHeating cycleModels SCM50ZJ-S1, 60ZJ-S1Heat exchangerSensor(Th21)Sensor(Th1)Sensor(Tho-D)CompressorDischargeMufflerSensor(Tho-S)CapillarytubeSensor(Tho-R)SuctionAccumlatorAccumlator(6.35)Service valve(Liquid)Electronicexpansion valveEEVAReceiver(6.35)StrainerEEVB- 153 - '11 • SCM-SM-110Liquid line(6.35)CapillarytubeEEVC1 Gas lineModel 20, 25, 35 : 9.52Model 50, 60 : 12.72 Humidity sensorSRK50, 60ZJX-S1, SRK35ZJR-S, 35, 50ZJ-S and SRF series only.
Outdoor UnitCooling cycleHeating cycleGas line1 Service valve (Gas)(9.52 or 12.7)1(9.52 or 12.7)1(9.52 or 12.7)1(9.52 or 12.7)1Humiditysensor(Th3) Indoor UnitSensor(Th22)SensorHeat (Tho-D)exchangerSensor(Th21)OilseparatorDischarge4way valveCompressorSensor(Tho-S)Heat exchangerSensor(Tho-A)Capillary tubeModels SCM71ZJ-S1, 80ZJ-S1Sensor(Th1)(6.35)(6.35)(6.35)SuctionService valve(Liquid)StrainerElectronicexpansion valveEEVAEEVBEEVCAccumlatorReceiverAccumlatorSensor(Tho-R)- 154 - '11 • SCM-SM-110EEVDLiquid line(6.35)Capillarytube1 Gas lineModel 20, 25, 35 : 9.52Model 50, 60 : 12.72 Humidity sensorSRK50, 60ZJX-S1, SRK35ZJR-S, 35, 50ZJ-S and SRF series only.
Gas lineLiquid line*1(φ9.52 or φ12.7 or φ15.88)*1(φ9.52 or φ12.7 or φ15.88)*1(φ9.52 or φ12.7 or φ15.88)*1(φ9.52 or φ12.7 or φ15.88)(φ9.52 or φ12.7or φ15.88) *1Indoor UnitSensor(Th22)HeatexchangerService valve (Gas)Thermistor(Tho-D)DischargeSensor(Th21)Humidity*2Compressorsensor(Th3)Sensor Suction(Th1) Service valve ElectronicAccumlator(Liquid) expansion valveEEVA(φ6.35)EEVB- 155 - '11 • SCM-SM-110(φ6.35)(φ6.35)(φ6.35)(φ6.35)Outdoor UnitStrainerMufflerOilseparator4way valveCapillarytubeStrainerEEVCEEVDEEVEHige preeuresensor(HPS)Thermistor(Tho-S)ReceiverStrainerAccumlatorStrainerElectronicexpansion valve(EEV-H)Cooling cycleHeating cycleHeat exchangerThermistor(Tho-A)Thermistor(Tho-R)Model SCM100ZJ-S1*1 Gas line 20, 25, 35 type : φ9.5250, 60 type : φ12.771 type : φ15.88*2 Humidity sensorSRK50,60ZJX-S1,35ZJR-S,35,50ZJ-S,71ZK-S and SRF series only.
Gas lineLiquid line*1(φ9.52 or φ12.7 or φ15.88)*1(φ9.52 or φ12.7 or φ15.88)*1(φ9.52 or φ12.7 or φ15.88)*1(φ9.52 or φ12.7 or φ15.88)*1(φ9.52 or φ12.7 or φ15.88)(φ9.52 or φ12.7or φ15.88) *1Indoor UnitSensor(Th22)HeatexchangerService valve (Gas)DischargeSensor(Th21)Humidity*2Compressorsensor(Th3)Sensor Suction(Th1) Service valve ElectronicAccumlator(Liquid) expansion valveEEVA(φ6.35)EEVB(φ6.35)EEVC(φ6.35)EEVD- 156 - '11 • SCM-SM-110(φ6.35)(φ6.35)(φ6.35)Outdoor UnitThermistor(Tho-D)StrainerMufflerOilseparator4way valveCapillarytubeStrainerEEVEEEVFHige preeuresensor(HPS)Thermistor(Tho-S)ReceiverStrainerAccumlatorStrainerElectronicexpansion valve(EEV-H)Cooling cycleHeating cycleHeat exchangerThermistor(Tho-A)Thermistor(Tho-R)Model SCM125ZJ-S1*1 Gas line 20, 25, 35 type : φ9.5250, 60 type : φ12.771 type : φ15.88*2 Humidity sensorSRK50,60ZJX-S1,35ZJR-S,35,50ZJ-S,71ZK-S and SRF series only.
'11 • SCM-SM-1105. INSTALLATION <strong>MANUAL</strong>5.1 Outdoor unitsRPC012A915A(1) Models SCM40ZJ-S, 45ZJ-SMULTI TYPE AIR CONDITIONERINSTALLATION <strong>MANUAL</strong> FOR OUTDOOR UNIT R410A REFRIGERANT USED• This installation manual deals with outdoor units and general installation specifications only. For indoor units, refer to page the respective 173 to 198. installation manuals supplied with the units.• When install the unit, be sure to check whether the selection of installation place, power supply specifications, usage limitation (piping length, height differences betweenindoor and outdoor units, power supply voltage and etc.) and installation spaces.SAFETY PRECAUTIONS• Read the “SAFETY PRECAUTIONS” carefully first of all and strictly follow it during the installation • Keep the installation manual together with owner’s manual at a place where any user can readwork in order to protect yourself.at any time. Moreover if necessary, ask to hand them to a new user.• The precautionary items mentioned below are distinguished into two levels, WARNING and • For installing qualified personnel, take precautions in respect to themselves by using suitableCAUTION .protective clothing, groves, etc., and then perform the installation works.WARNING : Wrong installation would cause serious consequences such as injuries or death. • Please pay attention not to fall down the tools, etc. when installing the unit at the high position.CAUTION : Wrong installation might cause serious consequences depending on• If unusual noise can be heard during operation, consult the dealer.circumstances.• The meanings of “Marks” used here are shown as follows:Both mentions the important items to protect your health and safety so strictly follow them byNever do it under anyAlways do it according to theany means.circumstances.instruction.• Be sure to confirm no anomaly on the equipment by commissioning after completed installationand explain the operating methods as well as the maintenance methods of this equipment tothe user according to the owner’s manual.WARNING• Installation must be carried out by the qualified • Use the prescribed pipes, flare nuts and tools for • This appliance must be connected to main powerinstaller.R410A.supply by means of a circuit breaker or switchIf you install the system by yourself, it may cause serious Using existing parts (for R22 or R407C) can cause the unit (fuse:25A) with a contact separation of at least 3mm.trouble such as water leaks, electric shocks, fire and failure and serious accidents due to burst of the refrigerant • Arrange the wiring in the control box so that it cannotpersonal injury, as a result of a system malfunction. Do not circuit.be pushed up further into the box. Install the servicecarry out the installation and maintenance work except the • Tighten the flare nut by torque wrench with specified panel correctly.by qualified installer.method.Incorrect installation may result in overheating and fire.• Install the system in full accordance with theIf the flare nut were tightened with excess torque, this may • Use the prescribed cables for electrical connection,installation manual.cause burst and refrigerant leakage after a long period. tighten the cables securely in terminal block andIncorrect installation may cause bursts, personal injury, • Do not open the operation valves for liquid line and relieve the cables correctly to prevent overloading thewater leaks, electric shocks and fire.gas line until completed refrigerant piping work, air terminal blocks.• Be sure to use only for household and residence. tightness test and evacuation.Loose connections or cable mountings can causeIf this appliance is installed in inferior environment such as If the compressor is operated in state of opening operation anomalous heat production or fire.machine shop and etc., it can cause malfunction.valves before completed connection of refrigerant piping • Be sure to fix up the service panels.• When installing in small rooms, take prevention work, air can be sucked into refrigerant circuit, which can Incorrect fixing can cause electric shocks or fire due tomeasures not to exceed the density limit of refrigerant cause bust or personal injury due to anomalously high intrusion of dust or water.in the event of leakage, referred by the formula pressure in the refrigerant.• Be sure to switch off the power supply in the event of(accordance with ISO5149).• The electrical installation must be carried out by the installation, inspection or servicing.If the density of refrigerant exceeds the limit, please consult qualified electrician in accordance with “the norm for If the power supply is not shut off, there is a risk of electricthe dealer and install the ventilation system, otherwise lack electrical work” and “national wiring regulation”, and shocks, unit failure or personal injury due to the unexpectedof oxygen can occur, which can cause serious accident. the system must be connected to the dedicated start of fan.• Use the original accessories and the specifiedcircuit.• Stop the compressor before removing the pipe aftercomponents for installation.Power supply with insufficient capacity and incorrect shutting the service valve on pump down work.If parts other than those prescribed by us are used, It may function done by improper work can cause electric shocks If the pipe is removed when the compressor is in operationcause water leaks, electric shocks, fire and personal injury. and fire.with the service valve open, air would be mixed in the• Install the unit in a location with good support. • Be sure to shut off the power before starting electrical refrigeration circuit and it could cause explosion and injuriesUnsuitable installation locations can cause the unit to fall work.due to abnormal high pressure in the cooling cycle.and cause material damage and personal injury.Failure to shut off the power can cause electric shocks, unit • Only use prescribed optional parts. The installation• Ensure the unit is stable when installed, so that it can failure or incorrect function of equipment.must be carried out by the qualified installer.withstand earthquakes and strong winds.• Be sure to use the cables conformed to safetyIf you install the system by yourself, it can cause seriousUnsuitable installation locations can cause the unit to fall standard and cable ampacity for power distribution trouble such as water leaks, electric shocks, fire.and cause material damage and personal injury.work.• Be sure to wear protective goggles and gloves while• Ventilate the working area well in the event ofUnconformable cables can cause electric leak, anomalous at work.refrigerant leakage during installation.heat production or fire.• Earth leakage breaker must be installed.If the refrigerant comes into contact with naked flames,If the earth leakage breaker is not installed, it can causepoisonous gas is produced.electric shocks.• Ensure that no air enters in the refrigerant circuit • Do not bundling, winding or processing for the power • Do not perform any change of protective device itselfwhen the unit is installed and removed.cord. Or, do not deforming the power plug due to or its setup condition.If air enters in the refrigerant circuit, the pressure in the tread it.The forced operation by short-circuiting protective device ofrefrigerant circuit becomes too high, which can cause burst This may cause fire or heating.pressure switch and temperature controller or the use ofand personal injury.• Do not run the unit with removed panels ornon specified component can cause fire or burst.• Do not processing, splice the power cord, or share a protections.socket with other power plugs.Touching rotating equipments, hot surfaces or high voltageThis may cause fire or electric shock due to defecting parts can cause personal injury due to entrapment, burn orcontact, defecting insulation and over-current etc.electric shocks.CAUTION• Carry out the electrical work for ground lead with care.Do not connect the ground lead to the gas line, water line, lightning conductor or telephone line’s ground lead. Incorrect grounding can cause unit faults such as electric shocks due toshort-circuiting.• Use the circuit breaker of correct capacity. Circuit Insufficient space can result in accident such as personal • When perform the air conditioner operation (coolingbreaker should be the one that disconnect all poles injury due to falling from the installation place.or drying operation) in which ventilator is installed inunder over current.• Take care when carrying the unit by hand.the room. In this case, using the air conditioner inUsing the incorrect one could cause the system failure and If the unit weights more than 20kg, it must be carried by two parallel with the ventilator, there is the possibility thatfire.or more persons. Do not carry by the plastic straps, always drain water may backflow in accordance with the• Install isolator or disconnect switch on the power use the carry handle when carrying the unit by hand. Use room lapse into the negative pressure status.supply wiring in accordance with the local codes and gloves to minimize the risk of cuts by the aluminum fins. Therefore, set up the opening port such asregulations.• Dispose of any packing materials correctly.incorporate the air into the room that may appropriateThe isolator should be locked in OFF state in accordance Any remaining packing materials can cause personal injury to ventilation (For example; Open the door a little). Inwith EN60204-1.as it contains nails and wood. And to avoid danger of addition, just as above, so set up the opening port if• After maintenance, all wiring, wiring ties and the like, suffocation, be sure to keep the plastic wrapper away from the room lapse into negative pressure status due toshould be returned to their original state and wiring children and to dispose after tear it up.register of the wind for the high rise apartment etc.route, and the necessary clearance from all metal • Be sure to insulate the refrigerant pipes so as not toparts should be secured.condense the ambient air moisture on them.• Secure a space for installation, inspection andInsufficient insulation can cause condensation, which canmaintenance specified in the manual.lead to moisture damage on the ceiling, floor, furniture andany other valuables.• Do not install the unit in the locations listed below. • Locations where any machines which generate high • Locations with any obstacles which can prevent inlet and• Locations where carbon fiber, metal powder or anyfrequency harmonics are used.outlet air of the unit.powder is floating.• Locations with salty atmospheres such as coastlines. • Locations where short circuit of air can occur (in case of• Locations where any substances that can affect the unit • Locations with heavy snow (If installed, be sure to provide multiple units installation).such as sulphide gas, chloride gas, acid and alkaline can base flame and snow hood mentioned in the manual). • Locations where strong air blows against the air outlet ofoccur.• Locations where the unit is exposed to chimney smoke. outdoor unit.• Vehicles and ships.• Locations at high altitude (more than 1000m high). • Locations where something located above the unit could• Locations where cosmetic or special sprays are often • Locations with ammonic atmospheres.fall.used.• Locations where heat radiation from other heat source can It can cause remarkable decrease in performance, corrosion• Locations with direct exposure of oil mist and steam such affect the unit.and damage of components, malfunction and fire.as kitchen and machine plant.• Locations without good air circulation.Chec• Model• Refrige• Piping• Indoor121AcceGromDrainSInsIns•••
5ANEREDe units.readblesition.rm.nnoticeon,g thent ofctricectedfterationjuriesonshileeitselfice ofoftolingd inthatriate). Inrt iftotc.t ande ofet ofouldrosion'11 • SCM-SM-110CAUTION• Do not install the outdoor unit in the locations listed handled.• Do not use any materials other than a fuse with thebelow.Corrosive gas can cause corrosion of heat exchanger, correct rating in the location where fuses are to be• Locations where discharged hot air or operating sound of breakage of plastic parts and etc. And combustible gas can used.the outdoor unit can bother neighborhood.cause fire.Connecting the circuit with copper wire or other metal• Locations where outlet air of the outdoor unit blows • Do not install nor use the system close to thethread can cause unit failure and fire.directly to plants. The outlet air can affect adversely to the equipment that generates electromagnetic fields or • Do not touch any buttons with wet hands.plant etc.high frequency harmonics.It can cause electric shocks.• Locations where vibration can be amplified andEquipment such as inverters, standby generators, medical • Do not touch any refrigerant pipes with your handstransmitted due to insufficient strength of structure. high frequency equipments and telecommunicationwhen the system is in operation.• Locations where vibration and operation sound generated equipments can affect the system, and cause malfunctions During operation the refrigerant pipes become extremely hotby the outdoor unit can affect seriously (on the wall or at and breakdowns. The system can also affect medical or extremely cold depending the operating condition, and itthe place near bed room).equipment and telecommunication equipment, and obstruct can cause burn injury or frost injury.• Locations where an equipment affected by high harmonics its function or cause jamming.• Do not touch the suction or aluminum fin on theis placed (TV set or radio receiver is placed within 1m). • Do not install the outdoor unit in a location where outdoor unit.• Locations where drainage cannot run off safely.insects and small animals can inhabit.This may cause injury.It can affect surrounding environment and cause a claim. Insects and small animals can enter the electric parts and • Do not put anything on the outdoor unit and operating• Do not install the unit near the location where leakage cause damage or fire. Instruct the user to keep theunit.of combustible gases can occur.surroundings clean.This may cause damage the objects or injury due to fallingIf leaked gases accumulate around the unit, it can cause fire. • Do not use the base flame for outdoor unit which is to the object.• Do not install the unit where corrosive gas (such as corroded or damaged due to long periods of• Do not use the unit for special purposes such assulfurous acid gas etc.) or combustible gas (such as operation.storing foods, cooling precision instruments andthinner and petroleum gases) can accumulate or Using an old and damage base flame can cause the unit preservation of animals, plants or art.collect, or where volatile combustible substances are falling down and cause personal injury.• Do not clean up the unit with water.Check before installation workOption parts Q’ty Necessary tools for the installation work9 Wrench key (Hexagon) [4m/m]10 Vacuum pumpa Sealing plate1 1 Plus headed driverVacuum pump adapter (Anti-reverse flow type)11b Sleeve1 2 Knife(Designed specifically for R410A)c Inclination plate1 3 Saw12 Gauge manifold (Designed specifically for R410A)d Putty1 4 Tape measure13 Charge hose (Designed specifically for R410A)Accessories for outdoor unit Q’ty eDrain hose (extension5 Hammer14 Flaring tool set (Designed specifically for R410A)1hose)6 Spanner wrench15 Gas leak detector (Designed specifically for R410A)Grommet (Heat pump type only) 1 Piping cover (for insulation 7 Torque wrench [14.0~62.0N·m (1.4~6.2kgf·m)] Gauge for projection adjustment (Used when flare isf116Drain elbow (Heat pump type only) 1 of connection piping)8 Hole core drill (65mm in diameter)made by using conventional flare tool)1 SELECTION OF INSTALLATION LOCATIONInstall at location that meets the following conditions after getting approval from the customer. Where the following installation space is available, and where air does not gather. Installation Space (on a flat surface) Where rain and sunlight do not directly hit the unit, and where there is enough air circulation. Also, where the unit cannot be buried by snow.Blowing out port and suction port on the back sideof the unit can be installed at a distance of 10cma location which can sustain the weight of the unit, and where noises and vibrations are notfrom walls.enhanced.In case the barrier is 1.2m or above in height, Where blasts of cold or hot air and noise do not bother the neighbors.or is overhead, the sufficient space between Where the unit does not receive heat radiation from other heat sources.the unit and wall shall be secured. Where there are no obstructions (animals, plants, etc.) to the suction inlet and blowing outlet. Where water may drain out.When the unit is installed, the space of the following Please avoid the following locations.dimension and above shall be secured. Where there is constant exposure to harsh winds such as the top floors of a building. Also,locations with exposure to salty air. Where there are oil splashes, vapor, and smoke. Where there are possibilities of flammable gas leaks.10cmAir intake10cm MINMINNo obstacles(Service spacefor electricalInstallationAirparts)intake Anchor bolt fixed position Notabilia for installationAir outlet60cm MIN5012IntakeFasten with bolts(M10-12)203OutletUse a long block to510137extend the width.85065Use a thicker block to anchor deeper. In installing the unit, fix the unit’s legs with bolts specified on the left. The protrusion of an anchor bolt on the front side must be kept within 15 mm. Securely install the unit so that it does not fall over during earthquakes or strong winds, etc. Refer to the above illustrations for information regarding concrete foundations. Install the unit in a level area. (With a gradient of 5 mm or less.)Improper installation can result in a compressor failure, broken piping within the unit and abnormal noise generation.• Model name and power source• Refrigerant piping length• Piping, wiring and miscellaneous small parts• Indoor unit installation manual122901231434014
2INSTALLATION OF OUTDOOR UNITDrainage There are 2 holes in the bottom panel of the outdoor unit to drain condensation. Install the outdoor unit so it will be horizontal. Also, secure the legs of the unit to a firm foundation to prevent any instabilities. Secure it firmly so the unit will not fall during earthquakes and from sudden gusts of wind. In areas where the temperatures drop below 0˚C for several continuous days, donot install a drain elbow. (water discharge could stop due to freezing.)Connection of the power supply cable and the connecting cablesfor indoor and outdoor units. This multi-type room air conditioner receives its power from outside. To ensure correct connections, mark each ends of the cables with number, A and B.It is important to use the same number the corresponding cables and pipes. An earth leakage breaker and a circuit breaker must be installed.Their capacities are 25A.Remove the service panel. (Remove the screw of the service panel.)Remove the terminal cover. (Remove the screw of the terminal cover.)Connect the power supply cable and the connection wire securely to the terminal block.POWER SUPPLY CODE CENELEC code for cables requiring fields cables. H05RNR3G4.0INTERCONNECTING WIRING CODECENELEC code for cables requiring fields cables. H05RNR4G1.51) In wiring, make sure that the wire terminal numbers of outdoor unit terminalblock are match to the wire terminal numbers of indoor unit terminal block.2) Terminal number A of the outdoor unit is used for A indoor unit and terminalnumber B for B indoor unit respectively.After connecting the wire, use wiring clamps to secure the wiring.Fit the terminal cover and the service panel.3CONNECTION OF REFRIGERANT PIPINGS[Connection of pipes]NOTE Cover the pipes with tape so that dust and sand do not enter the pipe until they areconnected. When connecting the pipes to the outdoor unit, be careful about the discharge of fluorocarbongas or oil. Make sure to match the pipes between the indoor unit and the outdoor unit with thecorrect operation valves.OutdoorRemovePressRemove the flared nuts.(on both liquid and gas sides)CAUTIONDo not apply excess torque to the flared nuts.Otherwise, the flared nuts may crack dependingon the conditions and refrigerant leak may occur.ConnectionOutdoorLiquid sideGas sideConnect the pipes on both liquid and gas sides.Tighten the nuts to the following torque.Liquid side : 14.018.0Nm (1.41.8kgfm)Gas side ( 9.52): 33.042.0Nm (3.34.2kgfm)900.5ADimension ALiquid side 9.1dia.Gas side9.52 : 13.2diaInstall the removed flared nuts to the pipesto be connected, then flare the pipes.CAUTIONDo not apply refrigerating machineoil to the flared surface.Gas Leakage Test'11 • SCM-SM-110Drain holeThe screw of the service panel is tightened securely.Terminal coverScrewPOWERunit A unit BSUPPLYView of Terminal blockService paneloutdoor unitunit A unit B1 2 3 1 2 3L NCircuit Earth1 2 3 1 2 3breaker leakageunit A unit Bbreakerindoor unitMeasurement B (mm)Copper pipediameterClutch typr flare tool for Conventional (R22) flare toolR410AClutch type Wing nut type6.35 0.00.5 1.01.5 1.52.09.52 0.00.5 1.01.5 1.52.0Use a flare tool designed for R410A or a conventional flare tool. Please note thatmeasurement B (protrusion from the flaring block) will vary depending on the type of aflare tool in use.If a conventional flare tool is used, please use copper pipe gauge or a similarinstrument to check protrusion so that you can keep measurement B to a correct value.Measurement BFlaringblockCopper pipe[Limit]piping lengthone indoor unit MAX 25mall indoor unit MAX 30mindoorunitMAX 15mhight differenceMAXoutdoor indoorunitunit25mMAX 15mindoorunitlength of chargelessrefrigerant pipe30mEnsure that there are no gas leaks from the pipejoints by using a leak detector or soap water.4 A Sinonap Re AftProc(1) Sp(2) C(3) Fpi(4) Al5(5) R(6) R(7) E7HHeaFiniBRMaoutBecan[CorrIndoorEAREarshoThedanTow
lethatof ailarlue.'11 • SCM-SM-1104 AIR PURGING NOTE : Fully open the operation valves (on both liquid and gas sides) after completing air purging. Since the system uses service ports differing in diameter from those found Please use an anti-reverse flow type vacuum pump adapter so as to preventon the conventional models, a charge hose (for R22) presently in use is notvacuum pump oil from running back into the system. Oil running back intoapplicable. Please use one designed specifically for R410A.an air-conditioning system may cause the refrigerant cycle to break down. Remove the cap on both gas and liquid sides before starting operation.Conduct air purging for all connected indoor units. After completing the operation, do not forget to tighten the cap (gas may leak).Operation ValveCompound pressure gaugeCapPressure gaugeOperation ValveProcedureGauge Manifold(two-way valve)-0.1MPa(Designed specifically for R410A)(-76cmHg)(1) Secure all flare nuts on both indoor and outdoor sides toHandle LoHandle Hi.prevent leaks from the pipes.Operation Valve(2) Connect the operation valves, charge hose, manifoldCharge hose(three-way valve)(Designed specifically for R410A)valve and vacuum pump as shown in the right figure.Vacuum pump adapter(3) Fully open the handle Lo for the manifold valve, andOperation Valve(Anti-reverse flow type)pump a vacuum for 15 minutes. Ensure that the meterCap(Designed specifically for R410A)Operation valveis indicating -0.1MPa (-76cmHg).for room B(4) After vacuuming, fully open the operation valve (bothCheck jointVacuum pumpCharge hoseliquid and gas sides) with a hexagon wrench.Operation valve(Designed specifically for R410A)for room ASecurely tighten the operation valve cap and the check joint blind nut after adjustment.Operation valve size Operation valve cap Check joint blind nut(mm)tightening torque (N·m) tightening torque (N·m)OpenOpen6.35 (1/4")(5) Remove the charge hose from service port.20 30 10 129.52 (3/8")(6) Repeat the above steps (1) ~ (5) for all connected indoor units.(7) Ensure that there are no gas leaks from the joints in the indoor and outdoor units.5 HEAT INSULATION FOR JOINTS6 TEST RUN AND HANDLING INSTRUCTIONSHeat insulation for jointsInstallation test check pointsVinyltapePosition sothe slitCover the joint withCheck the following points again after completion of the installation, and beforecomes on top.insulation materialturning on the power.for the indoor unitand tape it.Conduct a test run again and ensure that the unit operates properly.At the same time, explain to the customer how to use the unit and how to takecare of the unit following the installation manual.If the compressor does not operate after the operation has started, wait for 5-10Finish and fixingminutes. (This may be due to delayed start.)(Three-minutes restart preventive timer)Pipe clampApply exterior tape andWhen the air conditioner is restarted or when changing the operation, the unit willPipesshape along the placenot start operating for approximately 3minutes. This is to protect the unit and it isExterior tapewhere the pipes will benot a malfunction.routed. Secure to the wallCrossover wireswith a pipe clamp. BeAfter installationDrain hosecareful not to damage theThe power supply voltage is correct as the rating.Tapping screwpipes and the wires.No gas leaks from the joints of the operation valve.Power cables and crossover wires are securely fixed to the terminal board.Each indoor and outdoor unit is properly connected (no wrong wiring or piping).Operation valve is fully open. Refrigerant has been additionally charged (when the total pipe length exceeds7BEWARE OF WRONG CONNECTIONS INthe refrigerant charged pipe length).The pipe joints for indoor and outdoor pipes have been insulated.REFRIGERANT PIPING AND WIRINGEarthing work has been conducted properly.Make sure to match the piping and wiring from each unit to theThe screw of the service panel is tightened securely.outdoor unit.Test runBe careful because if connections are wrong, normal operationAir conditioning and heating are normal.cannot be achieved and may damage the compressor.No abnormal noise.[Correct connections] [Example of wrong connections]Water drains smoothly.Protective functions are not working.Operation of the unit has been explained to the customer.PipingThe remote control is normal.WiringIndoor unitIndoor unitOperation of indicator lampsunit Bunit BINDICATION LAMPCOLORFUNCTIONB OutdoorB OutdoorLED E (1)REDWARNING LAMPA unitA unitunit Aunit ASELF DIAGNOSIS FUNCTION BY LED E1 TIME FLASH CURRENT CUT2 TIME FLASH TROUBLE OF OUTDOOR UNIT3 TIME FLASH OVER CURRENT4 TIME FLASH TRANSMISSION ERROR IN OUTDOOR UNIT PCB5 TIME FLASH OVER HEAT OF COMPRESSOR6 TIME FLASH ERROR OF SIGNAL TRANSMISSIONEARTHING WORK7 TIME FLASH LOCK OF COMPRESSOREarth work shall be carried out without fail in order to prevent electric8 TIME FLASH SENSOR ERROR (EXCEPT DISCHARGE PIPE SENSOR)shock and noise generation.LIGHT ONOUTDOOR FAN MOTOR ERRORThe connection of the earth cable to the following substances causesFOUR SEC LIGHTANDDISCHARGE PIPE SENSOR ERRORdangerous failures, therefore it shall never be done. (City water pipe,FOUR SEC OFFTown gas pipe, TV antenna, lightning conductor, telephoneline, etc.)RPC012A915A
'11 • SCM-SM-110RPC012A916CMULTI TYPE AIR CONDITIONERR410A REFRIGERANT USEDpage 173 to 208.SAFETY PRECAUTIONS• Keep the installation manual together with owner’s manual at a place where any user can readat any time. Moreover if necessary, ask to hand them to a new user.WARNING and • For installing qualified personnel, take precautions in respect to themselves by using suitableprotective clothing, groves, etc., and then perform the installation works.• Please pay attention not to fall down the tools, etc. when installing the unit at the high position.• If unusual noise can be heard during operation, consult the dealer.• The meanings of “Marks” used here are shown as follows:Never do it under anyAlways do it according to thecircumstances.instruction.WARNING• This appliance must be connected to main powersupply by means of a circuit breaker or switch(fuse:25A) with a contact separation of at least 3mm.• Arrange the wiring in the control box so that it cannotbe pushed up further into the box. Install the servicepanel correctly.Incorrect installation may result in overheating and fire.• Use the prescribed cables for electrical connection,tighten the cables securely in terminal block andrelieve the cables correctly to prevent overloading theterminal blocks.Loose connections or cable mountings can causeanomalous heat production or fire.• Be sure to fix up the service panels.Incorrect fixing can cause electric shocks or fire due tointrusion of dust or water.• Be sure to switch off the power supply in the event ofinstallation, inspection or servicing.If the power supply is not shut off, there is a risk of electricshocks, unit failure or personal injury due to the unexpectedstart of fan.• Stop the compressor before removing the pipe aftershutting the service valve on pump down work.If the pipe is removed when the compressor is in operationwith the service valve open, air would be mixed in therefrigeration circuit and it could cause explosion and injuriesdue to abnormal high pressure in the cooling cycle.• Only use prescribed optional parts. The installationmust be carried out by the qualified installer.If you install the system by yourself, it can cause serioustrouble such as water leaks, electric shocks, fire.• Be sure to wear protective goggles and gloves whileat work.• Earth leakage breaker must be installed.If the earth leakage breaker is not installed, it can causeelectric shocks.• Do not perform any change of protective device itselfor its setup condition.The forced operation by short-circuiting protective device ofpressure switch and temperature controller or the use ofnon specified component can cause fire or burst.CAUTION• When perform the air conditioner operation (coolingor drying operation) in which ventilator is installed inthe room. In this case, using the air conditioner inparallel with the ventilator, there is the possibility thatdrain water may backflow in accordance with theroom lapse into the negative pressure status.Therefore, set up the opening port such asincorporate the air into the room that may appropriateto ventilation (For example; Open the door a little). Inaddition, just as above, so set up the opening port ifthe room lapse into negative pressure status due toregister of the wind for the high rise apartment etc.• Locations where any machines which generate high • Locations with any obstacles which can prevent inlet andfrequency harmonics are used.outlet air of the unit.• Locations with salty atmospheres such as coastlines. • Locations where short circuit of air can occur (in case of• Locations with heavy snow (If installed, be sure to provide multiple units installation).base flame and snow hood mentioned in the manual). • Locations where strong air blows against the air outlet of• Locations where the unit is exposed to chimney smoke. outdoor unit.• Locations at high altitude (more than 1000m high). • Locations where something located above the unit could• Locations with ammonic atmospheres.fall.• Locations where heat radiation from other heat source can It can cause remarkable decrease in performance, corrosionaffect the unit.and damage of components, malfunction and fire.• Locations without good air circulation.- 161 -(2) Models SCM50ZJ-S1, 60ZJ-S1INSTALLATION <strong>MANUAL</strong> FOR OUTDOOR UNIT• This installation manual deals with outdoor units and general installation specifications only. For indoor units, refer to the respective installation manuals supplied with the units.• When install the unit, be sure to check whether the selection of installation place, power supply specifications, usage limitation (piping length, height differences betweenindoor and outdoor units, power supply voltage and etc.) and installation spaces.• Read the “SAFETY PRECAUTIONS” carefully first of all and strictly follow it during the installationwork in order to protect yourself.• The precautionary items mentioned below are distinguished into two levels,CAUTION .WARNING : Wrong installation would cause serious consequences such as injuries or death.CAUTION : Wrong installation might cause serious consequences depending oncircumstances.Both mentions the important items to protect your health and safety so strictly follow them byany means.• Be sure to confirm no anomaly on the equipment by commissioning after completed installationand explain the operating methods as well as the maintenance methods of this equipment tothe user according to the owner’s manual.• Installation must be carried out by the qualifiedinstaller.If you install the system by yourself, it may cause serioustrouble such as water leaks, electric shocks, fire andpersonal injury, as a result of a system malfunction. Do notcarry out the installation and maintenance work except theby qualified installer.• Install the system in full accordance with theinstallation manual.Incorrect installation may cause bursts, personal injury,water leaks, electric shocks and fire.• Be sure to use only for household and residence.If this appliance is installed in inferior environment such asmachine shop and etc., it can cause malfunction.• When installing in small rooms, take preventionmeasures not to exceed the density limit of refrigerantin the event of leakage, referred by the formula(accordance with ISO5149).If the density of refrigerant exceeds the limit, please consultthe dealer and install the ventilation system, otherwise lackof oxygen can occur, which can cause serious accident.• Use the original accessories and the specifiedcomponents for installation.If parts other than those prescribed by us are used, It maycause water leaks, electric shocks, fire and personal injury.• Install the unit in a location with good support.Unsuitable installation locations can cause the unit to falland cause material damage and personal injury.• Ensure the unit is stable when installed, so that it canwithstand earthquakes and strong winds.Unsuitable installation locations can cause the unit to falland cause material damage and personal injury.• Ventilate the working area well in the event ofrefrigerant leakage during installation.If the refrigerant comes into contact with naked flames,poisonous gas is produced.• Ensure that no air enters in the refrigerant circuitwhen the unit is installed and removed.If air enters in the refrigerant circuit, the pressure in therefrigerant circuit becomes too high, which can cause burstand personal injury.• Do not processing, splice the power cord, or share asocket with other power plugs.This may cause fire or electric shock due to defectingcontact, defecting insulation and over-current etc.• Use the prescribed pipes, flare nuts and tools forR410A.Using existing parts (for R22 or R407C) can cause the unitfailure and serious accidents due to burst of the refrigerantcircuit.• Tighten the flare nut by torque wrench with specifiedmethod.If the flare nut were tightened with excess torque, this maycause burst and refrigerant leakage after a long period.• Do not open the operation valves for liquid line andgas line until completed refrigerant piping work, airtightness test and evacuation.If the compressor is operated in state of opening operationvalves before completed connection of refrigerant pipingwork, air can be sucked into refrigerant circuit, which cancause bust or personal injury due to anomalously highpressure in the refrigerant.• The electrical installation must be carried out by thequalified electrician in accordance with “the norm forelectrical work” and “national wiring regulation”, andthe system must be connected to the dedicatedcircuit.Power supply with insufficient capacity and incorrectfunction done by improper work can cause electric shocksand fire.• Be sure to shut off the power before starting electricalwork.Failure to shut off the power can cause electric shocks, unitfailure or incorrect function of equipment.• Be sure to use the cables conformed to safetystandard and cable ampacity for power distributionwork.Unconformable cables can cause electric leak, anomalousheat production or fire.• Do not bundling, winding or processing for the powercord. Or, do not deforming the power plug due totread it.This may cause fire or heating.• Do not run the unit with removed panels orprotections.Touching rotating equipments, hot surfaces or high voltageparts can cause personal injury due to entrapment, burn orelectric shocks.• Carry out the electrical work for ground lead with care.Do not connect the ground lead to the gas line, water line, lightning conductor or telephone line’s ground lead. Incorrect grounding can cause unit faults such as electric shocks due toshort-circuiting.• Use the circuit breaker of correct capacity. Circuitbreaker should be the one that disconnect all polesunder over current.Using the incorrect one could cause the system failure andfire.• Install isolator or disconnect switch on the powersupply wiring in accordance with the local codes andregulations.The isolator should be locked in OFF state in accordancewith EN60204-1.• After maintenance, all wiring, wiring ties and the like,should be returned to their original state and wiringroute, and the necessary clearance from all metalparts should be secured.• Secure a space for installation, inspection andmaintenance specified in the manual.• Do not install the unit in the locations listed below.• Locations where carbon fiber, metal powder or anypowder is floating.• Locations where any substances that can affect the unitsuch as sulphide gas, chloride gas, acid and alkaline canoccur.• Vehicles and ships.• Locations where cosmetic or special sprays are oftenused.• Locations with direct exposure of oil mist and steam suchas kitchen and machine plant.Insufficient space can result in accident such as personalinjury due to falling from the installation place.• Take care when carrying the unit by hand.If the unit weights more than 20kg, it must be carried by twoor more persons. Do not carry by the plastic straps, alwaysuse the carry handle when carrying the unit by hand. Usegloves to minimize the risk of cuts by the aluminum fins.• Dispose of any packing materials correctly.Any remaining packing materials can cause personal injuryas it contains nails and wood. And to avoid danger ofsuffocation, be sure to keep the plastic wrapper away fromchildren and to dispose after tear it up.• Be sure to insulate the refrigerant pipes so as not tocondense the ambient air moisture on them.Insufficient insulation can cause condensation, which canlead to moisture damage on the ceiling, floor, furniture andany other valuables.Chec• Model• Refrige• Piping,• IndoorAcce1 Grom2 DrainVaria39.5Note: Prodiam1CASInsIns•••
6CNEREDe units.readblesition.rm.nnoticeon,g thent ofctricectedfterationjuriesonshileeitselfice ofoftolingd inthatriate). Inrt iftotc.t ande ofet ofouldrosion'11 • SCM-SM-110CAUTION• Do not install the outdoor unit in the locations listed handled.• Do not use any materials other than a fuse with thebelow.Corrosive gas can cause corrosion of heat exchanger, correct rating in the location where fuses are to be• Locations where discharged hot air or operating sound of breakage of plastic parts and etc. And combustible gas can used.the outdoor unit can bother neighborhood.cause fire.Connecting the circuit with copper wire or other metal• Locations where outlet air of the outdoor unit blows • Do not install nor use the system close to thethread can cause unit failure and fire.directly to plants. The outlet air can affect adversely to the equipment that generates electromagnetic fields or • Do not touch any buttons with wet hands.plant etc.high frequency harmonics.It can cause electric shocks.• Locations where vibration can be amplified andEquipment such as inverters, standby generators, medical • Do not touch any refrigerant pipes with your handstransmitted due to insufficient strength of structure. high frequency equipments and telecommunicationwhen the system is in operation.• Locations where vibration and operation sound generated equipments can affect the system, and cause malfunctions During operation the refrigerant pipes become extremely hotby the outdoor unit can affect seriously (on the wall or at and breakdowns. The system can also affect medical or extremely cold depending the operating condition, and itthe place near bed room).equipment and telecommunication equipment, and obstruct can cause burn injury or frost injury.• Locations where an equipment affected by high harmonics its function or cause jamming.• Do not touch the suction or aluminum fin on theis placed (TV set or radio receiver is placed within 1m). • Do not install the outdoor unit in a location where outdoor unit.• Locations where drainage cannot run off safely.insects and small animals can inhabit.This may cause injury.It can affect surrounding environment and cause a claim. Insects and small animals can enter the electric parts and • Do not put anything on the outdoor unit and operating• Do not install the unit near the location where leakage cause damage or fire. Instruct the user to keep theunit.of combustible gases can occur.surroundings clean.This may cause damage the objects or injury due to fallingIf leaked gases accumulate around the unit, it can cause fire. • Do not use the base flame for outdoor unit which is to the object.• Do not install the unit where corrosive gas (such as corroded or damaged due to long periods of• Do not use the unit for special purposes such assulfurous acid gas etc.) or combustible gas (such as operation.storing foods, cooling precision instruments andthinner and petroleum gases) can accumulate or Using an old and damage base flame can cause the unit preservation of animals, plants or art.collect, or where volatile combustible substances are falling down and cause personal injury.• Do not clean up the unit with water.Check before installation work• Model name and power source9 Wrench key (Hexagon) [4m/m]• Refrigerant piping lengthOption parts Q’ty Necessary tools for the installation work10 Vacuum pump• Piping, wiring and miscellaneous small parts• Indoor unit installation manuala Sealing plate1 1 Plus headed driverVacuum pump adapter (Anti-reverse flow type)11b Sleeve1 2 Knife(Designed specifically for R410A)Accessories for outdoor unit Q’tyc Inclination plate1 3 Saw12 Gauge manifold (Designed specifically for R410A)d Putty1 4 Tape measure13 Charge hose (Designed specifically for R410A)1 Grommet (Heat pump type only) 1 Drain hose (extension5 Hammer14 Flaring tool set (Designed specifically for R410A)e12 Drain elbow (Heat pump type only) 1 hose)6 Spanner wrench15 Gas leak detector (Designed specifically for R410A)Variable diameter joint SCM50 1 Piping cover (for insulation 7 Torque wrench [14.0~62.0N·m (1.4~6.2kgf·m)] Gauge for projection adjustment (Used when flare is3f1169.5212.7SCM60 2 of connection piping)8 Hole core drill (65mm in diameter)made by using conventional flare tool)Note: Provide flare nuts when using the variablediameter joint (for 12.7).CAUTION This model requires a minimum of 2 indoor units.1 SELECTION OF INSTALLATION LOCATIONInstall at location that meets the following conditions after getting approval from the customer. Where the following installation space is available, and where air does not gather. Installation Space (on a flat surface) Where rain and sunlight do not directly hit the unit, and where there is enough air circulation. Also, where the unit cannot be buried by snow.Blowing out port and suction port on the back sideof the unit can be installed at a distance of 10cma location which can sustain the weight of the unit, and where noises and vibrations are notfrom walls.enhanced.In case the barrier is 1.2m or above in height, Where blasts of cold or hot air and noise do not bother the neighbors.or is overhead, the sufficient space between Where the unit does not receive heat radiation from other heat sources.the unit and wall shall be secured. Where there are no obstructions (animals, plants, etc.) to the suction inlet and blowing outlet. Where water may drain out.When the unit is installed, the space of the following Please avoid the following locations.dimension and above shall be secured. Where there is constant exposure to harsh winds such as the top floors of a building. Also,locations with exposure to salty air. Where there are oil splashes, vapor, and smoke. Where there are possibilities of flammable gas leaks.10cmAir intake10cm MINMINNo obstacles(Service spacefor electricalInstallationAirparts)intake Anchor bolt fixed position Notabilia for installationAir outlet60cm MIN5012IntakeFasten with bolts(M10-12)203OutletUse a long block to510137extend the width.85065Use a thicker block to anchor deeper. In installing the unit, fix the unit’s legs with bolts specified on the left. The protrusion of an anchor bolt on the front side must be kept within 15 mm. Securely install the unit so that it does not fall over during earthquakes or strong winds, etc. Refer to the above illustrations for information regarding concrete foundations. Install the unit in a level area. (With a gradient of 5 mm or less.)Improper installation can result in a compressor failure, broken piping within the unit and abnormal noise generation.2901231434014
2INSTALLATION OF OUTDOOR UNITDrainage There are 2 holes in the bottom panel of the outdoor unit to drain condensation. Install the outdoor unit so it will be horizontal. Also, secure the legs of the unit to a firm foundation to prevent any instabilities. Secure it firmly so the unit will not fall during earthquakes and from sudden gusts of wind. In areas where the temperatures drop below 0˚C for several continuous days, donot install a drain elbow. (water discharge could stop due to freezing.)Connection of the power supply cable and the connecting cablesfor indoor and outdoor units. This multi-type room air conditioner receives its power from outside. To ensure correct connections, mark each ends of the cables with number, A to C. Itis important to use the same number the corresponding cables and pipes. An earth leakage breaker and a circuit breaker must be installed.Their capacities are 25A.Remove the service panel. (Remove the screw of the service panel.)Remove the terminal cover. (Remove the screw of the terminal cover.)Connect the power supply cable and the connection wire securely to the terminal block.POWER SUPPLY CODE CENELEC code for cables requiring fields cables. H05RNR3G4.0INTERCONNECTING WIRING CODECENELEC code for cables requiring fields cables. H05RNR4G1.51) In wiring, make sure that the wire terminal numbers of outdoor unit terminalblock are match to the wire terminal numbers of indoor unit terminal block.2) Terminal number A of the outdoor unit is used for A indoor unit and terminalnumber B for B indoor unit respectively.After connecting the wire, use wiring clamps to secure the wiring.Fit the terminal cover and the service panel.3CONNECTION OF REFRIGERANT PIPINGS Regarding the change in the sizes of gas side pipes (usage of the variable joints);If a 5.0, 6.0 kw class indoor unit (gas side pipe 12.7) is going to be connected to theoperation valves (9.52), variable joints available as accessories must be applied to thegas side operation valves.Securely fit the copper packing between the operation valve and the variablediameter joint to prevent shifting.[Connection of pipes]NOTE Cover the pipes with tape so that dust and sand do not enter the pipe until they areconnected. When connecting the pipes to the outdoor unit, be careful about the discharge of fluorocarbongas or oil. Make sure to match the pipes between the indoor unit and the outdoor unit with thecorrect operation valves.OutdoorRemovePressRemove the flared nuts.(on both liquid and gas sides)900.5CAUTIONDo not apply excess torque to the flared nuts.Otherwise, the flared nuts may crack dependingon the conditions and refrigerant leak may occur.ConnectionOutdoorLiquid sideGas sideConnect the pipes on both liquid and gas sides.Tighten the nuts to the following torque.Liquid side : 14.018.0Nm (1.41.8kgfm)Gas side ( 9.52): 33.042.0Nm (3.34.2kgfm)( 12.7): 49.061.0Nm (4.96.1kgfm)ADimension ALiquid side 9.1dia.Gas side9.52 : 13.2dia12.7 : 16.2dia.Install the removed flared nuts to the pipesto be connected, then flare the pipes.CAUTIONDo not apply refrigerating machineoil to the flared surface.Gas Leakage Test'11 • SCM-SM-110Drain holeThe screw of the service panel is tightened securely.Terminal coverScrewPOWERunit A unit B unit CSUPPLYView of Terminal blockService paneloutdoor unitunit A unit B unit C1 2 3 1 2 3 1 2 3L N1 2 3 1 2 3 1 2 3Circuit Earthbreaker leakageunit A unit B unit Cbreakerindoor unit[Examples of use of variable diameter joints]Connection of indoor unit of Class 5.0 to A unit.Liquid side operation valve ( 6.35)6.35 pipe 5.0 kwOperationIndoor unitvalve for room A12.7 pipeGas side operationvalve ( 9.52) Copper packing Variable diameter joint( 9.52 - 12.7)Measurement B (mm)Copper pipeClutch typr flare tool for Conventional (R22) flare tooldiameterR410AClutch type Wing nut type6.35 0.00.5 1.01.5 1.52.09.52 0.00.5 1.01.5 1.52.012.7 0.00.5 1.01.5 2.02.5Use a flare tool designed for R410A or a conventional flare tool. Please note thatmeasurement B (protrusion from the flaring block) will vary depending on the type of aflare tool in use.If a conventional flare tool is used, please use copper pipe gauge or a similarinstrument to check protrusion so that you can keep measurement B to a correct value.Measurement BFlaringblockCopper pipe[Limit]piping lengthone indoor unit MAX 25mall indoor unit MAX 40mindoorunitMAX 15mhight differenceMAXoutdoor indoorunitunit25mMAX 15mindoorunitlength of chargelessrefrigerant pipe40mEnsure that there are no gas leaks from the pipejoints by using a leak detector or soap water.4 A Sinonap Re AftProc(1) Sp(2) Cv(3) Fpi(4) Ali5(5) R(6) R(7) E7HHeaFiniBRMakoutdBecan[CorrIndoorEAREarshoThedanTow
'11 • SCM-SM-1107BEWARE OF WRONG CONNECTIONS INthe refrigerant charged pipe length).The pipe joints for indoor and outdoor pipes have been insulated.REFRIGERANT PIPING AND WIRINGEarthing work has been conducted properly.NOTE : Fully open the operation valves (on both liquid and gas sides) after completing air purging. Since the system uses service ports differing in diameter from those foundon the conventional models, a charge hose (for R22) presently in use is notapplicable. Please use one designed specifically for R410A.Please use an anti-reverse flow type vacuum pump adapter so as to preventvacuum pump oil from running back into the system. Oil running back intoan air-conditioning system may cause the refrigerant cycle to break down. Remove the cap on both gas and liquid sides before starting operation.Conduct air purging for all connected indoor units. After completing the operation, do not forget to tighten the cap (gas may leak).Operation ValveCapCompound pressure gaugePressure gaugeOperation ValveProcedureGauge Manifold(two-way valve)-0.1MPa(Designed specifically for R410A)(-76cmHg)(1) Secure all flare nuts on both indoor and outdoor sides toHandle LoHandle Hi.prevent leaks from the pipes.Operation Valve(2) Connect the operation valves, charge hose, manifoldCharge hose(three-way valve)(Designed specifically for R410A)valve and vacuum pump as shown in the right figure.Operation valveVacuum pump adapter(3) Fully open the handle Lo for the manifold valve, andfor room COperation Valve(Anti-reverse flow type)pump a vacuum for 15 minutes. Ensure that the meterCap(Designed specifically for R410A)Operation valveis indicating -0.1MPa (-76cmHg).for room B(4) After vacuuming, fully open the operation valve (bothCheck jointVacuum pumpCharge hoseCliquid and gas sides) with a hexagon wrench.Operation valve(Designed specifically for R410A)for room ASecurely tighten the operation valve cap and the check joint blind nut after adjustment.Operation valve size(mm)Operation valve captightening torque (N·m)Check joint blind nuttightening torque (N·m)OpenOpen6.35 (1/4")(5) Remove the charge hose from service port.20 309.52 (3/8")(6) Repeat the above steps (1) ~ (5) for all connected indoor units.10 12(7) Ensure that there are no gas leaks from the joints in the indoor and outdoor units.12.7 (1/2")25 355 HEAT INSULATION FOR JOINTS6 TEST RUN AND HANDLING INSTRUCTIONSHeat insulation for jointsInstallation test check pointsVinyltapePosition sothe slitCover the joint withCheck the following points again after completion of the installation, and beforecomes on top.insulation materialturning on the power.for the indoor unitand tape it.Conduct a test run again and ensure that the unit operates properly.At the same time, explain to the customer how to use the unit and how to takecare of the unit following the installation manual.If the compressor does not operate after the operation has started, wait for 5-10Finish and fixingminutes. (This may be due to delayed start.)(Three-minutes restart preventive timer)Pipe clampApply exterior tape andWhen the air conditioner is restarted or when changing the operation, the unit willPipesshape along the placenot start operating for approximately 3minutes. This is to protect the unit and it isExterior tapewhere the pipes will benot a malfunction.routed. Secure to the wallCrossover wireswith a pipe clamp. BeAfter installationDrain hosecareful not to damage theThe power supply voltage is correct as the rating.Tapping screwpipes and the wires.No gas leaks from the joints of the operation valve.Power cables and crossover wires are securely fixed to the terminal board.Each indoor and outdoor unit is properly connected (no wrong wiring or piping).Operation valve is fully open. Refrigerant has been additionally charged (when the total pipe length exceedsMake sure to match the piping and wiring from each unit to theoutdoor unit.The screw of the service panel is tightened securely.Test runBe careful because if connections are wrong, normal operationAir conditioning and heating are normal.cannot be achieved and may damage the compressor.No abnormal noise.Water drains smoothly.Protective functions are not working.[Correct connections] [Example of wrong connections] Operation of the unit has been explained to the customer.The remote control is normal.PipingWiringOperation of indicator lampsINDICATION LAMPLED E (1)COLORREDFUNCTIONWARNING LAMPIndoor unitIndoor unitSELF DIAGNOSIS FUNCTION BY LED Eunit Cunit C1 TIME FLASH CURRENT CUT2 TIME FLASH TROUBLE OF OUTDOOR UNITunit BCCOutdoorOutdoor3 TIME FLASH OVER CURRENTBunitunit BBunit4 TIME FLASH TRANSMISSION ERROR IN OUTDOOR UNIT PCBAA5 TIME FLASH OVER HEAT OF COMPRESSORunit Aunit A6 TIME FLASH7 TIME FLASH8 TIME FLASHLIGHT ONFOUR SEC LIGHTANDERROR OF SIGNAL TRANSMISSIONLOCK OF COMPRESSORSENSOR ERROR (EXCEPT DISCHARGE PIPE SENSOR)OUTDOOR FAN MOTOR ERRORDISCHARGE PIPE SENSOR ERRORFOUR SEC OFFEARTHING WORKEarth work shall be carried out without fail in order to prevent electricshock and noise generation.The connection of the earth cable to the following substances causesdangerous failures, therefore it shall never be done. (City water pipe,Town gas pipe, TV antenna, lightning conductor, telephoneline, etc.)RPC012A916Cthatof ailarlue.
'11 • SCM-SM-110(3) Models SCM71ZJ-S1, 80ZJ-S1refer to page173 to 208.
'11 • SCM-SM-110
φφφφ'11 • SCM-SM-110 φφ φφ φφ φ φ φ - 167 -
'11 • SCM-SM-110 ~φ~φ~
'11 • SCM-SM-110(4) Models SCM100ZJ-S1, 125ZJ-S1RPC012A918CMULTI TYPE AIR CONDITIONERR410A REFRIGERANT USEDSAFETY PRECAUTIONS• Keep the installation manual together with owner’s manual at a place where any user can readat any time. Moreover if necessary, ask to hand them to a new user.WARNING and • For installing qualified personnel, take precautions in respect to themselves by using suitable.protective clothing, groves, etc., and then perform the installation works.: Wrong installation would cause serious consequences such as injuries or death. • Please pay attention not to fall down the tools, etc. when installing the unit at the high position.: Wrong installation might cause serious consequences depending on• If unusual noise can be heard during operation, consult the dealer.circumstances.• The meanings of “Marks” used here are shown as follows:Never do it under anyAlways do it according to thecircumstances.instruction.WARNING• Use the prescribed pipes, flare nuts and tools for • This appliance must be connected to main powerR410A.supply by means of a circuit breaker or switchUsing existing parts (for R22 or R407C) can cause the unit (fuse:30A) with a contact separation of at least 3mm.failure and serious accidents due to burst of the refrigerant • Arrange the wiring in the control box so that it cannotcircuit.be pushed up further into the box. Install the service• Tighten the flare nut by torque wrench with specified panel correctly.method.Incorrect installation may result in overheating and fire.If the flare nut were tightened with excess torque, this may • Use the prescribed cables for electrical connection,cause burst and refrigerant leakage after a long period. tighten the cables securely in terminal block and• Do not open the operation valves for liquid line and relieve the cables correctly to prevent overloading thegas line until completed refrigerant piping work, air terminal blocks.tightness test and evacuation.Loose connections or cable mountings can causeIf the compressor is operated in state of opening operation anomalous heat production or fire.valves before completed connection of refrigerant piping • Be sure to fix up the service panels.work, air can be sucked into refrigerant circuit, which can Incorrect fixing can cause electric shocks or fire due tocause bust or personal injury due to anomalously high intrusion of dust or water.pressure in the refrigerant.• Be sure to switch off the power supply in the event of• The electrical installation must be carried out by the installation, inspection or servicing.qualified electrician in accordance with “the norm for If the power supply is not shut off, there is a risk of electricelectrical work” and “national wiring regulation”, and shocks, unit failure or personal injury due to the unexpectedthe system must be connected to the dedicated start of fan.circuit.• Stop the compressor before removing the pipe afterPower supply with insufficient capacity and incorrect shutting the service valve on pump down work.function done by improper work can cause electric shocks If the pipe is removed when the compressor is in operationand fire.with the service valve open, air would be mixed in the• Be sure to shut off the power before starting electrical refrigeration circuit and it could cause explosion and injurieswork.due to abnormal high pressure in the cooling cycle.Failure to shut off the power can cause electric shocks, unit • Only use prescribed optional parts. The installationfailure or incorrect function of equipment.must be carried out by the qualified installer.• Be sure to use the cables conformed to safetyIf you install the system by yourself, it can cause seriousstandard and cable ampacity for power distribution trouble such as water leaks, electric shocks, fire.work.• Be sure to wear protective goggles and gloves whileUnconformable cables can cause electric leak, anomalous at work.heat production or fire.• Earth leakage breaker must be installed.If the earth leakage breaker is not installed, it can causeelectric shocks.• Do not bundling, winding or processing for the power • Do not perform any change of protective device itselfcord. Or, do not deforming the power plug due to or its setup condition.tread it.The forced operation by short-circuiting protective device ofThis may cause fire or heating.pressure switch and temperature controller or the use of• Do not run the unit with removed panels ornon specified component can cause fire or burst.protections.Touching rotating equipments, hot surfaces or high voltageparts can cause personal injury due to entrapment, burn orelectric shocks.CAUTIONInsufficient space can result in accident such as personal • When perform the air conditioner operation (coolinginjury due to falling from the installation place.or drying operation) in which ventilator is installed in• Take care when carrying the unit by hand.the room. In this case, using the air conditioner inIf the unit weights more than 20kg, it must be carried by two parallel with the ventilator, there is the possibility thator more persons. Do not carry by the plastic straps, always drain water may backflow in accordance with theuse the carry handle when carrying the unit by hand. Use room lapse into the negative pressure status.gloves to minimize the risk of cuts by the aluminum fins. Therefore, set up the opening port such as• Dispose of any packing materials correctly.incorporate the air into the room that may appropriateAny remaining packing materials can cause personal injury to ventilation (For example; Open the door a little). Inas it contains nails and wood. And to avoid danger of addition, just as above, so set up the opening port ifsuffocation, be sure to keep the plastic wrapper away from the room lapse into negative pressure status due tochildren and to dispose after tear it up.register of the wind for the high rise apartment etc.• Be sure to insulate the refrigerant pipes so as not tocondense the ambient air moisture on them.Insufficient insulation can cause condensation, which canlead to moisture damage on the ceiling, floor, furniture andany other valuables.• Locations where any machines which generate high • Locations with any obstacles which can prevent inlet andfrequency harmonics are used.outlet air of the unit.• Locations with salty atmospheres such as coastlines. • Locations where short circuit of air can occur (in case of• Locations with heavy snow (If installed, be sure to provide multiple units installation).base flame and snow hood mentioned in the manual). • Locations where strong air blows against the air outlet of• Locations where the unit is exposed to chimney smoke. outdoor unit.• Locations at high altitude (more than 1000m high). • Locations where something located above the unit could• Locations with ammonic atmospheres.fall.• Locations where heat radiation from other heat source can It can cause remarkable decrease in performance, corrosionaffect the unit.and damage of components, malfunction and fire.• Locations without good air circulation.INSTALLATION <strong>MANUAL</strong> FOR OUTDOOR UNIT• This installation manual deals with outdoor units and general installation specifications only. For indoor units, refer to the respective installation manuals supplied with the units.• When install the unit, be sure to check whether the selection of installation place, power supply specifications, usage limitation (piping length, height differences betweenindoor and outdoor units, power supply voltage and etc.) and installation spaces.• Read the “SAFETY PRECAUTIONS” carefully first of all and strictly follow it during the installationwork in order to protect yourself.• The precautionary items mentioned below are distinguished into two levels,CAUTIONWARNINGCAUTIONBoth mentions the important items to protect your health and safety so strictly follow them byany means.• Be sure to confirm no anomaly on the equipment by commissioning after completed installationand explain the operating methods as well as the maintenance methods of this equipment tothe user according to the owner’s manual.• Installation must be carried out by the qualifiedinstaller.If you install the system by yourself, it may cause serioustrouble such as water leaks, electric shocks, fire andpersonal injury, as a result of a system malfunction. Do notcarry out the installation and maintenance work except theby qualified installer.• Install the system in full accordance with theinstallation manual.Incorrect installation may cause bursts, personal injury,water leaks, electric shocks and fire.• Be sure to use only for household and residence.If this appliance is installed in inferior environment such asmachine shop and etc., it can cause malfunction.• When installing in small rooms, take preventionmeasures not to exceed the density limit of refrigerantin the event of leakage, referred by the formula(accordance with ISO5149).If the density of refrigerant exceeds the limit, please consultthe dealer and install the ventilation system, otherwise lackof oxygen can occur, which can cause serious accident.• Use the original accessories and the specifiedcomponents for installation.If parts other than those prescribed by us are used, It maycause water leaks, electric shocks, fire and personal injury.• Install the unit in a location with good support.Unsuitable installation locations can cause the unit to falland cause material damage and personal injury.• Ensure the unit is stable when installed, so that it canwithstand earthquakes and strong winds.Unsuitable installation locations can cause the unit to falland cause material damage and personal injury.• Ventilate the working area well in the event ofrefrigerant leakage during installation.If the refrigerant comes into contact with naked flames,poisonous gas is produced.• Ensure that no air enters in the refrigerant circuitwhen the unit is installed and removed.If air enters in the refrigerant circuit, the pressure in therefrigerant circuit becomes too high, which can cause burstand personal injury.• Do not processing, splice the power cord, or share asocket with other power plugs.This may cause fire or electric shock due to defectingcontact, defecting insulation and over-current etc.• Carry out the electrical work for ground lead with care.Do not connect the ground lead to the gas line, water line, lightning conductor or telephone line’s ground lead. Incorrect grounding can cause unit faults such as electric shocks due toshort-circuiting.• Use the circuit breaker of correct capacity. Circuitbreaker should be the one that disconnect all polesunder over current.Using the incorrect one could cause the system failure andfire.• Install isolator or disconnect switch on the powersupply wiring in accordance with the local codes andregulations.The isolator should be locked in OFF state in accordancewith EN60204-1.• After maintenance, all wiring, wiring ties and the like,should be returned to their original state and wiringroute, and the necessary clearance from all metalparts should be secured.• Secure a space for installation, inspection andmaintenance specified in the manual.• Do not install the unit in the locations listed below.• Locations where carbon fiber, metal powder or anypowder is floating.• Locations where any substances that can affect the unitsuch as sulphide gas, chloride gas, acid and alkaline canoccur.• Vehicles and ships.• Locations where cosmetic or special sprays are oftenused.• Locations with direct exposure of oil mist and steam suchas kitchen and machine plant.Chec• Model• Refrige• Piping• Indoor1234AcceGromDrainVariaVariaNote: Prodia1CASInsIns•••
eadableCNERSEDe units.sition.rmm.nnotvice.on,g thent ofctricectedfterationjuriesonushileeitselfice ofoftolingd innthatpriate). Inrt iftotc.t ande oflet ofouldrosion'11 • SCM-SM-110CAUTION• Do not install the outdoor unit in the locations listed handled.• Do not use any materials other than a fuse with thebelow.Corrosive gas can cause corrosion of heat exchanger, correct rating in the location where fuses are to be• Locations where discharged hot air or operating sound of breakage of plastic parts and etc. And combustible gas can used.the outdoor unit can bother neighborhood.cause fire.Connecting the circuit with copper wire or other metal• Locations where outlet air of the outdoor unit blows • Do not install nor use the system close to thethread can cause unit failure and fire.directly to plants. The outlet air can affect adversely to the equipment that generates electromagnetic fields or • Do not touch any buttons with wet hands.plant etc.high frequency harmonics.It can cause electric shocks.• Locations where vibration can be amplified andEquipment such as inverters, standby generators, medical • Do not touch any refrigerant pipes with your handstransmitted due to insufficient strength of structure. high frequency equipments and telecommunicationwhen the system is in operation.• Locations where vibration and operation sound generated equipments can affect the system, and cause malfunctions During operation the refrigerant pipes become extremely hotby the outdoor unit can affect seriously (on the wall or at and breakdowns. The system can also affect medical or extremely cold depending the operating condition, and itthe place near bed room).equipment and telecommunication equipment, and obstruct can cause burn injury or frost injury.• Locations where an equipment affected by high harmonics its function or cause jamming.• Do not touch the suction or aluminum fin on theis placed (TV set or radio receiver is placed within 1m). • Do not install the outdoor unit in a location where outdoor unit.• Locations where drainage cannot run off safely.insects and small animals can inhabit.This may cause injury.It can affect surrounding environment and cause a claim. Insects and small animals can enter the electric parts and • Do not put anything on the outdoor unit and operating• Do not install the unit near the location where leakage cause damage or fire. Instruct the user to keep theunit.of combustible gases can occur.surroundings clean.This may cause damage the objects or injury due to fallingIf leaked gases accumulate around the unit, it can cause fire. • Do not use the base flame for outdoor unit which is to the object.• Do not install the unit where corrosive gas (such as corroded or damaged due to long periods of• Do not use the unit for special purposes such assulfurous acid gas etc.) or combustible gas (such as operation.storing foods, cooling precision instruments andthinner and petroleum gases) can accumulate or Using an old and damage base flame can cause the unit preservation of animals, plants or art.collect, or where volatile combustible substances are falling down and cause personal injury.• Do not clean up the unit with water.Check before installation workOption parts Q’ty Necessary tools for the installation work9 Wrench key (Hexagon) [4m/m]10 Vacuum pumpa Sealing plate1 1 Plus headed driverVacuum pump adapter (Anti-reverse flow type)11b Sleeve1 2 Knife(Designed specifically for R410A)Accessories for outdoor unit Q’tyc Inclination plate1 3 Saw12 Gauge manifold (Designed specifically for R410A)d Putty1 4 Tape measure13 Charge hose (Designed specifically for R410A)Grommet (Heat pump type only) 2 Drain hose (extension5 Hammer14 Flaring tool set (Designed specifically for R410A)e1Drain elbow (Heat pump type only) 1 hose)6 Spanner wrench15 Gas leak detector (Designed specifically for R410A)Variable diameter joint9.5212.7 3 Piping cover (for insulation 7 Torque wrench [14.0~82.0N·m (1.4~8.2kgf·m)] Gauge for projection adjustment (Used when flare isf116Variable diameter joint9.5215.88 2 of connection piping)8 Hole core drill (65mm in diameter)made by using conventional flare tool)• This model requires normally a minimum of 4 indoor units.CAUTION • This model requires a minimum of 3 indoor units in case of SRK-ZK-S, SRK-ZJX-S, FDEN type combination only.• This model requires a minimum of 2 indoor units in case of SRK71ZK-S type only.1 SELECTION OF INSTALLATION LOCATIONInstall at location that meets the following conditions after getting approval from the customer.Where the following installation space is available, and where air Installation Space (on a flat surface)does not gather.Where rain and sunlight do not directly hit the unit, and where Walls surrounding the unit in the four sides are not acceptable.there is enough air circulation.There must be a 1-meter or large space in the above.Also, where the unit cannot be buried by snow.Where a danger of short-circuiting exists, install guide louvers.A location which can sustain the weight of the unit, and where When more than one unit are installed, provide sufficient intake spacenoises and vibrations are not enhanced.consciously so that short-circuiting may not occur. Where blasts of cold or hot air and noise do not bother the When piling snow can bury the outdoor unit, provide proper snow guards.neighbors.Where the unit does not receive heat radiation from other heat(mm)sources.Examples ofAir intake L3installation L2Where there are no obstructions (animals, plants, etc.) to theDemensionsNo obstaclessuction inlet and blowing outlet.(Service space forL1 Open Open 500Airelectrical parts)Where water may drain out.L2 300 5 Openintake Please avoid the following locations.L3 150 300 150Air outlet( Servicespace ) L1Where there is constant exposure to harsh winds such as thetop floors of a building. Also, locations with exposure to salty air.Where there are oil splashes, vapor, and smoke.Where there are possibilities of flammable gas leaks.InstallationIn installing the unit, fix the unit’s legs with bolts specified on Anchor bolt fixed position Notabilia for installationthe right.76The protrusion of an anchor bolt on the front side must be kept15Intakewithin 15 mm.Fasten withSecurely install the unit so that it does not fall over duringbolts (M10-12)earthquakes or strong winds, etc.Refer to the right illustrations for information regardingconcrete foundations.Install the unit in a level area. (With a gradient of 5 mm or less.)OutletUse a long block to Use a thicker block toImproper installation can result in a compressor failure, broken190 580 200extend the width.anchor deeper.piping within the unit and abnormal noise generation.97073• Model name and power source• Refrigerant piping length• Piping, wiring and miscellaneous small parts• Indoor unit installation manual1234Note: Provide flare nuts when using the variablediameter joint (for 12.7,15.88).3701941044819
900.54 A Sinonap Re AftProc(1) Sp(2) Cv(3) Fpi(4) Al5(5) R(6) R(7) E7HHeaFiniBRMakoutBecan[CorrIndooEAREarshoThedanTow
TerminalcoverScrewnit F2 33nit Folpethatof amilaralue.'11 • SCM-SM-1104 AIR PURGING NOTE : Fully open the operation valves (on both liquid and gas sides) after completing air purging. Since the system uses service ports differing in diameter from those found Please use an anti-reverse flow type vacuum pump adapter so as to preventon the conventional models, a charge hose (for R22) presently in use is notvacuum pump oil from running back into the system. Oil running back intoapplicable. Please use one designed specifically for R410A.an air-conditioning system may cause the refrigerant cycle to break down. Remove the cap on both gas and liquid sides before starting operation.Conduct air purging for all connected indoor units. After completing the operation, do not forget to tighten the cap (gas may leak).Operation ValveCompound pressure gaugeCapPressure gaugeOperation ValveProcedureGauge Manifold(two-way valve)-0.1MPa(Designed specifically for R410A)(-76cmHg)(1) Secure all flare nuts on both indoor and outdoor sides toHandle LoHandle Hi.prevent leaks from the pipes.Operation Valve(2) Connect the operation valves, charge hose, manifoldCharge hoseOperation valve(three-way valve)(Designed specifically for R410A)valve and vacuum pump as shown in the right figure.for room FVacuum pump adapter(3) Fully open the handle Lo for the manifold valve, andOperation valveOperation Valve(Anti-reverse flow type)pump a vacuum for 15 minutes. Ensure that the meterfor room ECap(Designed specifically for R410A)is indicating -0.1MPa (-76cmHg).Operation valve(4) After vacuuming, fully open the operation valve (bothfor room DCheck jointVacuum pumpCharge hoseliquid and gas sides) with a hexagon wrench.Operation valve(Designed specifically for R410A)for room COperation valve Securely tighten the operation valve cap and the check joint blind nut after adjustment.for room BOperation valve size Operation valve cap Check joint blind nutOperation valve(mm)tightening torque (N·m) tightening torque (N·m)for room AOpenOpen6.35 (1/4")20 30(5) Remove the charge hose from service port.9.52 (3/8")10 12(6) Repeat the above steps (1) ~ (5) for all connected indoor units.12.7 (1/2")25 35(7) Ensure that there are no gas leaks from the joints in the indoor and outdoor units.15.88 (5/8") 30 405 HEAT INSULATION FOR JOINTS6 TEST RUN AND HANDLING INSTRUCTIONSHeat insulation for jointsInstallation test check pointsVinyltapePosition sothe slitCover the joint withCheck the following points again after completion of the installation, and beforecomes on top.insulation materialturning on the power.for the indoor unitand tape it.Conduct a test run again and ensure that the unit operates properly.At the same time, explain to the customer how to use the unit and how to takecare of the unit following the installation manual.If the compressor does not operate after the operation has started, wait for 5-10Finish and fixingminutes. (This may be due to delayed start.)(Three-minutes restart preventive timer)Pipe clampApply exterior tape andWhen the air conditioner is restarted or when changing the operation, the unit willPipesshape along the placenot start operating for approximately 3minutes. This is to protect the unit and it isExterior tapewhere the pipes will benot a malfunction.routed. Secure to the wallCrossover wireswith a pipe clamp. BeAfter installationDrain hosecareful not to damage theThe power supply voltage is correct as the rating.Tapping screwpipes and the wires.No gas leaks from the joints of the operation valve.Power cables and crossover wires are securely fixed to the terminal board.Each indoor and outdoor unit is properly connected (no wrong wiring or piping).Operation valve is fully open. Refrigerant has been additionally charged (when the total pipe length exceeds7BEWARE OF WRONG CONNECTIONS INthe refrigerant charged pipe length).The pipe joints for indoor and outdoor pipes have been insulated.REFRIGERANT PIPING AND WIRINGEarthing work has been conducted properly.Make sure to match the piping and wiring from each unit to theThe screw of the service panel is tightened securely.outdoor unit.Test runBe careful because if connections are wrong, normal operationAir conditioning and heating are normal.cannot be achieved and may damage the compressor.No abnormal noise.Water drains smoothly.Protective functions are not working.[Correct connections] [Example of wrong connections] Operation of the unit has been explained to the customer.The remote control is normal.PipingIndoor unitWiringIndoor unitOperation of indicator lampsunit Funit FINDICATION LAMPCOLORFUNCTIONLED 1REDWARNING LAMPunit Eunit ESELF DIAGNOSIS FUNCTION BY LED EFF1 TIME FLASH CURRENT CUTEEunit Dunit D2 TIME FLASHOutdoorTROUBLE OF OUTDOOR UNITDD Outdoorunit CC unit4 TIME FLASH TRANSMISSION ERROR IN OUTDOOR UNIT PCBC unitunit CBB5 TIME FLASH OVER HEAT OF COMPRESSORAA6 TIME FLASH ERROR OF SIGNAL TRANSMISSIONunit Bunit B8 TIME FLASH SENSOR ERROR (EXCEPT DISCHARGE PIPE SENSOR)LIGHT ONOUTDOOR FAN MOTOR ERRORunit Aunit AFOUR SEC LIGHTANDDISCHARGE PIPE SENSOR ERRORFOUR SEC OFFEARTHING WORKEarth work shall be carried out without fail in order to prevent electricshock and noise generation.The connection of the earth cable to the following substances causesdangerous failures, therefore it shall never be done. (City water pipe,Town gas pipe, TV antenna, lightning conductor, telephoneline, etc.)RPC012A918 C
5.2 Indoor units(1) Wall mounted tyde (SRK)(a) Models SRK20~35ZJX-S, 50, 60ZJX-S1• This installation manual illustrates the method of installing an indoorunit.• For electrical wiring work, please see instructions set out on thebackside.• For outdoor unit installation and refrigerant piping, please refer topage 157 to 172.• Read the “SAFETY PRECAUTIONS” carefully first of all and strictly follow itduring the installation work in order to protect yourself.• The precautionary items mentioned below are distinguished into two levels,WARNING and CAUTION .WARNING : Wrong installation would cause serious consequences suchas injuries or death.CAUTION : Wrong installation might cause serious consequencesdepending on circumstances.Both mentions the important items to protect your health and safety so strictlyfollow them by any means.• Be sure to confirm no anomaly on the equipment by commissioning after completedinstallation and explain the operating methods as well as the maintenancemethods of this equipment to the user according to the owner’s manual.SAFETY PRECAUTIONS• Installation must be carried out by the qualified installer.If you install the system by yourself, it may cause serious trouble such aswater leaks, electric shocks, fire and personal injury, as a result of a system• A wired remote control unit is supplied separately as an optional part.• When install the unit, be sure to check whether the selection ofinstallation place, power supply specifications, usage limitation (pipinglength, height differences between indoor and outdoor units, powersupply voltage and etc.) and installation spaces.• Keep the installation manual together with owner’s manual at a place whereany user can read at any time. Moreover if necessary, ask to hand them to anew user.• For installing qualified personnel, take precautions in respect to themselves byusing suitable protective clothing, groves, etc., and then perform theinstallation works.• Please pay attention not to fall down the tools, etc. when installing the unit atthe high position.• If unusual noise can be heard during operation, consult the dealer.• The meanings of “Marks” used here are shown as follows:WARNINGNever do it under anycircumstances.RKY012A007B CAlways do it according to theinstruction.• Tighten the flare nut by torque wrench with specified method.If the flare nut were tightened with excess torque, this may cause burst andrefrigerant leakage after a long period.malfunction. Do not carry out the installation and maintenance work except • The electrical installation must be carried out by the qualifiedthe by qualified installer.electrician in accordance with “the norm for electrical work” and• Install the system in full accordance with the installation manual. “national wiring regulation”, and the system must be connected toIncorrect installation may cause bursts, personal injury, water leaks, electric the dedicated circuit.shocks and fire.Power supply with insufficient capacity and incorrect function done by• Be sure to use only for household and residence.improper work can cause electric shocks and fire.If this appliance is installed in inferior environment such as machine shop • Be sure to shut off the power before starting electrical work.and etc., it can cause malfunction.Failure to shut off the power can cause electric shocks, unit failure or• Use the original accessories and the specified components for incorrect function of equipment.installation.• Be sure to use the cables conformed to safety standard and cableIf parts other than those prescribed by us are used, It may cause water ampacity for power distribution work.leaks, electric shocks, fire and personal injury.Unconformable cables can cause electric leak, anomalous heat production• Install the unit in a location with good support.or fire.Unsuitable installation locations can cause the unit to fall and cause • This appliance must be connected to main power supply by meansmaterial damage and personal injury.of a circuit breaker or switch (fuse:16A) with a contact separation of• Ventilate the working area well in the event of refrigerant leakage at least 3mm.during installation.• When plugging this appliance, a plug conforming to the normIf the refrigerant comes into contact with naked flames, poisonous gas is IEC60884-1 must be used.produced.• Use the prescribed cables for electrical connection, tighten the• When installing in small rooms, take prevention measures not to cables securely in terminal block and relieve the cables correctlyexceed the density limit of refrigerant in the event of leakage, to prevent overloading the terminal blocks.referred by the formula (accordance with ISO5149).Loose connections or cable mountings can cause anomalous heatIf the density of refrigerant exceeds the limit, please consult the dealer and production or fire.install the ventilation system, otherwise lack of oxygen can occur, which • Arrange the wiring in the control box so that it cannot be pushed upcan cause serious accident.further into the box. Install the service panel correctly.• After completed installation, check that no refrigerant leaks from Incorrect installation may result in overheating and fire.the system.• Be sure to switch off the power supply in the event of installation,If refrigerant leaks into the room and comes into contact with an oven or inspection or servicing.other hot surface, poisonous gas is produced.If the power supply is not shut off, there is a risk of electric shocks, unit• Use the prescribed pipes, flare nuts and tools for R410A.failure or personal injury due to the unexpected start of fan.Using existing parts (for R22 or R407C) can cause the unit failure and • Be sure to wear protective goggles and gloves while at work.serious accidents due to burst of the refrigerant circuit.• Earth leakage breaker must be installed.If the earth leakage breaker is not installed, it can cause electric shocks.CAUTION• Carry out the electrical work for ground lead with care.Do not connect the ground lead to the gas line, water line, lightning conductor or telephone line’s ground lead. Incorrect grounding can cause unit faultssuch as electric shocks due to short-circuiting.Improper installation of indoor unit can cause dropping water into the roomand damaging personal property.• Install the drainage pipe to run off drainage securely according tothe installation manual.Incorrect installation of the drainage pipe can cause dropping water into theroom and damaging personal property.• Be sure to install the drainage pipe with descending slope of 1/100or more, and not to make traps and air-bleedings.Check if the drainage runs off securely during commissioning and ensurethe space for inspection and maintenance.• Secure a space for installation, inspection and maintenancespecified in the manual.Insufficient space can result in accident such as personal injury due to• Use the circuit breaker of correct capacity. Circuit breaker should falling from the installation place.be the one that disconnect all poles under over current.• For installation work, be careful not to get injured with the heatUsing the incorrect one could cause the system failure and fire.exchanger, piping flare portion or screws etc.• Install isolator or disconnect switch on the power supply wiring in • Be sure to insulate the refrigerant pipes so as not to condense theaccordance with the local codes and regulations.ambient air moisture on them.The isolator should be locked in OFF state in accordance with EN60204-1. Insufficient insulation can cause condensation, which can lead to moisture• Be sure to install indoor unit properly according to the installation damage on the ceiling, floor, furniture and any other valuables.manual in order to run off the drainage smoothly.• When perform the air conditioner operation (cooling or drying operation)in which ventilator is installed in the room. In this case, using theair conditioner in parallel with the ventilator, there is the possibilitythat drain water may backflow in accordance with the room lapse intothe negative pressure status. Therefore, set up the opening port suchas incorporate the air into the room that may appropriate to ventilation(For example; Open the door a little). In addition, just as above, soset up the opening port if the room lapse into negative pressure statusdue to register of the wind for the high rise apartment etc.• Be sure to perform air tightness test by pressurizing with nitrogengas after completed refrigerant piping work.If the density of refrigerant exceeds the limit in the event of refrigerantleakage in the small room, lack of oxygen can occur, which can causeserious accidents.- 173 - '11 • SCM-SM-110• Do not put the drainage pipe directly into drainage channels where • Do not processing, splice the power cord, or share a socket withpoisonous gases such as sulphide gas can occur.other power plugs.Poisonous gases will flow into the room through drainage pipe and This may cause fire or electric shock due to defecting contact, defectingseriously affect the user’s health and safety. This can also cause the insulation and over-current etc.corrosion of the indoor unit and a resultant unit failure or refrigerant leak. • Do not bundling, winding or processing for the power cord. Or, do• Ensure that no air enters in the refrigerant circuit when the unit is not deforming the power plug due to tread it.installed and removed.This may cause fire or heating.If air enters in the refrigerant circuit, the pressure in the refrigerant circuitbecomes too high, which can cause burst and personal injury.WARNING• Do not vent R410A into the atmosphere : R410A is a fluorinated • Do not perform any change of protective device itself or its setupgreenhouse gas, covered by the Kyoto Protocol with Grovalcondition.Warming Potential (GWP)=1975.The forced operation by short-circuiting protective device of pressure• Do not run the unit with removed panels or protections.switch and temperature controller or the use of non specified componentTouching rotating equipments, hot surfaces or high voltage parts can cause can cause fire or burst.personal injury due to entrapment, burn or electric shocks.• Do not install the unit in the locations listed below.If leaked gases accumulate around the unit, it can cause fire.• Locations where carbon fiber, metal powder or any powder is floating. • Do not install the unit where corrosive gas (such as sulfurous acid• Locations where any substances that can affect the unit such as sulphide gas etc.) or combustible gas (such as thinner and petroleum gases)gas, chloride gas, acid and alkaline can occur.can accumulate or collect, or where volatile combustible• Vehicles and ships.substances are handled.• Locations where cosmetic or special sprays are often used.Corrosive gas can cause corrosion of heat exchanger, breakage of plastic• Locations with direct exposure of oil mist and steam such as kitchen and parts and etc. And combustible gas can cause fire.machine plant.• Do not use the indoor unit at the place where water splashes may• Locations where any machines which generate high frequency harmonics occur such as in laundries.are used.Since the indoor unit is not waterproof, it can cause electric shocks and fire.• Locations with salty atmospheres such as coastlines.• Do not install nor use the system close to the equipment that• Locations with heavy snow (If installed, be sure to provide base flame and generates electromagnetic fields or high frequency harmonics.snow hood mentioned in the manual).Equipment such as inverters, standby generators, medical high frequency• Locations where the unit is exposed to chimney smoke.equipments and telecommunication equipments can affect the system, and• Locations at high altitude (more than 1000m high).cause malfunctions and breakdowns. The system can also affect medical• Locations with ammonic atmospheres.equipment and telecommunication equipment, and obstruct its function or• Locations where heat radiation from other heat source can affect the unit. cause jamming.• Locations without good air circulation.• Do not place any variables which will be damaged by getting wet• Locations with any obstacles which can prevent inlet and outlet air of the unit. under the indoor unit.• Locations where short circuit of air can occur (in case of multiple units When the relative humidity is higher than 80% or drainage pipe is clogged,installation).condensation or drainage water can drop and it can cause the damage of• Locations where strong air blows against the air outlet of outdoor unit. valuables.• Locations where something located above the unit could fall.• Do not install the remote control at the direct sunlight.It can cause remarkable decrease in performance, corrosion and damage It can cause malfunction or deformation of the remote control.of components, malfunction and fire.• Do not use the unit for special purposes such as storing foods,• Do not install the indoor unit in the locations listed below (Be sure cooling precision instruments and preservation of animals, plants orto install the indoor unit according to the installation manual for art.each model because each indoor unit has each limitation).It can cause the damage of the items.• Locations with any obstacles which can prevent inlet and outlet air of the • Do not use any materials other than a fuse with the correct ratingunit.in the location where fuses are to be used.• Locations where vibration can be amplified due to insufficient strength of Connecting the circuit with copper wire or other metal thread can causestructure.unit failure and fire.• Locations where the infrared receiver is exposed to the direct sunlight or • Do not touch any buttons with wet hands.the strong light beam (in case of the infrared specification unit).It can cause electric shocks.• Locations where an equipment affected by high harmonics is placed (TV • Do not touch any refrigerant pipes with your hands when theset or radio receiver is placed within 5m).system is in operation.• Locations where drainage cannot run off safely.During operation the refrigerant pipes become extremely hot or extremelyIt can affect performance or function and etc.cold depending the operating condition, and it can cause burn injury or• Do not install the unit near the location where leakage offrost injury.combustible gases can occur.
BEFORE INSTALLATION Before installation check that the power supply matches the air conditioner.- 174 - '11 • SCM-SM-11012345678910111213Standard accessories (Installation kit)Accessories for indoor unitInstallation board(Attached to the rear of the indoor unit)Wireless remote controlRemote control holderTapping screws(for installation board 4dia. by 25mm)Wood screw(for remote control switch holder 3.5(mm). by 16mm)Battery [R03(AAA,Micro) 1.5V]Air-cleaning filtersFilter holders(Attached to the front panel of indoor unit)Insulation (#486 50 x 100 t3)Sealing plateSleeveInclination platePuttyOption partsDrain hose (extention hose)Piping cover(for insulation of connection piping)Necessary tools for the installation workPlus headed driverKnifeSawTape measureHammerSpanner wrenchTorque wrenchHole core drill (65mm in diameter)Wrench key (Hexagon) [4m/m]Flaring tool setGas leak detectorGauge for projection adjustmentUsed when flare is made by using( conventional flare tool )Pipe bender(14.0 ~ 61.0N·m(1.4 ~ 6.1kgf·m)Designed( )for R410AspecificallyDesigned specifically( )for R410A)Q'ty111422221Q'ty111111SELECTION OF INSTALLATION LOCATION(Install at location that meets the following conditions, after getting approval from the customer)Indoor unit Where there is no obstructions to the air flow and where the cooled and heated air can be evenly distributed. A solid place where the unit or the wall will not vibrate. A place where there will be enough space for servicing. (Where space mentioned below can be secured) Where wiring and the piping work will be easy to conduct. The place where receiving part is not exposed to the direct rays of the sun or the strong rays of the street lighting. A place where it can be easily drained. A place separated at least 1m away from the television or the radio. (To prevent interference to images and sounds.) Places where this unit is not affected by the high frequency equipment or electric equipment. Avoid installing this unit in place where there is much oil mist. Places where there is no electric equipment or household under the installing unit.Wireless remote control A place where the air conditioner can be received the signal surely during operating the wireless remote control. Places where there is no affected by the TV and radio etc. Do not place where exposed to direct sunlight or near heat devices such as a stove.CAUTIONINSTALLATION OF INDOOR UNITInstallation of Installation boardLook for the inside wall structures (Intersediats support or pillar and finallyinstall the unit after level surface has been checked.)Level position (2 locations)Mating mark forlevel surfaceDrilling of holes and fixture of sleeve (Option parts) Drill a hole with whole core drill.Installing the support of pipingIn case of piping in the right rear direction Hold the bottom of the Tape only the portionpiping and fix direction that goes through thebefore stretching it and wall.shaping it. Always tape the wiringwith the piping.Sufficient care must be taken not to damagethe panel when connecting pipes.450Fixing on concrete wallUse of nut anchorUse of bolt anchorBolt(M6 12)MountingboardStandard holePiping in the left rear directionPiping in the left direction5 cm minimumfrom the wallWhen drilling the wall that contains a metal lath, wire lath or metal plate, be sure to use pipe hole sleeve sold separately.Indoor side65Shaping of pipingsPipingsDrain hoseOutdoor side5Nut(M6)MountingboardMax.10 In case of rear piping draw out, cut off the lowerand the right side portions of the sleeve collar.Taping of the exteriorb Topb cThicknese of the wall + 1.5cm• Matters of special notice when piping from left or central/rear of tha unit.[Top view][Drain hose changing procedures]Remove the screw anddrain hose, making itrotate.Left-hand-side piping Remove it with hand orpilers.Completely seal the hole onthe wall with putty. Otherwise,furniture, or other, may bewetted by leaked water ordewing.aTurn totightenIndoor sidePiping in the right rear direction Insert the drain cap which was removedat procedure “2” securely using ahexagonal wrench etc.Note: Be careful that If it is not Insertedsecurely, water leakage mayoccur.Wireless remote controlRemote control holderWood screwsPiping in the right direction7.0 cm minimum from the ceilingSleeve(sold separately)INSTALLATION SPACE (INDOOR UNIT)49222.55012048Space forservice220Installation board10 cm minimumfrom the wallRelation between setting plate and indoor unitRight-hand-side piping1. Remove the drain hose. 2. Remove the drain cap. 3. Insert the drain cap. 4. Connect the drain hose.puttyAdjustment of the installation board in the horizontaldirection is to be conducted with four screws in a temporarytightened state.Adjust so the board will be level by turning the board withthe standard hole as the center.Nothing is connected to thishole on the back of indoorunit.Indoor side Outdoor side Installed stateOutdoor sideputtyPiping for Liquid (20 to 60 type) : ø6.35Piping for Gas (20 to 35 type) : ø9.52(50 to 60 type) : ø12.7(FRONT VIEW)Indoor unitInstallation boardSpace forservice 100650120450 22035 3558 54Piping hole (ø65) Insert the drain hose securely,making rotate. And install thescrew.Note: Be careful that If it is notInserted securely, waterleakage may occur.Drain hose (ø16) 520.8Piping for Gas 491.1Piping for Liquid 559.1Piping hole (ø65)70 Space for service487.7295.715 Space for service5.6Piping is possible in the rear, left,left rear, left downward, right ordownward direction.RightRearDownward Left rear LeftLeft downward
Fixing of indoor unitIndoor unitLatch(2 locations)Installation Steps1 Pass the pipe throughthe hole in the wall,and hook the upperpart of the indoor unitto the installation board.• How to remove the indoor unit from the installation boardPush up at the marked portion of the indoor unit base lower latch, and slightly pull ittoward you. (both right and left hand sides) (The indoor unit base lower latch can beremoved from the installation board)Push up the indoor unit upward. So the indoor unit will be removed from the installationboard.Since this air conditioner has been designed to collect dew drops on the rearsurface to the drain pan, do not attach the power cord above the gutter.DrainageGutterPipe accommodating sectionWallInstallation boradWallInstallationborad2 Gently push the lowerpart to secure the unit. Arrange the drain hose in a downward angle Avoid the following drain piping.CAUTION Go through all installation steps and check if thedrainage is all right. Otherwise water leak may occur.Indoor unit base lower latchThe marked portion of the indoorunit base lower latch.Higher than specifiedThe drain hosetip is in water.WavyThe gap to the ground is5 cm or less.Odor fromthe gutterThe drain hosetip is in the gutter. Pour water to the drain pan located under the heat exchanger, and ensure that the water is discharged outdoor. When the extended drain hose is indoor, securely insulate it with a heat insulator available in the market.CONNECTION OF REFRIGERANT PIPINGSPreparationIndoor(Do not turn)Keep the openings of the pipes covered with tapes etc. to prevent dust, sand, etc. from entering them.PressRemove90 ± 0.5°ADimension ALiquid side ø6.35 : 9.1 (mm)Gas side ø9.52 : 13.2 (mm)ø12.7 : 16.6 (mm)CAUTIONDo not apply refrigerating machineoil to the flared surface.• Flaring workMeasurement BCopper pipe diameterø6.35ø9.52ø12.7Clutch type flare tool forR410A0.0 - 0.50.0 - 0.50.0 - 0.5Measurement B (mm)Conventional (R22) flare toolClutch type Wing nut type1.0 - 1.51.5 - 2.01.0 - 1.51.0 - 1.51.5 - 2.02.0 - 2.5CAUTIONDo not apply excess torque to the flared nuts.Otherwise, the flared nuts may checkdepending. Remove the flared nuts. (on both liquid and gas sides)Connection Install the removed flared nuts to the pipes to be connected,then flared the pipes.Insulation of the connection portionFlaringblockCopper pipeUse a flare tool designed for R410A or a conventional flare tool.Please note that measurement B (protrusion from the flaring block) will vary depending on thetype of a flare tool in use.If a coventional flare tool is used, please use a copper pipe gauge or a similar instrument tocheck protrusion so that you can keep measurement B to a correct value.IndoorLiquid sideGas sideCover the coupling with insulator and then cover it with tapes.Vinyl tapeUse an attached insulation pad for heat insulation.Finishing work and fixing(Do not turn) Connect the pipes on both liquid and gas sides. Tighten the nuts to the following torque.Liquid side (ø6.35) : 14.0 - 18.0 N·m (1.4 - 1.8 kgf·m)Gas side (ø9.52) : 34.0 - 42.0 N·m (3.4 - 4.2 kgf·m)(ø12.7) : 49.0 - 61.0 N·m (4.9 - 6.1 kgf·m)Position it so that the slit area faces upward.• Cover the indoor unit’s flare-connected joints, after they are checked for a gas leak, with an indoorunit heat insulating material and then wrap them with a tape with an attached insulation pad placedover the heat insulating material’s slit area.Wood screwClampRefrigerant pipingConnection wiring,Earth wiringOuter tapeDrain hoseCover the exterior portion with outer tape andshape the piping so it will match the contoursof the route that the piping to take.Also fix the wiring and pipings to the wall withclamps.Open/close and detachment/attachment of the air inlet panelHow to remove and fit the front panel- 175 - '11 • SCM-SM-110 To open, pull the panel at both ends of lower partand release latches, then pull up the panel untilyou feel resistance.(The panel stops at approx. 60 open position) To close, hold the panel at both ends of lowerpart to lower downward and push it slightly untilthe latch works. To remove, pull up the panel to the positionshown in right illustration and pull it toward you. To install, insert the panel arm into the slot on thefront panel from the position shown in rightillustration, hold the panel at both ends of lowerpart, lower it downward slowly, then push itslightly until the latch warks. Removing Remove the air inlet panel. Remove the 5 set screws. Remove the 4 latches in the upper section. Move the lower part of the panel forward andpush upwards to remove. Fitting Do remove the air filter. Cover the body with the front panel. Fit the 4 latches in the upper section. Tighten the 5 set screws. Fit the air filter. Fit the air inlet panel.Set screwslatch
ELECTRICAL WIRING WORKPreparation of indoor unitMounting of connecting wires Open the air inlet panel. Remove the service panel. Remove the wiring clamp Connect the connecting wire securely to the terminal block.1 ) Connect the connection wire securely to the terminalblock. If the wire is not affixed completely, contact will bepoor, and it is dangerous as the terminal block may heatup and catch fire.2 ) Take care not to confuse the terminal numbers for indoorand outdoor connections.3 ) Fix the connection wire using the wiring clamp. Fix the connecting wire by wiring clamp. Attach the service panel. Close the air inlet panel.CAUTIONIn case of faulty wiring connection, the indoor unit stops, andthen the run lamp turns on and the timer lamp blinks.Use cables for interconnection wiring to avoid loosening of thewires.CENELEC code for cables Required field cables.H05RNR4G1.5 (example) or 245IEC57H Harmonized cable type05 300/500 voltsR Natural-and/or synth, rubber wire insulationN Polychloroprene rubber conductors insulationR Stranded core4or5 Number of conductorsG One conductor of the cable is the earth conductor(yellow/green)1.5 Section of copper wire (mm 2 )The screw of the service panel is tightened securely.Service panelTerminal blockClampInstalling the air-cleaning filters1. Open the air inlet panel and remove the air filters.2. Install the filter holders, with the air-cleaning filters installed in the holders.In the air conditioner.• Each air-cleaning filter can be installed in the left or right filter holder.3. Install the air filters and close the inlet panel.Air-cleaning filterFilter holderINSTALLATION OF REMOTE CONTROL SWITCHMounting method of battery- 176 - '11 • SCM-SM-110CAUTIONDo not use new andold batteries together. BatteryCoverFixing to pillar or wall○Conventionally, operate the remote control switch by holding in your hand.○Avoid installing it on a clay wall etc. Wireless remote control Wood screw3.5 16INSTALLATION TEST CHECK POINTSCheck the following points again after completion of the installation, and before turning on the power. Conduct a test run again and ensure that the unit operates properly.At the same time, explain to the customer how to use the unit and how to take care of the unit following the user's manual.After installationThe power supply voltage is correct as the rating.No gas leaks from the joints of the operational valve.Power cables and crossover wires are securely fixed to the terminal board.The screw of the service panel is tightened securely.Operational valve is fully open.The pipe joints for indoor and outdoor pipes have been insulated.Test runAir conditioning operation is normal.No abnormal noise.Water drains smoothly.Protective functions are not working.The remote control is normal.Operation of the unit has been explained to the customer.(Three-minutes restart preventive timer)When the air conditioner is restarted or when changing the operation, the unitwill not start operating for approximately 3 minutes.This is to protect the unit and it is not a malfunction.HOW TO RELOCATE OR DISPOSE OF THE UNITCONCERNING TERMINAL CONNECTION FOR AN INTERFACE In order to protect the environment, be sure to pump down (recovery of refrigerant). Pump down is the method of recovering refrigerant from the indoor unit to theoutdoor unit when the pipes are removed from the unit. Connect charge hose to service port of outdoor unit. Liquid side : Close the liquid valve with hexagon wrench key.Gas side : Fully open the gas valveCarry out cooling operation . (If indoor temperature is low, operateforced cooling operation.) After low pressure gauge become 0.01MPa, stop cooling operationand close the gas valve.Forced cooling operationTurn on a power supply again after a while after turn off a power supply.Then press continually the ON/OFF button 5 seconds or more.Unit ON/OFF button Remove the front panel and lid of control. There is a terminal (respectively marked with CNS) for the indoor control board.In connecting an interface, connect to the respective terminal securely with the connection harness suppliedwith an optional “Interface connection kit SC-BIKN-E” and fasten the connection harness onto the indoor controlbox with the clamp supplied with the kit.For more details, please refer to the user's manual of your “Interface connection kit SC-BIKN-E”.
(b) Models SRK25ZJR-S, 35ZJR-SWALL TYPE AIR CONDITIONERR410A REFRIGERANT USEDSRK20ZJ-S, 25ZJ-S, 35ZJ-S, 50ZJ-SRLA012A012BINSTALLATION <strong>MANUAL</strong> FOR INDOOR UNIT• This installation manual illustrates the method of installing an indoorunit.• For electrical wiring work, please see instructions set out on thebackside.• For outdoor unit installation and refrigerant piping, please refer refer to the toinstallation page 157 to manual 172. that comes with your outdoor unit.• Read the “SAFETY PRECAUTIONS” carefully first of all and strictly follow itduring the installation work in order to protect yourself.• The precautionary items mentioned below are distinguished into two levels,WARNING and CAUTION .WARNING : Wrong installation would cause serious consequences suchas injuries or death.CAUTION : Wrong installation might cause serious consequencesdepending on circumstances.Both mentions the important items to protect your health and safety so strictlyfollow them by any means.• Be sure to confirm no anomaly on the equipment by commissioning after completedinstallation and explain the operating methods as well as the maintenancemethods of this equipment to the user according to the owner’s manual.SAFETY PRECAUTIONS• A wired remote control unit is supplied separately as an optional part.• When install the unit, be sure to check whether the selection ofinstallation place, power supply specifications, usage limitation (pipinglength, height differences between indoor and outdoor units, powersupply voltage and etc.) and installation spaces.• Keep the installation manual together with owner’s manual at a place whereany user can read at any time. Moreover if necessary, ask to hand them to anew user.• For installing qualified personnel, take precautions in respect to themselves byusing suitable protective clothing, groves, etc., and then perform theinstallation works.• Please pay attention not to fall down the tools, etc. when installing the unit atthe high position.• If unusual noise can be heard during operation, consult the dealer.• The meanings of “Marks” used here are shown as follows:WARNINGNever do it under anycircumstances.Always do it according to theinstruction.• Installation must be carried out by the qualified installer.• Tighten the flare nut by torque wrench with specified method.If you install the system by yourself, it may cause serious trouble such as If the flare nut were tightened with excess torque, this may cause burst andwater leaks, electric shocks, fire and personal injury, as a result of a system refrigerant leakage after a long period.malfunction. Do not carry out the installation and maintenance work except • The electrical installation must be carried out by the qualifiedthe by qualified installer.electrician in accordance with “the norm for electrical work” and• Install the system in full accordance with the installation manual. “national wiring regulation”, and the system must be connected toIncorrect installation may cause bursts, personal injury, water leaks, electric the dedicated circuit.shocks and fire.Power supply with insufficient capacity and incorrect function done by• Be sure to use only for household and residence.improper work can cause electric shocks and fire.If this appliance is installed in inferior environment such as machine shop • Be sure to shut off the power before starting electrical work.and etc., it can cause malfunction.Failure to shut off the power can cause electric shocks, unit failure or• Use the original accessories and the specified components for incorrect function of equipment.installation.• Be sure to use the cables conformed to safety standard and cableIf parts other than those prescribed by us are used, It may cause water ampacity for power distribution work.leaks, electric shocks, fire and personal injury.Unconformable cables can cause electric leak, anomalous heat production• Install the unit in a location with good support.or fire.Unsuitable installation locations can cause the unit to fall and cause • This appliance must be connected to main power supply by meansmaterial damage and personal injury.of a circuit breaker or switch (fuse:16A) with a contact separation of• Ventilate the working area well in the event of refrigerant leakage at least 3mm.during installation.• When plugging this appliance, a plug conforming to the normIf the refrigerant comes into contact with naked flames, poisonous gas is IEC60884-1 must be used.produced.• Use the prescribed cables for electrical connection, tighten the• When installing in small rooms, take prevention measures not to cables securely in terminal block and relieve the cables correctly toexceed the density limit of refrigerant in the event of leakage, prevent overloading the terminal blocks.referred by the formula (accordance with ISO5149).Loose connections or cable mountings can cause anomalous heatIf the density of refrigerant exceeds the limit, please consult the dealer and production or fire.install the ventilation system, otherwise lack of oxygen can occur, which • Arrange the wiring in the control box so that it cannot be pushed upcan cause serious accident.further into the box. Install the service panel correctly.• After completed installation, check that no refrigerant leaks from Incorrect installation may result in overheating and fire.the system.• Be sure to switch off the power supply in the event of installation,If refrigerant leaks into the room and comes into contact with an oven or inspection or servicing.other hot surface, poisonous gas is produced.If the power supply is not shut off, there is a risk of electric shocks, unit• Use the prescribed pipes, flare nuts and tools for R410A.failure or personal injury due to the unexpected start of fan.Using existing parts (for R22 or R407C) can cause the unit failure and • Be sure to wear protective goggles and gloves while at work.serious accidents due to burst of the refrigerant circuit.• Earth leakage breaker must be installed.If the earth leakage breaker is not installed, it can cause electric shocks.- 177 - '11 • SCM-SM-110• Do not put the drainage pipe directly into drainage channels where • Do not processing, splice the power cord, or share a socket withpoisonous gases such as sulphide gas can occur.other power plugs.Poisonous gases will flow into the room through drainage pipe andThis may cause fire or electric shock due to defecting contact, defectingseriously affect the user’s health and safety. This can also cause the insulation and over-current etc.corrosion of the indoor unit and a resultant unit failure or refrigerant leak. • Do not bundling, winding or processing for the power cord. Or, do• Ensure that no air enters in the refrigerant circuit when the unit is not deforming the power plug due to tread it.installed and removed.This may cause fire or heating.If air enters in the refrigerant circuit, the pressure in the refrigerant circuitbecomes too high, which can cause burst and personal injury.• Do not vent R410A into the atmosphere : R410A is a fluorinatedgreenhouse gas, covered by the Kyoto Protocol with GrovalWarming Potential (GWP)=1975.• Do not run the unit with removed panels or protections.Touching rotating equipments, hot surfaces or high voltage parts can causepersonal injury due to entrapment, burn or electric shocks.• Use the circuit breaker of correct capacity. Circuit breaker shouldbe the one that disconnect all poles under over current.Using the incorrect one could cause the system failure and fire.• Install isolator or disconnect switch on the power supply wiring inaccordance with the local codes and regulations.The isolator should be locked in OFF state in accordance with EN60204-1.• Be sure to install indoor unit properly according to the installationmanual in order to run off the drainage smoothly.Improper installation of indoor unit can cause dropping water into the roomand damaging personal property.• Install the drainage pipe to run off drainage securely according tothe installation manual.Incorrect installation of the drainage pipe can cause dropping water into theroom and damaging personal property.• Be sure to install the drainage pipe with descending slope of 1/100or more, and not to make traps and air-bleedings.Check if the drainage runs off securely during commissioning and ensurethe space for inspection and maintenance.• Secure a space for installation, inspection and maintenancespecified in the manual.Insufficient space can result in accident such as personal injury due toWARNING• Do not perform any change of protective device itself or its setupcondition.The forced operation by short-circuiting protective device of pressureswitch and temperature controller or the use of non specified componentcan cause fire or burst.CAUTION• Carry out the electrical work for ground lead with care.Do not connect the ground lead to the gas line, water line, lightning conductor or telephone line’s ground lead. Incorrect grounding can cause unit faultssuch as electric shocks due to short-circuiting.falling from the installation place.• For installation work, be careful not to get injured with the heatexchanger, piping flare portion or screws etc.• Be sure to insulate the refrigerant pipes so as not to condense theambient air moisture on them.Insufficient insulation can cause condensation, which can lead to moisturedamage on the ceiling, floor, furniture and any other valuables.• When perform the air conditioner operation (cooling or drying operation)in which ventilator is installed in the room. In this case, using theair conditioner in parallel with the ventilator, there is the possibilitythat drain water may backflow in accordance with the room lapse intothe negative pressure status. Therefore, set up the opening port suchas incorporate the air into the room that may appropriate to ventilation(For example; Open the door a little). In addition, just as above, soset up the opening port if the room lapse into negative pressure statusdue to register of the wind for the high rise apartment etc.• Be sure to perform air tightness test by pressurizing with nitrogengas after completed refrigerant piping work.If the density of refrigerant exceeds the limit in the event of refrigerantleakage in the small room, lack of oxygen can occur, which can causeserious accidents.• Do not install the unit in the locations listed below.If leaked gases accumulate around the unit, it can cause fire.• Locations where carbon fiber, metal powder or any powder is floating. • Do not install the unit where corrosive gas (such as sulfurous acid• Locations where any substances that can affect the unit such as sulphide gas etc.) or combustible gas (such as thinner and petroleum gases)gas, chloride gas, acid and alkaline can occur.can accumulate or collect, or where volatile combustible• Vehicles and ships.substances are handled.• Locations where cosmetic or special sprays are often used.Corrosive gas can cause corrosion of heat exchanger, breakage of plastic• Locations with direct exposure of oil mist and steam such as kitchen and parts and etc. And combustible gas can cause fire.machine plant.• Do not use the indoor unit at the place where water splashes may• Locations where any machines which generate high frequency harmonics occur such as in laundries.are used.Since the indoor unit is not waterproof, it can cause electric shocks and fire.• Locations with salty atmospheres such as coastlines.• Do not install nor use the system close to the equipment that• Locations with heavy snow (If installed, be sure to provide base flame and generates electromagnetic fields or high frequency harmonics.snow hood mentioned in the manual).Equipment such as inverters, standby generators, medical high frequency• Locations where the unit is exposed to chimney smoke.equipments and telecommunication equipments can affect the system, and• Locations at high altitude (more than 1000m high).cause malfunctions and breakdowns. The system can also affect medical• Locations with ammonic atmospheres.equipment and telecommunication equipment, and obstruct its function or• Locations where heat radiation from other heat source can affect the unit. cause jamming.• Locations without good air circulation.• Do not place any variables which will be damaged by getting wet• Locations with any obstacles which can prevent inlet and outlet air of the unit. under the indoor unit.• Locations where short circuit of air can occur (in case of multiple units When the relative humidity is higher than 80% or drainage pipe is clogged,installation).condensation or drainage water can drop and it can cause the damage of• Locations where strong air blows against the air outlet of outdoor unit. valuables.• Locations where something located above the unit could fall.• Do not install the remote control at the direct sunlight.It can cause remarkable decrease in performance, corrosion and damage It can cause malfunction or deformation of the remote control.of components, malfunction and fire.• Do not use the unit for special purposes such as storing foods,• Do not install the indoor unit in the locations listed below (Be sure cooling precision instruments and preservation of animals, plants orto install the indoor unit according to the installation manual for art.each model because each indoor unit has each limitation).It can cause the damage of the items.• Locations with any obstacles which can prevent inlet and outlet air of the • Do not use any materials other than a fuse with the correct rating inunit.the location where fuses are to be used.• Locations where vibration can be amplified due to insufficient strength of Connecting the circuit with copper wire or other metal thread can causestructure.unit failure and fire.• Locations where the infrared receiver is exposed to the direct sunlight or • Do not touch any buttons with wet hands.the strong light beam (in case of the infrared specification unit).It can cause electric shocks.• Locations where an equipment affected by high harmonics is placed (TV • Do not touch any refrigerant pipes with your hands when theset or radio receiver is placed within 1m).system is in operation.• Locations where drainage cannot run off safely.During operation the refrigerant pipes become extremely hot or extremelyIt can affect performance or function and etc.cold depending the operating condition, and it can cause burn injury or• Do not install the unit near the location where leakage offrost injury.combustible gases can occur.BEFORE INSTALLATION Before installation check that the power supply matches the air conditioner.Standard accessories (Installation kit)SELECTION OF INSTALLATION LOCATION(Install at location that meets the following conditions, after getting approval from the customer)Indoor unit Where there is no obstructions to the air flow and where the cooled and heated air can be evenly distributed.5 cm minimumfrom the wall6.5 cm minimum from the ceilingInstallation board
seriously affect the user’s health and safety. This can also cause thecorrosion of the indoor unit and a resultant unit failure or refrigerant leak.• Ensure that no air enters in the refrigerant circuit when the unit isinstalled and removed.If air enters in the refrigerant circuit, the pressure in the refrigerant circuitbecomes too high, which can cause burst and personal injury.insulation and over-current etc.• Do not bundling, winding or processing for the power cord. Or, donot deforming the power plug due to tread it.This may cause fire or heating.• Locations where an equipment affected by high harmonics is placed (TVset or radio receiver is placed within 1m).• Locations where drainage cannot run off safely.It can affect performance or function and etc.• Do not install the unit near the location where leakage ofcombustible gases can occur.• Do not touch any refrigerant pipes with your hands when thesystem is in operation.During operation the refrigerant pipes become extremely hot or extremelycold depending the operating condition, and it can cause burn injury orfrost injury.BEFORE INSTALLATION Before installation check that the power supply matches the air conditioner.12345678912345678910111213Standard accessories (Installation kit)Accessories for indoor unitInstallation board(Attached to the rear of the indoor unit)Wireless remote controlRemote control holderTapping screws(for installation board ø4 X 25mm)Wood screws(for remote control switch holder ø3.5 X 16mm)Battery [R03 (AAA, Micro) 1.5V]Air-cleaning filtersFilter holders(Attached to the front panel of indoor unit)Insulation (#486 50 x 100 t3)Sealing plateSleeveInclination platePuttyOption partsDrain hose (extension hose)Piping cover(for insulation of connection piping)Necessary tools for the installation workPlus headed driverKnifeSawTape measureHammerSpanner wrenchTorque wrenchHole core drill (65mm in diameter)Wrench key (Hexagon) [4m/m]Flaring tool setGas leak detectorGauge for projection adjustmentUsed when flare is made by usingconventional flare toolPipe bender(14.0 ~ 61.0N·m(1.4 ~ 6.1kgf·m)Designed specifically( for R410A )Designed specifically( for R410A )( ))Q’ty111522221Q’ty111111SELECTION OF INSTALLATION LOCATION(Install at location that meets the following conditions, after getting approval from the customer)Indoor unit Where there is no obstructions to the air flow and where the cooled and heated air can be evenly distributed. A solid place where the unit or the wall will not vibrate. A place where there will be enough space for servicing. (Where space mentioned below can be secured) Where wiring and the piping work will be easy to conduct. The place where receiving part is not exposed to the direct rays of the sun or the strong rays of the street lighting. A place where it can be easily drained. A place separated at least 1m away from the television or the radio. (To prevent interference to images and sounds.) Places where this unit is not affected by the high frequency equipment or electric equipment. Avoid installing this unit in place where there is much oil mist. Places where there is no electric equipment or household under the installing unit.Wireless remote control A place where the air conditioner can be received the signal surely during operating the wireless remote control. Places where there is no affected by the TV and radio etc. Do not place where exposed to direct sunlight or near heat devices such as a stove.INSTALLATION OF INDOOR UNITInstallation of Installation boardLook for the inside wall structures (Intermediats support or pillarand firmly install the unit after level surface has been checked.)Level position (2 locations)Mating mark forlevel surface Adjustment of the installation board in the horizontal direction is tobe conducted with four screws in a temporary tightened state. Adjust so the board will belevel by turning the board Standardwith the standard hole as holethe center.- 178 - '11 • SCM-SM-110Drilling of holes and fixture of sleeve (Option parts)When drilling the wall that contains a metal lath, wire lath or metal plate, be sure to use pipe hole sleeve sold separately.ø65Installing the support of pipingIn case of piping in the right rear directionShaping of pipingsPipingsDrain hoseTaping of the exteriorSufficient care must be taken not to damagethe panel when connecting pipes.5Piping in the left rear directionPiping in the left directionFixing on concrete wallUse of nut anchorUse of bolt anchorBolt(M6 12)Mountingboardb Topb cPiping in the right rear directionPiping in the right directionPiping is possible in the rear, left, left rear, left downward, right or downward direction.RightRearDownward LeftrearLeft downwardNut(M6)MountingboardMax.10Indoor side Outdoor side Thickness of the wall + 1.5cmIndoor side Outdoor side Installed state Drill a hole with whole core drill. Hold the bottom of thepiping and fix directionbefore stretching it andshaping it.450 In case of rear piping draw out, cut off the lowerand the right side portions of the sleeve collar. Tape only the portionthat goes through thewall. Always tape the wiringwith the piping.aLeftTurn totighten5 cm minimumfrom the wallCAUTIONCompletely seal the hole onthe wall with putty. Otherwise,furniture, or other, may bewetted by leaked water ordewing.Indoor sideWireless remote controlRemote control holderWood screwsSleeve(sold separately)Relation between setting plate and indoor unitINSTALLATION SPACE (INDOOR UNIT) (FRONT VIEW)Piping for Liquid (20 to 50 type) : ø6.35Piping for Gas (20 to 35 type) : ø9.52(50 type) : ø12.76.5 cm minimum from the ceilingInstallation board10 cm minimumfrom the wall• Matters of special notice when piping from left or central/rear of the unit.[Top view][Drain hose changing procedures]Left-hand-side pipingRight-hand-side piping1. Remove the drain hose 2. Remove the drain cap.puttyputty Remove the screw and drain hose,making it rotate.Indoor unitInstallation board50 Space for serviceSpace for service 100139 450 209106.5 585 106.548.947Outdoor side55Piping hole (ø65)55Piping for Gas 403.6Piping for Liquid 471.6Drain hose (ø16) 531.8Piping hole (ø65) Remove it with hand or pliers.3. Insert the drain cap. 4. Connect the drain hose. Insert the drain cap which was removed Insert the drain hose securely, makingat procedure “2” securely using arotate. And install the screw.hexagonal wrench etc.Note: Be careful that If it is not InsertedNote: Be careful that If it is not Insertedsecurely, water leakage maysecurely, water leakage may occur. occur.Space for service654715 Space for service7.2 279.1 7.7
RLA012A012BFixing of indoor unitLatch (2 locations)Indoor unit1Installation StepsPass the pipe throughthe hole in the wall,and hook the upperpart of the indoor unitto the installation board.• How to remove the indoor unit from the installation board1 Push up at the marked portion of the indoor unit base lower latch, and slightlypull it toward you. (both right and left hand sides) (The indoor unit base lowerlatch can be removed from the installation board)2 Push up the indoor unit upward. So the indoor unit will be removed from theinstallation board.Since this air conditioner has been designed to collect dew drops on the rearsurface to the drain pan, do not attach the power cord above the gutter.GutterPipe accommodating sectionWall2Gently push the lowerpart to secure the unit.Drainage Arrange the drain hose in a downward angle. Avoid the following drain piping.CAUTIONGo through all installation steps and check if thedrainage is all right. Otherwise water leak may occur.Installation boardWallInstallation boardOdor fromthe gutterIndoor unit base latchThe marked portion of the indoor unit base lower latch.Higher than specifiedThe drain hosetip is in water. Pour water to the drain pan located under the heat exchanger, and ensure that the water is discharged outdoor. When the extended drain hose is indoor, securely insulate it with a heat insulator available in the market.WavyThe gap to the ground is5 cm or less.The drain hosetip is in the gutter.CONNECTION OF REFRIGERANT PIPINGSPreparationKeep the openings of the pipes covered with tapes etc. to prevent dust, sand, etc. from entering them.ConnectionInsulation of the connection portionIndoor(Do not turn)PressRemove90 ± 0.5˚ADimension ALiquid side ø6.35 : 9.1 (mm)Gas side ø9.52 : 13.2 (mm)ø12.7 : 16.6 (mm)CAUTIONDo not apply refrigerating machineoil to the flared surface.IndoorLiquid sideGas side(Do not turn)Cover the coupling with insulator and then cover it with tapes.- 179 - '11 • SCM-SM-110Vinyl tapeUse an attached insulation pad for heat insulation. Remove the flared nuts. (on both liquid and gas sides)• Flaring workFlaringblockMeasurement BCopper pipeCopper pipe diameterø6.35ø9.52ø12.7 Install the removed flared nuts to the pipes to be connected,then flared the pipes.Clutch type flare tool forR410A0.0 - 0.50.0 - 0.50.0 - 0.5Measurement B (mm)Conventional (R22) flare toolClutch typeWing nut type1.0 - 1.51.5 - 2.01.0 - 1.51.0 - 1.51.5 - 2.02.0 - 2.5Use a flare tool designed for R410A or a conventional flare tool.Please note that measurement B (protrusion from the flaring block) will vary depending on thetype of a flare tool in use.If a conventional flare tool is used, please use a copper pipe gauge or a similar instrument tocheck protrusion so that you can keep measurement B to a correct value. Connect the pipes on both liquid and gas sides. Tighten the nuts to the following torque.Liquid side (ø6.35) : 14.0 - 18.0 N·m (1.4 - 1.8 kgf·m)Gas side (ø9.52) : 34.0 - 42.0 N·m (3.4 - 4.2 kgf·m)(ø12.7) : 49.0 - 61.0 N·m (4.9 - 6.1 kgf·m)CAUTIONDo not apply excess torque to the flared nuts.Otherwise, the flared nuts may check depending.Finishing work and fixingRefrigerant pipingConnection wiring,Earth wiringOuter tapeDrain hoseWood screwClampPosition it so that the slit area faces upward.• Cover the indoor unit s flare-connected joints, after they are checked for a gas leak,with an indoor unit heat insulating material and then wrap them with a tape with anattached insulation pad placed over the heat insulating material’s slit area.Cover the exterior portion with outer tape andshape the piping so it will match the contoursof the route that the piping to take.Also fix the wiring and pipings to the wall withclamps.Open/close and detachment/attachment of the air inlet panel To open, pull the panel at both ends of lower partand release latches, then pull up the panel untilyou feel resistance.(The panel stops at approx. 60° open position) To close, hold the panel at both ends of lowerpart to lower downward and push it slightly untilthe latch works. To remove, pull up the panel to the positionshown in right illustration and pull it toward you. To install, insert the panel arm into the slot on thefront panel from the position shown in rightillustration, hold the panel at both ends of lowerpart, lower it downward slowly, then push itslightly until the latch works.How to remove and fit the front panel Removing1 Remove the air inlet panel.2 Remove the 2 set screws.3 Remove the 3 latches in the upper section.4 Move the lower part of the panel forward andpush upwards to remove. Fitting1 Do remove the air filter.2 Cover the body with the front panel.3 Fit the 3 latches in the upper section.4 Tighten the 2 set screws.5 Fit the air filter.6 Fit the air inlet panel.Set screwsELECTRICAL WIRING WORKThe screws of the lid and the terminalcover are tightened securely.LidInstalling the air-cleaning filters
illustration, hold the panel at both ends of lowerpart, lower it downward slowly, then push itslightly until the latch works.4 Tighten the 2 set screws.5 Fit the air filter.6 Fit the air inlet panel.Set screwsELECTRICAL WIRING WORKPreparation of indoor unitMounting of connecting wires1234567Remove the lid.Remove the terminal cover.Remove the wiring clamp.Connect the connecting wire securely to the terminal block.1) Connect the connection wire securely to the terminalblock. If the wire is not affixed completely, contact will bepoor, and it is dangerous as the terminal block may heatup and catch fire.2) Take care not to confuse the terminal numbers for indoorand outdoor connections.Fix the connecting wire by wiring clamp.Attach the terminal cover.Attach the lid.CAUTIONIn case of faulty wiring connection, the indoor unit stops, andthen the run lamp turns on and the timer lamp blinks.Use cables for interconnection wiring to avoid loosening of thewires.CENELEC code for cables Required field cables.H05RNR4G1.5 (example) or 245IEC57H Harmonized cable type05 300/500 voltsR Natural-and/or synth, rubber wire insulationN Polychloroprene rubber conductors insulationR Stranded core4or5 Number of conductorsG One conductor of the cable is the earth conductor(yellow/green)1.5 Section of copper wire (mm 2 )The screws of the lid and the terminalcover are tightened securely.1 2 N 3Terminal blockClampLidTerminalcoverInstalling the air-cleaning filters1. Open the air inlet panel and remove the air filters.2. Install the filter holders, with the air-cleaning filters installed in the holders.In the air conditioner.• Each air-cleaning filter can be installed in the left or right filter holder.3. Install the air filters and close the inlet panel.Air-cleaning filterFilter holderINSTALLATION OF WIRELESS CONTROLMounting method of battery Uncover the wireless remote control, and mount the batteries[R03 (AAA, Micro), 2 pieces] in the body regularly.(Fit the poles with the indication marks, & without fail) Conventionally, operate the wireless remote control by holdingin your hand. Avoid installing it on a clay wall etc.- 180 - '11 • SCM-SM-110CAUTIONDo not use new andold batteries together.6 BatteryCoverFixing to pillar or wall2 Wireless remote control5 Wood screwsø3.5 X 16INSTALLATION TEST CHECK POINTSCheck the following points again after completion of the installation, and before turning on the power. Conduct a test run again and ensure that the unit operates properly.At the same time, explain to the customer how to use the unit and how to take care of the unit following the user’s manual.After installationThe power supply voltage is correct as the rating.No gas leaks from the joints of the operation valve.Power cables and crossover wires are securely fixed to the terminal board.The screws of the lid and the terminal cover are tightened securely.Operation valve is fully open.The pipe joints for indoor and outdoor pipes have been insulated.Test runAir conditioning operation is normal.No abnormal noise.Water drains smoothly.Protective functions are not working.The remote control is normal.Operation of the unit has been explained to the customer.(Three-minutes restart preventive timer)When the air conditioner is restarted or when changing the operation, the unitwill not start operating for approximately 3 minutes.This is to protect the unit and it is not a malfunction.HOW TO RELOCATE OR DISPOSE OF THE UNITCONCERNING TERMINAL CONNECTION FOR AN INTERFACE In order to protect the environment, be sure to pump down (recovery of refrigerant). Pump down is the method of recovering refrigerant from the indoor unit to theoutdoor unit when the pipes are removed from the unit.1 Connect charge hose to check joint of outdoor unit.2 Liquid side : Close the liquid valve with hexagon wrench key.Gas side : Fully open the gas valve.Carry out cooling operation. (If indoor temperature is low, operateforced cooling operation.)3 After low pressure gauge become 0.01MPa, stop cooling operationand close the gas valve.• Forced cooling operationTurn on a power supply again after a while after turn off a power supply.Then press continually the ON/OFF button 5 seconds or more.1 Remove the front panel and lid of control.2 Remove the control.3 There is a terminal (respectively marked with CNS) for the indoor control board.In connecting an interface, connect to the respective terminal securely with the connection harnesssupplied with an optional “Interface connection kit SC-BIKN-E” and fasten the connection harnessonto the indoor control box with the clamp supplied with the kit.For more details, please refer to the user’s manual of your “Interface connection kit SC-BIKN-E”.CNS terminalIndoor unit PCBLid of controlUnit ON/OFF button
(c) Model SRK71ZK-SRKW012A400AWALL TYPE AIR CONDITIONERR410A REFRIGERANT USEDINSTALLATION <strong>MANUAL</strong> FOR INDOOR UNIT• This installation manual illustrates the method of installing an indoorunit.• For electrical wiring work, please see instructions set out on thebackside.• For outdoor unit installation and refrigerant piping, please refer refer to the topage installation 169. manual that comes with your outdoor unit.• Read the “SAFETY PRECAUTIONS” carefully first of all and strictly follow itduring the installation work in order to protect yourself.• The precautionary items mentioned below are distinguished into two levels,WARNING and CAUTION .WARNING : Wrong installation would cause serious consequences suchas injuries or death.CAUTION : Wrong installation might cause serious consequencesdepending on circumstances.Both mentions the important items to protect your health and safety so strictlyfollow them by any means.• Be sure to confirm no anomaly on the equipment by commissioning after completedinstallation and explain the operating methods as well as the maintenancemethods of this equipment to the user according to the owner’s manual.SAFETY PRECAUTIONS• A wired remote control unit is supplied separately as an optional part.• When install the unit, be sure to check whether the selection ofinstallation place, power supply specifications, usage limitation (pipinglength, height differences between indoor and outdoor units, powersupply voltage and etc.) and installation spaces.• Keep the installation manual together with owner’s manual at a place whereany user can read at any time. Moreover if necessary, ask to hand them to anew user.• For installing qualified personnel, take precautions in respect to themselves byusing suitable protective clothing, groves, etc., and then perform theinstallation works.• Please pay attention not to fall down the tools, etc. when installing the unit atthe high position.• If unusual noise can be heard during operation, consult the dealer.• The meanings of “Marks” used here are shown as follows:WARNINGNever do it under anycircumstances.Always do it according to theinstruction.• Installation must be carried out by the qualified installer.• Tighten the flare nut by torque wrench with specified method.If you install the system by yourself, it may cause serious trouble such as If the flare nut were tightened with excess torque, this may cause burst andwater leaks, electric shocks, fire and personal injury, as a result of a system refrigerant leakage after a long period.malfunction. Do not carry out the installation and maintenance work except • The electrical installation must be carried out by the qualifiedthe by qualified installer.electrician in accordance with “the norm for electrical work” and• Install the system in full accordance with the installation manual. “national wiring regulation”, and the system must be connected toIncorrect installation may cause bursts, personal injury, water leaks, electric the dedicated circuit.shocks and fire.Power supply with insufficient capacity and incorrect function done by• Be sure to use only for household and residence.improper work can cause electric shocks and fire.If this appliance is installed in inferior environment such as machine shop • Be sure to shut off the power before starting electrical work.and etc., it can cause malfunction.Failure to shut off the power can cause electric shocks, unit failure or• Use the original accessories and the specified components for incorrect function of equipment.installation.• Be sure to use the cables conformed to safety standard and cableIf parts other than those prescribed by us are used, It may cause water ampacity for power distribution work.leaks, electric shocks, fire and personal injury.Unconformable cables can cause electric leak, anomalous heat production• Install the unit in a location with good support.or fire.Unsuitable installation locations can cause the unit to fall and cause • This appliance must be connected to main power supply by meansmaterial damage and personal injury.of a circuit breaker or switch (fuse:20A) with a contact separation of• Ventilate the working area well in the event of refrigerant leakage at least 3mm.during installation.• When plugging this appliance, a plug conforming to the normIf the refrigerant comes into contact with naked flames, poisonous gas is IEC60884-1 must be used.produced.• Use the prescribed cables for electrical connection, tighten the• When installing in small rooms, take prevention measures not to cables securely in terminal block and relieve the cables correctly toexceed the density limit of refrigerant in the event of leakage, prevent overloading the terminal blocks.referred by the formula (accordance with ISO5149).Loose connections or cable mountings can cause anomalous heatIf the density of refrigerant exceeds the limit, please consult the dealer and production or fire.install the ventilation system, otherwise lack of oxygen can occur, which • Arrange the wiring in the control box so that it cannot be pushed upcan cause serious accident.further into the box. Install the service panel correctly.• After completed installation, check that no refrigerant leaks from Incorrect installation may result in overheating and fire.the system.• Be sure to switch off the power supply in the event of installation,If refrigerant leaks into the room and comes into contact with an oven or inspection or servicing.other hot surface, poisonous gas is produced.If the power supply is not shut off, there is a risk of electric shocks, unit• Use the prescribed pipes, flare nuts and tools for R410A.failure or personal injury due to the unexpected start of fan.Using existing parts (for R22 or R407C) can cause the unit failure and • Be sure to wear protective goggles and gloves while at work.serious accidents due to burst of the refrigerant circuit.• Earth leakage breaker must be installed.If the earth leakage breaker is not installed, it can cause electric shocks.- 181 - '11 • SCM-SM-110• Do not put the drainage pipe directly into drainage channels where • Do not processing, splice the power cord, or share a socket withpoisonous gases such as sulphide gas can occur.other power plugs.Poisonous gases will flow into the room through drainage pipe andThis may cause fire or electric shock due to defecting contact, defectingseriously affect the user’s health and safety. This can also cause the insulation and over-current etc.corrosion of the indoor unit and a resultant unit failure or refrigerant leak. • Do not bundling, winding or processing for the power cord. Or, do• Ensure that no air enters in the refrigerant circuit when the unit is not deforming the power plug due to tread it.installed and removed.This may cause fire or heating.If air enters in the refrigerant circuit, the pressure in the refrigerant circuitbecomes too high, which can cause burst and personal injury.• Do not vent R410A into the atmosphere : R410A is a fluorinatedgreenhouse gas, covered by the Kyoto Protocol with GrovalWarming Potential (GWP)=1975.• Do not run the unit with removed panels or protections.Touching rotating equipments, hot surfaces or high voltage parts can causepersonal injury due to entrapment, burn or electric shocks.• Use the circuit breaker of correct capacity. Circuit breaker shouldbe the one that disconnect all poles under over current.Using the incorrect one could cause the system failure and fire.• Install isolator or disconnect switch on the power supply wiring inaccordance with the local codes and regulations.The isolator should be locked in OFF state in accordance with EN60204-1.• Be sure to install indoor unit properly according to the installationmanual in order to run off the drainage smoothly.Improper installation of indoor unit can cause dropping water into the roomand damaging personal property.• Install the drainage pipe to run off drainage securely according tothe installation manual.Incorrect installation of the drainage pipe can cause dropping water into theroom and damaging personal property.• Be sure to install the drainage pipe with descending slope of 1/100or more, and not to make traps and air-bleedings.Check if the drainage runs off securely during commissioning and ensurethe space for inspection and maintenance.• Secure a space for installation, inspection and maintenancespecified in the manual.Insufficient space can result in accident such as personal injury due toWARNING• Do not perform any change of protective device itself or its setupcondition.The forced operation by short-circuiting protective device of pressureswitch and temperature controller or the use of non specified componentcan cause fire or burst.CAUTION• Carry out the electrical work for ground lead with care.Do not connect the ground lead to the gas line, water line, lightning conductor or telephone line’s ground lead. Incorrect grounding can cause unit faultssuch as electric shocks due to short-circuiting.falling from the installation place.• For installation work, be careful not to get injured with the heatexchanger, piping flare portion or screws etc.• Be sure to insulate the refrigerant pipes so as not to condense theambient air moisture on them.Insufficient insulation can cause condensation, which can lead to moisturedamage on the ceiling, floor, furniture and any other valuables.• When perform the air conditioner operation (cooling or drying operation)in which ventilator is installed in the room. In this case, using theair conditioner in parallel with the ventilator, there is the possibilitythat drain water may backflow in accordance with the room lapse intothe negative pressure status. Therefore, set up the opening port suchas incorporate the air into the room that may appropriate to ventilation(For example; Open the door a little). In addition, just as above, soset up the opening port if the room lapse into negative pressure statusdue to register of the wind for the high rise apartment etc.• Be sure to perform air tightness test by pressurizing with nitrogengas after completed refrigerant piping work.If the density of refrigerant exceeds the limit in the event of refrigerantleakage in the small room, lack of oxygen can occur, which can causeserious accidents.• Do not install the unit in the locations listed below.If leaked gases accumulate around the unit, it can cause fire.• Locations where carbon fiber, metal powder or any powder is floating. • Do not install the unit where corrosive gas (such as sulfurous acid• Locations where any substances that can affect the unit such as sulphide gas etc.) or combustible gas (such as thinner and petroleum gases)gas, chloride gas, acid and alkaline can occur.can accumulate or collect, or where volatile combustible• Vehicles and ships.substances are handled.• Locations where cosmetic or special sprays are often used.Corrosive gas can cause corrosion of heat exchanger, breakage of plastic• Locations with direct exposure of oil mist and steam such as kitchen and parts and etc. And combustible gas can cause fire.machine plant.• Do not use the indoor unit at the place where water splashes may• Locations where any machines which generate high frequency harmonics occur such as in laundries.are used.Since the indoor unit is not waterproof, it can cause electric shocks and fire.• Locations with salty atmospheres such as coastlines.• Do not install nor use the system close to the equipment that• Locations with heavy snow (If installed, be sure to provide base flame and generates electromagnetic fields or high frequency harmonics.snow hood mentioned in the manual).Equipment such as inverters, standby generators, medical high frequency• Locations where the unit is exposed to chimney smoke.equipments and telecommunication equipments can affect the system, and• Locations at high altitude (more than 1000m high).cause malfunctions and breakdowns. The system can also affect medical• Locations with ammonic atmospheres.equipment and telecommunication equipment, and obstruct its function or• Locations where heat radiation from other heat source can affect the unit. cause jamming.• Locations without good air circulation.• Do not place any variables which will be damaged by getting wet• Locations with any obstacles which can prevent inlet and outlet air of the unit. under the indoor unit.• Locations where short circuit of air can occur (in case of multiple units When the relative humidity is higher than 80% or drainage pipe is clogged,installation).condensation or drainage water can drop and it can cause the damage of• Locations where strong air blows against the air outlet of outdoor unit. valuables.• Locations where something located above the unit could fall.• Do not install the remote control at the direct sunlight.It can cause remarkable decrease in performance, corrosion and damage It can cause malfunction or deformation of the remote control.of components, malfunction and fire.• Do not use the unit for special purposes such as storing foods,• Do not install the indoor unit in the locations listed below (Be sure cooling precision instruments and preservation of animals, plants orto install the indoor unit according to the installation manual for art.each model because each indoor unit has each limitation).It can cause the damage of the items.• Locations with any obstacles which can prevent inlet and outlet air of the • Do not use any materials other than a fuse with the correct rating inunit.the location where fuses are to be used.• Locations where vibration can be amplified due to insufficient strength of Connecting the circuit with copper wire or other metal thread can causestructure.unit failure and fire.• Locations where the infrared receiver is exposed to the direct sunlight or • Do not touch any buttons with wet hands.the strong light beam (in case of the infrared specification unit).It can cause electric shocks.• Locations where an equipment affected by high harmonics is placed (TV • Do not touch any refrigerant pipes with your hands when theset or radio receiver is placed within 1m).system is in operation.• Locations where drainage cannot run off safely.During operation the refrigerant pipes become extremely hot or extremelyIt can affect performance or function and etc.cold depending the operating condition, and it can cause burn injury or• Do not install the unit near the location where leakage offrost injury.combustible gases can occur.BEFORE INSTALLATION Before installation check that the power supply matches the air conditioner.SELECTION OF INSTALLATION LOCATION(Install at location that meets the following conditions, after getting approval from the customer)Indoor unit5 cm minimumfrom the wall6.5 cm minimum from the ceilingInstallation board
seriously affect the user’s health and safety. This can also cause thecorrosion of the indoor unit and a resultant unit failure or refrigerant leak.• Ensure that no air enters in the refrigerant circuit when the unit isinstalled and removed.If air enters in the refrigerant circuit, the pressure in the refrigerant circuitbecomes too high, which can cause burst and personal injury.insulation and over-current etc.• Do not bundling, winding or processing for the power cord. Or, donot deforming the power plug due to tread it.This may cause fire or heating.• Locations where an equipment affected by high harmonics is placed (TVset or radio receiver is placed within 1m).• Locations where drainage cannot run off safely.It can affect performance or function and etc.• Do not install the unit near the location where leakage ofcombustible gases can occur.• Do not touch any refrigerant pipes with your hands when thesystem is in operation.During operation the refrigerant pipes become extremely hot or extremelycold depending the operating condition, and it can cause burn injury orfrost injury.BEFORE INSTALLATION Before installation check that the power supply matches the air conditioner.12345678912345678910111213Standard accessories (Installation kit)Accessories for indoor unitInstallation board(Attached to the rear of the indoor unit)Wireless remote controlRemote control holderTapping screws(for installation board ø4 X 25mm)Wood screws(for remote control switch holder ø3.5 X 16mm)Battery [R03 (AAA, Micro) 1.5V]Air-cleaning filtersFilter holders(Attached to the front panel of indoor unit)Insulation (#486 50 x 100 t3)Sealing plateSleeveInclination platePuttyOption partsDrain hose (extension hose)Piping cover(for insulation of connection piping)Necessary tools for the installation workPlus headed driverKnifeSawTape measureHammerSpanner wrenchTorque wrenchHole core drill (65mm in diameter)Wrench key (Hexagon) [4m/m]Flaring tool setGas leak detectorGauge for projection adjustmentUsed when flare is made by usingconventional flare toolPipe bender(14.0 ~ 82.0N·m(1.4 ~ 8.2kgf·m)Designed specifically( for R410A )Designed specifically( for R410A )( ))Q’ty1111022221Q’ty111111SELECTION OF INSTALLATION LOCATION(Install at location that meets the following conditions, after getting approval from the customer)Indoor unit Where there is no obstructions to the air flow and where the cooled and heated air can be evenly distributed. A solid place where the unit or the wall will not vibrate. A place where there will be enough space for servicing. (Where space mentioned below can be secured) Where wiring and the piping work will be easy to conduct. The place where receiving part is not exposed to the direct rays of the sun or the strong rays of the street lighting. A place where it can be easily drained. A place separated at least 1m away from the television or the radio. (To prevent interference to images and sounds.) Places where this unit is not affected by the high frequency equipment or electric equipment. Avoid installing this unit in place where there is much oil mist. Places where there is no electric equipment or household under the installing unit.Wireless remote control A place where the air conditioner can be received the signal surely during operating the wireless remote control. Places where there is no affected by the TV and radio etc. Do not place where exposed to direct sunlight or near heat devices such as a stove.INSTALLATION OF INDOOR UNITInstallation of Installation boardLook for the inside wall structures (Intermediats support or pillarand firmly install the unit after level surface has been checked.)610450Mating mark forlevel surface Adjustment of the installation board in the horizontal direction is tobe conducted with eight screws in a temporary tightened state. Adjust so the board will belevel by turning the boardStandardwith the standard hole asholethe center.- 182 - '11 • SCM-SM-110Drilling of holes and fixture of sleeve (Option parts)When drilling the wall that contains a metal lath, wire lath or metal plate, be sure to use pipe hole sleeve sold separately.ø65Installing the support of pipingIn case of piping in the right rear directionShaping of pipingsPipingsDrain hoseTaping of the exteriorSufficient care must be taken not to damagethe panel when connecting pipes.5Piping in the left rear directionPiping in the left directionFixing on concrete wallUse of nut anchorUse of bolt anchorBolt(M6 12)Mountingboardb Topb cPiping in the right rear directionPiping in the right directionPiping is possible in the rear, left, left rear, left downward, right or downward direction.RightRearDownward LeftrearLeft downwardNut(M6)MountingboardMax.10Indoor side Outdoor side Thickness of the wall + 1.5cm Indoor side Outdoor side Installed state Drill a hole with whole core drill. Hold the bottom of thepiping and fix directionbefore stretching it andshaping it. In case of rear piping draw out, cut off the lowerand the right side portions of the sleeve collar. Tape only the portionthat goes through thewall. Always tape the wiringwith the piping.aLeftTurn totighten5 cm minimumfrom the wallCAUTIONCompletely seal the hole onthe wall with putty. Otherwise,furniture, or other, may bewetted by leaked water ordewing.Indoor sideWireless remote controlRemote control holderWood screws6.5 cm minimum from the ceilingSleeve (sold separately)Relation between setting plate and indoor unitINSTALLATION SPACE (INDOOR UNIT) (FRONT VIEW)Indoor unitInstallation boardSpaceSpace50 for service for service 100886106106 349 450 29950 50• Matters of special notice when piping from left or central/rear of the unit.[Top view][Drain hose changing procedures]Left-hand-side pipingRight-hand-side piping1. Remove the drain hose 2. Remove the drain cap.putty49.5221.544.5Outdoor sideputty53.5 77Piping hole (ø65)Piping for Gas 633.5Piping for Liquid 703.5For bolt anchorand nut anchorDrain hose 772 (ø16) Remove the screw and drain hose,making it rotate.Installation board10 cm minimumfrom the wall Remove it with hand or pliers.3. Insert the drain cap. 4. Connect the drain hose.25Piping hole (ø65)65 Spacefor service44.57.7 301.8 8.515 Spacefor service(Unit : mm) Insert the drain cap which was removed Insert the drain hose securely, makingat procedure “2” securely using arotate. And install the screw.hexagonal wrench etc.Note: Be careful that If it is not InsertedNote: Be careful that If it is not Insertedsecurely, water leakage maysecurely, water leakage may occur. occur.
RKW012A400AFixing of indoor unitLatch (2 locations)Indoor unit1Installation StepsPass the pipe throughthe hole in the wall,and hook the upperpart of the indoor unitto the installation board.• How to remove the indoor unit from the installation board1 Push up at the marked portion of the indoor unit base lower latch, and slightlypull it toward you. (both right and left hand sides) (The indoor unit base lowerlatch can be removed from the installation board)2 Push up the indoor unit upward. So the indoor unit will be removed from theinstallation board.Since this air conditioner has been designed to collect dew drops on the rearsurface to the drain pan, do not attach the power cord above the gutter.GutterPipe accommodating sectionWall2Gently push the lowerpart to secure the unit.Drainage Arrange the drain hose in a downward angle. Avoid the following drain piping.CAUTIONGo through all installation steps and check if thedrainage is all right. Otherwise water leak may occur.Installation boardIndoor unit base latchWallInstallation boardThe marked portion of the indoor unit base lower latch.Higher than specifiedThe drain hosetip is in water. Pour water to the drain pan located under the heat exchanger, and ensure that the water is discharged outdoor. When the extended drain hose is indoor, securely insulate it with a heat insulator available in the market.WavyThe gap to the ground is5 cm or less.Odor fromthe gutterThe drain hosetip is in the gutter.CONNECTION OF REFRIGERANT PIPINGSPreparationKeep the openings of the pipes covered with tapes etc. to prevent dust, sand, etc. from entering them.ConnectionInsulation of the connection portionIndoor(Do not turn)PressRemove90 ± 0.5˚ADimension ALiquid side ø6.35 : 9.1 (mm)Gas side ø9.52 : 13.2 (mm)ø12.7 : 16.6 (mm)ø15.88 : 19.7 (mm)CAUTIONDo not apply refrigerating machineoil to the flared surface.IndoorLiquid sideGas side(Do not turn)Cover the coupling with insulator and then cover it with tapes.Vinyl tapeUse an attached insulation pad for heat insulation. Remove the flared nuts. (on both liquid and gas sides)• Flaring workMeasurement BCopper pipe diameter Install the removed flared nuts to the pipes to be connected,then flared the pipes.Clutch type flare tool forR410AMeasurement B (mm)Conventional (R22) flare toolClutch type Wing nut type Connect the pipes on both liquid and gas sides. Tighten the nuts to the following torque.Liquid side (ø6.35) : 14.0 - 18.0 N·m (1.4 - 1.8 kgf·m)Gas side (ø9.52) : 34.0 - 42.0 N·m (3.4 - 4.2 kgf·m)(ø12.7) : 49.0 - 61.0 N·m (4.9 - 6.1 kgf·m)(ø15.88) : 68.0 - 82.0 N·m (6.8 - 8.2 kgf·m)Position it so that the slit area faces upward.• Cover the indoor unit s flare-connected joints, after they are checked for a gas leak,with an indoor unit heat insulating material and then wrap them with a tape with anattached insulation pad placed over the heat insulating material’s slit area.FlaringblockCopper pipeø6.350.0 - 0.51.0 - 1.51.5 - 2.0ø9.520.0 - 0.51.0 - 1.51.5 - 2.0ø12.7 0.0 - 0.5 1.0 - 1.5 2.0 - 2.5ø15.880.0 - 0.51.0 - 1.52.0 - 2.5Use a flare tool designed for R410A or a conventional flare tool.Please note that measurement B (protrusion from the flaring block) will vary depending on thetype of a flare tool in use.If a conventional flare tool is used, please use a copper pipe gauge or a similar instrument tocheck protrusion so that you can keep measurement B to a correct value.CAUTIONDo not apply excess torque to the flared nuts.Otherwise, the flared nuts may check depending.Finishing work and fixingRefrigerant pipingConnection wiring,Earth wiringOuter tapeDrain hoseWood screwCover the exterior portion with outer tape andshape the piping so it will match the contoursof the route that the piping to take.Also fix the wiring and pipings to the wall withclamps.ClampOpen/close and detachment/attachment of the air inlet panelHow to remove and install the front panel- 183 - '11 • SCM-SM-110 To open, pull the panel at both ends of lower partand release latches, then pull up the panel untilyou feel resistance.(The panel stops at approx. 60° open position) To close, hold the panel at both ends of lowerpart to lower downward and push it slightly untilthe latch works. To remove, pull up the panel to the positionshown in right illustration and pull it toward you. To install, insert the panel arm into the slot on thefront panel from the position shown in rightillustration, hold the panel at both ends of lowerpart, lower it downward slowly, then push itslightly until the latch works.To remove / To installApprox. 80°Removing Remove the air inlet panel. Remove the screw (A) 2pcs / screw(B) 3pcs fixing to the front panel. Remove the 3 latches in the uppersection of the front panel and thenremove the front panel from the unit.Installing Remove the air filter. Cover the unit with the front panel. Tighten the screw (A) 2pcs / screw(B) 3pcs to fix the front panel. Install the air filter. Install the air inlet panel.Screw (B)Air inlet panelAir filterFront panelScrew (A) Screw (A)Screw (B) Screw (B)LatchELECTRICAL WIRING WORKInstalling the air-cleaning filters
illustration, hold the panel at both ends of lowerpart, lower it downward slowly, then push itslightly until the latch works. Tighten the screw (A) 2pcs / screw(B) 3pcs to fix the front panel. Install the air filter. Install the air inlet panel.Screw (B)Screw (A)Screw (B)Screw (A)Screw (B)Front panelELECTRICAL WIRING WORKPreparation of indoor unitMounting of connecting wires1234567Open the air inlet panel.Remove the lid.Remove the wiring clamp.Connect the connecting wire securely to the terminal block.1) Connect the connection wire securely to the terminalblock. If the wire is not affixed completely, contact will bepoor, and it is dangerous as the terminal block may heatup and catch fire.2) Take care not to confuse the terminal numbers for indoorand outdoor connections.Fix the connecting wire by wiring clamp.Attach the lid.Close the air inlet panel.CAUTIONIn case of faulty wiring connection, the indoor unit stops, andthen the run lamp turns on and the timer lamp blinks.Use cables for interconnection wiring to avoid loosening of thewires.CENELEC code for cables Required field cables.H05RNR4G1.5 (example) or 245IEC57H Harmonized cable type05 300/500 voltsR Natural-and/or synth, rubber wire insulationN Polychloroprene rubber conductors insulationR Stranded core4or5 Number of conductorsG One conductor of the cable is the earth conductor(yellow/green)1.5 Section of copper wire (mm 2 )Terminal block1 2 N 3Wiring ClampThe screw of the lid istightened securely.LidInstalling the air-cleaning filters1. Open the air inlet panel and remove the air filters.2. Install the filter holders, with the air-cleaning filters installed in the holders.In the air conditioner.• Each air-cleaning filter can be installed in the left or right filter holder.3. Install the air filters and close the inlet panel.Air-cleaningfilterFilter holderINSTALLATION OF WIRELESS CONTROLMounting method of battery Uncover the wireless remote control, and mount the batteries[R03 (AAA, Micro), 2 pieces] in the body regularly.(Fit the poles with the indication marks, & without fail)CAUTIONDo not use new andold batteries together.6 BatteryCoverFixing to pillar or wall Conventionally, operate the wireless remote control by holdingin your hand. Avoid installing it on a clay wall etc.2 Wireless remote control5 Wood screwsø3.5 X 16INSTALLATION TEST CHECK POINTSCheck the following points again after completion of the installation, and before turning on the power. Conduct a test run again and ensure that the unit operates properly.At the same time, explain to the customer how to use the unit and how to take care of the unit following the user’s manual.After installationThe power supply voltage is correct as the rating.No gas leaks from the joints of the operation valve.Power cables and crossover wires are securely fixed to the terminal board.The screw of the lid is tightened securely.Operation valve is fully open.The pipe joints for indoor and outdoor pipes have been insulated.Test runAir conditioning operation is normal.No abnormal noise.Water drains smoothly.Protective functions are not working.The remote control is normal.Operation of the unit has been explained to the customer.(Three-minutes restart preventive timer)When the air conditioner is restarted or when changing the operation, the unitwill not start operating for approximately 3 minutes.This is to protect the unit and it is not a malfunction.HOW TO RELOCATE OR DISPOSE OF THE UNIT In order to protect the environment, be sure to pump down (recovery of refrigerant). Pump down is the method of recovering refrigerant from the indoor unit to theoutdoor unit when the pipes are removed from the unit.1 Connect charge hose to check joint of outdoor unit.2 Liquid side : Close the liquid valve with hexagon wrench key.Gas side : Fully open the gas valve.Carry out cooling operation. (If indoor temperature is low, operateforced cooling operation.)3 After low pressure gauge become 0.01MPa, stop cooling operationand close the gas valve.• Forced cooling operationTurn on a power supply again after a while after turn off a power supply.Then press continually the ON/OFF button 5 seconds or more.Unit ON/OFF button- 184 - '11 • SCM-SM-110CONCERNING TERMINAL CONNECTION FOR AN INTERFACE1 Remove the air inlet panel, lid and front panel.2 Remove the control cover. (Remove the screw.)3 There is a terminal (respectively marked with CNS) for the indoor control board.In connecting an interface, connect to the respective terminal securely with the connection harnesssupplied with an optional “Interface connection kit SC-BIKN-E” and fasten the connection harnessonto the indoor control box with the clamp supplied with the kit.For more details, please refer to the user’s manual of your “Interface connection kit SC-BIKN-E”.Indoor unit PCBScrewControl coverCNS terminal
(2) Floor standing type (SRF)Models SRF25, 35ZJX-S, 50ZJX-S1WARNING CAUTIONWARNINGCAUTIONSAFETY PRECAUTIONS WARNINGRFB012A002B - 185 - '11 • SCM-SM-110 CAUTION WARNING
BEFORE INSTALLATIONBefore installation check that the power supply matches the air conditioner.1234567891012345678910111213Standard accessories (Installation kit)Accessories for indoor unitInstallation board(Attached to the rear of the indoor unit)Wireless remote controlRemote control holderTapping screws(for installation board 4dia. by 25mm)Wood screws(for remote control switch holder 3.5(mm). by 16mm)Battery [R03(AAA,Micro) 1.5V]Air-cleaning filtersFilter holders(Attached to the front panel of indoor unit)Pipe cover (200mm)BandSealing plateSleeveInclination platePuttyOption partsDrain hose (extention hose)Piping cover(for insulation of connection piping)Q'tyNecessary tools for the installation workPlus headed driverKnifeSawTape measureHammerSpanner wrenchTorque wrenchHole core drill (65mm in diameter)Wrench key (Hexagon) [4m/m]Flaring tool setDesigned specificallyGas leak detector for R410AGauge for projection adjustmentUsed when flare is made by using( conventional flare toolPipe bender(14.0 ~ 61.0N m(1.4 ~ 6.1kgf m)Designed( )for R410Aspecifically( )))1119222212Q'ty111111SELECTION OF INSTALLATION LOCATION(Install at location that meets the following conditions, after getting approval from the customer)Indoor unitWhere there is no obstructions to the air flow and where the cooled and heated air can be evenly distributed.A solid place where the unit or the wall will not vibrate.A place where there will be enough space for servicing. (Where space mentioned below can be secured)Where wiring and the piping work will be easy to conduct.The place where receiving part is not exposed to the direct rays of the sun or the strong rays of the street lighting.A place where it can be easily drained.A place separated at least 1m away from the television or the radio. (To prevent interference to images and sounds.)Places where this unit is not affected by the high frequency equipment or electric equipment.Avoid installing this unit in place where there is much oil mist.Places where there is no electric equipment or household under the installing unit.Install the indoor unit on flat wall.Wireless remote controlA place where the air conditioner can be received the signal surely during operating the wireless remote control.Places where there is no affected by the TV and radio etc.Do not place where exposed to direct sunlight or near heat devices such as a stove.INSTALLATION OF INDOOR UNITOpen and detachment of the air inlet panelTo open, pull the panel at both ends of upper partand release latches, and undo the strings.Then remove the panel.CAUTIONWhen removing the air-inlet panel,be careful not to drop it on your feet.How to remove the front panel1 Remove the air inlet panel.2 Remove the 5 set screws.3 Remove the 3 latches in the upper section.If the latches are difficult to remove, push the latchportion out using a screw driver, for example.4 Move the lower part of the panel forward andremove the 6 latches in the under section.- 186 - '11 • SCM-SM-110Drilling of holes and fixture of sleeve (Option parts)Piping is possible in the rear,left,left rear, left downward,right or downward direction.RightRearDownward LeftLeft rearLeft downward4518.565Left rear pipingFor Right or Left rear piping8047065 6591.545Latch65Right rear pipingFor Right or Left piping6015 60The screw of the lidis tightened securely.LatchWhen drilling the wall that contains a metal lath, wire lath or metal plate, be sure to use pipe hole sleeve sold separately.Indoor side65Outdoor sideDrill a hole with whole core drill.Indoor unit piping directionDrainageArrange the drain hose in a downward angleAvoid the following drain piping.Higher than specified The drain hosetip is in water5b Topb cThicknese of the wall + 1.5cmIn case of rear piping draw out, cut off the lowerand the right side portions of the sleeve collar.WavyaTurn totightenIndoor side Outdoor side Installed stateCAUTION Go through all installation steps and check if thedralnage is all right. Otherwise water leak may occur.Odor fromthe gutterThe gap to the ground is The drain hose5 cm or lesstip is in the gutter5 cm minimumfrom the wall15 cm or below from the floorRight/Left pipingWireless remote control76.355157.27 cm minimum from the ceilingWood screwsCAUTIONCompletely seal the hole onthe wall with putty. Otherwise,furniture, or other, may bewetted by leaked water ordewing.Installing the support of pipingFor Right or Left bottom pipingLeft bottom piping85.3 22.760100Right bottom pipingRemote control holderIn case of piping in the right rear directionTaping of the exteriorIndoor sideputtyTape only the portionthat goes through thewall.Always tape the wiringwith the piping.Sufficient care must be taken not to damagethe panel when connecting pipes.from the wallOutdoor sidePour water to the drain pan located under the heat exchanger, and ensure that the water is discharged outdoor.When the extended drain hose is indoor, securely insulate it with a heat insulator available in the market.Installation board5 cm +Service space (30cm)Sleeve(sold separately)puttyCAUTIONBe careful not tostress the connectingrefrigerant pipse. (Donot pull with a force oflarger than 5 kgf.) Ifimproperly installed,it may cause abnormalnoise and vibration.
Fixing of indoor unitFloor installationSecure using upper 2 screws for floor installations.If possible, also attach two lower screws.CAUTION During the installation, do not lean on the control box or the display, as they may be damaged.Install the indoor unit on flat wall. If improperly installed, it may cause abnormal noise and vibration. (Distortion on the wall shall be no larger than 3 mm.)58530.5726(860)103.55Wall installationAt first secure the installation board using 5 screws and the indoor unit using 2 screws.Installation of Installation boardLook for the inside wall structures (Intersediatssupport or pillar and finally install the unit after levelsurface has been checked.)Tapping screw58530.583.5726(860)103.5156.55(238)198If there is an obstacle such as a cable cover,cut off the hatched part before installation.30.5 25.5185585595(600)Fixing on concrete wallUse of nut anchorBolt(M6 12) Adjustment of the installation board in the horizontaldirection is to be conducted with five screws in a temporarytightened state.InstallationboardStandard holeAdjust so the board will be level by turning the board withthe standard hole as the center.(238)585595(600)When practicing the half-console, make sure to fix the unit securely.Otherwise, it could fall.CONNECTION OF REFRIGERANT PIPINGSPreparationIndoorKeep the openings of the pipes covered with tapes etc. to prevent dust, sand, etc.from entering them.(Do not turn)RemovePress Remove the flared nuts. (on both liquid and gas sides)CAUTIONDo not apply refrigerating machine oil to the flared surface.• Flaring workFlaringblockMeasurement BCopper pipeCopper pipe diameterø6.35ø9.52ø12.790 ± 0.5°ADimension ALiquid side ø6.35:9.1(mm)Gas side ø9.52:13.2(mm)ø12.7:16.6(mm) Install the removed flared nuts to the pipes tobe connected,then flared the pipes.Clutch type flare tool forR410A0.0 - 0.50.0 - 0.50.0 - 0.5Measurement B (mm)Conventional (R22) flare toolClutch type Wing nut type1.0 - 1.5 1.5 - 2.01.0 - 1.51.0 - 1.51.5 - 2.02.0 - 2.5Use a flare tool designed for R410A or a conventional flare tool.Please note that measurement B (protrusion from the flaring block) will vary dependingon the type of a flare tool in use.If a coventional flare tool is used, please use a copper pipe gauge or a similarinstrument to check protrusion so that you can keep measurement B to a correct value.- 187 - '11 • SCM-SM-110CAUTIONDo not apply excess torque to the flared nuts. Otherwise, the flared nuts may check depending.155CAUTIONConnectionIndoor Liquid sideGas side45Be careful not to stress the connecting refrigerant pipes.(Do not pull with a force of larger than 5 kgf.)Insulation of the connection portion105130140(Do not turn)Pass the refrigerant pipe through the piping hole toindoor side.Arrange the pipes according to the direction of piping. Connect the pipes on both liquid and gas sides. Tighten the nuts to the following torque.Liquid side (ø6.35) : 14.0 - 18.0 N·m (1.4 - 1.8 kgf·m)Gas side (ø9.52) : 34.0 - 42.0 N·m (3.4 - 4.2 kgf·m)(ø12.7) : 49.0 - 61.0 N·m (4.9 - 6.1 kgf·m)Position it so that the slit area faces upward.Finishing work and fixingClampCover the coupling with insulator and then cover it with tapes.Use an attached pipe cover for heat insulation.RefrigerantpipeSlitRefrigerantpipeSlitAddTape 10bandRefrigerant pipingConnection wiring,Earth wiring Cover the exterior portion with outer tapeand shape the piping so it will match theOuter tape contours of the route that the piping to take.Drain hoseAlso fix the wiring and pipings to the wallwith clamps.Wood screwRefrigerantpipe9Pipe coverCAUTIONIf heat insulation is insufficient, water leakagemay occur. In addition, the room temperaturesensor may give a false alert due to heatradiation from the pipes.• Cover the indoor unit’s flare-connected joints, afterthey are checked for a gas leak, with an indoor unitheat insulating material and then wrap them with atape with an attached pipe cover placed over theheat insulating material’s slit area.ELECTRICAL WIRING WORKPreparation of indoor unitMounting of connecting wires1 Remove the fixing screw of clamp.2 Connect the connecting wire securely to the terminal block.1 ) Connect the connection wire securely to the terminalblock. If the wire is not affixed completely, contact will bepoor, and it is dangerous as the terminal block may heatup and catch fire.2 ) Take care not to confuse the terminal numbers for indoorand outdoor connections.3 Fix the connecting wire by wiring clamp.4 Pass the connecting wire through the wiring holder.CAUTIONIn case of faulty wiring connection, the indoor unitstops, and then the run lamp turns on and the timerlamp blinks.Use cables for interconnection wiring to avoidloosening of the wires.CENELEC code for cables Required field cables.H05RNR4G1.5 (example) or 245IEC57H Harmonized cable type05 300/500 voltsR Natural-and/or synth, rubber wire insulationN Polychloroprene rubber conductors insulationR Stranded coreCAUTION• During installation, do not lean on the control box or the display, as theymay be damaged.• Pass the connecting wire securely through the wiring holder. If it passeson the sensor, it may not detect suction temperature and/or humidity.Terminal blockClampHow to fit the front panel Fitting1 Do remove the air filter.2 Cover the body with the front panel.3 Fit the 6 latches in the lower section.then 3 latches in the upper section.4 Tighten the 5 set screws.5 Fit the air filter.6 Fit the air inlet panel.Close and attachment of the air inler panel To close, attach the panel after pullingthe strings, hold the panel at both ends ofupper part to lower downward and push itslightly until the latch works.LatchLatch4or5 Number of conductorsG One conductor of the cable is the earthconductor (yellow/green)Fixing screwWiring holder1.5 Section of copper wire (mm 2 )Sensor
Concealed installationInstall the indoor unit according to the following instructions.1 Secure the upper, right, and left spaces according to the right figure.2 Do not let the horizontal bar obstruct wind from blowing outupward/downward or reception from the remote controller.3 The lattice size should be 70 % or greater of the open rate.4 Cut the jumper cable (JP173) on the indoor circuit board to controlthe blow-out angle.5cm or more5cm or moreInstalling the air-cleaning filters1. Open the air inlet panel and remove the air filters.2. Install the filter holders, with the air-cleaning filters installed in the holders.In the air conditioner.• Each air-cleaning filter can be installed in the upper or lower filter holder.3. Install the air filters and close the inlet panel.7cm or moreCAUTIONIncorrect installation may cause problems such as non-cooling,non-warming, and condensation water leaking into the room.JP171JP170JP173CUSTOMREMOTE/AUTORESTARTAIR FLOWSWITCHJP172COOL ONLYCut2 - 3cmAir-cleaning filterFilter holderCAUTIONWhen installing an air-cleaning filter in the indoor unit, be careful not to injureyour hand with the heat exchanger.INSTALLATION OF REMOTE CONTROLMounting method of batteryCAUTIONDo not use new and old batteries together.Fixing to pillar or wall○Conventionally, operate the remote control switch byholding in your hand.○Avoid installing it on a clay wall etc.6 BatteryCover2 Wireless remote control5 Wood screw3.5 16HOW TO RELOCATE OR DISPOSE OF THE UNIT In order to protect the environment, be sure to pump down(recovery of refrigerant). Pump down is the method of recovering refrigerant from theindoor unit to the outdoor unit when the pipes are removedfrom the unit.1 Connect charge hose to service port of outdoor unit.2 Liquid side : Close the liquid valve with hexagon wrench key.Gas side : Fully open the gas valveCarry out cooling operation . (If indoor temperature is low,operate forced cooling operation.)3 After low pressure gauge become 0.01MPa, stop coolingoperation and close the gas valve.Forced cooling operationTurn on a power supply again after a while after turn off a power supply.Then press continually the ON/OFF button 5 seconds or more.Unit ON/OFF button- 188 - '11 • SCM-SM-110INSTALLATION TEST CHECK POINTSCheck the following points again after completion of the installation, and before turning on the power. Conduct a test run again and ensure that the unit operates properly.At the same time, explain to the customer how to use the unit and how to take care of the unit following the user's manual.After installationTest runThe power supply voltage is correct as the rating.Air conditioning operation is normal.No gas leaks from the joints of the operational valve.No abnormal noise.Power cables and crossover wires are securely fixed to the terminal board. Water drains smoothly.Operational valve is fully open.Protective functions are not working.The pipe joints for indoor and outdoor pipes have been insulated.The remote control is normal.The screw of the lid is tightened securely.Operation of the unit has been explained to the customer.(Three-minutes restart preventive timer)When the air conditioner is restarted or when changingthe operation, the unit will not start operating forapproximately 3 minutes.This is to protect the unit and it is not a malfunction.CONCERNING TERMINAL CONNECTIONFOR AN INTERFACE1 Remove the front panel and lid of control.2 There is a terminal (respectively marked with CNS) for the indoor control board.In connecting an interface, connect to the respective terminal securely with the connectionharness supplied with an optional “Interface connection kit SC-BIKN-E” and fasten theconnection harness onto the indoor control box with the clamp supplied with the kit.For more details, please refer to the user's manual of your “Interface connection kitSC-BIKN-E”.
(3) Ceiling concealod type (SRR)Models SRR25~60ZJ-SFOR MODEL SRR SERIESR410A REFRIGERANT USEDRJD012A201B AINSTALLATION <strong>MANUAL</strong> FOR INDOOR UNIT• This installation manual illustrates the method of installing an indoorunit.• For electrical wiring work, please see instructions set out on thebackside.• For outdoor unit installation and refrigerant piping, please refer refer to the topage installation 157 to manual 172. that comes with your outdoor unit.• Read the “SAFETY PRECAUTIONS” carefully first of all and strictly follow itduring the installation work in order to protect yourself.• The precautionary items mentioned below are distinguished into two levels,WARNING and CAUTION .WARNING : Wrong installation would cause serious consequences suchas injuries or death.CAUTION : Wrong installation might cause serious consequencesdepending on circumstances.Both mentions the important items to protect your health and safety so strictlyfollow them by any means.• Be sure to confirm no anomaly on the equipment by commissioning after completedinstallation and explain the operating methods as well as the maintenancemethods of this equipment to the user according to the owner’s manual.SAFETY PRECAUTIONS• A wired remote control unit is supplied separately as an optional part.• When install the unit, be sure to check whether the selection ofinstallation place, power supply specifications, usage limitation (pipinglength, height differences between indoor and outdoor units, powersupply voltage and etc.) and installation spaces.• Keep the installation manual together with owner’s manual at a place whereany user can read at any time. Moreover if necessary, ask to hand them to anew user.• For installing qualified personnel, take precautions in respect to themselves byusing suitable protective clothing, groves, etc., and then perform theinstallation works.• Please pay attention not to fall down the tools, etc. when installing the unit atthe high position.• If unusual noise can be heard during operation, consult the dealer.• The meanings of “Marks” used here are shown as follows:WARNINGNever do it under anycircumstances.Always do it according to theinstruction.• Installation must be carried out by the qualified installer.• Tighten the flare nut by torque wrench with specified method.If you install the system by yourself, it may cause serious trouble such as If the flare nut were tightened with excess torque, this may cause burst andwater leaks, electric shocks, fire and personal injury, as a result of a system refrigerant leakage after a long period.malfunction. Do not carry out the installation and maintenance work except • The electrical installation must be carried out by the qualifiedthe by qualified installer.electrician in accordance with “the norm for electrical work” and• Install the system in full accordance with the installation manual. “national wiring regulation”, and the system must be connected toIncorrect installation may cause bursts, personal injury, water leaks, electric the dedicated circuit.shocks and fire.Power supply with insufficient capacity and incorrect function done by• Be sure to use only for household and residence.improper work can cause electric shocks and fire.If this appliance is installed in inferior environment such as machine shop • Be sure to shut off the power before starting electrical work.and etc., it can cause malfunction.Failure to shut off the power can cause electric shocks, unit failure or• Use the original accessories and the specified components for incorrect function of equipment.installation.• Be sure to use the cables conformed to safety standard and cableIf parts other than those prescribed by us are used, It may cause water ampacity for power distribution work.leaks, electric shocks, fire and personal injury.Unconformable cables can cause electric leak, anomalous heat production• Install the unit in a location with good support.or fire.Unsuitable installation locations can cause the unit to fall and cause • This appliance must be connected to main power supply by meansmaterial damage and personal injury.of a circuit breaker or switch (fuse:16A) with a contact separation of• Ventilate the working area well in the event of refrigerant leakage at least 3mm.during installation.• When plugging this appliance, a plug conforming to the normIf the refrigerant comes into contact with naked flames, poisonous gas is IEC60884-1 must be used.produced.• Use the prescribed cables for electrical connection, tighten the• When installing in small rooms, take prevention measures not to cables securely in terminal block and relieve the cables correctly toexceed the density limit of refrigerant in the event of leakage, prevent overloading the terminal blocks.referred by the formula (accordance with ISO5149).Loose connections or cable mountings can cause anomalous heatIf the density of refrigerant exceeds the limit, please consult the dealer and production or fire.install the ventilation system, otherwise lack of oxygen can occur, which • Arrange the wiring in the control box so that it cannot be pushed upcan cause serious accident.further into the box. Install the service panel correctly.• After completed installation, check that no refrigerant leaks from Incorrect installation may result in overheating and fire.the system.• Be sure to switch off the power supply in the event of installation,If refrigerant leaks into the room and comes into contact with an oven or inspection or servicing.other hot surface, poisonous gas is produced.If the power supply is not shut off, there is a risk of electric shocks, unit• Use the prescribed pipes, flare nuts and tools for R410A.failure or personal injury due to the unexpected start of fan.Using existing parts (for R22 or R407C) can cause the unit failure and • Be sure to wear protective goggles and gloves while at work.serious accidents due to burst of the refrigerant circuit.• Earth leakage breaker must be installed.If the earth leakage breaker is not installed, it can cause electric shocks.- 189 - '11 • SCM-SM-110• Do not put the drainage pipe directly into drainage channels where • Do not processing, splice the power cord, or share a socket withpoisonous gases such as sulphide gas can occur.other power plugs.Poisonous gases will flow into the room through drainage pipe andThis may cause fire or electric shock due to defecting contact, defectingseriously affect the user’s health and safety. This can also cause the insulation and over-current etc.corrosion of the indoor unit and a resultant unit failure or refrigerant leak. • Do not bundling, winding or processing for the power cord. Or, do• Ensure that no air enters in the refrigerant circuit when the unit is not deforming the power plug due to tread it.installed and removed.This may cause fire or heating.If air enters in the refrigerant circuit, the pressure in the refrigerant circuitbecomes too high, which can cause burst and personal injury.• Do not vent R410A into the atmosphere : R410A is a fluorinatedgreenhouse gas, covered by the Kyoto Protocol with GrovalWarming Potential (GWP)=1975.• Do not run the unit with removed panels or protections.Touching rotating equipments, hot surfaces or high voltage parts can causepersonal injury due to entrapment, burn or electric shocks.• Use the circuit breaker of correct capacity. Circuit breaker shouldbe the one that disconnect all poles under over current.Using the incorrect one could cause the system failure and fire.• Install isolator or disconnect switch on the power supply wiring inaccordance with the local codes and regulations.The isolator should be locked in OFF state in accordance with EN60204-1.• Be sure to install indoor unit properly according to the installationmanual in order to run off the drainage smoothly.Improper installation of indoor unit can cause dropping water into the roomand damaging personal property.• Install the drainage pipe to run off drainage securely according tothe installation manual.Incorrect installation of the drainage pipe can cause dropping water into theroom and damaging personal property.• Be sure to install the drainage pipe with descending slope of 1/100or more, and not to make traps and air-bleedings.Check if the drainage runs off securely during commissioning and ensurethe space for inspection and maintenance.• Secure a space for installation, inspection and maintenancespecified in the manual.Insufficient space can result in accident such as personal injury due toWARNING• Do not perform any change of protective device itself or its setupcondition.The forced operation by short-circuiting protective device of pressureswitch and temperature controller or the use of non specified componentcan cause fire or burst.CAUTION• Carry out the electrical work for ground lead with care.Do not connect the ground lead to the gas line, water line, lightning conductor or telephone line’s ground lead. Incorrect grounding can cause unit faultssuch as electric shocks due to short-circuiting.falling from the installation place.• For installation work, be careful not to get injured with the heatexchanger, piping flare portion or screws etc.• Be sure to insulate the refrigerant pipes so as not to condense theambient air moisture on them.Insufficient insulation can cause condensation, which can lead to moisturedamage on the ceiling, floor, furniture and any other valuables.• When perform the air conditioner operation (cooling or drying operation)in which ventilator is installed in the room. In this case, using theair conditioner in parallel with the ventilator, there is the possibilitythat drain water may backflow in accordance with the room lapse intothe negative pressure status. Therefore, set up the opening port suchas incorporate the air into the room that may appropriate to ventilation(For example; Open the door a little). In addition, just as above, soset up the opening port if the room lapse into negative pressure statusdue to register of the wind for the high rise apartment etc.• Be sure to perform air tightness test by pressurizing with nitrogengas after completed refrigerant piping work.If the density of refrigerant exceeds the limit in the event of refrigerantleakage in the small room, lack of oxygen can occur, which can causeserious accidents.• Do not install the unit in the locations listed below.If leaked gases accumulate around the unit, it can cause fire.• Locations where carbon fiber, metal powder or any powder is floating. • Do not install the unit where corrosive gas (such as sulfurous acid• Locations where any substances that can affect the unit such as sulphide gas etc.) or combustible gas (such as thinner and petroleum gases)gas, chloride gas, acid and alkaline can occur.can accumulate or collect, or where volatile combustible• Vehicles and ships.substances are handled.• Locations where cosmetic or special sprays are often used.Corrosive gas can cause corrosion of heat exchanger, breakage of plastic• Locations with direct exposure of oil mist and steam such as kitchen and parts and etc. And combustible gas can cause fire.machine plant.• Do not use the indoor unit at the place where water splashes may• Locations where any machines which generate high frequency harmonics occur such as in laundries.are used.Since the indoor unit is not waterproof, it can cause electric shocks and fire.• Locations with salty atmospheres such as coastlines.• Do not install nor use the system close to the equipment that• Locations with heavy snow (If installed, be sure to provide base flame and generates electromagnetic fields or high frequency harmonics.snow hood mentioned in the manual).Equipment such as inverters, standby generators, medical high frequency• Locations where the unit is exposed to chimney smoke.equipments and telecommunication equipments can affect the system, and• Locations at high altitude (more than 1000m high).cause malfunctions and breakdowns. The system can also affect medical• Locations with ammonic atmospheres.equipment and telecommunication equipment, and obstruct its function or• Locations where heat radiation from other heat source can affect the unit. cause jamming.• Locations without good air circulation.• Do not place any variables which will be damaged by getting wet• Locations with any obstacles which can prevent inlet and outlet air of the unit. under the indoor unit.• Locations where short circuit of air can occur (in case of multiple units When the relative humidity is higher than 80% or drainage pipe is clogged,installation).condensation or drainage water can drop and it can cause the damage of• Locations where strong air blows against the air outlet of outdoor unit. valuables.• Locations where something located above the unit could fall.• Do not install the remote control at the direct sunlight.It can cause remarkable decrease in performance, corrosion and damage It can cause malfunction or deformation of the remote control.of components, malfunction and fire.• Do not use the unit for special purposes such as storing foods,• Do not install the indoor unit in the locations listed below (Be sure cooling precision instruments and preservation of animals, plants orto install the indoor unit according to the installation manual for art.each model because each indoor unit has each limitation).It can cause the damage of the items.• Locations with any obstacles which can prevent inlet and outlet air of the • Do not use any materials other than a fuse with the correct rating inunit.the location where fuses are to be used.• Locations where vibration can be amplified due to insufficient strength of Connecting the circuit with copper wire or other metal thread can causestructure.unit failure and fire.• Locations where the infrared receiver is exposed to the direct sunlight or • Do not touch any buttons with wet hands.the strong light beam (in case of the infrared specification unit).It can cause electric shocks.• Locations where an equipment affected by high harmonics is placed (TV • Do not touch any refrigerant pipes with your hands when theset or radio receiver is placed within 1m).system is in operation.• Locations where drainage cannot run off safely.During operation the refrigerant pipes become extremely hot or extremelyIt can affect performance or function and etc.cold depending the operating condition, and it can cause burn injury or• Do not install the unit near the location where leakage offrost injury.combustible gases can occur.BEFORE INSTALLATION Before installation check that the power supply matches the air conditioner.Indoor unit accessoriesOption partsNecessary tools for the installation work Plus headed driver Knife Saw
seriously affect the user’s health and safety. This can also cause thecorrosion of the indoor unit and a resultant unit failure or refrigerant leak.• Ensure that no air enters in the refrigerant circuit when the unit isinstalled and removed.If air enters in the refrigerant circuit, the pressure in the refrigerant circuitbecomes too high, which can cause burst and personal injury.insulation and over-current etc.• Do not bundling, winding or processing for the power cord. Or, donot deforming the power plug due to tread it.This may cause fire or heating.• Locations where an equipment affected by high harmonics is placed (TVset or radio receiver is placed within 1m).• Locations where drainage cannot run off safely.It can affect performance or function and etc.• Do not install the unit near the location where leakage ofcombustible gases can occur.• Do not touch any refrigerant pipes with your hands when thesystem is in operation.During operation the refrigerant pipes become extremely hot or extremelycold depending the operating condition, and it can cause burn injury orfrost injury.BEFORE INSTALLATION Before installation check that the power supply matches the air conditioner.Indoor unit accessoriesSymbol Part name UnitsWireless remote controlRemote control holderWireless receiverInstallation frame (for wireless receiver)Drain hoseClamp (for drain hose)Battery [R03 (AAA, Micro) 1.5V]Large washer (for hanging bolt M8)Flat head wood screw (for remote control holder 3.5x16)Flat head machine screw (for wireless receiver M3.5x10)Tapping screw (for clamp, 4x8)Plate (display)111111282211Option partsSymbol Part name UnitsabcdBlowout duct joint model RFJ22Drain up kit model RDU12EBack side suction filter set model RBF12Lower suction grill set model RTS12Parts to be prepared by the operative sideSymbol Part name UnitsABCDDrain hoseCeiling hanging bolts (M8)Nuts (M8)Spring lock washers (M8)11111484Necessary tools for the installation work Plus headed driver Knife Saw Tape measure Hammer Spanner wrench Torque wrench [14.0 62.0 N·m (1.4 6.2 kgf·m)] Hole core drill (65mm in diameter) Wrench key (Hexagon) [4 m/m] Vacuum pump Vacuum pump adapter (Anti-reverse flow type)(Designed specifically for R410A) Gauge manifold (Designed specifically for R410A) Charge hose (Designed specifically for R410A) Flaring tool set (Designed specifically for R410A) Gas leak detector (Designed specifically for R410A) Gauge for projection adjustment(Used when flare is made by using conventional flare tool)1SELECTION OF INSTALLING LOCATION(Install the unit with the customer's consent at a location that meets the following conditions.)Installation of wireless remote controlIndoor unit Where there are no barriers to the breeze, and where cool/hot air may diffuse throughoutthe room. A firm location that may sustain the weight of the unit, and do not cause the unit or theceiling to vibrate. A location that allows room for maintenance. Where wiring and plumbing may be performed with ease. Where water may be drained easily. Where the unit is not influenced by the television, stereo, radio, or the lights. Where the unit is not influenced by high frequency equipment and wiring equipment. Where oil splashes do not occur frequently. Where sunlight and strong lights do not directly hit the receiver. A flat ceiling surface (bottom of ceiling). Where the suction inlet of the unit is located far from the air inlet on the ceiling, the entireinside of ceiling acts as an air suction duct so that the capacity is reduced at the startup.In such occasion, it is recommended to install a duct at the air suction side. Where the suction inlet of the unit does not match the air inlet and there is not sufficientclearance between the unit and the ceiling face, the capacity is reduced. It is necessary toenable the air suction from the back by using optional parts © (Back side suction filter setmodel RBF12).Wireless remote control Where the main unit can definitely detect the signals from the wireless remote control. Where it is not influenced by television or stereo. Avoid locations with direct sunlight or around heaters. Do not attach to weak walls such as a mud wall.CAUTIONIndoor sideCompletely seal the hole onputtythe wall with putty. Otherwise,furniture, or other, may bewetted by leaked water ordewing.Outdoor sideputtySleeve(sold separately)Mounting method of batteryUncover the wireless remote control, and mount the batteriesR03 (AAA, Micro)2 pieces] in the body regularly.(Fit the poles with the indication marks, & without fail)Cover BatteryFixing to pillar or wall Conventionally, operate the wireless remote control by holding inyour hand. In the case of stationary operation service as by mounting on theholder for the wireless remote control, make sure that the locatingplace is satisfactory for access service before installing it. Avoid installing it on a clay wall etc.Maximum pipe length- 190 - '11 • SCM-SM-110The maximum lengths and height differences for the pipes differ according to theiroutdoor unit. Please refer the Installation Instructions for the outdoor unit.Clamp Wood screw Remote controlholder 3.516 Wireless remote controlAdjust the installation to vertical attitude.Avoid projecting the screw head.
Plan45551530Hanging bolt pi30 230150236Drain hose135 78 Liquid side pipes(Connection opening diameter ø16)(2) ConnectionIndoorLiquid sideGas side(Do not2INSTALLATION OF INDOOR UNITDrilling of holes in the wall and fixture of sleeve The connecting wires may touch the metal inside the wall and cause danger so it is necessary toalways use the sleeve.(unit : mm)Indoor sidePreparations for the main frameMounting of interconnecting wires (Field wiring) Remove the control lid. Connect the connection wire securely to the terminal block.Use cables for interconnection wiring to avoid looseningof the wires.CENELEC code for cables Required field cables.H05RNR4G1.5 (Example)HHarmonized cable type05 300/500 volts- 191 - '11 • SCM-SM-110RNRNatural-and/or synth. rubber wire insulationPolychloroprene rubber conductors insulationStranded core4 Number of conductorsG65One conductor of the cable is the earth conductor(yellow/green)1.5 Section of copper wire (mm 2 )1) Connect the connection wire securely to the terminalblock. If the wire is not affixed completely, contact willbe poor, and it isdangerous as the terminal block mayheat up and catch fire.2) Take care not to confuse the terminal numbers forindoor andoutdoor connections.3) Affix the connection wire using the wiring clamp. Attach the control lid.Installation dimensions74035 67035Hanging bolt pitchPlanOutdoor side Drill a hole with a 65 wholecore drill.Sleeve30455515Hanging bolt pitch30Wall thickness + 15FrontSleeve740 106Inclination plateSealing plate230 1130Control lidThe screw of thecontrol lid istightened securely.150Terminal blockSide455 38Gas side pipes236PipeAssembled state When the pipe is connected at the rear, cut off the lower and the right sideportions of the sleeve collar (as shown by the broken line).ClampDrain hose135 78 Liquid side pipes(Connection opening diameter ø16)Securing Connecting the the ceiling Drain hanging Hose boltsIf steel embedded ceilingHoled anchorHoled plug3 CONNECTION OF REFRIGERANT PIPINGSSecuring the wireless receiver Regarding the change in the sizes of gas side Cut off pipes this section (usage if it interferes of the with variable the wall. joints); If the 5.0 kw and 6.0 kw classindoor units (gas side pipe Installation 12.7) frame is going to be connected to the operation valves (9.52), variable joints available asaccessories must Plate be (display) applied to the gas side operation valves.[Connection of pipes]NOTECalkingCover the pipes with tape so that dust and sand do Cut not off this enter section the if it pipe interferes until they are connected.with the wall.When connecting the pipes to the outdoor unit, be careful about the discharge of fluorocarbon gas or oil.Make sure to match the pipes between the indoor unit and the outdoor unit with the correct operation valves.Flat head Flat head(1) Preparationsmachine screw machine screw(In the pack of )IndoorDimension A Open a (Do through-hole not turn) on the wall to install the reception face for the wireless receiver CAUTION .Liquid side 9.1(mm) Insert the wireless receiver in Athe installation Gas frame side , and fix the Do calking not apply section. refrigerating machine oil toPress9.52 : 13.2(mm)Fix the installation frame on the wall using the flat head machine screws the flared . surface.Remove12.7 : 16.2(mm) Fix the plate (display) on the installation frame using the flat head machine screws packed togetherRemove the flared nuts.Install the removed flared nuts to the pipeswith (on both the liquid plate and gas (display) sides) . to be connected, then flare the pipes.(2) ConnectionIndoorFlaringblockLiquid sideGas side(Do not turn)Hanging bolts M8Measurement BCopper pipeInsertsConcrete90 ± 0.5° Clamp Tapping screw Drain hoseIf wooden ceilingHoles for ceiling hanging boltsClampsOpposite slopeBeamsInstallingNOTEthe main unitAttach theConductwasherstheandinstallationnuts to thecorrectly,ceilingandhangingensurebolts.that the water is draining correctly.It may lead to water leaks.Attach the hanging tool to the above nuts, and tighten the nuts.M8 handling boltMain frameAbout the option partsM8 nut M8 large washer(standard accessory) M8 large washer(standard accessory)M8 spring lock washerM8 nutIf it is not leveled, the float switch may malfunction or may not start.Wireless receiverSquare bars for hanging the air conditionerTraps Secure the ceiling hangingbolts firmly following theillustrations and otherinstructions.BumpsMeasurement B (mm)Copper pipe diameter Clutch type flare tool for Conventional (R22) flare toolR410AClutch type Wing nut type6.35 0.0 ~ 0.5 1.0 ~ 1.5 1.5 ~ 2.09.52 0.0 ~ 0.5 1.0 ~ 1.5 1.5 ~ 2.012.7 0.0 ~ 0.5 1.0 ~ 1.5 2.0 ~ 2.5Use a flare tool designed for R410A or a conventional flare tool. Please note thatmeasurement B (protrusion from the flaring block) will vary depending on the type of aflare tool in use. If a conventional flare tool is used, please use a copper pipe gauge or asimilar instrument to check protrusion so that you can keep measurement B to a correctvalue.Filter guideConnect the pipes on both liquid and gas sides.Tighten the nuts to the following torque.Liquid side : 14.0 ~ 18.0 N·m (1.4 Air ~ filter 1.8 kgf·m)Gas side (9.52) : 33.0 ~ 42.0 N·m (3.3 ~ 4.2 kgf·m)(12.7) : 49.0 ~ 61.0 N·m (4.9 ~ 6.1 kgf·m)45HEAT INSUHeat insulVinyl tapeTEST RUNInstallationCheck the followConduct a test rcustomer how tIf the compressto delayed start(Three-minute rWhen the air coapproximately 3After installa The power su No gas leaks Power cablesthe terminal b Each indoorwrong wiring Operation va Refrigerant hpipe length e The pipe joininsulated. Earthing wor The screw ofEARTHING WOEarth work shall beprevent electric shoThe connection of tsubstances causesit shall never be doTV antenna, lightniSecuring the ceiling hanging boltsIf steel embedded ceilingInsertsIf wooden ceilingHoles for ceiling hanging boltsSquare bars for hanging the air conditioner Secure the ceiling hanging4HEAT INSULATION FOR JOINTSHeat insulation for jointsCover the joint withUnit main bodyFinish and fixingPipe clampApply exterior tape and
30Hang301236Drain hose135 78 Liquid side pipes(Connection opening diameter ø16)Liquid sideGas side(Do not turn)Connect the pipes on both liquid and gas sides.Tighten the nuts to the following torque.Liquid side : 14.0 ~ 18.0 N·m (1.4 ~ 1.8 kgf·m)Gas side (9.52) : 33.0 ~ 42.0 N·m (3.3 ~ 4.2 kgf·m)(12.7) : 49.0 ~ 61.0 N·m (4.9 ~ 6.1 kgf·m)Securing the ceiling hanging boltsssary to(unit : mm)Pipessembled stateright sideblock Clamp38Gas side pipes236135 78 Liquid side pipes6)If steel embedded ceilingConnecting the Drain HoseHoled anchorHoled plugSecuring the wireless receiver3 CONNECTION OF REFRIGERANT PIPINGS Plate (display) Regarding the change in the sizes of gas side pipes (usage of the variable joints); If the 5.0 kw and 6.0 kw classindoor units (gas side pipe 12.7) is going to be connected to the operation valves (9.52), variable joints available asaccessories must be applied to the gas side operation valves.Wireless receiver[Connection of pipes]NOTECover the pipes with tape so that dust and sand do not enter the pipe until they are connected.Flat head Flat headWhen connecting machine screw the pipes machine to the screw outdoor unit, be careful about the discharge of fluorocarbon gas or oil.Make sure to (In match the pack of the ) pipes between the indoor unit and the outdoor unit with the correct operation valves.(1) PreparationsOpen a through-hole on the wall to install the reception face for the wireless receiver . Insert the wireless receiver in the installation frame , and fix the calking section. Indoor Fix the installation frame on the wall using the Dimension flat head A machine screws . CAUTION(Do not turn) Fix the plate (display) on the installation frame Liquid side using 9.1(mm) the flat headAGas sideDo machine not apply screws refrigerating packed machine together oil towith the plate (display) Press .9.52 : 13.2(mm) the flared surface.Remove the flared nuts.(on both liquid and gas sides)(2) ConnectionIndoorFlaringblockLiquid sideGas sideHanging bolts M8Installing the main unitRemove(Do not turn)Measurement BCopper pipeInsertsConcrete90 ± 0.5° Clamp Tapping screw Drain hoseIf wooden ceiling12.7 : 16.2(mm)Install the removed flared nuts to the pipesto be connected, then flare the pipes.Holes for ceiling hanging boltsOpposite slopeClampsBeams Secure the ceiling hangingbolts firmly following theTraps illustrations and otherinstructions.BumpsAttach the washers and nuts to the ceiling hanging bolts.NOTEAttach the hanging tool to the above nuts, and tighten the nuts.Conduct the installation correctly, and ensure that the water is draining correctly.M8 handling boltIt may lead to water leaks. M8 nutMain frameAbout the option parts M8 large washer(standard accessory) M8 large washer(standard accessory)M8 spring lock washerM8 nutIf it is not leveled, the float switch may malfunction or may not start. Installation frameCalkingCut off this section if it interferes with the wall.Cut off this section if it interfereswith the wall.Square bars for hanging the air conditionerMeasurement B (mm)Copper pipe diameter Clutch type flare tool for Conventional (R22) flare toolR410AClutch type Wing nut type6.35 0.0 ~ 0.5 1.0 ~ 1.5 1.5 ~ 2.09.52 0.0 ~ 0.5 1.0 ~ 1.5 1.5 ~ 2.012.7 0.0 ~ 0.5 1.0 ~ 1.5 2.0 ~ 2.5Use a flare tool designed for R410A or a conventional flare tool. Please note thatmeasurement B (protrusion from the flaring block) will vary depending on the type of aflare tool in use. If a conventional flare tool is used, please use a copper pipe gauge or asimilar instrument to check protrusion so that you can Filter keep guide measurement B to a correctvalue.Air filterConnect the pipes on both liquid and gas sides.Tighten the nuts to the following torque.Liquid side : 14.0 ~ 18.0 N·m (1.4 ~ 1.8 kgf·m)Gas side (9.52) : 33.0 ~ 42.0 N·m (3.3 ~ 4.2 kgf·m)(12.7) : 49.0 ~ 61.0 N·m (4.9 ~ 6.1 kgf·m)Unit main bodyHEAT INSULATION FOR JOINTSHeat insulation for joints- 192 - '11 • SCM-SM-11045Vinyl tapeEARTHING WORKCover the joint withinsulation materialfor the indoor unitand tape it.Installation test check pointsPosition sothe slitcomes on top.TEST RUN AND HANDLING INSTRUCTIONSEarth work shall be carried out without fail in order toprevent electric shock and noise generation.The connection of the earth cable to the followingsubstances causes dangerous failures, thereforeit shall never be done. (City water pipe, Town gas pipe,TV antenna, lightning conductor, telephoneline, etc.)Finish and fixingPipe clampPipesExterior tapeCrossover wiresDrain hoseTapping screwApply exterior tape andshape along the placewhere the pipes will berouted. Secure to thewall with a pipe clamp.Be careful not todamage the pipes andthe wires.Check the following points again after completion of the installation, and before turning on the power.Conduct a test run again and ensure that the unit operates properly. At the same time, explain to thecustomer how to use the unit and how to take care of the unit following the instruction manual.If the compressor does not operate after the operation has started, wait for 5-10 minutes. (This may be dueto delayed start.)(Three-minute restart preventive timer)When the air conditioner is restarted or when changing the operation, the unit will not start operating forapproximately 3minutes. This is to protect the unit and it is not a malfunction.After installation The power supply voltage is correct as the rating. No gas leaks from the joints of the operation valve. Power cables and crossover wires are securely fixed tothe terminal board. Each indoor and outdoor unit is properly connected (nowrong wiring or piping). Operation valve is fully open. Refrigerant has been additionally charged (when the totalpipe length exceeds the refrigerant charged pipe length). The pipe joints for indoor and outdoor pipes have beeninsulated. Earthing work has been conducted properly. The screw of the control lid is tightened securely.Test run Air conditioning and heating are normal. No abnormal noise. Water drains smoothly. Protective functions are not working. Operation of the unit has beenexplained to the customer. The wireless remote control is normal.GAS LEAK DETECTOR Check that thereare no gas leaksfrom the pipejoints using aleak detector orsoap water.Indoor unit inspection pointRJD012A201Banging the air conditionere the ceiling hangingfirmly following the4HEAT INSULATION FOR JOINTSHeat insulation for jointsCover the joint withFinish and fixingPipe clampApply exterior tape and
(4) Ceiling cassette-4way compact type (FDTC)refer to page 157 to 172.- 193 - '11 • SCM-SM-110
81 1 Before installation• Install correctly according to the installation manual.• Confirm the following points: Unit type/Power supply specification Pipes/Wires/Small parts Accessory itemsAccessory itmeFor unit hanging For refrigerant pipe For draom pipeFlat washer Level gaugePipe coverPipe cover(big)Strap Pipe cover(big) Pipe cover(small) Drain hose Hose clamp(M10) (Insulation)(small)8 4 1 1 4 1 1 1 1For adjustment For heat For heatFor heat For heatFor pipe coverFor drain pipe For drain hoseFor unit hanging in hoisting in the insulation insulationinsulation insulationfixingconnecting mountingunit's main body of gas pipe of liquid tubeof drain socket of drain socket2 Selection of installation location for the indoor unitj Select the suitable areas to install the unit under approval of the user.• Areas where the indoor unit can deliver hot and cold wind sufficiently. Suggest to the user to usea circulator if the ceiling height is over 3m to avoid warm air being accumulated on the ceiling.• Areas where there is enough space to install and service.• Areas where it can be drained properly. Areas where drain pipe descending slope can be taken.• Areas where there is no obstruction of airflow on both air return grille and air supply port.• Areas where fire alarm will not be accidentally activated by the air conditioner.• Areas where the supply air does not short-circuit.• Areas where it is not influenced by draft air.• Areas not exposed to direct sunlight.• Areas where dew point is lower than around 28°C and relative humidity is lower than 80%.This indoor unit is tested under the condition of JIS (Japan Industrial Standard) high humiditycondition and confirmed there is no problem. However, there is some risk of condensation dropif the air conditioner is operated under the severer condition than mentioned above.If there is a possibility to use it under such a condition, attach additional insulation of 10 to20mm thick for entire surface of indoor unit, refrigeration pipe and drain pipe.• Areas where TV and radio stays away more than 1m. (It could cause jamming and noise.)• Areas where any items which will be damaged by getting wet are not placed such as food, tablewares, server, or medical equipment under the unit.• Areas where there is no influence by the heat which cookware generates.• Areas where not exposed to oil mist, powder and/or steam directly such as above fryer.• Areas where lighting device such as fluorescent light or incandescent light doesn’t affect theoperation.(A beam from lighting device sometimes affects the infrared receiver for the wireless remotecontroller and the air conditioner might not work properly.)k Check if the place where the air conditioner is installed can hold the weight of the unit. If it is notable to hold, reinforce the structure with boards and beams strong enough to hold it. If the strengthis not enough, it could cause injury due to unit falling.l If there are 2 units of wireless type, keep them away for more than 5m to avoid malfunction due tocross communication.m When plural indoor units are installed nearby, keep them away for more than 4m.Space for installation and service• When it is not possible to keep enough space between indoor unit and wall or between indoor units,close the air supply port where it is not possible to keep space and confirm there is no short circuitof airflow.• Install the indoor unit at a height of more than 2.5m above the floor.WallCeilingsurfaceDecorative panel1000mm or moreObstacleIndoor unit1000mm or more4000mm or moreFloorIndoor unit2500mm or more'11 • SCM-SM-1103 Preparation before installation• If suspension bolt becomes longer, do reinforcement of earthquake resistant. For grid ceilingWhen suspension bolt length is over 500mm, or the gap between the ceiling and roof is over700mm, apply earthquake resistant brace to the bolt. In case the unit is hanged directly from the slab and is installed on the ceiling plane which hasenough strength.When suspension bolt length is over 1000mm, apply the earthquake resistant brace to the bolt.• Prepare four (4) sets of suspension bolt, nut and spring washer (M10 or M8) on site.Ceiling opening, Suspension bolts pitch, Pipe position530 (Suspension bolts pitch) FDecorative panelSymbol ContentA Gas pipingB Liquid pipingFFC Drain pipingD Hole for wiringE Suspension boltsAir outlet openingFfor ductingAir return185DAir supply grille190 22321413200 48700Drain hose piece(Accessory)(Installed on site)570140 6-φ432560 Holes forA B 145C Etapping screwsHole100Hanger plate forFsuspension bolt4 Installation of indoor unitWork procedure1. This units is designed for 2 x 2 grid ceiling.If necessary, please detach the T bar temporarily before you install it.If it is installed on a ceiling other than 2 x 2 grid ceiling, provide an inspection port on the control boxside.2. Arrange the suspension bolt at the right position (530mm×530mm).3. Make sure to use four suspension bolts and fix them so as to be able to hold 500N load.4. Ensure that the lower end of the suspension bolt should be 45mm above the ceiling plane.Temporarily put the four lower nuts 88mm above the ceiling plane and the upper nuts on distantplace from the lower nuts in order not to obstruct hanging the indoor unit or adjust the indoor unitposition, and then hang the indoor unit.Control boxT bar Ceilingpanel5. Adjust the indoor unit position after hanging it by inserting the level gauge attached on the packageinto the air supply port and checking if the gap between the ceiling plane and the indoor unit isappropriate. In order to adjust the indoor unit position, adjust the lower nuts while the upper nuts areput on distant place. Confirm there is no backlash between the hanger plate for suspension bolt andthe lower nut and washer.Drain pipingSuspension boltRefrigerant pipingNut (upper)Flat washerSpring washer88mmNut (lower)45mmLevel gaugeCeiling surfaceUse level gauges asUse level gauges asreference, adjust thereference, adjust thebottom to the face ofbottom to the face ofthe indoor unit.the indoor unit.DiffuserDiffuserLevel gauge(insulation)T-bar Level gaugeCeiling panelCeiling panel T-bar(insulation)When the ceiling panel comes below the Tbar, align the bottom of the level gauge tothe lower face of the ceiling panel.CorrectWrongUnitUnitTouch the nut (lower) and Play is left between the fixturewasher without any play and the nut (lower) and washer.- 194 -530( 35019213232645 or more30556886721024835358810014030
4 Installation of indoor unit (continued)6. Make sure to install the indoor unit horizontally. Confirm thelevelness of the indoor unit with a level gauge or transparenthose filled with water. Keep the height difference at both ends ofthe indoor unit within 3mm.7. Tighten four upper nuts and fix the unit after height and levelnessadjustment.Caution• Do not adjust the height by adjusting upper nuts. It will cause unexpected stress on the indoor unitand it will lead to deformation of the unit, failure of attaching a panel, and generating noise from thefan.• Make sure to install the indoor unit horizontally and set the gap between the unit underside andthe ceiling plane properly. Improper installation may cause air leakage, dew condensation, waterleakage and noise.• Even after decorative panel attached, still the unit height can be adjusted finely. Refer to theinstallation manual for decorative panel for details.• Make sure there is no gap between decoration panel and ceiling surface, and between decorationpanel and the indoor unit. The gap may cause air leakage, dew condensation and water leakage.• In case decorative panel is not installed at the same time, or ceiling material is installed after theunit installed, put the cardboard template for installation attached on the package (packing materialof cardboard box) on the bottom of the unit in order to avoid dust coming into the indoor unit.5 Refrigerant pipeCaution• Use the new refrigerant pipe.When re-using the existing pipe system for R22 or R407C, pay attention to the following items.• Change the flare nuts with the attached ones (JIS category 2), and reprocess the flare parts.• Do not use thin-walled pipes.• Use phosphorus deoxidized copper alloy seamless pipe (C1220T specified in JIS H3300) forrefrigeration pipe installation.In addition, make sure there is no damage both inside and outside of the pipe, and no harmfulsubstances such as sulfur, oxide, dust or a contaminant stuck on the pipes.• Do not use any refrigerant other than R410A.Using other refrigerant except R410A (R22 etc.) may degrade inside refrigeration oil. And air gettinginto refrigeration circuit may cause over-pressure and resultant it may result in bursting, etc.• Store the copper pipes indoors and seal the both end of them until they are brazed in order to avoidany dust, dirt or water getting into pipe. Otherwise it will cause degradation of refrigeration oil andcompressor breakdown, etc.• Use special tools for R410 refrigerant.Work procedure1. Remove the flare nut and blind flanges on the pipe of the indoor unit.Make sure to loosen the flare nut with holding the nut on pipe side with a spanner and givingtorque to the nut with another spanner in order to avoid unexpected stress to the copper pipe,and then remove them.(Gas may come out at this time, but it is not abnormal.)• Pay attention whether the flare nut pops out. (as the indoor unit is sometimes pressured.)2. Make a flare on liquid pipe and gas pipe, and connect the refrigeration pipes on the indoor unit.Bend the pipe with as big radius as possible and do not bend the pipe repeatedly. In addition, donot twist and crush the pipes.Do a flare connection as follows:• Make sure to loosen the flare nut with holding the nut on pipe side with a spanner and givingtorque to the nut with another spanner in order to avoid unexpected stress to the copper pipe,and then remove them.• When fastening the flare nut, align the refrigeration pipe with the center of flare nut, screw thenut for 3-4 times by hand and then tighten it by spanner with the specified torque mentionedin the table below. Make sure to hold the pipe on the indoor unit securely by a spanner whentightening the nut in order to avoid unexpected stress on the copper pipe.3. Cover the flare connection part of the indoor unit with attached insulation material after a gasleakage inspection, and tighten both ends with attached straps.• Make sure to insulate both gas pipes and liquid pipes completely.Incomplete insulation may cause dew condensation or water dropping.4. Refrigerant is charged in the outdoor unit.As for the additional refrigerant charge for the indoor unit and piping, refer to the installation manualattached to the outdoor unit.Pipe diameter Tightening torque N·mf 6.35 14 to 18f 9.52 34 to 42f 12.7 49 to 61f 15.88 68 to 82f 19.05 100 to 1206 Drain pipeCautionStrap (Accessory)Indoor unit• Install the drain pipe according to the installation manual in order to drain properly.Imperfection in draining may cause flood indoors and wetting the household goods,etc.• Do not put the drain pipe directly into the ditch where toxic gas such as sulfur, the other harmful andinflammable gas is generated. Toxic gas would flow into the room and it would cause seriousdamage to user’s health and safety (some poisoning or deficiency of oxygen). In addition, it maycause corrosion of heat exchanger and bad smell.• Connect the pipe securely to avoid water leakage from the joint.• Insulate the pipe properly to avoid condensation drop.• Check if the water can flow out properly from both the drain outlet on the indoor unit and the end ofthe drain pipe after installation.• Make sure to make descending slope of greater than 1/100 and do not make up-down bend and/ortrap in the midway. In addition, do not put air vent on the drain pipe. Check if water is drainedout properly from the pipe during commissioning. Also, keep sufficient space for inspection andmaintenance.hosePipe cover (Accessory)The thickness of insulation should be 20mm or more.'11 • SCM-SM-1106 Drain pipe (continued)Work procedure1. Make sure to insert the drain hose (the end mode of soft PVC) to the end of the step part of drainsocket.Attach the hose clamp to the drain hose around 10mm from the end, and fasten the screw within5mm left to the nut.• Do not apply adhesives on this end.pipe cover (big) Joint for VP-20(For insulation) (Prepare on site)(Accessory)UnitThe step partDrain socketDrain hoseDrain hoseVP-20(Accessory)(Prepare on site)ConnectClampDrain socket (AccessoryPipe cover (small)(For insulation)No adhesive allowedPipe cover (small)(Prepare on site)(For insulation)(Accessory)Fasten the screw within 5 mm left to the nut.Hose clamp Drain hoseDrain socketMetal plate10mm2. Prepare a joint for connecting VP-20 pipe, adhere and connect the joint to the drain hose (the endmade of rigid PVC), and adhere and connect VP-20 pipe (prepare on site).As for drain pipe, apply VP-20 made of rigid PVC which is on the market.• Make sure that the adhesive will not get into the supplied drain hose.It may cause the flexible part broken after the adhesive is dried up and gets rigid.• Do not bend or make an excess offset on the drain hose as shown in the picture.Bend or excess offset will cause drain leakage.Over 20mm3. Make sure to make descending slope of greater than 1/100 and do not make up-down bend and/ortrap in the midway.• Pay attention not to give stress on the pipe on the indoor unit side, and support and fix the pipeas close place to the unit as possible when connecting the drain pipe.• Do not set up air vent.1.5m ~ 2mSupporting metalNo bumpTrapped air willgenerate noises.Air ventNo trapNot touching the waterInsulation materialDescending slope greater than 1/100As wide as possible• When sharing a drain pipe for more than one(about100mm)unit, lay the main pipe 100mm below the drainoutlet of the unit. In addition, select VP-30 orbigger size for main drain pipe.VP-30 or biggerDescending stop greater than 1/1004. Insulate the drain pipe.• Be sure to insulate the drain socket and rigid PVC pipe installed indoors otherwise it may causedew condensation and water leakage.After drainage test implementation, cover the drain socket part with pipe cover (small size),then use the pipe cover (big size) to cover the pipe cover (small size), clamps and part of thedrain hose, and fix and wrap it with tapes to wrap and make joint part gapless.Drain up• The position for drain pipe outlet can be raised up to 600mm above the ceiling. Use elbows forinstallation to avoid obstacles inside ceiling. If the horizontal drain pipe is too long before verticalpipe, the backflow of water will increase when the unit is stopped, and it may cause overflow ofwater from the drain pan on the indoor unit. In order to avoid overflow, keep the horizontal pipelength and offset of the pipe within the limit shown in the figure below.295 to 325mm 100 or lessDrain hoseJoint for VP-20(Prepare on site)- 195 -600mm or less6 DrainDrain test• After installeakage fro• Do drain te• For new buhanging the1. Pour waterpump so as2. Make sureleakage froConfirm thais operatingcheck if the3. Unplug theon the draipipe propeDrain pump In case eleDrain pumpFor the opework. In case eleDrain pumpthe Connec[ 1 and 2Make sure7 Wirin• Electrical ininstallationto the technBe sure to• Use specifinot to apply• Do not putmiscommu• Be sure to• For the det1. Remove a2. Hold each3. Fix the wiri4. Install a lid
drainithinP-20n site)P-20re on site)small)tion)site)e endand/ore pipeillises.causesize),rt of theforrticalofipe6 Drain pipe (continued)Drain test• After installation of drain pipe, make sure that drain system work in good condition and no waterleakage from joint and drain pan. Check if the motor sound of drain pump is normal or not.• Do drain test even if installation of heating season.• For new building cases, make sure to complete the test beforehanging the ceiling.1. Pour water of about 1000cc into the drain pan in the indoor unit bypump so as not to get the electrical component wet.2. Make sure that water is drained out properly and there is no waterleakage from any joints of the drain pipe at the test.Confirm that the water is properly drained out while the drain motoris operating. At the drain socket (transparent), it is possible tocheck if the water is drained out properly.3. Unplug the drain plug on the indoor unit to remove remaining wateron the drain pan after the test, and re-plug it. And insulate the drainpipe properly finally.Drain pump operation In case electrical wiring work finishedDrain pump can be operated by remote controller (wired).For the operation method, refer to Operation for drain pump in the installation manual for wiringwork. In case electrical wiring work not finishedDrain pump will run continuously when the dip switch“SW7-1” on the indoor unit PCB is turned ON,the Connector CNB is disconnected, and then the power supply (220-240VAC on the terminal block[ 1 and 2] or [ L and N ] ) is turned ON.Make sure to turn OFF “SW7-1” and reconnect the Connector CNB after the test.7 Wiring-out position and wiring connection• Electrical installation work must be performed according to the installation manual by an electricalinstallation service provider qualified by a power provider of the country, and be executed accordingto the technical standards and other regulations applicable to electrical installation in the country.Be sure to use an exclusive circuit.• Use specified cord, fasten the wiring to the terminal securely, and hold the cord securely in ordernot to apply unexpected stress on the terminal.• Do not put both power source line and signal line on the same route. It may causemiscommunication and malfunction.• Be sure to do D type earth work.• For the details of electrical wiring work, see attached instruction manual for electrical wiring work.1. Remove a lid of the control box (1 screws).2. Hold each wiring inside the unit and fasten them to terminal block securely.3. Fix the wiring with clamp.4. Install a lid of the control box back to original place.Single split (PAC) seriesVRF (KX) seriesSignal side terminal blockSignal side terminal blockDrain plugPower source side terminal blockEarthWiring between indoorand outdoor unitRemote controller lineWiring clampPower source side terminal blockEarthEarth (signal line)Wiring clampIndoor power source lineSignal line (shielded cord)Remote controller line'11 • SCM-SM-1108 Panel installation• After wiring work finished, install the panel on the indoor unit.• Refer to attached panel installation manual for details.Accessory items1 Hook 1 piece For fixing temporarily2 Chain 2 pieces3 Bolt 4 pieces For installing the panel4 Screw 1 piece For attaching a hook5 Screw 2 pieces For attaching a chain• Attach the panel on the indoor unit after electrical wiring work.• Refer to attached manual for panel installation for details. (See next page)9 Check list after installation• Check the following items after all installation work completed.Check if Expected trouble CheckThe indoor and outdoor units are fixed securely?Falling, vibration, noiseInspection for leakage is done?Insufficient capacityInsulation work is properly done?Water leakageWater is drained properly?Water leakageSupply voltage is same as mentioned in the model name plate? PCB burnt out, not working at allThere is mis-wiring or mis-connection of piping?PCB burnt out, not working at allEarth wiring is connected properly?Electric shockCable size comply with specified size?PCB burnt out, not working at allAny obstacle blocks airflow on air inlet and outlet?Insufficient capacityPJA012D781
'11 • SCM-SM-110PJAO12D786- 197 -
'11 • SCM-SM-110Note : This function is not able to be set with wireless remote controls or simple remote control (RCH-H3).57For setting the swing range of other louvers, return to 1 and proceed same procedure respectively.- 198 -75
(5) Ceiling suspended type (FDEN)This manual is for the installation of an indoor unit.For electrical wiring work (Indoor), refer to the electrical wiring work installationmanual. For remote controller installation, refer to the installation manual attachedto a remote controller. For wireless kit installation, refer to the installation manualattached to a wireless kit. For electrical wiring work (Outdoor) and refrigerant pipework installation for outdoor unit, refer to Page 165 to 172.SAFETY PRECAUTIONS● Read the “SAFETY PRECAUTIONS” carefully first of all and then strictly follow it during the installation workin order to protect yourself.● The precautionary items mentioned below are distinguished into two levels, and CAUTION .: Wrong installation would cause serious consequences such as injuries or death.CAUTION : Wrong installation might cause serious consequences depending on circumstances.Both mentions the important items to protect your health and safety so strictly follow them by any means.●The meanings of “Marks” used here are as shown as follows:Never do it under any circumstances. Always do it according to the instruction.●After completing the installation, do commissioning to confirm there are no abnormalities, and explain to thecustomers about “SAFETY PRECAUTIONS”, correct operation method and maintenance method (air filtercleaning, operation method and temperature setting method) with user’s manual of this unit.Ask your customers to keep this installation manual together with the user’s manual. Also, ask them to handover the user’s manual to the new user when the owner is changed.WARNING●Installation should be performed by the specialist.If you install the unit by yourself, it may lead to serious trouble such as water leakage, electric shock, fire, and injury due to overturn of the unit.●Install the system correctly according to these installation manuals.Improper installation may cause explosion, injury, water leakage, electric shock, and fire.●When installing in small rooms, take prevention measures not to exceed the density limit of refrigerant in theevent of leakage, referred by the formula (accordance with ISO5149).If the density of refrigerant exceeds the limit, please consult the dealer and install the ventilation system, otherwise lack ofoxygen can occur, which can cause serious accidents.●Use the genuine accessories and the specified parts for installation.If parts unspecified by our company are used it could cause water leakage, electric shock, fire, and injury due to overturn of the unit.●Ventilate the working area well in case the refrigerant leaks during installation.If the refrigerant contacts the fire, toxic gas is produced.●Install the unit in a location that can hold heavy weight.Improper installation may cause the unit to fall leading to accidents.●Install the unit properly in order to be able to withstand strong winds such as typhoons, and earthquakes.Improper installation may cause the unit to fall leading to accidents.●Do not mix air in to the cooling cycle on installation or removal of the air conditioner.If air is mixed in, the pressure in the cooling cycle will rise abnormally and may cause explosion and injuries.●Be sure to have the electrical wiring work done by qualified electrical installer, and use exclusive circuit.Power source with insufficient capacity and improper work can cause electric shock and fire.●Use specified wire for electrical wiring, fasten the wiring to the terminal securely, and hold the cable securely inorder not to apply unexpected stress on the terminal.Loose connections or hold could result in abnormal heat generation or fire.●Arrange the electrical wires in the control box properly to prevent them from rising. Fit the lid of the servicespanel property.Improper fitting may cause abnormal heat and fire.●Check for refrigerant gas leakage after installation is completed.If the refrigerant gas leaks into the house and comes in contact with a fan heater, a stove, or an oven, toxic gas is produced.●Use the specified pipe, flare nut, and tools for R410A.Using existing parts (R22) could cause the unit failure and serious accident due to explosion of the cooling cycle.●Tighten the flare nut according to the specified method by with torque wrench.If the flare nut were tightened with excess torque, it could cause burst and refrigerant leakage after a long period.●Do not put the drainage pipe directly into drainage channels where poisonous gases such as sulfide gas can occur.Poisonous gases will flow into the room through drainage pipe and seriously affect the user's health and safety. This can alsocause the corrosion of the indoor unit and a resultant unit failure or refrigerant leak.●Connect the pipes for refrigeration circuit securely in installation work before compressor is operated.If the compressor is operated when the service valve is open without connecting the pipe, it could cause explosion and injuries dueto abnormal high pressure in the system.●Stop the compressor before removing the pipe after shutting the service valve on pump down work.If the pipe is removed when the compressor is in operation with the service valve open, air would be mixed in the refrigeration circuitand it could cause explosion and injuries due to abnormal high pressure in the cooling cycle.●Only use prescribed optional parts. The installation must be carried out by the qualified installer.If you install the system by yourself, it can cause serious trouble such as water leaks, electric shocks, fire.●Do not repair by yourself. And consult with the dealer about repair.Improper repair may cause water leakage, electric shock or fire.●Consult the dealer or a specialist about removal of the air conditioner.Improper installation may cause water leakage, electric shock or fire.●Turn off the power source during servicing or inspection work.If the power is supplied during servicing or inspection work, it could cause electric shock and injury by the operating fan.●Do not run the unit when the panel or protection guard are taken off.Touching the rotating equipment, hot surface, or high voltage section could cause an injury to be caught in the machine, to getburned, or electric shock.●Shut off the power before electrical wiring work.It could cause electric shock, unit failure and improper running.'11 • SCM-SM-110PFA012D621B aCAUTION● Perform earth wiring surely.Do not connect the earth wiring to the gas pipe, water pipe, lightning rod and telephone earth wiring. Improper earth couldcause unit failure, electric shock and fire due to a short circuit.● Earth leakage breaker must be installed.If the earth leakage breaker is not installed, it can cause fire and electric shocks.● Use the circuit breaker of correct capacity. Circuit breaker should be the one that disconnect allpoles under over current.Using the incorrect one could cause the system failure and fire.● Do not use any materials other than a fuse of correct capacity where a fuse should be used.Connecting the circuit by wire or copper wire could cause unit failure and fire.● Do not install the indoor unit near the location where there is possibility of flammable gas leakages.If the gas leaks and gathers around the unit, it could cause fire.● Do not install and use the unit where corrosive gas (such as sulfurous acid gas etc.) or flammable gas (suchas thinner, petroleum etc.) may be generated or accumulated, or volatile flammable substances are handled.It could cause the corrosion of heat exchanger, breakage of plastic parts etc. And inflammable gas could cause fire.● Secure a space for installation, inspection and maintenance specified in the manual.Insufficient space can result in accident such as personal injury due to falling from the installation place.● Do not use the indoor unit at the place where water splashes such as laundry.Indoor unit is not waterproof. It could cause electric shock and fire.● Do not use the indoor unit for a special purpose such as food storage, cooling for precisioninstrument, preservation of animals, plants, and a work of art.It could cause the damage of the items.● Do not install nor use the system near equipments which generate electromagnetic wave or high harmonics.Equipments like inverter equipment, private power generator, high-frequency medical equipment, or telecommunicationequipment might influence the air conditioner and cause a malfunction and breakdown. Or the air conditioner mightinfluence medical equipments or telecommunication equipments, and obstruct their medical activity or cause jamming.● Do not install the remote controller at the direct sunlight.It could cause breakdown or deformation of the remote controller.● Do not install the indoor unit at the place listed below.· Places where flammable gas could leak.· Places where cosmetics or special sprays are· Places where carbon fiber, metal powder or any powder is floated. frequently used.· Place where the substances which affect the air conditioner are generated · Highly salted area such as beach.such as sulfide gas, chloride gas, acid, alkali or ammonic atmospheres. · Heavy snow area· Places exposed to oil mist or steam directly.· Places where the system is affected by· On vehicles and shipssmoke from a chimney.· Places where machinery which generates high harmonics is used. · Altitude over 1000m● Do not install the indoor unit in the locations listed below (Be sure to install the indoor unitaccording to the installation manual for each model because each indoor unit has each limitation)· Locations with any obstacles which can prevent inlet and outlet air of the unit· Locations where vibration can be amplified due to insufficient strength of structure.· Locations where the infrared receiver is exposed to the direct sunlight or the strong light beam. (in case of theinfrared specification unit)· Locations where an equipment affected by high harmonics is placed. (TV set or radio receiver is placed within 5m)· Locations where drainage cannot run off safely.It can affect performance or function and etc..● Do not put any valuables which will break down by getting wet under the air conditioner.Condensation could drop when the relative humidity is higher than 80% or drain pipe is clogged, and it damages user’s belongings.● Do not use the base frame for the outdoor unit which is corroded or damaged after a long period of use.It could cause the unit falling down and injury.● Pay attention not to damage the drain pan by weld sputter when brazing work is done near the unit.If sputter entered into the unit during brazing work, it could cause damage (pinhole) of drain pan and leakage of water.To avoid damaging, keep the indoor unit packed or cover the indoor unit.● Install the drain pipe to drain the water surely according to the installation manual.Improper connection of the drain pipe may cause dropping water into room and damaging user’s belongings.● Do not share the drain pipe for indoor unit and GHP (Gas Heat Pump system) outdoor unit.Toxic exhaust gas would flow into room and it might cause serious damage (some poisoning or deficiency of oxygen) touser’s health and safety.● Be sure to perform air tightness test by pressurizing with nitrogen gas after completed refrigerant piping work.If the density of refrigerant exceeds the limit in the event of refrigerant leakage in the small room, lack of oxygen canoccur, which can cause serious accidents.● For drain pipe installation, be sure to make descending slope of greater than 1/100, not to make traps,and not to make air-bleeding.Check if the drainage is correctly done during commissioning and ensure the space for inspection and maintenance.● Ensure the insulation on the pipes for refrigeration circuit so as not to condense water.Incomplete insulation could cause condensation and it would wet ceiling, floor, and any other valuables.● Do not install the outdoor unit where is likely to be a nest for insects and small animals.Insects and small animals could come into the electronic components and cause breakdown and fire. Instruct the user tokeep the surroundings clean.● Pay extra attention, carrying the unit by hand.Carry the unit with 2 people if it is heavier than 20kg. Do not use the plastic straps but the grabbing place, moving the unitby hand. Use protective gloves in order to avoid injury by the aluminum fin.● Make sure to dispose of the packaging material.Leaving the materials may cause injury as metals like nail and woods are used in the package.● Do not operate the system without the air filter.It may cause the breakdown of the system due to clogging of the heat exchanger.● Do not touch any button with wet hands.It could cause electric shock.● Do not touch the refrigerant piping with bare hands when in operation.The pipe during operation would become very hot or cold according to the operating condition, and it could cause a burn or frostbite.● Do not clean up the air conditioner with water.It could cause electric shock.● Do not turn off the power source immediately after stopping the operation.Be sure to wait for more than 5 minutes. Otherwise it could cause water leakage or breakdown.● Do not control the operation with the circuit breaker.It could cause fire or water leakage. In addition, the fan may start operation unexpectedly and it may cause injury.- 199 -
'11 • SCM-SM-110Before installationPreparation before installation (continued)Install correctly according to the installation manual.Pitch of suspension bolts and pipe positionLocation of pipe outletsConfirm the following points:Top coverPitch of suspension boltsDrain lineDrain line (left)Unit type/Power supply specification Pipes/Wires/Small parts Accessory itemsA(rear left)24 B24Blowout openingAccessory itemTop outletRight outletFor unit hangingFor refrigerant pipeFor drain pipeFor air return grilleRear coverDrain hoseRear outletStrapHose clamp Fixing bracket Screw Cutout parts(with clamp)Heay insulation Screw※The outlet through which the pipings are taken out isWall(mm) available in three directions.※Pipes can be taken out in 3 directions (rear, right or8 1 1 1 4 1 11 2 1 4Series type A Btop).For unit hanging For heat insulation For heat insulation For fixing of pipe For drain pipe For drain hose For fixing of For installing of For drain hose For fixing air40 to 50type 1070 1022and adjustment of gas pipe of liquid pipe coverconnection mounting drain hose fixing bracketreturn grilleSingle Split (PAC)・ Cut out holes using nippers, etc.series 60 to 71type 1320 1272・ Cut out holes to take out pipes along the cutoff line100 to 140type 1620 1572 on the rear cover.Accessories36 to 56type 1070 1022 ・ Cut out the top face cover aligning to the pipingAir return grilleare inside.VRF (KX) series 71type 1320 1272 position.112 to 140type 1620 1572 ・ When taking pipe out to right-hand side, cut out ahole along the groove at the inside of side panel.Pipe position・ After installing pipes and wires, seal clearancesaround pipes and wires with putty, etc. to shut off235(Liquid piping)135 GasRefrigerant linedust.piping75Drain piping (left)195(Gas piping)LiquidpipingMake sure to install the covers at rear and top in order toprotect the inside of unit from intrusion of dust orprotect wires from damages by sharp edges. Whentaking them out to the right-hand side, remove burrs or271 Unit interior10 mm slope 110 76 sharp edges from the cutout.Selection of installation location for the indoor unitDrain piping(right)HaulageGrille upside Select the suitable areas to install the unit under approval of the user.Move the box as close to the installation area as possible packed.・Areas where the indoor unit can deliver hot and cold wind sufficiently.If it must be unpacked, wrap the unit with a nylon sling,Suggest to the user to use a circulator if the ceiling height is over 3m toand be careful not to damage the unit.(Indoor unit)avoid warm air being accumulated on the ceiling.If you need to lay the unit on a floor after unpacking, always・Areas where there is enough space to install and service.put it with the intake grille facing upward.・Areas where it can be drained properly. Areas where drain pipe descendingslope can be taken.Preparation before instalation1. Remove the air return grille. 2. Remove the side panel.・Areas where there is no obstruction of airflow on both air return grille and air supply port.Slide stoppers (4 places) of the catches, Remove the screw and detach the・Areas where fire alarm will not be accidentally activated by the air conditioner.then pull out the pins ( 4 or 6 places).side panel by sliding it toward the・Areas where the supply air does not short-circuit.Filterdirection indicated by the arrow mark.・Areas where it is not influenced by draft air.PinSide panel screw・Areas not exposed to direct sunlight.(1 each on the left and right) (M4)・Areas where dew point is lower than around 23°C and relative humidity is lower than 80%.This indoor unit is tested under the condition of JIS (Japan IndustrialStandard) high humidity condition and confirmed there is no problem.Side panelHowever, there is some risk of condensation drop if the air conditioner is3. Remove the hanging plate.operated under the severer condition than mentioned above.Remove the screw, and then loosen・Areas where TV and radio stays away more than 1m. (It could cause jamming and noise.)the fixing bolts.Hanging platescrew・Areas where any items which will be damaged by getting wet are not placedUnscrew Indoor Hangingsuch as food, table wares, server, or medical equipment under the unit.8-12mm unit plate fixing・Areas where there is no influence by the heat which cookware generates.bolts(M8)Hanging plateHanging plate・Areas where not exposed to oil mist, powder and/or steam directly such as above fryer.・Areas where lighting device such as fluorescent light or incandescent lightdoesn’t affect the operation.Remote controller(A beam from lighting device sometimes affects the infrared receiver for thewireless remote controller and the air conditioner might not work properly.)Installation of remote controller Check if the place where the air conditioner is installed can hold the weight of the unit.If it is not able to hold, reinforce the structure with boards and beams strong enoughUp to two receiver or wired remote controller can be installed in one indoor unitgroup.to hold it. If the strength is not enough, it could cause injury due to unit falling. If there are 2 units of wireless type, keep them away for more than 6m toWhen both wired and wireless remote controller are usedavoid malfunction due to cross communication.It is necessary to set wired or wireless remote controller as slave. When plural indoor units are installed nearby, keep them away for more than 4 to 5m.(For the method of changing the setting, refer to the installtionmanual attached to remote controller or wireless kit.)Space for installation and serviceWhen wired remote controller are used only (wireless type)4000~5000mm or moreIt is necessary to remove the line that is connected to the receiver.Remove signal line connected to the receiver from primary side ofterminal block (X, Y).100mmATTENTIONor more150mm or moreInsulate with tape the removed line.5mm or moreThe LED of that removed connector will not be able to make anyindication.ObstaclePreparation before installationIf suspension bolt becomes longer, do reinforcement of earthquake resistant.For grid ceilingWhen suspension bolt length is over 500mm, or the gap between the ceilingand roof is over 700mm, apply earthquake resistant brace to the bolt.In case the unit is hanged directly from the slab and is installed on theceiling plane which has enough strength.When suspension bolt length is over 1000mm, apply the earthquake resistant brace to the bolt.Prepare four (4) sets of suspension bolt, nut and spring washer (M10) on site.Remove the line- 200 -Flat washer (M10) Paper pattern Pipe cover (large) Pipe cover (small)For unit hanging300mm or more6901010953215 2905312060 100175 1927 10827 3160 47
Installation of indoor unitWork procedure1. Select the suspension bolt locations and the pipe hole location.(1) Use enclosed paper pattern as a reference, anddrill the holes for the suspension bolts and pipe.※Decide the locations based on direct measurements.(2) Once the locations are properly placed, the paperpattern can be removed.2. Install the suspension bolts in place.3. Fix with 4 suspension bolts, which can endure load of 500N.4. Check the measurements given at the rightfigure for the length of the suspension bolts.UnitCeiling surfaceWasher(accessory)25 mm or more45 mm or lessUnitHanging plate ※Double nuts※Please fasten firmly with double nuts.Paper patternCeilingHanging plateSuspension bolt5. Fasten the hanging plate onto the suspension bolts.Air supply Suspension bolt Hanging plateSuspension boltNutFastenat thefrontend ofanelongatedhole.Strap (Accessory)0~3mmWasher(accessory)※Double nuts6. Install the unit to the hanging plate.Hanging plate(1) Slide the unit in from front side to get ithanged on the hanging plate with the bolts.(2) Fasten the four fixing bolts (M8: 2each on the left and right sides) firmly.(3) Fasten the two screws (M4: 1 each onthe left and right sides).Fixing bolts(M8)WARNINIG : Hang a side panel on from thepanel side to the rear side andthen fasten it securely ontothe indoor unit with screws. (For left-side drainconnection, give the※To ensure smooth drain flow, install the unit with reverse slope.)a descending slope toward the drain outlet.CAUTION : Do not give the reversed slope, which may cause water leaks.Refrigerant pipeCautionPipe diameterø 6.35ø 9.52ø 12.7ø 15.88ø 19.05Tightening torque N·m14 to 1834 to 4249 to 6168 to 82100 to 120Pipe cover (Accessory)Screw forhangingplate (M4)Use the new refrigerant pipe.When re-using the existing pipe system for R22 or R407C, pay attention to the following items.・Change the flare nuts with the attached ones (JIS category 2), and reprocess the flare parts.・Do not use thin-walled pipes.Use phosphorus deoxidized copper alloy seamless pipe (C1220T specified in JIS H3300) for refrigeration pipe installation.In addition, make sure there is no damage both inside and outside of the pipe, and noharmful substances such as sulfur, oxide, dust or a contaminant stuck on the pipes.Do not use any refrigerant other than R410A.Using other refrigerant except R410A (R22 etc.) may degrade inside refrigeration oil. And air gettinginto refrigeration circuit may cause over-pressure and resultant it may result in bursting, etc.Store the copper pipes indoors and seal the both end of them until they are brazed in order to avoid any dust, dirtor water getting into pipe. Otherwise it will cause degradation of refrigeration oil and compressor breakdown, etc.Use special tools for R410 refrigerant.Work procedure1. Remove the flare nut and blind flanges on the pipe of the indoor unit.※Make sure to loosen the flare nut with holding the nut on pipe side with a spanner and giving torque to thenut with another spanner in order to avoid unexpected stress to the copper pipe, and then remove them.(Gas may come out at this time, but it is not abnormal.)Pay attention whether the flare nut pops out. (as the indoor unit is sometimes pressured.)2. Make a flare on liquid pipe and gas pipe, and connect the refrigeration pipes on the indoor unit.・When taking out the pipe to rear or top, install it together with the electric wire,passing them through the attached cover.・Seal clearances with putty, etc. to shut off dust.※Bend the pipe with as big radius as possible and do not bend the pipe repeatedly.In addition, do not twist and crush the pipes.※Do a flare connection as follows:Make sure to loosen the flare nut with holding the nut on pipe side with a spannerand giving torque to the nut with another spanner in order to avoid unexpectedstress to the copper pipe, and then remove them.When fastening the flare nut, align the refrigeration pipe with the center of flare nut, screwthe nut for 3-4 times by hand and then tighten it by spanner with the specified torquementioned in the table below. Make sure to hold the pipe on the indoor unit securely by aspanner when tightening the nut in order to avoid unexpected stress on the copper pipe.3. Cover the flare connection part of the indoor unit with attached insulation materialafter a gas leakage inspection, and tighten both ends with attached straps.Make sure to insulate both gas pipes and liquid pipes completely.※Incomplete insulation may cause dew condensation or water dropping.4. Refrigerant is charged in the outdoor unit.As for the additional refrigerant charge for the indoor unit and piping, refer to the installationmanual attached to the outdoor unit.0~3mmThe thickness of insulation should be 20mm or more.'11 • SCM-SM-110Refrigerant pipe (continued)The pipe can be connected from three different directions. (back, reight, top)When the pipe is routed through the back.If the bracket is removed, piping work will become easy.※After piping, reinstall the removed bracket.BracketPipeWhen the pipe is routed through the back.Cut the removed top cover, and install tothe rear panel instead of rear cover.CutRemoveDrain pipeThe drain pipes may face out towards the back to the left, or to the right side.CautionInstall the drain pipe according to the installation manual in order to drain properly.Imperfection in draining may cause flood indoors and wetting the household goods,etc.Do not put the drain pipe directly into the ditch where toxic gas such as sulfur, theother harmful andinflammable gas is generated. Toxic gas would flow into the room andit would cause serious damage to user’s health and safety (some poisoning or deficiencyof oxygen). In addition, it may cause corrosion of heat exchanger and bad smell.Connect the pipe securely to avoid water leakage from the joint.Insulate the pipe properly to avoid condensation drop.Check if the water can flow out properly from both the drain outlet on theindoor unit and the end of the drain pipe after installation.Make sure to make descending slope of greater than 1/100 and do not make up-down bend and/or trapin the midway. In addition, do not put air vent on the drain pipe. Check if water is drained out properlyfrom the pipe during commissioning. Also, keep sufficient space for inspection and maintenance.Work procedureHeat insulation material1. Insert drain hose completely to theDrainbase, and tighten the drain hose clampsocketsecurely. ( adhesive must not be used.)Drain hose (accessory) VP-20Clamp (accessory) (prepare on site)※ When plumbing on the left side, move therubber plug and the cylindrical insulatingDrain hosematerials by the pipe connecting hole onHose clampthe left side of the unit to the right side.It can be attachedLowest pointfrom both inside andBeware of a possible outflow of water that mayoutside the unit.occur upon removal of a drain plug.No bumps2. Fix the drain hose at the lowest point withNo trapsa hose clamp supplied as an accessory.Not to be in waterTo be a descending※Give a drain hose a gradient of 10mmangleas illustrated in the right drawing bylaying it without leaving a slack.Take head of electrical cables so thatthey may not run beneath the drain hose.A drain hose must be clamped down with a hose clamp.There is a possibility that drain water overflows.3. Connect VP-20(prepare on site) to drain hose. (adhesive must not be used.)※ Use commercially available rigid PVC general pipe VP-20 for drain pipe.4. Do not to make the up-down bending and trap in the mid-way while assumingthat the drain pipes is downhill. (more than 1/100)Never set up air vent.5. Insulate the drain pipe.Insulate the drain hose clamp with the heat insulation supplied as accessories.When the unit is installed in a humid place, consider precautions againstdew condensation such as heat insulation for the drain pipe.Drain testAfter installation of drain pipe, make sure that drain system work in goodcondition and no water leakage from joint and drain pan.Do drain test even if installation of heating season.- 201 -10mm
Interconnecting wiringEarthSignal cable forremote controllerSignal cable forremote controllerSignal cableWiring-out position and wiring connectionElectrical installation work must be performed according to the installationmanual by an electrical installation service provider qualified by a powerprovider of the country, and be executed according to the technicalstandards and other regulations applicable to electrical installation in thecountry.Be sure to use an exclusive circuit.Use specified cord, fasten the wiring to the terminal securely, and hold thecord securely in order not to apply unexpected stress on the terminal.Do not put both power source line and signal line on the same route. It maycause miscommunication and malfunction.Be sure to do D type earth work.For the details of electrical wiring work, see attached instruction manual forelectrical wiring work.1. Remove a lid of the electrical box (2 screws).2. Hold each wiring inside the unit and connect to a terminal block surely.3. Fix the wiring by clamps.4. Install the removed parts back to original place.Single split (PAC) seriesVRF(KX) seriesAttaching the air return grilleThe air return grille must be attached when electrical cabling work is completed.1. Fix the chains tied to the air returngrille onto the indoor unit withscrews supplied as accessories (4pieces).Fix with screwsChainChainChainCheck list after installationCheck the following items after all installation work completed.Check if Expected trouble CheckThe indoor and outdoor units are fixed securely? Falling, vibration, noiseInspection for leakage is done?Insulation work is properly done?Water is drained properly?Power source sideterminal block1 2 3 X YPower source sideterminal blockL N X Y A BPower cableEarthInsufficient capacityWater leakageWater leakageSupply voltage is same as mentioned in the model name plate? PCB burnt out, not working at allThere is mis-wiring or mis-connection of piping?Earth wiring is connected properly?Cable size comply with specified size?EarthEarthSignal sideterminal blockWiring clampSignal sideterminal blockWiring clamp2. Close the air return grille.This completes the unitinstalltion work.PCB burnt out, not working at allElectric shockWirelessreceiver lineRemote controller lineWiring between indoorand outdoor unitWirelessreceiver lineSignal line(shielded cord)Remote controllerlineIndoor powersource linePCB burnt out, not working at allAny obstacle blocks airflow on air inlet and outlet? Insufficient capacity'11 • SCM-SM-110How to set the airflow directionIt is possible to change the movable range of the louver on the air outlet fromthe wired remote controller. Once the top and bottom position is set, the louverwill swing within the range between the top and the bottom when swingoperation is chosen. It is also possible to apply different setting to each louver.Note:This function is not able to be set with wireless (RCH-H3).1. Stop the air conditioner and press SET button andLOUVER button simultaneously for three seconds ormore.The following is displayed if the number of the indoor unitsconnected to the remote controller is one. Go to step 4.“ ”“ ”The following is displayed if the number of the indoor unitsconnected to the remote controller are more than one.“ ”“ ”2. Press or button.(selection of indoor unit) Select the indoor unit of which the louver is set.[EXAMPLE]“ ”“”“ ”“ ”3. Press SET button.(determination of indoor unit) Selected indoor unit is fixed.[EXAMPLE]“ ” (displayed for two seconds)“ ”“ ”4. Press or button.(selection of louver No.) Select the louver No. to be setaccording to the right figure.[EXAMPLE]“ ” “ ” “ ”“ ”5. Press SET button.(Determination of louver No.)The louver No. to be set is confirmed and the display shows the upperlimit of the movable range.[EXAMPLE] If No.1 louver is selected,“ ” current upper limit position6. Press or button.(selection of upper limit position)Select the upper limit of louver movable range.“position 1” is the most horizontal, and “position 6” is the most downward.“position --” is to return to the factory setting. (horizontal)If you need to change the setting to the defaultsetting, use “position --”.“ ” (the most horizotal) “ ” “ ” “ ” “ ” “” (the most downwards)(downwards) “” (return to the default setting)the position of the louver7. Press SET button.(Fixing of the upper limit position)The upper limit position is fixed and the setting position is displayed fortwo seconds. Then proceed to lower limit position selection display.[EXAMPLE](displayed for two seconds)(shows current setting)8. Press or button.(Selection of lower limit position)Select the lower limit position of louver.“position 1” is the most horizontal, and “position 6 ”is the most downwards.“position --” is to return to the factory setting. If you need to changethe setting to the default setting, use “position --”.(the most horizontal)(the most downwards)(return to the default setting)9. Press SET button.(Fixing of the lower limit position)Upper limit position and lower limit position are fixed, and the setpositions are displayed for two seconds, then setting is completed.• After the setting is completed, the louver which wasset moves from the original position to the lowerUpperlimit position, and goes back to the original position positionagain. (This operation is not performed if the indoorunit and/or indoor unit fan is in operation.)Movable[Example]range(displayed for two seconds)Lowerposition10.Press button.Louver adjusting mode ends and returns to the original display.CautionIf the upper limit position number and the lower limit position number are set to the sameposition, the louver is fixed at that position auto swing does not funtion.ATTENTIONIf you press RESET button during settings, the display will return to previous display.If you pressbutton during settings, the mode will be ended and return to original display, and the settings that have not beencompleted will become invalid.When plural remote controllers are connected, louver setting operationcannot be set by slave remote controller.- 202 -
'11 • SCM-SM-110(6) Duct connected Low/Middle static pressure type (FDUM)DUCT CONNECTED MIDDLE STATIC PRESSURE AIRCONDITIONING UNIT INSTALLATION <strong>MANUAL</strong>CAUTION● Perform earth wiring surely.Do not connect the earth wiring to the gas pipe, water pipe, lightning rod and telephone earth wiring. Improper earth couldcause unit failure and electric shock or fire due to a short circuit.● Earth leakage breaker must be installed.If the earth leakage breaker is not installed, it could cause electric shocks or fire.● Use the circuit breaker of correct capacity. Circuit breaker should be the one that disconnect allSAFETY PRECAUTIONSpoles under over current.Using the incorrect one could cause the system failure and fire.● Do not use any materials other than a fuse of correct capacity where a fuse should be used.CAUTIONConnecting the circuit by wire or copper wire could cause unit failure and fire.: Wrong installation would cause serious consequences such as injuries or death.● Do not install the indoor unit near the location where there is possibility of flammable gas leakages.CAUTION : Wrong installation might cause serious consequences depending on circumstances.If the gas leaks and gathers around the unit, it could cause fire.● Do not install and use the unit where corrosive gas (such as sulfurous acid gas etc.) or flammable gas (suchas thinner, petroleum etc.) may be generated or accumulated, or volatile flammable substances are handled.Never do it under any circumstances. Always do it according to the instruction.It could cause the corrosion of heat exchanger, breakage of plastic parts etc. And inflammable gas could cause fire.● Secure a space for installation, inspection and maintenance specified in the manual.Insufficient space can result in accident such as personal injury due to falling from the installation place.● Do not use the indoor unit at the place where water splashes such as laundry.Indoor unit is not waterproof. It could cause electric shock and fire.● Do not use the indoor unit for a special purpose such as food storage, cooling for precisioninstrument, preservation of animals, plants, and a work of art.WARNINGIt could cause the damage of the items.● Do not install nor use the system near equipments which generate electromagnetic wave or high harmonics.Equipments like inverter equipment, private power generator, high-frequency medical equipment, or telecommunicationequipment might influence the air conditioner and cause a malfunction and breakdown. Or the air conditioner mightinfluence medical equipments or telecommunication equipments, and obstruct their medical activity or cause jamming.● Do not install the remote controller at the direct sunlight.It could cause breakdown or deformation of the remote controller.● Do not install the indoor unit at the place listed below.· Places where flammable gas could leak.· Places where cosmetics or special sprays are· Places where carbon fiber, metal powder or any powder is floated. frequently used.· Place where the substances which affect the air conditioner are generated · Highly salted area such as beach.such as sulfide gas, chloride gas, acid, alkali or ammonic atmospheres. · Heavy snow area· Places exposed to oil mist or steam directly.· Places where the system is affected by· On vehicles and shipssmoke from a chimney.· Places where machinery which generates high harmonics is used. · Altitude over 1000m● Do not install the indoor unit in the locations listed below (Be sure to install the indoor unitaccording to the installation manual for each model because each indoor unit has each limitation)· Locations with any obstacles which can prevent inlet and outlet air of the unit· Locations where vibration can be amplified due to insufficient strength of structure.· Locations where the infrared receiver is exposed to the direct sunlight or the strong light beam. (in case of theinfrared specification unit)· Locations where an equipment affected by high harmonics is placed. (TV set or radio receiver is placed within 5m)· Locations where drainage cannot run off safely.It can affect performance or function and etc..● Do not put any valuables which will break down by getting wet under the air conditioner.Condensation could drop when the relative humidity is higher than 80% or drain pipe is clogged, and it damages user’s belongings.● Do not use the base frame for the outdoor unit which is corroded or damaged after a long period of use.It could cause the unit falling down and injury.● Pay attention not to damage the drain pan by weld sputter when brazing work is done near the unit.If sputter entered into the unit during brazing work, it could cause damage (pinhole) of drain pan and leakage of water.To avoid damaging, keep the indoor unit packed or cover the indoor unit.● Install the drain pipe to drain the water surely according to the installation manual.Improper connection of the drain pipe may cause dropping water into room and damaging user’s belongings.● Do not share the drain pipe for indoor unit and GHP (Gas Heat Pump system) outdoor unit.Toxic exhaust gas would flow into room and it might cause serious damage (some poisoning or deficiency of oxygen) touser’s health and safety.● Be sure to perform air tightness test by pressurizing with nitrogen gas after completed refrigerant piping work.If the density of refrigerant exceeds the limit in the event of refrigerant leakage in the small room, lack of oxygen canoccur, which can cause serious accidents.● For drain pipe installation, be sure to make descending slope of greater than 1/100, not to make traps,and not to make air-bleeding.Check if the drainage is correctly done during commissioning and ensure the space for inspection and maintenance.● Ensure the insulation on the pipes for refrigeration circuit so as not to condense water.Incomplete insulation could cause condensation and it would wet ceiling, floor, and any other valuables.● Do not install the outdoor unit where is likely to be a nest for insects and small animals.Insects and small animals could come into the electronic components and cause breakdown and fire. Instruct the user tokeep the surroundings clean.● Pay extra attention, carrying the unit by hand.Carry the unit with 2 people if it is heavier than 20kg. Do not use the plastic straps but the grabbing place, moving the unitby hand. Use protective gloves in order to avoid injury by the aluminum fin.● Make sure to dispose of the packaging material.Leaving the materials may cause injury as metals like nail and woods are used in the package.● Do not operate the system without the air filter.It may cause the breakdown of the system due to clogging of the heat exchanger.● Do not touch any button with wet hands.It could cause electric shock.● Do not touch the refrigerant piping with bare hands when in operation.The pipe during operation would become very hot or cold according to the operating condition, and it could cause a burn or frostbite.● Do not clean up the air conditioner with water.It could cause electric shock.● Do not turn off the power source immediately after stopping the operation.Be sure to wait for more than 5 minutes. Otherwise it could cause water leakage or breakdown.● Do not control the operation with the circuit breaker.It could cause fire or water leakage. In addition, the fan may start operation unexpectedly and it may cause injury.- 203 -This manual is for the installation of an indoor unit.For electrical wiring work (Indoor), refer to the electrical wiring work installation manual. For remotecontroller installation, refer to the installation manual attached to a remote controller. For wireless kitinstallation, refer to the installation manual attached to a wireless kit. For electrical wiring work(Outdoor) and refrigerant pipe work installation for outdoor unit, refer to page 165 to 172.● Read the “SAFETY PRECAUTIONS” carefully first of all and then strictly follow it during the installation workin order to protect yourself.● The precautionary items mentioned below are distinguished into two levels, and .Both mentions the important items to protect your health and safety so strictly follow them by any means.●The meanings of “Marks” used here are as shown on the right:●After completing the installation, do commissioning to confirm there are no abnormalities, and explain to thecustomers about “SAFETY PRECAUTIONS”, correct operation method and maintenance method (air filtercleaning, operation method and temperature setting method) with user’s manual of this unit.Ask your customers to keep this installation manual together with the user’s manual. Also, ask them to handover the user’s manual to the new user when the owner is changed.●Installation should be performed by the specialist.If you install the unit by yourself, it may lead to serious trouble such as water leakage, electric shock, fire, and injury due to overturnof the unit.●Install the system correctly according to these installation manuals.Improper installation may cause explosion, injury, water leakage, electric shock, and fire.●Check the density refered by the foumula (accordance with ISO5149).If the density exceeds the limit density, please consult the dealer and installate the ventilation system.●Use the genuine accessories and the specified parts for installation.If parts unspecified by our company are used it could cause water leakage, electric shock, fire, and injury due to overturn of the unit.●Ventilate the working area well in case the refrigerant leaks during installation.If the refrigerant contacts the fire, toxic gas is produced.●Install the unit in a location that can hold heavy weight.Improper installation may cause the unit to fall leading to accidents.●Install the unit properly in order to be able to withstand strong winds such as typhoons, and earthquakes.Improper installation may cause the unit to fall leading to accidents.●Do not mix air in to the cooling cycle on installation or removal of the air conditioner.If air is mixed in, the pressure in the cooling cycle will rise abnormally and may cause explosion and injuries.●Be sure to have the electrical wiring work done by qualified electrical installer, and use exclusive circuit.Power source with insufficient capacity and improper work can cause electric shock and fire.●Use specified wire for electrical wiring, fasten the wiring to the terminal securely, and hold the cable securely inorder not to apply unexpected stress on the terminal.Loose connections or hold could result in abnormal heat generation or fire.●Arrange the electrical wires in the control box properly to prevent them from rising. Fit the lid of the servicespanel property.Improper fitting may cause abnormal heat and fire.●Check for refrigerant gas leakage after installation is completed.If the refrigerant gas leaks into the house and comes in contact with a fan heater, a stove, or an oven, toxic gas is produced.●Use the specified pipe, flare nut, and tools for R410A.Using existing parts (R22) could cause the unit failure and serious accident due to explosion of the cooling cycle.●Tighten the flare nut according to the specified method by with torque wrench.If the flare nut were tightened with excess torque, it could cause burst and refrigerant leakage after a long period.●Do not put the drainage pipe directly into drainage channels where poisonous gases such as sulfide gas canoccur.Poisonous gases will flow into the room through drainage pipe and seriously affect the user's health and safety. This can alsocause the corrosion of the indoor unit and a resultant unit failure or refrigerant leak.●Connect the pipes for refrigeration circuit securely in installation work before compressor is operated.If the compressor is operated when the service valve is open without connecting the pipe, it could cause explosion and injuries dueto abnormal high pressure in the system.●Stop the compressor before removing the pipe after shutting the service valve on pump down work.If the pipe is removed when the compressor is in operation with the service valve open, air would be mixed in the refrigeration circuitand it could cause explosion and injuries due to abnormal high pressure in the cooling cycle.●Only use prescribed optional parts. The installation must be carried out by the qualified installer.If you install the system by yourself, it can cause serious trouble such as water leaks, electric shocks, fire.●Do not repair by yourself. And consult with the dealer about repair.Improper repair may cause water leakage, electric shock or fire.●Consult the dealer or a specialist about removal of the air conditioner.Improper installation may cause water leakage, electric shock or fire.●Turn off the power source during servicing or inspection work.If the power is supplied during servicing or inspection work, it could cause electric shock and injury by the operating fan.●Do not run the unit when the panel or protection guard are taken off.Touching the rotating equipment, hot surface, or high voltage section could cause an injury to be caught in the machine, to getburned, or electric shock.●Shut off the power before electrical wiring work.It could cause electric shock, unit failure and improper running.○This moblow typ1B●Ins●Co○AccesFor hangingFlat washer (M8For unithanging2S1 S・・・・・・・・・・・・・・2 CnstSpace●Ma(IndooSelecNotes
.e..○This model is middle static ducted type air conditioning unit. Therefore, do not use this model for directblow type air conditioning unit.1Before installation●Install correctly according to the installation manual.●Confirm the following points:○Unit type/Power supply specification ○Pipes/Wires/Small parts ○Accessory itemsAccessory itemFor hangingFlat washer (M10)8For unithangingFor refrigerant pipe2Selection of installation location for the indoor unit1 Select the suitable areas to install the unit under approval of the user.・Areas where the indoor unit can deliver hot and cold wind sufficiently. Suggest to the user to usea circulator if the ceiling height is over 3m to avoid warm air being accumulated on the ceiling.・Areas where there is enough space to install and service.・Areas where it can be drained properly. Areas where drain pipe descending slope can betaken.・Areas where there is no obstruction of airflow on both air return grille and air supply port.・Areas where fire alarm will not be accidentally activated by the air conditioner.・Areas where the supply air does not short-circuit.・Areas where it is not influenced by draft air.・Areas not exposed to direct sunlight.・Areas where dew point is lower than around 28°C and relative humidity is lower than 80%.This indoor unit is tested under the condition of JIS (Japan Industrial Standard) high humiditycondition and confirmed there is no problem. However, there is some risk of condensationdrop if the air conditioner is operated under the severer condition than mentioned above.If there is a possibility to use it under such a condition, attach additional insulation of 10 to20mm thick for entire surface of indoor unit, refrigeration pipe and drain pipe.・Areas where TV and radio stays away more than 1m. (It could cause jamming and noise.)・Areas where any items which will be damaged by getting wet are not placed such as food,table wares, server, or medical equipment under the unit.・Areas where there is no influence by the heat which cookware generates.・Areas where not exposed to oil mist, powder and/or steam directly such as above fryer.・Areas where lighting device such as fluorescent light or incandescent light doesn’t affectthe operation.(A beam from lighting device sometimes affects the infrared receiver for the wireless remotecontroller and the air conditioner might not work properly.)2 Check if the place where the air conditioner is installed can hold the weight of the unit. If it isnot able to hold, reinforce the structure with boards and beams strong enough to hold it. If thestrength is not enough, it could cause injury due to unit falling.Space for installation and serviceFor drain pipePipe cover (big) Pipe cover (small) Strap Pipe cover (big) Pipe cover (small) Drain hose Hose clamp1 1 4 1 1 1 1For heat insulationof gas pipeFor heat insulationof liquid tubeFor pipecover fixingFor heat insulationof drain socketFor heat insulationof drain socketFor drain pipeconnecting●Make installation altitude over 2.5m.(Indoor Unit)Select either of two cases to keep space for installation and services.(Case 1) From side of unitInspectionhole(400x400)Note (a)For drain hosemountingAccessory parts are storedinside this suction side.Notes (a) There must not be obstacle to draw out fan motor. ( marked area)(b) Install refrigerant pipe, drain pipe, and wiring so as not to cross marked area.(Case 2) From button of unitInspectionhole150-200B100or more1000 or more100-200A100or more600or moreSlabCeilingNote (b)(Size of inspection hole)Single typeMulti typeAB50-7122-901100620100-140112-160130074037020or more20or more'11 • SCM-SM-1103Preparation before installation●If suspension bolt becomes longer, do reinforcement of earthquake resistant.○For grid ceilingWhen the suspension bolt length is over 500mm, or the gap between the ceiling and roof isover 700mm, apply earthquake resistant brace to the bolt.○In case the unit is hanged directly from the slab and is installed on the ceiling plane whichhas enough strength.When suspension bolt length is over 1000mm, apply the earthquake resistant brace to the bolt.●Prepare four (4) sets of suspension bolt, nut and spring washer (M10) on site.Suspension Bolt LocationSuspensionbolt (M10)○ Adhere to theUnitmeasurements givenbelow for the length ofthe suspension bolts.AUNIT: mmMulti type 22-56 71, 90 112-160Single type 50 60, 71 100-140A786986 1404Pipe locations UNIT: mmMulti type22-90Single type 50-71510471413drain pipe connection VP20(PVC pipe)467Refrigerant liquid pipe(For natural drainage)Refrigerant gas pipedrain pipe connection VP20 (PVC pipe)Multi type 112-160Single type 100-140635468405drain pipe connection VP20(PVC pipe)467Refrigerant gas pipe(For natural drainage)Refrigerant liquid pipedrain pipe connection VP20 (PVC pipe)4Installation of indoor unitInstallation[Hanging]Hang the unit up.Suspension boltIf the measurements betweenM10 nutWasher for M10the unit and the ceiling hole donot match upon installation, itUnitmay be adjusted with the longSpring washer for M10holed installation tool.Adjustment for horizontality○Either use a level vial, or adjust the level according to the method below.●Adjust so the bottom side of the unit will be leveled with the water surface asillustrated below.Pipe sidePour waterWatersurface0~5mmVinyl hoseLet the pipe side be slightly sloped.○If the unit is not leveled, it may cause malfunctions or inoperation of the float switch.- 204 -292995145187104174203472Under60 mm
5Duct Work1A corrugated board (for preventing sputtering) is attached to the main body of the air conditioner(on the outlet port). Do not remove it until connecting the duct.●An air filter can be provided on the main body of the air conditioner (on the inlet port). Removeit when connecting the duct on the inlet port.2Blowout duct●Use rectangular duct to connect with unit.Duct size for each unit is as shown below.●Duct should be at their minimum length.●We recommend to use sound and heat insulated duct to prevent it from condensation.●Connect duct to unit before ceiling attachment.3Inlet port●When shipped the inlet port lies on the back.●When connecting the duct to the inlet port, remove the air filter if it is fitted to the inlet port.●When placing the inlet port to carry out suction from the bottom side, use the followingprocedure to replace the suction duct joint and the bottom plate.●Remove the screws which fasten thebottom plate and the duct joint on theinlet port side of the unit.●Replace the removed bottom plateand duct joint.●Fit the duct join with a screw; fit the bottom plate.●Make sure to insulate the duct to prevent dewing on it.4Install the specific blowout duct in a location where the air willcirculate to the entire room.●Conduct the installation of the specific blowout hole and theconnection of the duct before attaching them to the ceiling.●Insulate the area where the duct is secured by a band for dewcondensation prevention.Secure with a band, etc.Blowoutduct5Make sure provide an inspection hole on the ceiling. It is indispensable to service elecricequipment, motor, functional components and cleaning of heat exchanger.Bad example of duct workSingle typeMulti typeABBAir conditioner main unitBlow outletBlowout duct(optional or marketed item)Suction grille(option)5022-56682172Suction duct(marketed item)Inspection holeCeiling suriaceSuction hole(marketed item)(with air filter)Suction grille(Locality)1If a duct is not provided at the suction side but it is substituted with the space over the ceiling,humidity in the space will increase by the influence of capacity of ventilation fan, strength ofwind blowing against the out door air louver, weather (rainy day) and others.a)Moisture in air is likely to condense over the external plates of the unit and to drip on theceiling. Unit should be operated under the conditions as listed in the above table and withinthe limitation of wind volume. When the building is a concrete structure, especially immediatelyafter the construction, humidity tends to rise even if the space over the ceiling is notsubstituted in place of a duct. In such occasion, it is necessary to insulate the entire unit withglass wool (25mm). (Use a wire net or equivalent to hold the glass wool in place.)b)It may run out the allowable limit of unit operation (Example: When outdoor air temperatureis 35°C DB, suction air temperature is 27°C WB) and it could result in such troubles ascompressor overload, etc..c)There is a possibility that the blow air volume may exceed the allowable range of operationdue to the capacity of ventilation fan or strength of wind blowing against external air louverso that drainage from be heat exchanger may fall to reach the drain pan but leak outside(Example: drip on to the ceiling) with consequential water leakage in the room.2If vibration damping is not conducted between the unit and the duct, and between the unit andthe slab, vibration will be transmitted to the duct and vibration noise may occur. Also, vibrationmay be transmitted from the unit to the slab. Vibration damping must be performed.Bad example of duct workAFor ventilation60-7171-90882172Louver tooutdoor air100-140112-1401470590'11 • SCM-SM-1105Duct Work (continued)Connecting the air intake/vent ducts1Fresh Air Intake[for air intake duct only]Side fresh air intake hole○Use the side fresh air intake hole, or supplythrough a part of the suction duct.Fresh air intake through thesuction duct[for simultaneous air intake/vent]○Intake air through the suction duct.Air vent hole(the side cannot be used)Fresh air intake through thesuction duct2Air VentAir vent hole○Use the side air vent hole.(always use together with the air intake)Fresh air intake through thesuction duct○Insulate the duct to protect it from dew condensation.6Refrigerant pipeCaution●Use the new refrigerant pipe.When re-using the existing pipe system for R22 or R407C, pay attention to the following items.・Change the flare nuts with the attached ones (JIS category 2), and reprocess the flare parts.・Do not use thin-walled pipes.●Use phosphorus deoxidized copper alloy seamless pipe (C1220T specified in JIS H3300) for refrigeration pipe installation.In addition, make sure there is no damage both inside and outside of the pipe, and no harmfulsubstances such as sulfur, oxide, dust or a contaminant stuck on the pipes.●Do not use any refrigerant other than R410A.Using other refrigerant except R410A (R22 etc.) may degrade inside refrigeration oil. And air getting intorefrigeration circuit may cause over-pressure and resultant it may result in bursting, etc.●Store the copper pipes indoors and seal the both end of them until they are brazed in order to avoid any dust, dirt orwater getting into pipe. Otherwise it will cause degradation of refrigeration oil and compressor breakdown, etc.●Use special tools for R410 refrigerant.Piping workRefrigerant pipeWhen conducting piping work, make sure to allow the pipesto be aligned in a straight line for at least 250 mm, as shown250mm(Section where attached in the left illustration. (This is necessary for the drain pumpin a straight line) to function)Work procedure1. Remove the flare nut and blind flanges on the pipe of the indoor unit.※ Make sure to loosen the flare nut with holding the nut on pipe side with a spanner and giving torque to thenut with another spanner in order to avoid unexpected stress to the copper pipe, and then remove them.(Gas may come out at this time, but it is not abnormal.)● Pay attention whether the flare nut pops out. (as the indoor unit is sometimes pressured.)2. Make a flare on liquid pipe and gas pipe, and connect the refrigeration pipes on the indoor unit.※Bend the pipe with as big radius as possible and do not bend the pipe repeatedly. In addition,do not twist and crush the pipes.※Do a flare connection as follows:● Make sure to loosen the flare nut with holding the nut on pipe side with a spanner and givingtorque to the nut with another spanner in order to avoid unexpected stress to the copperpipe, and then remove them.● When fastening the flare nut, align the refrigeration pipe with the center of flare nut, screwthe nut for 3-4 times by hand and then tighten it by spanner with the specified torquementioned in the table below. Make sure to hold the pipe on the indoor unit securely by aspanner when tightening the nut in order to avoid unexpected stress on the copper pipe.3. Cover the flare connection part of the indoor unit with attached insulation material after a gasleakage inspection, and tighten both ends with attached straps.●Make sure to insulate both gas pipes and liquid pipes completely.※ Incomplete insulation may cause dew condensation or water dropping.4. Refrigerant is charged in the outdoor unit.As for the additional refrigerant charge for the indoor unit and piping, refer to the installationmanual attached to the outdoor unit.Pipe diameter Tightening torque N·m Strap (Accessory) Pipe cover (Accessory)φ 6.3514 to 18φ 9.5234 to 42φ 12.749 to 61φ 15.8868 to 82φ 19.05100 to 120The thickness of insulation should be 20mm or more.- 205 -(Pipe side)(Pipe side)(Pipe side)7DCaut● InIm● DasIn● C● In● Co● MadinWork1. MdAw●●F52. Pe※●●3. Ma●●●4. I●
oleh thethethelation.rmfulg into, dirt oretc.pipeshownpumpto thethem.ured.)r unit.dition,givingopperscreworquey by apipe.a gasllationsory)or more.7Drain pipeCaution● Install the drain pipe according to the installation manual in order to drain properly.Imperfection in draining may cause flood indoors and wetting the household goods, etc.● Do not put the drain pipe directly into the ditch where toxic gas such as sulfur, the other harmfuland inflammable gas is generated. Toxic gas would flow into the room and it would causeserious damage to user’s health and safety (some poisoning or deficiency of oxygen).In addition, it may cause corrosion of heat exchanger and bad smell.● Connect the pipe securely to avoid water leakage from the joint.● Insulate the pipe properly to avoid condensation drop.● Check if the water can flow out properly from both the drain outlet on the indoor unit and the endof the drain pipe after installation.● Make sure to make descending slope of greater than 1/100 and do not make up-down bendand/or trap in the midway. In addition, do not put air vent on the drain pipe. Check if water isdrained out properly from the pipe during commissioning. Also, keep sufficient space forinspection and maintenance.Work procedure1. Make sure to insert the drain hose (the end mode of soft PVC) to the end of the step part ofdrain socket.Attach the hose clamp to the drain hose around 10mm from the end, and fasten the screwwithin 5mm left to the nut.●Do not apply adhesives on this end.●Do not use acetone-based adhesives to connect to the drain socket.Drain socketFasten the screw within5 mm left to the nut.Drain socketMetal plateStage difflernce part10mmDrain hoseHose clampDrain hose2. Prepare a joint for connecting VP-20 pipe, adhere and connect the joint to the drain hose (theend made of rigid PVC), and adhere and connect VP-20 pipe (prepare on site).※As for drain pipe, apply VP-20 made of rigid PVC which is on the market.● Make sure that the adhesive will not get into the supplied drain hose.It may cause the flexible part broken after the adhesive is dried up and gets rigid.● The flexible drain hose is intended to absorb a small difference at installation of the unit ordrain pipes. Intentional bending, expanding may cause the flexible hose broken and waterleakage.3. Make sure to make descending slope of greater than 1/100 and do not make up-down bendand/or trap in the midway.●Pay attention not to give stress on the pipe on the indoor unit side, and support and fix thepipe as close place to the unit as possible when connecting the drain pipe.●Do not set up air vent.1.5m~2m Supporting metalInsulation materialDescending slope greater than 1/100Air vent●When sharing a drain pipe for morethan one unit, lay the main pipe 100mmbelow the drain outlet of the unit. Inaddition, select VP-30 or bigger size formain drain pipe.Pipe cover (big) (For insulation)(Accessory)VP20 joint (Prepare on site)Drain hoseAdhesion(Accessory)Drain socketClamp (Accessory)Pipe cover (small)(For insulation) (Accessory)VP20(Prepare on site)4. Insulate the drain pipe.● Be sure to insulate the drain socket and rigid PVC pipe installed indoors otherwise it maycause dew condensation and water leakage.※ After drainage test implementation, cover the drain socket part with pipe cover (smallsize), then use the pipe cover (big size) to cover the pipe cover (small size), clamps andpart of the drain hose, and fix and wrap it with tapes to wrap and make joint partgapless.UnitNo bumpNo trapNot touching the waterAs wide as possible(about100mm)VP-30 or biggerDescending slope greater than 1/100Pipe cover (small)(For insulation)(Prepare on site)Trapped air willgenerate noises.'11 • SCM-SM-1107Drain pipe (continued)Drain up● The position for drain pipe outlet can be raised up to 600mm above the ceiling. Use elbowsfor installation to avoid obstacles inside ceiling. If the horizontal drain pipe is too long beforevertical pipe, the backflow of water will increase when the unit is stopped, and it may causeoverflow of water from the drain pan on the indoor unit. In order to avoid overflow, keep thehorizontal pipe length and offset of the pipe within the limit shown in the figure below.290-325 100 or lessOtherwise, the construction point makes it same as drain pipe construction.Drain test1. Conduct a drain test after completion of the electrical work.2. During the trail, make sure that drain flows properly through the piping and that no waterleaks from connections.3. In case of a new building, conduct the test before it is furnished with the ceiling.4. Be sure to conduct this test even when the unit is installed in the heating season.Procedures1. Supply about 1000 cc of water to the unit through the air outlet by using a feed water pump.2. Check the drain while cooling operation.Insert water supply hosefor 20mm ~ 30mm toAttached drain hose clampsupply water.(Insert hose facingPour water into a convex jointDraintoward bottom.) MainpipingunitDrain situation can be checked with transparent socket.Remove grommetMake sure to InstallIf the electrical work has not been completed, connect a convexit back after test.joint in the drain pipe connection to provide a water inlet.Then, check if water leaks from the piping system and thatdrain flows through the drain pipe normally.Outline of bottom drain piping work● If the bottom drain piping can be done with adescending gradient (1/50-1/100), it is possible toconnect the pipes as shown in the drawing below.Connecting port of top drain pipeStandard hard polyvinylchloride pipesConnecting port of bottom drain pipesInsulating materialRubber stopper (to be removed)Uncoupling the drain motor connector● Uncouple the connector CNR for the drain motor asP.C. boardillustrated in the drawing on the right.Note: If the unit is run with the connector coupled,( )drain water will be discharged from the upperdrain pipe joint, causing a water leak.- 206 -600 max
8Wiring-out position and wiring connection● Electrical installation work must be performed according to the installation manual by anelectrical installation service provider qualified by a power provider of the country, and beexecuted according to the technical standards and other regulations applicable to electricalinstallation in the country.Be sure to use an exclusive circuit.● Use specified cord, fasten the wiring to the terminal securely, and hold the cord securely inorder not to apply unexpected stress on the terminal.● Do not put both power source line and signal line on the same route. It may cause miscommunicationand malfunction.● For the details of electrical wiring work, see attached instruction manual for electrical wiringwork.1. Remove a lid of the control box (2 screws).2. Hold each wiring inside the unit and fasten them to terminal block securely.3. Fix the wiring with clamps.4. Install the removed parts back to original place.9External static pressure settingYou can set External Static Pressure (E.S.P.) by either method of <strong>MANUAL</strong> SETTING or AUTO-MATIC SETTING by remote controller.Indoor unit will control fan-speed to keep rated air flow volume at each fan speed setting (Lo-Uhi)1. <strong>MANUAL</strong> SETTINGYou can set required E.S.P. by wired remote controller that calculated with the set air flowrate and pressure loss of the duct connected.Select No.1-10 (10Pa-100Pa) from following table according to calculation result.Refer to technical manual for details of air flow characteristic.Setting No.Signal lineSignal lineExternal Static Pressure (Pa)Power source lineSingle unit wiring connectionPower source lineMulti unit wiring connection※ When you set No.11-19 by remote controller, unit will control fan-speed with setting ofNo.10 Factory default is at No.5.● How to set E.S.P by wired remote controller Push "◆" marked button(E.S.P button). Select indoor unit No. by using button. Select setting No. by using button and set E.S.P. by button.See detailed procedure in technical manual.NoticeYou can NOT set E.S.P by wireless remote controller.110CautionBe sure to set E.S.P. according to actual duct connected.Wrong settings causes excessive air flow volume or water drop blown out.2202. AUTOMATIC SETTINGIndoor unit will recognize E.S.P. by itself automatically and select appropriate fan speed No.1-10.● How to start automatic setting, Same setting as <strong>MANUAL</strong> SETTING. Select [AUT] by using button and press button . After setting E.S.P. at "AUT", operate unit in FAN mode with certain fan speed (Lo-Uhi).330440550EarthEarth660770E.S.P. button880990'11 • SCM-SM-1109External static pressure setting (continued)Indoor unit fan will run automatically and recognize E.S.P. by itself.The operation for automatic E.S.P recognition will last about 6 minutes, and it will be stoppedafter recognition is completed.Caution· Be sure to execute AUTOMATIC SETTING by remote controller AFTER ducting work is completed.When duct specification is changed after AUTOMATIC SETTING, be sure to execute AUTOMATICSETTING again after power resetting and turning on again.· Be sure to execute AUTOMATIC SETTING before trial cooling operation.(See ELECTRICAL WIRING WORK INSTRUCTION about trial cooling operation)· Before AUTOMATIC SETTING, be sure to check that return air filter in duct is installed anddamper is opened.Wrong procedure causes excessive air flow or water drop blown out.Notice· During operation for automatic recognition (the Auto Operation), fan rotates with certain speedsregardless of set fan speed by remote controller.· When duct is set with low static pressure (around 10-50Pa), even if indoor unit operate withhigher air flow volume than rated one, but it is not abnormal.· When you changed operation mode or stop operation with ON/OFF button during Auto Operation,the Auto operation will be canceled.· In such case, be sure to execute AUTOMATIC SETTING again according to above procedure.10Check list after installation●Check the following items after all installation work completed.Check ifExpected troubleCheckThe indoor and outdoor units are fixed securely?Falling, vibration, noiseInspection for leakage is done?Insufficient capacityInsulation work is properly done?Water leakageWater is drained properly?Water leakageSupply voltage is same as mentioned in the model name plate? PCB burnt out, not working at allNo mis-wiring or mis-connection of piping?PCB burnt out, not working at allEarth wiring is connected properly?Electric shockCable size comply with specified size?PCB burnt out, not working at allAny obstacle blocks airflow on air inlet and outlet?Insufficient capacityIs setting of E.S.P finished?Excessive air flow, water drop blow out10100- 207 -
'11 • SCM-SM-110(7) Replacement procedure of the fan unit (For FDUM model)Notes(1) The unit is a heavy item. It must be supported securely and handled with care not to drop when it is necessary toreplace.Notes(2) For the maintenance space, to page 204.(a) Remove the control box and the side panel, and remove the screws marked in the circles (2 places) in the figure.Control boxSide panelScrew(b) Take out the fan unit in the arrow direction.- 208 -
6 TABLE OF FUNCTIONS CONNECTED WIRED REMOTE CONTROLLERS (RC-E4, E5)If wired remote controller (optional part) is connected to the following indoor units, some of the functions cannot be used. Pleasesee following table for details.・Wall mounted type:SRK**ZJX-S1,ZJX-S,ZJR-S,ZJ-S,ZK-S・Floor standing type:SRF**ZJX-S・Ceiling concealed type:SRR**ZJ-S'11 • SCM-SM-110○:OK, △:Conditionally OK, ×:N/AOnly SRK50,60ZJX-S,S1Flap control only. Louver cannot be controlled.Temperture range can be set from 18 degree to30 degree. Carving 0.5℃ is rounded up.Worm up timer and sleep control of on timermode is impossible.RAC unit does not have this function.Only error code is used in the RAC unit.RAC unit does not have this function.RAC unit can be set a part of function.For RAC models, only the range from 18℃ to30℃ is available.RAC unit does not have this function.RAC unit does not have this function.- 209 -NO. Functions SRK SRR SRF Outline of function Remarks1 Several remote controllers for 1unit ○ ○ ○ Indoor unit can be connected max. 2 remote controllers.2 Control of several indoor units ○ ○ ○3 Plural Control △ × ×4 Central control ○ ○ ○5 Run/Stop ○ ○ ○6 Change operation mode ○ ○ ○7 Adjust fan speed ○ ○ ○8 Auto swing of flap ○ × ○9 Setting of air flow direction × × ×10 Setting of temperture △ △ △11 Timer operation ○ ○ ○One remote controller can be connected toa max. of 16indoor unit.One outdoor unit can be connected to a max. of 4indoorunits.Signal of center mode from Center conslole can berestricted to operation of remote controller.Display of operation mode range is automatically decidedfrom the indoor unit's imformation.Display of airflow range is automatically decided from theindoor unit's imformation.Display of airflow direction ON/OFF is automaticallydecided from the indoor unit's imformation.Setting of air flow direction for indoor unit that can bechanged airflow direction.Sleep timer mode, Off timer mode, On timer mode,Weekly timer mode.12 Grill auto mode × × × Grill auto mode. RAC unit does not have this function.13 Setting of grill auto mode × × × Simple setting of grill auto mode. RAC unit does not have this function.14 Ventilation control × × ×Air infiltration can be controlled by the indoor unit thathas this function.15 Display of unit number ○ ○ ○ Display address number of remote control. Address setted by SC-BIK-N for RAC16Service switch-1: Display of errordataService switch -2 display of17operation data△ △ △Display and memorize the error code data that is checkedfinally.△ △ △ Display operation data. RAC unit can be displayed some data.18 Trial run ○ ○ ○ Cooling operation signal is sent to the indoor unit.19 Forced operation of drain pump × △ × Forced operation of drain pump is sent to the indoor unit. Option parts for SRR20 Setting of compressor frequency ○ ○ ○ Fixing compressor frequency.21 Quiet mode × × × On timer in order to start quiet mode. RAC unit does not have this function.22Auto address change from remotecontrol× × × Auto address can be changed from remote control. RAC unit does not have this function.23 Indoor unit's address set of master × × × Adapt controller for 3 pipe system. RAC unit does not have this function.24 Filter reset × × ×25Clear memory of error code inremote control26Clear memory of error code in theindoor unitTurning off signal display of filter sign and sending resetsignal of operating time.○ ○ ○ Reset memory that remote controller has the error code.○ ○ ○ Reset memory of error for the indoor unit.27 Clear address in indoor unit × × × Reset memory of address for the indoor unit. RAC unit does not have this function.28 Reset CPU ○ ○ ○ Reset outdoor or indoor CPU.29 Function setting △ △ △It is possible to set the function of remote control andindoor unit.30 Setting of temperature range △ △ △ Set Max and Min temperature.31 External input ○ ○ ○External input from CNT terminal can be switchedbetween all unit operation and individual operation.32 Auto adjustment of static pressure × × × Change auto adjustment of static pressure. RAC unit does not have this function.33 Setting of static pressure × × ×34 Filter sign × × ×Displayed part blinks on and off when it recives asignal about auto adjustment of static pressure mode.Displays filter sign via signal from indoor unit whencounting time achieves target time.
NO. Functions SRK SRR SRF Outline of function Remarks35Preparation of display of heatingopration○ ○ ○ Display of preparative heating opration from indoor unit. Starting time of heating, thermo operation36 Display of defrost operation ○ ○ ○ Display of defrost operation from indoor unit. Defrost operation37Display of compressor protectionoperation× × ×38 Missmatch operation mode × × ×Display of compressor protection operation from outdoorunit during compressor soft starting.Display it when Cooling only outdoor unit is receivedsignal of heating operation.'11 • SCM-SM-110RAC unit does not have this function.RAC unit does not have this function.( RAC unit operates by fan mode.)RAC unit does not have this function.RAC unit does not have this function.RAC unit does not have this function.- 210 -39 Periodic check × × × Displays when Periodic check signal is received. RAC unit does not have this function.40 Display of check ○ ○ ○41 Display of auto cleaning operation × × ×42 Display of room temperature ○ ○ ○ Display room temperature.Display of checking in case of signal of error code addressfrom remote control.Displays it when it is received auto cleaning singnal fromindoor unit.43 Display of demand control operation × × × Display of demand operation from indoor unit. RAC unit does not have this function.44Display of operation on autoadjusting static pressure× × ×Display checking when it receives signal of auto adjustingstatic pressure operation.It is available to select manual setting or automatic setting45 External static pressure setting × × ×for setting external static pressure by remote controller.RAC unit does not have this function.
7 COMPONENT REPLACEMENT7.1 Models SCM71ZJ-S1, 80ZJ-S1Fan and fan motor (FMo1)1. Loosen 6 screws and removethe top panel.2. Loosen 3 screws and removethe service panel.3. After removal of service panel,Loosen a screw.Screw4. And then loosen 4 screws andremove the front panel togetherwith the fan guard.5. Loosen a nut and remove the fanpropeller.6. Disconnect the connector ofCNFAN.Screws (For front panel)Screws (For front panel)'11 • SCM-SM-110Screws (For top panel)Screws (For service panel)Screws (For top panel)Nut- 211 -
Fan and fan motor (FMo1)7. Detach the clamps.8. Pull out the cable.9. Loose 4 nuts.10. Remove the fan motor(FMo1).Compressor (CM)1. Loosen screws and removethe service panel and toppanel.2. Loosen screws and removethe cover and the terminalcover.3. Loosen screws anddisconnect all power cableslocally installedCautionBe sure to do above workafter turning the power OFFby breaker.CoverClanpsScrews'11 • SCM-SM-110NutsTerminal cover〔After removed terminal cover〕TB1 (for power)Side panel- 212 -
Compressor (CM)4. Loosen screws and removethe side panel.5. Untie the string and removerear and front insulation cover.6. Disconnect the connector ofcrankcase heater.ScrewsScrews〔Side view〕〔Side panel〕'11 • SCM-SM-110Screws〔Rear view〕Rear coverDisconnect theconnector ofcrankcase heaterFront cover- 213 -
Compressor (CM)7. Remove the top cover andthe side jacket of compressor.8. Remove the crankcase heater.(It is available to remove thecrankcase heater afterremoving the compressor)9. Loosen 3 nuts of compressorfixing bolts.〔Front view〕'11 • SCM-SM-110Top coverSide jacketCrankcase heater〔Rear view〕- 214 -Nuts
Compressor (CM)10. Loosen a nut and removethe terminal cover.11. Disconnect the fastonconnectors from compressor.U : Pink cableV : White cableW : Gray cableNote : Be sure to do abovework after elapsing3 minutes from powerOFF.12. Disconnect the pipes forsuction and discharge bybrazing.(It is available to cut suctionand discharger pipes toremove the compressor)CautionWhen brazing, do not forgetto disconnect suction pipetemperature sensor (Tho-S)and discharge pipetemperature sensor (Tho-D)from sockets.Without disconnecting sensors,sensors may have damage bythe heat during brazing.Suction pipePosition to bedisconnectedAccumulator'11 • SCM-SM-110Nut Terminal coverW : Gray cable U : Pink cable V : White cableDischarge pipePosition to bedisconnectedCompressorDischarge pipe temperaturesensor (Tho-D)Suction pipe temperaturesensor (Tho-S)
Main PCB (upper layer)1. Loosen the screws andremove the top panel andservice panel.2. Unlatch the cover and removethe cover of control box.3. Disconnect the connectorof CNFAN.Note: Be sure to do followingwork after elapsing 3minutes from powerOFF.4. Loosen 6 screws and liftup the main PCB.'11 • SCM-SM-110〔Top view〕2 Latches on front side2 more Latches on rear sideTotally 4 Latches〔Front view〕Disconnect the connectorof CNFAN.〔Top view of PCB after removing the cover〕ScrewsScrews〔Side view after lifting〕- 216 -
Main PCB (upper layer)5. Disconnect all connectorson the main PCB side.1Disconnect the fastonconnectors for powersupply to compressor.U : Pink cableV : White cableW : Gray cable2Disconnect the fastonconnectors of reactotrwhich is located justabove the 4-way valve.3Disconnect the connectorof fan motor (CNFAN).4Disconnect the connectorof CNSUB.(Going to Sub PCB)5Disconnect the connectorof CNTH.ForTho-A (Outdoor air temp.)Tho-R (Heat exch. temp.)Tho-D (Discharge pipe temp.)6Disconnect the connectorof CN20V.(Going to Sub PCB)5. Disconnect all connectorson the Sub PCB side.1Disconnect the fastonconnectors of power line.(Going to Main PCB)'11 • SCM-SM-110〔Main PCB〕6Reactor21U : PinkV : WhiteW : Gray354〔Sub PCB〕- 217 -S0 : White R0 : Black S-1 : White C-1 : Red
Main PCB (upper layer)Layout of Main PCB'11 • SCM-SM-110〈Main PCB〉〔Part side〕W : Gray V : White U : PinkCNFAN CNSUB R : BlackS : WhiteC-2 : RedFuseCNTH CN20V S-2 : White〔Pattern side〕
Sub PCB (Lower layer)1.After removing the Main PCB,disconnect all connectors onSub PCB.1Disconnect the connectorof CNEEV1.(for EEV1 & EEV2)2Disconnect the connectorof CNEEV2.(for EEV3 & EEV4)3Disconnect the connectorof CNTH.(for suction pipe temp.)4Disconnect the connectorof CNMAIN.(Going to Main PCB)5Disconnect the connectorof CNHEAT.(for crankcase heater)6Disconnect the connectorof CN20S.(for 4-way valve)7Disconnect the connectorof CN20V.(Going to Main PCB)8Disconnect the connectorsof CNA, CNB, CNC andCND.2.Loosen screws and disconnectthe grounding cables.3.Disconnect the fastenconnector of the black cable.Note : Be sure to do abovework after elapsing3 minutes from power OFF.4.Loosen a screw and pull upthe right side of the upper TBto unlatch from the left sidesquare hole.5. Loosen the screw ofN-terminal and disconnectthe white cable.CNEEV2 2CNEEV1 1'11 • SCM-SM-110CNTH 3 C N D 8 C N C 8 C N B 8 C N A 8 C N 20V 7CN20S(RD) 6 Grounding cable (G-1)Grounding cable (G-3)CNMAIN 4Grounding cable (G-2)〔Front view〕〔Side view〕Grounding cable (G-2)〔Disconnect the black cable〕Grounding cable (G-3)Screw Square hole Disconnect the white cableCNHEAT(WH) 5Grounding cable (G-1)
Sub PCB (Lower layer)6. Loosen 4 screws and removeSub PCB.Layout of Sub PCB.ScrewsCNTHCNEEV1CNMAIN'11 • SCM-SM-110Screws〔Part side〕S-1 (WH) C-1 (RD) CND CNC CNB CNA CN20VSO (WH)Grounding cablesBlack cableCN20S RO (BK)White cable〔Pattern side〕to N-terminalCNEEV2CNHEAT
EEV coils1. Remove the faulty EEV coiland disconnect the connector.Note:1) When disconnecting theconnector, be sure tocheck the color markedon the top of coil andthe color of the connector.2) When replace to a newcoil, be sure to insert thesocket attached to the coilto the pipe correctly.'11 • SCM-SM-110GREEN BLUE WHITE REDMarking colorEEVDGREENEEVCBLUEEEVBREDEEVAWHITESocket- 221 -
4-way valve coil1. Disconnect the connector.2. Loosen a screw and removethe coil.'11 • SCM-SM-110ConnectorCoilScrew- 222 -
7.2 Models SCM100ZJ-S1, 125ZJ-S1Fan and fan motor (FMo1)1.Loosen 4 screws and removethe fan grille.2. Loosen the nut and removethe fan propeller.3. Remove the service panel.4. Detach the clamps and cutoff the strap.5. Disconnect the connectorof CNFAN1.6. Pull out the cable of fanmotor through the grommeton the partition.Strap'11 • SCM-SM-110ScrewsScrewsNutGrommetClampsClampCNFAN1- 223 -
Fan and fan motor (FMo1)7. Loosen 4 nuts.8. Remove the fan motor (FMo1).Compressor (CM)1. Loosen screws and removethe service panel and toppanel.2. Loosen screws and removethe cover and the terminalcover.3. Loosen screws anddisconnect all cableslocally installed.CautionBe sure to do above workafter turning the power OFFby breaker.Cover'11 • SCM-SM-110NutsScrews Terminal cover〔After removed terminal cover〕TB1 (for power)Unit A Unit C Unit EUnit B Unit D Unit F(125 only)Side panel
Compressor (CM)4. Loosen screws and removethe side panel.5. Remove the top cover.6. Remove the terminal cover.7. Disconnect the fastonconnectors from compressor.U : Red cableV : White cableW : Blue cableNote: Be sure to do above workafter elapsing 3 minutesfrom power OFF.8. Cut off the strap and pullout the thermistors of Tho-Dand Tho-S from sockets.〔Side view〕Tho-DTop cover'11 • SCM-SM-110Side panelScrewsScrews〔Rear view〕Terminal coverTho-SV(WH)U(RD)W(BL)- 225 -
Compressor (CM)9. Remove the control unit foreasy replacement work ofcompressor according tofollowing procedure.1) Disconnect all connectorsshown in the photo.10.Remove the control unit.(Continue)2) Loosen the screws (5 pieces)shown in the photo.3) Remove the control unit.'11 • SCM-SM-110〔Before disconnecting connectors〕CNEEV4 CNFAN1 CNR1 CNN1CNF(PK)(125 only)CNE(OR)CND(OR)CNCBL)CNEEV2CNB(BR)CNEEV3CNA(RD)CNEEV1〔After disconnecting connectors〕〔Front view〕〔Side view〕 〔Control unit removed〕Screws
Compressor (CM)11. Remove the partition foreasy replacement work ofcompressor according tofollowing procedure.1) Loosen the screws (4 pieces)shown in the photo.2) Disconnect the connectorof CNFAN1 and pull outthe cable for fan motorthrough the hole on thepartition.3) Remove the partitionas shown in photo.12. Untie the strings and removethe upper and the lowerjackets for compressor.〔Front view〕 〔Side view〕 〔Top view〕Remove the partitionin this wayUpper jacketRemove the jacketsin this way'11 • SCM-SM-110ScrewPull out the cable forfan motorScrewsLower jacketCrankcase heaterNote : Be sure to remove thewires of crankcaseheater from the jacketbefore removing the jacket- 227 -
Compressor (CM)13. Loosen 3 nuts ofcompressor fixing bolts.14. Remove the crankcaseheater.15. Disconnect the pipes forsuction and discharge bybrazing.(It is available to cut suctionand discharger pipes toremove the compressor)16. Remove the compressor.17. Replace to new compressor.Note: Before placing the newcompressor, be sureto mount the crankcaseheater onto the newcompressor properly.Control PCB (PWB1) on the 1st layer1. Cut the straps of the whitecable passing through theCT.Nut of compressorfixing bolts'11 • SCM-SM-110〔Front view〕 Crankcase heater 〔Rear view〕Nut of compressorfixing bolts〔Side view〕Discharge pipeSuction pipeDischarge pipe Suction pipePositions to bedisconnected〔Top view〕StrapsStraps〔Top view〕〔Front view〕
Control PCB (PWB1) on the 1st layer2. Loosen a screw anddismount the first layerby pulling upward.3. Loosen a screw on the fixingbracket for the capacitor andslide the capacitor to the rightslightly in order to disconnectthe connector 3 from the diodestack.4. Disconnect the connector 3(White cable) from the diodestack on the 2nd layer.Note: Be sure to do this workafter elapsing 3 minutesfrom power OFF.5. Take the white cable outfrom CT hole as shown inthe photo.6. Disconnect all connectors.7. Pinch the head of lockingsupports (7 pieces) andremove the control PCB.Locking supportsPull upwardScrew'11 • SCM-SM-110ScrewSlide to right〔Diode stack〕3 14 2White cableDisconnect all connectors- 229 -
Sub PCB (PWB4) on the 1st layer2. Disconnect the cables (Red& White) connected to theterminal TB3 & TB4 of N/FPCB (PWB3), after dismountthe 1st layer as follows.1) Dismount the 1st layeraccording to the dismountingprocedure for control PCBafter loosening 2 screwsand disconnect the powercables on secondary sideof TB1.2) Loosen 2 screws andremove the cables (Red &White) from TB3 & TB4on the N/F PCB (PCB3)located on back side ofthe 1st layer.3. Pinch the head of lockingsupports (4 pieces) andremove the Sub PCB (PWB4).'11 • SCM-SM-110Disconnect power cablesTB1Screws〔PCB3〕TB4TB3Locking supports- 231 -Disconneced cables
'11 • SCM-SM-110Inverter PCB (PWB2) on the 2nd layer1. Dismount the 1st layeraccording to the procedurefor control PCB (PWB1) and2nd layerSub PCB (PWB4).2. Loosen 3 screws anddisconnect the cables forcompressor.UVNote: Be sure to do this workWafter elapsing 3 minutesfrom power OFF.2 screws for fixing IPM and radiation finP1P2 N2(RD) (RD) (BL)ScrewsLocking supports3. Loosen 6 screws and(8 pieces)disconnect the cables of P1,P2, P3 and N1, N2, N3.N14. Disconnect 3 connectors of(BL)CNI2CNI2, CNI4 and CNACT1.5. Loosen 2 screws for fixingIPM and radiation fin.6. Pinch the head of lockingP3(RD)CNI4supports (8 pieces) andU V W Connectorsremove the Inverter PCBIPM(RD) (WH) (BL)Power transistorN3(PWB2).on the back side(BL)CNACT1Noise filter PCB (PCB3 & PCB5) on the back side of the 1st layerLayoutPCB3PCB5UpperLower
'11 • SCM-SM-110Noise filter PCB (PWB3) on the back side lower of the 1st layerPCB31. Dismount the 1st layeraccording to the procedureLocking supportfor control PCB (PWB1) andTB6Sub PCB (PWB4).TB52. Loosen 5 screws anddisconnect the cables ofTB3 - TB7.3. Pinch the head of lockingsupports (4 pieces) andTB7remove the N/F PCB(PWB3).Note: Be sure to do this workafter elapsing 3 minutesfrom power OFF.TB3TB4Noise filter PCB (PWB5) on the back side upper of the 1st layer1. Dismount the 1st layerPCB5according to the procedureLockingsupportfor control PCB (PWB1) andSub PCB (PWB4).TB3TB52. Loosen 5 screws anddisconnect the cables ofTB3 - TB7.TB4TB63. Pinch the head of lockingsupports (4 pieces) andremove the N/F PCB (PWB5). TB7Note: Be sure to do this workafter elapsing 3 minutesfrom power OFF.Active Filter (LACT) and Diode Stack (DS) on the 2nd layer1. Active FilterFaston connectoesDisconnect the fastonconnectors (6 pieces) andsensor (1 piece).ScrewAnd then loosen 2 screwsand remove LACT.2. Diode StackDisconnect all connectorsLACTSensor(4 pieces) and loosen 2screws.And then remove diodestack.Diode stack
EEV coils1. Remove the faulty EEV coiland disconnect the connector.Note:1) When disconnecting theconnector, be sure tocheck the color markedon the top of coil and thecolor of the connector.2) When replace to a newcoil, be sure to insert thesocket attached to the coilto the pipe correctly.Socket'11 • SCM-SM-110M A R KIN GEEVF(125 only)YELLOWEEVEBLACKEEVDGREENEEVCBLUEEEVBREDEEVAWHITEGREENBLUEREDWHITEBLACKYELLOW- 234 -
8 CHECKING PROCEDURE8.1 Models SCM71ZJ-S1, 80ZJ-S1U:PinkW:GrayResistance 1.154Ω'11 • SCM-SM-110CNFAN1 on PCB1WHORBR3 4BL 21RDNO. Output1 280VDC2 15VDC3 0-6VDC4 0-5VDCV:White- 235 -
'11 • SCM-SM-110MARKINGEEVDGREENEEVCBLUEEEVBREDEEVAWHITEInput : 12VDCWH46ΩMRD46Ω 46Ω 46ΩORYEBL- 236 -
Suction pipetemp. sensor(Tho-S)Outdoor airtemp. sensor(Tho-A)Discharge pipetemp. sensor(Tho-D)'11 • SCM-SM-110Heat exchangersensor (Tho-R)Resistance(kΩ)Name Color25℃ 90℃Tho-R Black5.0Tho-A Black5.0Tho-D Black4.6Tho-S Black5.0
'11 • SCM-SM-110W : Gray V : White U : Pink CNTH CNFAN CNSUBR : BlackS : WhiteC-2 : RedS-2 : WhiteFuseCN20VConnector Connected to Normal value RemarkCNFANFan motorCNSUB(1-4)13VDCCNSUB(2-4) 0-1VDC When 20S is ONCNMA1N of SUB PCBCNSUB(3-4) 0-1VDC When CH is ONCNSUB(5-4)5VDCR-S RO, SO of SUB PCB 220-240VACC-2 - S-2 C-1,S-1 of SUB PCB 20VDCCN20V CN20V of SUB PCB 20VDCCNTH Sensor Tho-R,Tho-A,Tho-DUCompressorVCompressor300VACUCompressor
'11 • SCM-SM-110S-1 (WH) C-1 (RD)CNTHCN20VCNACNEEV2CNBGrounding cableCNMA1NCNCCNDCNEEV2R IN to L-terminalS IN to N-terminalCNHEATGrounding cableCN20S SO (WH) RO (BK) Grounding cableConnector Connected to Normal value RemarkR IN TB1(L) 220-240VAC Power supplyS IN TB1(N) 0VAC Power supplySO R of Main PCB 220-240VACRO S of Main PCB 0VACS-1 - C-1 S-2,C-2 of Main PCB 20VDCCN20V CN20V of Main PCB 20VDCCNA(Black-White) Indoor unit A 220-240VAC Power supplyCNA(Red) Indoor unit A 0VAC EarthCNB(Black-White) Indoor unit B 220-240VAC Power supplyCNB(Brown) Indoor unit B 0VAC EarthCNC(Black-White) Indoor unit C 220-240VAC Power supplyCNC(Blue) Indoor unit C 0VAC EarthCND(Black-White) Indoor unit D 220-240VAC Power supplyCND(Yellow) Indoor unit D 0VAC EarthCN20S 20S 220-240VAC For 4 way valveCNHEAT Crankcase heater 220-240VAC For crankcase heaterCNEEV1EEV A(WH) and EEV B(RD)CNMA1N(1-4)13VDCCNMA1N(2-4) 0-1VDC When 20S is ONCNSUB of Main PCBCNMA1N(3-4) 0-1VDC When CH is ONCNMA1N(5-4)5VDCCNEEV2EEV C(BL) and EEV D(GR)CNTH Sensor for suction pipe Tho-S
8.2 Models SCM100ZJ-S1, 125ZJ-S1EEVF(125 only)EEVEEEVDEEVCEEVBEEVA'11 • SCM-SM-110CNFAN1 on PCB1RD1NO. OutputBL1 280VDCBR22 15VDC3OR4 3 0-6VDCWH4 0-5VDCMARKINGInput : 12VDCWHYELLOW46ΩMRD46Ω 46Ω 46ΩBLACK ORYEBLGREENBLUEREDWHITEInput : 12VDCWH46ΩMRD46Ω 46Ω 46ΩORYEBL- 240 -
NameResistance 0.293Ω34Discharge pipetemp. thermistor (Tho-D)Color0℃ 25℃ 50℃ 90℃Tho-R Black 16.4 5.0 1.8Tho-D Black 54.8 5.0Tho-S Black 16.4 5.0 1.8Tho-A Yellow 32.8 10.0Suction pipetemp. thermistor (Tho-S)Resistance(kΩ)Tho-AF Black 5.012U(RD)W(BL)'11 • SCM-SM-110Outdoor airtemp. thermistor (Tho-A)Power transistorthermistor (Tho-AF)V(WH)1Check a diode module by a mutimeterset on diode mode.34- 241 -Heat exchangerthermistor (Tho-R)
'11 • SCM-SM-110CNEEV1CNX1CNI3CNA1CNTHCNECNP1CNL1CNS1CNI1CNVCNFAN1CNA2CNR1CNN1CNWConnector Connected to Normal value RemarkCNX1 CNX2 on PCB4 Signal of SLCNI3CNI4 on PCB21-3 DC18V2-3 DC15VCNA1 Power transistor 280VDCCNW 220-240VAC PCB3 (N/F PCB)CNN1 20S 220-240VAC for solenoid coil of 4 way valveCNR1 Crankcase heater 220-240VACCNA2 280VDC green->P, white->NCNFAN1 fan motor Refer to page 240CNI1CNI2 on PCB21-2 5VDC1-3 0-5VDC1-4 0-5VDCCNS1 CNS2 on SUB PCB 13VDCCNL1High preassure sensorCNP1 Thermistor Tho-PCNTH Thermistor Tho-R,Tho-D,Tho-S,Tho-ACN EEV1 EEVH 1CN E F o r R AM checker F o r R AM checkerCNV For Mente PC For Mente PCused only at our factory- 242 -
'11 • SCM-SM-110P2 N2(RD) (BL) CNI2P1(RD)N1(BL)P3(RD)U V W N3 CNACT1(BL)CNI4Connector Connected to Normal value RemarkP1-N1 Diode Module 280VDCP2-N2 Active filter module 280VDCP3-N3 Contactor 280VDC COMP ON 300VDCCNI2CNI1 on PCB11-2 5VDC1-3 0-5VDC1-4 0-5VDCCNI4CNI3 on PCB11-3 18VDC2-3 15VDCCNACT1Active filter module1-2 15VDC1-3 0-5VDC1-4 0-3VDCUCompressorVCompressor300VDCWCompressorTB5TB6TB7TB3TB4Connector Connected to Normal value RemarkTB3TB4TB5 on PCB5,L_IN on PCB4TB6 on PCB5,N_IN on PCB4220-240VACTB5Diode ModuleTB6Diode Module220-240VACTB7Earth on control box
'11 • SCM-SM-110CNEEV4CNF(PK)CNEEV2CNE※2(OR)CNEEV3CNEEV1CND(YE)CNC(BL)CNS2CNX2CNB(BR)CNA(RD)CNDRMN, INL, INConnector Connected toCNTROCNTRINormal value※1RemarkCNEEV1 EEV A(WH) and EEV B(RD)CNEEV2 EEV C(BL) and EEV D(GN)CNEEV3 EEV E(BL)CNEEV4 EEV F(YE)CNS2 CNS1 on PCB1 13VDCCNX2 CNX1 on PCB1 Signal of SLCNFFor inddor unit (125 only)※1CNEFor indoor unit※1CNDFor indoor unit※1CNCFor indoor unit※1CNBFor indoor unit※1CNAFor indoor unit※1CNDRM TB8※2CNTRO30VACCNTRI0-21VDCL.IN - N.IN220-240VACTB3TB4TB5TB6TB7Connector Connected to Normal value RemarkTB3TB5TB1(L)CNW on PCB1,TB3 on PCB3TB4TB6TB2(N)CNW on PCB1,TB4 on PCB3220-240VAC220-240VACTB7Earth
'11 • SCM-SM-110INVERTER MULTI-SPLIT SYSTEMRESIDENTIAL AIR CONDITIONERSAir-Conditioning & Refrigeration Systems Headquarters16-5, Konan 2-chome, Minato-ku, Tokyo, 108-8215 Japanhttp://www.mhi.co.jpBecause of our policy of continuous improvement, we reserve the right to make changes in all specifications without notice.C Copyright MITSUBISHI HEAVY INDUSTRIES, LTD.